

GoPro Dual HERO System User Manual

Dual HERO System
CAPTURE SIMULTANEOUS
FOOTAGE + CREATE 3D CONTENT.
USER GUIDE
2 3
/ Camera Compatibility
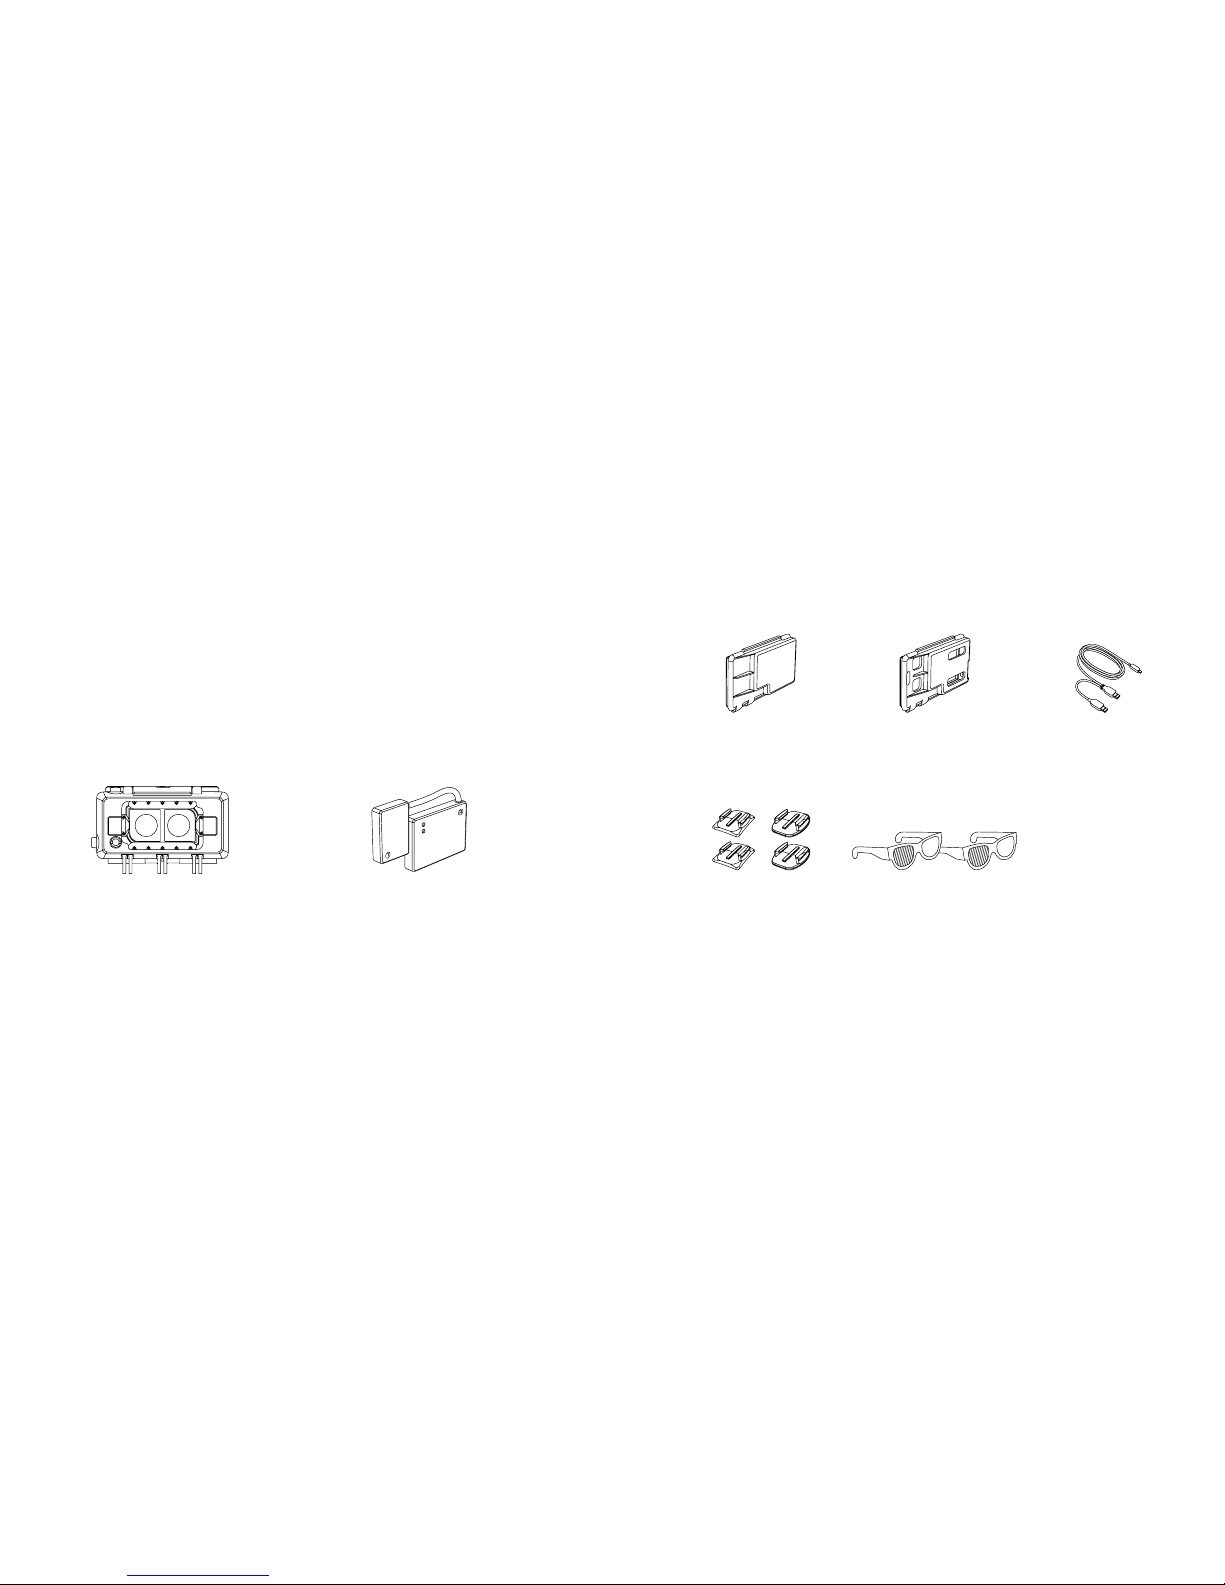
/ What’s Included
The Du al HERO System r equires two H ERO3+ Blac k Edition cam eras with t he latest ca mera sow are.
To check fo r available u pdates and d ownload t he latest so ware, visit gopro.com/update.
DUAL HE RO SYST EM HOUSING
Holds t wo camera s for simulta neous or
syn chronized c apture. Water proof to 197’ (60m).
SYNC CABLE
Conn ects the c ameras an d synchro nizes
their shutters.
STANDARD BACKDOOR
Waterproof housing backdoor.
CUR VE D + FLAT
ADHESIVE MOUNTS
Mount the Dual HERO System
to cur ved and flat s urfaces .
SKELETON BACKDOOR
Open si des allow ac cess to por ts
for live -feed vid eo, data offloa d
and charging. NOT waterproof.
USB CABLE
Enables simultaneous charging
of both c ameras in th e Dual
HERO System.
3D ANAGLYPH GLA SSE S
View yo ur 3D content on a
compa tible 3D TV or c omputer.
4 5
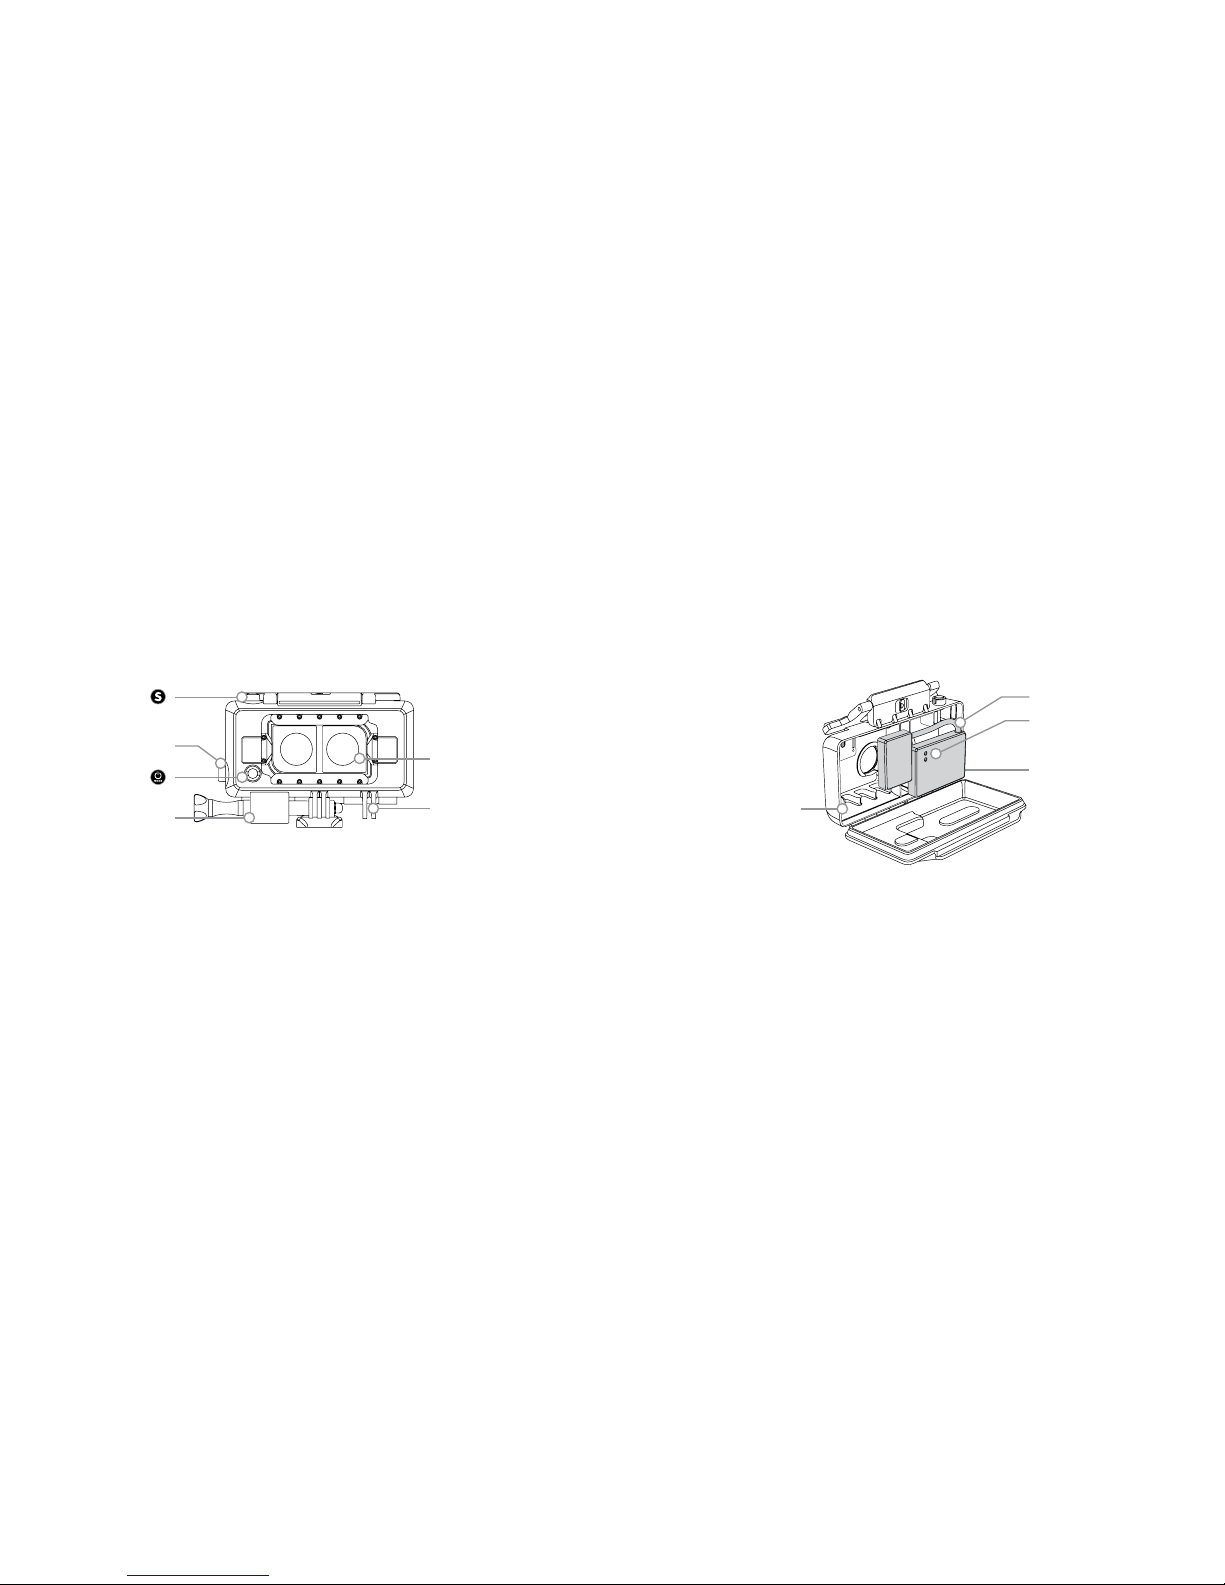
/ Features
Shutter/Select Button [ ]
Wi-Fi O n/Off Button
Power/Mod e Button [
]
Center Mount Adapter
Flat Le ns
Mounting Fingers
Anti-F og Insert S lots
Sync C able
LED Indicator Lights
Mini-U SB Port Ena bles:
• Dual camera charging
• Content Transfer
• Comp osite Video O ut
(cabl e sold separ ately)
Note: The Mini-U SB Port is only ac cessible
when using th e Skeleton Door.
Note: Each came ra requires a fu lly charged ba ttery and Cla ss 10 microSD™ card with su fficient memor y for recordi ng. Always use na me-brand
microSD card s.
6 7
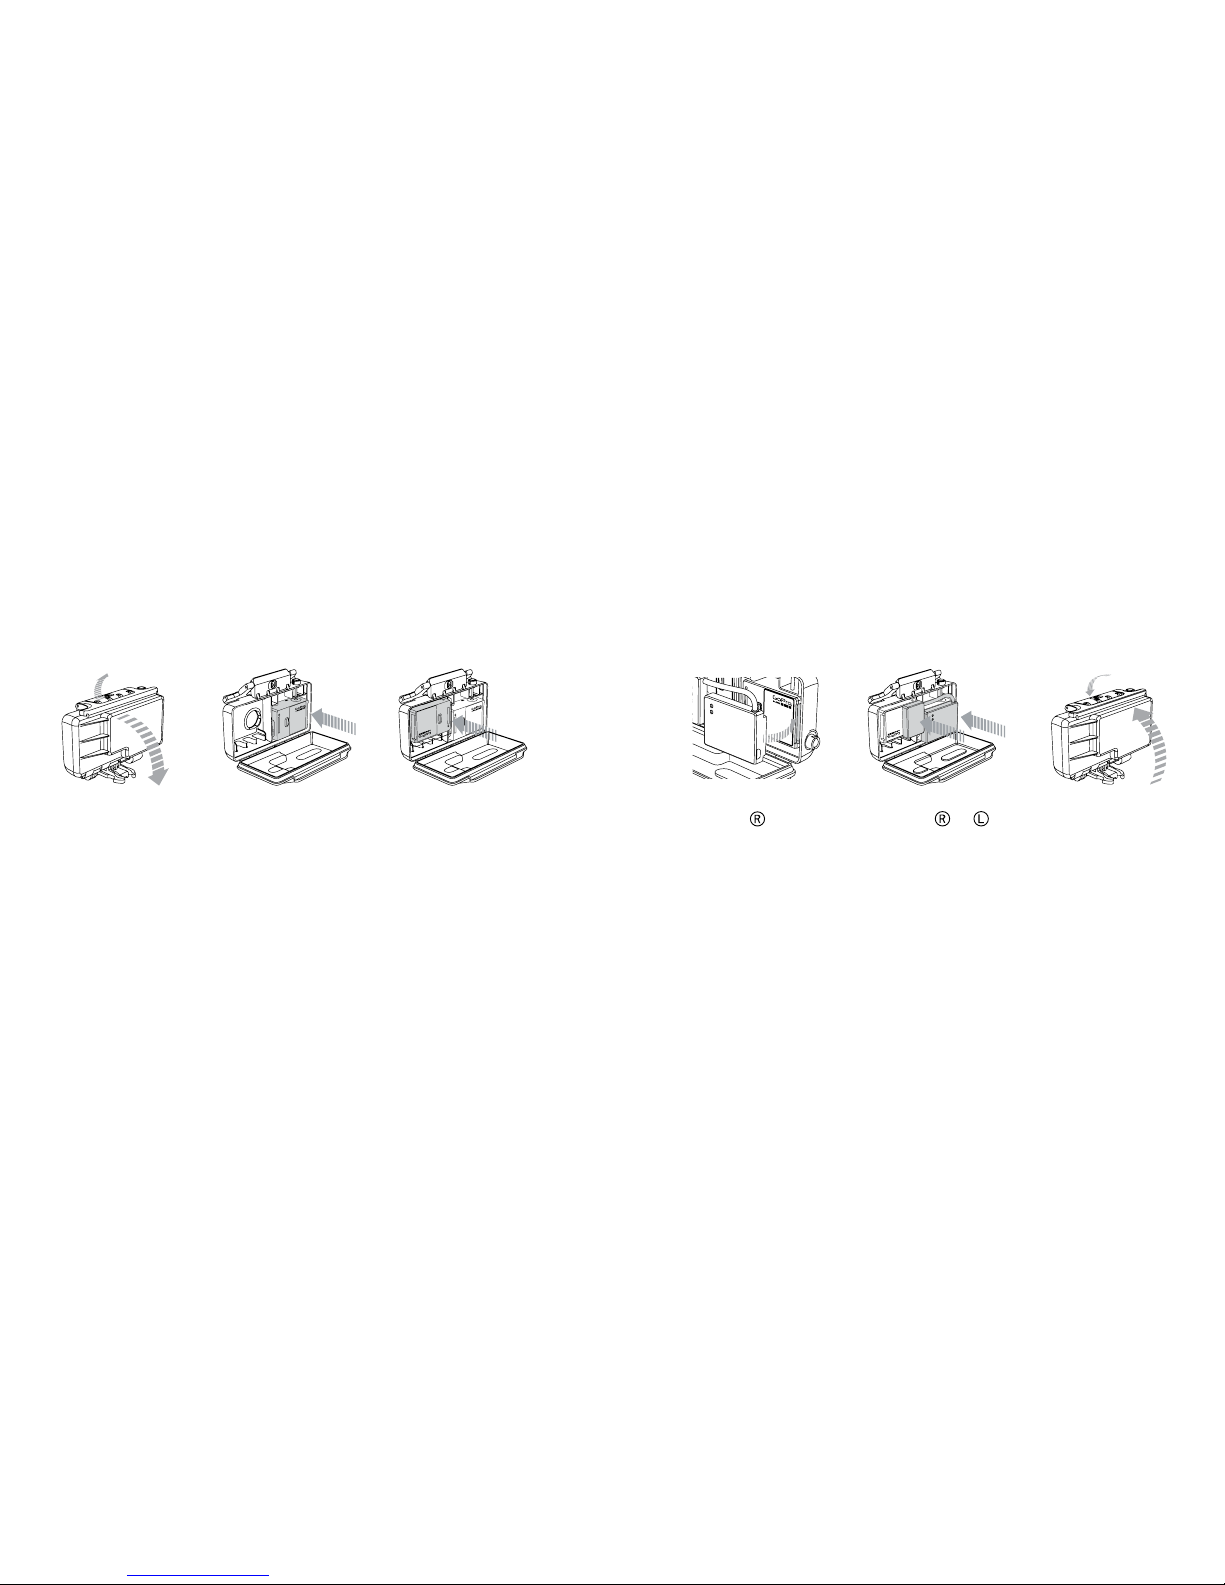
/ Assembling the Dual HERO System
STEP 1
Open t he housing ba ckdoor.
STEP 2
Inser t right (pr imary) ca mera
right s ide up into hou sing.
STEP 3
Inser t le (secon dary) ca mera
upsid e down into hou sing.
STEP 4
Hook th e Side
edge of t he
Sync C able into th e primary
came ra’s right side g roove.
STEP 5
Push b oth Sides
and into
the HER O Ports of ea ch camera .
Make sur e the Sync Ca ble is fully
inser ted and la ys flush again st
the ba ck of the came ras.
STEP 6
Close the housing.
IMPOR TANT: To prevent damag e to the Sync Ca ble, please s ee REMOVING SY NC CABLE FRO M CAMERAS s ection bef ore
attempting to unplug.
Note: Upon ins ertion of the Sy nc Cable, the pr imary (right) c amera will autom atically set it self to UP mode (rig ht side up), and the sec ondary
(le) camera will a utomaticall y set itself to UPd mo de (upside dow n). These settings ar e required for s imultaneous ca pture, and for re cording
synchro nized footage to c reate 3D content.
 Loading...