

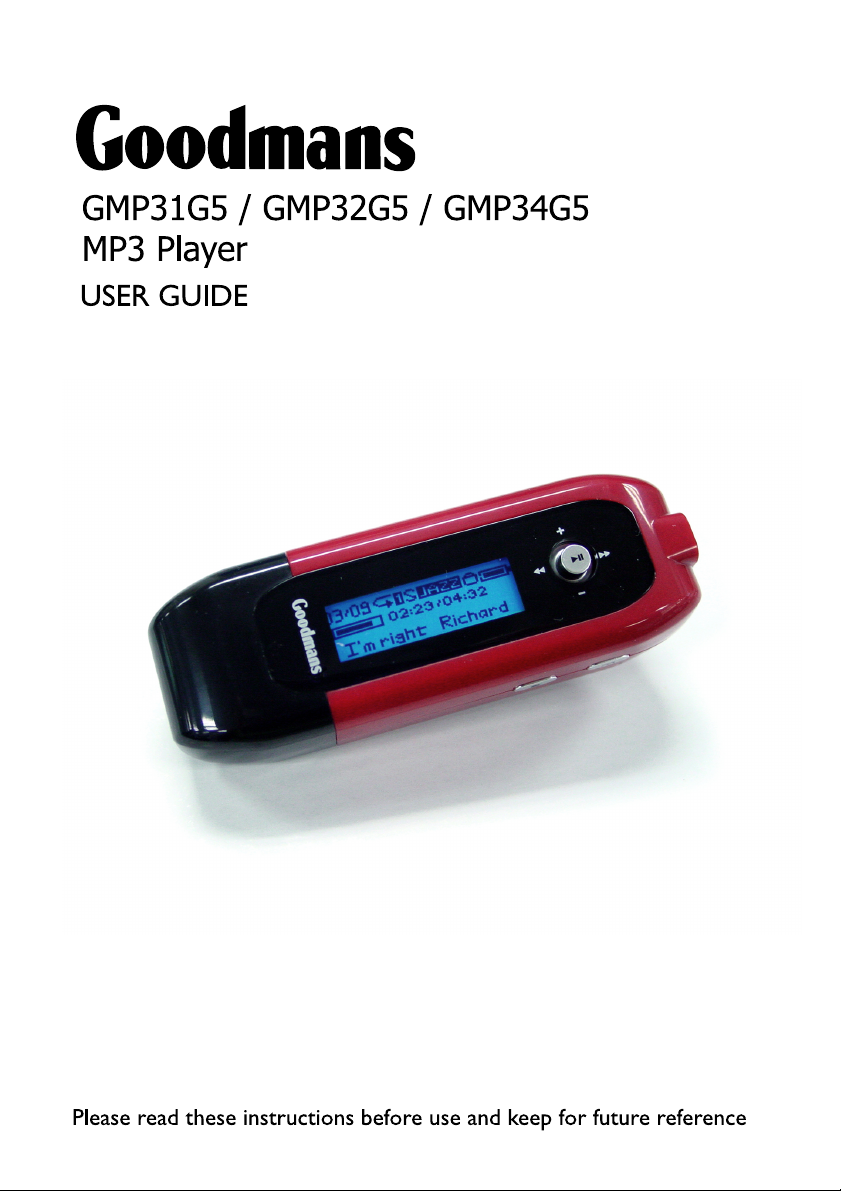
Page 1
Page 2

Catalog
Introduction.....................................................................3
Insert the battery.........................................................4
Installing the MP3 Player Utility..........................5
Transfer data to and from the MP3 Player.....6
Turning the player on / off...................................14
Screen Display..............................................................14
MP3 Player Controls..................................................15
Listening to music files ...........................................16
Play back the record .................................................19
Advance Settings ........................................................20
About the Device.........................................................23
Folder.................................................................................23
Reset...................................................................................24
Hold Function................................................................24
To Format the MP3 Player .....................................25
Removing the MP3 Player from your
computer..........................................................................26
Troubleshooting...........................................................27
MP3 Player Specifications......................................30
Goodmans User Guide
2
Page 3

Goodmans User Guide
Attention:
The following pictures are a guide may differ slightly
from the actual product display.
Introduction
This device incorporates a portable WMA/MP3 Player,
Voice Recorder and USB Mass Storage Device. It will bring
you great pleasure and enjoyment in this digital era.
MP3 Player Features:
• WMA/MP3 player.
• Support DRM10
• Voice recorder.
• USB mass storage device.
• Integrated USB connector.
• Superb audio quality.
System support:
• Supports Windows Me/2000/XP/Vista.
Windows 2000 users: Windows Service Pack 3 must
be installed.
• Supports Mac OS X (version 10.2.6 or above) without driver.
• Supports Windows 98 SE after installation of drivers
3
Page 4

Goodmans User Guide
Note:
9 To minimize damage from static electricity, avoid operating the
player in an extremely dry household environment. The product
may get malfunction and require user to reset the product.
Insert the battery
1. Remove the USB port cover first.
2. Slide the battery compartment cover in the back of
the player.
3. Insert the battery. Make sure the battery is
inserted properly by matching the + and – on the
battery with the symbols on the player.
4. Replace the battery compartment cover and the
USB port cover.
Note:
9 Please remove the battery when you are not going to use the
player for a long period.
9 Please ensure that batteries are disposed of in accordance with
local environmental legislation.
9 Please replace the battery when a picture is shown to indicating
low-battery. The player will be turned off automatically after
then.
4
Page 5

Goodmans User Guide
Installing the MP3 Player Utility
Installation of drivers for computers using Windows
Me/2000/XP/Vista is not necessary.
Note for Windows 2000 users: Windows Service Pack 3
must be installed.
Windows 98 SE users will need to install the MP3 Player
utility on their system:
1. Insert the CD-ROM in the package to the CD-ROM
drive.
2. Click on the “Setup Driver” button on the auto-run
screen. If the auto-run screen does not appear,
open the folder “Win98 Driver " bundled on the CD
and click on the Setup
icon to run the
installation.
3. Follow the on-screen instructions to complete the
installation.
5
Page 6
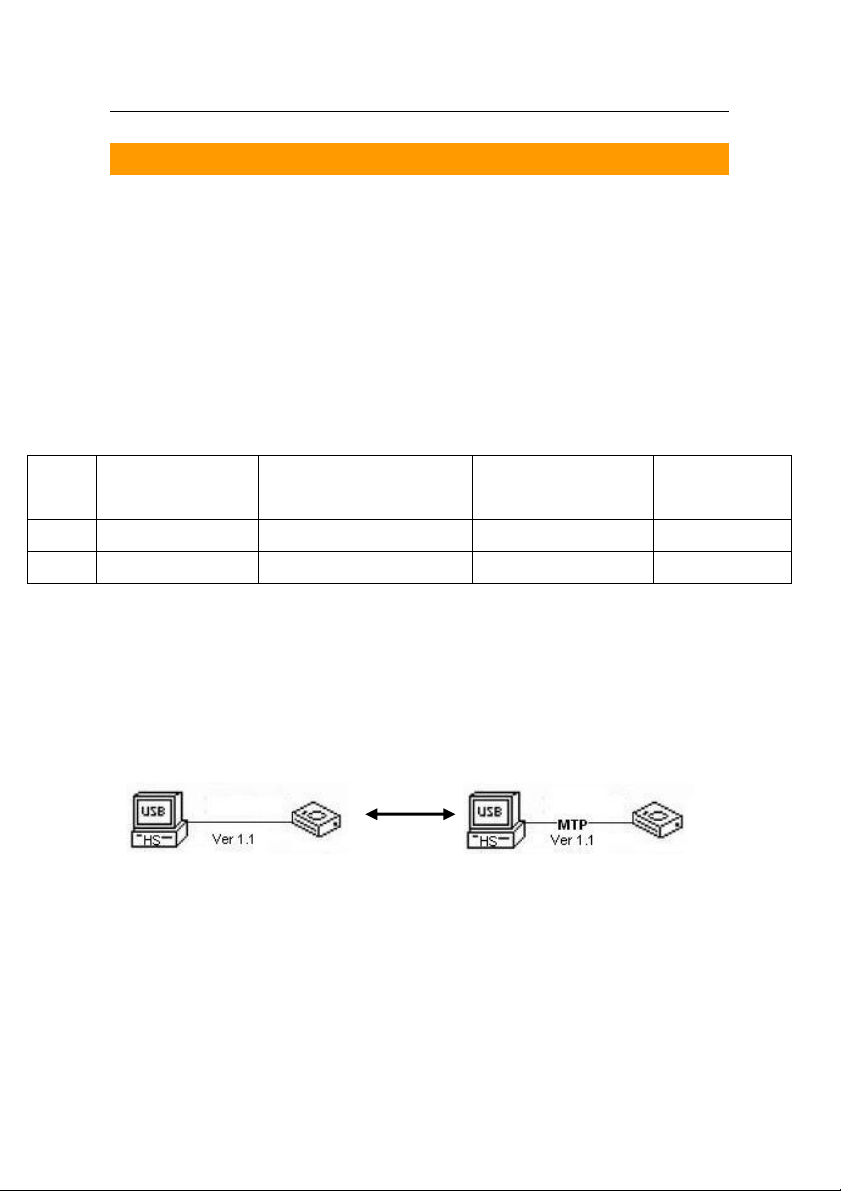
Transfer data to and from the MP3 Player
MSC Mode and MTP Mode
The MSC stands for Mass Storage Class. The player works as a
removable disk when connecting to PC in MSC mode.
The MTP stands for the Media Transfer Protocol. MTP applies the
latest technology of Microsoft to support the multimedia device.
When connecting to PC, working mode of the player depends on
the system your PC uses,
Windows Me/
2000/Mac OS
MSC
√ √ √ √
MTP
On Windows XP with Windows Media Player 10 (WMP10) system
and Window Vista system, the player can works in both MSC
mode and MTP mode, switch one mode to another by pressing
MENU button when the player is connecting to PC.
MSC mode MTP mode
Windows XP
without WMP10/1 1
Goodmans User Guide
Windows XP
with WMP10/11
Windows
Vista
√ √
Connect the Player to your computer through USB cable. The
player is automatically recognized (in 'My Computer') as a
removable media devices or a MTP device afterward.
Transferring Files in MTP mode(For Windows XP+WMP10
Users)
6
Page 7

Goodmans User Guide
{ There are two folders in the MTP device, Media folder
and Data folder. You must transfer your music to your
player in Media folder or Data folder, and transfer other
data to the player in Data folder.
{ Or you can use the Sync function in Windows Media
Player 10 to transfer media files into the player.(See the
next page on how to use the Window Media Player)
{ When the unit connects to a computer as a MTP device,
all files including media files and data files can not be
directly played or opened on the player. You must copy
them to your hard disk of computer for playing and
browsing.
Transferring Files in MTP mode
(For Windows XP+WMP11 and Windows Vista Users)
{ After accessed computer, once you connected your
player to your PC via MTP mode, the device MP3 Player
will pop up.
{ Y ou can create or copy folders or files in the root directory.
{ You can store your data files such as word, excel docs,
pdf files into the root directory.
Note:
¾ In MTP mode, all data transferred in MSC mode are
invisible.
Transferring Files in MSC mode (For all Windows and MAC
users)
{ The Media Player can be used as an external disk for you
to transfer files.
7
Page 8

Goodmans User Guide
{ You may use drag-and-drop or copy-and-paste method to
copy your files to the the unit memory.
{ After removing the player from your computer, you can
listen to all the music files and all data in the unit can be
transferred to another computer.
Note:
¾ All data including songs transferred in MTP mode are
saved in the folder MTPMEDIA which is only visible in
MSC mode.
¾ Do not disconnect the player from computer during
accessing.
Transferring Media Files to the Player by Windows Media
Player
You can use Windows Media Player 10 or 11 to manage your music
files, copy tracks from your audio CDs, transfer tracks to the
player, and more. The following is an ov e rv i ew of the options on
the Windows.
Windows Media Player 10:
8
Page 9
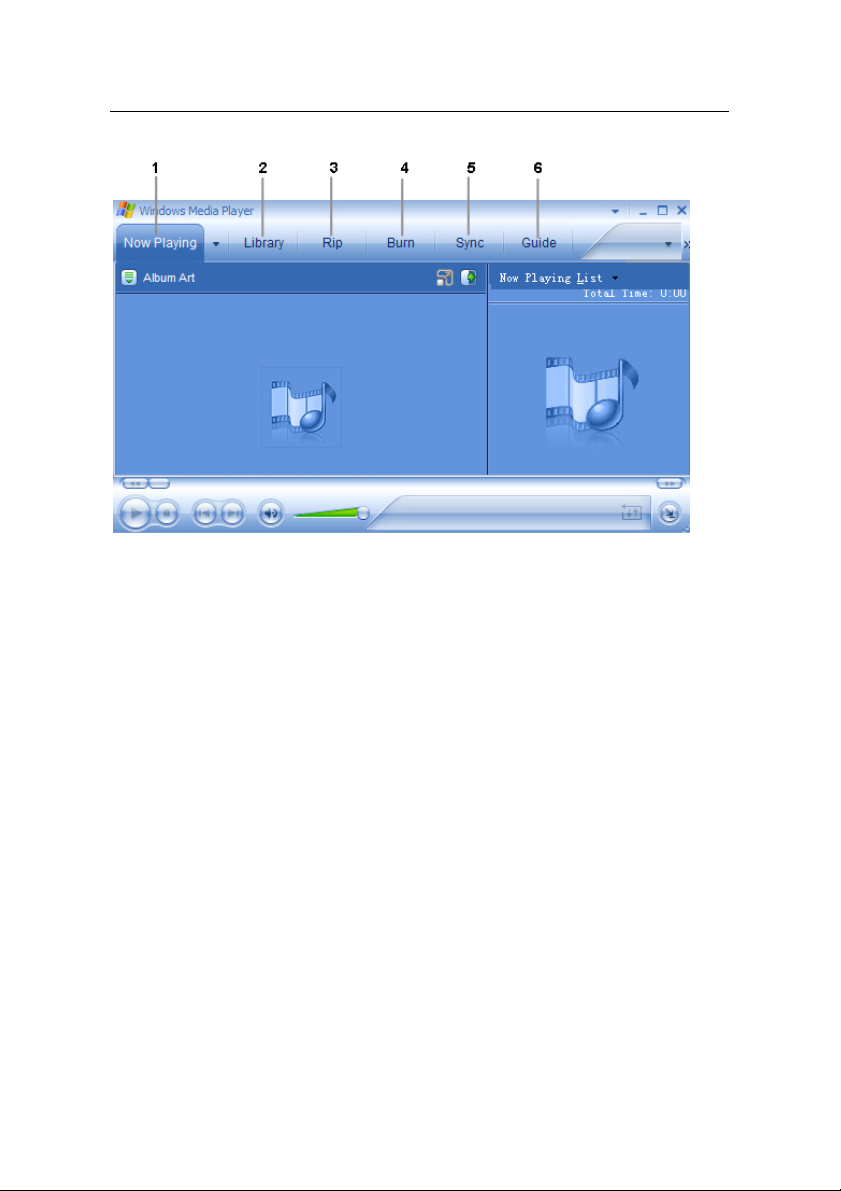
Goodmans User Guide
1. Now Pla ying - Watch/listen to currently playing media.
2. Library - Create playlists and manage your media files.
3. Rip - Copy CD Audio tracks to WMA format.
4. Burn - Copy MP3/WMA tracks to a recordable CD.
5. Sync - Copy MP3 or WMA tracks to your portable audio
player.
6. Guide - Search for media (music, movies, etc.) online.
Adding Tracks to your Media Library
Windows Media Player will automatically gather all MP3 and/or
WMA files on your PC into a media library, where they can be
played, edited, burned to CD, or copied to your portable audio
player.
9
Page 10
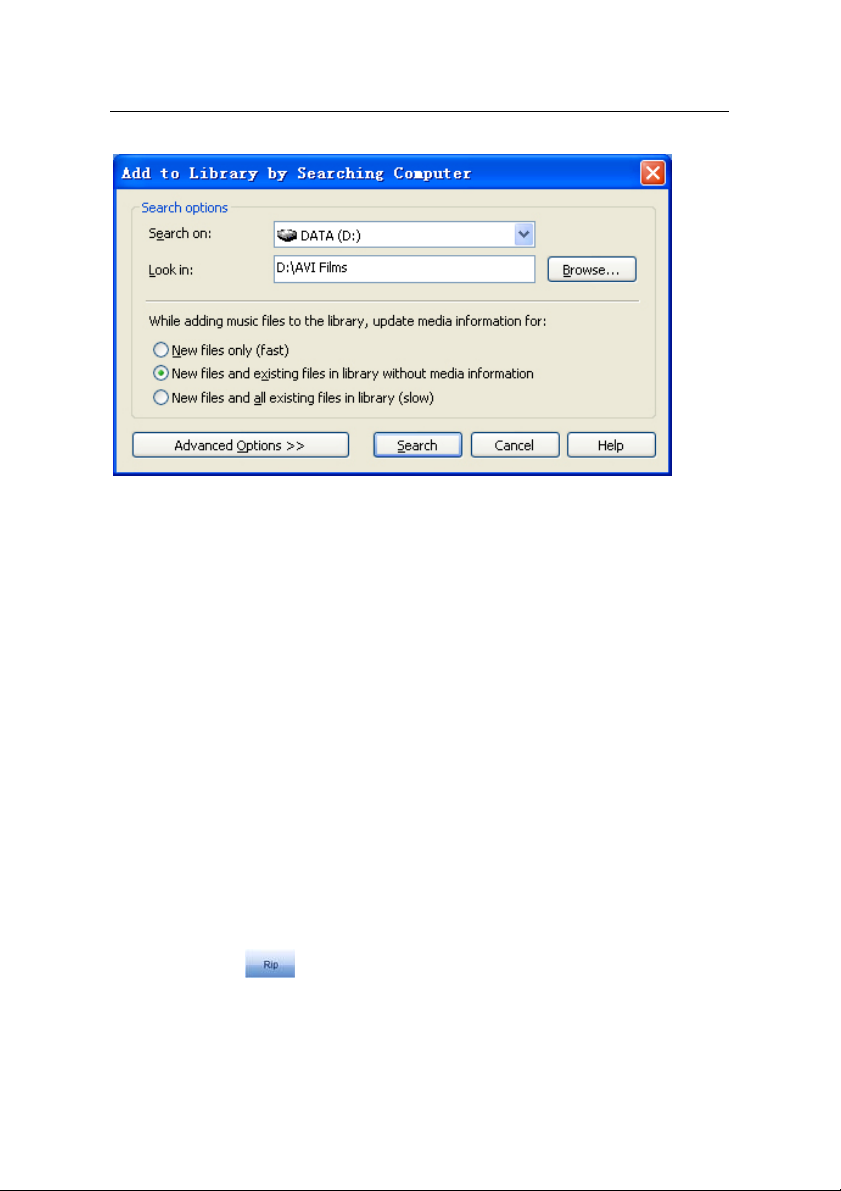
Goodmans User Guide
1. Click Tools > Search for Media Files (or press
F3).
2. In the “Look in”: dialog box, browse to the drive
and folder where your music files are stored.
3. Click Search.
4. Windows Media Player will automatically add all
tracks in the selected folders to your library.
5. When searching is complete, click Close.
Ripping Tracks from your CDs
You can also use Windows Media Player to build your music
library by encoding your Audio CD's to music f iles.
1. Insert an Audio CD.
2. Click Rip
.The contents of the CD will be displayed.
By default, all tracks are checked.
10
Page 11

Goodmans User Guide
3. Uncheck any track you do not want to encode into a
music file.
4. Click the Rip Music button to begin encoding th e selected
tracks.
NOTE: You can change your track encoding options by
selecting Tools > Options > Rip Music.
5. When finished, Windows Media Player will automatically
add the new tracks to your library.
Transferring Tracks to the Player
Transferring music files with DRM protection to the player by
traditional drag and drop method does not work, the songs
will not play back on the player by this way. Music files with
DRM protection must be transferred to your player by
Windows Media player or other media management software
supplied by the online store where you download and
purchase the songs.
To copy files from your PC to your player:
1. Connect the Player to your PC.
2. Click Sync
.
11
Page 12

Goodmans User Guide
3. Click Edit Playlist to add tracks to transfer to your
player. Click OK once all desired tracks have been
added.
4. You should now see the tracks you wish to transfer to
your player listed and checked on the left side of the
Windows Media Player screen under " Sync List ". If
you wish to not transfer any of the lis ted tra cks ,
uncheck them.
5. Click Start Sync.
6. The selected track(s) are copied to the player.
7. When you're finished copying files, unplug the
player.
Note: If you have any problem about the transfer DMR music files
to the player,
12
Page 13

Goodmans User Guide
¾ For Windows Media Player 10 users, please visit the following
link for instruction:
http://support.microsoft.com/kb/922814
¾ For Windows Media Player 11 users, please visit the following
link to restore the Windows Media Player 11:
http://www.microsoft.com/downloads/details.aspx?FamilyID=
1d224714-e238-4e45-8668-5166114010ca&DisplayLang=en
¾ For Windows Media Player11 users, please visit the following
link for instructions on how to sync files to this Player:
http://www.microsoft.com/windows/windowsmedia/knowledge
center/howto/mp11/sync.aspx
Windows Vista users must use Windows Media Player11 to
transfer songs to the player.
For better performance, please visit http://www.microsoft.com
to
update your OS with the latest service pack.
If you have encountered that some large files can not be
transferred to the player by using Windows Explorer, visit
http://support.microsoft.com/?kbid=895316
This hotfix resolves an issue that limits the size of files that you
can copy to a portable device by using Windows Explorer.
13
Page 14

Goodmans User Guide
Turning the player on / off
To turn on player, press PLAY button.
To turn off player, press and hold STOP button until the
motion disappears.
Screen Display
1. Play mode
2. Track number
3. Total number of tracks.
(If total track quantity
equal or over 1000 files,
it will show ONLY current
track number.)
4. Elapsed time
5. Battery Indicator
6. Play/Pause/Stop
7. Hold icon
8. Audio file name
9. Volume level
14
Page 15

MP3 Player Controls
Goodmans User Guide
A. Hold slider
B. Microphone(without hole)
C. Battery cover
D. Control stick
Play/Pause button
Rewind/Skip previous
Fast-forward/Skip next
Volume decrease/Down
Volume increase /Up
-
+
E. USB port cover
F. Earphone jack
G. MENU button M
H. Stop button
15
Page 16

Goodmans User Guide
Listening to WMA/MP3 music files with the
MP3 Player
Under the guide of “transfer of data to and from the MP3
Player” to copy WMA/MP3 music files to the MP3 Player.
1. Connect the supplied
earphone to the
earphone jack.
2. Press PLAY button to turn
on the player.
3. Press PLAY button to play
the music.
Lyric display function
The MP3 Player supports lyric files in LRC format.
1. Prepare MP3 or WMA music, for example,
happymusic.mp3.
2. Download a lyric file from internet. The lyric file
must have to be with a filename extension "LRC".
For example, happymusic-2004.lrc.
3. Rename the lyric file. For example, happymusic.lrc.
It is to make sure the lyric filename is the same as
the corresponding music filename.
4. Copy the lyric file and music file to the MP3 player.
5. Disconnect the MP3 player.
16
Page 17

Goodmans User Guide
6. Push the SKIP buttons to select the music file, for
example, happymusic.mp3. Press PLAY button to
play.
7. Lyric will display synchronously on LCD during the
playback.
Note:
9 The MP3 player supports LRC format only. If the lyric does not
synchronize with the music, please download a better lyric file
from internet and try again. Make sure the MP3 music file and
LRC file are located in same directory and their filenames are
same (of course, the extension is different). If not, the MP3
player will not be able to allocate the lyric file.
17
Page 18

Start Record
Goodmans User Guide
1. Long press MENU button
to enter to the main
menu.
2. Select Record and press
Play button to enter.
3. Then the record begins
automatically. (Please
put the microphone of
the player in front of the
voice resource. The
microphone is beside the
hold slider without hole.)
4. Press PAUSE button to
pause the recording.
5. Press MENU button to
stop the recording and
enter the playback of
recording.
6. Select a record and
press PLAY button to
play.
7. Press and hold MENU
button to back to the
main menu.
18
Page 19

Goodmans User Guide
Play back the record
This operation is similar to the playback of music.
1. Long press MENU button to
enter to the main menu.
2. Select Play Voice and press
PLAY button to enter.
3. Use SKIP buttons to select
a record for listening.
4. Press PLAY button to play
the selected file.
Note:
9 You can adjust the Play Mode in record playback
19
Page 20

Goodmans User Guide
Advance Settings
To navigate the settings menu:
1. Press and hold MENU
button to enter to the
main menu.
2. Select Settings and
press Play button to
enter.
3. Select an option to set
EQ Setting
The Equalizer (Eq) setting is to adjust the music playback
effect. There are six Eq presets available: Normal, Pop,
Rock, Classical, Jazz and Bass.
1. In the settings menu, select
2. Select an EQ.
Repeat Setting
The available play modes are: Normal, Repeat One, R epeat
All and Shuffle.
and press Play button to
enter.
4. After setting is finished,
press MENU button to
back to the superior
level.
Equalizer and press Play
button to enter.
20
Page 21

Goodmans User Guide
1. In the settings menu, select
Repeat and press Play button
to enter.
2. Select a play mode and press
Play button to confirm.
Contrast Setting
To adjust the screen contrast,
1. In the settings menu, select
Contrast and press Play
button to enter.
2. Use SKIP buttons to adjust
the contrast level and press
Play button to confirm.
Backlight
To set the delay time for backlight-off,
1. In the settings menu, select
Backlight and press Play
button to enter.
2. Select a period of time after
which the backlight should
switch off when no key entry
occurs.
3. Press Play button to confirm.
Note:
9 Select Off will keep the backlight off. Select Always on will keep
the backlight on
21
Page 22
Goodmans User Guide
Power Savings
To turn off the player automatically in case there is no
music playing or any key entry for the set time.
1. In the settings menu, select
Powerset and press Play
button to enter.
2. Select a time of inactivity
which is meant to cause
Power Saving.
3. Press Play button to
confirm.
Note:
9 Select Disable will never turn off the player automatically.
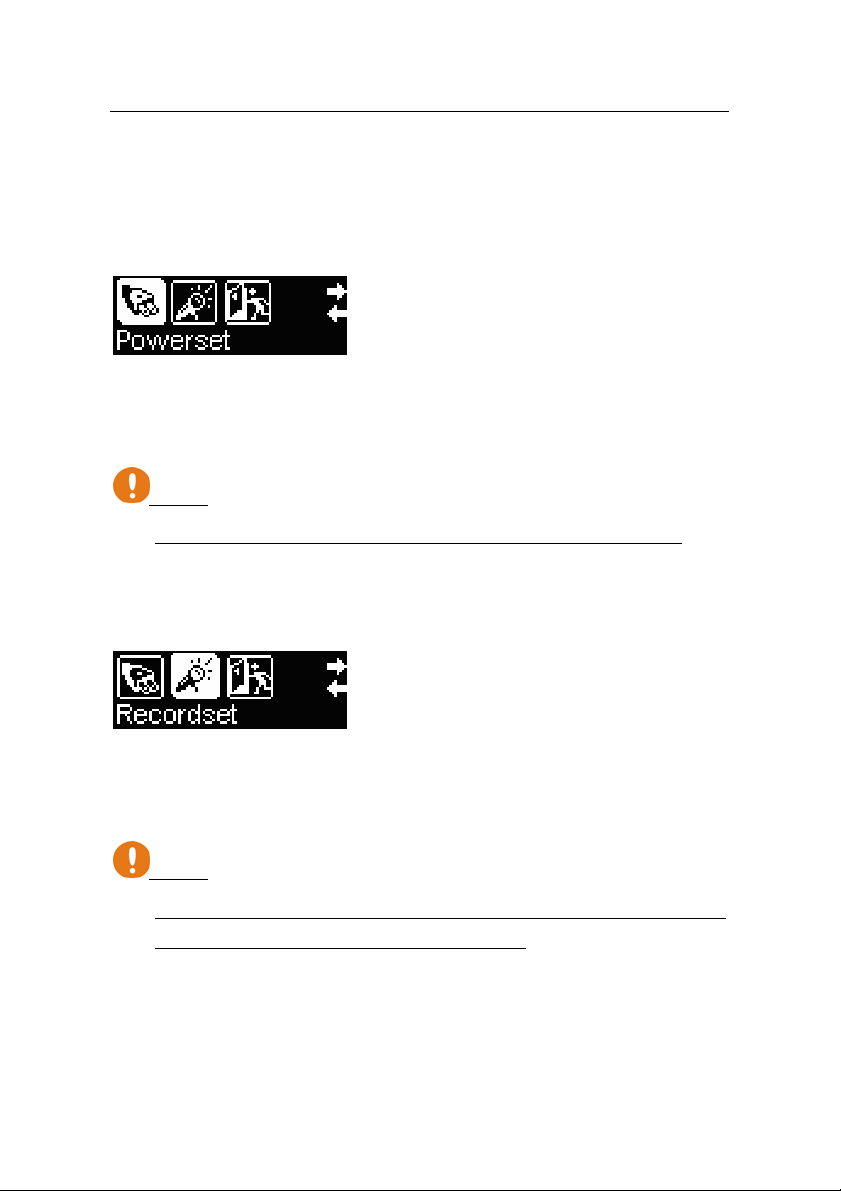
Record Setting
To set the record parameter,
1. In the settings menu, select
Recordset and press Play
button to enter.
2. Select an sampling rate and
press Play button to
confirm.
Note:
9 A higher recording sampling frequency brings better recording
quantity, but takes more memory space.
22
Page 23

Goodmans User Guide
About the Device
Information is available regarding the built-in memory and
free memory space.
1. Press and hold the MENU
button to enter the main
menu.
2. Use SKIP buttons to select
About and press Play button
to enter.
3. The information of your
player is displayed.
Folder
You can navigate and delete files easily by the Folder
function. The corresponding file or folder name will be
shown as you highlight it.
1. Press and hold MENU button
to enter the main menu.
2. Use SKIP buttons to select
Folder and press Play button
to enter.
3. Use Up and Down buttons to
select a folder or file and
press Play button to enter the
folder or play the audio file.
4. If a file is selected, press the
Play button, two options, Play
and Delete, pop up. Select
23
Page 24

Goodmans User Guide
Play and press Play button to
play the music file. Select
Delete and press Play button
to delete the music file.
Select Yes to confirm your
operation.
5. Press Stop button to back to
the main menu.
Reset
Reset function is to set all settings of the player to factory
default. It will not affect the stored music after the player
reset.
1. Press and hold MENU button
to enter the main menu.
2. Use SKIP buttons to select
Reset and press Play button.
3. Use SKIP buttons to select
Yes and press Play button.
4. Wait for a while, all settings
have been reset.
Hold Function
Use the Hold (LOCK) function to deactivate the MP3 Player
controls (to avoid unexpected activation).
24
Page 25

Goodmans User Guide
1. To turn on the Hold
function, slide the Hold
switch into the Lock
symbol direction.
2. To turn off the Hold
function, slide the Hold
switch back.
Note:
9 If the player is in hold mode when powering on, it will show
“Locked” and be off automatically.
To Format the MP3 Player
(By service experts only, otherwise warranty could
be voided)
1. Connect the MP3 Player to the computer.
2. Format the MP3 Player (removable disk) using the
Windows format tool.
Note:
9 Do not select NTFS from the File System menu. Or else, the MP3
Player can not work and needs to be formatted again.
9 Please backup the important data within the player before you
format it.
25
Page 26

Goodmans User Guide
Removing the MP3 Player from your computer
1. Click on the Safely Remove Hardware icon in
the taskbar (next to the clock).
2. Click on Safely remove USB Mass Storage
Device.
3. Wait until a Safe to Remove Hardware message is
displayed.
4. Remove the MP3 Player.
Caution:
9 Please consult the FAQ of your OS for further usage of
removable disk.
26
Page 27

Goodmans User Guide
Trouble Shooting
1. Why do I fail to install the installation software
on my operating system?
Cause and solution:
- Attention that Windows 95 doesn’t support USB
connection. Please update your operating system to
Windows 98(version 2.0, 4.10.2222A), Windows 2000,
Window ME, Windows XP or Windows Vista.
- There is no driver require for Windows 2000, ME, XP, and
Vista operating systems (Plug and play). But to Windows
2000 user, Windows 2000 Service Pack3 (SP3) must be
installed.
2. Why do I fail to download the files to the internal
memory?
Cause and solution:
- Check to see if the player has been properly connected to
the computer.
- Check to see if the driver should be installed.
- Try to format the internal memory of the player and
download the file again.
- The USB controller of your computer may not be
compatible to the player. Please try to upgrade the
motherboard driver of your computer.
3. Why the player can not play some music?
Cause and solution:
- This player only supports WMA and MP3 formats.
27
Page 28

Goodmans User Guide
- The music in WMA format is protected.
4. Why is there distortion during playback?
Cause and solution:
- This may be caused by low battery or temporary outside
interface, please replace the battery or remove to
another place.
- It may because of the badly encoding of the file or result
from the poor-quality source, please close all temporary
programs before encoding to get a better quality or
download a better one from the internet.
5. Why is the play quality bad?
Cause and solution:
- If the same file played fine on the computer, please
download it again to the player. If it doesn’t work, format
the player and download again.
- It may be caused by the poor- quality source if it is played
badly on the computer. Please replace a better one.
6. Why is there no responds to the pressing after
powering on?
Cause and solution:
- Hold function may be activated. Slide the Hold button to
inactivate this function.
- Battery is too low, please replace it.
7. Why do I hear nothing while the play button is
pressed?
Cause and solution:
28
Page 29

Goodmans User Guide
- Hold function may be activated. Slide the Hold button to
inactivate this function.
- There may be no WMA or MP3 files within the player.
Please download the music files with proper format into
the player.
- The headphone may be not connected to the player
correctly. Please connect it in the right way.
- The volume may be too low to hear, please adjust the
volume level.
- The music file is not in WMA or MP3 format. Please
encode the file to the accurate format.
- If the problem remains, please contract to the supplier
for further support.
8. Why does the player display less internal memory
than the volume it indicates?
Cause and solution:
- The volume that the player indicates is the memory
volume of the flash within the player. And a player must
conserve firmware for work, which occupies some
memory of the flash.
- The firmware is system files of the player which cannot be
seen and revised by the user.
- The internal memory displayed by the player does not
include the volume of the firmware. Therefore, it will be
less than the volume it indicates.
9. Why does the player display nothing after
powering on?
29
Page 30

Goodmans User Guide
Cause and solution:
- Ensure the battery is enough for powering on.
- Reset the player by pressing the reset hole.
MP3 Player Specifications
• Internal Memory
o Built-in 512MB,1GB,2GB or 4GB (Some
memory reserved for firmware and system
management)
• Interface
o USB Compatible
• Power
o 1 x AAA battery
o Battery continuous playing time: Up to 18
hours
• Equalizer
o Normal, XBass, Rock, Jazz, Classical, Pop
• Display
o 96 x 32 Dot-Matrix LCD display
• Controls
o PLAY / PAUSE / POWER ON button
o STOP / POWER OFF button
o SKIP buttons
o MENU button
o VOLUME control buttons
o HOLD Switch
• Processor
30
Page 31

Goodmans User Guide
o 75 MIPS DSP
• Audio Playback
o Windows Media Audio (WMA)
o MPEG Audio Layer 3 (MP3)
• Signal to Noise Ratio
o > 90 dB
• Frequency Response
o 20 Hz ~ 20 kHz
• Output
o < 4.4 mW (each output)
• Total Harmonic Distortion Output
o 0.01% ~ 0.5%
• Ports
o USB Port
o Phone Out
• Firmware
o Flash based
Listening to loud sounds for prolonged periods may
permanently damage your hearing. Before putting
on the earphone, place them around your neck and
turn the volume down. Then put the earphone on
and slowly increase the volume until you find a
comfortable listening level.
31
Page 32

 Loading...