

Page 1
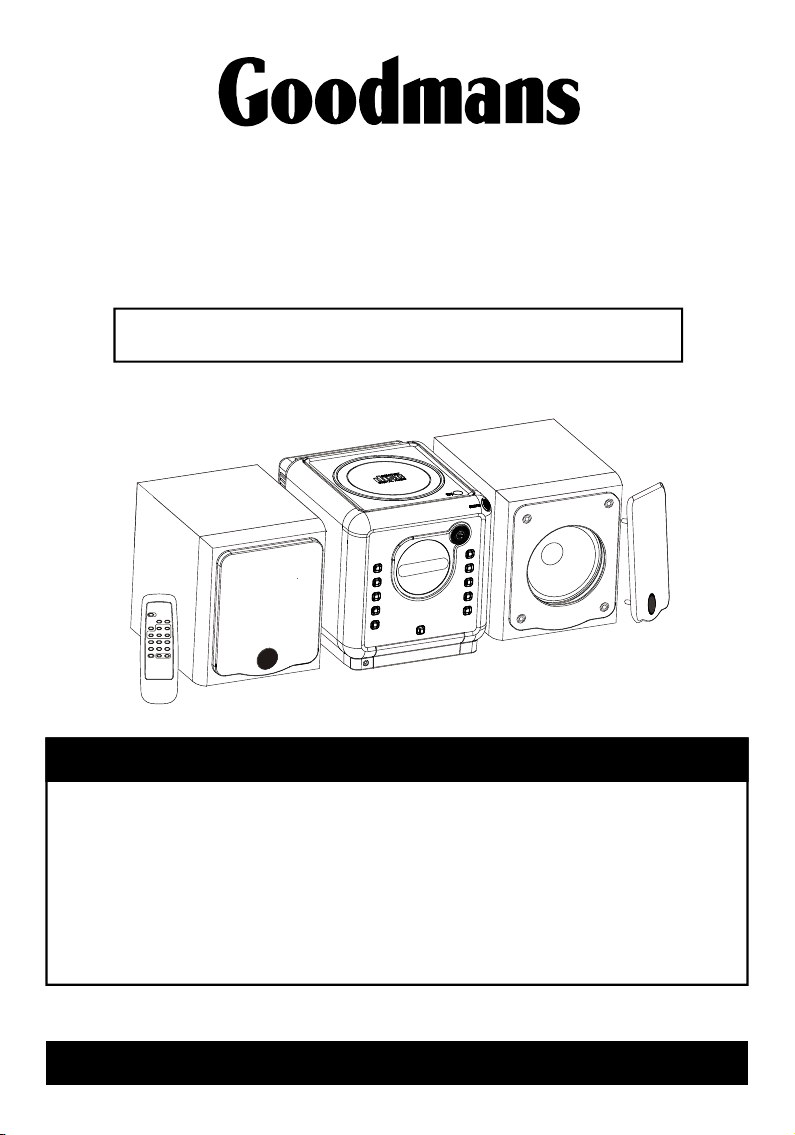
CD/DAB Digital Radio Micro System
GMC 1034DAB
Instruction Manual
SPECIFICATIONS
Program Play.... .. .. .. .. .. .. .. ...............................Up to 20 mem or ie s
Earphone Output................ .. .. .. .. .. .. .. ..............12m W
Power Requirement.............. .. .. .. .. .. .. .. ............AC230V
Main Unit Dimension.............. .. .. .. .. .. .. .. .......... 1 65 (L )X 17 8( H)X208(W)mm
Speaker Box Dimension............ .. .. .. .. .. .. .. ....... 139(L)X1 65 (H )X 18 2( W) mm
Weight....... .. .. .. .. .. .. .. ..................................... 4.36kg
For improvement purposes, specifica ti on a nd d es ig n ar e su bject to change without notice
Goodmans product Information Helpine 08708730080
Page 2

Page 3

SAFE TY PRECAUT IONSTABL E OF CONTENT S
Important s af eguards ..... .. ......... .. .. ......... .. ... 1
Important n ot es......... .. ......... .. .. ......... .. .........2
Power Sourc es . ........... .. ......... .. .. ......... .. ......3
Player Main te nance ....... .. ......... .. .. ......... .. ....3
Disc cleani ng , power failure . .. ......... .. .. ......... .4
Player operation
Features an d co ntrols..... .. ......... .. .. ......... .. ....5
Features an d co ntrols..... .. ......... .. .. ......... .. ....6
Remote cont ro l.......... .. ......... .. .. ......... .. ........ 6
Putting the b at teries
into the remo te c ontrol unit.. .. ......... .. .. ......... . 6
Switching y ou r radio on for th e fi rs t time..... .. . 7
Listening t o yo ur radio..... .. ......... .. .. ......... .. 7-8
Storing and r ec alling the stor ed s tations.. .. .. ..
Factory res et ........... .. ......... .. .. ......... .. .......... 9
Display mod es ........... .. ......... .. .. ......... .. ........ 9
Listening t o yo ur compact disc s. ......... .. .. ..10-11
Sleep funct io n(remote cont ro l only).... .. .. .......11
Tim er function.. .. ......... .. .. ......... .. .. ......... .. .....12
Mute functi on (remote contr ol o nly)..... .. .. ....... 12
Preset EQ.. .. ........... .. ......... .. .. ......... .. .......... 12
X-bass func ti on(remote con tr ol only)... .. .. ......
Display bac kl ight....... .. ......... .. .. ......... .. .........12
Aux input.. .. ........... .. ......... .. .. ......... .. ........... .1 2
Headphone j ac k.......... .. ......... .. .. ......... .. .......13
Compact dis c. ........... .. ......... .. .. ......... .. .........13
Specifica ti on......... .. ......... .. .. ......... .. ........... . 14
Tro ubleshootin g gu ide...... .. .. ......... .. .. ......... . 15
8
12
1. As the laser be am used in this compact disc
player is harmful to t he e ye s, d o not attemp t
to disassem bl e the casing.
2. Sto p operatio n immediat el y if any liq uid o r
solid object shou ld f al l in to t he c abinet.
Unplug th e unit an d have it checked by
qualified p er sonnel.
3. Do n ot touch the le ns or p oke at it. if you do,
you may dam age the len s and the p layer
may not opera te p roperly.
4. D o not put anything in the safet y sl ot . If y ou
do, the laser diode will be ON when the lid
is still open ed .
5. T his un it e mploys a l aser. T he u se o f
controls or adjust me nt s or performanc e of
pr oce dur es oth er t hen th ose sp eci fie d
herein may resu lt in ex posure to hazar do us
radiation .
WARNING
To pr ev ent f ir e or shock harzar d, do not expose
the unit to rai n or m oisture.
To av oi d electrica l shock, do n ot open the
cabinet. Refer ser vi cing to qualified personnel
only.
Goodmans product Information Helpine 08708730080
Page 4
1. I MPORTANT S AFEG UARD
For you r co nveni en ce a ma in s plug wi th a fuse has been fit ted to this applia nce. For yo ur safe ty plea se
obser ve t he foll ow ing.
1. Sh ou ld the fu se fai l i n the p lu g remo ve the pl ug from the wall soc ket and r eplace t he fuse w ith a 3 Am p
ASTA appr oved to B S1 362.
2. Never use the plu g withou t the fus e cover fit ted. Rep lacemen t fuse cove rs are avai lable from yo ur
deale r or m ost ele ct rical r et ail
Outl et s.
3. I F th e ma in s pl ug i s cu t off fr om t he c able, rew ire th e re place me nt p lug in a ccordan ce w it h th e
instr uc tion gi ve n in this m an ual.
CAUTI ON :
4. Unde r no ci rcums ta nces shou ld the dis carded plug be insert ed into th e main s so ck et. To
preve nt a s oc k hazard ca re fully d is pose of the dis ca rded pl ug . Do n ot leave th e pl ug l ying arou nd w here
child re n might s ee i t.
WAR NING: To pr ev ent fir e of s hock ha za rd, do not e xp ose thi s un it to rai n or m oistu re .
CAUTI ON : D ANGER OU S VOLTAGES EXI ST INSID E T HI S UNIT, DO NOT REMOVE C OV ER (OR BACK ).
NO USER SERV IC EABLE PARTS INSI DE. REF ER SERV ICING TO QUA LIFIED SE RVICE PERSON NEL
DISCO NN ECT FRO M MAINS S UP PLY WH EN NOT IN U SE.
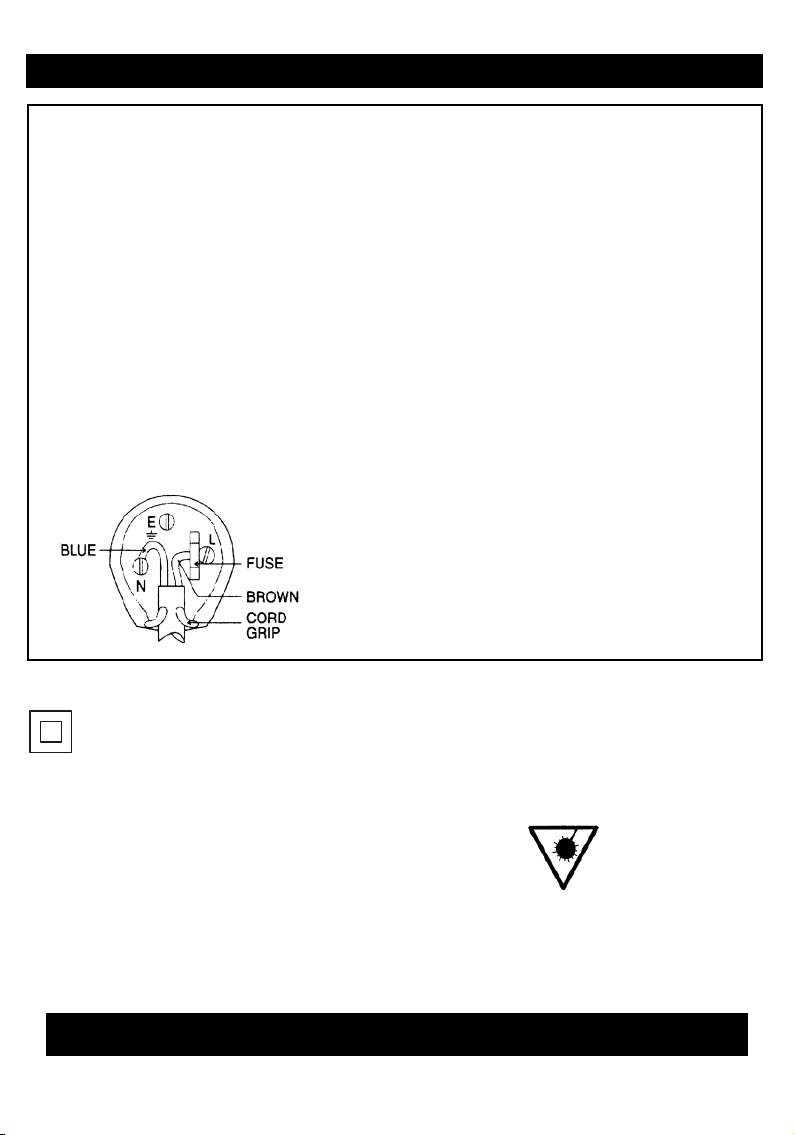
MAINS P LU G WIRIN G DE TAIL S
accor da nce wit h fo llowi ng w iring c od es:
The wir es i n this ma in s lead ar e co loure d in a ccord an ce with
thefo ll owing w ir ing cod es :
Blue- -- ----- -- ----- -- ----- -- ----- -- ----- -- ----- Ne utral
Brown -- ----- -- ----- -- ----- -- ----- -- ----- -- ----l iv e
The wir es i n this ma in s lead mu st b e conne ct ed to the
termi na lsin th e pl ugs as fo ll ow:
Blue Wi re ----- -- ----- -- ----- -- ----- -- ----- -- N or Blac k
Brown W ir e---- -- ----- -- ----- -- ----- -- ----- -L or R ed
Only a 3 Am p fu se shou ld b e fitte d in t he plug o r a 5 Am p fuse
atthe d is tribu ti on boar d.
WAR NING: UNDER NO CI RC UMSTAN CE S MU ST THE LI VE O R NE UTRAL WIRES BECONN EC TED
TO THE EA RTH TERMINA L IN A 3-PIN M AI NS PLUG.
This symbol m ea ns that this unit i s do uble insula te d.
An earth conn ec tion is not requi re d.
CAUTI ON
CLASS 1 L AS ER PROD UC T
Use of Co ntrol s or adju stments o r per fo rmance of
proce du res other t han those s pe cifie d he rein ma y
resul t in h azard ou s radia ti on expo su re.
CLEAN IN G
Alway s d isconne ct uni t f rom po we r supp ly befor e
attem pt ing t o cle an it. Use s oft c loth mo isten ed with
soapy w at er, wipe g en tly.
Do not us e so lvent s or a brasi ve m ateri al .
LASER S AF ETY
This un it e mploy s a la ser. Onl y qu alifi ed s ervic e
perso nn el shou ld a ttemp t re pair.
DANGE R: I NVISI BL E LASER R AD IATI ON
WHEN OPEN A ND IN TERLO CK FAI LED OR
DEF E AT ED. AV OID DIR ECT E XP OSUR E T O
BEAM.
CAU TION: H AZA R D OUS L ASE R R AD IATIO N
WHEN OP EN A ND INTE RL OCK DEF EATED.
Goodmans product Information Helpine 08708730080
1
Page 5

2. I MPORTANT N OTES
Your he ar in g i s ver y impor ta nt to you and to u s, so pl ea se ta ke ca re wh en oper at ion t hi s e qu ipment.
The followi ng g uidelines a re p ro vided for you r in fo rmation.
ESTABL IS H A SAFE SOUND LEVEL
O ver time your hear in g w il l a dapt to continu ou s l oud sounds and wil l g iv e t he impression
that t he volum e has i n fact been r educed. Wh at s ee ms norma l to yo u may in fac t b e h ar mful. To
guard again st t his BEFORE YOUR H EA RING ADAPTS s et t he v olume at a low le ve l.
Slowly incr ea se the level unti l yo u can hear comf or ta bly and clear ly a nd without dist or tion.
Damage to you r he aring is accu mu la tive and is irr ev er sible.
Any ringing o r di scomfort in t he e ar s indicates t ha t th e volume is too l ou d.
Remember li st ening for pro lo ng ed period of ti me a t hi gh volume lev el s will harm your he ar ing.
Once you ha ve esta bl ished a comfo rt able listen in g level, DO NOT INCREASE THE SOUN D LE VEL
FURTH ER .
The fo llowing list o f ty pi ca l so un d le ve ls may assis t you in re co gnising ju st how loud you h ave se t the
volume leve l.
DECIBEL
Level dB Exam pl e
30dB
40
50
60
70
THE FOLLOWI NG N OISE CAN BE HAR MF UL UN DE R CO NSTANT E XPOSURE
80dB
90
100
120
140
180
Quiet libra ry, soft whisp er.
Living room , fr idge freezer be dr oom away from t ra ffic.
Normal conv er sation, quiet o ffice, li gh t tr affic .
Electric se wi ng machine.
Vacuum c le aner, hair dryer, n oi sy restaura nt .
Avera ge c ity traff ic , alarm clock buz ze r at 1 Metre, foo d mi xe r.
Motorcycl e, h eavy goods vehi cl e, petrol law n mo we r.
Pneumatic d ri ll, chain saw, gar ba ge truck, dis co te c/night-c lu b.
Rock band con ce rt, thundercl ap , fast train pa ss in g by.
THRESHOLD O F PAIN Gunshot , je t plane takin g off.
Rocket Laun ch ing pad.
Goodmans product Information Helpine 08708730080
2
Page 6
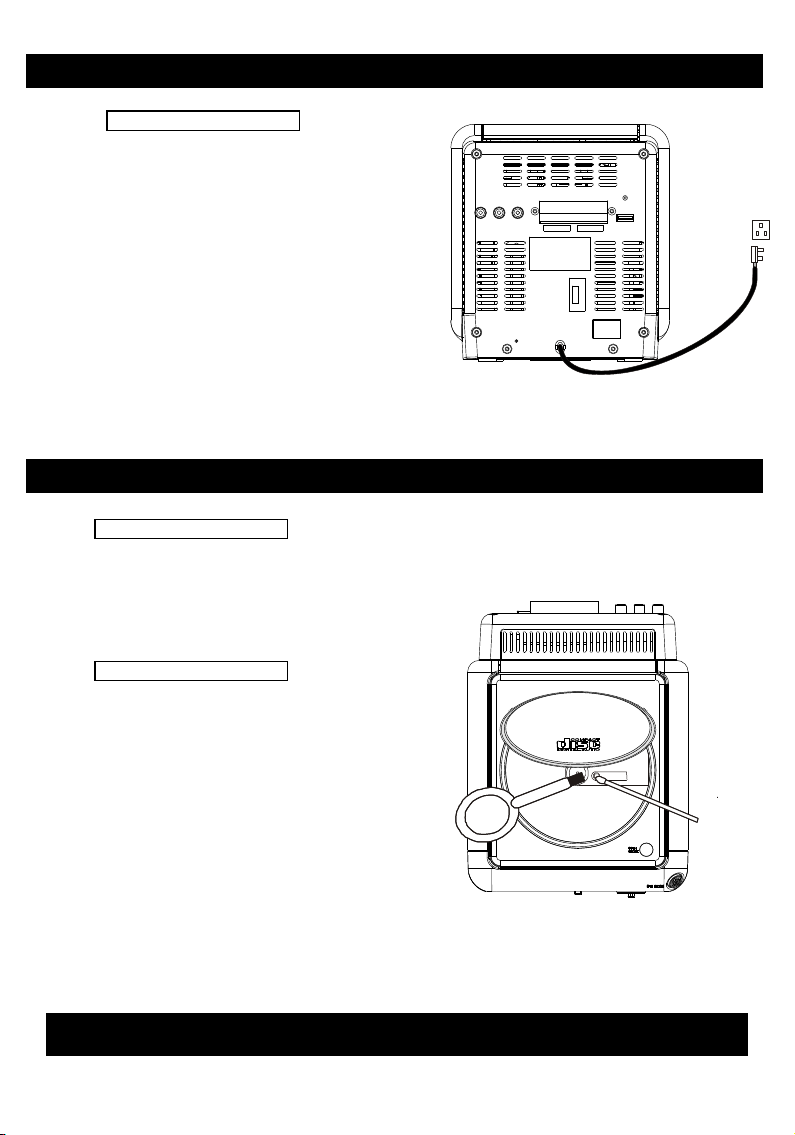
3. P OWER S OURC ES
Power conne ct ion
Plug the AC 230V Power Co rd into an AC
household o ut let.
Cleaning th e Ca binet
IMPORTANT :
Disconnec t fr om Main Sup-ply b ef ore cleanin g.
Wipe with a soft clot h. If th e c ab inet is very dirty,
dampen the c lo th w it h a w eak so lu tion o f neut ra l
detergent a nd w ater, and then wip e cl ean.
Cleaning th e Le ns
A dir ty len s will cause sound skipping and, if t he len s is
very d irty, the CD ma y no t work . Open the disc cover
and clean the l en s as follow :
Dust Dry Part ic les
Using a ca me ra lens brush/b lo wer, blow on the lens
couple t im es , then wi pe it lightly wi th the br us h to
remove dust . Th en, blow on the len s on ce more.
Finger prin ts
If the lens c an not be cleaned by using a b ru sh/blower,
use a dry cotto n sw ab.
4. P LAYER M AINTENA NCE
Goodmans product Information Helpine 08708730080
3
Page 7

5. D ISC CL EANI NG, PO WER FAI LURE
Cleaning th e Di sc
1. Notes on han dl ing discs
Removing the di sc fr om it s sto rage case and
load it with la be l side facing u p.
* Do not touch th e re flective reco rd ed surface.
o not stick paper or write an yt hi ng on the
* D
surface.
* Do not bend the d is c.
2. To wi pe a disc, use on ly a so ft cl ot h. Do not
use be nz ene or thinner which will dama ge
the d is c. Th e dis c shoul d alway s be wiped i n a
straight li ne from the c en tre to the ed ge . It
should neve r be w iped in a circula r mo tion.
3. Ne ve r pl ac e the disc on other equipm en t or
near any heat sou rce. Avoid positi on s whe re
the disc wou ld be s ubjected to di re ct sunlight
for long peri od s.
Maintenan ce a nd care
1. El ec tronic p ro du cts shou ld never b e subjecte d
to ext re me tem pe ra tures nor hig h humi di ty to
ensure good pe rformance and a long life-ti me .
Th e c lo ck ra di o s ho ul d not be pl ac ed in
bathing ar ea s, or around stoves and r ad iators,
etc. Alw ay s leave s ufficient space around the
unit for vent il ation.
2. If nece ss ary, on ly cl ea n the c ab in et of t he unit
with a soft da mpened piec e of cl ot h (be sure
the AC power cord is un pl ugged from the
ou t let ). N eve r us e a p oli sh o r a s t ro n g
detergent for clea ni ng sin ce this can damage
the finish of t he c abinet.
Goodmans product Information Helpine 08708730080
Goodmans product Information Helpine 08708730080
4
Page 8

6. FEATURES AND CONT ROLS
1
2
10
13
14
12
3
4
5
6
7
8
9
11
16
18
20
24
15
17
19
21
22
23
25
26
27
5
Page 9

7. FEA T U RES AND C O N T R O L S
1. CD DOO R
2. OPEN /CLOS E BUTTON
3. VOLU ME UP BUTTON
4. IR SEN SOR
5. VOLU ME DN BUT TON
6. CD BUT TON
7. PLAY/PAUS E BUT TON
8. STOP/ PRE SETS BU TTO N
9. BACK LIGHT BUTT ON
10. EQ BU TTO N
11. HE ADPHO NE JACK
12. LCD D ISPLAY
13. SKI P /SE ARCH FR B UTTON
14. SEL ECT UP BUT TON
8. REMO T E C O N T ROL
1. STAND BY/ON B UT TON
2. DAB BU TTON
3. CD BUT TON
4. PROG /S ELECT B UTTON
5. REPE AT/AUT OTUNE B UT TON
6. EQ BUT TON
7. MUTE B UT TON
8. AUX BU TTON
9. STOP / PRESE TS B UTTON
10. PLAY /PAU SE B UTTON
11. SK IP /SEAR CH F R/SEL EC T DN BU TTON
12. SKI P/ SEARC H FF /SELE CT UP BUT TON
13. RAN DO M BUTTO N
14. DIS PL AY/I NF O BUTTO N
15. X-B AS S BUTTO N
16. SLE EP BUTT ON
17. VOL UM E DN BUTT ON
18. VOL UM E UP BU TTON
15. STANDBY O N BUT TON
16. SEL ECT BUTTON
17. SKI P /SE ARCH FF B UTTON
18. SEL ECT DN BUTTO N
19. DAB B UTTON
20. REP EAT/ AUTOT UNE B UT TON
21. DIS PLAY/INFO B UTTON
22. TIM ER BUTTON
23. AUX B UTTON
24. OPE N BUTTON (LI NE IN)
25. SPE AKER TE RMINA LS
26. DAB W IRE ANT ENNA
27. AC PO WER COR D
1
2
3
4
5
6
7
13
15
17
9
10
11
12
14
16
18
8
9. PUT TING THE B A T T E RIES INT O
THE REM O T E C O N TROL UNI T
Press on the side of t he c ompar tm ent cover, tak e the
cover o ff to ope n th e compart ment. Pla ce the two
(UM3) , (AA) , (1.5V) bat teries in th e remo te
contr ol accor ding t o the p olarity marki ng s (" +" and " ") i nside the compa rt ment and on the batteri es. Pl ace
the cov er over the comp ar tment , press dow n lightly,
until i t sn aps on.
NOTE : Re move the ba tteri es from the re mo te
contr ol if not i n us e f or long per iod of th e t im e. D o
not mi x norm al bat te ries w ith re ch argea bl e ba tt eries ,
when the ba tteries be come wea k, remote con trol wil l
not fun ct ion and r ep lace wi th n ew batt er ies.
**B ATTER IES NOT I NCLUD ED**
1
2
6
Page 10

10 . SWITCHI NG YOUR RAD IO ON F OR THE FI RST T IM E
When the sy stem is c on nected to t he power fo r the
first t ime, it will be i n Standby, the display will f irst
show the greeti ng s and then th e clock. Pr es s the
STANDB Y bu tt on onc e will turn t he syste m ON, t he
DAB mode will b e au to matically s el ected and
perform aut o tu ne full scan fu nc ti on. (F1) (F.2) (F.3 )
F 1
F 2
F 3
11 . LISTENI NG TO YOUR RADIO
Hi nts f or be tt er re cep ti on
This unit carries a le ad w ir e DA B an te nn a, t o ob ta in t he bes t perf or mance, you s hould fully extend the
wire antenna an d ad ju st t he p osition as well as the dire ct io n un til you find the best recep ti on. For ideal
DAB reception, always maintain the lea d wire antenn a in a verti ca l positi on (hold in g it upward or
downward be hi nd the unit) is hig hl y recommend ed .
DA B MOD E
When the s ystem is f irst p ower u p, t he s ys tem wi ll a utomaticall y en te r in to the DAB mode and perfor m
DAB auto tune quick sc an functi on , the display wil l sh ow a slid e ba r to indicate the progre ss of the
scan. Unlike normal radio, the se parate signals from a numb er of stations are grouped together and
transmitt ed in a s in gl e f requency; th es e g ro ups are referred to as mul ti plexes and ensemb le s. Ev ery
time one of these gr ou ps has be en found, t he name of t ha t group w il l be disp la ye d on the b ottom half
of the displa y.
Auto tune modes
There are two types of auto tune modes, one is quick scan and the other is full scan. Quick scan will only
search for the UK DAB Band III channels and full scan will search all DAB Band III channels. Once the
scan has finished, the radio will select the first alphanumerically found station.
1. To activate the quick scan, press the AUTOTUNE button once, the display will show "Autotune Quick
scan" and then a progressing slide bar and "Searching..." (F.4)
2. activate full scan, press and hold the AUTOTUNE button until the display shows "Autotune Full
To
scan". (F.5)
3. To explore the stations that have been found, press the SEL or SEL button.
F 4
F 5
7
Page 11

Manual tuning
1. To select manual tuning, press and hold the SELECT button until the display shows "Manual tune".
(F.6)
2. Press the SEL or SEL button to move through the DAB channels, on the top half of the display will
show "5A" to "13F" and their associated frequencies. When your radio locates a station group
(ensemble/multiplex) on one of the DAB channels, the name of the station group will appear on the
bottom half of the display. (F.7)
3. To enter the ensemble/multiplex, press the SELECT button, the top half of the display will show the
first station in the ensemble/multiplex.
4. Pr ess the SEL or SEL but ton to se e what st ation s are pre sent on the found ensemble/multiplex,
when you have located your desir ed s tatio n, press the S ELECT button , and at the same time, you
will exit from the manual tu ning mo de.
F7
F6
Autoselec t on /o ff
You can explore the found stations by pressing the SEL or SEL button, if the auto select is "ON", the
station will be automatically selected when the button is released, and the name of the station will be
displayed. If the auto select is 'OFF", you have to press the SELECT button to switch to that station
when the display shows your desired station, otherwise it will revert back to the original station after 4
seconds.
To toggle between the auto select "ON" and "OFF", press the SEL or SEL button and then quickly
press and hold the SELECT button until the display shows the "Autoselect ON" or "Autoselect OFF".
(F.8) (F.9)
F9
F8
12. STORING AND RECALLING STORED STATIONS
You can store up to 10 stations to the favourite presets; this will enable you to get direct access to your
favourite stations.
1. To s tor e a p r ese t, fir st tun e t o y our d e sir ed sta tio n , the n p r es s a n d hol d t h e PRE S ETS b u tto n
un t il th e dis pla y s how s "PR ESE T #". ( F.10 )
2. Press the SEL or SEL button to select your desired station preset number.
3. Press the PRESETS to confirm your selection, the display will show "PRESET # Stored" (F.11)
4. To recall a preset station, press the PRESETS button once, then press the SEL or SEL button to
select the stations that you have stored. The display will show "PRESET # Loaded". If the preset
hasn't been allocated a station, the display will show "PRESET # empty". (F.12) (F.13)
F11F10
F13F12
8
Page 12

13. FACTORY RESET
When you move the system to another part of the country, your pre-tuned DAB stations may no longer be
available and you might need to reset your system back to its original factory settings; to perform factory
reset, please do the following:
1. U n plu g the u nit f rom m a in s .
2. D e pre ss an d hol d the S E LE C T bu t to n w hen r e-c onn ect i ng th e uni t to ma ins a g ai n .
3. Re l eas e t he bu t ton u n til " S yst e m res e t " dis p lay e d on th e L CD.
4. The un it w i ll perfo rm " A utotu ne F u l l scan" .
5. After the searching (around 1 minute depends on the no. of stations), press the SELECT button
together with the SEL and SEL buttons for stations.
Note: All of your stored presets will be lost once the reset has taken place.
14. DISPLAY MODES
Every time you press the INFO button, the display will cycle through the following display modes:
Ensemble/Multiplex
DD
AA
BB
MM
OO
DD
EE
Signal strength
Time/Date
DLS(Scrolling text)
Programme Type
Timer status
CD STOP MODECD STOP MODE
Total tracks and time
Timer status
CD PLAY MODECD PLAY MODE
Current track and elapsed time
Current track and remain time
Timer status
Ensemble/ Multipl ex ( Group nam e)
The Ensemble/Multiplex is a collection of radio stations that are bundled and transmitted together in a
single frequency. There are national and local multiplexes, local ones contain stations that are specific to
that area.
On some occasions you will see a ">" symbol appeared after the name of the station, this indicates that
there are secondary services available to that station. These secondary services contain extra services
that relate to the primary station.
Signal stre ng th
The display will show a slide bar to indicate the signal
strength, the stronger the signal, the longer the bar will
be from left to right. (F.14)
Time and date
The time and date will be automatically updated by the broadcasted information; it is no need to set the
clock manually. In the unlikely event that no clock information is received, the display will show
"<Time/Date>".
DLS
DLS stands for Dynamic Label Segment which is a scrolling message that the broadcaster may include in
their transmissions. The message usually includes information such as programme details ... etc.
Programme t yp e
This describes the style of the programme that is being broadcast. If the information is not available, the
display will show "<Programme Type>".
F14
9
Page 13

15. LISTENING TO YOUR COMPACT DISCS
NOTE: Although this CD/MP3 player can read CD-R and CD-RW discs in addition to normal CDs, the
playability of CD-R and CD-RW discs may be effected by the type of software that was used to create the
discs, as well as the quality and condition of the blank media you are using. 100% playability cannot be
guaranteed. This is not an indication of a problem with the player.
Pl ayi ng the en tir e CD
1. When the unit is ON, press the CD button to select CD function.
2. Press the OPEN/CLOSE button to open the CD door, insert the disc with the printed label side facing
up, again press the OPEN/CLOSE button to close the CD door. The display will first show "Reading
CD" then the total number of tracks on the disc and time. (F.15)
3. Press PLAY/PAUSE button to start playback from the first track, the display will show the current track
number and its elapsed time. (F.16)
F15
F16
4. interrupt playback, press PLAY/PAUSE, the time in the display will flash.
To
5. To resume playback, press PLAY/PAUSE again.
6. To stop playback, press the STOP button.
Se lec ti ng a di ffe re nt tr ack d uri ng p lay
1. Press the SKIP/SEARCH FF or SKIP/SEARCH FR buttons until the required track number appears on
the display. (F.17)
2. Release the button, playback will be started from
this track.
3. To play the next track, press the SKIP/SEARCH
FF button once.
4 . To p l a y the p r ev io us tr a c k , pr e s s the
SKIP/SEARCHF R button twice.
5. Press the SKIP/SEARCH FR button once, the
current playing track will be started again from the beginning.
F17
Re pe at pl ay
1. Press the REPEAT button to select repeat play, to repeat the same track only, press the REPEAT
button once, the display will show "RepeatOne" (F.18)
2. To repeat the en ti re disc, pres s th e RE PEAT but ton again, th e di sp lay will show " Re peatAll" (F.19)
F18
F19
3. To cancel repeat play, press the REPEAT button until the "Repeat" disappears.
10
Page 14

Ra nd om pl ay (r emote c ont ro l o nl y)
1. Pre ss the RANDOM button on the remote to
select random play, "Random" will a ppear in the
display. (F.20)
2. Press the PLAY/PAUSE button to start random
play, the tracks will be started playing randomly.
3. To cancel random play, press the RANDOM
button again until the "Random" off.
Pr og ram p lay
In CD stop mode, a maximum number of 20 tracks can be programmed to play in any desired order.
1. Load your dis c as usual and wait unt il the displa y shows the total number of tracks o n the disc and
time.
2. Pr ess t he SELECT but ton , the display will show "PROGRAM -01" an d "Track 01". (F.21)
3. Press the SKIP/SEARCH FF or SKIP/SEARCH FR buttons to select the first track to be programmed.
4. When the desired track appears on the display, press the SELECT button, the first track to play is
programmed. The program memory number will advance to "PROGRAM -02" and the track number
will reset to "Track 00" and ready for the next entry. (F.22)
5. Repeat step 3 & 4 to program other tracks for program play.
6. When you have completed programming the desired tracks, press the PLAY/PAUSE button to begin
program play. The display will show “PROG". Playback will begin on the first track you programmed
and will continue until the last programmed track has played.
7. To erase the program, in CD stop mode, press the STOP button once; in CD play mode, press the
STOP button twice, the "PROG" will disappear.
F21
F20
F22
16. SLEEP FUNCTION(remote control only)
This function allows you to program the radio to switch off itself after a set period of time. You can set y our
sleep time in power on mode.
1. To activate the sleep function, press the SLEEP button on the remote control, the display will show
"SLEEP 90 mins" (F.23)
2. Repeatedly press the SLEEP button, the time will change in the below sequence on every press:
90 > 60 >30 > 10 > OFF > 90 > 60 > ......90.
3. When the display shows your desired sleep time, release the button, the sleep setting will be
confirmed in 2 seconds. The display will show "SLEEP Confirmed" and then "SLP" will show to
indicate that the sleep time is set. (F.24)
F23
F24
4. To cancel sleep, press the SLEEP button until the "SLP" disappears.
11
Page 15

17 . TIME R F U NCT ION
You can set this timer to switch on the system at your desired time and listening mode.
1. Press the TIMER button will toggle the timer function between "ON" and "OFF", the display will show
the "system on time" together with the "TIMER ON" or "Timer OFF".(F.25)(F.26)
F25 F26
2. adjust the timer, press and hold the TIMER button until the "Timer On Set" appears in the display,
To
and the "minute" digit will flash.
3. the SEL or SEL button to select the desired minute and press the PROG/SEL button to
Press
confirm, and then the "hour" digit will flash.
4. Press the SEL or SEL button to select the desired hour and press the PROG/SEL button to confirm,
then the time to switch on the system is set and the "Time ON Mode" will appear in the display and the
"mode (DAB or CD)" will flash.
5. Press the SEL or SEL button to select the mode and press the PROG/SEL button to confirm, then
the mode to switch on is confirmed. The timer function is activated.
18 . MUTE F UNCT ION (remo te control onl y)
Press the MUTE button on the remote control will stop the sound from the speakers temporarily, the
display will show “Mute” and flash. Press the MUTE button again to cancel mute function and restore the
sound, the “Mute” will disappear in the display.
19 . PRES ET EQ
You c an press th e EQ butt on to selec t d iffer ent preset EQ mode, th e display w ill show in sequence o f
every pre ss: “FLAT - JAZZ - RO CK - CLASSI C - PO P - FLAT - ……”
Note: To avoi d distort ion, the EQ e ffect m ig ht not be so ob vious in hi gh v olume.
20 . X-BA SS FUN CTIO N (re mote cont rol o nly)
Press t he X-BA SS butt on on the rem ote con trol wi ll togg le the x-bass function between o n and off. The
display will s how “X- BASS On ” or “ X-BASS Off ”. When t he x-bass i s ON, the b ass sound i s enhan ced.
21 . DISP LAY BACKLI GHT
When the unit is ON, pre ss th e B AC KLIGHT b ut ton w ill toggle the dis pl ay backlight betw ee n O N a nd
OFF.
22 . AUX IN PUT
A pa ir of RAC jacks is provide d i ns id e a fr ont door cover for the AUX inpu t f un ction, stereo ana lo gu e
audio signal can be input throu gh t he se j ac ks. To sel ect AUX in put, press the AUX button. The disp la y
will show ‘AU X” .
12
Page 16

23 . HEAD PHON E JACK
A 3.5m m typ e ste reo h ead pho ne ja ck is l oca ted o n the f ron t p an el. C onn ect a s e t of st ere o
he adp hon es (no t i nc lud ed) to th is ja ck for pr iva te lis te nin g w ith out di st urb ing ot her s. Th e e xte rna l
sp eak ers a re a uto mat ic all y dis con ne cte d whe n th e hea dp hon es ar e in u se.
IM POR TANT: Whe n usi ng h ead ph one s alw a ys se t the vo lu me t o a lo w l eve l bef ore you p ut the
he adp hon es o n. T he n in ser t th e h e ad pho nes and gr a du all y in cre ase th e vo lum e to a co mf ort abl e
li ste nin g le vel .
24 . COMPACT DISC
1. Always use a c om pact discs bear in g the mark as sho wn .
2. Notes on han dl ing discs
Removing th e di sc from its stora ge c ase and loadi ng i t.
* Do not touch th e re flective
recorded su rf ace.
* Do not stick pa pe r or write
anything on t he s urface.
* Do not bend the d is c.
3. Storage
* Store the dis c in i ts case.
* Do not expose d is cs to direct sunl ig ht or high temp er at ures, high hu mi dity or dusty
places.
4. Cleaning a d is c
* Should the di sc b ecome soiled,
FROM THE CENTRE TO THE EDGE
wipe off dust, dirt and fingerprints
with a soft clo th .
* The disc shou ld b e cleaned from
the centre to t he e dge.
CORRECT
INCORRECT
* Never use ben ze ne, thinners, r ec ord cleaner f lu id o r anti static s pr ay.
* Be sure to clos e th e CD door so the lens i s no t contamina te d by d ust.
* Do not touch th e le ns.
13
Page 17

25. SPECIFICATION
POWER SUPPLY:
OUTPUT POWER:
UNIT DIMENSION:
SPEAKER BOX DIMENSION:
WEIGHT:
RADIO SECTION
FREQUENCY RANGE:
COMPACT DISC SECTION
OPTICAL PICKUP:
230V~50Hz
4.5WattsX2
165(L)x208(W)x178(H)mm
139(L)x182(W)x165(H)mm
4.36Kg
DAB 174-240 MHz
3-BEAM LASER
100Hz - 16KHz
FREQUENCY RESPONSE:
AUX INPUT
INPUT VOLTAGE RANGE:
700mv - 1000mv
47
IMPEDANCE:
SPECIFICATION SUBJECT TO CHANGE WITHOUT FURTHER NOTICE.
Dripping warning : " The product shall not be exposed to dripping or splashing and that no objects
filled with liquids, such as vases, shall be placed ont the product."
Ventilation warning : " The normal ventilation of the product shall not be impeded for intended use."
14
Page 18

26 . TROU BLES HOOT ING GUIDE
Every effort has been mad e t o e nsure this product pr ov id es optim um perform an ce in all
condition s, however we app re ci ate tha t sometimes d iffic ul ties may arise and the foll ow ing tab le
summarise s so me common probl em s.
Problem
General
No sound
No DAB statio ns f ound
Erroneous i nf ormation
in the displa y
If the prob le m experience d is not listed abo ve or if after c hecking the remedie s the problem stil l
exists, ple as e call our produc t in formation h el pl ine on
possible ca us e
No power to uni t
Headphone s co nnected to
headphone s oc ket
Aerial not ex te nded
Outside bro ad cast area
Temporary mem or y problem
* Check AC supp ly i s connected
* Remove head ph ones
* Check Aeria l po sition
* Use the signa l me ter on the
* Check locat io n reception
* Switch the un it o ff then bac k
Remedy
unit to check f or s ignal
details at ww w.d rdb.org or
call 08707 74 7 4 74
ON this will cl ea r the problem
0877 877 0080
or visit our we bs ite: www.goodm an s.co.uk
Goodmans product Information Helpine 08708730080
Goodmans product Information Helpine 08708730080
15
 Loading...