

Page 1
1
RT700i/RT730i BARCODE PRINTER
USER MANUAL
User Manual
Version
Issue Date
P/N
: RT700i series
: Rev. 1.6
: 2013.10.03
: 920-014811-00
Page 2
50
5 Accessories
5.2 Installing the Label Dispenser
The Overview of the Label Dispenser
**** A label liner thickness of 0.006 mm ± 10% and a weight of 65 g/m2 ± 6% are recommended.
**** The label dispenser will take labels up to a max. width of 118 mm.
**** When using the label dispenser, set the stop position (printer command ^E) to 13.
Preparation Steps
Please see the Section 5.1 Preparation Steps to complete the preparation steps before installing the label dispenser.
Installing the Label Dispenser
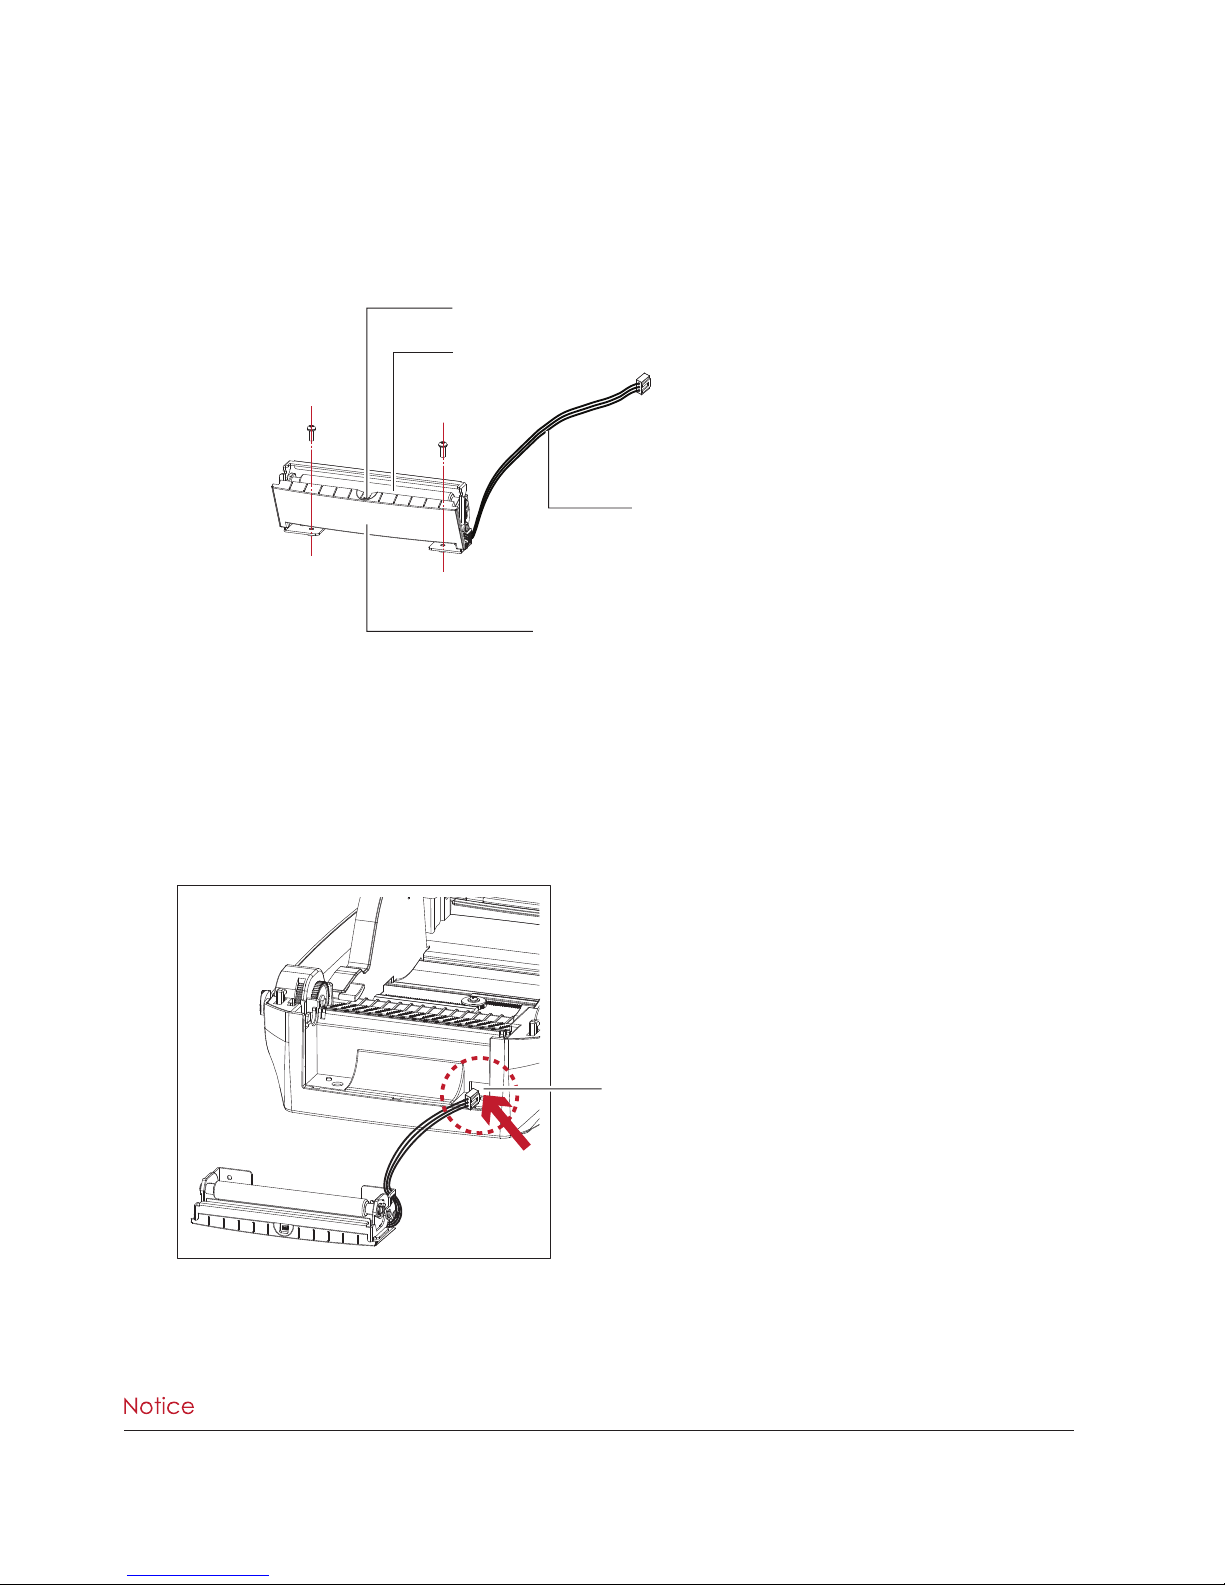
1. Pass the connection cable through the slot of the printer.
PAPER SENSOR
PAPER FEED ROLLER
COVER
CONNECTION CABLE OF LABEL DISPENSER
SLOT
Page 3
51
5 Accessories
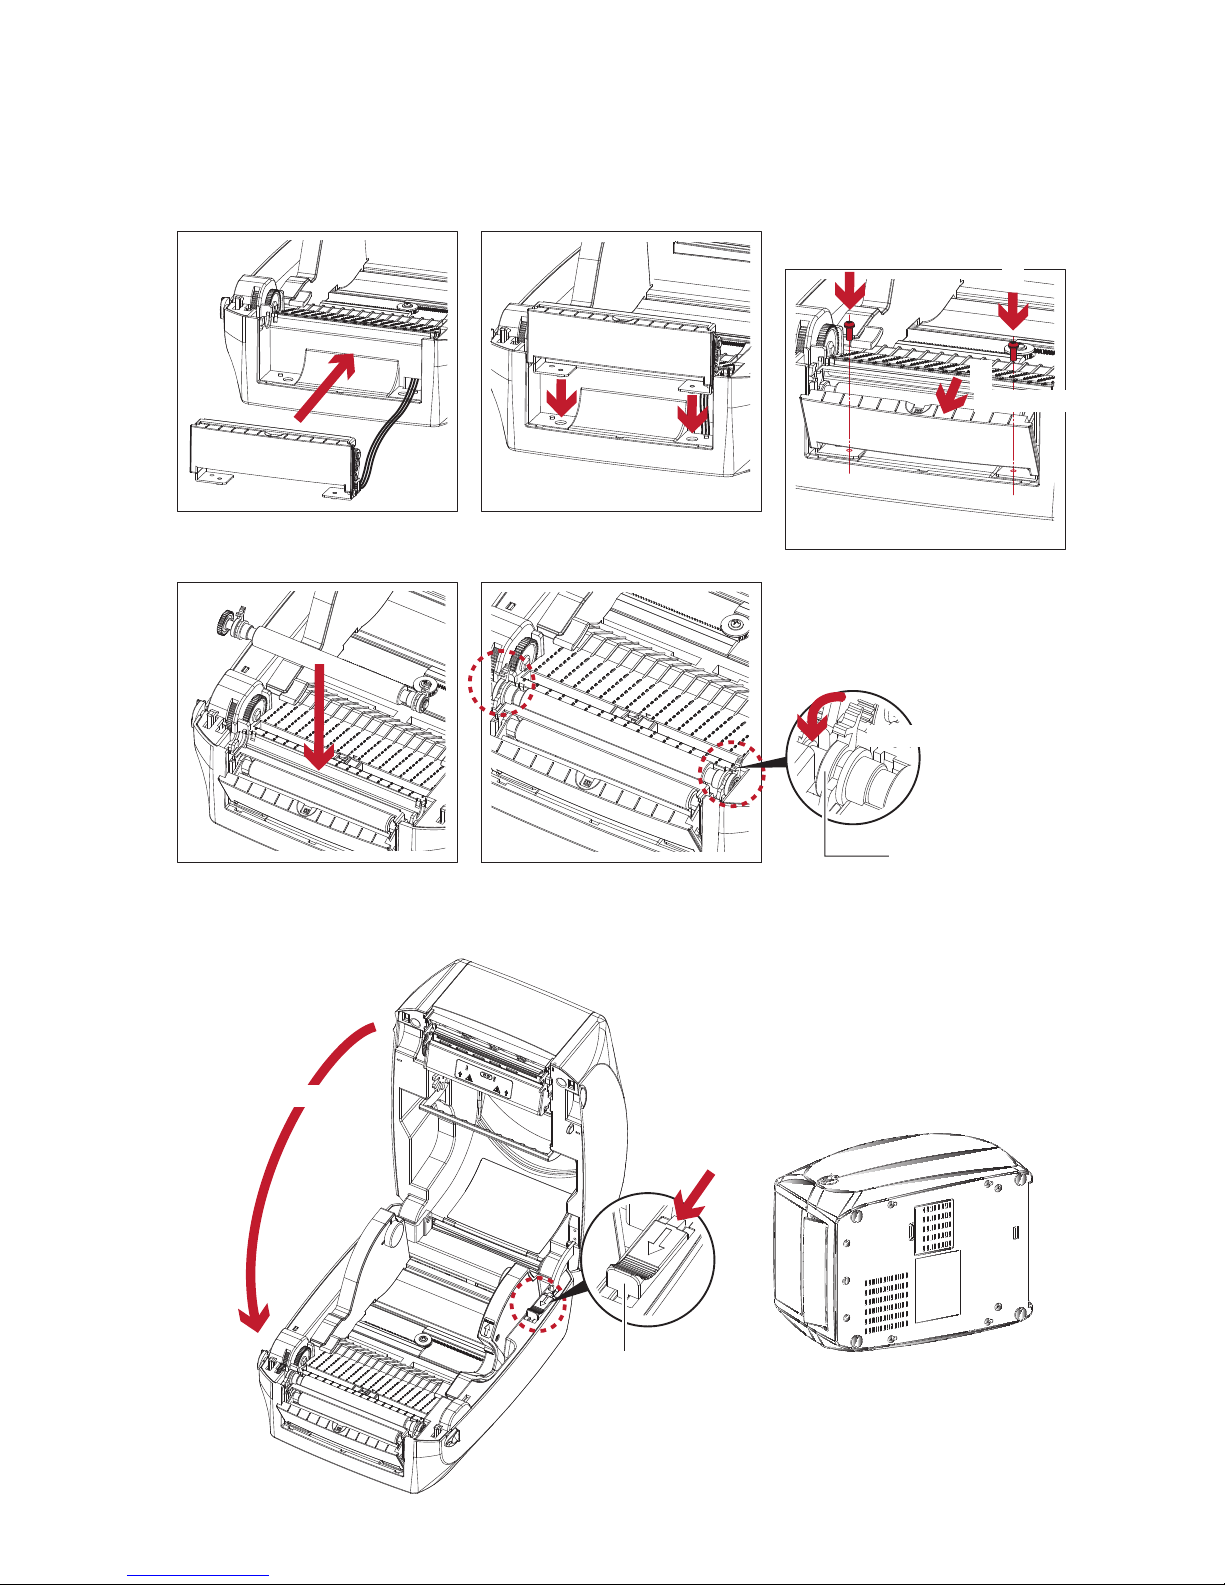
2. Place label dispenser to align both holes of screw and then tighten the screws.
3. Place the platen back to the printer and lock the clips.
4. Close the printer cover and printing mechanism.
Then to turn the printer upside down.
Open the cover
1
2
2
Tighten the screw
Lock the clip
CLIP
Close the printer cover
2
Push
1
RELEASE CATCH
Release catch for closing
the printer cover
Page 4

52
5 Accessories
5. Open the cover on the bottom of printer.
6. Plug the connector fo the label dispenser to the jack.
7. Close the cover of the module connection jacks.
Open the cover
COVER OF THE MODULE CONNECTION JACKS
Plug
JACK
CONNECTOR OF THE CONNECTION CABLE
Close the cover
COVER OF THE MODULE CONNECTION JACKS
****The printer must be switched off when plugging the connector, or the motherboard may be destroyed!
****There are 2 jacks : the lower jack for the label dispenser, the upper jack for the cutter.
CUTTER JACK
LABEL DISPENSER JACK
Page 5

53
5 Accessories
2. Feed the Label stock through the label guides.
And pull the label liner through the platen and the steel of the label dispenser.
****Labels should be at least 25 mm high.
Loading Label Roll with the Label Dispenser Module
1. Remove the first label from the label stock.
Tear a label
THE FIRST LABEL
LABEL STOCK
LABEL LINER
Through the label guides
LABEL LINER
PLATEN
Through the platen
and the steel
STEEL
Page 6

54
5 Accessories
3. The feeding path of label and liner should be as shown in below graphic.
4. Close the label dispenser and printer cover. The installation is completed now.
LABEL STOCK
PLATEN
ROLLER
LABEL
LABEL LINER
RT700i
Close the cover
Page 7

55
5 Accessories
5. Press the FEED button to feed the label. The label will be peeled from the liner while it passes through the label
dispenser.
RT700i
Press the feed key
LABEL LINER
LABEL
**** There is a paper sensor on the Label Dispenser module. It will stop the printing if it is covered by label. Remove
the last printed label and the printer will then continue to print next label.
RT700i
PAPER SENSOR
 Loading...