

Page 1

USER MANUAL
: Programmer’s Manual
EZPL Programmer’s Manual
VERSION
ISSUE DATE
P/N
: Rev. E (1.00B)
: 2013.09.09
: 920-013412-01
Page 2

Introduction ................................................................................................................................... 1
Setup Comma n ds ........................................................................................................................ 2
^An - Printing mode ................................................................................................................................................ 2
^Bx - Set the backward length ............................................................................................................................. 2
^Cx - Number of copies per label ........................................................................................................................ 2
^D+dddd.hh - Date calculation function ........................................................................................................... 3
^Dx - Number of labels per cut ............................................................................................................................. 3
^Ex - Stop position setting ...................................................................................................................................... 3
^Fname - Download label file to printer ............................................................................................................. 4
^Gn - Enable/disable See-Through sensor ......................................................................................................... 4
^Hx - Print darkness setting ..................................................................................................................................... 4
^Kname - Recall label format ............................................................................................................................... 5
^Lx - The start sign of label format ........................................................................................................................ 5
^Mx - Set the forward length ................................................................................................................................. 6
^On - Label Dispenser (peel) / Applicator ......................................................................................................... 6
^PAx - Auto Print ...................................................................................................................................................... 6
^Px - Number of pages printed ............................................................................................................................ 7
^PI - Continuous printing ........................................................................................................................................ 7
^Qx,y(,z±) - Label length ........................................................................................................................................ 8
^Rx - Row column adjustment .............................................................................................................................. 8
^Sx - Speed setting .................................................................................................................................................. 9
^T+hhh.mm - Time calculation function .............................................................................................................. 9
^Wx - Label width setting .................................................................................................................................... 10
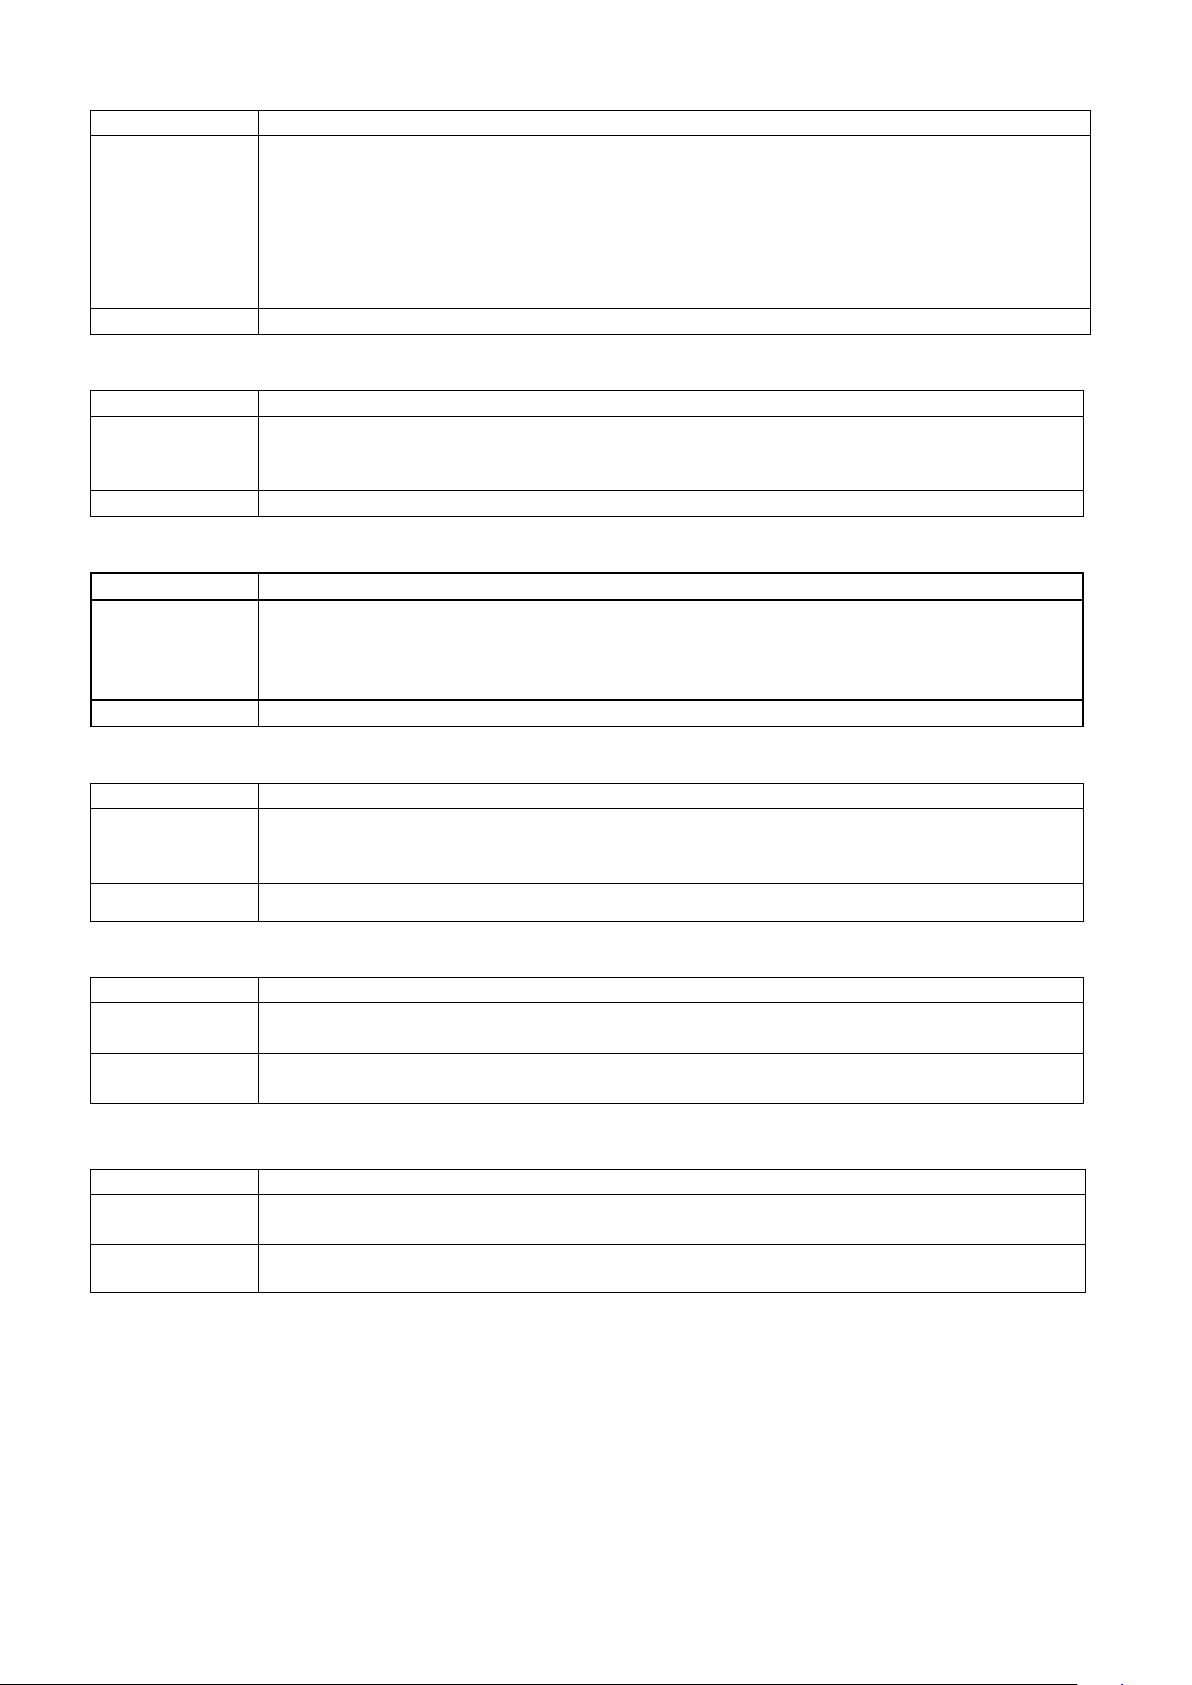
^XGET,CONFIG - Return the configure status ................................................................................................. 10
^XGET,TPHRESISTANCE - Dot detect .................................................................................................................. 11
^XSET,ACTIVERESPONSE,n - Active response ................................................................................................... 12
^XSET,ACTIVEMESSAGE,n - turn on/off auto print error message function ................................................ 12
^XSET,ALIAS,string - Printer alias name used for the recognition of each network printer ..................... 12
^XSET,AUTOTPHTEST,x - AUTO PRINTING SELF TEST PAGE WHEN PRINTER TURNED ON ............................... 12
^XSET,BUZZER,n - Set remind buzzer on/off ...................................................................................................... 12
^XSET,CODEPAGE,n - Select Code Page ........................................................................................................ 13
^XSET,ERRORPRINT,n - Set Error Reprint ............................................................................................................. 13
^XSET,FEEDCUT,n - Setup feed and cut function ............................................................................................ 13
^XSET,FEEDTYPE,n - Setup feed function .......................................................................................................... 13
^XSET,IMMEDIATE,n - Set immediate response on/off ................................................................................... 13
^XSET,KEYBOARD,n - Select different area PS2 Keyboard ............................................................................ 13
^XSET,LOCKCMD,xxxx - Command Lock function, use only hardware modifications set ..................... 14
^XSET,REWINDER,n - Set Rewinder ..................................................................................................................... 14
^XSET,REALLENGHTPRINT,n - Adjust label length based on label content ................................................ 14
^XSET,RECALLCRLF,n - Line feed characters include a character in recall label mode........................ 14
^XSET,ROTATION,n - Rotate whole label .......................................................................................................... 15
^XSET,SENSING,n - Assign reflect or see-through sensor mode be a detector while using continuous
label ......................................................................................................................................................................... 16
^XSET,SLASHZERO,n - Slashed zero .................................................................................................................... 16
Page 3

^XSET,SMARTBACK,n - Smart backfeed............................................................................................................ 16
^XSET,TOPOFFORM,n - Top of Form ................................................................................................................... 17
^XSET,UNPROMPT,p1 - Automatically acquire variables .............................................................................. 17
^XSET,WHENTOSENSING,n - Set up autosensing ............................................................................................. 17
^XSETCUT,DOUBLECUT,x - Double cut ............................................................................................................... 18
^XSETCUT,MODE,n - Set cutter mode ............................................................................................................... 18
^XSETRTC,ISOWEEKNUM,n - ISO Week .............................................................................................................. 19
^XSETRTC,LANGUAGE,n - Different language layout .................................................................................... 20
^Yb,p,d,s - RS232 serial Port communication setting ..................................................................................... 21
^Z - Reset to factory default settings ................................................................................................................ 21
Control Commands ................................................................................................................... 22
~B - Display the version message ...................................................................................................................... 22
~Dm,d,y,h,i,s - Date/Time setting ....................................................................................................................... 22
~En,name,size - Download graphic to memory ............................................................................................. 22
~G - Graphic mode.............................................................................................................................................. 22
~H,TTF,Xname,size<CR>data - Download true type font .............................................................................. 23
~H,TTF_TABLE,Xname,size<CR>data - Download Unicode Table ................................................................ 23
~Jx - Bit-Mapped font download ...................................................................................................................... 23
~Kn – Response function’’ Y’’ from RS-232 ...................................................................................................... 23
~L,DBASE,x,y - Download dBase III to Printer ................................................................................................... 23
~L,SERIAL,name,data - Download serial file to printer .................................................................................. 23
~MCPY,s:o.x,d:o.x – Copy file ............................................................................................................................. 24
~MDEL - Format current memory (not include download font- Asian font & TTF) ................................... 24
~MDEL* - Format current memory ..................................................................................................................... 24
~MDELn,name - Delete specific file from memory ........................................................................................ 25
~MDIR - Get memory state from printer ........................................................................................................... 25
~MGETS,name - Get Serial File information ..................................................................................................... 25
~MSETT,name<CR>nnnnnnnn<data> - Save the .TXT file to printer ............................................................ 25
~MGETT,name<CR> - Read saved file .............................................................................................................. 26
~MMOV,s:o.x,d:o.x - Move file ........................................................................................................................... 26
~Px - Print label ...................................................................................................................................................... 26
~Q±x - Row Offset Adjustment ........................................................................................................................... 26
~Rx - Rotate printing ............................................................................................................................................. 26
~S,CHECK - Status immediate response command ...................................................................................... 27
~S,DUMP - Enter into DUMP Mode ..................................................................................................................... 28
~S,OFFSETa,n - Setup position micro adjustment ............................................................................................ 28
~S,SENSOR - Auto Sensing ................................................................................................................................... 28
~S,n ( n = FEED, PAUSE, CANCEL, BUFCLR ) - Analogue press control keys ............................................... 29
~S, ES[p1] – Change printer command language ........................................................................................ 29
~S,STATUS - Status immediate response command ....................................................................................... 29
~T - Print head testing ........................................................................................................................................... 29
~V - Print Self-Test page ....................................................................................................................................... 29
~Xn - Print the available space and file information in the memory .......................................................... 30
~Z - Reset printer .................................................................................................................................................... 31
Label formatting commands ................................................................................................... 32
Page 4

AUTOFR - Automatic form printing .................................................................................................................... 32
At,x,y,x_mul,y_mul,gap,rotationInverse,data - Text ....................................................................................... 33
AT,x,y,w,h,g,s,d,m,data - Print built-in true type font ..................................................................................... 34
ATt,x,y,w,h,g,s,d,m,data - Print downloaded true type font ........................................................................ 35
Bt,x,y,narrow,wide,height,rotation,readable,data - Barcode ..................................................................... 36
B5n,x,y,narrow,segment,height,rotation,readable,data - lay out GS1 Databar ..................................... 37
C#x,y,±value,z - Print count with serial file ....................................................................................................... 38
Cx,ys,±value,prompt - Serial number setting ................................................................................................... 39
Daa|bb|cc - Define date layout ..................................................................................................................... 40
E - Terminate label formatting mode and print label .................................................................................... 41
FILEDB,OPEN,name - Open database .............................................................................................................. 41
FILEDB,MOVE,n - Move data record ................................................................................................................. 41
FILEDB,FIND,x,y - Searching from database..................................................................................................... 41
Gwxxx - Graphic command ............................................................................................................................... 42
Hx,y,col_count,row_count,col_width,row_width,line_width – Table command drawing ...................... 43
La,x,y,x1,y1 - Line command drawing .............................................................................................................. 43
Mx,y,sno,nos,mode,ccode,zip,class,rotation,message - Print Maxicode .................................................. 44
Px,y,w,h,r,c,ec,len,rotation - Print PDF 417 ....................................................................................................... 44
PCx,y,w,h,r,c,ec,max_len,rotation - PDF 417 with variable length data.................................................... 45
PMx,y,w,h,mode,length,rotation – Micro PDF 417 .......................................................................................... 46
Qx,y,width,height - Pattern command ............................................................................................................ 47
Rx,y,x1,y1,lrw,ubw – Rectangle drawing .......................................................................................................... 47
Th|m|s – Internal real-time setting.................................................................................................................... 47
V#ADD,name,size,prompt - Store variable wi th a name ............................................................................. 48
V#ADDCHKSUM,x - Add modulus 10 check code......................................................................................... 48
V#ADDCHKSUM43,x - Add modulus 43 check code .................................................................................... 49
V#LINKDB,x,y - Like a Variable name for dBase data ................................................................................... 49
V#OPx,p1,p2,p3 - Variable calculation ........................................................................................................... 49
V#RENAME,name,x - Variable rename ............................................................................................................ 50
V#SETZERO,Vxx –Adjustment parameters bits with the same as parameter definition .......................... 50
V#SET,FLOATFORMAT,X,Y,Vxx - handle the number of decimals ................................................................ 51
V#SET,PROMPTONCE,Vx –only prompt the variable once while printing .................................................. 51
V#SET,THOUFORMAT,V00ab[c] .......................................................................................................................... 52
V#SET,UNPROMPT,x - Disable variable prompt ............................................................................................... 52
V#STRCPY,x,y - Copy all of variable data........................................................................................................ 52
V#STRSUB,x,y,first,length - Copy part of Variable value ................................................................................ 53
Vt,x,y,x_mul,y_mul,gap,rotationInverse,data - Print with downloaded character sets .......................... 53
Vxx,length,prompt[,jnl][,sab] - Store variable.................................................................................................. 54
Wx,y,mode,type,ec,mask,mul,len,roatae<CR>data - Arrange QR code and Micro QR Code .......... 55
XRBx,y,enlarge,rotation,length<CR>data - Arrange DataMatrix Code .................................................... 56
XRBx,y,enlarge,rotationR,length<CR>data - Arrange Rectangular DataMatrix Code .......................... 56
Yx,y,name – Graphics file .................................................................................................................................... 56
Zx,y,a,b,c,d,e,n<CR>data – Print Aztec Bar Code ......................................................................................... 57
LAN Set Commands ................................................................................................................... 58
^NA,function[,p1] – setup SMTP ......................................................................................................................... 58
Page 5

^NL[,TrapIP,Community] – setup SNMP ............................................................................................................ 58
^NL,ENABLE,n –enable or disable SNMP .......................................................................................................... 58
^NR[,p[,ei[,sw]]] –setup LAN response .............................................................................................................. 59
^NMACADDR[,addr] –setup or get MAC address information ................................................................... 59
^NS[a,b,c,d,e,f,g,h,I] –Set and request for NET connection parameters .................................................. 59
Appendix ..................................................................................................................................... 60
I. Barcode Samples ............................................................................................................................................... 60
II. Command Examples ....................................................................................................................................... 68
Page 6

1
Introduction
About EZPL
The EZPL (EZ Programming Language) is a high-level label definition and printer control language.
Features of EZPL are as follows:
1. The data are stored to be processed and will not be printed out until the last printing instruction is
received.
2. All the printing contents can be rotated.
3. Images can be downloaded and stored.
There are two ways to send printing commands to the printer. One is sending through the command
TM
window of (GoLabel or QLabel), the other is sending through Windows
The EZPL language consists of three types of commands:
♦ Setup commands – It includes printer control instructions, configuration instructions and image
downloading instructions.
♦ Control commands – It includes commands that can control the printer to take action
immediately, such as cleaning memory, feeding label.
♦ Label Format commands - Define the format of data that will be presented on the label, such as
Line, Rectangle, Barcode, Text and image.
Rules and syntax
EZPL commands include parameter strings associated with them:
1. The syntax of commands contains capital letters as the ID for each function.
2. The lower case letters in command represent parameters.
3. Control and Setup commands use the tilde (~) and caret (^) as prefix.
4. Label Format commands have no prefix.
5. The comma (,) is the delimiter to separate each parameter, and the CR (Carriage Return) signifies
the end of every command.
Example: In “~En,name,size “ command, “E” is an identity letter of this image downloading command;
“n”, “name” and “size” are three parameters.
HyperTerminalTM via RS-232 port.
*All company and/or product names are trademarks and/or registered trademarks of their respective
owners.
Page 7
2
Setup Commands
Syntax
^An
Parameter
n = D, Direct thermal mode, the ribbon out sensor is disabled.
n = T, Thermal transfer mode, the ribbon out sensor is enabled.
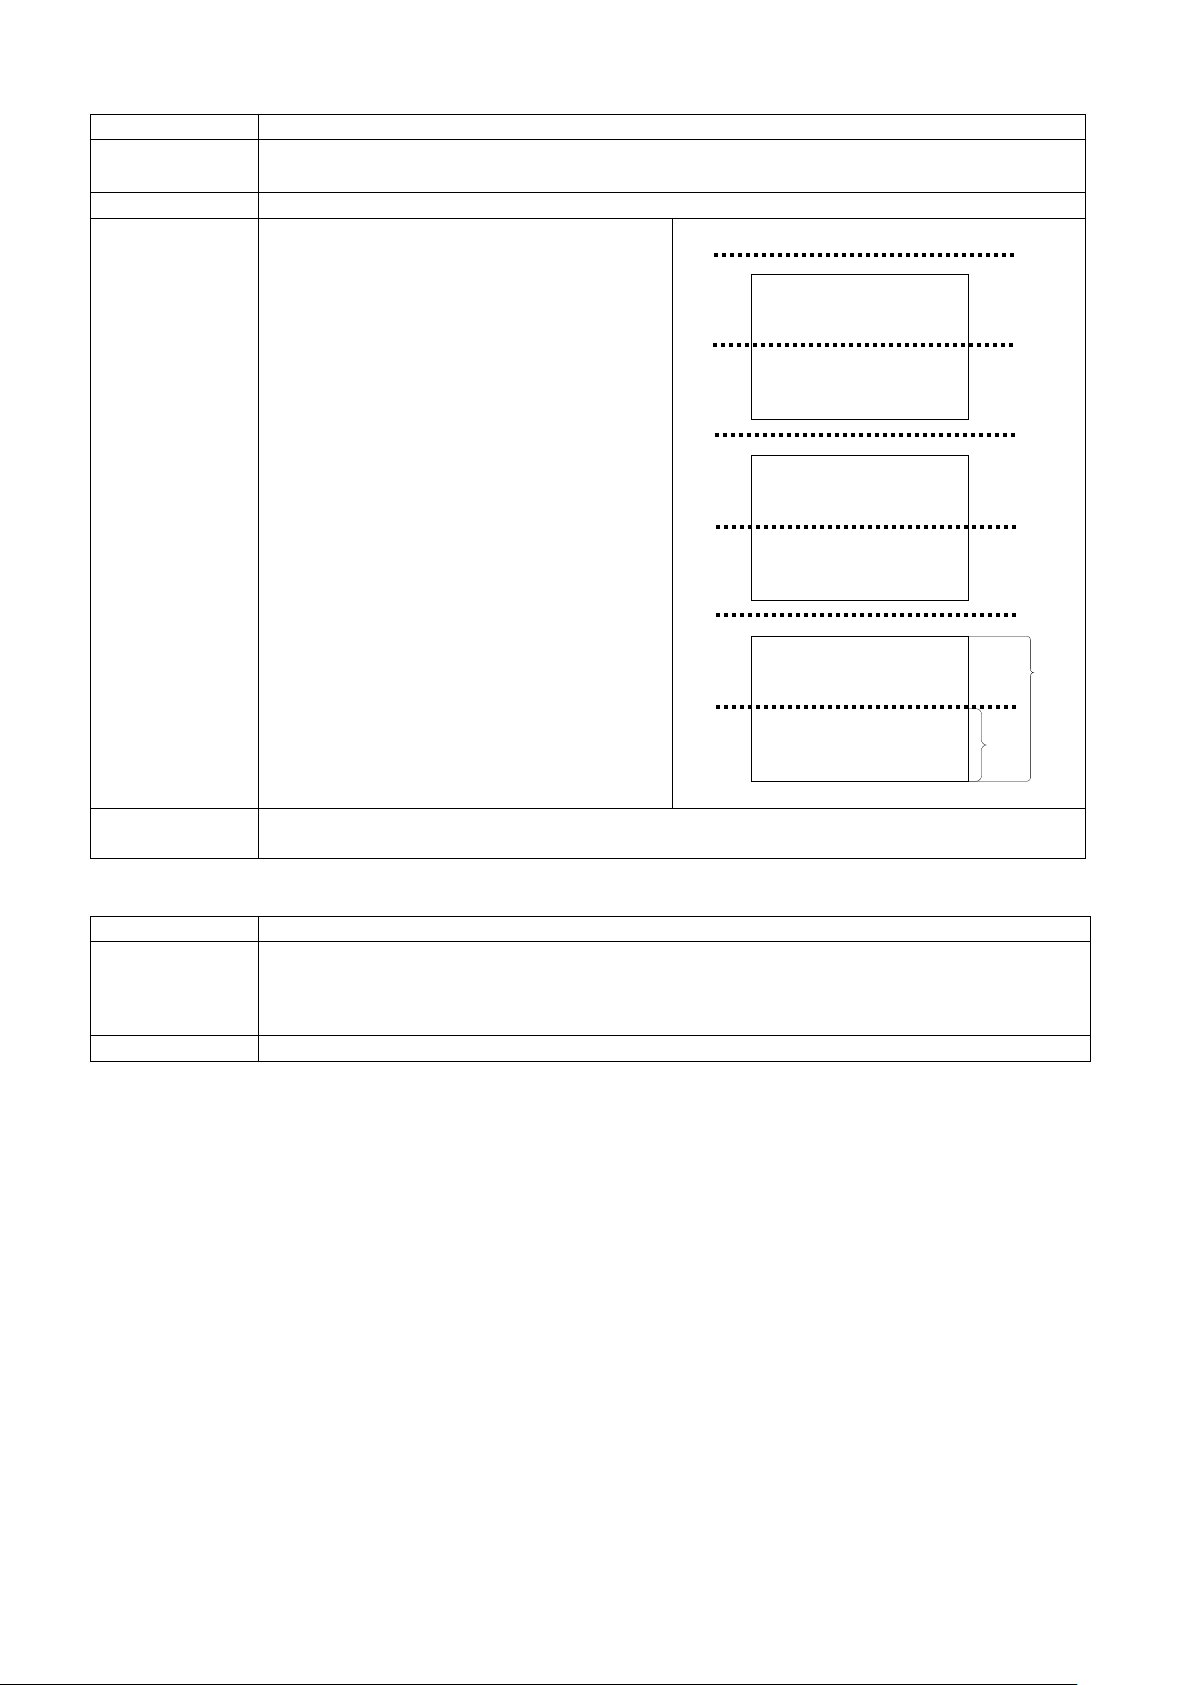
Description
1. If you want to change the print mode, you need to send the printing command
* Note: this command will not be applied on Direct Thermal only models.
Example
^AD
E
Syntax
^Bx
Parameter
x = 1~1000 (unit: mm)
Set the backward length to move the position of paper.
after printer cover close.
PC to Printer
^B1000
Syntax
^Cx
Parameter
x = 1 ~ 32767
Description
Set the number of copies to print for a label.
Example
Send command :
E
Print result :
003
^An - Printing mode
to the printer for changing print mode setting. There are two ways to send
printing commands to the printer. One is sending through the command
window of (GoLabel or QLabel), the other is sending through Windows
HyperTerminal
printer is on standby mode (LED light is green) and send below command to
change the print mode.
2. Send "^AD" command to printer to change the print mode to Direct Thermal
Mode.
3. Send "^AT" command to printer to change the print mode to Thermal Transfer
Mode. When printer is on Thermal Transfer Mode, it is necessary to install the
ribbon into printer. Otherwise the error message "Print Mode Error" will be
triggered and the printer will not be able to print.
^L
…..
TM
TM
via RS-232 port. To send printing command, make sure that the
^Bx - Set the backward length
In progress
Description
If ~S,CHECK will feedback 00
If ~Z printer would turn on immediately
If Dooropen RED light would up and motor would stop at the same time even
Result :
Example
Printer to actio n Motor would turn backwards 1000mm
^Cx - Number of copies per label
^C2
^P3
^L
C0,001,+1,Prompt
AE,10,10,1,1,0,0,^C0
001
001
002
002
003
Page 8
3
^D+dddd.hh - Date calculation function
Syntax
^D+dddd.hh
Parameter
dddd = days in 4 digits. Set how many days to be added to the current date.
hh = hours in 2 digits. Set how many hours to be added to the current time.
Description
This command will set the specified days and hours forward based on the printer's
current date then print it.
Example
In this sample, the printer will print current
E
Syntax
^Dx
Parameter
x = 0, disable the cutting.
x = 1 ~ 32767, number of label per cut.
Example
Send command :
will cut 3 times as well.
Syntax
^Ex
Parameter
x = 0~40 (unit: mm)
Description
Feed the paper to specific stop position.
Example
^E12
E
time and count the date that is 5 days
and 12 hours after current time.
Send command :
^Q40,0,0
^W102
^AT
^L
Dy2-me-dd
Th:m:s
~D01,01,05,12,00,00
AD,72,96,1,1,0,0,Manufactured Date: ^D
^T
AD,72,190,1,1,0,0,Expiration Date:
^D+0005.12
^Dx - Number of labels per cut
Print result :
Manufactured Date: 05-JAN-01 12:00
Expire Date: 05-JAN-07
^Q20,0,0
^P6
^D2
^L
E
Print result :
^P6 = print 6 labels, ^D2 = cut once every 2 labels. It will cut 3 times in this case.
Note : The last label will be cut anyway. For example, if send command ^P5 ^D2, it
^Ex - Stop position setting
^L
…..
Page 9
4
^Fname - Download label file to printer
Syntax
^Fname
data
Parameter
name = the name of label format (up to 20 characters)
data = the data containing the label formatting command for this stored format
Description
Download label file to the memory of printer. After the download is completed, the
^Fname
:
:
^L
:
:
E
Control/S etup command
Label for mat command
data
“REPEAT FILE NAME”, and the format will not be stored to the memory.
Example
To see ^Kname Example
Syntax
^Gn
Parameter
n = 0, disable see-through sensor
n = 2, Auto-mode
Description
There are two types of sensor in printer: Reflective Sensor and See-through Sensor.
the center of the printer.
Syntax
^Hx
Parameter
x = 00 ~ 19
Description
Set the darkness of printing.
Example
^H10
E
printer will beep once (refer to page76).
Duplicate name inspection: If you use the same file name, the printer will print
^Gn - Enable/disable See-Through sensor
n = 1, enable see-through sensor
Users can set one of them as active sensor. By default, the sensor setting is set on
Auto-mode. However, sometimes the sensor may not be able to detect the label
gap on special label materials. Then it would be necessary to change the sensor
setting to other sensor. For example, when printing on labels with thick liner, colored
liner or back graphics, the see-through sensor would need to be enabled since the
reflective sensor may not work correctly.
To switch between different sensors, please do as follows:
1. Make sure that the printer is on standby mode (LED light is green) and send
below command to change the sensor setting.
2. Send "^G0" command to printer to set the Reflective Sensor as active sensor.
3. Send "^G1" command to printer to set the See-through Sensor as active sensor.
4. Send "^G2" command to printer to change the sensor setting to Auto-mode.
*For the EZ-1000Plus series, EZ-DT series, EZ-1105 / EZ-1305 and EZPi-1000 series models,
if the see-through sensor is enabled, the moveable Label Sensor must be placed in
^Hx - Print darkness setting
^L
…..
Page 10
5
^Kname - Recall label format
Syntax
^Kname
Parameter
name = the name of recalled label format (up to 20 characters)
Description
Recall a label format stored in printer’s memory (refer to page76)
^Kname
:
:
E
:
:
~Px
data
Control/S etup comm and [option]
Syntax
^Lx
Parameter
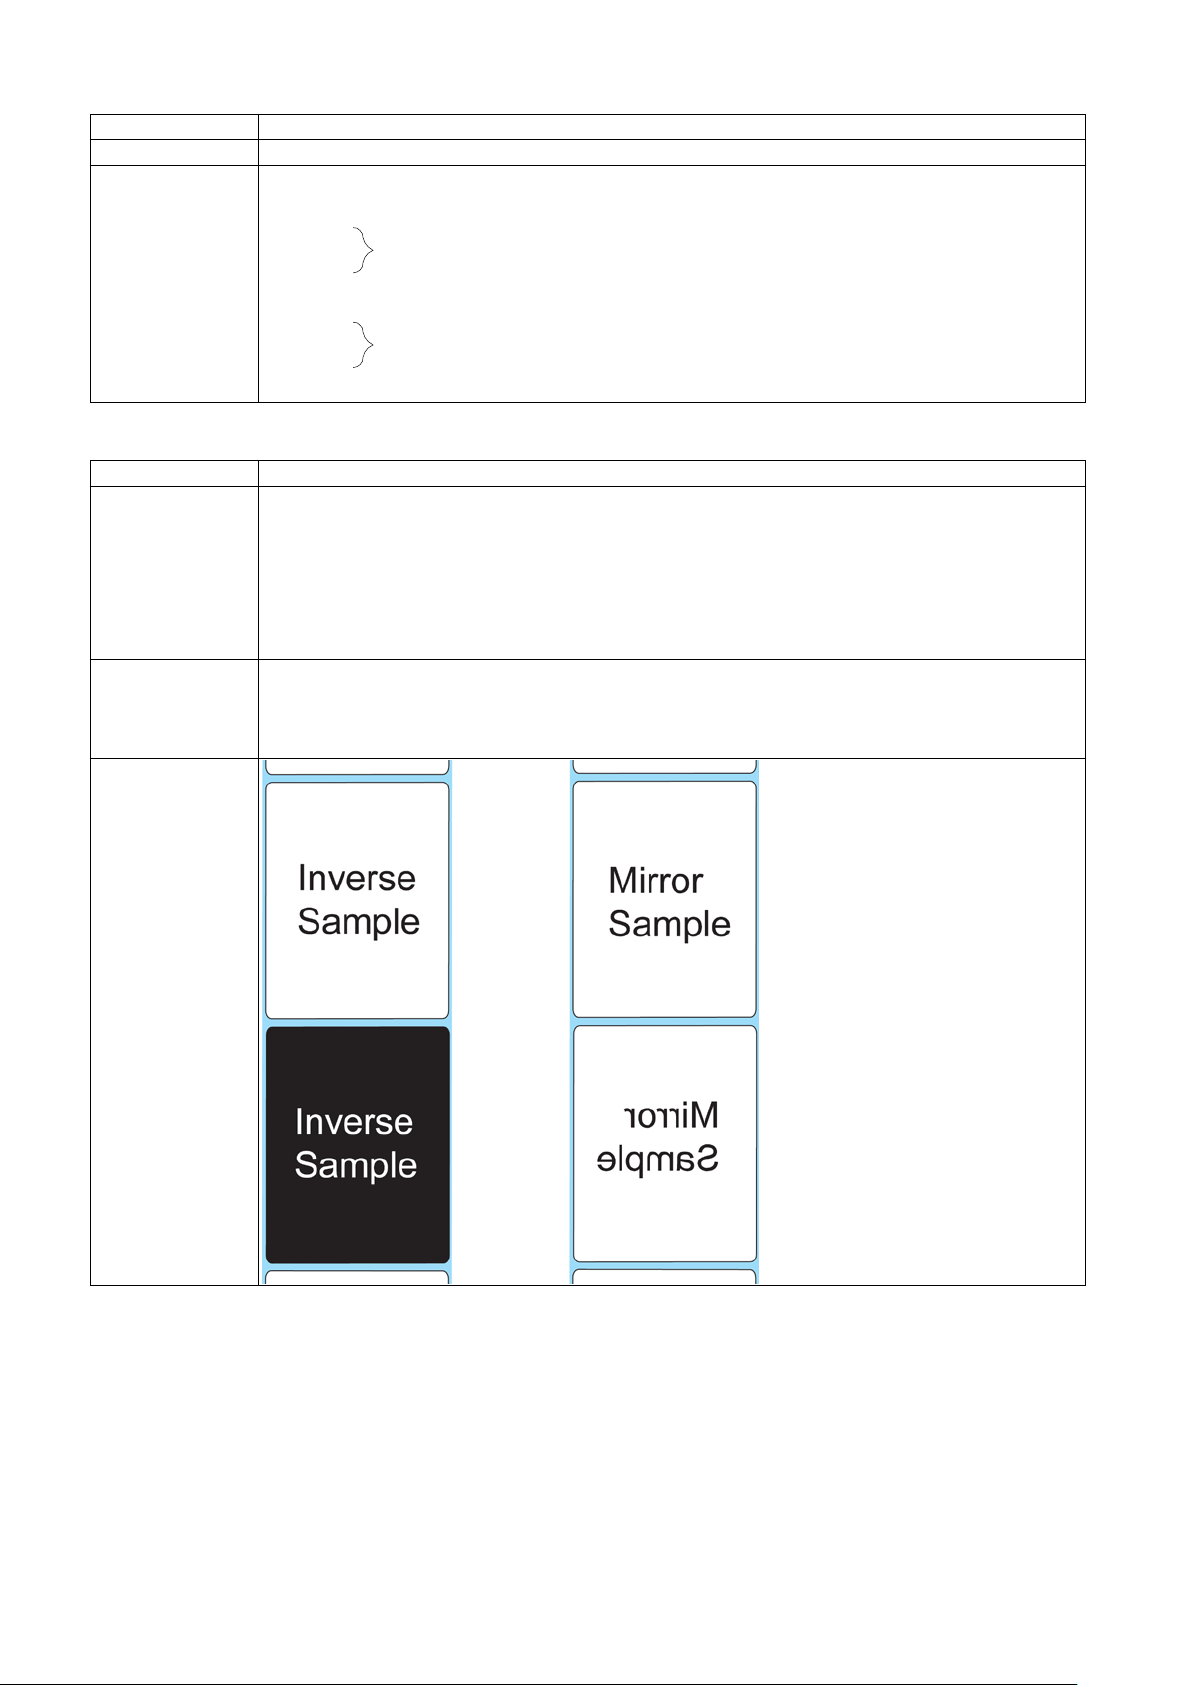
Use ^L to do normal printing;
I , M , R can be used at the same time.
Description
Define the start sign of Label format. Commands to set up the label format should
50 mm if set ^W50. This command will not affect by ^R.
Sample
^Lx - The start sign of label format
^LI to do inverse printing;
^LM to do Mirror printing.
^LRn Whole label rotation n=0, 0°printing ; n=1, 90°printing ; n=2, 180°printing ; n=3,
270°printing
( the same as ^XSET,ROTATION,n )
be listed after ^Lx command.
When rotates whole label ( ^Q & ^W will be the reference point), it will only handle
Page 11

6
^Mx - Set the forward length
Syntax
^Mx
Parameter
x = 1~1000 (unit: mm)
Set the forward length to move the position of paper.
after printer cover close.
PC to Printer
^M100
Printer to actio n
co-rotating 100mm
Syntax
^On
Parameter
n = 0 , disable the Label Dispenser and Applicator
(Please check with dealer whether your printer supports this function or not.)
Description
Enable or disable the Label Dispenser / Applicator. When you use this command, it
setting, please refer to page72)
Example
^O1
E
Syntax
^PAx
Parameter
x = 1~30000
Description
After the recall of label, printer will read variables and Serial Number and then print
automatically for the number of copies that has been set.
Example
^Flabel1
E
Printer will auto print 3 pieces.
In progress
Description
If ~S,CHECK will feedback 00
If ~Z printer would turn on immediately
If Dooropen RED light would up and motor would stop at the same time even
Result:
Example
^On - Label Dispenser (peel) / Applicator
n = 1 , enable the Label Dispenser, disable the Applicator
n = 2 , enable the applicator, disable the Label Dispenser (applied on EZ-2000Plus /
EZ6000Plus only)
^PAx - Auto Print
should be matched with ^Ex for setting the stop position. (For the Label Dispenser
^L
…..
^Q40,0,0
^PA3
^L
C0,0000001,+1,Counter
V00,15,Variable
AF,108,140,1,1,0,0,^C0
AE,122,278,1,1,0,0,^V00
E
^Klabel1
00001
Variable
Page 12

7
^Px - Number of pages printed
Syntax
^Px
Parameter
x = 1 ~ 32767
Description
Set the amount of copies for a printing. The Serial Number will be reset for each time
the command is implemented.
Printer will auto print 3 pieces.
Syntax
^PI
Parameter
None
Description
Printer will print immediately, until the “Cancel” key is pressed or the printer is turned
off. It can be paused by pressing “Pause” key otherwise printer would be keep going
printing.
Example
^Flabel2
.
.
.
000003
Apple
000002
Apple
000001
Apple
Send command :
^Q40,0,0
Example
^P3
^L
AF,108,140,1,1,0,0,Test
E
^PI - Continuous printing
00001
Variable
00002
Variable
00003
Variable
^Q40,0,0
^PI
^L
C0,000001,+1,Counter
V00,15,Product
AF,108,140,1,1,0,0,^C0
AE,122,278,1,1,0,0,^V00
E
^Klabel2
00001
Apple
E
Page 13

8
^Qx,y(,z±) - Label length
Syntax
^Qx,y(,z±)
Parameter
Gap label: (See fig. 1)
y = Gap length (unit: mm)
EX.
paper feed
direction
x
y
Figure 1
Plain paper:
z = Feed paper length (unit: mm)
Black mark label:
z-: When the position is within the black mark.
EX.
Description
Set label size (length, gap length, [plain paper feed length])
Syntax
^Rx
Parameter
x = 0 ~ 399 dots
Description
Set left margin
^R08 ( move right 1mm )
E
x = Label length (unit: mm)
^Q25,3
(x=25,y=3) mm
x = Label length (unit: mm)
y = 0 (constant)
x = Label length (unit: mm)
y = Black mark width (unit: mm)
z = Black line to top of form position.
z+: When the position is outside the black mark.
^Q25,4,3+
(x=25, y=4, z=3+) mm
^Q25,4,3(x=25, y=4, z=3-) mm
^Rx - Row column adjustment
Example
^L
…..
Page 14
9
^Sx - Speed setting
Syntax
^Sx
Parameter
x = 2 to 7 inch/sec ;
2 to 3 inch/sec
Description
Set printing speed
In addition , special case S1 = 38.1 mm/s ( To base on customer demanded )
^S4
E
Syntax
^T+hhh.mm
Parameter
hhh = hours in 3 digits (from 0 to 23 hours). Set how many hours to be added to the
mm = minutes in 2 digits. Set how many minutes to be added to the current time.
Description
This command will set the specified time forward based on the printer's current time
then print it.
Example
In this sample, the printer will print current time and count the date that is 5 days
E
Expiration Time : 14:41:03
2 to 6 inch/sec ;
2 to 4 inch/sec ;
S2 = 50.8 mm/s
S3 = 76.2 mm/s
S4 = 101.6 mm/s
S5 = 127.0 mm/s
S6 = 152.4 mm/s
S7 = 177.8 mm/s
Example
^T+hhh.mm - Time calculation function
^L
…..
current time.
and 12 hours after current time.
^Q100,3
^W171
^H10
^P1
^S4
^AT
^C1
^R0
~Q+0
^O0
^D0
^E14
~R200
^L
Dy4-me-dd
Th:m:s
AD,90,154,1,1,0,0,Manufactured Day :^D ^T
AD,90,248,1,1,0,0,Expiration Day :^D+0005.00
AD,90,324,1,1,0,0,Expiration Time: ^T+012.00
Manufactured Day : 2005-JAN-19 02:41:03
Expiration Day : 2005-JAN-24
Page 15
10
^Wx - Label width setting
Syntax
^Wx
Parameter
x = label width (unit: mm), the input range is defined by the specification of printer
models.
Description
Label width setting
Example
^W100
E
Syntax
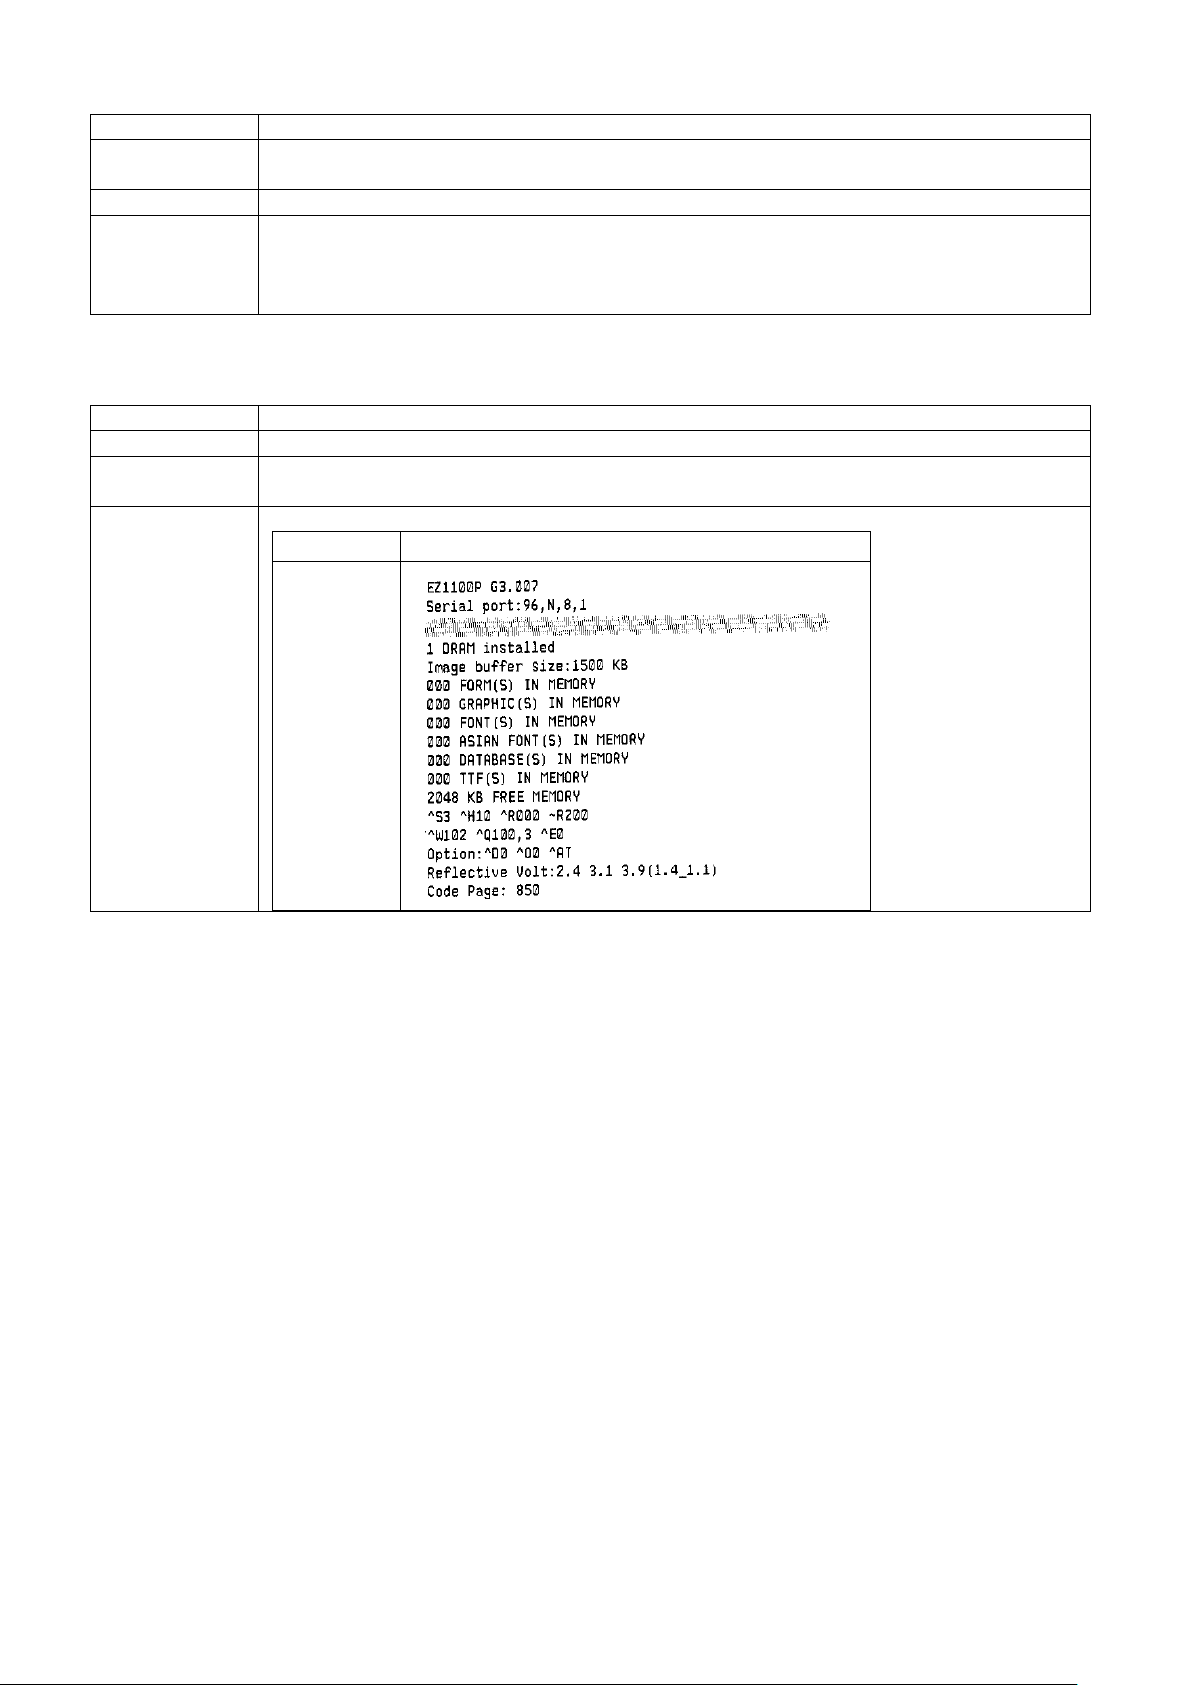
^XGET,CONFIG
Parameter
None
Description
The printer will return configure status (the content is same as Self-Test page) from
RS232 or USB and display it on Hyper Terminal.
Example
Procedure as below :
^L
…..
^XGET,CONFIG - Return the configure status
PC to Printer ^XGET,CONFIG
Printer to PC
Page 16
11
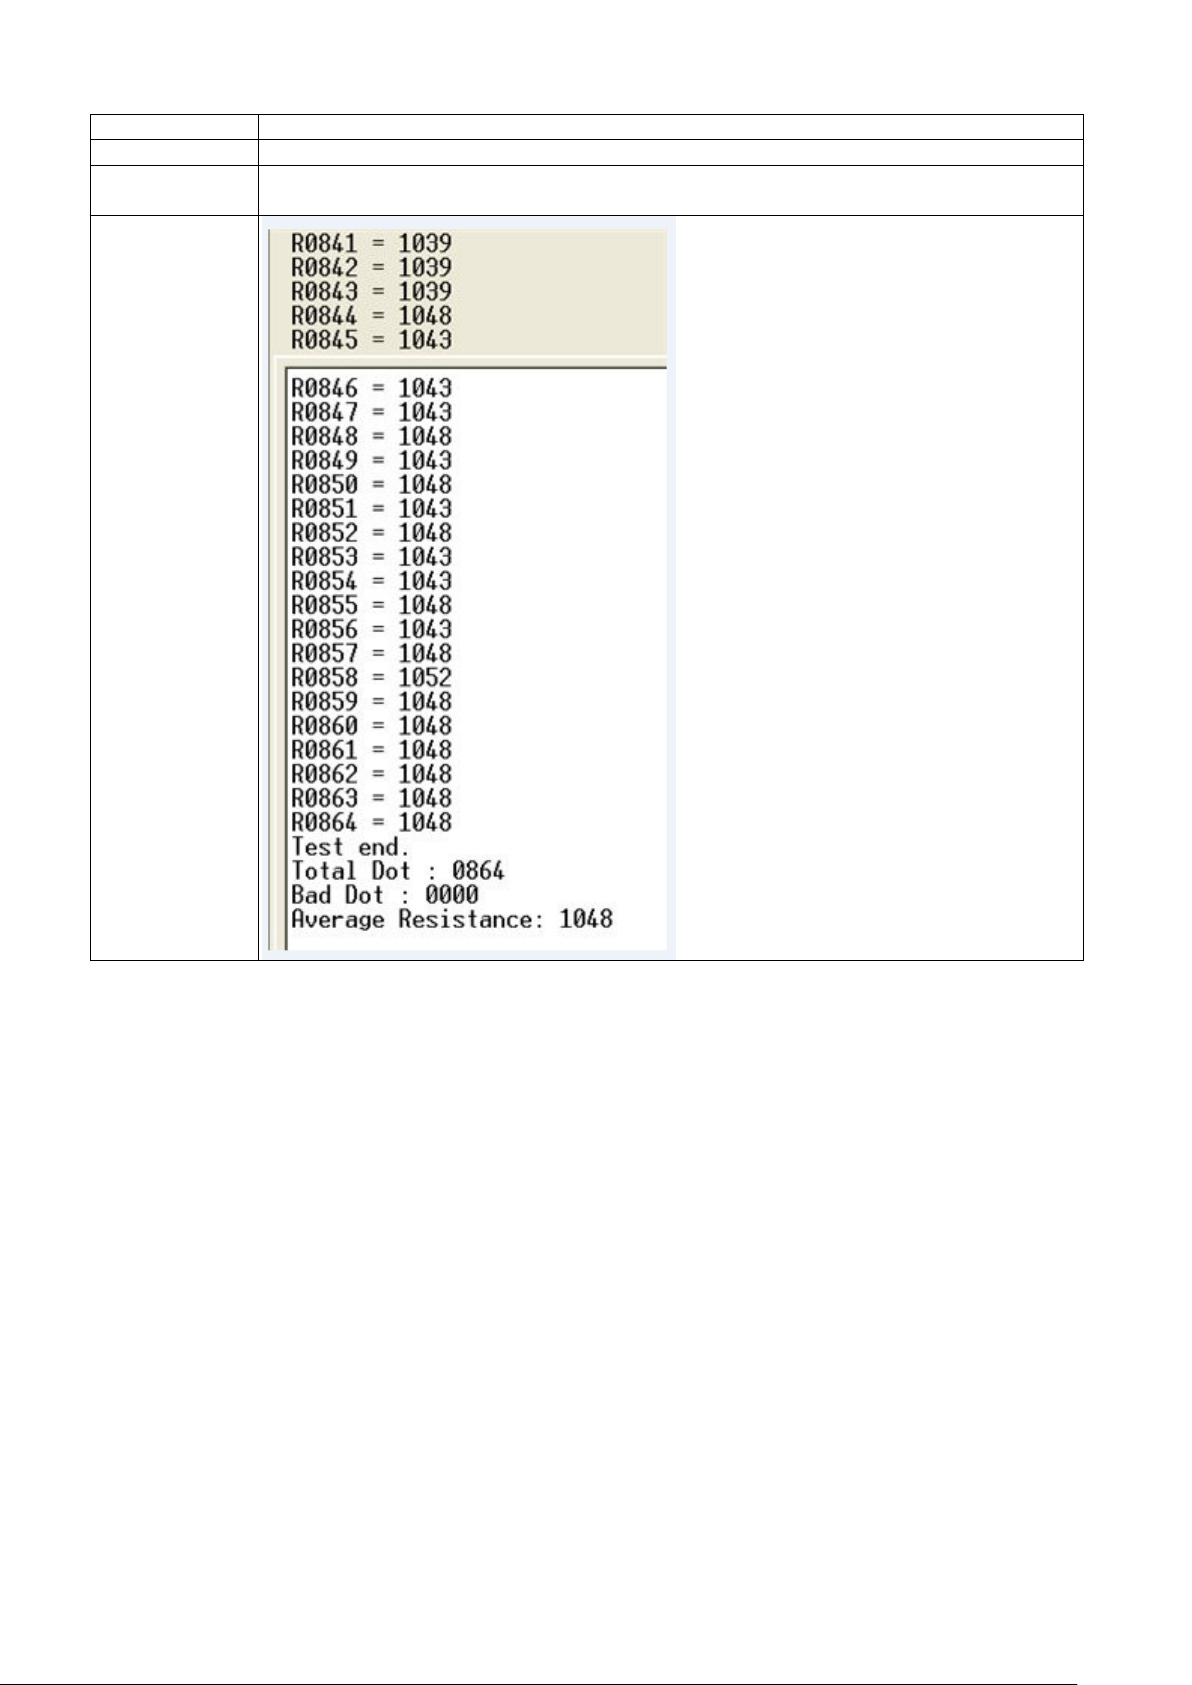
^XGET,TPHRESISTANCE - Dot detect
Syntax
^XGET,TPHRESISTANCE
Parameter
None
Description
Detect the resistance of each heat dot to check if there is any bad dot on thermal
print head.
Example
Page 17
12
^XSET,ACTIVERESPONSE,n - Active response
Syntax
^XSET,ACTIVERESPONSE,n
Parameter
n = 0, do not return the "ERRORxx" message to PC
occur, the printer will return the "ERRORxx" message to PC
Description
Set the Active Response function on/off. The error code includes:
response” function should be turned on (send “^XSET,IMMEDIATE,1” to printer).
Example
Procedure :
PC to Printer
^XSET,ACTIVERESPONSE,1
Printer action
Door open
Printer to PC
ERROR04
ERROR04 is means Door open
Syntax
^XSET,ACTIVEMESSAGE,n
Parameter
n = 0, disable ; = 1, enable this function.
Syntax
^XSET,ALIAS,string
Length<16Byte
If does not input “string”, it will response the existing setting in printer.
Description
Setup printer alias name to recognize each printer under network.
Syntax
^XSET,AUTOTPHTEST,x
Parameter
x = 0 disable , = 1 enable this function
Set Enable. Printer would be auto printing self-test page when turn on printer
(example refer to ~T command )
Syntax
^XSET,BUZZER,n
Parameter
n = 0, remind buzzer function off
n = 1, remind buzzer function on
Description
This command can set printer remind buzzer on/off. When download graphic or font,
function. But it can’t set error buzzer on/off.
n = 1, return the error message (default). When door open, ribbon out… or other error
01 – Paper out
02 – Paper jam or missing gap
03 – Ribbon out
04 – Print head is up
05 – Rewinder full
06 – Memory is full
07 – Filename can not be found
08 – Filename duplicate
09 – Syntax error
10 – Cutter JAM
11 – CF Card not found
*Note: before turning on the error code response function, the “Set immediate
^XSET,ACTIVEMESSAGE,n - turn on/off auto print error message function
It will print error message while below error occurred:
File System Full
Description
File Name Not Found
Duplicate Name
Command Not Recognized
Extended Memory Not Found
^XSET,ALIAS,string - Printer alias name used for the recognition of each network printer
Parameter
^XSET,AUTOTPHTEST,x - AUTO PRINTING SELF TEST PAGE WHEN PRINTER TURNED ON
Description
^XSET,BUZZER,n - Set remind buzzer on/off
printer will beep once. And use this command can turn off the remind buzzer
Page 18
13
^XSET,CODEPAGE,n - Select Code Page
Syntax
^XSET,CODEPAGE,n
Parameter
n=0, CODEPAGE 850 n=1, CODEPAGE 852 n=2, CODEPAGE 437
n=18, WINDOWS 1254 n=19, WINDOWS 1255 n=20, WINDOWS 1257
Description
Set the code page.
Syntax
^XSET,ERRORPRINT,n
n = 0 , after ERROR relieved, print the error label again and keeps printing.
n = 2 , after ERROR relieved , cancel print job.
Description
Setup the process when error occurred.
Syntax
^XSET,FEEDCUT,n
n = 1 : when press feed key, printer will feed then cut label (cutter should be
when press feed key, printer will not cut label (cutter function enable). When
uses continuous paper, printer will stop feed paper while release feed key.
Description
Setup the process when error occurred.
Syntax
^XSET,FEETYPE,n
Parameter
n=0, Press FEED key. Printer will be printing a blank label in standby mode.
n=2, Press FEED key. None function in standby mode.
Description
Setup feed function
Syntax
^XSET,IMMEDIATE,n
Parameter
n = 0, set immediate response function off (default)
n = 1, set immediate response function on
Description
This command can set printer’s immediate response function on/off. To implement
commands that related to immediate response, the function should be turned on.
Syntax
^XSET,KEYBOARD,n
Parameter
n = 0 - US , 1 - UK , 2 - French , 3 - German , 4 - Spanish , 5 - Italian , 6 – Finnish ,
7 – Dutch, 8 – Belgian , 9 – Russian , 10 – Norwegian , 11 – Icelandic , 12 – Swedish
Description
Change the area setting of keyboard mode.
* Note: this command is only applied on printer models that support keyb o a rd mode.
n=3, CODEPAGE 860 n=4, CODEPAGE 863 n=5, CODEPAGE 865
n=6, CODEPAGE 857 n=7, CODEPAGE 861 n=8, CODEPAGE 862
n=9, CODEPAGE 855 n=10, CODEPAGE 866 n=11, CODEPAGE 737
n=12, CODEPAGE 851 n=13, CODEPAGE 869 n=14, WINDOWS 1252
n=15, WINDOWS 1250 n=16, WINDOWS 1251 n=17, WINDOWS 1253
^XSET,ERRORPRINT,n - Set Error Reprint
Parameter
n = 1 , after ERROR relieved, will not print error label again and keeps printing.
^XSET,FEEDCUT,n - Setup feed and cut function
Parameter
n = 0 :
enable). When uses continuous paper, the feed distance will be one label.
^XSET,FEEDTYPE,n - Setup feed function
n=1, Press FEED key. Printer will be printing a previous one label in standby mode.
^XSET,IMMEDIATE,n - Set immediate response on/off
^XSET,KEYBOARD,n - Select different area PS2 Keyboard
Page 19
14
^XSET,LOCKCMD,xxxx - Command Lock function, use only hardware modifications set
Syntax
^XSET,LOCKCMD,xxxx
Description
For value protected, user only can use LCD do any value setting.
Syntax
^XSET,REWINDER,n
Parameter
n = 0, disable the rewinder
n = 1, enable the rewinder
Description
Set EZ-6000Plus Rewinder enable/disable.
* Note: this command is only applied on EZ-6000Plus.
Syntax
^XSET,REALLENGHTPRINT,n
Parameter
n = 1, enable
Description
Adjust label length based on label content
(Only support EZPL(Zebra mode).GZPL(Godex mode) in continues label)
Syntax
^XSET,RECALLCRLF,n
Parameter
n = 1, enable
Description
Enable EZPL(Zebra mode) and GEPL(Godex mode). Line feed characters include a
character in recall label mode.
Parameter
^XSET,REWINDER,n - Set Rewinder
^XSET,REALLENGHTPRINT,n - Adjust label length based on label content
n = 0, disable
^XSET,RECALLCRLF,n - Line feed characters include a character in recall label mode
n = 0, disable
Page 20
15
^XSET,ROTATION,n - Rotate whole label
Syntax
^XSET,ROTATION,n
n = 0 , rotate 0° printing ; n = 1 , rotate 90° printing ;
n = 2 , rotate 180° printing ; n = 3 , rotate 270° printing
Description
When perform thi s comma nd, the length and width of l a b el format will be swapped.
Print labels as below:
Parameter
^Q50,3
^W102
^L
Dy2-me-dd
Th:m:s
R12,8,806,386,5,5
BA,118,74,3,7,200,0,1,43546576876
E
Case 1 : Continues paper, setup ^Q50,0,0 ^W100. Rotate 90°, it becomes ^Q100,0,0
^W50.
Example
Case 2 : Gap paper ( Label: 50(H) * 100(W) * gap 3 ), setup ^Q50,0,0 ^W100. Rotate
90°, it becomes ^Q100,0,0 ^W50. It will only print out 50mm (H) * 50mm (W)
Case 3 : Gap paper ( Label: 50(H) * 100(W) * gap 3 ) ^Q50,0,0 ^W100. Rotate 90°, it
becomes ^Q100,0,0 ^W50 + ^XSET,ACROSS,1 ( cross label command ). It will print out
below labels with 100mm (H) * 50mm (W).
Page 21
16
^XSET,SENSING,n - Assign reflect or see-through sensor mode be a detector while using continuous label
Syntax
^XSET,SENSING,n
Parameter
n = 0 reflect sensor , = 1 see-through sensor , =2 none detected mode
Description
Assign reflect or see-through sensor mode be a detector while using continuous label
Syntax
^XSET,SLASHZERO,n
Parameter
n = 0, without slash,
n = 1, with slash
Description
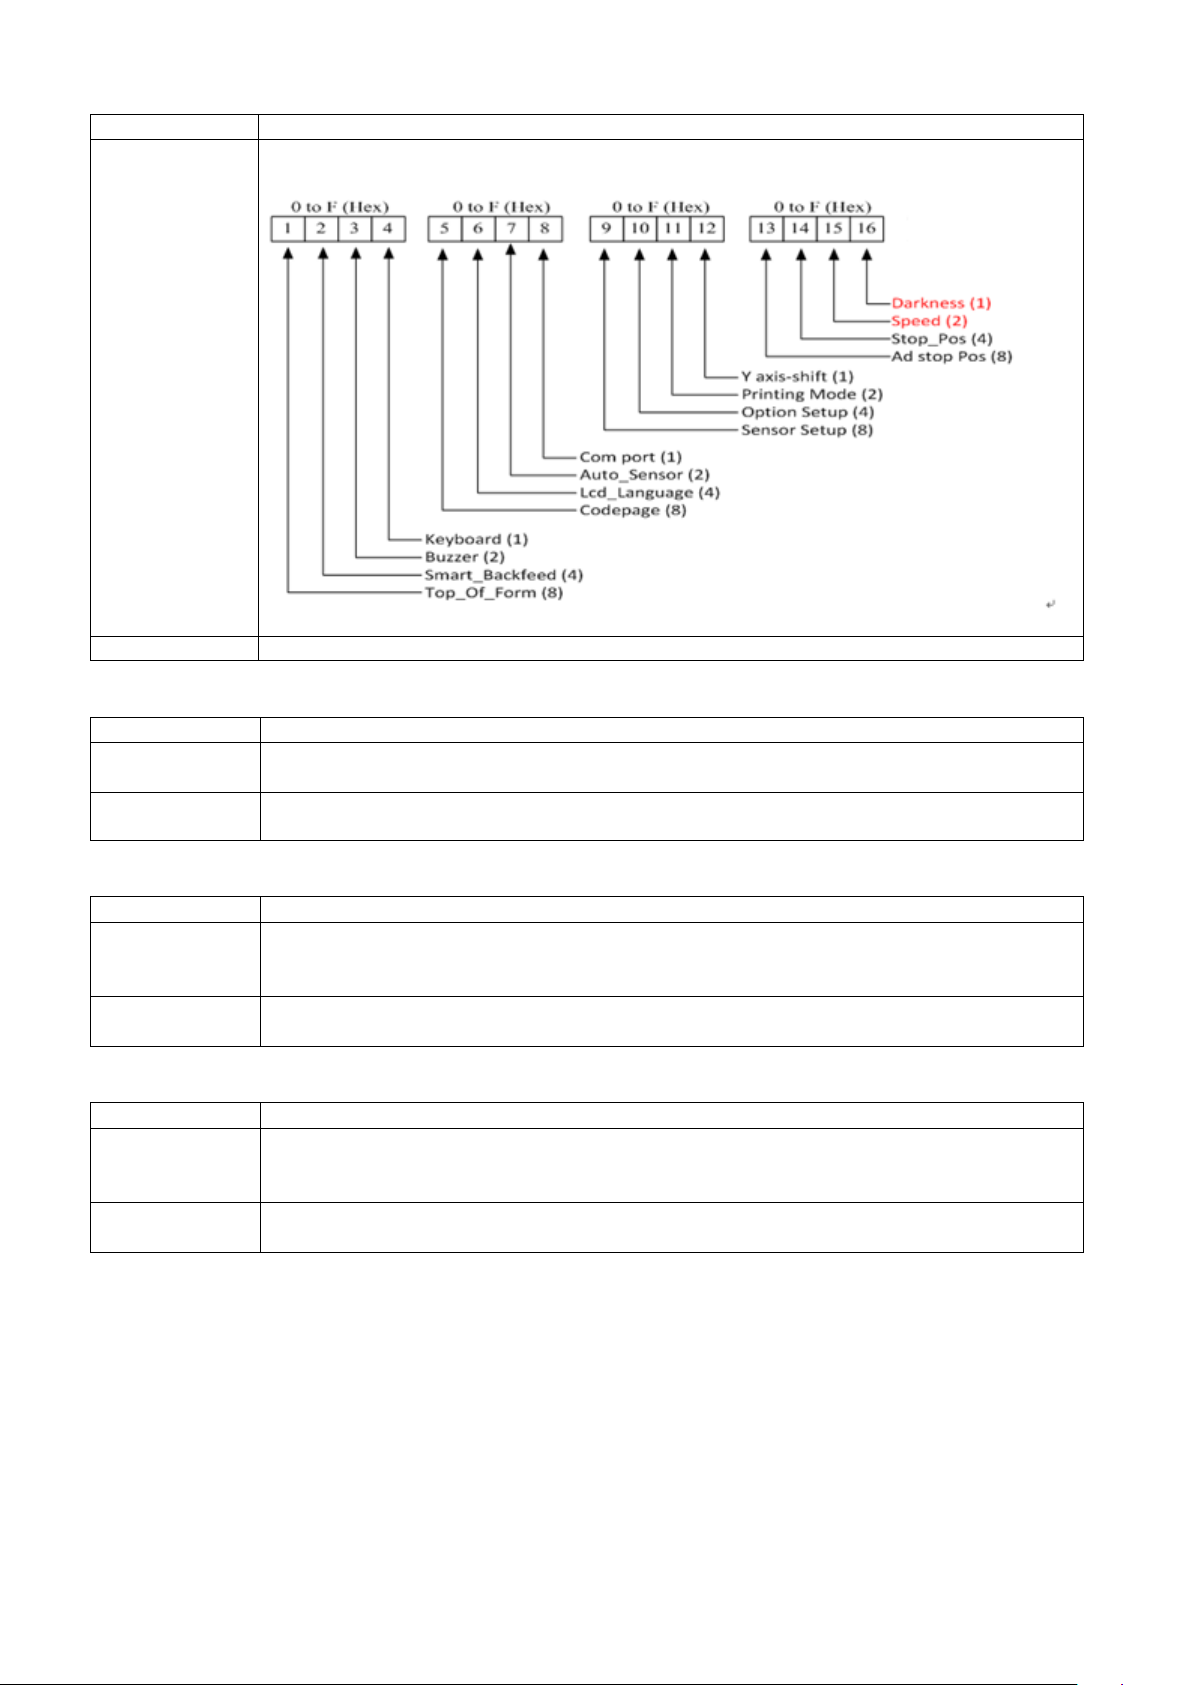
Set all zero to be printed as slashed zero.
Example
^XSET,SLASHZERO,1
E
Syntax
^XSET,SMARTBACK,n
Parameter
n = 0, OFF
n = 1, ON
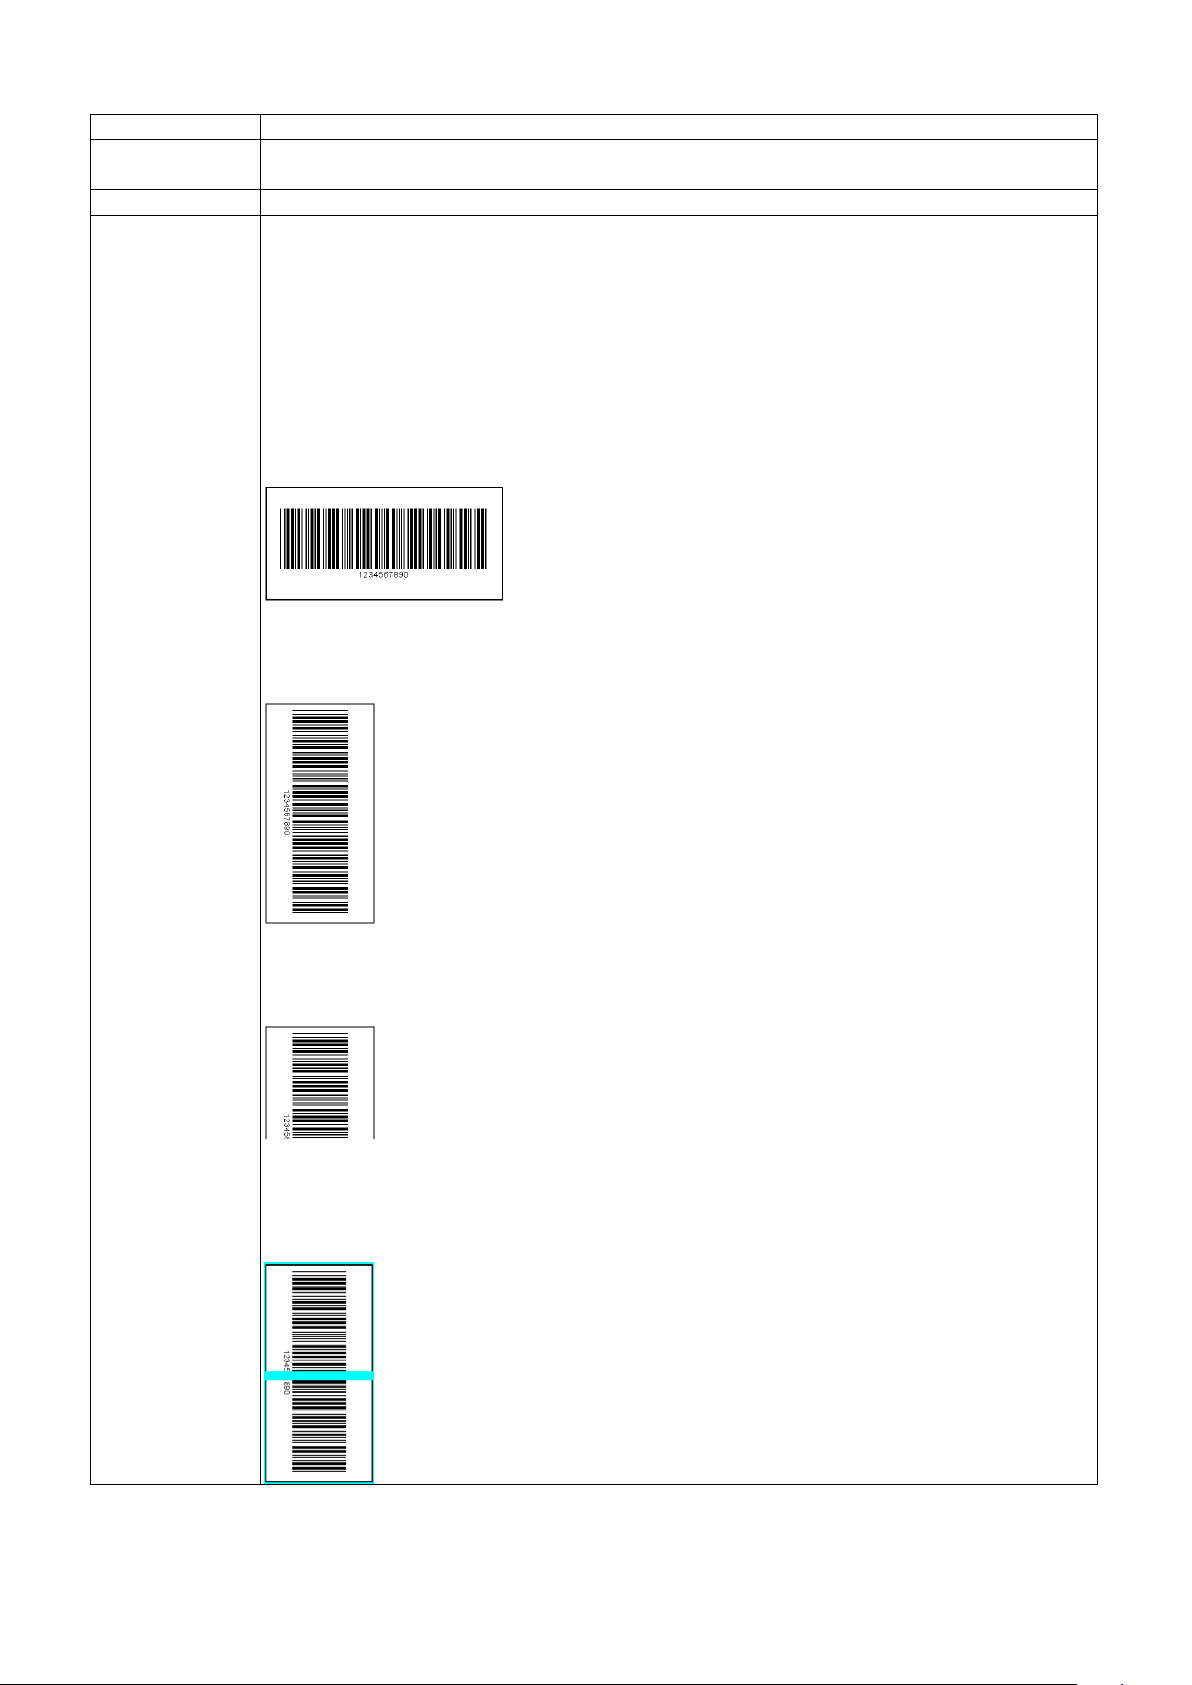
Description
This function can reduce the process time when Label Dispenser or Cutter been
peeled, the printer will continue to print the rest contents of the next label.
Example
(For Label Dispenser)
E
1. Printer will print out first label and part of
(For Cutter)
E
^XSET,SLASHZERO,n - Slashed zero
^Q60,0,0
^L
AA,81,15,1,1,0,0,A0123
AB,81,41,1,1,0,0,B0123
AC,81,71,1,1,0,0,C0123
AD,81,111,1,1,0,0,D0123
AE,81,160,1,1,0,0,E0123
AF,81,230,1,1,0,0,F0123
AG,81,298,1,1,0,0,G0123
AH,81,396,1,1,0,0,H0123
^XSET,SMARTBACK,n - Smart backfeed
used. With this command, when the prior label is waiting for cutting or peeling, the
partial contents of the next label will be printed. After the label has been cut or
^XSET,SMARTBACK,1
^Q100,3
^E30
^O1
^P3
^L
R18,18,750,774,10,10
^XSET,SMARTBACK,1
^Q100,3
^E30
^D1
^P3
^L
R18,18,750,774,10,10
second
label
2. After taking label away, printer continues
printing
second label and part of third label.
3. After taking label away, printer print out third
label.
Page 22

17
^XSET,TOPOFFORM,n - Top of Form
Syntax
^XSET,TOPOFFORM,n
Parameter
n = 0, disable Top of Form function
n = 3, disable Top of Form function but will back up according to E value.
Description
Enable/Disable Top of Form function.
Example
When power on printer or relieved from error, 2nd label will be moved to printing line.
Form.
Syntax
^XSET,UNPROMPT,p1
Parameter
p1 : the variable code which want to acquire
Description
Automatically acquire variables. Same as V#SET,UNPROMPT,p1
Send command :
~P1
Syntax
^XSET,WHENTOSINSING,n
n=3 printer cover open up do the auto sensing. Printer cover closes up as well.
Description
Set up autosensing
n = 1, Enable Top of Form function
n = 2, it will not perform Top of Form while power on but when error or door open
occurred, it will perform Top of Form. When function enabled and power on, printer
will back up according to E value.
If press feed key after power on printer or relieved from error, it will not perform Top of
^XSET,UNPROMPT,p1 - Automatically acquire variables
~MDELF,T001
^FT001
^Q50,0,0
^W100
^L
V00,10,Prompt
V01,10,Prompt
V02,10,Prompt
Example
V#OP+,V02,V00,V01
^XSET,UNPROMPT,V02
AH,188,20,1,1,0,0,V1 = ^V00
AH,188,120,1,1,0,0,V2 = ^V01
AH,188,220,1,1,0,0,V1 + V2 = ^V02
E
^KT001
001
002
E
^XSET,WHENTOSENSING,n - Set up autosensing
Print result :
V1 = 001
V2 = 002
V1+V2 = 3
n=0 None function
n=1 do the auto sensing when printer turned on
Parameter
n=2 After printer cover close do the auto sensing
Page 23
18
^XSETCUT,DOUBLECUT,x - Double cut
Syntax
^XSETCUT,DOUBLECUT,x
Parameter
x = 0, disable the doublecut
x = offset length (offset length <Label length, unit: mm)
Description
Set the printer to cut twice per label.
Example
^XSETCUT,DOUBLECUT,45
a001
a001
a002
a002
a003
a003
Cut
Cut
Cut
Cut
Cut
Cut
45mm
90mm
Note
This function may decrease the service life of cutter since the adhesive of label will
stain the cutter. Hence it is not recommended to use this function.
Syntax
^XSETCUT,MODE,n
Parameter
n = 0, Full-cut mode (default)
doesn't support Partial-cut function.
Description
Set the cutter mode to Full-cut mode or Partial-cut mode
^Q90,3
^E20
^P3
^D1
^L
C0,001,+1,A1
AC,350,144,1,1,1,0,a^C0
AC,350,544,1,1,1,0,a^C0
E
^XSETCUT,MODE,n - Set cutter mode
n = 1, Partial-cut mode
* Note: do not set the cutter mode to Partial-cut mode when cutting with cutter module that
Page 24
19
Syntax
^XSETRTC,ISOWEEKNUM,n
Parameter
n = 0, disable the ISO Week (default)
n = 1, enable the ISO Week
Description
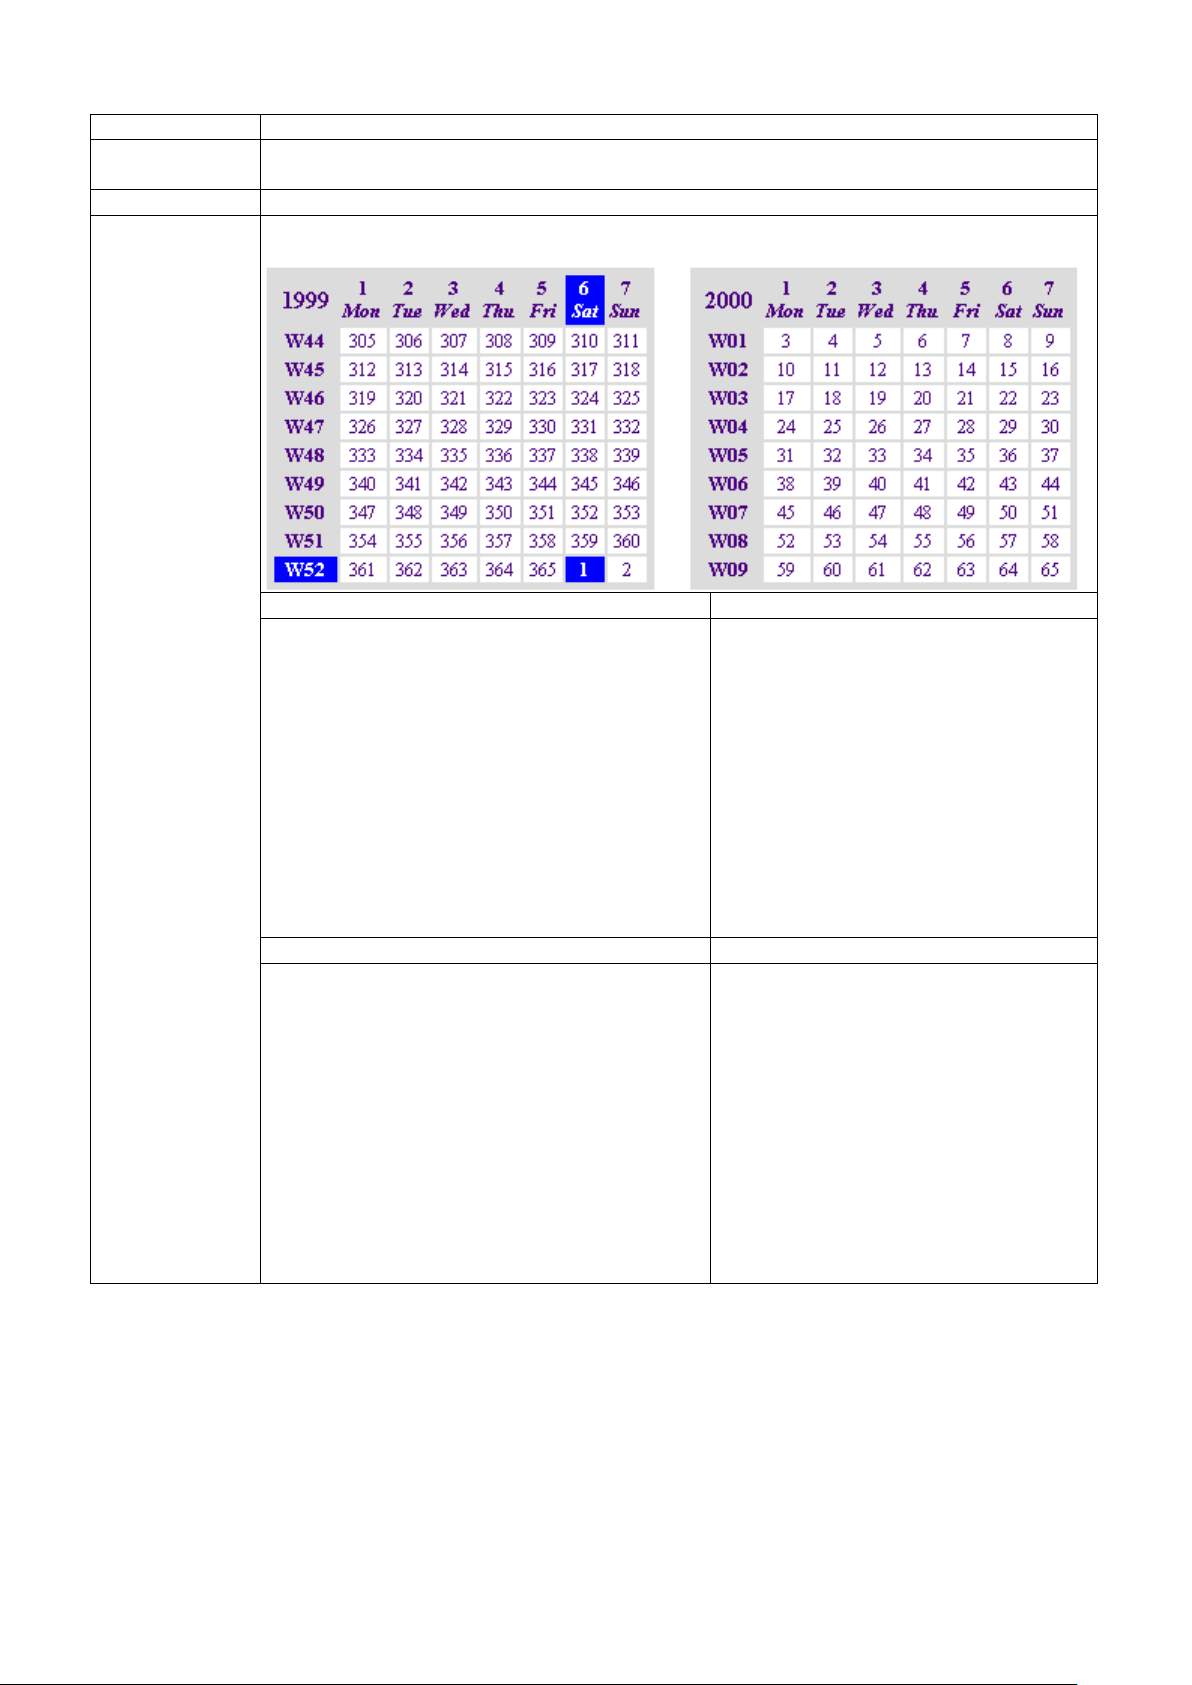
This command can set ISO week of the year to print.
Example
The following figure shows the ISO Week for 1 January 2000
Program: with the ISO Week Date function
Remark
~D1,1 ,0, 0,0,0
E
Set the date and time
Program: without the ISO Week Date function
Remark
~D1,1 ,0, 0,0,0
E
Set the date and time
^XSETRTC,ISOWEEKNUM,n - ISO Week
It is week 52 of year 1999, day 6 of the week, and day 1 of year 2000.
^XSETRTC,ISOWEEKNUM,1
^Q50,0,0
^L
Dy4-mn-dd
AC,58,32,1,1,0,0,Today is ^D
Dwy1
AC,58,132,1,1,0,0,Week of year in one digit:
^D
Dwy2
AC,58,194,1,1,0,0,Week of year in two digits:
^D
Define the clock type
Print the date
Print the Week of year in one digit
(Week of year in one digit: 52)
Print the Week of year in two digits
(Week of year in two digits: 52)
^XSETRTC,ISOWEEKNUM,0
^Q50,0,0
^L
Dy4-mn-dd
AC,58,32,1,1,0,0,NOT ISO week of year (^D)
Dwy1
AC,58,132,1,1,0,0,Week of year in one digit:
^D
Dwy2
AC,58,194,1,1,0,0,Week of year in two digits:
^D
Define the clock type
Print the date
Print the Week of year in one digit
(Week of year in one digit: 1)
Print the Week of year in two digits
(Week of year in two digits: 01)
Page 25
20
^XSETRTC,LANGUAGE,n - Different language layout
Syntax
^XSETRTC,LANGUAGE,n
Parameter
n = 0-English
2-French
4-Italian
Description
This command can set the language of RTC.
Example
^XSETRTC,LANGUAGE,0
E
1-German
^Q50,0,0
^L
AC,58,06,1,1,0,0,English
Dw1
AC,58,046,1,1,0,0,Day-of-week 3
letter: ^D
Dw2
AC,58,098,1,1,0,0,Day-of-week
complete: ^D
Dwn
AC,58,144,1,1,0,0,Day-of-week
number: ^D
Dm1
AC,58,188,1,1,0,0,Month of year 3
letter: ^D
Dm2
AC,58,240,1,1,0,0,Month of year
complete: ^D
Dmn
AC,58,286,1,1,0,0,Month of year
number: ^D
E
^XSETRTC,LANGUAGE,1
^Q50,0,0
^L
AC,58,06,1,1,0,0,German
Dw1
AC,58,046,1,1,0,0,Day-of-week 3
letter: ^D
Dw2
AC,58,098,1,1,0,0,Day-of-week
complete: ^D
Dwn
AC,58,144,1,1,0,0,Day-of-week
number: ^D
Dm1
AC,58,188,1,1,0,0,Month of year 3
letter: ^D
Dm2
AC,58,240,1,1,0,0,Month of year
complete: ^D
Dmn
AC,58,286,1,1,0,0,Month of year
number: ^D
3-Spanish
English
Day-of-week 3 letter: Thu
Day-of-week complete: Thursday
Day-of-week number: 4
Month of year 3 letter: Mar
Month of year complete: March
Month of year number: 03
German
Day-of-week 3 letter: Sam
Day-of-week complete: Samstag
Day-of-week number: 6
Month of year 3 letter: Nov
Month of year complete: November
Month of year number: 11
Page 26
21
^Yb,p,d,s - RS232 serial Port communication setting
Syntax
^Yb,p,d,s
Parameter
Description
Serial Port communication setting
Syntax
^Z
Parameter
^Z: default value comes from EEPROM default area.
Description
Reset to factory default. Same as ~~INTERNALCOMMAND+INIT
b = Baud Rate 48=4800bps
96=9600bps
19=19200bps
38=38400bps
57=57600bps
11=115200bps
p = Parity (N, O, E) N=none parity
O=odd parity
E=even parity
d = Number of data bits 7
8
s = Number of stop bits 1
2
^Z - Reset to factory default settings
Page 27
22
Control Commands
Syntax
~B
Parameters
None
Description
Show the version number of firmware on Hyper Terminal.
Syntax
~Dm,d,y,h,i,s
Parameter
m = Month (01 to 12)
y = Year (last two digits of year)
h = Hour (00 to 23)
s = Seconds (00 to 59)
Description
Set real time clock of the printer. For format setting of the date, use the Daa|bb|cc
command.
Example
~D12,22,04,11,11,11
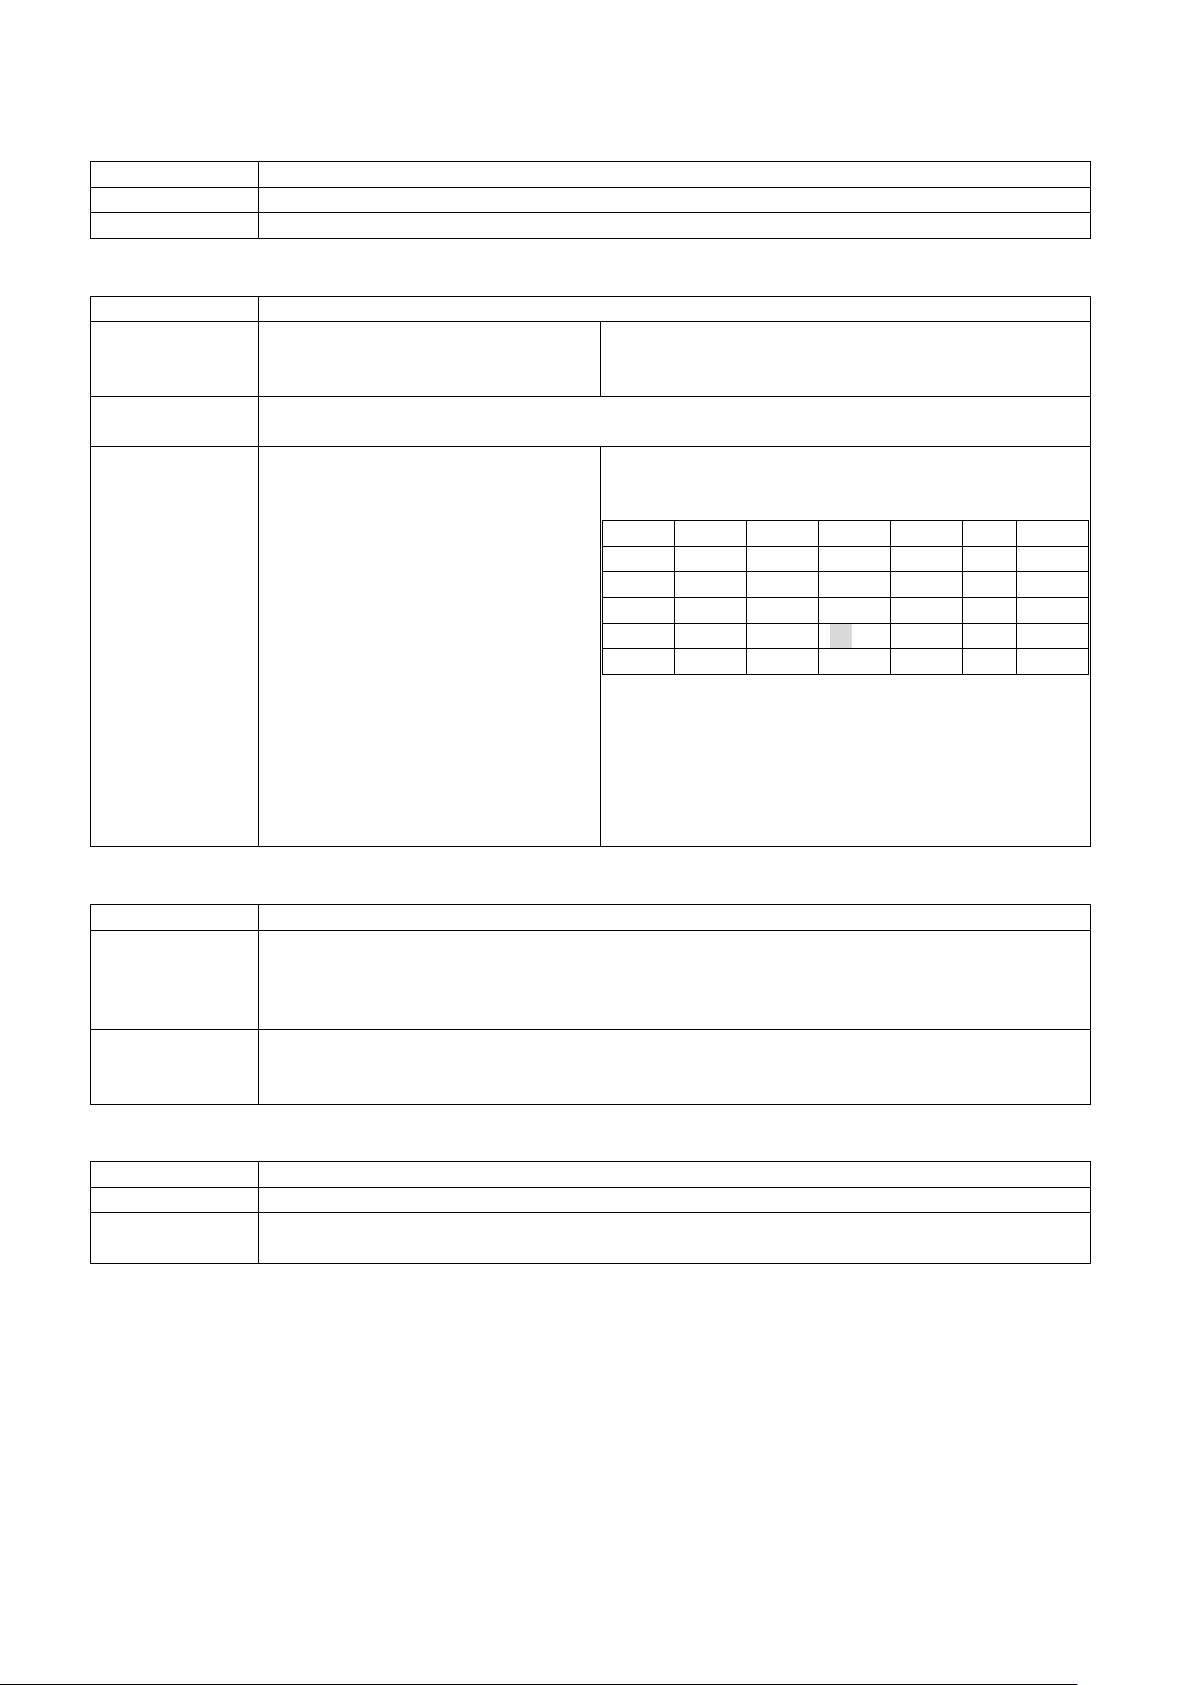
The following form shows the date for December
Sun.
Mon.
Tue.
We.
Thu.
Fri.
Sat.
1 2 3 4 5 6 7 8 9 10
11
12
13
14
15
16
17
18
19
20
21
22
23
24
25
26
27
28
29
30
31
Wed
Syntax
~En,name,size
Parameters
n = P or p: PCX file
size = Size of image (bytes), maximum 512K byte.
Description
Download monochrome image onto memory. Printer will beep once after
“REPEAT FILE NAME”, and the download will not be accepted (refer to page75).
Syntax
~G
Parameter
None
Description
Set the printer to image-receiving mode. The image data is sent directly from host to
the printing buffer (refer to page74)
~B - Display the version message
~Dm,d,y,h,i,s - Date/Time setting
d = Date (01 to 31)
^L
Dwn
AD,182,145,1,1,0,0,^D
Dw2
AD,135,186,1,1,0,0,^D
Dw1
AD,168,226,1,1,0,0,^D
Dmn/dd/y2
AD,126,110,1,1,0,0,^D
E
~En,name,size - Download graphic to memory
i = Minutes (00 to 59)
2004.
The print result as below.
12/22/04
3
Wednesday
n = B or b: BMP file
name = Name of image (up to 20 character)
downloaded completed. If the file name of graph is duplicated, the printer will show
~G - Graphic mode
Page 28

23
~H,TTF,Xname,size<CR>data - Download true type font
Syntax
~H,TTF,Xname,size<CR>data
Parameter
X = from A to Z
data = binary data of TTF font file
Description
Download True Type Font to printer via command set.
download TTF through (GoLabel or QLabel).
Syntax
~H,TTF_TABLE,Xname,size<CR>data
Parameter
X = from A to Z
data = binary data of Unicode Table file
Description
Download the Unicode Table for printing True Type Font.
recommended to use this command.
Syntax
~Jx
Parameters
x = character; From a ~ z or A ~ Z; the amount is up to 26 characters.
Description
The command used for font loading is usually generated by (GoLabel or QLabel)
4).
Example
Download the “HVR0OE1A.SFP” text file to external memory card. Use “A” to do the
character code name.
~JA
; Define A as HVR0OE1A.SFP
COPY HVR0OE1A.SFP PRN/B
; Send the order with the DOS mode
Syntax
~Kn
Parameter
n = 0, disable.
n = 1, enable.
Description
Respond a “Y” signal from RS-232 back to host after each printing is done.
Syntax
~L,DBASE,x,y
data…
Parameter
x = database name
y = database size (unit: byte)
Description
This command can download dBase III file to printer.
Example
~L,DBASE,customer,364
…(Data of customer.dbf)
Syntax
~L,SERIAL,name,data…
Parameter
name = serial file name
data = serial file data
Description
Download serial file to printer.
name = font name, accepted values: English alphabet and numbers
size = size of font file in bytes
*Note: This command is designed for advance programmer. For general user, it is
recommended to
~H,TTF_TABLE,Xname,size<CR>data - Download Unicode Table
name = table name, accepted values: English alphabet and numbers
size = size of font in bytes
*Note: This command is designed for advance programmer. For general user, it is not
~Jx - Bit-Mapped font download
label creation software. The printer will beep once after downloaded. If you use the
same file name, the printer will show “REPEAT FILE NAME”, and the download will not
be accepted. The downloaded font is compatible with the HP Laser Jet II Plus (PCL-
~Kn – Response function’’ Y’’ from RS-232
~L,DBASE,x,y - Download dBase III to Printer
~L,SERIAL,name,data - Download serial file to printer
Page 29

24
~MCPY,s:o.x,d:o.x – Copy file
Syntax
~MCPY,s:o.x,d:o.x
s = source device of stored object ( s = Dor F )
= B, Unicode Table
Description
Copy file
~MCPY,F:*.F,D:*.F
~MCPY,D:*.G,F:
Syntax
~MDEL
Parameter
None
Format current memory (not include download font- Asian font & TTF),
~X4 can check status of memory.
Syntax
~MDEL*
Parameter
None
Description
Format current memory
d = distination device of stored object
o = object name , o also can use * for this command.
x = extension , x also can use * for this command.
= D, database
= A, Asia font
Parameter
= C, TTF font
= E, Bit-Mapped font
= F, label form
= G, graphic
= S, serial file
= T, text
Example
~MDEL - Format current memory (not include download font- Asian font & TTF)
Description
Example None
~MDEL* - Format current memory
Example None
Page 30
25
~MDELn,name - Delete specific file from memory
Syntax
~MDELn,name
Parameter
n = D, database
*Note: The ‘name’ of Asia font, TTF font and Unicode Table is ID tag.
Description
Delete specific file from printer’s memory
Example
~MDELD,customer
Delete “customer” database.
~MDELG,Bus
The graphic “Bus” will be deleted
Syntax
~MDIR
Parameter
None
Description
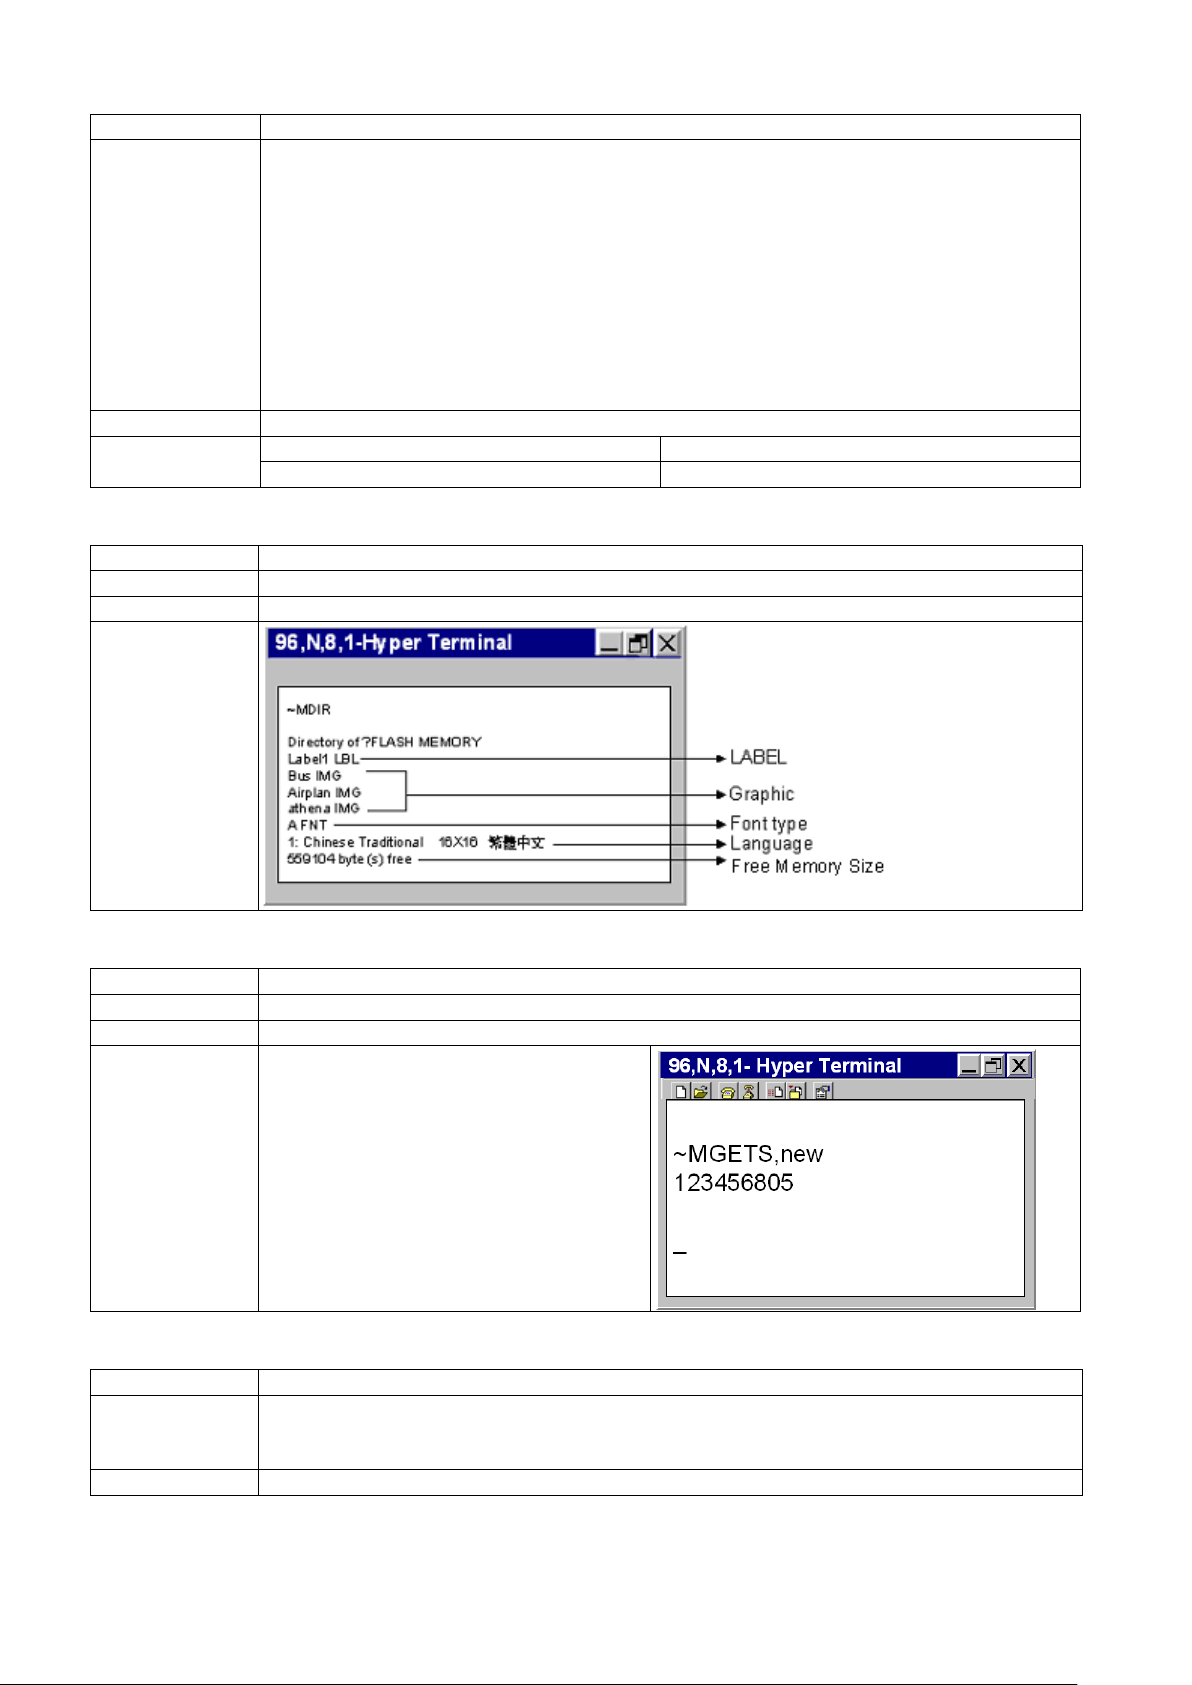
Show the information of memory from printer
Example
Syntax
~MGETS,name
Parameter
name = serial file name
Description
Show the serial file information on Hyper Terminal
Example
(Get the information of serial file “new”
Syntax
~MSETT,name<CR>nnnnnnnn<data>
Parameter
name = the name of saved
data = data to be saved
Description
Save the .TXT file to printer.
A, Asia font
C, TTF font
E, Bit-Mapped font
F, label form
G, graphic
S, serial file
T, text
B, Unicode Table
name = The name of the graphic, form, Bit-Mapped font or oth ers.
~MDIR - Get memory state from printer
~MGETS,name - Get Serial File information
from printer)
~MGETS,new
~MSETT,name<CR>nnnnnnnn<data> - Save the .TXT file to printer
nnnnnnnn = data size (8 digits)
Page 31

26
~MGETT,name<CR> - Read saved file
Syntax
~MGETT,name<CR>
Parameter
name = the name of saved
Description
Read the saved file from printer.
Example
Use “~MSETT, text1<CR>00000015Text file test2” to save data to printer.
Text file test2
Syntax
~MMOV,s:o.x,d:o.x
s = source device of stored object ( s = D or F )
= B, Unicode Table
Description
Move file
~MMOV,F:*.F,D:*.F
~MMOV,D:*.G,F:
Syntax
~Px
Parameter
x = 1 ~ 32767
Description
This command will repeatedly print the specific copies of label format.
Syntax
~Q±x
Parameter
X =-100 ~ +100 (unit: dots)
Description
This command is used for setting the start position of label printing. The top edge of
move the position upward (it can be set across 2 labels).
Syntax
~Rx
Parameter
x = label width (unit: mm), the input range is defined by the specification of printer
models.
Description
Rotate the label format 180-degrees when printing (refer to page75). To return to
specification.
Then use “~MGETT,name<CR>“ command to read saved data
Example:
~MGETT,text1
Hyper Terminal will show:
~MMOV,s:o.x,d:o.x - Move file
d = distination device of stored object
o = object name , o also can use * for this command.
x = extension , x also can use * for this command.
= D, database
= A, Asia font
Parameter
= C, TTF font
= E, Bit-Mapped font
= F, label form
= G, graphic
= S, serial file
= T, text
Example
~Px - Print label
~Q±x - Row Offset Adjustment
~Rx - Rotate printing
label is considered as “0”. The “+n” move the start position downward, and the “–n”
the original print direction, set the x value greater than the max width of model’s
Page 32

27
~S,CHECK - Status immediate response command
Syntax
~S,CHECK
Parameter
None
Description
The command will show the status of printer in “aa <CR><LF>“ format.
on/off) command should be turned on.
Procedure:
PC to Printer
^XSET,IMMEDIATE,1
Printer action
Door open
PC to Printer
~S,CHECK
Printer to PC
04
**04: Door open
aa = printer status information:
00 – Ready
01 – Media Empty or Media Jam
02 – Media Empty or Media Jam
03 – Ribbon Empty
04 – Printhead Up ( Open )
05 – Rewinder Full
06 – File System Full
07 – Filename Not Found
08 – Duplicate Name
09 – Syntax error
10 – Cutter JAM
11 – Extended Menory Not Found
20 – Pause
21 – In Setting Mode
22 – In Keyboard Mode
50 – Printer is Printing
60 – Data in Process
*Note: Before using this command, the “^XSET,IMMEDIATE” (Set immediate response
Example
Page 33

28
~S,DUMP - Enter into DUMP Mode
Syntax
~S,DUMP
Parameter
None
Description
When the printout result doesn’t match to the label format setting, it is
To get out from the Dump Mode, please press the FEED key, and then the printer will
automatically print out “OUT OF DUMP MODE”. This indicates that the printer is back
to standby mode. You can also power off the printer to exit from the Dump Mode.
Syntax
^XSET,OFFSETa,n
Parameter
n=-100 ~ +100
Description
Setup position micro adjustment
Syntax
~S,SENSOR
Parameter
None
Description
Printer can automatically detect the label and store the result of detecting. By
doing this, the printer will calibrate the printing position of the label and the user can
and make sure the printer is
3. When calibration finished, printer will be back to standby mode.
recommended to go into the Dump Mode to check whether any mistake in data
transmission between the printer and the PC. For example, when printer receives 8
commands, yet without processing these commands, only printing out the contents
of commands, this will confirm whether the commands were received correctly.
To enter the Dump Mode, please do as follows:
2. Make sure that the printer is on standby mode (LED light is green).
3. Send "~S,DUMP" command to the printer.
4. Printer will automatically print “DUMP MODE BEGIN”. This indicates the printer is
already in Dump Mode.
5. Send other printing commands to the printer, and check if the content
matches the sent commands.
6. The print width would be changed when use ^W command in the meantime.
~S,OFFSETa,n - Setup position micro adjustment
a=X or Y
~S,SENSOR - Auto Sensing
do printing without setting the label length.
To perform the Auto Sensing, please do as follows:
1. Check if the label is correctly loaded on the printer
on standby mode (LED light is green).
2. Send "~S,SENSOR" command to the printer. The printer will start to detect the
label and record the result.
Page 34

29
~S,n ( n = FEED, PAUSE, CANCEL, BUFCLR ) - Analogue press control keys
Syntax
~S,n
n = FEED, same as push Feed key once.
in standby status. ( Serial and Variable will be cleared as well )
Current printer default = ~S,ESA (auto switch). When a printer switch to certain
language, it can auto detect and switch again by rebooting printer.
Syntax
~S, ES[p1]
Parameter
n = p1 ; p1 = A or blank : auto switch ; p1 = G : EZPL ; p1 = E : GEPL ; p1 = Z : GZPL
Current printer default = ~S,ESA (auto switch). When a printer switch to certain
language, it can auto detect and switch again by rebooting printer.
Syntax
~S,STATUS
Almost same as ~S,CHECK, the only difference is the response format of ~S,STATUS is
nnnnn : remaining number of prints, range from 00000 to 99999
PC to Printer
^XSET,IMMEDIATE,1
Printer action
Door open
PC to Printer
~S,STATUS
Printer to PC
04,00100
Syntax
~T
Parameter
None
Description
Print a pattern for the user to determine if the print head is damaged. The printing is
based on width setting.
Print resolute as below::
Syntax
~V
Parameter
None
Description
Print out the Self-Test page. The printing is based on width setting.
( if the media setup is plain paper, ~S,FEED = feed 1mm)
n = PAUSE, same as Pause key. On the printers without LCD display, the LED will flash
Parameter
slowly while sending this command. Send ~S,PAUSE or ~S,FEED again, it
will come back to standby status.
n = CANCEL, same as Cancel key used to clear error status.
n = BUFCLR, printer will stop printing immediately and clean printer buffer then stays
Description
Example None
~S, ES[p1] – Change printer command language
Description
Example None
~S,STATUS - Status immediate response command
Parameter None
Description
“aa,nnnnn<CR><LF>
aa : please check ~S,CHECK for further explanation
Procedure :
Example
**04: Door open , 00100: 100 labels waiting for printing
~T - Print head testing
Example
~V - Print Self-Test page
Page 35

30
~Xn - Print the available space and file information in the memory
Syntax
~Xn
Parameter
n = 1, print label format names and available space in memory.
n = 9, Print download TTF information in memory
Description
Print the available space in the memory (unit: kb)
Example
Procedure :
FREE MEMORY SPACE
1 FORM(S) IN CF CARD
FREE MEMORY SPACE
1 GRAPHIC(S) IN CF CARD
FREE MEMORY SPACE
1 FONT(S) IN CF CARD
FREE MEMORY SPACE
1 FORM(S) IN CF CARD
FREE MEMORY SPACE
1 ASIAN FO NT(S) IN CF CARD
Total printing length
00000565 METER(S)
FREE MEMORY SPACE
1 DBASE(S) IN CF CARD
FREE MEMORY SPACE
1 SERIAL(S) IN CF CARD
FREE MEMORY
001 TTF(S) IN MEMORY
n = 2, print graphic names and available space in memory.
n = 3, print Bit-Mapped font names and available space in memory.
n = 4, print the name of the label formats, graphics, fonts, Asia font, database, serial
variable and available space in memory.
n = 5, print Asia font names and available space in memory
n = 6, print out total printing length and response through RS-232
n = 7, Print database information in memory
n = 8, Print serial file name
PC to Printer ~X1
Printer to PC
PC to Printer ~X2
Printer to PC
PC to Printer ~X3
Printer to PC
PC to Printer ~X4
Printer to PC
978336 KB
T001.LBL
978336 KB
godex logo.I MG
978336 KB
A.FNT
978336 KB
New.SER
1 SERIAL(S) IN CF CARD
TEST1.DBF
1 DBASE(S) IN CF CARD
1: Chinese Traditional 24x24
1 ASIAN FO NT(S) IN CF CARD
A.FNT
1 FONT(S) IN CF CARD
godex logo.I MG
1 GRAPHIC(S) IN CF CARD
T001.LBL
PC to Printer ~X5
978336 KB
Printer to PC
1: Chinese Traditional 24x24
PC to Printer ~X6
Printer to PC
PC to Printer ~X7
978336 KB
Printer to PC
TEST1.DBF
PC to Printer ~X8
978336 KB
Printer to PC
new.SER
PC to Printer ~X9
SPACE: 1597 KB
Printer to PC
A: CP850_Latin1 TTF_TABLE
001 TTF TABLE(S) IN MEMORY
A: Arial (True Type) TTF
Page 36

31
~Z - Reset printer
Syntax
~Z
Parameter
None
Description
Reset the printer and the LED will flash once. It only applied when printer is in
standby mode.
Page 37

32
Label formatting commands
Syntax
AUTOFR
Parameters
None
Description
When use "^Fname" command to store a label form, set the form name as
standalone mode when power on next time.
It will print 3 labels wit h APPLE on it.
NOTE1 : Uses 0x13 to logout AUTOFR status. ~MDELF,AUTOFR to delete the saved file.
means input blank.
AUTOFR - Automatic form printing
"AUTOFR" and save into printer's memory. The printer then can print the label in
Sample
^FAUTOFR
^Q20,0,0
^P1
^L
V00,6,Prompt
AG,260,32,1,1,0,0,^V00
E
~Z
Printer will reboot after the save the file. Yellow
light stands for the printer is standby and waiting
for print. Input the variable and prints labels. For
instance:
APPLE
3
^FAUTOFR
^Q20,0,0
^PA3
^L
V00,6,Prompt
AG,260,32,1,1,0,0,^V00
E
~Z
Printer will reboot after the save the
file. Yellow light stands for the printer
is standby and waiting for print. Input
the variable and prints labels. For
instance:
APPLE
It will print 3 labels wit h APPLE on it.
NOTE2 : If command included ^PAx, it would print label quantities according to “x”. No need to input
print quantity.
NOTE3 : If push feed key while printer requests input variable, it equals to press “Enter” key which
Page 38

33
At,x,y,x_mul,y_mul,gap,rotationInverse,data - Text
Syntax
At,x,y,x_mul,y_mul,gap,rotationInverse,data
Parameter
t = Font type, see table below.
Font
Points
Font style
A 6
CG Triumvirate, Code page 850
B 8
CG Triumvirate, Code page 850
C 10
CG Triumvirate, Code page 850
D 12
CG Triumvirate, Code page 850
E 14
CG Triumvirate, Code page 850
F 18
CG Triumvirate, Code page 850
G 24
CG Triumvirate, Code page 850
H 30
CG Triumvirate, Code page 850
I 16x26 dots for US ASCII 8 bit
K OCR-B font
L OCR-A font
Zn, n = 1 ~ 9
Asia font from 1 to 4
x = Hori of top-left position of text (unit: dot, 1mm = 8 dots in 203dpi printer; 1mm=12
Serial variable (^Cx) and Variable data (^Vxx).
Description
Prints an ASCII or ASIA text string. The ASCII text oriented form left to right, the Asian
text from left to right or top to bottom.
Sample
Text Rotation Rotation with Inverse
dots in 300dpi printer)
y = Vert of top-left position of text (unit: dot, 1mm = 8 dots in 203dpi printer; 1mm=12
dots in 300dpi printer)
x_mu = Horizontally magnified up to 8 times as large
y_mul = Vertically magnified up to 8 times as large
gap = Distance of the character (unit: dot, 1mm = 8 dots in 203dpi printer; 1mm=12
dots in 300dpi printer)
rotationInverse = The rotation of ASCII text from 0 to 3, the Asian text rotation form 0
to 7
0 0° 1 90° 2 180° 3 270°
4 0° 5 90° 6 180° 7 270°
(0~3rotated for all characters; 4~7rotated individually for each character)
In addition, if the rotation parameter is followed with “I”, the text will be printed in
inverse font.
To use UNICODE please setup as below:
E UTF8 L UTF16 LO H UTF16 HI ( UTF16 characters should be end up with 4
0x00)
Data = data string, it includes Constant, Date information (^D), Time information (^T),
Page 39
34
AT,x,y,w,h,g,s,d,m,data - Print built-in true type font
Syntax
AT,x,y,w,h,g,s,d,m,data
Parameter
x = Hori of left-top position of text (unit: dot, 1 mm = 8 dots or 12 dots)
(www.freetype.org).
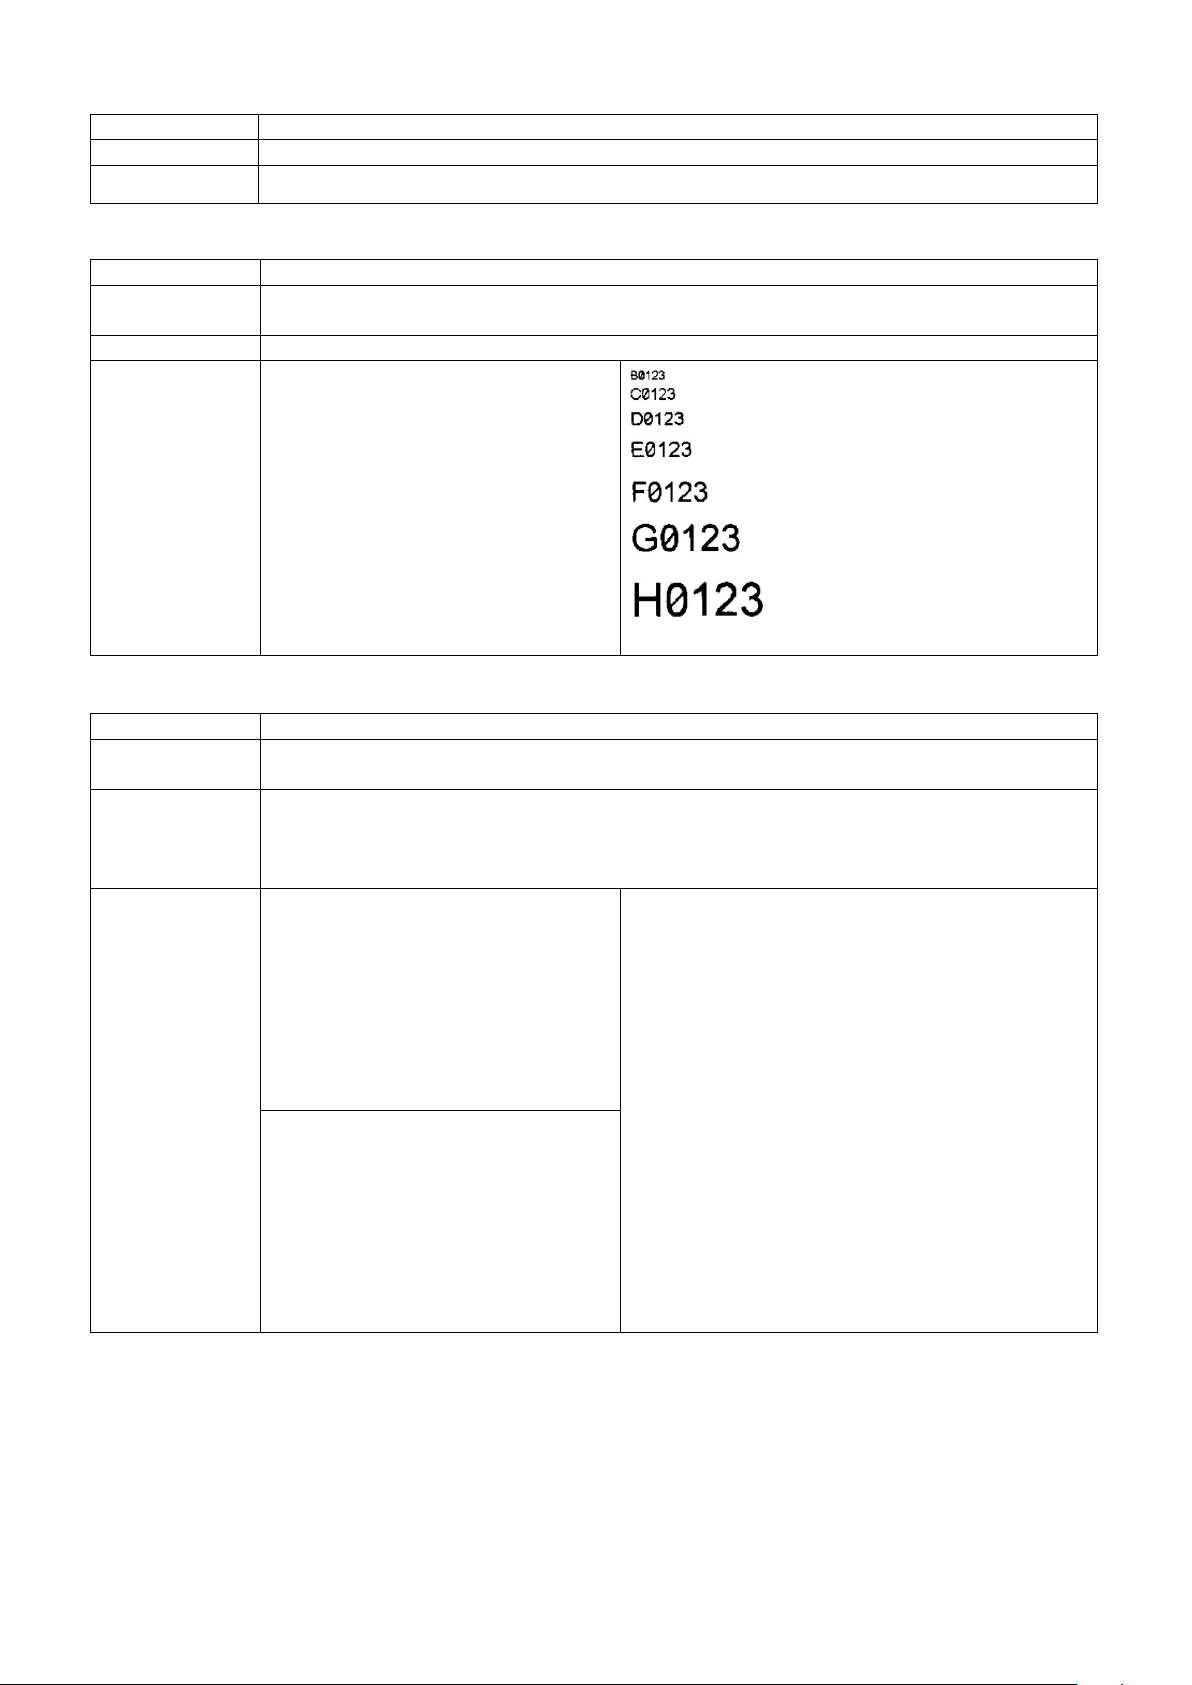
Description
Print built-in True Type Font (TTF).
Further
In width/height AspectRatio mode (m = 0):
will be the same with Windows font 72pt.
In Average width mode (m = 1):
width is the average width in dots. If width=0, a 1:1 aspect ratio font is rendered.
Sample
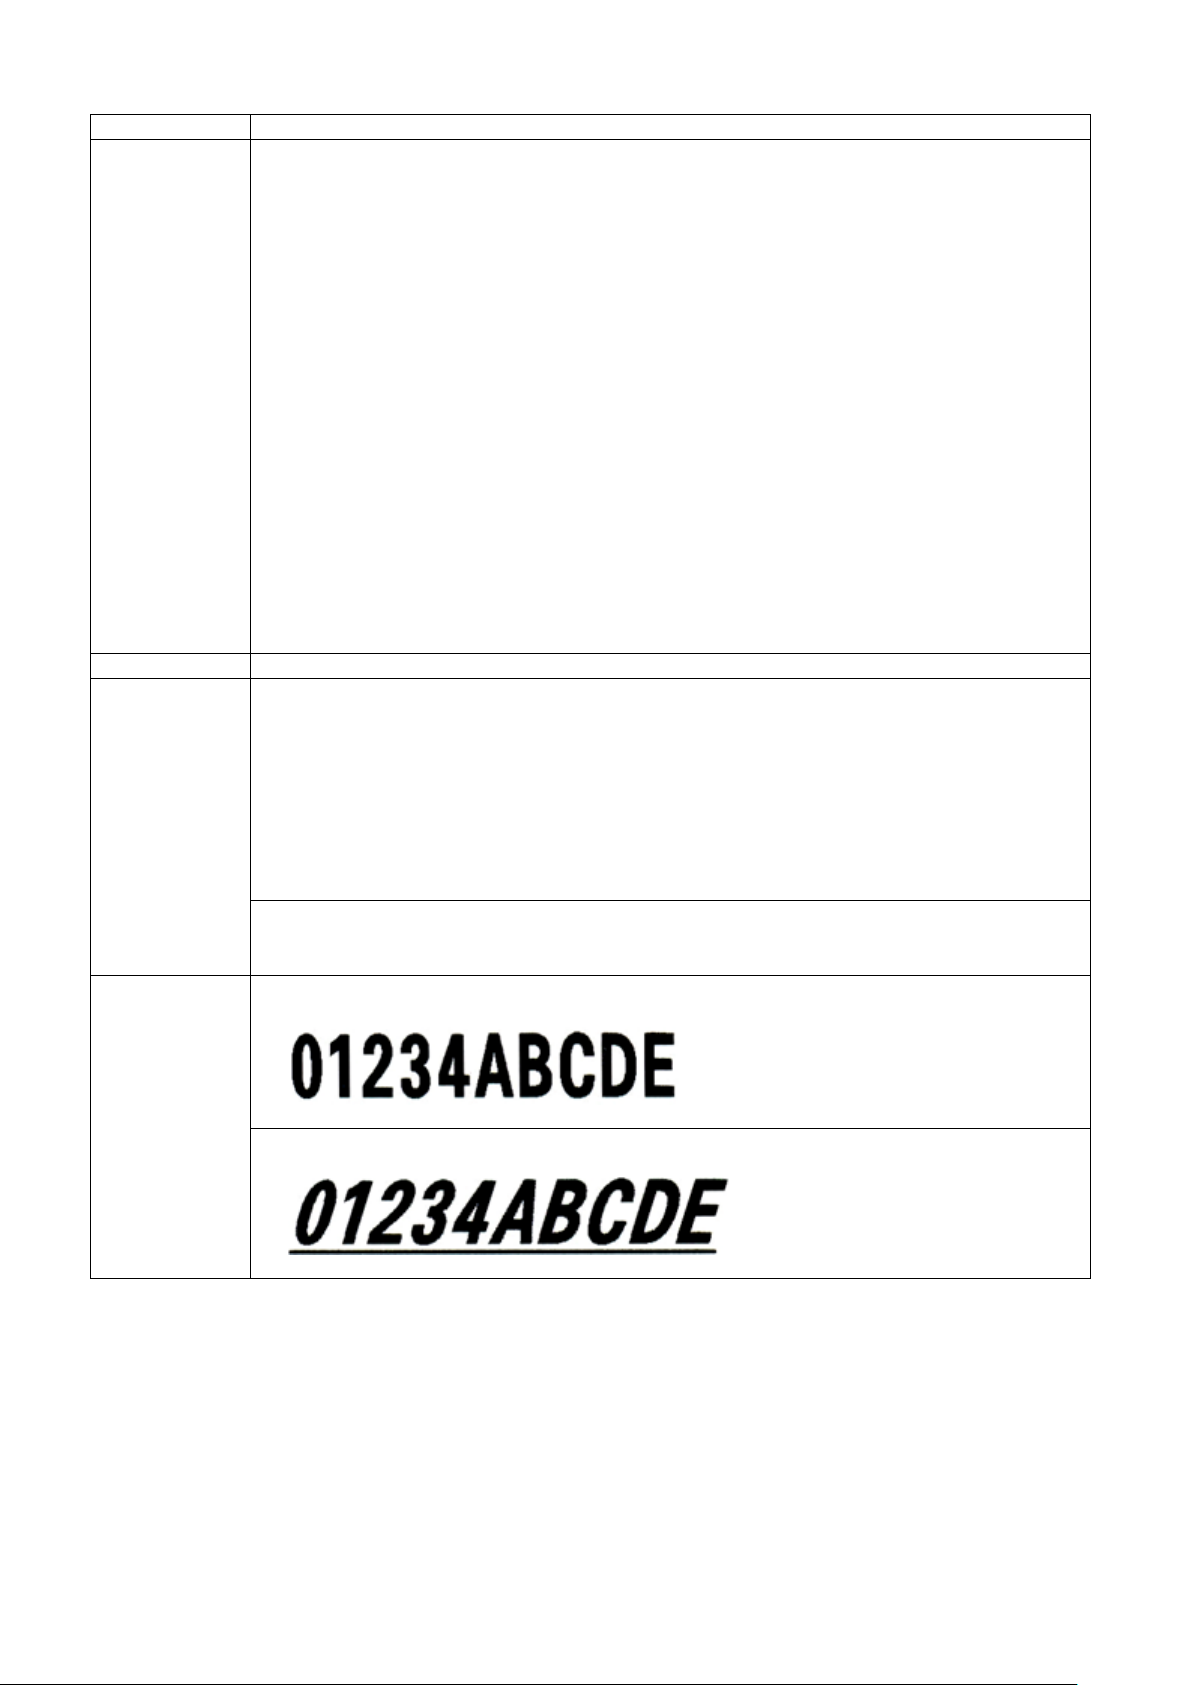
AT,48,92,90,90,0,0,0,0,01234ABCDE
AT,50,324,90,90,0,0BTU,0,0,01234ABCDE
y = Vert of left-top position of text (unit: dot, 1 mm = 8 dots or 12 dots)
w = The width of font (8~2000 dot)
h = The height of font (8~2000 dot)
g = Space between characters (0~200 dot)
s = Font setting. It consists of 2 parts, one is rotation setting and the other is font style
setting.
The rotation setting is from 0 to 3:
0 0° 1 90° 2 180° 3 270°
The font style setting is optional setting. It includes 3 types, can be set with none,
one, two or three together:
B Bold T Italic U Underline
To use UNICODE please setup as below:
E UTF8 L UTF16 LO H UTF16 HI ( UTF16 characters should be end up with 4
0x00)
d = DType, 0 ASCII
m = m = 0 width/height AspectRatio mode
m = 1 Average width mode (refer to Further Information)
data = Data to be printed
*Portions of this software are copyright 2000-Feb-08 The FreeType Project
Information
When the width (w) and the height (h) of TTF are equal, the printing result of TTF will
be exactly the same with Windows font. There is a formula to calculate the Windows
font size from TTF size:
TTFheightsize = WindowsFontsize*dpi/72
For example, if user want to print Windows font 72pt on 203dpi printer, then the
TTFheightsize = 72*203/72 = 203. And the TTFwidthsize should be equal to TTFheightsize,
which is 203. As a result, when the width and height of TTF both are 203, the printout
The height in dot is calculated the same as width/height AspectRatio mode, but the
【
Note】
For conversion: 1mm = 8 dots when printing with 203dpi printer; 1mm = 12 dots when printing with 300dpi printer.
Page 40

35
ATt,x,y,w,h,g,s,d,m,data - Print downloaded true type font
Syntax
ATt,x,y,w,h,g,s,d,m,data
Parameter
t = TTF type, accepted values: from A to Z
data = Data to be printed
Description
Print downloaded True Type Font.
Further
In width/height AspectRatio mode (m = 0):
will be the same with Windows font 72pt.
In Average width mode (m = 1):
width is the average width in dots. If width=0, a 1:1 aspect ratio font is rendered.
x = Hori of left-top position of text (unit: dot, 1 mm = 8 dots or 12 dots)
y = Vert of left-top position of text (unit: dot, 1 mm = 8 dots or 12 dots)
w = The width of font (8~2000 dot)
h = The height of font (8~2000 dot)
g = Space between characters (0~200 dot)
s = Font setting. It consists of 2 parts, one is rotation setting and the other is font style
setting.
The rotation setting is from 0 to 3:
0 0° 1 90° 2 180° 3 270°
The font style setting is optional setting. It includes 3 types, can be set with none,
one, two or three together:
B Bold T Italic U Underline
To use UNICODE please setup as below:
E UTF8 L UTF16 LO H UTF16 HI ( UTF16 characters should be end up with 4
0x00)
d = DType 0 : ASCII A~Z: Unicode table
m = m = 0 width/height AspectRatio mode
m = 1 Average width mode (refer to Further Information)
Information
When the width (w) and the height (h) of TTF are equal, the printing result of TTF will
be exactly the same with Windows font. There is a formula to calculate the Windo ws
font size from TTF size:
TTFheightsize = WindowsFontsize*dpi/72
For example, if user want to print Windows font 72pt on 203dpi printer, then the
TTFheightsize = 72*203/72 = 203. And the TTFwidthsize should be equal to TTFheightsize,
which is 203. As a result, when the width and height of TTF both are 203, the printout
The height in dot is calculated the same as width/height AspectRatio mode, but the
Page 41

36
Bt,x,y,narrow,wide,height,rotation,readable,data - Barcode
Syntax
Bt,x,y,narrow,wide,height,rotation,readable,data
Parameter
A Code 39 STD
P
Code 93
A2
Code 39 STD w check
Q
Code 128 (auto)
A3
Code 39 full ASCII
Q2
Code 128 (subset A/B/C)
A4
Code 39 full ASCII w check
R
UCC 128
A5
Code 39 STD w check & *
S
Post NET
A6
Code 39 STD w *
T
UPC Interleaved 2 of 5
B EAN 8
U
EAN 128
C EAN 8 - Add ON 2
V
RPS 128
D EAN 8 - Add ON 5
X
HIBC
E EAN 13
Y
MSI 1 MOD 10
F EAN 13 – Add ON 2
Y2
MSI 2 MOD 10
G EAN 13 – Add ON 5
Y3
MSI 1 MOD 11 & 10
H UPC A
Y4
MSI no digit check
I UPC A - Add ON 2
Z
I 2 of 5 with Shipping Bearer Bars
J UPC A - Add ON 5
1
UCC/EAN-128 K-MART
K UPC E
2
UCC/EAN-128 RANDOM
L UPC E - Add ON 2
3
Telepen
M UPC E - Add ON 5
4
FIM N I 2 of 5
7
Plessey
N2
I 2 of 5 with check digit
O Codabar
Example
Please refer to Appendix to see all 1D and 2D barcodes sample and commands.
type Barcode type Barcode
Page 42

37
B5n,x,y,narrow,segment,height,rotation,readable,data - lay out GS1 Databar
Syntax
Bt,x,y,narrow,wide,height,rotation,readable,data
Parameter
n = The type of GS1 Databar, see table below.
"n"
GS1 Databar type
"n"
GS1 Databar type
0 GS1 Databar Omnidirectional
4
GS1 Databar Limited
1 GS1 Databar Truncated
5
GS1 Databar Expanded
2 GS1 Databar Stacked
6
GS1 Databar Expanded Stacked
3 GS1 Databar Stacked Omnidir.
x = Hori. of top-left position of barcode (unit: dot, 1 mm = 8 dots or 12 dots)
(^T), Serial variable (^Cx) and Variable data (^Vxx).
y = Vert. of top-left position of barcode (unit: dot, 1 mm = 8 dots or 12 dots)
narrow (x dimension) = narrow bar from 1 ~ 10 dots(0.125 ~ 1.25 mm)
Segment = the width setting of data segment from 2 ~ 22, only applied on "GS1 Data
bar Expanded Stacked". When the data length exceeds the segment setting, the
barcode will add more line automatically to contain all data. The maximum number
of barcode lines is 11.
Height = not available yet, please always enter "0".
rotation = rotation of barcode (0 ~ 3)
0) 0° 1) 90° 2) 180° 3) 270°
readable = set to show human readable text
0 – human readable off; 1 – below barcode, left
Data = barcode data, it includes Constant, Date information (^D), Time information
Page 43
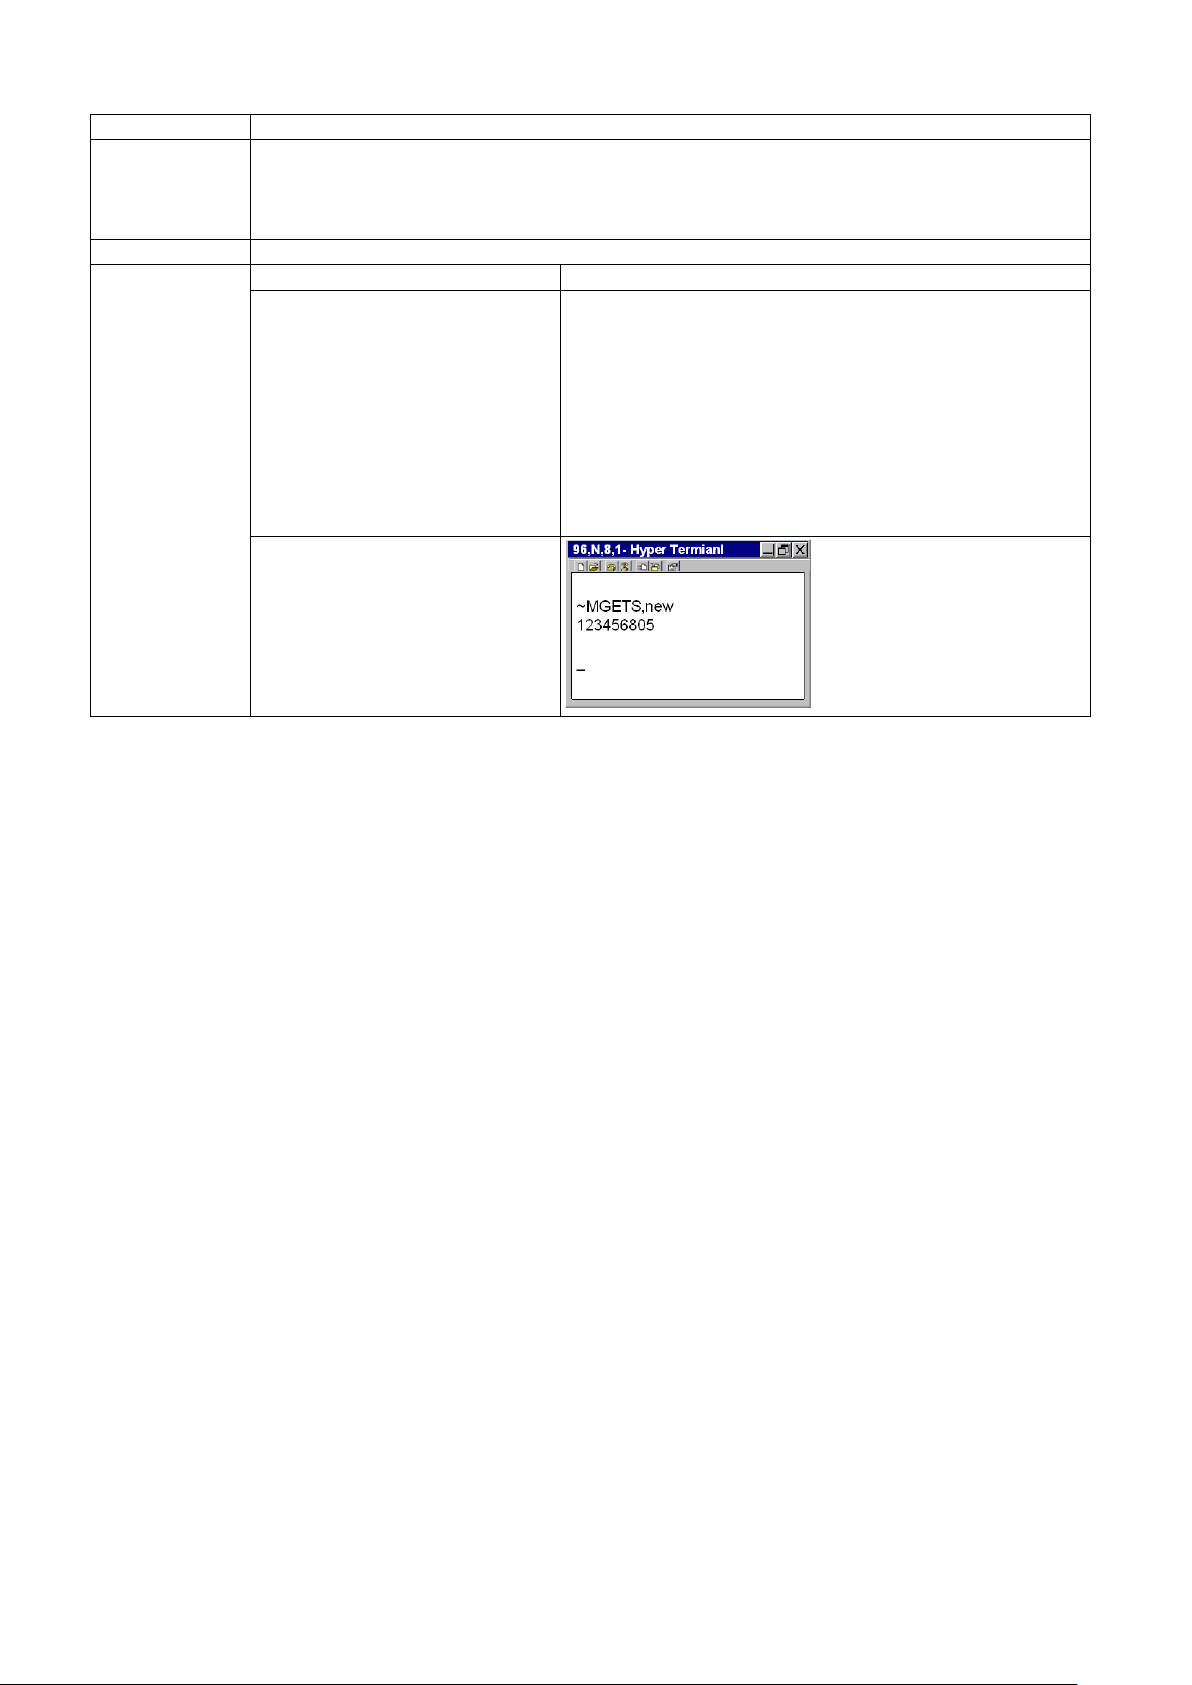
38
C#x,y,±value,z - Print count with serial file
Syntax
C#x,y,±value,z
Parameter
x = counter index
z =’0’~’9’ or ‘B’ for decimal, ‘A’ for hexadecimal, ‘C’ for 0~9,A~Z
Description
Set print count with serial file by this command.
Example
~L,SERIAL,new,123456795
Download the new file to printer first
Turn printer off
E
Print Result:
Key in ~MGETS, new in
y = serial file name
±value = ±value of serial variable (up to 12-digit)
Turn printer on.
Print again.
^Q60,0,0
^P5
^L
C#0,new,+1,0
AG,50,137,1,1,0,0,^C0
HyperTerminal
123456800
123456801
123456802
123456803
123456804
Page 44

39
Syntax
Cx,ys,±value,prompt
Parameter
x = 0 to 9(up to10group), maximum combination up to 10 groups.
in "s"
LCD or EZ-Viewer.
Description
Set the serial number
Example
^Q50,0,0
decimal with leading zeros: 000
decimal with leading spaces: 1
hexadecimal: EE
0~9 A~Z: ZYY
decimal with leading zeros: 001
decimal with leading spaces: 2
hexadecimal: EF
0~9 A~Z: ZYZ
decimal with leading zeros: 002
decimal with leading spaces: 3
hexadecimal: F0
0~9 A~Z: ZZ0
Cx,ys,±value,prompt - Serial number setting
y = select the decimal
y 0~9, set serial number as Decimal numbers, the value of "y" is included
(start value of serial variable) as first digit.
y A, set serial number as Hexadecimal numbers, the value of "y" (e,g, A) is not
included in "s" (start value of serial variable).
y C, set serial number as Base 36 numbers, the value of "y" (e,g, C) is not
included in "s" (start value of serial variable).
s = start value of serial variable (up to 29-digit). You can use the leading spaces to
replace the leading zeros.
±value = ±value of serial variable (up to 28-digit)
Prompt = prompt of serial variable (up to 20 characters), only applied on models with
^W100
^H10
^P3
^L
Dy2-me-dd
Th:m:s
C0,000,+1,Prompt
C1, 1,+1,Prompt
C2,AEE,+1,Prompt1
C3,CZYY,+1,Prompt2
AC,80,10,1,1,0,0,decimal with leading zeros: ^C0
AC,80, 80,1,1,0,0,decimal with leading spaces:
^C1
AC,80 ,1 6 0,1,1,0,0,hexadecimal: ^C2
AC,80,240,1,1,0,0, 0~9 A~Z: ^C3
E
Page 45
40
Daa|bb|cc - Define date layout
Syntax
Daa|bb|cc
Parameter
aa = Year
Dm2: month of the year as a complete name
Description
Define the date layout for print out
Example
E
y2: Year with two digits (such as 97)
y4: Year with four digits (such as 1997)
bb = Month
me: Month in letters (JAN, FEB, .... )
mn: Month in numeric (01 , 02, .... )
cc = day of 2 digits
| = Partition, can be any ASCII character from decimal 32 to 63.
Djj1: Julian calendar format(YYDD)
Djj2: Julian calendar format(YDDD)
Dwy1: week of year format(W)
Dwy2: week of year format(WW)
Dwn: day-of-week as number value
Dw1: day-of-week as 3 letter abbreviation
Dw2: day-of-week as complete
Dm1: month of the year as 3 letter abbreviation
^Q100,0,0
^W100
^L
Dy2-me-dd
AD,36,40,1,1,0,0,^D
Djj1
AD,36,80,1,1,0,0,^D
Dwy1
AD,36,120,1,1,0,0,^D
Dw1
AD,36,160,1,1,0,0,^D
Dm1
AD,36,200,1,1,0,0,^D
Dy4/mn/dd
AD,36,280,1,1,0,0,^D
Djj2
AD,36,320,1,1,0,0,^D
Dwy2
AD,36,360,1,1,0,0,^D
Dw2
AD,36,400,1,1,0,0,^D
Dm2
AD,36,440,1,1,0,0,^D
Dwn
AD,36,530,1,1,0,0,^D
AC,228,82,1,1,0,0,julian date format
AC,228,124,1,1,0,0,week of year format
AC,228,166,1,1,0,0,day-of-week as 3 letter abbreviation
AC,228,210,1,1,0,0,month of the year as 3 letter
abbreviation
AC,228,318,1,1,0,0,julian date format
AC,228,360,1,1,0,0,week of year format
AC,228,402,1,1,0,0,day-of-week as complete
AC,228,446,1,1,0,0,month of the year as a complete name
AC,228,532,1,1,0,0,day-of-week as number value
AC,228,40,1,1,0,0,Date layout
AC,228,274,1,1,0,0,Date layout
05-APR-15
5105
15
Fri
Apr
2005/04/15
05105
15
Friday
April
5
Date layout
Julian date format
Week of year format
Day of week as 3 letter
abbreviation
Month of the year as 3
letter abbreviation
Date layout
Julian date format
Week of year format
Day-of-week as
complete
Month of the year as a
complete name
Day of week as
number value
Page 46

41
E - Terminate label formatting mode and print label
Syntax
E
Parameter
None
Description
End of formatting command; printer will print label after receiving this command.
Syntax
FILEDB,OPEN,name
Parameter
name = the name of the database
Description
Open a database for printing.
Example
FILEDB,OPEN,customer
Syntax
FILEDB,MOVE,n
Parameter
n = number
n = PRIOR, the prior record
Description
Use variable or counter to select a specific record from the database.
Example
FILEDB,MOVE,3
FILEDB,MOVE,NEXT
Move to third record
Move to next record
Syntax
FILEDB,FIND,x,y
Parameter
x =Column name in database file
y =Keyword for searching
Description
Select a specific record form database and print it.
Example
Download database “customer” :
E
Find Mary’s data and print it.
FILEDB,OPEN,name - Open database
FILEDB,MOVE,n - Move data record
n = FIRST, the first record
n = LAST, the last record
n = NEXT, the next record
FILEDB,MOVE,FIRST
FILEDB,FIND,x,y - Searching from database
^Q60,0,0
^P1
^L
FILEDB,OPEN,customer
V00,10,Prompt0
V#LINKDB,PHONE,V00
FILEDB,FIND,NAME,Mary
AC,79,120,1,1,0,0, Marry’s phone:
^V00
Move to first record
Page 47

42
Gwxxx - Graphic command
Syntax
Gwxxx
Parameter
w = byte number of image data
xxx...: image data
Description
This command is a sub-command of ~G It is sent by binary data. W is the digits
command is G2xxx. (2: ASCII is 50 decimal)
~G = start Graphical receive mode
number byte of image data. For example, if the image file is 50 bytes, the
範例
^Q35,0,10
^W70
^H10
^S4
^R0
~G
G<@
G<@@@@@@@@@@@@@@@@@@@@@@@@@@@@@@
G<@
G<@
G<@
G<
@
G<@
G<@
E
Page 48

43
Hx,y,col_count,row_count,col_width,row_width,line_width – Table command drawing
Syntax
Hx,y,col_count,row_count,col_width,row_width,line_width
Parameter
x = left-upper Hori .pos. (unit: dots)
line_width = line width
Description
Draw a table in the label.
Example
^Q50,0,3
E
Syntax
La,x,y,x1,y1
Parameter
a = o, overwrite the line on the bottom
y1 = right-bottom Vert. Pos. (unit: dots)
Description
Define a line to render in the label
*Note: The diagonal line draw is not available.
Example
^Q50,0,0
E
Result
y = left-upper Vert. Pos. (unit: dots)
col_count = number of columns
row_count = number of rows
col_width = column width
row_width = row width
^W171
^H10
^P1
^S4
^AT
^C1
^R0
~Q+0
^O0
^D0
^E14
~R200
^L
Dy2-me-dd
Th:m:s
H20,20,2,3,20,30,10
La,x,y,x1,y1 - Line co m mand drawing
a = e, exclusive the line on the bottom
x = left-up; per horizontal(Hori.) pos.
(unit: dots; 1mm= 8 dots or 12 dots)
y = left-upper vertical (Vert.) pos.
(unit: dots; 1mm= 8 dots or 12 dots)
x1 = right-bottom Hori. Pos. (unit: dots)
^W50
^H15
^P1
^S2
^L
Dy2-me-dd
Th:m:s
R08,08,252,252,4,4
Lo,128,010,132,250
Le,008,128,252,132
Ls,008,010,4,248,250
Ls,248,010,4,008,250
Page 49

44
Mx,y,sno,nos,mode,ccode,zip,class,rotation,message - Print Maxicode
Syntax
Mx,y,sno,nos,mode,ccode,zip,class,rotation,message
Parameter
x = Hori. of left-bottom pos. of barcode (unit: dots).
message = 1 ~ 84 characters.
Description
Print a 2 dimensional Maxicode
Syntax
Px,y,w,h,r,c,ec,len,rotation
Data
Parameters
x = Hori. of left-bottom pos. of barcode ( unit: dots)
of "len"; up to 1024 characters)
Description
Print a 2 dimensional PDF417 code
y = Vert. of left-bottom pos. of barcode (unit: dots).
sno = symbol number, in set of symbols: 1 ~ 8.
nos = number of symbols in set of symbols: 1 ~ 8 sets.
mode = mode of maxicode 2, 3, 4 or 6.
ccode = 3 digits country code.
zip = postal code 9 digits for US style postal code. If there is a 5 digits zip code, 4 zeros
must be padded 6 digits alphanumeric zip code for non-US style postal code.
class = service class, 3 digits numeric.
rotation = rotation of barcode (0 ~ 3)
0) 0° 1) 90° 2) 180° 3) 270°
Px,y,w,h,r,c,ec,len,rotation - Print PDF 417
y = Vert. of left-bottom pos. of barcode (unit: dots)
w = Width (x dimension) of the narrowest element (bar or space) in the barcode.
h = Height (y dimension) of each barcode row in the symbol.
r = number of barcode rows, from 3 to 90. If you key in 0, printer will count all the rows.
c = number of barcode columns, from 1 ~ 30. If you key in 0, printer will count the all
columns.
ec = error correction level: 0 ~ 8.
len = number of encoded data bytes, including carriage returns ↵ and line feed.
rotation = rotation of barcode (0 ~ 3)
0) 0° 1) 90° 2) 180° 3) 270°
Data = data to be encoded (the length of the data must be equal to the set value
Page 50

45
PCx,y,w,h,r,c,ec,max_len,rotation - PDF 417 with variable length data
Syntax
PCx, y, w, h, r, c, ec, max_len,rotation
&*Data&*
Parameter
x = Hori. of left-bottom pos. of barcode ( unit : dots)
the beginning and the end.
Description
To adjust the PDF 417 data length by this command
Example
^Q50,0,0
E
(Data read from CCD:
y = Vert. of left-bottom pos. of barcode (unit: dots)
w = Width (x dimension) of the narrowest element (bar or space) in the barcode.
h = Height (y dimension) of each barcode row in the symbol.
r = number of barcode rows, from 3 to 90. If you key in 0, printer will count all the rows.
c = number of barcode columns, from 1 ~ 30. If you key in 0, printer will count the all
columns.
ec = error correction level: 0 ~ 8.
max_len = max of number encoded data bytes, including carriage returns ↵ and line
feed.
rotation = rotation of barcode (0 ~ 3)
0) 0° 1) 90° 2) 180° 3) 270°
Data = data to be encoded. The content of data must be enclosed with "&*" sign on
^L
PC141,104,3,5,3,3,3,50
&*0123456789
Line2
Line3
9876543210&*
0123456789[ CR][ LF]Line2[ CR][ LF]Line3[
CR][ LF]9876543210)
Page 51

46
PMx,y,w,h,mode,length,rotation – Micro PDF 417
PMx,y,w,h,mode,length,rotation
Data
x = Hori. of left-bottom pos. of barcode ( unit: dots)
Description
Print a 2D Micro PDF417 code
PM100,100,6,8,3,10,3
1234567890
Syntax
y = Vert. of left-bottom pos. of barcode (unit: dots)
w = Width (x dimension) of the narrowest element (bar or space) in the barcode.
0~50 unit : dots
h = Height (y dimension) of each barcode row in the symbol. 0~50 unit : dots
mode = 0 ~ 33.
length = number of encoded data bytes, including carriage returns ↵ and line feed.
0~400
rotation = rotation of barcode (0 ~ 3)
0) 0° 1) 90° 2) 180° 3) 270°
Data = data to be encoded (the length of the data must be equal to the set value
of "len"; up to 1024 characters)
Parameter
Example
Page 52

47
Qx,y,width,height - Pattern command
Syntax
Qx,y,width,height
Data...
Parameters
x = Hori. of left-bottom pos. (unit: dots).
(data length = width x height)
Description
4
20
1
2
3
4
5 6 7 8
77 78
79
80
Syntax
Rx,y,x1,y1,lrw,ubw
Parameter
x = left-upper Hori .pos. (unit: dots)
(unit: dots)
(x,y)
lrm
ubw
(x1,y1)
Description
Draw a rectangle in the label
Syntax
Th|m|s
Parameter
h = Hour format ( 2 digits, 00 ~ 23)
| = Partition (It can be any separator between dec. 32 to 63 of ASCII).
Description
Define the time layout for internal real-time clock
y = Vert. of left-bottom pos. (unit: dots).
width = width of graphic (unit: byte)
height = height of graphic (unit: dots)
Rx,y,x1,y1,lrw,ubw – Rectangle drawing
y = left-upper Vert. Pos. (unit: dots)
x1 = right-bottom Hori. Pos. (unit: dots)
y1 = right-bottom Vert. Pos. (unit: dots)
lrw = thickness of left, right border
(unit: dots)
ubw = thickness of upper bottom border
Data send out
1 2 3 4 ......77 78 79 80
width = 4 ; height = 20
(data length: 4x20 = 80)
(refer to page75)
Th|m|s – Internal real-time setting
m = Minute format ( 2 digits, 00 ~ 59)
s = Second format (2 digits, 00 ~ 59)
Page 53

48
V#ADD,name,size,prompt - Store variable with a name
Syntax
V#ADD,name,size,prompt
Parameters
name = descriptive name
prompt = prompt of variable
Description
The name of the variable can be defined by user.
Example
~MDELF,aaa
~P1
Weight is 16 kg
Syntax
V#ADDCHKSUM,x
Parameters
x = variable
Description
Add the modulus 10 check code to x
Example
Add modulus 10 check code to V00
~P1
Print result
size = number of character
^Faaa
^Q50,0,3
^AD
^L
V#ADD,weight,10,Weight
V#ADD,date,15,Date
AE,7,46,1,1,0,0,Weight is ^(weight)
AE,7,86,1,1,0,0,Date is ^(date)
E
^Kaaa
16 kg
11/26/2004
E
V#ADDCHKSUM,x - Add modulus 10 check code
~MDELF,test
^Ftest
^Q60,0,0
^L
V00,16,Prompt
V#ADDCHKSUM,V00
AE,47,57,1,1,0,0,Date:^V00
E
^Ktest
111222333
E
Date is 11/26/2004
Enter Variable value
111222333
Print result
1112223332
Page 54

49
V#ADDCHKSUM43,x - Add modulus 43 check code
Syntax
V#ADDCHKSUM43,x
Parameters
x = variable
Description
Add the modulus 43 check code to x
Add modulus 43 check cod e to V00
~P1
Syntax
V#LINKDB,x,y
Parameter
x = Column name of database
y = Variable
Description
Set a Variable name for dBase data. Before using this command, a dBase data
The number of links is limited to 10.
Syntax
V#OPx,p1,p2,p3
Parameters
x = +, -, *, /, % ; p1,p2,p3= variable
x = %, p1=p2%p3
Description
This command can calculate variables.
*Note: the calculation result will be rounded off to integer value.
Example
V#OP+,V00,V01,V02
V00=V01+V02
V#OP-,V00,V01,V02
V00=V01-V02
V#OP*,V00,V01,V02
V00=V01*V02
V#OP/,V00,V01,V02
V00=V01/V02
V#OP%,V00,V01,V02
V00=V01%V02
~MDELF,test
^Ftest
^Q60,0,0
^L
V00,16,Prompt
Example
V#ADDCHKSUM43,V00
AE,47,57,1,1,0,0,Date:^V00
E
^Ktest
111222334
E
V#LINKDB,x,y - Like a Variable name for dBase data
Print result
Enter Variable value
111222333
Print result
111222334
should opened first, and then can link dBase data to print designate data out.
V#OPx,p1,p2,p3 - Variable calculation
x = +, p1=p2+p3
x = -, p1=p2-p3
x = *, p1=p2*p3
x = /, p1=p2/p3
Page 55

50
V#RENAME,name,x - Variable rename
Syntax
V#RENAME,name,x
Parameters
name = new name of the variable (max 8 characters)
x = variable
Description
Rename the variable.
Example
~MDELF,aaa
~P1
Weight is 16 kg
Syntax
V#SETZERO,Vxx
Parameters
xx = 00 ~ 99 same as parameter definition.
Description
Adjustment parameters bits with the same as parameter definition
^Faaa
^Q50,0,3
^AD
^L
V00,10,Prompt
V01,10,Prompt
V#RENAME,weight,V00
V#RENAME,date,V01
AE,7,46,1,1,0,0,Weight is ^(weight)
AE,7,86,1,1,0,0,Date is ^(date)
E
^Kaaa
16 kg
11/20/2004
E
V#SETZERO,Vxx –Adjustment parameters bits with the same as parameter definition
Date is 11/20/2004
Page 56

51
V#SET,FLOATFORMAT,X,Y,Vxx - handle the number of decimals
Syntax
V#SET,FLOATFORMAT,X,Y,Vxx
X : numbers after decimal point ( 0 ~ 127 )
xx = 00 ~ 99 same as parameter definition.
Description
Use V#OPx,p1,p2,p3 and this command to perform floating point operation
Send command :
~P1
Syntax
V#SET,PROMPTONCE,Vx
Parameters
Vx = number of Variable
Printer will be asked for the variable only once when repeat print the same label
x = variable
Example
V#SET,PROMPTONCE,V00
Parameters
Example
Y = N : Rounded ; U : Round up ; = D : R oun d d ow n
~MDELF,001
^F001
^Q65,0,0
^W100
^L
Dy2-me-dd
Th:m:s
V00,20,V00
V01,20,V01
V02,20,V02
V03,20,V03
V04,20,V04
V05,20,V05
V06,20,V06
V#OP+,V02,V00,V01
V#OP-,V03,V00,V01
V#OP*,V04,V00,V01
V#OP/,V05,V00,V01
V#OP%,V06,V00,V01
V#SET,FLOATFORMAT,3,N,V02
V#SET,FLOATFORMAT,3,N,V03
V#SET,FLOATFORMAT,4,U,V04
V#SET,FLOATFORMAT,5,D,V05
V#SET,FLOATFORMAT,3,N,V06
V#SET,UNPROMPT,V02
V#SET,UNPROMPT,V03
V#SET,UNPROMPT,V04
V#SET,UNPROMPT,V05
V#SET,UNPROMPT,V06
AE,040,30,1,1,0,0,TEST Variable calculation
AF,080,110,1,1,0,0,^V00 + ^V01 = ^V02
AF,080,190,1,1,0,0,^V00 - ^V01 = ^V03
AF,080,280,1,1,0,0,^V00 X ^V01 = ^V04
AF,080,360,1,1,0,0,^V00 / ^V01 = ^V05
AF,080,440,1,1,0,0,^V00 % ^V01 = ^V06
E
^K001
144.14
13.088
E
Print result :
TEST Variable calculation
144.14 + 13.088 = 157.228
144.14 – 13.088 = 131.052
144.14 x 13.088 = 1886.5044
144.14 / 13.088 = 11.01314
144.14 % 13.088 = 1
V#SET,PROMPTONCE,Vx –only prompt the variable once while printing
Description
format.
Page 57

52
V#SET,THOUFORMAT,V00ab[c]
Syntax
V#SET,THOUFORMAT,V00ab[c]
a = the symbol will be displayed at Thousand point
c = the symbol will be displayed at End of number
Description
The symbol will be displayed at Thousand point, Decimal point and End of number
Send command :
E
Syntax
V#SET,UNPROMPT,x
Parameters
x = variable
Description
This command can set the variable without prompt.
Example
V#OP+,V00,V01,V02
V#SET,UNPROMPT,V00
Use doesn’t need to input the value of V00
Syntax
V#STRCPY,x,y
Parameters
x = target variable
y = source variable
Description
Copy all data of y to x
Example
V#STRCPY,V00,V01
Copy all of V01 data to V00
Parameters
Example
b = the symbol will be displayed at Decimal point
^Q50,0,0
~MDELF,TEST
^FTEST
^L
V00,10,V00
V01,10,V01
V02,10,V02
V#SET,UNPROMPT,V02
V#SET,FLOATFORMAT,2,0,V02
V#SET,THOUFORMAT,V02,,,
V#OP+,V02,V00,V01
R22,14,774,378,10,10
AH,100,050,1,1,0,0,V00 = ^V00
AH,100,150,1,1,0,0,V01 = ^V01
AH,100,250,1,1,0,0,V02 = ^V02
E
^KTEST
1411.12
1333.23
~P1
Print result :
V00 = 1411.12
V01 = 1333.23
V02 = 2,744,35,
V#SET,UNPROMPT,x - Disable variable prompt
V#STRCPY,x,y - Copy all of variable data
Page 58

53
V#STRSUB,x,y,first,length - Copy part of Variable value
Syntax
V#STRSUB,x,y,first,length
Parameters
x = target variable
length = the number of characters
Description
Copy part of y value to x
Example
Copy year, month and day values
~P1
Print result:
Syntax
Vt,x,y,x_mul,y_mul,gap,rotationInverse,data
Parameter
t = the font name; from A ~ Z
data = Data string (up to 239 characters).
Description
Download Bit-Mapped font to memory. All parameters are all the same with text
command
Example
VA,5,10,1,1,1,0,data
The name of font “A”
y = source variable
first = the position of first character
respectively from a whole date variable.
~MDELF,test
^Ftest
^Q60,0,0
^L
V00,16,PromptV0
V01,16,PromptV1
V02,16,PromptV2
V03,16,PromptV2
V#STRSUB,V01,V00,5,2
V#STRSUB,V02,V00,8,2
V#STRSUB,V03,V00,0,4
V#SET,UNPROMPT,V01
V#SET,UNPROMPT,V02
V#SET,UNPROMPT,V03
AE,47,57,1,1,0,0,Date:^V00
AE,38,115,1,1,0,0,Month:^V01
AE,38,155,1,1,0,0,Day:^V02
AE,38,205,1,1,0,0,Year:^V03
E
^Ktest
2005/01/31
E
Date:2005/01/31
Month:01
Day:31
Year:2005
Vt,x,y,x_mul,y_mul,gap,rotationInverse,data - Print with downloaded character sets
To use UNICODE please setup as below:
E UTF8 L UTF16 LO H UTF16 HI ( UTF16 characters should be end up with 4
0x00)
Page 59

54
Vxx,length,prompt[,jnl][,sab] - Store variable
Syntax
Vxx,length,prompt
Parameter
xx = a code name of the variable, from 00 ~ 99
a = p , b = the ending string of data
Description
Define variables for further use. If the input data characters more than the setup
3 , input date = apple . Printer will only print “app” (the first 3 words)
length = number of characters (up to 98 characters).
prompt = prompt of variable (maximum up to 20 characters)
j = Justification option
n = l(for left), c(for center), r(for right)
l = the length of entire string in millimeters ( 100mm for 4” printer ; 50mm for 2” printer )
s = intercept option ; a = n , b = the length of intercept string
data length, firmware would only take the setup date length. For example, length =
Page 60
55
Wx,y,mode,type,ec,mask,mul,len,roatae<CR>data - Arrange QR code and Micro QR Code
Syntax
Wx,y,mode,type,ec,mask,mul,len,roatae<CR>
data
Parameters
x = Hori. of left-bottom pos. of barcode (unit: dots)
means the data length of following bar code content must be 15 bytes.
Description
Arrange QR-code by setting.
Example
Q50,0,0
Data mode: 2
y = Vert. of left-bottom pos. of barcode (unit: dots)
mode = input mode (1 ~ 5)
1 Numerical data mode
2 Alpha numerical data mode
3 8-bit data mode*
4 Kanji data mode
5 Mixing mode (not available in Micro QR Code)
type = barcode type (1 ~ 2)
1 Model1 (original)
2 Model2 (enhanced)
3 Micro QR code
ec = error correction level (L、M、Q、H)
L Low
M Medium
Q Medium high
H High (not available in Micro QR Code)
mask = masking factor (0 ~ 7 or 8 for auto). When printing with Micro QR code, it must
be set to "0".
mul = multiple (1 ~ 8)
len = number of encoded data bytes, including carriage returns ↵ and line feed.
roatae =rotation of barcode (0 ~ 3)
0) 0° 1) 90° 2) 180° 3) 270°
data = bar code data.
*Note: if input mode is set to 8-bit data mode, the first four digits of bar code data
must indicate the data length in bytes. For example, if first four digits are 0015, that
^L
W10,10,2,1,L,8,10,36,0
0123456789ABCDEFGHIJKLMNOPQRSTUVW
XYZ
E
Model type: 1
Error level: L
Masking factor: 8
Multiple:10
Data length: 36
Page 61
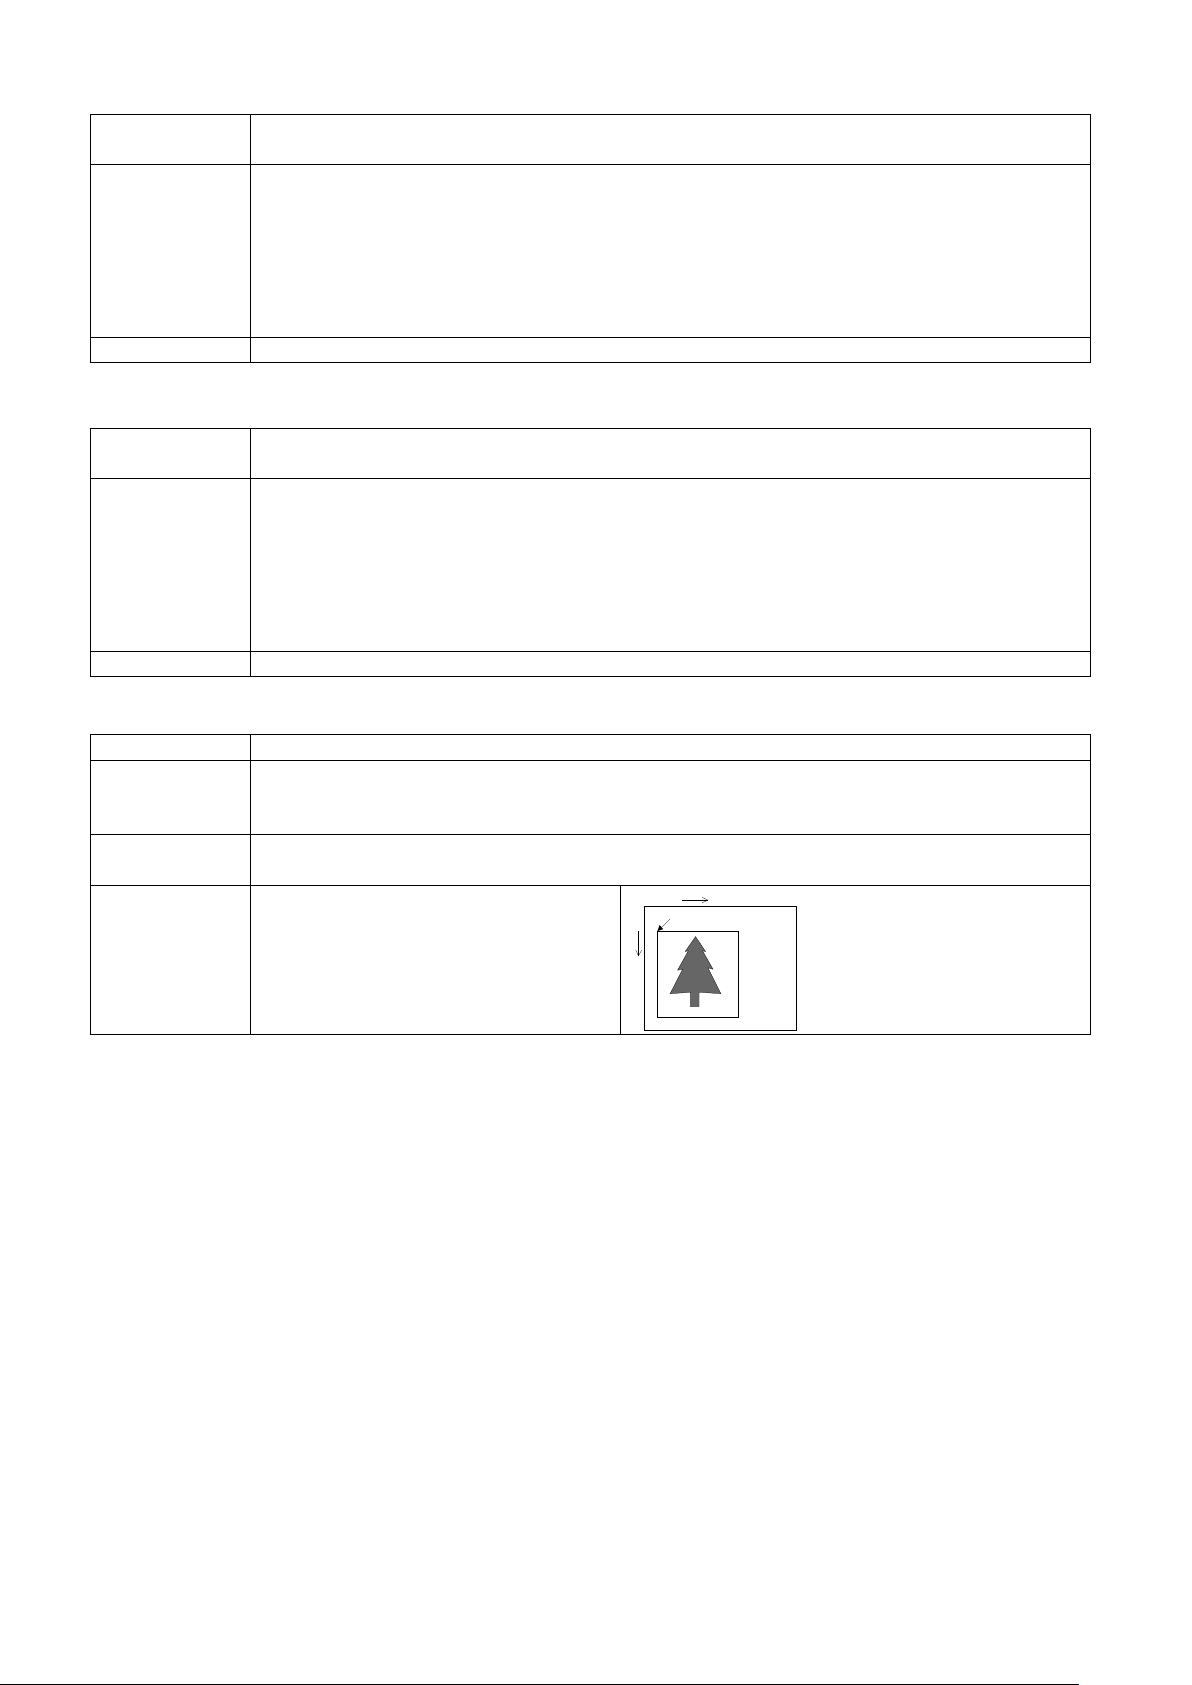
56
XRBx,y,enlarge,rotation,length<CR>data - Arrange DataMatrix Code
Syntax
XRBx,y,enlarge,rotation,length<CR>
data
Parameters
x = Horizontal start position of barcode (unit: dots).
data = bar code data.
Description
Arrange DataMatrix code.
Syntax
XRBx,y,enlarge,rotationR,length<CR>
data
Parameters
x = Horizontal start position of barcode (unit: dots).
data = bar code data.
Description
Arrange rectangular DataMatrix code.
Syntax
Yx,y,name
Parameter
x = Hori. Pos. of left-upper of graphics (unit: dots)
name = Name of graphics download, the variable data can also be accepted.
Description
This command is for printing a graphic file that has been previously stored in printer
memory.
Example:
(20,40)
x
y
y = Vertical start position of barcode (unit: dots).
enlarge = Enlarge the DataMatrix Code 1~8 times (horizontally and vertically).
rotation = rotation of barcode (0 ~ 3)
0) 0° 1) 90° 2) 180° 3) 270°
length = data length (unit: bytes).
XRBx,y,enlarge,rotationR,length<CR>data - Arrange Rectangular DataMatrix Code
y = Vertical start position of barcode (unit: dots).
enlarge = Enlarge the DataMatrix Code 1~8 times (horizontally and vertically).
rotationR = rotation of barcode (0R ~ 3R)
0R) 0° 1R) 90° 2R) 180° 3R) 270°
length = data length (unit: bytes).
Yx,y,name – Graphics file
y = Vert. Pos. of left-upper of graphics (unit: dots)
A graphic in printer named
“Graphic1”, command Y20, 40;
Graphic1 ↵ will put this graphic into
label at position (20, 40).
Page 62

57
Zx,y,a,b,c,d,e,n<CR>data – Print Aztec Bar Code
Syntax
Zx,y,a,b,c,d,e,n<CR>data
x = Hori. of left-bottom pos. of barcode (unit: dots).
data = bar code data
Description
Print a 2D Aztec
y = Vert. of left-bottom pos. of barcode (unit: dots).
a = rotation of barcode (0 ~ 3)
0) 0° 1) 90° 2) 180° 3) 270°
b = Magnification factor ( 1 to 10 )
1 on 150 dpi printers
2 on 200 dpi printers
3 on 300 dpi printers
6 on 600 dpi printers
c = extended channel interpretation code indicator
Y = if data contains ECICs
N = if data does not contains ECICs
Parameter
d = error control and symbol size/type indicator. If the input data is not numeric, the
beginning will be 000.
0 = default error correction level
01 to 99 = error correction percentage ( minimum )
101 to 104 = 1 to 4 – layer compact symbol
201 to 232 = 1 to 32 – layer full - range symbol
300 = a simple Aztec “Rune”
e = menu symbol indicator Accepted Values
Y = if this symbol is to be a menu ( bar code reader initialization ) symbol
N = if it is not a menu symbol
n = data length : maximum = 2000
Example Please refer to Appendix1 to see all 1D and 2D barcodes sample and commands.
Page 63
58
LAN Set Commands
Syntax
^NA,function[,p1]
Function = ENABLE: without “p1”, it wills response SMTP enables or disables status.
Ex. ^NA,TO,godex@godexintl.com
Description
Refer to above Parameter explanation.
PC to Printer
^NA,USER
Printer to PC
godex
PC to Printer
^NA,SUBJECT
Printer to PC
errormessage
Syntax
^NL,TrapIP,Community
Without “TrapIP,Community”, it will response SNMP setting
With “TrapIP,Community” = setup SNMP
Description
Setup SNMP or check SNMP setting
Syntax
^NL,ENABLE,n
Parameter
= 0 disable ; = 1 enable this function
Without “n”, it will response the status of SNMP (enable or disable)
With “n” = setup SNMP enable or disable
Example
None
^NA,function[,p1] – setup SMTP
USER : without “p1”, it will response USER string ( login SMTP server account )
Ex. ^NA,USER,godex
PASS : without “p1”, it will response PASSWORD
IP : without “p1”, it will response SMTP IP address
Parameter
SUBJECT : without “p1”, it will response e-mail subject
FROM : without “p1”, it will response e-mail sender address
with “p1” = setup e-mail sender address
Ex. ^NA,FROM,godex@godexintl.com
TO : without “p1”, it will response e-mail receiver address
With “p1”. P1 = 0 disable SMTP , = 1 enable SMTP
with “p1” = setup USER string
with “p1” = setup PASSWORD 4 digits ( login SMTP server password )
Ex. ^NA,PASS,0000
with “p1” = setup SMTP IP address
Ex. ^NA,IP,192.168.0.1
with “p1” = setup e-mail subject
Ex. ^NA,SUBJECT,error message
with “p1” = setup e-mail receiver address
Procedure :
Example
^NL[,TrapIP,Community] – setup SNMP
Parameter
Procedure :
Example
PC to Printer ^NL
Printer to PC
192.168.0.1,public
^NL,ENABLE,n –enable or disable SNMP
Description
Page 64
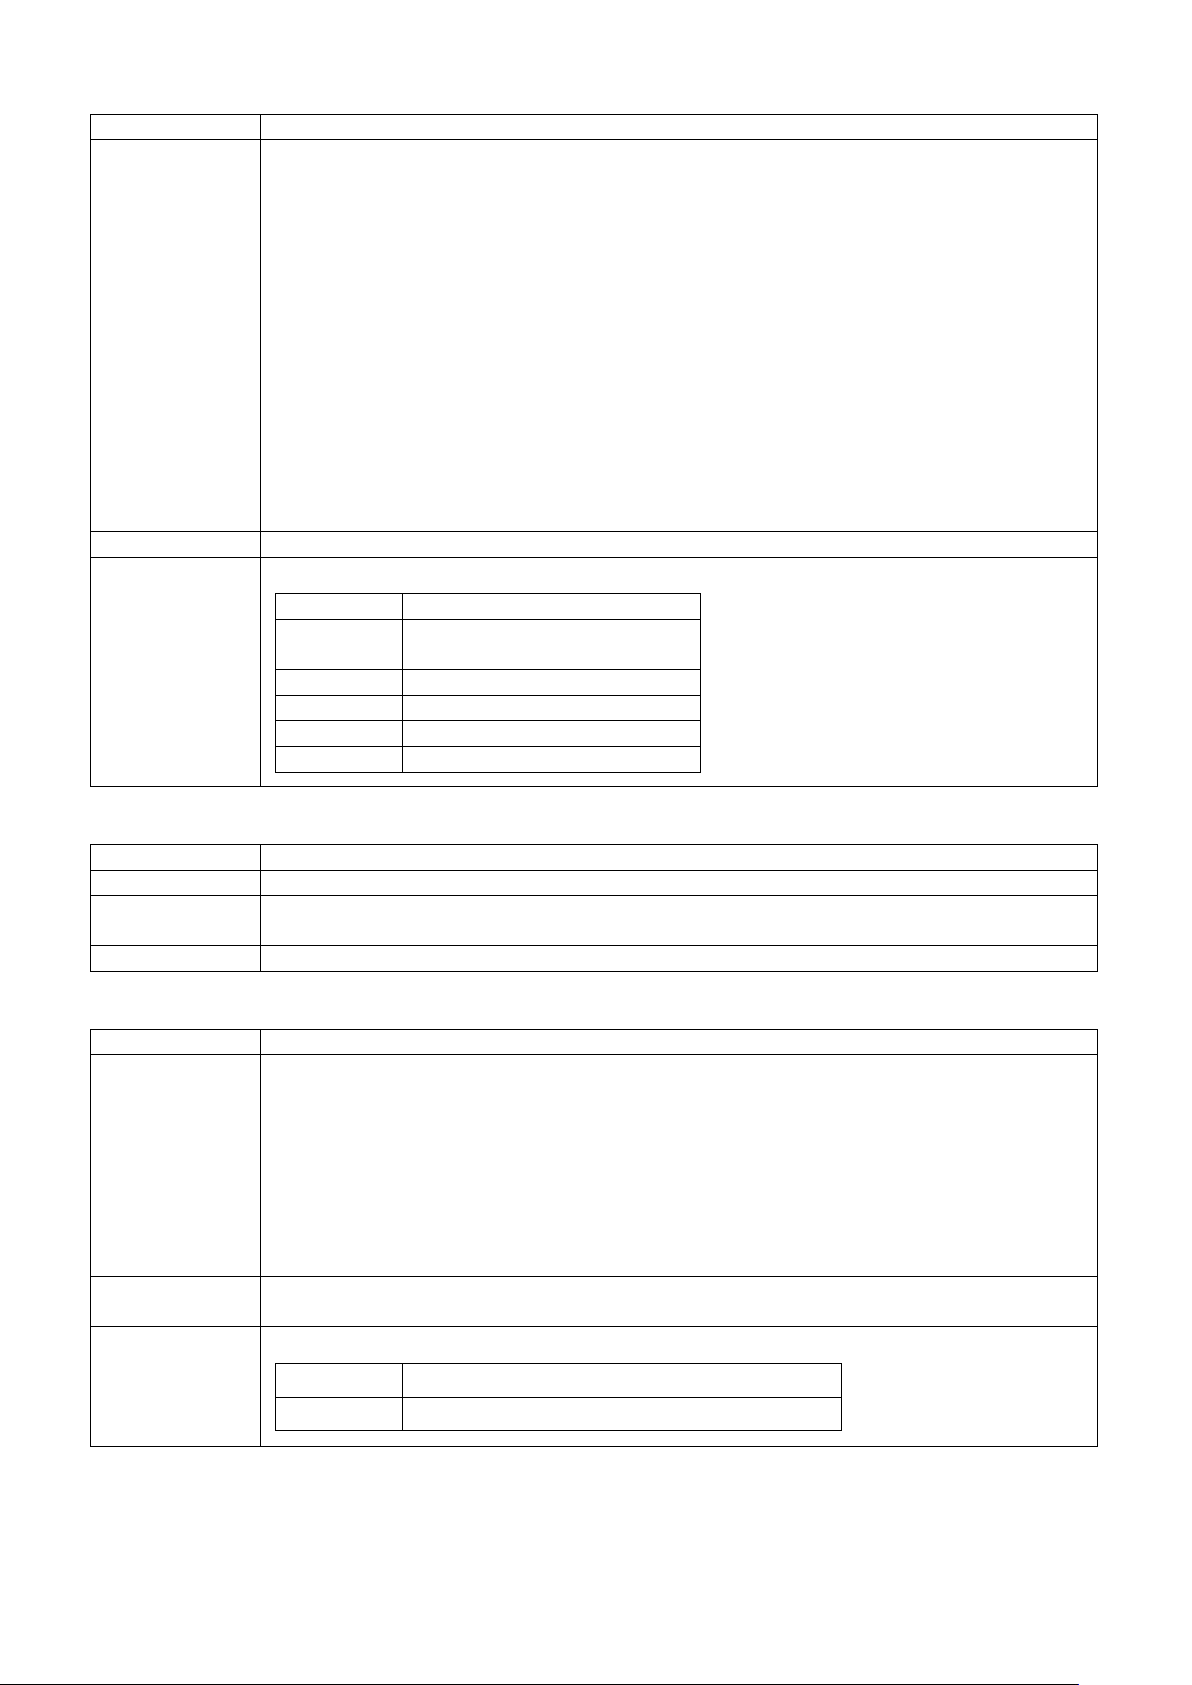
59
^NR[,p[,ei[,sw]]] –setup LAN response
Syntax
^NR[,p[,ei[,sw]]]
p : 0 = adjust SMTP response setting ; 1 = adjust SNMP response setting.
If doesn’t input parameter or input inappropriate parameter, it will only response
current status.
Description
Refer to above Parameter explanation
PC to Printer
^NR
SMTP : 1,1,1,1,1,1,1,1,1,1,0
SNMP : 1,1,1,1,1,1,1,1,1,1,1
PC to Printer
^NR,0
Printer to PC
SMTP : 1,1,1,1,1,1,1,1,1,1,0
PC to Printer
^NR,0,11
Printer to PC
0
Syntax
^NMACADDR[,addr]
Parameter
addr = MAC address
Without “addr”, it will response MAC address
With “addr” = setup MAC address
Example
^NMACADDR,001D9A000C16
Syntax
^NSa,b,c,d,e,f,g,h,i
a: D(DHCP) or P(PERMANENT)
i: port number
Without parameter, it will response current network setting
With parameter = setup network
ei : 0 – 11
0 = ERROR01 : PAPER_OUT_ID
1 = ERROR02:PAPER_JAM_ID
2 = ERROR03:RIBBON_OUT_ID
3 = ERROR04:DOOR_OPEN_ID
4 = ERROR05:STRIPPER_ERROR_ID
Parameter
5 = ERROR06:MEMORY_FULL_ID
6 = ERROR07:FILENAME_NO_FOUND_ID
7 = ERROR08:FILENAME_REPEAT_ID
8 = ERROR09:SYNTAX_ERROR_ID
9 = ERROR10:DATA_LENGTH_ERROR_ID
sw : 0 = disable ; 1 = enable “ei” response function
Procedure :
Printer to PC
Example
^NMACADDR[,addr] –setup or get MAC address information
Description
^NS[a,b,c,d,e,f,g,h,I] –Set and request for NET connection parameters
b: IP adress
c: subnet mask adress
d: gateway
Parameter
e: reserved
f: reserved
g: reserved
h: reserved
Description
Procedure :
Example
PC to Printer ^NS
Printer to PC D,192.168.0.1,255.255.255.0,192.168.0.1,,,,,9100
Page 65

60
Appendix
Barcode Type
Barcode Sample
Sample Commands
Code 39
^L
E
Code 39
^L
E
EAN 8
^L
E
EAN 8 - Add
^L
E
EAN 8 - Add
^L
E
I. Barcode Samples
Dy2-me-dd
Th:m:s
R8,13,631,384,8,8
BA,30,57,2,6,80,0,1,22-.$ /+%40
BA,30,200,2,5,80,0,0,22-.$ /+%40
AB,400,25,1,1,0,0,Human Readable
AB,400,170,1,1,0,0,No Human Readable
AD,36,300,1,1,0,0I,Code39
with check
digit
ON 2
Dy2-me-dd
Th:m:s
R8,13,631,384,8,8
BA2,30,57,2,6,80,0,1,22-.$ /+%40
BA2,30,200,2,5,80,0,0,22-.$ /+%40
AB,400,25,1,1,0,0,Human Readable
AB,400,170,1,1,0,0,No Human Readable
AD,36,300,1,1,0,0I,Code39 with check
Dy2-me-dd
Th:m:s
R8,13,631,384,8,8
BB,30,57,2,5,80,0,1,22408785
BB,30,200,2,5,80,0,0,22408785
AB,400,25,1,1,0,0,Human Readable
AB,400,170,1,1,0,0,No Human Readable
AD,36,300,1,1,0,0I,EAN8
Dy2-me-dd
Th:m:s
R8,13,631,384,8,8
BC,30,57,2,5,80,0,1,2240878412
BC,30,200,2,5,80,0,0,2240878412
AB,400,25,1,1,0,0,Human Readable
AB,400,170,1,1,0,0,No Human Readable
AD,36,300,1,1,0,0I,EAN8 Add ON 2
ON 5
Dy2-me-dd
Th:m:s
R8,13,631,384,8,8
BD,30,57,2,5,80,0,1,2240878512345
BD,30,200,2,5,80,0,0,2240878512345
AB,400,25,1,1,0,0,Human Readable
AB,400,170,1,1,0,0,No Human Readable
AD,36,300,1,1,0,0I,EAN8 Add ON 5
Page 66
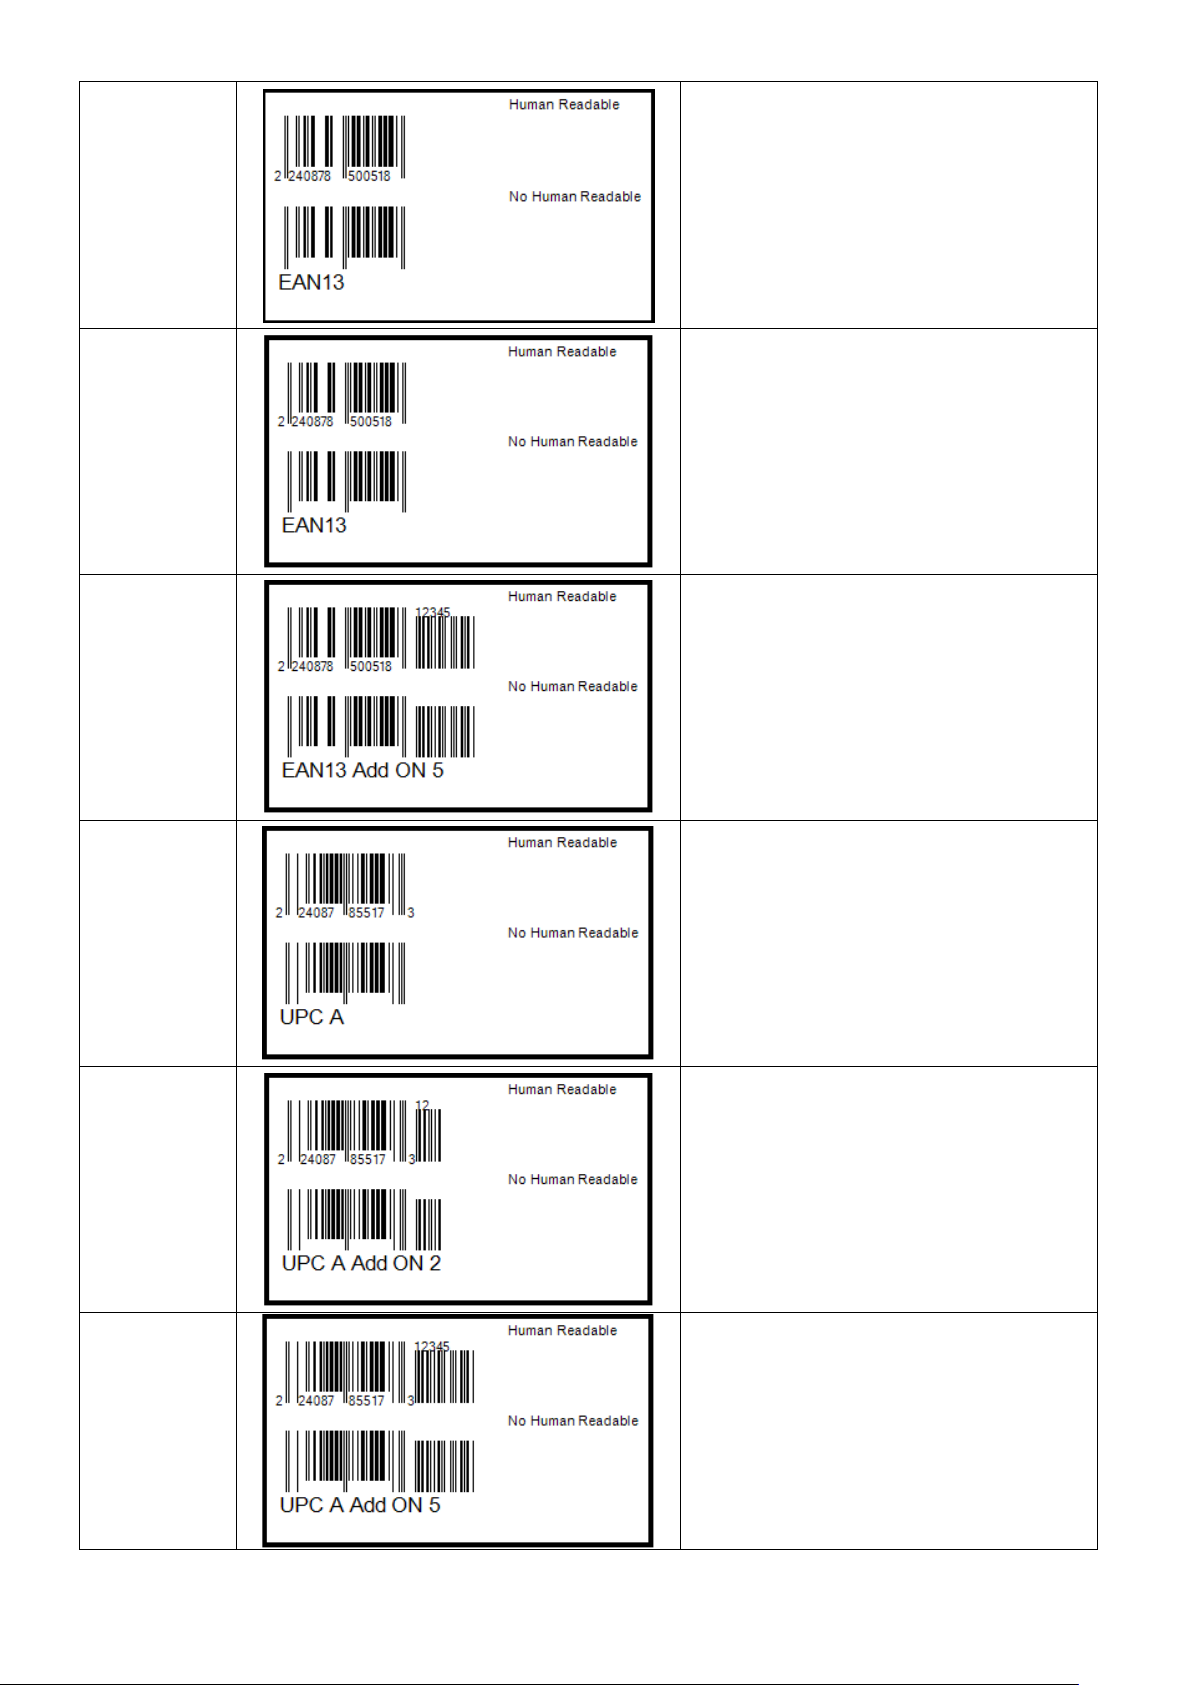
61
EAN 13
^L
Dy2-me-dd
E
EAN 13 -
^L
E
EAN 13 -
^L
E
UPC A
^L
E
UPC A - Add
^L
E
UPC A - Add
^L
Th:m:s
R8,13,631,384,8,8
BE,30,57,2,5,80,0,1,2240878500518
BE,30,200,2,5,80,0,0,2240878500518
AB,400,25,1,1,0,0 ,Human Readable
AB,400,170,1,1,0,0,No Human Readable
AD,36,300,1,1,0,0I,EAN13
Add ON 2
Add ON 5
Dy2-me-dd
Th:m:s
R8,13,631,384,8,8
BF,30,57,2,5,80,0,1,224087850051812
BF,30,200,2,5,80,0,0,224087850051812
AB,400,25,1,1,0,0,Human Readable
AB,400,170,1,1,0,0,No Human Readable
AD,36,300,1,1,0,0I,EAN13 Add ON 2
Dy2-me-dd
Th:m:s
R8,13,631,384,8,8
BG,30,57,2,5,80,0,1,224087850051812345
BG,30,200,2,5,80,0,0,224087850051812345
AB,400,25,1,1,0,0,Human Readable
AB,400,170,1,1,0,0,No Human Readable
AD,36,300,1,1,0,0I,EAN13 Add ON 5
Dy2-me-dd
Th:m:s
R8,13,631,384,8,8
BH,30,57,2,5,80,0,1,224087855173
BH,30,200,2,5,80,0,0,224087855173
AB,400,25,1,1,0,0,Human Readable
AB,400,170,1,1,0,0,No Human Readable
AD,36,300,1,1,0,0I,UPC A
ON 2
ON 5
Dy2-me-dd
Th:m:s
R8,13,631,384,8,8
BI,30,57,2,5,80,0,1,22408785517312
BI,30,200,2,5,80,0,0,22408785517312
AB,400,25,1,1,0,0,Human Readable
AB,400,170,1,1,0,0,No Human Readable
AD,36,300,1,1,0,0I,UPC A Add ON 2
Dy2-me-dd
Th:m:s
R8,13,631,384,8,8
BJ,30,57,2,5,80,0,1,22408785517312345
BJ,30,200,2,5,80,0,0,22408785517312345
AB,400,25,1,1,0,0,Human Readable
AB,400,170,1,1,0,0,No Human Readable
AD,36,300,1,1,0,0I,UPC A Add ON 5
E
Page 67
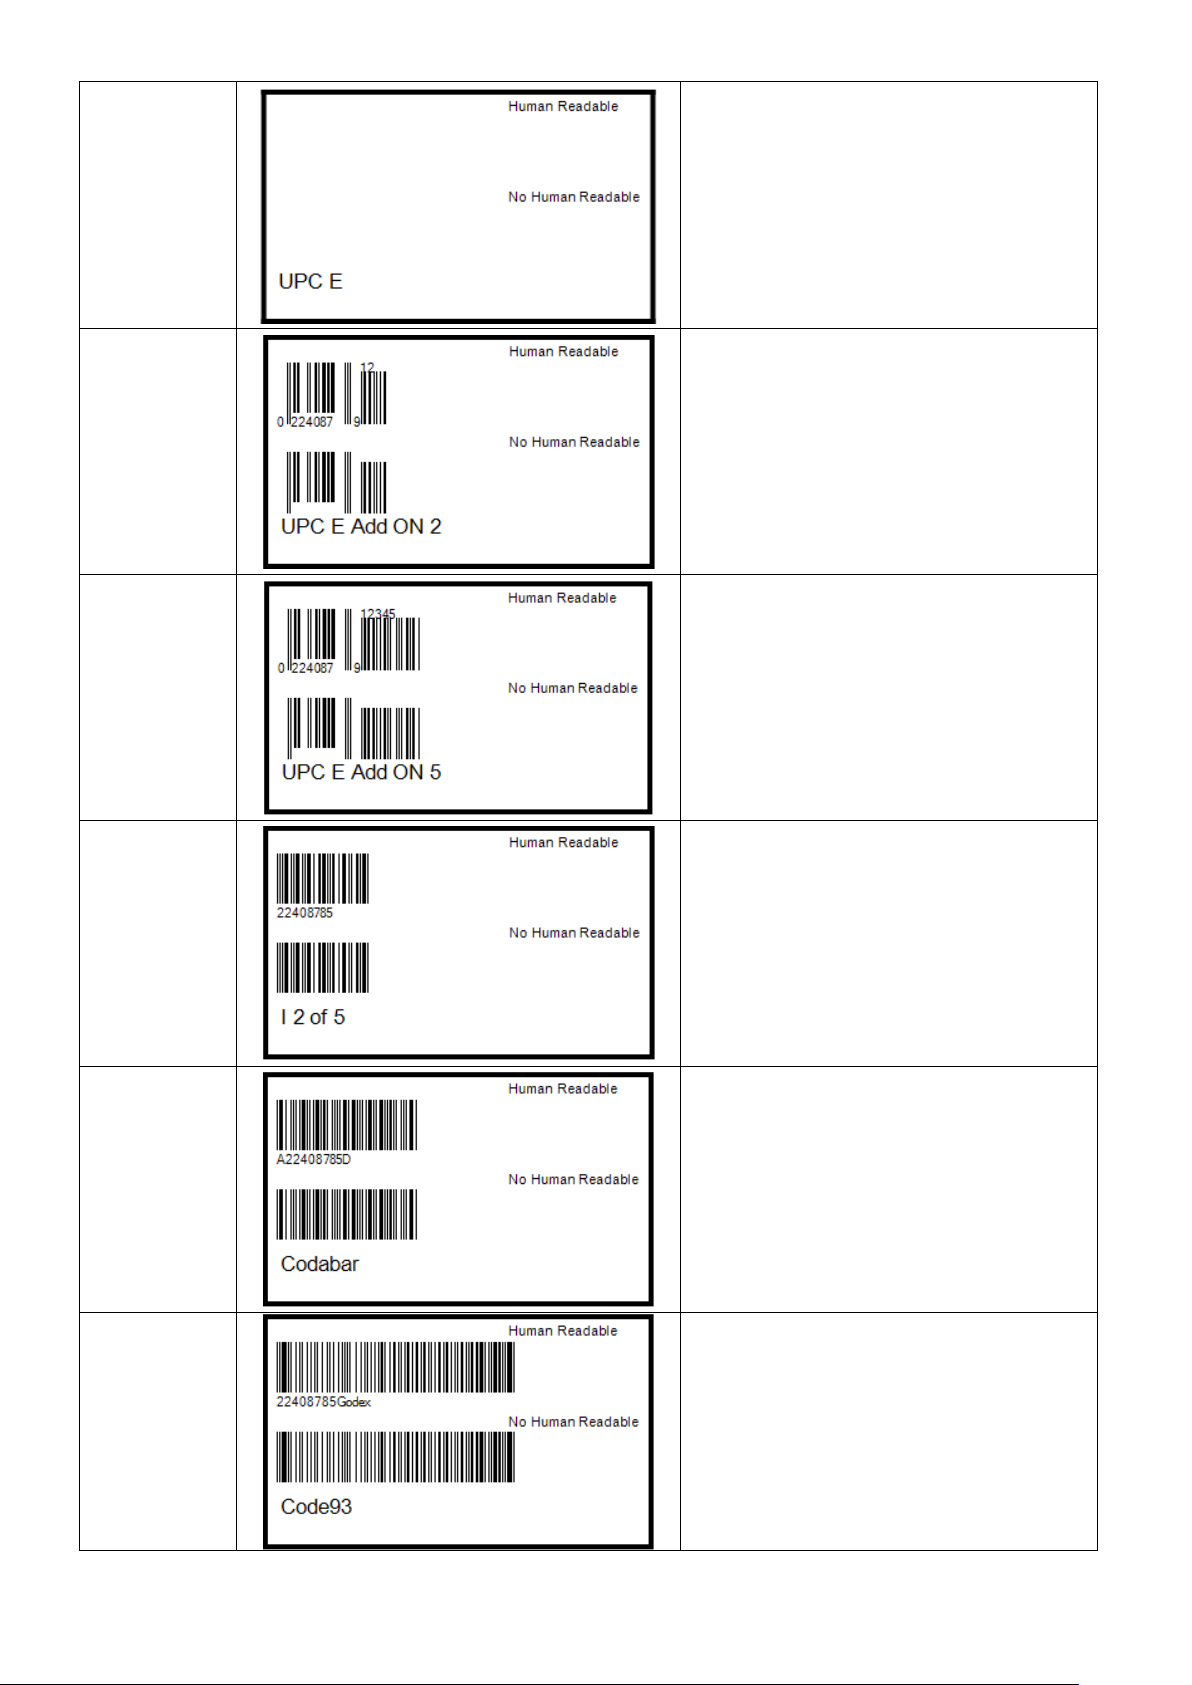
62
UPC E
^L
Dy2-me-dd
E
UPC E - Add
^L
E
UPC E - Add
^L
E
I 2 of 5
^L
E
Codabar
^L
E
Code 93
^L
Th:m:s
R8,13,631,384,8,8
BK,30,57,2,5,80,0,1,2240879
BK,30,200,2,5,80,0,0,2240879
AB,400,25,1,1,0,0,Human Readable
AB,400,170,1,1,0,0,No Human Readable
AD,36,300,1,1,0,0I,UPC E
ON 2
ON 5
Dy2-me-dd
Th:m:s
R8,13,631,384,8,8
BL,30,57,2,5,80,0,1,224087912
BL,30,200,2,5,80,0,0,224087912
AB,400,25,1,1,0,0,Human Readable
AB,400,170,1,1,0,0,No Human Readable
AD,36,300,1,1,0,0I,UPC E Add ON 2
Dy2-me-dd
Th:m:s
R8,13,631,384,8,8
BM,30,57,2,5,80,0,1,224087912345
BM,30,200,2,5,80,0,0,224087912345
AB,400,25,1,1,0,0,Human Readable
AB,400,170,1,1,0,0,No Human Readable
AD,36,300,1,1,0,0I,UPC E Add ON 5
Dy2-me-dd
Th:m:s
R8,13,631,384,8,8
BN,30,57,2,5,80,0,1,22408785
BN,30,200,2,5,80,0,0,22408785
AB,400,25,1,1,0,0,Human Readable
AB,400,170,1,1,0,0,No Human Readable
AD,36,300,1,1,0,0I,I 2 of 5
Dy2-me-dd
Th:m:s
R8,13,631,384,8,8
BO,30,57,2,5,80,0,1,A22408785D
BO,30,200,2,5,80,0,0,A22408785D
AB,400,25,1,1,0,0,Human Readable
AB,400,170,1,1,0,0,No Human Readable
AD,36,300,1,1,0,0I,Codabar
Dy2-me-dd
Th:m:s
R8,13,631,384,8,8
BP,30,57,2,5,80,0,1,22408785Godex
BP,30,200,2,5,80,0,0,22408785Godex
AB,400,25,1,1,0,0,Human Readable
AB,400,170,1,1,0,0,No Human Readable
AD,36,300,1,1,0,0I,Code93
E
Page 68

63
Code 128
(auto subset
^L
E
Code 128
^L
E
UCC 128
^L
E
Post NET
^L
E
^L
E
A/B/C)
Dy2-me-dd
Th:m:s
R8,13,631,384,8,8
BQ,30,57,2,5,80,0,1,22408785Godex
BQ,30,200,2,5,80,0,0,22408785Godex
AB,400,25,1,1,0,0,Human Readable
AB,400,170,1,1,0,0,No Human Readable
AD,36,300,1,1,0,0I,Code128 auto
(subset
A/B/C)
Dy2-me-dd
Th:m:s
R8,13,631,384,8,8
BQ2,30,57,2,5,80,0,1,A22408785GODEX
BQ2,30,200,2,5,80,0,0,A22408785GODEX
AB,400,25,1,1,0,0,Human Readable
AB,400,170,1,1,0,0,No Human Readable
AD,36,300,1,1,0,0I,Code128 subset A
Dy2-me-dd
Th:m:s
R8,13,631,384,8,8
BR,30,57,2,5,80,0,1,0022408785123456789
BR,30,210,2,5,80,0,0,002240878512345678
9
AB,400,25,1,1,0,0,Human Readable
AB,400,180,1,1,0,0,No Human Readable
AD,36,300,1,1,0,0I,UCC128
Dy2-me-dd
Th:m:s
R8,13,631,384,8,8
BS,30,100,2,5,80,0,1,22408
BS,30,230,2,5,80,0,0,22408
AB,400,25,1,1,0,0,Human Readable
AB,400,170,1,1,0,0,No Human Readable
AD,36,300,1,1,0,0I,Post NET 5
ITF 14
Dy2-me-dd
Th:m:s
R8,13,631,384,8,8
BT,30,57,2,5,80,0,1,012345011238
BT,30,200,2,5,80,0,0,01234011238
AB,400,25,1,1,0,0,Human Readable
AB,400,170,1,1,0,0,No Human Readable
AD,36,300,1,1,0,0I,ITF14
Page 69

64
EAN 128
^L
Dy2-me-dd
E
RPS 128
^L
E
China Postal
^L
E
HIBC
^L
E
Plessey
^L
E
Th:m:s
R8,13,631,384,8,8
BU,30,57,2,5,80,0,2,0010084423744920094
1
BU,30,200,2,5,80,0,0,001008442374492009
41
AB,400,25,1,1,0,0,Human Readable
AB,400,170,1,1,0,0,No Human Readable
AD,36,300,1,1,0,0I,EAN128
Dy2-me-dd
Th:m:s
R8,13,631,384,8,8
BV,30,57,2,5,80,0,1,2240878522408785123
45
BV,30,200,2,5,80,0,0,224087852240878512
345
AB,400,25,1,1,0,0,Human Readable
AB,400,170,1,1,0,0,No Human Readable
AD,36,300,1,1,0,0I,RPS128
Code
Dy2-me-dd
Th:m:s
R8,13,631,384,8,8
BW,30,57,2,5,80,0,1,22408785
BW,30,200,2,5,80,0,0,22408785
AB,400,25,1,1,0,0,Human Readable
AB,400,170,1,1,0,0,No Human Readable
AD,36,300,1,1,0,0I,China Postal Code
Dy2-me-dd
Th:m:s
R8,13,631,384,8,8
BX,30,57,2,6,80,0,1,22-.$ /+%40
BX,30,200,2,6,80,0,0,22-.$ /+%40
AB,400,25,1,1,0,0,Human Readable
AB,400,170,1,1,0,0,No Human Readable
AD,36,300,1,1,0,0I,HIBC
Dy2-me-dd
Th:m:s
R8,13,631,384,8,8
BY,30,57,2,5,80,0,1,22408785
BY,30,200,2,5,80,0,0,22408785
AB,400,25,1,1,0,0,Human Readable
AB,400,170,1,1,0,0,No Human Readable
AD,36,300,1,1,0,0I,Plessey MSI2 1 mod10
Page 70

65
I 2 of 5 with
Shipping
^L
E
UCC/EAN-
^L
E
UCC/EAN-
^L
E
Telepen
^L
E
Bearer Bars
Dy2-me-dd
Th:m:s
R8,13,631,384,8,8
BZ,30,57,2,5,80,0,1,2240878512345
BZ,30,200,2,5,80,0,0,2240878512345
AB,400,25,1,1,0,0,Human Readable
AB,400,170,1,1,0,0,No Human Readable
AC,36,300,1,1,0,0I,I 2 of 5 with Shipping
Bearer Bars
128 K-MART
128
RANDOM
Dy2-me-dd
Th:m:s
R8,13,631,384,8,8
B1,30,57,2,5,80,0,1,224087858901234567
B1,30,200,2,5,80,0,0,224087858901234567
AB,400,25,1,1,0,0,Human Readable
AB,400,170,1,1,0,0,No Human Readable
AD,36,300,1,1,0,0I,UCC/EAN 128 K-MART
Dy2-me-dd
Th:m:s
R8,13,631,790,8,8
B2,500,60,2,5,80,1,1,2240878522408785678224087852240878
B2,250,60,2,5,80,1,0,2240878522408785678224087852240878
AB,550,400,1,1,0,1,Human Readable
AB,300,400,1,1,0,1,No Human Readable
AD,36,720,1,1,0,0I,UCC/EAN 128 RANDAN
Dy2-me-dd
Th:m:s
R8,13,631,384,8,8
B3,30,57,2,5,80,0,1,22408785
B3,30,200,2,5,80,0,0,22408785
AB,400,25,1,1,0,0,Human Readable
AB,400,170,1,1,0,0,No Human Readable
AD,36,300,1,1,0,0I,Telepen
Page 71

66
FIM ^L
Dy2-me-dd
E
GS1 Databar
^L
E
Maxicode
^L
PDF417
^L
QR Code
^L
E
Th:m:s
R8,13,631,384,8,8
B4,110,80,1,1,50,0,1,A
B4,350,80,1,1,50,0,1,B
AB,130,220,1,1,0,0,char A
AB,370,220,1,1,0,0,char B
AD,36,300,1,1,0,0I,FIM
Dy2-me-dd
Th:m:s
R8,13,631,384,8,8
B55,30,57,2,5,80,0,1,1234567890000
B55,30,200,2,5,80,0,0,1234567890000
AB,400,25,1,1,0,0,Human Readable
AB,400,170,1,1,0,0,No Human Readable
AD,36,300,1,1,0,0I,GS1 Databar
Dy2-me-dd
Th:m:s
R8,13,631,384,8,8
M200,50,1,1,2,840,068107317,666,0,12345
6
AD,36,300,1,1,0,0I,MaxiCode
E
Dy2-me-dd
Th:m:s
R8,13,631,384,8,8
PC50,100,3,10,3,3,3,19
&*01234567
012&*
AD,36,300,1,1,0,0I,PDF 417
E
Dy2-me-dd
Th:m:s
R8,13,631,384,8,8
W100,60,1,1,M,8,7,10,0
0123456789
W400,60,1,2,M,8,7,10,0
0123456789
AB,130,230,1,1,0,0,mode 1
AB,430,230,1,1,0,0,mode 2
AD,36,300,1,1,0,0I,QR Code
Page 72

67
Micro QR
Code
^L
DataMatrix
^L
E
DataMatrix
^L
E
(Square)
Dy2-me-dd
Th:m:s
R8,13,631,384,8,8
W100,80,1,3,M,0,7,10,0
0123456789
AD,36,300,1,1,0,0I,Micro QR Code
E
Dy2-me-dd
Th:m:s
R8,13,631,384,8,8
XRB250,100,7,0,50
01234567890123456789012345678901234567890123456789
AD,36,300,1,1,0,0I,DataMatrix Code Square
(Rectangular
)
Dy2-me-dd
Th:m:s
R8,13,631,384,8,8
XRB180,100,7,0R,50
01234567890123456789012345678901234567890123456789
AD,36,300,1,1,0,0I,DataMatrix Code Rectangle
Page 73

68
II. Command Examples
Control command
^L
^L is precedent for the beginning of label
Label format
Label format command must be
E
E is ending of label format
Program command
Description
^Q25,3
Setting up the height 25mm, gap 3mm
^W32
Setting up the width 32mm
^H10
Setting up the darkness 10
^S6
Setting up the speed 6 inches per second
^P1
Setting up the number of printing 1
^E10
Setting up the paper advance length to 10 mm from the print head after
printing. The label will move back 10 mm when the next label is printed.
^C1
Setting up the number of copies (start value is 1)
^O0
Setting up the Label Dispenser function to be turned OFF
^R0
Setting up the left margin 0 dot
^D0
Turning the cutting function off
^L
The label content of start symbol
BB,42,39,2,5,100,0,1,12345
67
Select EAN8 label, data content is 1234567
E
Label content of stop symbol
How to construct a label using EZ-Series command:
To create a label, it must be an order command combination.
And
Setup up command
format
command
** Control or setup commands to be used in the label command area will be ineffective.
Example:
The following example is printing a label with EAN8. The program is a text file. No matter what language
you use in programming, simply send out the text file of the contents and you can control the printing
with EZ-Series printers.
Save the following contents (command file named: EX1.TXT).
included between the ^L and E
command
The label can be created by the following MS-DOS command:
C:\>COPY EX1.TXT PRN↵
To send the label to serial port by the following MS-DOS command:
C:\>MODE COM1 96,N,8,1
C:\>TYPE EX1.TXT >> COM1
Page 74
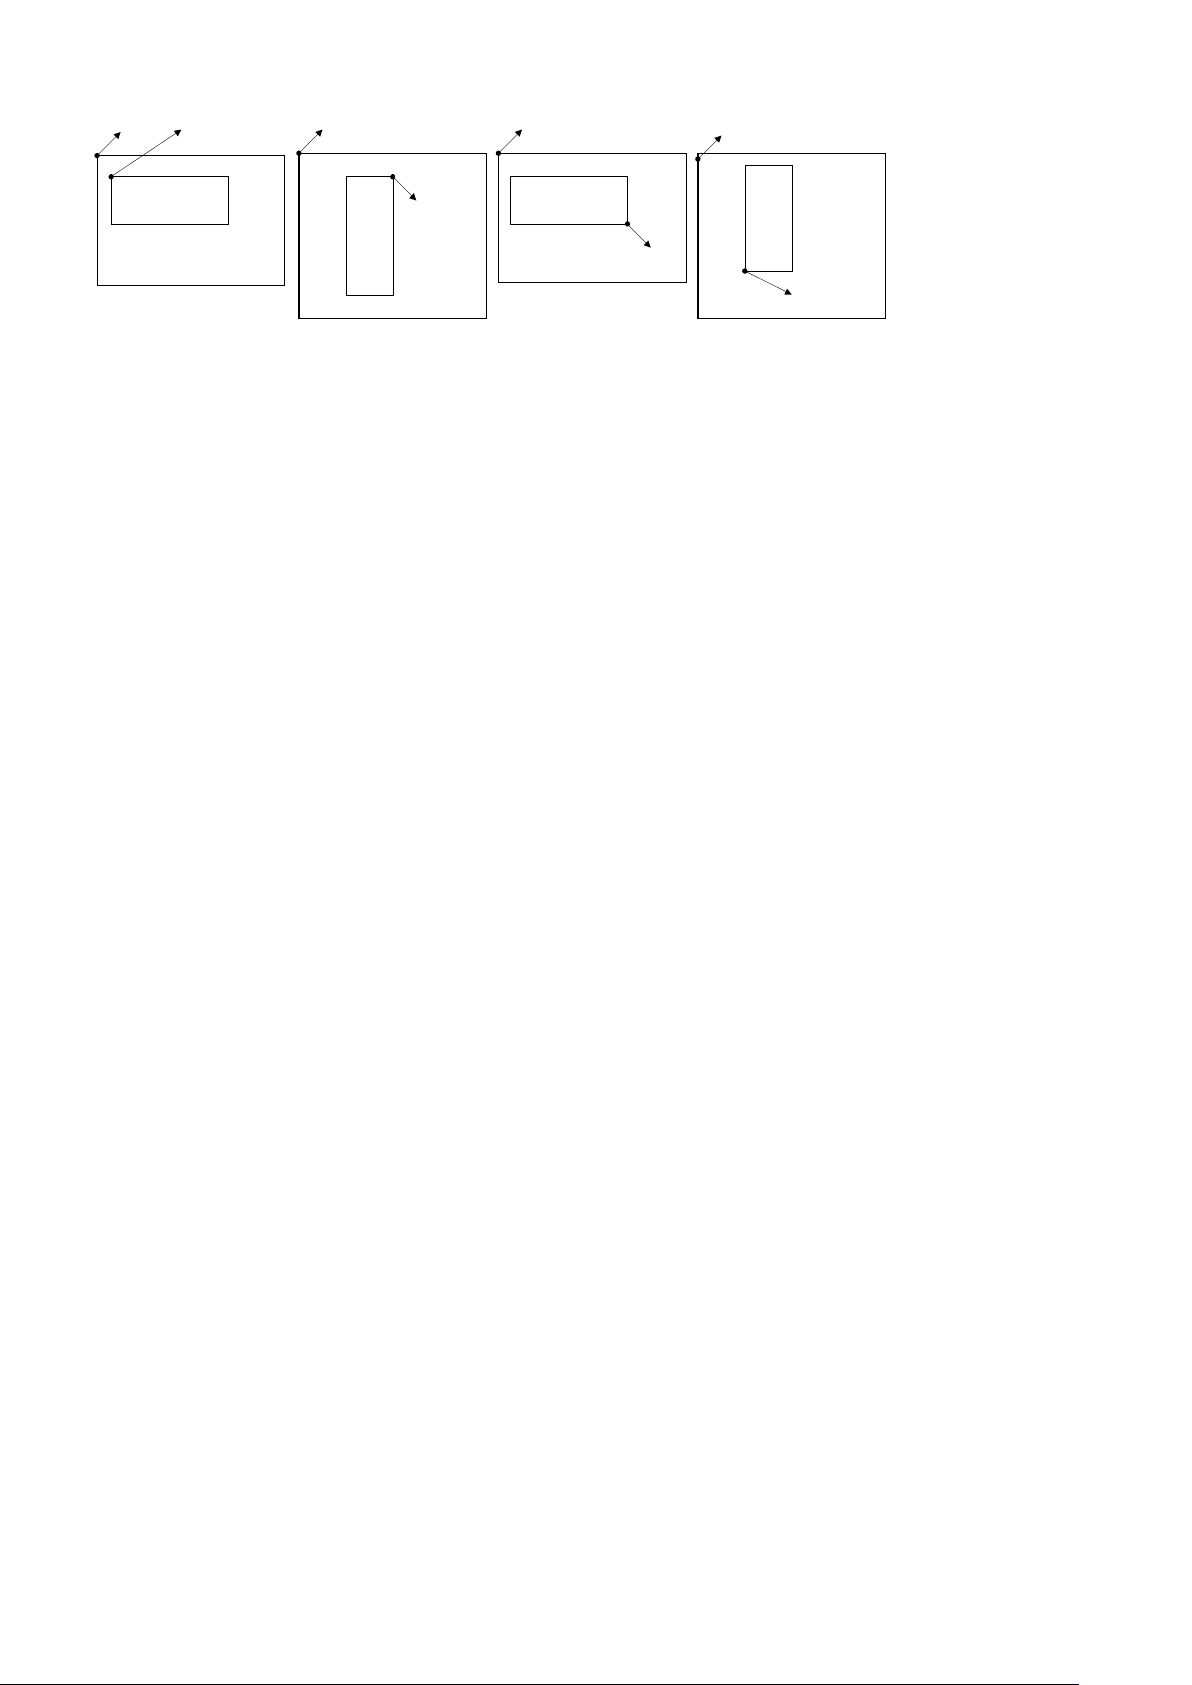
69
Setting the x and y values:
abcd
(x,y)
(0,0)
abcd
(x,y)
(0,0)
(0,0)
(0,0)
abcd
(x,y)
abcd
(x,y)
0?
90?
180?
270?
Page 75

70
1. Text
Example
Result
Rotate printing
Result
^Q50,0,2
PRINTER
^Q50,0,0
^W50
^S6
^H10
^L
AC,100,30,1,1,1,0,ROTATION 0
AC,
AC,260,150,1,1,1,2,R
180
AC,290,200,1,1,1,3,ROTATION
270
E
ROTATION 0
ROTATIO N 90
ROTATION 180
ROTATIO N 27 0
^W50
AUG/27/00
^S6
08:39:36
^H10
^R10
~D8,27,00,8,39,36
^L AC,10,10,1,1,1,0,PRINTER
AC,10,50,1,1,1,0,^D
AC,10,100,1,1,1,0,^T
E
Adjusting the character
spacing
Result
Asia Font
Result
^Q30,0,0
P R I N T E R
^L
^W50
^S6
^H10
^L
PRINTER
AC,10,10,1,1,10,0,PRINTER
AC,10,100,1,1,1,0,PRINTER
E
Example
Result
Rotation of barcode
Result
^H10
^H10
^S6
^W25
^Q30,0,2
^L
BE,100,20,2,4,80,1,1,123456789
012
E
Change the date formatting
Result
Dy4-me-dd
2000-MAY-29
Dy4/mn/dd
2000/05/29
Dmn|dd|y4
05|29|2000
Dy4
2000
Dme
MAY
Ddd
09
Dy4-me
2000-MAY
Dme-dd
MAY-29
38,0,1,1,1,1,ROTATION 90
AZ,100,12,1,1,0,4,中文
AZ,223,65,1,1,0,5,中文
AZ,60,100,1,1,0,6,中文
AZ,90,144,1,1,0,7,中文
E
OTATION
The data output is a default setting and user can change it with ~D command (refer to page40).
The time output format is a default setting and user can change it with T command.
2. Barcode
^S6
^Q30,0,2
^W60
^L
BB,20,100,3,3,100,0,1,1234567
E
3. RTC Setting
Page 76
71
4. Line printing
Example
Description
Result
^Q50,3
E
; Darkness= 7
Example
Description
Result
^H10
; Darkness = 10
lrw = 8 dots, ubw = 8 dots
Example
Result
^Q50,0,3
E
Example
Result
^Q50,0,0
E
^W100
^E32
^H7
^P1
^S6
^L
Lo,212,45,311,53
Lo,244,11,252,128
Le,34,43,149,51
Le,72,8,80,121
5. Rectangle printing
^S6
^Q50,2
^W70
^L
R20,20,120,120,8,8
E
6. PDF417
; Speed = 6 inch/second
; Label height = 50mm, gap = 3
mm
; Label width = 100mm
; Speed = 6 inch/second
; Label height = 50mm, gap = 2
mm
; Label width= 70mm
; (x,y) = (20,20),
(x1,y1) = (120,120)
^W70
^S6
^H10
^L
P30,20,3,3,3,3,1,100
12345678
12345678
12345678
12345678
12345678
12345678
12345678
12345678
12345678
12345678
7. Maxicode
^W70
^S6
^H10
^L
M30,20,1,1,2,840,068107317,8,0,123456
Page 77
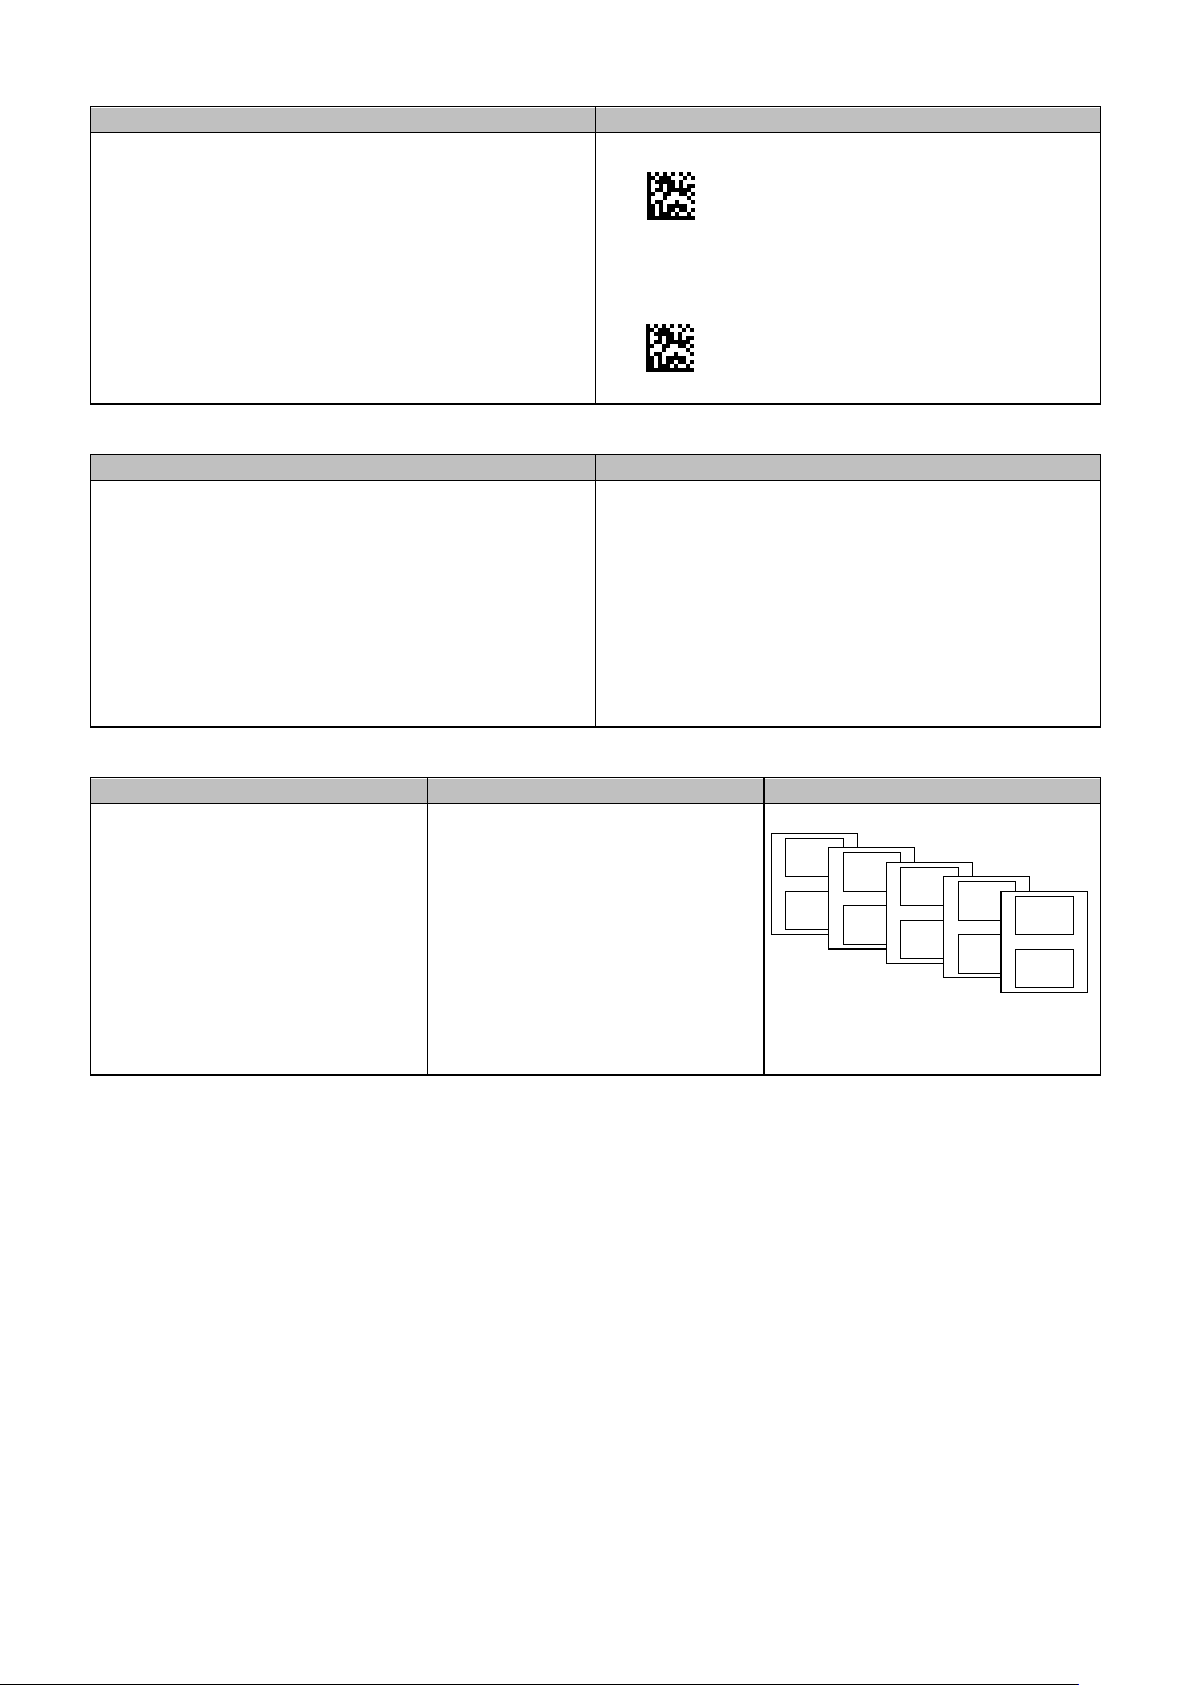
72
8. DataMatrix Code
Example
Result
^Q60,3
E
Example
Result
^Q50,2
; Label height= 50mm, gap= 2mm
^W50
; Label width= 50mm
^S6
; Speed =6 inch/second
^O1
; Label Dispenser enable
^E8
; Set stop position to 8 mm
^P1
; Printing one label
^H10
; Darkness = 10
^L
; Label format begin sign
AD,20,20,1,1,3,0, Label Dispenser Function
E
; Label format end and begin print
Example
Description
Result
^Q20,0,0
E
;plain paper length:20mm
a001
a002
a003
a004
a005
a006
a007
a008
a009
a010
^W80
^H19
^P1
^S2
^L
XRB314,134,8,0,10
0123456789
XRB312,438,8,0R,10
0123456789
9. Label Dispenser setting
10. Cutter setting
^H5
^S2
^P10
^D2
^C1
^L
R10,10,120,90,2,2
C0,001,+1,A1
AC,20,30,1,1,1,0,a^C0
;feed label length :0mm
;print 10 labels
;2 labels per cut
Page 78

73
11. Serial number
TEXT
Example 1
Result
Example 2
Result
^Q10,0,0
0018
~P10
0038
^W30
0016
0036
^S6
0014
0034
^H10
0012
If you want to continue printing
example.
0032
^P10
0010
0030
^L
0008
0028
C0,0000,+2,A1
0006
0026
AB,10,10,1,1,2,0,^C0
0004
0024
E
0002
0022
0000
0020
Example 3
Result
Example 4
Result
^Q10,0,0
0006
^Q10,0,0
abc0014def
^W30
0006
^W30
abc0012def
^S6
0004
^S6
abc0010def
^H10
0004
^H10
abc0008def
^P4
0002
^P8
abc0006def
^C2
0002
^L
abc0004def
^L
0000
C0,0000,+2,A1
abc0002def
C0,0000,+2,A1
0000
AB,10,10,1,1,2,0,abc^C0def
abc0000def
AB,10,10,1,1,2,0,^C0
E E
Barcode
Barcode with serial number
Result
^H10
10 more serial numbers that is
starting from 0018, enter the
command “~P10”. With this
command you do not have to
re-enter all the command in
^S6
^Q20,0,2
^W50
^P10
^L
C0,000,-1,A3
BE,20,100,3,3,100,0,1,111111^C0111
E
Page 79

74
Example
Description
^Q20,2
^W50
^R20
; Left margin = 20 dots
~G
G(AAAAAAAAAAAAAAAAAAAAAAAAAAAAAAAAAAAAA
AAA
For this example, ASCII “(“character is 40
Result
E
12. Graphic driver format
AAA
G(AAAAAAAAAAAAAAAAAAAAAAAAAAAAAAAAAAAAA
AAA
G(AAAAAAAAAAAAAAAAAAAAAAAAAAAAAAAAAAAAA
AAA
G(AAAAAAAAAAAAAAAAAAAAAAAAAAAAAAAAAAAAA
AAA
G(AAAAAAAAAAAAAAAAAAAAAAAAAAAAAAAAAAAAA
AAA
G(AAAAAAAAAAAAAAAAAAAAAAAAAAAAAAAAAAAAA
AAA
G(AAAAAAAAAAAAAAAAAAAAAAAAAAAAAAAAAAAAA
AAA
G(AAAAAAAAAAAAAAAAAAAAAAAAAAAAAAAAAAAAA
AAA
G(AAAAAAAAAAAAAAAAAAAAAAAAAAAAAAAAAAAAA
AAA
G(AAAAAAAAAAAAAAAAAAAAAAAAAAAAAAAAAAAAA
AAA
G(AAAAAAAAAAAAAAAAAAAAAAAAAAAAAAAAAAAAA
AAA
G(AAAAAAAAAAAAAAAAAAAAAAAAAAAAAAAAAAAAA
AAA
G(AAAAAAAAAAAAAAAAAAAAAAAAAAAAAAAAAAAAA
AAA
G(AAAAAAAAAAAAAAAAAAAAAAAAAAAAAAAAAAAAA
decimal (=40 bytes). Total 14 lines, so the
graphics height is 1.75mm (14 dots)
Page 80

75
13. Pattern command setting
Example
Result
^Q,20,0,0
^L
Q40,10,2,8
E
Length: 2x8=16
Description
HEIGHT = 8 DOTS
0100011101000111
0100011101000111
0100011101000111
0100011101000111
0100011101000111
0100011101000111
0100011101000111
0100011101000111
1 BYTE
WIDTH = 2 BYTES
1 BYTE
G : 01000111 (binary )
8dots
2mm
Example
Description
Result
^Q40,2
E
; Label size is 40 mm(h) x 50
^Q50,0,0
E
; Disable the rotate function
TEST1.TXT
TEST2.TXT
Print Result
~EP,TREE,922
^Q30,0,0
E
^W40
^S6
^D5
GGGGGGGGGGGGGGGG
14. Rotate label format for printing
^W50
^S6
^H10
~R50
^L
AC,153,42,1,1,1,2,ROTATE
BB,156,112,2,5,50,2,1,1234567
~R200
^L
AC,20,10,1,1,1,0,ROTATE
BB,20,45,2,5,50,0,1,1234567
15. Download graphic to printer’s memory
Following the below steps to download graphic to printer.
1. Prepare a graphic file (file name: TREE.PCX, file size: 922 bytes).
2. Prepare two text files (TEST1.TXTand TEST2.TXT, see the following contents).
3. In DOS mode, running the following commands.
COPY TEST1.TXT PRN↵
COPY TREE.PCX PRN/B↵
COPY TEST2.TXT PRN↵
mm(w); 2 mm gap
; Rotate the label format 180∘for
printing
^W50
^S2
^H5
^L
Y30,50,TREE
Page 81
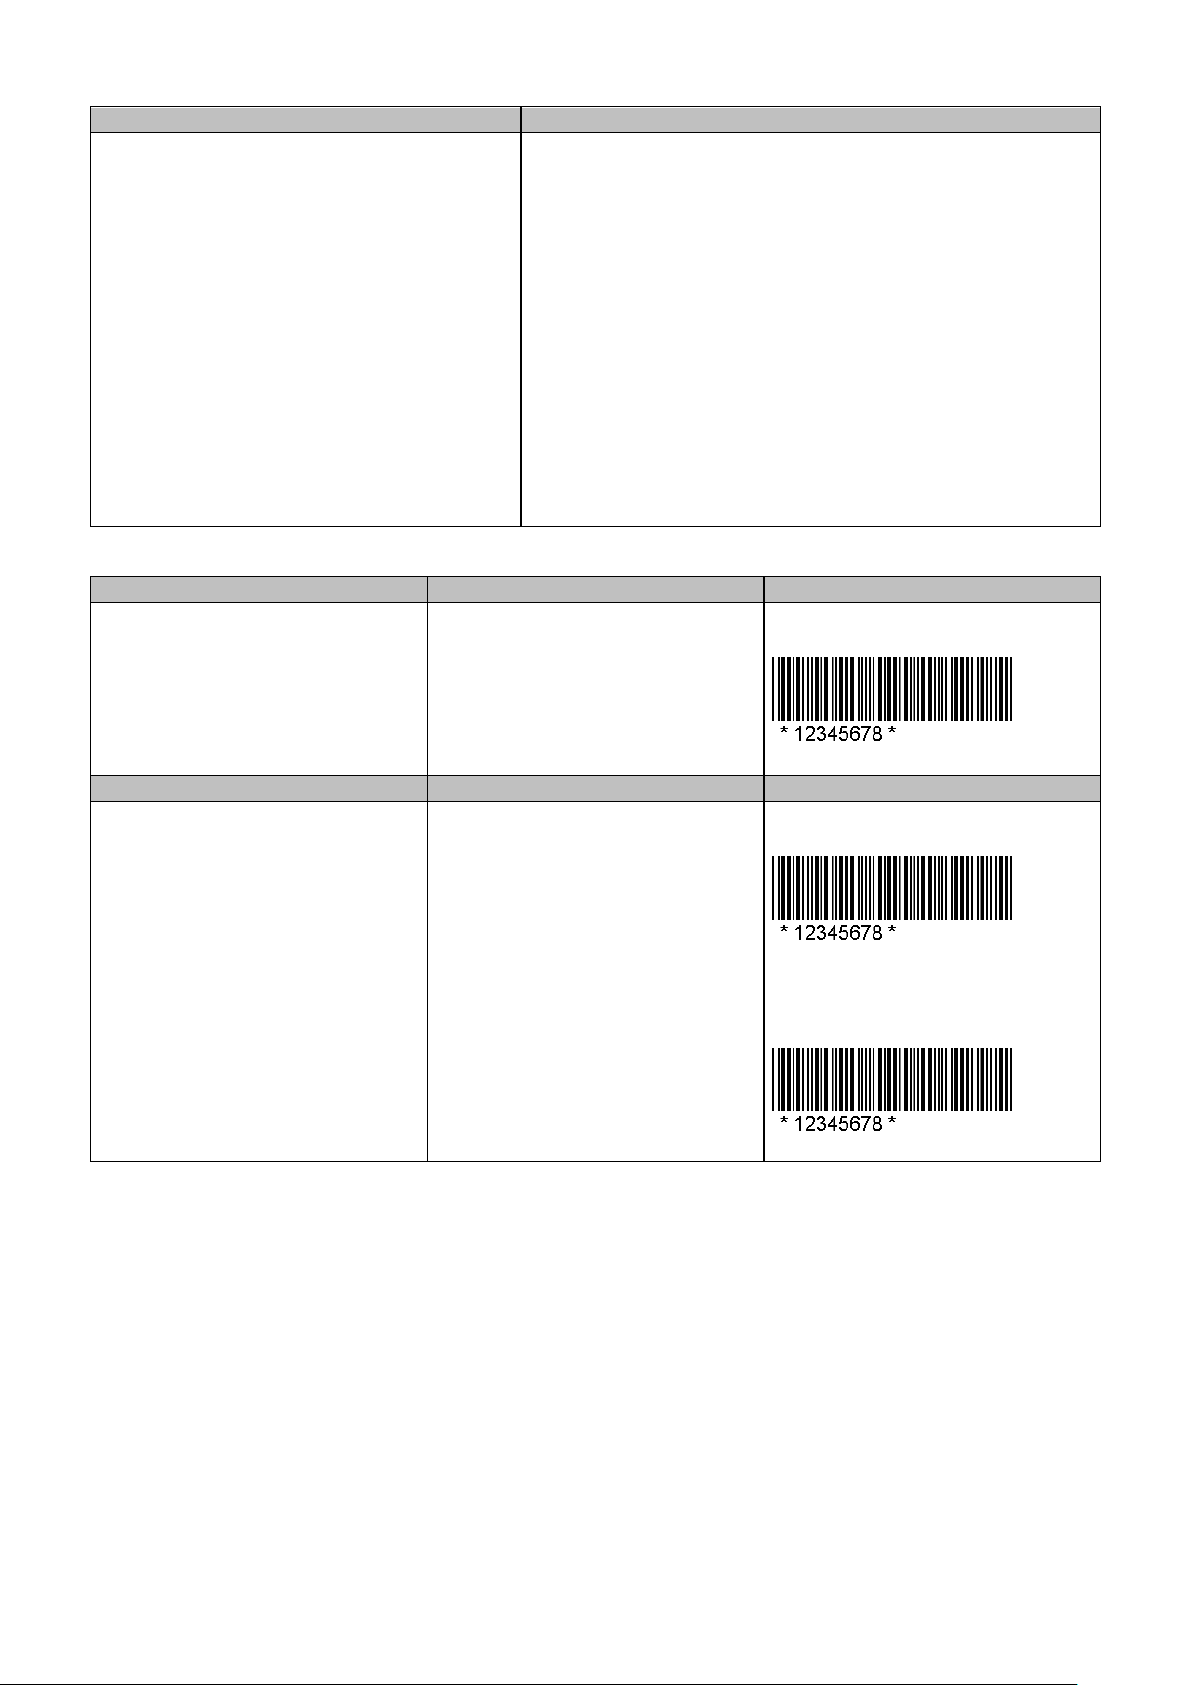
76
16. Download label and variable settings
Example
Description
^Ftest
^L
; Download label to memory card and the label name is
C0,0000,+1,serial no.
; Setting serial number is C0
V00,10,name
V02,6,price
; Setting three variables V00, V01, V02
AE,108,306,1,1,1,0,$^V02
E
Example 1
Description
Result
^Ktest
Recall label format without
changing the label format
S/N.0000
0000
Book
C0 = 0000
12345678
V00 = book
200.00
V01 = 12345678
E
V02 = 200.00
~P1
Example 2
Description
Result
^Ktest
E
Recall label format and change
V02 = 100.00
S/N.1111
$100.00
^Q35,0,0
Changing the size
^S6
Changing speed to 6”/sec
^H10
Changing darkness to 10
~P2
Printing the last label twice
^Q50,0,15
^W70
^H10
^S6
^E12
V01,8,barcode
AC,39,27,1,1,1,0,S/N.^C0
AD,126,78,1,1,1,0,^V00
BA,108,135,2,5,100,0,1,^V01
17. Recall label format from memory
“test”.
book
$200.00
1111
Pencil
12345678
100.00
Each time you change variable data or label format, repeat to send command from ^Kname to ~Px.
label format
C0 = 1111
V00 = pencil
V01 = 12345678
Pencil
$100.00
S/N.1112
Pencil
Page 82

77
18. Print head test & Version list
Example
Result
~T
~V
EZXXXX : VX.XXX
(3)
Serial port :96,N,8,1
1 DRAM installed
Image buffer size : 1475K
000 FORM(S) IN ME MO R Y
000 GRAPHIC (S) IN MEMORY
000 FONT(S) IN MEMORY
000 ASIAN FONT(S) IN MEMORY
150K BYTES FREE MEMORY
^S6 ^H8 ^R000 ~R200
^W100 ^Q100,3
Option : ^D0 ^O0 ^AD
Gap Sensor AD : 129 162 195
Page 83

78
19. Use variable settings
Example
Result
1. User input unit
~MDELF,test1
~P1
Price: 100
2. Calculation
~MDELF,test2
~P1
price and
amount. Printer
calculates total
price.
sample
^Ftest1
^Q60,0,0
^P1
^L
V00,10,Price
V01,10,Amount
V02,10,Total Price
V#OP*,V02,V00,V01
V#SET,UNPROMPT,V02
AC,30,110,1,1,0,0,Price: ^V00
AC,30,189,1,1,0,0,Amount: ^V01
AE,30,273,1,1,0,0,Total Price: ^V02
E
^Ktest1
100
3
E
^Ftest2
^Q60,0,0
^L
V00,10,Input V00
V01,10,Input V01
V02,10,Input V02
V03,20,Input V03
V04,20,Input
V05,20,Input
V06,20,Input
V#OP+,V02,V01,V00
V#OP-,V03,V01,V00
V#OP*,V04,V01,V00
V#OP/,V05,V01,V00
V#OP%,V06,V01,V00
V#SET,UNPROMPT,V02
V#SET,UNPROMPT,V03
V#SET,UNPROMPT,V04
V#SET,UNPROMPT,V05
V#SET,UNPROMPT,V06
AA,38,37,1,1,0,0,V00=^V00
AA,38,77,1,1,0,0,V01=^V01
AE,38,115,1,1,0,0,V1+V0=^V02
AE,38,165,1,1,0,0,V1-V0=^V03
AE,38,215,1,1,0,0,V1*V0=^V04
AE,38,265,1,1,0,0,V1/V0=^V05
AE,38,315,1,1,0,0,V1 MOD V0=^V06
E
^Ktest2
10
20
E
Amou n t: 3
Total Price: 300
V00=10
V01=20
V1+V0=30
V1-V0=10
V1*V0=200
V1/V0=2
V1 MOD V0 = 0
Page 84

79
20. dBase III data setting
NAME
ADDRESS
PHONE
Tom
Address of Tom
11111111
Mary
Address of Mary
22222222
John
Address of John
33333333
Joe
Address of Joe
44444444
Bob
Address of Bob
55555555
Gilbert
Address of Gilbert
66666666
Example
Description
Result
^Q60,0,0
E
Print out Mary’s phone number
Mary’s phone: 22222222
^Q60,0,0
E
Print out John Address
Address of John
^Q60,0,0
E
Print out last person name
Last Name is Gilbert
^Q60,0,0
E
Print second person name
Second Name is Mary
Example:
customer.dbf has following data
^P1
^L
FILEDB,OPEN,customer
V00,10,Prompt0
V#LINKDB,PHONE,V00
FILEDB,FIND,NAME,Mary
AC,79,120,1,1,0,0, Mary’s phone: ^V00
^P1
^L
FILEDB,OPEN,customer
V00,10,Prompt0
V#LINKDB,ADDRESS,V00
FILEDB,FIND,NAME,John
AC,79,120,1,1,0,0, ^V00
^P1
^L
FILEDB,OPEN,customer
V00,10,Prompt
V#LINKDB,NAME,V00
FILEDB,MOVE,LAST
AC,79,120,1,1,0,0,Last Name is ^V00
^P1
^L
FILEDB,OPEN,customer
V00,10,Prompt
V#LINKDB,NAME,V00
FILEDB,MOVE,2
AC,79,120,1,1,0,0,Second Name is ^V00
Page 85

80
^Q60,0,0
E
Print first, second and third person
Tom Phone is 11111111
^P3
^L
FILEDB,OPEN,customer
C0,1,+1,DB Move C
V00,10,name
V01,10,phone
V#LINKDB,NAME,V00
V#LINKDB,PHONE,V01
FILEDB,MOVE,C0
AC,79,120,1,1,0,0,^V00 Phone is ^V01
phone number
Mary Phone is 22222222
John Phone is 33333333
Page 86

81
About Code 128
Example
Subset A: BQ2,8,8,2,5,40,0,0,AAPPLE
To select Code 128 Subset A, place a ASCII A
before the data to be encoded.
Subset B: BQ2,8,8,2,5,40,0,0,BAPPLE
To select Code 128 Subset B, place a ASCII B
before the data to be encoded.
Subset C: BQ2,8,8,2,5,40,0,0,C1234
To select Code 128 Subset C, place a ASCII C
before the data to be encoded.
Special character handling:
BQ2,8,8,2,5,40,0,0, ATEST&G
To encode FNC1 into a Code 128 Subset A, send
the ASCII &G.
ASCII
2
Character
Code A
Code B
Code C
96
&A
FNC3
FNC3
-NA-
97
&B
FNC3
FNC2
-NA-
98
&C
SHIFT
SHIFT
-NA-
99
&D
Code C
Code C
-NA-
100
&E
Code B
FNC
Code B
101
&F
FNC4
Code A
Code A
102
&G
FNC1
FNC1
FNC1
BQ2, X, Y, NARROW, WIDE, HEIGHT, RTATION, READABLE, DATA
Code 128 Subset A: Included the standard uppercase alphanumeric keyboard characters, control and
special characters.
Code 128 Subset B: Includes the standard uppercase, lowercase alphanumeric keyboard characters
and special characters.
Code 128 Subset C: Used for double density encoding of numeric data (the set of 100 digit pairs from 00
through 99).
Page 87

82
PMx,y,w,h,r,c,ec,max_len,rotation
Revision Sections changed from previous release Doc. date Prepared
A First Edition 2010/11/23 Chard Hu
B Add “*” to CODE 39 2011/08/15 Chard Hu
Revision Sections changed from previous release Doc. date Prepared
ADD CANCEL MODIFICATION
^Z ^Bx ^An
^XSET,ACTIVEMESSAGE,n ^Mx ^D+dddd.hh
^XSET,ALIAS,string ^XSET,CF_FORMAT,1 ^Dx
^XSET,ERRORPRINT,n ^XSET,LANGUAGE,n ^Fname
^XSET,FEEDCUT,n
^XSET,HEATOFFSET,n ^XSET,MEMORY,n ^L
^XSET,ROTATION,n ^XSET,PASSWORD,n,x ^On
^XSET,UNPROMPT,p1 ^XSET,UNICODE,n ^PI
~MCPY ^XSET,USBETHERNET,n
~MDEL* ~G ^Sx
~MMOV Xx,y,narrow,data ^XGET,CONFIG
~S,STATUS XRx,y,narrow,rotate,data ^XSET,ACTIVERESPONSE,n
~X6 ^XSET,CODEPAGE,n
C
~X9 ^XSET,ERRORPRINT,n
^XSET,LOCKCMD,xxxx ^Gn
^Qx,y(,z±)
2012/10/19 Betty Tsou
^XSET,HEATOFFSET,n
V#ADDCHECKSUM43,x ^XSET,KEYBOARD,n
V#SET,FLOATFORMAT,X,Y,Vnn ^XSET,ROTATION,n
V#SET,PROMPTONCE,p1 ^XSET,TOPOFFORM,n
V#SET,THOUFORMAT,V00ab[c] ^XSET,UNPROMPT,p1
Zx,y,a,b,c,d,e,n ^Yb,p,d,s
^NA,function[,p1] ~S,CHECK
^NL[,TrapIP,Community] ~S,n
^NL,ENABLE,n ~S,STATUS
^NR[,p[,ei[,sw]]] ~T
^NMACADDR[,addr] ~V
^NS[a,b,c,d,e,f,g,h,i] ~Xn
Firmware reversion difference
between V1.xxx and G3.xxx
At,x,y,x_mul,y_mul,gap,rotationInverse,data
Page 88

83
Revision Sections changed from previous release Doc. date Prepared
ADD CANCEL MODIFICATION
^XSET,AUTOTPHTEST,x
^XSET,FEEDTYPE,n
^XSET,PAGEDELAY,n
^XSET,REALLENGHTPRINT,n
^XSET,RECALLCRLF,n
D
^XSET,SENSING,n
^XSET,SPEEDDOWN,n
^XSET,TOPOFFORM,n
^XSET,WHENTOSENSING,n
~S,OFFSETa,n
~S, ES[p1]
~PCB,MODELNAME[n],name
V#SETZERO,Vxx
2013/08/08 Betty Tsou
Page 89

84
Firmware reversion difference
between V1.xxx and G3.xxx
Revision Sections changed from previous release Doc. date Prepared
ADD CANCEL MODIFICATION
^XSET,LOCKCMD,xxxx ^XSET,HEATOFFSET,n
E
^XSET,PAGEDELAY,n
^XSET,SPEEDDOWN,n
2013/08/19 Betty Tsou
 Loading...