

Page 1

life
life A
You can find the most up-to-date
user guide at
www.gigaset.com/manuals
Page 2

Page 3
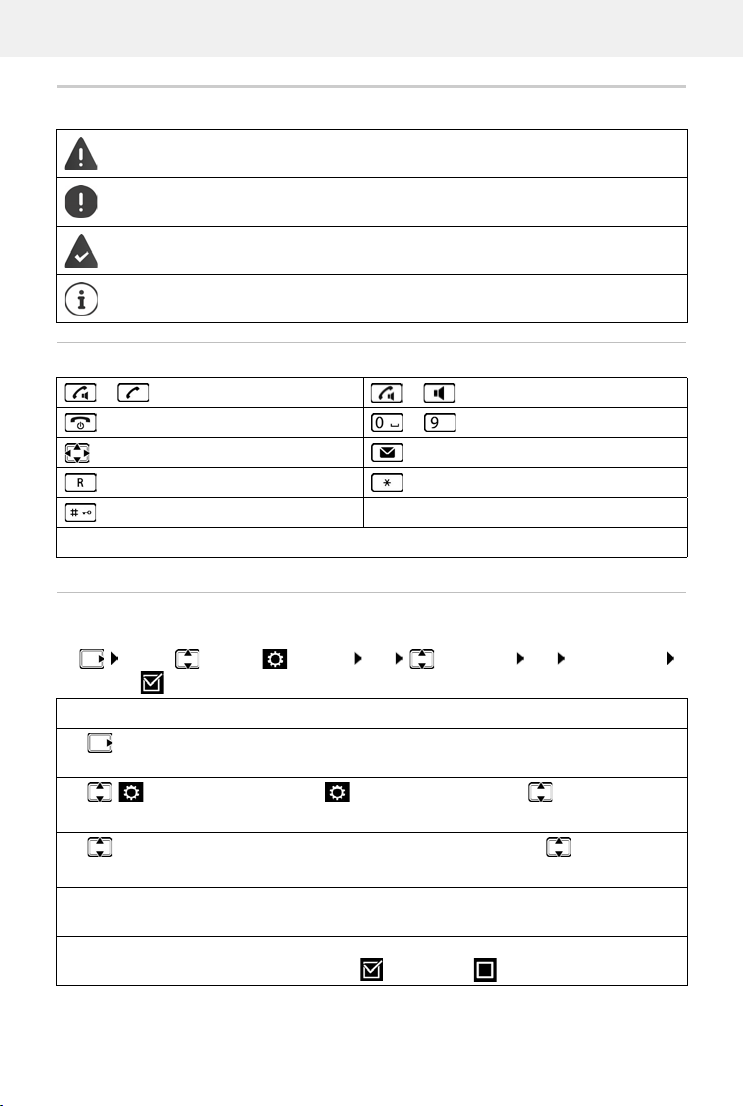
Illustration in the user guide
Illustration in the user guide
Warnings, which if not heeded, can result in injury to persons or damage to devices.
Important information regarding function and appropriate handling or functions
that could generate costs.
Prerequisite for being able to carry out the following action.
Additional helpful information.
Keys
or Talk key or Handsfree key
End call key to Number / letter keys
Control key rim Message key
Recall key Star key
Hash key
OK, Back, Select, Change, Save, . . . Display keys
Procedures
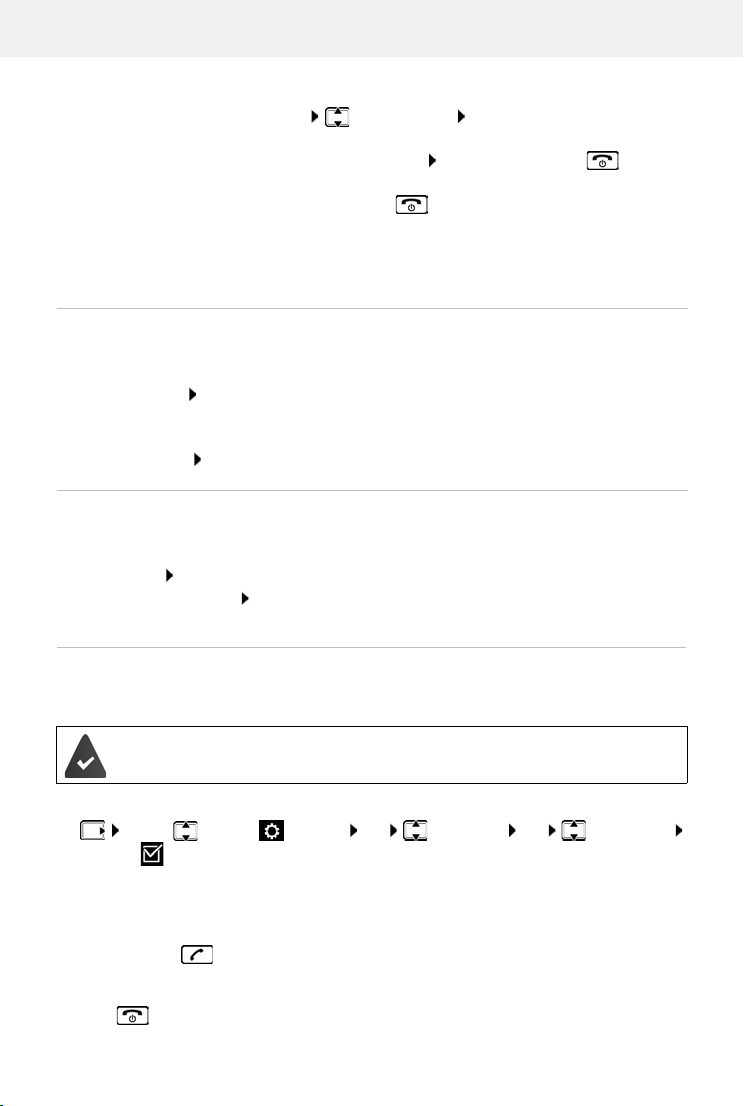
Example: Switching Auto answer on/off
. . . use to select Settings OK Tel e ph o ny OK Auto Answer
Change ( = activated)
Symbols Meaning
In idle mode, press the control key on the right
The main menu opens.
OK
Tel epho ny
OK
Navigate to the icon using the control key .
Select OK to confirm. The submenu Settings opens.
Select the Tel ep ho ny entry using the control key .
Select OK to confirm. The submenu Tel ep h on y opens.
Auto Answer The function to switch Auto answer on/off appears as the first menu
item.
Change Select Change to activate or deactivate.
Function is activated /deactivated .
Availability and operation of the functions
may differ on your telephone.
1
Page 4

Contents
Contents
Overview . . . . . . . . . . . . . . . . . . . . . . . . . . . . . . . . . . . . . . . . . . . . . . . . . . . . . . . . . . . . . . . . . . . . . . . . . . . . . .4
Handset . . . . . . . . . . . . . . . . . . . . . . . . . . . . . . . . . . . . . . . . . . . . . . . . . . . . . . . . . . . . . . . . . . . . . . . . . . . . . . . 4
Base without answering machine . . . . . . . . . . . . . . . . . . . . . . . . . . . . . . . . . . . . . . . . . . . . . . . . . . . .
Base with answering machine . . . . . . . . . . . . . . . . . . . . . . . . . . . . . . . . . . . . . . . . . . . . . . . . . .
Safety precautions . . . . . . . . . . . . . . . . . . . . . . . . . . . . . . . . . . . . . . . . . . . . . . . . . . . . . . .
Getting started . . . . . . . . . . . . . . . . . . . . . . . . . . . . . . . . . . . . . . . . . . . . . . . . . . . . . . . . . . . . . . . . . . . . . . . .9
Base . . . . . . . . . . . . . . . . . . . . . . . . . . . . . . . . . . . . . . . . . . . . . . . . . . . . . . . . . . . . .
Handset . . . . . . . . . . . . . . . . . . . . . . . . . . . . . . . . . . . . . . . . . . . . . . . . . . . . . . . . . . . . . . .
Using the telephone . . . . . . . . . . . . . . . . . . . . . . . . . . . . . . . . . . . . . . . . . . . . . . . . . . . . . .
Getting to know your telephone . . . . . . . . . . . . . . . . . . . . . . . . . . . . . . . . . . . . . . . . . . . . . . . . . . . . .
Making calls . . . . . . . . . . . . . . . . . . . . . . . . . . . . . . . . . . . . . . . . . . . . . . . . . . . . . . . . . . .
Provider-specific functions (network services) . . . . . . . . . . . . . . . . . . . . . . . . . . . . . . . . . . . . . . . . . .
Directory . . . . . . . . . . . . . . . . . . . . . . . . . . . . . . . . . . . . . . . . . . . . . . . . . . . . . . . . . . . . . .
Call lists . . . . . . . . . . . . . . . . . . . . . . . . . . . . . . . . . . . . . . . . . . . . . . . . . . . . . . . . . . .
Message lists . . . . . . . . . . . . . . . . . . . . . . . . . . . . . . . . . . . . . . . . . . . . . . . . . . . . . . . . . . .
Answer machine . . . . . . . . . . . . . . . . . . . . . . . . . . . . . . . . . . . . . . . . . . . . . . . . . . . . . . . . .
Local answer machine (if available) . . . . . . . . . . . . . .
Network mailbox . . . . . . . . . . . . . . . . . . . . . . . . . . . . . . . . . . . . . . . . . . . . . . . . . . . . . . . .
Set fast access for the answer machine . . . . . . . . . . . . . . . . . . . . . . . . . . . . . . . . . . . . . . . . . . . . . .
Additional functions . . . . . . . . . . . . . . . . . . . . . . . . . . . . . . . . . . . . . . . . . . . . . . . . . . . . .
Emergency call . . . . . . . . . . . . . . . . . . . . . . . . . . . . . . . . . . . . . . . . . . . . . . . . . . . . . . . . .
Direct dial for emergencies . . . . . . . . . . . . . . . . . . . . . . . . . . . . . . . . . . . . . . . . . . . . . . . . . . .
Accessibility features . . . . . . . . . . . . . . . . . . . . . . . . . . . . . . . . . . . . . . . . . . . . . . . . . . . .
Calendar . . . . . . . . . . . . . . . . . . . . . . . . . . . . . . . . . . . . . . . . . . . . . . . . . . . . . . . . . . . . . . .
Timer . . . . . . . . . . . . . . . . . . . . . . . . . . . . . . . . . . . . . . . . . . . . . . . . . . . . . . . . . . . . .
Alarm clock . . . . . . . . . . . . . . . . . . . . . . . . . . . . . . . . . . . . . . . . . . . . . . . . . . . . . . . . . . . .
Baby monitor . . . . . . . . . . . . . . . . . . . . . . . . . . . . . . . . . . . . . . . . . . . . . . . . . . . . . . . . . .
ECO DECT . . . . . . . . . . . . . . . . . . . . . . . . . . . . . . . . . . . . . . . . . . . . . . . . . . . . . . . . . . . . . .
Protection against unwanted calls . . . . . . . . . . . . . . . . . . . . . . . . . . . . . . . . . . . . . . . . . . . . . . . . . . .
SMS (text messages) . . . . . . . . . . . . . . . . . . . . . . . . . . . . . . . . . . . . . . . . . . . . . . . . . . . . . . . . .
Bluetooth . . . . . . . . . . . . . . . . . . . . . . . . . . . . . . . . . . . . . . . . . . . . . . . . . . . . . . . . . . . . . .
Expanding the functionality of the telephone . . . . . . . . . . . . . . . . . . . . . . . . . . . . . . . . . . . . . . . . . 63
Multiple handsets . . . . . . . . . . . . . . . . . . . . . . . . . . . . . . . . . . . . . . . . . . . . . . . . . . . . . . .
Repeater . . . . . . . . . . . . . . . . . . . . . . . . . . . . . . . . . . . . . . . . . . . . . . . . . . . . . . . . . . . . . . .
Operation with a router . . . . . . . . . . . . . . . . . . . . . . . . . . . . . . . . . . . . . . . . . . . . . . . . . . . . . .
Operation with a PABX . . . . . . . . . . . . . . . . . . . . . . . . . . . . . . . . . . . . . . . . . . . . . . . . . . . . . . .
. . . . . . . . . . . . . . . . . . . . . . . . . . . . . . . . . . . . . . 35
. . . . . . . . . . . . . .8
. . . . . . . . . . . . . . . . . . . . . . 9
. . . . . . . . . . . . . . . 10
. . . . . . . . . . . 13
. . . . . . . . . . . . . . . 18
. . . . . . . . . . . . . . . 27
. . . . . . . . . . . . . . . . . . . . 32
. . . . . . . . . . . . . . . 33
. . . . . . . . . . . . 35
. . . . . . . . . . . . . . 39
. . . . . . . . . . . . 41
. . . . . . . . . . . . . . . 41
. . . . . . . . . . . . . . 44
. . . . . . . . . . . . . . . 46
. . . . . . . . . . . . . . . . . . . . 48
. . . . . . . . . . . . . . . 49
. . . . . . . . . . . . . . . 49
. . . . . . . . . . . . . . . 51
. . . . . . . . . . . . . . . 61
. . . . . . . . . . . . . . 63
. . . . . . . . . . . . . . . 65
. . . 6
. . . . . . . . 6
. . 13
23
. . 40
. . . . . . . . . 43
. . 52
. . . . . . . . . 55
. . . . . . . . . 66
. . . . . . . . . 66
2
Availability and operation of the functions
may differ on your telephone.
Page 5

Contents
Adjusting the telephone settings . . . . . . . . . . . . . . . . . . . . . . . . . . . . . . . . . . . . . . . . . . . . . . . . . . . . . 68
Handset . . . . . . . . . . . . . . . . . . . . . . . . . . . . . . . . . . . . . . . . . . . . . . . . . . . . . . . . . . . . . . . . . . . . . . . . . . . . . . 68
System . . . . . . . . . . . . . . . . . . . . . . . . . . . . . . . . . . . . . . . . . . . . . . . . . . . . . . . . . . . . .
Appendix . . . . . . . . . . . . . . . . . . . . . . . . . . . . . . . . . . . . . . . . . . . . . . . . . . . . . . . . . . . .
Questions and answers . . . . . . . . . . . . . . . . . . . . . . . . . . . . . . . . . . . . . . . . . . . . . . . . . . . . . . .
Service (Customer Care) . . . . . . . . . . . . . . . . . . . . . . . . . . . . . . . . . . . . . . . . . . . . . . . . . . . . . . . . . . . . .
Manufacturer’s advice . . . . . . . . . . . . . . . . . . . . . . . . . . . . . . . . . . . . . . . . . . . . . . . . . . . . . . . .
Technical data . . . . . . . . . . . . . . . . . . . . . . . . . . . . . . . . . . . . . . . . . . . . . . . . . . . . . . . . .
Display icons . . . . . . . . . . . . . . . . . . . . . . . . . . . . . . . . . . . . . . . . . . . . . . . . . . . . . . . . . . .
Menu overview . . . . . . . . . . . . . . . . . . . . . . . . . . . . . . . . . . . . . . . . . . . . . . . . . . . . . . . . .
. . . . . . . . . . . . . . . . . . . 74
. . . . . . . . . . . . . . . . 76
. . . . . . . . . 76
. . 78
. . . . . . . . . 80
. . . . . . . . . . . . . . . 82
. . . . . . . . . . . . . . . 85
. . . . . . . . . . . . . . 87
Index . . . . . . . . . . . . . . . . . . . . . . . . . . . . . . . . . . . . . . . . . . . . . . . . . . . . . . . . . . . . . . . . . . . . . . . . . . . . . . . . 91
Not all functions described in the user guide are available in all countries or from all
network providers.
Availability and operation of the functions
may differ on your telephone.
3
Page 6
5
6
13
14
16
10
4
11
8
7
1
2
9
15
Calls
INT 1 30 Jan
10:30
3
12
Overview
Handset
Overview
4
Availability and operation of the functions
may differ on your telephone.
Page 7

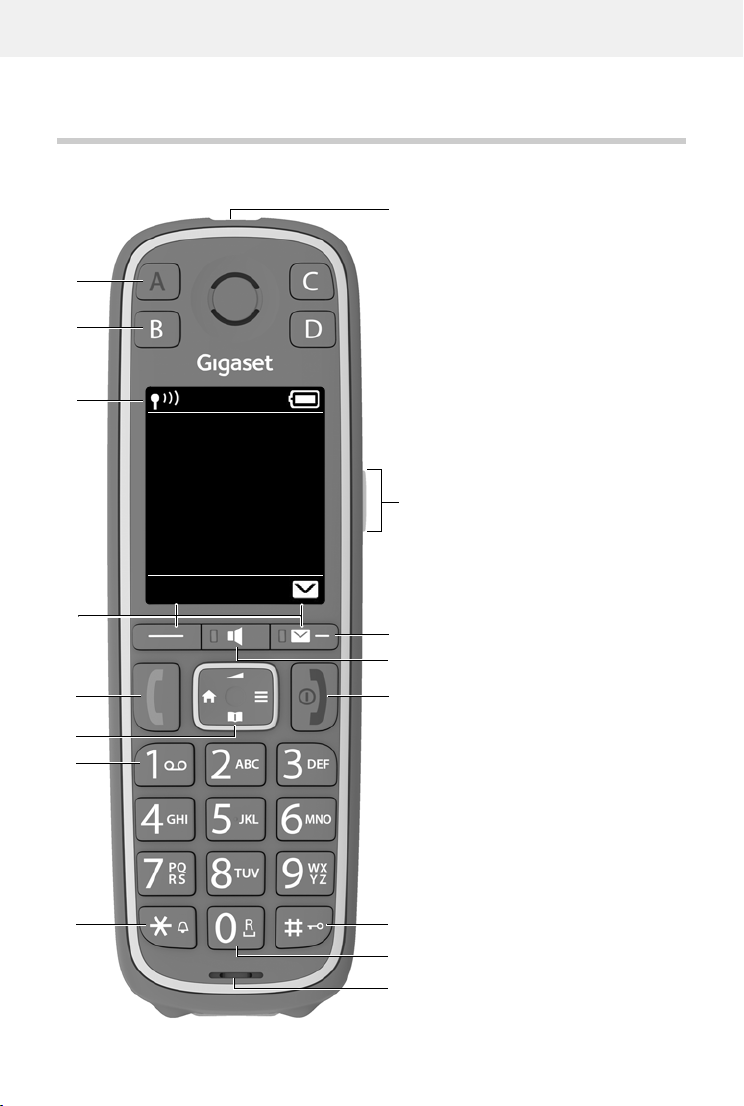
1 Direct dial key A / Emergency button ( p. 41)
Lights up: Emergency function enabled; Flashes: Emergency call
started
2Direct dial keys B to D ( p. 14)
3 Status bar ( p. 85)
Icons display current settings and operating status of the telephone
4Display keys ( p. 15)
Different functions, depending on the operating situation
5Talk key
Accept call; dial number displayed; send SMS; open redial list
Start dialling
6 Control key / Menu key ( p. 15)
Open a menu; navigate in menus and entry fields; access functions
7Key 1
Select answering machine/network mailbox
8Star key
Switch the ringtone on/off
Open the table of special characters; switch from pulse dialling to
tone dialling
9 Signal light (LED)
Flashes: incoming call
10 Boost key
During a call, enable/disable the Boost function (receiver extra loud) ( p. 13)
11 Message key ( p. 33)
Access to the call and message lists;
Flashes: New voice message, New call, New SMS, missed
appointment
12 Handsfree key ( p. 22)
Switch between receiver and handsfree mode; accept call;
dial the number displayed
Lights up: Handsfree mode enabled; Flashes: incoming call
13 End call key / On/Off key
End call; Cancel function; one level back
Back to idle mode; switch handset on/off
14 Hash key / Lock key
Lock/unlock the keypad; enter a dialling pause
Toggle between upper/lower case and digits
15 Recall key
Consultation call (flash)
16 Microphone
If multiple functions are listed, the button function depends on the situation.
The colour and shape of your device may be different from the illustration.
Overview
Press briefly
Press and hold
Press and hold
Press and hold
Press briefly
Press and hold
Press briefly
Press and hold
Press and hold
Press briefly
Press and hold
Availability and operation of the functions
may differ on your telephone.
5
Page 8
Base without answering machine
A
A
B
C
D
E
F
G
H
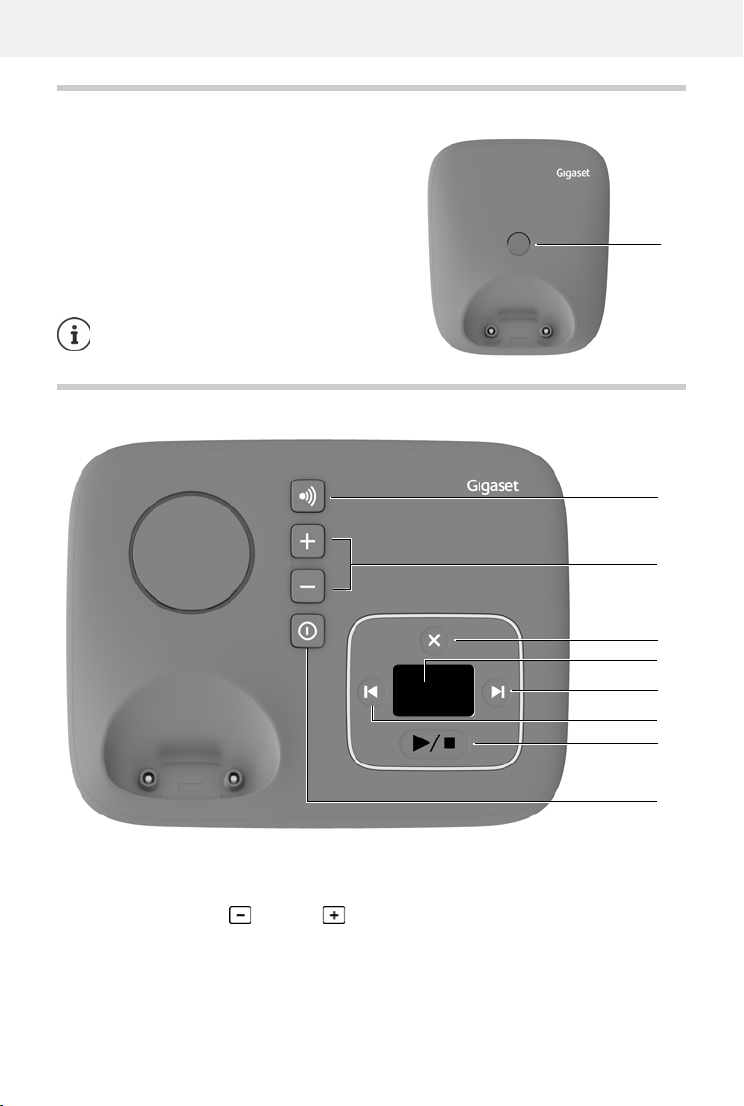
Base without answering machine
A Registration/paging key
Locate a handset (paging):
Register handsets and
other DECT devices
(e.g. repeater):
The colour and shape of your device ma y
different from the illustration.
be
Press briefly
Press and hold
Base with answering machine
A Registration/paging key
Locate a handset (paging):
Register handsets and other DECT devices (e.g. repeater):
B Volume keys ( = quieter; = louder)
During playback: Adjusting the loudspeaker volume
During an external call: adjust the ringtone volume
C Delete key
During playback: Delete the current message
6
Availability and operation of the functions
may differ on your telephone.
Press briefly
Press and hold
Page 9

Base with answering machine
DDisplay
Lights up: The answering machine is switched on. The number
of saved messages is displayed.
00 flashing: The answering machine is recording a message.
Flashing slowly: There are new messages. The number of new
messages is displayed.
99 flashing quickly: The answering machine is full.
EForward key
During message playback: Skip to the next message
F Back key
During playback (< 5 secs): Go to the start of the message
During playback (> 5 secs): Go back 5 secs
During playback: Go to the start of the message
During the time stamp announcement: Skip to previous message
GPlay/stop key
Play new messages:
No new messages: play old messages or cancel play
HOn/Off key
Switching the answering machine on/off:
If the answering machine is being operated from a handset or if it is recording a
message (00 flashing), it cannot be operated from the base at the same time.
Press briefly
Press briefly
Press and hold
Press briefly
Press briefly
Press briefly
Availability and operation of the functions
may differ on your telephone.
7
Page 10
Safety precautions
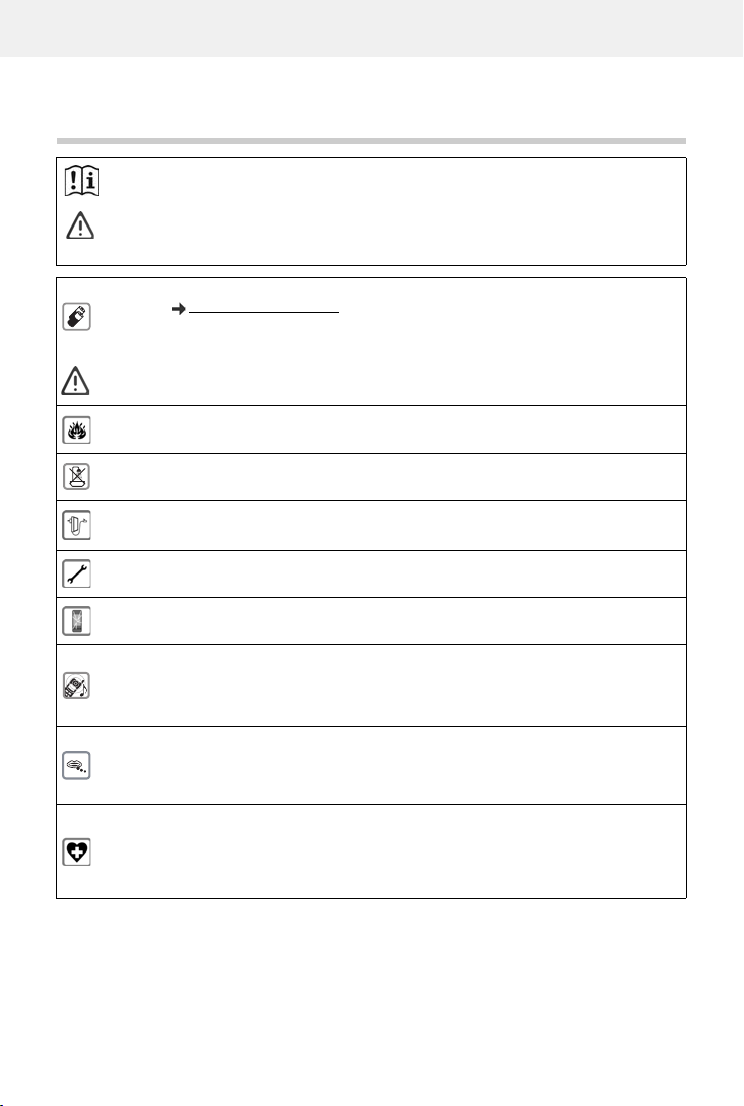
Read the safety precautions and the user guide before use.
The device cannot be used in the event of a power failure. In case of a power failure it is also not
possible to make emergency calls.
Emergency numbers cannot be dialled if the keypad/display lock is activated!
Safety precautions
Use only rechargeable batteries that correspond to the specification (see list of permitted
batteries www.gigaset.com/service
other battery types as this could result in significant health risks and personal injur y. Rechargeable
batteries, which are noticeably damaged, must be replaced.
The handset must not be operated if the battery cover is open.
Ensure that the batteries can not be short-circuited by objects in the battery compartment.
Do not use the devices in environments with a potential explosion hazard (e.g. paint shops).
The devices are not splashproof. For this reason do not install them in a damp environment such
as bathrooms or shower rooms.
Use only the power adapter indicated on the device.
Whilst charging, the power socket must be easily accessible.
Remove faulty devices from use or have them repaired by our Service team, as these could interfere with other wireless services.
Do not use the device if the display is cracked or broken. Broken glass or plastic can cause injury
to hands and face. Send the device to our Service department to be repaired.
Do not hold the rear of the handset to your ear when it is ringing or when speaker mode is activated. Otherwise you risk serious and permanent damage to your hearing.
The phone may cause interference in analogue hearing aids (humming or whistling) or cause
them to overload. If you require assistance, please contact the hearing aid supplier.
Keep small cells and batteries, which can be swallowed, out of the reach of children.
Swallowing a battery can lead to burns, perforation of soft tissue and death. Severe burns can
occur within 2 hours of swallowing.
In the case of a swallowed cell or battery, seek medical care immediately.
Using your telephone may affect nearby medical equipment. Be aware of the technical conditions
in your particular environment, e.g. doctor's surgery. If you use a medical device (e.g. a pacemaker), please contact the device manufacturer. They will be able to advise you regarding the
susceptibility of the device to external sources of high frequency energy (for the specifications of
your Gigaset product see "Technical data").
). Never use a conventional (non-rechargeable) battery or
8
Availability and operation of the functions
may differ on your telephone.
Page 11
Getting started
1
234
3
2 1
4 3
2
1
4
Device without answer machine Device with answer machine
Contents of the package
• One base,
• One power adapter for the base,
• One phone cable,
• One handset
• One battery cover
• Two batteries
• One user guide
The base station and charging cradle are designed for use in closed, dry rooms within
a temperature range of +5 °C to +45 °C.
Position the base on a level, non-slip surface at a central point in the flat or house. The
device's feet do not usually leave any marks on surfaces. However, due to the multitude of different varnishes and polishes used on furniture, contact marks on the
surfaces cannot be completely ruled out.
Never expose the telephone to heat sources, direct sunlight or other electrical
devices.
Protect your telephone from moisture, dust, corrosive liquids and vapours.
This device is only suitable for a maximum installation height of 2 m.
Getting started
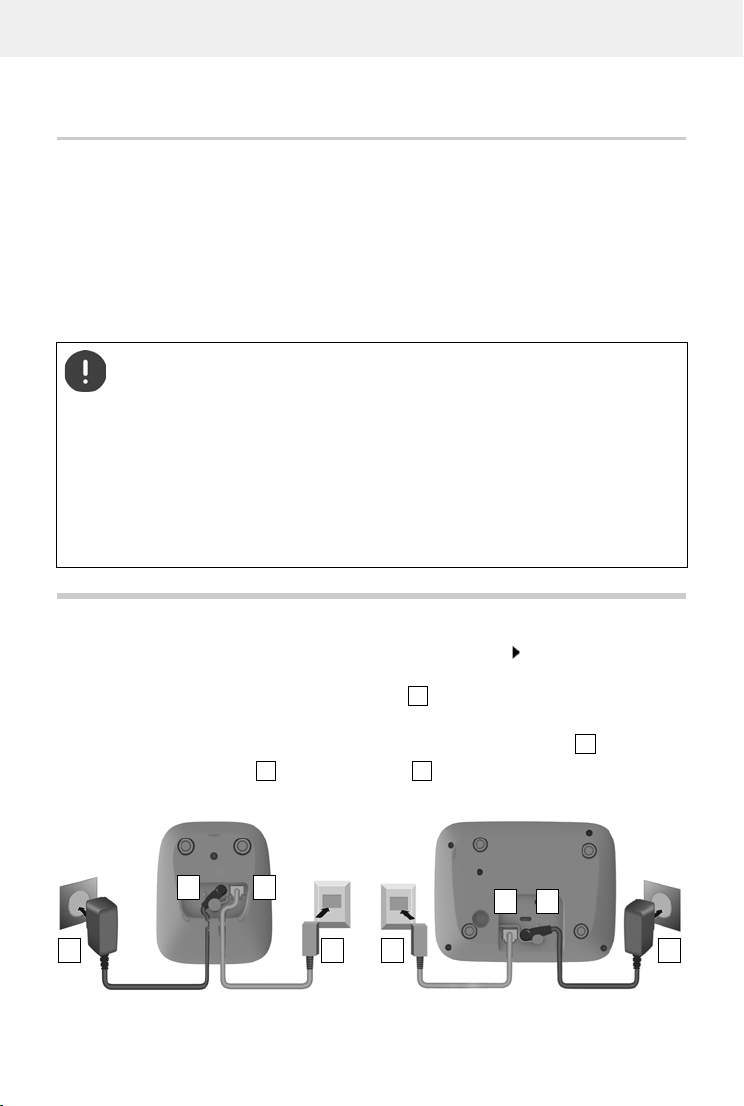
Base
The display of the base with answering machine has protective film. Please remove the protective film
Insert the phone cable into the connection socket at the rear of the base until it clicks into
place.
Insert the power cable from the power adapter into the connection socket .
Plug in the power adapter and the phone jack .
Availability and operation of the functions
may differ on your telephone.
9
Page 12
Handset
5
5 5
Device without answer machine Device with answer machine
2
1
3
4
1
2
3
4
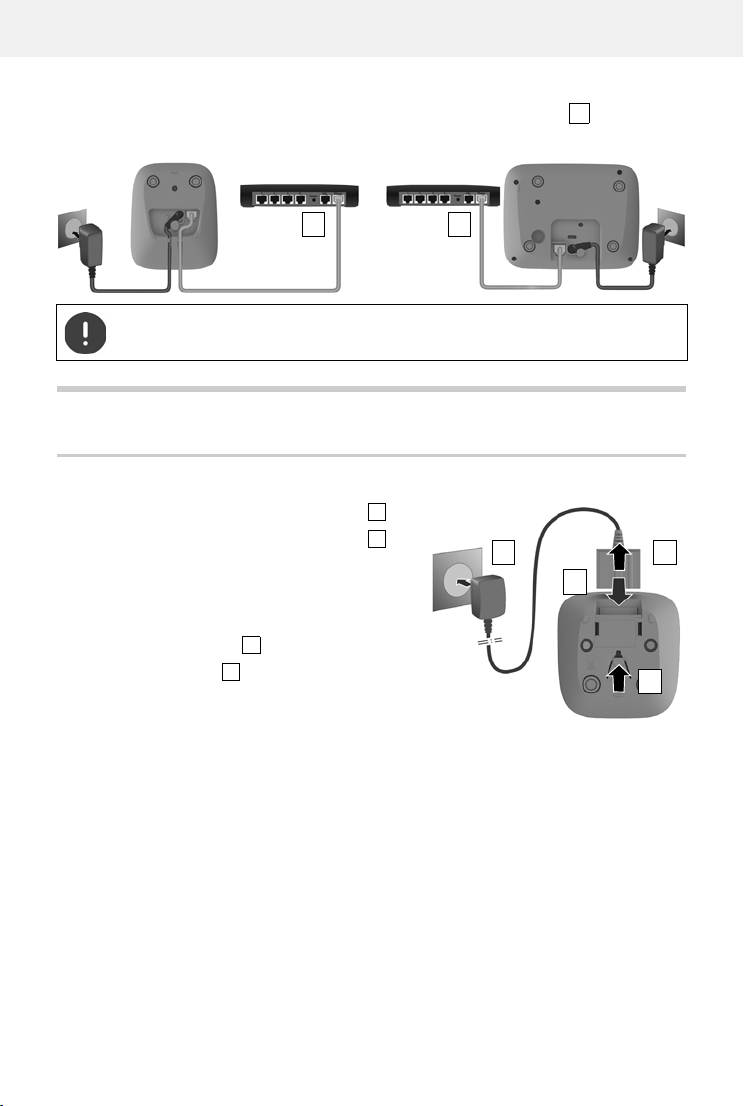
If connecting to a router:
Plug the phone cable into the telephone connection socket on the router .
The network cable must always be connected in order to function, as the phone will
not operate without a power supply.
Handset
Connecting the charging cradle (if included in the delivery)
Connect the flat plug of the power adapter .
Plug the mains unit into your power socket .
To remove the plug from the charging cradle again:
Disconnect the power adapter from the mains
power supply.
Press the release button .
Remove the flat plug .
10
Availability and operation of the functions
may differ on your telephone.
Page 13
Setting up the handset for use
8 - 10 h
The display is protected by a plastic film. Please remove the protective film!
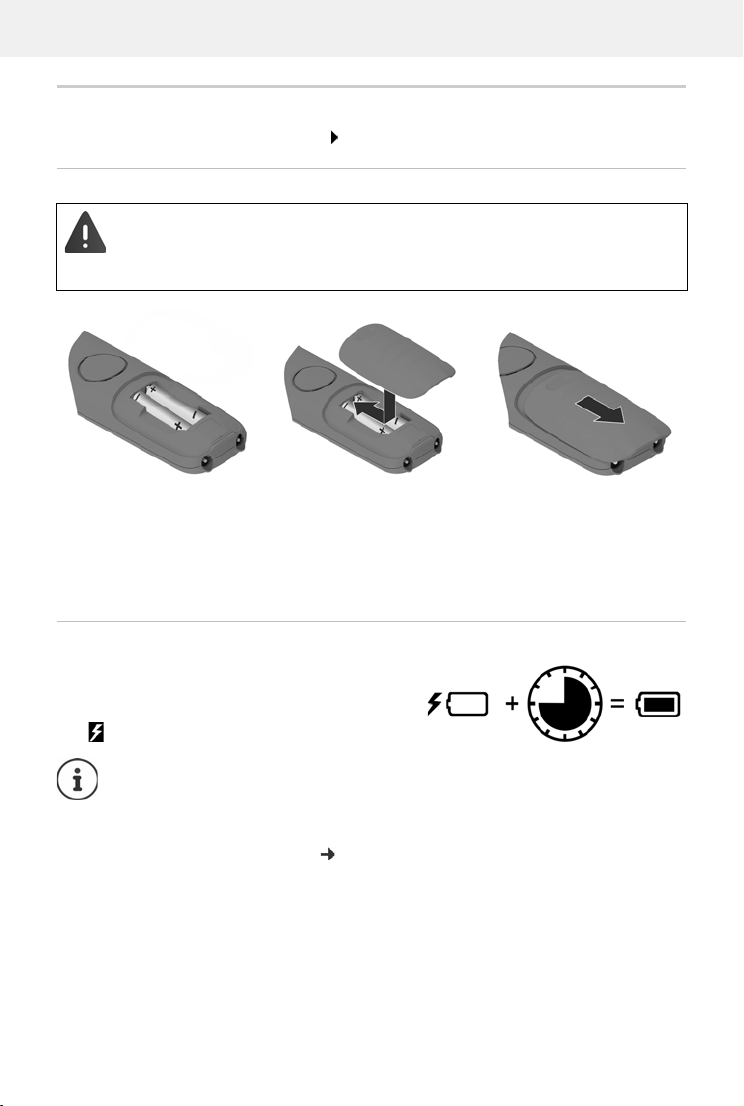
Inserting the batteries
Only use rechargeable batteries, as this could otherwise result in significant health
risks and personal injury. For example, the outer casing of the batteries could be
destroyed or the batteries could explode. The device could also malfunction or be
damaged as a result of using batteries that are not of the recommended type.
Handset
Insert the batteries
(for correct +/- direction,
see diagram).
Fit the battery cover
from the top.
Press the cover until it
clicks into place.
To re-open the battery cover:
Insert a fingernail behind
the notch at the top of
the cover and slide it
downwards.
Charging the batteries
Charge the batteries fully prior to first use in the
charging cradle.
The batteries are fully charged when the power
icon disappears from the display.
Batteries may heat up during charging. This is not dangerous.
After a time, the charge capacity of the battery will decrease for technical reasons.
Handsets contained in the package have already been registered to the base. In the
event that a handset is not registered however (indicated by Please register handset),
register the handset manually ( p. 63).
Availability and operation of the functions
may differ on your telephone.
11
Page 14
Handset
Deutsch
English
Fran cais
Example
Time
Date/Time
Date:
15.08.2021
Time:
00:00
Back Save
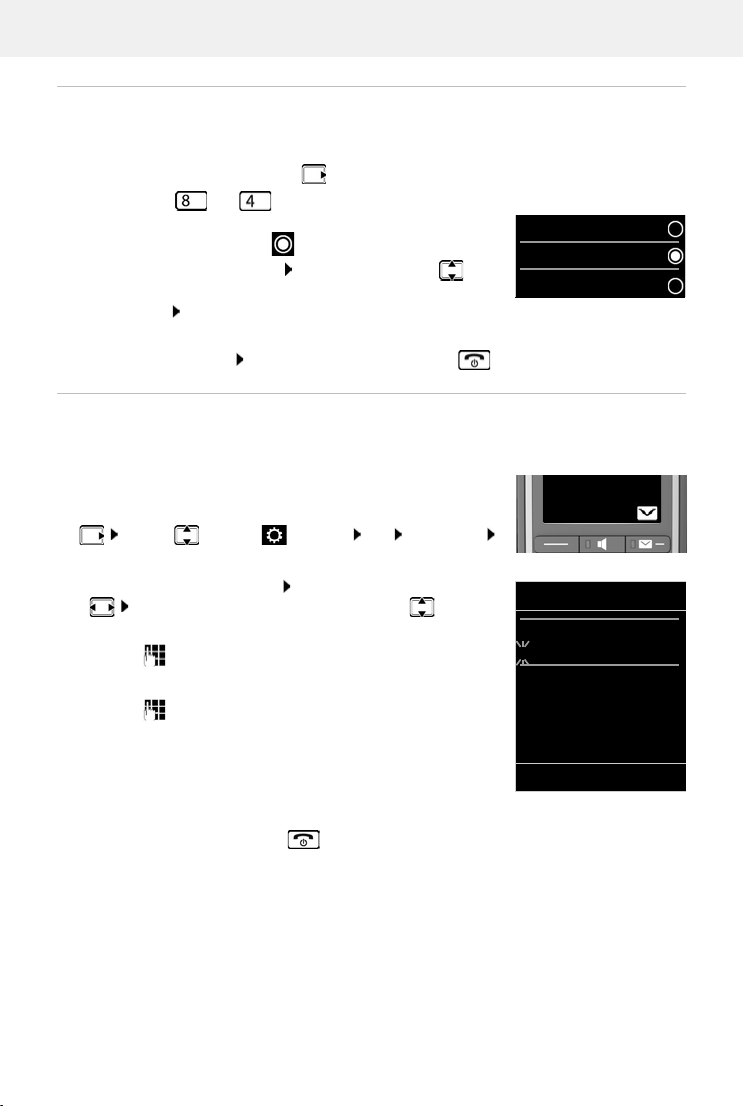
Changing the display language
You can change the display language, if the telephone has been set to an incomprehensible
language.
Press the control key on the right .
Press the keys and slowly and successively . . . the
language settings display appears, the set language
(e. g. English) is highlighted ( = selected).
To select a different language: Press the control key until
the desired language is highlighted on the display,
e. g. Francais press the key on the right directly underneath
the display to activate the language.
To revert to idle status: Press and hold the End call key
Setting the date and time
Set the date/time so that the correct date and time can be assigned to incoming calls and to
enable the alarm to be used.
Press the display key Time
or, if the date and time have already been set:
. . . use to select Settings OK Date/Time
OK
The active cursor position flashes
with . . . switch between cursor positions with
Enter date:
. . . change cursor position
. . . using enter the day, month and year in 8-digit format.
Enter time:
. . . using enter hours and minutes in 4-digit format.
Save settings:
Press the display key Save. . . . Saved is shown in the display and
a confirmation tone sounds.
Return to idle status:
Press and hold the End call key
The telephone is now ready for use.
12
Availability and operation of the functions
may differ on your telephone.
Page 15
Getting to know your telephone
Using the telephone
Getting to know your telephone
Switch the handset on/off
Switching on:
Switch off:
When you place a switched off handset into the base or charging cradle, it switches itself on
automatically.
Lock/unlock the keypad
The keypad lock prevents any accidental use of the telephone.
Lock/unlock the keypad: Press and hol
Keypad lock activated: the f
When the handset is switched off, press and hold the End call key
When the handset is in idle status, press and hold the End call key
d
ollowing symbol appears
If a call is indicated on the handset, the keypad automatically unlocks and you can
accept the call. It then locks again when the call is finished.
It is not possible to call emergency numbers either when keypad lock is activated.
The emergency key also works when the keypad lock is activated.
Boost key
During a call, set the volume for the receiver or speaker to the highest level (Boost).
Enabling/disabling Boost:
Press the Boost key on the right of the handset . . . An icon on the display indicates the status
Enabled: Disabled:
The Boost setting only applies for the duration of the call.
This setting can result in harm to health for those with normal hearing ability and is
only intended for those with a hearing impairment or reduced hearing.
Disruptive noises on the phone line can be increased.
Availability and operation of the functions
may differ on your telephone.
13
Page 16
Getting to know your telephone
Direct dial keys A to D
You can store particularly important phone numbers on the four direct dial keys ( to ).
To dial these saved numbers, press the corresponding direct dialling key.
You can also assign the SOS function to the di
rect dial key ( p. 41).
Assigning phone numbers to direct dial keys
The direct dialling key in question is not already assigned a function.
In idle mode, press the direct dial key ( to ) to which you want to assign a function.
Using the key as a direct dial key: Edit entry OK
Keys to :
. . . use to enter the number . . . use to enter the first/last name Save
or select from the directory:
Press the display key Select an entry Select the number as required OK
. . . Call number, first name and last name are taken from the directory Save
Changing and deleting direct dial key assignments
. . . use to select Accessibility OK Direct Dial Keys OK
Select the direct dial key ( to ) . . . the current key assignment is displayed, e.g.:
A: – – – = Key is not yet assigned
B: Smith, John = Key is assigned the phone number of the subscriber displayed
C: 12345678 = Key is assigned the phone number displayed, the name is not
Changing the assignment:
known
Select the key Options Edit entry OK
. . . use to switch between the entry fields
. . . use to delete existing characters
. . . use to enter the new name and new number
Save
Deleting the current key assignment:
Select the key Options Delete entry OK
Only key : Assign the SOS function to the key p. 41
14
Availability and operation of the functions
may differ on your telephone.
Page 17
Getting to know your telephone
Control key
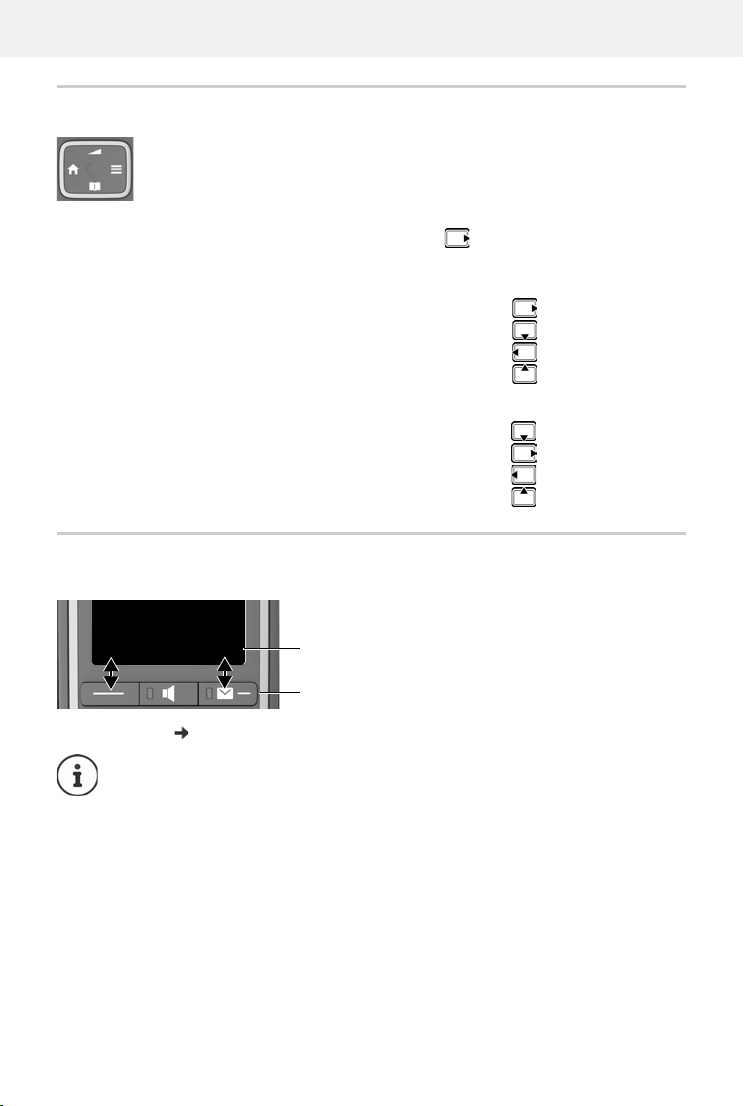
The control key enables you to navigate the menus and input fields, and also to
call up certain functions depending on the situation.
In the description below, the side of the control key (up, down, right, left) that you have to press
in the different operating situations is marked in black, e. g. for "press the right of the control
key".
In idle status
Open the main menu
Open the directory
Open the list of handsets
Set the call volume for receiver and handsfree function
During a conversation
Open the directory
Mute the microphone
Initiate an internal consultation call
Adjust the loudspeaker volume for receiver and handsfree mode
Display keys
The display keys perform a range of functions depending on the operating situation.
Back Save
Display key icons p. 85
The right display key is always preassigned with the Messages function in idle mode.
The assignment of the left display key can be changed.
Availability and operation of the functions
Current display key
functions
Display keys
may differ on your telephone.
15
Page 18
Getting to know your telephone
Back OK
Call
Lists
Example
Settings
Date/Time
Display
Language
Registration
Back OK
Example
Menu guidance
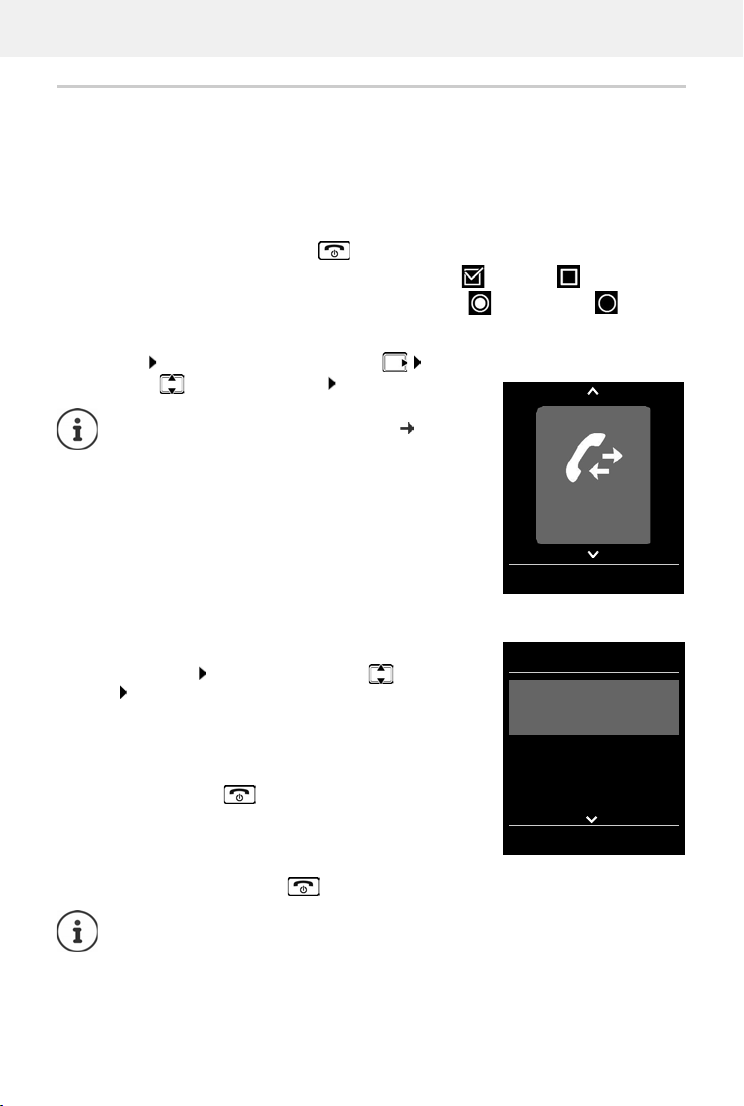
The functions of your telephone are displayed in a menu that consists of several levels.
Selecting/confirming functions
Confirm selection using OK
One menu level back using Back
Change to idle status press and hold
Switch function on/off using Change enabled / disabled
Activate/deactivate option using Select activated / not activated
Main menu
In idle status: Press the control key on the right . . . use
the control key to select a submenu OK
You can set which submenus are displayed
Submenus
The functions in the submenus are displayed as lists. The current
selection is shown in large font and highlighted in orange.
To access a function: . . .
function OK
Return to the previous menu level:
use the control key to select a
Press the display key Back
or
Press the End call key briefly
Returning to idle status
Press and hold the End call key
If a key is not pressed, after 2 minutes the display will automatically change to idle
16
status.
Availability and operation of the functions
may differ on your telephone.
( p. 46).
Page 19
Getting to know your telephone
New Entry
First Name:
Peter|
Surname:
Abc
‚
Save
Example
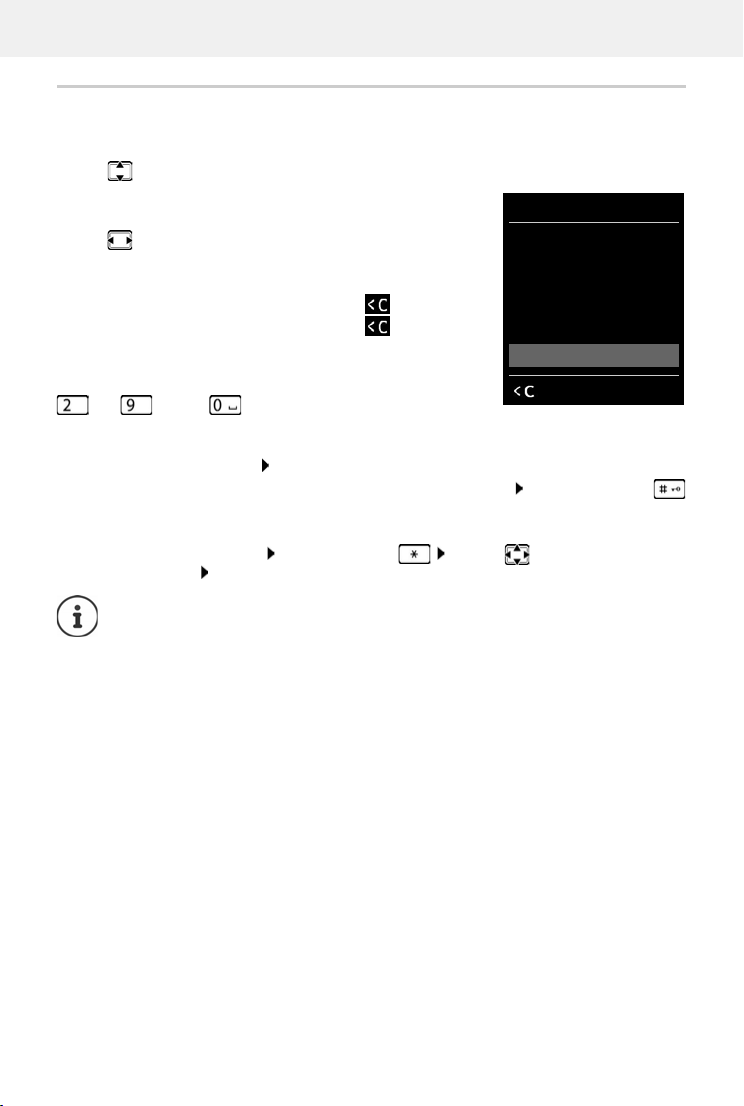
Entering text
Input position
Use to select an entry field. The cursor flashes in the
active entry field, the title and the text entered turn orange
and are shown in large font.
Use to move the position of the cursor.
Correcting incorrect entries
Delete characters to the left of the cursor: Press briefly
Delete words to the left of the cursor:
Entering letters/characters
Multiple letters and numbers are assigned to each key between
and and the ke y. As soon as a key is press ed, the
possible characters are displayed at the bottom of the display.
T
he selected character is highlighted.
• Selecting letters/numbers: Press the key briefly several times in succession
• Switch between lower case, upper case and number entry mode: Press the hash key
When editing a directory entry, the first letter and
automatically in upper case.
• Entering special characters: Press the star key . . . use to navigate to the
desired character Insert
Press and hold
each letter following a space is
The availability of special characters depends on the language setting.
Availability and operation of the functions
may differ on your telephone.
17
Page 20
Making calls
Making calls
Making calls
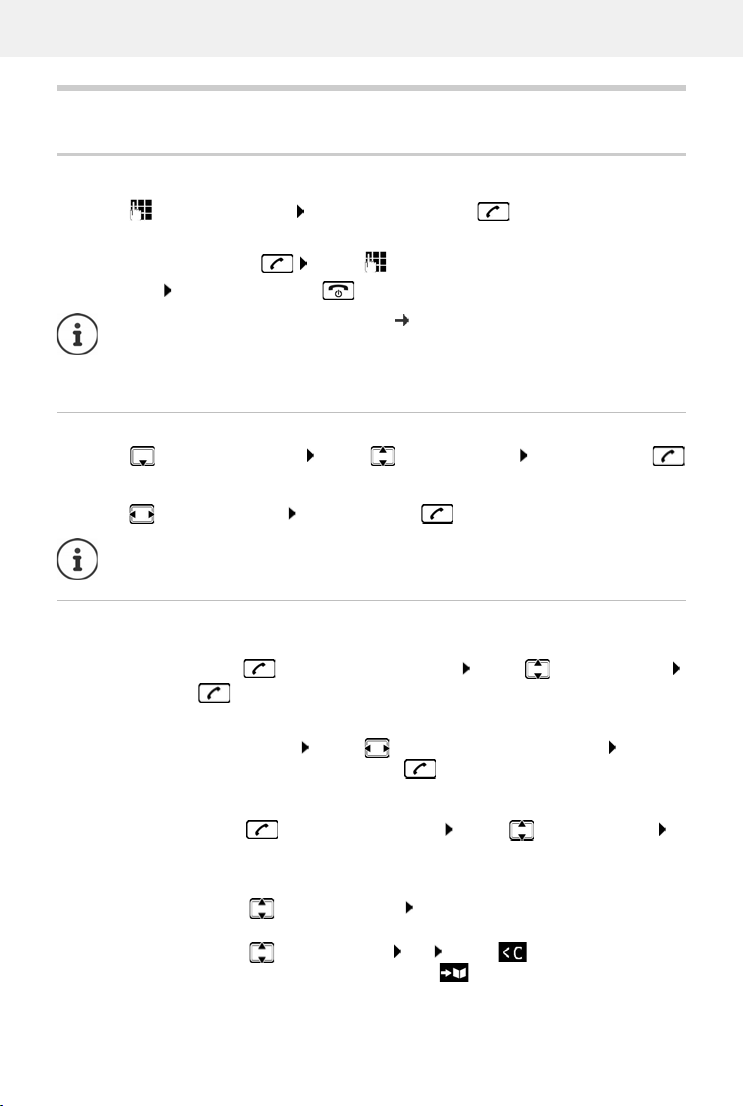
. . . use to enter the number briefly press the Talk key
or
Press and hold the Talk key . . . use to enter the number
Cancel dialling: Press the End call key
Information for Calling Line Identification: p. 23
If the display backlight is deactivated, you can reactivate it by pressing any key. Digit
keys that are pressed appear in the display for pre-dialling, other keys have no further
function.
Dialling from the directory
. . . use to open the directory . . . use to select an entry press the Talk key
If multiple numbers are entered:
. . . use to select a number press the Talk key . . . the number is dialled
For fast access (quick dial): Assign numbers from the directory to the digit or display
keys.
Dialling from the redial list
The redial list contains the 20 numbers last dialled with the handset.
Briefly press the Talk key . . . the redial list is opened . . . use to select an entry
press the Talk key
If a name is displayed:
View . . . the number is displayed . . . use to browse numbers if necessary . . . when
the desired number is reached press the Talk key
Managing entries in the redial list
Briefly press the Talk key the redial list is opened . . . use to select an entry
Options . . . possible options:
Copy an entry to the directory:
Copy to Directory OK
Copy the number to the display:
Display number OK . . . use to amend or add
numbers if necessary . . . use to save as a new entry in the
directory
18
Availability and operation of the functions
may differ on your telephone.
Page 21
Making calls
07:15
INT 1 22 Feb
OneTouchCall active
0891234567
OFF
Example
Delete the selected entry:
Delete entry OK
Delete all entries:
Dialling from the call list
The call lists ( p. 32) contain the most recent accepted, outgoing and missed calls.
Delete List OK
. . . use to select Call Lists OK . . . use to select a list OK . . .
use to select an entry Press the Talk key
The call lists can be displayed directly by pressing the display key Calls if the relevant
function has been assigned to the display key.
The Missed calls list can also be opened by pressing the Message key .
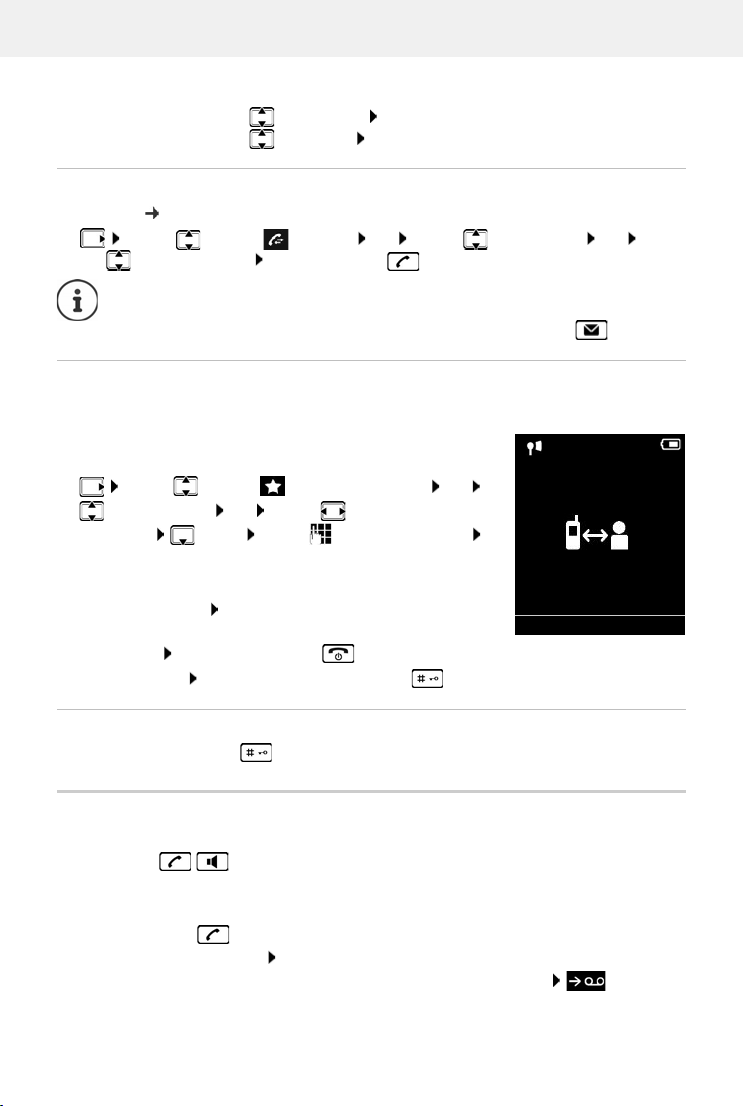
One touch call
A saved number is dialled by pressing any key. This allows children
who are not yet able to enter a number to call a certain number, for
example.
Activate one touch call mode:
. . . use to select Additional Features OK
One Touch Call OK . . . use to activate
Activation Call to . . . use to enter the number
Save . . . the active one touch mode is shown in the idle
display
Make a one touch call: Press any key . . . the saved number is
dialled
Cancel dialling: Press the End call key
End one touch call: Press and hold the End call key
Enter a dial pause when dialling
Press and hold the hash key. A P is shown on the display
Incoming calls
An incoming call is indicated by ringing, by a display on the screen and by the flashing Talk /
Handsfree key ( / ).
The signal light (LED) at the top of the handset als
Accept a call:
• Press the Talk key
• If Auto Answer is activated: Remove the handset from the charging cradle
• On a system with an answer machine: Forward to the answer machine:
Availability and operation of the functions
may differ on your telephone.
o flashes (if enabled).
19
Page 22
Making calls
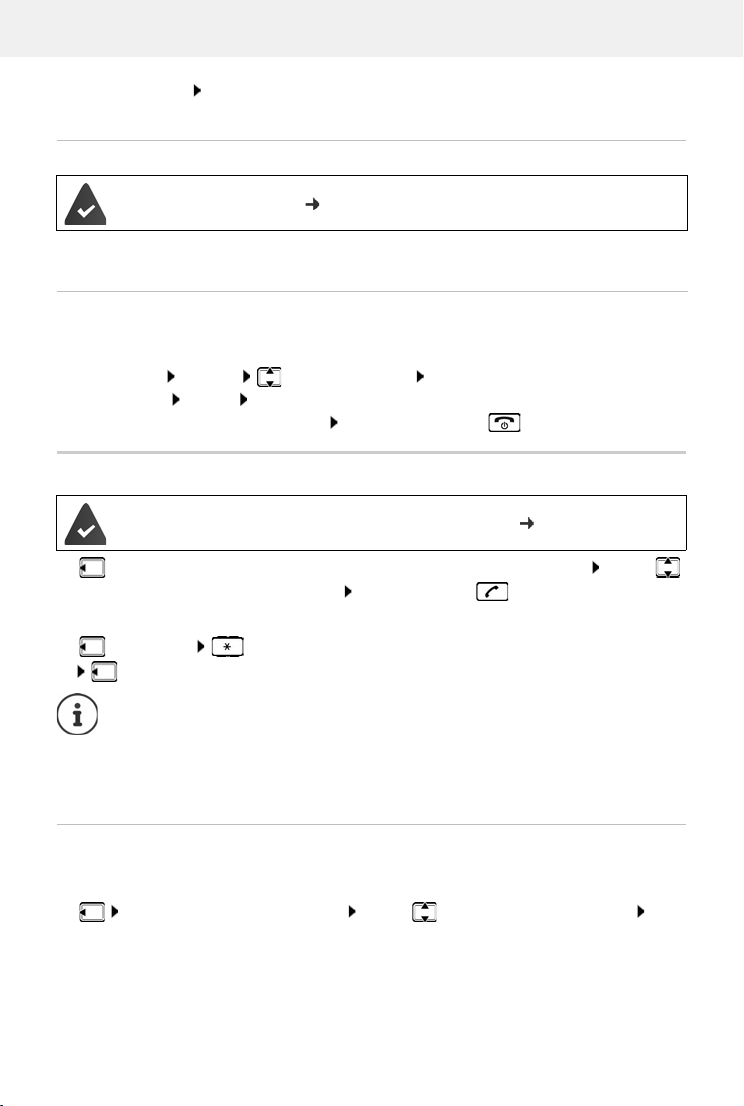
Switch off ringtone: Silence . . . the call can be accepted for as long as it is shown on the
display
Information about the caller
The caller's number is sent ( p. 23).
The caller's phone number is displayed.
If the caller's number is saved in the local directory, the name is displayed.
Accepting/rejecting call waiting
A call waiting tone indicates a call during an external call. The number or the name of the caller
is displayed if the phone number is transferred.
• Reject a call: Options Reject waiting call OK
• Accept a call: Accept . . . speak to the new caller. The previous call is placed on hold.
• End the call, resume the on-hold call: Press the End call key .
Making internal calls
Multiple handsets have been registered to the base station ( p. 63).
Press briefly . . . the handset list is opened, this handset is indicated by < . . . use
to select handset or Call all (group call) Press the Talk key
Fast access for group call:
Press briefly
or press and ho
Internal calls to other handsets registered to the same base station are free of charge.
You hear the busy tone if:
• There is already an internal connection
• The handset being called is not available (deactivated, outside of range).
• The internal call is not accepted within 3 minutes.
ld
Internal consultation call/Internal transfer
Call an external participant and transfer the call to an internal participant or hold a consultation
call with him or her.
. . . the list of handsets is opened . . . use to select a handset or Call all OK
. . . the internal participant(s) are called . . . possible options:
Hold a consultation call:
Speak to the internal participant
20
Availability and operation of the functions
may differ on your telephone.
Page 23
Making calls
Return to the external call:
Options End active call OK
Transfer the external call when the internal participant has answered:
Announce an external call Press the End call key
Transfer the external call before the internal participant answers:
Press the End call key . . . the external call is forwarded
immediately. If the internal participant does not answer or the line
is busy, the external call will automatically return to you.
End the internal call if the internal participant does not answer or the line is busy:
End . . . You return to the external call
Accepting/rejecting call waiting
An external call arriving during an internal call is indicated with a call waiting tone. If the number
is transferred, you will see the number or the name of the caller on the display.
• Rejecting a call: Reject
The call waiting tone is turned off. The call continues to be indicated on the other registered
handsets.
• Accepting a call: Accept . . . Speak to the new caller, the previous call is placed on hold.
Internal call waiting during an external call
If an internal participant attempts to call you while you are involved in an external or internal call,
this call is shown on the display (Call Waiting).
• End display: Press any key
• Accept the internal call: End your current call
The internal call is indicated in the usual way. You can accept the call.
Listening in to an external call
You are conducting an external call. An internal participant can listen in to this call and take part
in the conversation (conference).
The Listening In function must be activated.
Activating/deactivating internal listening in
. . . use to select Settings OK Telepho ny OK Listening In
Change ( = activated)
Internal listening in
The line is engaged with an external call. Your screen will display information to that effect. You
can listen in to the external call.
Press and hold . . . all participants will hear a signal tone
Ending listening in
Press . . . all participants will hear a signal tone
Availability and operation of the functions
may differ on your telephone.
21
Page 24
Making calls
During a conversation
Handsfree mode
Activating/deactivating handsfree mode during a call, when establishing a connection and
when listening to the answer machine (where the system has a local answer machine):
Press the handsfree key
Placing the handset in the charging cradle during a call:
Press and hold down the handsfree key . . . Place the handset in the charging
cradle . . . hold for a further 2 seconds
Call volume
Applies for the mode currently being used (handsfree, receiver or headset):
Press . . . use to set the volume Save
Boost function (extra-loud): Press the Boost key on the right-hand side of the handset
The setting is automatically saved after around 3 seconds, even if Save is not pressed.
The Boost setting only applies for the duration of the call.
Muting the microphone
When the microphone is switched off, callers will no longer hear you.
Switch the microphone on/off during a call: Press .
22
Availability and operation of the functions
may differ on your telephone.
Page 25
Provider-specific functions (network services)
Provider-specific functions (network services)
Network services depend on the network (analogue fixed line network or IP telephony) and on
the network provider (service provider) and must be requested from that provider if required.
You will find a description of the features on your net
store branches.
If you require assistance, please contact your network provider.
Requesting network services may incur additional costs. Please consult your network
provider.
Network services fall into two distinct groups:
• Network services that are activated when in idle status for the following call or all subsequent
calls (for example, "calling anonymously"). These are activated/deactivated via the
Select Services menu.
• Network services that are activated during an external call, (for example, "consultation call",
"swapping between two callers"). These are made available during an external call either as
an option or by using a display key (e.g. Ext. Call).
To activate/deactivate the features, a code is sent to the telephone network.
After a confirmation tone from the telephone network, press .
It is not possible to reprogram the network services.
Calling Line Identification
During a call, the caller's number is transferred (CLI = Calling Line Identification) and may be
displayed on the recipient's display (CLIP = CLI presentation). If the caller's number is withheld,
it will
not be displayed to the recipient. The call is made anonymously (CLIR = CLI Restriction).
work provider's website or at one of their
Caller display for incoming calls
Calling Line Identification
The caller's phone number is displayed. If the caller's number is saved in the directory, the name
is displayed.
No Calling Line Identification
Instead of name and number, the following is displayed:
• External: No number has been transferred.
• Withheld: Caller has withheld Calling Line Identification.
• Unavailable: Caller has not authorised Calling Line Identification.
Availability and operation of the functions
may differ on your telephone.
23
Page 26
Provider-specific functions (network services)
Call Waiting
1234567
Accept Options
Calling Line Identification for outgoing calls
Switching Calling Line Identification on/off for all calls
These settings apply to all registered handsets.
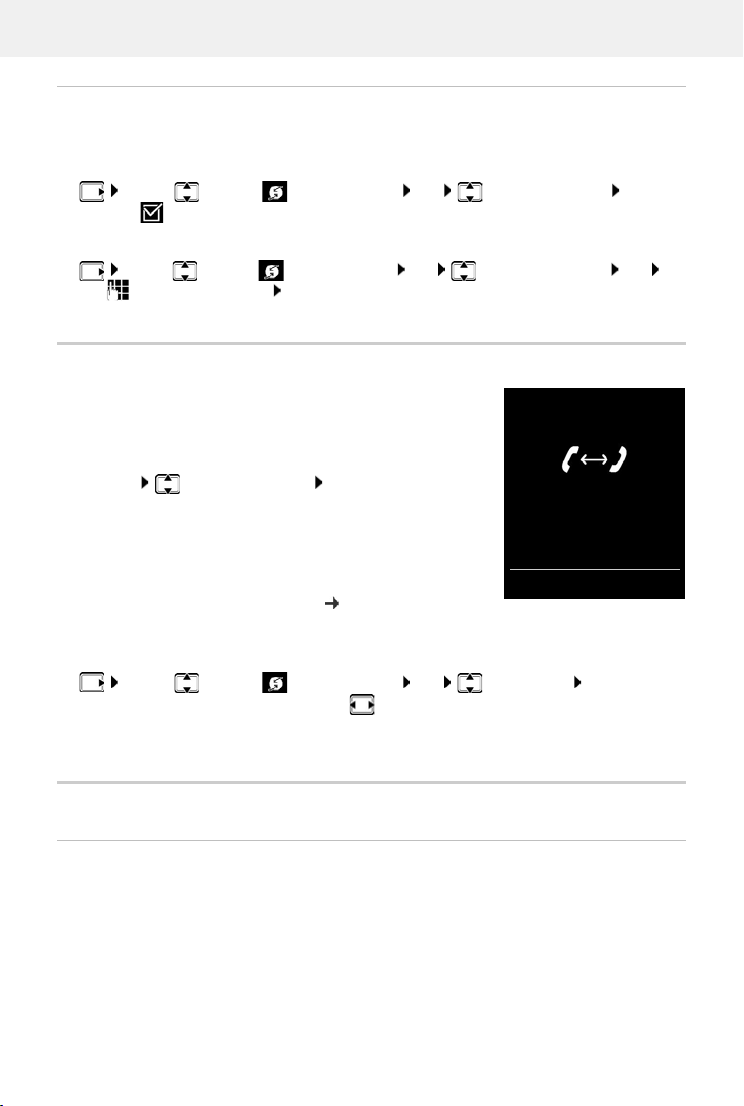
. . . use to select Select Services OK All Calls Anonym.
Change ( = activated)
Deactivating Calling Line Identification for the next call
. . . use to select Select Services OK Next Call Anonym. OK . . .
use to enter the number Dial . . . the connection is established without Calling Line
Identification
Call waiting during an external call
During an external call, a call waiting tone indicates another
external caller. If the number is bein g transferred, you will see the
number or the name of the caller on the display.
Reject waiting caller:
Options Reject waiting call OK . . . the waiting
caller hears the busy tone
Accept the waiting call:
Accept
Once you have accepted the waiting call, you can switch
etween the two callers (Call swapping p. 26) or speak to
b
both simultaneously.
Activating/deactivating call waiting
. . . use to select Select Services OK Call Waiting OK . . . then
Switch on/off:
Activate:
Call waiting is activated or deactivated for all registered handsets.
Status: . . . use to select On or Off
Send
Ringback
If busy/no answer
If a call recipient is unavailable, you can initiate a ringback.
• If busy: The ringback takes place as soon as the participant in question terminates the
current call.
• If no answer: The ringback takes place as soon as the participant in question has made
another call.
24
Availability and operation of the functions
may differ on your telephone.
Page 27
Provider-specific functions (network services)
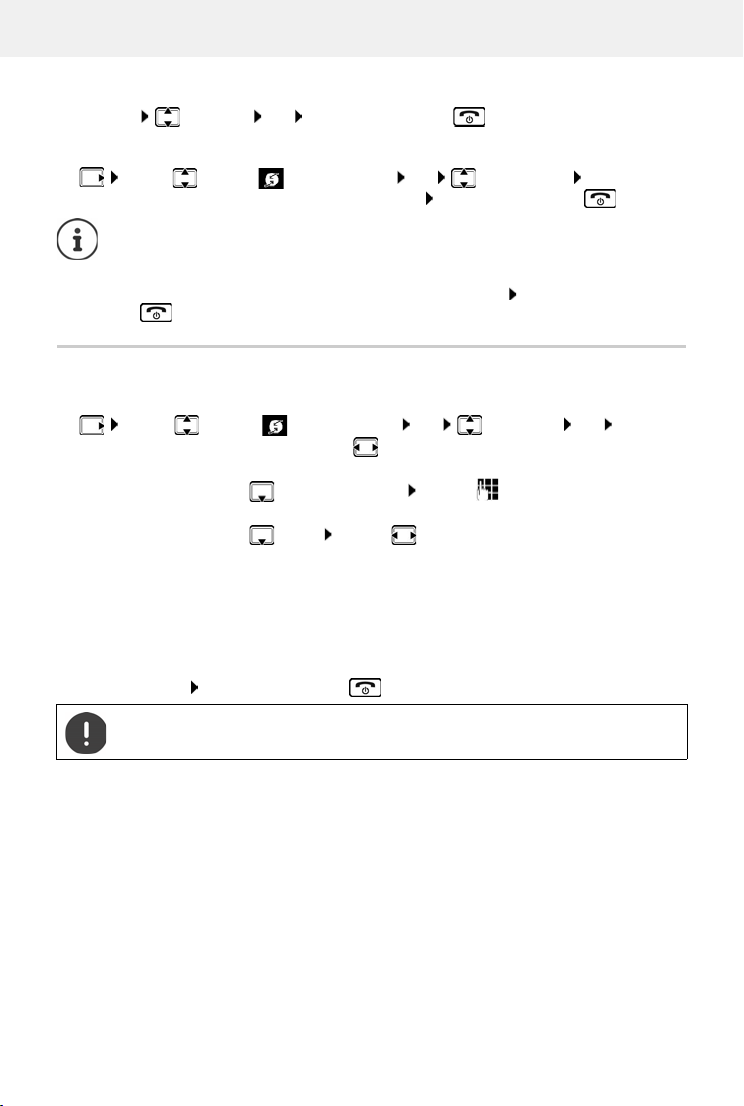
Initiate ringback
Options Ringback OK Press the End call key
Cancelling ringback
. . . use to select Select Services OK Ringback Off OK . . . You will
receive a confirmation from the telephone network Press the End call key
You can only activate one ringback at a time. Activating a ringback will automatically
cancel any ringback that is already active.
The ringback can only be received on the handset that activated the ringback.
If the ringback is indicated before you are able to cancel it: Press the End call
key
Call divert
When diverting a call, the call is forwarded to another connection.
. . . use to select Select Services OK Call Divert OK . . . then
Switch on/off:
Enter the number for call diverting:
Status: . . . use to select On or Off
To P hone Numb er . . . use to enter the number
Set the time for call divert:
When . . . use to select the time for call divert
All Calls: Calls are diverted immediately
No Answer: Calls are diverted if no one accepts the call within
several rings.
When Busy: Calls are diverted if the line is busy.
Activate:
A connection is established to the telephone network . . . a confirmation is sent from the
telephone network Press the End call key
Send
Diverting calls may incur additional costs. Please consult your network provider.
Availability and operation of the functions
may differ on your telephone.
25
Page 28
Provider-specific functions (network services)
Consultation
Call to:
12
On hold:
025167435
End Options
Call Swap
1234567
025167435
08:15
Conference Options
Calls with three participants
Consultation calls
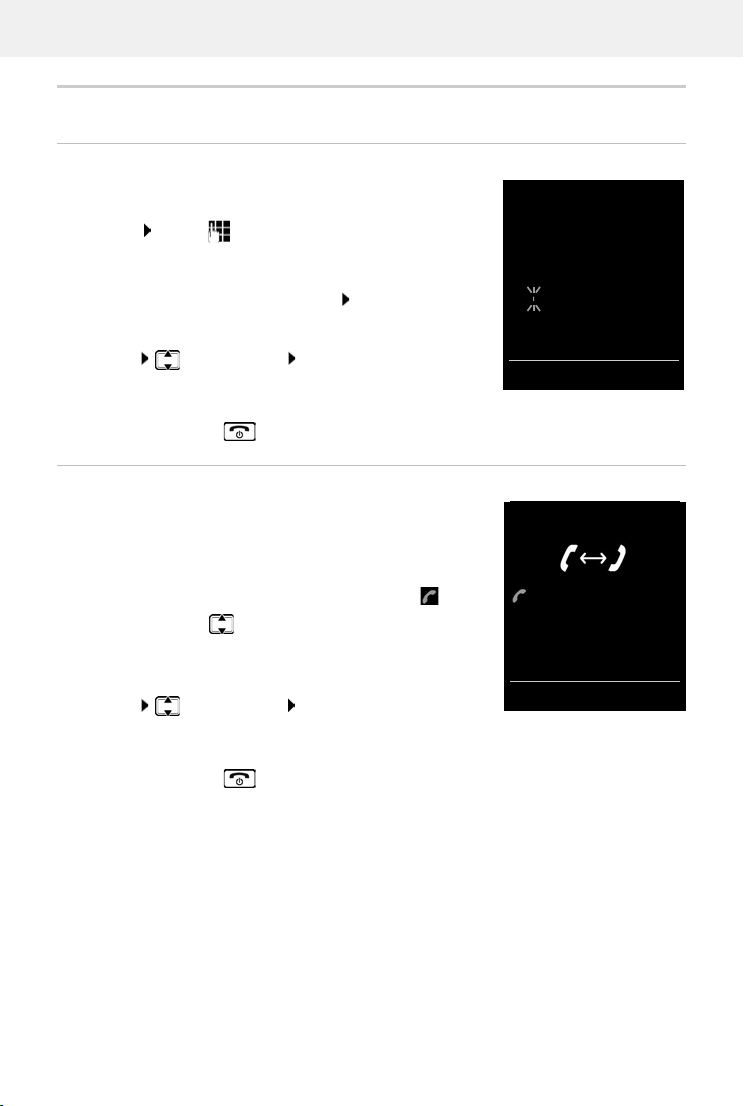
Make another external call during an external call. The first call is
placed on hold.
Ext. Call . . . use to enter the number of the second
participant . . . the active call is placed on hold and the second
participant is called
If the second participant does not answer: End
Ending a consultation call
Options End active call OK . . . the connection to
the first caller is reactivated
or
Press the End call key . . . a recall to the first participant is initiated
Call swapping
Switching between two calls. The other call is placed on hold.
During an external call, dial the number of a second
participant (consultation call) or accept a waiting caller . . .
the display shows the numbers and/or names of both call
participants, the current participant is marked with .
use the control key to switch back and forth between
participants
Ending a currently active call
Options End active call OK . . . the connection to
the other caller is reactivated
or
Press the End call key . . . a recall to the first participant is initiated
26
Availability and operation of the functions
may differ on your telephone.
Page 29
Directory
New Entry
First Name:
Robert|
Surname:
Abc
‚
Save
Example
The local directory is unique to the handset. However, it is possible to send entries to other
handsets.
Opening the directory
Briefly press in idle status
or
. . . use to select Handset Directory OK
Directory entries
Number of entries: up to 200
Information: First name and surname, up to three telephone numbers, anniversary
Length of the entries: Numbers: max. 32 digits
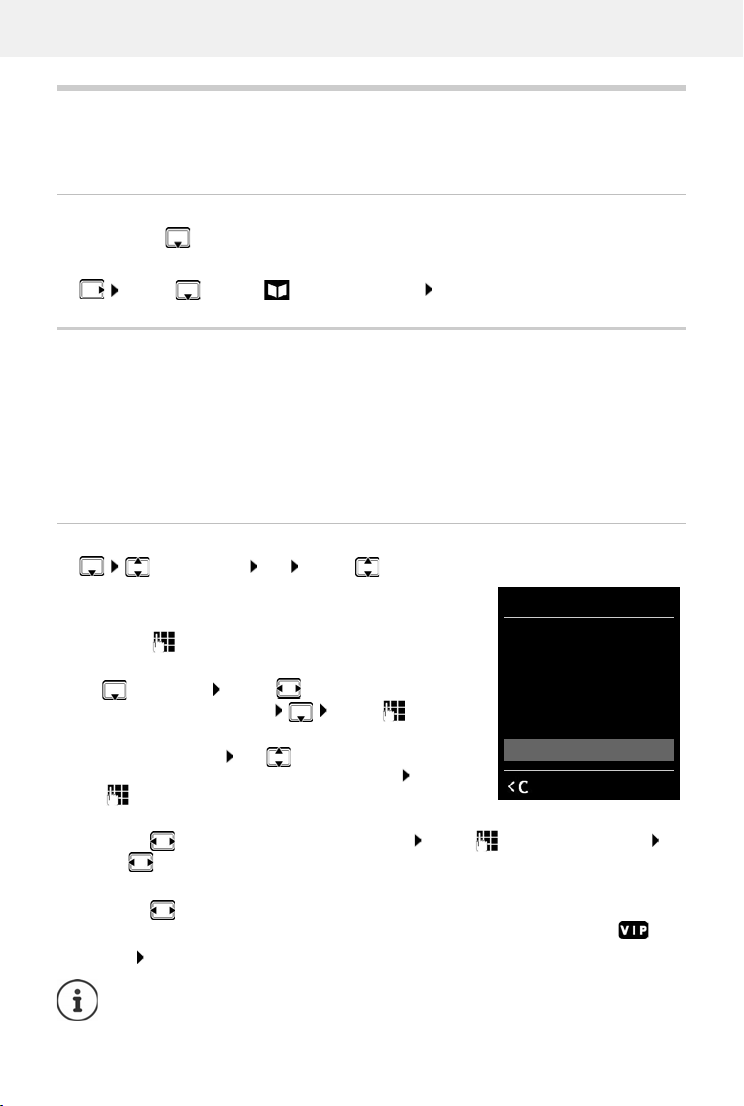
Creating an entry
<New Entry> OK . . . use to switch
between the entry fields
Name:
. . . use to enter the first and/or last name
Numbers:
Tel .1 - Typ e . . . use to select a number type
(Home, Office or Mobile) . . . use to enter a
number
Enter more numbers: use to toggle between the
entry fields Te l.1 - Type /Te
use to enter a number
Anniversary:
. . . use to activate/deactivate Anniversary . . . use t o en te r da te and ti me . . .
use to select type of alert (Visual only or a ringtone)
Caller Melody (VIP):
. . . use to select the ringtone that will indicate a call from the participant . . . if a Caller
Melody (VIP) has been assigned, the entry will appear in the directory with the icon.
Save entry: S
ave
with alert, VIP ringtone with VIP icon, announcement for reading out
on scrolling through the directory or for incoming calls
First name, surname: max. 16 characters
l. 2 - Typ e/Tel. 3 - Typ e . . .
Directory
The entry is only valid if it contains at least one number.
Availability and operation of the functions
may differ on your telephone.
27
Page 30
Directory
For Caller Melody (VIP): the telephone number of the caller must be supplied.
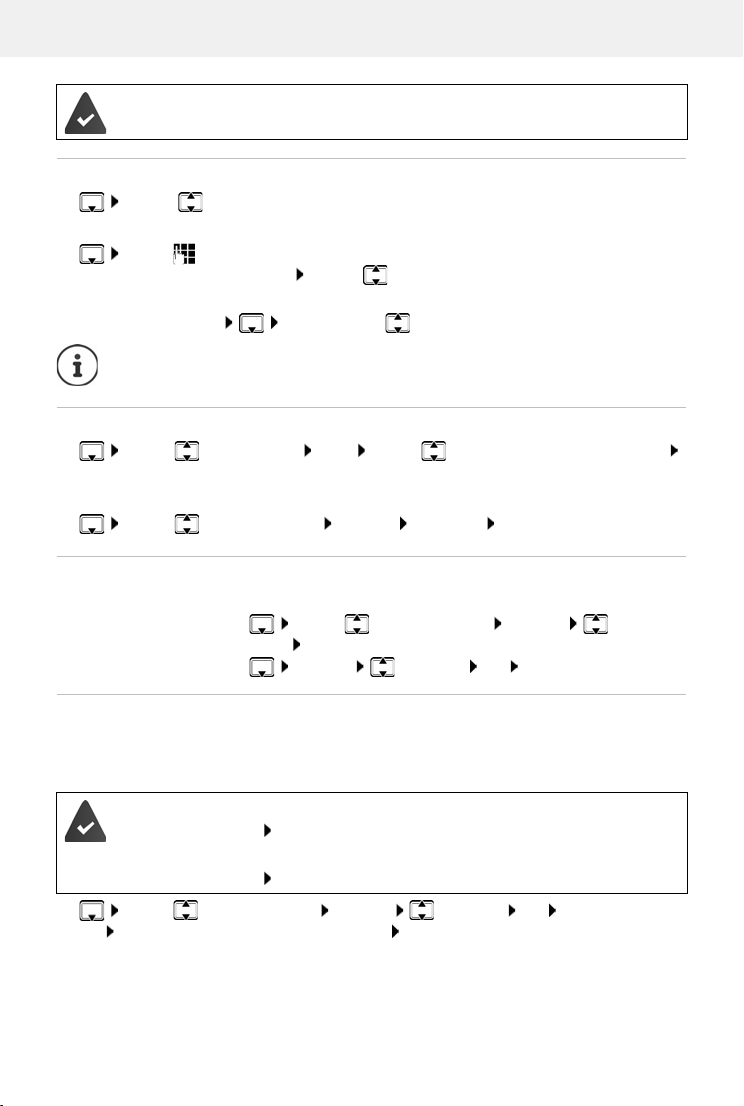
Searching for/selecting a directory entry
. . . use to browse searched names
or
. . . use to enter initial l etters (max. 8 letters) . . . the display jumps to the first name
starting with these initial letters . . .
needed
Scroll through directory: Press and ho
If you have recorded an announcement for a contact, this announcement is read out
as soon as you select the contact.
Displaying/changing an entry
use to continue browsing to the desired entry, if
ld
. . . use to select entry View . . . use to select the field to be changed
Edit
or
. . . use to select an entry Options Edit entry OK
Deleting entries
Delete the selected entry:
. . . use to select an entry Options Delete
entry OK
Delete all entries:
Options Delete all OK Yes
Recording an announcement for incoming calls
You can record an announcement for a directory entry, e.g. the name of the contact. This
announcement is read out when you select the contact in the directory or when a call arrives
from this contact.
Read out announcement when the contact is selected from the directory:
• The Accessibility Read out contacts function is enabled.
Read out announcement for incoming call:
• The Accessibility Spoken Caller ID function is enabled.
. . . use to select an entry Options Voi ce Tag OK Record Voice Tag:
OK Record the announcement (max. 8 secs) Save
28
Availability and operation of the functions
may differ on your telephone.
Page 31
Directory
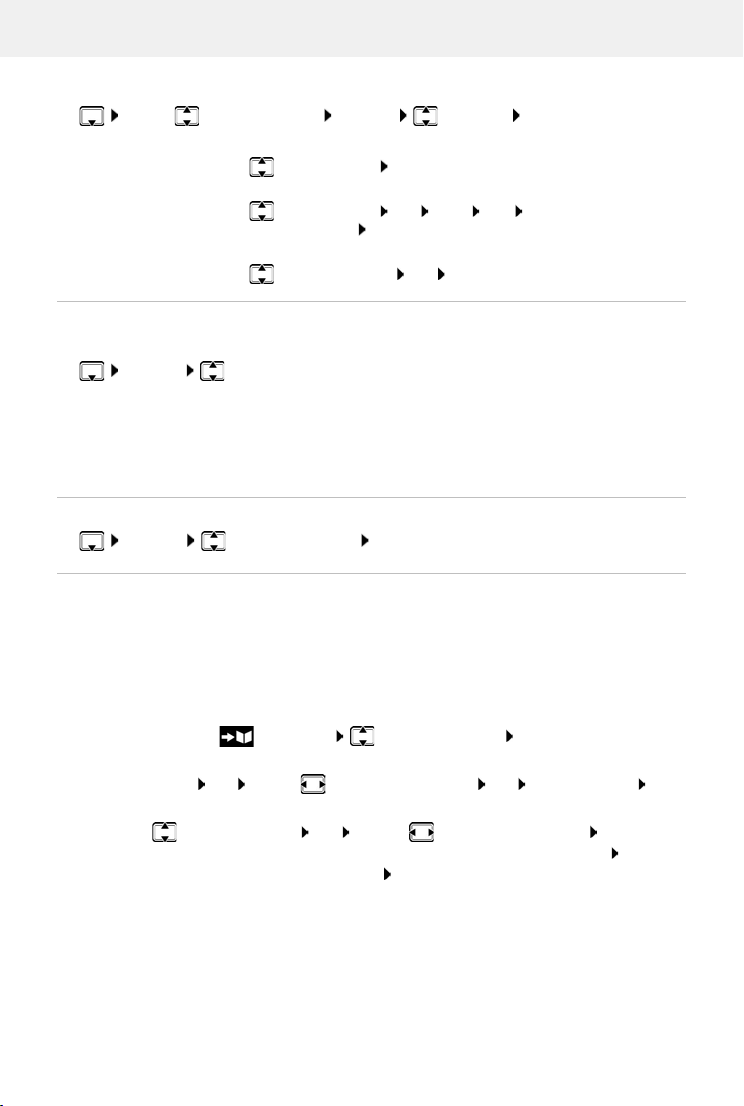
Checking/changing/deleting an announcement:
. . . use to select an entry Options Vo ice Tag OK
Listen to an announcement:
Play Voice Tag OK
Change an announcement:
Play Voice Tag OK New Yes Record the
announcement Save
Delete announcement:
Delete Voice Tag OK Yes
Setting the order of the directory entries
Directory entries can be sorted by first name or surname.
Options Sort by Surname / Sort by First Name
If no name was entered, the default telephone number is shown in the surname field. These
tries appear at the beginning of the list, regardless of how the entries are sorted.
en
The sort order is as follows:
Space | Digits (0-9) | Letters (alphabetically) | Other characters.
Displaying the number of entries available in the directory
Options Available Memory OK
Copying number to the directory
Copy numbers to the directory:
• From a list e.g. the call list or the redial list
• From the text of an SMS
• When dialling a number
The number is displayed or highlighted.
Press the display key or Options Copy to Directory OK . . . possible options:
Create a new entry:
<New Entry> OK . . . use to select number type OK complete entry Save
Add number to an existing entry:
. . . use to select an entry OK . . . use to select number type OK . . . the
number is entered or a prompt to overwrite an existing number is displayed . . . if
required, answer the prompt with Ye s /No Save
Availability and operation of the functions
may differ on your telephone.
29
Page 32
Directory
Copying an entry/directory
The sending and receiving handset must both be registered to the same base station.
The other handset and the base station are able to send and receive directory entries.
An external call interrupts the transfer.
Only the date is transferred for an anniversary.
Both handsets support vCards:
• No entry with the name is available: a new entry is created.
• An entry with the name is already available: The entry is expanded to include the
new numbers. If the entry contains more numbers than allowed by the recipient
handset, a second entry is created with the same name.
The recipient handset does not support vCards:
A separate entry is created and sent for each number.
The sending handset does not support vCards:
A new entry is created on the receiving handset and the transferred number is added
to the Phone (Home) field. If an entry with this number already exists, the copied
number is discarded.
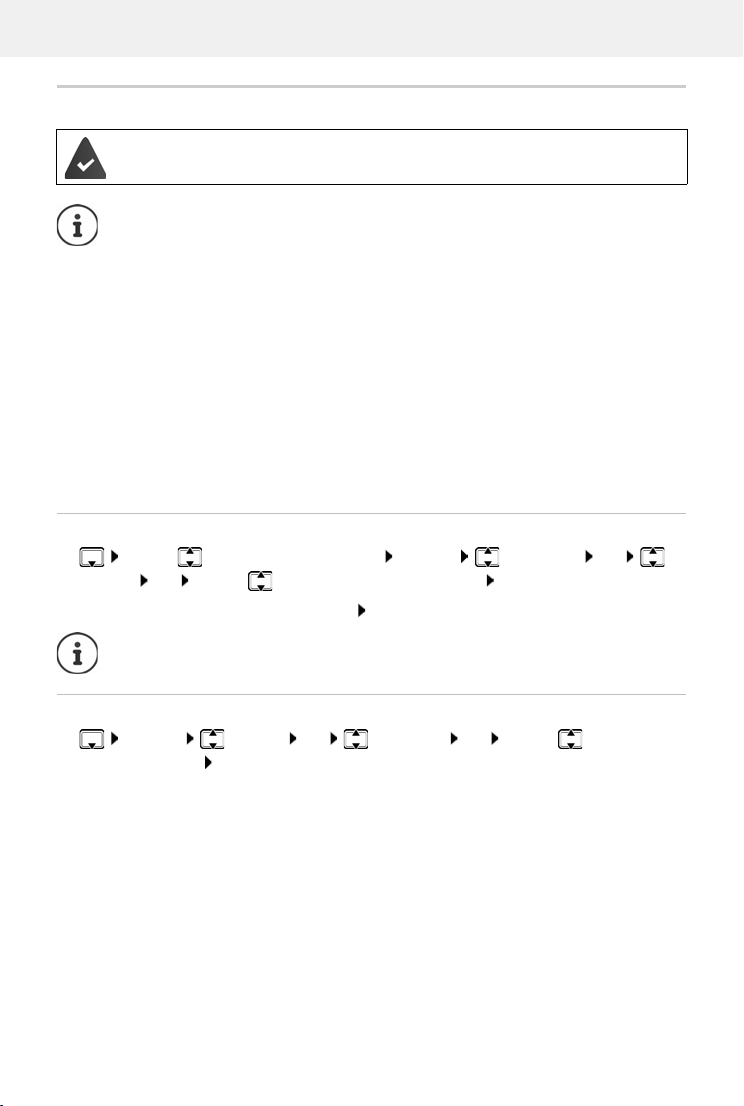
Copying individual entries
. . . use to select the desired entry Options Copy entry OK to
Internal OK . . .
Copy the next entry after successful transfer: Press Ye s or No
use to select the receiving handset OK . . . the entry is copied
use vCard via SMS to send a directory entry in vCard format by SMS.
Copying the entire directory
Options Copy all OK to Internal OK . . . use to select the
receiving handset OK . . . the entries are copied one after the other
30
Availability and operation of the functions
may differ on your telephone.
Page 33

Directory
Copying a vCard using Bluetooth
Copy directory entries in vCard format, e.g. to exchange entries with a mobile phone.
Bluetooth mode is activated
T
he other handset/mobile phone supports Bluetooth.
. . . use to select an entry if needed Options Copy entry / Copy all
vCard via Bluetooth
device OK
Receiving a vCard using Bluetooth
If a device in the Known Devices list sends a vCard to your handset, a directory entry is automatically created and a message is shown in the display.
If the sending device is not in the list: . . . use to enter the PIN of the sending Bluetooth
device OK
. . . the copied vCard is available as a directory entry
. . . the Known Devices list is displayed . . . use to select
Availability and operation of the functions
may differ on your telephone.
31
Page 34
Call lists
All calls
Black,
Susan
30.01. 10:30
View Options
Example
Call lists
The telephone saves different types of calls (missed, accepted and outgoing calls) in lists.
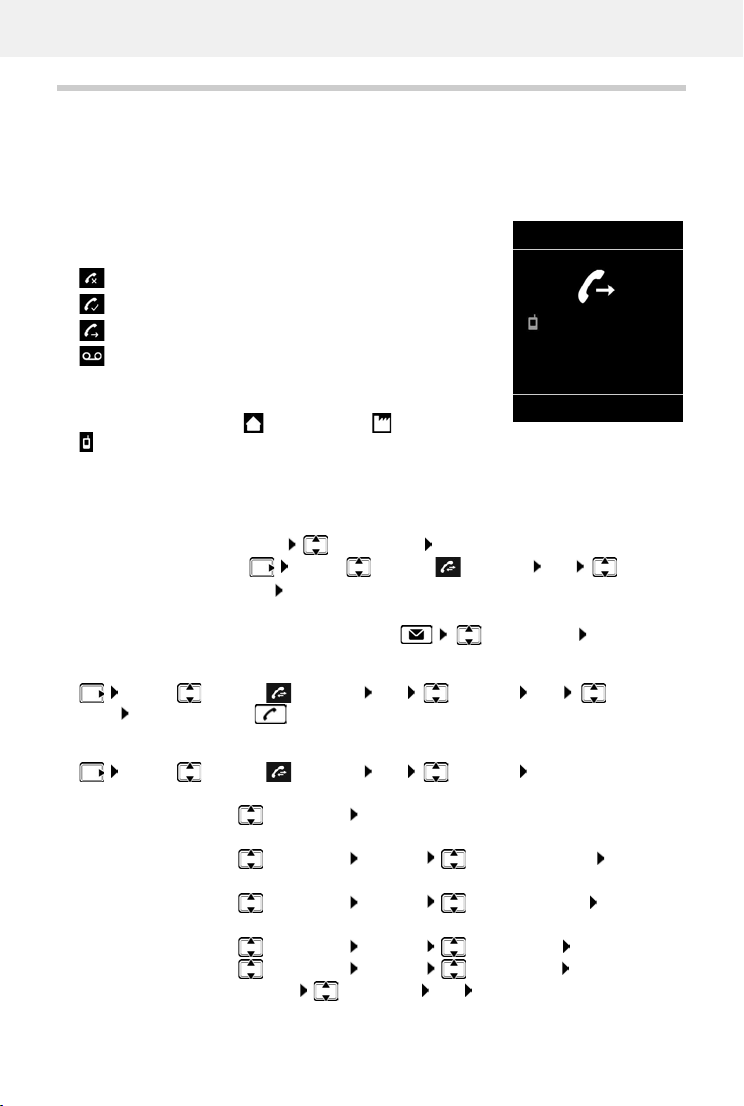
List entry
The following information is displayed in the list entries::
• The list type (in the header)
• Icon for the type of entry:
Missed calls,
Accepted calls,
Outgoing calls (redial list),
Call on the answer machine (only for a system with a
local answer machine)
• Caller's number. If the number is stored in the directory, the
name and number type ( Phone (Home), Phone (Office),
Phone (Mobile)) are shown instead. In the event of missed
calls, the number of missed calls from this number is also shown in square brackets.
• Date and time of call (if set)
Opening the call list
Via the display key:
Via the menu:
Via the Message key (missed calls):
Calling back a caller from the call list
. . . use to select Call Lists OK select list OK select
entry Press the Talk key
Additional options
. . . use to select Call Lists OK select list OK . . . possible
options:
View an entry:
Number into directory:
Number into black list:
Request SMS information about a call number (might require payment):
Delete an entry:
Delete list:
32
Calls select the list OK
. . . use to select Call Lists OK select the
list OK
Press the Message key Missed Calls: OK
select entry View
select entry Options Copy to Directory OK
select entry Options Copy to Blacklist OK
select entry Options SMS Enquiry OK
select entry Options Delete entry OK
Options Delete List OK Yes
Availability and operation of the functions
may differ on your telephone.
Page 35
Message lists
07:15
INT 1 14 Oct
02 10 09
08
Calls
Example
Messages & Calls
Missed Appts: (1)
Missed Calls: (3)
Mailbox: (0)
Answer Mach.: (5)
Back OK
Example
Message lists
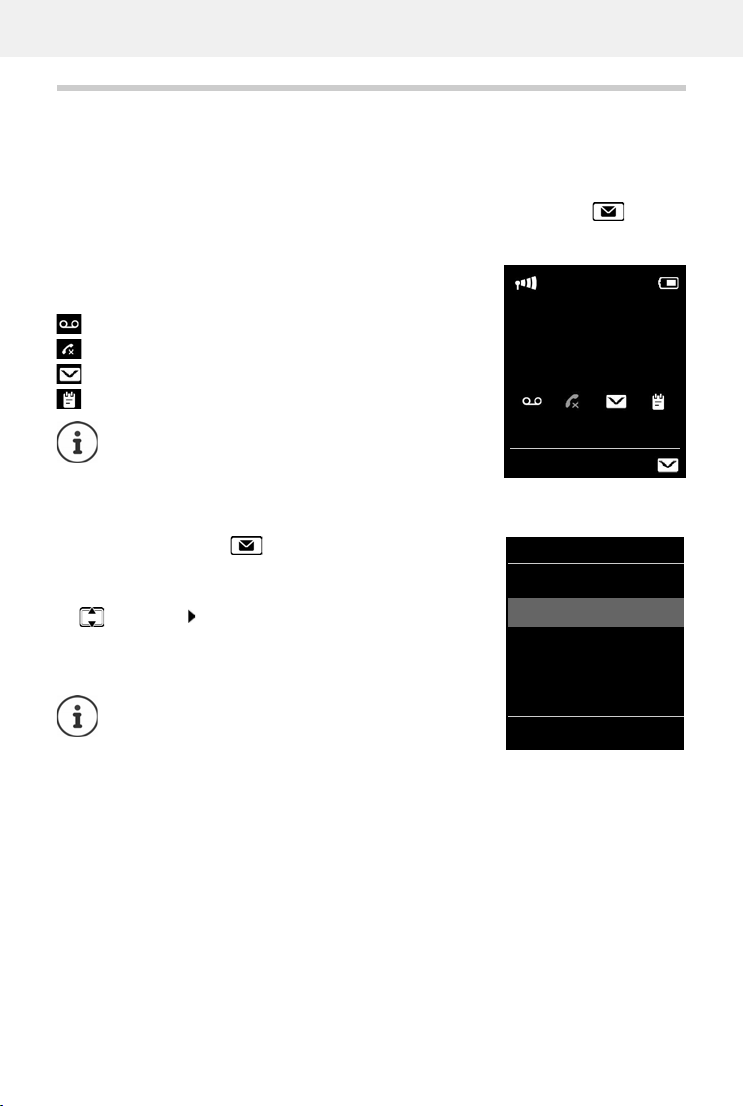
Notifications about missed calls, messages on the answering machine/network mailbox, missed
SMS messages and missed alarms are saved in the messages list and can be shown on the
handset display.
As soon as a new message arrives, an advisory tone will sound. The Message key also
flashes (if activated).
Icons for message types and the number of new messages are
shown on the idle display.
Notification for the following message types is available:
on the answer machine/network mailbox
in the missed calls list
in the SMS message list
in the missed alarms list
The icon for the network mailbox is always displayed,
provided the number is stored in the telephone. The
other lists are only displayed if they contain messages.
Display messages:
Press the Message key . . . Messages lists that contain
messages are displayed, Mailbox: is always displayed
The number of new messages is shown in brackets.
Select a list OK . . . the calls or messages are listed
Network mailbox: The network mailb
ox number is dialled.
The message list contains an entry for every answer
machine assigned to the handset, e.g. for the local
answer machine (if available) or for a network mailbox.
Availability and operation of the functions
may differ on your telephone.
33
Page 36

Message lists
System
975 SET:
[0]
Back OK
Activating/deactivating Message key flashing
Receipt of new messages is displayed by a flashing message key on the handset. This type of
alert can be activated/deactivated for each message type.
In idle status:
Press keys . . . the number 9
appears in the display . . . use to select the message type:
Messages on the network mailbox
missed calls
new SMS
Messages on the answer machine (only for a
system with a local answer machine)
. . . the number 9 followed by the entry (e.g. 975) is displayed,
the current setting for the select message type flashes in the
entry field (e.g. 0) . . . use to set the action for the arrival
of new messages:
The Message key flashes
The Message key does not flash
. . . confirm selected setting with OK
or
return to idle display without making changes: Back
34
Availability and operation of the functions
may differ on your telephone.
Page 37
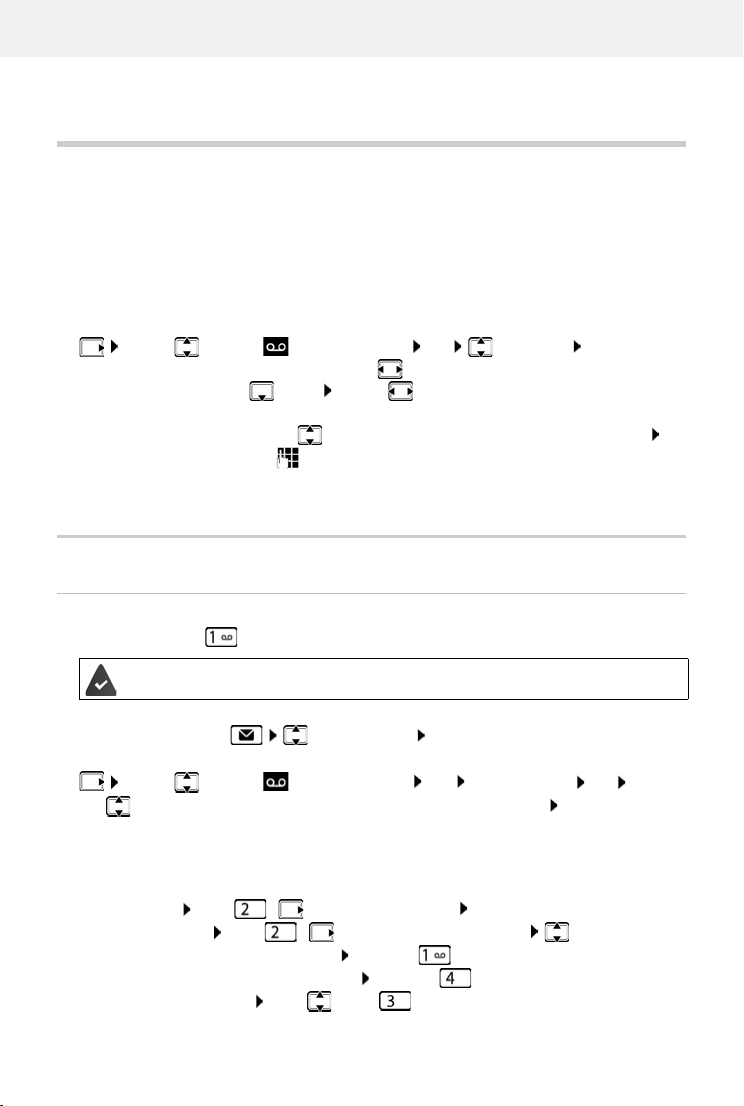
Local answer machine (if available)
Answer machine
Local answer machine (if available)
Switching the answer machine on/off
The answer machine can be set to the following modes:
Answer & record The caller hears an announcement and is able to leave a message.
Answer only The caller hears an announcement but cannot leave a message.
Alternating The mode switches between A
determined times.
. . . use to select Answer Machine OK Activation OK . . . then
Switch on/off:
Set mode:
Set the time for Alternating mode:
Activation: . . . use to select On or Off
Mode . . . use to select mode
. . . use to switch bet ween Record from and Record until . . .
use to enter hours/minutes in 4-digit format to set the start and
end of the period. (The time must be set.)
Save settings:
Save
Operation using the handset
nswer & record and Answer only at pre-
Playing back messages
Press and hold the key
Key 1 is assigned to the answer machine.
or
Press the Message key Answer Mach.: OK
or
. . . use to select Answer Machine OK Play Messages OK . . .
use to select Answer Machine (when a network mailbox is set up) OK
The answer machine begins immediately with message playback. New messages are played
ck first.
ba
Actions during playback
• Stop playback: Press / or use the display key: Options
• Continue playback: Press / again or use the display key: Continue
• Go to the start of the current message: Press key
• Repeat the last 5 seconds of the message: Press key
• Skip to the next message: Press or key
Availability and operation of the functions
may differ on your telephone.
35
Page 38
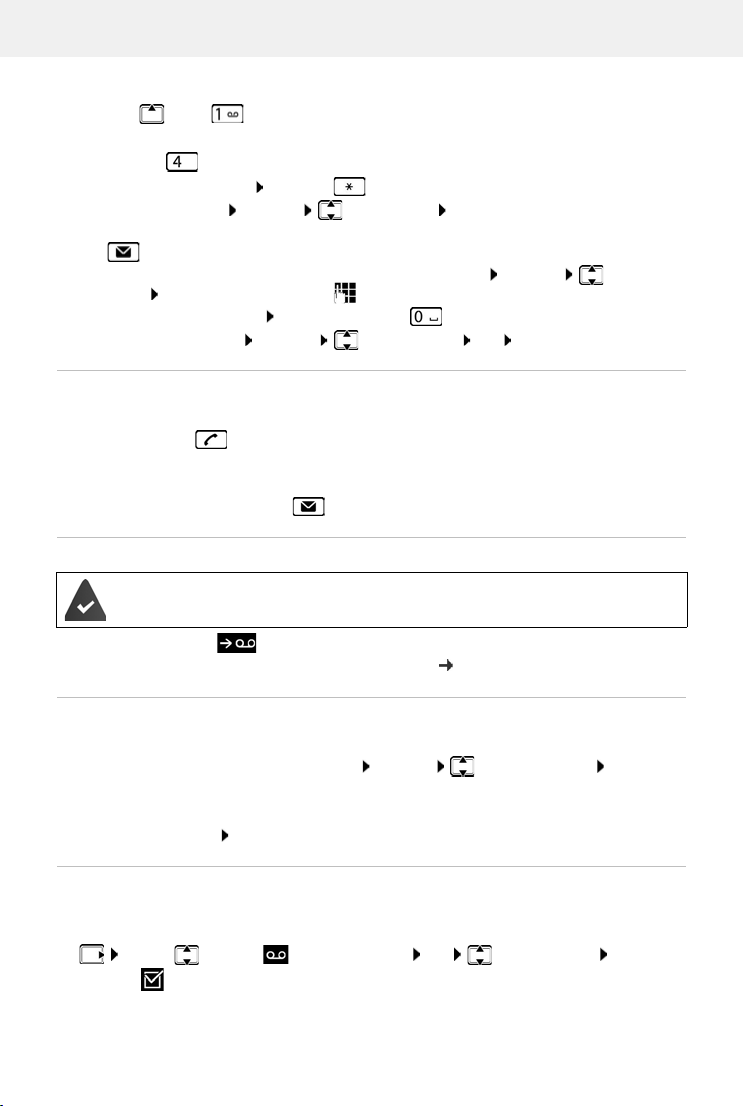
Local answer machine (if available)
• Skip to previous message during the time stamp playback:
Press or key
• Skip to next message during the time stamp playback:
Press key
• Mark a message as "new": Press key
or use the display key Options Mark as new OK
An "old" message that has already been played back
The key on the handset flashes.
is displayed as a "new" message again.
• Copying the phone number from a message to the directory: Options Copy to
Directory . . . complete entry using
• To delete a single message: Press Delete or key
• Delete all old messages: Options Delete old list OK Yes
Picking up a call from the answer machine
You can pick up a call while the answer machine is recording or is being operated remotely:
Press the Talk key or use display key Accept . . . recording is interrupted . . . speak to the
caller
If three seconds of the message have already been recorded when you accept the call, the
sage is saved. The Message key on the handset flashes.
mes
Forwarding an external call to the answer machine
An external call is indicated on the handset.
he answer machine is activated, is not in use and still has enough memory.
T
Press the display key . . . The answer machine starts immediately in answer and record
mode and records the call. The set time for ring delay ( p. 39) is ignored
Activating/deactivating two-way record
Pick up an external call with the answer machine:
Inform the caller of the two-way recording Options Two -way Record OK . . . two-
way recording is indicated in the display by an advisory text and placed in the answer
machine list as a new message
End two-way recording: End
Activating/deactivating call screening
During recording of a message you can screen a call via the handset loudspeaker:
Permanently switching call screening on/off:
. . . use to select Answer Machine OK Call Screening
Change ( = activated) . . . call screening is switched on/off for all registered handsets
36
Availability and operation of the functions
may differ on your telephone.
Page 39
Local answer machine (if available)
Switching off call screening for the current recording:
Press the display key Silence or the End call key . . . Pick up call using
Operating when on the move (remote operation)
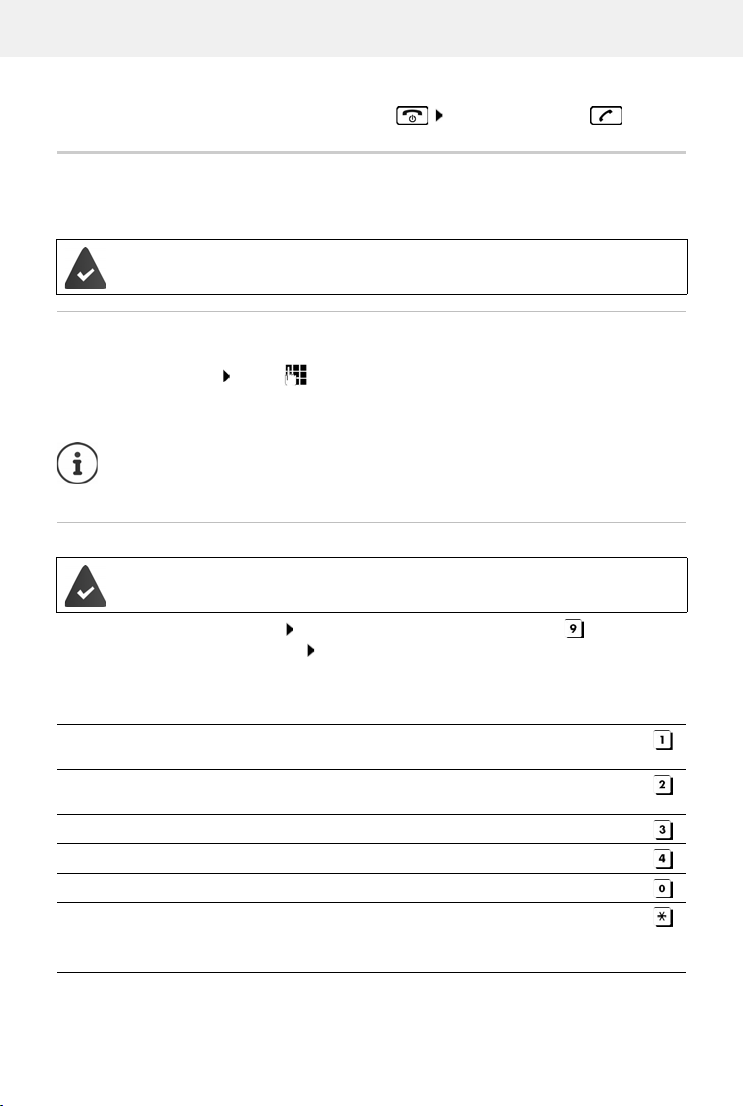
Access answer machine or switch answer machine on from another telephone (e.g. hotel, mobile
phone).
The system PIN is set to something other than 0000 and the other telephone has tone
dialling (D
TMF).
Switching on the answer machine
Call the telephone connection and let it ring until the announcement "Please enter PIN"
(approx. 50 seconds) . . . use to enter the telephone's system PIN within 10 seconds . . .
the answer machine is switched on, the remaining memory is announced, messages are
played back
Incorrect PIN is entered or entry takes too long (more than 10 seconds): The
connection is interrupted. The answer machine will remain deactivated.
The answer machine cannot be deactivated remotely.
Checking the answer machine
The answer machine is activated.
Call the telephone connection . . . during the announcement press key . . . playback of
the announcement is interrupted Enter system PIN
You are informed whether any new messages have been recorded. Message playback begins.
The answer machine is operated using the following keys:
During the time stamp playback: Skip to previous message.
During message playback: Go to the start of the current message.
Pause playback. Press again to resume.
After a pause of approx. 60 seconds, the connection is ended.
Go to the next message.
Repeat the last 5 seconds of the message playback.
During message playback: Delete current message.
Change the status of a previously played back message to "new".
The next message starts to play. The remaining memory is announced at the end of the last
message.
Availability and operation of the functions
may differ on your telephone.
37
Page 40
Local answer machine (if available)
Cancelling remote operation
Press the End call key or replace the receiver
The answer machine will terminate the connection under the following circumstances:
• The entered system PIN is incorrect.
• There are no messages on the answer machine.
• After the remaining memory announcement.
Settings
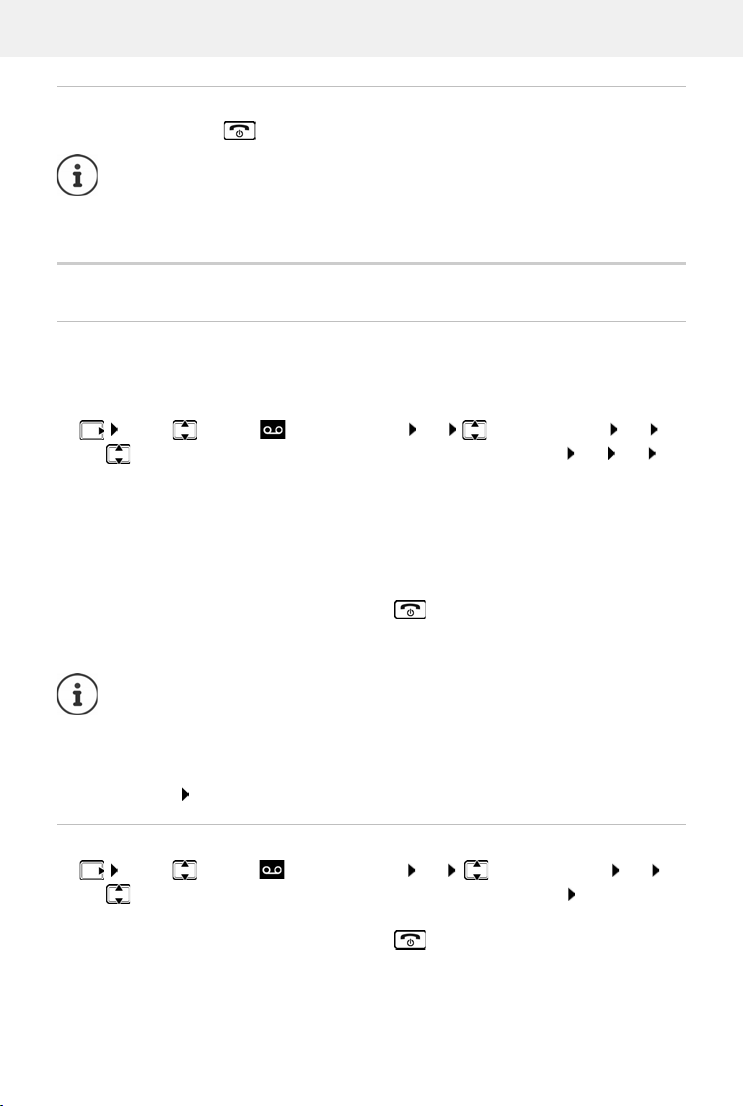
Recording a personal announcement/advisory message
The phone is supplied with pre-recorded announcements for announcement and advisory
mode. If a personal announcement has not been recorded, the relevant pre-recorded
announcement is used.
. . . use to select Answer Machine OK Announcements OK . . .
use to switch between Record Announcem. and Rec. Advisory Msg. OK OK
record your announcement message (at least 3 seconds) . . . possible options:
Complete the recording and save:
End . . . the announcement is played back for you to check
Repeat the recording:
New
Cancel the recording:
Press the End call key or Back
Resume the recording:
OK
Recording ends automatically if the maximum recording time of 170 seconds is
exceeded or there is a break in speech for more than 2 seconds.
If the recording is cancelled, the default announcement is used.
The recording is cancelled or not started if the answer machine memory is full.
Delete old messages . . . the answer machine switches back to Answer & record
mode . . . repeat the recording, if needed
Listening to announcements/advisory messages
. . . use to select Answer Machine OK Announcements OK . . .
use to switch between Play Announcement and Play Advisory Msg. OK . . . the
announcement is played back . . . possible options:
Cancel playback:
Cancel playback and record a new announcement:
Press the End call key or Back
New
38
Availability and operation of the functions
may differ on your telephone.
Page 41
Network mailbox
If the answer machine's memory is full, it will switch to Answer only mode.
Delete old messages . . . the answer machine switches back to Answer & record . . . repeat
any recording
Deleting announcements/advisory messages
. . . use to select Answer Machine OK Announcements OK . . .
use to switch between Delete Announcem. and Del. Advisory Msg. OK Yes
Once the announcement has been deleted, the relevant pre-recorded announcement is used
again.
Setting recording parameters
. . . use to select Answer Machine OK Recordings OK . . . then
Maximum recording time:
Length: . . . use to select timeframe
Recording quality:
When should a call be picked up:
Quality . . . use to switch between Long P lay and Excel-
lent (at higher quality, the max. recording time will decrease)
Ring Delay . . . use to select a time
Save settings:
The following apply when setting is Automatic:
• No new messages available: a call will be picked up after 18 seconds.
• New messages available: a call will be picked up after 10 seconds.
When checking messages remotely ( p. 37) it is therefore apparent after 15 seconds that there
are no new messages waiting. No call costs are incurr
Save
ed if the call is ended immediately.
Network mailbox
Enter number
. . . use to select Answer Machine OK Network Mailbox OK
. . . use to enter or amend the network mailbox number Save
To activate/deactivate the network mailbox use the phone number and a function
code of your network provider. Please contact the network provider if you require any
further information.
Availability and operation of the functions
may differ on your telephone.
39
Page 42
Set fast access for the answer machine
Playing back messages
Press and hold
Key 1 has been assigned to the network mailbox.
or
Press the Message key Network Mailbox OK
or
. . . use to select Answer Machine OK Play Messages OK
Network Mailbox OK
Listen to announcement out loud: Press the handsfree key
Set fast access for the answer machine
It is possible to call a network mailbox or the telephone's local answer machine directly by
pressing key .
For systems without a local answer machine, the network mailbox is automatically
connected with key .
Assigning key 1 / Changing assignment
Settings for the fast access are device-specific. A different answer machine can be assigned to
key on each registered handset.
. . . use to select Answer Machine OK Set Key 1 OK . . . use
to select answer machine Select ( = selected)
Return to idle status: Press and hold the End call key
Network mailbox
If no number has yet been saved for the network mailbox:
. . . use to make a change in the line Network Mailbox . . . use to enter the number
of the network mailbox Save Press and hold the End call key (idle status)
40
Availability and operation of the functions
may differ on your telephone.
Page 43
Emergency call
Additional functions
Emergency call
You can set up up to four numbers as emergency numbers. If the Emergency func tion is enabled,
you can trigger an emergency call with the SOS button when the handset is in idle.
Emergency call activated:
The SOS key lights red.
Emergency call not activated:
The SOS key does not light.
Process
The Emergency function is set up ( p. 42).
Press the SOS key
You hear the following announcement through the speaker:
ergency call being sent." The participant called is displayed.
"Em
The person receiving the emergency call hears the emergency call message:
his is an emergency call. Please press key 5 in order to accept the emergency call."
"T
The participant called presses key 5:
The participant called does not accept the emergency call:
After 60 seconds, the emergency function automatically dials the next emergency number
provided more than one number is stored).
(
The emergency function also automatically switches to the next emergency number after
60 seconds in the following situations:
• The answer machine of the emergency number selected is activated
• The emergency number is busy
• The telephone of the person receiving the emergency call is not set to "tone dialling".
This process is repeated a maximum of 5 times. I
emergency function is ended with an error tone.
he telephone of the person receiving the emergency call must be set to tone
T
dialling, otherwise the acceptance of the emergency call using the key 5 is not
recognised.
You can speak to one another.
f none of the calls are accepted, the
Cancelling an emergency call
If you have triggered an emergency call by mistake, you can cancel it.
Briefly press the End call key
Availability and operation of the functions
may differ on your telephone.
41
Page 44
Emergency call
SOS
SOS
Setting up emergency call
In order to be able to use the function you must
• save the emergency numbers and
• activate the emergency function.
The police, ambulance service or fire service must not be used for an emergency call.
Storing emergency numbers
To set up the emergency call, the SOS key must be not be assigned a direct dial
number. Delete the key assignment as required.
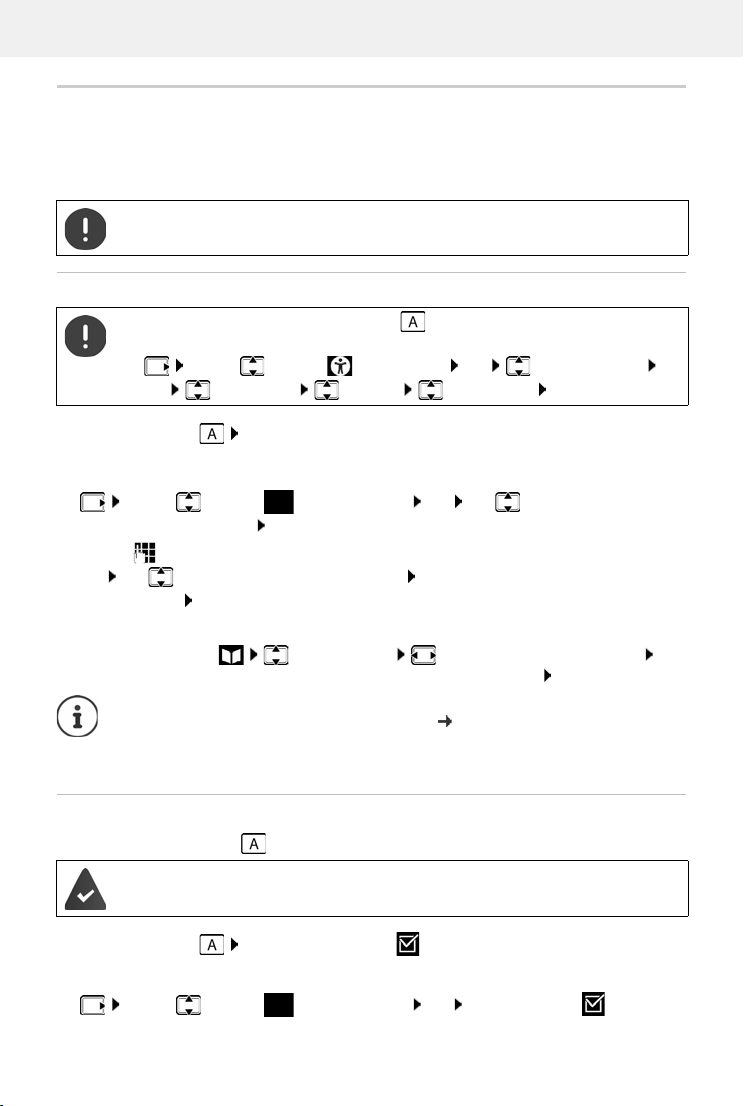
. . . use to select Accessibility OK Direct Dial Keys
OK Select key A Options Delete entry OK
Press the SOS key Edit . . . the No SOS No. available message is shown and the
handset switches to input mode for an emergency number
or
. . . use to select Emergency Call OK use to select the emergency
number (SOS 1: - SOS 4: ) Edit
. . . use to enter the first name and/or last name and the number for the emergency
call use to toggle between the entry fields Save . . . The emergency call is automatically activated Enter more emergency numbers if required
or select from the directory:
Press the display key Select an entry Select the number as required OK
. . . call number, first name and last name are taken from the directory Save
If your telephone is connected to a PABX, you must enter the access code (outside line
code) as the first digit of your entry, if necessary (
You should carry out a test run to ensure that the emergency function has been
correctly set up.
user guide of your PABX).
Activating/deactivating the emergency call function
Enabling with the SOS key
The function is deactivated. At least one SOS number has been entered.
Press the SOS key Emergency Call : Edit ( = enabled)
Enabling/disabling from a menu
. . . use to select Emergency Call OK Activation: Edit ( = activated)
Availability and operation of the functions
may differ on your telephone.
42
Page 45
Direct dial for emergencies
SOS
Changing/deleting an emergency number
. . . use to select Emergency Call OK use to select the emergency
number (SOS 1: - SOS 4: ) Edit . . . use to delete the entry Enter a new number if
required Save
If no valid numbers are entered, the Emergency Call function is automatically
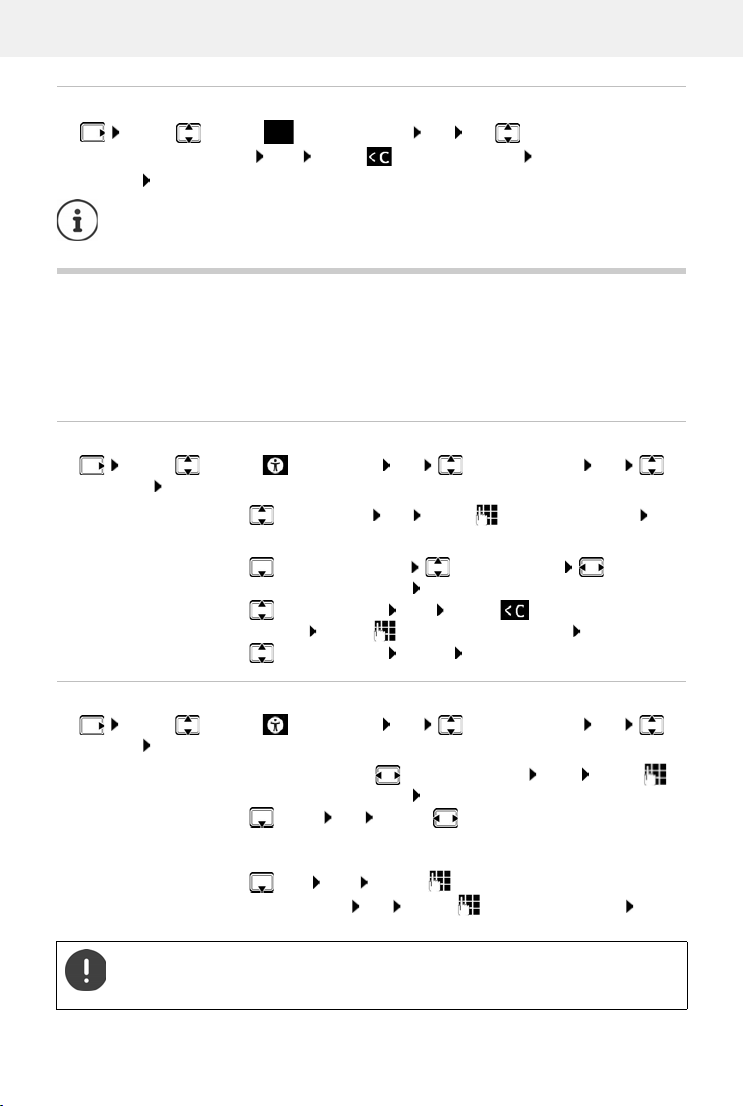
deactivated.
Direct dial for emergencies
Specify up to 15 numbers that are put through automatically when a call is made. You can talk
to the caller using the handsfree function on your handset without having to accept the call.
Define a direct dial PIN for the direct dial function. This is
It must also be entered when the function is enabled and disabled.
Entering/editing/deleting call numbers
. . . use to select Accessibility OK Supervision Call OK
White List OK
Enter the number:
<New Entry> OK . . . use to enter the number Save
or:
Open the directory Select the entry Select the
call number as required OK
Change entry:
Delete entry:
Select the entry Edit . . . use to delete the existing
number . . . use to enter the new number Save
Select the entry Delete Confirm deletion with Ye s
required by the caller for direct dialling.
Enabling/disabling direct dial
. . . use to select Accessibility OK Supervision Call OK
Settings OK
Enable/disable:
Set the delay time:
Set the direct dial PIN:
Activation: . . . use to select On or Off Save . . . use to
enter the direct dial PIN OK
Delay OK . . . use to set the delay time
(between 5 and 120 seconds) after which the call is put through
PIN: Edit . . . use to enter the current PIN
(default: 0000) OK . . . use to enter the new PIN OK
Save settings:
When the answering machine is switched on, the delay time must be shorter that the
time set for the Ring Delay of the answering machine. Direct dial is no longer possibl e
once the answering machine has accepted a call.
Save
Availability and operation of the functions
may differ on your telephone.
43
Page 46
Accessibility features
Process
Supervision Call is enabled, a direct dial PIN is specified. The caller is entered as an
approved caller and knows the current direct dial PIN.
• The caller dials the number. The caller is prompted to enter the direct dial PIN.
• The caller enters the direct dial PIN.
• Direct dial PIN incorrect: the call is ended immediately.
• Direct dial PIN correct: the call is put through. The handset handsfree function is
enabled. The display shows a red microphone icon.
• Both people are able to talk to each other using the handsfree function.
The call is ended automatically after two and a half minutes (if one of the people does
not put down the phone). The caller may need to call again.
For security reasons, the phone is sensitive when interpreting the direct dial PIN. Transmission fluctuations in the phone network can mean the PIN is not recognised. If a call
is cancelled, try again.
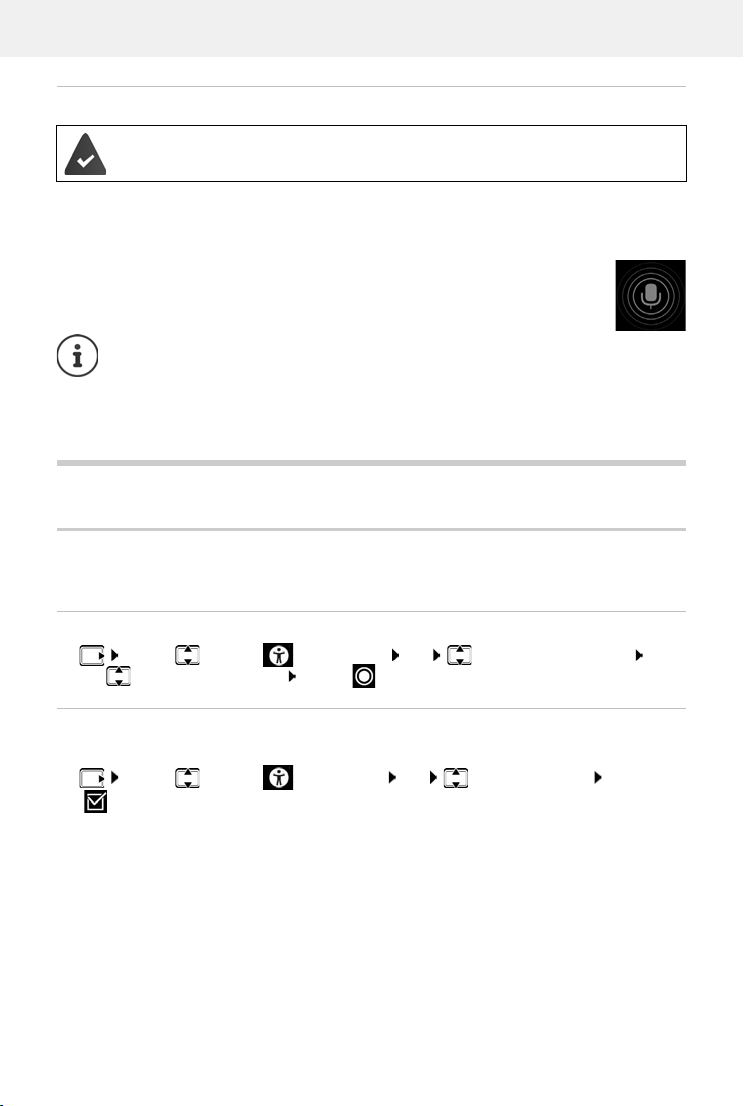
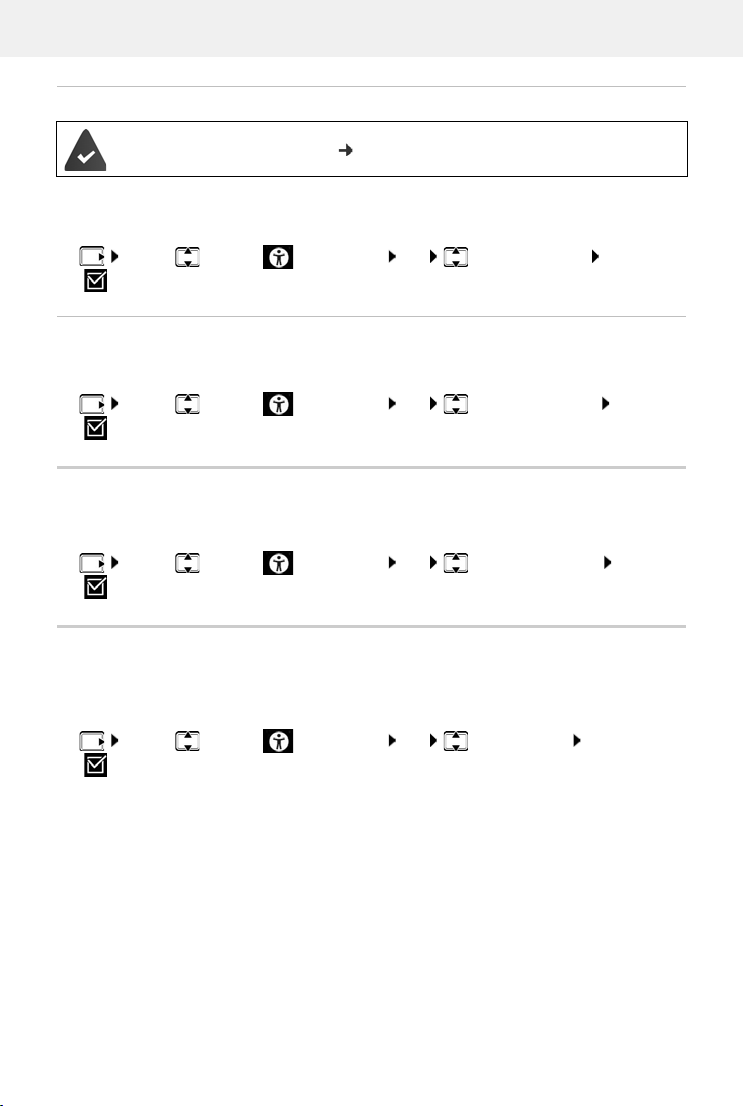
Accessibility features
Announcements
People with restricted vision can display numbers and contacts.
Setting the language for the announcements
. . . use to select Accessibility OK Read-Aloud Language . . .
use to select the language Select ( = selected)
Announcing numbers when entered
If the function is enabled, the digits entered are announced when the call number is entered.
. . . use to select Accessibility OK Talking Dial Keys Edit
( = enabled)
44
Availability and operation of the functions
may differ on your telephone.
Page 47
Accessibility features
Announcing caller information
The number of the caller is sent ( p. 23).
If the function is enabled, information on the caller is announced for an incoming cal l. If the caller
is entered in the handset directory and an announcement is stored for the contact, the
announcement is read out. Otherwise the number of the caller is announced.
. . . use to select Accessibility OK Spoken Caller ID Edit
( = enabled)
Having contacts read out
If the function is enabled and an entry in the handset directory is selected, the announcement
stored for the contact is read out.
. . . use to select Accessibility OK Read out contacts Edit
( = enabled)
LED call signal
If the function is enabled, the signal light at the top of the handset flashes red for an incoming
call.
. . . use to select Accessibility OK Signal Call via LED Edit
( = enabled)
Serious callers
If this function is enabled, all calls from contacts entered in the handset directory are signalled
noticeably by a green display background that is visible from a long way away. Other calls are
displayed with a black or white background depending on the colour scheme selected.
. . . use to select Accessibility OK Trusted Caller Edit
( = enabled)
Availability and operation of the functions
may differ on your telephone.
45
Page 48
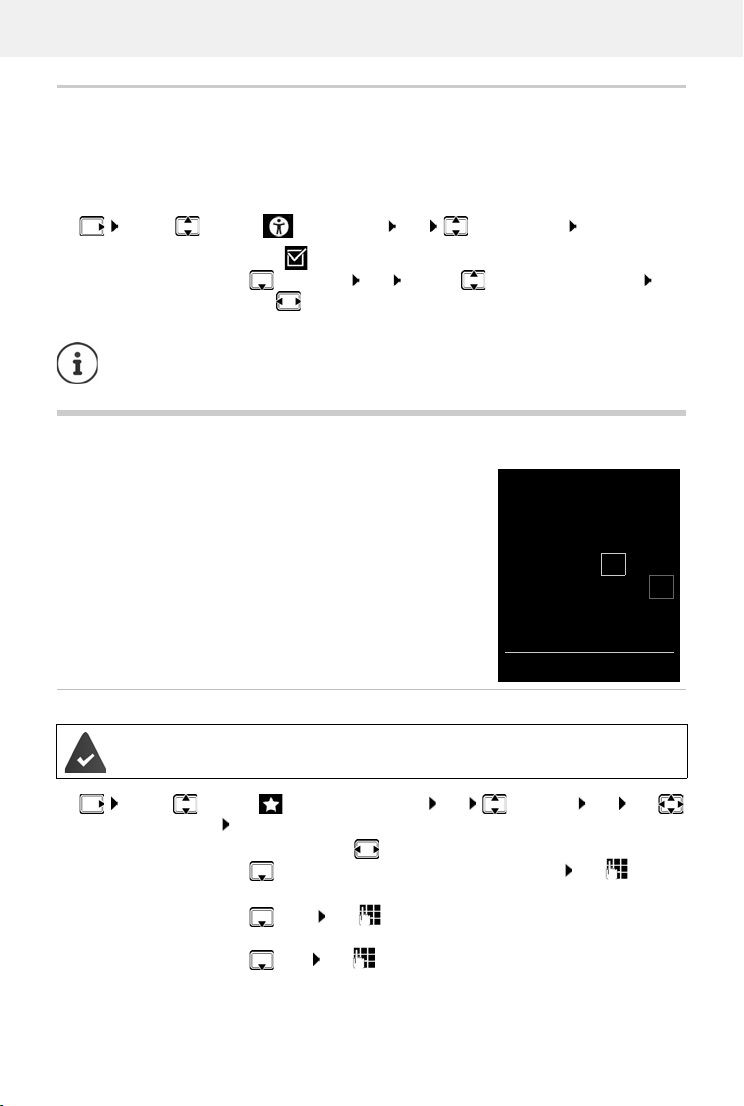
Calendar
June 2021
Mo Tu We Th Fr Sa Su
01 02 03
04 05 06 07 08 09 10
11 12 13 14 15 16 17
18 19 20 21 22 23 24
25 26 27 28 29 30
Back OK
Simple menu
Decide yourself which functions are displayed in the menu. You can show and hide the following
submenus:
Handset Directory, C
Settings, Bluetooth, Additional Features, Select Services, Accessibility, SMS
all Lists, Answer Machine, Emergency Call, Alarm Clock, Audio Settings,
. . . use to select Accessibility OK Simple Menu OK
Enable/disable: Edit ( = enabled)
Hide/show function:
Save the selection:
When you hide Accessibility, Simple Menu is displayed instead in the menu. So you
can change your settings for the menu at any time.
Menu List OK . . . use to select the submenu . . .
use to select Show/Hide
Save
Calendar
You can remind yourself of up to 30 appointments.
In the calendar, the current day is outlined in white; on days with
tments, the numbers are displayed in colour. When a day
appoin
is selected, it will be outlined in colour.
Saving appointments to the calendar
Date and time have been set.
. . . use to select Additional Features OK Calendar OK use
to select desired day OK . . . then
Switch on/off:
Enter date:
Enter time:
Set name:
46
Activation: use to select On or Off
Date . . . the selected day has been pre-set use to enter
new date
Time use to enter hours and minutes of the
appointment
Tex t use to enter a description of the appointment (e.g.
evening meal, meeting)
Availability and operation of the functions
may differ on your telephone.
Page 49
Calendar
Set alarm tone: Signal use to select the melody of the reminder alarm
or deactivate the acoustic signal
Save appointment:
If an appointment has already been entered: <New Entry> OK then enter
information for the appointment.
Save
Notification of appointments/anniversaries
Anniversaries are transferred from the directory and displayed as an appointment. An
appointment/anniversary is displayed in idle status and the selected ringtone plays for
60 seconds as a notification.
Acknowledge and stop the reminder: Press the display key OF
Respond with SMS: Press the display key SM
During a call, a reminder is indicated on the handset once with an advisory tone on the
handset.
S . . . the SMS menu is displayed
F
Displaying missed appointments/anniversaries
The following appointments and anniversaries are saved in the Missed Alarms list:
• The appointment/anniversary call was not acknowledged.
• The appointment/anniversary was notified during a phone call.
• The handset was switched off at the time of the appointment/anniversary.
The last 10 entries are stored. The icon and the number of new entries are shown in the
display. The most recent entry appears at the top of the list.
Opening the list
Press the Message key Missed Alarms: OK . . . use to browse through
the list of any appointments
or
. . . use to select Additional Features OK Missed Alarms OK
Each entry is displayed with the number or name, da
at the top of the list.
Delete an appointment/anniversary: De
Compose an SMS: SM
opened
S (only if the list has been opened via the menu) . . . the SMS menu is
Availability and operation of the functions
lete
may differ on your telephone.
te and time. The most recent entry appears
47
Page 50
Timer
Displaying/changing/deleting stored appointments
. . . use to select Additional Features OK Calendar OK use
to select day OK . . . the appointment list is displayed use to select date . . . possible
options:
Display appointment details:
View . . . the appointment settings are displayed
Change appointment:
View Edit
or Options Edit entry OK
Activate/deactivate appointment:
Options Activate/Deactivate OK
Delete appointment:
Delete all appointments for a day:
Options Delete entry OK
Options Delete all Appoints. OK Yes
Timer
Setting the timer (countdown)
. . . use to select Additional Features OK Timer OK . . . then
Enable/disable:
Set the duration:
Save the timer:
The timer starts the countdown. In the idle display, icon and the remaining hours and
minutes are displayed until one minute is left.
counted down. At the end of the countdown, the alarm is triggered.
Activation: . . . use to select On or Off
Duration . . . use to enter the hours and minutes for the
timer
Min.: 00:01 (one minute); Max.: 23:59 (23 hours, 59 minutes)
Save
From this point, the remaining seconds are
Disabling/repeating the alarm
Switch off the alarm:
Repeat the alarm:
48
OFF
Restart . . . the timer display is displayed again set another
duration as required Save . . . the countdown is restarted
Availability and operation of the functions
may differ on your telephone.
Page 51
Alarm clock
Alarm clock
Date and time have been set.
Activating/deactivating the alarm clock and setting the wake-up time
. . . use to select Alarm Clock OK . . . then
Switch on/off:
Setting the wake-up time:
Set days:
Set the volume:
Set alarm:
Save settings:
When the alarm clock is activated, the icon and the wake-up time are displayed in idle
display.
Alarm
An alarm is shown on the display and indicated by the selected ringtone melody. The alarm
sounds for 60 seconds. If no key is pressed, the alarm is repeated after 5 minutes. After the
second
repetition, the alarm call is deactivated for 24 hours.
Activation: . . . use to select On or Off
Time . . . use to enter hours and minutes
Occurrence . . . use to switch between Monday-Friday
and Daily
Volume . . . use to set volume in 5 levels s or select
crescendo (increasing volume)
Melody . . . use to select a ringtone for the alarm
Save
During a call, the alarm is only indicated by a short tone.
Switching off/repeating the alarm after an interval (snooze mode)
Deactivate the alarm: OFF
Repeat the alarm (snooze mode): Press Sn
repeated after 5 minutes.
ooze or any key . . . the alarm is switched off and
Baby monitor
When the baby monitor is switched on, the stored (internal or external) destination number is
called as soon as a defined noise level is exceeded in the vicinity of the handset. The alarm to an
external number is cancelled after approximately 90 seconds.
You can answer the alarm using the Tw
loudspeaker of the handset located in the baby's room on or off.
Availability and operation of the functions
o Wa y Talk function. This function is used to switch the
may differ on your telephone.
49
Page 52
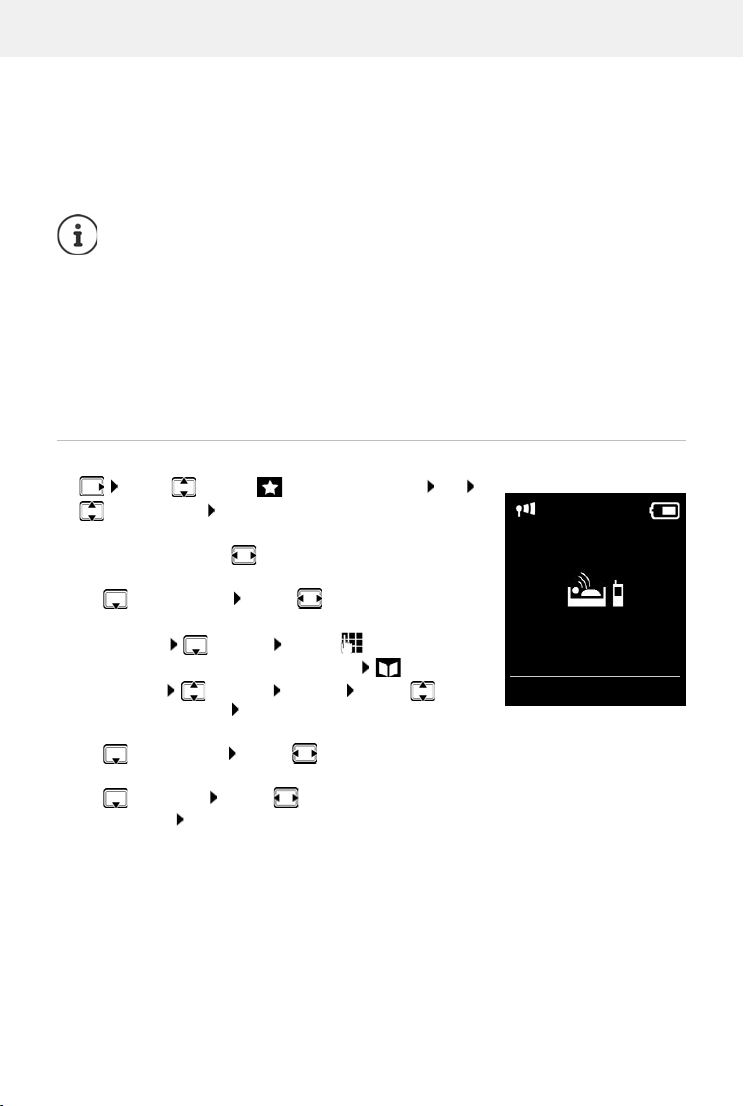
Baby monitor
07:15
INT 1
14 Oct
Baby Monitor
0891234567
OFF Options
Baby Monitor activated
In baby monitor mode, incoming calls are only indicated on the display (without ringtone). The
display backlight is reduced to 50%. Advisory tones are deactivated. All keys with the exception
of the display keys are disabled.
If you accept a n incoming call, the ba by monitor mo
but the function remains activated. The baby monitor mode is not deactivated by switching the
handset off and on again.
The handset should be positioned 1 to 2 metres away from the baby. The microphone
must point towards the baby.
Activating the function reduces the operating time of your handset. For that reason,
place the handset in the charging cradle if necessary.
The baby monitor is activated 20 seconds after switching on.
The answer machine for the destination number must be switched off.
After switching on:
de is suspended for the duration of the call,
Test sensitivity.
Test the connection, if the alarm is being forwarded to an external number.
Activating and setting the baby monitor
. . . use to select Additional Features OK
Baby Monitor OK . . . then
Switch on/off:
Activation: . . . use to select On or Off
Enter destination:
Send alarm to . . . use to select External or
Internal
External: Number . . . use to select number
or select a number from the directory:
Internal: Handset Change . . . use to
select the handset OK
Activate/deactivate two-way talk:
Tw o Way Tal k . . . use to select On or Off
Set microphone sensitivity:
Sensitivity . . . use to select High or Low
Save settings: Save
The destination number is displayed in idle display when the baby monitor is activated.
50
Availability and operation of the functions
may differ on your telephone.
Page 53
ECO DECT
Deactivate baby monitor / Cancel alarm
Deactivate the baby monitor:
In idle status press the display key OFF
Cancel the alarm:
Deactivate the baby monitor remotely
The alarm is forwarded to an external destination number.
The receiving phone supports tone dialling.
Press the End call key during an alarm
Accept alarm call Press keys
The baby monitor is deactivated and the handset is in idle status. The baby monitor settings
on the handset (e.g. no ringtone) will remain activated until you press the display key OFF.
The baby monitor cannot be reactivated remotely.
Reactivate: p. 50
ECO DECT
The device range is set to maximum as default. This guarantees the best connection between
the handset and the base station. In idle status, the handset will not function (as it is not
transmitting). Only the base station will maintain contact with the handset via a low wireless
signal. During a call, the transmission power automatically adapts to the distance between the
base station and handset. The smaller the distance to the base, the lower the radiation.
To reduce the radiation further:
Reducing radiation by up to 80%
. . . use to select Settings OK ECO DECT OK Maximum
Range Change ( = deactivated)
The range is also reduced with this setting.
It is not possible to use a repeater to increase the range.
Deactivating radiation in idle status
. . . use to select Settings OK ECO DECT OK No
Radiation Change ( = activated)
Availability and operation of the functions
may differ on your telephone.
51
Page 54
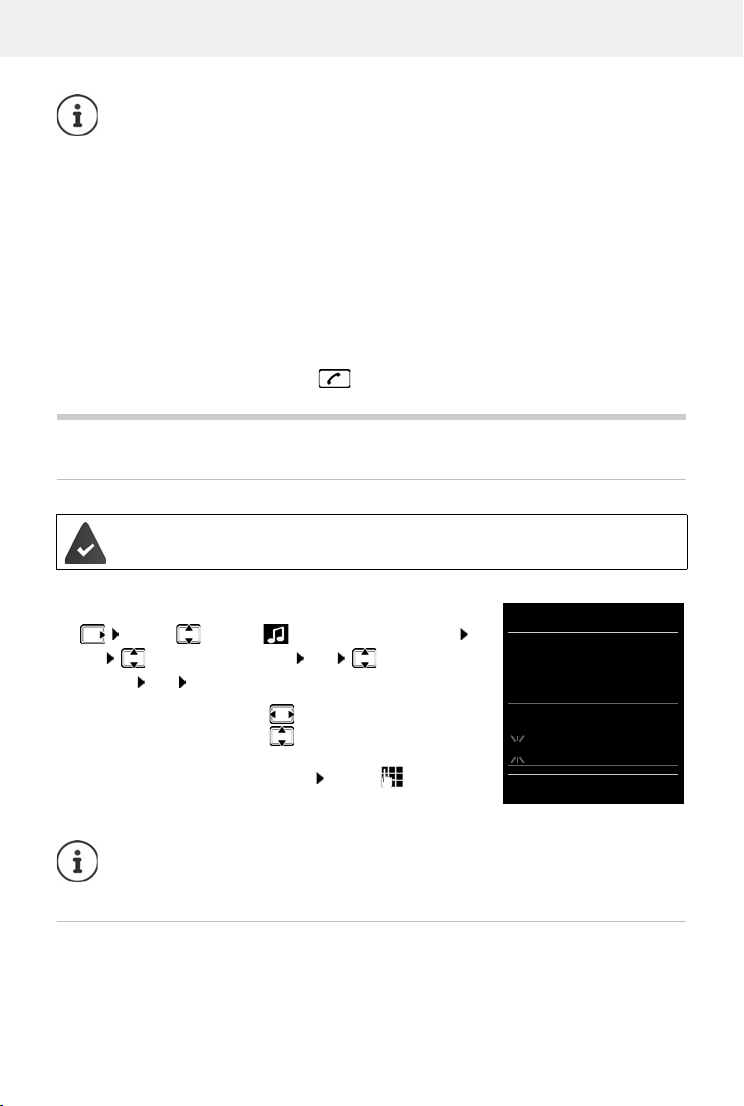
Protection against unwanted calls
Time Control
For external calls:
On
Suspend ring. from:
22:00
Back Save
Example
To benefit from the advantages of the setting No R
must support this feature.
If the setting No Radiation is activated and a handset is registered to the base that
does not support this feature, No Radiation is automatically deactivated. As soon as
this handset is de-registered, No Radiation will automatically be re-activated.
The wireless connection will only be established for an incoming or outgoing call and
the connection will be delayed by about 2 seconds.
In order that a handset can establish a wireless connection with the base station more
quickly for an incoming call, it must "listen" to the base stat ion more ofte n, i.e . sca n the
environment. This increases power consumption and reduces the standby and talktime of the handset.
When No Radiation is activated, there will be no range display/range alarm on the
handset. Contactability can be tested by attempting to establish a connection.
adiation, all registered handsets
Press and hold the Talk key . . . the dialling tone sounds.
Protection against unwanted calls
Time control for external calls
Date and time have been set.
Enter a time period during which the handset should suspend
ringing to indicate external calls e.g. during the night.
. . . use to select Audio Settings Settings
OK Ringtones (Handset) OK Time
Control OK . . . then
Switch on/off:
Enter time:
Save:
The time control only applies to the handset for which the setting is configured.
The telephone will continue to ring for numbers that have been assigned to a VIP
group in the directory.
Protection from anonymous callers
The handset will not ring if callers' numbers are not revealed. This setting can be applied to only
one or to all registered handsets.
52
use to select On or Off
use to switch between
Suspend ring. from and Suspend
ring. until . . . use to enter
start and end in 4-digit format
Save
Availability and operation of the functions
may differ on your telephone.
Page 55
Protection against unwanted calls
For one handset
. . . use to select Audio Settings Settings OK Ringtones
(Handset) OK Anon. Calls Silent Edit ( = activated) . . . the call is only
signalled on the display
For all handsets
. . . use to select Settings OK Te le p ho ny OK Anonymous
Calls Edit ( = activated) . . . use to select Protection Mode:
No Protection Anonymous calls are indicated in the same way as identified numbers.
Silent Call The telephone will not ring and the incoming call will only appear in
Block Call The telephone will not ring and the incoming call will not appear in
Save settings:
the display.
the display. The caller will hear the busy tone.
Save
Only put through known callers
The system PIN is not 0000 (default).
Changing the system PIN: p. 75
Only callers entered in the directory are put through:
. . . use to select Select Services OK Just Friends Change
( = enabled)
When the function is enabled, the icon
As soon as one of your contacts changes his or her number, this number must also be
changed in the directory. Otherwise you will no longer receive calls from this
contact.
is shown on the display.
Black list
When the black list function is activated, calls from black list numbers are not indicated or are
only indicated in the display. These settings apply to all registered handsets.
The black list is enabled when Silent Call or Block Call is selected as the protection mode.
Displaying/editing the black list
. . . use to select Settings OK Telephony OK Black List
Edit Blocked Numbers OK . . . the list of blocked numbers is displayed . . . possible
options:
Create an entry:
Delete an entry:
New . . . use to enter a number Save
. . . use to select an entry Delete . . . the entry is deleted
Availability and operation of the functions
may differ on your telephone.
53
Page 56

Protection against unwanted calls
Transferring a number from a call list to the black list
. . . use to select Call Lists OK . . . use to select Accepted calls/
Missed calls OK . . . use to select entry Options Copy to Blacklist OK
Setting the protection mode
. . . use to select Settings OK Te l ep h on y OK Black List
Edit Protection Mode OK . . . use to select desired protection
No Protection All calls are indicated, including from callers whose numbers are on
Silent Call The telephone will not ring and the incoming call will only appear in
Block Call The telephone will not ring and the incoming call will not appear in
Save settings:
the black list.
the display.
the display. The caller will hear the busy tone.
Save
54
Availability and operation of the functions
may differ on your telephone.
Page 57
SMS (text messages)
SMS (text messages)
It is possible to send SMS messages as soon as the telephone has been connected.
Calling Line Identification is enabled ( p. 23).
The network provider supports the SMS service.
If no SMS service centre is entered, the submenu SMS only consists of the entry
Settings.
Writing and sending SMS messages
An SMS may be up to 612 characters in length. If the number of characters exceeds
160, the SMS is sent as linked SMS messages (up to four individual SMS messages).
The remaining number of characters is shown in the top right corner of the display,
followed by an indication in brackets of which part of a linked SMS is currently being
written. Example: 405(2).
. . . use to select SMS OK . . . then
Write an SMS:
Send an SMS:
Enter number: From the directory: . . . use to select number OK
Send:
The number must include the local area code (even if you are in that area).
If an external call comes in, or if you interrupt writing for more than 2 minutes, the text
is automatically saved in the draft message list.
New SMS OK . . . use to enter SMS text
Press the End call key
or Options Send OK
or . . . use to enter number directly
If sending SMS messages to an SMS mailbox: add the mailbox ID to the
end of the number.
Send
Sending SMS messages may incur additional costs. Please consult your network
provider.
Availability and operation of the functions
may differ on your telephone.
55
Page 58
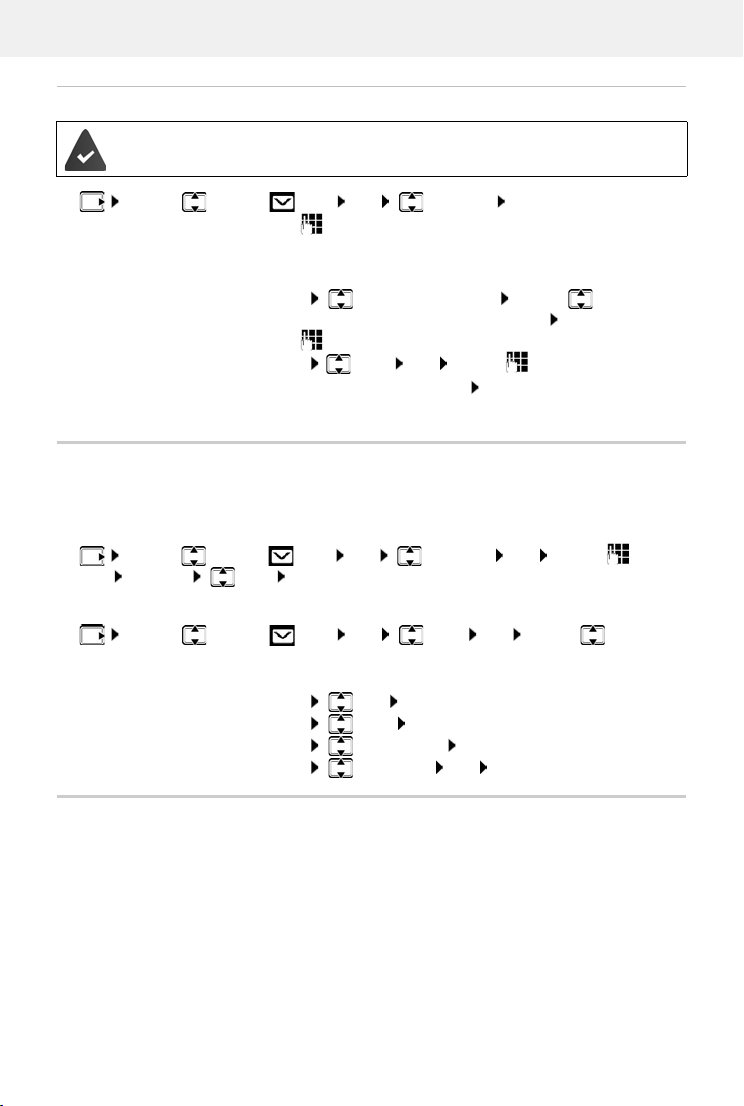
SMS (text messages)
Sending SMS messages to an e-mail address
The network provider supports this feature.
. . . use to select SMS OK New SMS OK . . . then
Enter address:
. . . use to enter the e-mail address at the start of the SMS
message
or
Options Insert eMail address . . . use to select a
directory entry containing an e-mail address OK
Write text:
Send:
. . . use to complete the SMS message
Options Send OK . . . use to enter the number of
the e-mail service (if not entered) Send . . . the SMS is sent to the
e-mail service of the SMS send service centre
Temporary storing of an SMS (draft message list)
You can temporarily store text messages, change and send them later.
Saving SMS in the draft message list
. . . use to select SMS OK New SMS OK . . . use to write
SMS Options Save OK
Opening and editing an SMS from the draft message list
. . . use to select SMS OK Draft OK . . . use to select
saved SMS . . . possible options:
Read draft:
Edit:
Send SMS:
Delete an entry:
Delete all entries:
Read
Options Edit OK
Options Send OK
Options Delete entry OK
Options Delete List OK Yes
Receiving an SMS
Incoming SMS messages are saved in the incoming message list, linked SMS messages are
generally displayed as one SMS.
56
Availability and operation of the functions
may differ on your telephone.
Page 59
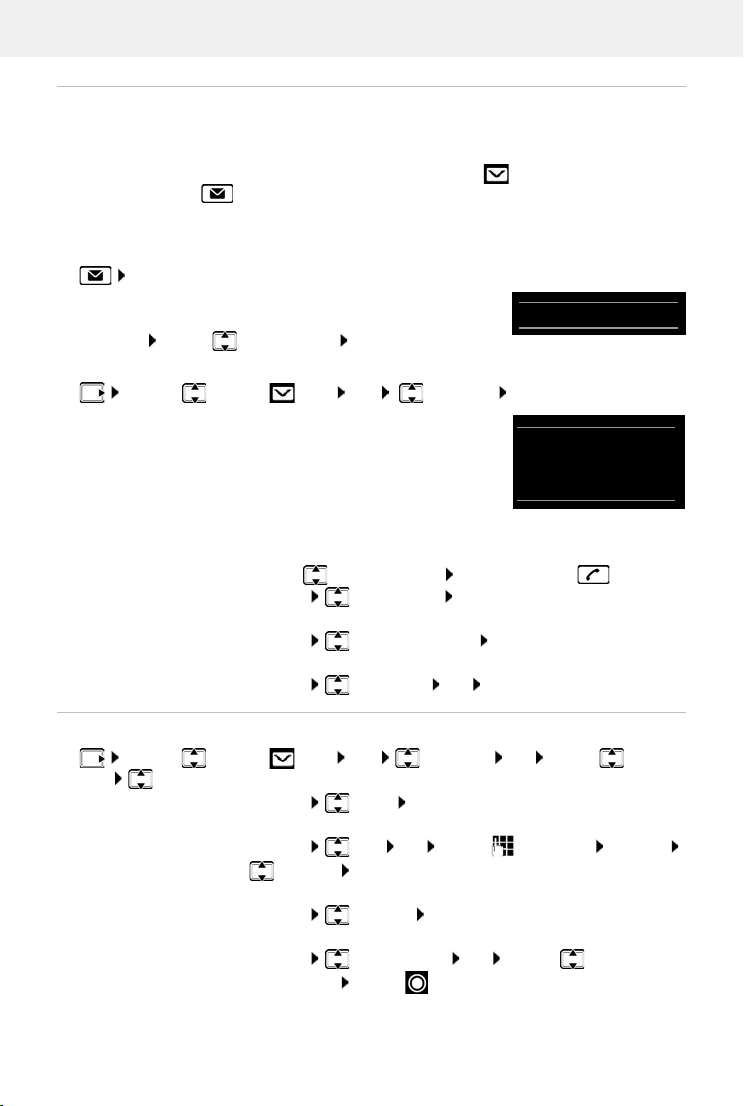
SMS (text messages)
SMS:
(2)
0123727859362922
10/02/21 09:07
SMS message list
The incoming SMS message list contains all the received SMS messages and those SMS
messages that could not be sent due to an error.
New SMS messages are indicated on all Gigaset handsets by the icon on the display, the
flashing Message key and an advisory tone.
Open the SMS message list
With the Message key:
• . . . the messages list is opened
The messages list shows the number of SMS messages it
contai
ns: bold = new messages, no
Open list: . . . use to select SMS
Via the SMS menu:
t bold = read messages
: OK
. . . use to select SMS OK Incoming OK
Every entry in the list contains:
• the number or name of the sender,
• arrival date and time.
Functions of the incoming message list
Call the sender of the SMS:
. . . use to select an SMS Press the Talk key
Delete an entry:
Save the number in the directory:
Options Delete entry OK
Options Copy to Directory OK
Delete all entries in the SMS message list:
Options Delete List OK Yes
Reading and managing SMS messages
. . . use to select SMS OK Incoming OK . . . use to select
SMS Read . . . possible options:
Answer SMS:
Edit SMS text and send to recipient of your choice:
Options Reply OK
Options Edit OK . . . use to edit text Options
Forward OK
Forward SMS to recipient of your choice:
Options Forward OK
Display text in a different character set:
Options Character Set OK . . . use to select
character set Select ( = selected)
Availability and operation of the functions
may differ on your telephone.
57
Page 60
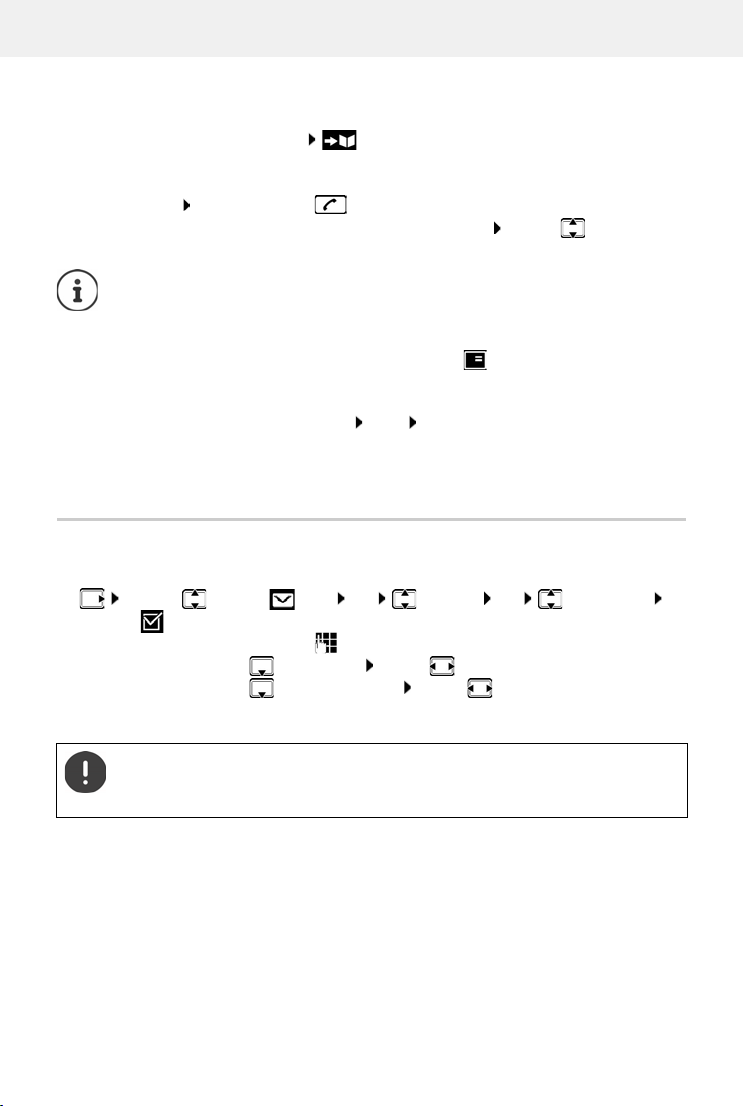
SMS (text messages)
Saving numbers from SMS text to the directory
If a telephone number in the SMS text is recognised, it is automatically highlighted.
• Save the number in the directory:
If the number is to also be used to send an SMS,
code (dialling code).
save the number including the local area
• Dial a number: Press the Talk key
• Select the next number, if an SMS contains multiple numbers: . . . use to scroll down
until the first number has disappeared from the display.
The +-icon is not copied for international area codes.
You should then enter "00" at the start of the number.
SMS with vCard
The vCard is an electronic business card. It is indicated by the icon in the SMS text. A vCard
can contain a name, home number, work number, mobile
entries in a vCard can be saved to the directory one after the other.
When reading an SMS containing the vCard: Vi
The directory is opened automatically. The number and
on the vCard, the date is copied to the directory as an anniversary. If necessary, edit the entry in
the directory and save it. You will return to the vCard automatically.
number and a birthday. Individual
ew Save
name are copied. If a birthday is entered
SMS notification
Receive notifications of missed calls and/or new messages on the answer machine.
. . . use to select SMS OK Settings OK Notification
Change ( = activated) . . . then
Enter number:
Missed calls:
Answer machine:
Save settings:
Do not enter your own fixed line network number for notification of missed calls. This
can create an endless loop that will incur charges.
SMS notification may incur additional costs.
To . . . use to enter the number to which the SMS should be sent
Missed calls . . . use to select On or Off
For AM messages . . . use to select On or Off
(only for a system with a local answer machine)
Save
58
Availability and operation of the functions
may differ on your telephone.
Page 61
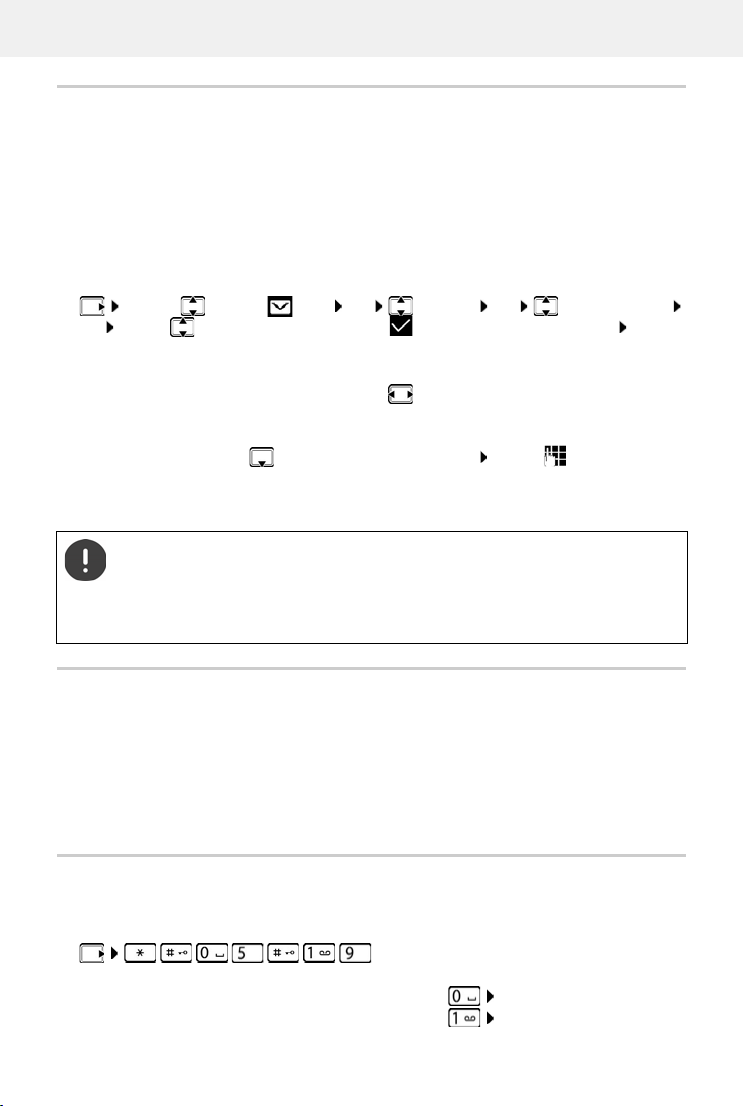
SMS (text messages)
SMS service centres
The number for at least one SMS service centre must be saved in the device to be able to send
SMS messages. The SMS service centre number can be obtained from the service provider.
SMS messages are received from ev
with their service provider.
Your SMS messages are sent via the SMS service centre that is entered as the active send centre.
O
nly one SMS service centre can be the active send centre at any one time.
ery entered SMS service centre as long as they are registered
Entering/changing the SMS service centre, setting the send service centre
. . . use to select SMS OK Settings OK Service Centres
OK . . . use to select SMS service centre ( = current send service centre) Edit . . .
then
Activate send service centre:
Active Send: . . . use to select Yes or No (Ye s = SMS messages
are sent via the SMS service centre)
Enter the number of the SMS service:
SMS Service Centre Number . . . use to enter the
number
Save settings:
If you have agreed a flat fixed line network rate, the chargeable numbers with dialling
code 09
service centre, you will not be able to send text messages from your phone.
If the attempt to send fails, the SMS is saved in the incoming messages list and
indicat
ed as failed.
Save
00 are often blocked. If, in this case, a 0900 number is entered for the SMS
SMS to PABXs
• The Call Line Identification must be forwarded to the extension of the PABX (CLIP).
• If necessary, the access code/outside line code must be prefixed to the number of the SMS
service centre (depending on your PABX). To test: Send an SMS to your own number, once
with the access code and once without.
• If the SMS is sent without the extension number, it will not be possible for the recipient to
answer directly.
Activating/deactivating first ring muting
Every incoming SMS is indicated by a single ring. If such a "call" is answered, the SMS is lost. To
prevent this, mute the first ring for all external calls. In idle status:
. . . the current setting flashes in the input field
(e.g. 1) . . . then
Do not mute the first ringtone:
Mute the first ringtone (default setting):
Availability and operation of the functions
may differ on your telephone.
OK
OK
59
Page 62

SMS (text messages)
SMS troubleshooting
E0 Calling Line Identification permanently withheld
activated.
FE Error occurred while sending SMS.
FD Connection to SMS service centre failed, see self-help.
Self-help with errors
You cannot send messages
• You have not requested the CLIP service (Calling Line Identification Presentation).
(CLIR) or Calling Line Identification not
Ask your network provider to enable the feature.
• SMS sending was interrupted (e.g. by a call).
Re-send the SMS.
• The network provider does not support this feature.
• No number or an incorrect one has been entered for the send service centre.
Enter the number ( p. 59).
SMS text is incomplete
• The phone's memory is full.
Delete old SMS messages.
• The network provider has not yet sent the rest of the SMS.
You have stopped receiving SMS messages
Call divert has been activated for All calls.
Change call divert ( p. 25).
The SMS is played back
• The "display call number" service is not activated.
Ask the network provider to enable this feature (subject to a fee).
• Your mobile phone operator and SMS service provider are not working in partnership.
Obtain information from your SMS service provider.
• The phone is not registered with the SMS service provider.
Send an SMS to register the phone for receiving SMS.
60
Availability and operation of the functions
may differ on your telephone.
Page 63
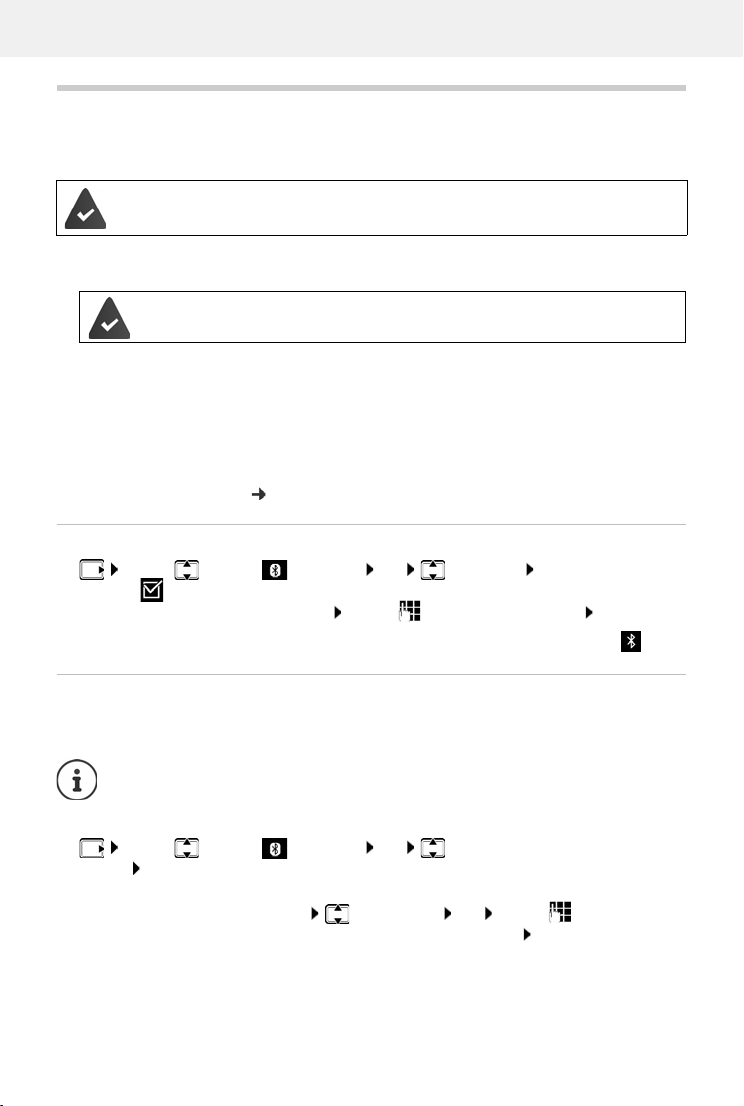
Bluetooth
Bluetooth
The handset is able to use Bluetooth™ to communicate wirelessly with other devices that also
use this technology, e.g. to connect a Bluetooth headset or hearing aid.
Bluetooth is activated and the devices have
The following devices can be connected:
been registered to the handset.
• A Bluetooth headset or hearing aid
The headset / hearing aid has the Headset or Handsfree profile. If both profiles
are available, the handsfree profile is used to communicate.
It may take 5 seconds to establish a connection to the headset, whether a call is accepted
the headset or transferred to the headset, or a call is made from the headset.
using
• Up to 5 data devices (PCs, tablets or mobile phones) for the transmission of address book
entries as a vCard or for the exchange of data with the computer.
In order for telephone numbers to be used further
code) must be saved to the telephone.
Operating Bluetooth devices device user guides
, the area code (international and local area
Activating/deactivating Bluetooth mode
. . . use to select Bluetooth OK Activation
Change ( = activated)
If the local area code is still not saved: . . . use to enter local area code OK
When in idle status, the activated Bluetooth mode is indicated on the handset by the icon.
Registering Bluetooth devices
The distance between the handset in Bluetooth mode and the active Bluetooth device (headset
or data device) should not exceed 10 m.
The registration of a headset overwrites a previously registered headset.
If a headset is to be registered that is already registered with a different device, this
connection must be deactivated before registering.
. . . use to select Bluetooth OK Search Headset / Search Data
Device OK . . . the search starts (may take up to 30 seconds) . . . the names of found devices
are displayed . . . possible options:
Register device:
Options Tr ust D ev ice OK . . . use to enter the PIN
of the Bluetooth device to be registered OK . . . the device is
added to the list of known devices
Availability and operation of the functions
may differ on your telephone.
61
Page 64
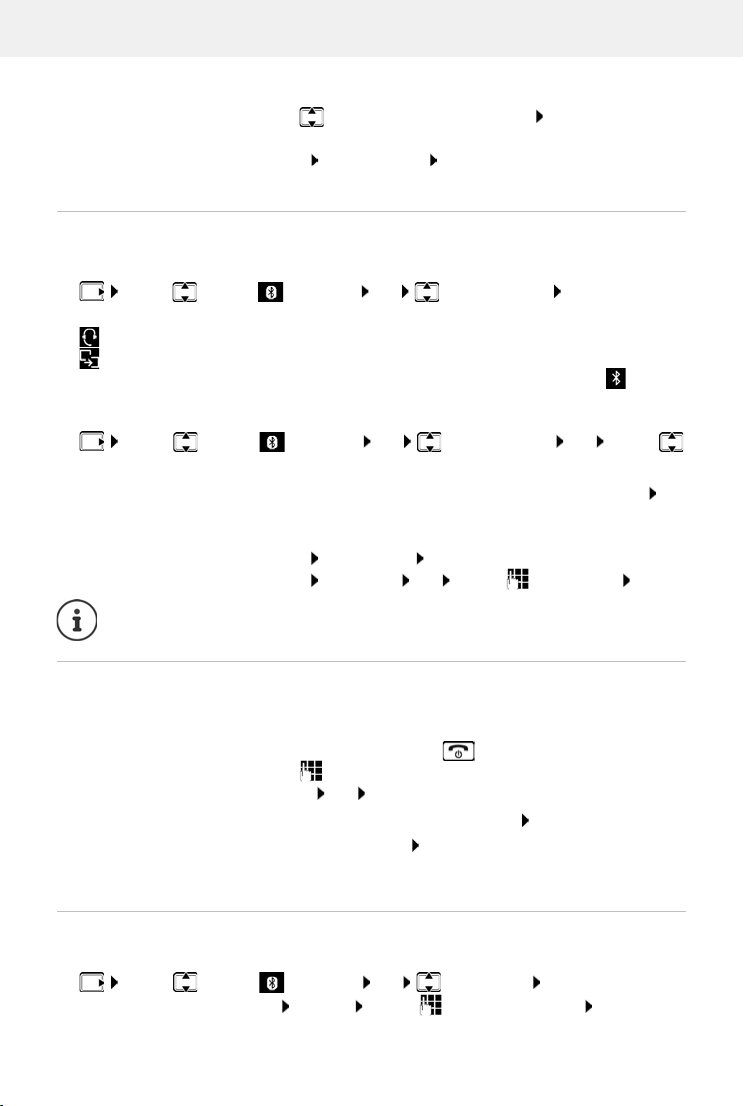
Bluetooth
Showing information:
. . . use to select a device, if applicable View . . . the device
name and device address are displayed
Repeat search:
Cancel search:
Options Repeat Search OK
Cancel
Editing the list of known (trusted) devices
Open the list
. . . use to select Bluetooth OK Known Devices OK . . . the known
devices are listed, an icon indicates the type of device
Bluetooth headset
Bluetooth data device
If a device is connected, the relevant icon is shown in the display header instead of .
Edit an entry
. . . use to select Bluetooth OK Known Devices OK . . . use
to select entry . . . possible options:
View an entry:
De-registering a device:
View . . . the device name and device address are displayed
Press OK to go back
Options Delete entry OK
Edit name:
If an active Bluetooth device is de-registered, it may try to re-connect as a "nonregistered device".
Options Edit Name OK . . . use to edit name Save
Rejecting/accepting a non-registered Bluetooth device
If a Bluetooth device that is not registered in the list of known devices tries to connect to the
handset, a prompt will appear asking you to enter the PIN of the Bluetooth device (Bonding).
Reject:
Accept:
Briefly press the End call key
. . . use to enter the PIN of the Bluetooth device to be
accepted OK . . . Wait for PIN confirmation . . . then
Add the device to the list of known devices: Yes
use the device temporarily: No . . . the Bluetooth connection can be
used, as long as the device is located within transmission range or until
it is switched off
Changing the Bluetooth name of the handset
The handset is shown by this name on another Bluetooth device.
. . . use to select Bluetooth OK Own Device OK . . . the name and
the device address are shown Change . . . use to change the name Save
62
Availability and operation of the functions
may differ on your telephone.
Page 65
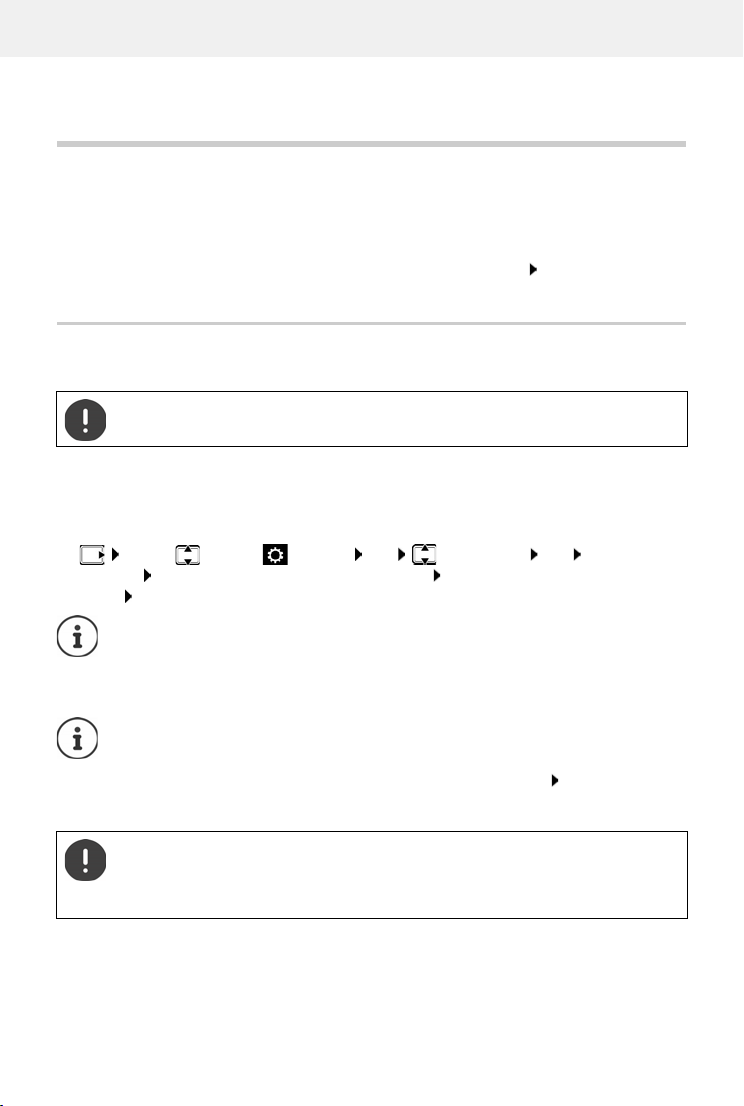
Multiple handsets
Expanding the functionality of the telephone
Multiple handsets
Up to six handsets can be registered to the base station.
Each registered device is assigned an internal
INT 6).
The number or name assigned can be changed.
If all internal numbers have already been assigned at the base station: de-register a handset
that is no longer needed
Registering the handset
A handset can be registered on up to four base stations.
Registration must be initiated on the base station an
Both must be carried out within 60 secs.
On the base station
Press and hold the Registration/Paging key on the base station (approx. 3 secs)
On the handset
. . . use to select Settings OK Registration OK Register
Handset OK . . . an ava ilable base station is sought . . . Enter system PIN (de fault setting:
0000) OK
If the handset is already registered with four bases, select the base to be replaced by
the new base.
Once registration is complete, the handset returns to idle status. The internal number of the
handset appears in the display, e. g. INT 1. I
Maximum possible number of handsets registered to the base station (all internal
numbers assigned): The handset with the highest internal number is replaced by the
new one. If this is not possible, because a conversation is being held on this handset,
for example, the message No available internal number is given. De-register a
handset that is no longer required and repeat the registration procedure
number (1 – 6) and an internal name (INT 1 –
d on the handset.
f not, repeat the procedure.
Some Gigaset bases and bases/routers from third party manufacturers might not be
fully compatible with the handset and not all functions are displayed correctly. In
such cases, use menu entry Legacy Registration. This guarantees correct displays on
the handset, but can entail restrictions for some functions.
Availability and operation of the functions
may differ on your telephone.
63
Page 66
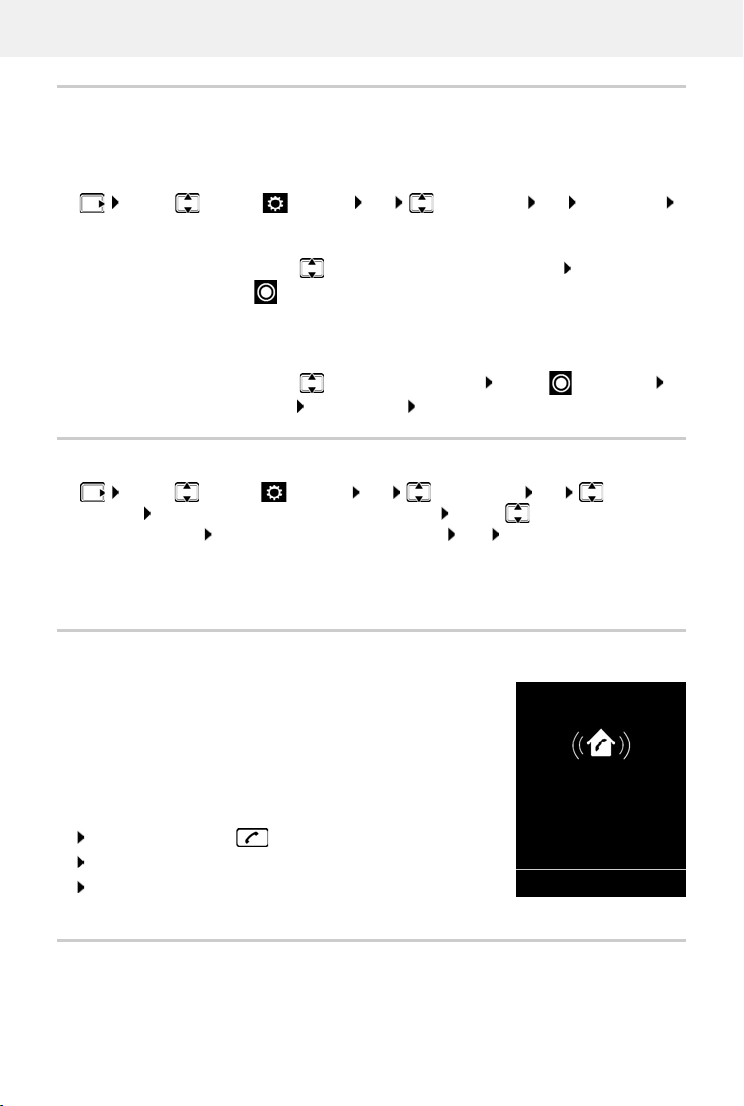
Multiple handsets
Paging
Silence
Registering a handset to multiple base stations
Your handset can be registered to up to four base stations. The active base station is the base
station to which the handset was last registered. The other base stations remain saved in the list
of available base stations.
. . . use to select Settings OK Registration OK Select Base
OK . . . possible options:
Change active base station:
. . . use or Best Base to select base station Select
( = selected)
Best Base: The handset chooses the base station with the best
reception as soon as it loses connection to the current base station.
Change name of a base station:
. . . use to select a base station Select ( = selected)
Name change name Save
De-registering the handset
. . . use to select Settings OK Registration OK De-register
Handset OK . . . the handset being used is selected . . . use to select a different
handset if desired OK . . . enter system PIN if desired OK . . . confirm de-registration
with Ye s
If the handset is still registered to other bases, it switches to the base with the best reception
(Best Base).
Locating a handset (Paging)
Briefly press the Registration/paging key on the base station.
All handsets will ring at the same time (paging), ev
switched off. Exception: handsets on which the baby monitor is
activated.
Ending the search
en if ringtones are
Briefly press the registration/paging key on the base station
or Press the End call key on the handset
or Press the display key Sil
or No action. After approx. 30 seconds, the paging call will end
automatically.
ence on the handset
Changing the handset name and internal number
When registering multiple handsets, they will automatically be assigned the names INT 1,
INT 2
etc. Each handset will automatically be assigned the lowest unassigned internal number.
64
Availability and operation of the functions
may differ on your telephone.
Page 67
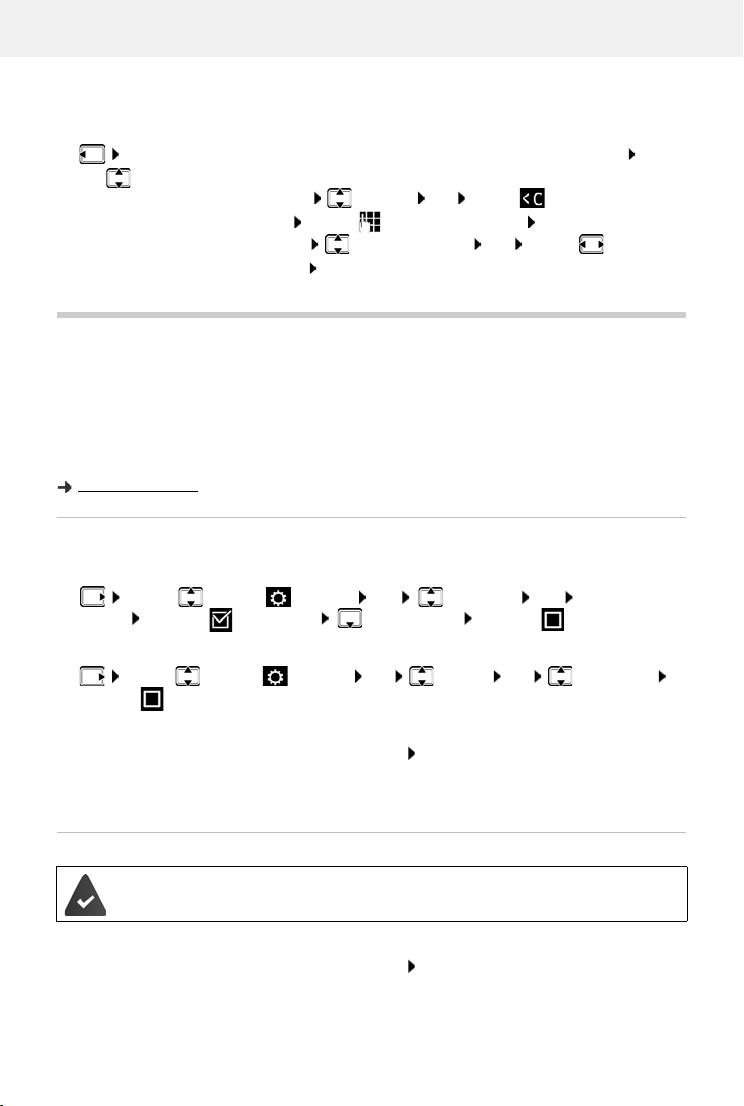
Repeater
The internal number is shown as the name of the handset on the display e.g. INT 2. You can
change the names and the numbers of handsets. The name must not exceed 10 characters in
length.
. . . the list of handsets is opened, the current handset is highlighted with < . . .
use to select a handset . . . possible options:
Edit name:
Edit number:
Options Rename OK . . . use to delete the current
name . . . use to enter a new name OK
Options Edit Handset No. OK . . . use to select a
number Save
Repeater
A repeater increases the receiving range between the Gigaset handset and the base station.
The registration procedure for a repeater depends on the version of the repeater being used.
• Repeater without encryption, e.g. Gigaset repeater prior to Version 2.0
• Repeater with encryption, e.g. Gigaset repeater later than Version 2.0
Further information about the Gigaset repeater can be found in the repeater user guide and at
www.gigaset.com.
Repeater without encryption
Activate Maximum Range/deactivate No Radiation
. . . use to select Settings OK ECO DECT OK Maximum
Range Change ( = activated) No Radiation Change ( = deactivated)
Deactivate encryption
. . . use to select Settings OK System OK Encryption
Change ( = deactivated)
Registering a repeater
Connect the repeater to the mains power supply Press and hold the Registration/paging
key on the telephone base station (min. 3 secs) . . . the repeater is automatically registered
It is possible to register more than one Gigaset repeater.
Repeater with encryption
Encryption is activated (default setting).
Registering a repeater
Connect the repeater to the mains power supply Press and hold the Registration/paging
key on the telephone base station (min. 3 secs) . . . the repeater is automatically registered
Up to 2 repeaters may be registered.
Availability and operation of the functions
may differ on your telephone.
65
Page 68
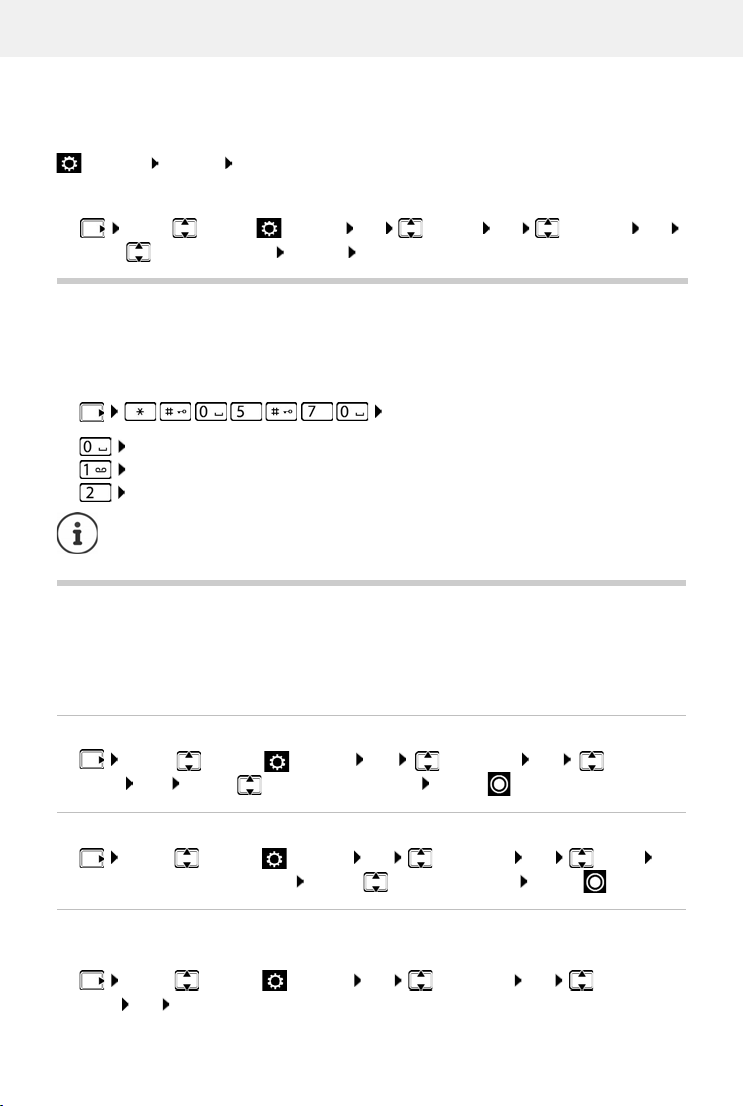
Operation with a router
The ECO DECT function Maximum Range is activated and the No Radiation function is
deactivated. The settings cannot be changed whilst the repeater is registered.
As soon as a repeater is registered, it wil
Settings System Repeater
l appear in the repeater list under
De-registering a repeater
. . . use to select Settings OK System OK Repeater OK
. . . use to select repeater De-reg. Ye s
Operation with a router
When operating on the analogue connection of a router, any echoes that may occur can be
reduced by activating XES mode 1 (XES = eXtended Echo Suppression).
If the XES mode 1 does not sufficiently suppress the occurring echoes: activate XES mode 2.
. . . press one of the following keys
OK Normal mode
OK XES mode 1
OK XES mode 2
If there are no problems with echoes, the normal mode (factory settings) should be
activated.
Operation with a PABX
To find out which settings are required for a PABX, please refer to the PABX user guide.
You cannot send or receive SMS messages on P
Identification.
Setting Tone or Pulse dialling mode
. . . use to select Settings OK Te leph ony OK Dialling
Mode OK . . . use to select To ne or Pulse Select ( = selected)
Setting the flash time
. . . use to select Settings OK Te l ep ho ny OK Recall OK
. . . possible flash times are listed . . . use to select flash time Select ( = selected)
Saving an access code (outside line code)
Setting the access code (e.g. "0") for dialling using the fixed line network.
. . . use to select Settings OK Telep hon y OK Access
Code OK . . . then
66
Availability and operation of the functions
may differ on your telephone.
ABXs that do not support Calling Line
Page 69
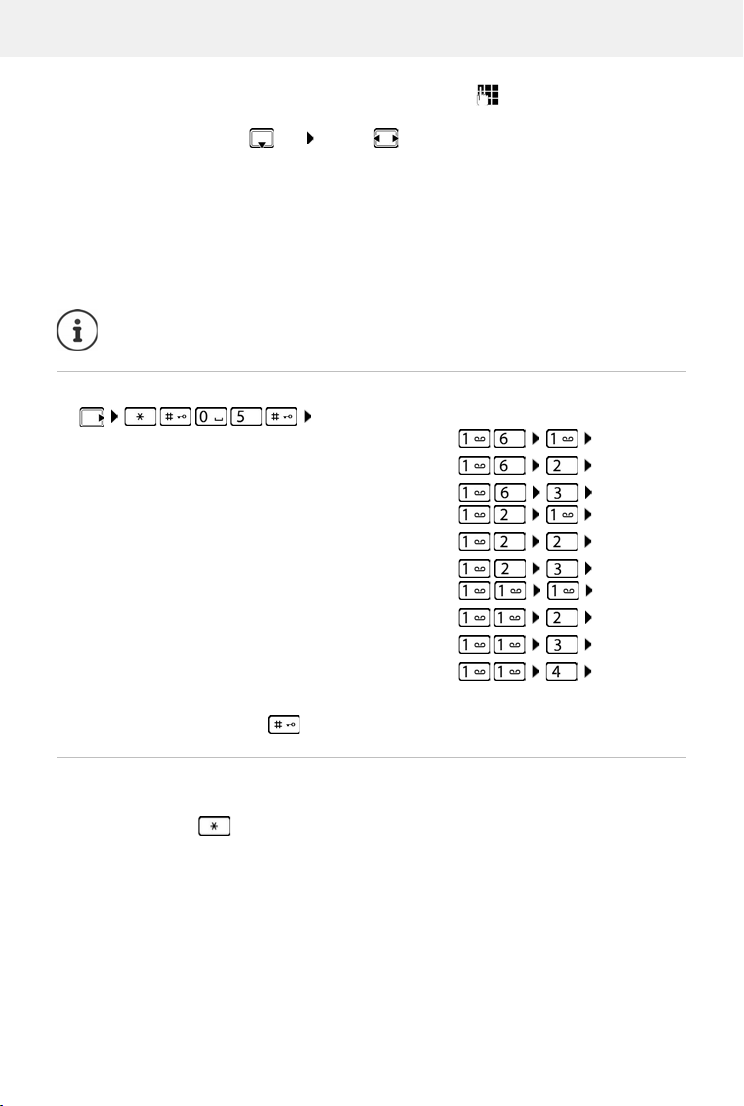
Operation with a PABX
Fixed line network: Access external line with: . . . use to enter or change access
code, max. 3 digits
Rule:
Save:
The access code never prefixes any SMS service centre numbers.
For . . . use to select when the access code should be
dialled
Call Lists: The access code will only prefix numbers from a list (list
of answered calls, list of missed calls, SMS list, answer machine list).
All calls: The access code prefixes all numbers dialled.
Off: The access code is deactivated and does not prefix any
telephone number.
Save
Setting pauses
. . . then
Pause after line seizure: 1 sec
3 secs
7 secs
Pause after Recall key: 800 ms
1600 ms
3200 ms
Dialling pause (pause after access code): 1 sec
2 secs
3 secs
6 secs
To enter dialling pause when dialling:
OK
OK
OK
OK
OK
OK
OK
OK
OK
OK
Press and hold the hash key . . . a P appears in the display.
Switching temporarily to tone dialling (Tone)
After dialling the external number or after establishing the connection:
Press the Star key briefly.
After the call ends, pulse dialling
is automatically reactivated.
Availability and operation of the functions
may differ on your telephone.
67
Page 70
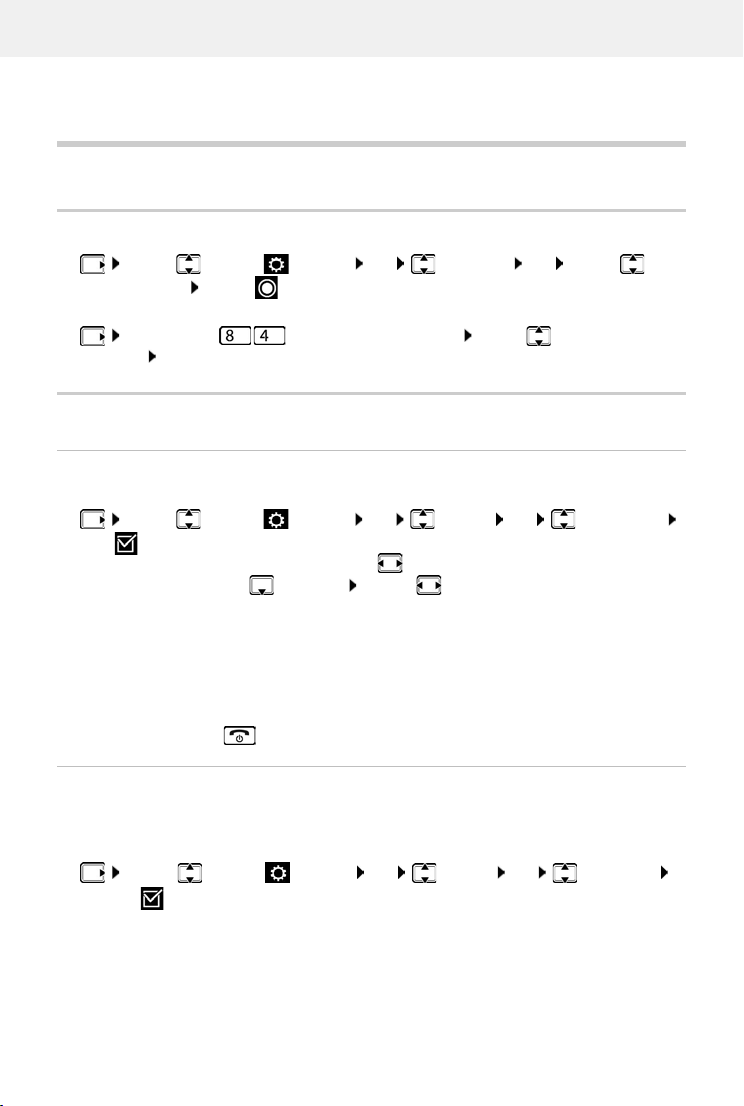
Handset
Adjusting the telephone settings
Handset
Changing the language
. . . use to select Settings OK Language OK . . . use to
select language Select ( = selected)
If the handset has been set to an incomprehensible language:
Press the keys slowly one after the other . . . use to select the correct
language press the right display key
Display
Screensaver
A digital or analogue clock can be selected to be displayed as a screensaver when in idle status.
. . . use to select Settings OK Display OK Screensaver
Edit ( = activated) . . . then
Switch on/off:
Select screensaver:
View screensaver:
Save selection:
The screensaver is activated approx. 10 seconds after the display has changed to idle status.
End screensaver
Press the End call key briefly . . . the display changes to idle status
Activation: . . . use to select On or Off
Selection . . . use to select a screensaver
(Digital Clock / Analog Clock )
View
Save
Large font
Show text and icons in call lists and in the directory in a larger size in order to improve legibility.
Only one entry is shown in the display and names are abbreviated if necessary. The number is
displayed in large font when it is dialled.
. . . Use to select Settings OK Display OK Large Font
Change ( = activated)
68
Availability and operation of the functions
may differ on your telephone.
Page 71
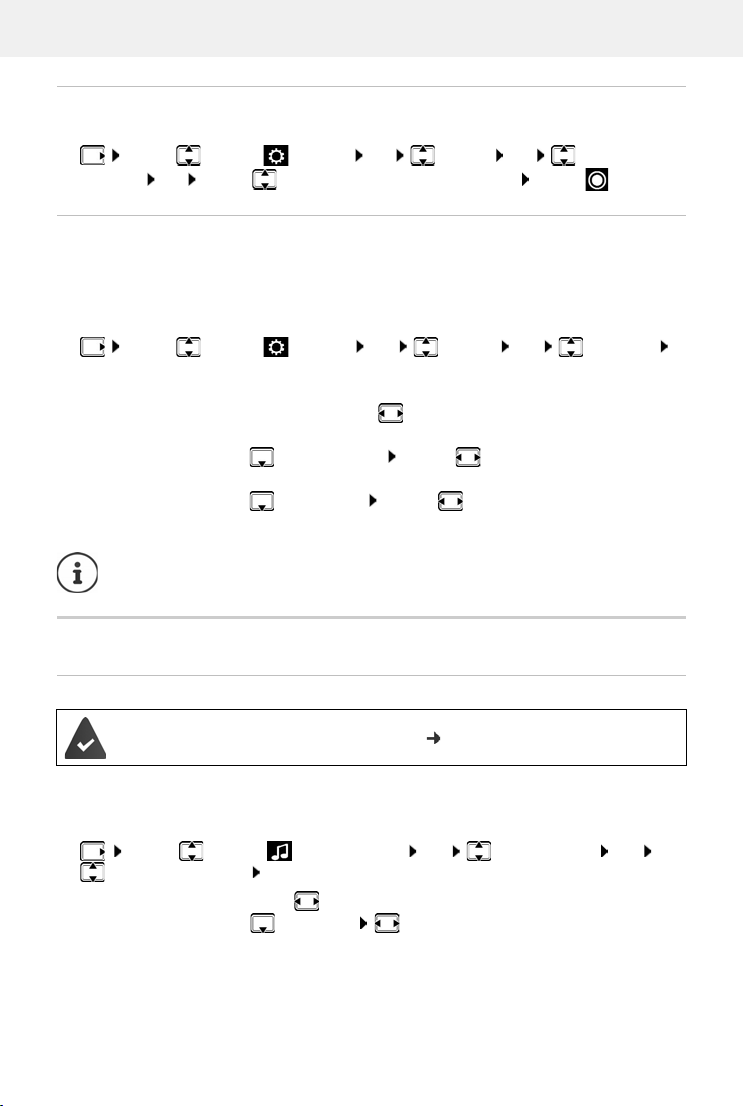
Handset
Colour scheme
You can choose from a range of colour combinations for the display.
. . . use to select Settings OK Display OK Colour
Schemes OK . . . use to select the desired colour scheme Select ( = selected)
Display backlight
The display backlight always illuminates when the handset is taken out of the base station/
charging cradle or when a key is pressed. Any digit keys that are pressed appear on the display
for pre-dialling.
Switch the display backlight on/off when in idle status:
. . . use to select Settings OK Display OK Backlight
OK . . . then
Backlight when in the charging cradle:
In Charger: . . . use to select On or Off
Backlight when not in the charging cradle:
Out of Charger . . . use to select On or Off
Backlight during a call:
In Talk State . . . Use to select On or Off
Save selection:
The handset's standby time may be significantly reduced if the display backlight is
switched on.
Save
Tones and signals
Adjusting the volume automatically
Crescendo is not set for the ringtone volume ( p. 70).
The phone is able to automatically adjust the volume of the receiver and ringtone to the
ambient volume. Here you can set the sensitivity with which the phone reacts to changes in
noise level (Ver y High, High, Medium, Low, Very Low).
. . . use to select Audio Settings OK Smart Volume OK
Earpiece / Ringtone OK . . . then
Enable/disable:
Set the sensitivity:
Save the setting:
Select On or Off
Sensitivity Select the level
Save
Availability and operation of the functions
may differ on your telephone.
69
Page 72
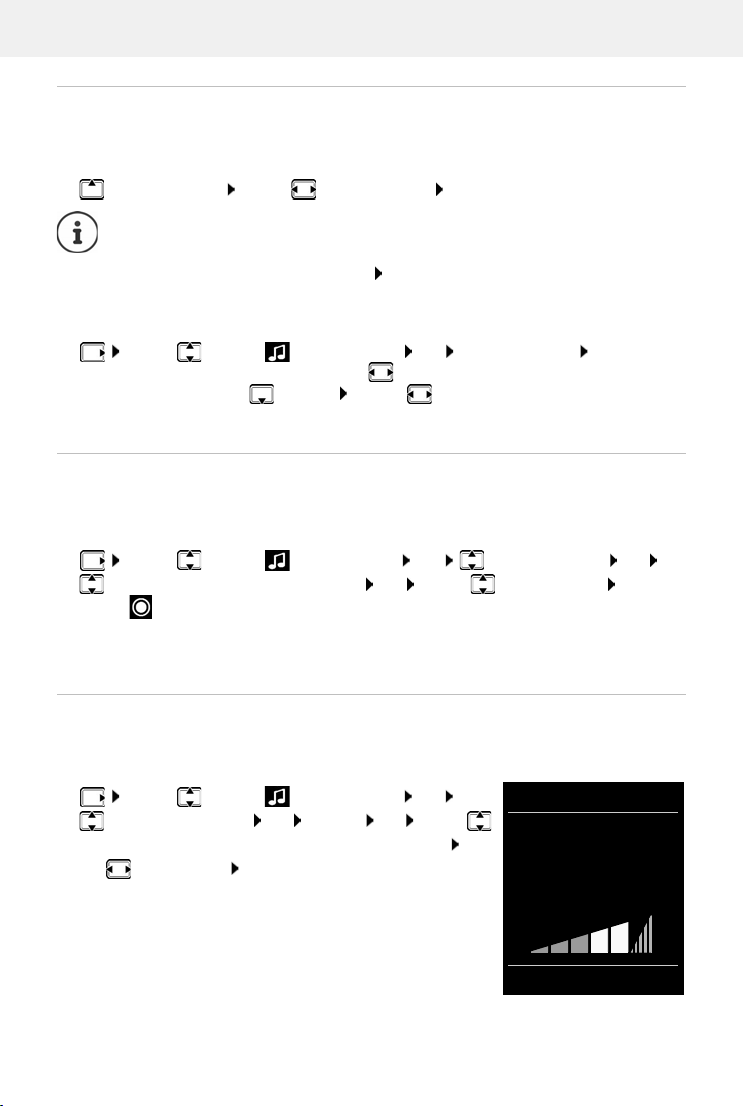
Handset
Volu me
For internal calls
and alarms:
<
>
Back Save
Example
Changing the earpiece and handsfree volume
You can set the volume of the earpiece and speaker at 5 levels independently of each other.
During a conversation
Handset Volume . . . use to select volume Save . . . the setting is saved
Without saving, the setting is automatically saved after around 3 seconds.
Enabling/disabling Boost (extra-loud function): press the Boost key on the right of the
handset
In idle status
. . . use to select Audio Settings OK Handset Volume OK . . . then
For the earpiece:
For the speaker:
Save settings:
Earpiece and handsfree profile
Select a profile for the earpiece and handsfree mode in order to adapt the telephone as much
as possible to the surroundings. Check which is the most comfortable profile for you and your
caller.
Earpiece: . . . use to set the volume
Speaker . . . use to set the volume
Save
. . . use to select Audio Settings OK Acoustic Profiles OK
Earpiece Profiles / Handsfree Profiles OK . . . use to select profile
Select ( = selected)
Earpiece Profiles: Hi
Handsfree Profiles: Pr
gh or Low (default setting)
ofile 1 (default setting) or Profile 2
Ringtones
Ringtone volume
Volume can be set at 5 levels or crescendo (increasing volume).
. . . use to select Audio Settings OK
Ringtones (Handset) OK Volume OK . . . use
to select For internal calls and alarms or External Calls . . .
use to set volume Save
70
Availability and operation of the functions
may differ on your telephone.
Page 73
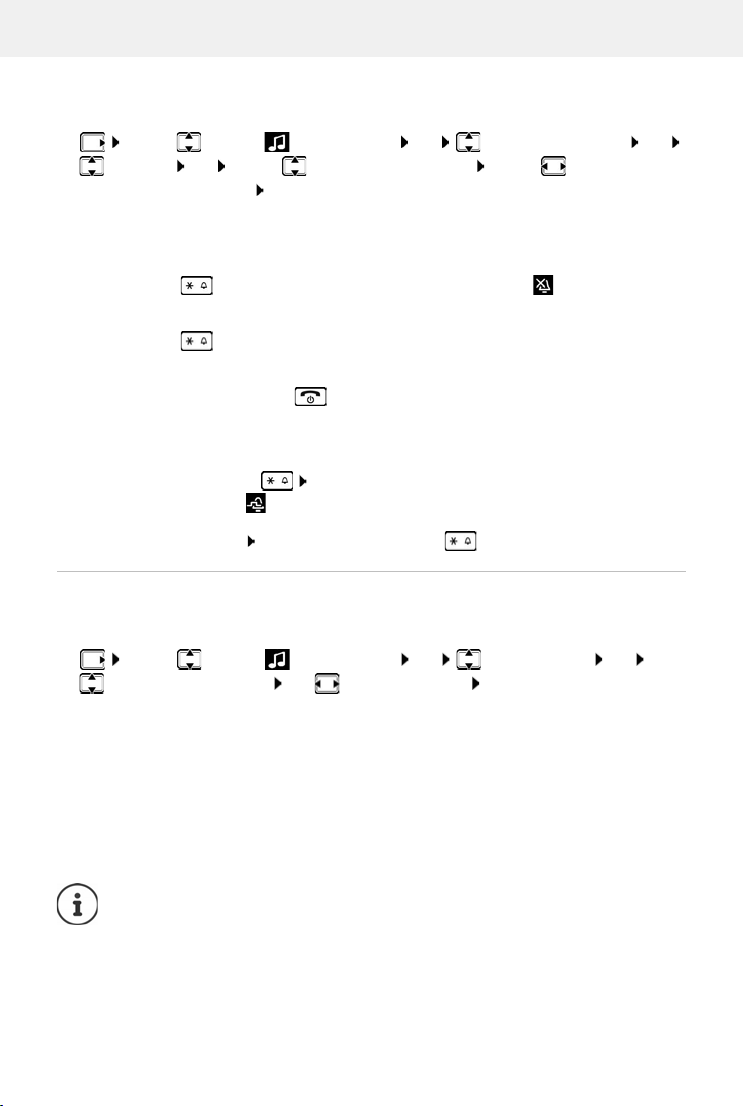
Handset
Ringtone melody
Set different ringtones for internal and external calls.
. . . use to select Audio Settings OK Ringtones (Handset) OK
Melodies OK . . . use to select the connection . . . use to select the ring-
tone/melody in each case Save
Switching the ringtone on/off
Switching the ringtone off permanently
Press and hold . . . the following icon appears in the status bar
Switching the ringtone on permanently
Press and hold
Switching the ringtone off for the current call
Press Silence or the End call key
Switching the alert tone (beep) on/off
Switch on an alert tone (beep) instead of the ringtone:
Press and hold the star key Press Beep within 3 seconds . . . the following icon
appears in the status bar
Switching off the alert tone: Press and hold the star key
Switching advisory tones on/off
The handset notifies acoustically about different activities and statuses. These advisory tones
can be switched on/off independently of each other.
. . . use to select Audio Settings OK Advisory Tones OK
Select the advisory tone use to select On or Off Save
You can select the following advisory tones:
Key Tones Tone when keys are pressed
Confirmation Confirmation/error tone after making entr
Battery Warning tone when there are fewer than 10 minutes of talk time
Out of Range Warning tone when the handset is moved out of range of the base
new message has been received
maining (every 60 seconds)
re
ies, advisory tone when a
There is no battery warning when the baby monitor is switched on.
Availability and operation of the functions
may differ on your telephone.
71
Page 74
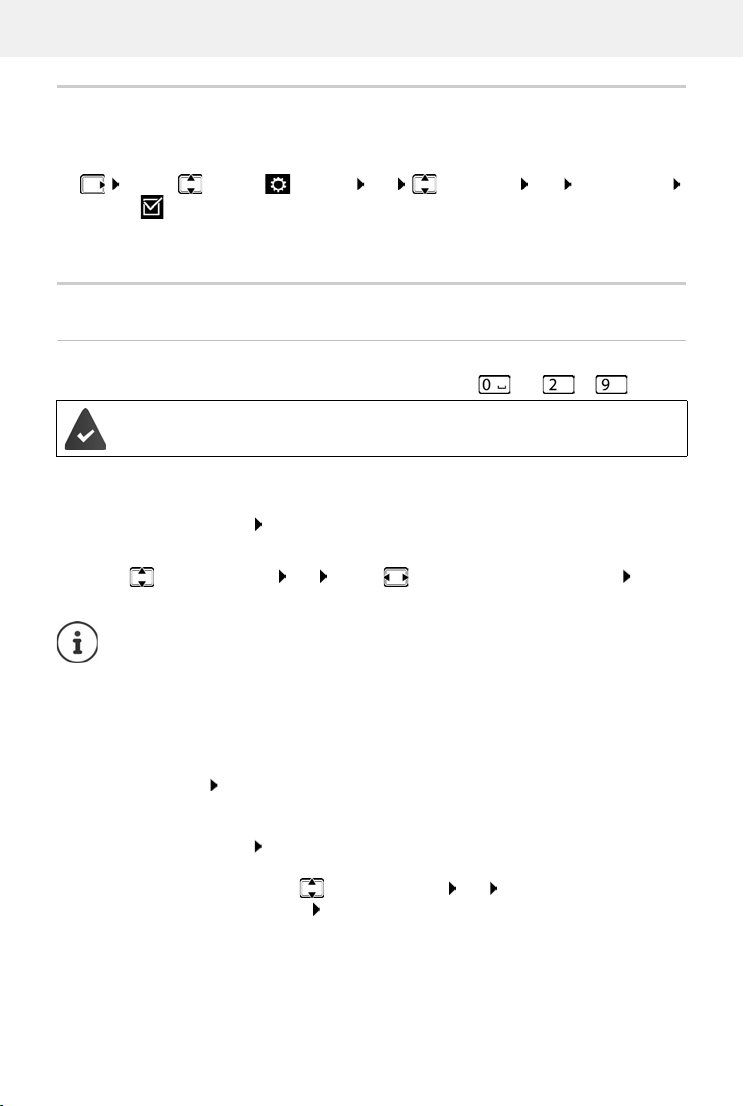
Handset
Auto answer
When Auto answer is enabled, the handset accepts an incoming call as soon as it is removed
from the charging cradle.
. . . use to select Settings OK Te le ph on y OK Auto Answer
Change ( = activated)
Regardless of the Auto Answer setting, the connection ends as soon as you place the handset
back in the charging cradle.
Fast access to numbers and functions
Assigning a number to digit keys (quick dial)
It is possible to assign a number from the directory to the keys and to .
A number has not been assigned to the digit key.
Press and hold the digit key
or
Briefly press the digit key Press the display key QuickDial
The directory opens.
. . . use to select an entry OK . . . use to select a number if necessary OK . . .
the entry is saved to the digit key
If the entry in the directory is deleted later, this will not affect the assignment of the
digit key.
Dialling a number
Press and hold the digit key . . . the number is dialled immediately
or
Briefly press the digit key . . . the number/name (possibly in abbreviated form) is shown on
the left display key . . . press the display key . . . the number is dialled
Changing the digit key assignment
Briefly press the digit key Change . . . the directory is opened . . . possible options:
Change the assignment:
. . . use to select an entry OK . . . select a number if
required OK
Delete the assignment:
Clear Key
72
Availability and operation of the functions
may differ on your telephone.
Page 75
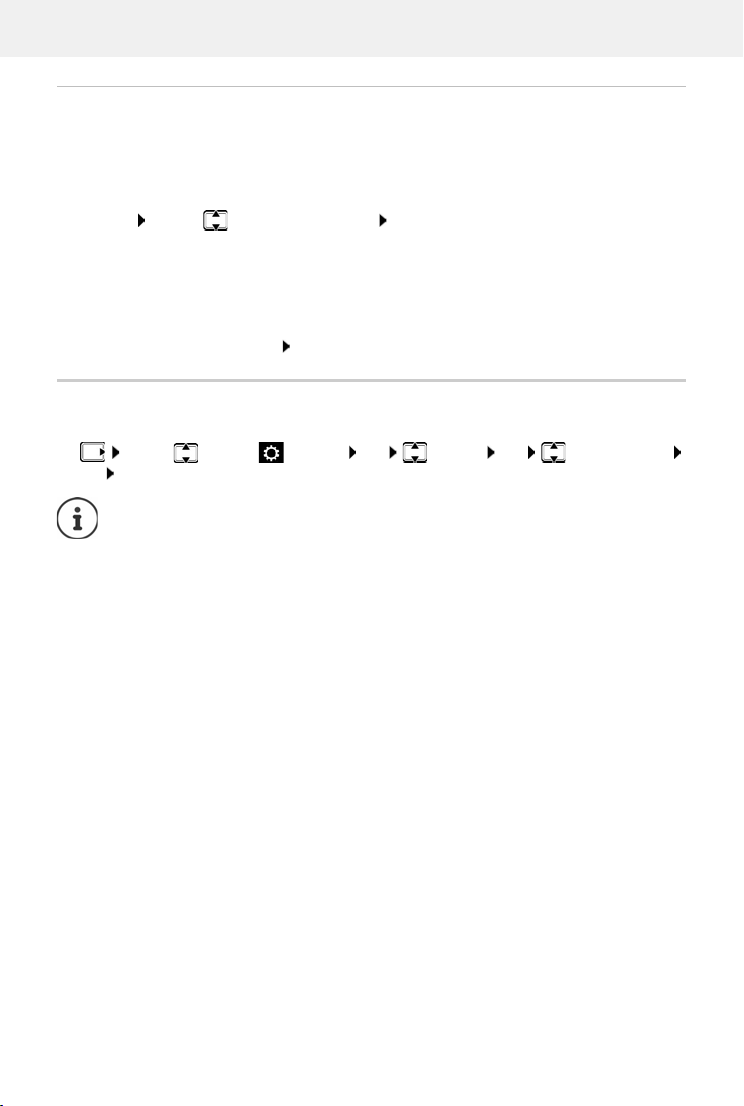
Handset
Assigning display keys / Changing assignments
The left and right display keys have a function preset by default when in idle mode. The
Messages function is assigned on the right display key. The assignment of the left display key can
be changed.
Press and hold the left display key in idle status . . . the list of possible key assignments is
opened . . . Use to select the function OK . . . The assignment of the display key is
changed
Possible functions: Alarm Clock, Redia
More Functions...
l, Handset Directory . . . More functions are available in
Starting a function
With the telephone in idle status: Briefly press . . . the assigned function is executed
Resetting a handset
Reset any individual settings and changes that you have made.
. . . use to select Settings OK System OK Handset Reset
OK Ye s . . . the handset's settings are reset
The following settings are not affected by a reset
• Registration of the handset to the base station
• Date and time
• Directory entries and call lists
• SMS lists
Availability and operation of the functions
may differ on your telephone.
73
Page 76
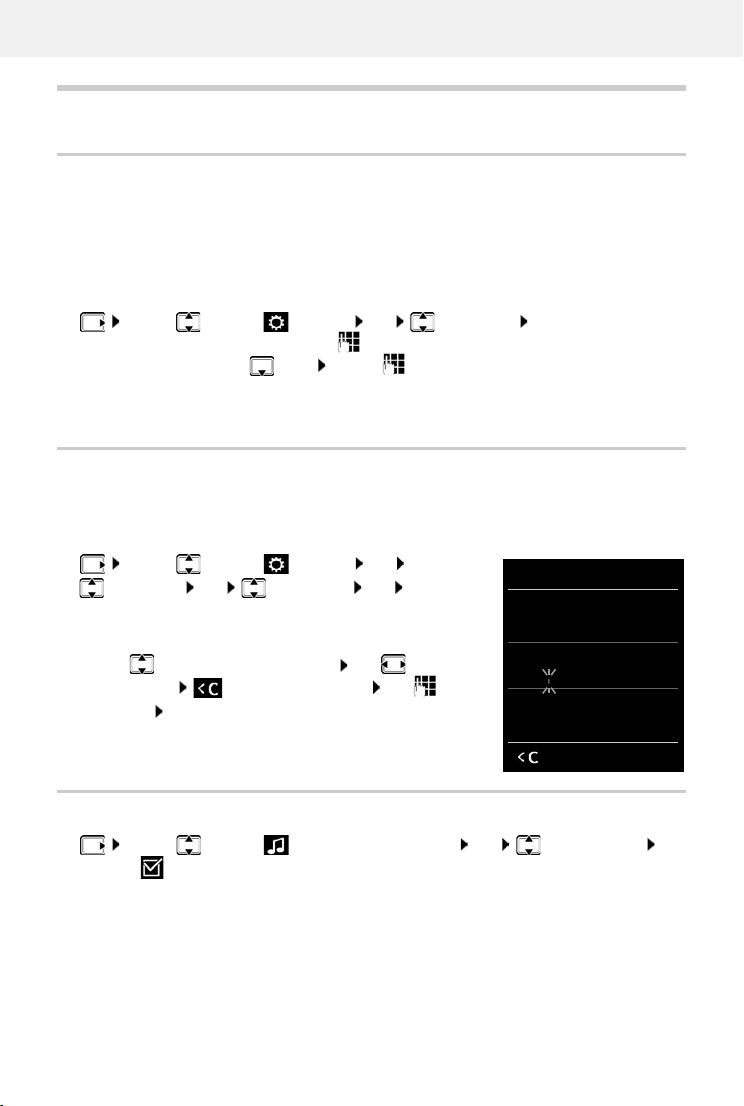
System
Area Codes
International code:
00 - 49
Local area code:
0 - [8 ]
Save
Example
System
Date and time
To ensure you have the correct time for incoming calls and to use the alarm clock and calendar,
for example, the date and time must be set.
If the date and time have not yet been set on the handset, the display key Ti
Press the display key Time
or
. . . use to select Settings OK Date/Time OK . . . then
Set the date:
Set the time:
Save settings:
Date: . . . use to enter the day, month and year in 8-digit format
Time . . . use to enter hours and minutes in 4-digit
format
Save
Own area code
Your area code (international and local area code) must be saved on the phone before you can
transfer phone numbers (e.g. in vCards).
Some of these numbers are already preset.
. . . use to select Settings OK
Tel e ph on y OK Area Codes OK Check
(pre-)set area code
Edit the number:
. . . use to select/switch entry field use to change
entry position delete digit if desired use to
enter digit Save
me appears.
Activating/deactivating music on hold
. . . use to select Audio Settings Settings OK Music on hold
Change ( = activated)
74
Availability and operation of the functions
may differ on your telephone.
Page 77
System
Setting the base ringtone
. . . use to select Audio Settings Settings OK Ringtones (Base)
OK . . . then
Set the volume:
Set the ringtone:
Save the setting:
Volu me: use to set the volume at 5 levels or set a crescendo
(rising volume).
Melody use to select the ringtone
Save
Changing the system PIN
Secure the telephone's system settings with a system PIN. You must enter the system PIN when,
for example, (de)registering a handset or resetting to the default settings.
The direct dial PIN defined on setting up the direct Supervision Call is independent of
it.
Change the telephone's 4-digit system PIN (default setting: 0000):
. . . use to select Settings OK System OK System PIN
OK use to enter the current PIN (if other than 0000) OK use to enter new
system PIN Save
Resetting system PIN
Resetting the base station to the original PIN 0000:
Unplug the network cable from the base station Press and hold the Registration/Paging
key on the base station At the same time reconnect the network cable to the base
station Press and hold the key for at least 5 secs . . . the base station is reset and the system
PIN is set to 0000
All handsets are de-registered and must be re-registered. All settings are returned to
default settings.
Restoring the phone to default settings
When the settings are reset
• the date and time are retained,
• handsets are still registered,
• the system PIN is retained,
• Maximum Range is activated and No Radiation is deactivated.
. . . use to select Settings OK System OK Base Reset
OK use to enter system PIN OK Ye s . . . the base station is restarted. The restart
takes around 10 seconds
Availability and operation of the functions
may differ on your telephone.
75
Page 78

Questions and answers
Appendix
Questions and answers
Possible solutions are available online at www.gigaset.com/service
Troubleshooting
The display is blank.
• The handset is not activated. Press and hold .
• The battery is empty. Charge the battery or replace it
"No Base" flashes on the display.
• The handset is outside the range of the base station. Move the handset closer to the base station
• The base is not activated. Check the base station power adapter
• The base station's range is reduced because Maximum Range is deactivated.
Activate Maximum Range or reduce the distance between the handset and base station
"Please register handset" flashes on the display.
• The handset has not yet been registered or was de -registered due to the registration of an additional
handset (more than 6 DECT registrations). Re-register the handset
The handset does not ring.
• The ringtone is deactivated. Activate ringtone
• Call forwarding is set. Deactivate call forwarding.
• The phone does not ring if the caller has withheld his number.
Activate the ringtone for anonymous calls.
• The phone does not ring during a specific period or for certain numbers.
Check the time control for external calls
No ringtone/dial tone from the fixed line network.
• Incorrect phone cable. Please always use the phone cable supplied or ensure that the pin connections
are correct when purchasing from a retailer.
The connection always terminates after approx. 30 seconds.
• A repeater (earlier than Version 2.0) has been activated or deactivated. Switch the handset off and back
on again.
Error tone sounds after system PIN prompt.
• You have entered the wrong system PIN. Repeat the process, reset the system PIN to 0000 if required
Forgotten syste m PIN.
Reset the system PIN to 0000
The other party cannot hear you.
• The handset is "muted". Activate the microphone again
Some of the network services do not work as specified.
• Features are not enabled. Contact the network provider for details.
76
Availability and operation of the functions
may differ on your telephone.
Page 79

Questions and answers
The caller's number is not displayed.
• Calling Line Identification (CLI) is not enabled for the caller. The caller should ask the network provider
to enable Calling Line Identification (CLI).
• Calling Line Identification Presentation (CLIP) is not supported or enabled by the network provider.
Ask the network provider to enable Caller Line Identification Presentation (CLIP).
• The telephone is connected via a PABX or a router with an integrated PABX (gateway) that does not
transmit all information.
Reset the system: Briefly pull out the power plug. Reinsert the plug and wait until the device restarts.
Check the settings on the PABX and activate phone number disp lay, if neces sary. To d o this , sear ch for
terms such as CLIP, calling line identification, telephone number identification, caller ID, ... in the
system user guide or ask the system manufacturer.
You hear an error tone when keying in (descending tone sequence).
• Action has failed/invalid input. Repeat the process. Read the display and refer to the user g uide if neces-
sary.
You cannot listen to messages on the network mailbox.
• Your PABX is set to pulse dialling. Set your PABX to tone dialling.
No time is specified for a message in the call list.
• Date/time are not set. Set the date/time.
Registration or connection problems with a Bluetooth headset.
Reset the Bluetooth headset (see headset user guide).
Delete the registration data on the handset by de-registering the device.
Repeat the registration procedure.
Answer machine (only on systems with a local answer machine)
No time is specified for a message in the call list.
• Date/time are not set. Set the date/time
The answer machine reports "Invalid PIN" during remote operation.
• You have entered the wrong system PIN. Repeat input of system PIN
• The system PIN is still set to 0000. Set the system PIN to something other than 0000.
The answer machine is not recording any messages/has switched to answer only mode.
• The memory is full. Delete old messages Listen to new messages and then delete
Availability and operation of the functions
may differ on your telephone.
77
Page 80

Service (Customer Care)
Service (Customer Care)
Step by step towards your solution with Gigaset Customer Care
www.gigaset.com/service.
Visit our Customer Care pages
Here you will find:
• Frequently asked questions
• Free software and user manual downloads
• Compatibility checks
Contact our Customer Care team
Couldn't find a solution in the FAQs section?
We are happy to help...
... online:
via our contact form on the customer service page
... by telephone:
United Kingdom
Service Hotline: 020 36953111
(local call cost charge)
Ireland
Service Hotline: 0818 200 033
(6.6561 Ct./Call)
Please have your proof of purchase ready when calling.
Please note that if the Gigaset product is not sold by authorised dealers in the national territory the product
y not be fully compatible with the national telephone network. It is clearly specified on the box near the CE
ma
mark for which country/countries the equipment has been developed. If the equipment is used in a manner
inconsistent with this advice or with the instructions of the manual and on the product itself, this may have
implications on the conditions for warranty or guarantee claims (repair or exchange of product).
In order to make use of the warranty, the product purchaser is asked to submit a receipt which proves the date
urchase (date from which the warranty period starts) and the type of goods that have been purchased.
of p
Guarantee Certificate - United Kingdom and Ireland
Without prejudice to any claim the user (customer) may have in relation to the deal er or retailer, the customer
shall be granted a manufacturer’s Guarantee under the conditions set out below:
• In the case of new devices and their components exhibiting defects resulting from manufacturing and/or
material faults within 24 months of purchase, Gigaset Communications shall, at its own option and free of
charge, either replace the device with another device reflecting the current state of the art, or repair the
said device. In respect of parts subject to wear and tear (including but not limited to, batteries, keypads,
casing), this warranty shall be valid for six months from the date of purchase.
• This G uarantee shall be i nvalid if t he devic e defect i s attribu table to i mproper c are or use and/or fa ilure to
comply with information contained in the user manuals. In particular claim s under the Guarantee cannot
be made if:
• The device is opened (this is classed as third party intervention)
• Repairs or other work done by persons not authorised by Gigaset Communications.
• Components on the printed circuit board are manipulated
• The software is manipulated
78
Availability and operation of the functions
may differ on your telephone.
Page 81
Service (Customer Care)
Description Maximum number of permitted pixel errors
Colour illuminated sub-pixels 1
Dark sub-pixels 1
Total number of coloured and dark sub-pixels 1
Signs of wear on the display and casing are excluded from the warranty.
• Defects or damage caused by dropping, breaking, lightning or ingress of moisture. This also applies if
defects or damage was caused by mechanical, chemical, radio interference or thermal factors (e.g.: microwave, sauna etc.)
• Devices fitted with accessories not authorised by Gigaset Communications
• This Guarantee shall not apply to or extend to services performed by the authorised dealer or the
customer themselves (e.g. installation, configuration, software downloads). User manuals and any software supplied on a separate data medium shall be excluded from the Guarantee.
• The purchase receipt, together with the date of purchase, shall be required as evidence for invoking the
Guarantee. Claims under the Guarantee must be submitted within two months of the Guarantee default
becoming evident.
• Ownership of devices or components replaced by and returned to Gigaset Communications shall vest in
Gigaset Communications.
• This Guarantee shall apply to new devices purchased in the European Union. For Products sold in the
United Kingdom and in the Republic of Ireland the Guarantee is issued by: Gigaset Communications UK
Limited, 2 White Friars, Chester, CH1 1NZ.
• Any other claims resulting out of or in connection with the device shall be excluded from this Guarantee.
Nothing in this Guarantee shall attempt to limit or exclude a Customers Statutory Rights, nor the manufacturer’s liability for death or personal injury resulting from its negligence.
• The duration of the Guarantee shall not be extended by services rendered under the terms of the Guar-
antee.
• Insofar as no Guarantee default exists, Gigaset Communications reserves the right to charge the customer
for replacement or repair.
• The above provisions do not imply a change in the burden of proof to the detriment of the customer.
To invoke this Guarantee, please contact the Gigaset Communications helpdesk. This number is also to be
found in the accompanying user guide.
Exclusion of liability
Your handset's display consists of pixels. Each pixel consists of three sub-pixels (red, green, blue).
It may be the case that a sub-pixel is missing or has a colour deviation.
A warranty claim is only valid if the maximum number of permitted pixel errors is exceeded.
Availability and operation of the functions
may differ on your telephone.
79
Page 82

Manufacturer’s advice
Manufacturer’s advice
Authorisation
This device is intended for analogue phone lines in the UK and on the Irish network.
Country-specific requirements have been taken into consideration.
Hereby, Gigaset Communications GmbH declares that the radio equipment type Gigaset E794 (A) –
et E794H is in compliance with Directive 2014/53/EU and
Gigas
The full text of the EU declaration of conformity is available at the following internet address:
www.gigaset.com/docs.
This declaration could also be availabl
rations of Conformity" files.
Therefore please check all of these files.
e in the "International Declarations of Conformity" or "European Decla-
Data protection
We at Gigaset take the protection of our customers’ data very seriously. It is precisely for this reason that we
are ensuring all our products feature "Privacy by Design" as standard. All information we collect is used to
make our products as good as possible. In the process, we ensure your details are protected and only used for
the purposes of making available to you a product or service. We know which path your data takes through
the company and ensure this happens in line with data protection specifications in a secure and protected
manner.
The full text of the privacy policy is available from:
www.gigaset.com/privacy-policy
Environment
the UK Radio Equipment Regulations 2017.
Our environmental statement
We at Gigaset Communications GmbH are aware of our social resp onsib ility. Th at is why we act ively t ake ste ps
to create a better world. In all areas of our business – from product planning and production to sales and waste
of disposal – following our environmental conscience in everything we do is of utmost importance to us.
Learn more about our earth-friendly products and processes online at
www.gigaset.com.
Environmental management system
Gigaset Communications GmbH is certified pursuant to the international st andards ISO 14001 and
ISO 9001.
ISO 14001 (Environment):
GmbH.
ISO 9001 (Quality): C
80
ertified since 17/02/1994 by TÜV SÜD Management Service GmbH.
Certified since September 2007 by TÜV SÜD Management Service
Availability and operation of the functions
may differ on your telephone.
Page 83
Manufacturer’s advice
Disposal
Batteries should not be disposed of in general household waste. Obser ve the local waste disposal regulations,
details of which can be obtained from your local authority.
All electrical and electronic products should be disposed
designated collection facilities appointed by the government or the local authorities.
his crossed-out wheeled bin symbol on the product means the product is covered by the
EU: T
European Directive 2012/19/EU.
he Waste Electrical and Electronic Equipment Regulations 2013 (as amended).
UK: T
negative consequences for the environment and human health. It is a precondition for reuse and recycling of
used electrical and electronic equipment.
For more detailed information about disposal of your old
centre or the original supplier of the product.
The correct disposal and separate collection of y
of separately from the municipal waste stream via
our old appliance will help prevent potential
appliance, please contact your local council refuse
Care
Wipe the device with a damp cloth or an antistatic cloth. Do not use solvents or microfibre cloths.
a dry cloth; this can cause static.
Never use
In rare cases, contact with chemical substances can cause
variety of chemical products available on the market, it was not possible to test all substances.
Impairments in high-gloss finishes can be carefully removed using display polishes for mobile phones.
changes to the device’s exterior. Due to the wide
Contact with liquid
If the device comes into contact with liquid:
1 Disconnect the power supply.
2
Remove the batteries and leave the battery compartment open.
3 Allow the liquid to drain from the device.
4Pat all parts dry.
5 Place the de vice in a dry, warm place for at least 72 hours (not in a microwave, oven etc.) with the battery
compartment open and the keypad facing down (if applicable).
6 Do not switch on the device again until it is completely dry.
When it has fully dried out, you will normally be able to use it again.
Availability and operation of the functions
may differ on your telephone.
81
Page 84
Technical data
Technical data
Batteries
Technology: 2 x AAA NiMH
Volt age: 1.2 V
Capacity: 750 mAh
Handset operating times/charging times
The operating time of your Gigaset depends on the capacity of the battery, its age and the way it is used.
(All times are maximum possible times.)
Standby time (hours) 300 / 170 *
Talktime (hours) 14
Operating time with 1.5 hours of calls per day (hours) 130 / 95*
Charging time in base (hours) 9.5
Charging time in charging cradle (hours) 8.0
* No Radiation switched off/on, without display backlight in idle status
Power consumption of the handset in the charging cradle
When charging: approx. 1.50 W
To maintain the charge status: approx. 0.50 W
Base power consumption
Standby: Without answer machine With answer machine
– Handset in the charging cradle approx. 1.00 W approx. 1.00 W
– Handset away from the charging cradle approx. 0.50 W approx. 0.65 W
During a call: approx. 0.65 W approx. 0.75 W
General specifications
DECT standard Supported
GAP standard Supported
No. of channels 60 duplex channels
Radio frequency range 1880-1900 MHz
Duplex mode Time division multiplexing, 10 ms frame length
Repetition frequency of the transmission
pulse
Duration of the transmission pulse 370 μs
Channel grid 1728 kHz
Bit rate 1152 kbit/s
Modulation GFSK
Language code 32 kbit/s
82
Availability and operation of the functions
100 Hz
may differ on your telephone.
Page 85
Technical data
3
2
1
4
5
6
1unused
2unused
3a
4b
5unused
6unused
Transmission power 10 mW average power per channel, 250 mW pulse power
Range Up to 50 m indoors, up to 300 m outdoors
Base station power supply 230 V ~/50 Hz
Environmental conditions for operation +5 °C to +45 °C; 20% to 75% relative humidity
Dialling mode DTMF (tone dialling)/PD (pulse dialling)
Bluetooth
Radio frequency range 2402-2480 MHz
Transmission power 4 mW pulse power
Pin connections on the telephone jack
Power adapter for the handset
Manufacturer Salom Electric (Xiamen) Co. Ltd.
Model identifier C705 / C710
Input voltage 230 V
Input AC frequency 50 Hz
Output voltage 4 V
Output current 0.15 A
Output power 0.6 W
Average active efficiency > 46%
Efficiency at low load (10%) not relevant – only at output power > 10 W
No-load power consumption < 0.10 W
Commercial registration number: 91350200612003878C
31 Building, Huli Industrial District,
Xiamen, Fujian 361006, P.R. China
Salcomp (Shenzen) Co. Ltd.
Commercial registration number: 91440300618932635P
Salcomp Road, Furond Industrial Area,
Xinqiao, Shajing, Baoan District, Shenzen 518125 China
Availability and operation of the functions
may differ on your telephone.
83
Page 86
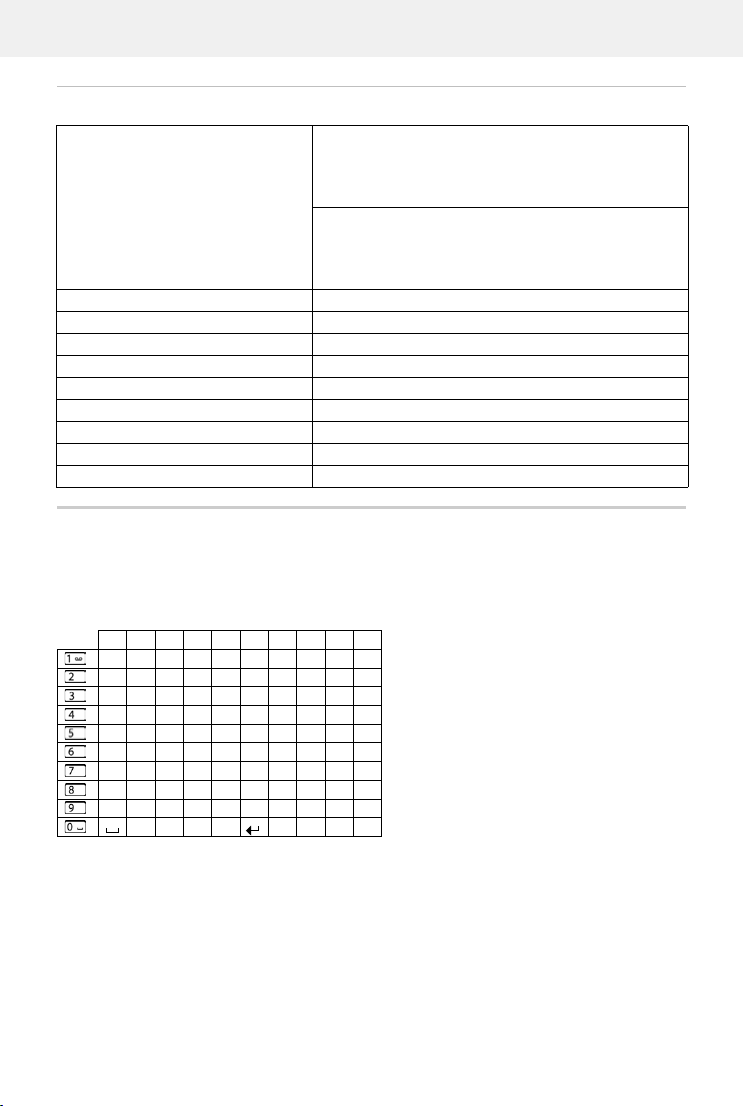
Technical data
1) Space
2) Line break
1x 2x 3x 4x 5x 6x 7x 8x 9x 10x
1
abc2дбавгз
def 3лйик
gh i4ğïíìîı
jkl5
mno6цсутфх
pqr s7Яş
tuv8üúùû
wxy z 9 ÿ ýæøå
.,?! 0
1)
2)
Power adapter for the base
Manufacturer Salom Electric (Xiamen) Co. Ltd.
Commercial registration number: 91350200612003878C
31 Building, Huli Industrial District,
Xiamen, Fujian 361006, P.R. China
Salcomp (Shenzen) Co. Ltd.
Commercial registration number: 91440300618932635P
Salcomp Road, Furond Industrial Area,
Xinqiao, Shajing, Baoan District, Shenzen 518125 China
Model identifier C707/C769 / C771/C785
Input voltage 230 V
Input AC frequency 50 Hz
Output voltage 6.5 V
Output current 0.3 A
Output power 1.95 W
Average active efficiency > 71.5 %
Efficiency at low load (10%) not relevant – only at output power > 10 W
No-load power consumption < 0.10 W
Character charts
The character set used on the handset is dependent on the language set.
Standard characters
Press the relevant key several times.
84
Availability and operation of the functions
may differ on your telephone.
Page 87
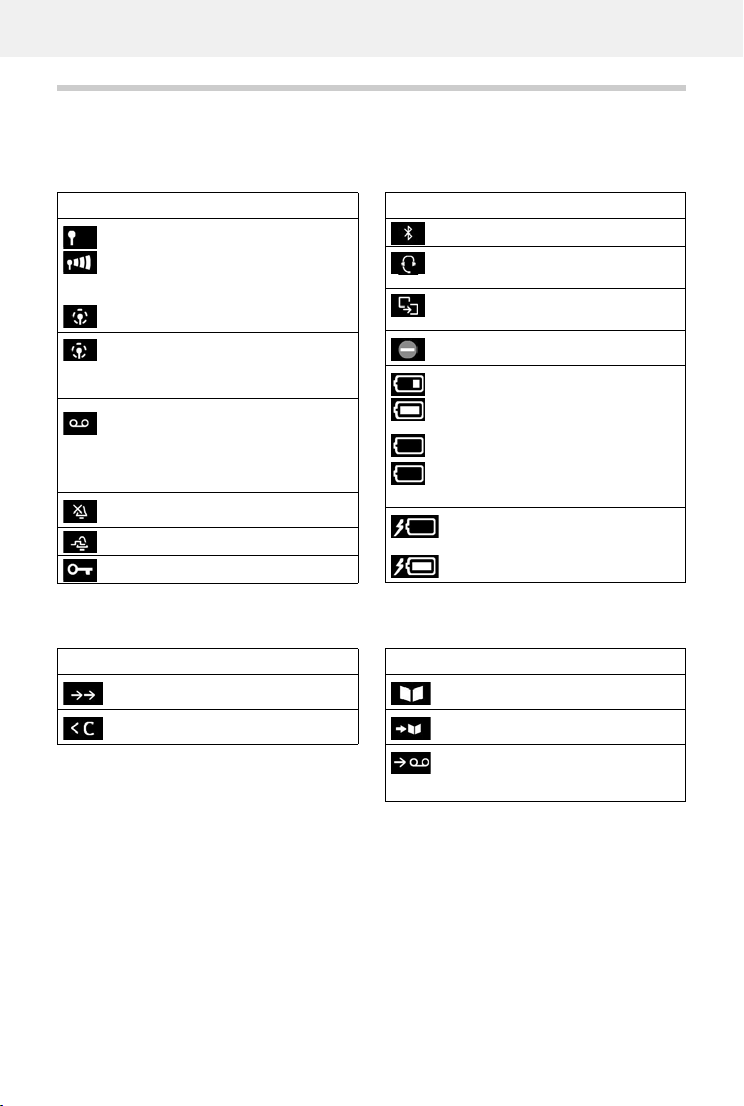
Display icons
Icon Meaning
Signal strength (No Radiation off )
1% -100%
white, if Maximum Range on;
green, if Maximum Range off
Red: no connection to the base station
No Radiation activated:
white, if Maximum Range on;
green, if Maximum Range off
Answer machine activated indicator
flashes: Answer machine is recording
a message or is being operated by
another internal participant (only for a
system with a local answer machine)
Ringtone switched off
"Beep" ringtone activated
Keypad lock activated
Bluetooth enabled
Headset / hearing aid connected via
Bluetooth
Data device connected via
Bluetooth
"Do not disturb" enabled
Battery charge status:
White: between 11% and 100%
charged
Red: less than 11% charged
Flashes red: battery almost empty
(approx. 5 minutes of talktime left)
Battery is charging
(current charge status):
0% - 100%
Icon Meaning
Icon Meaning
Last number redial
Delete text
Open the directory
Copy number to the directory
Divert a call to answer machine (only
for a system with a local answer
machine)
Icon Meaning
Display icons
The following icons are displayed depending on the settings and the operating status of your telephone.
Icons in the status bar
Display key icons
Availability and operation of the functions
may differ on your telephone.
85
Page 88
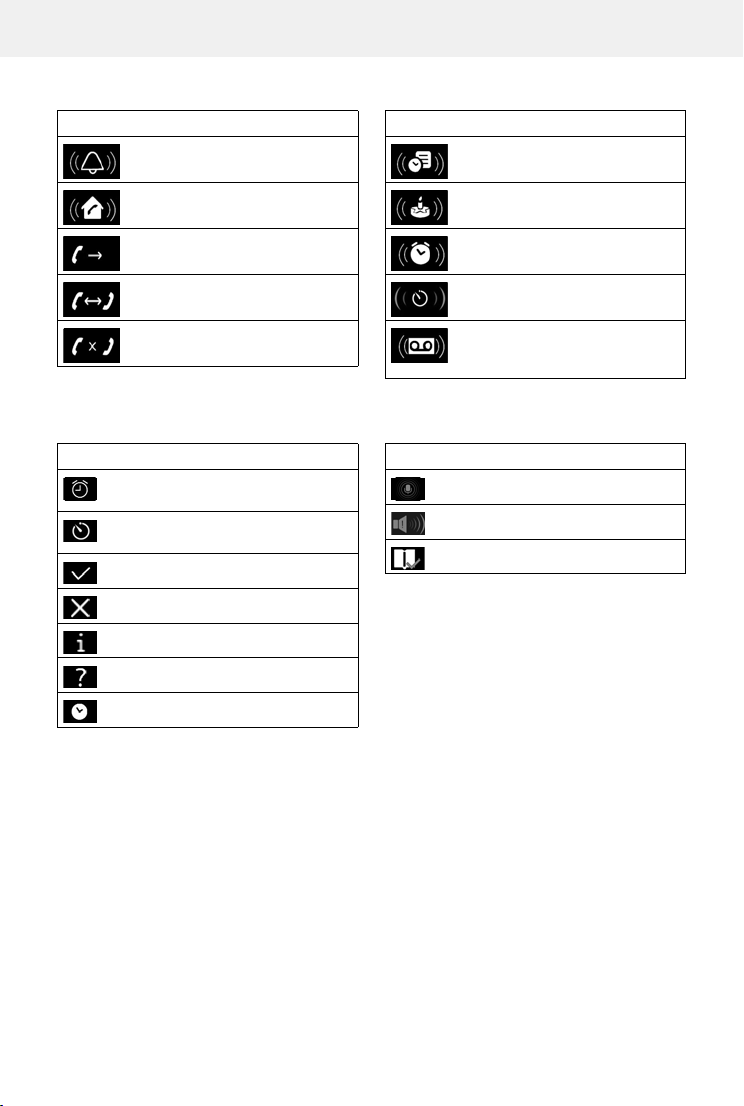
Display icons
Icon Meaning
External call
Internal call
Establishing a call (outgoing call)
Connection established
No connection established/
connection terminated
Reminder for appointment
Reminder for anniversary
Alarm call
Countdown timer
Answer machine is recording
(only for a system with a local answer
machine)
Icon Meaning
Icon Meaning
Alarm clock is activated, display with
alarm time
Timer switched on, display with
countdown
Action complete (green)
Action failed (red)
Information
(Security) prompt
Please wait ...
Direct dial enabled in emergency
Boost enabled
Just Friends function enabled
Icon Meaning
Display icons to indicate . . .
Other display icons
86
Availability and operation of the functions
may differ on your telephone.
Page 89
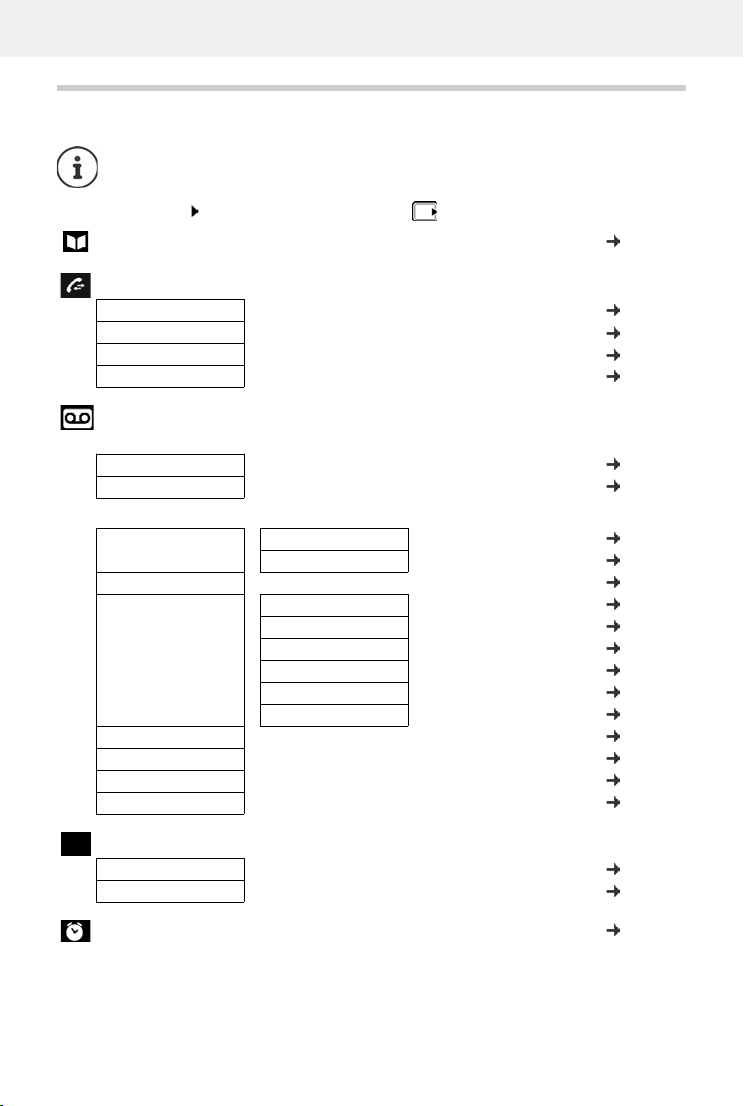
Menu overview
SOS
Menu overview
Not all functions described in the user guide are av
providers.
Open the main menu: when handset is in idle status press
Handset Directory
. . . . . . . . . . . . . . . . . . . . . . . . . . . . . . . . . . . . . . . . . . . . . . . . . . . . . . p. 27
ailable in all countries or from all network
Call Lists Lists
All calls
Outgoing calls
Accepted calls
Missed calls
. . . . . . . . . . . . . . . . . . . . . . . . . . . . . . . . . . . . . . . . . . . . . . . . . . . . . . p. 32
. . . . . . . . . . . . . . . . . . . . . . . . . . . . . . . . . . . . . . . . . . . . . . . . . . . . . . p. 32
. . . . . . . . . . . . . . . . . . . . . . . . . . . . . . . . . . . . . . . . . . . . . . . . . . . . . . p. 32
. . . . . . . . . . . . . . . . . . . . . . . . . . . . . . . . . . . . . . . . . . . . . . . . . . . . . . p. 32
Answer Machine Machine
System without local answer machine
Play Messages
Network Mailbox
System with local answer machine
Play Messages Network Mailbox
Activation
Announcements Record Announcem.
Recordings
Call Screening
Network Mailbox
Set Key 1
. . . . . . . . . . . . . . . . . . . . . . . . . . . . . . . . . . . . . . . . . . . . . . . . . . . . . .
. . . . . . . . . . . . . . . . . . . . . . . . . . . . . . . . . . . . . . . . . . . . . . . . . . . . . .
Answer Machine
. . . . . . . . . . . . . . . . . . . . . . . . . . . . . . . . . . . . . . . . . . . . . . . . . . . . . .
Play Announcement
Delete Announcem.
Rec. Advisory Msg.
Play Advisory Msg.
Del. Advisory Msg.
. . . . . . . . . . . . . . . . . . . . . . . . . . . . . . . . . . . . . . . . . . . . . . . . . . . . . .
. . . . . . . . . . . . . . . . . . . . . . . . . . . . . . . . . . . . . . . . . . . . . . . . . . . . . .
. . . . . . . . . . . . . . . . . . . . . . . . . . . . . . . . . . . . . . . . . . . . . . . . . . . . . .
. . . . . . . . . . . . . . . . . . . . . . . . . . . . . . . . . . . . . . . . . . . . . . . . . . . . . .
. . . . . . . . . . . . . . . . . . . . . . . . . .
. . . . . . . . . . . . . . . . . . . . . . . . . .
. . . . . . . . . . . . . . . . . . . . . . . . . .
. . . . . . . . . . . . . . . . . . . . . . . . . .
. . . . . . . . . . . . . . . . . . . . . . . . . .
. . . . . . . . . . . . . . . . . . . . . . . . . .
. . . . . . . . . . . . . . . . . . . . . . . . . .
. . . . . . . . . . . . . . . . . . . . . . . . . .
p. 35
p. 39
p. 39
p. 35
p. 35
p. 38
p. 38
p. 39
p. 38
p. 38
p. 39
p. 39
p. 36
p. 39
p. 40
Emergency Call
Activation
SOS 1: – SOS 4:
Alarm Clock
. . . . . . . . . . . . . . . . . . . . . . . . . . . . . . . . . . . . . . . . . . . . . . . . . . . . . . p. 42
. . . . . . . . . . . . . . . . . . . . . . . . . . . . . . . . . . . . . . . . . . . . . . . . . . . . . . p. 42
. . . . . . . . . . . . . . . . . . . . . . . . . . . . . . . . . . . . . . . . . . . . . . . . . . . . . . p. 49
Availability and operation of the functions
may differ on your telephone.
87
Page 90
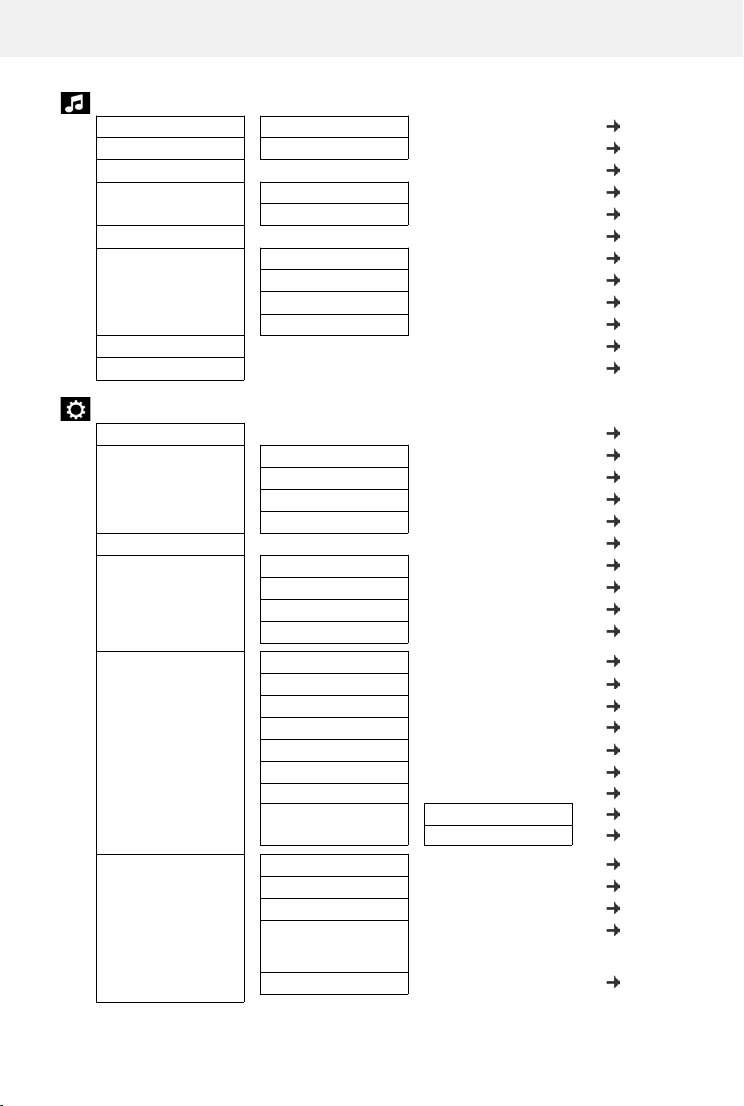
Menu overview
Audio Settings
Smart Volume Earpiece p. 69
Ringtone p. 69
Handset Volume
Acoustic Profiles Earpiece Profiles
Advisory Tones
Ringtones (Handset) Volume
Ringtones (Base)
Music on hold
. . . . . . . . . . . . . . . . . . . . . . . . . . . . . . . . . . . . . . . . . . . . . . . . . . . . . .
. . . . . . . . . . . . . . . . . . . . . . . . . .
Handsfree Profiles
. . . . . . . . . . . . . . . . . . . . . . . . . . . . . . . . . . . . . . . . . . . . . . . . . . . . . .
Melodies
Time Control
Anon. Calls Silent
. . . . . . . . . . . . . . . . . . . . . . . . . . . . . . . . . . . . . . . . . . . . . . . . . . . . . .
. . . . . . . . . . . . . . . . . . . . . . . . . . . . . . . . . . . . . . . . . . . . . . . . . . . . . .
. . . . . . . . . . . . . . . . . . . . . . . . . .
. . . . . . . . . . . . . . . . . . . . . . . . . .
. . . . . . . . . . . . . . . . . . . . . . . . . .
. . . . . . . . . . . . . . . . . . . . . . . . . .
. . . . . . . . . . . . . . . . . . . . . . . . . .
Settings
Date/Time
Display Screensaver
Language
Registration Register Handset
Telephony Auto Answer
System Handset Reset
. . . . . . . . . . . . . . . . . . . . . . . . . . . . . . . . . . . . . . . . . . . . . . . . . . . . . .
. . . . . . . . . . . . . . . . . . . . . . . . . .
Large Font
Colour Schemes
Backlight
. . . . . . . . . . . . . . . . . . . . . . . . . . . . . . . . . . . . . . . . . . . . . . . . . . . . . .
Legacy Registration
De-register Handset
Select Base
Area Codes
Listening In
Access Code
Dialling Mode
Recall
Anonymous Calls . . . . . . . . . . . . . . . . . . . . . . . . . . p. 52
Black List Blocked Numbers p. 53
Base Reset
Encryption . . . . . . . . . . . . . . . . . . . . . . . . . .
Repeater
System PIN
. . . . . . . . . . . . . . . . . . . . . . . . . .
. . . . . . . . . . . . . . . . . . . . . . . . . .
. . . . . . . . . . . . . . . . . . . . . . . . . .
. . . . . . . . . . . . . . . . . . . . . . . . . .
. . . . . . . . . . . . . . . . . . . . . . . . . .
. . . . . . . . . . . . . . . . . . . . . . . . . .
. . . . . . . . . . . . . . . . . . . . . . . . . .
. . . . . . . . . . . . . . . . . . . . . . . . . .
. . . . . . . . . . . . . . . . . . . . . . . . . .
. . . . . . . . . . . . . . . . . . . . . . . . . .
. . . . . . . . . . . . . . . . . . . . . . . . . .
. . . . . . . . . . . . . . . . . . . . . . . . . .
. . . . . . . . . . . . . . . . . . . . . . . . . .
Protection Mode p. 54
. . . . . . . . . . . . . . . . . . . . . . . . . .
. . . . . . . . . . . . . . . . . . . . . . . . . .
only when at least one
repeater has been
registered
. . . . . . . . . . . . . . . . . . . . . . . . . .
p. 69
p. 70
p. 70
p. 71
p. 70
p. 71
p. 52
p. 52
p. 75
p. 74
p. 74
p. 68
p. 68
p. 69
p. 69
p. 68
p. 63
p. 63
p. 64
p. 64
p. 72
p. 74
p. 21
p. 66
p. 66
p. 66
p. 73
p. 75
p. 65
p. 65
p. 75
88
Availability and operation of the functions
may differ on your telephone.
Page 91
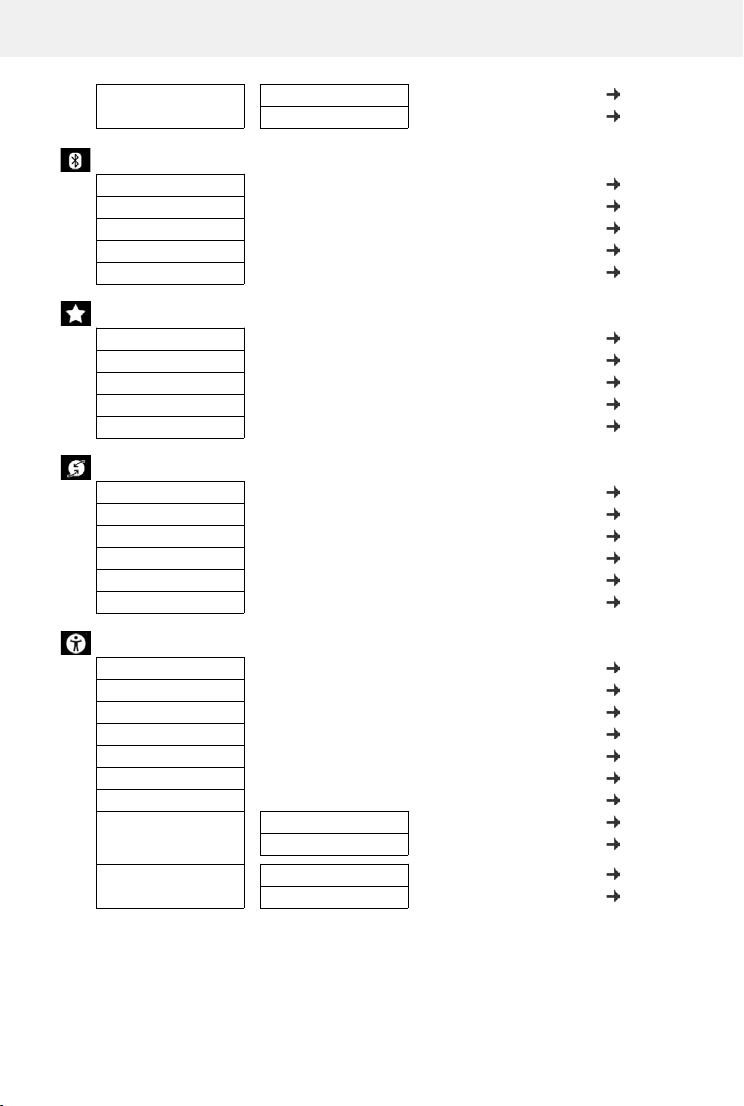
Menu overview
ECO DECT Maximum Range
No Radiation
Bluetooth
Activation
Search for Headset
Search Data Device
Known Devices
Own Device
. . . . . . . . . . . . . . . . . . . . . . . . . . . . . . . . . . . . . . . . . . . . . . . . . . . . . .
. . . . . . . . . . . . . . . . . . . . . . . . . . . . . . . . . . . . . . . . . . . . . . . . . . . . . .
. . . . . . . . . . . . . . . . . . . . . . . . . . . . . . . . . . . . . . . . . . . . . . . . . . . . . .
. . . . . . . . . . . . . . . . . . . . . . . . . . . . . . . . . . . . . . . . . . . . . . . . . . . . . .
. . . . . . . . . . . . . . . . . . . . . . . . . . . . . . . . . . . . . . . . . . . . . . . . . . . . . .
Additional Features
Calendar
Timer
Baby Monitor
One Touch Call
Missed Alarms
. . . . . . . . . . . . . . . . . . . . . . . . . . . . . . . . . . . . . . . . . . . . . . . . . . . . . .
. . . . . . . . . . . . . . . . . . . . . . . . . . . . . . . . . . . . . . . . . . . . . . . . . . . . . .
. . . . . . . . . . . . . . . . . . . . . . . . . . . . . . . . . . . . . . . . . . . . . . . . . . . . . .
. . . . . . . . . . . . . . . . . . . . . . . . . . . . . . . . . . . . . . . . . . . . . . . . . . . . . .
. . . . . . . . . . . . . . . . . . . . . . . . . . . . . . . . . . . . . . . . . . . . . . . . . . . . . .
Select Services
Next Call Anonym.
Call Divert
Call Waiting
All Calls Anonym.
Ringback Off
Just Friends
. . . . . . . . . . . . . . . . . . . . . . . . . . . . . . . . . . . . . . . . . . . . . . . . . . . . . .
. . . . . . . . . . . . . . . . . . . . . . . . . . . . . . . . . . . . . . . . . . . . . . . . . . . . . .
. . . . . . . . . . . . . . . . . . . . . . . . . . . . . . . . . . . . . . . . . . . . . . . . . . . . . .
. . . . . . . . . . . . . . . . . . . . . . . . . . . . . . . . . . . . . . . . . . . . . . . . . . . . . .
. . . . . . . . . . . . . . . . . . . . . . . . . . . . . . . . . . . . . . . . . . . . . . . . . . . . . .
. . . . . . . . . . . . . . . . . . . . . . . . . . . . . . . . . . . . . . . . . . . . . . . . . . . . . .
Accessibility Features
Direct Dial Keys
Tal kin g Di al Key s
Read-Aloud Language
Spoken Caller ID
Read out contacts
Signal Call via LED
Trusted C alle r
Simple Menu
Supervision Call
. . . . . . . . . . . . . . . . . . . . . . . . . . . . . . . . . . . . . . . . . . . . . . . . . . . . . .
. . . . . . . . . . . . . . . . . . . . . . . . . . . . . . . . . . . . . . . . . . . . . . . . . . . . . .
. . . . . . . . . . . . . . . . . . . . . . . . . . . . . . . . . . . . . . . . . . . . . . . . . . . . . .
. . . . . . . . . . . . . . . . . . . . . . . . . . . . . . . . . . . . . . . . . . . . . . . . . . . . . .
. . . . . . . . . . . . . . . . . . . . . . . . . . . . . . . . . . . . . . . . . . . . . . . . . . . . . .
. . . . . . . . . . . . . . . . . . . . . . . . . . . . . . . . . . . . . . . . . . . . . . . . . . . . . .
. . . . . . . . . . . . . . . . . . . . . . . . . . . . . . . . . . . . . . . . . . . . . . . . . . . . . .
Simple Menu
Menu List
Settings
White List
. . . . . . . . . . . . . . . . . . . . . . . . . .
. . . . . . . . . . . . . . . . . . . . . . . . . .
. . . . . . . . . . . . . . . . . . . . . . .
. . . . . . . . . . . . . . . . . . . . . . .
. . . . . . . . . . . . . . . . . . . . . . .
. . . . . . . . . . . . . . . . . . . . . . .
p. 51
p. 51
p. 61
p. 61
p. 61
p. 62
p. 62
p. 46
p. 48
p. 50
p. 19
p. 47
p. 24
p. 25
p. 24
p. 24
p. 25
p. 53
p. 14
p. 44
p. 44
p. 45
p. 45
p. 45
p. 45
p. 46
p. 46
p. 43
p. 43
Availability and operation of the functions
may differ on your telephone.
89
Page 92

Menu overview
SMS
New SMS
Incoming
Draft
Settings Service Centres
. . . . . . . . . . . . . . . . . . . . . . . . . . . . . . . . . . . . . . . . . . . . . . . . . . . . . .
. . . . . . . . . . . . . . . . . . . . . . . . . . . . . . . . . . . . . . . . . . . . . . . . . . . . . .
. . . . . . . . . . . . . . . . . . . . . . . . . . . . . . . . . . . . . . . . . . . . . . . . . . . . . .
. . . . . . . . . . . . . . . . . . . . . . . . . .
Notification
. . . . . . . . . . . . . . . . . . . . . . . . . .
p. 55
p. 56
p. 56
p. 59
p. 58
90
Availability and operation of the functions
may differ on your telephone.
Page 93

Index
A
Access code (PABX) . . . . . . . . . . . . . . . . . . . . . . . . . 66
Accessibility features. . . . . . . . . . . . . . . . . . . . . . . . 44
Activating/deactivating message LED . . . . . . . . . 34
Advisory tones. . . . . . . . . . . . . . . . . . . . . . . . . . . . . 71
Alarm . . . . . . . . . . . . . . . . . . . . . . . . . . . . . . . . . . . . 49
Alarm clock . . . . . . . . . . . . . . . . . . . . . . . . . . . . . . . 49
switch on/off. . . . . . . . . . . . . . . . . . . . . . . . . . . . 49
Alert tone (beep) . . . . . . . . . . . . . . . . . . . . . . . . . . . 71
Anniversary, see Appointment
Announcement
call number
for an incoming call . . . . . . . . . . . . . . . . . . . . . . 45
for directory entry . . . . . . . . . . . . . . . . . . . . . . . 45
language . . . . . . . . . . . . . . . . . . . . . . . . . . . . . . . 44
record for contac t. . . . . . . . . . . . . . . . . . . . . . . . 28
Announcement (answer machine) . . . . . . . . . . . . 38
deleting. . . . . . . . . . . . . . . . . . . . . . . . . . . . . . . . 39
Announcement language . . . . . . . . . . . . . . . . . . . 44
Announcement mode (answer machine). . . . . . . 35
Anonymous calling . . . . . . . . . . . . . . . . . . . . . . . . . 23
Answer machine . . . . . . . . . . . . . . . . . . . . . . . . . . . 35
activating/deactivating. . . . . . . . . . . . . . . . . . . 35
announcement mode . . . . . . . . . . . . . . . . . . . . 35
calling back a caller . . . . . . . . . . . . . . . . . . . . . . 32
deleting messages . . . . . . . . . . . . . . . . . . . . . . . 36
playing back messages . . . . . . . . . . . . . . . . 35, 40
recording a personal announcement/
remote operation . . . . . . . . . . . . . . . . . . . . . . . . 37
set fast access . . . . . . . . . . . . . . . . . . . . . . . . . . . 40
skipping ahead . . . . . . . . . . . . . . . . . . . . . . . . . . 35
skipping back . . . . . . . . . . . . . . . . . . . . . . . . . . . 35
Answer, auto . . . . . . . . . . . . . . . . . . . . . . . . . . . . . . 72
Answering machine . . . . . . . . . . . . . . . . . . . . . . . . . .6
control panel. . . . . . . . . . . . . . . . . . . . . . . . . . . . . .7
deleting individual messages. . . . . . . . . . . . . . . .6
display . . . . . . . . . . . . . . . . . . . . . . . . . . . . . . . . . . .7
enabling and disabling . . . . . . . . . . . . . . . . . . . . .7
new messages . . . . . . . . . . . . . . . . . . . . . . . . . . . .7
set volume . . . . . . . . . . . . . . . . . . . . . . . . . . . . . . .6
Appointment
display missed
missed . . . . . . . . . . . . . . . . . . . . . . . . . . . . . . . . . 47
notification . . . . . . . . . . . . . . . . . . . . . . . . . . . . . 47
setting . . . . . . . . . . . . . . . . . . . . . . . . . . . . . . . . . 46
Assigning key 1 . . . . . . . . . . . . . . . . . . . . . . . . . . . . 40
Assigning number key . . . . . . . . . . . . . . . . . . . . . . 72
Authorisation . . . . . . . . . . . . . . . . . . . . . . . . . . . . . . 80
Auto answer . . . . . . . . . . . . . . . . . . . . . . . . . . . . . . . 72
B
Baby monitor . . . . . . . . . . . . . . . . . . . . . . . . . . . . . . 49
activation . . . . . . . . . . . . . . . . . . . . . . . . . . . . . . 50
. . . . . . . . . . . . . . . . . . . . . . . . . . . . . 44
advisory message
. . . . . . . . . . . . . . . . . . . 38
. . . . . . . . . . . . . . . . . . . . . . . . . . 47
Index
deactivation. . . . . . . . . . . . . . . . . . . . . . . . . . . . . 51
Backing up system settings . . . . . . . . . . . . . . . . . . 75
Barrier-free, see Accessibility features
Base
connecting to the mains power supply/telephone
twork
. . . . . . . . . . . . . . . . . . . . . . . . . . . . 9
ne
ringtone . . . . . . . . . . . . . . . . . . . . . . . . . . . . . . . . 75
Base station
changing
. . . . . . . . . . . . . . . . . . . . . . . . . . . . . . . 64
changing the name . . . . . . . . . . . . . . . . . . . . . . 64
connecting to the PABX . . . . . . . . . . . . . . . . . . . 66
connecting to the router . . . . . . . . . . . . . . .10, 66
restoring to default settings . . . . . . . . . . . . . . .75
setting . . . . . . . . . . . . . . . . . . . . . . . . . . . . . . . . . 74
system PIN . . . . . . . . . . . . . . . . . . . . . . . . . . . . . . 75
Battery
Beep (alert tone) . . . . . . . . . . . . . . . . . . . . . . . . . . . 71
Best base station . . . . . . . . . . . . . . . . . . . . . . . . . . . 64
Black list . . . . . . . . . . . . . . . . . . . . . . . . . . . . . . . . . . 53
Bluetooth . . . . . . . . . . . . . . . . . . . . . . . . . . . . . . . . . 61
Boost . . . . . . . . . . . . . . . . . . . . . . . . . . . . . . . . . . . . . 13
Boost key. . . . . . . . . . . . . . . . . . . . . . . . . . . . . . . . . . . 5
Broken display . . . . . . . . . . . . . . . . . . . . . . . . . . . . . . 8
. . . . . . . . . . . . . . . . . . . . . . . . . . . . . . . . 11
charging
charging status . . . . . . . . . . . . . . . . . . . . . . . . . . 85
inserting . . . . . . . . . . . . . . . . . . . . . . . . . . . . . . . . 11
copying a number from a call list . . . . . . . . . . . 54
activate. . . . . . . . . . . . . . . . . . . . . . . . . . . . . . . . . 61
changing the device name . . . . . . . . . . . . . . . . 62
copy director y (vCard) . . . . . . . . . . . . . . . . . . . . 31
de-register devices . . . . . . . . . . . . . . . . . . . . . . . 62
list of known devices . . . . . . . . . . . . . . . . . . . . . 62
registering devices . . . . . . . . . . . . . . . . . . . . . . . 61
C
Calendar . . . . . . . . . . . . . . . . . . . . . . . . . . . . . . . . . . 46
Call
accepting
anonymous . . . . . . . . . . . . . . . . . . . . . . . . . . . . . 24
external . . . . . . . . . . . . . . . . . . . . . . . . . . . . . . . . 18
internal. . . . . . . . . . . . . . . . . . . . . . . . . . . . . . . . . 20
participant listening in . . . . . . . . . . . . . . . . . . . . 21
transferring internally (connecting) . . . . . . . . . 20
two-way recording . . . . . . . . . . . . . . . . . . . . . . . 36
Call back a caller. . . . . . . . . . . . . . . . . . . . . . . . . . . . 24
Call block. . . . . . . . . . . . . . . . . . . . . . . . . . . . . . . . . . 54
Call divert . . . . . . . . . . . . . . . . . . . . . . . . . . . . . . . . . 25
Call list
copying a number to the directory
delete . . . . . . . . . . . . . . . . . . . . . . . . . . . . . . . . . . 32
delete an entry . . . . . . . . . . . . . . . . . . . . . . . . . . 32
dialling . . . . . . . . . . . . . . . . . . . . . . . . . . . . . . . . . 19
entry . . . . . . . . . . . . . . . . . . . . . . . . . . . . . . . . . . . 32
opening . . . . . . . . . . . . . . . . . . . . . . . . . . . . . . . . 32
Call lists . . . . . . . . . . . . . . . . . . . . . . . . . . . . . . . . . . . 32
. . . . . . . . . . . . . . . . . . . . . . . . . . . . . . . 19
. . . . . . . . . . 32
Availability and operation of the functions
may differ on your telephone.
91
Page 94

Index
Call number
announce for incoming call
for direct dial. . . . . . . . . . . . . . . . . . . . . . . . . . . . 43
Call protection. . . . . . . . . . . . . . . . . . . . . . . . . . . . . 52
Call screening during recording . . . . . . . . . . . . . . 36
Call signal, visual . . . . . . . . . . . . . . . . . . . . . . . . . . . 45
Call swapping
two external calls
Call waiting, external . . . . . . . . . . . . . . . . . . . . . . . 24
accepting/rejecting . . . . . . . . . . . . . . . . . . . 20, 21
Call waiting, internal
. . . . . . . . . . . . . . . . . . . . . . . . . . . . . . . . . 21
accept
Call, anonymous . . . . . . . . . . . . . . . . . . . . . . . .23, 24
protection from . . . . . . . . . . . . . . . . . . . . . . . . . 52
Caller
serious
Caller display . . . . . . . . . . . . . . . . . . . . . . . . . . . . . . 23
Calling
Calling Line Identification . . . . . . . . . . . . . . . . . . . 23
Cancel the alarm (baby monitor). . . . . . . . . . . . . . 51
Care . . . . . . . . . . . . . . . . . . . . . . . . . . . . . . . . . . . . . . 81
Care of the device . . . . . . . . . . . . . . . . . . . . . . . . . . 81
Changing
Changing the device name (Bluetooth) . . . . . . . . 62
Changing the name of the handset . . . . . . . . . . . 64
Changing the PIN . . . . . . . . . . . . . . . . . . . . . . . . . . 75
Changing the system PIN . . . . . . . . . . . . . . . . . . . . 75
Character charts . . . . . . . . . . . . . . . . . . . . . . . . . . . 84
Charge status of the batteries . . . . . . . . . . . . . . . . 85
Charging cradle (handset)
Charging time of handset . . . . . . . . . . . . . . . . . . . 82
CLI, Calling Line Identification . . . . . . . . . . . . . . . . 23
CLIP, CLI Presentation . . . . . . . . . . . . . . . . . . . . . . . 23
CLIR, CLI Restriction . . . . . . . . . . . . . . . . . . . . . . . . 23
Colour scheme. . . . . . . . . . . . . . . . . . . . . . . . . . . . . 69
Connecting the power cable . . . . . . . . . . . . . . . . . . .9
Connections with the base station . . . . . . . . . . . . 64
Consultation call
Contact
Contact with liquid . . . . . . . . . . . . . . . . . . . . . . . . . 81
Contents of the package . . . . . . . . . . . . . . . . . . . . . .9
Control key . . . . . . . . . . . . . . . . . . . . . . . . . . . . . . 5, 15
Correcting incorrect entries . . . . . . . . . . . . . . . . . . 17
Countdown (timer) . . . . . . . . . . . . . . . . . . . . . . . . . 48
. . . . . . . . . . . . . . . . . . . . . . . . . . . . . . . . . 45
external
. . . . . . . . . . . . . . . . . . . . . . . . . . . . . . . . 18
internal . . . . . . . . . . . . . . . . . . . . . . . . . . . . . . . . 20
none. . . . . . . . . . . . . . . . . . . . . . . . . . . . . . . . . . . 23
switching off temporarily . . . . . . . . . . . . . . . . . 24
switching on/off . . . . . . . . . . . . . . . . . . . . . . . . . 24
display language
earpiece volume. . . . . . . . . . . . . . . . . . . . . . . . . 70
handsfree volume . . . . . . . . . . . . . . . . . . . . . . . 70
system PIN. . . . . . . . . . . . . . . . . . . . . . . . . . . . . . 75
connecting
ending
external . . . . . . . . . . . . . . . . . . . . . . . . . . . . . . . . 26
internal . . . . . . . . . . . . . . . . . . . . . . . . . . . . . . . . 20
read out
record announcement. . . . . . . . . . . . . . . . . . . . 28
. . . . . . . . . . . . . . . . . . . . . . . . 68
. . . . . . . . . . . . . . . . . . . . . . . . . . . . . 10
. . . . . . . . . . . . . . . . . . . . . . . . . . . . . . . . . 26
. . . . . . . . . . . . . . . . . . . . . . . . . . . . . . . . 45
. . . . . . . . . . . . . . . 45
. . . . . . . . . . . . . . . . . . . . . . . . 26
Customer Care . . . . . . . . . . . . . . . . . . . . . . . . . . . . . 78
D
Data protection . . . . . . . . . . . . . . . . . . . . . . . . . . . . 80
Deactivating wireless module . . . . . . . . . . . . . . . . 51
Deleting
messages
De-registering (handset) . . . . . . . . . . . . . . . . . . . . . 64
De-registering devices (Bluetooth) . . . . . . . . . . . . 62
Dialling
from the call list
from the directory. . . . . . . . . . . . . . . . . . . . . . . . 18
from the redial list. . . . . . . . . . . . . . . . . . . . . . . . 18
using quick dial . . . . . . . . . . . . . . . . . . . . . . . . . . 72
Dialling mode. . . . . . . . . . . . . . . . . . . . . . . . . . . . . . 66
Dialling pause. . . . . . . . . . . . . . . . . . . . . . . . . . . . . . 67
Direct dial . . . . . . . . . . . . . . . . . . . . . . . . . . . . . . . . . 43
call number . . . . . . . . . . . . . . . . . . . . . . . . . . . . . 43
enable/disable. . . . . . . . . . . . . . . . . . . . . . . . . . . 43
process . . . . . . . . . . . . . . . . . . . . . . . . . . . . . . . . . 44
save/change key assignment . . . . . . . . . . . . . . 14
saving numbers. . . . . . . . . . . . . . . . . . . . . . . . . . 14
Direct dial key A . . . . . . . . . . . . . . . . . . . . . . . . . . . . . 5
Direct dial keys . . . . . . . . . . . . . . . . . . . . . . . . . . . . . 14
Direct dial keys B to D . . . . . . . . . . . . . . . . . . . . . . . . 5
Direct dial PIN. . . . . . . . . . . . . . . . . . . . . . . . . . . . . . 43
Directory . . . . . . . . . . . . . . . . . . . . . . . . . . . . . . . . . . 27
copy vCard (Bluetooth) . . . . . . . . . . . . . . . . . . . 31
copying numbers . . . . . . . . . . . . . . . . . . . . . . . . 29
dialling numbers. . . . . . . . . . . . . . . . . . . . . . . . . 18
entry . . . . . . . . . . . . . . . . . . . . . . . . . . . . . . . . . . . 27
memory . . . . . . . . . . . . . . . . . . . . . . . . . . . . . . . . 29
opening . . . . . . . . . . . . . . . . . . . . . . . . . . . . . . . . 27
order of entries . . . . . . . . . . . . . . . . . . . . . . . . . . 29
saving an entry . . . . . . . . . . . . . . . . . . . . . . . . . . 27
searching . . . . . . . . . . . . . . . . . . . . . . . . . . . . . . . 28
selecting an entry . . . . . . . . . . . . . . . . . . . . . . . . 28
sending entry/list to handset . . . . . . . . . . . . . . 30
sending to handset. . . . . . . . . . . . . . . . . . . . . . . 30
Display
activating/deactivating new message
anonymous . . . . . . . . . . . . . . . . . . . . . . . . . . . . . 23
backlight . . . . . . . . . . . . . . . . . . . . . . . . . . . . . . . 69
broken . . . . . . . . . . . . . . . . . . . . . . . . . . . . . . . . . . 8
changing display language . . . . . . . . . . . . . . . . 68
colour scheme. . . . . . . . . . . . . . . . . . . . . . . . . . . 69
directory memory . . . . . . . . . . . . . . . . . . . . . . . . 29
external . . . . . . . . . . . . . . . . . . . . . . . . . . . . . . . . 23
large font . . . . . . . . . . . . . . . . . . . . . . . . . . . . . . . 68
missed appointment/anniversar y. . . . . . . . . . . 47
network mailbox message. . . . . . . . . . . . . . . . . 33
screensaver . . . . . . . . . . . . . . . . . . . . . . . . . . . . . 68
setting . . . . . . . . . . . . . . . . . . . . . . . . . . . . . . . . . 68
unknown . . . . . . . . . . . . . . . . . . . . . . . . . . . . . . . 23
Display icons. . . . . . . . . . . . . . . . . . . . . . . . . . . . . . . 85
Display keys . . . . . . . . . . . . . . . . . . . . . . . . . . . . .5, 15
assigning . . . . . . . . . . . . . . . . . . . . . . . . . . . . . . . 72
icons . . . . . . . . . . . . . . . . . . . . . . . . . . . . . . . . . . . 85
. . . . . . . . . . . . . . . . . . . . . . . . . . . . . . . 36
. . . . . . . . . . . . . . . . . . . . . . . . . . 19
. . . . . . . 34
92
Availability and operation of the functions
may differ on your telephone.
Page 95

Index
Disposal . . . . . . . . . . . . . . . . . . . . . . . . . . . . . . . . . . 81
Draft message list (SMS) . . . . . . . . . . . . . . . . . . . . . 56
DTMF (tone dialli ng) . . . . . . . . . . . . . . . . . . . . . 66, 67
E
Earpiece profile . . . . . . . . . . . . . . . . . . . . . . . . . . . . 70
Earpiece volume . . . . . . . . . . . . . . . . . . . . . . . . . . . 22
Echo, when operating a router . . . . . . . . . . . . . . . 66
ECO DECT . . . . . . . . . . . . . . . . . . . . . . . . . . . . . . . . . 51
E-mail address . . . . . . . . . . . . . . . . . . . . . . . . . . . . . 56
Emergency
direct dial
Emergency call . . . . . . . . . . . . . . . . . . . . . . . . . . . . 41
activating/deactivating. . . . . . . . . . . . . . . . . . . 42
cancel . . . . . . . . . . . . . . . . . . . . . . . . . . . . . . . . . 41
process . . . . . . . . . . . . . . . . . . . . . . . . . . . . . . . . 41
Emergency number . . . . . . . . . . . . . . . . . . . . . . . . 41
change. . . . . . . . . . . . . . . . . . . . . . . . . . . . . . . . . 43
delete. . . . . . . . . . . . . . . . . . . . . . . . . . . . . . . . . . 43
store. . . . . . . . . . . . . . . . . . . . . . . . . . . . . . . . . . . 42
Emergency numbers
not possible
End call key . . . . . . . . . . . . . . . . . . . . . . . . . . . . . . . 18
Enter flash . . . . . . . . . . . . . . . . . . . . . . . . . . . . . . . . . .5
Entering numbers . . . . . . . . . . . . . . . . . . . . . . . . . . 17
Entering special characters . . . . . . . . . . . . . . . . . . 17
Entering text . . . . . . . . . . . . . . . . . . . . . . . . . . . . . . 17
Entering the number
of the network mailbox
Entering umlauts. . . . . . . . . . . . . . . . . . . . . . . . . . . 17
Environment . . . . . . . . . . . . . . . . . . . . . . . . . . . . . . 80
Exclusion of liability . . . . . . . . . . . . . . . . . . . . . . . . 79
External call
forwarding to answer machine
. . . . . . . . . . . . . . . . . . . . . . . . . . . . . . 43
. . . . . . . . . . . . . . . . . . . . . . . . . . . . . .8
. . . . . . . . . . . . . . . . . . . 39
. . . . . . . . . . . . 36
F
Fast access . . . . . . . . . . . . . . . . . . . . . . . . . . . . . 18, 40
Flash time . . . . . . . . . . . . . . . . . . . . . . . . . . . . . . . . . 66
G
Getting started . . . . . . . . . . . . . . . . . . . . . . . . . . . . . .9
Guarantee Certificate . . . . . . . . . . . . . . . . . . . . . . . 78
H
Handset
changing the name
changing the number . . . . . . . . . . . . . . . . . . . . 64
changing the settings . . . . . . . . . . . . . . . . . . . . 68
changing to a different base station . . . . . . . . 64
changing to best reception. . . . . . . . . . . . . . . . 64
colour scheme . . . . . . . . . . . . . . . . . . . . . . . . . . 69
connecting the charging cradle . . . . . . . . . . . . 10
de-registering the handset . . . . . . . . . . . . . . . . 64
display backlight . . . . . . . . . . . . . . . . . . . . . . . . 69
display language . . . . . . . . . . . . . . . . . . . . . . . . 68
earpiece volume. . . . . . . . . . . . . . . . . . . . . . . . . 70
handset volume . . . . . . . . . . . . . . . . . . . . . . . . . 22
. . . . . . . . . . . . . . . . . . . . . . 64
handsfree volume. . . . . . . . . . . . . . . . . . . . .22, 70
idle status. . . . . . . . . . . . . . . . . . . . . . . . . . . . . . . 16
muting . . . . . . . . . . . . . . . . . . . . . . . . . . . . . . . . . 22
paging . . . . . . . . . . . . . . . . . . . . . . . . . . . . . . . . . 64
registering . . . . . . . . . . . . . . . . . . . . . . . . . . . . . . 63
registering to another base station . . . . . . . . . 64
resetting . . . . . . . . . . . . . . . . . . . . . . . . . . . . . . . . 73
searching for . . . . . . . . . . . . . . . . . . . . . . . . . . . . 64
set up . . . . . . . . . . . . . . . . . . . . . . . . . . . . . . . . . . 11
switch on/off . . . . . . . . . . . . . . . . . . . . . . . . . . . . 13
switching on/off . . . . . . . . . . . . . . . . . . . . . . . . . 13
use as a baby monitor . . . . . . . . . . . . . . . . . . . . 49
Handsfree key. . . . . . . . . . . . . . . . . . . . . . . . . . . . . . 22
Handsfree mode . . . . . . . . . . . . . . . . . . . . . . . . . . . 22
key . . . . . . . . . . . . . . . . . . . . . . . . . . . . . . . . . . . . . 5
Handsfree profile . . . . . . . . . . . . . . . . . . . . . . . . . . . 70
Handsfree volume . . . . . . . . . . . . . . . . . . . . . . . . . . 22
Hash key . . . . . . . . . . . . . . . . . . . . . . . . . . . . . . . . . . . 5
Headset (Bluetooth). . . . . . . . . . . . . . . . . . . . . . . . . 61
Hearing aids . . . . . . . . . . . . . . . . . . . . . . . . . . . . . . . . 8
Help . . . . . . . . . . . . . . . . . . . . . . . . . . . . . . . . . . . . . . 76
I
Icons
alarm clock
displaying new messages . . . . . . . . . . . . . . . . . 33
indications . . . . . . . . . . . . . . . . . . . . . . . . . . . . . . 86
new SMS . . . . . . . . . . . . . . . . . . . . . . . . . . . . . . . 57
on display keys . . . . . . . . . . . . . . . . . . . . . . . . . . 85
status bar . . . . . . . . . . . . . . . . . . . . . . . . . . . . . . . 85
timer. . . . . . . . . . . . . . . . . . . . . . . . . . . . . . . . . . . 48
Idle status
returning to
Indications, icons . . . . . . . . . . . . . . . . . . . . . . . . . . . 86
Internal
consultation
listening in . . . . . . . . . . . . . . . . . . . . . . . . . . . . . . 21
making calls. . . . . . . . . . . . . . . . . . . . . . . . . . . . . 20
International code . . . . . . . . . . . . . . . . . . . . . . . . . . 74
. . . . . . . . . . . . . . . . . . . . . . . . . . . . . . 49
. . . . . . . . . . . . . . . . . . . . . . . . . . . . . 16
. . . . . . . . . . . . . . . . . . . . . . . . . . . . . 20
K
Key (base), registration/paging . . . . . . . . . . . . . . . . 6
Key 1
speed dialling of answering machine
speed dialling of network mailbox. . . . . . . . . . . 5
Key, assigning. . . . . . . . . . . . . . . . . . . . . . . . . . . . . . 72
Keys
boost key
control key. . . . . . . . . . . . . . . . . . . . . . . . . . . .5, 15
display keys . . . . . . . . . . . . . . . . . . . . . . . . . . .5, 15
end call key . . . . . . . . . . . . . . . . . . . . . . . . . . . . . 18
handsfree. . . . . . . . . . . . . . . . . . . . . . . . . . . . . . . 22
handsfree key . . . . . . . . . . . . . . . . . . . . . . . . . . . . 5
hash key . . . . . . . . . . . . . . . . . . . . . . . . . . . . . . . . . 5
key 1 . . . . . . . . . . . . . . . . . . . . . . . . . . . . . . . . . . . . 5
menu . . . . . . . . . . . . . . . . . . . . . . . . . . . . . . . . . . 15
paging key . . . . . . . . . . . . . . . . . . . . . . . . . . . . . . . 6
recall key . . . . . . . . . . . . . . . . . . . . . . . . . . . . . . . . 5
. . . . . . . . . . . . . . . . . . . . . . . . . . . . . . . . 5
. . . . . . . . . 5
Availability and operation of the functions
may differ on your telephone.
93
Page 96

Index
speed dialling of answering machine . . . . . . . . .5
speed dialling of network mailbox. . . . . . . . . . . .5
star key . . . . . . . . . . . . . . . . . . . . . . . . . . . . . . . . . .5
talk key . . . . . . . . . . . . . . . . . . . . . . . . . . . . . . . . . .5
L
Language
Large font. . . . . . . . . . . . . . . . . . . . . . . . . . . . . . . . . 68
LED . . . . . . . . . . . . . . . . . . . . . . . . . . . . . . . . . . . . . . . .5
Linked, see SMS
Liquid
List
Listening in to an external call . . . . . . . . . . . . . . . . 21
Local area code . . . . . . . . . . . . . . . . . . . . . . . . . . . . 74
Lock/unlock the keypad . . . . . . . . . . . . . . . . . . . . . 13
Lower/upper case . . . . . . . . . . . . . . . . . . . . . . . . . . 17
. . . . . . . . . . . . . . . . . . . . . . . . . . . . . .12, 68
display
. . . . . . . . . . . . . . . . . . . . . . . . . . . . . . . . . . . . 81
known devices (Bluetooth)
SMS draft message list. . . . . . . . . . . . . . . . . . . . 56
SMS message list . . . . . . . . . . . . . . . . . . . . . . . . 57
. . . . . . . . . . . . . . . . 62
M
Mains unit
base
. . . . . . . . . . . . . . . . . . . . . . . . . . . . . . . . . . . 84
handset . . . . . . . . . . . . . . . . . . . . . . . . . . . . . . . . 83
Making calls
accepting a call
external . . . . . . . . . . . . . . . . . . . . . . . . . . . . . . . . 18
internal . . . . . . . . . . . . . . . . . . . . . . . . . . . . . . . . 20
Manufacturer’s advice . . . . . . . . . . . . . . . . . . . . . . 80
Maximum Range . . . . . . . . . . . . . . . . . . . . . . . . . . . 51
Medical equipment. . . . . . . . . . . . . . . . . . . . . . . . . . .8
Melody
ringtone for internal/external calls
Memory in the directory. . . . . . . . . . . . . . . . . . . . . 29
Menu
complete
simple . . . . . . . . . . . . . . . . . . . . . . . . . . . . . . . . . 46
Menu key . . . . . . . . . . . . . . . . . . . . . . . . . . . . . . . . . 15
Message
marking as "new"
Message key
opening list
Message list (SMS). . . . . . . . . . . . . . . . . . . . . . . . . . 56
Message lists . . . . . . . . . . . . . . . . . . . . . . . . . . . . . . 33
Messages
copying number to the directory
Messages key. . . . . . . . . . . . . . . . . . . . . . . . . . . . . . . .5
Microphone
switch on/off
Missed anniversaries/appointments . . . . . . . . . . . 47
Music on hold . . . . . . . . . . . . . . . . . . . . . . . . . . . . . 74
Mute the first ringtone . . . . . . . . . . . . . . . . . . . . . . 59
Muting the handset . . . . . . . . . . . . . . . . . . . . . . . . 22
. . . . . . . . . . . . . . . . . . . . . . . . . . 19
. . . . . . . . . . 71
. . . . . . . . . . . . . . . . . . . . . . . . . . . . . . . 46
. . . . . . . . . . . . . . . . . . . . . . . . 36
. . . . . . . . . . . . . . . . . . . . . . . . . . . . . 57
. . . . . . . . . . . 36
. . . . . . . . . . . . . . . . . . . . . . . . . . . . 22
N
Network mailbox . . . . . . . . . . . . . . . . . . . . . . . . . . .39
defining for fast access. . . . . . . . . . . . . . . . . . . . 40
entering number. . . . . . . . . . . . . . . . . . . . . . . . . 39
Network MB, see Network mailbox
Network provider
Network services, provider-specific . . . . . . . . . . . . 23
Number
announcement on entering
copying to the directory . . . . . . . . . . . . . . . . . . 29
do not transfer. . . . . . . . . . . . . . . . . . . . . . . . . . . 24
saving in the directory . . . . . . . . . . . . . . . . . . . . 27
withhold. . . . . . . . . . . . . . . . . . . . . . . . . . . . . . . . 24
. . . . . . . . . . . . . . . . . . . . . . . . . . . 23
. . . . . . . . . . . . . . . 44
O
One touch call . . . . . . . . . . . . . . . . . . . . . . . . . . . . . 19
Operating time of handset . . . . . . . . . . . . . . . . . . .82
Outside line code (PABX). . . . . . . . . . . . . . . . . . . . . 66
Overview
. . . . . . . . . . . . . . . . . . . . . . . . . . . . . . . . . . . . 6
base
handset . . . . . . . . . . . . . . . . . . . . . . . . . . . . . . . . . 5
P
PAB X
connecting to the base station
pauses . . . . . . . . . . . . . . . . . . . . . . . . . . . . . . . . . 67
saving access code . . . . . . . . . . . . . . . . . . . . . . . 66
setting dialling mode . . . . . . . . . . . . . . . . . . . . . 66
setting flash time . . . . . . . . . . . . . . . . . . . . . . . . 66
SMS. . . . . . . . . . . . . . . . . . . . . . . . . . . . . . . . . . . . 59
switching to tone dialling . . . . . . . . . . . . . . . . . 67
Pagin g . . . . . . . . . . . . . . . . . . . . . . . . . . . . . . . . . .6, 64
Pause
after access code
after line seizure . . . . . . . . . . . . . . . . . . . . . . . . . 67
after Recall key . . . . . . . . . . . . . . . . . . . . . . . . . . 67
PD (pulse dialling) . . . . . . . . . . . . . . . . . . . . . . . . . . 66
Phone
setting
Phone directory, see Directory. . . . . . . . . . . . . . . . 18
Phonebook, see Directory. . . . . . . . . . . . . . . . . . . . 18
Picking up
a call from answer machine
Playing back
announcement (answer machine)
Playing back messages . . . . . . . . . . . . . . . . . . . . . . 35
Power adapter . . . . . . . . . . . . . . . . . . . . . . . . . . .8, 83
base . . . . . . . . . . . . . . . . . . . . . . . . . . . . . . . . . . . 84
handset . . . . . . . . . . . . . . . . . . . . . . . . . . . . . . . . 83
Power consumption (base) . . . . . . . . . . . . . . . . . . . 82
Protection from calls
anonymous
black list . . . . . . . . . . . . . . . . . . . . . . . . . . . . . . . . 53
time control. . . . . . . . . . . . . . . . . . . . . . . . . . . . . 52
Pulse dialling . . . . . . . . . . . . . . . . . . . . . . . . . . . . . . 66
. . . . . . . . . . . . . . . . . . . . . . . . . 67
. . . . . . . . . . . . . . . . . . . . . . . . . . . . . . . . . 74
. . . . . . . . . . . . . . . . . . . . . . . . . . . . . 52
. . . . . . . . . . . . . 66
. . . . . . . . . . . . . . . . 36
. . . . . . . . . . 38
94
Availability and operation of the functions
may differ on your telephone.
Page 97

Index
Q
Questions and answers. . . . . . . . . . . . . . . . . . . . . . 76
Quick dial . . . . . . . . . . . . . . . . . . . . . . . . . . . . . . 18, 40
Quick dialling, see Direct dial
R
Radiation
Radiation-free . . . . . . . . . . . . . . . . . . . . . . . . . . . . . 51
Recall key . . . . . . . . . . . . . . . . . . . . . . . . . . . . . . . 5, 67
Reception booster, see Repeater
Recording
Recording quality (answer machine) . . . . . . . . . . 39
Recording time . . . . . . . . . . . . . . . . . . . . . . . . . . . . 39
Redial list . . . . . . . . . . . . . . . . . . . . . . . . . . . . . . 18, 32
Registering (handset) . . . . . . . . . . . . . . . . . . . . . . . 63
Registering device (Bluetooth) . . . . . . . . . . . . . . . 61
Registration/paging key . . . . . . . . . . . . . . . . . . . . . . .6
Remotely operating the answer machine . . . . . . 37
Repeater. . . . . . . . . . . . . . . . . . . . . . . . . . . . . . . . . . 65
Ring delay (answer machine). . . . . . . . . . . . . . . . . 39
Ringback
Ringtone. . . . . . . . . . . . . . . . . . . . . . . . . . . . . . . . . . 70
Router, connecting the base station . . . . . . . .10, 66
. . . . . . . . . . . . . . . . . . . . . . . . . . . . . . . 51
reducing
two-way recording
cancelling
initiate . . . . . . . . . . . . . . . . . . . . . . . . . . . . . . . . . 24
base . . . . . . . . . . . . . . . . . . . . . . . . . . . . . . . . . . . 75
changing. . . . . . . . . . . . . . . . . . . . . . . . . . . . . . . 70
melody for internal/external calls . . . . . . . . . . 71
muting. . . . . . . . . . . . . . . . . . . . . . . . . . . . . . . . . 59
muting first . . . . . . . . . . . . . . . . . . . . . . . . . . . . . 59
time control . . . . . . . . . . . . . . . . . . . . . . . . . . . . 52
volume . . . . . . . . . . . . . . . . . . . . . . . . . . . . . . . . 70
. . . . . . . . . . . . . . . . . . . . . . . 36
. . . . . . . . . . . . . . . . . . . . . . . . . . . . . . 25
S
Safety precautions . . . . . . . . . . . . . . . . . . . . . . . . . . .8
Screensaver . . . . . . . . . . . . . . . . . . . . . . . . . . . . . . . 68
Searching
handset
Searching in directory. . . . . . . . . . . . . . . . . . . . . . . 28
Sending
Sensitivity
Service . . . . . . . . . . . . . . . . . . . . . . . . . . . . . . . . . . . 78
Service provider, see Network provider
Setting the date
Setting the system . . . . . . . . . . . . . . . . . . . . . . . . . 74
Setting the time. . . . . . . . . . . . . . . . . . . . . . . . .12, 74
Setting up handset . . . . . . . . . . . . . . . . . . . . . . . . . 11
Setting up the base. . . . . . . . . . . . . . . . . . . . . . . . . . .9
Setting up the charging cradle (handset). . . . . . . . .9
Show new messages. . . . . . . . . . . . . . . . . . . . . . . . 33
Signal light . . . . . . . . . . . . . . . . . . . . . . . . . . . . . . . . . .5
Signal strength . . . . . . . . . . . . . . . . . . . . . . . . . . . . 85
. . . . . . . . . . . . . . . . . . . . . . . . . . . . . . . . 64
entire directory to handset
SMS messages . . . . . . . . . . . . . . . . . . . . . . . . . . 55
. . . . . . . . . . . . . . . . . . . . . . . . . . . . . . . . 69
volume
. . . . . . . . . . . . . . . . 30
. . . . . . . . . . . . . . . . . . . . . . . . . 12, 74
Simple menu . . . . . . . . . . . . . . . . . . . . . . . . . . . . . . 46
SMS
SMS message list (SMS). . . . . . . . . . . . . . . . . . . . . . 57
SMS notification. . . . . . . . . . . . . . . . . . . . . . . . . . . . 58
SMS service centre
Snooze mode (alarm) . . . . . . . . . . . . . . . . . . . . . . .49
SOS key . . . . . . . . . . . . . . . . . . . . . . . . . . . . . . . . . . . 41
Speaker . . . . . . . . . . . . . . . . . . . . . . . . . . . . . . . . . . . 22
Star key . . . . . . . . . . . . . . . . . . . . . . . . . . . . . . . . . . . . 5
Status bar . . . . . . . . . . . . . . . . . . . . . . . . . . . . . . . . . . 5
Switch on/off alarm (timer). . . . . . . . . . . . . . . . . . . 48
Switching the ringtone on/off . . . . . . . . . . . . . . . . 71
Symbols, see Icons. . . . . . . . . . . . . . . . . . . . . . . . . . 85
System PIN
. . . . . . . . . . . . . . . . . . . . . . . . . . . . . . . . 57
deleting
draft message list . . . . . . . . . . . . . . . . . . . . . . . . 56
incoming message list . . . . . . . . . . . . . . . . . . . . 57
linked . . . . . . . . . . . . . . . . . . . . . . . . . . . . . . . . . . 55
message list . . . . . . . . . . . . . . . . . . . . . . . . . . . . . 57
reading . . . . . . . . . . . . . . . . . . . . . . . . . . . . . . . . . 57
receiving . . . . . . . . . . . . . . . . . . . . . . . . . . . . . . . 56
self help with error messages . . . . . . . . . . . . . . 60
send centre . . . . . . . . . . . . . . . . . . . . . . . . . . . . . 59
sending to e-mail address . . . . . . . . . . . . . . . . . 56
temporary storing. . . . . . . . . . . . . . . . . . . . . . . . 56
to PABXs. . . . . . . . . . . . . . . . . . . . . . . . . . . . . . . . 59
troubleshooting . . . . . . . . . . . . . . . . . . . . . . . . . 60
vCard . . . . . . . . . . . . . . . . . . . . . . . . . . . . . . . . . . 58
writing/sending . . . . . . . . . . . . . . . . . . . . . . . . . 55
changing the number
setting . . . . . . . . . . . . . . . . . . . . . . . . . . . . . . . . . 59
icons . . . . . . . . . . . . . . . . . . . . . . . . . . . . . . . . . . . 85
. . . . . . . . . . . . . . . . . . . . . . . . . . . . . . . 75
changing
resetting . . . . . . . . . . . . . . . . . . . . . . . . . . . . . . . . 75
. . . . . . . . . . . . . . . . . . . . 59
T
Talk k ey . . . . . . . . . . . . . . . . . . . . . . . . . . . . . . . . . . . . 5
Technical data. . . . . . . . . . . . . . . . . . . . . . . . . . . . . . 82
Telephone
operating
Time control for external calls . . . . . . . . . . . . . . . . 52
Timer . . . . . . . . . . . . . . . . . . . . . . . . . . . . . . . . . . . . . 48
Tone dialling (DTMF) . . . . . . . . . . . . . . . . . . . . .66, 67
Transferring, external call internally. . . . . . . . . . . . 20
Troubleshooting
general
SMS. . . . . . . . . . . . . . . . . . . . . . . . . . . . . . . . . . . . 60
. . . . . . . . . . . . . . . . . . . . . . . . . . . . . . . 13
. . . . . . . . . . . . . . . . . . . . . . . . . . . . . . . . . 76
U
Upper/lower case. . . . . . . . . . . . . . . . . . . . . . . . . . . 17
Using
multiple handsets
. . . . . . . . . . . . . . . . . . . . . . . . 63
Availability and operation of the functions
may differ on your telephone.
95
Page 98

Index
All rights reserved. Rights of modification reserved.
V
vCard (SMS) . . . . . . . . . . . . . . . . . . . . . . . . . . . . . . . 58
Viewing network mailbox message . . . . . . . . . . . 33
VIP group, classify directory entry. . . . . . . . . . . . . 27
VIP ringtone . . . . . . . . . . . . . . . . . . . . . . . . . . . . . . . 27
Volu me
boost
. . . . . . . . . . . . . . . . . . . . . . . . . . . . . . . . . . 13
earpiece . . . . . . . . . . . . . . . . . . . . . . . . . . . . . . . . 70
handset handsfree volume . . . . . . . . . . . . . . . . 70
handset speaker/earpiece volume . . . . . . . . . . 22
set automatically. . . . . . . . . . . . . . . . . . . . . . . . . 69
speaker. . . . . . . . . . . . . . . . . . . . . . . . . . . . . . . . . 70
Volume buttons . . . . . . . . . . . . . . . . . . . . . . . . . . . . . 6
W
Withheld number. . . . . . . . . . . . . . . . . . . . . . . . . . . 23
Writing (SMS) . . . . . . . . . . . . . . . . . . . . . . . . . . . . . . 55
X
XES mode . . . . . . . . . . . . . . . . . . . . . . . . . . . . . . . . . 66
96
Availability and operation of the functions
may differ on your telephone.
Page 99

Issued by
Gigaset Communications GmbH
Frankenstr. 2a, D-46395 Bocholt
© Gigaset Communications GmbH 2021
Subject to availability.
All rights reserved. Rights of modification reserved.
www.gigaset.com
This user guide is printed on 100 % recycled paper which is certified by the Blue Angel eco label.
 Loading...