


GFU21M6AW4
Gibson GFU21M6AW4, GFU21M6AW3, GFU21M6AW2, GFU21M3AW3, GFU21M3AW1 Owner’s Manual
...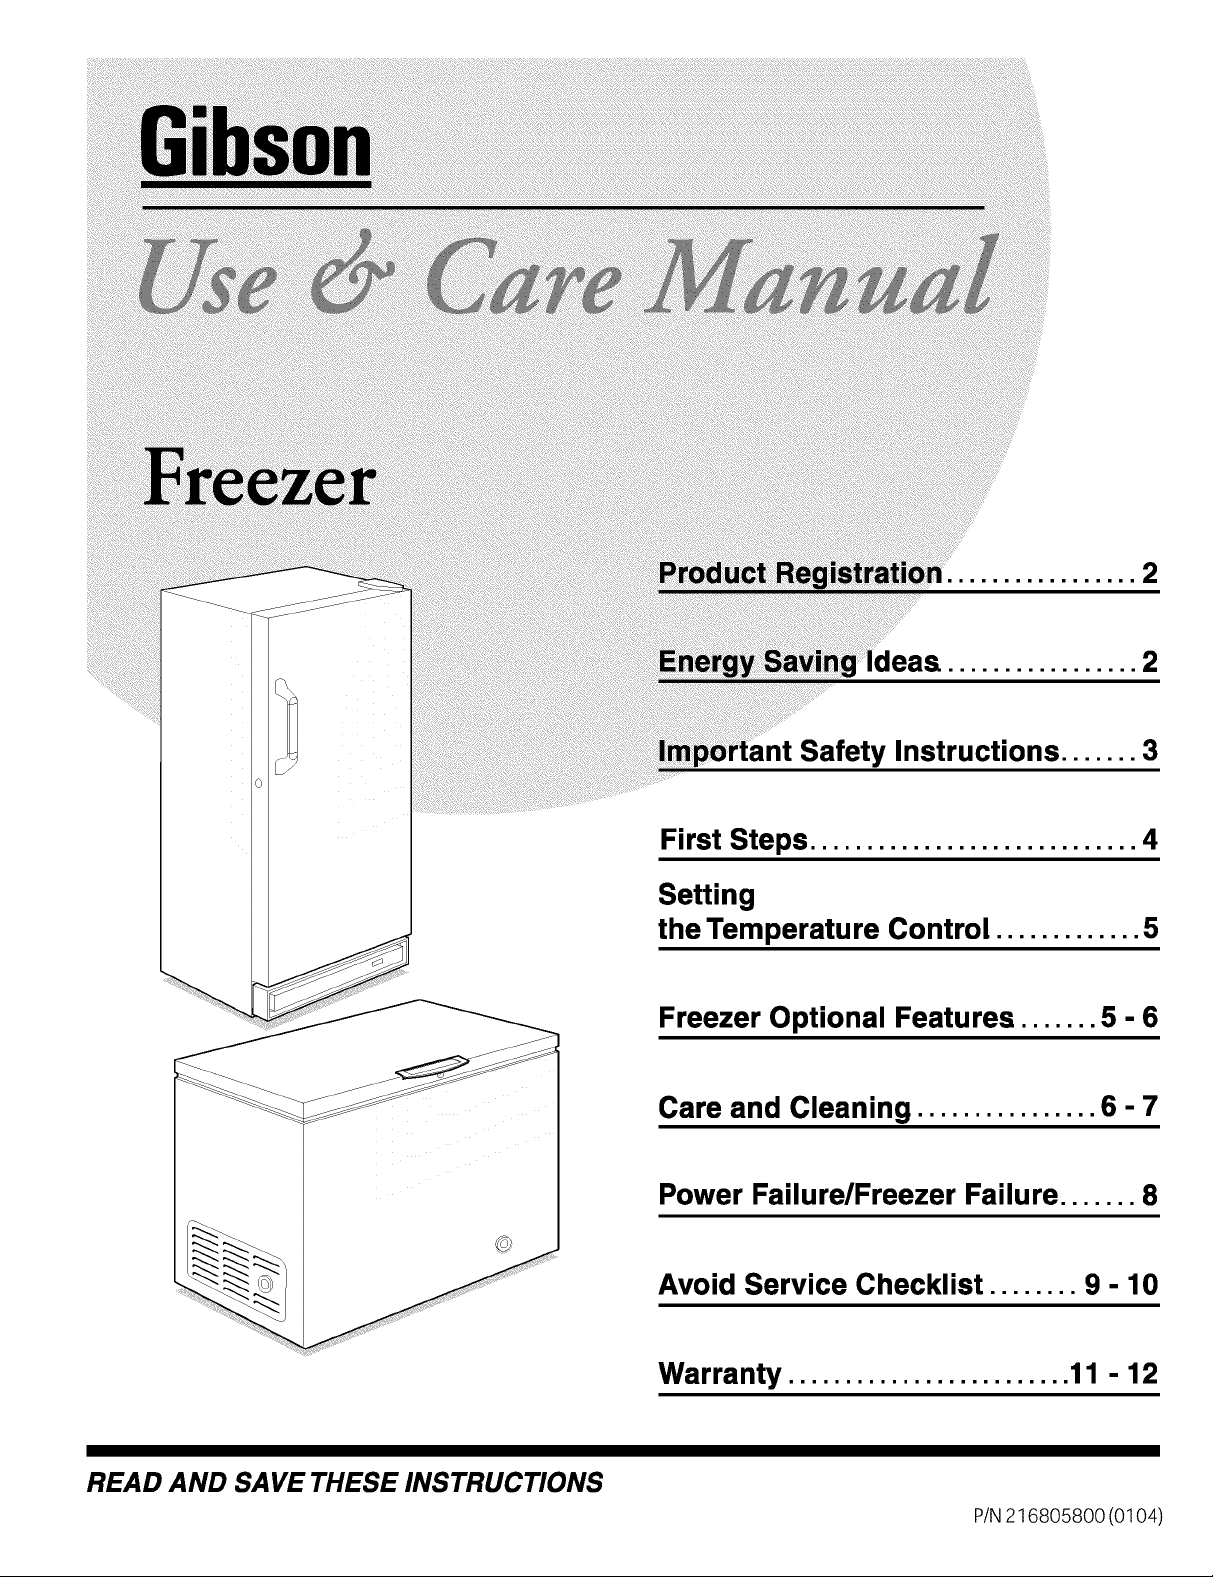
.................
Safety Instructions ....... 3
First Steps ............................. 4
Setting
the Temperature Control ............. 5
Freezer Optional Features ....... 5 - 6
Care and Cleaning ................ 6 - 7
Power Failure/Freezer Failure ....... 8
READ AND SAVE THESE INSTRUCTIONS
Avoid Service Checklist ........ 9 - 10
Warranty ......................... 11 - 12
PIN216805800 (0104)
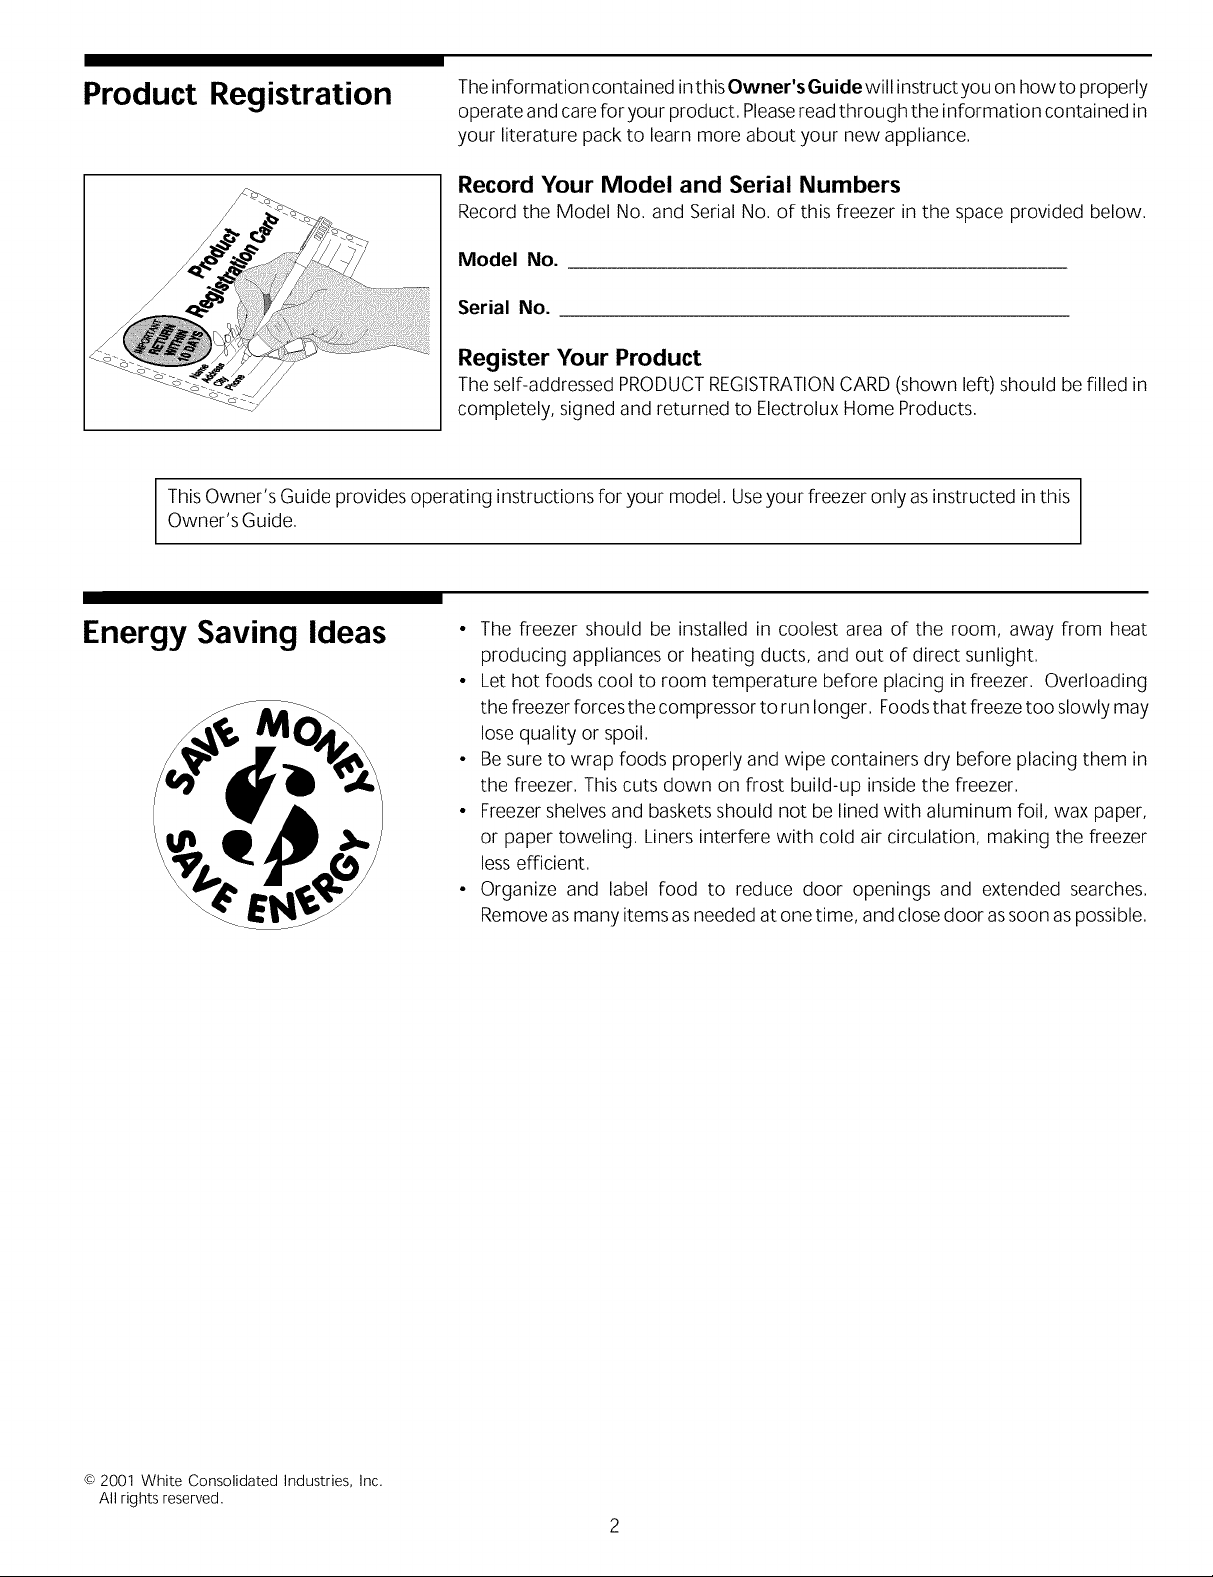
Product Registration
Theinformation contained in this Owner'sGuide will instruct you on howto properly
operate and careforyour product, Pleaseread through the information contained in
your literature pack to learn more about your new appliance,
Record Your Model and Serial Numbers
Record the Model No, and Serial No, of this freezer in the space provided below,
P
!ix
Y
/
ThisOwner's Guide provides operating instructions for your model. Useyour freezer only as instructed in this
Owner's Guide,
Energy Saving Ideas
Model No.
Serial No.
Register Your Product
Theself-addressed PRODUCTREGISTRATIONCARD (shown left) should be filled in
completely, signed and returned to Electrolux Home Products,
The freezer should be installed in coolest area of the room, away from heat
producing appliances or heating ducts, and out of direct sunlight,
• Let hot foods cool to room temperature before placing in freezer, Overloading
the freezer forces the compressor to run longer, Foodsthat freeze too slowly may
lose quality or spoil,
• Be sure to wrap foods properly and wipe containers dry before placing them in
the freezer, This cuts down on frost build-up inside the freezer,
• Freezer shelves and baskets should not be lined with aluminum foil, wax paper,
or paper toweling, Liners interfere with cold air circulation, making the freezer
less efficient,
• Organize and label food to reduce door openings and extended searches,
Remove asmany items as needed at one time, and close door assoon aspossible,
© 2001 White Consolidated Industries, Inc.
All rights reserved.
Important Safety
Instructions
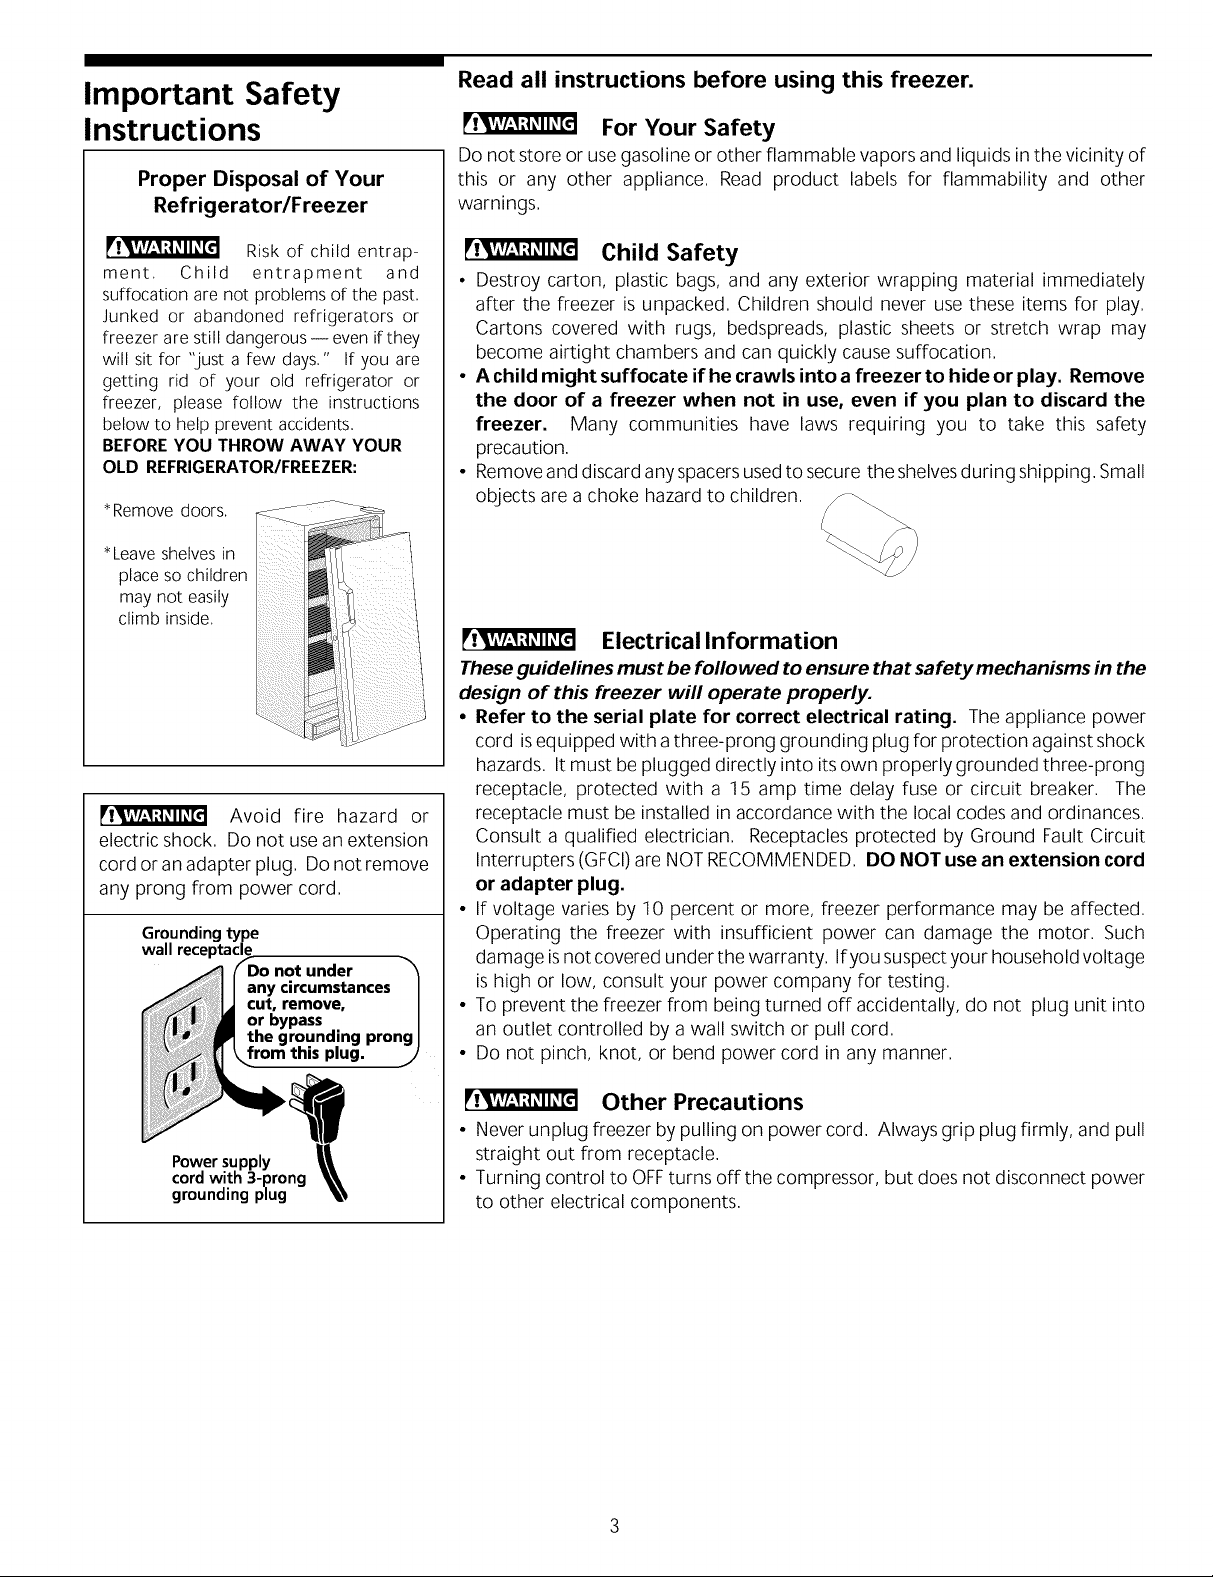
Proper Disposal of Your
Refrigerator/Freezer
Read all instructions before using this freezer.
For Your Safety
Do not store or use gasoline or other flammable vapors and liquids in the vicinity of
this or any other appliance. Read product labels for flammability and other
warnings.
Risk of child entrap-
ment. Child entrapment and
suffocation are not problems of the past.
Junked or abandoned refrigerators or
freezer are still dangerous- even if they
will sit for "just a few days." If you are
getting rid of your old refrigerator or
freezer, please follow the instructions
below to help prevent accidents.
BEFORE YOU THROW AWAY YOUR
OLD REFRIGERATOR/FREEZER:
*Leave shelves in
place so children
may not easily
climb inside.
Avoid fire hazard or
electric shock. Do not use an extension
cord or an adapter plug. Do not remove
any prong from power cord.
Grounding type
wall
not under
Child Safety
• Destroy carton, plastic bags, and any exterior wrapping material immediately
after the freezer is unpacked. Children should never use these items for play.
Cartons covered with rugs, bedspreads, plastic sheets or stretch wrap may
become airtight chambers and can quickly cause suffocation.
• Achild might suffocate if he crawls into a freezer to hide or play. Remove
the door of a freezer when not in use, even if you plan to discard the
freezer. Many communities have laws requiring you to take this safety
precaution,
• Removeand discard any spacersusedto secure the shelvesduring shipping, Small
objects are a choke hazard to children,
Electrical Information
These guidelines must be followed to ensure that safety mechanisms in the
design of this freezer will operate properly.
• Refer to the serial plate for correct electrical rating. The appliance power
cord is equipped with a three-prong grounding plug for protection against shock
hazards. Itmust be plugged directly into its own properly grounded three-prong
receptacle, protected with a 15 amp time delay fuse or circuit breaker. The
receptacle must be installed in accordance with the local codes and ordinances.
Consult a qualified electrician. Receptacles protected by Ground Fault Circuit
Interrupters (GFCI)are NOT RECOMMENDED, DO NOT use an extension cord
or adapter plug.
• If voltage varies by 10 percent or more, freezer performance may be affected,
Operating the freezer with insufficient power can damage the motor, Such
damage isnot covered under the warranty, If you suspect your household voltage
is high or low, consult your power company for testing,
• To prevent the freezer from being turned off accidentally, do not plug unit into
an outlet controlled by a wall switch or pull cord,
• Do not pinch, knot, or bend power cord in any manner,
Power supply
cord with 3-prong
grounding plug
Other Precautions
• Never unplug freezer by pulling on power cord, Always grip plug firmly, and pull
straight out from receptacle,
• Turning control to OFFturns off the compressor, but does not disconnect power
to other electrical components,
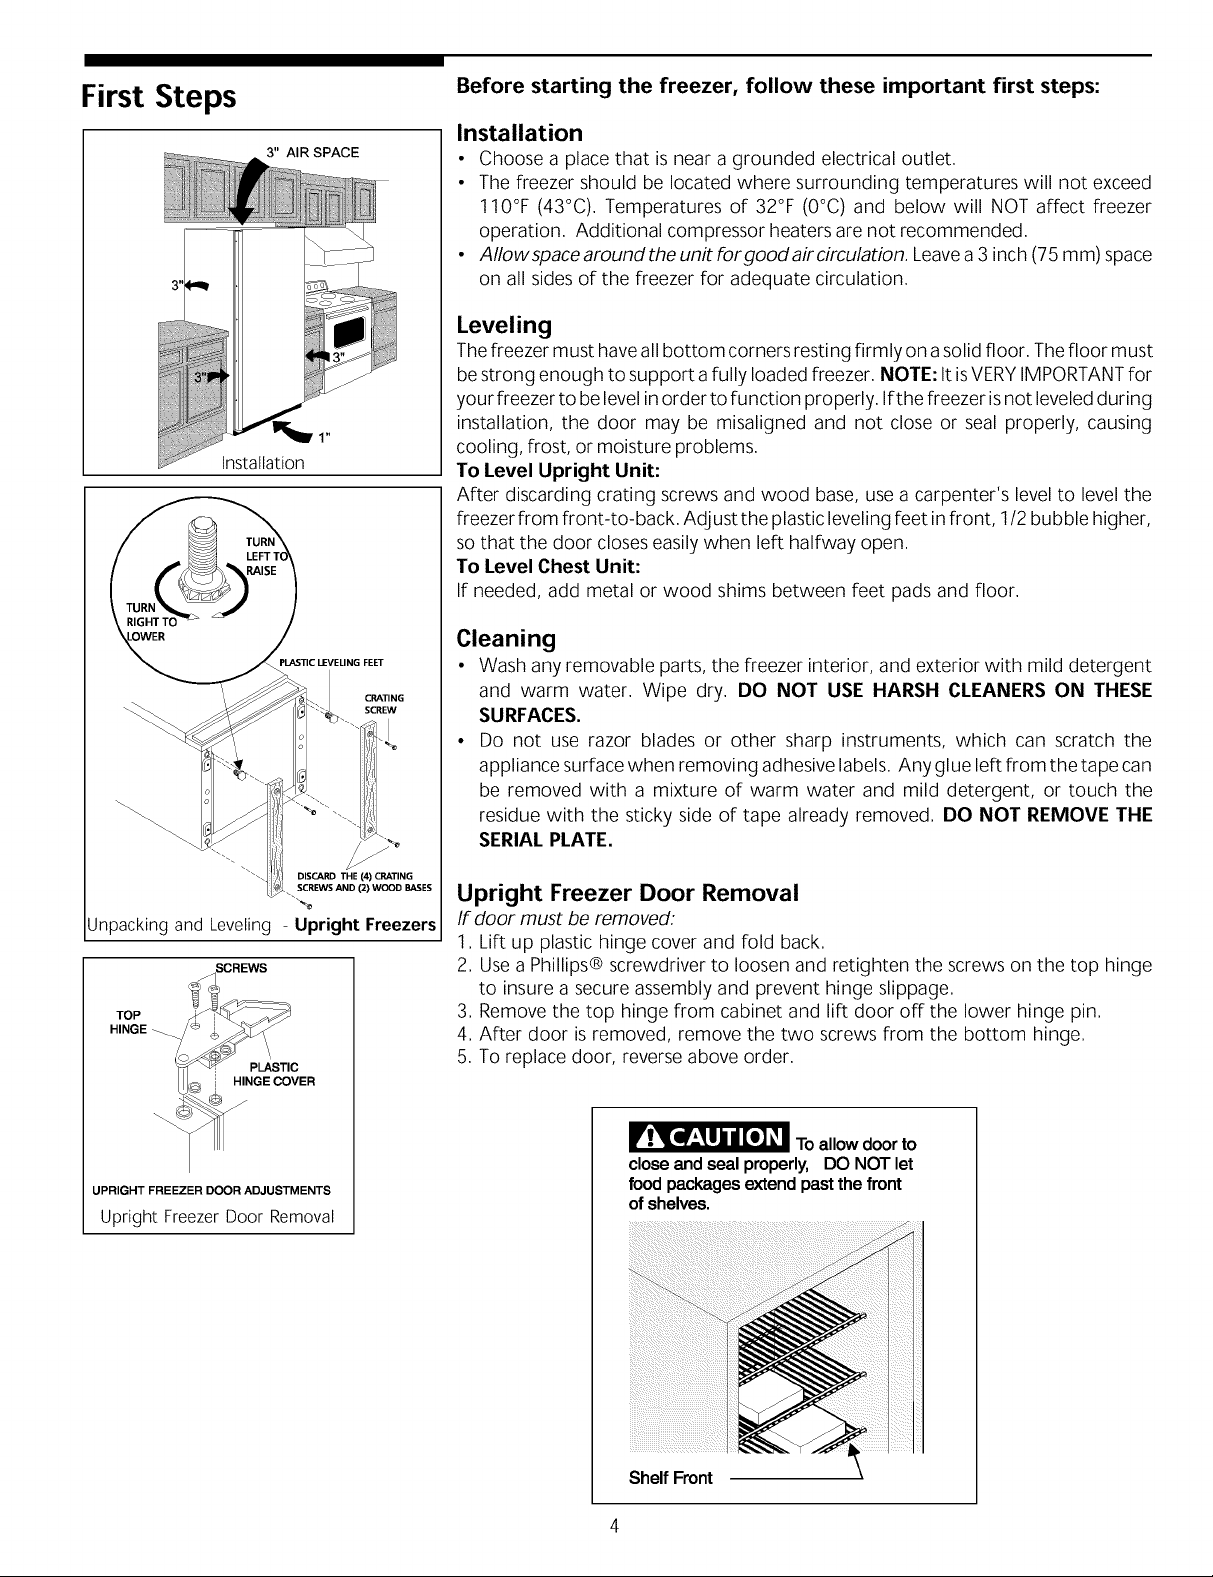
First Steps
3" AIR SPACE
Installation
Before starting the freezer, follow these important first steps:
Installation
• Choose a place that is near a grounded electrical outlet.
• The freezer should be located where surrounding temperatures will not exceed
110°F (43°C). Temperatures of 32°F (0°C) and below will NOT affect freezer
operation. Additional compressor heaters are not recommended.
• AIIowspace around the unit for good air circulation. Leavea 3 inch (75 mm) space
on all sides of the freezer for adequate circulation.
Leveling
Thefreezer must haveall bottom corners resting firmly on a solid floor, The floor must
be strong enough to support afully loaded freezer, NOTE: It is VERYIMPORTANTfor
your freezer to be level in order to function properly, Ifthe freezer isnot leveled during
installation, the door may be misaligned and not close or seal properly, causing
cooling, frost, or moisture problems,
To Level Upright Unit:
After discarding crating screws and wood base, use a carpenter's level to level the
freezer from front-to-back. Adjust the plastic leveling feet infront, 1/2 bubble higher,
so that the door closes easily when left halfway open.
To Level Chest Unit:
If needed, add metal or wood shims between feet pads and floor.
Cleaning
• Wash any removable parts, the freezer interior, and exterior with mild detergent
and warm water. Wipe dry. DO NOT USE HARSH CLEANERS ON THESE
SURFACES.
• Do not use razor blades or other sharp instruments, which can scratch the
appliance surface when removing adhesive labels. Any glue left from the tape can
be removed with a mixture of warm water and mild detergent, or touch the
residue with the sticky side of tape already removed. DO NOT REMOVE THE
SERIAL PLATE.
DISCARD THE (4) CRATING
SCREWS AND (2) WOOD BASES
%
Unpacking and Leveling - Upright Freezers
SCREWS
_ PLASTIC
N_._b _UVER
UPRIGHT FREEZER DOOR ADJUSTMENTS
Upright FreezerDoor Removal
Upright Freezer Door Removal
If door must be removed:
1. Lift up plastic hinge cover and fold back.
2. Use a Phillips® screwdriver to loosen and retighten the screws on the top hinge
to insure a secure assembly and prevent hinge slippage.
3. Remove the top hinge from cabinet and lift door off the lower hinge pin.
4. After door is removed, remove the two screws from the bottom hinge.
5. To replace door, reverse above order.
If!_[=f_'_lJld(H _I Toallow door to
closeandsealproperly, DO NOT let
foodpackagesextendpastthefront
ofshelves,
Shelf Front
4
Setting the
Temperature Control
Cool Down Period
• For safe food storage, allow 4 hours for freezer to cool down completely. The
freezer will run continuously for the first several hours. Foodsthat are already
frozen may be placed in freezer after the first few hours of operation. Unfrozen
foods should NOTbe loaded into freezer until freezer has operated for 4 hours.
When loading freezer, freeze only 3 pounds of fresh food per cubic foot of freezer
space at one time. Distribute packages to be frozen evenly throughout the
freezer. It is not necessary to turn control knob to a colder setting while freezing
food.
Temperature Control
The temperature control islocated inside the freezer on upright models, and on
the left outside wall on chest models. The temperature is factory preset to provide
satisfactory food storage temperatures. However, the temperature control is
adjustable to provide a range of temperatures for your personal satisfaction. If a
colder temperature isdesired, turn the temperature control knob toward COLD-
ESTand allow several hours for temperatures to stabilize between adjustments.
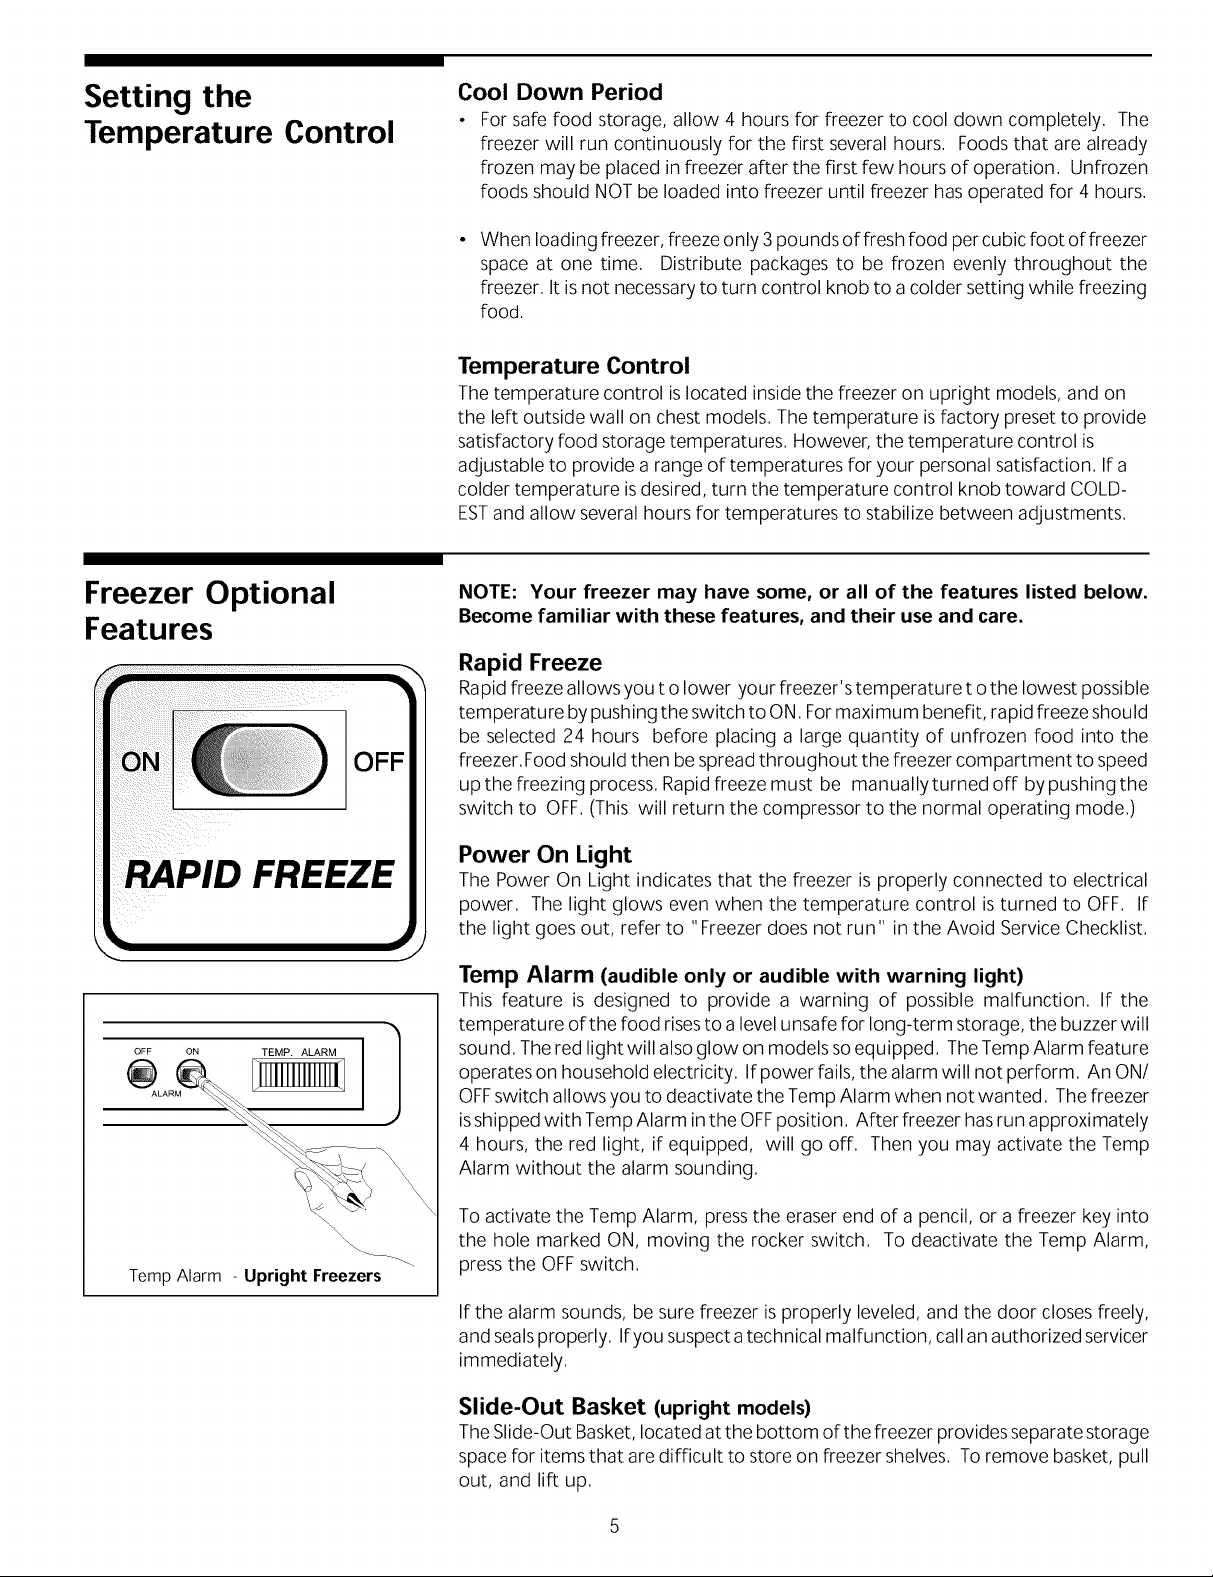
Freezer Optional
Features
RAPID
OFF ON TEMP. ALARM
ALARM
FREEZE
OFF
NOTE: Your freezer may have some, or all of the features listed below.
Become familiar with these features, and their use and care.
Rapid Freeze
Rapidfreeze allows you t o lower your freezer's temperature t o the lowest possible
temperature bypushing the switch to ON. Formaximum benefit, rapid freeze should
be selected 24 hours before placing a large quantity of unfrozen food into the
freezer. Food should then be spread throughout the freezer compartment to speed
up the freezing process. Rapid freeze must be manually turned off bypushing the
switch to OFF.(This will return the compressor to the normal operating mode.)
Power On Light
The Power On Light indicates that the freezer is properly connected to electrical
power. The light glows even when the temperature control is turned to OFF. If
the light goes out, refer to "Freezer does not run" in the Avoid Service Checklist.
Temp Alarm (audible only or audible with warning light)
This feature is designed to provide a warning of possible malfunction. If the
temperature of the food risesto a levelunsafe for long-term storage, the buzzer will
sound. Thered light will alsoglow on models soequipped. TheTemp Alarm feature
operates on household electricity. If power fails, the alarm will not perform. An ON/
OFFswitch allows you to deactivate the Temp Alarm when not wanted. Thefreezer
isshipped with Temp Alarm inthe OFFposition. After freezer hasrun approximately
4 hours, the red light, if equipped, will go off. Then you may activate the Temp
Alarm without the alarm sounding.
\4\
\\\
TempAlarm - Upright Freezers
To activate the Temp Alarm, pressthe eraser end of a pencil, or a freezer key into
the hole marked ON, moving the rocker switch. To deactivate the Temp Alarm,
press the OFFswitch.
If the alarm sounds, be sure freezer is properly leveled, and the door closes freely,
and sealsproperly, Ifyou suspect atechnical malfunction, callan authorized servicer
immediately,
Slide-Out Basket (upright models)
The Slide-Out Basket, located at the bottom of the freezer provides separate storage
space for items that are difficult to store on freezer shelves. To remove basket, pull
out, and lift up.
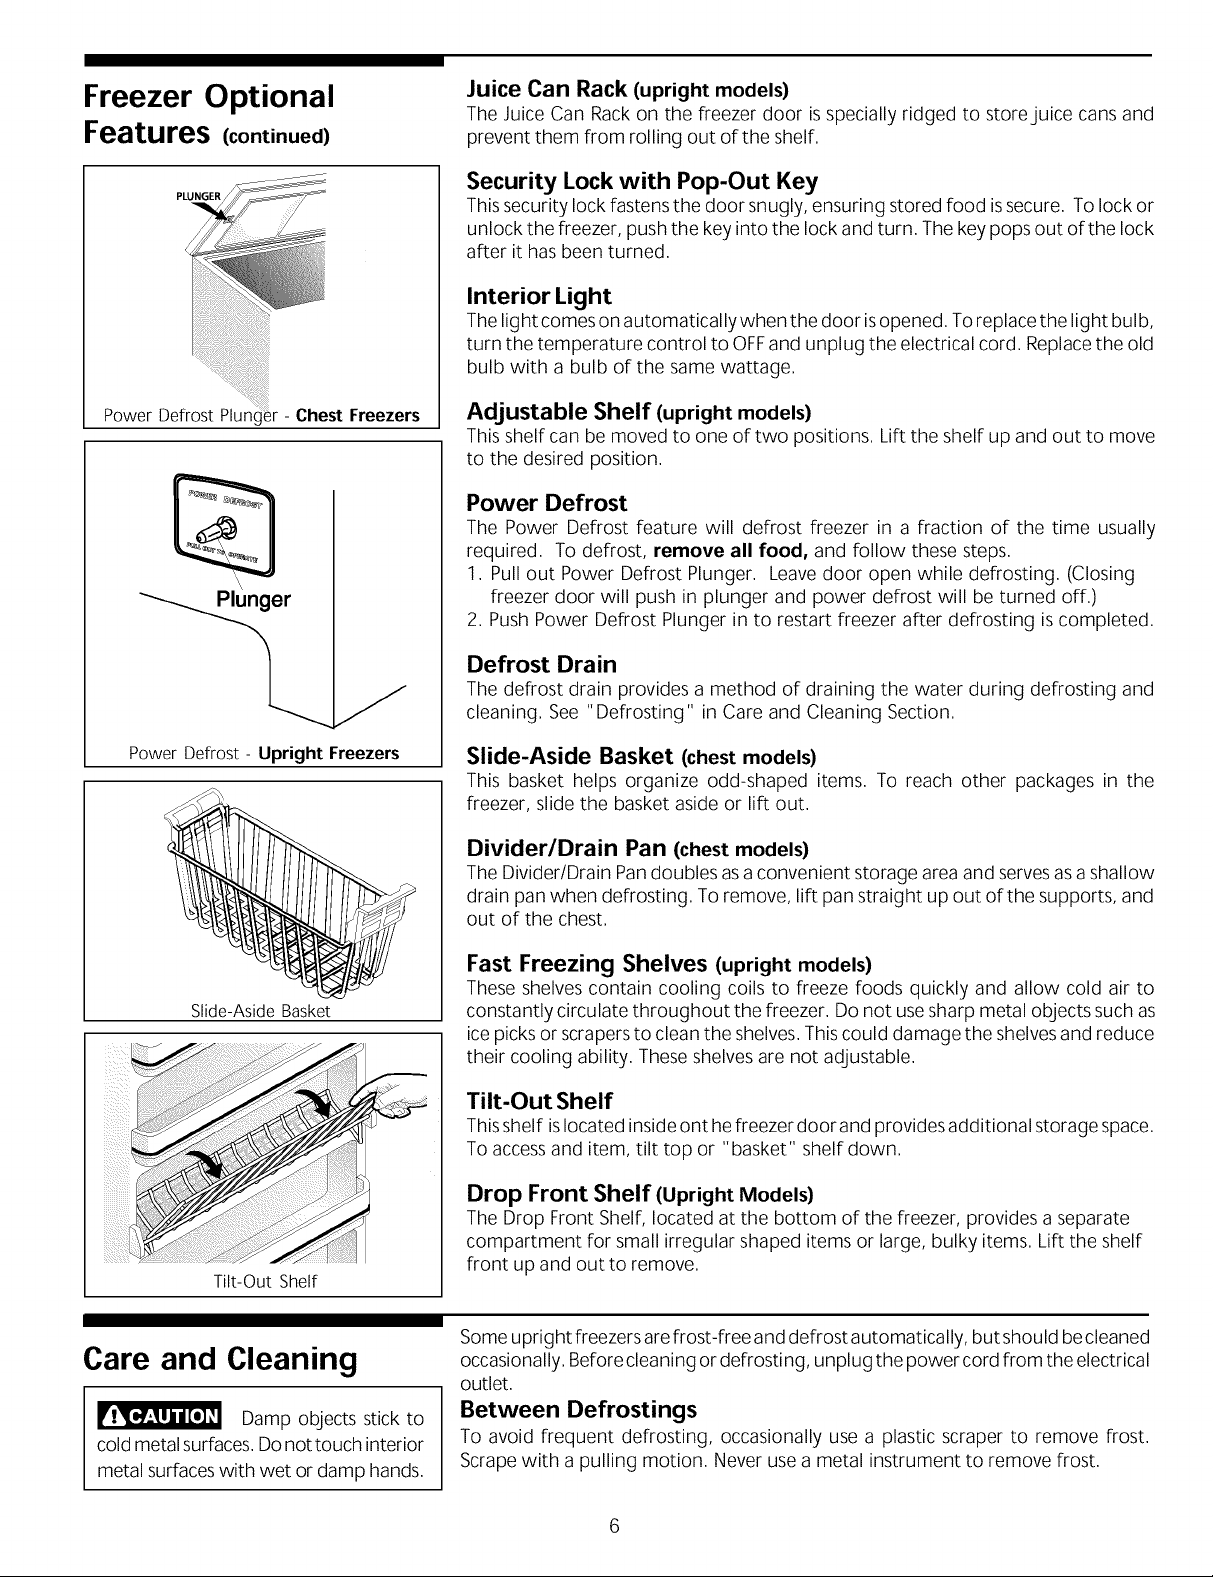
Freezer Optional
Features (continued)
Juice Can Rack (upright models)
The Juice Can Rack on the freezer door isspecially ridged to store juice cans and
prevent them from rolling out of the shelf.
PLUNGER
Power Defrost Plun( ;r - Chest Freezers
\
Power Defrost - Upright Freezers
Security Lock with Pop-Out Key
This security lock fastens the door snugly, ensuring stored food issecure. To lock or
unlock the freezer, push the key into the lock and turn. The key pops out of the lock
after it has been turned.
Interior Light
The light comes on automatically when the door is opened. To replace the light bul b,
turn the temperature control to OFFand unplug the electrical cord. Replacethe old
bulb with a bulb of the same wattage.
AdJustable Shelf (upright models)
This shelf can be moved to one of two positions. Lift the shelf up and out to move
to the desired position.
Power Defrost
The Power Defrost feature will defrost freezer in a fraction of the time usually
required, To defrost, remove all food, and follow these steps,
1, Pull out Power Defrost Plunger, Leavedoor open while defrosting, (Closing
freezer door will push in plunger and power defrost will be turned off,)
2, Push Power Defrost Plunger in to restart freezer after defrosting iscompleted,
Defrost Drain
The defrost drain provides a method of draining the water during defrosting and
cleaning. See "Defrosting" in Care and Cleaning Section.
Slide-Aside Basket (chest models)
This basket helps organize odd-shaped items. To reach other packages in the
freezer, slide the basket aside or lift out.
Slide-Aside Basket
Tilt-Out Shelf
Care and Cleaning
Damp objects stick to
cold metal surfaces. Donot touch interior
metal surfaceswith wet or damp hands.
Divider/Drain Pan (chest models)
The Divider/Drain Pandoubles asaconvenient storage area and servesasa shallow
drain pan when defrosting. To remove, lift pan straight up out of the supports, and
out of the chest.
Fast Freezing Shelves (upright models)
These shelves contain cooling coils to freeze foods quickly and allow cold air to
constantly circulate throughout the freezer. Do not usesharp metal objects such as
icepicks or scrapers to clean the shelves.This could damage the shelvesand reduce
their cooling ability. These shelves are not adjustable.
Tilt-Out Shelf
Thisshelf islocated inside ont hefreezer door and provides additional storage space.
To accessand item, tilt top or "basket" shelf down.
Drop Front Shelf (Upright Models)
The Drop Front Shelf, located at the bottom of the freezer, provides a separate
compartment for small irregular shaped items or large, bulky items. Lift the shelf
front up and out to remove.
Some upright freezers arefrost-free anddefrost automatically, but should be cleaned
occasionally. Beforecleaning or defrosting, unplug the power cord from the electrical
outlet.
Between Defrostings
To avoid frequent defrosting, occasionally use a plastic scraper to remove frost.
Scrape with a pulling motion. Never use a metal instrument to remove frost.
6

Care and Cleaning
(continued)
Fi ure 1
DEFROST
DRAIN PLUG Figure 2
PAN
Defrosting
It is important to defrost and clean freezer when 1/4 to 1/2 inch of frost has
accumulated. Frost may tend to accumulate faster on upper part of freezer due to
warm, moist air entering freezer when door is opened. Remove food and leave
door open when defrosting freezer.
• On upright modelswith adefrost drain (Figure1),remove drain plug on the inside
floor of the freezer by pulling straight out. To accessexternal drain tube on models
with a base panel, first remove the two screws from the base panel. Locate the
drain tube near the left center under the freezer. Placea shallow pan under the
drain tube. Defrost water will drain out. Check pan occasionally sowater does not
overflow. A 1/2 inch garden hose adapter can be used to drain the freezer directly
into a floor drain. If your model is not equipped with an adapter, one can be
purchased at most hardware stores. Replacethe drain plug when defrosting and
cleaning are completed. If the drain is left open, warm air may enter freezer.
• On chest models with a defrost drain, place a shallow pan or the Divider/Drain
Pan(some models) beneath the drain outlet (Figure2).A onehalf inch garden hose
adapter can be usedto drain the freezer directly into a floor drain (Figure 3).If your
model is not equipped with an adapter, one can be purchased at most hardware
stores. Pull out the drain plug inside the freezer, and pull off the outside defrost
drain plug (Figure 4). Defrost water will drain out. Check pan occasionally sowater
does not overflow. Replace the drain plugs when defrosting is completed.
• On models without adefrost drain, place towels or newspapers on the freezer
bottom to catch the frost. The frost will loosen and fall. Remove towels and/or
newspapers.
• Ifthe frost issoft, remove it by using a plastic scraper. Ifthe frost isglazed and hard,
fill deep pans with hot water and place them on the freezer bottom. Close the
freezer door. Frost should soften in about 15 minutes. Repeat this procedure if
necessary,
Cleaning the Inside
After defrosting, wash insidesurfacesof the freezer with asolution of two tablespoons
of baking soda in one quart (1,136 litres) warm water, Rinseand dry, Wring excess
water out of the sponge or cloth when cleaning in the area of the controls, or any
electrical parts,
Wash the removable parts and door basket with the baking sodasolution mentioned
above, or mild detergent and warm water, Rinse and dry, Never use metallic
scouring pads, brushes, abrasive cleaners, or alkaline solutions on any surface, Do
not wash removable parts in a dishwasher,
DRAIN PLUG
Figure 3
DRAIN _'_
PLUG
Figure 4
Cleaning the Outside
Wash the cabinet with warm water and mild liquid detergent. Rinsewell and wipe
dry with a clean soft cloth. Replaceparts and food.
 Loading...