


1
Introduction
The Dimension 200 is a router/engraver for three-dimensional signage created for use with the GRAPHIX ADVANTAGE or
other computer systems along with ART Path software.
The ART Path Software Option allows the GRAPHIX ADVANTAGE to fully control the routing operation, enabling you to send jobs directly from ART Path on the GRAPHIX ADVANTAGE through the ADVANTAGE Router Control (ARC) station.
The Dimension 200 can cut designs from a variety of materials, as well as draw all types of text or graphics. In addition, the Dimension 200 is an excellent solution for creating ADAcompliant (Americans with Disabilities Act) signage.
Warning: THE DIMENSION 200 IS A COMPUTERCONTROLLED MACHINE TOOL AND SHOULD BE OPERATED ONLY BY TRAINED OPERATORS. THE SAFETY GUIDELINES IN THIS MANUAL MUST BE FOLLOWED AT ALL TIMES TO AVOID RISK OF INJURY.
Manual Contents
This manual provides installation, operation, and maintenance procedures as well as safety guidelines for the Dimension 200. Covering the basic information needed for using the Dimension 200, it is arranged as follows:
Router requirements and package contents
Stand assembly instructions
Router and optional equipment installation instructions
Safety guidelines
Principles of operation
System preparation and use

2 Dimension 200
Cleaning and maintenance procedures
Recommended feed rates for various materials (card)
Conventions
The following conventions are used in this manual:
Note: A note contains important information which could affect successful completion of a task.
CAUTION: A caution statement contains information which, if not observed, could result in damage to the equipment.
WARNING: A warning statement contains information which, if not observed, could result in personal injury.
Customer Support
If you require assistance installing or operating your Dimension 200, contact your Gerber distributor or the Router Support Group at 800-336-1698 (USA and Canada) or fax at 203-290-5568.
If possible, please use a phone that is close to your GRAPHIX ADVANTAGE system and have the following information available before calling:
MS-DOS and Microsoft Windows version numbers
GSP System ID number
System serial number
GRAPHIX ADVANTAGE, Windows, MS-DOS, and hardware utilities disks
GRAPHIX ADVANTAGE, Windows, and MS-DOS user manuals

3
Router Requirements
This section discusses the work space, equipment, and electrical requirements for the Dimension 200 router system.
Work Space Requirements
Warning: THERE MUST BE SUFFICIENT SPACE PROVIDED IN THE PRODUCTION AREA AROUND THE ROUTER FOR MATERIAL STORAGE AND SAFE ACCESS FROM ALL SIDES.
A 3-ft. clearance on all sides of the router stand is the recommended minimum work area. In addition, all equipment should be kept reasonably close together. The T-Vac blower must be located close to the rear of the table.
CAUTION: Do not place a router in a damp work area. The operating environment should fall within a temperature range between 32 - 99°F (0 and 37oC) and within a relative humidity range between 0 and 70%.
Equipment Requirements
ROUTER STAND
A 48 in. square table or stand (with 3-ft. clearance on all sides, or more if the paneling feature is used) is needed. If the stand is not used, the table must be a heavy duty table able to support 300 lbs.
ELECTRICAL BOX
Gerber recommends placing the electrical box on the table beside the unit or under the table. The power switch must be easily accessible. Do not set the box directly on concrete floors because of condensation potential. The electrical box must also be protected from any coolant.

4 Dimension 200
HIGH FREQUENCY SPINDLE OPTION AND SPEED CONTROLLER
The Speed Controller is used only with the High Frequency Spindle Option. Mount the Speed Controller vertically a minimum of 3 ft. away from the system, with the controls easily accessible. Do not set the Speed Controller directly on concrete floors because of condensation potential. The Speed Controller must also be protected from coolant.
MIST COOLANT COMPRESSED AIR
The optional Mist Coolant System requires 30-100 psi of compressed air. The compressor is purchased separately.
CHIP REMOVAL SYSTEM
The Chip Removal System requires a wet/dry shop vacuum with a 2 1/2" hose diameter to attach to the Chip Removal System.
T-VAC VACUUM SYSTEM (FACTORY-INSTALLED)
The optional T-Vac Vacuum System requires a vacuum blower and filter (purchased and installed separately) and a dedicated line installed by a licensed industrial electrician. The vacuum filter must be placed directly under the rear of the router table, with the vacuum blower nearby. To obtain additional information on the vacuum blower, please contact your authorized Gerber distributor.
Electrical Requirements
The Dimension 200 has specific power requirements which must be supplied for the system to work properly. Gerber recommends that all power requirements be installed by a licensed industrial electrician.
Note: The High Frequency Spindle Speed Controller and T-Vac Vacuum System electrical service MUST be installed by a licensed industrial electrician.

Router Requirements 5
Requirements are as follows:
Electrical Box:
Domestic systems: 200, 208, 220, 230, or 250V AC, 30 amp, 60 Hz, single phase, dedicated line.
NEMA Reference |
|
X |
|
3-POLE, 4-WIRE |
G |
W |
|
Receptacle: L14-30R |
|||
|
|
||
Plug: L14-30P |
|
Y |
|
|
Neutral |
||
|
|
Export systems: 200, 208, 220, 230, or 250V AC, 20 amp, 50 Hz, single phase, dedicated line.
NEMA Reference
3-POLE, 4-WIRE
Receptacle: L14-20R
Plug: L14-20P
X
G W
Y
Neutral, not connected
T-Vac Vacuum System:
220V AC, 10 amp, 50/60 Hz, single phase, dedicated line. The plug and receptacle will be determined by the licensed industrial electrician at the time of installation.
220V AC, 10 amp, 50/60 Hz, three-phase, dedicated line. The plug and receptacle will be determined by the licensed industrial electrician at the time of installation.
6 Dimension 200
Speed Controller:
200-240V AC ±10%, 20 amp, 50/60 Hz, single phase, dedicated line.
NEMA Reference
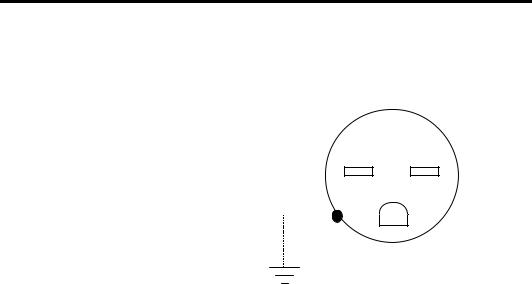
2-POLE, 3-WIRE
Receptacle: 6-15R
Plug: 6-15P
GROUND
Note: If the High Frequency Spindle Option is purchased, a licensed industrial electrician must install a dedicated power line for the Speed Controller. Instructions for this installation are supplied separately.

Router Requirements 7
Router Package Contents
Contents of the large shipping crate for the Dimension 200 are listed below. Check each part against the list and inspect all parts for any damage which may have occurred during shipping.
WARNING: Do not attempt to assemble and install the Dimension 200 without adequate assistance. Though small, the router table is heavy. At least four people are needed to move the Dimension 200.
caution: BE EXTREMELY CAREFUL WHEN UNPACKING THE DIMENSION 200 SO AS NOT TO DAMAGE THE EQUIPMENT.
Crate:
1ADVANTAGE Router Control (ARC) Station
1Electrical Box
1Dimension 200 Router Table
1Table Stand Kit
1Small components box
1Mist Coolant System (optional)
1Engraver System (optional for the Dimension 200, standard for the Dimension 200E)
1Engraver Vacuum System (optional for the Dimension 200, standard for the Dimension 200E)
18' x 2 1/2" diameter Chip Removal System hose
120' braided copper ground strap (may be assembled inside the Chip Removal System vacuum hose)
17' x 2" diameter hose for the T-Vac Vacuum System (optional)
1T-Vac filter and blower fitting (optional)
2Hose clamps (optional)
1 Training video
1 ADA material sample
1 Tool Kit

8 Dimension 200
Small Components Box:
1 ARC station power supply
1 Ground strap with connectors and instructions
1 Power cord for the ARC station power supply 1 100' 9-pin to 25-pin RS-232 cable
1 8' 37-pin cable
1 Owner's Guide
1 Warranty
Stand Kit:
4 |
Legs |
2 |
Front/Rear Cross Members |
2 |
Side Cross Members |
2 |
Front/Rear Tie Members |
2 |
Side Tie Members |
36 |
M6 Bolts (10 mm) |
36 |
M6 Nuts (10 mm) |
8 |
M8 Nuts (13 mm) |
12 |
M8 Washers |
4 |
M8 Bolts (13 mm) |
1 |
Instruction Illustration |
Chip Removal System:
1 Fully Assembled Vacuum Shroud
Mist Coolant System (Option):
1Mist coolant applicator with gauge, flexible coolant tubing, screws and washers
1 Hole drilling template
1 Installation and Usage Guide

Router Requirements 9
Tool Kit Contents
Tool Kit contents are listed below and identified in the illustration. Metric sizes are shown in parentheses.
1 Collet wrench set
1 Collet nut
1 .250" collet (6 mm)
1 .125" router bit sleeve (3 mm)
1 .500" collet
3.125" Gerber Gold bits (3 mm)
3.250" Gerber Gold bits (6 mm)
1.020" profile cutter (engraver type) (6 mm)
1Table surfacing bit
1Pen assembly
1Tool Height Gage
1Step Height Gage
15 mm hex key
4T-nut assemblies
4 Work clamps
4 Clamp nuts

10 Dimension 200
Note: The contents of your tool kit may vary from the photograph.
11
Router Stand Assembly
Warning: THIS PROCEDURE REQUIRES AT LEAST FOUR PERSONS TO LIFT THE ROUTER TABLE BECAUSE OF ITS WEIGHT.
CAUTION: When removing the four foot subassemblies from the Dimension 200 router table, do not set the table on the ground. Damage to the undercarriage will occur. Use the wooden packing materials to block up the router table.
Assemble the Leg Assembly
1.Unpack the router and use the wooden packing materials to block up the router table.
2.Unscrew and remove the four foot subassemblies from the bottom of the Dimension 200 router table.
3.Attach one foot subassembly to the bottom of each leg of the stand (as shown on the next page) using the specified parts. DO NOT tighten the nuts or install the M8 bolt and washer at the top of each leg at this time.
Note: The top of each leg has one bolt hole on each outside surface. The bottom of each leg has three bolt holes on each outside surface. Refer to the Assembled Stand figure.

12 Dimension 200
LEG ASSEMBLY

Router Stand Assembly 13
Assemble the Stand
1.Attach the front, side, and rear cross members to the legs (as shown in the Assembled Stand figure) using the specified parts. Do not yet tighten the nuts.
2.Attach the front, side, and rear tie members to the legs (as shown in the Assembled Stand figure) using the specified parts. Do not tighten the nuts at this time.
3.Use a carpenter's square to align all parts of the stand. Hand tighten all nuts.
Mount the Router Table on the Stand
1.Carefully place the router table on the stand. Align the holes where the foot subassemblies on the bottom of the router table were with the holes in the top of the legs.
2.Secure the router table to the stand with the M8 bolts and washers as shown in Leg Assembly figure. Use a wrench to tighten all nuts on the stand assembly.
Level the Stand and Router Table
1.Use the foot subassemblies to level the stand and router table.
Note: It may be easier to screw the nuts up or down on the foot subassembly if someone assists you by slightly lifting the router table to take some of the weight off the foot subassembly.

14 Dimension 200
ASSEMBLED STAND
2.To lower a foot subassembly, use a 13 mm wrench to loosen the top nut inside the leg frame. When the foot is lowered sufficiently, tighten the bottom nut against the bottom of the leg frame.
3.To raise a foot subassembly, use a 13 mm wrench to loosen the bottom nut on the bottom of the leg frame. When the foot is raised sufficiently, tighten the top nut inside the leg frame.

15
Router Installation Procedure
Before You Begin
WARNING: Turn OFF power to the GRAPHIX ADVANTAGE and unplug the system from the outlet. DO NOT plug in power until instructed to do so.
WARNING: Turn OFF and unplug any lettering systems or plotters connected to the GRAPHIX ADVANTAGE.
WARNING: THE MAIN POWER BREAKER SWITCH ON THE FRONT PANEL OF THE ELECTRICAL BOX MUST BE OFF (POINTING DOWN). THE ROUTER MOTOR SWITCH (LOCATED ON THE ROUTER MOTOR) MUST BE OFF.
Note: Should problems occur while you install the hardware to your system, contact the Router Support Group at 800-336-1698 (USA and Canada) or fax at 203-290-5568.
Power Off Check
The main power breaker switch on the front panel of the electrical box must be OFF (pointing down).

16 Dimension 200
ARC Station
Connect Power Supply to ARC Station
1.Plug the single-pronged end of the ARC station power cord into the port labeled R831 on the ARC station (the other end already connects to the power supply box). See the above illustration.
2.Locate the power cord and plug the three-slotted end into the power supply box.
3.Plug the three-pronged end of the power cord into either receptacle labeled ARC STATION/ACCESSORY on the back of the electrical box.
Connect Router Table to ARC Station
1.Plug the 14-pin round X and Y limit switch connector from the router table into the receptacle labeled R892 on the ARC station. (See the illustration above.)
Connect Electrical Box to ARC Station
1.Plug one end of the 37-pin to 37-pin cable into the receptacle labeled R830 on the ARC station. Tighten the screws.
2.Plug the other end into the receptacle labeled R846 on the electrical box. Tighten the screws.

Router Installation Procedure 17
Connect Electrical Box to Router Table
1.Plug the 3-pronged power cord from the router table into the receptacle labeled R849 on the electrical box.
2.Connect the cable labeled P856 (X motor cable bundled with the Y and Z motor cables on the router table) to the receptacle labeled R856X.
3.Connect the cable labeled P857 (Y motor) to the receptacle labeled R857Y.
4.Connect the cable labeled P858 (Z motor) to the receptacle labeled R858Z.
Electrical Box

18 Dimension 200
Connect Chip Removal System
The Chip Removal System helps keep the work area clean during the routing operation. In addition, its pressure foot provides downward force to keep the workpiece from lifting due to forces exerted by the routing bit. The pressure foot pad rests on the workpiece and slides easily over the workpiece surface, while the tool bit extends through an opening in the pressure foot pad.
Two pads are supplied, one with a 1.5" (38 mm) opening for normal use, and one with a 0.4" (10 mm) diameter opening for cutting very small pieces. The 1.5" diameter opening pad, which is installed at the factory, is used for the mat milling procedure. The 0.4" diameter opening pad is included the tool kit.
A heavy duty wet/dry shop vacuum is required and is not supplied with the router system. A 2 1/2" (64 mm) diameter hose and all necessary fittings are provided with the Dimension 200.
INSTALLING THE CHIP REMOVAL SYSTEM
WARNING: BEFORE INSTALLING THE CHIP REMOVAL SYSTEM, UNPLUG THE ELECTRICAL BOX FROM ITS POWER SOURCE.
WARNING: SCRAP CHIPS GENERATED BY CUTTING CREATE STATIC CHARGES WHICH CAN BE HARMFUL TO THE OPERATOR AS WELL AS MACHINERY COMPONENTS. A PROPERLY INSTALLED GROUND STRAP CABLE (ALSO CALLED STATIC DRAIN WIRE) REDUCES THE CHANCES OF STATIC SHOCK HAZARD. THE GROUND STRAP CABLE IS ALREADY INSTALLED IN THE VACUUM HOSE SUPPLIED WITH THE SYSTEM. YOU MUST CONNECT IT TO THE ELECTRICAL BOX.

Router Installation Procedure 19
 To install the vacuum shroud
The vacuum shroud is installed by Gerber. Should you need to reinstall it, follow the procedure below.
1.Align the screw holes on the vacuum shroud with the screw holes in the carriage sidewalls.
2.Insert and tighten the screws.
 To attach the vacuum hose
1.Attach the vacuum hose onto the pressure foot of the Dimension 200. (One end of the ground strap cable is already connected at this end in the interior of the hose.)
2.Lead the vacuum hose and the ground strap which extends from the end of the vacuum hose to the electrical box. Make sure that there is ample slack on the strap to comfortably connect in the next procedure.

20Dimension 200
3.Now lead the vacuum hose and ground strap to the shop vacuum canister, inserting some of the ground strap into the canister.
4.Make sure that some of the ground strap still extends from the vacuum hose and that there is enough slack on the ground strap. (The ground strap goes in and comes back out of the canister to connect to the electrical box in the next procedure.)
Connect the Ground Strap Cables
Ground strap cables are static protection devices that reduce the risk of static electricity damage to the router system's integrated circuitry. The Dimension 200 comes equipped with three ground strap cables which connect as follows:
ARC station to the electrical box
foot mount block on the Dimension 200 router table to the electrical box
vacuum hose pressure foot to the electrical box.
All three ground strap cables must connect at the same point on the electrical box. Both ends of all ground strap cables must be securely fastened to ensure a reliable ground connection.
To connect the ground strap cable at the router table
1.At the left rear of the Dimension 200 router table, remove the left capscrew that secures the foot mount block to the router bed.
2.Locate the ground strap cable (recognizable by the yellow ring lug) fastened to the limit switch and motor cables.
3.Insert the capscrew through the ground strap ring lug and reinstall.
4.Securely tighten the capscrew to ensure a reliable ground connection.
Router Installation Procedure 21
To connect the ground strap cable at the ARC station
1.Looking at the ARC station from the back, remove the screw located on the right side near the back. (In some models, the screw may instead be located underneath the rear of the ARC station.)
2.Place the ground strap ring lug over the removed screw.
3.Place the star washer over the screw.
4.Reinstall the screw into the side of the ARC station and tighten securely.
5.Use the tie wraps supplied to fasten the ground strap cable to the 37-pin interface cable.
To connect the ground strap cable at the vacuum shroud
Note: The ground strap is already connected to the vacuum shroud.
 To connect all ground strap cables to the electrical box
1.Looking at the rear of the electrical box, remove the screw located on the right side of the electrical box near the attention label (triangle with an exclamation point).
2.Insert the removed screw through the ring lug of all three ground strap cables (from the Dimension 200 router table, the ARC station, and the vacuum shroud).
3.Place one star washer over the screw.
4.Reinstall the screw into the side of the electrical box. To ensure a reliable connection, tighten the screw securely.
5.Coil up any excess ground strap cable extending from the vacuum hose and place it inside the reservoir of the shop vacuum canister.
6.Insert the end of the vacuum hose into the receptacle on the side of the shop vacuum canister.

22 Dimension 200
Connect GRAPHIX ADVANTAGE to ARC Station
1.Plug the 9-pin D-connector of the RS-232 cable into the port labeled PLOTTER or COM at the rear of the GRAPHIX ADVANTAGE. Carefully align all pins and press all the way in.
2.Tighten the connector thumb screws to secure the cable to the system.
3.Plug the 25-pin D-connector into the receptacle labeled R829 on the ARC station (see the illustration on page 16). Tighten the thumb screws.
Power Connections
1.Plug the power cord from the electrical box into an appropriately grounded outlet.
2.If necessary, plug in the router motor power cord into the receptacle, as shown.
3.Plug the shop vacuum into the duplex receptacle on the electrical box labeled SHOP VAC/BLOWER.
4.Turn ON power at the electrical box.

Router Installation Procedure 23
5.Turn ON power at the GRAPHIX ADVANTAGE system.
The ARC station displays the message SLEW TO THE POINT OF ORIENTATION in the display panel after performing power-up diagnostics. The router system is now ready to operate. Refer to the section on setting up the ARC station later in this chapter.
6.Turn ON the router motor power switch when ready to cut.
Set Up the ARC Station
The ARC station can support several different routers. When you first install your system, follow the procedure below to configure the ARC station for the Dimension 200. (See page 39 for an illustration of the front panel of the ARC station.)
1.With the main power switch off on the electrical box, press and hold down the RESET and UP arrow keys on the ARC station.
2.While holding these keys down, turn the main power switch on.
3.Release the ARC station keys after the second beep. The SYSTEM: message appears.
4.Press SELECT.
5.Press the left or right arrow key until DIMENSION 200 is displayed.
6.Press SELECT.
7.LIMIT SWITCH displays. (Gerber recommends that the limit switch be set to ON.)
8.Press SELECT.

24 Dimension 200
Below is an illustration of the basic Dimension 200 system and its peripherals to assist you in installing and checking the connections. The illustration does not depict the actual connections or placement of the equipment.

25
Optional Equipment Installation
This section addresses the installation of optional equipment for the Dimension 200: the Mist Coolant System, the T-Vac Vacuum System, High Frequency Spindle and Speed Controller, and the Engraver and vacuum.
Mist Coolant System
The Mist Coolant System option is used to cool and lubricate the cutting tool as it cuts metals such as aluminum or brass. It is not intended for use with non-metallic materials such as wood or plastic.
The Mist Coolant System is equipped with an 8½ oz. coolant reservoir that can be filled under pressure with no need to disconnect air input or stop the system. The coolant drip rate is easily adjustable from one drop every six minutes to 30 drops per minute.
The Mist Coolant System requires 30-100 psi of compressed air. The compressor is purchased separately.
The Mist Coolant System is designed to be used with Gerber Cool coolant, a high performance spray lubricant available from Gerber Scientific Products, Inc. Gerber Cool is a non-toxic, biodegradable coolant custom-formulated for Gerber routers. It meets all FDA and USDA requirements for use in areas with incidental food contact and will not harm the environment.
Note: The Mist Coolant System cannot be used at the same time as the Chip Removal System or the Engraving Option.

26 Dimension 200
INSTALLING THE MIST COOLANT SYSTEM
WARNING: Turn off the GRAPHIX ADVANTAGE and unplug the Dimension 200 from the AC outlet before installing the Mist Coolant System to avoid possible electrical shock.
1.Remove the top two screws from the Dimension 200 right end plate on the right end of the beam when viewed from the front.
2.Insert these screws through the top hole of each hanging bracket, reinsert into the end plate, and finger tighten.
3.Align the standoffs on the hanging brackets with the semicircular openings in the sides of the mist coolant system.
4.Insert one M4 x 50 mm Phillips panhead screw with flat and lock washers through semi-circular openings in the mist coolant reservoir into each threaded standoff in the hanging brackets. Tighten the hanging bracket and the mist coolant mounting screws.
5.Cut out the hole drilling template provided in the option kit, fold the top edge along the fold line, and hold the template against the left side of the carriage with the folded portion on top of the carriage wall and the right edge along the front edge of the carriage wall.
6.Drill a 1/4" hole in the carriage wall where indicated by the template.
7.Insert the socket head capscrew through the M6 flat washer and through the carriage wall from the right and into the nozzle coupling mounting block on the outside of the carriage wall. Tighten using a 5mm Allen wrench.
8.Run the coolant hose from the reservoir along the cable harness in the cable trough at the back of the beam. Run the coolant hose along the entire length of the cable harness, then across the beam to the X carriage. This will prevent the hose from stretching as the carriage moves. Run the hose to the left

Optional Equipment Installation 27
side of the carriage when viewed from the front. See the illustration at right.

28 Dimension 200
The illustration below shows the Dimension 200 carriage with the optional High Frequency Spindle Motor installed (on the upper left) and Mist Coolant Option components (on the lower right).

Optional Equipment Installation 29
9.Attach the two tie mounts on top of the carriage (as shown in the illustration on the previous page) and secure the hose.
10.Use the tie wraps to secure the hose to the cable harness in the cable trough. Place a tie wrap about every 8" along the cable. Tie the wraps firmly but not so tightly that coolant flow is restricted.
11.Insert the barb fitting on the air line intake and connect the air line.
12.Insert the quick-disconnect fitting to the opposite end of the air line and connect to the compressor.
13.Turn on the Dimension 200. Make sure the coolant hose travels smoothly in the cable trough by slewing the carriage from one end of the beam to the other. The coolant hose must not stretch as the carriage moves.
T-Vac Vacuum System
The optional T-Vac Vacuum System uses vacuum to hold down a workpiece easily and securely on the router table. Depending on the material and the job, vacuum hold-down may be used with adhesive and sacrificial material.
T-Vac requires a vacuum blower, filter, and relief valve purchased separately. The blower, filter, and relief valve must be connected to the router table. Hose and necessary attachment fittings are supplied with the router table.
 To install the T-Vac Vacuum System
1.Place the filter directly below the intake opening at the rear of the router table.
2.Position the blower as close to the filter as possible.

30 Dimension 200
3.Insert the 2" diameter hose supplied in the kit on the intake opening on the table and secure with a hose clamp.
4.Insert the 2" adapters supplied in the kit on the reducing tee as shown above.
5.Insert the 1.5" adapter in the relief valve.
6.Install the relief valve on the reducing tee as shown above.
7.Cut the hose to fit in a straight line between the manifold intake opening and the air filter/relief valve.
8.Attach the hose to the air filter/relief valve assembly and secure with a hose clamp.
9.Attach one end of the remaining hose to the filter exhaust opening with a 2" barb adapter and secure with a hose clamp.
 Loading...