

Page 1

This product may be purchased from Connevans Limited
secure online store at www.DeafEquipment.co.uk
DeafEquipment.co.uk
Offering you choice
Helping you choose
Connevans.info
Solutions to improve the quality of life
Page 2

Page 3

Page 4

CONTENTS
CONTENTS 1
INTRODUCTION 6
Unpacking the Telephone 7
DESCRIPTION 8
General Description 8
DESCRIPTION (HANDSET) 10
Key Description 10
DESCRIPTION (BASE) 12
Key Description 12
DESCRIPTION (HANDSET & BASE) 14
LCD Screen Description 14
LCD Screen Navigation 15
Menu Map (Handset) 16
Menu Map (Base) 17
INSTALLATION (Handset) 18
Location 18
Setting Up 18
Battery Use 20
Handset Carrying Clip 20
INSTALLATION (Base) 21
Setting Up 21
Wall Mounting 21
HANDSET SETTINGS 22
On/Off Settings 22
Alarm Setting 22
Audio Setup 23
Ringer Setup 24
Keypad Tone Setup 26
1
Page 5

CONTENTS
Range alarm 27
Language Settings 28
Handset Name 29
Auto Answer 29
Set Contrast 30
Date & Time 31
Select Base 33
Handset Reset 33
Amplify Setting 34
Key Lock 35
BASE SETTINGS FROM HANDSET 36
Terminate Handset 36
Dialling Mode Setting 37
Flash Time Setting 37
Modify PIN 38
Base Default 39
Terminate Handset 40
BASE SETTINGS 42
Audio Setup 42
Range Setup 42
Keypad Tone Setup 44
Language Settings 45
Set Contrast 46
Date & Time 47
Dialling Mode Setting 49
Flash Time Setting 49
Modify PIN 50
Base Default 51
USING THE TELEPHONE (HANDSET) 53
Making a Call 53
Pre-Dialling 53
Receiving a Call 53
Hands Free 54
2
Page 6

CONTENTS
Mute Function 55
Receiving Volume 55
Last Number Redial 55
Recalling Recent Numbers 56
Adding Recent Numbers to the Phonebook 56
Deleting Recent Numbers 57
Flash Signal 59
Hearing Aid Use 59
Paging the Handset 59
Call Timer 59
USING THE TELEPHONE (BASE) 60
Making a Call 60
Pre-Dialling 60
Receiving a Call 60
Hands Free 61
Mute Function 62
Last Number Redial 62
Recalling Recent Numbers 63
Adding Recent Numbers to the Phonebook 63
Deleting Recent Numbers 63
Flash Signal 63
Hearing Aid Use 63
Call Timer 63
OPTIONAL ACCESSORIES (HEADSET) 64
Headset Use 64
CALLER ID 65
View Caller ID Book 65
Dial a Number from the Caller ID Book 66
Add a Number from the Caller ID Book to the Phonebook 66
Delete a Number from the Caller ID Book 68
Delete all Numbers from the Caller ID Book 68
3
Page 7

CONTENTS
PHONEBOOK 69
Create a Phonebook Entry 69
View Phonebook Entries 70
Dialling using a Phonebook Entry 71
Modify a Phonebook Entry 71
Delete a Phonebook Entry 71
Delete all Entries from the Phonebook 73
Phonebook Status 74
QUICK DIAL (HANDSET) 75
Create a Quick Dial Number 75
View a Quick Dial Number 75
Dial a Quick Dial Number 75
Modify Quick Dial Number 76
Delete a Quick Dial Number 77
QUICK DIAL (BASE) 78
Create a Quick Dial Number 78
View/Dial a Quick Dial Number 78
ADDITIONAL HANDSETS & BASES 79
Register a New Handset 79
Select a Base 80
Release a Handset 80
Internal Calls 80
Call Transfer between Handsets 81
Three Way Conference Call 82
CALL WAITING 84
Caller ID on Call Waiting 84
ANSWERING MACHINE 85
Setting the Answering Machine On/Off 85
Using the base to set the Answering Machine On/Off 86
The Answering Machine Alert 86
Announce 1 and Announce 2 87
4
Page 8

CONTENTS
Record Announce 1 87
Record Announce 2 88
Use the Base to Record Announce 1 & Announce 2 89
Checking the Outgoing Message 89
Use the Base to Playback Announce 1 and Announce 2 90
Restore the Outgoing Message 90
Use the Base to Restore Announce 1 and Announce 2 91
Answering Machine Mode 91
Answering Machine Settings 92
Voice Prompt Language 93
Listening to Messages using the Menu 94
Listening to Messages using the Base 95
Call Screening 95
Deleting All Messages 96
Use the Base to Delete all Messages 96
Operating the Answering Machine Remotely 96
Remote Code 96
Remote Control 97
Remote Control Commands 98
Recording a Memo 98
Out of Memory 99
Answering Machine Reset 99
TROUBLESHOOTIING (Handset) 101
TROUBLESHOOTIING (Base) 103
SAFETY INFORMATION 104
GUARANTEE 105
RECYCLING DIRECTIVES 107
5
Page 9

INTRODUCTION
Congratulations on purchasing your Geemarc AMPLIDECTTM
COMBI355. There is a multifunction telephone which offers
features such as hands free use, caller display*, a phone book
and an answering machine. It offers amplification, helpful for
those with hearing difficulties. It has a large button, easy to see
and use keypad, to help stop any misdialling. There are photo
dial buttons, also designed to make dialling easier because you
will be able to identify photo dial buttons with pictures of your
friends and family. Together with the above, there is also a
cordless telephone. This telephone offers all the advantages of
cordless technology (compliant with Digitally Enhanced Cordless
Telecommunications-DECT standard) together with an easy to
see big button keypad, ideal for those who suffer with poor sight.
This entire telephone package is compatible with hearing aids.
It is important that you read the instructions below in order to use
your Geemarc telephone to its full potential. Keep this user guide
in a safe place for future reference.
This guide explains how to use the following telephone:
AMPLIDECTTM COMBI355
*To use the caller display facility, you must subscribe to your network provider’s caller display
service.
6
Page 10

INTRODUCTION
Unpacking the Telephone
When unpacking the AMPLIDECTTM COMBI355, you should find
the following in the box:
y 1 AMPLIDECTTM COMBI355 unit
y 1 AMPLIDECTTM COMBI355 handset with curly cord
y 1 AMPLIDECTTM COMBI355 handset
y 1 AMPLIDECTTM COMBI355 base
y 3 x AAA Ni-MH rechargeable batteries
y 1 Telephone line cord
y 2 Mains power adaptors
y 1 Carrying clip
y 1 User Guide
For product support and help visit our website at
www.geemarc.com
Telephone 01707 384438
Or fax 01707 372529
7
Page 11

DESCRIPTION
General Description
Earpiece
Up/CID key
Int key
Left soft key
Speaker key
Dial/
Alphanumeric
keys
key
*
Keypad
locked
function
Microphone
Base Description:
Charge indicator
Visual ringer
Display
Right soft key
Redial key
End key
Down
/Phonebook
key
# key
Torch
Vibrator Function
Carrying
clip
Speaker
Battery
compartment
cover
Charging contacts
Charge pins
8
Page 12

Base:
Handset
Rear View:
DESCRIPTION
Left soft key
Photo
memory
Microphone
In use/New call
indicaotr
Base display
Right soft key
Page
button
Power Jack Phone Line Jack
9
Page 13

DESCRIPTION (HANDSET)
Key Description
Dial/Speaker key
Make/Answer a call
Activates the speakerphone if pressed during a
call
End/Power key
End a call.
Long press to power the telephone on and off
Navigation Button
Up/CID key
Scroll up through lists and menu options.
Increase the earpiece/speakerphone volume
during a call.
Enter the Caller ID book
Down/Phonebook key
Scroll down through lists and menu options.
Decrease the earpiece/speakerphone volume
during a call.
Enter the Phonebook
INT key
Set up an internal call to another handset.
Transfer an incoming call to another handset.
Set up a conference call with an external line
and an internal handset.
Redial key
Enter the redial book
Insert a pause when pre-dialing a number.
10
Page 14

DESCRIPTION (HANDSET)
Soft key (left and right )
Perform selections & actions indicated by the
context sensitive displayed above on the
handset screen.
Star key
M1 to M4 Quick Dial
Press and hold to turn on/off keypad lock
function.
Set up a conference call,
The four keys are one-touch quick dial keys.
Press and hold to activate the vibrate and LED
when receiving an incoming call
Press and hold to activate the light
11
Page 15

DESCRIPTION (BASE)
Key Description
Speaker key
M1 to M8
Make/Answer/End a call.
Activates the speakerphone if pressed during a
call
Redial Key
Enter the redial book
Insert a pause when pre-dialing a number
Int Key
Set up an internal call to another handset
Transfer an incoming call to another handset
Set up a conference with an external line and an
internal handset
Volume up/down key
Use them to adjust the volume of ringer,
speakerphone and handset
Photo Dial
The eight keys are one-touch quick dial keys.
Soft keys.
They perform the functions indicated by the text
immediately over it (on the bottom line of the
display) which changes depending on context
Up/CID key
Scroll up through lists and menu options
Increase earpiece/speakerphone volume during a
call
Enter CID book
Down/Phonebook key
Scroll down through lists and menu options
Decrease earpiece/speakerphone volume during
a call
Enter phonebook
12
Page 16

DESCRIPTION (BASE)
Answer on/off Key
Press to turn the answering machine on/off. The
telephone will announce ‘Answer On’ or ‘Answer
Off’
Play/Stop key
Press to start or stop the Message or Memo
playing.
Skip keys
Press to play the next message
Press to play the previous message
Delete key
When playing a message press this key to delete
the current message.
In standby, press and hold to delete all
messages.
Annc1/Annc2 Keys
Press to play Announce1 or Annouce2.
Press and hold to record a Announce 1 or
Announce2
Page/Mute Key
Locate a registered handset
Register a new handset
Enter mute during a call
13
Page 17

DESCRIPTION (HANDSET & BASE)
LCD Screen Description
Signal Strength icon
This is always displayed when your telephone is
switched on. It shows the current signal strength.
More bars indicate more signal strength. If the
handset is too far from the base,
this icon will blink.
Line icon
This indicates that the line is engaged i.e. off hook
Hands-free
This indicates that hands-free is activated
New Call icon
This indicates that you have missed one or more calls
Key Lock icon
This indicates the keys are locked
Battery Status icon
This is always displayed when your telephone is
switched on. It shows the level of battery charge.
More bars indicate more battery charge
Incoming Message icon (Handset)
This indicates there are new messages
Incoming Message icon (Base)
This indicates there are new messages
Alarm icon (Handset)
This indicates an alarm has been set to ring at a
specified time
14
Page 18

DESCRIPTION (HANDSET & BASE)
LCD Screen Navigation
The (left side) key is used to activate the menu. The
(handset) or ‘BACK’ (base) is used to deactivate the menu and
return to standby mode from any menu.
The and keys are used to scroll through the menu.
: move backward through the menu
: move forward through the menu
The (left side) key is also used to select an action or choice
on a screen.
The (right side) key is used to cancel an action/entry.
If you press (right side) from any menu (except whilst in
number input mode), the telephone returns to the previous screen.
If you press and hold (right side) from any menu (except
whilst in number input mode), the telephone returns to standby
mode (handset only).
The telephone will automatically return to standby mode from any
menu if no button is pressed for 30 seconds.
15
Page 19

DESCRIPTION (HANDSET & BASE)
Menu Map (Handset)
Caller ID Book
Phone Book
New
Edit
BS Setting
HS Setting
Alarm
HS Name
Auto Answer
LCD Contrast
Date & Time
Select Base
HS Reset
Amplified
Registration
Delete
Delete All
PB Status
Terminate HS
Dial Mode
Flash Time
Modify PIN
BS Reset
Audio Setup
Ring Setup
Tone Setup
Language
16
Page 20

DESCRIPTION (HANDSET & BASE)
Menu Map (Base)
CID Book
Phonebook
New
Edit
Delete
Delete All
PB Status
BS Setting
Terminate HS
Audio Setup
Ring Setup
Key Tone
Language
LCD Contrast
Date & Time
Dial Mode
Flash Time
Modify PIN
BS Reset
TAM
Announce
Message
TAM Setting
17
Page 21

INSTALLATION (HANDSET)
Location
Ensure you situate the telephone close enough to the power
socket so that the cable will reach safely without stretching. Also,
the mains power needs to be easily accessible in case you need
to disconnect the power.
Make sure the telephone is at least 1 metre away from other
electrical products e.g.TV, radio and monitors so as to avoid
interference. Also, avoid direct heat and sunlight.
We advise you to place the telephone on a table cloth or similar,
as the rubber feet on the base can mark some surfaces
Handset Range
The telephone has a range of 30-50 metres indoors and up to 300
metres outdoors. The range will be reduced when there is no
clear line of sight between the base and handset. Place the base
as high as practically possible to ensure the best signal between
the base and the handset. The icon at the top left of the
LCD display will blink and the signal strength bars will disappear
to warn you if you have moved out of range of the base. You will
need to move closer to the base station as the telephone line
might be disconnected and the handset will return to standby.
Setting Up
Plug the power cable into the power socket on the base. Plug
the adaptor end of the power cable into the mains supply and
switch the supply on. (*)
To AC wall outlet
18
Page 22

INSTALLATION (HANDSET)
Install the rechargeable batteries in the handset. The handset
requires three Nickel Metal Hydride (NiMH) AAA batteries.
These are supplied with your telephone. Slide the battery cover
in the direction of the arrow and pull it out. Check the battery
polarity diagrams on the handset when inserting the batteries. Fit
the battery cover by sliding the cover on to the back of the
handset until it snaps shut.
Place the handset on the base, a short beep will be heard. The
battery symbol will be displayed on the handset. Once the
handset is fully charged, the display will show a full battery symbol.
123
6
4
5
7
9
8
0
The telephone has an automatic charging control to avoid
excessive charging.
Before the handset can be used, the handset batteries must
be charged for a minimum of 15 hours on the AMPLIDECTTM
COMBI355 base.
(*) Classified “hazardous voltage” according to EN60950 standard
(**) Classified TNV-3 according to EN60950 standard.
19
Page 23

INSTALLATION (HANDSET)
Battery Use
The icon is continuously displayed at the top right corner of
the LCD display. The icon indicates the level of battery power.
The more bars displayed, the more power available.
When the battery is too weak for the telephone to operate, the
handset will automatically switch off. Place the handset on the
base to charge the handset battery. Under ideal conditions, the
handset battery should give about 6 hours talktime or 150 hours
standby on a single charge.
Handset Carrying Clip
The handset carrying clip allows you to carry the handset on your
belt or short pocket. If you want to remove the clip, insert a
screw driver along the edge of one of the arms and release the
clip. Lift the clip off.
20
Page 24

INSTALLATION (BASE)
Setting Up
Connect one end of the curly cord to the handset. The other end
of the curly cord plugs into the jack on the left hand side of the
AMPLIDECTTM COMBI355. Place the handset on the cradle.
Connect the line cord to the socket located at rear of telephone
then connect the plug into the wall socket **.
Connect the power adaptor to the jack located at the rear of the
telephone then plug the other end into a 13amp wall socket (*).
Please choose a socket near your telephone to enable you to
unplug the mains power quickly in case of a problem.
(*) Classified “hazardous voltage” according to EN60950 standard
(**) Classified TNV-3 according to EN60950 standard.
Wall Mounting
Slide the handset hanger tab out and reverse its position (rotate it
180 degrees). Slide it back into place so that the hook points up
(see diagram 1). This will keep the handset from falling out of the
cradle when it is mounted on the wall.
Knock two self-tapping screws (not supplied) into a wall at a
distance of 80 mm from each other and placed in a vertical line.
Place the phone onto the screw-heads and slide down to secure
(see diagram 2).
Diagram 1
Diagram 2
21
Page 25

HANDSET SETTINGS
On/Off Settings
When the handset is placed on the charger it automatically
switches on. Alternatively, press for about 5 seconds. The
telephone will enter subscription mode in which the handset is
searching for a registered base.
On successfully finding a base, the LCD window will display the
time (either set by yourself – see Handset Settings – Set Date &
Time or it will be set automatically when you receive a call
provided that you subscribe to a Caller ID service) and the
handset number. The handset is now in standby mode and is
ready for use.
To turn the handset off, press for about 5 seconds again.
The LCD display will then switch off.
Alarm Setting
You are able to set an alarm and adjust the settings using the
handset..
Press ‘MENU’ soft key to activate the menu
Use and to scroll through the menu to select
‘HS SETTINGS’
Press (left side) to select
Press (left side) again to select
‘ALARM’
Use and to scroll through the menu to select
‘ON’or ‘OFF’ Press (left side) to select
22
Page 26

HANDSET SETTINGS
If you select ‘ON’ you will be prompted to enter the time
in HH:MM format (24 hour format). Enter the alarm time
using the numeric keypad.
Use and to scroll through the menu to select
Notes:
Press any key to silence the alarm.
If you select ‘SNOOZE ON’, the alarm will ring at regular intervals
of 10 minutes until you set snooze or alarm to off.
Press (left side) to go to Next screen
‘SNOOZE ON’or ‘SNOOZE OFF’
Press (left side) to save. Either press to
return to standby or wait 30 seconds
Audio Setup
The volume of the speaker or earpiece can be adjusted.
Use and to scroll through the menu to select
Use and to scroll through the menu to select
Press ‘MENU’ soft key to activate the menu
‘HS SETTINGS’
Press (left side) to select
‘AUDIO SETUP’
Press (left side) to select
23
Page 27

HANDSET SETTINGS
Use and to scroll through the menu to select
‘SPEAKER VOL’or ‘EARPIECE VOL’.
Use and to scroll through the menu to select
required volume. There are 5 volume settings
Ringer Setup
Ringer Tones
There is a choice of 10 handset ringer tones to notify you of
incoming calls. You can select different tones to notify you if the
call is internal (from other handsets registered to the same base)
or external (from the telephone network).
Use and to scroll through the menu to select
Press ‘MENU’ soft key to activate the menu
Press (left side) to save
‘HS SETTINGS’
Press (left side) to select
Use and to scroll through the menu to select
‘RING SETUP’
Press (left side) to select
Use and to scroll through the menu to select
‘INT RING/EXT RING’
24
Page 28

HANDSET SETTINGS
Use and to scroll through the menu to select
desired melody. As you scroll through, the telephone
Ringer Volume
There is a choice of five handset ringer volumes. The ringer can
also be turned off.
Use and to scroll through the menu to select
Press ‘MENU’ soft key to activate the menu
Press (left side) to select
Press (left side) to select ‘MELODY’
Press (left side) to select
demonstrates the selected tone/melody
Press (left side) to save
‘HS SETTINGS’
Press (left side) to select
Use and to scroll through the menu to select
‘RING SETUP’
Press (left side) to select
Use and to scroll through the menu to select
‘INT RING/EXT RING’
Press (left side) to select
25
Page 29

HANDSET SETTINGS
Use and to scroll through the menu to select
‘VOLUME’
Press (left side) to select
Use and to scroll through the menu to select
desired ringer volume. As you scroll through, the
telephone demonstrates the selected volume
Keypad Tone Setup
A key tone is heard every time you press a key on the handset.
This can be switched to silent.
Note: Warning tones will still be emitted when an incorrect key is
pressed.
Use and to scroll through the menu to select
Press ‘MENU’ soft key to activate the menu
Press (left side) to save.
‘HS SETTINGS’
Press (left side) to select
Use and to scroll through the menu to select
‘TONE SETUP’
Press (left side) to select
Press (left side) again to select
‘KEY TONE’
26
Page 30

HANDSET SETTINGS
Use and to scroll through the menu to select
‘ON’or ‘OFF’
Press (left side) to confirsavem. Either press
to return to standby or wait 30 seconds
Range Alarm
A beep is heard every time the handset is out of range of the
Base. This beep can be switched to silent.
Use and to scroll through the menu to select
Use and to scroll through the menu to select
Press ‘MENU’ soft key to activate the menu
‘HS SETTINGS’
Press (left side) to select
‘TONE SETUP’
Press (left side) to select
Use and to scroll through the menu to select
‘RANGE ALARM’
Press (left side) to select
Use and to scroll through the menu to select
‘ON’or ‘OFF’
27
Page 31

HANDSET SETTINGS
Press (left side) to save. Either press to
return to standby or wait 30 seconds
Language Settings
The handset supports eight languages. You can select the
language used to display menu options.
Use and to scroll through the menu to select
Use and to scroll through the menu to select
Press ‘MENU’ soft key to activate the menu
‘HS SETTINGS’
Press (left side) to select
‘LANGUAGE’
Press (left side) to select
Use and to scroll through the menu to select
the desired language. Each language will be displayed
in its own native translation
Press (left side) to save. Either press to
return to standby or wait 30 seconds
28
Page 32

HANDSET SETTINGS
HS Name
The handset has a name - “HS n” (where n is either 1,2,3,4 or 5).
This number indicates that the handset is the nth handset
registered to the base i..e. HS 1 is the 1st handset registered to
the base. The Handset name is displayed in standby mode. If
desired, it can be changed.
Use and to scroll through the menu to select
Use and to scroll through the menu to select
Enter the new handset name (up to 12 characters) using
the numeric keypad (see Phonebook – Add New Entry).
Press (right side) to erase the previous character if
Press ‘MENU’ soft key to activate the menu
‘HS SETTINGS’
Press (left side) to select
‘HS Name’
Press (left side) to select
incorrect.
Press (left side) to save. Either press to
return to standby or wait 30 seconds
Auto Answer
Auto answer allows you to answer a call by simply picking up the
handset from the base without pressing any key.
Press ‘MENU’ soft key to activate the menu
29
Page 33
HANDSET SETTINGS
Use and to scroll through the menu to select
‘HS SETTINGS’
Use and to scroll through the menu to select
Use and to scroll through the menu to select
Press (left side) to save. Either press to
Press (left side) to select
‘AUTO ANSWER’
Press (left side) to select
‘ON’or ‘OFF’.
return to standby or wait 30 seconds
Set Contrast
The contrast of the background against the text can be increased
or decreased.
Press ‘MENU’ soft key to activate the menu
Use and to scroll through the menu to select
‘HS SETTINGS’
Press (left side) to select
Use and to scroll through the menu to select
‘LCD CONTRAST’
30
Page 34

HANDSET SETTINGS
Use and to scroll through the 16 contrast
Press (left side) to save. Either press to
Press (left side) to confirm
levels available
return to standby or wait 30 seconds
Date and Time
Date & Time Format
The date format displayed on the handset can be changed. The
format can be either dd//mm or mm/dd. The format of the time
can be either 12 hour or 24 hour.
Use and to scroll through the menu to select
Use and to scroll through the menu to select
Press ‘MENU’ soft key to activate the menu
‘HS SETTINGS’
Press (left side) to select
‘DATE & TIME’
Press (left side) to select
Press (left side) again to select
‘DATE FORMAT’or‘TIME FORMAT’
Press (left side) to select
31
Page 35

HANDSET SETTINGS
Use and to scroll through the menu to select
‘DD-MM’ or ‘MM-DD’’12-Hour’ or ’24-Hour’
Press (left side) to save. Either press to
return to standby or wait 30 seconds
Date & Time Setting
Use and to scroll through the menu to select
Use and to scroll through the menu to select
Use and to scroll through the menu to select
Enter the current date or time using the numeric keypad
Notes: If you subscribe to a Caller ID service, the time will be
set automatically when you receive a call.
Press ‘MENU’ soft key to activate the menu
‘HS SETTINGS’
Press (left side) to select
‘DATE & TIME’
Press (left side) to select
‘SET DATE’ or ‘SET TIME’
Press (left side) to select
Press (left side) to save. Either press to
return to standby or wait 30 seconds
32
Page 36

HANDSET SETTINGS
Select Base
You can select a base from those already registered to the
handset. You can only select bases that are registered to the
handset.
Use and to scroll through the menu to select
Use and to scroll through the menu to select
Use and to scroll through the list of registered
Press ‘MENU’ soft key to activate the menu
‘HS SETTINGS’
Press (left side) to select
‘SELECT BASE’
Press (left side) to select
bases to select the base required
Press (left side) to confirm
‘BASE n’will be displayed (n is the number of the
registered base). A confirmation beep willl be heard
Handset Reset
You can reset the handset settings to the factory default.
Press ‘MENU’ soft key to activate the menu
33
Page 37

HANDSET SETTINGS
Use and to scroll through the menu to select
‘HS SETTINGS’
Use and to scroll through the menu to select
You will be prompted to enter the PIN code (default is
If the PIN code is accepted, all handset settings will be
reset to the factory default. You will automatically be
Press (left side) to select
‘HS RESET’
Press (left side) to select
0000).
Press (left side) to reset
returned to standby mode
Amplify Setting
The normal range of volume control is 0-15dB. If the amplify
function is on, the range is increased to 15-30dB.
Use and to scroll through the menu to select
Use and to scroll through the menu to select
Press ‘MENU’ soft key to activate the menu
‘HS SETTINGS’
Press (left side) to select
34
Page 38

HANDSET SETTINGS
‘AMPLIFIED’
Use and to scroll through the menu to select
‘ON’or ‘OFF’ Either press to return to standby or
Key Lock
When this feature is turned on, all buttons except for will be
locked and will not function. You can use for answering
incoming or intercom calls. When you complete the call and
hang up, the telephone returns to lock mode. This lock feature is
useful to avoid pressing buttons by mistake.
Switch lock On: Press until the icon and ‘HS
LOCKED’ appear in the LCD display
Press (left side) to select
wait 30 seconds
Switch lock Off: Press until the icon disappears in the
LCD display
35
Page 39

BASE SETTINGS FROM HANDSET
Terminate Handset
You can delete a handset registration from a base.
Use and to scroll through the menu to select
Press ‘MENU’ soft key to activate the menu
‘BS SETTINGS’
Press (left side) to select
Press (left side) again to select
‘TERMINATE HS’
You will be prompted to enter the PIN code (default is
0000).
’PIN ?’
Enter the PIN using the numeric keypad
Press (left side) to confirm (OK)
Use and to scroll through the list of registered
handsets to select the handset required
Press (left side) to select (if the current handset or
a non existant handset is selected, a warning beep will be
heard)
The selected handset will be deregistered
36
Page 40

BASE SETTINGS FROM HANDSET
Dialling Mode Setting
In the UK, all telephone exchanges now use Tone dialing. If your telephone
does not dial out, it is probably being used from an older private switch- board
(PBX). In this case, the Tone/Pulse setting must be changed to Pulse.
Use and to scroll through the menu to select
Use and to scroll through the menu to select
Use and to scroll through the menu to select
Press ‘MENU’ soft key to acivate the menu
‘BS SETTINGS’
Press (left side) to select
‘DIAL MODE’
Press (left side) to select
either
‘TONE’ or ‘PULSE’
Press (left side) to save. Either press to
return to standby or wait 30 seconds
Flash Time Setting
You can adjust the flash time setting. There are two options
available. Your telephone works with a flash time for United
Kingdom (R=100ms).
Press ‘MENU’ soft key to acivate the menu
37
Page 41

BASE SETTINGS FROM HANDSET
Use and to scroll through the menu to select
‘BS SETTINGS’
Use and to scroll through the menu to select
Use and to scroll through the menu to select
‘FLASH-1’for 100ms or ‘FLASH-2’for 300ms
Press (left side) to save. Either press to
Press (left side) to select
‘FLASH TIME’
Press (left side) to select
either
return to standby or wait 30 seconds
Modify PIN
The PIN is pre-set to ‘0000’. This can be changed – this is
recommended for confidentiality.
Use and to scroll through the menu to select
Use and to scroll through the menu to select
Press ‘MENU’ soft key to acivate the menu
‘BS SETTINGS’
Press (left side) to select
‘MODIFY PIN’
38
Page 42

BASE SETTINGS FROM HANDSET
You will be prompted to enter the old PIN code (default is
0000). ‘PIN ?’ . Enter the old Pin using the numeric
keypad. Press ‘NEXT’ soft key to go to the next screen.
If the old PIN code is accepted, you will be prompted to
Enter new PIN code using the numeric keypad and press
You will be prompted to confirm the new PIN code,
Press (left side) to save. Either press to
Press (left side) to select
enter a new PIN code. ‘NEW PIN’
(left side) to go to the next screen
‘REPEAT’. Enter new PIN code again..
return to standby or wait 30 seconds
Base Default
You can reset the base settings to the factory default.
Use and to scroll through the menu to select
Use and to scroll through the menu to select
Press ‘MENU’ soft key to acivate the menu
‘BS SETTINGS’
Press (left side) to select
‘BS RESET’
39
Page 43

BASE SETTINGS FROM HANDSET
Press (left side) to select
You will be prompted to enter the PIN code (default is
0000).
Press (left side) to reset
If the PIN code is accepted, all base settings will be reset
to the factory default. You will be automatically returned
to standby mode
Terminate Handset
You can delete a handset registration from a base.
Use and to scroll through the menu to select
Press ‘MENU’ soft key to activate the menu
‘BS SETTINGS’
Press (left side) to select
Press (left side) again to select
‘TERMINATE HS’
You will be prompted to enter the PIN code (default is
0000).
’PIN ?’
Enter the PIN using the numeric keypad
Press (left side) to confirm (OK)
40
Page 44

BASE SETTINGS FROM HANDSET
Use and to scroll through the list of registered
handsets to select the handset required
Press (left side) to select (if the current handset or
a non existant handset is selected, a warning beep will be
heard)
The selected handset will be deregistered
41
Page 45
BASE SETTINGS
Audio Setup
The volume of the speaker or earpiece can be adjusted.
Use and to scroll through the menu to select
Use and to scroll through the menu to select
Use and to scroll through the menu to select
Press ‘MENU’ soft key to activate the menu
‘BS SETTINGS’
Press (left side) to select
‘AUDIO SETUP’
Press (left side) to select
‘SPEAKER VOL’or ‘EARPIECE VOL’.
Use and to scroll through the menu to select
required volume. There are 5 volume settings
Press (left side) to save
Ringer Setup
Ringer Tones
There is a choice of 5 base ringer tones to notify you of incoming
calls. You can select different tones to notify you if the call is
internal (from other handsets registered to the same base) or
external (from the telephone network).
42
Page 46

BASE SETTINGS
Press ‘MENU’ soft key to activate the menu
Use and to scroll through the menu to select
‘BS SETTINGS’
Press (left side) to select
Use and to scroll through the menu to select
‘RING SETUP’
Press (left side) to select
Use and to scroll through the menu to select
‘INT RING/EXT RING’
Press (left side) to select
Press (left side) to select ‘MELODY’
Use and to scroll through the menu to select
desired melody. As you scroll through, the telephone
demonstrates the selected tone/melody
Press (left side) to save
Ringer Volume
There is a choice of five base ringer volumes. The ringer can
also be turned off.
Press ‘MENU’ soft key to activate the menu
Use and to scroll through the menu to select
43
Page 47

BASE SETTINGS
‘BS SETTINGS’
Use and to scroll through the menu to select
Use and to scroll through the menu to select
Use and to scroll through the menu to select
Press (left side) to select
‘RING SETUP’
Press (left side) to select
‘INT RING/EXT RING’
Press (left side) to select
‘VOLUME’
Use and to scroll through the menu to select
desired ringer volume. As you scroll through, the
telephone demonstrates the selected volume
Press (left side) to save.
Keypad Tone Setup
A key tone is heard every time you press a key on the base. This
can be switched to silent.
Note: Warning tones will still be emitted when an incorrect key is
pressed.
Press ‘MENU’ soft key to activate the menu
44
Page 48

BASE SETTINGS
Use and to scroll through the menu to select
‘BS SETTINGS’
Use and to scroll through the menu to select
Use and to scroll through the menu to select
Language Settings
Press (left side) to select
‘KEY TONE’
Press (left side) to select
‘ON’or ‘OFF’
Press (left side) to save.
The base supports three languages (English, Deutsch, Français).
You can select the language used to display menu options.
Press ‘MENU’ soft key to activate the menu
Use and to scroll through the menu to select
‘BS SETTINGS’
Press (left side) to select
Use and to scroll through the menu to select
‘LANGUAGE’
Press (left side) to select
45
Page 49

BASE SETTINGS
Use and to scroll through the menu to select
the desired language. Each language will be displayed
in its own native translation
Set Contrast
The contrast of the background compared against the text can be
increased or decreased.
Use and to scroll through the menu to select
Use and to scroll through the menu to select
Press ‘MENU’ soft key to activate the menu
Press (left side) to save.
‘BS SETTINGS’
Press (left side) to select
‘LCD CONTRAST’
Press (left side) to select
Use and to scroll through the 16 contrast
levels available
Press (left side) to save.
46
Page 50

BASE SETTINGS
Date and Time
Date & Time Format
The date format displayed on the base can be changed. The
format can be either dd//mm or mm/dd. The format of the time
can be either 12 hour or 24 hour.
Use and to scroll through the menu to select
Use and to scroll through the menu to select
Press ‘MENU’ soft key to activate the menu
‘BS SETTINGS’
Press (left side) to select
‘DATE & TIME’
Press (left side) to select
Press (left side) again to select
‘DATE FORMAT’or‘TIME FORMAT’
Press (left side) to select
Use and to scroll through the menu to select
‘DD-MM’ or ‘MM-DD’’12-Hour’ or ’24-Hour’
Press (left side) to save.
47
Page 51

BASE SETTINGS
Date & Time Setting
Press ‘MENU’ soft key to activate the menu
Use and to scroll through the menu to select
‘BS SETTINGS’
Press (left side) to select
Use and to scroll through the menu to select
‘DATE & TIME’
Press (left side) to select
Use and to scroll through the menu to select
‘SET DATE’ or ‘SET TIME’
Press (left side) to select
Enter the current date or time using the numeric keypad
Notes: If you subscribe to a Caller ID service, the time will be
set automatically when you receive a call.
Press (left side) to save.
48
Page 52

BASE SETTINGS
Dialling Mode Setting
In the UK, all telephone exchanges now use Tone dialing. If your
telephone does not dial out, it is probably being used from an
older private switch- board (PBX). In this case, the Tone/Pulse
setting must be changed to Pulse.
Use and to scroll through the menu to select
Use and to scroll through the menu to select
Use and to scroll through the menu to select
Press ‘MENU’ soft key to activate the menu
‘BS SETTINGS’
Press (left side) to select
‘DIAL MODE’
Press (left side) to select
either
‘TONE’ or ‘PULSE’
Press (left side) to save
Flash Time Setting
You can adjust the flash time setting. There are two options
available. Your telephone works with a flash time for United
Kingdom (R=100ms).
Press ‘MENU’ soft key to acivate the menu
49
Page 53

BASE SETTINGS
Use and to scroll through the menu to select
‘BS SETTINGS’
Use and to scroll through the menu to select
Use and to scroll through the menu to select
‘FLASH-1’for 100ms or ‘FLASH-2’ for 300ms
Press (left side) to select
‘FLASH TIME’
Press (left side) to select
either
Press (left side) to save
Modify PIN
The PIN is pre-set to ‘0000’. This can be changed – this is
recommended for confidentiality.
Use and to scroll through the menu to select
Use and to scroll through the menu to select
Press ‘MENU’ soft key to acivate the menu
‘BS SETTINGS’
Press (left side) to select
‘MODIFY PIN’
50
Page 54
BASE SETTINGS
Press (left side) to select
You will be prompted to enter the old PIN code (default is
0000). ‘PIN ?’ . Enter the old Pin using the numeric
keypad. Press ‘NEXT’ soft key to go to the next screen.
If the old PIN code is accepted, you will be prompted to
enter a new PIN code. ‘NEW PIN’
Enter new PIN code using the numeric keypad and press
(left side) to go to the next screen
You will be prompted to confirm the new PIN code,
‘REPEAT’. Enter new PIN code again..
Press (left side) to save.
Base Default
You can reset the base settings to the factory default.
Use and to scroll through the menu to select
Press ‘MENU’ soft key to acivate the menu
‘BS SETTINGS’
Press (left side) to select
Use and to scroll through the menu to select
‘BS RESET’
Press (left side) to select
51
Page 55

BASE SETTINGS
You will be prompted to enter the PIN code (default is
0000).
If the PIN code is accepted, all base settings will be reset
to the factory default. You will be automatically returned
Press (left side) to reset
to standby mode
52
Page 56

USING THE TELEPHONE (HS)
Making a Call
Press . will be displayed on the LCD
When you hear dialing tone, dial the number on the
To end the call simply press or place the handset on
Pre-Dialling
Pick up handset. Dial the number on the keypad (up to 32
Note: If you make an incorrect entry while pre-dialling the
telephone number :
Press , the number is automatically dialled
To end the call simply press again or place the
• Press (right side) to ‘ERASE’ the last digit and then
enter the correct number
• Press (right side) for more than one second to
‘ERASE’ all digits entered and return to standby mode.
Pick up handset.
keypad.
the base
digits)
handset on the base
Receiving a Call
When an incoming call is received the telephone rings. If the
caller can be identified (due to subscription to a Caller ID service),
the caller’s telephone number will be displayed. If this caller’s
number is stored on the Phonebook, the associated name will
displayed
53
Page 57

USING THE TELEPHONE (HS)
If auto answer is activated, simply lift the handset out of
To end the call simply press or replace the handset
Call duration is always displayed once you hang up.
Note: You can alter the ringer volume whilst the telephone is
ringing. Simply use and to select the desired volume.
Hands Free
You can turn on the speakerphone built into the handset either
before or during a call. In this mode there is no need to hold the
handset. You will hear the third party through the speaker and
the microphone will pick up your voice.
Press .to answer
Or
the base
on the base
Before making a call, press twice to turn hands free on.
The icon will be displayed on the LCD.
Press during a call to turn hands free on. The icon
will be displayed on the LCD.
Press again during a call to turn hands free off. The
icon will disappear from the LCD.
Note: To adjust the speakerphone volume use Audio Setup in
Handset Settings.
54
Page 58

USING THE TELEPHONE (HS)
Mute Function
If you wish, you can speak privately to someone else in the room
with you without your caller overhearing.
You will still be able to hear the caller but they cannot hear you
during the mute operation.
Receiving Volume
During a conversation, the and keys adjust the ear
piece volume level. The volume can be adjusted from level 1 to
5. The selected volume is displayed in the LCD display. The
receiving volume range is 0dB to 15dB. If you press the Amplify
button on the right hand side of the handset if you have set the
Amplify settings in Handset Settings to On, the range of volume is
increased to 15-30dB.
There is also a tone adjustment button on the right hand side of
the handset.
During a call, press (right side) for ‘MUTE’
The LCD will show‘CALL MUTED’ which indicates that
your voice is muted to the call and the caller cannot hear
you speaking
Press (right side) again to resume the coversation.
‘CALL MUTED’ will disappear from the LCD display
Last Number Redial
To redial the last number dialled:
Press in standby mode
Press to dial the number
Pick up handset.
55
Page 59

USING THE TELEPHONE (HS)
Recalling Recent Numbers
You can call back any of the last 10 numbers dialled as follows:
Press in standby mode
dialled numbers until you find the number you wish to call
Use and to scroll through the
Notes:
• When no numbers are found, EMPTY is displayed
• If the redial memory is full i.e. 10 numbers stored, each
time you dial a new number, the oldest number stored is
automatically erased and the redial memory is updated.
Press to dial the number
Pick up handset.
Adding Recent Numbers to the Phone Book
Press in standby mode
dialled numbers until you find the number you wish to add
Use and to scroll through the
Press (left side) to select ‘More’
Press (left side) again to select
Pick up handset.
to phone book
‘ADD TO PB’
56
Page 60
USING THE TELEPHONE (HS)
The display will show ‘NAME?’Enter the name you wish
using the numeric keypad (see character map below)
The display will show the selected number from the
Use and to scroll through the melody menu to
select desired ringer tone. As you scroll through, the
telephone demonstrates the selected melody. If you
want to set a VIP number, you should select a special
ring tone. The ring tone should be different from the
external ring you have set. You can set up to 9 VIP ring
Press (left side) to select ‘NEXT’
recently dialled list
Press (left side) to select ‘NEXT’
tones associated with 9 numbers
Press (left side) to save.
Deleting Recent Numbers
To delete a specific number in the redial memory
Press in standby mode
dialled numbers until you find the number you wish to
Use and to scroll through the
Press (left side) to select ‘More’
Pick up handset.
delete
57
Page 61

USING THE TELEPHONE (HS)
Use and to scroll through the menu to select
‘DELETE’
You will be prompted to ‘CONFIRM ?’. press (left
To delete all numbers in the redial memory
Use and to scroll through the menu to select
Press (left side) to select
side) again to ‘DEL’
Pick up handset.
Press in standby mode
Press (left side) to select
‘DELETE ALL’
Press (left side) to select
You will be prompted to ‘CONFIRM ?’. press (left
side) again to ‘DEL ALL’
58
Page 62

USING THE TELEPHONE (HS)
Flash Signal
The (left side) key can also be used during a call with
special services such as Call Waiting (if provided by your service
provider) or transferring external calls to another extension within
a private switchboard. The LCD will display ‘R’.
Hearing Aid Use
This telephone is hearing aid compatible. Select the T mode on
your hearing aid to enable this feature.
Paging the Handset
If you wish to locate the handset simply follow the instructions
below:
Press , located on the bottom of the base for less
than 5 seconds
All registered handsets will be paged and will ring for
about 60 seconds
Press any button on the located handset or press
on the base again to stop paging mode
Call Timer
Your handset automatically times the duration of every external
call. The time is shown during the call and for a few seconds
after the call has ended.
59
Page 63

USING THE TELEPHONE (BASE)
Making a Call
When you hear the dialling tone, dial the number on the
To end the call simply replace the handset in the cradle
Pre-Dialling
You can enter the desired phone number in standby mode, which
allows you to make corrections before dialling. Follow these steps:
Enter a telephone number (up to 32 digits). Check it. If you make
a mistake while entering a number, press the ‘EDIT’ soft key to
edit it.
When the number appears correctly, lift the handset or press the
Pick up the handset.
keypad.
button.
Receiving a Call
When an incoming call is received, the telephone rings and the
incoming call LED lights up.
To end the call simply replace the handset in the cradle
Lift the handset and speak
60
Page 64

USING THE TELEPHONE (BASE)
Hands Free
Receiving a call – Hands Free
Press to speak hands free
To end the call press
Making a Call – Hands Free
Press the button to get a dialling tone then dial the telephone
number on the keypad. The icon appears on the LCD. To
end the call, simply press again. The icon will
disappear.
To activate the Hands Free function during the call, press the
button and replace the handset on the cradle at the same time.
To deactivate the Hands Free function during a call, lift the
handset.
Note: When in hands free mode, only one person may talk at a
time. The switch-over between speaker and microphone is
automatic. This is dependent on the sound level of the incoming
call and the microphone respectively. It is therefore essential
that there are no loud noises, e.g. music, in the immediate vicinity
of the telephone, as this will disrupt the hands free function.
Speakerphone Volume Setting
In hands free mode you can adjust the speaker volume by using
the volume controls + or - located on the base unit of the
phone.
61
Page 65

USING THE TELEPHONE (BASE)
Mute Function
If you wish, you can speak privately to someone else in the room
with you without your caller overhearing.
You will still be able to hear the caller but they cannot hear you
during the mute operation.
The LCD will show‘CALL MUTED’ which indicates that
your voice is muted to the call and the caller cannot hear
Press again to resume the coversation. ‘CALL
MUTED’ will disappear from the LCD display
Receiving Volume
During a call press
you speaking
During a conversation, the + or - keys adjust the ear
piece volume level. The volume can be adjusted from level 1 to
5. The selected volume is displayed in the LCD display. The
receiving volume range is 0dB to 15dB.
Last Number Redial
Lift the handset or press for hands free use
Press to redial the last number dialled.
Press ‘OK’ to dial.
62
Page 66

USING THE TELEPHONE (BASE)
Recalling Recent Numbers
dialled numbers until you find the number you wish to call
Lift the handset or press for hands free use
Adding Recent Numbers to the Phone Book
As for Handset page 61
Deleting Recent Numbers
To delete a specific number in the redial memory
As for Handset page 62
To delete all numbers in the redial memory
As for Handset page 63
Press whilst in standby mode
Use and to scroll through the
Flash Signal
The (left side) key can also be used during a call with
special services such as Call Waiting (if provided by your service
provider) or transferring external calls to another extension within
a private switchboard. The LCD will display ‘R’.
Hearing Aid Use
This telephone is hearing aid compatible. Select the T mode on
your hearing aid to enable this feature.
Call Timer
The duration of every external call is timed. The time is shown
during the call and for a few seconds after the call has ended.
63
Page 67

OPTIONAL ACCESSORIES (HS)
Headset Use
Your handset is equipped with a Headset jack.
The Headset jack allows you to listen and speak through your
hands free headset. Connect the headset at the side of the
handset in the 2.5mm Press to get a dial tone
64
Page 68
CALLER ID
The features described in this section are only available if you
subscribe to a Caller ID service from your network provider.
Caller ID means you can see who is calling on your handset
display (provided the number is not withheld, unavailable or is an
international call).
The display shows ‘PRIVATE’ for a witheld number.
The display shows ‘OUT OF AREA’ when someone calls from
an area where the telephone company is not offering caller
identification services or is not yet providing number delivery to
your area.
Whether you take a call or not, the caller’s details are stored in the
Caller ID book. This book stores the last 40 incoming calls. Each
item in the book is marked with if the call has been reviewed
and if it has not.
The icon will be shown on the LCD if you missed one or more
calls. If the Caller ID book is full, the icon will blink.
View Caller ID Book
The list of numbers in the Caller ID book will be displayed
HANDSET: Pick up the handset first
Press ‘MENU’ soft key to activate the menu
Press (left side) to select
‘CID BOOK’
Use and to scroll through the list
65
Page 69

CALLER ID
Alternatively, you can access the book by pressing key
whilst in standby mode.Note: If there are no caller ID telephone
numbers in the call book, ‘EMPTY’ is displayed
Dial a Number from the Caller ID Book
The list of numbers in the Caller ID book will be displayed
Use and to scroll through the list to find the
HANDSET: Press , the number is automatically
HANDSET: Pick up the handset first
Press in standby mode
required number
dialled
BASE: Pick up the base handset or press
Add a Number from the Caller ID Book to the
Phone Book
The list of numbers in the Caller ID book will be displayed
Use and to scroll through the list to find the
HANDSET: Pick up the handset first
Press ‘MENU’ soft key to activate the menu
Press (left side) to select‘CID BOOK’
required phonebook entry to be modified
66
Page 70
CALLER ID
The curser will start to flash on the right hand side of the
name. Modify name using (right side) to clear the
The curser will start to flash on the right hand side of the
number. Modify name using (right side) to clear
the previous digit(s) and then enter the correct digit(s)
Use and to scroll through the melody menu to
select desired ringer tone. As you scroll through, the
telephone demonstrates the selected melody. If you
want to set a VIP number, you should select a special
ring tone. The ring tone should be different from the
external ring you have set. You can set up to 9 VIP ring
Press (left side) to select ‘More’
Press (left side) to select ‘ADD TO PB’
previous character(s) and then enter the correct
character(s)
(Press (left side) to select ‘NEXT’s)
(Press (left side) to select ‘NEXT’s)
tones associated with 9 numbers
Press (left side) to save.
67
Page 71

CALLER ID
Delete a Number from the Caller ID Book
Use and to scroll through the menu to select
You will be prompted to ‘CONFIRM ?’. press (left
HANDSET: Pick up the handset first
Press ‘MENU’ soft key to activate the menu
Press (left side) to select ‘CID BOOK’
The Caller ID number to delete
Press (left side) to select ‘More’
Press (left side) to ‘DEL’
side) again to ‘DEL’
Delete All Numbers from the Caller ID Book
Use and to scroll through the menu to select
You will be prompted to ‘CONFIRM ?’. press (left
HANDSET: Pick up the handset first
Press ‘MENU’ soft key to activate the menu
Press (left side) to select ‘CID BOOK’
Press (left side) to select ‘More’
‘DELETE ALL’
side) again to ‘DEL ALL’
68
Page 72

PHONEBOOK
Telephone numbers can be stored in the phonebook. It allows
you to store frequently used numbers so that you can easily make
a call without having to remember or enter the telephone number
The phone book can contain 50 entries. Each phone number
can contain up to 20 digits and have a name of up to 12
characters.
Create a Phonebook Entry
The display will show ‘NAME?’Enter the name you wish
using the numeric keypad (see character map below).
The display will show ‘NUMBER?’Enter the telephone
number you wish using the numeric keypad (up to 20
Use and to scroll through the melody menu to
select desired ringer tone. As you scroll through, the
telephone demonstrates the selected melody. If you
want to set a VIP number, you should select a special
ring tone. The ring tone should be different from the
HANDSET: Pick up the handset first
Press ‘MENU’ soft key to activate the menu
Press to select‘PHONEBOOK’
Press (left side) to select
Press (left side) again to select ‘NEW’
(Up to 12 characters)
Press (left side) to select ‘NEXT’
digits)
69
Page 73
PHONEBOOK
external ring you have set. You can set up to 9 VIP ring
tones associated with 9 numbers
Note: Press (right side) ‘ERASE’ to clear the last digit and
then enter the correct number.
Insert Pause
Inserting a pause provides a delay of 3 seconds. This is
necessary with some telephone systems.
To insert a dialling pause between numbers when storing a
number, press until P appears in the LCD display.
Character Map
Key Characters in the displayed order
0 (spc) 0 ? & / . , !
1 1 @ _ + -
2 A B C a b c 2
3 D E F d e f 3
4 G H I g h i 4
5 J K L j k l 5
6 M N O m n o 6
7 P Q R S p q r s 7
8 T U V t u v 8
9 W X Y Z w x y z 9
Press (left side) to save.
( ) %
"
View Phonebook Entries
The list of names in the phonebook will be displayed
Use and to scroll through the list to find the
HANDSET: Pick up the handset first
Press in standby mode
required name
70
Page 74

PHONEBOOK
Dialling using a Phonebook Entry
The list of names in the phonebook will be displayed
Use and to scroll through the list to find the
HANDSET: Press the ‘DIAL’ soft key or press ,
the number is automatically dialled. Press to
BASE: Press the ‘DIAL’ soft key or press , the
number is automatically dialled. Pick the handset up if
you wish to speak through the handset of the base.
Handset – pick up the handset first
Press in standby mode
required name
speak via the loudspeaker
Modify a Phonebook Entry
HANDSET: Pick up the handset first
Press ‘MENU’ soft key to activate the menu
Press to select‘PHONEBOOK’
Press (left side) to select
Press to select‘EDIT’
Press (left side) to select
71
Page 75

PHONEBOOK
Use and to scroll through the list to find the
required phonebook entry to be modified
The curser will start to flash on the right hand side of the
name. Modify name using (right side) to clear the
previous character(s) and then enter the correct
The curser will start to flash on the right hand side of the
number. Modify name using (right side) to clear
the previous digit(s) and then enter the correct digit(s)
Use and to scroll through the melody menu to
select desired ringer tone. As you scroll through, the
telephone demonstrates the selected melody. If you
want to set a VIP number, you should select a special
ring tone. The ring tone should be different from the
external ring you have set. You can set up to 9 VIP ring
Press ‘MENU’ soft key to activate the menu
Press (left side) to confirm
character(s)
Press (left side) to select ‘NEXT’
Press (left side) to select ‘NEXT’
tones associated with 9 numbers
Press (left side) to save.
Delete a Phonebook Entry
HANDSET: Pick up the handset first
72
Page 76
PHONEBOOK
Use and to scroll through the menu to select
Use and to scroll through the list to find the
You will be prompted to ‘CONFIRM ?’. press (left
Press to select‘PHONEBOOK’
Press (left side) to select
‘DELETE’
Press (left side) to select
required phonebook entry to be modified
Press (left side) to ‘DEL’
side) again to ‘DEL’
Delete All Entries from the Phonebook
Use and to scroll through the menu to select
HANDSET: Pick up the handset first
Press ‘MENU’ soft key to activate the menu
Press to select‘PHONEBOOK’
Press (left side) to select
‘DELETE ALL’
73
Page 77

PHONEBOOK
Press (left side) to select
You will be prompted to ‘CONFIRM ?’. press (left
side) again to ‘DEL ALL’
Phonebook Status
The phonebook status shows the number of entries
already stored in the phonebook e.g. 05/50
Use and to scroll through the menu to select
HANDSET: Pick up the handset first
Press ‘MENU’ soft key to activate the menu
Press to select‘PHONEBOOK’
Press (left side) to select
‘PB STATUS’
Press (left side) to select
The number of entries already stored in the phonebook
will be displayed
Press (left side) to select ‘OK’
74
Page 78

QUICK DIAL (HANDSET)
This handset has 4 quick dial memory buttons. These numbers
will be stored in the Phonebook.
Create a Quick Dial Number
Press a memory key (M1 to M4) in standby mode
‘NUMBER?’will be displayed. Enter the desired
number (up to 20 digits)
Press (left side) to confirm ‘NEXT’
Use and to scroll through the melody menu
to select desired ringer tone. As you scroll through, the
telephone demonstrates the selected melody.
Press (left side) to save
View a Quick Dial Number
Press in standby mode
Use and to scroll through the list to find the
required number. The memory default names are M1 to
M4. You can add something following them but you
cannot delete the default name e.g. M1 could beome
M1: Doctor
Dial a Quick Dial Number
In standby mode, press M1 to M4 to dial out the required quick
dial telephone numbger.
75
Page 79

QUICK DIAL (HANDSET)
Modify a Quick Dial Number
The curser will start to flash on the right hand side of the
name. Modify name using (right side) to clear the
The curser will start to flash on the right hand side of the
the previous digits and then enter the correct character(s)
Use and to scroll through the melody menu to
Press ‘MENU’ soft key to activate the menu
Press to select‘PHONE BOOK’
Press (left side) to select
Press to select‘EDIT’
Press (left side) to select
Use and to scroll through the list to find the
required phone book entry to be modified
Press (left side) to select
previous character(s) and then enter the correct
character(s)
Press (left side) to select ‘NEXT’
number. Modify name using (right side) to clear
Press (left side) to select ‘NEXT’
76
Page 80

QUICK DIAL (HANDSET)
select desired ringer tone. As you scroll through, the
telephone demonstrates the selected melody. If you
want to set a VIP number, you should select a special
ring tone for it. The ring tone should be different from the
external ring you have set. You can set up to 9 VIP ring
tones associated with 9 numbers
Press (left side) to confirm. You can then repeat
the process again and modify another entry in the
phonebook or press to return to standby or wait 30
seconds
Delete a Quick Dial Number
Use and to scroll through the menu to select
You will be prompted to ‘CONFIRM ?’. press (left
Press ‘MENU’ soft key to activate the menu
Press to select‘PHONE BOOK’
Press (left side) to select
‘DELETE’
Press (left side) to select
Use and to scroll through the list to find the
required phone book entry to be modified
Press (left side) to select
side) again to ‘DEL’
77
Page 81

QUICK DIAL (BASE)
This base telephone has 8 quick dial memory buttons. These
buttons are photo dial buttons where you can store your contact’s
photograph under the perspex of the button. This is very useful if
you tend to forget telephone numbers or names. Once a number
has been stored in a memory location, you only need to press one
button to make the call.
Create a Quick Dial Number
Enter the telephone number to be stored (maximum of
20digits). You can edit the number using the ‘ERASE’
soft key
Select the quick dial location to store the telephone
number by pressing the corresponding button for about 3
seconds. A confirmation beep will be heard
View/Dial a Quick Dial Number
In standby mode, press the required quick dial location.
The telephone number will be displayed
Press the ‘DIAL’ soft key or press , the number is
automatically dialled. Pick the handset up if you wish to
speak through the handset.
78
Page 82

ADDITIONAL HANDSETS & BASES
The handset that came with your base is already registered to the
base (factory setting). This is registered as handset 1. Each
additional handset you purchase must be registered to the base.
Up to 5 handsets can be registered to one base unit. This means
you can make internal calls between registered handsets, transfer
an incoming call between handsets and answer a call anywhere in
the office/home at any time as all the handsets will call at the
same time.
You can also register up to 4 base units to each handset. This
will increase the phone range, allowing you to move between the
telephone coverage areas.
Register a new Handset
Before registering a handset to the base, you should press and
hold the key on the front panel of the base for about 5
seconds and then release it. The rest of the registration process
for a handset takes place via the handset.
Use and to scroll through the menu to select
Press ‘MENU’ soft key to activate the menu
‘REGISTRATION’
Press (left side) to select
Use and to scroll through the base names list
Press (left side) to select desired base. The
handset will search for the requested base and the
relevant information will flash on the LCD.
79
Page 83

ADDITIONAL HANDSETS & BASES
If the base is found and the handset is successfully
registered, you will be prompted to enter the PIN code
(the default is 0000).
If the PIN code is accepted, the registration tone will
sound and the base assigns a number to the handset. If
the PIN code entered is invalid, a warning tone will sound,
and the handset will return to the
previous registration state.
Select a Base
Your handset can be used with up to 4 bases. See Select Base
in Handset Settings.
Note: In order to use the handset with more than one base unit,
the handset must be registered with each base (see Register a
New Handset section).
Release a Handset
A registered handset can be removed from a base if necessary.
See Terminate Handset in Base Settings.
Internal Calls
When using several handsets registered to the same base unit,
you can make internal calls and transfer external calls between
handsets.
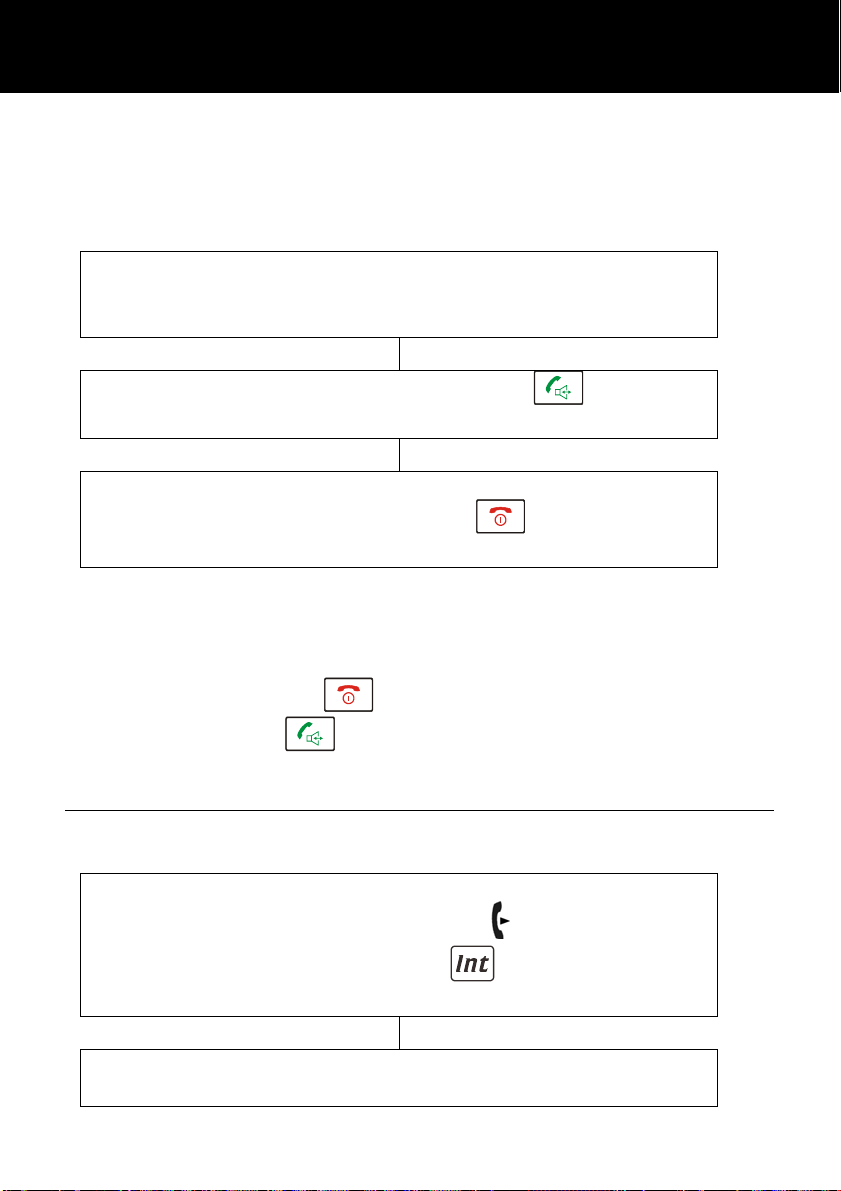
Make an Internal Call
Enter the handset number you wish to page (0-5 will
appear on the handset). 0 is the base telephone. (1-5)
will appear on the base telephone)
HANDSET: Press
BASE: Press
80
Page 84
ADDITIONAL HANDSETS & BASES
Notes:
If an incorrect handset number is entered i.e. one that does not
exist, the handset wil sound an error tone
Receive an Internal Call
Notes:
If there is an external call during the course of an internal call, the
caller’s telephone number will be displayed. The internal call can
The paged handset will ring. The calling handset
number will be displayed on the LCD display ‘ HS n
CALLING’
HANDSET:To answer, press
BASE:Pick up the handset to answer.
To end the call,
HANDSET: Press
BASE: Replace the handset
be finished by pressing . The normal external call ring tone
will be heard, press to answer the call.
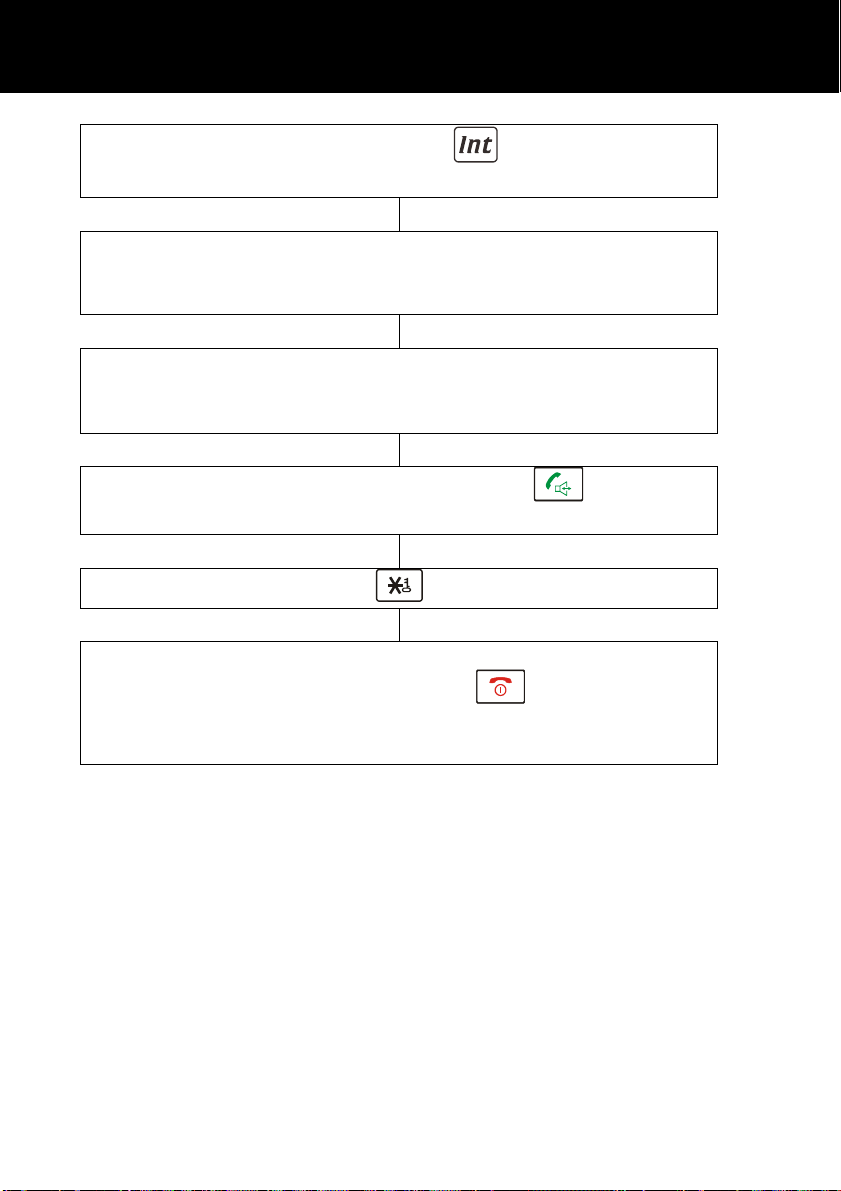
Call Transfer between Handsets
An external call can be transferred from one handset to another.
During an external call, when you wish to transfer the call.
HANDSET: Press
BASE: Press .
Your external caller will be placed on hold
Enter the handset number you wish to page (0-5 will
appear on the handset). 0 is the base telephone. (!-5)
81
Page 85

ADDITIONAL HANDSETS & BASES
will appear on the base telephone)
The paged handset will ring. The calling handset
number will be dsiplayed on the LCD display ‘ HS n
CALLING’
HANDSET:To answer, press
BASE:Pick up the handset to answer.
If required, you may now speak to the paged user.
To transfer the external call to the paged handset,
HANDSET: Press
BASE: Replace the handset
OR
To cancel the call transfer and talk to the external caller
again, press or for a telephone base user
Notes:
On transferring a call, you may hang up before the paged handset
answers. The connection between the external caller and the
paged handset is complete once you hang up.
If the paged handset does not answer a call within a
predetermined time, the call will be transferred back to your
handset.
Three Way Conference Call
When you have both an external call and an intercom call in
progress, you can set up a three way conference call
During an external call.
HANDSET: Press
82
Page 86
ADDITIONAL HANDSETS & BASES
BASE: Press
Your external caller will be placed on hold
Enter the handset number you wish to page (0-5 will
appear on the handset). 0 is the base telephone. (1-5)
will appear on the base telephone
The paged handset will ring. The calling handset
number will be displayed on the LCD display ‘ HS n
CALLING’
HANDSET:To answer, press
BASE:Pick up the handset to answer.
The caller can now press to start the three way call
Either of the two internal handsets can
HANDSET: Press
BASE: Replace the handset
to leave the conference call at any time.
83
Page 87

CALL WAITING
Caller ID on Call Waiting
When you subscribe to a Call Waiting service from your local
telephone service provider, the LCD will display the name and
number of the second caller while you are having a conversation
with the first caller.
Press the ‘Flash’ +2 soft key to answer the second caller
When you have finished with the second caller press‘Flash’ +2
soft key again to resume your conversation with the first caller.
Note: If you have transferred an external call to another handset,
the call waiting function will nor work via the second handset.
84
Page 88

ANSWERING MACHINE
When switched to ON position, incoming calls will be answered by
the answering machine after a certain number of rings (see
Answering Machine Settings). When the answering machine
answers an incoming call, the caller will hear your outgoing
message. After a short beep they can then leave a message.
If the Answering Machine is OFF, it will answer a call after 10
rings. This is to allow some features to be accessed remotely.
Your AMPLIDECTTM COMBI355 answering machine can be
operated from either:
• the telephone unit
• remotely from any external telephone.
Switching the Answering Machine On/Off
The answering machine can be switched on and off as follows:
Press ‘TAM’ soft key to activate the answering machine
Use and to scroll through the menu to select
‘TAM SETTING’
Press ‘SELECT’ soft key
Press ‘SELECT’ soft key again to choose ‘TAM
ON/OFF’
Use and to scroll through the menu to select
‘ON’or‘OFF’.
Press ‘SELECT’ soft key. will be displayed on the
base LCD if the answering machine is ON
85
Page 89

ANSWERING MACHINE
Use the Base to Switch the Answering
Machine On/Off
In standby, press key to switch the answer machine on or
off. The machine state will be announced.
The Answering Machine Alert
A tone will be heard once a minute when a new message has
been stored on the answering machine. You can choose to
switch this tone on or off.
Press ‘TAM’ soft key to activate the answering machine
Use and to scroll through the menu to select
‘TAM SETTING’
Use and to scroll through the menu to select
Press ‘SELECT’ soft key
‘TAM ALERT’
Press ‘SELECT’ soft key
Use and to scroll through the menu to select
‘ON’or‘OFF’
86
Page 90

ANSWERING MACHINE
Announce 1 and Announce 2
Before you use the answering machine you should record an
outgoing message. There is an answer and record message
(Announce 1) and an answer only message (Announce 2).
These outgoing messages are your messages to an incoming
caller and may be up to 3 minutes in length.
Record Announce 1
Announce 1 is a conventional outgoing message, requesting the
caller to leave a message. The default outgoing message is
“Hello, your call cannot be taken at the moment, to record your
message, please speak after the tone”. If you prefer, you can
record your own outgoing message.
Press ‘TAM’ soft key to activate the answering machine
Press ‘SELECT’ soft key to choose ‘ANNOUNCE’
Press ‘SELECT’ soft key to choose ‘ANNOUNCE1’
Press to ‘RECORD’
Press ‘SELECT’ soft key
CORDLESS HANDSET: On hearing the tone, record
your personal outgoing message. When you have
finished speaking press the ‘OK’ soft key. If you speak
for longer than 3 minutes, recording will stop
automatically. Whilst recording the LCD will show
‘RECORDING’ The new OGM will be played after
recording
BASE: On hearing the tone, record your personal
87
Page 91

ANSWERING MACHINE
outgoing message. When you have finished speaking
press the ‘STOP’ soft key. If you speak for longer than
3 minutes, recording will stop automatically. Whilst
recording the LCD will show ‘RECORD’ The new OGM
will be played after recording
Record Announce 2
Announce 2 is an answer-only message.
The default outgoing message is “Hello, your call cannot be taken
at the moment, please call back later”. If you prefer, you can
record your own outgoing message.
Press ‘TAM’ soft key to activate the answering machine
.
Press ‘SELECT’ soft key to choose ‘ANNOUNCE’
Press to choose ‘ANNOUNCE2’
Press ‘SELECT’ soft key
Press to ‘RECORD’
Press ‘SELECT’ soft key
CORDLESS HANDSET: On hearing the tone, record
your personal outgoing message. When you have
finished speaking press the ‘OK’ soft key. If you speak
for longer than 3 minutes, recording will stop
automatically. Whilst recording the LCD will show
‘RECORDING’ The new OGM will be played after
recording
88
Page 92
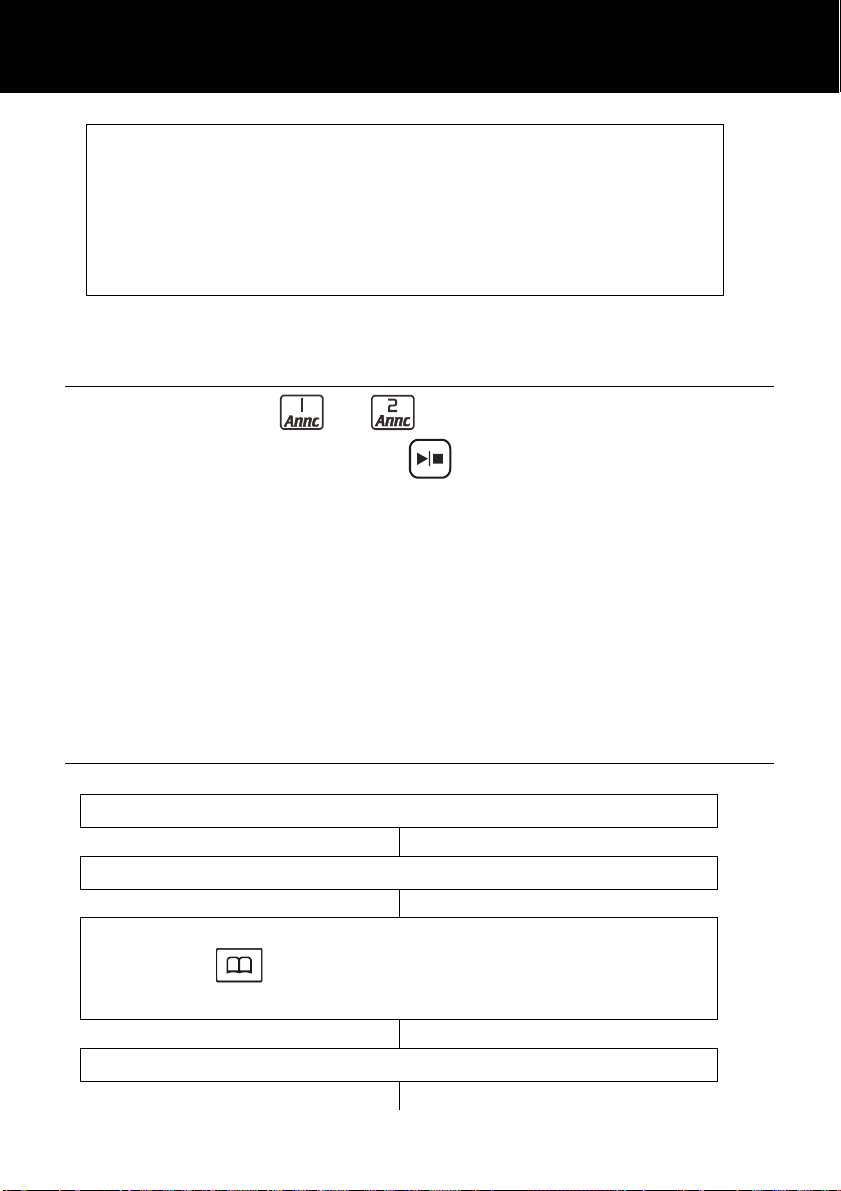
ANSWERING MACHINE
BASE: On hearing the tone, record your personal
outgoing message. When you have finished speaking
press the ‘STOP’ soft key. If you speak for longer than
3 minutes, recording will stop automatically. Whilst
recording the LCD will show ‘RECORD’ The new OGM
will be played after recording
Use the Base to Record Announce1 &
Announce2
Press and hold the or key on the base unit until you
hear the voice prompt. Use the key or ‘STOP’ to finish at
anytime
Notes: When recording, speak towards the microphone at the
bottom of the front panel of the base. Keep about 20cm distance
from the microphone for the best results.
If you record/playback/restore Announce1 or Announce2, the
answer mode will be switched to the corresponding mode.
Checking the Outgoing Message
Press ‘TAM’ soft key to activate the answering machine
Press ‘SELECT’ soft key to choose ‘ANNOUNCE’
Press ‘SELECT’ soft key to choose ‘ANNOUNCE1’ or
Press to choose ‘ANNOUNCE2’ and press
‘SELECT’ soft key
Press ‘SELECT’ soft key to choose‘PLAYBACK’
89
Page 93

ANSWERING MACHINE
The current Announce1/Announce2 will be played. You
can use the ‘BACK’soft key to stop and exit
Press ‘SELECT’ soft key
Use the Base to Playback Announce1 &
Announce2
In standby, press either the or key on the base..Use
the key to finish at anytime.
Restore the Outgoing Message
You can delete your personal recorded OGM and restore the
factory default OGM.
Press ‘TAM’ soft key to activate the answering machine
Press ‘SELECT’ soft key to choose ‘ANNOUNCE’
Press ‘SELECT’ soft key to choose ‘ANNOUNCE1’ or
Press to choose ‘ANNOUNCE2’ and press
‘SELECT’ soft key
Use and to scroll through the menu to select
‘DEFAULT’
Press ‘SELECT’ soft key to restore the default
Announce1/Announce2 or press ‘BACK’ to cancel
Press ‘SELECT’ soft key
The LCD will show ‘CONFIRM?’
90
Page 94

ANSWERING MACHINE
Use the Base to Restore the Outgoing
Message
In standby, press either the or key on the base to play
Announce1 or Announce2. Press to restore the message
being played to its default. A confirmation tone will be heard.
The default Announce1 or Announce2 will be played automatically.
Answering Machine Mode
You can select the whether the answering machine should
answer in answer and record mode (ANNOUNCE1) or answer
only mode (ANNOUNCE2).
Press ‘TAM’ soft key to activate the answering machine
Use and to select‘TAM SETTING’
Press ‘SELECT’ soft key
Use and to scroll through the menu to select
‘ANNC Select’
Press ‘SELECT’ soft key
Use and to select
either‘ANNOUNCE1’or‘ANNOUNCE2’
Press ‘SELECT’ soft key
91
Page 95

ANSWERING MACHINE
Answering Machine Settings
You can select the number of rings before the answering machine
is activated and responds to an incoming call. You can choose
from the following:
2 = calls are answered after two rings
3 = calls are answered after three rings
4 = calls are answered after four rings
5 = calls are answered after five rings
6 = calls are answered after six rings
• TS (TOLL SAVER) = activates the toll saver function
In Toll Saver mode incoming calls are answered after five rings
until the first new message has been recorded. Once a message
has been recorded the answering machine will answer after three
rings. This is useful when trying to remotely access the answering
machine. If the answering machine has not answered at the
fourth ring, no messages have been recorded and you can hang
up before you are charged for the call. If the machine answers
after three rings, new messages have been recorded.
Press ‘TAM’ soft key to activate the answering machine
Use and to select‘TAM SETTING’
Press ‘SELECT’ soft key
Use and to scroll through the menu to select
‘SET RING’
Press ‘SELECT’ soft key
Use and to select either‘2,3,4,5,6
RINGS’or‘TOLL SAVER’
Press ‘SELECT’ soft key
92
Page 96

ANSWERING MACHINE
Voice Prompt Language
You can select the language in which the voice prompt on the
answering machine is spoken.
Press ‘TAM’ soft key to activate the answering machine
Use and to select‘TAM SETTING’
Press ‘SELECT’ soft key
Use and to scroll through the menu to select
‘TAM LANGUAGE’
Press ‘SELECT’ soft key
Use and to scroll through the list of languages
available. Each language will be displayed in its native
form.
Press ‘SELECT’ soft key to select the desired language.
A confirmation beep will be heard
93
Page 97

ANSWERING MACHINE
Listen to Messages using the Menu
The base and handset LED will show if you have a new
message. The base display will also show how many new
messages have been received. Up to 15 minutes of messages
can be recorded.
Press ‘TAM’ soft key to activate the answering machine
Press ‘SELECT’ soft key again to choose ‘NEW MSG’ or
CORDLESS HANDSET: The phone will announce "
You have N new message(s) " or " You have N saved
The relevant messages will be played one by one. You
Press to choose ‘MESSAGE’
Press ‘SELECT’ soft key to confirm
press to choose ‘SAVED MSG’
Press ‘SELECT’ soft key to confirm
message(s)"
can use the key to delete the current message or
the ‘BACK’ soft key to stop the playing and exit.
BASE: The phone will announce " You have N new
message(s) " or " You have N saved message(s)"
The relevant messages will be played one by one. You
can use the key to delete the current message or
the ‘BACK’ soft key to stop the playing and exit.
94
Page 98

ANSWERING MACHINE
Listen to Messages using the Base
To play the messages, press the key. The telephone will
announce, “You have N new messages” or “You have N old
messages”. The messages will be played one by one. During
playback, you can do the following:
Press to delete the current message
Press to re-play the previous message
Press to play the next message
Press or ‘BACK’ soft key to stop the playing and exit
When playback is finished the machine will return to standby
mode. All incoming messages are saved (unless you have erased
any during playback, see above), new messages will then be
recorded after the old ones.
During playback use + or - to adjust the volume.
Call Screening
Incoming messages can be heard through the Speakerphone as
they are received.
If you want to speak to the caller, lift the handset out of the cradle
or press on the handset..
95
Page 99

ANSWERING MACHINE
Deleting All Messages
Press ‘TAM’ soft key to activate the answering machine
Use and to scroll through the menu to select
Press ‘OK’ soft key to confirm or press ‘CANCEL’ soft
Press to choose ‘MESSAGE’
Press ‘SELECT’ soft key to confirm
‘DELETE ALL’
Press ‘SELECT’ soft key to confirm
The LCD will show ‘CONFIRM ?’
key to exit
Use the Base to Delete All Messages
In standby, press key to delete all the messages.
Operating the Answering Machine Remotely
This answering machine can be accessed remotely using the
keys of an ordinary tone dialling telephone.
Remote Code
A confidential four digit code is required to listen to your
messages from a remote external telephone. The default remote
code is 0000. For security reasons it is advisable to change this
code.
96
Page 100

ANSWERING MACHINE
Press ‘TAM’ soft key to activate the answering machine
Use and to select‘TAM SETTING’
Press ‘SELECT’ soft key
Use and to scroll through the menu to select
‘REMOTE CODE’
Press ‘SELECT’ soft key
The current remote code will be displayed on the LCD.
Enter your new code
Press ‘OK’ soft key
Remote Control
Call the answering machine (using your telephone
number)
While the ANNOUNCE1 or ANNOUNCE2 is playing,
enter the remote code
If the remote code is accepted, the system will play the
menu of commands. You can then follow the voice
prompt to operate
When you have finished accessing the machine replace
the handset.
97
 Loading...