


Model WZSE5310T
Washer
Owner’s Manual
Important Safety Information
Operating Instructions
The Controls on Your Washer
Other Washer Features
Preparing to Wash
Changing Factory-Set Options
Care of Product
Helpful Information
Specialized Fabric Guide
Stain Removal Guide
Removing Specific Stains
3
6
22
If Something Goes Wrong
Before You Call For Service
GE Service Numbers
Warranty, Back Cover
26
Monogram.
Welcome
Welcome to the GE family. We’re
proud of our quality products and
we believe in dependable service.
You’ll see it in this easy-to-use
manual and you’ll hear it in the
friendly voices of our customer
service department.
Best of all, you’ll experience
these values each time you do
the laundry. That’s important,
because your new washer will be
part of your family for a long time.
Start Here!
Before
using
your
washer
Staple your receipt to the inside back
cover of this manual.
Write down the model and serial
numbers here.
the top edge of the control panel.
Model number
Serial number
Date of purchase
They are behind
Need Help?
Help us
help you
800.626.2000
2
Before you call for service,
there are a few things you can
do to help us serve you better.
Read this manual.
instructions to help you use and
maintain your washer properly.
Save time and money.
section titled “If Something Goes
Wrong” before calling. This
section was designed to solve
common problems you might
encounter.
It contains
Check the
If you do need service, you can
relax knowing help is only a phone
call away. A list of toll-free customer
service numbers is included on the
inside back cover. Or call the
Answer Center
24 hours a day, 7 days a week.
® at 800.626.2000,
GE

Important Safety Information
Read all safety information before using
Many washers are located near a gas dryer or a water heater in the home.
WARNING:
followed to minimize the risk of fire or explosion or to prevent property
damage, personal injury or loss of life.
Do not store or use gasoline
or other flammable vapors
and liquids in the vicinity of
this or any other appliance.
Installation and service must
be performed by a qualified
installer, service agency or
the gas supplier.
For your safety the information in this manual must be
IF YOU SMELL GAS
1
Do not try to light any appliance.
2
Do not touch any electrical
switch; do not use any phone
in your building.
3
Clear the room, building or
area of all occupants.
4
Immediately call your gas
supplier from a neighbor’s
phone. Follow the gas
supplier’s instructions.
5
If you cannot reach your gas
supplier, call the fire department.
Water Heater Safety
Under certain conditions
hydrogen gas may be produced
in a water heater that has not been
used for two weeks or more.
HYDROGEN GAS CAN BE
EXPLOSIVE UNDER THESE
CIRCUMSTANCES.
If the hot water has not been used
for two weeks or more, prevent the
possibility of damage or injury by
turning on all hot water faucets
and allow them to run for several
minutes before using any electrical
appliance which is connected to
the hot water system. This will
allow any hydrogen gas to escape.
Since the gas is flammable, do
not smoke or use an open flame
or appliance during this process.
3

Important Safety Information
Warning
To reduce the risk of fire, electric shock, or injury to persons
when using your appliance, follow basic precautions, including
the following:
Safety Precautions
4
• Use this appliance only for its
intended purpose as described
in this Owner’s Manual.
• Do not use washer if inspection
cover (on bottom right-hand side
of washer) has been removed or
damaged.
• This washer must be properly
installed and located in accordance
with the Installation Instructions
before it is used. If you did not
receive an Installation Instructions
sheet with your washer, you can
obtain one by calling, toll-free, the
GE Answer Center
—Properly ground to conform
with all governing codes and
ordinances. Follow details in
Installation Instructions.
— Do not install or store where it will
be exposed to temperatures below
freezing or exposed to the weather.
—
Connect to a properly rated, protected and sized power supply circuit to avoid electrical overload.
— Connect to adequate plumbing
and drain facilities as described
in the Installation Instructions.
• Turn off water faucets when the
washer is not in use to relieve
pressure on hoses and valves and
to minimize leakage if a hose or
valve should break or rupture.
®, 800.626.2000.
• Do not repair or replace any
part of the appliance or attempt
any servicing unless specifically
recommended in this Owner’s
Manual or in published userrepair instructions that you
understand and have the skills
to carry out.
• When disconnecting this
appliance pull by the plug rather
than the cord to avoid damage to
the cord or junction of cord and
plug. Make sure that the cord
is located so that it will not be
stepped on, tripped over or
otherwise subjected to damage
or stress.
• Keep all laundry aids (such
as detergents, bleaches, fabric
softeners, etc.) out of the reach
of children, preferably in a
locked cabinet. Observe all
warnings on container labels
to avoid personal injury.
• Do not tamper with the controls.
• Keep the area around and
underneath your appliances
free from the accumulation of
combustible materials, such as
lint, paper, rags, chemicals, etc.

• Keep the floor around your
appliances clean and dry to
reduce the possibility of slipping.
• Never reach into washer if the
basket or agitator is moving.
Before loading, unloading or
adding clothes, press
START/PAUSE and wait until
the machine has completely
stopped before opening the lid.
• Close supervision is necessary
if this appliance is used by or
near children. Do not allow
children to play inside, on or
with this appliance or any
discarded appliance. Dispose
of discarded appliances and
shipping/packing materials
properly. Before discarding
a washer, or removing from
service, remove the washer lid.
• Do not leave washer lid up during
cycle. This will stop the wash and
spin action and prevent completion of the cycle
lid and press START/PAUSE .
• Do not wash or dry articles that
have been cleaned in, washed
in, soaked in, or spotted with
combustible or explosive
substances (such as wax, oil,
paint, gasoline, degreasers,
dry-cleaning solvents, kerosene,
etc.) which may ignite or
explode. Do not add these
substances to the wash water.
Do not use these substances
around your washer and/or
dryer during operation, as they
give off vapors that could ignite
or explode.
. To restart close
• The laundry process can reduce
the flame retardancy of fabrics.
To avoid such a result, the
garment manufacturer’s care
instructions should be followed
very carefully.
• Do not mix chlorine bleach with
ammonia or acids such as vinegar
and/or rust remover. Mixing can
produce a toxic gas which may
cause death.
• Never climb on or stand on the
washer top.
• Do not wash fiberglass articles in
your washer. Skin irritation could
result from the remaining particles that may be picked up by
clothing during subsequent
washer use.
• To minimize the possibility
of electric shock, unplug this
appliance from the power supply
or disconnect the washer at the
household distribution panel by
removing the fuse or switching
off the circuit breaker before
attempting any maintenance
or cleaning.
•
NOTE:
Pressing POWER does
NOT disconnect the appliance
from the power supply, even
though the lights are out.
• Do not operate this appliance
if it is damaged, malfunctioning,
partially disassembled, or has
missing or broken parts, including
a damaged cord or plug.
SAVE THESE INSTRUCTIONS
5
The
Operating Instructions
controls
on your
washer
FAVORITE
PERM.
PRESS
WASH CYCLES
(WASHABLES)
9
1
DELAY
6 1 hrs
WASH
Long
Wash
REGULARDELICATEWOOL
HEAVY
DUTY
1
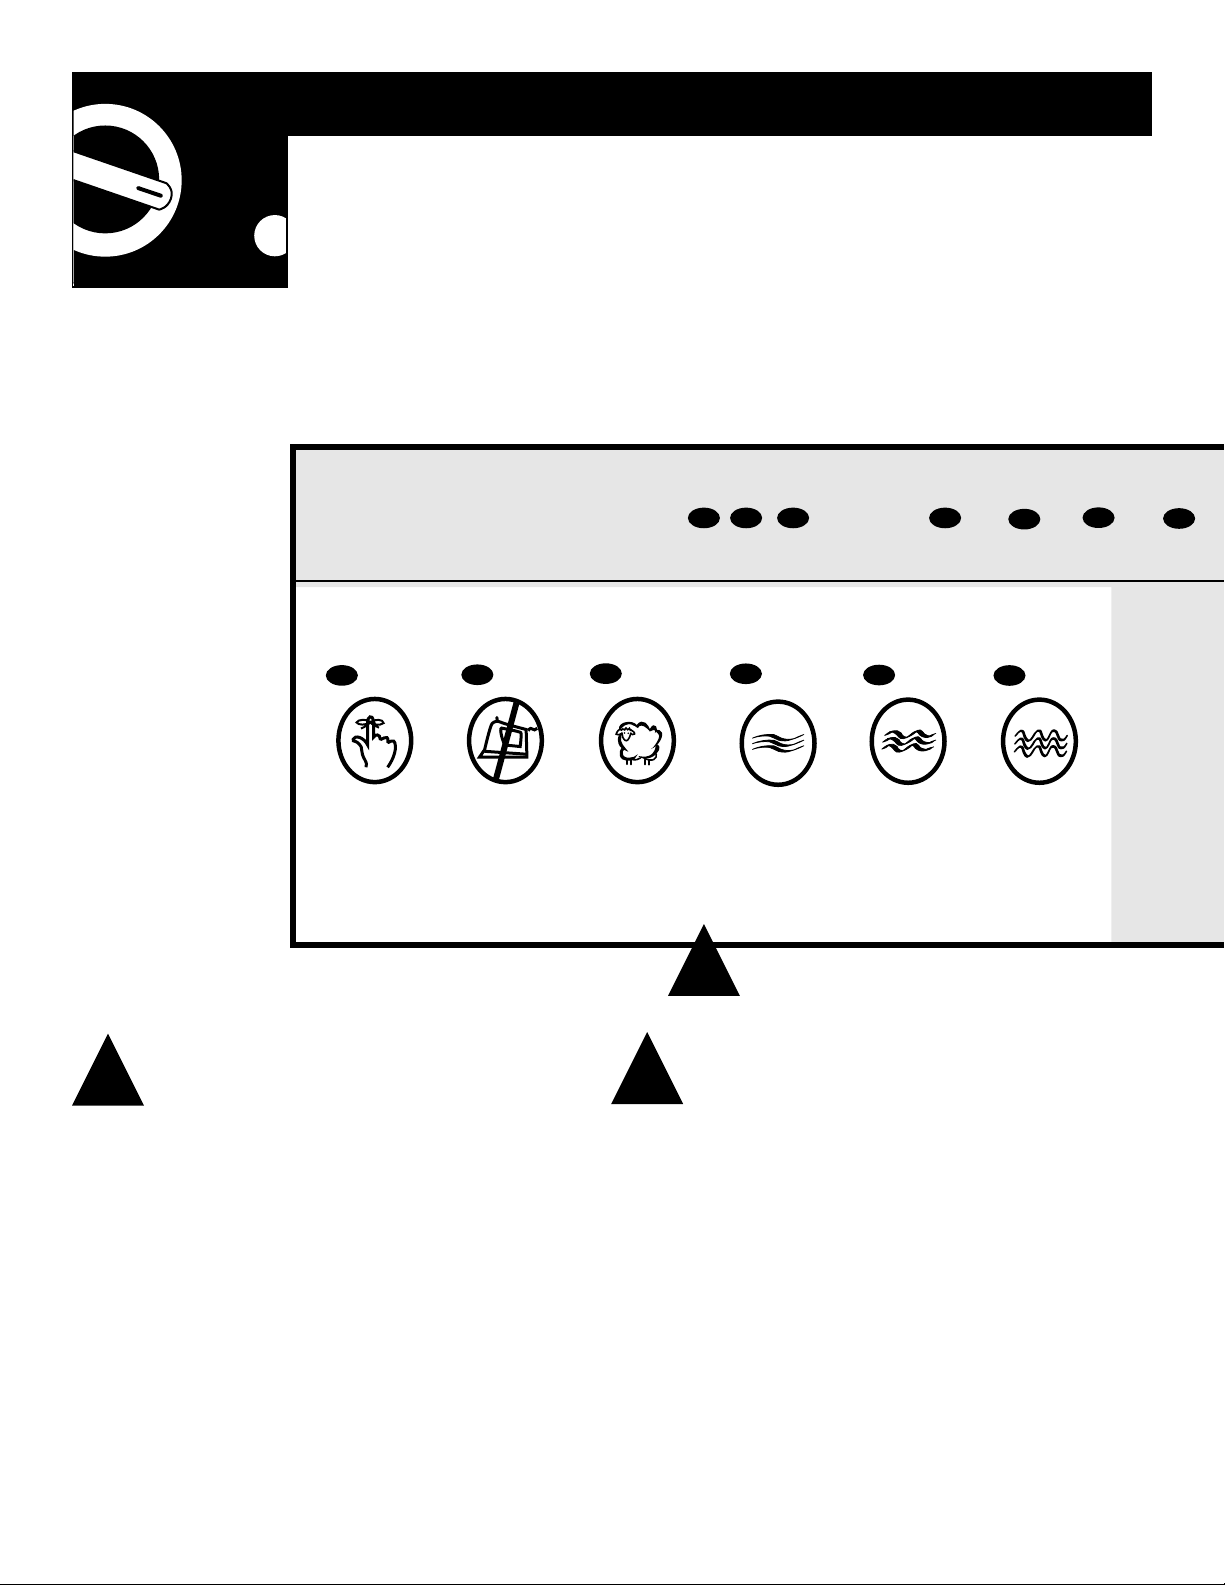
Select Wash Cycle
Select the desired wash cycle. See the above
Cycle Descriptions.
6
2
Add clothes then close lid.
If you select Auto WATER LEVEL the washer
will automatically select the appropriate water
level. During the water fill the machine will
pause occasionally to sense the water level. The
machine will check if the water level is correct
by quick agitation strokes. If it detects that the
water level is not enough it will fill with more
water and recheck. You can also select the
water level yourself. See Water Levels section.
Add Clothes/Select Water Level
Cycle Descriptions
FAVORITE
Lets you design a wash cycle
to suit your needs. See
Favorite Wash Cycle section.
PROGRESS
Short
Wash
Time
Saver
Soak
Water
Saver
WASH
OPTIONS
Rinse
Hot
Warm
Cold
WASH
TEMP
Auto
High
Med
Low
WATER
LEVEL
2
PERMANENT PRESS
For synthetics, blends and/or
delicate fabrics with normal
soil. Provides a regular wash
action, a warm wash temperature, 2 deep cold rinses, and
a slow spin speed.
Spin
Fast
Med
Slow
Hold
DELAY
START
SPIN
SPEED
ADVANCE
POWER
START/
PAUSE
3
WOOL
Specially designed for normally
soiled knits. Provides a delicate
wash action, a warm wash temperature, a cold spray and warm-cold
deep rinse, and a medium spin
speed.
DELICATE
For lingerie and special-care fabrics
with light soils. Provides a delicate
wash action, a warm wash temperature, 2 deep cold rinses, and a slow
spin speed.
REGULAR
For medium to lightly soiled cottons, linens, work and play clothes.
Provides a regular wash action, a
warm wash temperature, a cold
spray and deep rinse, and a fast
spin speed.
HEAVY DUTY
For heavily soiled and heavy duty
fabrics. This cycle provides a longer
agitation, a heavy duty wash action, a
warm wash temperature, a cold spray
and deep rinse, and a fast spin speed.
3
Starting Washer
• Open lid and add detergent by removing the
fabric softener
dispenser and pouring the
detergent down the center of the agitator.
Place the dispenser back on the agitator.
• Close lid.
• Press START/PAUSE to start the washer.
• Washer will beep at the end of the cycle.
See next page for other washer features
7

Operating Instructions
Other washer features your model has
Your Washer
Please Note
This washer has the unique ability to let you change (customize) wash
settings, agitation time, to shorten wash time, delay your start, design
your favorite wash cycle with any options, just to name a few of your
features, all with the ease of following the step-by-step instructions.
All of your features are listed in this section.
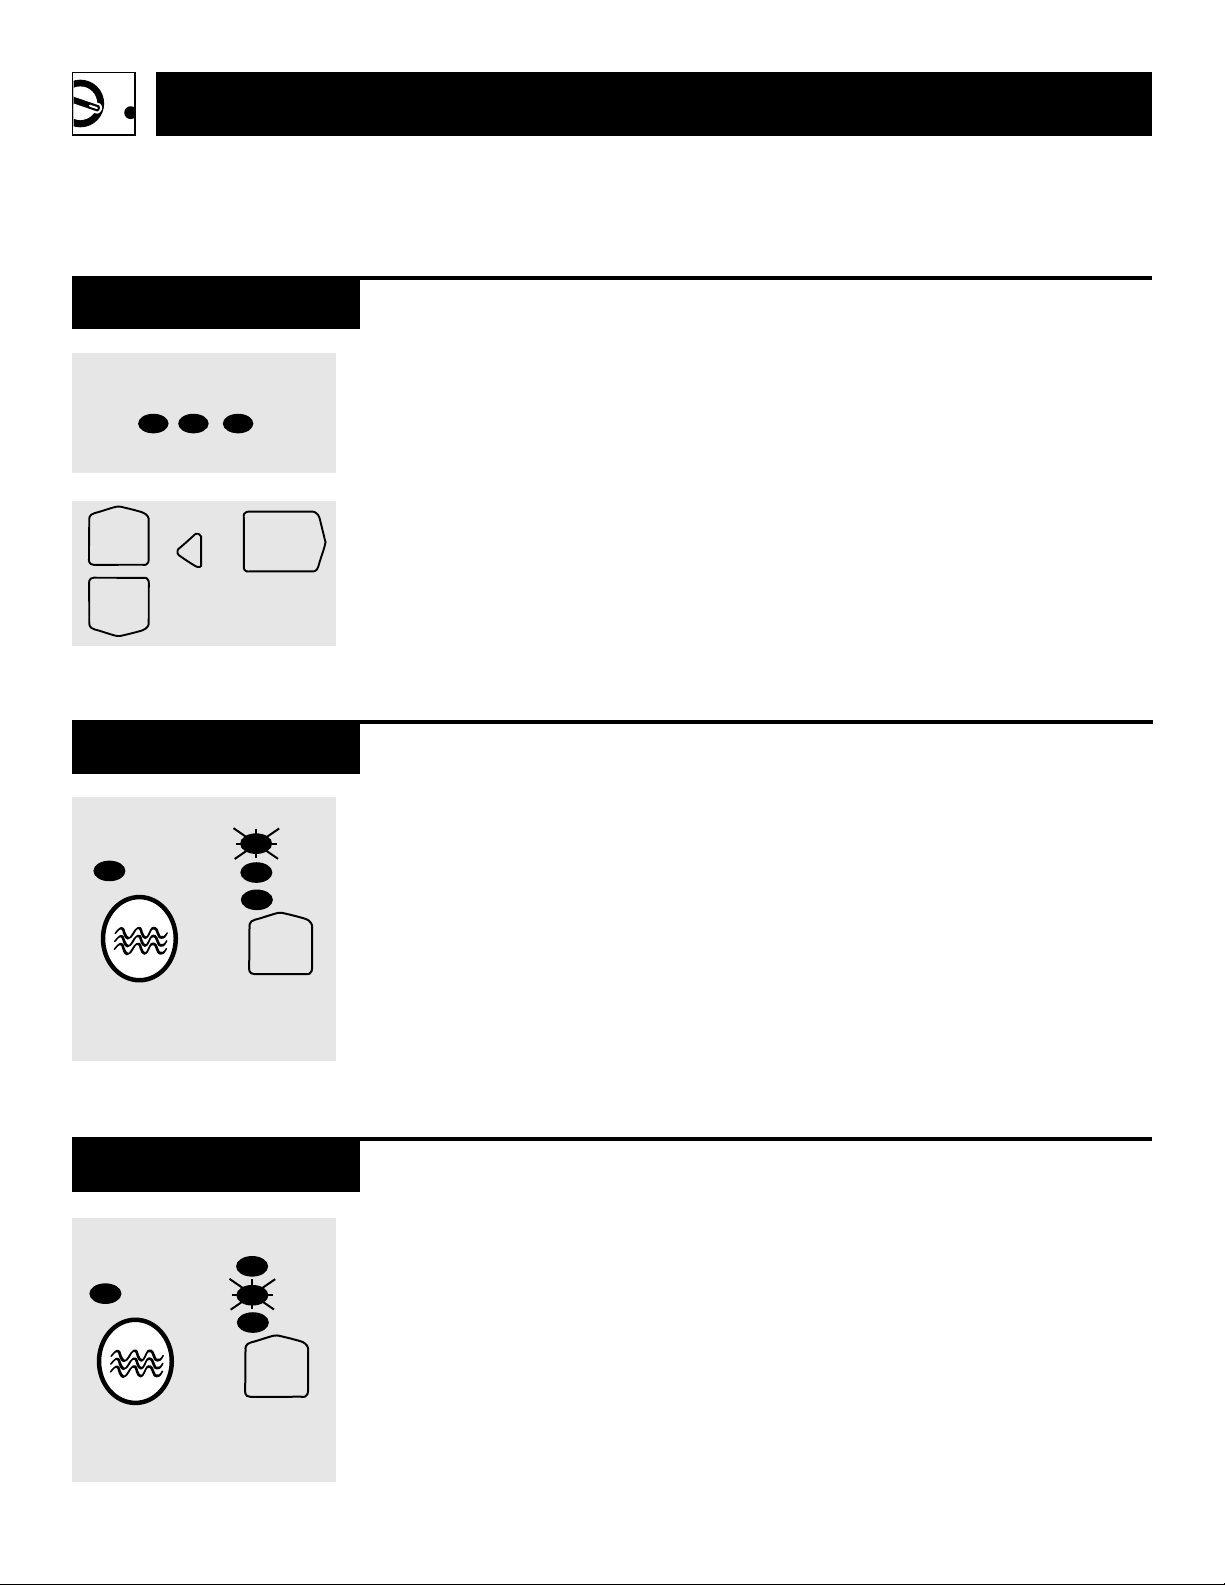
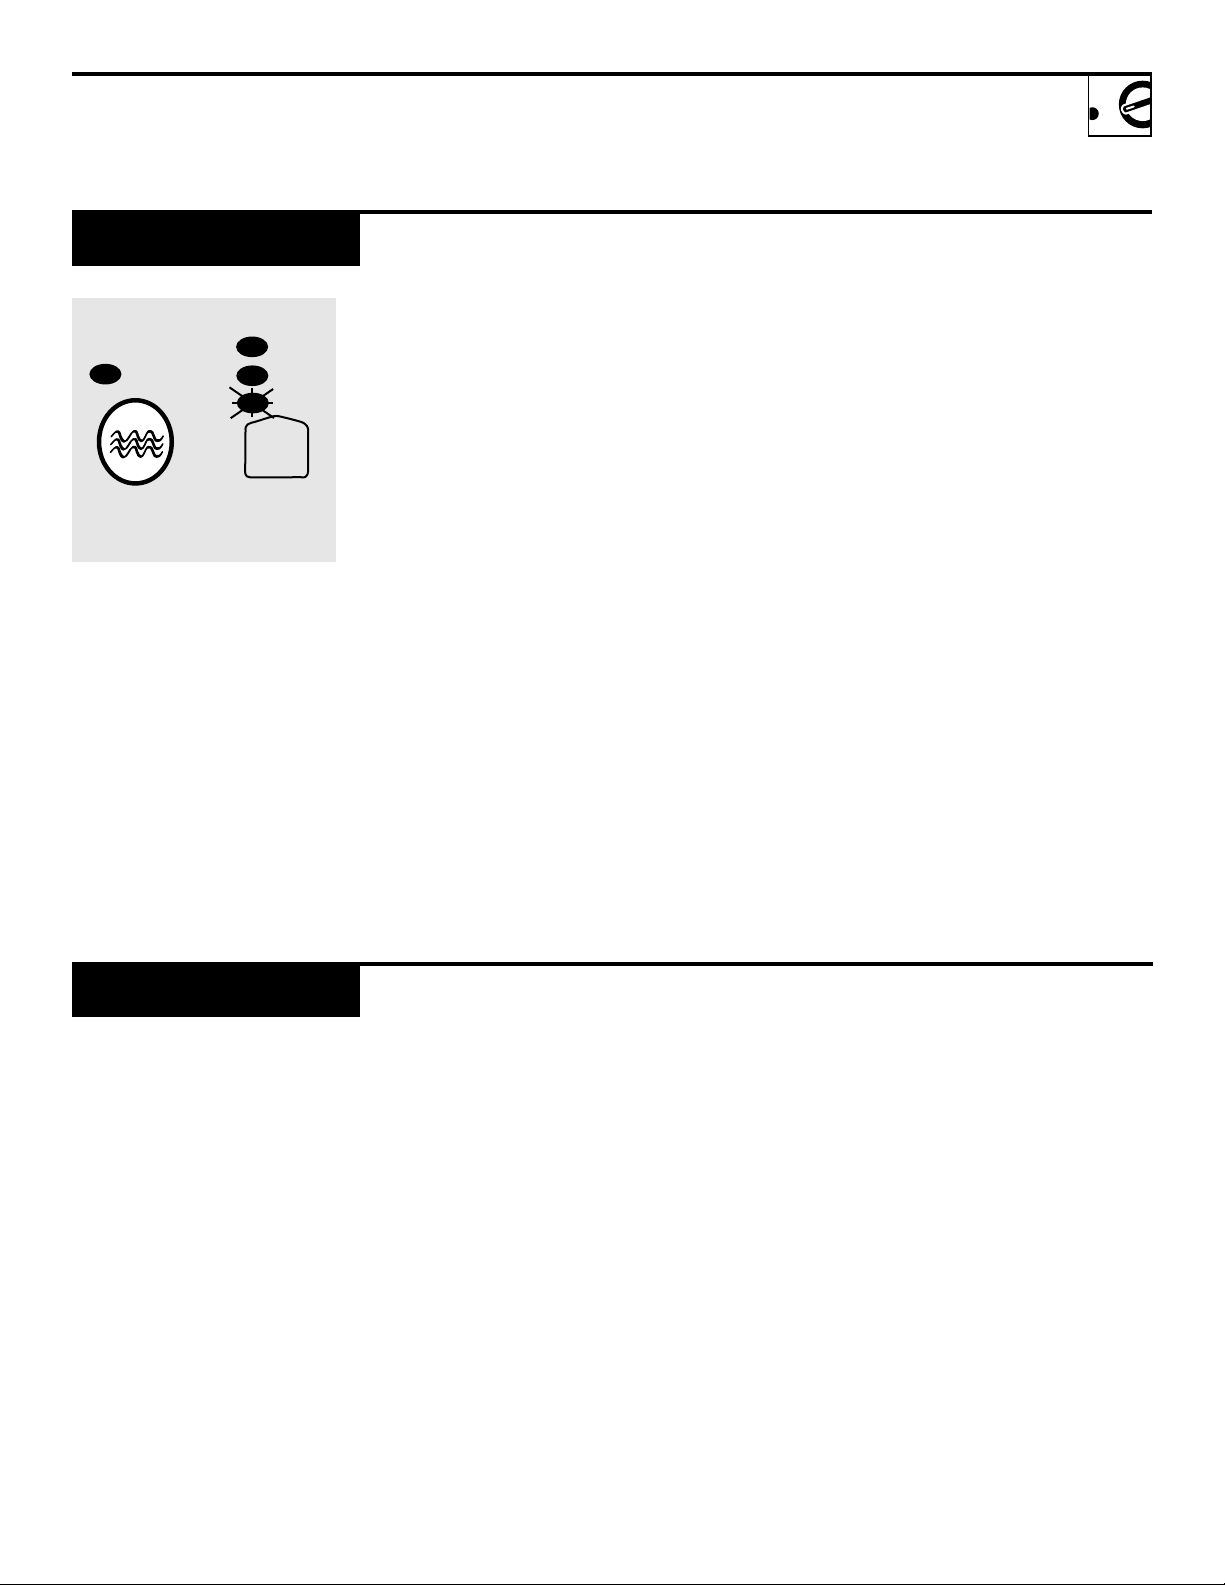
In the following graphics please
notice when a is displayed it
indicates a light is on. When
is displayed, it indicates a light that
is off.
NOTE:
•
For all cycles/options use the up or
down pads to make your selections.
•
You can stop/pause your washer during any stage. Press START/PAUSE.
Wait until the machine has fully
stopped before opening the lid. To
restart the machine close the lid and
press START/PAUSE.
When You Press
POWER
8
When you press POWER the
washer will automatically select a:
Regular wash cycle
•
•
Warm WASH TEMP
•
Auto WATER LEVEL
•
Fast SPIN SPEED
Each of these options can be
changed.
To change the options:
1
Select a wash cycle.
2
Use the up and down pads to
change the WASH TEMP,
WATER LEVEL and/or the
SPIN SPEED.
3
Press START/PAUSE.
Two lights are sometimes used to
show some wash options.
For example, you can select a
Warm-Hot or Warm-Cold water
temperature.
Hot
Warm
Cold
WASH
TEMP
Hot
Warm
Cold
WASH
TEMP
The washer has a built-in feature
not
that will
let you select a hot
wash on DELICATE, PERMANENT
PRESS or WOOL cycles. It will also
not
let you select a Fast spin speed
on DELICATE or PERMANENT
PRESS cycles. These selections
could cause fabric damage.
Advancing the Wash
Cycle
Auto
High
Med
Low
LEVEL
Spin
Fast
Med
Slow
Hold
SPIN
SPEED
DELAY
START
ADVANCE
POWER
START/
PAUSE
Rinse
WATER
The WASH PROGRESS lights
show what stage the washer is in. As
each stage is completed a light goes
out, so you can tell at a glance
where the washer is in the cycle.
To shorten the wash time, to rinse
and spin or to spin dry:
1
Select a wash cycle.
2
Press ADVANCE until only the
lights for the wash stages you
want remain on. Each green light
in the wash stages represents 3
minutes of agitation.
3
Press START/PAUSE.
Water Levels
H
I
G
H
M
E
D
L
O
W
HIGH
MED/HIGH
MEDIUM
MED/LOW
LOW
Auto Water Level
Your washer can automatically
select the appropriate water level
for the load.
1
Place your clothes in the
machine.
2
Select a wash cycle.
3
Select Auto from the WATER
LEVEL options if not already
selected.
4
Press START/PAUSE.
During fill the machine will pause
occasionally to sense the water level.
The machine will check if the water
level is correct by using a series of
two different agitate strokes. If it
detects that the water level is not
enough it will fill the machine with
more water and recheck the level.
The Auto WATER LEVEL can be
adjusted. See the Auto Water Fill
Level section.
Manual Water Level
You can also manually select the
water level for the load.
The agitator has five levels marked
on its base that can be used to help
you select the correct water level.
Select the correct water level by
using the mark nearest to the top
of the clothes in the washer.
NOTE:
•
The levels marked on the agitator
are a guide for the clothes and do
not correspond to the water level.
•
Your washer may occasionally add
water during agitation. This is to
maintain the water level due to the
release of air trapped in the garments.
9
Operating Instructions
Other washer features your model has
Delay Start
DELAY
6 1 hrs
9
DELAY
START
Time Saver
START/
PAUSE
Time
Saver
Soak
Water
Saver
DELAY START will delay the wash
cycle for 1, 6 or 9 hours.
How to use the DELAY START:
1
Select a wash cycle.
2
Press DELAY START. A delayed
start of 1 hour will appear first.
Press again for 6 hours, a third
time for 9 hours and again to
return to normal.
Time Saver allows you to shorten
the wash cycle for lightly soiled
clothes.
To use Time Saver:
1
Select a wash cycle.
2
Select Time Saver.
Your washer is now programmed to
begin the wash after the delay period.
NOTE:
•
Be careful when using DELAY
START for non-colorfast clothes
because dyes may run if the clothes
are damp.
•
It is not possible to program a
DELAY START in the Favorite cycle.
Time Saver can be turned on or off
at any time during the cycle.
To use Water Saver or Soak with
Time Saver push WASH OPTIONS
until both options have been
selected.
HEAVY
DUTY
Soak
HEAVY
DUTY
10
WASH
OPTIONS
Time
Saver
Soak
Water
Saver
WASH
OPTIONS
3
Press START/PAUSE.
Use the Soak option to soak clothes
for 2 hours at the end of the wash
phase. During Soak the washer will
agitate for a few seconds every
minute.
To use Soak:
1
Select a wash cycle.
2
Select
3
Press START/PAUSE.
Soak
.
If at any time during the soak you
wish to continue on with the rest of
the cycle press ADVANCE and the
machine will start the rinsing phase
of the cycle.
NOTE:
For directions on how to soak before
washing see Soaking and Pretreating
section.
Water Saver
HEAVY
DUTY
Time
Saver
Soak
Water
Saver
WASH
OPTIONS
Use the Water Saver option when
you want to minimize the amount
of water used during a REGULAR
or HEAVY DUTY wash cycle.
When you have selected
Saver
your washer will alter the reg-
Water
ular rinse to a shower rinse. A shower rinse alternately showers the
clothes with water and spins them to
remove the sudsy water.
To use Time Saver or Soak with
Water Saver push WASH OPTIONS
until both options have been
selected.
How to use the Water Saver:
1
Select REGULAR or HEAVY
DUTY wash cycle.
NOTE:
•
This option is not designed to
be used with fabric softener. The
shower rinse does not use a deep
rinse so it cannot dispense fabric
softener correctly.
•
There are some wash loads that
are not suited for this option. For
instance, loads that have a lot of
sand or sawdust, etc. in them, or
garments where the color bleeds.
•
This option is only available on the
REGULAR and HEAVY DUTY cycles.
Spin Hold
2
Select Water Saver.
3
Press START/PAUSE.
Use the SPIN SPEED Hold option
to minimize wrinkling by removing
drip dry garments before the washer
goes into spin.
To use SPIN SPEED Hold:
1
Select wash cycle.
2
Select
3
Press START/PAUSE.
SPIN SPEED Hold
.
When you have selected
Hold
,
your washer will pause at the
SPIN SPEED
end of rinse, beep and the spin light
will flash to tell you that it is waiting
for you to remove the drip dry garments. Press START/PAUSE to
begin the spin.
11

Operating Instructions
Other washer features your model has
Favorite Wash Cycle
The FAVORITE cycle lets you
design a wash cycle to suit your
needs.
This wash cycle can be any wash
cycle with any of its wash options
and it can start from any point
along the wash progress lights.
For instance, your FAVORITE
cycle may be set to wash your gym
clothes or it may be used to rinse
and spin cloth diapers.
Whatever you program as your
FAVORITE cycle, your washer will
remember it even when turned off.
How to program your FAVORITE
wash cycle:
1
Press FAVORITE and hold down
for two seconds. The FAVORITE
light will flash telling you that
you are in the programming
mode.
2
Select the wash cycle and wash
options you want to program as
your FAVORITE cycle.
3
If you would like to shorten the
wash cycle, press ADVANCE
until only the lights of the wash
stages you want remain on.
4
Press FAVORITE again to store
what you have selected.
To change your FAVORITE cycle
repeat the steps above.
12
FAVORITE
PERM.
PRESS
WASH CYCLES
(WASHABLES)
To use FAVORITE cycle:
1
Press FAVORITE. (The
FAVORITE cycle you programmed will be automatically
selected.)
2
Press START/PAUSE.
REGULARDELICATEWOOL
HEAVY
DUTY

Customizing the
Wash Cycles
All the wash cycles can be customized like the FAVORITE cycle.
You can program your washer to
automatically set the wash options
and agitation time you want when
you select each wash cycle.
For instance, you may want to set
the REGULAR cycle for cold wash
or set HEAVY DUTY to include a
wash and soak.
Once you have programmed the
wash cycles, your washer will
remember them, even when electricity has been turned off.
To customize the wash cycles:
1
Press the wash cycle you wish to
customize and hold down for
two seconds.
2
The machine will give two quick
beeps and the wash cycle light
will flash telling you that you are
in the programming mode.
3
Select your wash options.
4
If you would like to shorten the
wash cycle, press ADVANCE
until only the lights of the wash
stages you want remain on. Each
green light in the wash progress
represents 3 minutes of agitation.
To increase the agitation time
keep pressing ADVANCE until
all the lights are displayed again.
On HEAVY DUTY and WOOL
you can only decrease the wash
time.
5
Press the wash cycle again to
store your customized cycle.
To change your customized wash
cycle repeat the above steps.
NOTE:
The customized wash cycles cannot
be set to start at the rinse or spin
stage.
FAVORITE
PERM.
PRESS
WASH CYCLES
(WASHABLES)
REGULARDELICATEWOOL
HEAVY
DUTY
13

Operating Instructions
Other washer features your model has
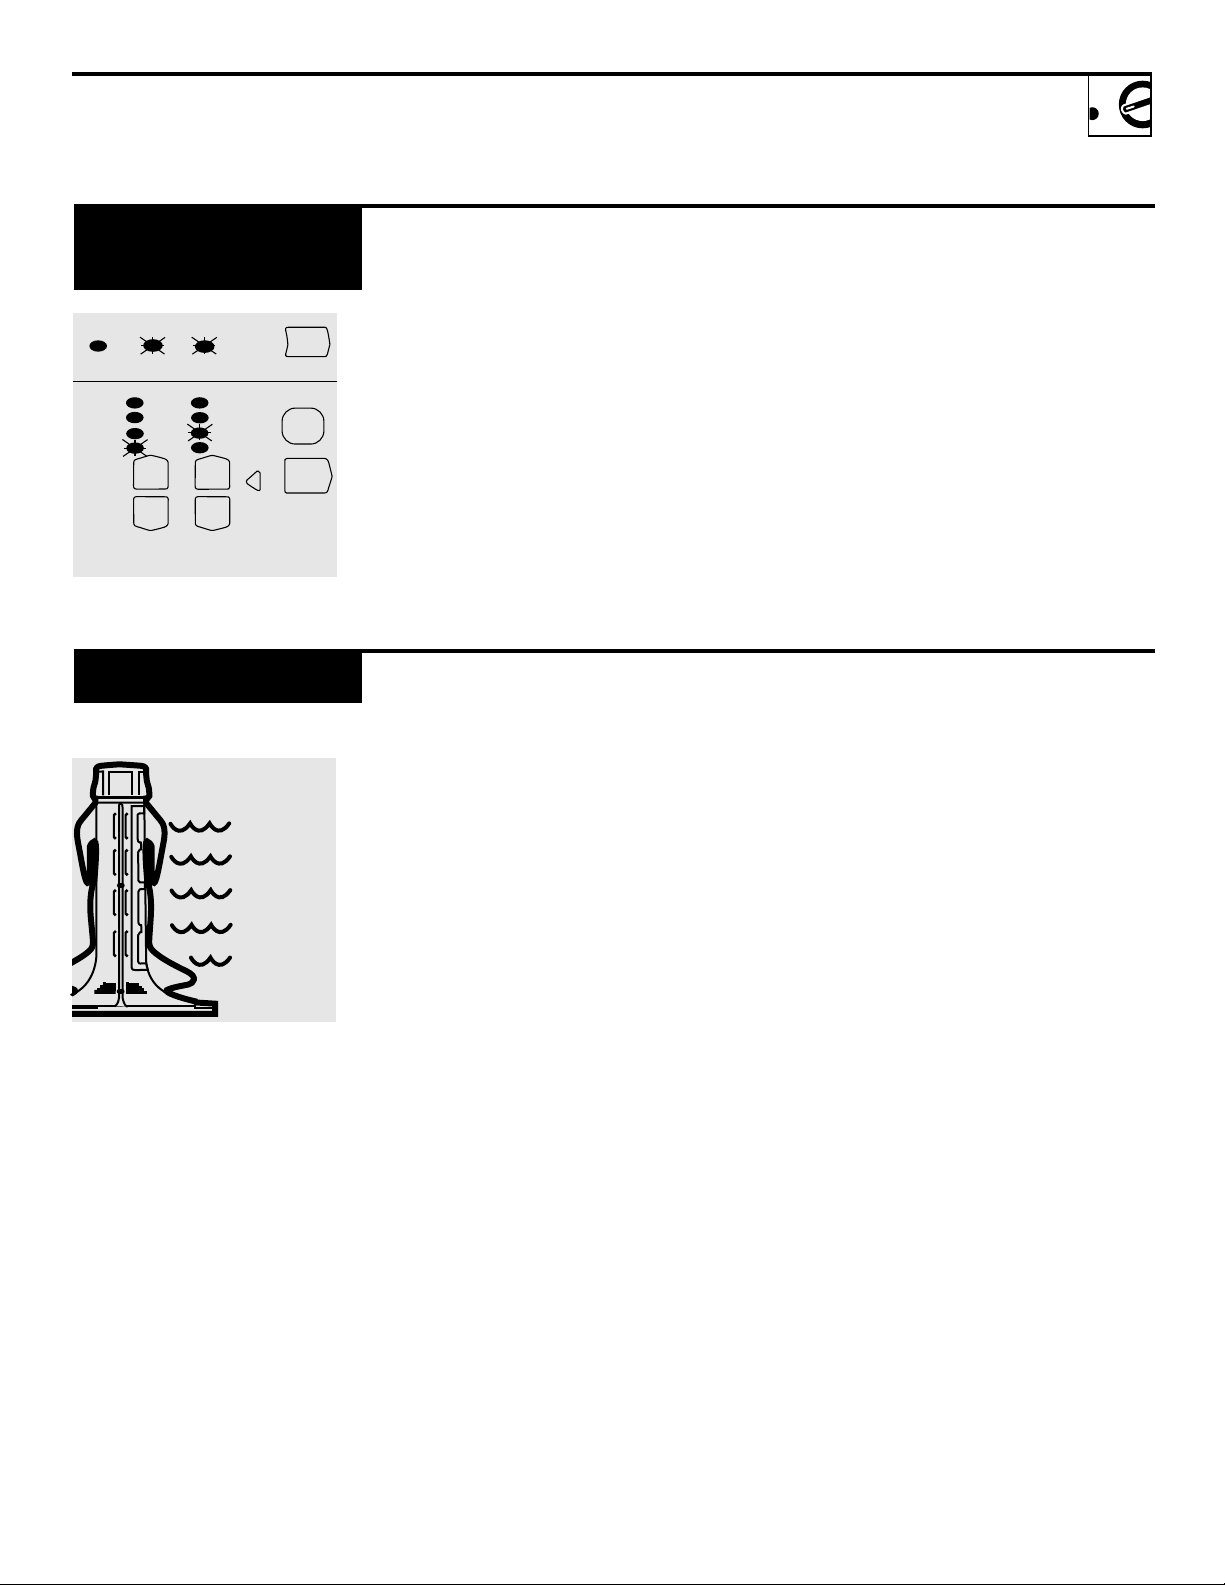
Fabric Softener
Dispenser
Pour
liquid
fabric softener
and water into fabric softener
dispenser
Cleaning Fabric
Softener Dispenser
This dispenser automatically
releases liquid fabric softener during the final rinse.
To use, follow these steps:
1
Make sure dispenser is securely
attached to agitator.
2
Using amount recommended on
package, dilute fabric softener
with water.
3
Pour into dispenser.
1
Remove the dispenser from the
top of the agitator.
2
Separate the dispenser cup from
the cover by pushing down on the
base of the cup with your thumb.
Dispenser cup will pop free from
the cover.
3
To clean dispenser, soak both the
dispenser cup and the dispenser
cover in the following solution:
NOTE:
•
Do not stop the washer during
the first spin. This will cause
the dispenser to empty too soon.
•
Do not use the Fabric Softener
Dispenser with the Water Saver
Option.
•
Never pour fabric softener directly
on clothes. It will leave spots on
clothes.
•
Only use dispenser for liquid fabric
softeners. If dispenser gets clogged,
see Cleaning section below.
4
If necessary, loosen build-up
with a clean, soft cloth after soaking. Do not use a stiff brush; you
may roughen the surface of the
dispenser.
5
Rinse and reassemble dispenser.
Place dispenser back on the
agitator.
Separate for cleaning
14
1 US gallon (3.8 liters) warm water
1/4 cup (60 ml) heavy duty liquid
detergent
1 cup (240 ml) bleach

Preparing to Wash
Prepare
Sort
Empty pockets, unroll cuffs, shake
out loose dirt, zip zippers, fasten
snaps, hooks and buttons.
Treat/remove stains. See Stain
Removal Guide.
Always follow Fabric Manufacturer’s
Care Label when laundering.
Sort by color
(Separate colorfast from
non-colorfast fabrics*)
• Whites
• Lights
• Darks
Separate by fabric type
• Cottons and linens
Permanent press cottons and
•
blends
• Synthetic and poly knits
Turn poly knits inside-out to
reduce pilling.
Do any necessary mending.
Use a net laundry bag for
delicate items.
Separate lint producers from
lint collectors
• Lint producers: terry cloth and
chenille
• Lint collectors: velveteen and
corduroy
Sort by soil
• Light
• Medium
• Heavy
* Non-colorfast fabrics may bleed or fade. Sort by
individual color.
Detergent
• Delicates
To use liquid or powdered
detergent:
1
Remove the Fabric Softener
Dispenser.
2
Pour the detergent down the
center of the agitator stem, using
the amount recommended on
package.
3
Replace the Fabric Softener
Dispenser.
Using the correct amount of detergent is one of the most important
things you can do to make sure your
wash comes out clean. Always follow
the detergent package directions.
Using too little detergent is a common cause of laundry problems. Use
more detergent if you have hard
water, large loads, greasy or oily soils
or lower water temperature.
15

Operating Instructions
Preparing to Wash
Bleach
Load
To use liquid chlorine bleach:
1
Check clothing care labels for
special instructions.
2
Measure liquid bleach carefully,
following instructions on package.
3
Dilute liquid bleach with water.
4
Remove Fabric Softener
Dispenser.
5
Pour diluted liquid bleach down
the center of the agitator stem.
6
Replace the Fabric Softener
Dispenser.
Load dry items loosely, spacing evenly around agitator, and close the lid.
A maximum wash load: 2 queen
sheets, 4 standard pillow cases,
2 medium tablecloths, 6 medium
bath towels, 8 wash cloths, 5 men’s
handkerchiefs, 3 men’s short sleeve
shirts, 4 t-shirts and 7 pairs of shorts.
Place large items in bottom, small
items in the middle and medium
items on top.
When loading wet items make
sure you set the water level high
enough to allow the items to move
freely.
Wash bulky items like blankets
separately.
If you prefer to use powdered bleach,
pour into the agitator with your
detergent.
NOTE:
Never pour undiluted liquid chlorine
bleach directly onto clothes, into the
wash basket, or into the center of the
agitator.
To add items after washer has started, press START/PAUSE, wait
until the machine has fully stopped
then open lid and submerge additional items next to the agitator.
Close the lid and press
START/PAUSE to restart.
To reduce wrinkling, give
permanent press items, synthetics
and poly knits room to move freely
in the washer.
NOTE:
•
Do not wrap large items like sheets
around the agitator.
•
Do not wash fabrics containing
flammable materials (waxes, cleaning fluids, etc.) in your washer.
16

Changing factory-set options
Option Adjustment
Mode
After using your washer you may
want to change some of the factoryset options to suit your wash needs.
You can change the following
factory-set options:
•
The rinse option on HEAVY DUTY,
REGULAR and WOOL cycles.
•
The amount of water used in the
Water Saver option.
•
The temperature for each wash
temperature setting.
•
The number of beeps at the end of
the cycle.
•
The Out of Balance Recovery routine.
•
The fill level selected by Auto
WATER LEVEL.
To make these changes it is
necessary to enter the Option
Adjustment Mode.
To enter Option Adjustment Mode:
1
Press START/PAUSE and hold
down. Press POWER.
2
When the pads have been
pressed correctly the machine
will give two quick beeps and
show an unusual pattern of lights.
In this mode the lights are used
to indicate the different options
available. The below diagram
shows how the lights relate to the
options you can change.
3
Use the pads on the panel to make
your changes to the factory-set
options.
4
Press POWER to return to normal mode and store your
changes.
5
Your washer will automatically
remember your changes even
when electricity has been turned
off.
Colder
AUTO WATER LEVEL
Less Water More Water
6
To make further changes, repeat
the above steps
TEMPERATURE SETTING ADJUSTMENT
15 Beeps
5 Beeps
None
AUTOMATIC
OUT OF BALANCE
RECOVERY
Definition of pads in the Option Adjustment Mode
BEEPS
Hot
Warm
Cold
TEMP
SETTING
More
Standard
Less
SHOWER
RINSE
VOLUME
.
RINSES
Hotter
2 Deep
1 Deep
Spray & Deep
DELAY
START
ADVANCE
POWER
START/
PAUSE
17

Operating Instructions
Changing factory-set options
Rinse Options for
the HEAVY DUTY,
REGULAR and WOOL
Cycles
Water Usage in Water
Saver Option
The factory-set rinse option on these
cycles is a spray rinse followed by a
deep rinse. The spray rinse may be
replaced with a short spin or a deep
rinse.
If you have a problem with impurities in your water supply you may get
a better wash if you change the rinse
option to 1 or 2 deep rinses.
1
Enter the Option Adjustment
Mode. (Press START/PAUSE
and hold down. Press POWER.)
You can increase or decrease the
volume of water added during the
shower rinse on the Water Saver
option.
2
The SPIN SPEED pads now
define the rinse options
Med light on = 2 deep rinses
Slow light on = 1 deep rinse
Hold light = Spray rinse and 1
deep rinse (factory setting)
3
Press POWER to return to normal
mode and store your changes.
.
18
1
Enter the Option Adjustment
Mode. (Press START/PAUSE
and hold down. Press POWER.)
2
The WATER LEVEL pads now
define the
wish to be used in the shower
rinse.
High light on = more water
Med light on = factory-set water
Low light on = less water
3
Press POWER to return to normal
mode and store your changes.
volume of water you
volume

Adjusting Wash
Temperature Settings
The five wash temperatures can be
individually adjusted if you think
t
hey are too hot or too cold.
1
Enter the Option Adjustment
Mode. (Press START/PAUSE
and hold down. Press POWER.)
2
The WASH TEMP pad now
defines the temperature setting
you want to adjust.
• Press ADVANCE to move
through the WASH PROGRESS
lights to the new temperature
setting.
• Advancing one WASH
PROGRESS light is approximately
a 2°F. (1°C.) temperature rise.
• If you keep pressing ADVANCE,
the light will scroll to the coldest
setting available for that wash
temperature.
3
Press POWER to return to
normal mode and store your
changes.
NOTE:
Using colder temperature settings
can save energy.
End of Cycle Beeps
The number of beeps signaling the
end of the cycle can be increased or
decreased.
1
Enter the Option Adjustment
Mode. (Press START/PAUSE
and hold down. Press POWER.)
2
The WASH OPTIONS pad now
defines the number of beeps you
prefer.
Time Saver light on = 15 beeps
Soak light on = 5 beeps
Water Saver light on = no beeps
3
Press POWER to return to
normal mode and store your
changes.
19

Operating Instructions
Changing factory-set options
Out of Balance
Recovery
When your washer is spinning it
can sense when the wash load is out
of balance and will stop and retry
spinning. If the machine still senses
an unbalanced load it will stop,
give a short burst of beeps every
five seconds and the Rinse or Spin
light and the Fast SPIN SPEED
light will flash. Redistribute the
load more evenly yourself.
Your washer can correct out of balance loads by filling with water, agitating to redistribute the load and
spinning.
If you would like your machine to
automatically try and correct out of
balance loads follow the instructions below.
1
Enter the Option Adjustment
Mode. (Press START/PAUSE
and hold down. Press POWER.)
2
The HEAVY DUTY pad is used
to select the out of balance
recovery option you prefer.
HEAVY DUTY light on = automatic
HEAVY DUTY light off = stops
3
Press POWER to return to
normal mode and store your
changes.
Auto Water Fill Level
You can increase or decrease the
fill level that Auto WATER LEVEL
will select.
NOTE:
We recommend you check the water
level by pausing the machine and
pushing the clothes down to see how
much water is in the basket. Clothes
often float and your washer can
sense the water under the clothes.
1
Enter the Option Adjustment
Mode. (Press START/PAUSE
and hold down. Press POWER.)
2
The WASH CYCLES pads now
define the amount of water used
in Auto WATER LEVEL.
FAVORITE light on = lower level
PERM. PRESS light on = factory-set
WOOL light on = high level
DELICATE light on = higher level
REGULAR light on = highest level
3
Press POWER to return to
normal mode and store your
changes.
20

Care & Cleaning
The Washer
Leave the lid open after washing
to allow moisture to evaporate. The
wash basket is practically care free.
If you want to clean the basket use
a clean, soft cloth dampened with
liquid detergent, then rinse. (Do
not use harsh or gritty cleaners.)
To rinse:
1
Choose the highest water level.
2
Choose the REGULAR wash cycle.
3
Press ADVANCE pad advancing
the cycle to rinse.
4
Press START/PAUSE.
Wash Basket—
water for washing, we recommend
that a warm or hot wash be used for
every 5th wash. This helps keep
detergent residue from building up
on and around the basket.
Fill Hoses—
er to faucet should be replaced
every five years.
Lint Filter—
cleaning lint filter that requires no
maintenance.
If you always use cold
Hoses connecting wash-
Your washer has a self-
Control Panel and Exterior of Washer—
I
mmediately wipe off any spills.
Clean with a clean, damp cloth. Try
not to hit surface with sharp objects.
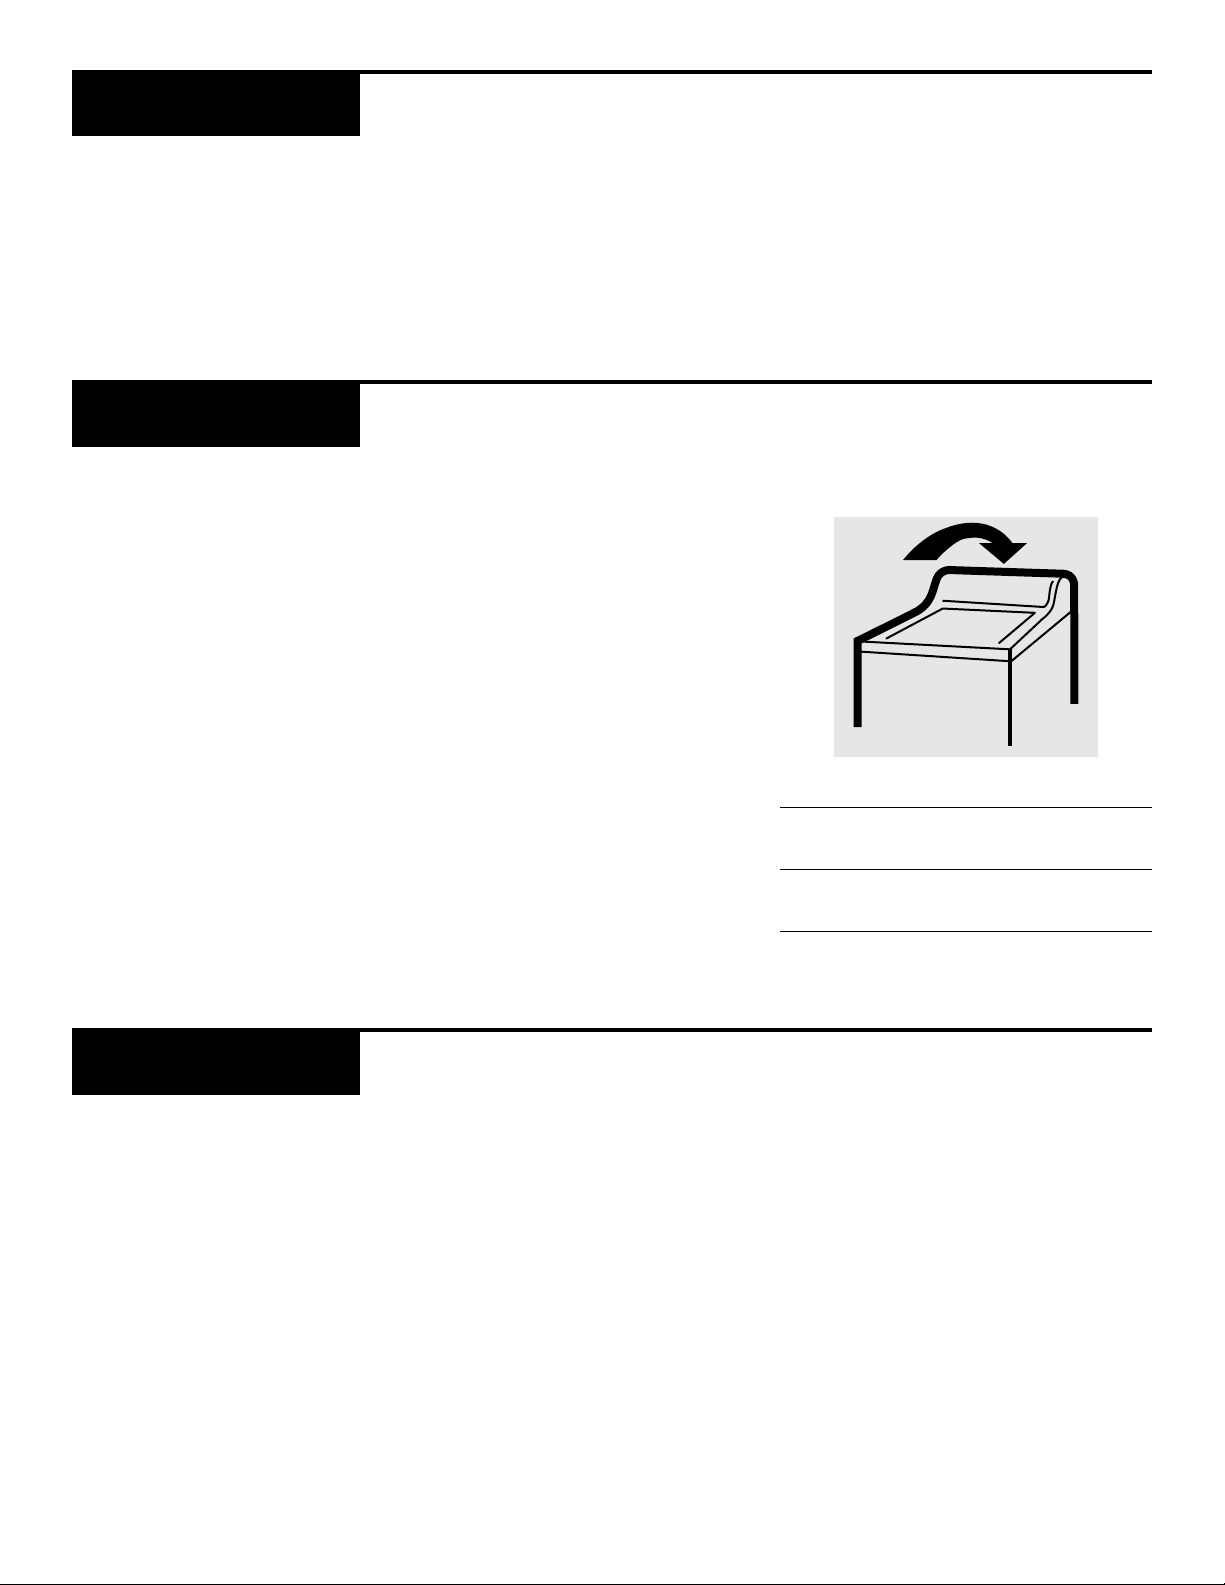
Lid—
The lid can be removed for
cleaning.
1
Open the lid all the way up.
3
To replace the lid, hold lid
vertically and align both hinges
before pushing down firmly.
Make sure the lid is on tight.
CAUTION:
Do not use the lid as a work surface.
Solvents, bleaches and pretreatment
products can damage the lid’s
appearance.
Agitator—
for cleaning, unscrew the nut in
the center of the agitator by turning
counterclockwise.
Use a clean, soft cloth dampened
with liquid detergent to clean the
agitator, then rinse.
To remove the agitator
CAUTION:
•
The agitator must be fully pushed
on the shaft when refitting. Tighten
the nut firmly by hand. Make sure
the agitator is not loose.
•
Do not use the washer if the agitator or lid is not fitted properly.
Moving and Storage—
technician to remove water from
drain pump and hoses. Do not store
the washer where it will be exposed
to the weather.
Long Vacations—
supply is shut off at faucets. Drain
all water from hoses if weather will
be below freezing.
Ask the service
Be sure water
2
Hold one side with one hand and
gently tap the other side with an
upward motion. This releases the
hinges. Clean with a clean, damp
cloth.
21

Helpful Information
Specialty Care Guide
Always follow Fabric Manufacturer’s Care Label or instructions when laundering.
Otherwise use the information below as a general guide.
Item Suggested Care
Down-Filled Garments Always wash down-filled garments separately from other types
of garments. Wet down gives off an odor that will disappear when
the down is dried. Wash down items frequently to fluff up the
down and to retain down’s warmth. When washing make sure
the load is balanced. Also make sure the garments are beneath
the level of the Fabric Softener Dispenser. Add towels if necessary.
Always tumble-dry down garments.
Pillows Pillows are made from a variety of materials. Wash only if
recommended on the Pillow Manufacturer’s Care Label. Before
washing check pillows for weak seams or holes, and mend. Let
the washer fill with water and add detergent. Let the washer
agitate for several minutes and then add pillows in pairs. Submerge
pillow in wash water. This will keep the load balanced. Use the
highest load/water level available. Make sure that the pillows are
beneath the level of the Fabric Softener Dispenser.
Blankets Let the washer fill with water, add detergent, allow detergent to
dissolve, then add blanket. Wash only one blanket at a time.
Electric Blankets Sew a strong piece of cloth over the plug to protect the
blanket and washer from damage. Wash according to pillow
instructions above.
Permanent Press Clothes Select a higher load/water level than normal. This will provide
that are Line Dried more water to help reduce wrinkling and to allow clothes enough
room to move around. Remove clothes as soon as the wash cycle is
complete and hang them up immediately.
22

Stain Removal Guide
General Hints
Soaking and
Pretreating
• Check Fabric Care Label.
• Remove stains as soon as
possible. The fresher the stain,
the easier it is to remove.
• To make sure a stain removal
product is safe for your fabric
test it on a hidden inside seam.
• Avoid use of hot water on
unknown stains. It can set
some stains.
A thorough soaking with detergent
or a special soaking agent is an
effective way to remove heavy
soils or stains.
Try one of these methods.
• Select the REGULAR wash cycle.
Then, select Soak from the WASH
OPTIONS. Press ADVANCE until
only one green light is left on.
• Diaper sanitizers are very corro-
sive to metal surfaces. Rinse and
wring diapers out thoroughly
before putting them in the washer.
DO NOT
ers in the washer or tip the contents of the diaper bucket into the
washer.
• To remove stains on white or
bleachable fabrics, try soaking the
stained area in a container for five
minutes in the following solution
and then launder in the washer:
1 US gallon (3.8 liters) cool water
1/4 cup (60 ml) chlorine bleach
soak diapers in sanitiz-
Bleach Solution
• Pretreat heavy soil by rubbing
in a small amount of liquid
detergent or a paste made of
water and powdered detergent
or soap. For best results, wait
1/2 hour before washing.
To remove stains on white or bleachable fabrics, try soaking the stained
area in a container for five minutes in the following solution and then
launder in the washer:
1 US gallon (3.8 liters) cool water
1/4 cup (60 ml) chlorine bleach
Turn page for specific stain removal
23

Helpful Information
Removing Specific Stains
The Invisible Stain
Foods on synthetic clothes may
cause stains which are virtually
invisible when you put the clothes
in the washer. If these stains are not
completely removed in the wash,
they may pick up dirt from other
clothes in the washer and appear
after the clothes are dried.
When They Become Visible:
• Rub the stain with undiluted
liquid detergent.
• Let stand 30 minutes.
• Rewash using the hottest water
that is safe for the fabric.
Preventing These Stains:
• Increase the amount of
detergent used.
• Increase water temperature.
• Wash synthetics often.
Stain White and Bleachable Fabrics Other Washable Fabrics
Adhesives
(Chewing Gum, etc.)
Rub with ice or immerse in very cold water. Same as white and bleachable
Use dull tool to carefully scrape off as much fabrics.
adhesive or gum as possible. Rub the stain with
undiluted liquid detergent. Rinse well,
then wash as usual.
Antiperspirants,
Deodorants
Blood
Chocolate, Cream,
Ice Cream and Milk
24
Apply undiluted liquid detergent. Rinse. Same as white and bleachable
If stain remains, use the Bleach Solution; fabrics except use non-chlorine
launder. bleach.
Soak in cold water, then launder in warm Sponge or soak in cool water,
water. If stain remains, use the Bleach then launder.
Solution; launder.
Soak in cold water. Use the Bleach Same as white and bleachable
Solution; launder.
fabrics except use non-chlorine
bleach.

Stain White and Bleachable Fabrics Other Washable Fabrics
Coffee and Tea
Cosmetics, Crayon
Grass, Mildew,
Scorch
Ink, Ballpoint
Without cream: Use the Bleach Solution;
launder. stain remains, apply warm
With cream: Soak in cold water, then use stores), let stand 30 minutes
the Bleach Solution; launder. and rinse well. Wash as usual.
Use the Bleach Solution; launder. Rub the stain with undiluted
Apply undiluted liquid detergent; launder. Sponge with warm water. Apply
(Treat mildew spots while they are fresh, undiluted liquid detergent;
before mold has a chance to weaken fabric.) launder. Bleach with
If either type stain remains, use the Bleach non-chlorine bleach; launder.
Solution; launder. (Severe scorch stains can Old mildew cannot be removed.
seldom be removed.) Scorch can seldom be removed.
Fresh stains: Place stain face down on an Same as white and bleachable
absorbent towel and use a spray cleaner. fabrics except launder using
Rinse well, then wash as usual. Old stains: non-chlorine bleach.
Use the Bleach Solution; launder.
Sponge with warm water. If
glycerine (available at drug
liquid detergent. Rinse well,
then wash as usual.
Juices, Wine,
Food Coloring
Perspiration
Soak stain in cool water. If stain remains, Sponge with warm water.
use the Bleach Solution; launder. Bleach remaining stain with
non-chlorine bleach.
Apply undiluted liquid detergent and launder Launder in warm water. Rinse
in warm water. If color has changed you may well. Bleach with non-chlorine
be able to restore it by treating with ammonia bleach.
or vinegar.
Do not mix chlorine bleach with ammonia or acids such as
vinegar and/or rust remover. Mixing can produce a toxic gas
which may cause death.
25

If Something Goes Wrong
Before you call for service
Beeps
Your washer can diagnose its own
beeps every 5 seconds it is telling you that it has a problem which you can correct.
NOTE:
A short burst of beeps will also be heard when the washer is plugged in.
problems. If the washer gives a short burst of
If the washer gives a
short burst of beeps and… Possible Causes and What to Do
Hot water temperature light • The hot water faucet has not been turned
is flashing on. (If the Cold water wash setting has been
adjusted in the Option Adjustment Mode
the hot water faucet must be turned on.)
• Hot water supply is not hot enough to main-
tain the wash temperature you have selected.
Select a lower wash temperature.
• Inlet hoses are improperly connected. Make
sure they are connected to the correct faucets.
Cold water temperature light • Cold water faucet has not been turned on.
flashing
is
• Inlet hoses are improperly connected.
Make sure they are connected to the
correct faucets.
26
Cold and Hot water • Faucets have not been turned on.
temperature lights are flashing
High water light is flashing • The machine is overloaded and cannot
Water Saver light is flashing • The washer has a suds build up. Too much
• Inlet hoses are improperly connected. Make
sure they are connected to the correct faucets.
agitate. Remove clothes until the remaining
clothes can move freely.
detergent has been used for the amount of
soil in the load or the household water is
very soft.

If the washer gives a
short burst of beeps and… Possible Causes and What to Do
Beeps
(continued)
First Rinse or Spin light is • Wash load is out of balance. Open the lid
flashing as well as SPIN SPEED and redistribute the load. Check and make
light sure the machine is level. To program the
washer to correct itself when a load becomes
unbalanced, see Out of Balance Recovery
section.
If the washer beeps
continuously…
•
Unplug the washer from the outlet.
15 seconds and plug it back into the outlet.
If fault reoccurs repeat this procedure. If
fault occurs a third time the washer needs
servicing. Contact GE Consumer Service.
Problem Possible Causes What to Do
Washer Won’t Operate
Washer is unplugged • Make sure cord is plugged securely into a
working outlet.
Wait
Wash Cycle Does
Not Start
Controls are not set properly • Check controls and make sure
START/PAUSE has been pressed.
Circuit breaker/fuse is • Check house circuit breakers/fuses. Replace
tripped/blown fuses or reset breaker and wait 15 seconds
before turning the power on again. Washer
should have separate outlet.
Water supply is improperly • Make sure hoses are connected to correct
connected faucets.
Lid is open • Close lid and press START/PAUSE.
Inlet hoses kinked • Check inlet hoses.
27

If Something Goes Wrong
Problem Possible Causes What to Do
Water Temperature
is Incorrect
Water Won’t Drain
Water Leaks
Control is not set properly • Check water temperature control and adjust.
Water valve screens are • Turn off the water source and remove the
stopped up
Water Temperature setting • See Adjusting Wash Temperature Settings.
needs adjusting
Water heater is not set • Make sure water heater is delivering
properly water at 120°F.-150°F. (48°C.-65°C.).
Drain hose is kinked or • Straighten drain hose and make sure
improperly connected washer is not sitting on it.
Fill hoses or drain hose is • Make sure hose connections are tight at faucets
improperly connected and make sure end of drain hose is correctly
water connection hoses from the upper back
of the washer. Use a brush or toothpick to
clean the screens in the machine. Reconnect
the hoses and turn the water back on.
• Top of drain outlet should be less than 8 ft.
(2.4 m) above floor.
inserted in and secured to drain facility.
Washer is Noisy
28
Household drain may
be clogged to call a plumber.
Constant water pressure to the • Tighten hoses at the faucets and turn the water
fill hoses at the water source off after each use.
Washer is uneven or washer • Make sure washer is level and firm
is continually going out of to the floor.
balance
•
Check household plumbing. You may need
•
Check condition of the fill hoses; they need
to be replaced after 5 years.

Problem Possible Causes What to Do
Washer Pauses
in Cycle
Washer Will Not Spin
The washer normally pauses
between washing steps
Lid is open • Close lid.
Lid is not properly fitted on • See Care and Cleaning section.
washer
Washer is in PAUSE mode • If the spin light is flashing press
START/PAUSE.
Washer is not draining •
Washer load is unbalanced • Press START/PAUSE to stop the washer,
Make sure drain hose is not kinked.
Straighten drain hose and make sure the
washer is not sitting on it.
•
Top of drain outlet should be less than 8 ft.
(2.4 m) above floor.
open lid and redistribute the load evenly.
Close the lid and restart.
• You can program the washer to correct an
unbalanced load. See Out of Balance
Recovery section.
Detergent Residue on
Wash Basket
Too Much or Too Little
Water When Filling on
Automatic Water Level
Washer is not level • Make sure washer is level and firm to the
floor.
Always using a cold water • Use a warm or hot water wash about every
wash temperature 5th wash cycle.
Water in tub before automatic • Select a wash cycle then press ADVANCE
water level was selected until only the SPIN light is on.
A large load like pillows, • Auto WATER LEVEL should not be used
bedding or large bulky for these items. Manually select the water
garments level.
If household voltage supply is • Manually select the water level.
higher or lower than normal
the water level selected can
be affected
Automatic Water Fill Level • See Auto Water Fill Level section.
needs adjusting
• Adjust the automatic water level. See Auto
Water Fill Level section.
29

If Something Goes Wrong
Problem Possible Causes What to Do
Lint or Residue
on Clothes
Wrinkling
Incorrect sorting • Separate lint producers from
lint collectors.
Washing too long • Wash small loads for a shorter time than
larger loads.
Detergent not dissolving • If you use powdered detergent dissolve it
in hot water before adding to washer.
• Try a liquid detergent.
• Use a warmer water temperature.
Overloading • Make sure load/water level selection
matches load size.
Too much bleach • Check bleach package for correct amount.
Not enough detergent • Try using more detergent.
Incorrect use of fabric softener • Check fabric softener package for
instructions (see Fabric Softener
Dispenser section).
Improper loads • Avoid mixing heavy items (like work
clothes) with light items (like blouses).
Shrinkage
30
• Separate permanent press from
other laundry.
• Try a fabric softener (like Downy brand).
Overloading or incorrect • Load your washer so clothes have enough
water level room to move freely.
Incorrect wash and dry cycles • Match Wash Cycle selection to the type
of fabric you are washing (especially for
permanent press loads).
Repeated washing in water • Wash in warm or cold water with plenty
that is too hot of detergent.
Some fabrics will naturally • Hot water is more likely to cause shrinkage
shrink in the wash than cold water.
• Follow directions on care label.

Problem Possible Causes What to Do
Grayed Clothes
Not enough detergent • Try using more detergent (especially with
(larger loads, heavy soil, larger loads).
and hard water might
require more detergent)
Water is not hot enough • Make sure water heater is delivering water
Washer is overloaded • Make sure load/water level selection
Soak time is too short • Soak at least 30 minutes.
Soaking with too little detergent • Use more detergent (especially with
Detergent is not dissolving • If you use powdered detergent dissolve it
To restore Grayed Clothes, • Put clothes through a wash cycle using hot
try one of the following water. (Check the garment’s manufacturing
• If you live in a hard water area try using
a water conditioner like Calgon brand or
install a water softener.
at 120°F.-150°F. (48°C. -65°C.).
• Do not use the washer when hot water is
used for other needs (dishes, baths, etc.).
matches load size.
heavy soil).
in hot water before adding to washer.
• Try a liquid detergent.
• Use a warmer water temperature.
care label to see if hot water can be used.)
Add a non-precipitating water softener, such
as Calgon brand. Use 2 1⁄2 times more than
is recommended for normal water softening.
Do not use detergent or soap. Allow clothes
to go through a complete cycle. Repeat if
necessary.
Too Many Suds
Pilling
• Soak your clothes using a water softener
instead of a soaking agent. Allow clothes
to soak for about 20 minutes.
Type of detergent • Switch to a lower sudsing detergent brand
and follow instructions on package.
Very soft water • Try less detergent.
Result of normal wear on • While this is not caused by the washer,
poly-cotton blends you can slow the pilling process by washing
poly-cotton blends inside out.
31

If Something Goes Wrong
Problem Possible Causes What to Do
Yellowed Clothes
Blue or Gray Spots
Not enough detergent • Always use recommended amount of
on a consistent basis detergent.
Chlorine bleach may yellow • Use non-chlorine bleach.
some fabrics
Iron or manganese in water may •
cause yellowing or yellow spots water softener dissolved in water and
Incorrect use of fabric softener • Check fabric softener package
Use extra detergent plus a non-precipitating
non-chlorine bleach.
• Run hot water for 2 minutes to help the
pipes clean out iron buildup.
• Drain your water heater occasionally.
• To remove spots spread stain area over a pan
of boiling water and squeeze lemon juice
through the stain.
for instructions (see Fabric Softener
Dispenser section).
• To remove spots dampen the spots
and rub with undiluted liquid detergent.
Rewash, using chlorine bleach if it is safe
for the fabric.
Clothes too Wet
32
Washer load is unbalanced • Press START/PAUSE and wait until washer
stops. Open the lid and redistribute the load
evenly. Close lid and press START/PAUSE.
Incorrect cycle selected • Make sure the cycle selected matches the
load you are washing.
This is normal for some fabrics

Problem Possible Causes What to Do
Snags, Holes, Tears,
Rips, or Excessive
Wear
Pins, snaps, hooks, sharp • Fasten snaps, hooks, buttons, and zippers.
buttons, belt buckles,
zippers, and sharp objects
left in pockets
Undiluted chlorine bleach • Check bleach package instructions for
Small tears or holes • Repair tears and holes before washing.
present before wash
Chemicals like hair bleach, • Rinse items that may have chemicals
hair dye, permanent wave on them before washing.
solution and toilet bowl cleaners
Permanent press items • While this is not caused by the washer,
naturally fray (especially you can slow the fraying process by
collars and cuffs) washing small permanent press loads with
• Remove loose items like pins, objects in
pockets and sharp buttons.
• Turn knits (which snag easily) inside out.
proper amount.
• Never add undiluted bleach to wash or
allow clothes to come in contact with
undiluted bleach.
higher water setting.
• Avoid washing heavy items (like towels)
with permanent press items.
Sounds
Your washer will make sounds • The motor will pulse before agitating to
that you have not heard from check if there is enough water in the tub.
other washers It also pulses before spinning to check if the
water has drained out of the tub.
• The washer will beep at the end of the cycle
and if you have used SPIN SPEED Hold.
• When Auto WATER LEVEL is selected the
washer alternates filling and agitating to
check that the right amount of water is in
the basket for the clothes load.
33

GE Service Numbers
We’ll be there!
GE Answer Center
®
800.626.2000
In-Home Repair Service
800-GE-CARES
(800-432-2737)
Whatever your question about any
GE major appliance, GE Answer
Center
available to help. Your call—and
your question—will be answered
promptly and courteously.
A GE consumer service professional
will provide expert repair service,
scheduled at a time that’s convenient for you. Many GE Consumer
Service company-operated locations offer you service today or
tomorrow, or at your convenience
(7:00 a.m. to 7:00 p.m. weekdays,
9:00 a.m. to 2:00 p.m. Saturdays).
® information service is
And you can call any time. GE
Answer Center
24 hours a day, 7 days a week.
Our factory-trained technicians
know your appliance inside and
out—so most repairs can be handled in just one visit.
® service is open
For Customers With
Special Needs
800.626.2000
34
Upon request, GE will provide
Braille controls for a variety of
GE appliances, and a brochure
to assist in planning a barrier-free
kitchen for persons with limited
mobility. To obtain these items,
free of charge, call 800.626.2000.
Consumers with impaired hearing
or speech who have access to a
TDD or a conventional teletypewriter may call 800-TDD-GEAC
(800-833-4322) to request information or service.

Service Contracts
800-626-2224
You can have the secure feeling that GE Consumer Service will still
be there after your warranty expires.
warranty is still in effect and you’ll receive a substantial discount. With a
multiple-year contract, you’re assured of future service at today’s prices.
Purchase a GE contract while your
Parts and Accessories
800-626-2002
Further Service
Individuals qualified to service
their
own appliances can have
parts or accessories sent directly
to their home. The GE parts system
provides access to over 47,000
parts…and all GE Genuine Renewal
Parts are fully warranted. VISA,
MasterCard and Discover cards
are accepted.
We’re proud of our service and
want you to be pleased. If for some
reason you are not happy with the
service you receive, here are three
steps to follow for further help.
First,
contact the people who serviced your appliance. Explain why
you are not pleased. In most cases,
this will solve the problem.
Care and cleaning instructions contained in this manual cover procedures to be performed by any user.
Other servicing generally should be
referred to qualified service personnel. Caution must be exercised,
since improper servicing may cause
unsafe operation.
Finally,
not resolved, write:
Major Appliance Consumer
Action Program
20 North Wacker Drive
Chicago, IL 60606
if your problem is still
Next,
if you are still not pleased,
write all the details—including
your phone number—to:
Manager, Consumer Relations
GE Appliances, Appliance Park
Louisville, KY 40225
35

WASHER
WARRANTY
What is Covered
Staple sales slip or cancelled check here. Proof of original purchase
date is needed to obtain service under warranty.
FULL TWO-YEAR WARRANTY
For two years from date of original purchase,
we will provide, free of charge, parts and
service labor in your home to repair or replace
any part of the washer that fails because of a
manufacturing defect.
LIMITED ADDITIONAL WARRANTIES
Lifetime warranty—For the third year from
date of
the product, we will provide, free of
replacement basket for any basket that fails
because of a manufacturing defect.
Eight year warranty—For the third through the
tenth year from the date of original purchase,
we will provide, free of charge:
tub for any tub that fails due to a
manufacturing defect.
Three year warranty—For the third through the
fifth year from the date of original purchase, we
will provide, free of charge: replacement parts
for any part of the suspension rod and spring
assembly that fails due to a manufacturing
defect; replacement parts for any part of the
electronic parts that fail due to manufacturing
defect.
original purchase through the life
charge, a
replacement
of
For limited additional warranties you pay for the
service trip to your home and all service labor
charges.
************************************
This warranty is extended to the original
purchaser and any succeeding owner for
products purchased for ordinary home use in
the 48 mainland states, Hawaii and Washing-
the
ton, D.C. In Alaska the warranty is the same
except that it is LIMITED because you must pay
to ship the product to the service shop or for
the service technician’s travel costs to your
home.
All warranty service will be provided by our
Factory Service Centers or by our authorized
Customer Care®servicers during normal
working hours.
Should your appliance need service,
during warranty period or beyond, call
800-GE-CARES(800-432-2737).
What is Not
Covered
• Service trips to your home to teach you how
to use the product.
Read your Owner’s Manual. If you then have
any questions about
please contact
Consumer Affairs office at the address below,
or call, toll-free:
GE Answer Center®
800.626.2000
consumer information service
operating the product,
your dealer or contact our
• Improper installation.
If you have an installation problem,
contact your dealer or installer. You
responsible for providing adequate
exhausting and other connecting facilities.
• Replacement of house fuses or resetting
circuit breakers.
• Failure of the product if it is misused, or
used for other than the intended purpose
or used commercially.
•
Damage to product caused by accident,
floods or acts of God.
are
electrical,
fire,
of
WARRANTOR IS NOT RESPONSIBLE FOR CONSEQUENTIAL DAMAGES.
Some states do not allow the exclusion or limitation of incidental or consequential damages, so the above limitation or
exclusion may not apply to you. This warranty gives you specific legal rights, and you may also have other rights which
vary from state to state. To know what your legal rights are in your state, consult your local or state consumer affairs
office or your state’s Attorney General.
Warrantor: General Electric Company
If further help is needed concerning this warranty, write:
Manager—Consumer Affairs, GE Appliances, Louisville, KY 40225
Part No. 175D1807P134
Pub. No. 49-9883
425959
12-95 CG
WZSE5310T
Printed in New Zealand
 Loading...