

Page 1
STD150_AU_Ed01.qxd 26/11/04 12:00 Page 1
D150
User guide
Page 2

English
STD150_AU_Ed01.qxd 26/11/04 12:00 Page 2
The package contains the following items:
- a base,
- two line cables,
- two handsets,
- two chargers,
- two electric power supply units for the chargers,
- one electric power supply unit for the base,
- six batteries,
- the user guide and a quick guide.
Please read this guide carefully to get to know the main features of the
D150
.
2
Page 3

STD150_AU_Ed01.qxd 26/11/04 12:00 Page 3
1. INSTALLATION . . . . . . . . . . . . . . . . . . . . . . . . . . . . . . . . . . . . . . . . . . . . 5
1.1 Precautions . . . . . . . . . . . . . . . . . . . . . . . . . . . . . . . . . . . . . . . . . . . . . . . 5
1.2 Connecting the charger . . . . . . . . . . . . . . . . . . . . . . . . . . . . . . . . . . . . . . 5
1.3 Installing the handset . . . . . . . . . . . . . . . . . . . . . . . . . . . . . . . . . . . . . . . . 5
1.4 Installing the base . . . . . . . . . . . . . . . . . . . . . . . . . . . . . . . . . . . . . . . . . . 6
1.5 Getting to grips with your telephone . . . . . . . . . . . . . . . . . . . . . . . . . . . . . 7
2. CONFIGURING THE BASE'S LINES . . . . . . . . . . . . . . . . . . . . . . . . . . . . 8
2.1 Line priority . . . . . . . . . . . . . . . . . . . . . . . . . . . . . . . . . . . . . . . . . . . . . . . 8
2.2 Choosing the ringing group . . . . . . . . . . . . . . . . . . . . . . . . . . . . . . . . . . . 8
2.3 Ringing priority . . . . . . . . . . . . . . . . . . . . . . . . . . . . . . . . . . . . . . . . . . . . . 9
3. USING THE TELEPHONE . . . . . . . . . . . . . . . . . . . . . . . . . . . . . . . . . . . . 10
3.1 Making a call . . . . . . . . . . . . . . . . . . . . . . . . . . . . . . . . . . . . . . . . . . . . . . 10
3.2 Making an internal call . . . . . . . . . . . . . . . . . . . . . . . . . . . . . . . . . . . . . . . 10
3.3 Receiving a call . . . . . . . . . . . . . . . . . . . . . . . . . . . . . . . . . . . . . . . . . . . . 10
3.4 Transferring a call . . . . . . . . . . . . . . . . . . . . . . . . . . . . . . . . . . . . . . . . . . 11
3.5 Redialling one of the last numbers called (bis) . . . . . . . . . . . . . . . . . . . . . 11
3.6 Mute function (turning off the microphone) / putting on hold . . . . . . . . . . . 11
3.7 Calling from the log of calls (list of the last 10 calls received) . . . . . . . . . . 11
3.8 Shuttling between an external and internal call . . . . . . . . . . . . . . . . . . . . . 12
3.9 3-way conference (2 internal correspondents and 1 external . . . . . . . . . . 12
3.10 Managing 2 simultaneous external calls on the same handset . . . . . . . . . 13
3.11 Activating / deactivating hands-free mode during a call . . . . . . . . . . . . . . . 13
3.12 Locking the keyboard . . . . . . . . . . . . . . . . . . . . . . . . . . . . . . . . . . . . . . . . 14
4. YOUR PHONE BOOK . . . . . . . . . . . . . . . . . . . . . . . . . . . . . . . . . . . . . . . 14
4.1 Creating a contact page . . . . . . . . . . . . . . . . . . . . . . . . . . . . . . . . . . . . . . 14
4.2 Using the phone book to make a call . . . . . . . . . . . . . . . . . . . . . . . . . . . . 15
4.3 Modifying a contact page . . . . . . . . . . . . . . . . . . . . . . . . . . . . . . . . . . . . . 15
4.4 Deleting a contact page . . . . . . . . . . . . . . . . . . . . . . . . . . . . . . . . . . . . . . 15
5. CUSTOMISING YOUR HANDSET . . . . . . . . . . . . . . . . . . . . . . . . . . . . . . 16
5.1 Adjusting the keytones . . . . . . . . . . . . . . . . . . . . . . . . . . . . . . . . . . . . . . . 16
5.2 Choosing a melody and adjusting the volume . . . . . . . . . . . . . . . . . . . . . . 16
5.3 Emergency number . . . . . . . . . . . . . . . . . . . . . . . . . . . . . . . . . . . . . . . . . 16
5.4 Naming a handset . . . . . . . . . . . . . . . . . . . . . . . . . . . . . . . . . . . . . . . . . . 17
5.5 Selecting the display language . . . . . . . . . . . . . . . . . . . . . . . . . . . . . . . . . 17
5.6 Changing the automatic pick-up settings . . . . . . . . . . . . . . . . . . . . . . . . . . 17
5.7 Changing the handset's pin number . . . . . . . . . . . . . . . . . . . . . . . . . . . . . 18
5.8 Adjusting the automatic line seizure . . . . . . . . . . . . . . . . . . . . . . . . . . . . . 18
6. ASSOCIATING / DISASSOCIATING A HANDSET WITH THE BASE . . . . 18
6.1 Associating an extra handset with the base . . . . . . . . . . . . . . . . . . . . . . . 18
6.2 Removing (disassociating) a handset . . . . . . . . . . . . . . . . . . . . . . . . . . . . 19
7. BASE SETTING . . . . . . . . . . . . . . . . . . . . . . . . . . . . . . . . . . . . . . . . . . . 19
7.1 Dialling method . . . . . . . . . . . . . . . . . . . . . . . . . . . . . . . . . . . . . . . . . . . . 19
7.2 Call barring . . . . . . . . . . . . . . . . . . . . . . . . . . . . . . . . . . . . . . . . . . . . . . . 20
7.3 Setting the flashing time . . . . . . . . . . . . . . . . . . . . . . . . . . . . . . . . . . . . . . 20
7.4 Setting the pause time . . . . . . . . . . . . . . . . . . . . . . . . . . . . . . . . . . . . . . . 20
8. TECHNICAL SPECIFICATIONS . . . . . . . . . . . . . . . . . . . . . . . . . . . . . . . . 21
9. TROUBLESHOOTING ... . . . . . . . . . . . . . . . . . . . . . . . . . . . . . . . . . . . . . 22
10. WARRANTY . . . . . . . . . . . . . . . . . . . . . . . . . . . . . . . . . . . . . . . . . . . . . . 23
11. ENVIRONMENT . . . . . . . . . . . . . . . . . . . . . . . . . . . . . . . . . . . . . . . . . . . . 24
12. SAFETY . . . . . . . . . . . . . . . . . . . . . . . . . . . . . . . . . . . . . . . . . . . . . . . . . 24
3
Page 4
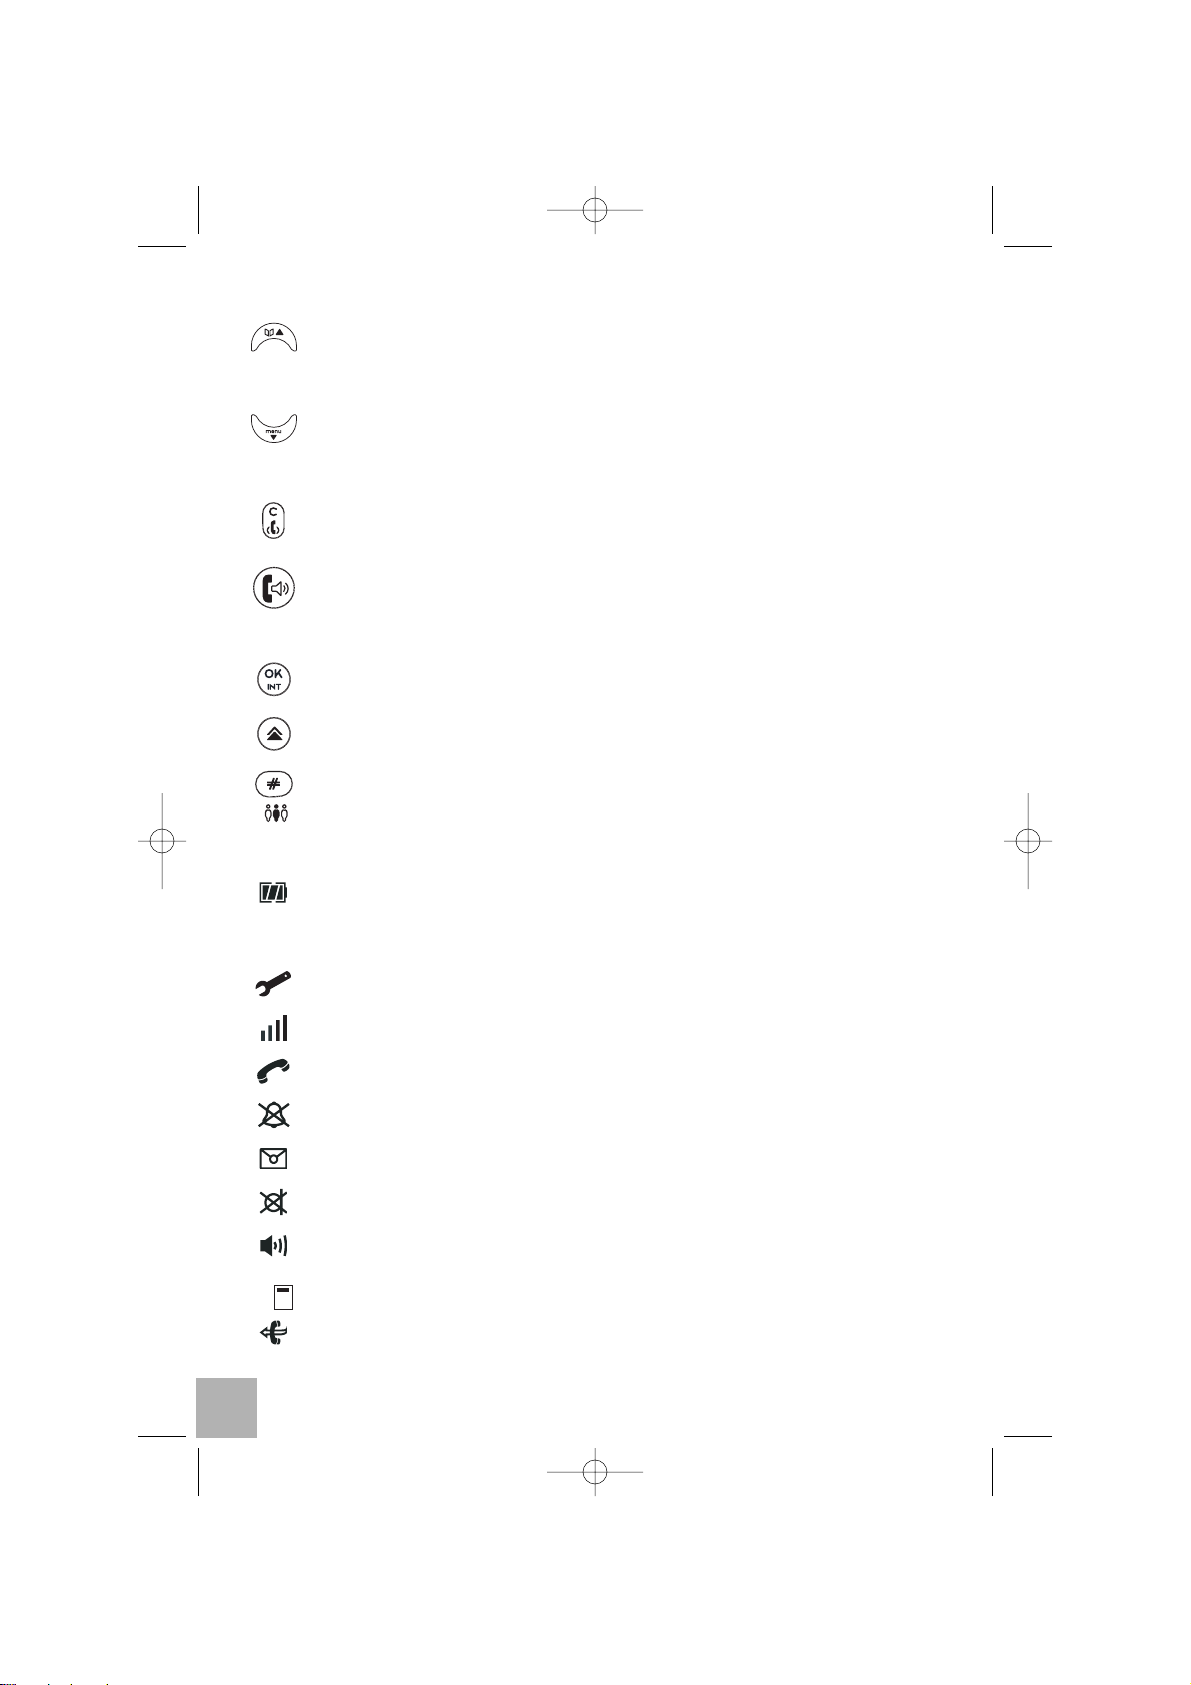
Handset keys
Access the address book
Increase the sound volume of the handset's earpiece and the handsfree speaker
Access the menu
Decrease the sound volume of the handset's earpiece and the handsfree speaker
Cancel/return key
Mute function
Line seizure and hang up key
Press and hold: activate/deactivate hands-free mode
ON/OFF switch
Intercom and menu confirmation
Recall last three numbers dialled
Long press: insertion of pause
Set up three-way conference
Display and associated icons
Battery charge level: flashes when charging. The icon appears on the
screen when the batteries have only 25% of charge left and when they
are exhausted.
Enter the menu indicator
Reception antenna: indicates the quality of reception
Fixed when transmitting and receiving a call
Silence (ringing volume in silent mode)
Indicates calls present in the log
Put on hold
Hands-free activated
Line 1 indicator
Hot call activated (SOS)
STD150_AU_Ed01.qxd 26/11/04 12:00 Page 4
L1
4
Page 5

1. INSTALLA TION
1.1 PRECAUTIONS
The quality of communication depends on the location and environment of the
base.
Your handsets must be kept away from sources of excessive heat (radiators, direct sunlight, etc.) and protected against vibrations and
dust. Never allow your telephones to come into contact with water or other
liquids or with aerosols.
To reduce the risk of interference and optimise reception, take particular care
to keep it away from the immediate vicinity of windows, large metal objects,
reinforced concrete, televisions, music centres, halogen lamps or heating devices, fluorescent lighting, burglar alarms, microwave ovens, computers, etc.
To clean your handsets, use a lightly moistened antistatic cloth.
Informative note: your telephone is a DECT™* standard
certified item of equipment. It is meant for transmitting and receiving telephone calls and for connection to the public switched telephone network.
1.2 CONNECTING THE CHARGER
Connect the power supply cable to the charger.
Plug the mains adaptor into a 230 V / 50 Hz
electric socket.
1.3 INSTALLING THE HANDSET
Mains
cable
* DECT is a trade mark registered by the ETSI.
Mains
cable
* DECT is a trade mark registered by the ETSI.
Mains
cable
* DECT is a trade mark registered by the ETSI.
Mains
cable
* DECT is a trade mark registered by the ETSI.
STD150_AU_Ed01.qxd 26/11/04 12:00 Page 5
D150
D150
-
+
-
++
-
5
Page 6
Fitting the batteries and charging up for the first time
Insert the batteries in the handset's compartment.
Before using for the first time, we recommend that you leave the handset to
charge up on the charger for 24 hours in order to optimise battery performance and longevity.
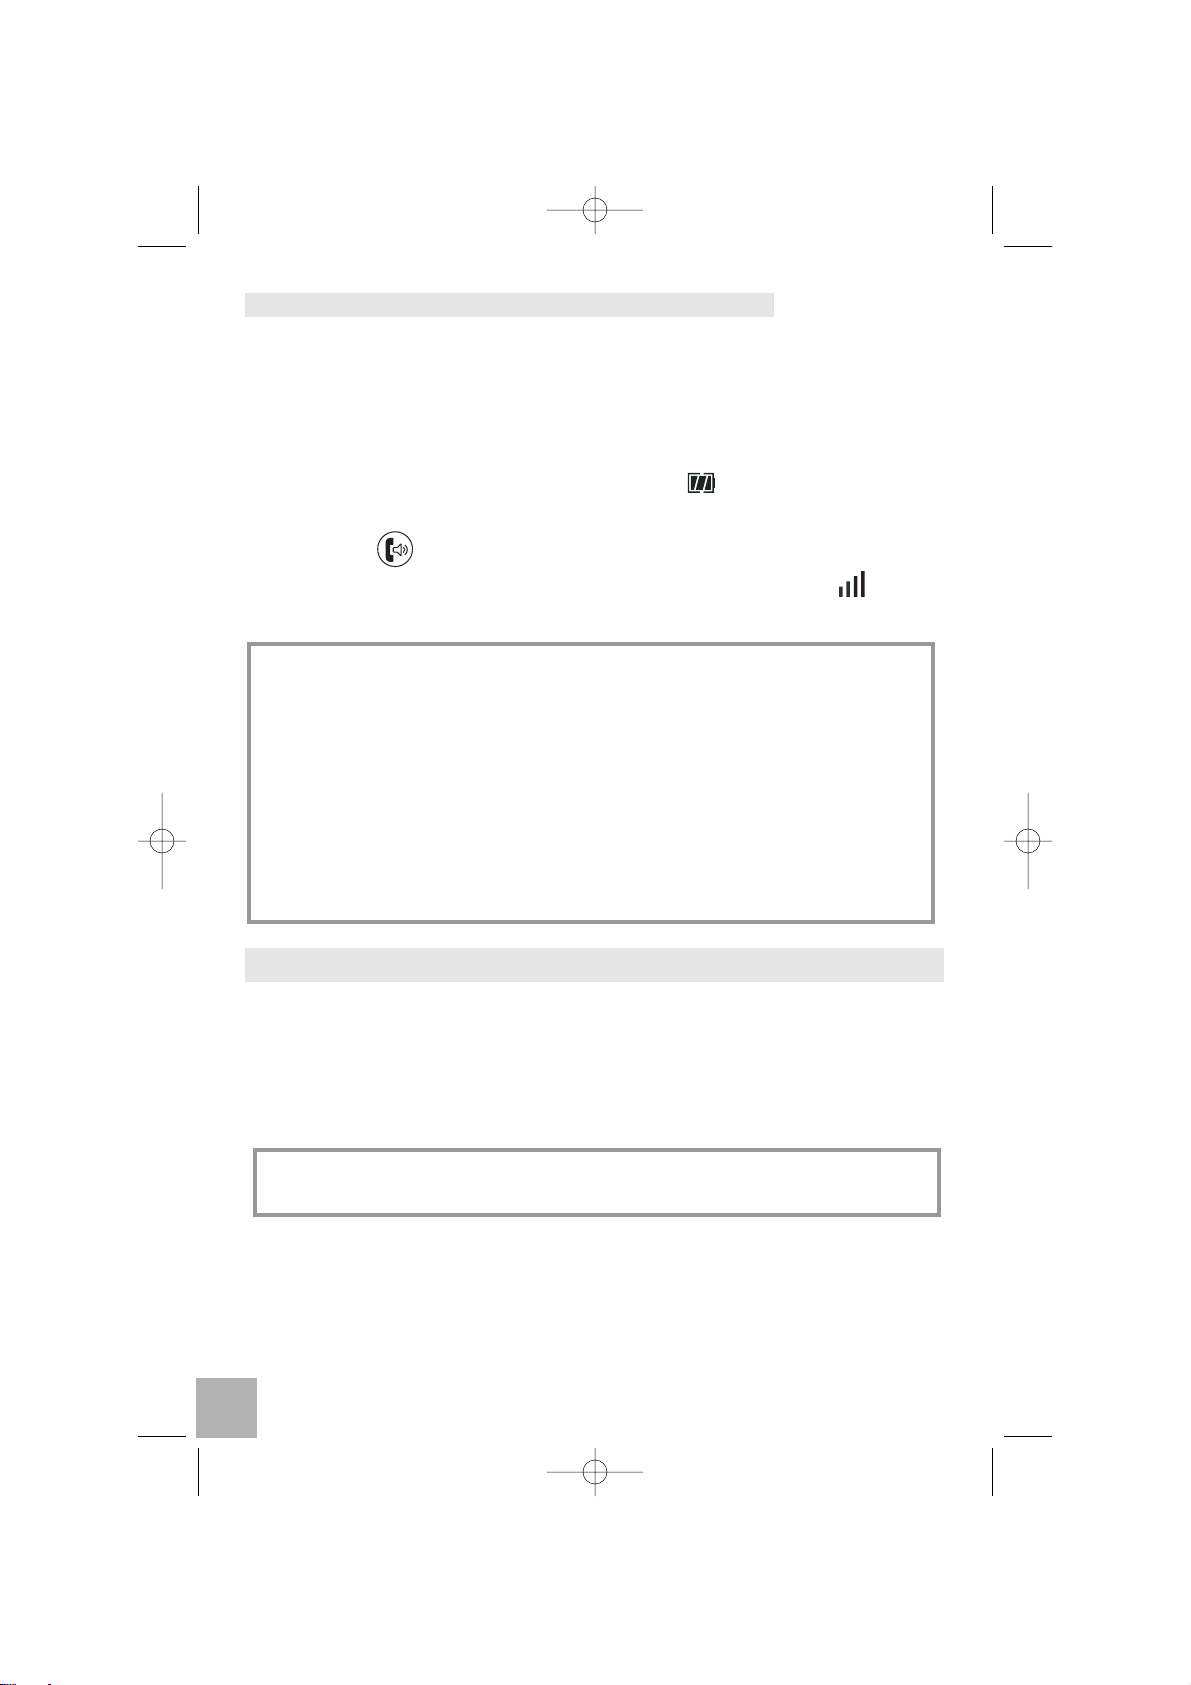
Place the handset on the charger. It beeps. The icon flashes during charging.
Obtain a line .
The tone confirms that the telephone is working. Check that the symbol
is not flashing.
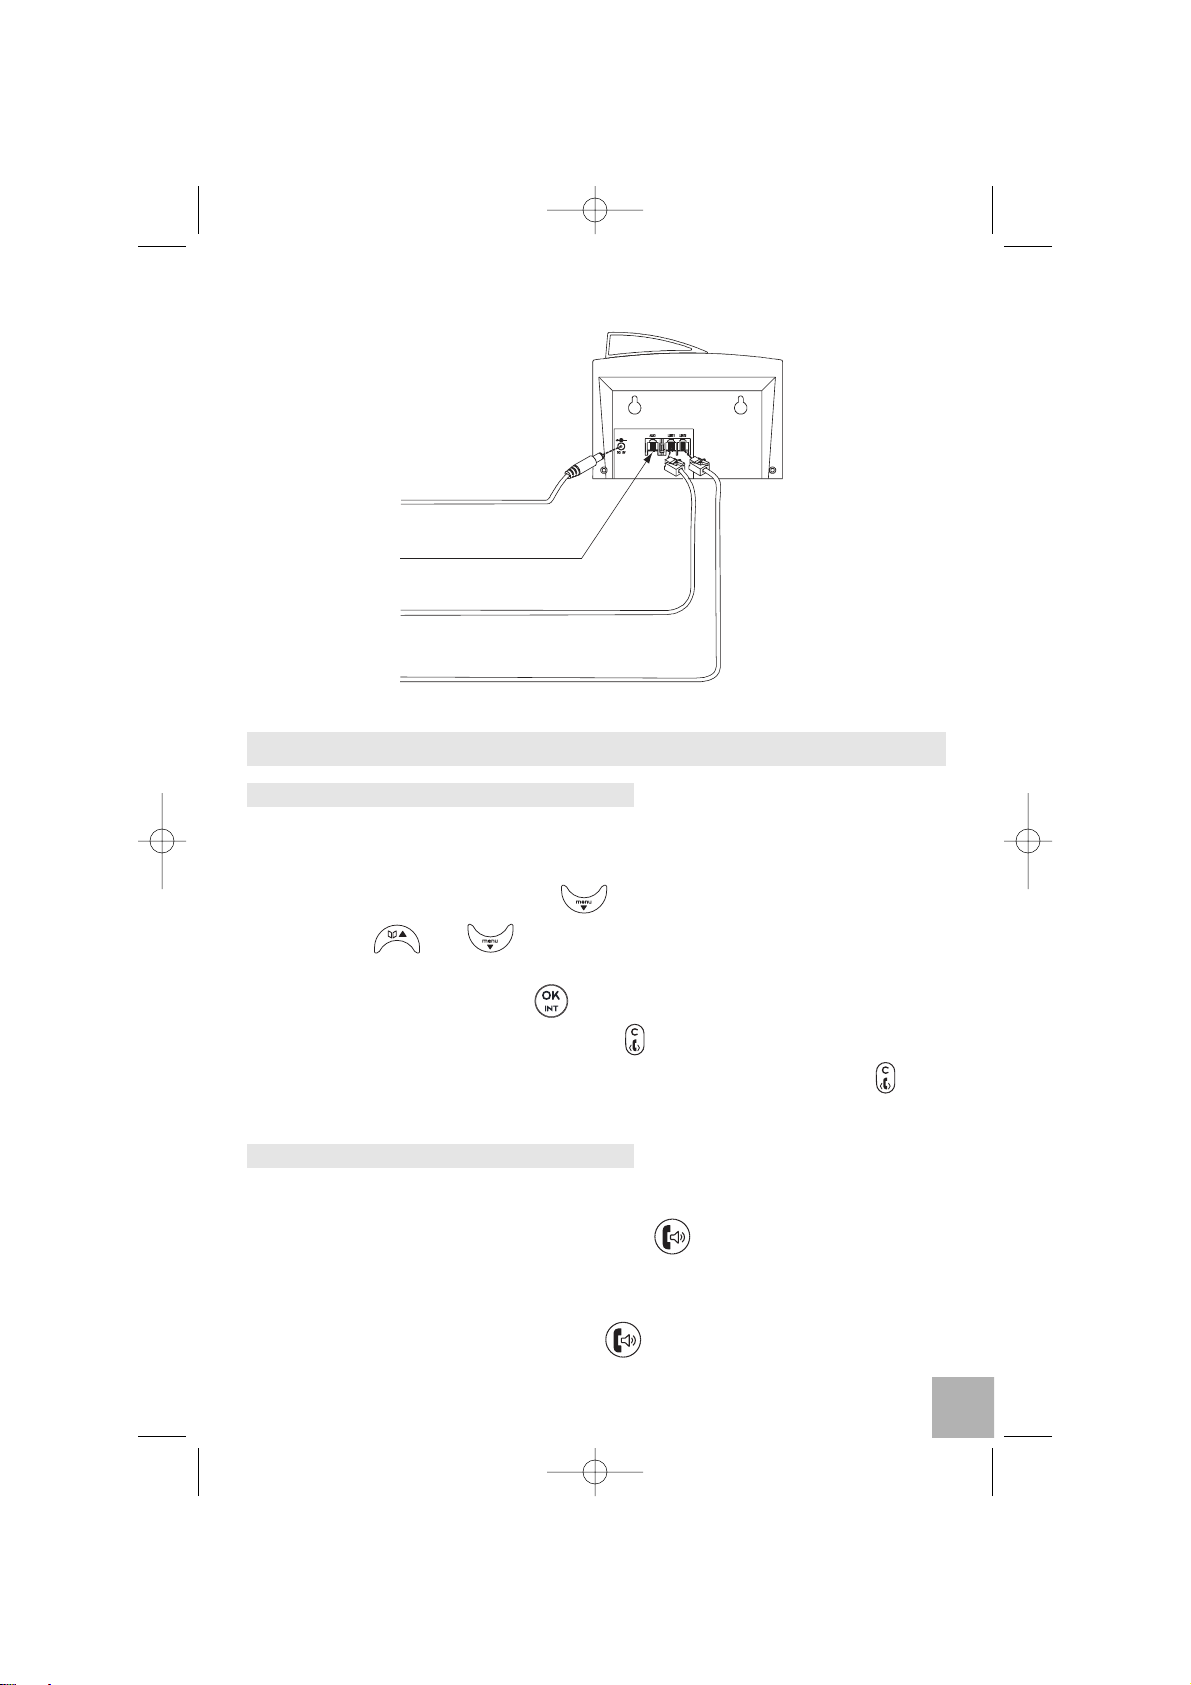
1.4 INSTALLING THE BASE
Fix the base about 2 metres above the floor and in a central point in the building in order to optimise the DECT radio range of all the terminals connected to it.
l Connect the power supply cable to the base and plug the mains adapter into
a 230 V / 50 Hz electrical socket.
l Connect the telephone cables to the base (line 1 and line 2) and to the cor-
responding telephone sockets.
!
The 9 V mains power supply unit must be connected to the base
and is not suitable for the handset chargers.
!
Only use rechargeable batteries with exactly the same specifications as those supplied with the product.
Using non-rechargeable or non-conforming batteries (see the
"Safety" chapter) can damage the product and presents a health
hazard.
Failure to comply with this recommendation will invalidate the
manufacturer's warranty.
The batteries could split or leak if incorrectly inserted, opened or
exposed to heat.
Never dispose of batteries in a fire: risk of explosion.
STD150_AU_Ed01.qxd 26/11/04 12:00 Page 6
6
Page 7
STD150_AU_Ed01.qxd 26/11/04 12:00 Page 7
l You can also connect a fax or answering machine to "Aux. 1".
Mains cable
Connection to a fax,
an answering machine
Telephone cable
Line 1
Telephone cable
Line 2
1.5 GETTING TO GRIPS WITH YOUR TELEPHONE
1.5.1 Navigating through the menus
It's easy to adjust and customise your DECT cordless telephone using the
scrolling menu.
l To access the menu: press the key.
l Press the and keys to find your way to the option you want to
select. The options succeed each other in a loop.
l To validate an option, press .
l To return to the previous menu, press .
l To quit the menu and return to the idle screen, press and hold the key.
Note: When an option is proposed, the current setting is displayed first.
1.5.2 Handset On/Off
In idle mode:
l To switch off the handset, press and hold for at least 2 seconds.
l The display goes out. You can no longer call. The handset will not ring if you
receive calls.
l To switch on the handset, press the key (hold it down).
7
Page 8
2. CONFIGURING THE BASE'S LINES
You can configure the base's lines according to your requirements.
2.1 LINE PRIORITY
You have the following options for managing the outgoing calls for each handset:
- Alternative (Line 1 or Line 2): default setting
- Line 1 First: line 1 takes priority and if this line is busy, line 2 will be used
- Line 2 First: line 2 takes priority and if this line is busy, line 1 will be used
- Line 1 Only (line 1): line 1 authorized and no access to line 2
- Line 2 Only (line 2): line 2 authorized and no access to line 1
- No Ext (internal calls only)
This line priority has no effects on the reception of incoming calls.
l Press to enter the menu.
l Select "BS Setting" and press to confirm.
l Enter the "MASTER PIN:" 1590 (default) and press to confirm.
l Select "Select Line" and press to confirm.
l Use the direction keys to choose the handset you want from the list and
press to confirm (HS 1 = handset 1).
l Choose the line priority from the 6 options given above and press to
confirm.
2.2 CHOOSING THE RINGING GROUP
Each handset may receive a call on line 1 and/or line 2.
For example, you may decide that handsets 1, 3 and 5 will be associated with
line 1 and ring on line 1 and that handsets 2 and 4 will be associated with line 2
and ring on line 2.
l Press to enter the menu.
l Select "BS Setting" and press to confirm.
l Enter the "MASTER PIN:" 1590 (default) and press to confirm.
STD150_AU_Ed01.qxd 26/11/04 12:00 Page 8
8
Page 9

l Select "Ring Group" and press to confirm.
l
Use the
and
keys to choose one of the lines and press
to
confirm
.
l Choose the handsets you want using the keyboard and press to
confirm.
The handsets which are not available for this line will be indicated by an "X".
2.3 RINGING PRIORITY
You can choose the handset that will ring first when an incoming call is received. You can also set the number of rings on the priority handsets before the
others ring.
l Press to enter the menu.
l Select "BS Setting" and press to confirm.
l Enter the "MASTER PIN:" 1590 (default) and press to confirm.
l Select "Ring Prior" and press to confirm.
l Select "Line 1" or "Line 2" and press to confirm.
l Use the and keys to choose the num-
ber of the handset that should ring first and press
to confirm.
l
Now use the and keys to choose the
number of rings on the priority handset before the
other handsets ring and press to confirm.
l To cancel the ringing priority for a handset, select "Off" with the and
keys and press to confirm.
STD150_AU_Ed01.qxd 26/11/04 12:00 Page 9
HS No.:2
HS No.:2
Ring Cnt:4
9
Page 10

3. USING THE TELEPHONE
3.1 MAKING A CALL
Before you make a call, you can see on the screen if lines 1 and 2 are busy.
Direct dialling
l Press .
l Dial the number to be called.
l To hang up after finishing a call, press .
Pre-dialling
With the pre-dialling feature you can enter and modify a number before making
the call.
l Dial a number of up to 25 digits.
l Press to correct an input error.
l Press to make the call and to hang up at the end of the call.
Note: You can insert a pause with a long press on .
3.2 MAKING AN INTERNAL CALL
If you have registered more than one handset, you can make internal calls.
l Press .
l Dial the number of the handset you want to call.
"
You will call your internal correspondent.
3.3 RECEIVING A CALL
To pick up the call:
l Press .
"
The icon appears on the screen.
l Press to increase the volume or to decrease it (9 volume levels).
l To hang up at the end of the call, press .
STD150_AU_Ed01.qxd 26/11/04 12:00 Page 10
2
10
Page 11

3.4 TRANSFERRING A CALL
During a call, you can transfer it to another handset:
l Press and dial the number of the handset to which you want to trans-
fer the call.
l When your internal correspondent picks up the phone, press to trans-
fer the call.
l If your internal correspondent does not pick up the phone, press .
3.5 REDIALLING ONE OF THE LAST NUMBERS CALLED (BIS)
The last 3 numbers dialled on your DECT cordless telephone are recorded in
the redial list.
To redial a number:
l Press .
l Scroll through the numbers using the key.
l To dial the call, just press when you reach the number you want.
3.6 MUTE FUNCTION (TURNING OFF THE MICROPHONE) / PUTTING
ON HOLD
You can put a correspondent on hold so that he/she does not hear a private
discussion.
l Press briefly during the call.
l The icon appears on the screen.
"
The handset's microphone is then disabled. The correspondent can then
no longer hear you and you can talk internally in complete confidentiality.
l Press again to reactivate the microphone.
3.7 CALLING FROM THE LOG OF CALLS (LIST OF THE LAST
10 CALLS RECEIVED)
l Press to enter the menu.
l Select "Caller ID" and press to confirm.
l Use the and keys to navigate through the list.
l When you get to the one you want, press to make the call.
STD150_AU_Ed01.qxd 26/11/04 12:00 Page 11
11
Page 12

The last 10 incoming calls only appear in the log of calls if they were received
via the analogue network and on condition that you have subscribed to the
"Calling line identification presentation" service.
Deleting the list of calls from the log
l Press to enter the menu.
l Select "HS Setting" and press to confirm.
l Select "Erase CID" and press to confirm.
"
The screen displays:
l Confirm with .
"
The log's list of calls is empty.
l To undelete it, press .
3.8 SHUTTLING BETWEEN AN EXTERNAL AND INTERNAL CALL
l Press to put the external call on hold.
l Now dial the number of the internal handset you want to call.
l To pick up the external call again, press .
3.9 3-WAY CONFERENCE (2 INTERNAL CORRESPONDENTS AND
1 EXTERNAL CORRESPONDENT)
You can talk to an internal correspondent and an external correspondent at the
same time.
When you are on-line with an external correspondent:
l Press .
l Dial the number of the internal handset you want. The external correspon-
dent is put on hold.
l When the internal correspondent pick up the phone, press and hold .
"
The 3-way conference has been set up.
l If one of the internal correspondents hangs up, the internal correspondent
who is still on-line must press twice to resume the call with the external correspondent.
STD150_AU_Ed01.qxd 26/11/04 12:00 Page 12
Sure ?
12
Page 13

3.10 MANAGING 2 SIMULTANEOUS EXTERNAL CALLS ON THE SAME
HANDSET
You can manage 2 external calls simultaneously on the same handset.
You are on-line with an external correspondent and you receive a second
external call (you hear a beep in the earpiece). To take the second call:
l Put the first call on hold by pressing .
l Press .
l Press again to take the second call when the handset rings.
You have two options:
l
You can continue your conversation with the second caller and hang up at the
end of your conversation by pressing . Then press again when the
handset rings to resume your conversation with the first caller.
l Alternatively, you can put the second caller on hold in order to resume
your conversation with the first caller. Press then .
When the handset rings, press to obtain a line. When your conversation
has ended, press to hang up. The handset will ring; you can take the line
by pressing in order to speak to the second caller who you had put on
hold.
3.11 ACTIVATING / DEACTIVATING HANDS-FREE MODE DURING A
CALL
To talk on the phone while doing something else, or share a conversation with
someone next to you:
l Press and hold .
"
The icon appears on the display.
To adjust the hands-free volume:
l Press or .
To deactivate hands-free mode:
l Press and hold .
STD150_AU_Ed01.qxd 26/11/04 12:00 Page 13
13
Page 14

3.12 LOCKING THE KEYBOARD
You can lock your handset's keyboard.
l Press to enter the menu.
l Select "Key Lock" and press to confirm.
"
The screen displays "Locked".
l To unlock, press
"
The screen displays "Unlock ?".
l Confirm by pressing the key.
"
Your keyboard is unlocked.
4. YOUR PHONE BOOK
Each handset contains an phone book capable of storing your 20 most useful
contacts.
Each contact page in the address book consists of a name (max. 12 characters) and a number (max. 25 digits).
4.1 CREATING A CONTACT PAGE
With your DECT cordless telephone, you can key in letters as well as digits.
Handy for entering names in the address book or for naming a handset!
l Enter the menu by pressing the .
l Select "Phone Book" and press to confirm.
l Select "Add" and press to confirm.
l Enter the name using the alphanumeric keyboard
(maximum 12 characters).
l To select a letter, press the corresponding key as many times as required.
For example:
- for S, press 4 times.
- for E, press twice.
To toggle from capitals to small letters, press .
To enter a space: . To make a correction: .
STD150_AU_Ed01.qxd 26/11/04 12:00 Page 14
Name:
14
Page 15

Confirm by pressing the key.
l Enter the number and press to confirm.
4.2 USING THE PHONE BOOK TO MAKE A CALL
l Enter the phone book by pressing .
l Use the and keys to scroll through the list of names.
l To quit the menu, press .
l Press to make the call.
4.3 MODIFYING A CONTACT PAGE
l Enter the phone book by pressing .
l Select "Phone Book" and press to confirm.
l Select "Edit" and press to confirm.
l Select the page you want to modify and press to confirm.
l Use the key to delete the name or correct it, then enter the new name
and press to confirm.
l Use the key to delete the number or correct it, then enter the new num-
ber and press to confirm.
4.4 DELETING A CONTACT PAGE
l Enter the menu by pressing .
l Select "Phone Book" and press to confirm.
l Select "Delete" and press to confirm.
l Select the page you want to delete and press to confirm.
"
The screen displays "Sure ?".
l Press to confirm.
"
The contact page is deleted.
l To delete all the pages, select "Erase all".
STD150_AU_Ed01.qxd 26/11/04 12:00 Page 15
Number:
15
Page 16

5. CUSTOMISING YOUR HANDSET
5.1 ADJUSTING THE KEYTONES
A sound is emitted every time you press a key on your DECT cordless telephone handset: it can be activated or deactivated.
l Press to enter the menu.
l Select "HS Setting" and press to confirm.
l Select "Set Keytone" and press to confirm.
l To deactivate: select "Off" with the and keys and press to
confirm.
"
The keytones are deactivated.
l To reactivate: select "On" with the and keys and press to
confirm.
5.2 CHOOSING A MELODY AND ADJUSTING THE VOLUME
l Press to enter the menu.
l Select "HS Setting" and press to confirm.
l Select "Melody Ext" (sonnerie externe) or "Melody Int" (sonnerie interne)
and press to confirm.
l Use the and keys to select the melody you want (9 melodies)
and press to confirm.
l Use the and keys to select the volume you want (1 to 9) and
press to confirm.
5.3 EMERGENCY NUMBER
If you activate this function, the emergency number recorded will be dialled
automatically, whatever the key pressed.
l Press to enter the menu.
l Select "HS Setting" and press to confirm.
l Select "Hot Call" and press to confirm.
l Dial the emergency number and press to confirm.
l To deactivate this function, press twice quickly.
STD150_AU_Ed01.qxd 26/11/04 12:00 Page 16
16
Page 17

5.4 NAMING A HANDSET
You can change the name of your handset.
l Press to enter the menu.
l Select "HS Setting" and press to confirm.
l Select "User Name" and press to confirm.
l Enter the name (max. 8 characters) and press to confirm.
5.5 SELECTING THE DISPLAY LANGUAGE
Your DECT cordless telephone has menus in 3 languages. To change the
language:
l Press to enter the menu.
l Select "HS Setting" and press to confirm.
l Select "Language" and press to confirm.
l Select the language and press to confirm.
5.6 CHANGING THE AUTOMATIC PICK-UP SETTINGS
This means that when you lift the handset off its charger to answer a call, you
automatically pick up the line without having to press .
To activate this feature:
l Press to enter the menu.
l Select "HS Setting" and press to confirm.
l Select "Auto answer" and press to confirm.
l Select "On" and press to confirm.
To turn off this setting, follow the first three steps then select "Off" and press
to confirm.
STD150_AU_Ed01.qxd 26/11/04 12:00 Page 17
17
Page 18

5.7 CHANGING THE HANDSET'S PIN NUMBER
l Press to enter the menu.
l Select "HS Setting" and press to confirm.
l Select "Set PIN:" and press to confirm.
l Enter the PIN code: 1590 (by default) and press to confirm.
l Enter the new PIN code and press to confirm.
l Confirm the new PIN code and press to confirm.
5.8 ADJUSTING THE AUTOMATIC LINE SEIZURE
The automatic line seizure function allows you to take an incoming call, by
pressing any of the keys on the telephone.
l Press to enter the menu.
l Select "HS Setting" and press to confirm.
l Select "Anykey talk" and press to confirm.
l Select "On" or "Off" to activate or deactivate this setting.
6. ASSOCIATING / DISASSOCIATING A HANDSET WITH
THE BASE
6.1 ASSOCIATING AN EXTRA HANDSET WITH THE BASE
You can associate up to 5 handsets with the base.
To register a handset that is not yet associated:
From a handset which has already been registered:
l Press to enter the menu.
l Select "BS Setting" and press to confirm.
l Enter "MASTER PIN:" 1590 (by default) and press to confirm.
l Select "New HS" and press to confirm.
l Enter the PIN code: 1590 (by default) and press to confirm.
l Select a number from 1 to 9 or "Auto" and press to confirm.
The numbers which have already been assigned are marked by "–".
STD150_AU_Ed01.qxd 26/11/04 12:00 Page 18
18
Page 19

Then, on the handset which has not yet been registered: you have about
2 minutes to register the handset.
l Press to enter the menu.
l Select "HS register" and press to confirm.
l Select the base with which the handset is to be associated and press
to confirm.
"
A message will appear on the screen within 15 seconds and press .
l Enter the PIN code: 1590 (by default) and press to confirm.
"
The number of the handset will be displayed within 15 seconds.
If this fails, repeat the complete operation.
6.2 REMOVING (DISASSOCIATING) A HANDSET
This operation can only be performed using the handset you want to remove
(disassociate).
l Press to enter the menu.
l Select "BS Setting" and press to confirm.
l Enter "MASTER PIN:" 1590 (by default) and press to confirm.
l Select "Remove HS" and press to confirm.
l Enter the number of the handset you are removing (disassociating) and
press to confirm.
7. BASE SETTING
7.1 DIALLING METHOD
You can choose tone or pulse dialling. The default is tone dialling.
l Press to enter the menu.
l Select "BS Setting" and press to confirm.
l Enter "MASTER PIN:" 1590 (by default) and press to confirm.
l Select "Dial Mode" and press to confirm.
l Select "DTMF Dial" or "PULSE Dial" and press to confirm.
STD150_AU_Ed01.qxd 26/11/04 12:00 Page 19
19
Page 20

7.2 CALL BARRING
You can program up to 5 call barrings. These call barrings may cover all the
terminals or just some of them. It is possible to bar the first 5 digits.
l Press to enter the menu.
l Select "BS Setting" and press to confirm.
l Enter "MASTER PIN:" 1590 (by default) and press to confirm.
l Select "CallBarring" and press to confirm.
For example, to bar access to the international network:
l Enter 00 and press to confirm.
l Then choose the handset or handsets that will be
covered by the barring and press to confirm.
The call barring is activated on handsets 1, 2 and 5,
on the screen given as an example.
7.3 SETTING THE FLASHING TIME
l Press to enter the menu.
l Select "BS Setting" and press to confirm.
l Enter "MASTER PIN:" 1590 (by default) and press to confirm.
l Select "Flash Time" and press to confirm.
l Use the and keys to choose the flashing time you want and
press to confirm.
7.4 SETTING THE PAUSE TIME
l Press to enter the menu.
l Select "BS Setting" and press to confirm.
l Enter "MASTER PIN:" 1590 (by default) and press to confirm.
l Select "Pause Time" and press to confirm.
Use the and keys to choose the pause time you want and
press to confirm.
STD150_AU_Ed01.qxd 26/11/04 12:00 Page 21Page 20
No. 1 : 00
HS No.
12XX5XXXX
20
Page 21

8. TECHNICAL SPECIFICATIONS
* Data supplied for informative purposes
Standard DECT
Radio frequency From 1880 MHz to 1900 MHz
Channels 10
Bandwidth 1.728 MHz
Modulation GFSK
Range in open air 300 m*
Range inside 50 m*
Base mains adapter Input AC 230 V / 50 Hz / 59 mA
Output DC 9 V / 600 mA
Charger mains adapter Input AC 230 V / 50 Hz / 59 mA
Output DC 7.5 V / 210 mA
Handset batteries Ni-MH 1.2 V AAA x 3
Battery life Standby: 150 hours
Talktime: 15 hours
Operating temperature + 5 °C to + 40 °C
STD150_AU_Ed01.qxd 26/11/04 12:00 Page 21
21
Page 22

9. TROUBLESHOOTING ...
Generally speaking, if you have a problem, take the batteries out of all the
handsets in your installation, disconnect the base's electricity power supply.
Wait for 1 minute, reconnect the base and re-insert the batteries.
However, if the problem persists, you can call the hotline on the following number: , from Monday to Friday , from 9 a.m. to 5 p.m. (call
billed at current rates).
The store where you bought your is also able to inform you
and provide after-sales service.
1300 302 699
Problems
Causes
Remedies
The handset is off (deactivated).
Press and hold the
key to reactivate it.
The display is off.
The batteries are discharged.
Place the handset on its
charger to recharge the
batteries and check that
the charger is correctly
connected to the mains.
The handset is out of
base range.
Move closer to the base.
The handset is not registered with the base.
Refer to the
“Associating an extra
handset with the base"
paragraph.
You hear no tone.
The batteries are discharged.
Place the handset on its
base to recharge the
batteries.
Reception quality deteriorates during the
call.
You are out of range of
the base or in a disturbed environment.
Move closer to the base.
Your correspondent
cannot hear you.
The mike is deactivated,
the Mute function is
activated.
Refer to the "Mute function" paragraph.
The charger is not receiving power.
Check the electrical
power supply
connection.
The batteries are still
discharged after
several hours of
charging.
The handset batteries
are faulty.
Contact your reseller to
obtain new batteries.
STD150_AU_Ed01.qxd 26/11/04 12:00 Page 22
22
D150
Page 23

10. WARRANTY
complies with requirements of the Australian Com-
munications Authority as certified by the A-Tick.
You are covered by a legal warranty for this product and for all information
concerning this warranty, please contact your reseller
.
Notwithstanding other applicable statutory warranties, the reseller warrants that
the product complies with the applicable technical specifications and is free from
any defect in workmanship and materials for a period of twelve (12) months from
the date of purchase shown on the invoice or receipt.
You should therefore keep
your invoice or till receipt specifying the date of purchase of the product and the
name of the reseller. Nonetheless, if the statutory warranty in force in your country exceeds twelve (12) months, the statutory warranty in force in your country
will apply in lieu of the manufacturer's warranty
.
The manufacturer undertakes to repair or replace at its option the defective product or part thereof with a comparable product or part or at least equivalent as to
the performances and functionality. The replacement product or parts, which may
be new or reconditioned, are warranted for a period expiring either simultaneously with the initial warranty of the concerned product or part thereof or three
(3) months after delivery of such repaired product or part, which ever is later
.
Moreover, upon proof evidence, the initial warranty period may be extended for
the period you have not been able to use the product due to the repair. All product or parts that are replaced become the property of the manufacturer
.
This warranty does not cover damage caused by:
Non-compliance with the instructions for use, installation or maintenance of
the product, in particular regarding the power supply and climatic conditions.
Improper maintenance of energy sources and of the general electrical
installation.
Acts of vandalism, lightning, fire, humidity, bad weather.
Use of the product in combination with, or integration of the product into,
equipment not supplied by the reseller, unless such combination or integration has been expressly approved in writing by the reseller
.
Use of the product for a purpose other than that for which it is intended.
Faults and deterioration caused by normal wear and tear, a shock or a fall.
Product malfunctioning due to external causes (e.g., radio-electric interfe-
rence produced by other equipment, variation in voltage of the mains supply and/or telephone line).
Changes made to the product, including mandatory changes.
Product from or on which the brand or serial numbers have been removed
or altered.
Defects as a result of other goods and services being connected to the pro-
duct which disturb or affect the predicted level of service.
UNLESS OTHERWISE STIPULATED BY LAW, ANY AND ALL WARRANTY
PROVISION OTHER THAN THOSE MENTIONED HEREIN ARE EXPRESSL
Y
EXCLUDED.
STD150_AU_Ed01.qxd 26/11/04 12:00 Page 23
D150
23
Page 24

STD150_AU_Ed01.qxd 26/11/04 12:00 Page 24
11. ENVIRONMENT
Used handset batteries must be disposed of in compliance with
current environmental protection regulations.
batteries to your reseller or dispose of them in an approved recycling
centre.
You should return your
12. SAFETY
In the event of danger, the mains adapter acts as 230V power isolating device. It should therefore, as a precaution, be installed close to the appliance and
be easily accessible.
If the mains adapter fails, it must be replaced by an identical model.
If they are not connected to the mains power or if there is a mains power failure, installations with cordless handsets will no longer work.
unable to make or receive calls in the event of an emergency
recommend that you also have a conventional telephone as a backup.
You will then be
. This is why we
Battery type: rechargeable batteries Ni-MH AAA 1.2V / 650 mAh.
Do not attempt to open the batteries, as they contain chemical substances. In
the event of leakage, avoid contact with the skin, eyes, mouth and nose. In the
event of contact, rinse the affected part for twenty minutes in running water
and seek medical assistance immediately
Clean the telephone with absorbent paper or a dry cloth and contact your
reseller to change your batteries.
Do not use your telephone to notify a gas leak when you are in the
!
vicinity of the leak.
We recommend that you avoid using this device during electrical storms.
.
24
Page 25

© Thomson Telecom - Reproduction interdite / All rights reserved / Reproducción prohibida
THOMSON et sont des marques déposées / THOMSON and are registered trade marks / THOMSON y son marcas
registradas
Le constructeur se réserve le droit de modifier les caractéristiques de ses produits en vue d'y apporter des améliorations techniques ou de respecter de nouvelles
réglementations. / The manufacturer reserves the right to modify the specifications of its products in order to make technical improvements or comply with new
regulations. / El fabricante se reserva el derecho de modificar sin previo aviso las características de sus productos para introducir mejoras técnicas o cumplir con
nuevas regulaciones oficiales.
STD150_AU_Ed01.qxd 26/11/04 12:00 Page 25
Thomson Telecom Australia
1st Floor
Building B
1 Moorebank Avenue
Moorebank NSW 2170
Australia
Ref: XX-XXX-XXXX-XX - 29/11/04
 Loading...