

GE 2 Cubic Foot Series, 3 Cubic Foot Series, 4 Cubic Foot Series, 6 Cubic Foot Series Owner's Manual & Installation Instructions
Page 1
wwvv.GEAppliances.com
©
Safety Informalion ........ 2--4
Operating Instrudions
Care and Cleaning ........ 7, 8
Control Settings ............ 5
Refrigerator Features ........ 6
Replacing the Eight Bulb ..... 7
Insta!_ztion Instructions ...9-11
Troubleshooting Tips .... 12, 13
Cmzsumer Support
Consumer Support..Back Cover
Warranty ................. 15
2 CubicFootModels
3 CubicFootModels
4 CubicFootModels
6 CubicFootModels
ATTENTION:
Defrosting--Do not use sharp, pointed
objects to remove frost or ice from
surfaces ofthe freezer compartment,
Doing so could puncture the cooling
coil, causing the unit to lose its ability
to maintain cold temperatures and
voiding the warranty, See the Care and
Cleaning section for instructions on
defrosting the freezer compartment.... r:_:_..!;_':_i_-_._::......
Write the model and serial numbers here:
Model #
Serial #
Find these numbers on a label inside
the refrigerator on the side _lI.
Page 2

_i!g:i
,E _- . 5
ii:g
i7_::
-2!_,_-'. "_
b:,_
IMPORTANTSAFETYINFORMATION.
READALLINSTRUCTIONSBEFOREUSING.
_k WARNING!
Use this appliance only for its intended purpose as described
in this Owner's Manual.
SAFE_.PRECAUTIONS
When using electrical appliances, basic safety precautions
should be followed, including the following:
_;_-_This reMgerator must be .-;:'.Keep fingers out of the "pinch
properly installed and located in
accordance with the Installation
Insmlctions before it is used.
iY_Do not allow children to climb,
stand or hang on the shelves
in the refrigerator. They could
damage the refrigerator and
seriously injure themselves.
_:::Do not store or ttse gasoline or
other flammable _apors and
liquids in the vicinity of this or
any other appliance.
_;.:_Before replacing a burned-out
lightbulb,the refn'geratorshould
be unplugged in order to avoid
contact with a live wire filament.
(A burned-out light bulb may
break when being replaced.)
point" areas; de.arances between
the doors and cabinet are
necessarily small. Be careful
closing doors when children
are in the area.
Unplug the refrigerator before
cleaning and m_"akingrepairs.
NOTE"Westronglyrecommend
thatanyservicingbeperformedby
aqualifiedindividual.
Turning the temperature
control dial to the OFFposifion
stops cooling but does not shut
offpower to the refrigerator.
DANGER!RISKOFCHILDENTRAPMENT
PROPERDISPOSALOFTHEREFRIGERATOR
Child entrapment and
suffocation are not problems of
the past.Junked or abandoned
refrigerators are stil!dangerous..,
even if they _ill sit for 'lust a few
dais." ]/'you are getting rid of
your old refrigerator, please
follow the instructions below to
help prevent accidents.
Before YouThrowAway Your
OldRefrigerator or Freezer:.
g.:-Take off the doors.
YlLeave the shelves in pIace so
that children may not easily
climb inside.
Refrigerants
All refrigeration products contain
refrigerants, which under federal
law must be removed prior to
product disposal. If you are
getting rid of an old refrigeration
product, check with the company
handling the disposal about
what to do.
Page 3

www.GEAppliances.com
USEOFEXTENSIONCORDS
Because ofpotential safety hazards under certain conditions,
we strongly recommend against the useof an extension cord.
Howevel, ffyou must use an extension cord, it is absolutely necessary
that it be a UL-listed, 3-wire grounding tspe appliance extension cord
having a grounding type plug and outlet and that the electrical rating
of the cord be 15 amperes (minimum) and 120 volts.
HOWTOCONNECTELECTRICITY
Donot, under any circumstances, cut orremove the third
(ground)prong from thepower cord. Forpersonal safety,
this appliance must be properly grounded.
The power cord of this appliance
is equipped with a 3-prong
(grounding) plug which
mates with a standard 3-prong
(grounding) wall outlet to
minimize the possibili W of electric
shock hazard from this appliance.
Have the ,,_all outlet and circuit
checked by a qualified eledrician
to make sure the outlet is
properly grounded.
ffyou have only a standard
2-prong watt outlet, it is your
personal responsibility and
obligation to have it repIaced
with a properly grounded
3-prong wall outle_
The refrigerator should always be
plugged into its ovm indi_4dual
electrical outlet which has a
voltage rating that matches the
rating plate.
Tiffs provides the best
performance and also prevents
overloading house wiring circuits
which could cause a fire hazard
from overheated wires.
Never unplug your refrigerator
by pulling on the power cord.
Al_avs grip plug firmly and prfll
straight out from the outleL
Repair or replace hnmediately all
power cords that have become
frayed or otherwise damaged.
Do not use a cord that shows
cracks or abrasion damage along
its length or at either end.
When moving the refligerator
a_y from the wall, be careful
not to roll over or damage the
power cord.
::7!_
Page 4
IMPORTANTSAFETYINFORMATION.
READALLINSTRUCTIONSBEFOREUSING.
A WARNING!
USEOFADAPTERPLUGS
Because ofpotential safety hazards under certa& conditions,
we strongly recommend against the use of an adapter plug.
However, if you must use an
adapter, where local codes
permit, a temporary connection
may be made to a properly
grotmded 2-prong wall outlet
by use ofa Ul_Aisted adapter
available at most local hard_mre
stores.
The larger slot in the adapter
must be aligned _4th the larger
slot in the wall outlet to prox4de
proper polarity in the connection
of the power cord.
If the adapter ground terminal
breaks, DO NOT USEthe
refrigerator until a proper
ground has been estabfished.
Attaching the adaptergroundtetminat
to a wall outlet coverscrew doesnot
groundtheapplianceunlessthe cover
screw is metal,and not insulated,and
the wall outlet is groundedthroughthe
housewiring. Youshouldhavethe
circuit checkedbya qualified electrician
to makesurethe outlet isproperly
grounded.
When disconnecting the power
cord from the adapter, alxcays
hold the adapter in place _4th
one hand while piffling dae
power cord plug with the other
hand. 12 this is not done, the
adapter ground terminal is very
likely to break with repeated use.
READANDFOLLOWTHISSAFETY
INFORMATIONCAREFULLY
SAVETHESEINSTRUCTIONS
Page 5
About the control
on the refrigerator.
wwvv.. GEAppliances.com
ulllzH iiii
OFF COLDEST OFF
COLDEST _ ; 3_ k .
COLD COOL
COLD
OH= . .J
COLDEST
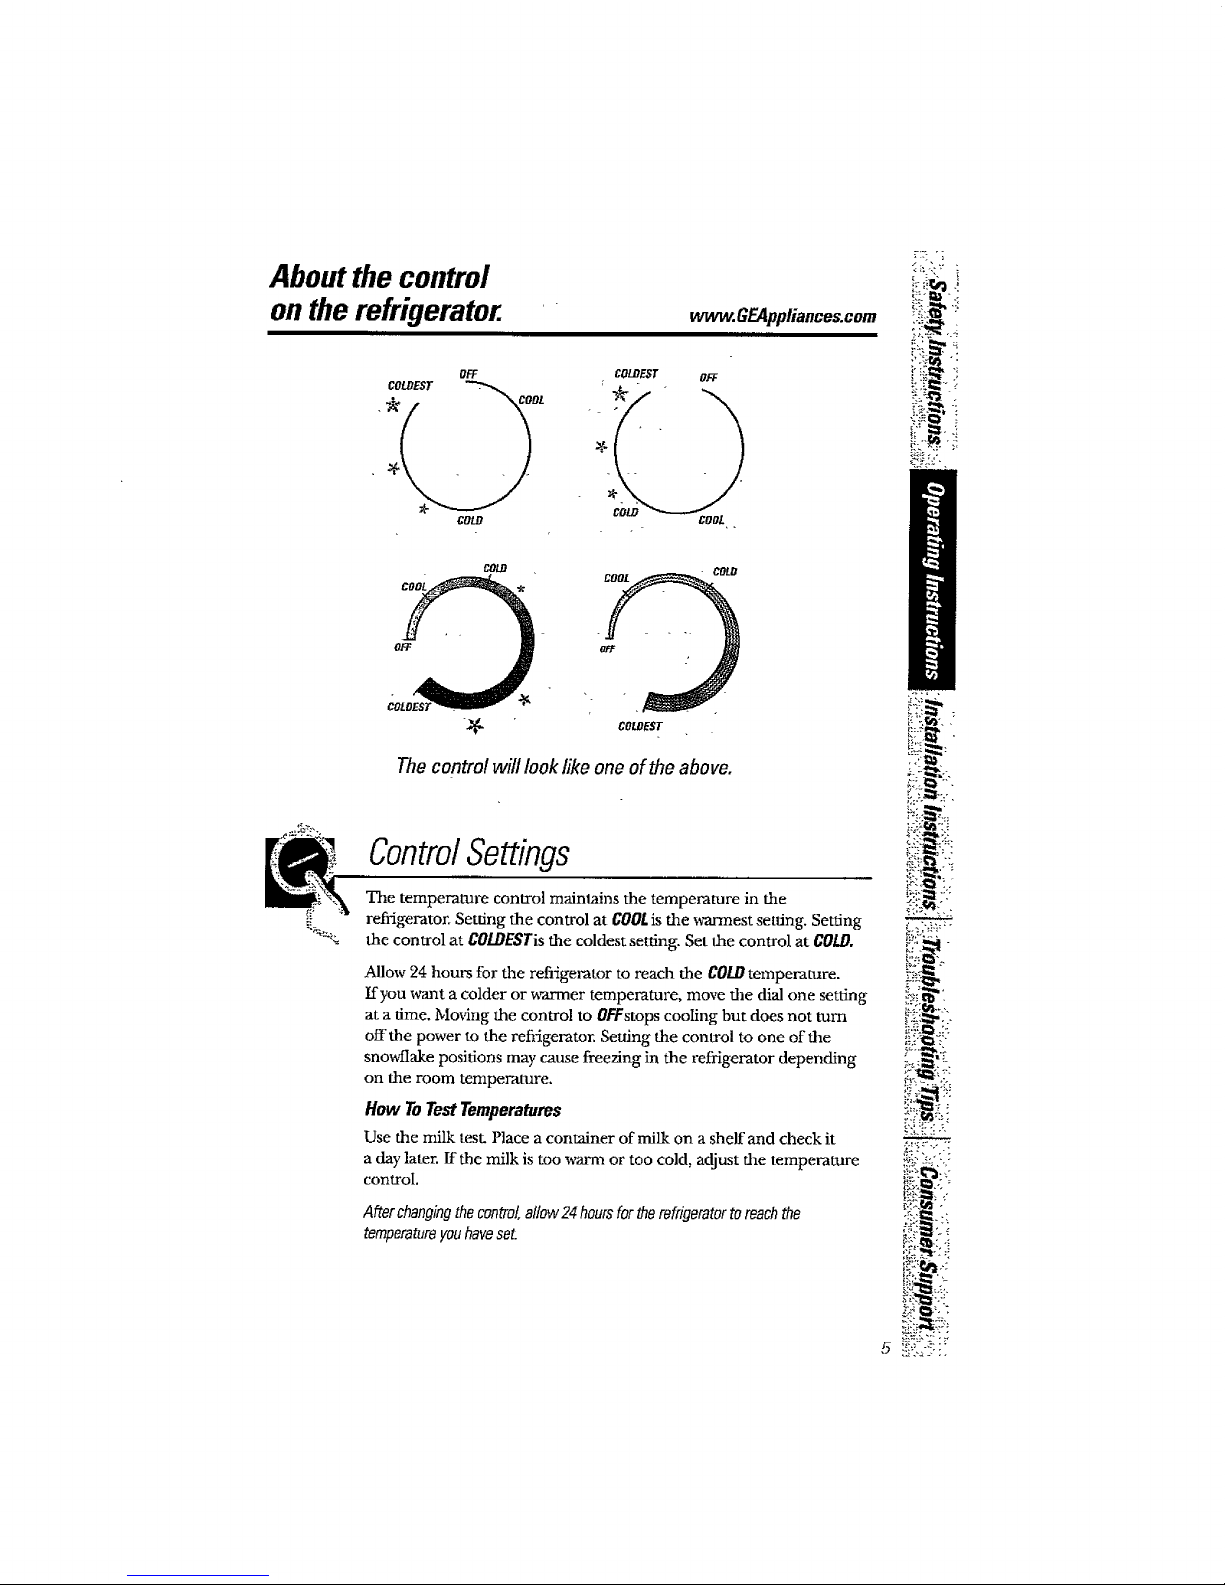
Thecontrolwill look like one of the above.
ControlSettings
The temperature contyol maintains the temperature in the
refi-igemtor. Setting the control at COOLis the _¢armest setting. Setting
the control at COLDESTis the coldest setting. Set the control at COW.
Allow 24 hours for the refi_gemtor to reach the COLDtemperature.
I.fyou want a colder or _a-mer temperature, move T.hedial one setting
at a time. Mo_dng the control to OFFstops cooling but does not turn
off the power to the refi-igemtor. Setting the control to one of the
snowflake positions may cause freezing in the refrigerator depending
on the room temperature.
How To Test Temperatures
Use the milk test. Place a container of milk on a shelf and check it
a day later, tithe milk is too x_rm or too cold, adjust the temperature
control
Afterchangingthecontrol,allow24hoursfor#Terefrigeratorto reachthe
temperatureyouhaveset.
_-::_..
:!:?-_'JE.
i? _. 2
iL_ ;!
5,_.:4:::
_:. -.-;
i!: i
Page 6

t
L,-". -.:
t.-- n . .
About the refrigerator features.
Shelves
To remove a shelf, lift up the back slightly and pull foiward.
Some models have multi-position shelves that can be moved
to different levels.
Ice Tray Compartment
This comparmmnt is designed for production of ice cubes and
short-ten'n storaome (a few days at most) of some commerciall)-
frozen foods when in contact with the evaporator (cold surface
in compartment.)
i!i N ,
_:'O'_ ."
v:;::{:::::." ".
a.:: ......
g{: ,_z! ,;-
[:-_:
,'
i_:ta,:'.
,_RW; -:-
Door Shelves
Shelves on the door provide convenient storage for frequently
used items, Some models have doors that are deep enough to
store large bottles.
Key-Ejecting Lock (onsome models)
The key for the spring-loaded lock is automatically ejected_
key will not remain in lock in either the open or closed position.
Keepth_key outofreach of childrenandaway fromthe refrigerator.
Ifa replacement key is needed, it can be ordered by _4siting our
Website www, GEAppliances.com,or calling GE Parts and Accessories,
800.626.2002. Order part WR05X10006.
Page 7

Careandcleaning
of therefrigerator.
vvvvvc.GEAppliances.com
u lie ,,
Cleaning the Outside
Keep the outside clean. V_Spe with a clean cloth lightly dampened
with kitchen appliance wax or mild liquid dish detergent. Dry and
polish with a dean, soft cloth.
Donotwipetherefrigeratorwithasoileddishclothorwettowel.Thesemay
leavearesiduethatcanerodethepaint_Donotusescouringpads,powdered
cleaners,bleachorcleanerscontainingbleachbecausetheseproductscan
scratchandweakenthepaintfinish.
Protect the paint finish. The finish on the outside of the refrigerator
is a high quality, baked-on paint finish. With proper care, it will
stay new-looking and rust-fi'ee for yem_. Apply a coat of kitchen/
appliance wax when the refrigerator is new, and then at least
twice a year.
Cleaning the Inside
Tohelp prevent odors,leave an open bo× of baking soda Ln the
re_gerator.
Unplugtherefdgeratorbefore cleaning, ff this is not practical,
wring excess moisture out of sponge or cloth when cleaning
around the conu:oI.
Use x_rm water and baking soda solution-about a tablespoon
(15 ml) ofbaldng soda to a quart (I liter) of water. This both
cleans and neutralizes odors. Rinse and wipe dr}:
Other parts of the refrigerator-including door gaskets, fruit
and vegetable drawers, and all plastic paris-can be cleaned
the same way.
Donotwashanyplasticreffigeratorpartsinthedishwasher
Replacing the Light Bulb (onsomemodels)
Unplug the refiJgemtor before replacing a burned-out bulb.
Setting the controls to OFFdoes not remove power to the
light circuit.
The light bulb is Iocated behind the temperature control housing
and is visible through the slots in the housing.
Reach up through the opening at the bottom of the conu'ol
housing and gently unscrew the light bulb. Replace with a bulb
of the same or lower wattage.
7 i!;_!5:_:'_!
Page 8

Careandcleaningoftherefrigerator.
Defrosting
Defrostwheneverfroston thewall of theicetraycompartmentbecomes
1/4" thick.Never use a sharp or metallic instrument to remove frost as
it may damage the cooling coils, (A puncturedcooling coil will cause
seriousproblemsand void thewarrant] Werecommendustnga plastic scraper.
Donotuse anyelectricaldeviceindefrostingyourrefrigerator
Todefrus_
:L.:-Remove foods and ice trays fi-om the ice tray compm'tment.
;-:i:Set the temperature con_ol dial at OFFposition.
On models without a drip way, place a pm_ beneath the ice tray
compartment to collect _ater.
Defrosting usually takes a few hours. To defrost faster, keep the
door open. Also, pouring warm (not hot) u_ter on the frosted part
may speed defrosting. Do net use boiling water---qt may damage
plastic parts.
,alter defrosting:
_;_Empty water from the drip tray or from the pan placed beneath
the ice tray comparunent, Wash the tray or pan with warm water,
L_Wipe the ice tray compartment with a damp cloth.
_,i:Turn the temperature conu-ol to the desired setting and
return food and ice trays to the refrigerator.
NOTE:ffice buildupis verythick,it maykeep the ice traycom_rtment door
from openingor closing completely Don't tryto force it open,"after defrosting,
thedoor will open and closeeasily.
Preparing for Vacation
For Iong vacations or absences, remove food and unplug the
refrigerator. Move the control to the OFFposition, and clean the
interior with a baking soda solution of one tablespoon (15 inl) of
baking soda to one quart (l liter) of water. Leave the door open.
Preparing to Move
Secure all loose items such as shelves and ice trays by taping them
securely in place to prevent damage.
Besure the refrigeratorstaysin an uprightpositionduringmoving.
Page 9

Preparing to install the refrigerator.
¢-$3
Readtheseinstructionscompletelyandcarefully.
RefrigeratorLocation
iff Do not install the refrigerator where the temperature will go below
50°F (10°C) because it will not run often enough to maintain
proper temperatures.
i.:i,Install it on a floor strong enough to support it fully loaded.
,_.ttithe 2 cubic foot model is placed on a countertop or stand,
the front surface of the door should be 3" or more back fi-om the
edge of the eountertop or stand to avoid accidental tipping of the
appliance during normal use.
LT.Do not install it closer than 5" (13 cm) next to a range.
Thefollowing applies onlyto theZ 3and 4 Cubic loot Models:
2.:Do not install it in a recessed area.
_?_Do not build in the refrigerator.
_it :
:::
_g'..Z-. 2"
Clearances
Allow the following clearances for ease of installation and proper
air drculadon.
2.3 and4 6Cubicloot
CubicFootModels Modelonly
Sides 1/2" (13 mm) 0" (0 mm)*
Top 2" (51 mm) 0t' (0 mm)
Back 2" (51 mm)** 0" (0 mm)
"1-1/4" (32 rmn) for hinge side clemance
**From the rear cabinet surface to the wall
Turncounterclockwsetoraise,
clockwpseto lower.
LevelingLegs(onsomemodels)
Adjustable legs at the front comers of'the refrigerator
should be set so the refrigerator is firmly positioned on
the floor and the front is raised just enough that the
door closes emil), when opened about halfivay.
Toadjustthe leveling legs, turn the legs counterclockwise
to raise rite refrigerator, clockwise to lower iu
,;.,,:._ . :
t-P:£_::,-
":';g.?-V::
Page 10

7.'_ :i
Preparingtoinstall therefrigerator.
H=ngecover_
Rugbuttons
or_ Hmge
-1
Bottom
._11_ t hinge
Levelinglegs
DoorReversal
3 and 6 Cubic FootModels
1. Remove the small plug button on the
left side of the door top cap.
2. Remove the three plug buttons or
screws on the Ieft side on top of the
cabinet.
3. Remove the pIastic hinge cover by
lifting it up by the front edge.
4. Remove the three screws from the
top hinge.
5. Lift the door up and off the bottom
hinge (fight side).
6. Tilt the refrigerator cabinet back to
remove the fight leveling Ieg.
7. Remove the screws on the bottom
hinge (fight side) and the left leveling
leg. Move the bottom binge to the left
side and sect_re it with the screws and
leveling leg,
IMPORTANT_Theleft leg hasa spacerthat
mustbe moved to the right sidelevelingleg
when the doorswing isreversed.
8. Screw the fight leveling leg, with the
spacer in place, back in place on the
fight side.
9. Position the door on the left bottom
hinge. With the magnetic gasket
holding the door in place, secure the
top hinge with scre_.
10. Make sure the dooris aligned with _e
refrigerator cabinet beforeconffnuing.
11. Replace the hinge cover on top of
the hinge.
12. Put the plug button in the hole on the
fight side of the door cap.
13. Put the three plug buttons or screws on
the fight side on top of the cabinet.
Page 11

,Upper
plate
Door
topcap
_- Levelingle_ hinge
DoorReversal(onsomemodels]
4 CubicFootModels
l. Remove the two screws at the back of
the top cover.
2, Remove the top cover by lifting the back
up about 2" and then sliding it forward.
3. Remove the small plug button on the
left side of the door top cap.
4. Remove the three scre_s on the upper
hinge (right side). Remove the hinge.
5. Remove the three screws at the left
hinge location on the top plate.
6. Remove file screw in the middle of the
top plate and remove the top plate.
7. Lift the door up and offthe bottom
hinge (fight side).
8. Tilt the refrigerator cabinet back to
remove the fight leveling leg.
9. Remove the screws on the bottom
hinge (fight side) and the left leveling
leg. Move the bottom hinge to the left
side and secure it with the screws and
leveling leg.
IMPORTAI_ Theleft leg hasa spacerthat
must bemovedto theright side leveling leg
whenthedoorswing isreversed.
lO. Screw the fight leveling leg, with the
spacer in place, back in place on the
fight side,
11. Position the door on the left bottom
hinge. With the magnetic gasket
holding the door in place, secure the
top hinge with screws.
12. Make surethe dooris aligned with the
refrigerator cabinet beforecontinuing.
13. Replace the top plate and screws.
14. Slide the top cover back in place and
replace the two screws.
15. Put the plug button in the hole on the
right side of the door top cap.
Page 12

--.-
Before you call for service...
Troubleshooting tips
Save time and money! Review the chart be!ow first
and you may not need to call for service.
",'A,
_:--':.. -_.: _:.!,.-::::5.-.-_::_;:_; _{
_i_bbiem:_._:_:,.:_._%<-,,_<...-.._ Possible Causes
Re_igerator does not Conml m OFFpos_fion.
operate
What To Do
Move the control to a
temperature setting.
Refrigerator is • Push the plug completely
unplugged, into the oudet.
The fuse is blown/circuit _ Replace fuse or reset
breaker is tripped, the breaker.
Vibrationor rattling
(slight vibration
is normal)
Frontleveling legs
(on some models)
need adjusting.
See Leveling Legs.
Refrigerator is on.
an uneven surface.
Use shims to level the
refrigerator.
Motoroperatesfor
longperiodsorcycles
Normal when refrigerator • Wait 24 hours for the
is first plugged in. refrigerator to completely
cooI down.
Door will not open
Often occurs when * This is normal.
large amounts of food
are placed in refrigerator.
Door left open. * Check m see if package is
holding door open.
Hot weather or frequent o This is normal.
door openings.
Temperature control _ See About the control.
set at the coldest setting.
Not enough clearance _'See Clearances in Preparing
from the wall. to install the refrigerator.
Refrigerator is locked
(lock is available
on some models).
Unlock the door with
the key. Kthe key has
been lost, a replacement
key can be ordered by
visiting our Website
wwvv.GEAppliances.com,
or calling GE Parts and
Accessories, 800.626.2002,
Order part WR05X10006.
Page 13

vvww.GEAppliances.com
- Regtigemtur too warm Temperature control
not set cold enough.
What ToDo
*,SeeAboutthe cOntTOI.
Warm weather or _ Set the tempei_tL_re
frequent door openings, conl_ol one step colder.
See About the control.
Door le_ open. _ Check to see ff package is
holding door open.
Cabinet sides are warm o This is nozraaI for a hot
(applies o_y to 2, 3 and wail type condenser.
4 Cubic Foot Models).
Refrigerator has odor
Moistureformson
outsideofre_gerator
Moisturecellectsinside
(inhumidweather,
aircarriesmoisture
intorefrigeratorwhen
deeris opened)
Refdgeretortoocold
Foods transmitting odor
to re_L_cator.
_,Foods with strong odors
should be tightly wrapped.
Keep an open box of
baking soda in the
refrigerator;, replace
every three months.
!aaterior needs deatting, o See Care and cleaning.
Defrost water pan = See Careand cleaning.
needs cleaning.
Not unusual during
periods of high humldily.
Too frequent ortoo long
door openings.
Temperature control
set too cold.
o Wipe surface dry.
See Aboutthecon_'oL
I3
Page 14

_'_"_: _" Notes.
- f_
:,r
_)N:):
ii_N?,
.'--'-=L bt...,.,] ./.4'
Page 15

Refrigerator Warranty. (ForcustomersintheUnitedStates)
_!i!i, All warranty service provided by our Staple your receipt here.
Factory Service Centers, or an authorized Proof of the original
Customer Care_ technician. To schedule purchase date is needed
service, on-line, 24 hours a day, visit to obtain service under
us at www.GEAppfiances.com, or call
800.GE.CARES. the warranty,
OneYear Any part of the refrigerator which fails due to a
From the date of the defect in materials or workmanship. During this
originafpurchase limited one-year warranty, GE will also provide, free
" " " " of charge, all labor (does not include service trip to
home) to replace the defective part.
o-0 " ";_;'_-;-,!-F:_:--_ '-,) _'_:-'_ _:z_'--_4=-:'-.;_%:=:[_,: _ i_;_.:_2_'_--,'_'_-_:L_;,;--_- "_-=7.-,.,-;: ,_ __ --_=_-- _'_-. ,-.-_v.:-:_.-;_--.;_,_-; : .-_.=-: ;_.. ,,-- .
:_;_Service trips to your home to teach
you how to use the product.
_?.iImproper installation, delivery or
maintenance.
i?:Failure of the product if it is
abused, mLsaLsed,or used for
other than the intended purpose
or used commercially.
_!Loss of food due to spoilage.
_ Damage caused after delivery.
_._Rephcement of house fuses or
resetting of circuit breakers.
i:_YReplacement of the light bulbs.
_ Damage to the product caused by
accident, fire, floods or acts of God.
_ Incidental or consequential damage
caused by possible defects with
this appliance.
Thiswarranty is extended tothe originalpurchaserandanysucceeding owner for
products purchased forhome usewithin the USA.InAlaska, the warranty excludes
the cost ofshipping or service calls to yourhome.
Somestates do not allowthe exclusionor limitation of incidental or consequential
damages. Thiswarranty gives youspecific legal rights,and you may alsohave other
rights which vary from state to state. Toknow what your legal rights are,consult your
local or state consumeraffairsofficeor yourstate's Attorney General.
Warrantor, General Electric Company Louisv#le, KY40225
t5
Page 16

ConsumerSupport.
GEAppliancesWebsite www.GEAppliances.com
Have a question or need assistmace with ),our appliance? qq3_file GE Appliances Website
24 hom_ a do}; mW day of the year! For _leater com_enience mid faster serx_ce, you can
now do_aload O_mer's Manuals, order parts, catalog, or even schedule sen_ce on-line..
_bu can also "Ask Our Team of Expels"' yotu" questions, mad so much moire...
ScheduleService
www.GEAppliances.com
Expert GE repair sexa4ce is only one step away from your door. Get on-line and schedule
your serx4ce at your convenience 24 hours an}, day of the year! Or call 800.GE.CNRF_
(800.432.2737) during normal business hours.
RealLifeDesignStudio
www. GEAppliances.com
GE supports the Universal Design concept-products, ser_ces and enviromnents that
can be used by people of all ages, sizes and capabilities. We recognize the need to
design for a wide range of ph)_ical and mental abififies mad impairments. For details
of GE's Universal Design applications, including kitchen design ideas for people _\4th
disabilities, check out our Website today. For the hearing impaired, please call
800.TDD.GEAC (800.833.4322).
ExtendedWarranties
wwvv.GEAppliances.com
Purchase a GE extended gananty and learn about special discotmts that are available
while your _'ran_, is still in effecL You can pro-chase it on-line anytime, or call
800.626.2224 during normal business hours. GE Consmner Home Services will
still be there after your _uran_, e.xpire_.
PartsandAccessories
www.GEAppliances.com
IndMduals qualified to service their own appliances can have parts or accessories
sent directly to their homes (VISA, MasterCard and Discover cards are accepted).
Order on-line toda}; 24 hours every day or by phone at 800.626.2002 during normal
business hom_.
Instructionscontainedin thismanualcoverproceduresto be performedby anyuser.Other
servicinggenerallyshouldbe referredtoqualifiedservicepersonnel,Cautionmust be
exercised,since improperservicingmay cause unsafeoperation.
ContactUs
www..GEAppliances.com
If you are not satisfied with the _r_4ce you receive from GE, contact tts on our Website
_4th all the details including your phone number, or _a-ite to:
General Manager; Customer Relations
GE Appliances, Appliance Park
Louisville, KY40225
RegisterYourAppliance
www.GEAppliances.com
Register your new appfiance on-tlne--at your convenience! TLrnely product re#stration
_dll allow for enhanced comanmaication and prompt service tinder the terms of your
warran V, should the need arise.You may also mail in the pro_printed regiswadon card
included in the packing material.
Printedin China
 Loading...