


Garmin STREETPILOT C320 quick reference guide
StreetPilot® c320
quick reference guide

Step 1: Configure Your c320
Press and hold the Power button
on-screen instructions to set up your c320; you only have to do this once.
on the side of the unit to turn it on. Follow the
Step 2: Install Software and Load Maps
Before using your c320, you need to install software on your computer using the
DVD-ROM and then load maps on your c320. Refer to the Setup Guide for complete
instructions.
Step 3: Mount Your c320
To ensure a tight grip, clean and dry your windshield before you mount the suction
cup.
Tension knob
Fit the bottom of your c320
into the cradle of the suction
cup mount.
Tilt your c320 back until
it snaps in place.
Place the suction cup on the
windshield. Flip the lever back,
toward the windshield.
Continued on the top of the next column....
Continued from Step 3....
Plug the cable into a receptacle in your vehicle. If necessary, use the tension knob to
loosen or tighten the tension in the mount to improve your viewing angle.
Your unit will turn on automatically if you have started your vehicle. To manually
turn on your c320, press and hold the Power button
on the side of the unit. Refer
to the image on the back of this sheet.
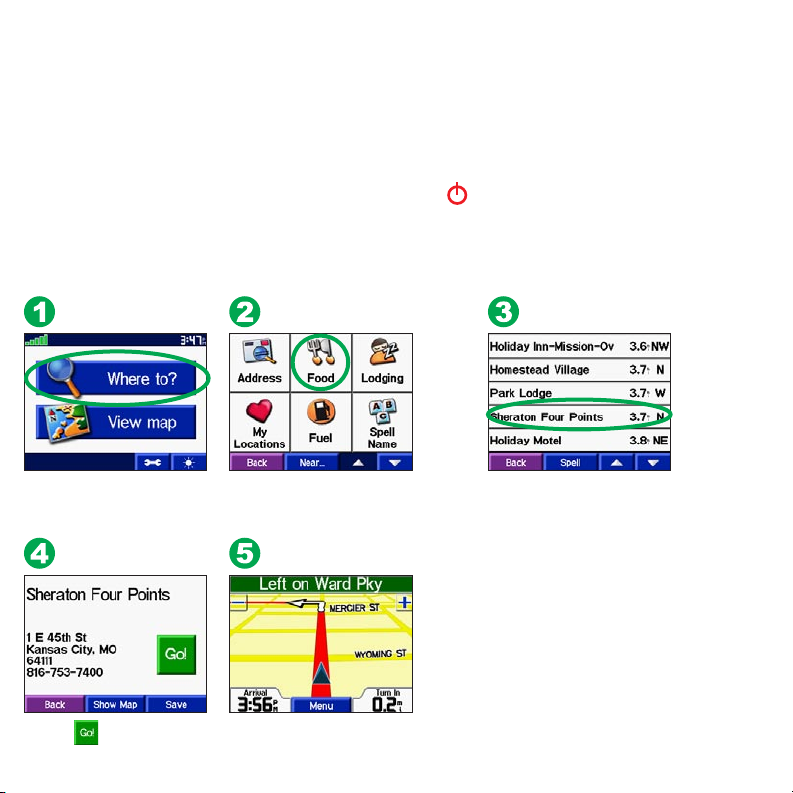
Step 4: Find Your Destination
Touch Where to?
Touch .
Select a category. Touch the
arrows to see more categories.
Enjoy the route!
Select a destination. Touch
the arrows to see more places.