

Page 1

quick reference guide
F O R E R U N N E R® 4 0 5
GPS-ENABLED SPORTS WATCH WITH WIRELESS SYNC
Page 2
WARNING: This product contains a non-replaceable lithium-ion battery.
See the Important Safety and Product Information guide in the product box
for important battery safety information.
WARNING: Always consult your physician before you begin or modify any
exercise program. See the Important Safety and Product Information guide
in the product box for product warnings and other important information.
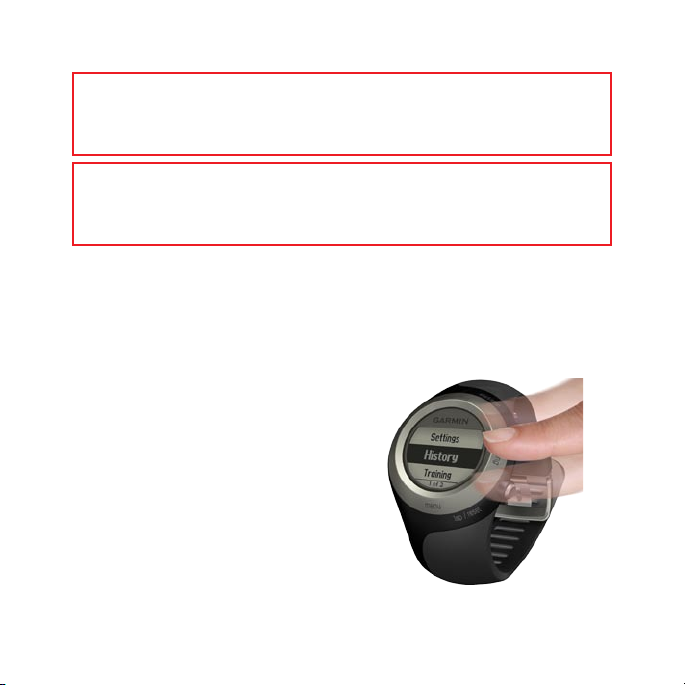
Using the Touch Bezel
The silver bezel around the watch
face acts as a multifunction button.
Tap: quickly press your nger on the
bezel to make a selection, toggle a
menu option, or change pages.
Touch and hold: hold your nger on
one of the four labeled areas on the
bezel to switch modes.
Double press: press two ngers on
two areas on the bezel to turn on the
backlight.
2 Forerunner 405 Quick Reference Guide
Touch and drag (scroll): press your
nger on the bezel and drag it around
the bezel to scroll through the menu
options or to increase or decrease
values.
Page 3
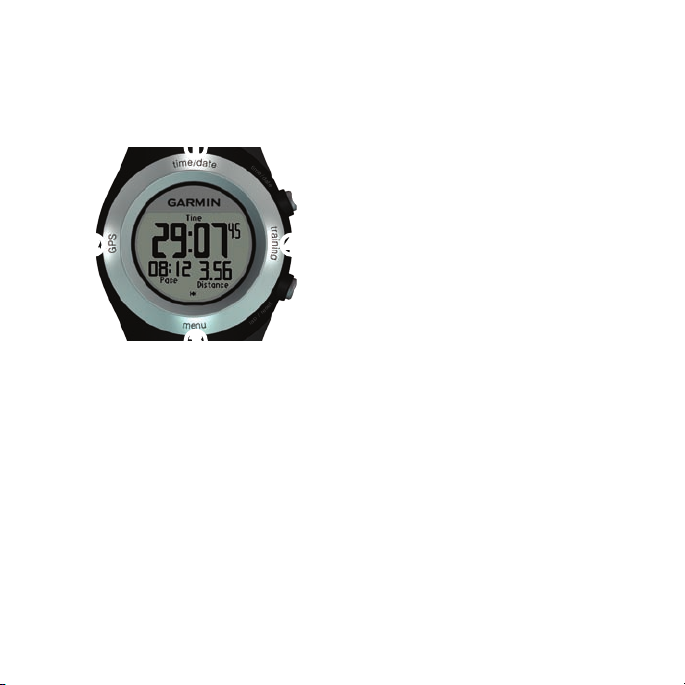
Touch Bezel Areas
t
e
s
a
r
l
e
p
/
/
t
i
e
m
d
a
t
e
and Buttons
➊
➎
➋
➍
➌
time/date: touch and hold to
➊
enter time/date mode.
GPS: touch and hold to enter
➋
GPS mode.
menu: touch and hold to open
➌
the menu page.
➏
training: touch and hold to enter
➍
training mode.
start/stop/enter:
➎
Press to start/stop the timer in
•
training mode.
Press to make a selection.
•
Press to exit power save mode.
•
lap/reset/quit:
➏
Press to create a new lap in
•
training mode.
Press and hold to reset the timer
•
in training mode.
Press to exit a menu or page.
•
Press to exit power save mode.
•
Forerunner 405 Quick Reference Guide 3
Page 4
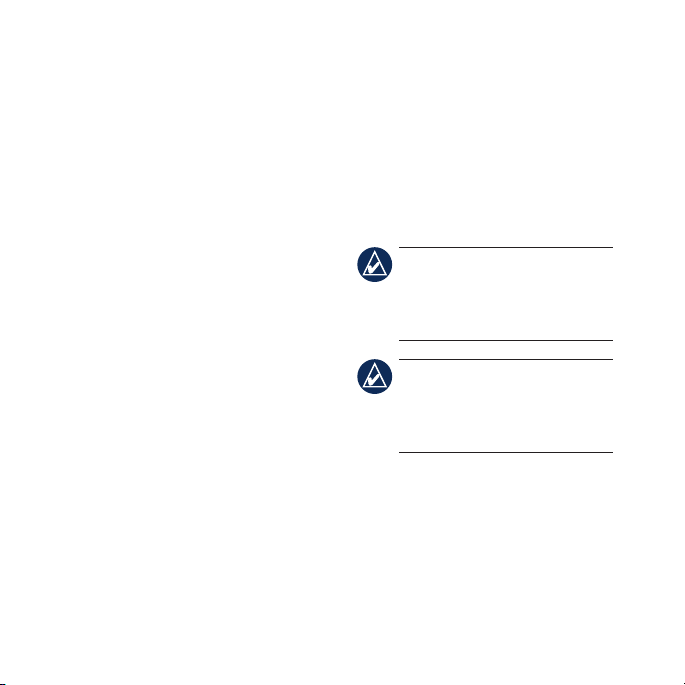
Bezel Tips
Touch the bezel rmly.
•
Touch the bezel on the outer ring,
•
where the words appear, not the
inner ring near the watch face.
Make each bezel selection a
•
separate action.
Do not rest your nger or thumb
•
on the bezel while using it.
Do not wear thick gloves while
•
using the bezel.
If bezel is wet, wipe the bezel dry
•
before using it.
Step 1: Charge the Battery
Your Forerunner ships with the
power off to conserve the battery.
Charge the Forerunner for at least
three hours before using it.
NOTE: To prevent corrosion,
thoroughly dry the charging
contacts and surrounding area
before charging.
TIP: The Forerunner will
not charge when outside
the temperature range of
32°F–122°F (0°C–50°C).
Locking the Bezel
To prevent accidental bezel taps,
press enter and quit simultaneously.
To unlock the bezel, press enter and
quit simultaneously again.
4 Forerunner 405 Quick Reference Guide
To charge the Forerunner:
1. Plug the USB connector on the
charging clip cable into the AC
adapter.
2. Plug the AC adapter into a
standard wall outlet.
Page 5
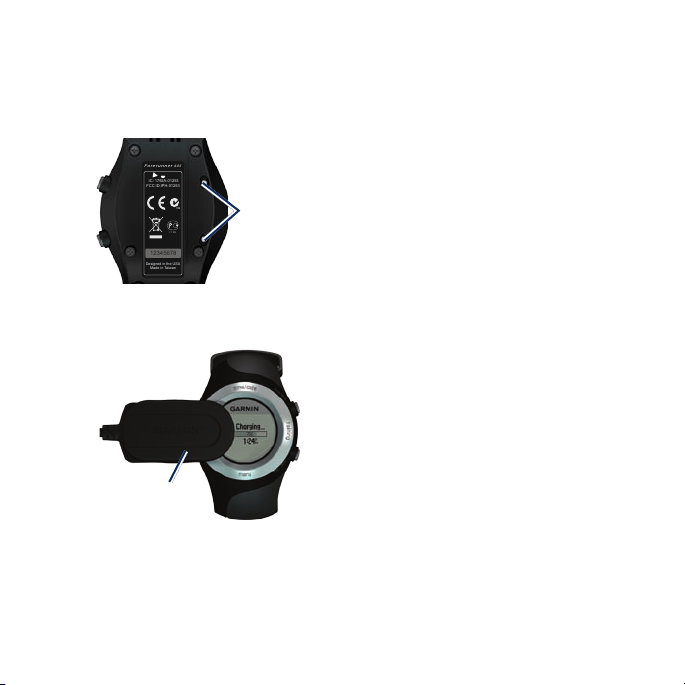
3. Align the charging clip posts with
N9
Ì Ï0 2
For erun ner
405
12345678
FCC ID:IPH-01253
IC: 1792A-01253
Designed in the USA
Made in Taiwan
t
e
s
a
r
l
e
p
/
/
t
i
e
m
d
a
t
e
the contacts on the back of the
Forerunner.
Forerunner with GPS on for up to 8
hours. See the owner’s manual for
more information.
Step 2: Congure
Contacts
4. Clip the charger securely over the
face of the Forerunner.
Charging
clip
The length of time a fully charged
battery will last depends upon usage.
A fully charged battery can run the
Forerunner 405 Quick Reference Guide 5
Your Forerunner
The rst time you use your
Forerunner, follow the on-screen
instructions to learn how to use the
bezel and congure the Forerunner.
If you are using an ANT+Sport™
heart rate monitor, select Yes during
the conguration to allow the heart
rate monitor to pair (connect) with
your Forerunner. See Step 3 on the
next page for more information.
Page 6
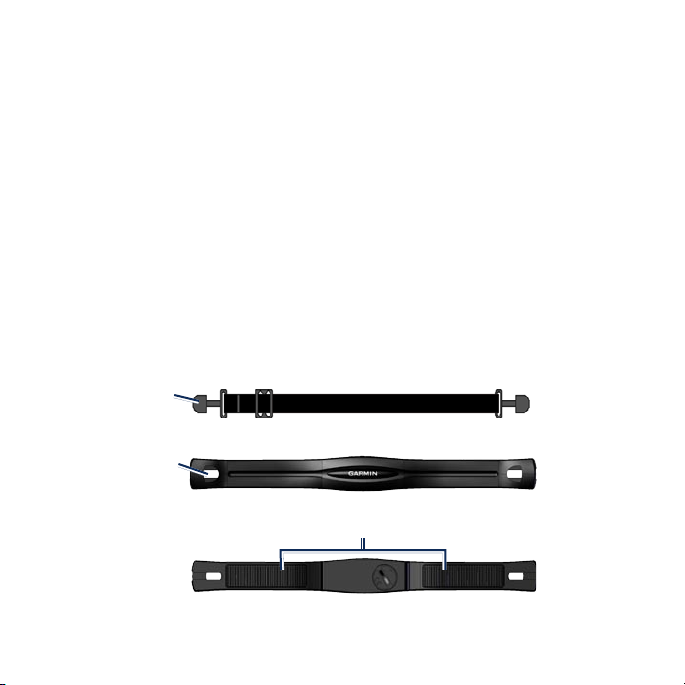
Step 3: Pair the
skin, just below your breastplate.
It should be snug enough to stay in
Heart Rate Monitor
(Optional)
While you are trying to pair your
heart rate monitor with your
Forerunner for the rst time, move
away (10 m) from other ANT+Sport
accessories.
The heart rate monitor is on standby
and ready to send data. Wear the
heart rate monitor directly on your
Tab
Heart Rate Monitor Strap
Slot
Heart Rate Monitor (Front)
Heart Rate Monitor (Back)
6 Forerunner 405 Quick Reference Guide
place during your run.
1. Push one tab on the strap through
the slot in the heart rate monitor.
Press the tab down.
2. Wet both sensors on the back of
the heart rate monitor to create a
strong connection between your
chest and the transmitter.
3. Wrap the strap around your chest
and attach it to the other side of
the heart rate monitor.
Sensors
Page 7
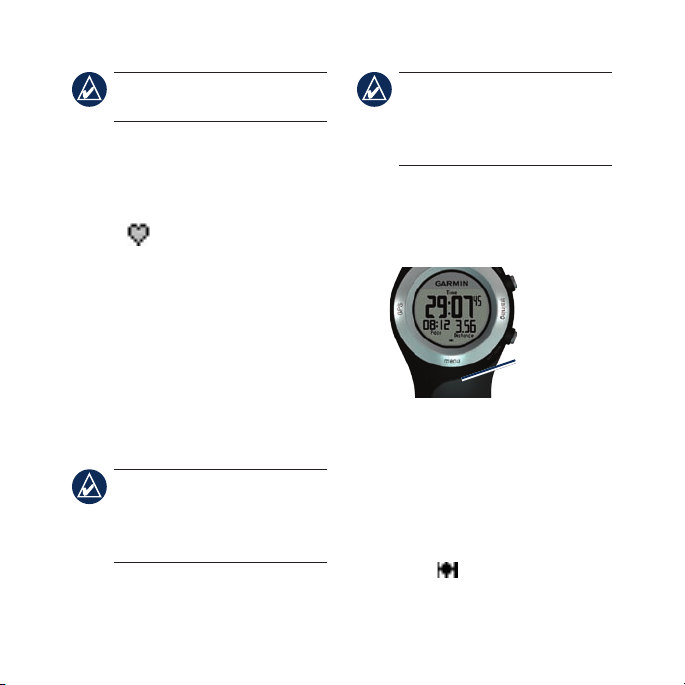
NOTE: The Garmin logo
t
e
s
a
r
l
e
p
/
/
t
i
e
m
d
a
t
e
should be right-side up.
4. Press quit or enter to exit power
save mode.
5. Bring the Forerunner within range
(3 m) of the heart rate monitor.
The heart rate icon appears
on the training mode pages.
NOTE: You cannot acquire
satellites in power save mode.
To exit power save mode,
press enter or quit.
1. Go outdoors to an open area. For
the best reception, make sure
the antenna of the Forerunner is
oriented toward the sky.
Step 4: Acquire Satellite Signals
To set the correct time of day and
begin using the Forerunner, you must
acquire GPS satellite signals. It may
take a few minutes to acquire signals.
NOTE: To turn off the
GPS receiver and use the
Forerunner indoors, touch and
hold GPS. Select Off for GPS.
2. Touch and hold
training mode.
3. Stand still and do not begin
moving until the locating satellites
page disappears.
When you are receiving satellite
signals, the GPS icon appears in
the training mode pages.
Forerunner 405 Quick Reference Guide 7
Antenna
location
training to enter
Page 8
Step 5: Go for a Run!
TIP: Set your user prole so
the Forerunner can calculate
calories correctly. Touch and
hold menu > select Settings >
User Prole.
1. Touch and hold training.
2. Press
3. After completing your run, press
4. Press and hold
start to start the timer.
stop.
reset to save your
run data and reset the timer.
Step 6: Download Free Software
ANT Agent™ allows you to use your
Forerunner with Garmin Connect, a
Web-based training tool, and Garmin
Training Center, a computer-based
training tool.
8 Forerunner 405 Quick Reference Guide
1. Go to www.garmin.com
/forerunner405.
2. Follow the on-screen instructions
to download and install ANT
Agent.
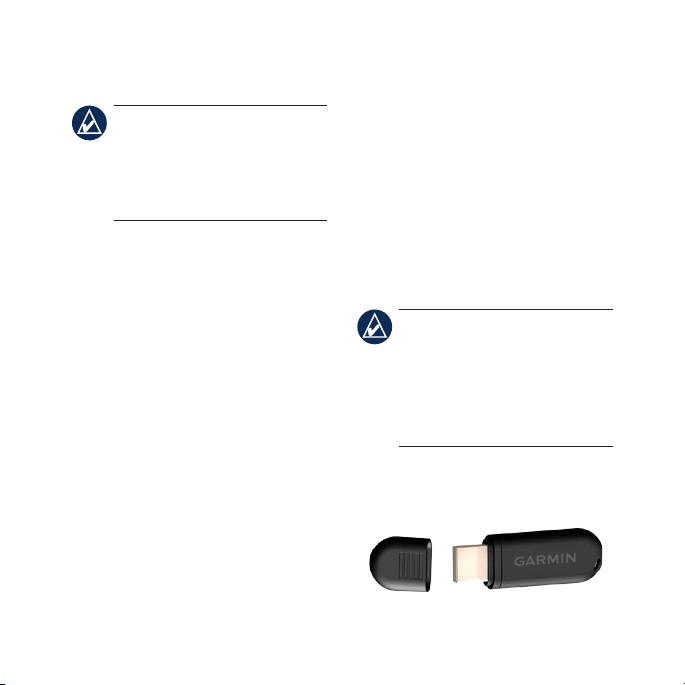
Step 7: Pair Your Computer and Forerunner
NOTE: Before connecting
the USB ANT™ stick to your
computer, you must download
software as instructed in Step
5 so that the necessary USB
drivers are installed.
1. Plug the USB ANT stick into
an available USB port on your
computer.
Page 9
2. Bring your Forerunner within
range (3 m) of your computer.
3. WhentheANTAgentndsyour
Forerunner, ANT Agent displays
a unique number and asks you if
you want to pair. Select yes.
4. Your Forerunner should display
the same number ANT Agent
displayed. If so, select yes on
your Forerunner to complete
pairing process.
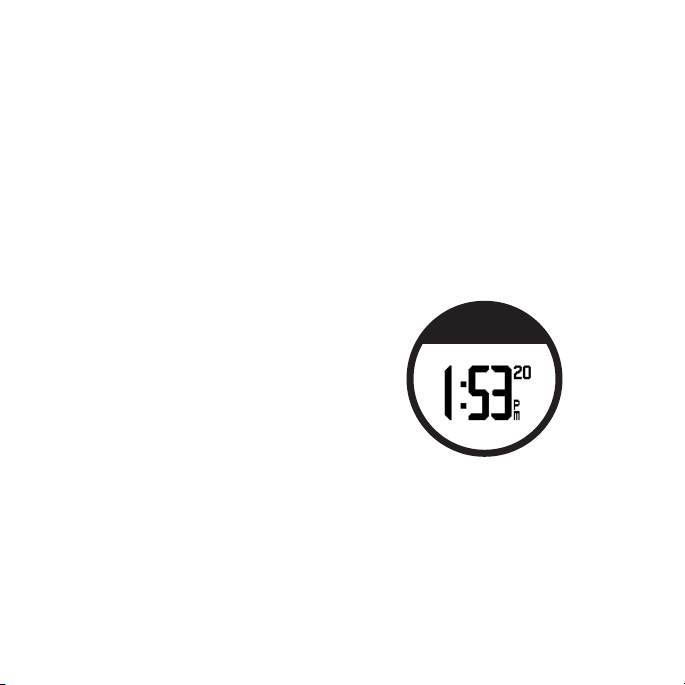
Power Save Mode
After a period of inactivity, the
Forerunner switches to power save
mode. While in power save mode,
you can view the time of day,
turn on the backlight, and use the
ANT+Sport computer connection.
To exit power save mode, press the
enter or quit button.
Step 8: Transfer Data to Your Computer
Bring your Forerunner within
range (3 m) of your computer.
ANT Agent automatically transfers
data between your Forerunner and
Garmin Connect. This may take a
few minutes. Use Garmin Connect to
view and analyze your data.
Forerunner 405 Quick Reference Guide 9
Page 10

Using the Four Modes
Touch and hold your nger on one of
the four labeled areas on the bezel to
switch modes.
Time/date Mode
Time/date mode displays the current
time and date. Tap the bezel to scroll
through the available pages, such as
time, battery gauge, and alarm time.
Menu Mode
Menu mode allows you to access
your Forerunner’s history, the
training menu, and the unit settings.
Training Mode
Training mode is the mode you will
use most often. Use training mode to
record your activities, view training
data, and compete with your Virtual
Partner.
GPS Mode
GPS mode allows you to view and
use the GPS menu. You can view the
satellites page, turn on and off GPS,
save and go to locations, and route
back to your starting point.
10 Forerunner 405 Quick Reference Guide
Page 11
Resetting the Forerunner
If your Forerunner is locked up,
reset your Forerunner. Press and
hold enter and quit simultaneously
until the screen goes blank (about 6
seconds). This does not erase any of
your data or settings.
CAUTION: The Forerunner
is not intended to be used
while swimming. Swimming
or prolonged water submersion
can cause a short in the
unit, which can in rare cases
result in a minor skin burn or
irritation in the area of the unit.
Product Registration
Help us better support you by
completing our online registration
today. Go to http://my.garmin.com.
Keep the original sales receipt, or a
photocopy, in a safe place.
More Information
For more information about the
functions and settings of the
Forerunner, refer to the owner’s
manual.
Forerunner 405 Quick Reference Guide 11
Page 12
Garmin®, Forerunner®, Garmin Training Center®, Auto Pause®, Auto Lap®, Virtual Partner® are
trademarks of Garmin Ltd. or its subsidiaries, registered in the USA and other countries. Garmin
Connect™, Dynastream™, ANT™, ANT Agent™, and ANT+Sport™ are trademarks of Garmin Ltd. or
its subsidiaries. These trademarks may not be used without the express permission of Garmin.
Other trademarks and trade names are those of their respective owners.
For the latest product information and accessories, visit the Garmin Web site
1200 East 151st Street, Olathe, Kansas 66062, USA
Liberty House, Hounsdown Business Park, Southampton, Hampshire, SO40 9RB UK
No. 68, Jangshu 2nd Road, Shijr, Taipei County, Taiwan
January 2008 Part Number 190-00700-01 Rev. A Printed in Taiwan
at www.garmin.com.
© 2008 Garmin Ltd. or its subsidiaries
Garmin International, Inc.
Garmin (Europe) Ltd.
Garmin Corporation
 Loading...