

Page 1
Page 2
CONTENTS
Setting Up Your Console........................4
Memory Cards.....................................4
Multitap.................................................5
Controller Diagram..................................5
Controls......................................................5
Hitting the Notes......................................6
Feel the Music..........................................7
Main Menu................................................8
Setting Options.........................................9
Game Screens........................................10
Game Mode Screen .........................10
Remix Mode Screen........................11
FreQuency Instruments........................12
FreQuency Activator........................12
Scratcher............................................13
Axe.......................................................13
Playing Game Mode.............................14
Notes...................................................14
T racks..................................................14
Skill Level............................................15
Score...................................................15
Stages.................................................15
Arenas.................................................16
Bonus Points......................................16
Player Stats........................................16
Solo Game Powerups ...........................17
Playing Remix Mode.............................18
Creating a Remix...............................18
Playing Notes.....................................18
Effects..................................................18
Overdubbing.......................................19
Erasing Notes....................................19
Switch Tracks....................................19
Advancing Through Sections........20
Saving a Remix Mode Title.............20
Jukebox: Playlist...............................21
Loading a Custom Remix
to the Game Mode............................22
Create the FreQ, Your DJ Alter Ego...22
Select a Basic FreQ..........................22
Create a Unique FreQ
from Scratch......................................23
Modify a Basic FreQ........................24
Save Your FreQ..................................25
Load Your FreQ..................................25
Pause Screen.........................................26
Game Settings...................................26
Multiplayer Games................................27
Start a Multiplayer Game
or Remix..............................................27
Multi Game Mode.............................27
Multi Game Powerups.....................28
Who’s in the Lead.............................29
Multi Remix Mode............................29
Saving and Loading Game Data.........31
Virtual Keyboard....................................32
The Music in FreQuency......................32
Credits......................................................34
32
Page 3
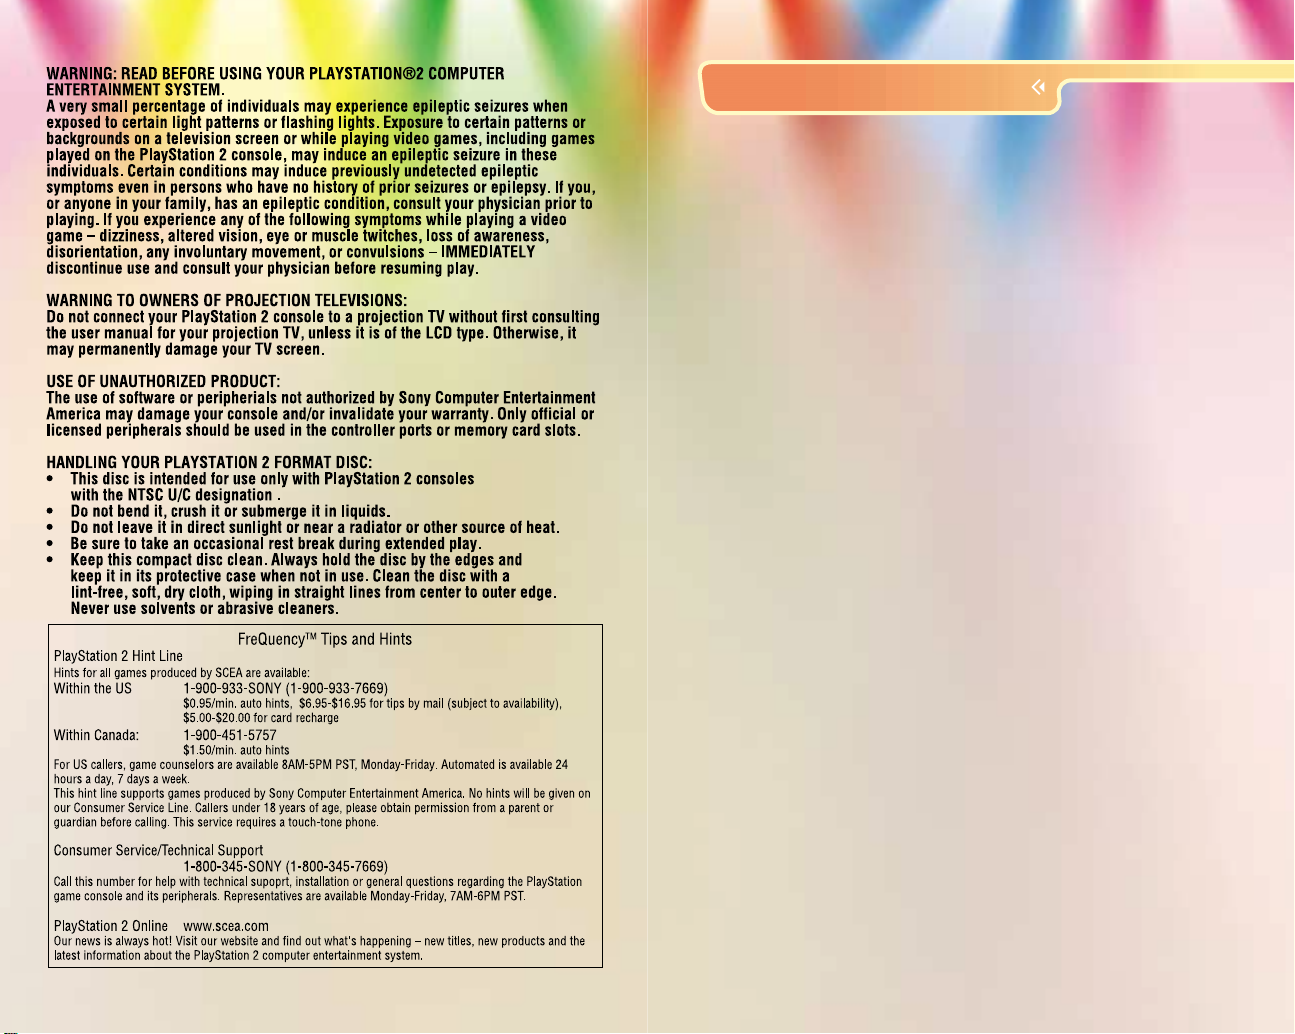
RESET
button
MEMORY CARD slot 2
MEMORY CARD slot 1
USB connector
S400 i.LINK connector
controller port 1
controller port 2
disc tray
(OPEN)
button
SETTING UP YOUR CONSOLE
For information, see “Saving and Loading Game Data” on page 31.
Multitap (for PlayStation®2)
Memory Card (8MB) (for PlayStation®2) slots 1-A, 1-B, 1-C and 1-D.
Set up your PlayStation®2
computer entertainment
system according to the
instructions in the manual.
Make sure the MAIN POWER
switch (located in the back
of the console) is turned ON.
Press the STANDBY/RESET
button. When the power
indicator lights up, press the OPEN button and the disc tray will
open. Place the FREQUENCY™ disc on the disc tray with the label
side facing up. Press the OPEN button again and the disc tray will
close. Attach game controllers and other peripherals, as appropriate.
Note: FreQuency supports analog and DUALSHOCK™ / DUALSHOCK™2
analog controllers, but not digital-only controllers.
Follow on-screen instructions and refer to the manual for
information on using the software.
For a 3 & 4 Player game, use a Multitap (sold separately). Each
player will need a controller. Connect the Multitap to Controller Port
1 of the PlayStation
®
2 computer entertainment system. Then
connect the controllers to the controller ports on the side of the
Multitap. You cannot use the Multitap in Controller Port 2. When the
Multitap is connected to Controller Port 1, you cannot connect a
controller to Controller Port 2.
CONTROLS
Menus
Memory Cards
To save game settings and progress, insert a Memory Card
(8MB) (for PlayStation
PlayStation
®
2 computer entertainment system. You can load saved
game data fromthesamecard, or from any Memory Card (8MB)
(for PlayStation
• Use Memory Card (8MB) (for PlayStation
• To copy game data from one Memory Card (8MB)
(for PlayStation
(8MB) (for PlayStation
Multitap and Memory Cards
In Multi Mode, you may use Memory Card (8MB) (for PlayStation
slots 1 & 2 for 2 player games. For 3 & 4 player games, use the
Multitap in Controller Port 1, and insert up to four Memory Cards in
4 5
®
2) into MEMORY CARD slot 1 of your
®
2) containing previously saved FreQuency games.
®
2) slot 1 for Solo play.
®
2) to the other, use Memory Card
®
2) slots 1 and 2.
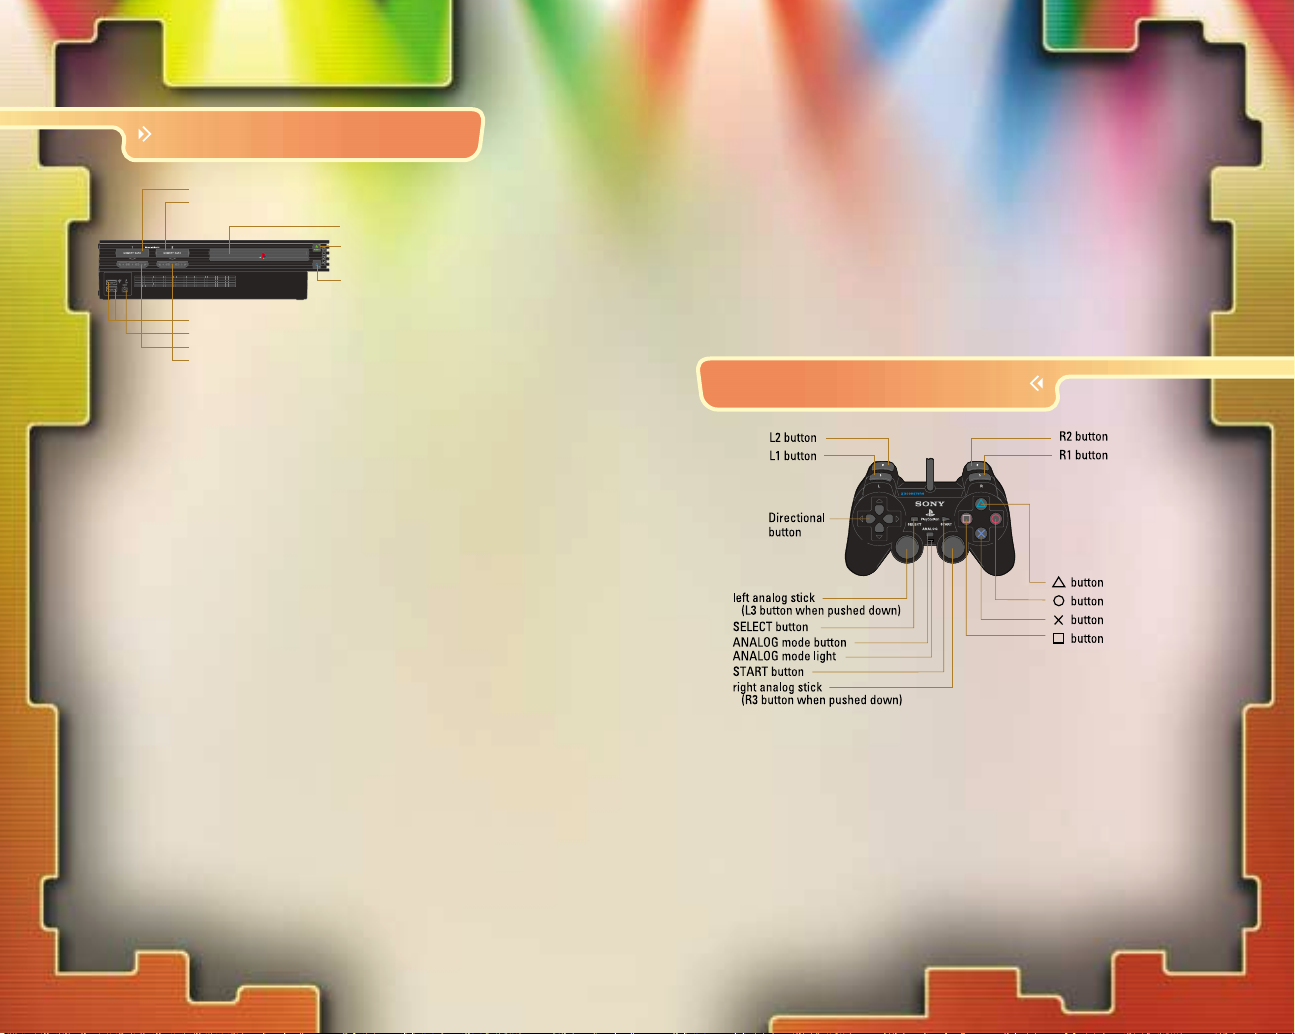
Start/Pause game....................................÷ button
Select menu item . . . . . . . . . . . . . . . . . . . . . . . . . . Directional button
or left analog stick UP/DOWN/LEFT/RIGHT
Confirm Selection . . . . . . . . . . . . . . . . . . . . . . . . . . . . . . . . .≈ button
Back to previous screen . . . . . . . . . . . . . . . . . . . . . . . . . . .ç button
®
2)
Refresh Memory Card (8MB)
(for PlayStation
®
2) display on Options screen . . . . . . . . . .Ω button
Display virtual keyboard where it’s accessible . . . . . . . . .Ω button
Page 4
Game Mode
Change tracks . . . . . . . . . . . . . . . . . . . . . . . . . . . . . . . . . . . . . . ..∫˜
Play axe and scratcher, change pitch . . . . . . . . . . left analog stick
Activate notes and samples . . . . . . . . . . . . å, ∂, and ƒ,
or √, ç and Ω
Deploy Powerup . . . . . . . . . . . . . . . . . . . . . . . . . . . . . . . . . . ≈ button
∫˜
Remix Mode
Activate/De-activate loop tool . . . . . . . . . . . . . . . . . . . . . . . . . . . . .≤
Toggle Advance to
new section/Repeat Section . . . . . . . . . . . . . . . . . . . . . . . . . . . .µ
Erase current bar in Remix Mode . . . . . . . . . . . . . . . . . . . .≈ button
Erase whole track in
current section in Remix Mode . . . . . . . . . . . . .Tap ≈ button twice
Highlight effects . . . . . . . . . . . . . . . . . right analog stick UP/DOWN
Turn on effects..................Press right analog stick in ( )
HITTING THE NOTES
The real challenge in FreQuency is capturing notes fast enough
by pressing the correct button as a note passes under the
ACTIVATOR. You may find that using only the √,ç and Ω
buttons with a thumb (or even fingers) is not fast enough at the
higher skill levels. Try these recommended methods for Normal
and Expert players:
Method 1
• Left note – å button
• Center note – ∂ button
• Right note – ƒ button
∫˜
FEEL THE MUSIC!
You’re a FreQ, a DJ soaring
through musical cyberspace
darting from one track to the
next as you feverishly bring
music to life note by note
and instrument by instrument.
FreQuency spins you into a
world of musical creation,
visual excitement and
intense competition. Jam
with pulsing rhythms while weaving your own musical creations into
the mix as you see and hear your music explode to life.
In Game Mode, survive by quickly activating tracks to keep you and
the music alive. Activate the drums, bass, guitar, synth, vocal, and
F/X tracks to reveal a song. As the tempo increases, so does the
pressure as you frantically activate more complex tracks.
In Remix Mode, remix samples from the major techno, rock,
house, drum ‘n’ bass, hip-hop, trance and turntable stars featured in
FreQuency. Then take your new creations and plug them into the
Game Mode competition. You can even organize and play your
creations in the FreQuency Jukebox.
You’ve hit the right frequency with some of the greatest tunes and
talent in the digital music universe. Now, try to harness and mix
every pulsing bassline, hypnotic drumbeat, guitar riff and scratch.
You have the music and the machine. Now find out if you have what
it takes to be the biggest FreQ at the party.
Method 2
• Left note – √ button
• Center note – ∂ button
• Right note – ƒ button
6 7
Page 5
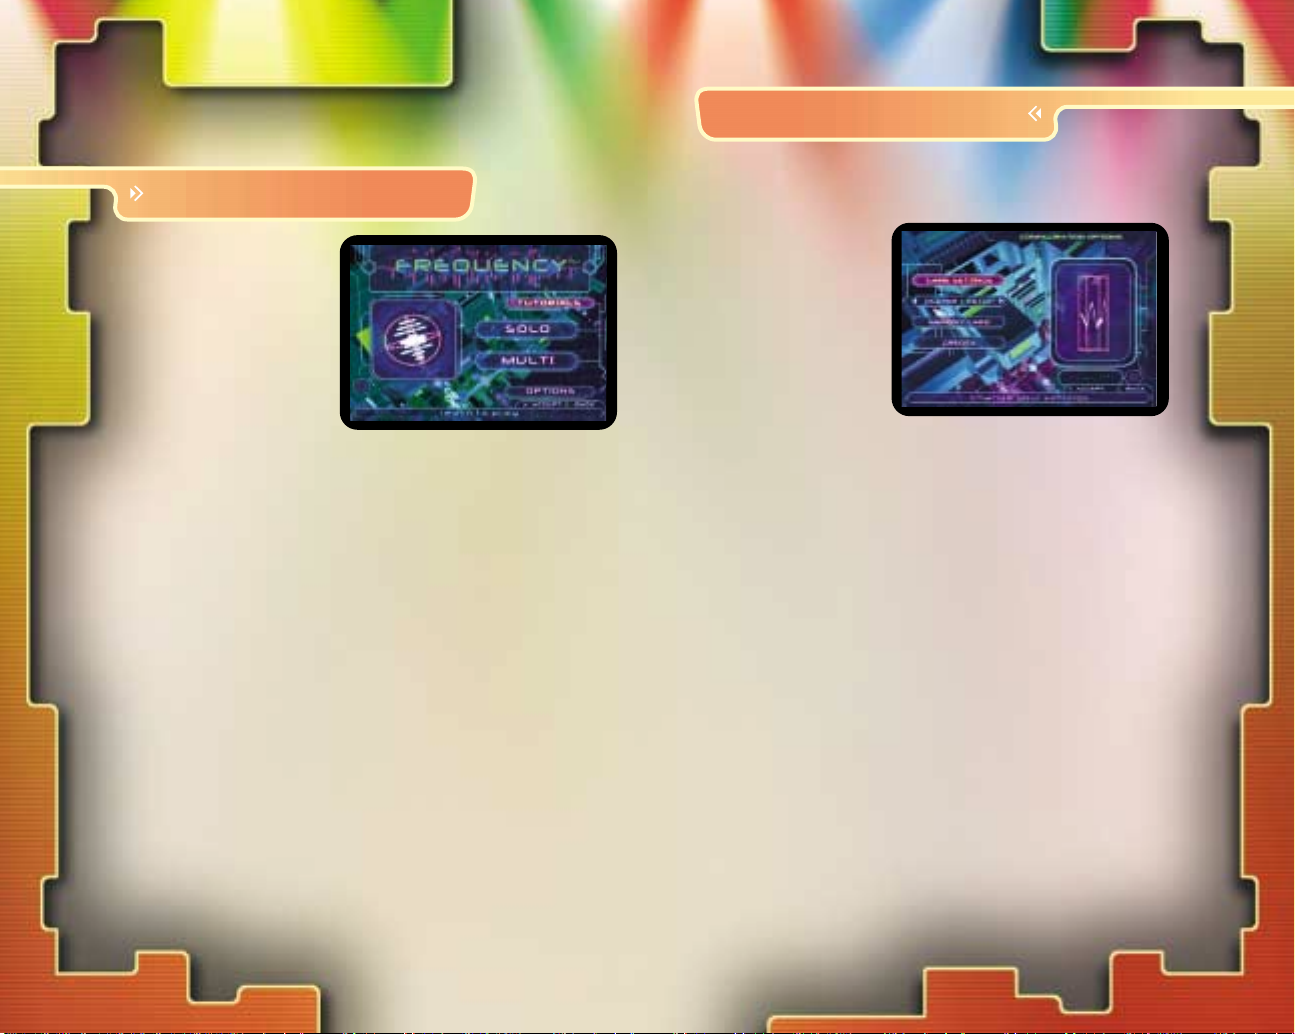
THE MAIN MENU
1. Check out the cut-scene
and game demo. When the
TITLE SCREEN appears,
press the START button
to display the Main Menu.
2.Press the Directional
button or left analog
stick UP/DOWN to
highlight a selection
and press the ≈ button.
T utorial
Learn the basics of FreQuency gameplay. Highlight GAME MODE
or REMIX MODE and press the ≈ button. Follow the training
program’s direction.
Solo
Play Game Mode or Remix Mode in 1 Player games.
Multi
Compete in 2, 3 or 4 Player split-screen games.
Note: For 3 & 4 Player games, use Multitap (for PlayStation
(sold separately).
®
2)
Options
Set game options. Press the Directional button or left analog stick
UP/DOWN to highlight a setting and press the ≈ button.
SETTING OPTIONS
Press the Directional buttons UP/DOWN to highlight an
option and press the ≈ button.
Game Setup
Audio
Select STEREO or
MONO depending
on your system.
Vibration Function
Turn vibration
function ON/OFF on a
DUALSHOCK 2 analog
controller or DUALSHOCK analog controller.
Player Setup
Configure each controller for SOLO or MULTImodes. Press the
Directional button or left analog stick LEFT/RIGHT to select the
controller number you want to change and press the ≈ button.
Press the Directional button UP/DOWN to select a function and
LEFT/RIGHT to select a button option. To complete the configuration you must make a button assignment for all controls displaying
a “?”. When you are finished, press the ≈ button to save your new
configuration to the Memory Card (8MB) (for PlayStation
Press the Ω button to restore the default controller configuration.
®
2).
Memory Card (8MB) (for PlayStation®2) Setup
Access the Memory Card (8MB) (for PlayStation®2) to copy or delete
FreQuency campaigns or remixes.
See “Saving and Loading Game Data” on page 31.
FreQuency Credits
Meet the creators of FreQuency.
8 9
Page 6
Note
Press the correct button as the note crosses your activator.
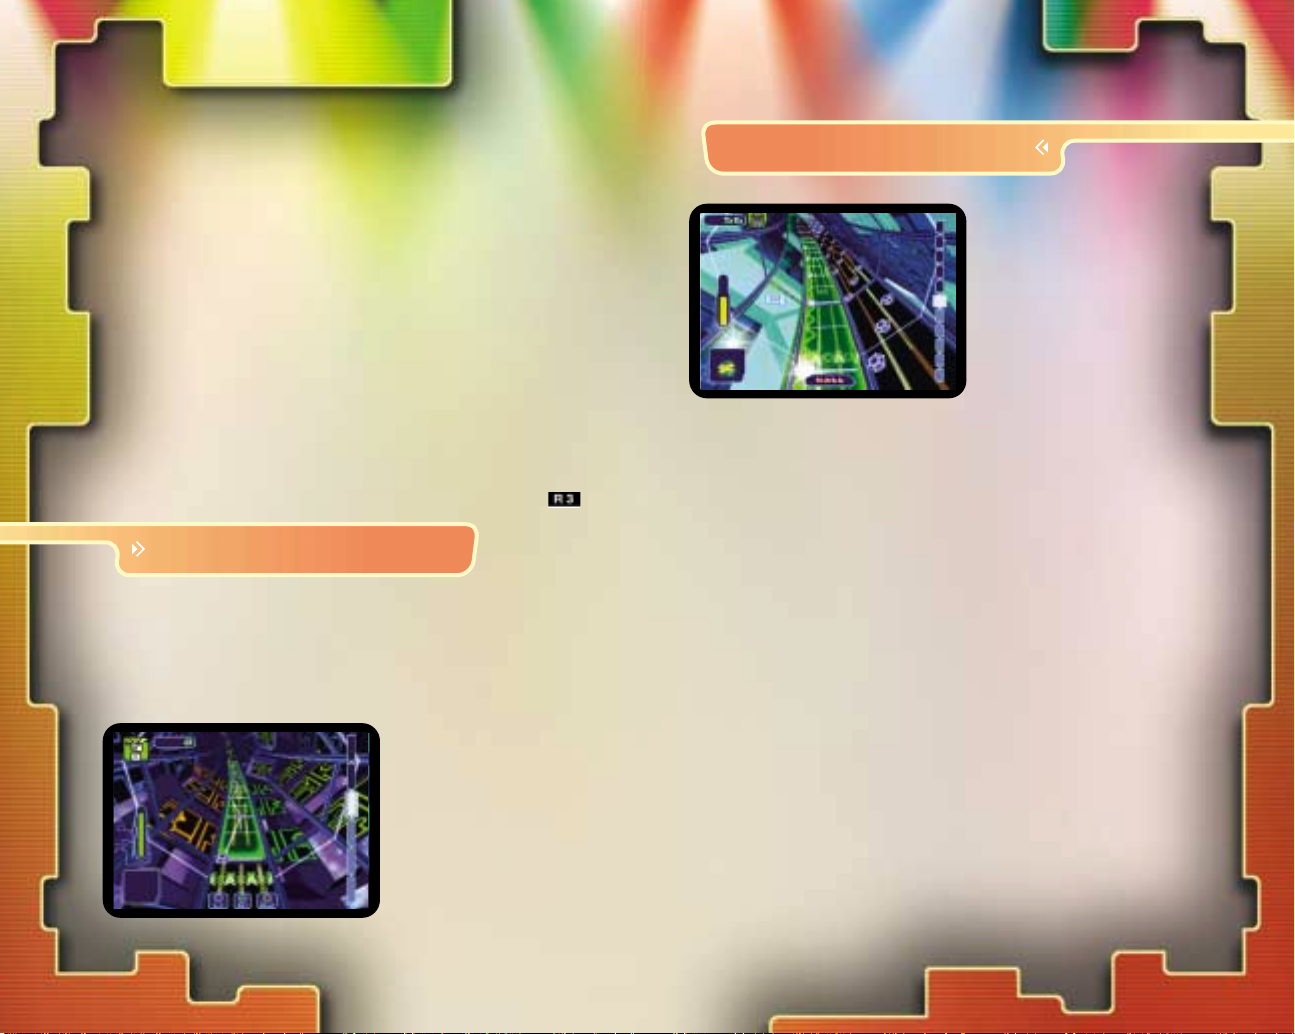
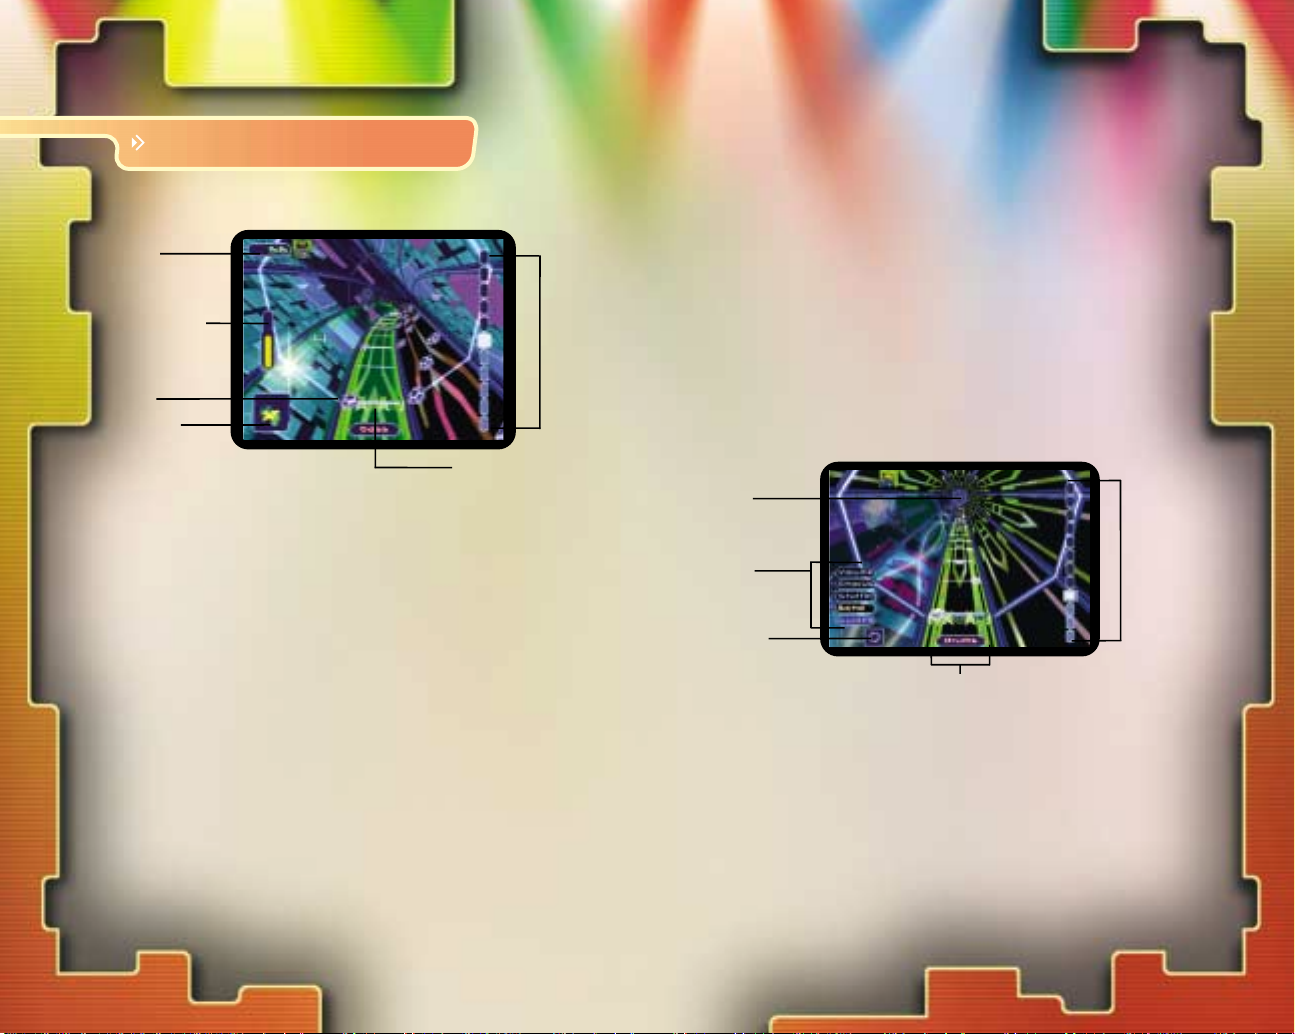
GAME SCREENS
Timing must be perfect to catch the note. Activate notes in order
to activate the whole track of a song.
• Left note – å or √ button.
Game Mode Screen
• Center note – ∂ or ç button
• Right note – ƒ or Ω button
Score
Energy Meter
Song
Location
Meter
Powerup Note Inventory Display
Powerup Notes increase your note catching abilities and multiply
your score. See “Solo Game Powerups” on page 17.
Portal
Portals mark the boundaries between song sections. When
Note
Powerup
and Inventory
FreQuency Activator
FreQuency Activator
This activates notes as they approach on the selected track. As notes
pass into the activator, press the correct button to catch the note.
Hitting the button at just the right time is essential. Hitting a sequence
you advance through a section, you move up one position on
the song location meter.
Remix Mode Screen
Portal
Effects
Song
Location
Meter
of notes activates the track and charges the Energy Meter.
Energy Meter
Keep the Energy Meter charged by activating tracks. When the
Loop Tool
meter is green, you are making progress. When it turns orange,
your energy is getting low. When the meter is completely drained,
the game is over.
Song Location Meter
The Song Location Meter highlights the section of the song in which
you are playing. To survive, you must travel the length of the song.
Score
The longer you remain in the song by activating progressively
more complex tracks, the higher your score. You also score more
points for activating more complex patterns than simpler ones.
Loop Tool
With Loop Tool ON, play two bars of music and they will repeat
throughout the section. With Loop Tool OFF, play every bar of
music in a section. Press the Directional button DOWN to toggle
the Loop Tool ON or OFF.
Loop Boundaries
The green rectangle on the track marks the boundaries of a loop
where your patterns are recorded.
Effects
Loop Boundaries
When playing the FreQuency Activator or Scratcher, the effects
alter the mix. Experiment with each to see how it affects each
10 11
Page 7
track of a song. To turn on the effect, press the right analog stick
UP/DOWN to highlight an effect. Then press the right analog stick
( ) in. The highlighted effect will change color from black to blue.
See “Playing Remix Mode” on page 18 for information on effects.
Portal
Portals are the divisions between each section of a song.
• To advance, press the Directional button UP once anytime
before entering the portal and you will begin a new section.
The words “Advance to Next Section” will appear. Your
position will also advance on the Song Location Meter.
• If you want to remain in the current section, do not press the
Directional button UP. If you have already pressed it, press
it again to toggle back to “Repeat Section”.
Song Location Meter
The Song Location Meter highlights the section of the song you
are remixing.
Playback
Press the SELECT button to listen/view your Remix in
playback mode. You will not be able to edit your Remix when
in Playback mode.
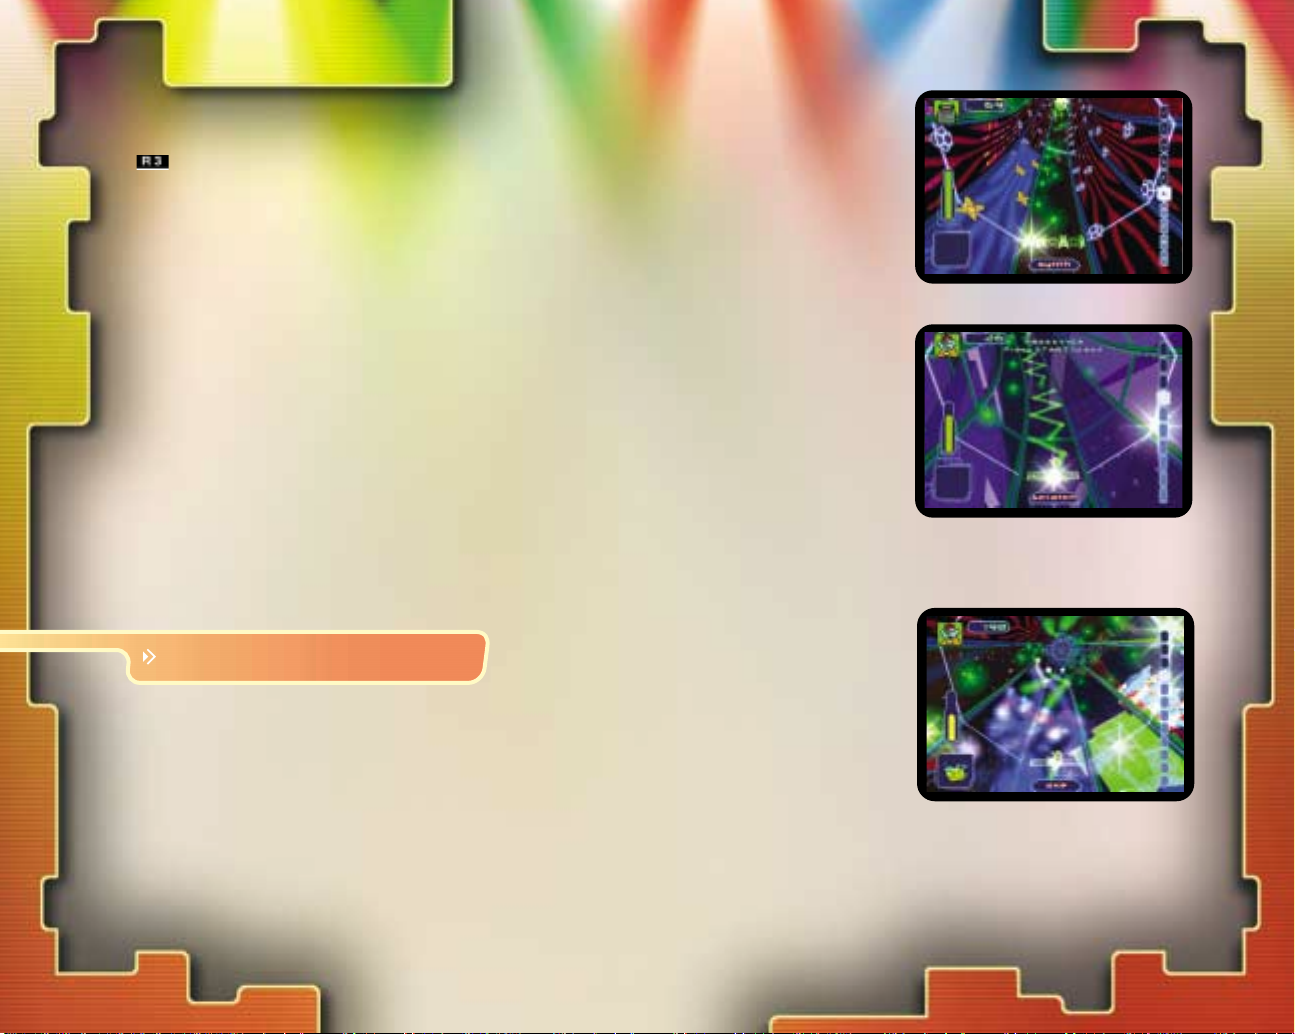
FREQUENCY INSTRUMENTS
FreQuency Activator
Use the FreQuency Activator to activate notes in Game Mode.
By pressing the correct button just as a note passes under it, you
activate the note. Activate the required number of notes
consecutively and the whole track is activated. When a track is
activated, the activation alert flashes on-screen. You can then move
to the next track by pressing the Directional button LEFT/RIGHT.
In Multiplayer Mode, each
activator is color-coded.
• Player 1 – Green
• Player 2 – Purple
• Player 3 – Yellow
• Player 4 – Red
Scratcher
When you move to a
freestyle track in both
Game Mode and Remix
Mode, the Scratcher may
appear. This instrument
allows you to create
turntable noise. Move the
left analog stick right and
left to create a sound with
the Scratcher. Press the √
button or å, ç button or ∂, or Ω button or ƒ button to
change the sample that is recorded when you scratch.
Axe
Use the Axe to play musical
notes by moving the left
analog stick right and left.
Press the √ button, ç
button, or Ω button to play
certain notes. You will hear
the Axe in its different forms
as a Synthesizer or Guitar.
12 13
Page 8
PLAYING GAME MODE
Game Mode is the
competitive game in
FreQuency. Each FreQ starts
out on a campaign through
the game activating tracks
in songs to survive. The
more tracks you activate,
the longer you stay in the
game, which results in a
higher score. You must capture two bars of music at a time to score
and unlock the music in the whole track. Miss one note in a twobar section and you score nothing. In the beginning, the songs are
fairly easy to master. But as you progress through the campaign,
capturing tracks becomes feverishly complex.
Notes
Press the button that matches the position of the note on the track
at the exact time it passes through your activator.
See "Hitting the Notes" on page 6.
T racks
Several tracks make up a song. There are drum, bass, instrument
and voice tracks that must be activated, among others. When you
activate one track, quickly switch to the next track (Directional
button LEFT or RIGHT) and attempt to activate the next track.
Active Bar Alert
When you miss a note in the current bar, you can no longer score
in that two-bar area and it becomes inactive. Look ahead, and you
will see that the next pair of active bars have a color cast (green
in Solo Mode or the controller color code in Multi Mode) alerting
you to the next pair of bars active for capture. You may decide to
switch tracks or hold position in the current track. Keep your eye
on the upcoming bars for powerups.
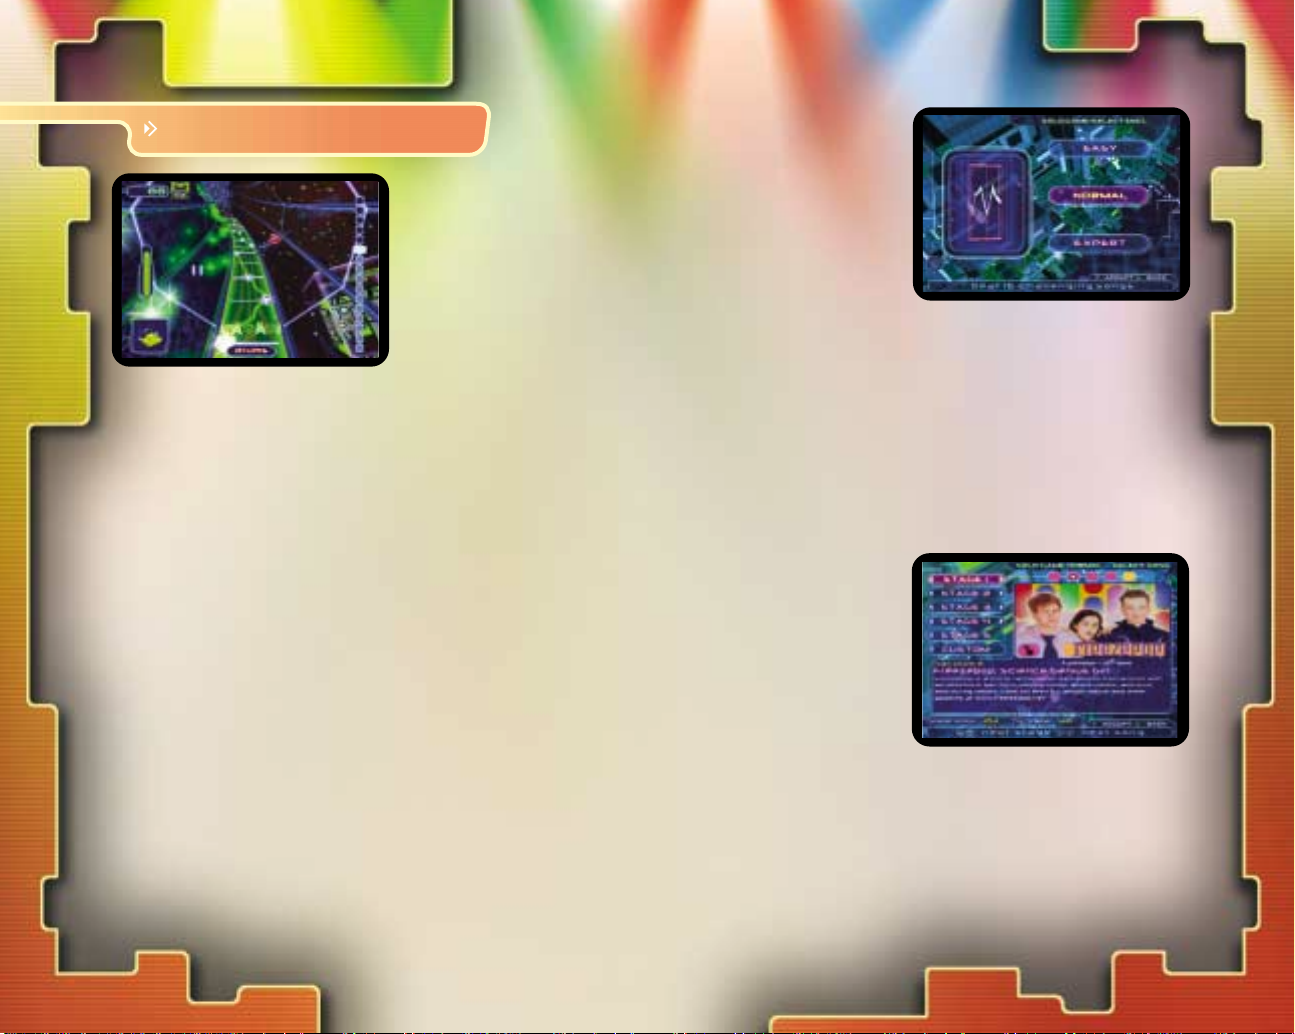
Skill Level
FreQuency Game Mode has
three skill levels based on
the number and complexity
of the songs.
Easy
Beat 15 beginner level
songs, including three
bonus songs.
Normal
Beat 20 songs that present a moderate challenge, including four
bonus songs.
Expert
Beat 25 mind-numbing songs, including five bonus songs.
Bonus Songs
Each stage in each skill level contains a bonus song. Beat the
bonus stage score in each stage to unlock the bonus song. The
bonus stage score is the sum of all the song scores in the stage.
Score
Gain more points for more
complex patterns captured.
Higher scores allow you
to unlock bonus songs in
each stage.
Stages
FreQuency is divided into
five stages. Each stage
contains a number of songs. At the beginning of the game, Stage
1 contains four unlocked songs you must beat to unlock the next
stage. All other songs at the higher stages are locked. You can see
which songs are locked or unlocked by looking at the Lock Icon
that appears on the song art of any selected song. As you unlock
stages in Game Mode, they become available in Remix and Multi
Mode play as well.
14 15
Page 9
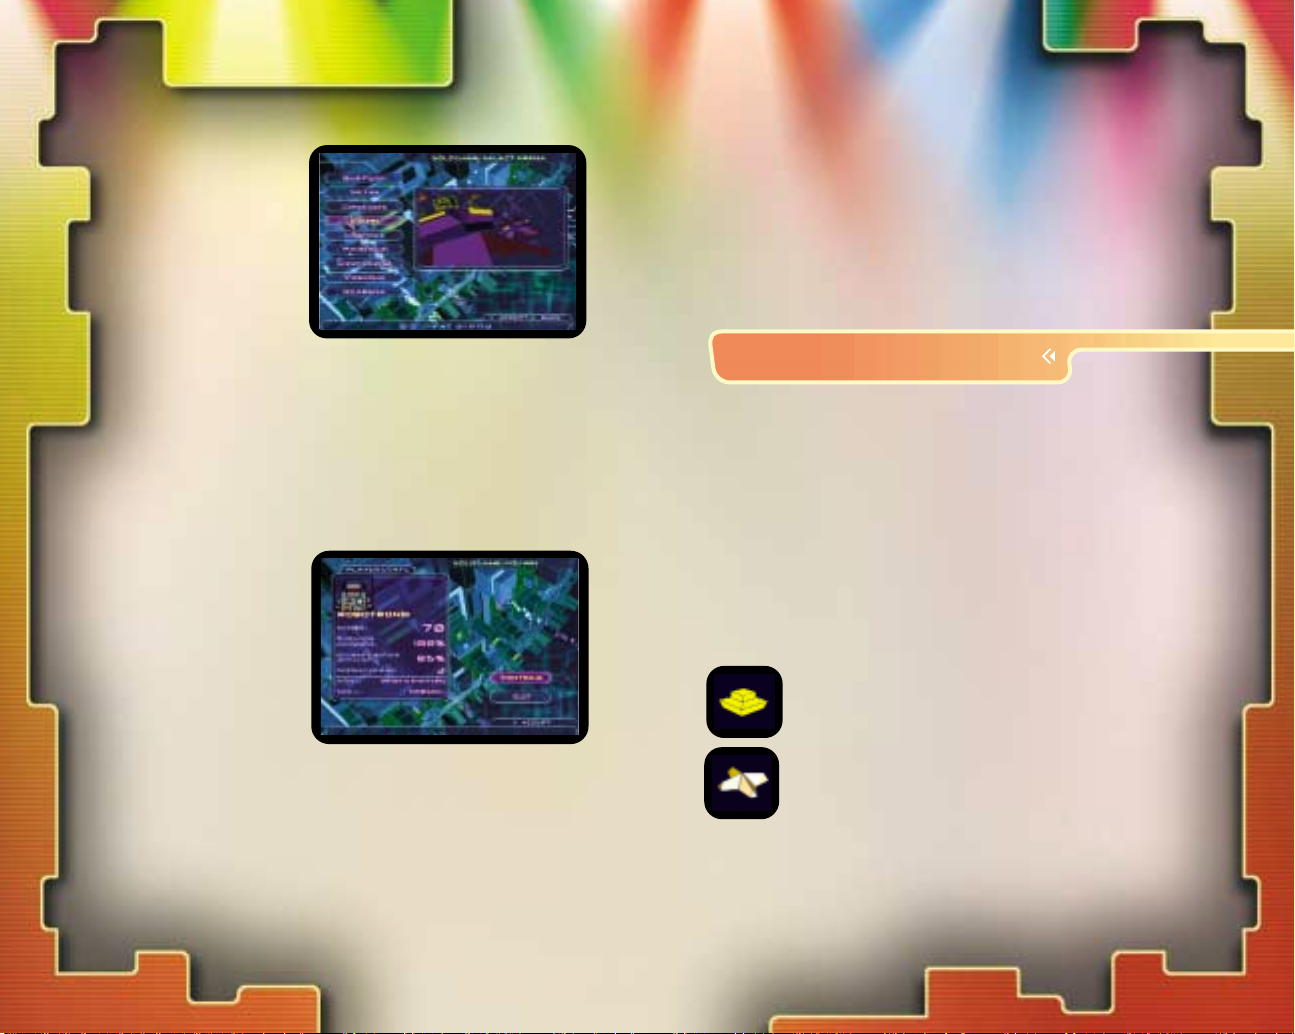
Arenas
Arenas are where you
ride through the song
tracks. As you progress
through the game, more
arenas become available.
You will be able to select
an available arena
immediately before
entering each game. As you unlock arenas in Game Mode, they
become available in Remix and Multi Mode play.
• There are eight Solo arenas.
• There are four Multi arenas.
Bonus Points
You receive a bonus point multiplier as you activate tracks
sequentially without making mistakes.
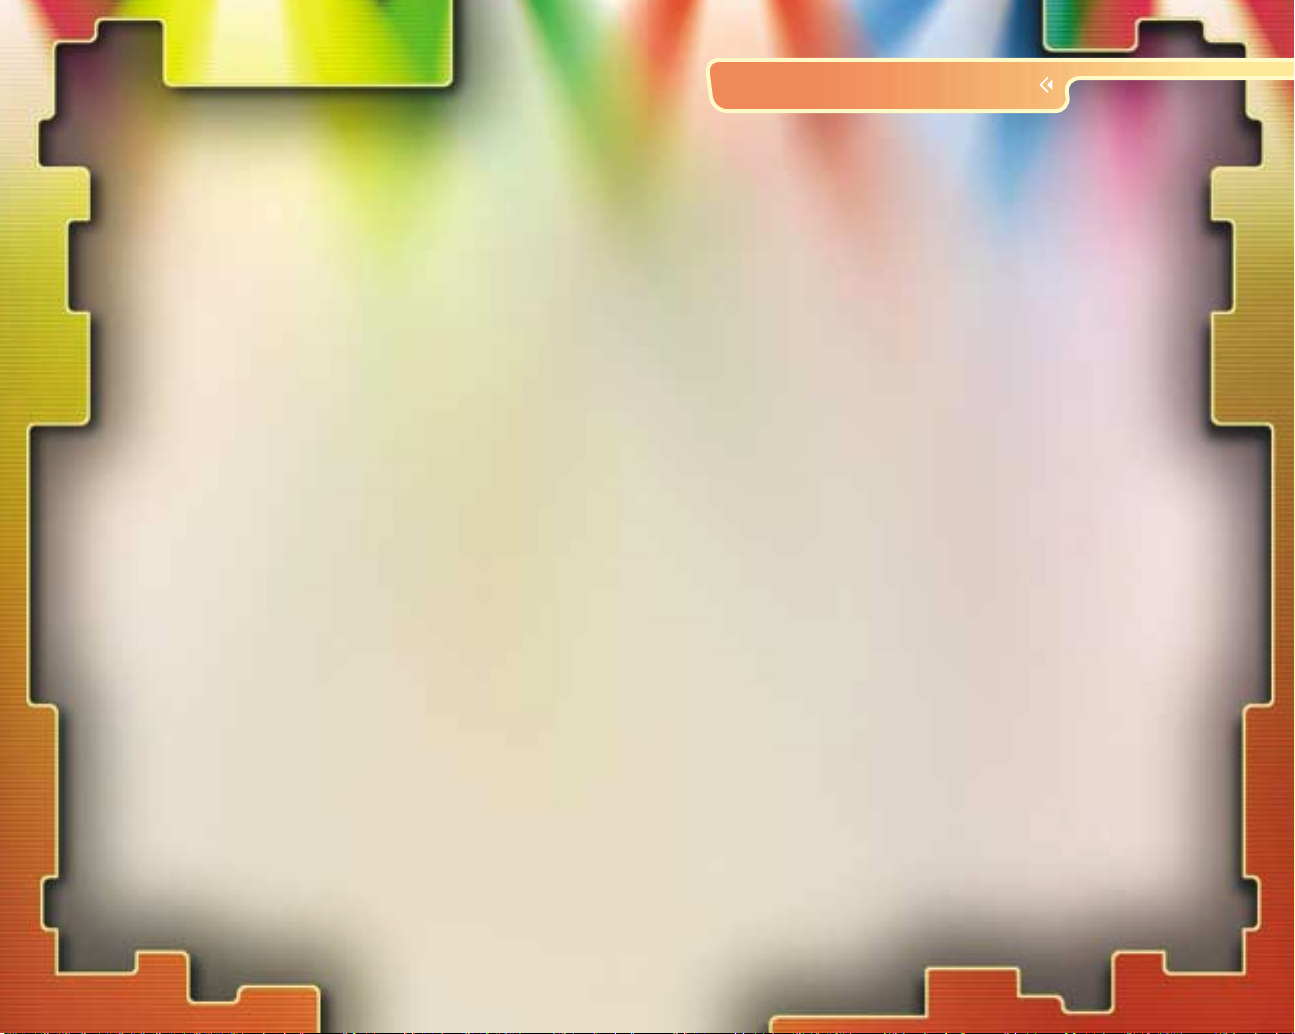
Player Stats
When you win or lose
a game, the Player Stats
screen appears to show
how well you did with
the song.
Score
This is the score
for the last song.
Song
This is the last song you competed against.
Skill
This is the skill level you chose at the beginning of the game.
As the skill level increases, there are more notes to catch
and the Energy Meter drains at a faster rate.
% of level complete
This is the measure of how far you made it through the song
as shown on the Song Location Meter during the game.
Phrase capture accuracy
Percentage of two-bar phrases that are captured in an
entire song.
Hottest streak
This is the number of consecutive tracks activated without error.
SOLO GAME POWERUPS
In a Solo game, catch Powerup Notes to help you capture
notes more quickly or multiply your score.
Catching Powerup Notes
There are Powerup Notes throughout the game. Capture all the
Powerup Notes in a bar and win the Powerup. After you capture
a Powerup Note, it appears in your inventory. Your Powerup
inventory holds only one Powerup at a time.
Deploy Powerups
Press the ≈ button to deploy a Powerup on a specific bar of notes.
The Powerups
Auto-catcher
Deploy on a panel of free notes to catch them
all automatically.
Multiplier
Deploy Multiplier at any time and watch it double the
score you receive for the next eight bars.
16 17
Page 10

PLAYING REMIX MODE
In Remix Mode, you
compose your own sounds
by synthesizing and sampling
music. Your new creation can
be saved to a Memory Card
(8MB) (for PlayStation
and loaded through the Load
Remix option on the Remix
Screen or loaded as a
Custom Game through the Custom option in the Game Mode. T ake the
Tutorial for Remix Mode to familiarize yourself with track switching,
instruments and looping.
®
2)
Creating a Remix
1.Select SOLO on the Main Menu. Then select REMIX and
NEW REMIX.
2.Select a song from an unlocked stage.
Note: You must have unlocked a stage in Game Mode to select it
in Remix Mode.
3.Press the Directional button or left analog stick LEFT/RIGHT
to choose a song you want to use for your remix and press
the ≈ button to open the Arena screen.
4. Select an arena to begin your remix session.
Note: You must have unlocked an arena during Game Mode to
select it in Remix Mode.
Playing Notes
Instead of pressing buttons to catch pieces of a song as in Game
Mode, you are pressing buttons to lay down pieces of the song,
which are remixed by you to create a new song.
Effects
Use Effects to create whole new sounds or slightly alter existing
ones. To turn on the effect, press the right analog stick UP/DOWN
to highlight the effect. Then
press the right analog stick
( ) in. The highlighted
effect will change color
from black to blue.
The Effects vary depending
on the music or sound you
want to alter. Experiment
with Chorus, Stutter and
Echo to create interesting new mixes.
Volume - Adjusts the mix level of your track.
Chorus - Makes your sounds fuller and wider.
Chorus works best in stereo.
Stutter - Rapidly changes the volume of your track to create
a “gate” or “stutter” effect. Try it on vocals and
certain melodic instruments.
Echo - Sounds repeat themselves to create an “echo”
or “reverberation” of the original sound.
Guides - Turn Guide Notes ON/OFF. Follow the Guide Notes
to create a quick mix that sounds similar to the
original version of the song.
Overdubbing
Once you lay down some notes on a track, you may add notes
to that track when that section of the song loops around again.
Erasing Notes
If you change your mind, you can erase a bar of notes or a whole
section on a track. To erase one bar, press the ≈ button once.
To erase all the notes on one track in one section, press the ≈
button twice quickly.
Switch Tracks
After you lay down the notes on one track, switch tracks by pressing
the Directional button LEFT/RIGHT and begin creating more music.
18 19
Page 11

Advancing Through Sections
You can begin a new section or repeat the section you are in by
pressing the Directional button UP. Just before entering a Portal,
press UP on the Directional button and make sure your choice
of ADVANCE TO NEXT SECTION or REPEAT SECTION displays
on-screen just prior to entering the portal. The Song Location
Meter on the right of the screen shows which section you are
in at any point in the remix session.
Saving a Remix Mode Title
1. Press the START
button when in a
remix to enter the
Pause screen.
2. Press the ç button
to exit and open the
Save screen.
3. The game will give
your remix a default
title. Press the ≈ button to save your track.
Renaming the Remix
If you want to rename your remix before saving it:
1. Press the Ω button when the Save screen is displayed
to open the virtual keyboard.
2. Select the BACKSP key (ß) to remove the current name.
3. Type in the new name by selecting each letter and pressing
the ≈ button.
4. Select ENTER (Ω button) to enter your new name. Press
the ≈ button to save the new remix to Memory Card (8MB)
(for PlayStation
Note: You will not be able to save a remix to your Memory Card
(8MB) (for PlayStation
®
2) slot 1.
®
2) if you have not inserted it prior to startup.
Jukebox Playlist
Use the Jukebox to play
your saved remixes or any
of the factory-created
remixes from the songs of
FreQuency. Create a playlist
of your favorite tracks and
save them.
Create a Playlist
1. Press the Directional button LEFT/RIGHT to access a list
of saved remixes or factory remixes.
2.Press the Directional button UP/DOWN to highlight a remix
and press the ≈ button to enter it on your playlist.
3.The selected remix will appear in the My Playlist panel.
4.When you’re finished creating your playlist, press the
Directional button RIGHT to the Edit or Done option.
Note: A Jukebox playlist may contain up to 50 remixes.
Edit
• To sort your list, press the å or ß button.
• To remove a playlist entry, select it and press the ≈ button.
• To clear your list, press the √ button.
Done
• Save Playlist to Memory Card (8MB) (for PlayStation
When you save a new playlist, it will overwrite the previously
saved playlist.
• Play Random – The Jukebox will choose the order in which
to play your playlist.
• Play in Order – Your remixes play in the order displayed in
your playlist.
®
2) slot 1.
20 21
Page 12

Loading a Custom Remix to the Game Mode
You can load any remix you created to the Game Mode.
1. On the Game Mode Stage screen, select CUSTOM. Previously
saved remixes and factory remixes will load and display.
2.Highlight one and press the ≈ button to display the
Arena screen. Select an available arena.
Tips to make a Good Custom Song
• Follow the Guide Notes if you need help making your song
sound like the original mix.
• Make sure each track and section has enough notes on it for
people to have fun while playing in Game Mode.
• When making a multiplayer remix, take time to listen to what
others are doing, so your tracks fit the mix.
• Try turning off Loop Mode and adding some cool drum fills at
the end of a section to create a transition to the next section.
CREATE THE FREQ,
YOUR DJ ALTER EGO
A FreQ is your on-screen DJ
alter ego. You can create a
FreQ at the beginning of the
game and edit his or her
appearance on the FreQmaker
screen anytime. Use the FreQ
to identify and reload saved
game campaigns.
Select a Basic FreQ
Note: To save FreQ data you must be using a Memory Card (8MB)
(for PlayStation
(8MB) (for PlayStation
be able to make changes to your FreQ, but your creation will be
lost when you reset or power down.
®
2). If you are playing without a Memory Card
®
2), the Pick A FreQ screen appears. You will
FreQuency comes with 20 basic FreQs. The first time you
play FreQuency, the Create Your FreQ screen appears.
If you just want to select a FreQ and start playing:
1.Press the Directional button or left analog stick LEFT/RIGHT
to select one of the basic FreQs and press the ≈ button.
2.On the keyboard screen, enter up to 12 letters or numbers to
name your FreQ. To remove a letter, select BACKSP (ß)
and press the ≈ button. When you have the name you
want, select ENTER (Ω button) and press the ≈ button.
See “Virtual Keyboard” on page 32 for a full list of quick
controller keys.
Note: FreQuency is not USB Keyboard compatible.
Create a Unique FreQ From Scratch
Select CREATE NEW FREQ. Then select FREQMAKER. FreQs are
created with pieces called “stamps”. You can place multiple
stamps of the same type on the FreQ canvas. Each FreQ may
consist of a maximum of 16 stamps.
Select basic attributes . . . . . . . . . . . . . . . .Directional button or left
analog stick UP/DOWN
Highlight stamp in Attribute field.........Directional button or left
analog stick
Add stamp to FreQ Canvas . . . . . . . . . . . . . . . . . . . . . . . . .≈ button
Change position of selected stamp . . . . . . . . . . . .right analog stick
Move selected stamp to the front . . . . . . . . . . . . . . . . .∂ button
Move selected stamp to the back . . . . . . . . . . . . . . . . .ƒ button
Change color of selected stamp . . . . . . . . . . . . . . . . . . . . .Ω button
Set color. . . . . . . . . . . . . .right analog stick LEFT/RIGHT/UP/DOWN,
+ ≈ button
Delete a stamp (From Edit Field) . . . . . . . . . . . . . . . . . . . . .√ button
Reset stamp to center of canvas . . . . . . . . . . . . . . . . . .ß button
22 23
Page 13

Body, Head and Face
Select each one of these to create the basics of your FreQ.
Details and Logos
Add earphones, a swatch of
hair or a special symbol to
make your FreQ distinctive.
Name
Name your FreQ on the
virtual keyboard.
1.Type in name by
selecting each letter
and pressing the ≈
button. Select BACKSP
key (ß) and press
the ≈ button to remove letters.
2. When you have the name you want, select ENTER (Ω button)
and press the ≈ button.
Randomize
Press the ≈ button if you’d like the FreQmaker to create a random
FreQ for you.
Modify a Basic FreQ
On the FreQmaker screen, you can tweak your selected FreQ.
1. Select MODIFY BASIC FREQ or FREQMAKER and press the
≈ button to open the FreQmaker screen.
2.Press the Directional button or left analog stick UP/DOWN to
select an attribute and press the ≈ button to enter the field
for that attribute.
3. Press the Directional button or left analog stick to highlight
an attribute stamp and press the ≈ button to place it in the
FreQ canvas at the upper right of the screen.
Mutate
Press the ≈ button repeatedly to try various mutations of your
selected FreQ.
Edit
Select this to fine tune your FreQ. As you place each attribute
stamp of your FreQ on the canvas, that feature will be stored in
the Edit field. When you select EDIT and press the ≈ button,
any attribute stamp you have selected will appear in the field,
giving you the ability to modify it on the FreQ canvas. Select the
attribute stamp you want to edit and make changes while
viewing the FreQ canvas.
Save Your FreQ
Select SAVE and your FreQ will be saved to Memory Card (8MB)
(for PlayStation
Each saved FreQ is associated with a saved campaign, including
your game progress through the skill levels and stages.
®
2) Slot 1. All saved FreQs are available for Loading.
Load Your FreQ
At the beginning of a new game, if you have saved FreQ data,
the Load Your FreQ screen will appear. Press the Directional
button or left analog stick LEFT/RIGHT to highlight the FreQ you are
going to play as and press the ≈ button. All Memory Card (8MB)
(for PlayStation
available during gameplay.
®
2) information stored with that FreQ will be
24 25
Page 14

MULTIPLAYER GAMES
THE PAUSE SCREEN
Press START to pause
the game. Pause screen
options vary depending
on the game mode you
are playing.
Resume
Press the ÷ button to resume play.
Quit
Press the ç button to quit a game or end a remix.
Restart
Press the ≈ button to start the song over from the beginning.
Controller Configuration
Customize your controller settings. Press the √ button to
open the configuration screen. Press the Directional button or
left analog stick UP/DOWN to select an action. Press the
Directional button or left analog stick LEFT/RIGHT to cycle
through the button control options to assign a new button.
You must make an assignment for all controls. Press the
≈ button to confirm changes and close the screen.
Game Settings
Press the Directional button or left analog stick UP/DOWN to
highlight a setting and LEFT/RIGHT to change the setting. You can
also access these settings from Options on the Main Menu.
See “Setting Options” on page 9.
Up to four players can compete in Game Mode or collaborate
in Remix Mode. Button controls are the same as Solo play.
Note: For 3 & 4 Player
games, use Multitap
(for PlayStation
(sold separately).
®
2)
Start a Multiplayer Game
or Remix
1. On the Main Menu,
select MULTI.
2.Select MULTITIPS to
get a quick tutorial on gameplay. Press the ≈ button to
continue through each tips screen and return to the Multi
Select Number screen.
3.Select the number of players.
4.Each player selects a FreQ and presses the ≈ button.
When all players have selected, the Multiplayer Select Mode
screen appears.
5.Any player can select GAME or REMIX and press the ≈
button to advance to the Arena selection screen. Player 1
must select an Arena to launch Game or Remix play.
Multi Game Mode
Multiplayer is a head-to-head race through the song. Win by
scoring the most points during the competition. The Song Location
Meter is positioned at the center of the screen. Don’t worry about
losing energy. Just hammer out drumbeats, guitar licks and vocals
to stay ahead of everyone else. In Multi Game Mode, each player
must capture the song one bar at a time. This differs from Solo play
where capturing only two bars will activate a track.
Each player’s activator, FreQ, name, score, notes and panels are
color-coded.
• Player 1 – Green • Player 2 – Purple
• Player 3 – Yellow • Player 4 – Red
26 27
Page 15

Multi Game Over Screen
When the song ends, the scores are posted on the Game Over
screen. The song and skill level are also displayed here.
• Select PLAY AGAIN for a rematch.
• Select NEW GAME to start over from the Song Select screen.
Multi Game Powerups
Catching Powerup Notes
There are Powerup Notes throughout the game. Capture all the
Powerup Notes in a bar and win the Powerup. After you capture
a Powerup Note, it appears in your inventory box at the bottom
of the screen. You may only hold one powerup at one time.
If you have a powerup in your inventory and you capture a new
powerup, it will replace the one in your inventory.
To Deploy Powerups
Press the ≈ button to deploy your Powerup. Powerups can
be deployed upon your opponent’s activator or upon a specific
bar of notes.
The Multi Game Powerups
Auto-catcher - Deploy on a panel of free notes to
catch them automatically.
Freestyler - Deploy on an Axe track or Scratcher
track, then freestyle on that track to get more points.
Crippler - Deploy upon another player’s activator
and watch the sparks fly.
Neutralizer - Deploy on your opponent’s captured track
to zap their points and free up the track.
Bumper - Deploy upon another player’s activator to
bump them to the back of the line.
Who’s in the Lead
Multi Game Mode demands intense concentration while you
keep your eye on a track. FreQuency has two ways of telling
who the leader is with a quick glance.
Activator State
The leader’s activator glows distinctively.
Score Highlights
The lead player’s score becomes highlighted and begins to pulse.
Multi Remix Mode
Multi Remix Mode functions
the same as the Solo Remix
mode with added dynamics.
You can create and
collaborate with other
players. Players compose
their own music on separate
tracks in the same section.
28 29
Page 16
SAVING AND LOADING GAME DATA
You may add effects to each other’s tracks, but may only delete
your own tracks.
• Player 1 controls the advance to the next section.
• The first player to lay down a note on a track takes
possession of it.
• To delete a whole track, press the ≈ button twice.
The track then becomes available to other players.
See “Playing Remix Mode” on page 18.
Saving a Remix in Multi Mode
When you quit a Remix session, the End Remix screen appears.
Each player may save a remix to a Memory Card (8MB)
(for PlayStation
®
2) if he already has it inserted prior to startup.
To save remixes, each player must press the ≈ button. Player 1
will have the first opportunity to save the remix, followed by the
remaining players in numerical order.
Each remix is saved individually to a file on that player’s Memory
Card (8MB) (for PlayStation
®
2). The Save screen will then reappear
for the next player to save a remix.
Controller # 1 – Memory Card (8MB) (for PlayStation
Controller # 2 – Memory Card (8MB) (for PlayStation
®
2) slot 1
®
2) slot 2
Using Multitap
Controller # 1 – Memory Card (8MB) (for PlayStation
Controller # 2 – Memory Card (8MB) (for PlayStation
Controller # 3 – Memory Card (8MB) (for PlayStation
Controller # 4 – Memory Card (8MB) (for PlayStation
®
2) slot 1-A
®
2) slot 1-B
®
2) slot 1-C
®
2) slot 1-D
Press the Ω button (when it is your turn to save) to open the
virtual keyboard. Name your remix, select the ENTER key and
press the ≈ button to return to the Save screen. Press the
≈ button to save or press the √ button to discard the remix.
See "Virtual Keyboard" on page 32.
30 31
Saving Game Data
If a Memory Card (8MB) (for PlayStation®2) is inserted in slot 1,
FreQuency auto-saves your game progress at the completion of
each game. The Memory Card (8MB) (for PlayStation
accessed upon startup, reset, on the Memory Card Screen, and
when auto-saving.
What is Saved
• A maximum of eight FreQ campaigns is saved. Each saved
FreQ campaign contains your FreQ, its name, your game
progress and scores in each skill level.
• Option settings include controller configuration, game
settings, and one Jukebox playlist.
• Saved Remixes – Save up to 200 remixes.
Deleting Saved Game Data
You can delete FreQ campaigns or an individual remix. Each is
stored separately. To access a file:
1.Select Options from the Main Menu.
2.Select Memory Card (8MB) (for PlayStation
Options screen.
3.Select the Memory Card (8MB) (for PlayStation
4.Select FreQs or Remixes.
5.Select the file you want to delete.
6.Press the √ button to delete a file.
Copy a FreQ Campaign or Remix
1.Select Options from the Main Menu.
2.Select Memory Card (8MB) (for PlayStation
Options screen.
3.Select the Memory Card (8MB) (for PlayStation
from which you would like to copy.
4.Select FreQs or Remixes.
5 Select the file you want to copy.
6.Press the Ω button to copy file.
You may copy to and from Memory Card (8MB) (for PlayStation
slots 1 & 2 only.
®
2) is only
®
2) from the
®
2) slot number.
®
2) from the
®
2) slot number
®
2)
Page 17

VIRTUAL KEYBOARD
Name your FreQ or Remix using the Virtual Keyboard. Press the
Directional button or left
analog stick to select a key
and press the ≈ button to
enter a character. Select
the ENTER key when you
have completed the name.
You may also use the
quick controls below to
speed up entries.
Select Type .................................................................................≈ button
Enter..............................................................................................Ω button
Back/Exit .....................................................................................ç button
Space ...........................................................................................√ button
Edit Cursor Left .....................................................................å button
Backspace .............................................................................ß button
Edit Cursor Right....................................................................∂ button
Shift Uppercase toggle.......................Press left analog stick in
Caps Lock toggle ..............................Press right analog stick in
THE MUSIC IN FREQUENCY
Unlock these tracks Stage by Stage.
• Songs unlocked in the Game Mode become available for
Remix Mode and Multi Mode.
• Stage 4 is available in Normal and Expert.
• Stage 5 songs are only available if you take on the Expert
skill level.
• The fifth song in each stage is the bonus song (listed on
pg. 33 in bold text).
ARTIST CUT TYPE
Stage 1
The Crystal Method The Winner big beat 127
Akrobatik Exterminator hip-hop 96
No Doubt Ex-Girlfriend (Remix) electronic rock 100
Orbit XLR8R rock ‘n’ roll 135
Freezepop Science Genius Girl synthpop 137
Stage 2
Dub Pistols Official Chemical beats ‘n’ rhymes
Lo Fi All Stars Lofis In Ibiza disco house
Fear Factory Frequency industrial rock
Paul Oakenfold See It trance 135
Ethan Eves Selecta drum ‘n’ bass 180
Stage 3
Powerman 5000 Danger is Go industrial rock 156
Orbital Funny Break techno 130
(Weekend Raver’sMix)
DJ Q-Bert Cosmic Assassins turntablism 96
BT Smartbomb big beat 100
Curve Worst Mistake electronic rock 150
Stage 4
Jungle Brothers What's the Five 0 drum ‘n’ bass 172
Funkstar De Luxe Ignition funk 115
Roni Size & Reprazent Railing Pt. 2 drum ‘n’ bass 175
Meat Beat Manifesto Dynamite Fresh big beats in space 134
Juno Reactor Higher Ground techno 143
Stage 5
Toni Trippi Motomatic hard electro 135
DJ HMX Ibiza Dreamz trance 144
Symbion Project Funny Dope Maneuver big beat 140
Komputer Kontroller Control Your Body hard house 144
Symbion Project FreQout hard breakz 140
BPM
150
129
150
32 33
Page 18

CREDITS
Harmonix Music
Systems, Inc.
FreQuency developed by
Harmonix Music Systems, Inc.
www.harmonixmusic.com
Team FreQuency is:
Project Leader
Greg LoPiccolo
Executive Producer
Alex Rigopulos
Lead Programmer
Eran Egozy
Music Director
Josh “Robotkid” Randall
Art Director
Ryan Lesser
Producer
Tracy Rosenthal-Newsom
Engineering Team
Game Systems Programmer
Dan Schmidt
Graphics Engine Programmer
Eric Malafeew
Game Shell Programmer
Christine Legge
Synth and Related
PlayStation
Doug Church
Programmers
Rex Bradford
Jonathan Cummings
®
2 Voodoo
Mike James
Denny Bromley
Jonathon Bell
Francis Phan
Music Team
Lead Composer/Sound
Designer
Kasson Crooker
Composer/Sound Designers
Tony Trippi
Christopher Child
Pete Maguire
Juno Kang
Art Team
Game Shell and Arena Artist
Dare Matheson
Game Shell Artist
Jason Arnone
Arena Artists
Alan Murphy
Adolph Wong
QA Team
QA Manager
Erik Volkert
Playtester/Audio Assistant
Jeremy Bridge
Playtester/Assistant Network
Administrator
DeVron Warner
Playtesters
Daniel Sussman
Christian Wright
Support Team
C.O.O.
Michael Dornbrook
Seneschal
Kris Fell
Network Administrator/
Playtester
Jason Warburg
Tutorial Voice
Terri Brosius
Intro Cutscene
Treanor Brothers
Samples
Zero-G
Legal Representation
Gene Landy
Special Thanks
Chris Rigopulos
Spencer Saltonstall
Jesse Wiens
Ryan Shafer
Steve Desilets
Paul Bernstein
Tim O’Keefe
A.J. Wolosenko
Warren Spector and Ion
Storm/Austin
Hendon Pingeon
Rob Vawter
Sony Computer
Entertainment America
Product Development
Vice President of Product
Development
Shuhei Yoshida
Online Studios Director
Randel Reiss
Producer
Tim Ryan
Assistant Producer
Mike Benton
Online Studios
Justin Wolf
Scott Haile
Kenton Hoover
Nadine Miller
Michael Chow
Hunter Luisi
Mike Reitmeyer
Tony Ramos
Satoe Haile
Van Dempsey
Walter Gonzales
Brian Edenfield
Christian Davis
Greg Orduyan
Jacky Powell
Jeppe Oland
Lasse Faabeng
Tiffani Butler
Music and Audio
Director of Audio
Buzz Burrowes
Music Director
Chuck Doud
34 35
Page 19

First Party Quality
Assurance
Director
Michael Blackledge
Senior Manager
Ritchard Markelz
Technology Manager
Kevin Simmons
Project Manager
Nicole Nokes
Project Coordinator
Eric Ippolito
Core Manager
Sam Bradley
Usability Manager
Christian Arends
Lead Testers
Jim Harper
Christian Low
Assistant Lead Tester
Ian Gorman
Core Test Team
Caley Roberts
Jeff Custis
Ramon Ortiz
Geoff Yeh
Tad Hirabayashi
Richie Hideshima
Joel Sigua
Randy Chu
Petros Rotsidis
Mike Desenganio
Jason Dean
Kelly Smith
Information Technology
Director Information
Technology
Paul Moore
IT Support Engineers
Chip Capelik
Derrell Jenkins
Jeff Eng
Brian Edenfield
Marketing
Senior Vice-President of
Marketing
Andrew House
Director of Marketing
Ami Matsumura-Blaire
Product Manager
John Koller
Product Marketing Specialist
Maggie Rojas
Director of Public Relations
Molly Smith
Public Relations
Patrick Seybold
Ryan Bowling
Director of Promotions
Sharon Shapiro
Promotions
Andrew Adams
Donna Armentor
Aimee Duell
Johanna Legarda
Mary Thomas
Director of Creative Services
Ed DeMasi
Creative Services
Josh Bingham
Marv Cabanero
Peggy Gallagher
Ted Jalbert
Marie Macaspac
Quinn Pham Le
Jack Siler
Noel Silvia
Ben Wallace
Vice-President of Loyalty
and Channel Marketing
Marilyn Weyant
Director of Online
and Direct Mail
Steve Williams
Direct Mail
Kim Yuen, Jesse Caid
Legal and Intellectual Property
Dan Figueroa
Brian Fukuji
Lisa Lunger
Michelle Manahan
Ninalei Morrison
Susan O’Driscoll
Riley Russell
Diane Tucker
Jim Williams
Package Design
Creative Dynamics, Inc.
Documentation
Hanshaw Ink & Image
Special Thanks
Jeff Adams, Shelley
Ashitomi, John Aspinwall,
Omar Brodrick, Pele Burgess,
Claudette Castillo, Bruce
Cochrane, Brian Dimick, Ron
Eagle, Allan Frankel, Butch
Freedhoff, Michele Freeman,
Keith Friedly, Brian Hale,
Kim Henning, Kaz Hirai,
Jeff Hutchinson, Ian Jackson,
Grace Kao, Lori Kajiya,
Rich LaRocca, Chuck Lacson,
Kenneth Law, Ed Loonam,
Hunter Luisi, Grant Luke,
Troy Mack, Kaytie Mandell,
Colin MacLean, Natasha
Mirosnkoff, Letha Moore,
Frank O’Malley, Susan Nourai,
David Pfaff, Dayton Paiva,
Tenny Park, George Richard,
Jonathan Ries, Rick Rooney,
Mike Rose, Rob Segal, Sarai
Sequeira, Cy Tano, Jack
Tretton, Mark Valledor, Joe
Ward, Rapp Collins, Zugara
36 37
Page 20

Enterprises International Rights Secured. Not for broadcast transmission.
All rights reserved. DO NOT DUPLICATE.
FreQuency Music Credits
“Cosmic Assassins”
Written by Richard Quitevis
Performed by DJ Q-Bert
Engineered by Kormann Roque
© 2001 Galactic Butt Hair d/b/a Thud Rumble Ltd.
P
2001 Thud Rumble Ltd.
“Control Your Body”
Written by Kasson Crooker [BMI]
Performed by the Komputer Kontroller
© 2001 Sony Computer Entertainment America Inc.
“Danger Is Go”
Music by Powerman 5000 / Lyrics by Spider
Performed by Powerman 5000
© 2001 DreamWorks Songs [ASCAP] / Soulsuck Music [ASCAP]
Worldwide rights for DreamWorks Songs and Soulsuck Music administered
by Cherry Lane Music Publishing Company, Inc. [ASCAP]
Courtesy of DreamWorks Records Under License From
Universal Music Enterprises.
International Copyright Secured. All Rights Reserved.
“Dynamite Fresh”
Written, produced and engineered by Jack Dangers at Tape Lab (2001)
Performed by Meat Beat Manifesto
© 2001 Songs of Windswept Pacific / Tweekland Music [BMI]
All rights on behalf of Tweekland Music administered by Songs of Windswept
Pacific © 2001 Jack Dangers
“Ex-Girlfriend (The Psycho Ex Mix)”
Words and Music by Gwen Stefani, Thomas Dumont & Tony Kanal
Performed by No Doubt:
Gwen Stefani – Vocals
Tony Kanal – Bass Guitar
Tom Dumont – Guitars
Adrian Young – Drums
With: Gabrial McNair – Keyboards
Produced by Glen Ballard
Recorded by Karl Derfler
Mixed by Jack Joseph Puig
Remix and additional production by Philip Steir for MCT
© Universal-MCA Music Publishing, a Division of Universal Studios, Inc.
on behalf of itself and World of the Dolphin Music [ASCAP]
Courtesy of Interscope Records Under License From Universal Music
www.nodoubt.com
“Exterminator”
Written, produced, arranged and performed by Akrobatik
Vocal scratches performed by Akrobatik
Recorded and mixed by Akrobatik and Ray Fernandes at Boston Butta Beats,
Everett, MA
© 2001 Jared Bridgeman
P
2001 Detonator Records
Akrobatik appears courtesy of Detonator Records
“End of Your World”
Written and Performed by Robotkid vs Inter:sect
Remixed by Symbion Project
© 2001 Sony Computer Entertainment America Inc.
“Funky Dope Maneuver”
Written by Kasson Crooker [BMI]
Performed by Symbion Project
© 2001 Sony Computer Entertainment America Inc.
“Frequency”
Music by Dino Cazares, Raymond Herrera & Christian Olde Wolbers / Lyrics by
Burton C. Bell
Performed by Fear Factory
Produced by Fear Factory, Mixed by Dino Cazares
Engineered by Duane Baron
Published by Roadblock Music, Inc. / Hatefile Music [ASCAP] c/o BMG Songs,
Inc. [ASCAP]
P
& © 2001 The All Blacks B.V.
Used by permission of Roadrunner Records
www.roadrunnerrecords.com
“FreQout”
Written by Kasson Crooker [BMI]
Performed by the Symbion Project
© 2001 Sony Computer Entertainment America Inc.
“Funny Break (One Is Enough) - Weekend Raver's Mix”
Written by Philip Hartnoll & Paul Hartnoll
Performed by Orbital
© 2001 Sony/ATV Songs LLC [BMI]
P
2001 London – Sire Records Inc.
Produced Under License From London – Sire Records Inc. By Arrangement
With Warner Special Products
All Rights Reserved. Used By Permission.
38 39
Page 21

“Higher Ground”
Written by Ben Watkins
Performed by Juno Reactor
© 2001 Songs of Windswept Pacific [BMI] on behalf of Mute Song Ltd.
P
2001 Juno Reactor Productions
“Ibiza Dreamz”
Written by Kasson Crooker [BMI]
Performed by DJ HMX
Vocals by Melissa Kaplan
© 2001 Sony Computer Entertainment America Inc.
“Ignition”
Written by Martin Ottesen
Produced and performed by Funkstar De Luxe
© 2001 Hard Publishing
P
2001 Hypnotic Records
www.funkstardeluxe.com
www.hypnotic.dk
“Lo Fi’s In Ibiza”
Written by Ward, Whiteman, Machin, Dickerson
Produced and performed by Lo Fidelity Allstars
Vocals by Lisa Millett
© Warner Chappell Music Ltd. [PRS] / Protoons Inc. [ASCAP] / Dickerson,
Machin, Whiteman Designee. All rights on behalf of Warner Chappell Music
Ltd. [PRS] administered by WB Music Corp. [ASCAP]
© 2001 Skint Records
From the album “Don’t Be Afraid Of Love”
ALL RIGHTS RESERVED. USED BY PERMISSION.
“Luge Crash”
Written by Greg LoPiccolo
Performed by SurgeCore
© 2001 Sony Computer Entertainment America Inc.
“Motomatic”
Written and Performed by Tony Trippi
© 2001 Sony Computer Entertainment America Inc.
“Official Chemical”
Written by Jason O'Bryan, T.K. Lawrence, Baqi Abdush-Shaheed, James
Sheffield Dewes & Barry Ashworth
Performed by Dub Pistols
© 2001 Bug Music Ltd. [PRS] / Lowtech Music [ASCAP] Deconstruction Songs
Ltd/BMG Music Pub. Ltd. [PRS]
All rights on behalf of Bug Music Ltd. and Lowtech Music administered by Bug
Courtesy of A&M Records Under License From Universal Music Enterprises.
International Copyright Secured. Not for broadcast transmission.
ALL Rights Reserved. DO NOT DUPLICATE.
“Railing Part 2”
Written by Roni Size & MC Dynamite
Performed by Roni Size
Published by Bucks Music Ltd. (David Platz Music Inc. [BMI]) and Universal
Music Publishing Ltd. administered in the United States and Canada by
Universal – Polygram International Publishing, Inc. [ASCAP]
Courtesy of Universal Records Under License From Universal
Music Enterprises.
International Rights Secured. Not for broadcast transmission.
All rights reserved. DO NOT DUPLICATE.
“Science Genius Girl”
Written by Duke[BMI]/Enthusiasm
Performed by Freezepop
© 2001 Freezepop
Freezepop appears courtesy of the Archenemy Record Company
“See It”
Written by Paul Oakenfold & Andy Gray
Performed by Paul Oakenfold
Produced and mixed by Paul Oakenfold & Andy Gray
© 2001 Songs of Windswept Pacific [BMI] on behalf of Mute Song Ltd. and
Universal Music Publishing Ltd. administered in the United States and Canada
by Universal – Polygram International Publishing, Inc. [ASCAP]
P
2001 Paul Oakenfold LLC
International Rights Secured. Not for broadcast transmission.
All rights reserved. DO NOT DUPLICATE.
“Selecta”
Written & Performed by Ethan E Eves
www.e3-music.com
© 2001 Sony Computer Entertainment America Inc.
“Smart Bomb”
Written by Brian Transeau
Performed by BT
© 2000 Warner-Tamerlane Publishing Corp. [BMI]
& Embrace The Future Music [BMI]
All Rights Administered By Warner-Tamerlane Publishing Corp. [BMI]
Courtesy of Nettwerk Productions
All Rights Reserved. Used By Permission.
4140
Page 22
“The Winner”
Written by Ken Jordan & Scott Kirkland
Performed, produced and mixed by The Crystal Method
© 2001 EMI Virgin Music, Inc. / Harder Faster Music [ASCAP] and EMI Virgin
Songs, Inc. / Drug Money Music [BMI]
All rights for Harder Faster Music administered by EMI Virgin Music, Inc.
[ASCAP]
All rights for Drug Money Music administered by EMI Virgin Songs, Inc. [BMI]
Courtesy of Outpost Recordings Under License From Universal Music Enterprises
“What’s The Five O”
Written by N. Hall, M. Small, T. Terry
Performed by the Jungle Brothers
Produced by Todd Terry for Big Management Ltd. NYC
© 2001 Careers-BMG Music Publishing, Inc. / Tee’s Publishing, Inc. [BMI] and
Universal-Songs of Polygram International, Inc. [BMI]
P
2001 Sound Design
From the upcoming Jungle Brothers album on Sound Design Records
International Rights Secured. Not for broadcast transmission.
All rights reserved. DO NOT DUPLICATE.
“Worst Mistake”
Written by Toni Halliday & Dean Garcia
Performed by Curve
P
& © 2001 Curve
“XLR8R”
Words and Music by Jeff Robbins
Performed by Orbit
Jeff Robbins - vocals, guitar, synth
Paul Buckley - drums, vocals
Linda Bean - bass, vocals
Fred Archambault - guitar, vocals
Produced by Jeff Robbins
From the album "XLR8R" on Lunch Records
P
& © 2001 Orbit
Published by Burned Out Building [BMI]
www.orbitband.com
LIMITED WARRANTY
Sony Computer Entertainment America (SCEA) warrants to the original
purchaser of this SCEA product that this software is free from defects in
material and workmanship of a period of ninety (90) days from the original
date of purchase. SCEA agrees for a period of ninety (90) days either repair
or replace, at its option, the SCEA product. You must call 1-800-345-SONY
to receive instructions to obtain repair/replacement services.
This warranty shall not be applicable and shall be void if the defect in the
SCEA product has arisen through abuse, unreasonable use, mistreatment
or neglect. THIS WARRANTY IS IN LIEU OF ALL OTHER WARRANTIES
AND NO OTHER REPRESENTATIONS OR CLAIMS OF ANY NATURE SHALL
BE BINDING ON OR OBLIGATE SCEA. ANY IMPLIED WARRANTIES
APPLICABLE TO THIS SOFTWARE PRODUCT, INCLUDING WARRANTIES
OF MERCHANTABILITY AND FITNESS FOR A PARTICULAR PURPOSE, ARE
LIMITED TO THE NINETY (90) DAY PERIOD DESCRIBED ABOVE. IN NO
EVENT WILL SCEA BE LIABLE FOR INCIDENTAL OR CONSEQUENTIAL
DAMAGES RESULTING FROM POSSESSION, USE OR MALFUNCTION OF
THE SCEA SOFTWARE PRODUCT.
Some states do not allow limitations as to how long an implied warranty
lasts and/or exclusions or limitations of consequential damages, so the
above limitations and/or exclusions of liability may not apply to you.
This warranty gives you specific legal rights, and you may also have
other rights which vary from state to state.
WARNING: It is a violation of Federal Copyright Law to copy, duplicate or reproduce this
Program or any portions of this Program, to synchronize this Video Game with video tape
or film or to print the Composition embodied on this Video Game in the form of standard
music notation without the express written permission of the copyright owner.
Covered by U.S. patent No. 5,627,335. Other patents pending.
4342
 Loading...