

Page 1

Operating and Assembly Instructions
CK 483 / SP 483
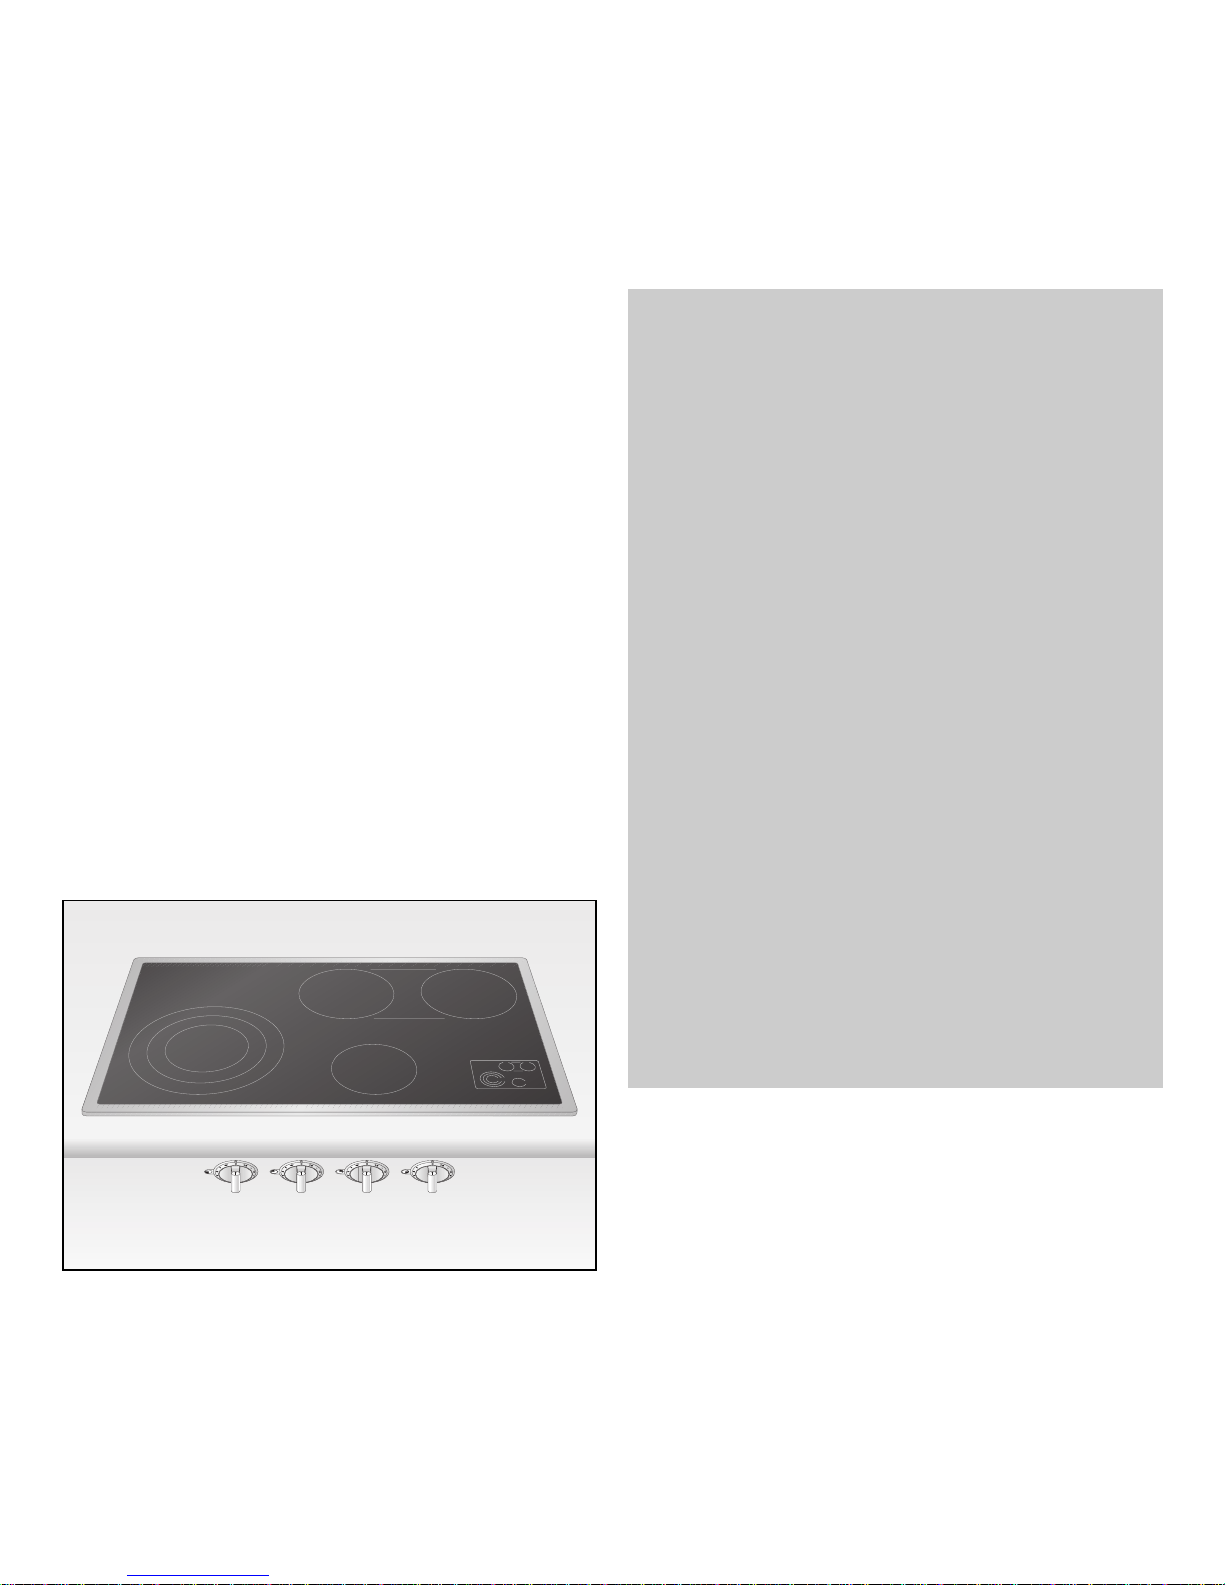
Electronic Glass-Ceramic Hob with Control Panel
Page 2

CK 483 / SP 483
1
1. Important notes Page 3-4
For your safety Page 3
Operating for the first time Page 4
About use Page 4
2. Features Page 5
Features of the appliance Page 5
Allocation of the control knobs Page 5
Special accessories Page 5
3. Operation Page 6-8
Switching on and off Page 6
Indicator light / Residual heat display Page 6
Cooking zone extension Page 7-8
Holiday safeguard Page 8
4. Settings table Page 9
5. Energy saving tips Page 10
6. Cleaning and care Page 11
7. Maintenance Page 12
8. Remedying slight malfunctions yourself Page 13
9. Installation Page 14-17
Technical Data Page 14
Important notes on installation Page 14
Preparing the cabinet Page 15
Installing the control panel Page 16
Installing the hob Page 17
Page 3
2
Cooking with your new glass-ceramic hob
will be even more fun than before.
The appliance offers you the following
advantages:
– A generous cooking area.
– Cooking zones for large pans and oval shaped
roasters – the cooking zone size can be adjusted
individually using the extension feature.
To ensure that you will be able to use this
appliance in all its diversity, read through
the operating and assembly instructions
conscientiously before operating it for the first
time. The instructions contain important notes
on use, installation and maintenance of the
appliance.
In the following pages you will find important notes
on safety and operation. These will serve to
ensure your personal safety and the lasting value
of your appliance.
You will find notes on page 4 that you ought to
observe before operating the appliance for the
first time.
The chapters entitled “Features" and “Operation"
tell you all about what your appliance can do and
how you operate it.
The chapter entitled “Cleaning and care" will
make sure that your appliance will stay operable
and beautiful for a long time.
And now we wish you lots of fun cooking.
Page 4

3
For your safety
Do not operate the appliance if it is damaged.
The appliance must only be connected by
an authorised specialist, paying attention to
the relevant regulations of the power supply
companies and the regional construction
regulations.
Observe the assembly instructions!
The appliance could be damaged if connected
wrongly!
When connecting electrical appliances in the
proximity of cooking surfaces and ovens, make sure
that connecting cables do not become jammed
under the hot oven door or come into contact with
hot cooking surfaces.
Only ever operate the appliance under supervision.
Observe caution with oils and fats. Overheated oils
and fats can easily cause fires.
Caution: the appliance heats up during operation.
Keep children away.
Do not operate the cooking positions without pots
and pans placed on them.
To avoid jeopardising the electrical safety of the
appliance, do not use high-pressure or steam jet
cleaning devices.
Do not store any substances that are sensitive to
high temperatures, or which pose a fire hazard
(e.g. cleaning agents or spray cans), in drawers or
cupboards under the appliance.
Operation of the appliance must be discontinued
immediately if improper use produces cracks,
breaks or flaws on the cooking surface, with the
result that live parts can come into contact directly
or indirectly with seeping liquid or if there is a risk
of injury. Remove the mains plug or switch off the
corresponding mains fuse. Call after-sales service!
Isolate the appliance from the mains during every
maintenance operation. To do this, remove the
mains plug or switch off the corresponding fuse.
Repairs must be carried out by authorised
specialists, thus ensuring electrical safety.
As the user, you are responsible for maintenance
and proper use in the household. No warranty
claims can be lodged for any damage resulting
from failure to observe these instructions.
Subject to technical change without notice.
1. Important notes
Page 5
4
Operating for the first time
Remove the packaging from the appliance and
dispose of it according to local regulations. Be
careful to remove all accessories from the
packaging. Keep packaging elements and plastic
bags away from children.
This appliance is labelled in accordance
with the European Directive 2002/96/EG
concerning used electrical and electronic
appliances (waste electrical and
electronic equipment – WEEE). The
guideline determines the framework for the return
and recycling of used appliances as applicable.
Check the appliance for transport damage before
installing it.
The appliance must be installed and connected by
an authorised specialist before operation. Before
operating the appliance for the first time, make
sure that the mains connection is in proper working
order.
The serial number of the appliance can be found on
the quality control slip which is included with these
instructions. This quality control slip should be kept,
for guarantee reasons, together with your operating
and assembly instructions.
Read through these instructions attentively before
operating your appliance for the first time.
Thoroughly clean the appliance and accessories
before using them for the first time. This will
eliminate any 'newness' smells and soiling (see
chapter “Cleaning and care”).
About use
The appliance is intended solely for household use
and must not be put to any other uses.
Use the appliance to prepare meals only. Do not use
the appliance to heat up the room in which it is
installed.
Do not use the cooking surface as space to store
items.
Place a cooking vessel on the corresponding
cooking zone before operating it. Do not remove
the cooking vessel until you have switched off the
hotplate. The size of pots and pans should correspond to the size of the hotplate. This will save you
energy and time.
Switch off the hob after use.
Iridiscent discoloration can be caused by the bases
of some pots. These do not interfere with the
operation of the glass ceramic hob.
Always keep the cooking area dry and clean. The
surface can be scratched due to dirt (e.g. sand
grains).
Never heat food in aluminium or plastic containers
as the material can melt and damage your hob.
Built-in overheating protection prevents overheating
of the appliance and of surrounding kitchen
furniture.
If installed above a pyrolytic oven, the overheating
protection may be triggered when the hob is
operated during a pyrolytic cleaning cycle.
In the event of malfunction, first check your
household fuses. If the power supply is in proper
working order, but the appliance is still not
functioning, please inform your specialist dealer or
your nearest Gaggenau after-sales service.
Page 6
5
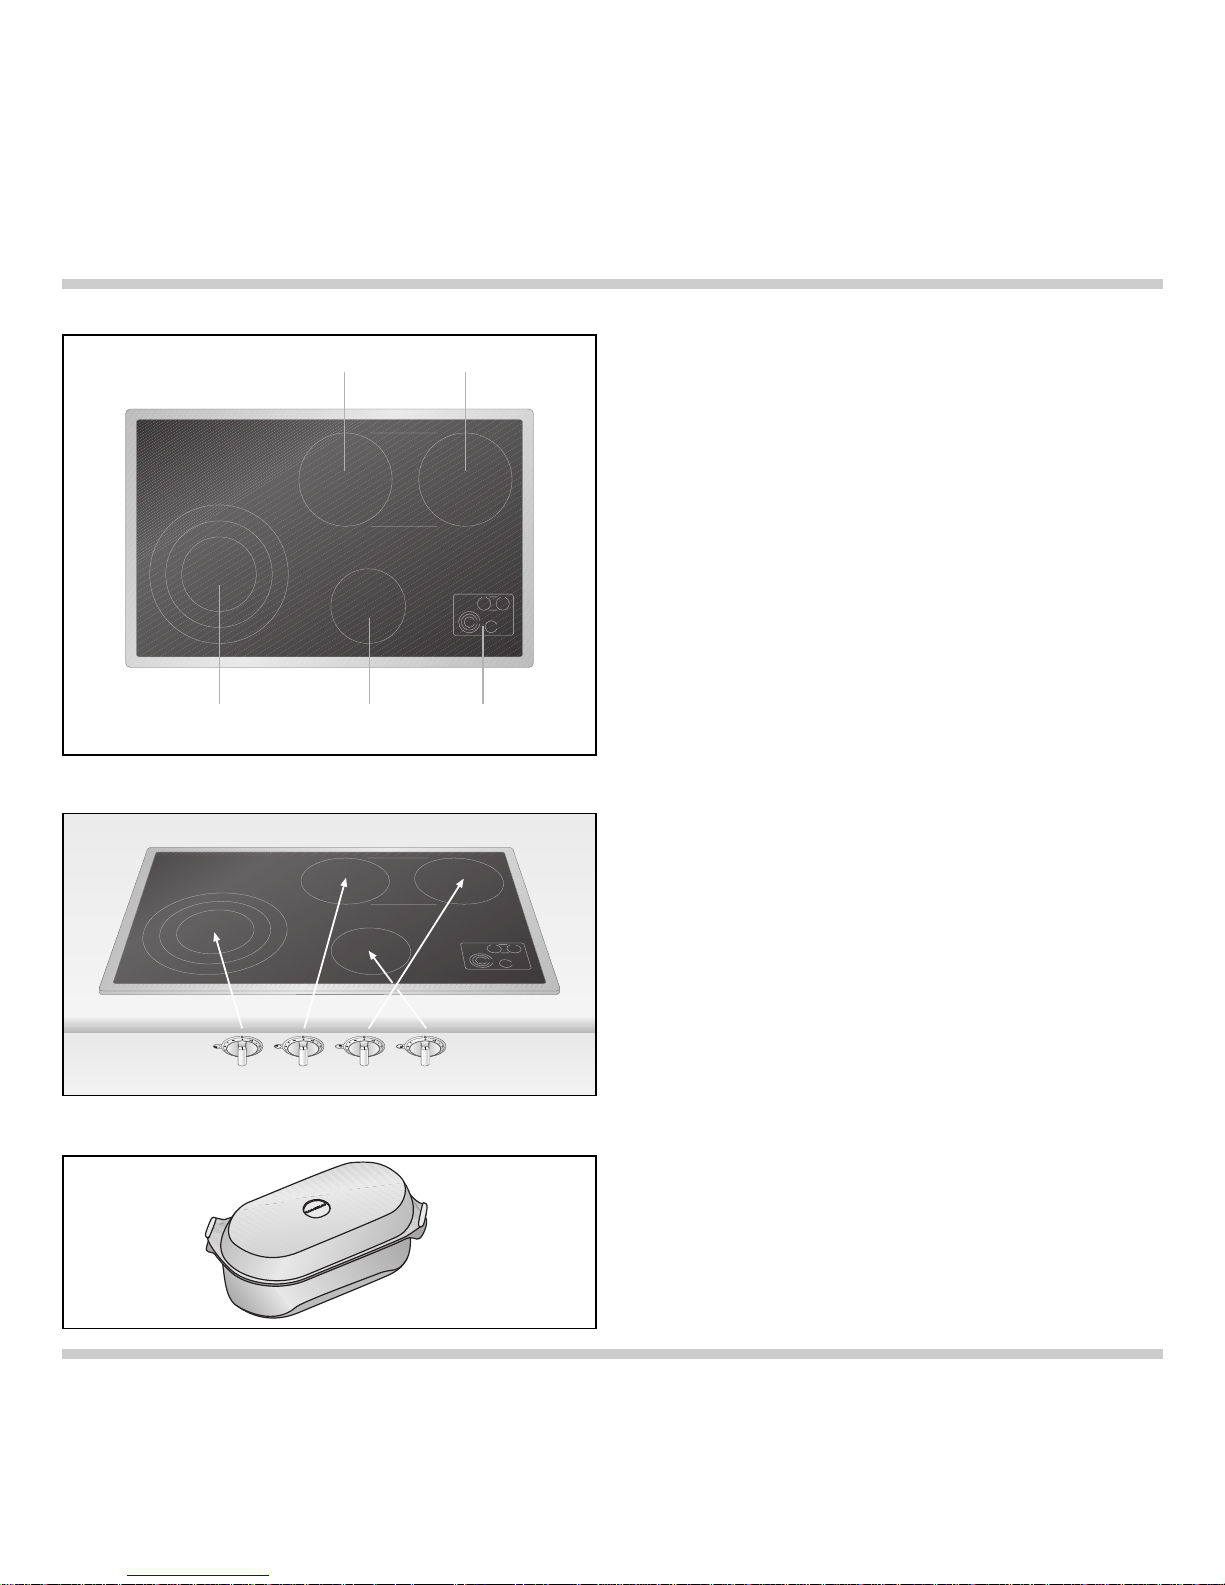
Features of the appliance
Allocation of the control knobs
Special accessories
1 SuperQuick cooking zone Ø 140 mm (1050 W),
converts to Ø 210 mm (2200 W)
or to Ø 280 mm (3080 W)
2 SuperQuick cooking zone Ø 180 mm (1800W)
3 SuperQuick cooking zone Ø 180 mm (1800W)
cooking zones 2 and 3 plus additional zone
800 W convert to oval roasting zone
180 x 415 mm (4400 W)
4 SuperQuick cooking zone Ø 145 mm (1200 W)
5 Display panel with indicator light and
residual heat display
You can order the following special accessory:
BT 481-000 Cast aluminium, non-stick coated
roaster with lid, suitable for the
roasting zone
2. Features
23
145
Page 7

Switching on
Press down the control knob for the corresponding
cooking position and turn it left or right to the
required position (1 - 12). The luminous disc behind
the control knob and the corresponding indicator
light on the display panel light up, as long as the
corresponding cooking zone is switched on.
The cooking zones are electronically controlled
during use, in order to maintain a constant heat, the
cooking zone switches on and off intermittently.
Switching off
Fully turn the control knob to the OFF position. The
luminous disc goes off.
Indicator light /Residual heat display
The corresponding indicator light on the display
panel lights, as long as the corresponding cooking
zone is switched on. After switching off the cooking
zone the corresponding indicator light will flash, as
long as the cooking zone has not cooled down sufficiently to be touched safely.
6
3. Operation
Switching on
Switching off
Indicator light / Residual heat display
Page 8

7
Cooking zone extension front left
The front left cooking zone can be extended to a
middle or large diameter.
Activating extension to a middle size (210 mm)
Turn the corresponding control knob to the right to
the extension symbol. An audible signal is sounded
and the middle extension is activated. Now turn the
control knob left or right to the required position
(1 - 12). Two spots appear on the indicator display
while the cooking zone is on.
Activating extension to a large size (280 mm)
Turn the corresponding control knob to the right to
the extension symbol. An audible signal is sounded.
Leave the control knob on the extension symbol, a
second audible signal is sounded and the large
extension is activated. Now turn the control knob
left or right to the required position (1 - 12). Three
spots appear on the indicator display while the
cooking zone is on.
Switching off
Fully turn the control knob to the OFF position.
The luminous disc goes off. After switching off the
cooking zone the corresponding indicator light will
flash, as long as the cooking zone has not cooled
down sufficiently to be touched safely.
Note:
the extension will not be activated, when switching
the cooking zone on again.
Activating extension
Page 9

Holiday safeguard
(Automatic switch-off)
Cooking zone extension rear to oval roaster zone
Both rear cooking zones convert together with an
additional zone, to create an oval cooking zone
especially suitable for roasters.
When the extension is activated, both rear cooking
zones and the additional zone operate as one single
cooking zone.
Activating extension
Turn either of the two corresponding control knobs
to the right to the extension symbol. An audible
signal is sounded. Now turn the other control knob
left or right to the required position (1 - 12). The
selected cooking level is valid for both cooking
zones and the additional zone. Three spots appear
on the indicator display while the roaster zone is on.
Note: do not use the roaster zone for heating up
round pots or pans.
Switching off
Fully turn the control knob to the OFF position.
The luminous disc goes off. After switching off the
cooking zone the corresponding indicator light will
flash, as long as the cooking zone has not cooled
down sufficiently to be touched safely.
Note:
the extension will not be activated, when switching
the cooking zone on again.
The appliance is set to automatically switch off a
cooking zone 4 hours after the last operation. The
luminous disc behind the corresponding control
knob flashes. Turn the control knob to 0. Now the
cooking zone can be switched on again as normal.
8
Activating extension
Page 10

9
Settings table
Cooking Cooking method Examples
level
12 Boiling Water
Searing Meat
Heating Fat, liquids
Boiling Soup, sauce
Blanching Vegetables
11 - 8 Roasting Meat, fish, potatoes
7 - 6 Browning Flour, onions
Roasting Almonds, breadcrumbs
Baking Pancakes, egg dishes
Boiling in open pot Liquids
6 - 5 Frying Bacon
Reducing Stocks, sauces
5 - 4 Simmering Sweet sauces
Simmering in open pot Dumplings, sausages, soup garnish,
meat stock, poached eggs
4 - 3 Boiling with closed lid Pasta, soup, sauces
Steaming Vegetables, potatoes, fish
Stewing Vegetables, fruit, fish
Braising Goulash, rolled beef steaks, roasts, vegetables
Thawing Frozen foods
3 - 1 Slow cooking Rice, pulses
Reheating / keeping warm Soup, casserole, vegetables in a sauce
Melting Butter, chocolate
Thickening Egg dishes
Switch to the highest cooking level in order to reach the required temperature quickly. Then always switch
back to the lower cooking level.
The cooking levels are identical for all cooking zones.
The values given above must be looked upon as recommended values. The heat required depends not
only on the type and condition of the food, but also the size and contents of the pot.
4. Settings table
Page 11

Pots and saucepans should always be covered by a
matching lid. The cooking time is shortened and
the energy use reduced.
Pay attention to the right size when choosing pots
and pans. The diameters of pots and pans should
correspond to that of the hotplate. When buying
pots, pay attention to the fact that the manufacturer
frequently specifies the top pot diameter, which is
generally larger than the diameter of the base.
We recommend that you use high quality pots and
pans with thick flat bases.
For longer cooking times, it is possible to switch off
the cooking zone before the end of the cooking
time to make use of the residual heat.
10
5. Energy saving tips
Page 12

Caution, risk of burns! Before cleaning, please
wait until the hob has cooled to hand-warm.
Please thoroughly clean the appliance before
operating it for the first time and after every use.
Immediately remove food remains and burnt-in
residues with the blade scraper. The blade is very
sharp. Risk of injury! Only use the blade on the
glass-ceramic hob. Do not use the blade casing as
it may scratch the glass-ceramic.
Clean the hob with a damp, soft cloth or kitchen
paper and the Gaggenau glass ceramic cleaner or
similar cleaner suitable for glass ceramic cooktops.
Polish with a soft, dry cloth.
The Gaggenau glass ceramic cleaner will coat the
glass ceramic hob with a gleaming, dirt repellent
film. This will help to preserve the attractive
appearance of your hob over a long period of time
and make it easier to clean as well.
Do not apply the cleaner while the hob is still hot as
this may cause stains. Do not use scouring agents,
abrasives or chemically aggressive cleaners (for
example oven cleaner)! Do not use any nitro
polishing agents for cleaning! Do not use any
abrasive sponges either.
Food with a high sugar content (e.g. boiled-over
milk, jam) can damage the surface of your hob.
Immediately remove such food using the glass
scraper.
Iridiscent discoloration can be caused by the bases
of some pots. These do not interfere with the
operation of the glass ceramic hob.
Please refer to the enclosed brochure for further
notes on cleaning.
You can order our blade scraper (Order No.
087670) and the Gaggenau glass ceramic cleaner
(Order No. 098690) from your Gaggenau dealer.
The frame of the hob should be cleaned using a
soft, damp cloth and light soapy liquid or a
commercially available stainless steel cleaner.
11
6. Cleaning and care
Note: to avoid jeopardising the electrical safety of
the appliance, do not use high-pressure or steam
jet cleaning devices – risk of short circuits!
Page 13

If the appliance does not function correctly, check
the household fuses first.
If the power supply is functioning correctly, but your
appliance still does not work, please contact your
dealer or your local Gaggenau customer service
agency. Specify the appliance type. The serial
number and type of the appliance can be found on
the quality control slip which is included with these
instructions.
Repairs may only be carried out by authorised
electricians, in order to guarantee the safety of the
appliance.
Unauthorised tampering with the appliance
will invalidate any warranty claims.
12
7. Maintenance
The appliance must always be disconnected from
the mains when being repaired.
Page 14

Not every malfunction can be ascribed to a defect
of your cooker. If your appliance should not function
properly, search for the fault in the list below. If you
are not successful in remedying the fault with the
aid of the list below, then contact your Gaggenau
after-sales service.
13
Fault Possible cause Remedy
The appliance cannot be No electricity. Check the domestic fuse.
switched on.
Both right cooking zones The overheating protection has You can use the remaining
cook with reduced power. been triggered. cooking zones. Both right
cooking zones are operated
on level 7, if level 8 or 9 is
selected. After cooling
down, the complete hob can
be used normally.
A cooking zone switches off The holiday safeguard is set to Turn the control knob to 0.
after operating for a longer automatically switch off a cooking zone Now the cooking zone can
period of time. The luminous 4 hours after the last operation. be switched on again as
disc behind the corresponding normal.
control knob flashes.
After installation, the appliance The connecting cable between control Check the connecting cable.
cannot be switched on. panel and hob is not plugged in correctly. Check the domestic fuse.
8. Remedying slight malfunctions yourself
Page 15

14
Technical Data
Total connected load: 8680 W
Important notes on installation
Pay attention to the “Important notes" on page
3 and 4.
The appliance must only be connected by an
authorised specialist, paying attention to the
relevant regulations of the power supply companies
and the regional construction regulations.
The installation technician is responsible for the
correct functioning of the appliance at the place of
installation. He must instruct the user on how to
disconnect the appliance from electricity in an
emergency.
If the range is not installed over a built-in cooker,
protection against hazardous contact from below
must be ensured after assembly, e.g. by installing
an intermediate shelf that can only be detached
using a tool. The distance between the intermediate shelf and the worktop in which the range is
recessed must be at least 145 mm.
There must be a gap of at least 20 mm at each side
between the appliance and any flammable walls or
furnishings.
If all poles of the appliances cannot be isolated
from the mains by removing an accessible plug, an
isolating device with a contact gap of at least 3 mm
must be installed (e.g. domestic fuse).
No warranty claims can be lodged for any
damage resulting from failure to observe these
instructions.
Subject to technical change without notice.
Electrical connection
The appliance must only be connected by an
authorised specialist.
All corresponding regulations must be observed.
The mains connecting cable must at least
correspond to type H 05 VV-F.
Note for single phase connection:
This device is intended for the connection to a
power supply system with a maximum permissible
system impedance Z
max
of 0.46 Ohm at the interface
point (power service box) of the user’s supply.
The user has to ensure that this device is
connected only to a power supply system which
fulfills the requirement above. If necessary, the user
can the ask the public power supply company for
the system impedance at the interface point.
Pay attention to the data on the rating plate. The
appliance must be properly grounded. Connect the
connecting cable to the mains.
When connecting electrical appliances in the
proximity of cooking surfaces, make sure that
connecting cables do not come into contact with hot
cooking surfaces.
This appliance may be installed in kitchen
combinations made of wood or similar combustible
materials without taking additional measures.
The built-in furniture and worktop where the
appliance is installed must be heat resistant up to
temperatures of 200° F/90° C.
9. Installation
Page 16

Preparing the cabinet
The appliance is installed in a base cabinet with a
width of more than 900 mm.
• Cut out the recess for the hob in your worktop.
Proceed as indicated on the installation sketch.
• As shown in the installation sketch, drill the
Ø35mm holes to secure the control knobs in the
cabinet front.
• If the cabinet front is thicker than 26 mm, the front
must be routed from the back to max. 26 mm on
an area of 75 x 450 mm.
15
180
min.
105
90
35
60
270
68,2
58,2
418
365,6
min. 60
800
520
490
±2,5
780
±2,5
min. 30
46
min. 50
3
Page 17

16
Installing the control panel
• Hold the support plate from the rear against the
cabinet front, insert control knobs into the holes,
secure from the rear with the nuts. Take care to
install control knobs in the correct order.
• Secure the control panel with the included nuts
onto the support plate.
Note:
only install control panel and hob of the
corresponding type.
Page 18

Installing the hob
• Before connecting the hob, make sure the
electricity is switched off at fuse point!
• Open the lid of the connecting terminal on the
hob. Secure the mains connecting lead as shown
in the connection diagram. Secure the connecting
lead with the pull relief. The mains connecting
cable must at least correspond to the type
H 05 VV-F. Close the lid of the connecting terminal.
• Firmly plug the connecting cable in the hob.
• Guide the cables into the cut-out. Insert the hob
with the display panel front right into the cut-out
and align it.
Note: do not stick the hob onto the worktop with
silicone.
• Firmly plug the connecting cable in the control
panel.
• Secure the appliance on the worktop with the
clamping screws included. Do not tighten the
clamping screws too tightly, as a uniform sealing
gap should be left all round.
• Connect the appliance to the electricity. Test it for
correct functioning. If the appliance does not work,
check, if the connecting cable between the
control panel and the hob is firmly plugged in.
• Fit the intermediate shelf.
5080009628 en 06.05 EB 17
Page 19

GAGGENAU HAUSGERÄTE GMBH
CARL-WERY-STR. 34 · D-81739 MÜNCHEN
Y (089) 45 90-03
FAX (089) 45 90-23 47
www.gaggenau.com
 Loading...