

Page 1
www.fusionelectronics.com
FUSION Electronics New Zealand Ph: +64 9 369 2900
FUSION Electronics Australia Ph: +61 1300 736 012
FUSION Electronics Europe Ph: +44 845 299 7586
FUSION Electronics USA Ph: +1 623 580 9000
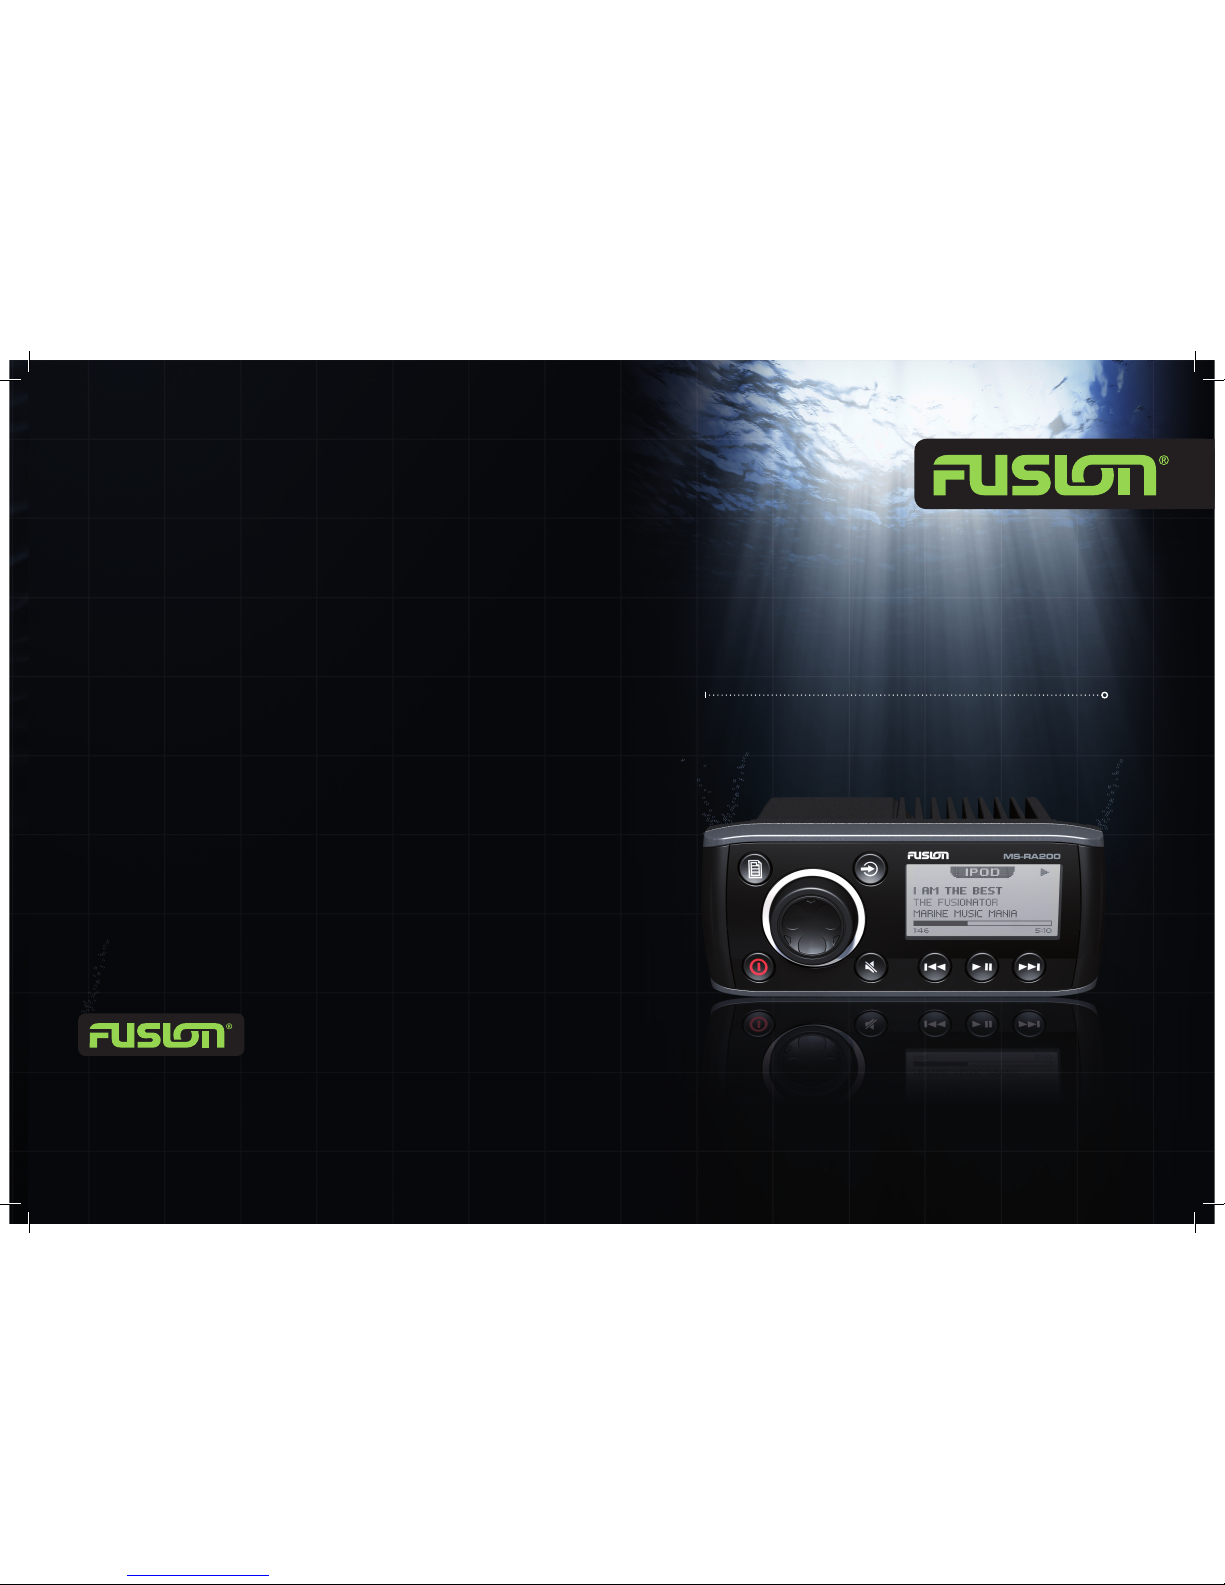
USER / INSTALLATION MANUAL
MARINE STEREO
MS-RA200
Page 2

PRECAUTIONS
Do not attempt to open the unit. There are no user
serviceable parts or adjustment’s inside.
No responsibility can be taken for use of the unit
other than under normally expected operating
conditions.
If exposed to direct sunlight or operated for extended
periods metal surfaces may become hot. Take care
when handling.
FCC COMPLIANCE STATEMENT
This device complies with part 15 of the FCC rules.
Operation is subject to the following two conditions:
This device may not cause harmful interference,
and
This device must accept any interference received,
including interference that may cause undesired
operation.
»
»
RECORD YOUR PRODUCT DETAILS HERE:
Serial Number
Date Of Purchase
Affix Receipt Here
Page 3
021
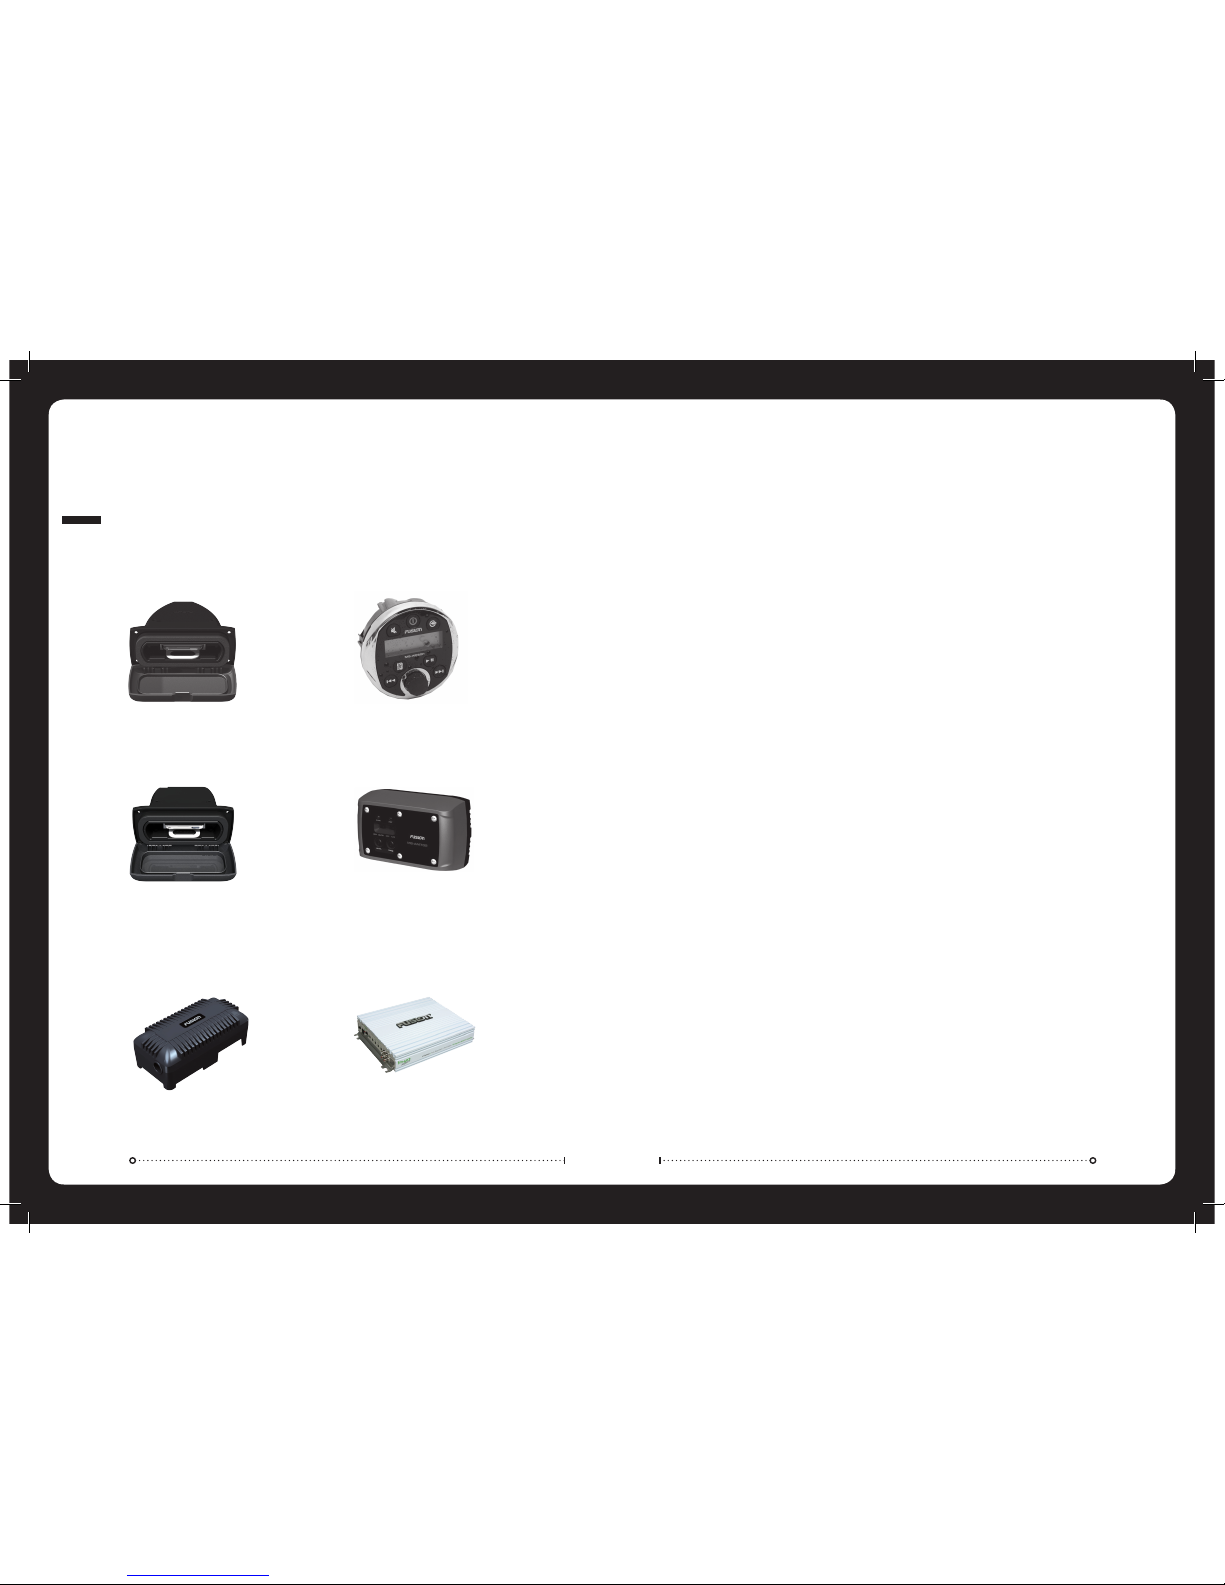
MARINE ACCESSORIES
FUSION MARINE ACCESSORIES
MARINE ZONE AMPLIFIER
MS-AM702
The Marine 2x70
Watt D-Class Zone
Amplifier is designed
to support the MultiZone technology of
the Marine Stereo. The
Zone Amplifier is small, enabling discrete installation
and when combined with the Marine Stereo provides the
platform for a True Multi-Zone audio system.
MARINE WIRED REMOTE
MS-WR600
The Marine Wired Remote
Control extends the
capabilities of our Stereo
by enabling local control
of the audio in each
zone of your vessel. Up
to three remote’s can be
linked to the Stereo, providing true system flexibility.
MARINE DOCK FOR iPod
MS-DKIP
Connect a Marine Dock
for iPod (MS-DKIP) to
provide an integrated
housing for your iPod or
iPhone, protecting them
from the harsh marine
environment. The dock
can be flush mounted or wall mounted.
MARINE PORTABLE MEDIA DEVICE DOCK
MS-DKIPUSB
Connect a Marine Portable
Media Device Dock
(MS-DKIPUSB) to provide
an integrated housing
for your iPod or iPhone,
protecting them from the
harsh marine environment. Video playback from your
iPod/iPhone and two USB ports for portable flash drive
playback. The dock can be flush or wall mounted.
MARINE 2 CHANNEL AMPLIFIER
FM-402
Add more power and
increase the bass
level of your music of
your FUSION Marine
Audio System by
connecting a 2-Channel Amplifier. Built for the harsh
marine environment with conformal coated PCB and
stainless steel end panels.
MARINE ACTIVE SUBWOOFER
MS-AB108
Features a down firing
bass reflex enclosure
and its own internal
Active 210 Watt
amplifier allowing
easy connection to
the music source delivering crisp clear low frequency
reproduction from any music selection.
CONTENTS
INSTALLATION 3
WIRING DIAGRAM 5
CONNECTIONS 6
BUTTON DESCRIPTION 7
GENERAL OPERATION 9
RADIO OPERATION 11
USB/MP3 OPERATION 12
AUX OPERATION 12
iPod/iPhone OPERATION 13
SIRIUS SATELLITE RADIO (USA ONLY) 15
ZONE OPERATION 16
MENU STRUCTURE 17
TROUBLESHOOTING 18
SPECIFICATIONS AND LICENSING 19
FUSION MARINE ACCESSORIES 21
Page 4
003
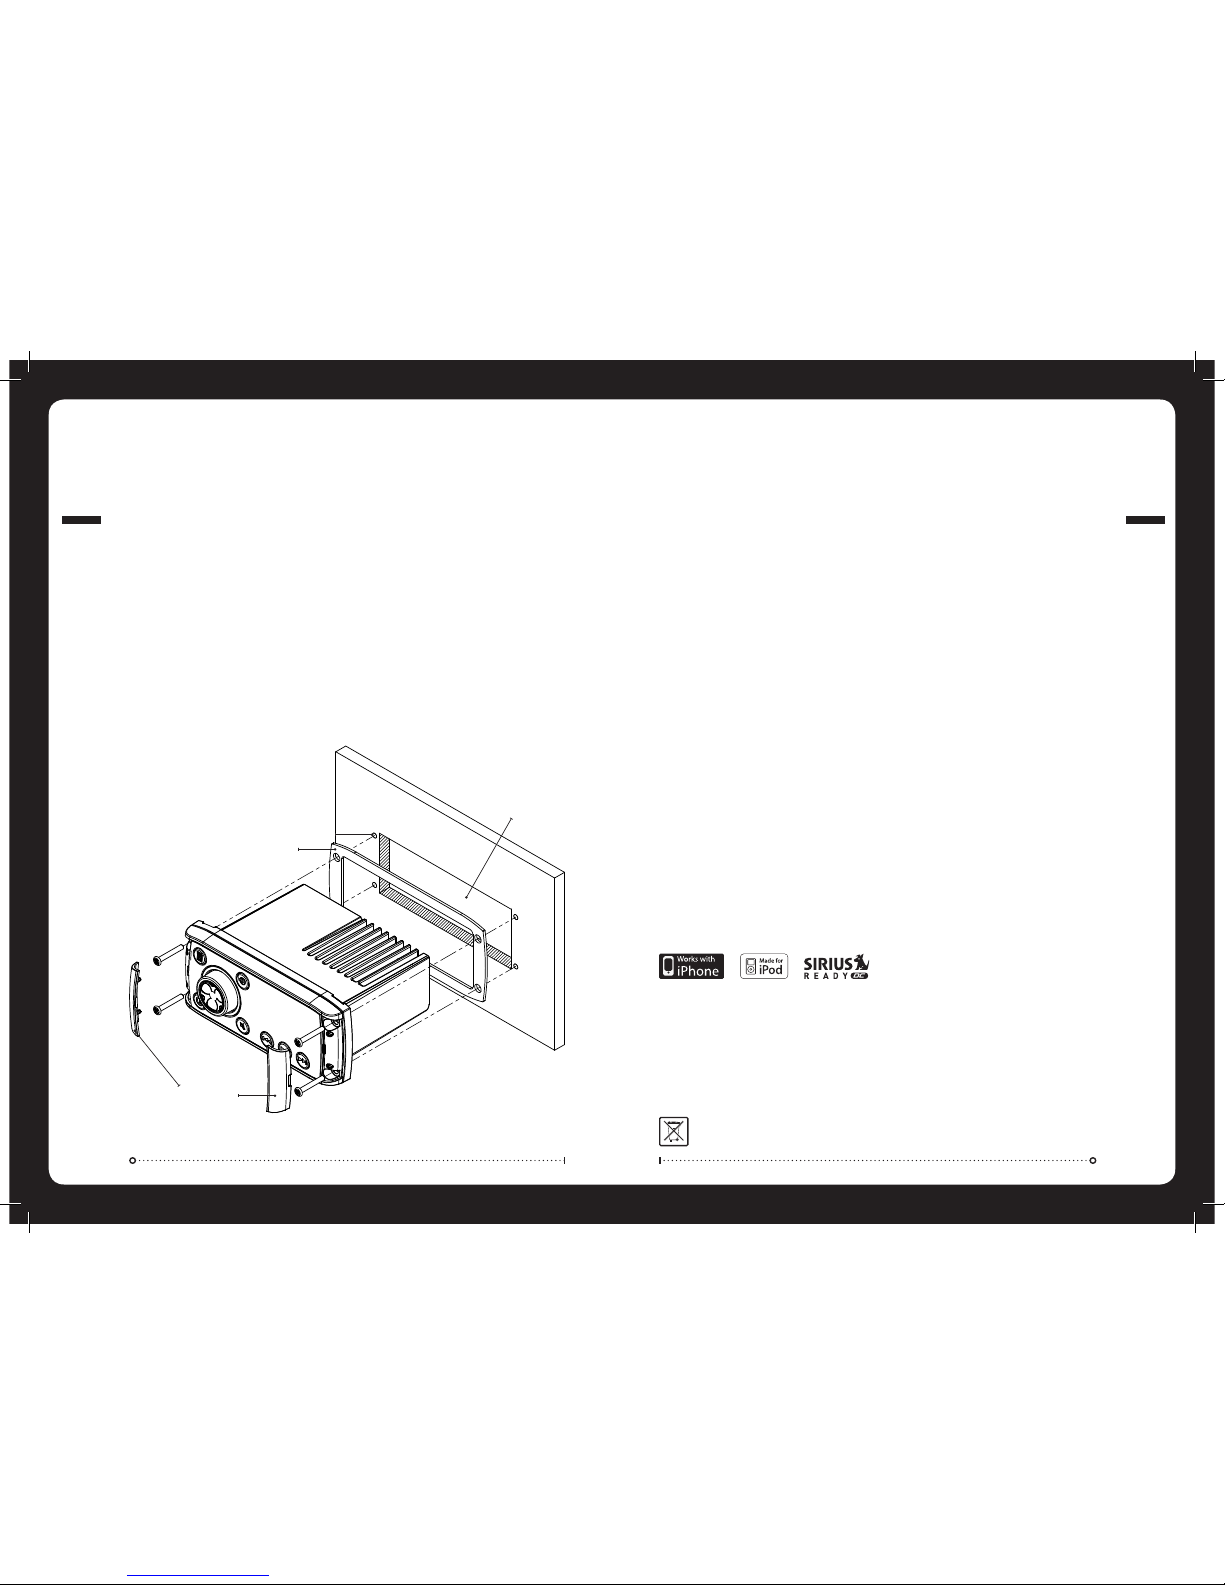
INSTALLATION
INSTALLATION
IF ANY MODIFICATION TO THE VESSEL IS REQUIRED, SUCH AS DRILLING
HOLES ETC FUSION RECOMMENDS CONSULTATION WITH YOUR BOAT
DEALER OR MANUFACTURER BEFOREHAND.
Caution: The MS-RA200 is designed for vessels with a 12V DC Negative ground electrical system
ELECTRICAL WIRING
Note: Appropriate mounting is very important to
ensure correct operation. Select a location that allows
both free/open airflow around rear of chassis, whilst
minimizing exposure to moisture. Allow adequate
room at the rear of the unit for the cable looms
(approx 2”).
Create mounting hole for product and drill Screw
Pilot Holes.
Refer to mounting template included with product
or download from www.fusionelectronics.com
Fit mounting gasket
Insert the unit into the mounting hole
Use the supplied 4 x self tapping screws, to affix
the unit into position.
Attach screw covers
»
»
»
»
»
Mounting Gasket
Screw Covers
Screw Pilot Hole
Mounting Hole
020
SPECS & LICENSING
PUBLISHED BY FUSION ELECTRONICS LIMITED. © Copyright 2010 by FUSION Electronics Limited. All rights reserved. Specifications and design
are subject to change without notice. YOU CAN HELP PROTECT THE ENVIRONMENT Please remember to respect the local regulations:
Hand in the non-working electrical equipment to an appropriate waste disposal centre. v4.2
SPECIFICATIONS
CHASSIS DIMENSIONS Depth 93mm - 3-5/8”
Width 130mm – 5-1/16”
Height 50mm – 2”
FACE PLATE DIMENSIONS Depth 29mm – 1-1/8”
Width 157mm – 6-3/16”
Height 68mm – 2-11/16”
OPERATING VOLTAGE: 10 – 16VDC Negative ground
FUSE RATING: 15 Amp
OUTPUT POWER: 50 Watts x 4 (Max)
SPEAKER IMPEDANCE: 4 Ohms per channel
PRE – OUTPUT VOLTAGE: 3V
SPECIFICATIONS AND LICENSING
LICENSING
Apple, the Apple logo, iPod, iPhone, ‘Made for iPod’ and ‘Works
with iPhone’ are Trademarks of Apple Computer, Inc., registered in
the U.S. and other countries.
© 2007 SIRIUS Satellite Radio Inc. “SIRIUS” and the SIRIUS dog logo
are trademarks of Sirius Satellite Radio Inc. All rights reserved.
TUNING RANGE
EUROPE AND AUSTRALASIA:
AM Radio
Frequency Range:
522 – 1620 MHz
Frequency step:
9 kHz
FM Radio
Frequency Range:
87.5 – 108 MHz
Frequency step:
100 kHz
FM Radio
Frequency Range:
87.5 – 107.9 MHz
Frequency step:
200 kHz
AM Radio
Frequency Range:
530 – 1710 MHz
Frequency step:
10 kHz
USA
FM Radio
Frequency Range:
70 – 90 MHz
Frequency step:
50 kHz
AM Radio
Frequency Range:
522 – 1620 MHz
Frequency step:
9 kHz
JAPAN
VHF TUNING RANGE
All Regions:
Frequency Range:
156 – 164 MHz
Page 5

019
SPECS & LICENSING
Allow at least 37mm
(1-7/16”) for cables at
rear of unit.
Rear support holes
004
INSTALLATION
In some cases a rear support strap (not supplied)
may be required. Please use the two holes indicated
above, to attach the strap using two 8 gauge x 8mm
self-tapping screws (not supplied).
INSTALLATION WARNING
Ensure the marine vessels +12V lead is removed
from the battery before any equipment is
connected
Investigate the marine vessels fuel tanks and
electrical wiring locations before you begin
installation
Ensure all wiring is protected to avoid damage
When wiring the MS-RA200, ensure that the wires are
away from sharp objects and that rubber grommets
and insulated bungs are used when routing the
wiring. Ensure that when connecting the wires to
the speakers and audio system, the terminals and
connections are protected from shorting to each other.
»
»
»
Note: Ensure the Aerial cable is routed away from any
power cables, and is the minimal length, as long cable
runs will affect AM reception performance.
Page 6

005
WIRING DIAGRAM
WIRING DIAGRAM
SIRIUS REMOTEAERIAL USB
B CABLE
WHITE RCA (Grey wire) AUX-IN (L)
RED RCA (Grey wire) AUX-IN (R)
ORANGE RCA (Black wire) SUB-OUT
ORANGE RCA (Black wire) SUB-OUT
WHITE RCA (Black wire) LINE-OUT ZONE 1 ( L)
RED RCA (Black wire) LINE-OUT ZONE 1 (R)
A CABLE
YELLOW POWER (+)
RED IGNITION (+12V switched)
BLACK GROUND (-)
WHITE SPEAKER ZONE 1 L (+)
WHITE/BLACK STRIPE SPEAKER ZONE 1 L (-)
GREY SPEAKER ZONE 1 R (+)
GREY/BLACK STRIPE SPEAKER ZONE 1 R (-)
GREEN SPEAKER ZONE 2 L (+)
GREEN/BLACK STRIPE SPEAKER ZONE 2 L (-)
PURPLE SPEAKER ZONE 2 R (+)
PURPLE/BLACK STRIPE SPEAKER ZONE 2 R (-)
ORANGE 2 WIRE REMOTE
ORANGE/WHITE STRIPE 2 WIRE REMOTE
BROWN DIM (+12V switched)
BLUE/WHITE STRIPE AMPLIFIER ON
BROWN/WHITE STRIPE TEL MUTE / INTERUPT
Note: Sub + Lineout volume control is linked to Zone 1.
A
B
018
TROUBLESHOOTING
TROUBLESHOOTING
RESET
Should the stereo become unresponsive. Follow the below steps:
Press and hold the ‘Power’ button for 10 seconds to reset
the stereo.
Reset your iPod/iPhone
Remove all power for 5 minutes and then reconnect.
If you are unable to correctly tune to radio stations, check you
have the correct tuner region selected.
»
»
»
»
Page 7

017
MENU STRUCTURE
MENU STRUCTURE
ROOT MENU
PRESETS
SQUELCH
SCAN
SAVE CURRENT
VIEW PRESETS
REMOVE PRESET
REMOVE ALL PRESETS
VHF
SAVE CURRENT
VIEW PRESETS
REMOVE PRESET
REMOVE ALL PRESETS
AM/FM PRESETS
FOLDER/TRACK LIST
DISK
REPEAT
SHUFFLE
53"34)#+
SETTINGS
!58
BALANCE
VOLUME LIMIT
55
85
120
160
SUB LIMIT
SUB FILTER
SUBWOOFER
BASS/TREBLE
ENG - DE - NED - ESP - ITA - FRA
TONE
KEY SOUND
LANGUAGE
POWER SAVE
TELE MUTE / INTERUPT
ABOUT
CONTRAST
BRIGHTNESS
LCD
3%44).'3
TUNER REGION
EU - USA - JAP - AUS
MARINE REGION
USA - CAN - INT
ZONE 1
BALANCE
VOLUME LIMIT
ZONE 2
ZONE
OFF - 100 - 200 - 400 - 800
ARTISTS
ALBUMS
SONGS
PLAYLISTS
COMPOSERS
AUDIOBOOKS
VIDEOS
PREFERENCES
PODCASTS
GENRES
OFF - ON - ALL
REPEAT
OFF - TRACKS - ALBUMS
OFF
SUBTITLES
CLOSED CAPTION
SHUFFLE
SEARCHING
SUBTITLES
4:3
16:9
MONITOR
NTSC
PAL
FORMAT
iPod VIDEO
I0OD
ADD PRESETS
REMOVE PRESETS
CHANNELS
CATEGORY TUNE
FAVOURITES
ENABLE
LOCK/UNLOCK
SKIP/UNSKIP
CHANGE PIN
PARENTAL MENU
3)2)53
006
CONNECTIONS
A CABLE
DESCRIPTION COLOUR
Battery +12VDC Yellow
Ignition +12V switched Red
Negative Ground Black
Remote Amplifier Turn On Blue/White
DIM +12V switched Brown
Mute / Tele-Interupt -12V switched Brown/White
DIM
Connect to vessel lighting sytem to dim LCD and
button illumination when vessel lights are turned on.
2 WIRE REMOTE
Connect to FUSION 2 Wire Remote (not included).
TELE MUTE / INTERUPT
Connect to handsfree kit to either mute the stereo or
switch to AUX to hear call.
Note: If ‘turn on’ from ignition is not required, the
+12V ignition (Red) and +12V battery (Yellow) can be
connected together.
CONNECTIONS
B CABLE
AUX INPUT
Connect an Auxiliary source to the left and right RCA
(White = L, Red = R).
SUBWOOFER OUT (DUAL MONO)
Connect to an amplifier, volume control linked to
Zone 1. (Orange + Orange)
LINEOUT ZONE 1
Connect to an amplifier, volume control linked to
Zone 1. (White = L, Red = R).
AERIAL CONNECTION
Connect an AM/FM marine antenna or FM/VHF splitter.
USB/iPod CONNECTION
Connect a USB storage device (not included) or the
MS-DKIP / MS-DKIPUSB Marine Docks for iPod (not
included) or a certified Apple iPod lead (not included).
SIRIUS SATELLITE RADIO (For use in USA only)
Connect to SiriusConnect™ tuner (not included)
WIRED REMOTE (MS-WR600)
Connect a marine wired remote to the CANbus system
connector.
Up to 3 remotes can be connected to the system.
Page 8

BUTTON DESCRIPTION
ROTARY ENCODER
Turn
To adjust volume, move up or down a
menu structure, or adjust a specific
setting.
Press
To select a highlighted option, confirm
a setting. Press to step through each
zone for volume adjustment.
Press and Hold
For quick access to subwoofer level
adjustment
POWER
Press to turn the unit ON/OFF.
Press and Hold
Press and hold for 10 seconds to ‘Reset’
the stereo.
MENU
Press to enter Menu System. Press to
return to previous screen.
Press and Hold
To exit the menu system.
007
BUTTON DESCRIPTION
016
ZONE OPERATION
The MS-RA200 Marine Stereo features Multi-Zone
technology which enables 2 ‘Zones’ with independent
balance/volume control.
ZONE SETUP
Press the ‘Menu’ button and select ‘Settings’. Select
‘Zones’ then the Zone you wish to setup.
VOLUME LIMIT
Select ‘Volume Limit’ to set the desired maximum
output volume for each individual Zone.
BALANCE
Select ‘Balance’ to adjust the balance from left to
right.
ZONE OPERATION
SUBWOOFER
Adjust the sub limit and filter.
SUB FILTER
Press the ‘Menu’ button and select ‘Zones’. Select
‘Subwoofer’ then ‘Sub Filter’. Select the desired
frequency. 55hz - 85hz - 120hz - 160hz
SUB LIMIT
Press the ‘Menu’ button and select ‘Zones’. Select
‘Subwoofer’ then ‘Sub Limit’. Select the desired
maximum subwoofer output volume.
Note: Press and Hold the ‘Rotary Encoder’ for quick
access to subwoofer level adjustment.
Note: Subwoofer and Lineout volume control is linked
to Zone 1.
Page 9

015
SIRIUS SATELLITE RADIO
SIRIUS SATELLITE RADIO
USA only - SIRIUS TUNER NOT INCLUDED
ACTIVATING YOUR SIRIUS TUNER
You must activate the SIRIUS tuner before you can begin
to receive the SIRIUS Satellite Radio Service.
In order to activate your radio subscription, you will
need the SIRIUS ID (SID) which uniquely identifies your
tuner. The 12 digit SID is displayed on the LCD on
initialization. The Marine Stereo will display the SID on
Channel 0.
Power on your system and make sure that you are
receiving good signal, you are able to hear audio on the
SIRIUS Preview channel (Ch-184)
Note: Have your credit card handy and contact SIRIUS
via the internet at https://activate.sirius.radio.com/
and follow the prompts to activate your subscription.
You can also call SIRIUS toll-free at 1-888-539-SIRIUS
(1-888-539-7474) Once activated, you will be
able to begin enjoying SIRIUS Satellite Radio’s digital
entertainment and can tune to other channels.
SIRIUS OPERATION
Press ‘Source’ to select Sirius Satellite radio source.
SIRIUS NAVIGATION
Press the ‘Menu’ button and navigate the functions.
CHANNELS
Select the desired channel (listed in channel order) and
music preference
CATEGORY
Select the desired genre type. (The unit will only play the
selected option)
FAVOURITES
Add your favourite channel to your favourites list
by selecting ‘Add Favourite’ (Maximum 15 channels).
Remove channels by selecting ‘Remove Favourite’.
Select ‘All’ or the individual channel. Exit by pressing
the ‘Menu’ button.
Alternatively: Press and hold the ‘Play’ button to store
favourite.
PARENTAL MODE
ENABLE ON/OFF
Select to enable channels to be locked/unlocked
PIN #
Turn the ‘Rotary Encoder’ to select number and press
to enter, repeat to enter the 4 digit code. (Factory
setting is 0000)
Note: Must be entered before the following items are
operational.
LOCK / UNLOCK
Select the channel to be locked or unlocked
SKIP / UN-SKIP
Select the channel to be bypassed
CHANGE PIN
Personalise your Pin number. (4 digits max)
BACK/PREVIOUS
Short Press
iPod/USB - Select the previous track.
AM/FM/Sirius/VHF - Start tuning down
the frequency spectrum. (Auto/Manual
tuning mode) or previous preset
(Preset mode).
Press and Hold
iPod/USB - Rewind the current track.
VHF - Fast channel stepping.
FORWARD/NEXT
Short Press
iPod/USB - Select the next track.
AM/FM/Sirius/VHF - Start tuning up
the frequency spectrum. (Auto/Manual
tuning mode) or next preset (Preset
mode).
Press and Hold
iPod/USB - Fast forward the current track.
VHF - Fast channel stepping.
008
BUTTON DESCRIPTION
SOURCE
Press to cycle through sources
AM - FM - VHF - iPod - USB - AUX
- SIRIUS (USA only)
PLAY/PAUSE
iPod/USB - Pause / resume the current
track.
AM/FM/Sirius/VHF - Switch between
Auto/Manual and Preset tuning mode.
Press and Hold
AM/FM/Sirius/VHF - Store the current
station as a Preset.
MUTE
Mutes sound in all zones.
Page 10

INITIAL SETUP
Important: The Tuner Region must be selected for
correct operation. Default - USA.
Important: The Marine Region must be selected for
correct operation. Default - USA.
GENERAL OPERATION
ZONE SETUP
The MS-RA200 Marine Stereo features Multi-Zone
technology which enables 2 ‘Zones’ with independent
volume/balance control.
Select the Zone you wish to setup.
Select ‘Balance’ to adjust the audio balance from left
to right within the selected zone.
Select ‘Volume Limit’ to set the maximum volume limit
within the selected zone.
SUBWOOFER
Select ‘Settings’ then ‘Zones’ then ‘Subwoofer’.
Select ‘Sub Limit’ to set the desired maximum
subwoofer output volume.
Select ‘Sub Filter’ to select the desired cut-off
frequency. 55hz - 85hz - 120hz - 160hz
Default: 85hz
Note: Press and Hold the ‘Rotary Encoder’ for quick
access to subwoofer level adjustment
SETTINGS
Press the ’Menu’ button and select ‘Settings’.
Select the desired setting to adjust.
Note: Whilst in Settings the ‘Menu’ button acts as a
back/return to the previous screen.
TONE
Adjust the treble and bass settings. Press the ‘Rotary
Encoder’ to cycle between bass and treble selection.
LCD
Press the Rotary Encoder to cycle between Contrast
and Brightness. Turn to adjust.
KEY SOUND
Press the Rotary Encoder to cycle between ‘On’ and
‘Off’.
»
»
ADJUSTING THE VOLUME
Turn the ‘Rotary Encoder’ to adjust
the volume.
ZONE VOLUME
Press the ‘Rotary Encoder’ to step through zones.
All zones Zones 1 Zone 2
009
GENERAL OPERATION
VIDEO PLAYBACK
Note: Requires the optional FUSION Marine Portable
Media Device Dock (MS-DKIPUSB). Featuring composite
video out which enables iPod/iPhone video playback on
a compatible monitor or television.
Press the ‘Menu’ button to enter the iPod/iPhone
menu. Select ‘Videos’ and select video to start
playback.
SUBTITLES
Press ‘Menu’ and select ‘Preferences’. Select ‘iPod
Video’ then ‘Subtitles’.
OFF SUBTITLES CLOSED CAPTION
MONITOR
Press ‘Menu’ and select ‘Preferences’. Select ‘iPod
Video’ then ‘Monitor’.
Select ‘4:3’ or ‘16:9’ aspect ratio.
FORMAT
Press ‘Menu’ and select ‘Preferences’. Select ‘iPod
Video’ then ‘Format’.
Select ‘NTSC’ or ‘PAL’ video format.
014
iPod/iPhone OPERATION
NO iPod CONNECTED
If this appears on the display possible causes are
Ensure the iPod/iPhone is correctly connected
Ensure the cable is not excessively bent
The iPods battery remains low (refer to iPod
manual and charge the battery)
Reset your iPod/iPhone
»
»
»
»
Page 11

iPod/iPhone OPERATION
CONNECTING AN iPod/iPhone
Connect a FUSION Marine Dock for iPod (MS-DKIP or
MS-DKIPUSB) to gain the benifits of integrated housing
for your iPod or iPhone. Alternativily a certified Apple
iPod cable can be used to connect your iPod/iPhone to
the MS-RA200.
LISTENING TO AN iPod/iPhone
Press ‘Source’ button and cycle to iPod mode. Playback
of the iPod/iPhone will start automatically.
iPod/iPhone NAVIGATION
Press the ‘Menu’ button to enter the iPod menu. The
rotary encoder operates similar to the click wheel on
your iPod. Turn to navigate and press to enter.
Note: Press the ‘Menu’ button to return to the
previous menu screen.
PLAY/PAUSE Play or Pause the track
BACK/PREVIOUS Short Press:
Selects previous track
Press and Hold:
Rewind track
NEXT/FORWARD Short Press:
Selects next track
Press and Hold:
Fast-forward track
REPEAT
Press the ‘Menu’ button and select ‘Preferences’, select
‘Repeat’.
OFF ONE ALL
SHUFFLE
Press the ‘Menu’ button and select ‘Preferences’, select
‘Shuffle’.
OFF TRACKS ALBUMS
F.A.S.T
FUSION ALPHA SEARCH
TECHNOLOGY
If your iPod contains more than 50 Artists, Songs
or Albums you can use F.A.S.T to quickly navigate by
letter or number.
Example: Press the ‘Menu’ button and select ‘Artists’.
Select ‘D’ and the first ‘Artist’ beginning with ‘D’ will
automatically highlight. Using the ‘Rotary Encoder’ you
can then scroll up or down from this selection.
F.A.S.T THRESHOLD
The threshold (number of items) at which point the
Alpha Search screen appears for iPod menus can be
changed. To change the threshold, navigate as follows
- press the ‘Menu’ button and select ‘Setup’, then
’Searching’. Select your desired item number threshold.
OFF 100 200 400 800
013
iPod/iPhone OPERATION
010
GENERAL OPERATION
LANGUAGE
Select the desired language for the on screen display
English - Deutsch - Nederlands - Espanol - Italiano - Francais
POWER SAVE
Press the Rotary Encoder to cycle between ‘On’ and
‘Off’.
OFF LCD/Buton backlight on constantly
ON LCD/Button backlight turns off after one minute
of non-activity
TUNER REGION
Select the appropriate Region.
Europe USA Japan Australasia
Important: The correct Tuner Region must be selected.
Default - USA.
MARINE REGION
Select the appropriate VHF Marine Region.
USA Canada International
Important: The correct Marine Region must be selected.
Default - USA.
Note: The MS-RA200 can be be completely
disconnected from the constant +12V voltage supply
(Battery switch) with no settings lost.
Page 12

011
RADIO OPERATION
RADIO OPERATION
SOURCE SELECTION
Press the ‘Source’ button and cycle to desired source.
AM FM VHF SIRIUS (USA only)
STATION SEARCH
Press ‘Play’ to cycle between tuning seek modes.
Auto Manual Preset
AUTOMATIC SEEK TUNING
Press ‘Play’ to cycle to Auto tuning mode. Press the
‘Previous’ or ‘Next’ button to scan to the next station.
MANUAL SEEK TUNING
Press ‘Play’ to cycle to Manual tuning mode. Press the
‘Previous’ or ‘Next’ button to step up and down the
spectrum.
PRESET STATION SELECTION
Press ‘Play’ to cycle to Preset tuning mode. Press the
’Previous’ or ‘Next’ button to select previous or next
preset.
PRESETS
STORING A STATION AS A PRESET
When listening to a frequency (AM/FM/VHF), press and
hold the ‘Play’ button to store preset.
Alternatively: Press the ‘Menu’ button and select
‘Presets’. Select ‘Save Current’.
Note: There are 15 presets available per band.
VIEW PRESETS
Press ‘Menu’ and select ‘Presets’. Select ‘View Presets’.
Use the ‘Rotary Encoder’ to cycle and select a saved
preset.
REMOVE PRESET
Press ‘Menu’ and select ‘Presets’. Select ‘Remove
Preset’. Select the desired preset.
REMOVE ALL PRESETS
Press ‘Menu’ and select ‘Presets’. Select ‘Remove All
Presets’.
VHF OPERATION
SQUELCH
Press ‘Menu’ and select ‘Squelch’.
Increase Squelch to filter out nearby chatter and
decrease Squelch to receive all.
SCAN
Press ‘Menu’ and select ‘Scan’.
The Marine Stereo will scan the VHF preset stations
for an active channel.
It remains on the channel until the transmission ends,
then resumes scanning.
Note: If the Squelch control is adjusted so you can
constantly hear a hissing sound the unit will not scan
correctly.
012
USB/MP3/AUX OPERATION
AUX OPERATION
CONNECTING AN
AUXILIARY AUDIO DEVICE
The Left & Right AUX RCA plugs are located on
accessory cable ‘B’ at the rear of the unit.
Connect your auxiliary audio device.
Note: You may require an adapter cable to connect
your device.
»
»
LISTENING TO YOUR
AUXILIARY AUDIO DEVICE
Press ‘Source’ and cycle to AUX mode.
Start playback on your auxiliary audio device.
Use both the volume control on your auxiliary device
(if available) and the volume control on the FUSION
Marine Stereo to set the volume level.
»
»
USB/MP3 OPERATION
SOURCE SELECTION
Press the ‘Source’ button and cycle to USB.
Press ‘Menu’ and select ‘DISK’.
Note: We reccommend you name your USB device
allowing the device name to be displayed. Default
name of a connected device is ‘DISK’.
Navigate USB device file structure and select Track
to begin playback
»
»
»
REPEAT
Press the ‘Menu’ button and select ‘Repeat’, to repeat
all playable tracks within the folder of the current
selection. Default: On.
SHUFFLE
Press the ‘Menu’ button and select ‘Shuffle’, to shuffle
all playable tracks within the folder of the current
selection. Default: Off.
Important: Ensure the USB Device is formatted as
Fat32 format.
 Loading...