

Page 1
GMDSS Radio Station
RC-1800F/1800T
Page 2

C
9-52, Ashihara-cho,
Nishinomiya, Japan
Telephone: 0798-65-2111
Telefax: 0798-65-4200
Your Local Agent/Dealer
All rights reserved.
PUB. No. OME-56320
RC-1800F/1800T
(
YAKI)
FIRST EDITION : FEB. 2001
C : OCT. 30, 2001
Printed in Japan
Page 3

iiiiiiiiiiiii
i
SAFETY INSTRUCTIONS
Do not open the equipment.
This equipment uses high
voltage electricity which can
shock, burn or cause serious
injury. Only qualified personnel should work inside the
equipment.
WARNING
Do not disassemble or modify the
equipment.
Fire, electrical shock or serious injury
can result.
Turn off the power immediately if
water leaks into the equipment or
the equipment is emitting smoke or
fire.
Continued use of the equipment can
cause fire or electrical shock.
Keep sparks and lit smoking materials
away from the lead-acid battery. Make sure
the battery room is well ventilated.
The battery emits hydrogen gas which can
cause explosion.
The electrolyte in the lead-acid battery
contains sulfuric acid which can be harmful, particularly to the eyes.
If sulfuric acid contacts eyes, skin or clothing,
flush directly with water. For eyes, contact a
physician. Loss of eyesight can result.
The temperature of the electrolyte in the
lead-acid battery should not exceed 45°C.
The electrolyte can cause explosion if it
becomes too hot.
DANGER
Never touch the SSB antenna, antenna
coupler or lead-in insulator when the
SSB radiotelephone is transmitting.
High voltage which can cause death is
present at the above-mentioned locations
when the SSB radiotelephone is transmitting.
Turn off the power before performing
maintenance on the SSB antenna.
Antenna
Coupler
Antenna Wire
(High Voltage)
Indoor
Antenna
Wire
Lead-in
Insulator
WARNING
To avoid electrical shock,
do not remove cover,
No user-serviceable parts
inside.
Name : WARNING LABEL(2)
Type : 03-129-1001
CodeNo. : 100-236-740
Page 4

ii
TABLE OF CONTENTS
Part 1 Radio Rack Console
Part 2 SSB Radiotelephone
Part 3 MF/HF DSC Terminal
Part 4 NBDP Terminal
Part 5 Inmarsat C
SPECIFICATIONS____________________________________ SP-1
Page 5

1
Radio Rack Console
Radio Rack Console
Part
Part
Page 6

TABLE OF CONTENTS
Chapter 1 INTRODUCTION
1.1 Operational Overview...................................................................................................... 1-1
1.2 System Diagram ..............................................................................................................1-2
1.3 Equipment Description ....................................................................................................1-3
1.4 Mutual Operation of Equipment ......................................................................................1-4
1.5 Power On/Off...................................................................................................................1-4
Chapter 2 Control Panel and Printer PP-510
2.1 Control Panel ...................................................................................................................2-1
2.2 Maintenance..................................................................................................................... 2-4
2.3 Printer PP-510.................................................................................................................. 2-5
Page 7

1 – 1
Chapter 1 INTRODUCTION
1.1 Operational Overview
The RC-1800F/1800T radio rack console conforms to the IMO regulations for GMDSS radio
equipment. It contains an SSB radiotelephone, DSC terminal, NBDP terminal and Inmarsat C
mobile earth station.
The RC-1800F is operated with the control panel and the dimmer knob. You can monitor the
AC mains source by the Lamp, Ammeter and Voltmeter with the meters at the left side of the
console. Power can be checked with the power meter.
The RC-1800T is operate with the control panel and the dimmer knob(option).
Not used
Dimmer knob
Dimmer knob
(option)
Ammeter, Voltmeter
for AC main source
Lamp for AC
main source
Meter for
power switches
Control panel
Control panel
RC-1800F
RC-1800T
Page 8
1 – 2
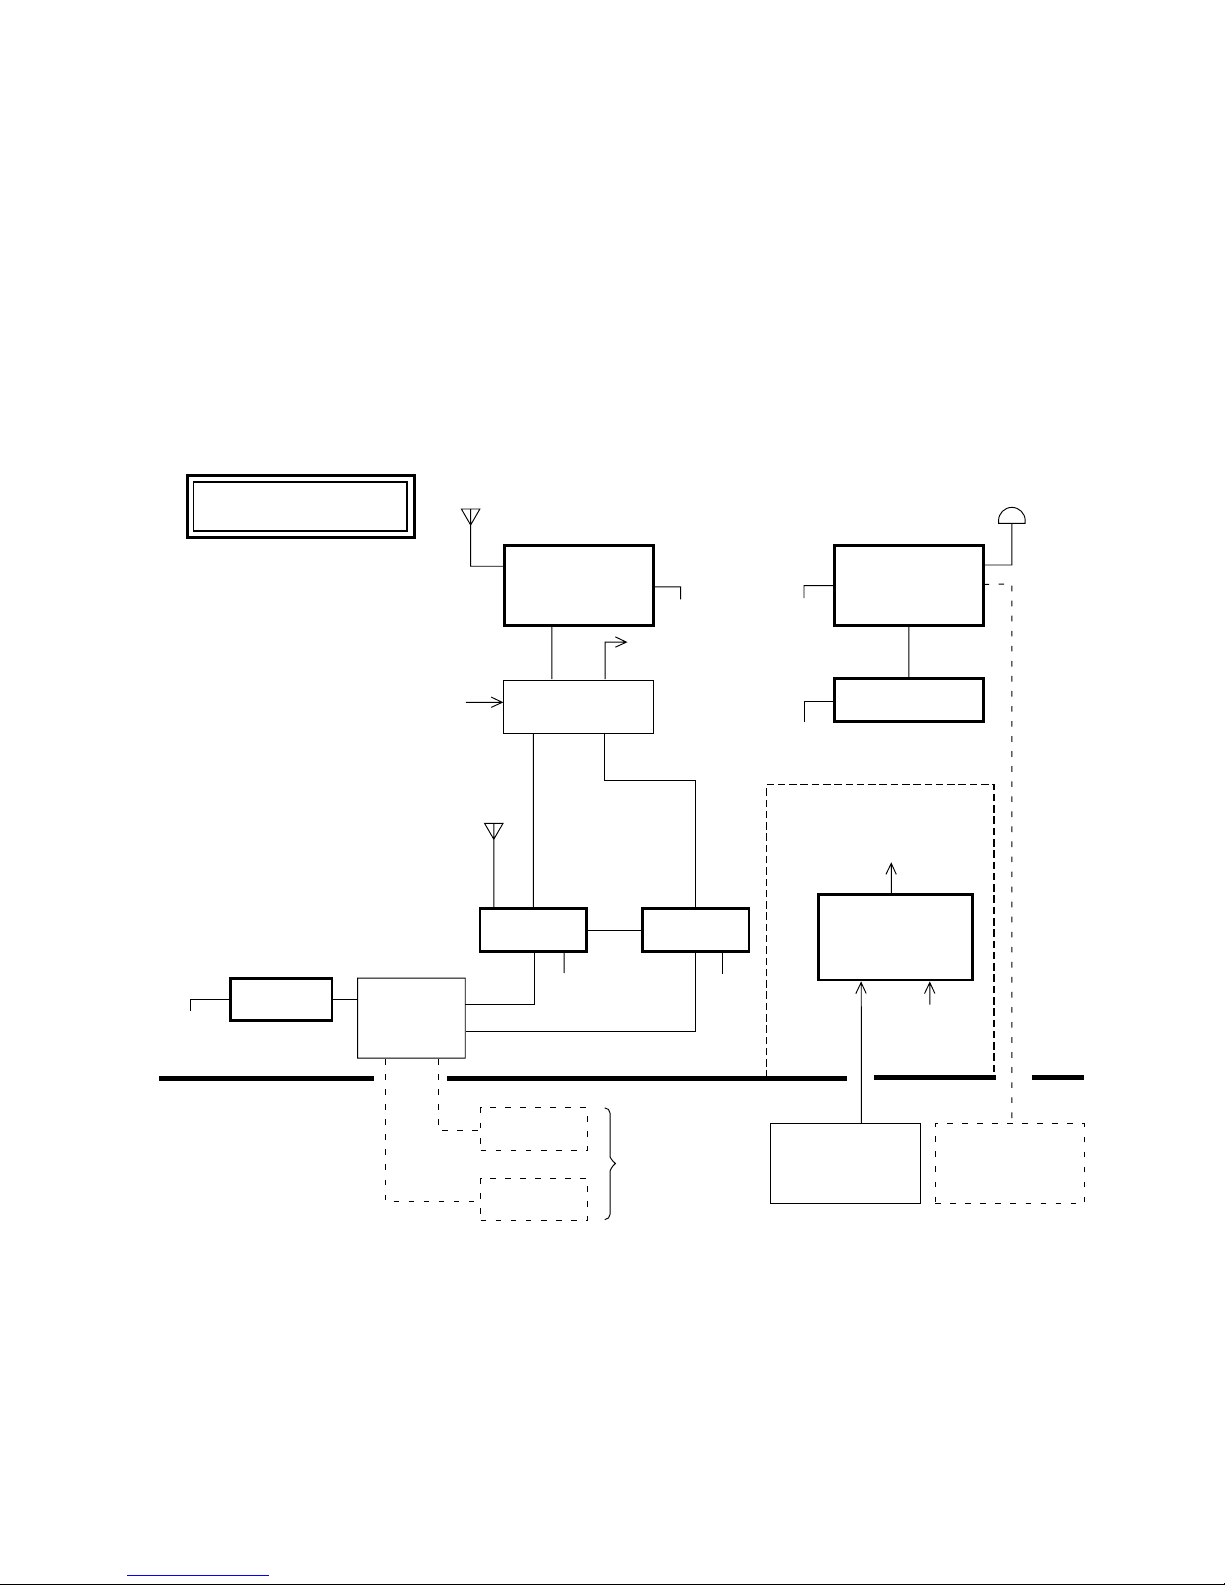
1.2 System Diagram
The figure below shows the system diagram for the RC-1800F/1800T. The RC-1800 series
GMDSS Radio Station consists of two models' RC-1800F (floor deck mount) and 1800T (tabletop
mount). Equipment are controlled using FURUNO’s radio interface protocol called MIF (see
note below).
The type and number of the component differ from set to set.
Note: MIF is a handshaking type signal exchange protocol developed by FURUNO for remote
control of radio equipment. In the RC-1800F/1800T, for example, the DSC-60 can automatically set the frequency on the SSB Radiotelephone.
100/110/
220/440VAC
(Main Source)
FS-1562/
FS-5000
Distribution
PCB
24VDC
24VDC
24VDC
24VDC
24VDC
NMEA OUT
(Maximum five outputs)
(Inside Console)
(Inside Console)
DSC-60
DP-6
IF-8500
(Printer
Interface)
PP-510
PP-510
(Printer)
(Printer)
No.1
No.2
FM-8500
FM-8500
NMEA IN
(Nav data)
24VDC (To each unit)
RC-1800F only, built in
console
AC/DC
Power Supply
24VDC
24VDC
(Reverse
Source)
IC-302
(Option)
Radio
Battery
FELCOM 12
(Distress Alert Unit)
External VHF
Radiotelephone
(Including DSC)
RC-1800F/1800T
Page 9

1 – 3
1.3 Equipment Description
Regulations require that all equipment be powered while the vessel is underway.
FS-1562/5000 SSB Radiotelephone
For ship-ship and ship-station radio communications in the MF/HF band (1.6-26.175 MHz),
the main communications modes are;
• Voice communications (J3E) via the handset
• DSC communications (Telex:J2B) by the DSC-60
• Telex communications by the DP-6 (J2B)
DSC-60 MF/HF DSC Terminal
The DSC-60 has many functions. Below are its main functions.
• Distress alert: Transmit the distress alert via the SSB Radiotelephone.
• W atches DSC distress and safety frequencies. The DSC-60 receives distress alert from vessel in distress and all ships call (safety and urgent call) from ship or coast station.
• All Ships Call: For urgent situation on own ship (for example, request for medical assistance).
• Individual Call: Place a call to a specific ship or coast station.
NBDP Terminal
The DP-6 provides Telex communications with coast stations over the MF/HF band via the
SSB Radiotelephone. Furthermore, it can receive MSI (Maritime Safety Information) messages via the SSB Radiotelephone (Scan reception).
Inmarsat-C Mobile Earth Station
Provides distress and general Telex communications for mobile and fixed terrestrial subscribers in the Inmarsat-C communications network. T elex messages are processed by what is known
as store-and-forward T elex. A T elex message transmitted by you arrives at a coast station where
it is stored temporarily and then delivered to the subscriber specified. (Full duplex communications are not possible.)
AC/DC Power Supply
The AC/DC Power Supply consists of a battery charger and two rectifiers (PR-850AR and PR-
300) which can accept both AC and DC powers (RC-1800F only). For RC-1800T the AC/DC
Power Supply is installed externally. In the event of main AC power failure, auxiliary power
(battery) provides power to the equipment, for the amount of time stipulated by radio regulations.
Page 10

1 – 4
1.4 Mutual Operation of Equipment
As noted earlier, the equipment in this radio console are interfaced by FURUNO's MIF radio
interface. For example, to transmit a message over the DSC-60 or DP-6, the Tx and Rx frequencies and class of emission are automatically set on the SSB Radiotelephone and then the message is transmitted.
Two printers are supplied and one is dedicated to the Inmarsat C. The other printer is shared by
up to four units: DSC-60, DP-6, and external VHF DSC (maximum two sets, option). It is
automatically connected to one of those equipment on a first-come-first-served basis. For example, if the DSC-60 is used (message transmission or reception), the printer is automatically
connected to the DSC-60 and disconnects itself from other equipment.
Connection between DSC-60 and DP-6
Suppose you transmitted a call over the DSC-60 and want to communicate with the receiving
station by the DP-6 instead of the SSB Radiotelephone. If the DSC-60 and DP-6 were not
connected you would have to set the several data such as working frequency, communication
mode, etc. manually on the DP-6. Because they are connected by the remote function, however,
the data mentioned above are automatically set on the DP-6 via the DSC-60.
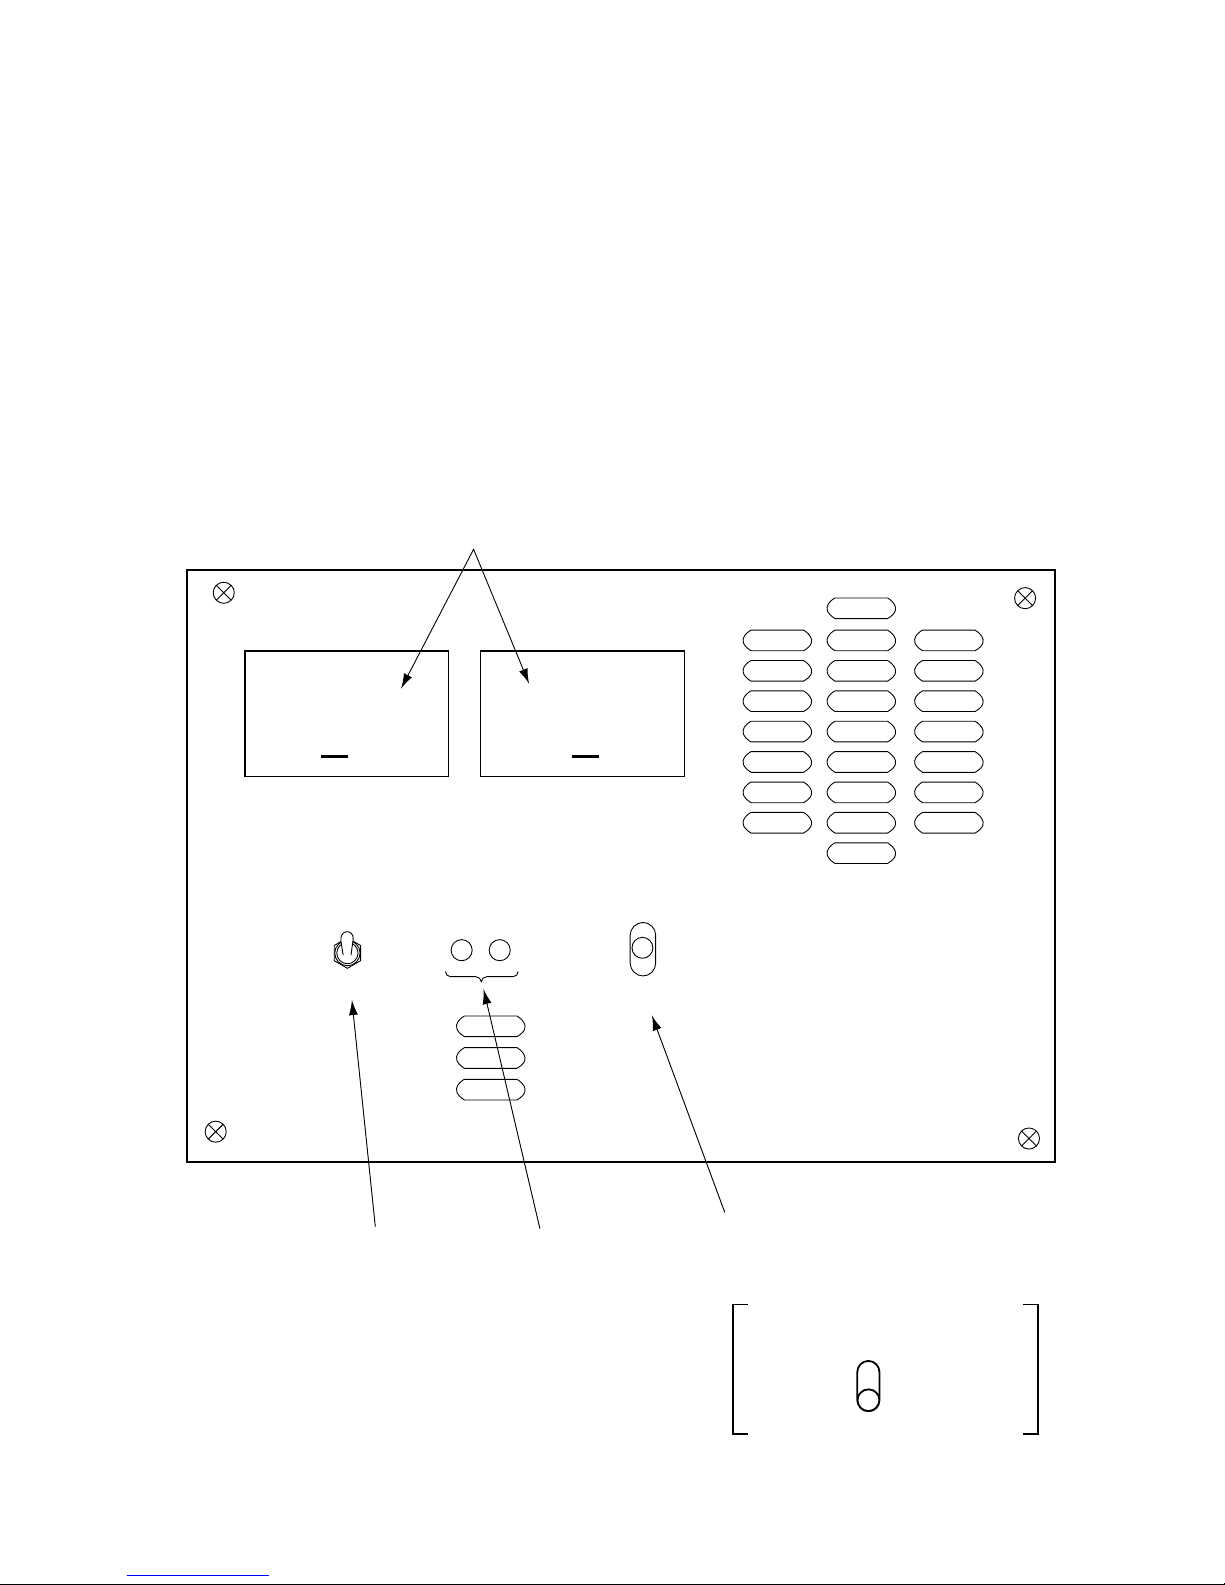
1.5 Power On/Off
Turning on the system
For RC-1800F use the power switch at the lower left side of the console. For RC-1800T use
main switch on the switchboard and power switch on each AC/DC power supply.
1. Turn on breakers and switches on the AC/DC Power Supply in the following order:
1 100/200 VAC main power switch
2 PR-850AR AC input breaker
3 PR-850AR DC output breaker
4 All toggle switches (any order) on right side
2. Turn on power switches (any order) of all equipment in the console.
AC MAIN
24VDC OUT
(BACK UP)
AC IN
PR-850AR
1Main
Switch
3PR-850AR DC
Output Breaker
2PR-850AR AC
Input Breaker
4Toggle Switches
Page 11

1 – 5
Turning off the system
Reverse the order shown above.
(Reference: RC-1800F-25E)
Battery
Charger
PR-850AR
PR-300
Battery
Inmarsat C
100/110/220VAC
(Main Switch)
1
2
3
FS-1562
DSC-60
DP-6
(24VDC backed
up by battery)
24VDC
(24VDC backed
up by battery)
Power switches NBDP terminal/Inmarsat-C
To turn off a power switch individually, grasp the two knobs below DSC terminal and pull
down control panel to access power switches.
IC
-212
I
I
O
F
F
ON
ON
D
P
-6
O
F
F
Power switch of
NBDP terminal
Power switch of Inmarsat-C
Page 12
2 – 1
Chapter 2 Control Panel and Printer
PP-510
2.1 Control Panel
The figure which follows is an exploded view of the Control Panel.
IN USE LOW VOLT
BATTERY
MONITOR
MANUAL
BATTERY
CHARGER
AUTO
OFF
EMG
LIGHT
2
BATTERY
CHARGER
switch
For MSE (Maintenance free)
battery:
OFF
AUTO
3
4
5
EMG LIGHT
switch
1
BATTERY
MONITOR
lamp
AV
Dimmer knob: right side of console (refer to page 1-1)
(RC-1800T: option)
RADIO 24V BATT
RADIO 24V BATT
OFF
ON
Page 13

2 – 2
Control description
11
11
1 BATTERY CHARGER switch
Turns battery charger on/off. When charging, battery voltage is shown on the voltage meter on
the Control Panel.
AUTO: Automatically turns on the battery charger when the battery voltage is below 23
VDC and turns it off when the voltage exceeds 27.5 VDC. While the vessel is
underway, set the switch in this position.
OFF: Disconnects the charger from the radio battery.
MANUAL: Charges the battery manually.
Note: When the charging current falls below 2A the switch to the “OFF” or “AUTO” position.
For maintenance free battery, keep the switch to the “AUTO” position to maintain the battery
voltage between 23 V to 27.5 VDC.
22
22
2 BATTERY MONITOR lamp
IN USE lamp (AC power failure: orange): Lights to alert that the AC power has failed and radio
equipment are being powered by the radio battery (DC power) alone. When lit, only the equipment related to distress communications are powered. (Power is not supplied to PP-510 or
console lights.)
LOW VOLT lamp (low battery voltage: red): Lights to alert that the battery voltage is below 22
VDC. (Aural alarm sounds until the voltage becomes 22 VDC.)
33
33
3 EMG LIGHT switch
Turns the emergency lamps at the top of the console on/off(RC-1800T: option).
44
44
4 Ammeter, Voltmeter
Monitors voltage and electric current for charge of radio battery. Green line on voltmeter indicates 24 VDC.
55
55
5 Dimmer knob
Turns the desk lamp on/off and adjusts lamp brilliance, and is located at the right side of the
console. The desk lamp will not light during AC power failure; use the emergency light instead
(RC-1800T: option).
Battery charging
Before operating the radio, check the battery voltage on the meter provided on the AC/DC
Power Supply. The battery voltage is kept between 23 VDC and 27.5 VDC when the BATTERY CHARGER switch is in the AUTO position. Note that the OFF position of the BATTERY CHARGER switch may allow the voltage to drop below 23 VDC. In this case, charge
the battery as follows:
Page 14

2 – 3
1. Set the BATTERY CHARGER switch for MANUAL. Watch the charging current of the
ammeter at the RADIO 24V BATT on the Control Panel. (For a 200AH battery, the charging current will be around 20A at the start, and will be reduced gradually as charging
proceeds.)
For maintenance free battery, set the BATTERY CHARGER switch for AUTO.
2. Turn the BATTERY CHARGER switch off or set it to AUTO when the charging current
falls below 2A.
Note: If the AC power has failed, the radio battery automatically supplies power to the radio
equipment regardless of BA TTER Y CHARGER switch position. The battery will not discharge
as long as the AC power is alive.
Care of the lead-acid battery
The lead-acid battery powers distress-related communications equipment when the ship’s main
power and emergency power fail, to enable communications in the event of distress. Therefore,
follow the points mentioned below to keep the battery in good working order.
Keep sparks and lit smoking materials
away from the lead-acid battery. Make sure
the battery room is well ventilated.
The battery emits hydrogen gas which can
cause explosion.
The electrolyte in the lead-acid battery
contains sulfuric acid which can be harmful, particularly to the eyes.
If sulfuric acid contacts eyes, skin or clothing,
flush directly with water. For eyes, contact a
physician. Loss of eyesight can result.
The temperature of the electrolyte in the
lead-acid battery should not exceed 45 C.
The electrolyte can cause explosion if it
becomes too hot.
WARNING
1. Confirming charging
Confirm that the BATTERY CHARGER switch on the Control Panel is set for AUT O. Further ,
confirm that the battery voltage meter on the Control Panel reads between 23 V and 27.5 VDC.
2. Checking specific gravity of electrolyte
The specific gravity of electrolyte is normal if it is 1.240 ±0.010 (at 20°C).
Page 15

2 – 4
3. W ater supply
The electrolyte level can be seen on the battery. When the electrolyte falls below the highest
graduation on the scale, fill to highest graduation with distilled water. Do not use diluted sulfuric acid or ordinary tap water—they will shorten battery life.
4. Cleaning
The battery and the area around it should always be clean and dry. Clean the battery case with
a water-moistened cloth. Do not use chemical cleaners to clean the battery; they may crack the
case. Kerosene may be used.
5. Environmental conditions
• Keep the battery out of direct sunlight.
• Coat the nuts and bolts which secure the battery contacts with anticorrosive paint for the
lead-acid battery. Check yearly that bolts are securely fastened. Tighten nuts and bolts if
necessary.
2.2 Maintenance
1. Cleaning display screens
Dust or dirt on the display screens of equipment may be removed with a soft cloth. Do not use
chemical cleaners—they may remove paint and markings.
2. Cleaning floppy disk drives
The heads in the floppy disk drive of the DP-6 and FELCOM 12 should be cleaned regularly to
prevent damage to floppy disks. Use a cleaning floppy disk. (FURUNO can supply a cleaning
floppy disk. It is type MCD-2, code no. 000-116-420.)
Procedure
1. Insert ∞a cleaning floppy disk in the drive.
2. Execute “Format” operation (in the
F1
menu). The access lamp on the drive lights.
3. W ait until the access lamp goes off. Remove the disk. (Error message for formatting appears
on the screen.)
Page 16

2 – 5
2.3 Printer PP-510
Turning on the power
Turn on the POWER switch at the front of the printer. The POWER and ON LINE lamps light.
The printer is now ready to print. If the ON LINE lamp is off, press the ON LINE switch to turn
it on; you cannot print when the ON LINE lamp is off.
P.PARK
FF
LF
NLQ
ON LINE
POWER Lamp
P.OUT Lamp
Lights when paper runs
out or internal error
is found.
Toggles between online
and offline state.
These keys are operative when the
printer is in off line state (ON LINE
lamp is off).
POWER
Switch
Key description
[NLQ] (Near Letter Quality) key
Toggles between draft and NLQ print modes. Lighting the key selects near letter quality (high
quality) print.
[LF] key
Advances the paper one line. Press and hold down the key to advance the paper continuously.
[FF] key
Advances the paper to the top of the next available form. The default form length is 1 1 inches.
[P.PARK] key
Backs the paper by maximum 18 inches. If the paper is not detected after backing it, the P. OUT
lamp blinks three times and the printer stays in offline state.
Page 17

2 – 6
Paper
Paper Guide Bar
Printer Cover
Print Head
Paper
Support Bar
Platen Knob
Loading roll paper
This section shows you to load the roll paper.
Keep fingers away from edges on the
printer and cover.
Edges can cut fingers.
CAUTION
Observe the following cautions when loading the paper:
• To prevent paper skewing or jamming, be sure the paper is positioned correctly.
• Never turn the platen knob too fast—gears may be damaged.
PP-510, side view
Removing remaining paper
1. Press the
P. PARK
switch to back up the paper. Turn off the power.
Page 18

2 – 7
2. Unfasten screws A and push back B (for both right and left) shown below to remove the
printer cover.
3. Swing out the paper cover by 100° to 120° then lift it from the right-hand side to remove it
from the printer.
4. Referring to the figure above, lift the paper bail C. As shown in the figure which follows,
remove the roll paper stay D and then take out the roll paper.
Loading new roll paper
5. Insert the roll bar into the roll paper from the left side. Set the roll paper to the roll paper
cradle.
Paper
Paper
Cover
C
B
A
Screw
D
Roll Paper
Code No. :000-134-903
Type :A2 1PLY W
Type :T-214 white OKFIP
Code No. :000-119-433
Roll Paper
Cradle
Select
either.
(no carbon)
Roll Bar
Page 19

2 – 8
Platen
Paper Bail
Paper Release Lever
Platen
Knob
Paper Guide
Bar
Remarks on Replacement of Ribbon Cassette
Change the ribbon when print darkness is no longer suitable to your
needs.
The print head is hot after printing. Allow it cool before touching it.
Part Type Code No.
Ribbon Cassette SP-16051NB 000-133-029
Guide
Ring
Guide
Ring
6. Pull the paper bail forward. Manually feed the paper over the paper guide bar and under the
platen. Turn the platen knob clockwise to feed the paper so it reaches the paper guide bar.
7. Unlock the paper release lever to adjust the paper and then lock it.
8. Slide the left and right guide rings to position the paper straightly.
9. Replace the paper cover, the printer cover and roll paper stay.
Page 20

2
SSB Radiotelephone
SSB Radiotelephone
Part
Part
Page 21

Remarks on Communications
Observe the following guidelines for radio communications:
1. General rules
All stations are forbidden to carry out;
• unnecessary communications
• the transmission of profane language, and
• the transmission of signals without identification.
2. Avoid interference
All stations are forbidden to carry out;
• the transmission of superfluous signals and correspondence, and
• the transmission of false or misleading signals.
All stations shall radiate minimum power necessary to ensure a satisfactory communication.
3. Secrecy of communications
All administrations bind themselves to take the necessary measures to prohibit and prevent;
• the unauthorized interception of radio communications not intended for the general use of
the public, and
• the divulgence of the contents, simple disclosure of the existence, publication or any use
whatsoever, without authorization of information of any nature whatever obtained by the
interception of the radio communications.
4. Radio log book
Vessels complying with Part2 of the Merchant Shipping (Radio Installations) Regulations
1992, namely those vessels operating under GMDSS, have a requirement under regulation 17
(1) that a Radio Log of matters specified in Schedule 3 of the Regulations shall be maintained
and made available for inspection. The matters specified, to include the time of their occurrence, are:
a) a summary of communications relating to distress, urgency and safety traffic;
b) a record of important incidents connected with the radio service, and
c) where appropriate, the position of the ship at least once a day.
Part 2
Page 22

Part 2
For SSB Radiotelephone operation, refer to Operator's Manual for the SSB Radiotelephone
issued separately.
Page 23

3
MF/HF DSC Terminal
MF/HF DSC Terminal
Part
Part
Page 24
i
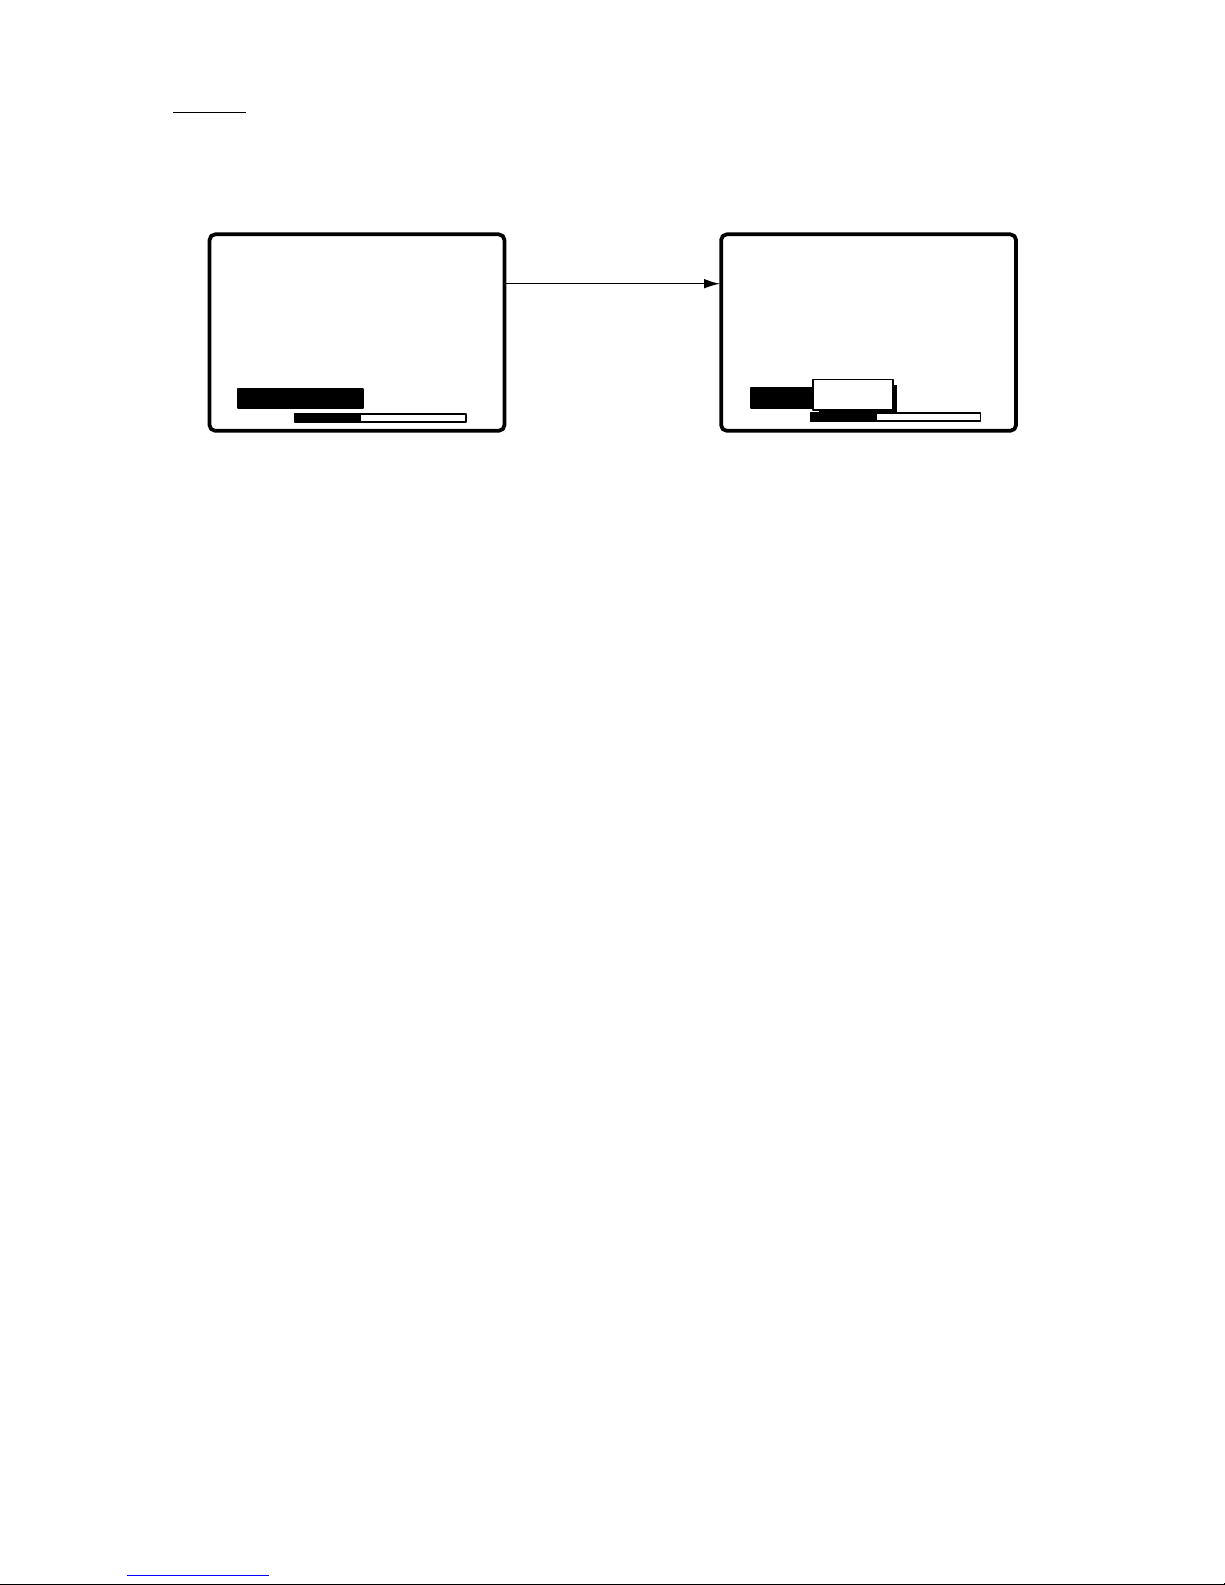
DISTRESS Call Procedure
Do the following when a life-endangering situation arises on your vessel:
1. Open the DISTRESS button cover and press the [DISTRESS] button more than three
seconds to show the following display, then release the [DISTRESS] button.
Distress
call in progress!
TIME TO GO : 38S
NATURE: UNDESIGNATED
POS:
12˚34N 123˚45E AT 12:34
TELEPHONE
2182.0 KHZ
DSC FREQ :
2187.5 KHZ
2. After the distress call is transmitted the following displays appear in order.
Wait for distress
acknowledgement.
TIME TO GO: 3M10S
NATURE: UNDESIGNATED
POS:
12˚34N 123˚45E AT 12:34
TELEPHONE
2182.0 KHZ
DSC FREQ :
2187.5 KHZ
SHIP IN DIST:
123456789
POS:
12˚34N 123˚45E AT 12:34
TELEPHONE
2182.0 KHZ
FROM COAST:
001234567
NATURE: UNDESIGNATED
Distress acknowledge
call received.
STOP ALARM
When distress call is acknowledged
by coast station (within 1 min to 2 min.
45 sec).
3. The audio alarm sounds; press the [CANCEL] key to silence the alarm.
4. Communicate with the coast station via radiotelephone as follows:
a) Say MAYDAY three times.
b) Say “This is … “ name of your vessel and your call sign three
times.
c) Give nature of distress and assistance needed.
d) Give description of your vessel (type, number of persons onboard, etc.) and any other
information which may aid in rescue.
For detailed information see page 3-1.
Page 25

iii
TABLE OF CONTENTS
FOREWORD .................................................................................................................vi
1. DSC SYSTEM OVERVIEW...................................................................................1-1
1.1 What is DSC? .............................................................................................................................1-1
1.2 DSC Call..................................................................................................................................... 1-1
1.2.1 Distress alert call and reply ...............................................................................................1-3
1.2.2 Individual call .....................................................................................................................1-4
1.3 Audio Alarms ..............................................................................................................................1-4
1.4 Remote Control and Automatic Acknowledge............................................................................1-5
1.4.1 Remote control ..................................................................................................................1-5
1.4.2 Automatic acknowledge.....................................................................................................1-5
1.4.3 Both remote control and automatic acknowledge ON.......................................................1-5
1.5 Interpreting Call Displays............................................................................................................ 1-6
1.5.1 Receive calls......................................................................................................................1-6
1.5.2 Send calls ..........................................................................................................................1-8
1.6 Remote Control of SSB Radiotelephone....................................................................................1-9
2. OPERATIONAL OVERVIEW.................................................................................2-1
2.1 Controls, LED Description ..........................................................................................................2-1
2.2 Turning the Power On/Off ...........................................................................................................2-3
2.3 DSC Standby Screen, Radiotelephone Setting Screen and Their Indications...........................2-3
2.3.1 DSC standby screen.......................................................................................................... 2-3
2.3.2 Radiotelephone setting screen .......................................................................................... 2-3
2.4 Panel Backlighting, LCD Contrast and Brightness .....................................................................2-4
2.5 Loudspeaker, Buzzer On/Off ......................................................................................................2-5
2.6 Starting, Stopping Scanning DSC Routine Frequencies ............................................................2-6
2.7 Automatic Acknowledge On/Off..................................................................................................2-7
2.8 Intercom On/Off ..........................................................................................................................2-8
2.9 Selection of On-screen Items .....................................................................................................2-9
2.10 Manual Entry of Position and Time .........................................................................................2-10
2.11 Remote Control of FURUNO SSB Radiotelephone ................................................................2-12
3. DISTRESS OPERATIONS....................................................................................3-1
3.1 Sending Distress Alert ................................................................................................................3-1
3.1.1 Sending distress alert by DISTRESS button .....................................................................3-1
3.1.2 Sending distress alert with nature of distress specified..................................................... 3-3
3.2 Receiving a Distress Alert........................................................................................................... 3-7
3.2.1 Distress alert received on MF band...................................................................................3-7
3.2.2 Distress alert received on HF band ...................................................................................3-8
3.3 Sending Distress Relay on Behalf of a Ship in Distress........................................................... 3-13
3.3.1 Sending distress relay to coast station ............................................................................3-13
3.3.2 Sending distress relay to all ships ...................................................................................3-16
3.4 Receiving Distress Relay All Ships from Ship ..........................................................................3-19
3.5 Receiving Distress Relay from Coast Station........................................................................... 3-19
Page 26

iv
4. CALLING ............................................................................................................. 4-1
4.1 All Ships Call ...............................................................................................................................4-1
4.1.1 Sending all ships call .........................................................................................................4-1
4.1.2 Receiving all ships call.......................................................................................................4-3
4.2 Individual Call..............................................................................................................................4-4
4.2.1 Sending individual call........................................................................................................4-4
How to set working frequency............................................................................................4-6
How to set DSC frequency.................................................................................................4-8
4.2.2 Receiving individual call...................................................................................................4-12
4.3 Group Call .................................................................................................................................4-17
4.3.1 Sending a group call ........................................................................................................4-17
4.3.2 Receiving a group call......................................................................................................4-19
4.4 Geographical Area Call .............................................................................................................4-20
4.4.1 Sending a geographical area call.....................................................................................4-20
4.4.2 Receiving a geographical area call ..................................................................................4-23
4.5 Neutral Craft Call.......................................................................................................................4-24
4.5.1 Sending a neutral craft call ..............................................................................................4-24
4.5.2 Receiving a neutral craft call............................................................................................4-25
4.6 Medical Transport Call ..............................................................................................................4-26
4.6.1 Sending a medical transport call......................................................................................4-26
4.6.2 Receiving a medical transport call ...................................................................................4-27
4.7 Polling Call ................................................................................................................................4-28
4.7.1 Sending a polling call .......................................................................................................4-28
4.7.2 Receiving a polling call ....................................................................................................4-31
4.8 Position Call ..............................................................................................................................4-33
4.8.1 Position call: requesting other ship’s position ..................................................................4-34
4.8.2 Position call: other ship requests your position................................................................4-36
4.9 PSTN Call .................................................................................................................................4-39
4.9.1 Sending PSTN call, receiving acknowledge back (ACK BQ) ..............................................4-39
4.9.2 Sending PSTN call, receiving acknowledge back (QUEUE indication),
ring back...........................................................................................................................4-43
4.9.3 Receiving PSTN call, sending acknowledge back (ACK BQ)..........................................4-47
4.9.4 PSTN call disconnection, receiving charge information
(ship disconnects line) .....................................................................................................4-48
4.9.5 PSTN call disconnection, receiving charge information
(coast station disconnects line) ........................................................................................4-50
5. LOG FILE............................................................................................................. 5-1
5.1 Log File Description ....................................................................................................................5-1
5.2 Opening a Log File......................................................................................................................5-1
5.2.1 Distress log ........................................................................................................................5-1
5.2.2 Ordinary log........................................................................................................................5-3
5.2.3 Transmitted log ..................................................................................................................5-4
6. PREPARING SEND MESSAGES........................................................................ 6-1
6.1 Preparing Individual Call Messages............................................................................................6-1
6.2 Preparing Group Call Messages .................................................................................................6-4
6.3 Preparing Geographical Area Call Messages.............................................................................6-5
6.4 Preparing PSTN Call Messages .................................................................................................6-7
6.5 Preparing Test Call Messages ....................................................................................................6-8
Page 27

v
6.6 Sending Prepared Messages .....................................................................................................6-9
6.7 Printing List of Send Message Files .........................................................................................6-10
7. SETUP MENU.......................................................................................................7-1
7.1 Setup Menu Overview ................................................................................................................7-1
7.2 Alarm Menu ................................................................................................................................7-2
7.3 Auto Ack Menu ...........................................................................................................................7-3
7.4 Erase File Menu..........................................................................................................................7-5
7.5 Message Menu ...........................................................................................................................7-5
7.6 Position Menu............................................................................................................................. 7-6
7.7 Print Out Menu............................................................................................................................ 7-6
7.7.1 Sample printouts................................................................................................................ 7-7
7.8 Scan Freq Menu .........................................................................................................................7-8
7.8.1 Distress frequencies ..........................................................................................................7-8
7.8.2 Routine frequencies........................................................................................................... 7-9
7.9 User CH Menu.......................................................................................................................... 7-10
7.10 Volume Menu........................................................................................................................7-12
7.11 Test Menu .............................................................................................................................7-13
7.12 System Menu........................................................................................................................ 7-13
8. CHECKING, MAINTENANCE...............................................................................8-1
8.1 Daily Test ....................................................................................................................................8-1
8.2 Maintenance ............................................................................................................................... 8-2
8.2.1 Preventive maintenance ....................................................................................................8-2
8.2.2 Cleaning.............................................................................................................................8-2
8.3 Simple Troubleshooting ..............................................................................................................8-3
8.4 Error Messages .......................................................................................................................... 8-3
8.5 Test Call...................................................................................................................................... 8-4
APPENDIX ................................................................................................................. A-1
Menu Tree.........................................................................................................................................A-1
DSC Frequency Table.......................................................................................................................A-2
DSC Regulations
Page 28

vi
FOREWORD
Thank you for purchasing this DSC/Watch Receiver. We are confident you will discover why
FURUNO has become synonymous with quality and reliability.
Dedicated in the design and manufacture of marine electronics equipment for half a century,
FURUNO Electric Company has gained an unrivaled reputation as a world leader in the industry.
This is the result of our technical excellence as well as our worldwide distribution and service
network.
Please carefully read and follow the safety information and operating and maintenance
instructions set forth in this manual before attempting to operate the equipment and conduct any
maintenance. Your DSC/Watch Receiver will perform to the utmost of its ability only if it is
operated and maintained in accordance with the correct procedures.
Features
Connected to an SSB radiotelephone, the DSC-60 generates and receives digital selective calls
for quick and efficient establishment of distress, urgency, safety and routine communications
with other ships and coast stations that install any MF/HF DSC facilities. Data is displayed on a
large, easy-to-read backlit LCD. Operation is simplified by the use of few keys and
easy-to-follow menus.
The main features are
•
DSC Terminal, DSC Watch Receiver, DSC General Watch Receiver (option) and MF/HF
Radiotelephone Remote Station all contained in a compact and light-weight cabinet.
•
Fully meets GMDSS carriage requirements. Large LCD of 160-character indication.
•
Conforms to the following standards and regulations:
IMO A. 694(17)
IMO A. 806(19)
IMO A. 813(19)
IMO MSC 68(68)
IEC-61097-3/8/9
IEC-60945 (3
rd
edition)
IEC-61162-1
ETS-300/338
ITU-R M.493-9, M.541-8, M.1082-1
•
Scan watch feature scans operator-programmed DSC frequencies.
•
Remote operation optionally available.
•
Automatic position and time input and update with connection of EPFS (Electronic
Position-Fixing Equipment).
•
Optional printer can automatically print out received messages and test results.
•
Log stores 50 each of latest ordinary, distress and transmitted messages, in separate
memory blocks.
Page 29

vii
•
Built-in intercom function provides voice communications between the DSC-60 and SSB
radiotelephone.
•
Optional built-in receiver board for DSC ship's business/routine frequencies.
•
One-touch testing facility.
Program number
MAIN CPU 0550201002
MODEM 0550202001
Page 30
1-1
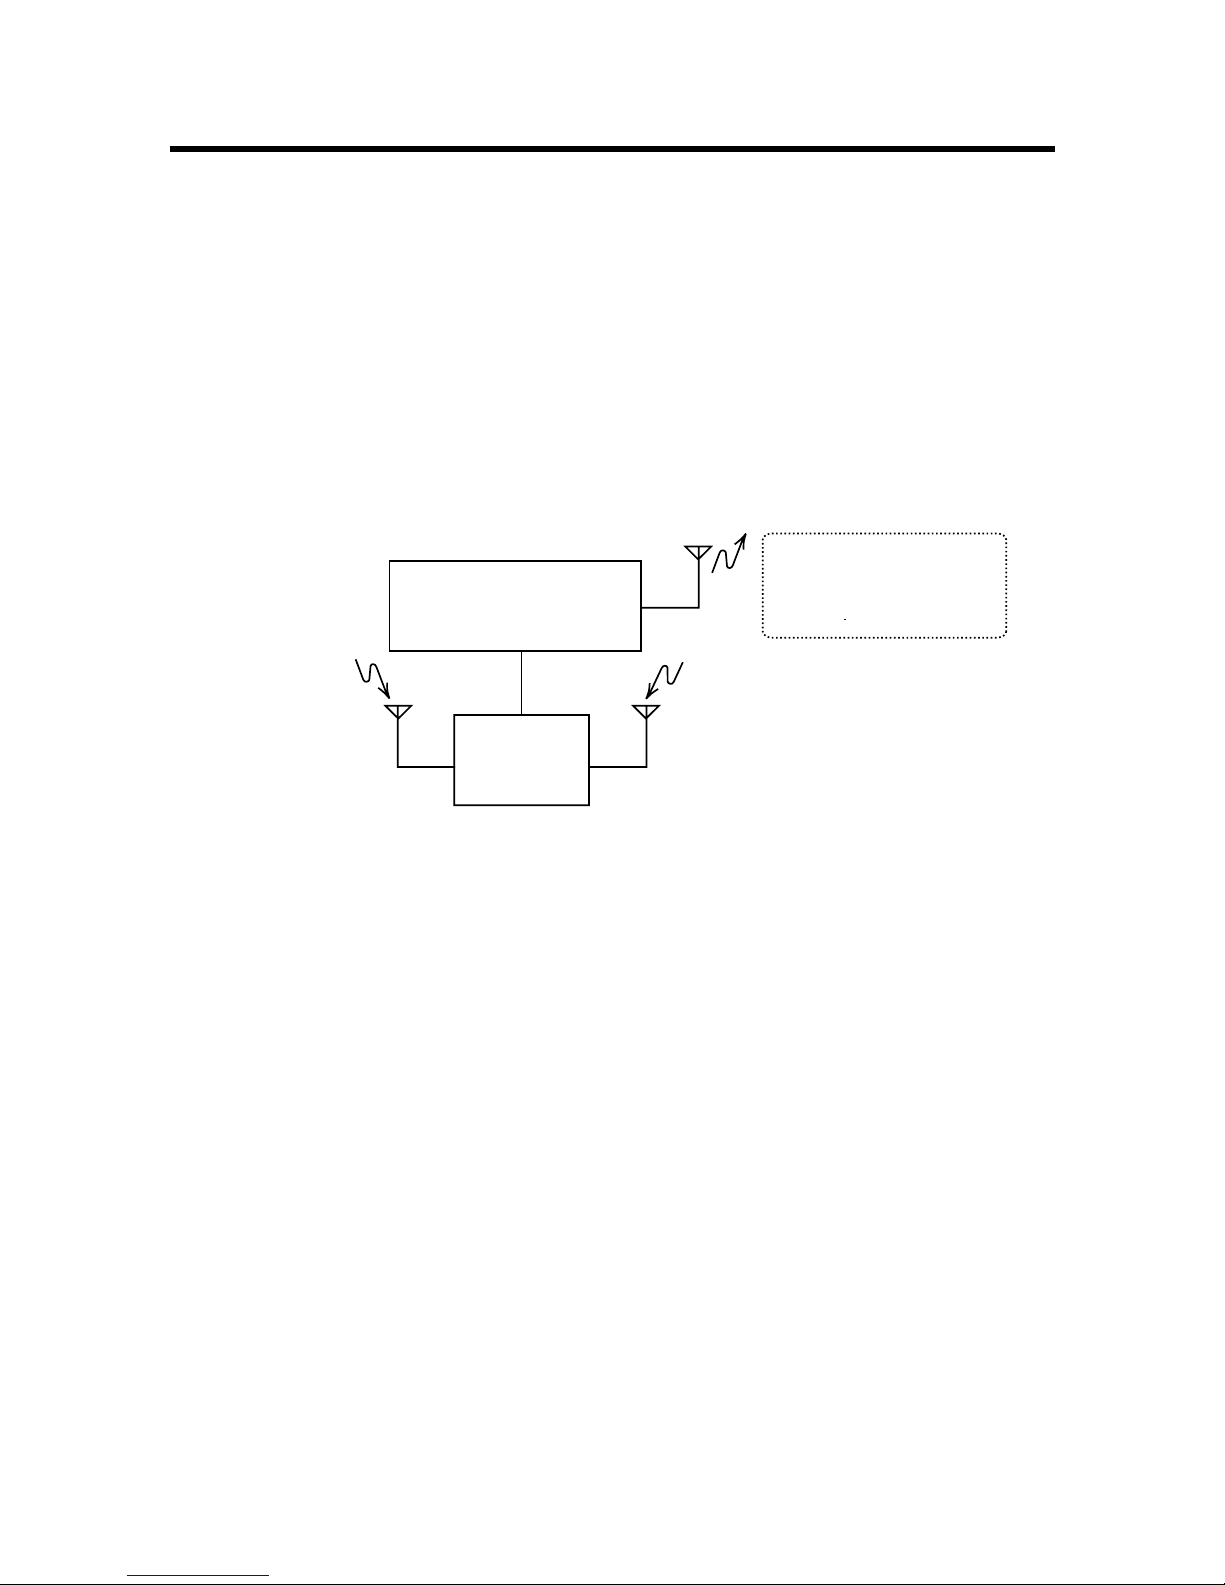
1. DSC SYSTEM OVERVIEW
1.1 What is DSC?
DSC is an acronym meaning Digital Selective Calling. It is a digital distress and general calling
system in the MF, HF and VHF bands used by ships for transmitting distress alerts and general
calls and by coast stations for transmitting the associated acknowledgements.
For DSC distress and safety calling in the MF and HF bands the frequencies are (kHz) 2187.5,
4207.5, 6312.0, 8414.5, 12577.0, and 16804.5.
The DSC-60 is a combination MF/HF DSC Terminal and Watch Receiver. Connected to an SSB
radiotelephone, the DSC-60 sends and receives calls via the SSB radiotelephone. The built-in
remote control permits control of a FURUNO radiotelephone from the DSC-60.
SSB RADIOTELEPHONE
FS-1562/5000/8000
DSC-60
DSC message, which contains
calling category, working frequency, etc, is sent on DSC
frequency
General DSC Call
Distress and Safety DSC Calls
Option
1.2 DSC Call
DSC calls are roughly divided in two categories: distress and safety calls, and routine calls.
Below are the types of DSC calls and the pages on which their descriptions and procedures
appear.
•
All Ships (page 4-1)
•
Distress (your ship is in distress) (page 3-1)
•
Distress relay all (all ships) (page 3-18)
•
Distress relay sel (coast station) (page 3-15)
•
Geographical Area (page 4-20)
•
Group (page 4-17)
•
Individual (page 4-4)
•
Medical Transport (page 4-26)
•
Neutral Craft (4-24)
•
Polling (page 4-28)
•
Position (page 4-33)
•
PSTN (page 4-39)
•
Test (page 8-4)
Page 31

1-2
Contents of a DSC call
• Calling category
Call category Call
Individual Individual, PSTN, Test, Position, Polling, Relay Sel (specific coast station)
All Ships All Ships, Neutral, Medical, Relay All
Group Group
Geographical Area Area
• Station ID
Own ship ID and sending station ID. Coast station ID begins with 00; Group ID begins with
0.
• Priority
Distress: Grave and imminent danger and request immediate assistance.
Safety: A station is about to transmit a message containing an important navigational or
meteorological warning.
Urgency: A calling station has a very urgent message to transmit concerning safety of
ship, aircraft or other vehicle or safety of person.
Business: Communication related to the navigation, movements and needs of ships and
aircraft.
Routine: General calling
• Communication type
Telephone: telephone (J3E) by SSB
NBDP-ARQ: Telex (J2B) mode ARQ via NBDP Terminal
NBDP-FEC: Telex (J2B) mode FEC via NBDP Terminal
• Communication frequency
Working frequency used to call by telephone or NBDP. The sending station may have the
receiving station (ship or coast station) assign the frequency to use.
• Position
Position can be automatically or manually input.
• DSC frequency
DSC frequency to use. If the order of communications priority is SAFETY, URGENCY and
DISTRESS, select a DSC distress frequency.
• End code
The end of a DSC message is denoted by ACK RQ (Acknowledge Request), ACK BQ
(Acknowledge Back) or EOS (End of Sequence).
Page 32

1-3
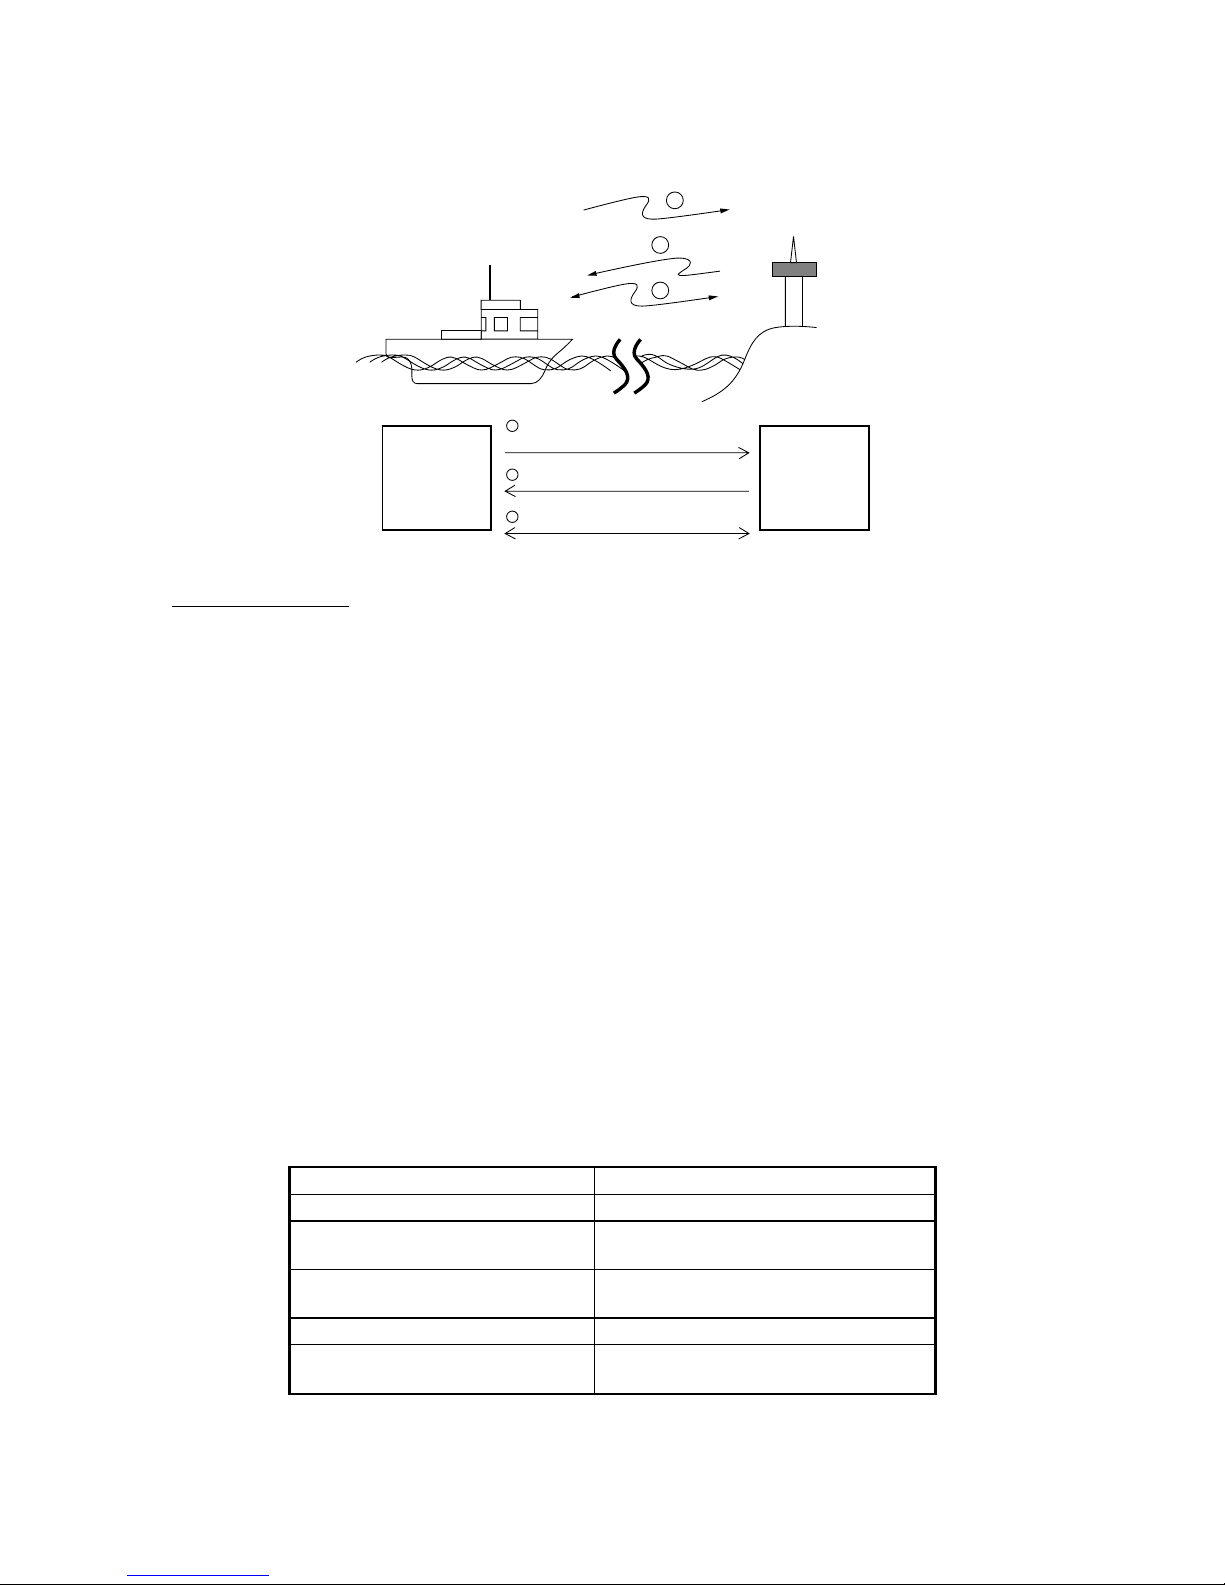
1.2.1 Distress alert call and reply
This type of call is sent by own ship in the event of distress, by pressing the [DISTRESS] button
more than three seconds as follows:
1. The LED in the button initially flashes, and lights when the button is pressed more than
three seconds. (If the button is pressed less than three seconds the distress alert is not sent.
Once the alert is sent it cannot be cancelled.)
WARNING
IN CASE OF ACCIDENTAL TRANSMISSION OF THE DISTRESS ALERT
If the distress is accidentally transmitted,
contact the nearest coast station and inform
them of the accidental transmission as
follows:
a) Ship's name
b) Ship's call sign and DSC number
c) Position at time of transmission
d) Time of transmission
2. The DSC-60 sets the DSC distress frequency on the SSB radiotelephone and it transmits
the distress alert.
3. After the distress alert is transmitted (about 40 seconds) the DSC-60 waits for the DIST
ACK call from a coast station. This usually takes less than 3 minutes and is accompanied
with an audio alarm. (If it is not received within 4.5 minutes the distress alert is
re-transmitted.)
4. The SSB sets the DSC distress frequency to use to communicate with the coast station.
With the optional handset you can communicate through the DSC-60.
Coast
Station
Own Ship
Ship in
Distress
(Own Ship)
Ship in distress sends Distress Alert
Coast station sends distress acknowledgement (DIST ACK).
Voice or telex communications between ship in distress and coast station
1
1
2
3
1
2
3
2
3
Page 33
1-4
1.2.2 Individual call
The individual call is for sending a call to a specific station.
Coast
Station
Own Ship
DSC Message [Called Acknowledge
Request (ACK RQ) Signal]
Acknowledge Back (ACK BQ) Signal
Voice or telex communication
3
2
1
1
2
3
Basic procedure
1. Prepare message and transmit it by pressing the [CALL] key. The DSC-60 then awaits
acknowledgement of the call.
2. Receive acknowledge back (ACK BQ) signal from receiving station (coast station or ship
station) within about five minutes. The audio alarm sounds at this time; press the [CANCEL]
key to silence it.
3. After receiving ACK BQ signal, communicate with coast station; the FURUNO SSB
radiotelephone sets the working frequency and class of emission specified by your ship.
1.3 Audio Alarms
When you receive a distress alert or routine call addressed to your ship the audio and visual
alarms are released. For the distress or urgent call, the audio alarm sounds until the [CANCEL]
key is pressed. For other calls, the audio alarm sounds for one second and then automatically
goes off.
The tone of the alarm depends on the call received. By becoming accustomed to the tone you
can know which type of call you have received.
Alarm Frequency (interval)
Safety message received 1300 Hz and 0 Hz (250 ms)
Routine, Ship's Business
message received
880 Hz and 440 Hz (500 ms)
While DISTRESS button is
pressed for three seconds
2200 Hz and 0 Hz (125 ms)
Distress alert is being sent 2200 Hz, continuous
Own ship position not updated 2200 Hz (50 ms), three beeps every
two seconds
Page 34

1-5
1.4 Remote Control and Automatic Acknowledge
1.4.1 Remote control
The DSC-60 and a FURUNO SSB radiotelephone communicate with each other by means of
the MIF (FURUNO Radio Interface) protocol, a unique handshaking type signal exchange
system developed by FURUNO. The DSC-60 can also communicate with other makes of
radiotelephones which incorporate data format IEC-61162-1. The remote control feature allows
the DSC-60 to automatically set the DSC and working frequencies and class of emission on a
FURUNO SSB radiotelephone.
1.4.2 Automatic acknowledge
The automatic acknowledge feature, when turned on, automatically transmits the acknowledge
back signal to the sender when an individual, position or polling call is received. With the
automatic acknowledge feature turned on the remote control is also turned on.
Automatic acknowledge is alternately enabled or disabled with the [5/ACK] key.
1.4.3 Both remote control and automatic acknowledge ON
The illustration and table below outline the sequence of events in an individual call when both
remote control and automatic acknowledge are turned on.
FS-1562*
DSC-60
FS-1562*
DSC-60
TX
ACK BQ
AUTO ACK (own ship)
AUTO ACK (other station)
* FURUNO SSB radiotelphone
1
2
21
DSC operation Radiotelephone frequency !!!! Radiotelephone frequency""""
1. DSC-60! [CALL] key
pressed.
DSC frequency changed; call
sent.
Scans DSC frequencies.
2. DSC-60" receives via
radiotelephone.
Sets DSC frequency received.
3. DSC-60" automatically
sends acknowledge back
(ACK BQ) signal.
DSC frequency set; ACK BQ
sent. Then, working frequency
and class of emission specified at
DSC-60! are set.
4. DSC-60! receives
acknowledge back signal
via radiotelephone.
Working frequency and class of
emission specified at DSC-60!
are set.
Both communication frequency and class of emission are already set on the FS-1562 ! and
FS-1562", so you may begin communications.
Page 35
1-6
1.5 Interpreting Call Displays
This paragraph provides the information necessary for interpreting receive and send calls.
1.5.1 Receive calls
Below are sample distress and individual receive calls. Content of other receive calls is similar
to that of the individual call.
Distress call
*
Received message
*
JUL-23-1999-23:59 ECC: OK
DISTRESS CALL
ANSWER
SHIP IN DIST:
123456789
NATURE: UNDESIGNATED
POS:
12˚34N 123˚45E AT 12:34
TELEPHONE
2182.0 KHZ
34
ALL VIEW
END OF SEQUENCE: EOS
ERROR-CHECK: OK
DSC FREQUENCY : 2187.5 KHZ
5
*
Received message
*
GO TO EASY VIEW
[ENT] to
switch.
5
or
6
to
switch.
FORMAT : DISTRESS
SELF-IDENTITY : 123456789
NATURE OF DISTRESS:
UNDESIGNATED DISTRESS
DISTRESS COORDINATES:
12˚34N 123˚45E AT 12:34
TELECOMMAND: J3E TELEPHONE
5
*
Received message
*
Date and time of message
ECC (Error Check Character): OK or NG (No Good)
Category (Distress call)
Ship in Distress (ID No. of ship in distress)
Nature of Distress (Undesignated, Fire, Flooding,
Collision, Grounding, Listing, Sinking, Disable,
Abandoning, Piracy, Man Overboard, EPIRB emission)
Position of ship in distress
Working frequency to use
End of sequence (EOS for distress)
Error check (OK or NG)
DSC frequency used to transmit distress call
Format (distress)
ID no. of ship in distress
Nature of distress (problem with ship in distress, see above)
Distress coordinates (position of ship in distress)
Telecommand (class of emission)
Page 36

1-7
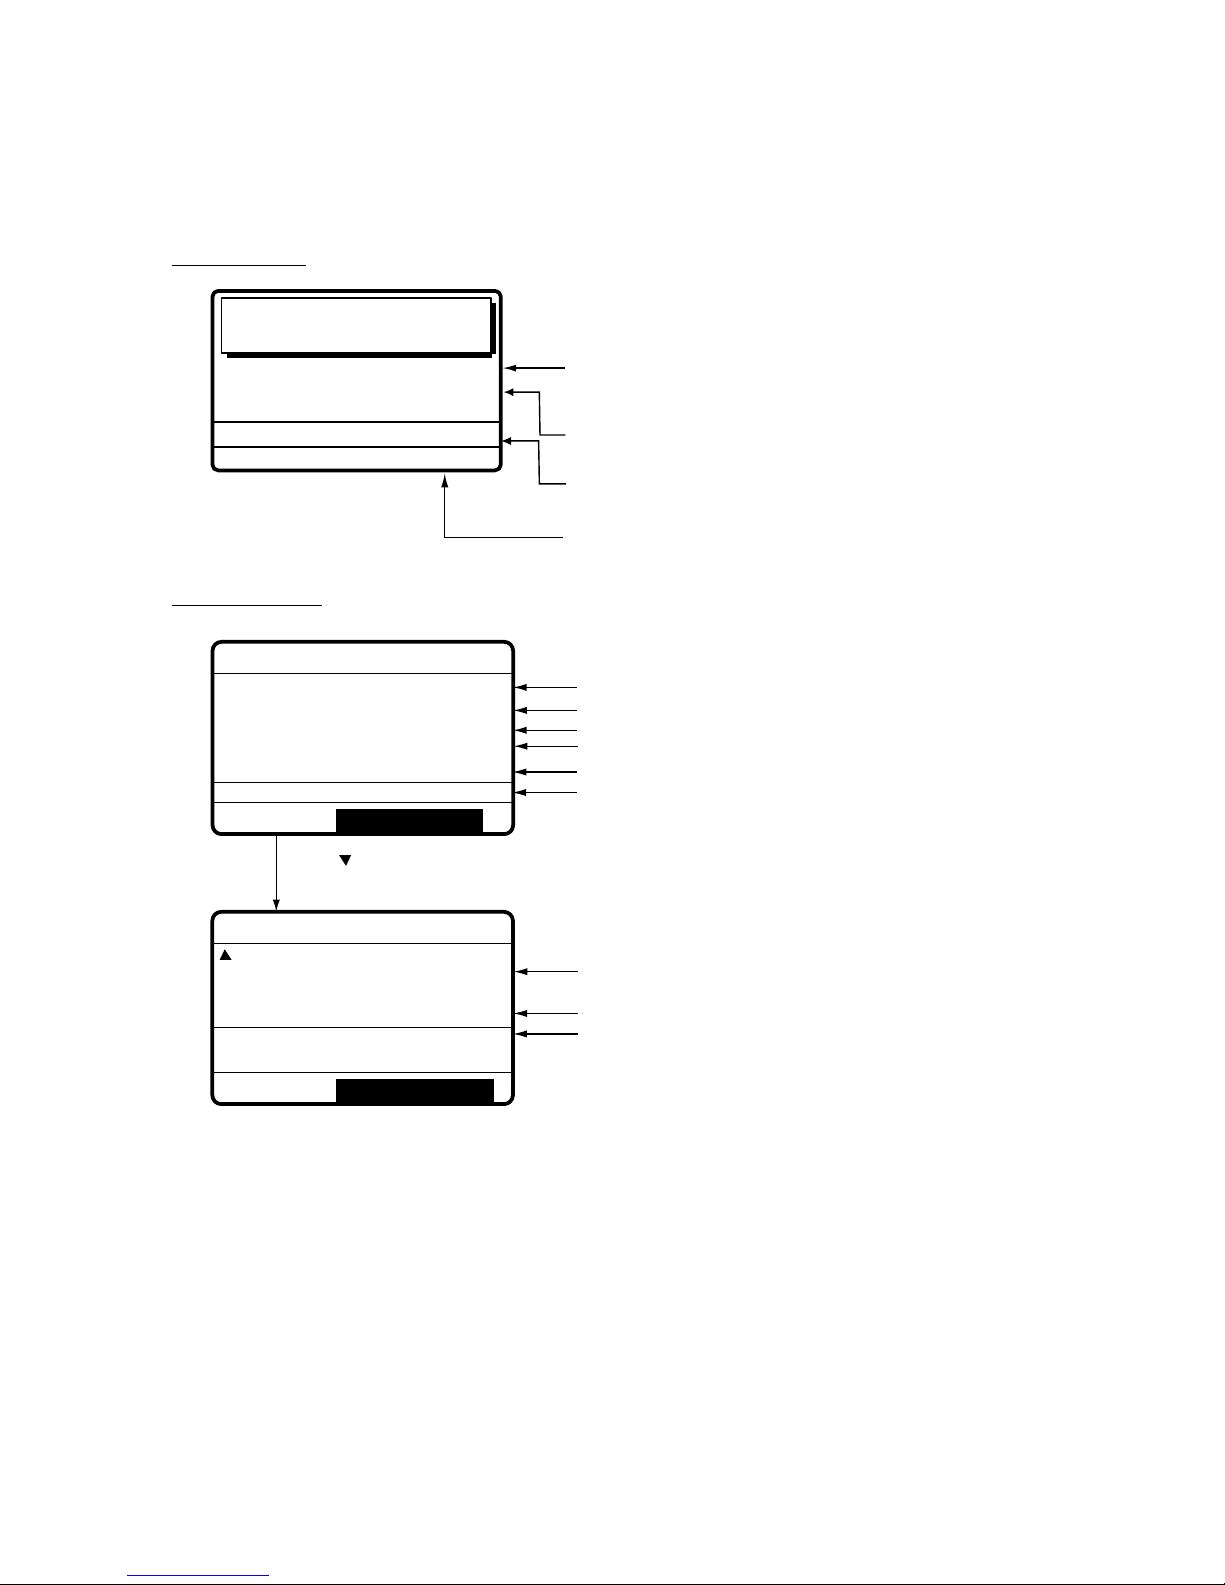
Individual call
FORMAT : INDIVIDUAL
ADDRESS : 987654321
CATEGORY : ROUTINE
SELF-IDENTITY : 123456789
1ST TELECOMMAND: J3E TELEPHONE
2ND TELECOMMAND : NO INFORMATION
*
Received message
*
*
Received message
*
JUL-23-1999-23:59 ECC: OK
INDIVIDUAL REQUEST
FROM SHIP:
123456789
ROUTINE
TELEPHONE 2182.0 KHZ
*
Received message
*
[ENT]
to switch.
or
to switch.
WORKING FREQUENCY : 2182 KHZ
END OF SEQUENCE: ACK. RQ
ERROR-CHECK: OK
DSC FREQUENCY TX: 2189.5 KHZ
RX: 2177.0 KHZ
GO TO EASY VIEW
Date and time of message
ECC (Error Check Character): OK or NG (No Good)
Able acknowledge ("Unable acknowledge" and reason if unable)
ID No. of sending station
Category (Routine, Business, Safety, Urgency)
Working frequency to use
End of sequence (ACK. BQ or ACK. RQ)
Error check (OK or NG)
DSC frequency used
Format (individual)
ID of your station
Category (Routine, Business, Safety, Urgency)
1st Telecommand (class of emission)
Working frequency to use
2nd Telecommand (class of emission)
ID of sending station
Note: ANSWER is for replying to message.
ANSWER3 4ALL VIEW
Page 37
1-8
1.5.2 Send calls
Below are sample distress and individual send calls. Content of other send calls is similar to that
of the individual call.
Distress call
Distress
call in progress!
TIME TO GO : 38S
NATURE: UNDESIGNATED
POS:
12˚34N 123˚45E AT 12:34
TELEPHONE
2182.0 KHZ
DSC FREQ :
2187.5 KHZ
Time remaining until transmission of distress call
is completed
Nature of Distress (Undesignated, Fire, Flooding,
Collision, Grounding, Listing, Sinking, Disable,
Abandoning, Piracy, Man Overboard)
Position of ship in distress (your ship)
DSC frequency used to send distress call
Individual call
***
Send message
***
COM. FREQ : CH 1234
PRIORITY
: ROUTINE
COM. TYPE : TELEPHONE
CALL TYPE: INDIVIDUAL
STATION ID: 123456789
GO TO ALL VIEW
DSC FREQ : 2M-INTL
Press to select GO TO ALL VIEW
and press [ENT] key to view.
***
Send message
***
GO TO EASY VIEW
DSC FREQUENCY TX: 2189.5 KHZ
RX: 2177.0 KHZ
WORKING FREQ. : CH 1234
END OF SEQUENCE: ACK. RQ
ID of station where message is to be sent
Mode of communication (Telephone)
Working frequency
Call type (Individual)
Working frequency
Priority (Routine, Safety, Urgency, Business)
DSC frequency
End of sequence (Acknowledge request)
DSC frequency used
Page 38

1-9
1.6 Remote Control of SSB Radiotelephone
SSB output power at transmission of distress alert
When the [DISTRESS] button is pressed, the output power of the FURUNO SSB
radiotelephone is automatically set to maximum, even if it is set for minimum.
Keyboard lock at the SSB radiotelephone
The keyboard of the FURUNO SSB radiotelephone is automatically locked while a DSC
message is being transmitted.
•
Distress alert or distress relay transmitted (transmission time about 40 seconds)
The keyboard is locked until the transmission of the distress alert or distress relay is
completed.
•
Call other than distress is transmitted (transmission time about 8 seconds)
Press the [CANCEL] key to unlock the keyboard.
Page 39

2-1
2. OPERATIONAL OVERVIEW
2.1 Controls, LED Description
DISTRESS
CANCEL
CALL
ALARM
RT
2182
1
DSC
ABC
2
ACK
JKL
5
LOG
0
TEST
DEF
3
ENT
SCAN
MNO
6
PRINT
TUV
8
SETUP
#
FILE
*
IntCom
GHI
4
PQRS
7
WXYZ
9
VOLUME
OVEN
POWER
LCD
DSC/WATCH RECEIVER DSC-60
Cursor Pad
Page 40
2-2
Control, LED description
Control Function
POWER switch Turns the power on/off.
DISTRESS button Press and hold down the button more than three seconds to transmit the distress
alert. When pressed it initially flashes, and lights up if the button is pressed more
than three seconds. It stays lit until your ship receives the distress acknowledge
message. The distress alert will not be transmitted if the button is pressed less
than three seconds.
CALL key Transmits calls other than distress.
Cursor Pad Selects items on menus; adjusts loudspeaker volume (64 levels) on the DSC
standby screen. (The distress and urgency alarms are received at maximum
volume regardless of current loudspeaker volume setting.)
ENT key Registers key input.
CANCEL key
•
Cancels wrong data.
•
Restores previous menu.
•
Returns to DSC standby screen from other screen.
•
Silences audio alarm (distress or routine).
•
Cancels transmission, printing.
•
Erases error message.
1/ RT/2182 key
•
Switches from the DSC standby screen to the radiotelephone setting screen.
•
Switches to 2182.0 kHz/J3E on radiotelephone setting screen by pressing more
than two seconds.
2/DSC key Switches from the radiotelephone setting screen to the DSC standby screen.
3/TEST key Executes daily test.
4/IntCom key Turns intercom with radiotelephone on/off, from the radiotelephone setting screen.
5/ACK key Switches automatic and manual acknowledge alternately at the DSC standby
screen.
6/SCAN key Starts/stops scanning of DSC routine frequencies at the DSC standby screen.
7/ key
•
Turns loudspeaker on/off.
•
Silences buzzer.
Note that this key does not silence the distress or urgency alarm.
8/PRINT key Prints communications log files, current screen (except DSC standby screen and
radiotelephone setting screen) and test results.
9/ key
Adjusts keyboard/LCD backlighting and LCD contrast.
*/FILE key
•
Opens the send message file from the DSC standby screen, to send stored
message.
•
Selects station or coast ID when preparing an individual message.
0/LOG key Opens the Tx/Rx log file from the DSC standby screen.
#/SETUP key Opens the Setup menu from the DSC standby screen.
ALARM lamp
•
Flashes in red for distress or urgency call.
•
Flashes in green (more rapidly) for safety or routine call.
OVEN lamp Lights (in green) when oven power is on.
Page 41

2-3
2.2 Turning the Power On/Off
Press the [POWER] switch at the right-hand side of the equipment to turn the power on or off.
Whenever the power is applied the DSC standby screen appears.
2.3 DSC Standby Screen, Radiotelephone Setting
Screen and Their Indications
2.3.1 DSC standby screen
The DSC standby screen appears by pressing the [2/DSC] key. This is where you begin all
calling operations.
WATCH KEEPING
2187.5
4207.5
6312.0
16804.5 12577.0
DISTRESS
ROUTINE
2177.0
4219.5
6331.0
16903.0 12657.0
VOLUME
32
AUTO ACK
AUTO ACK (Automatic Acknowledge) or
MAN ACK (Manual Acknowledge)
DSC Distress/Safety Frequencies
(Frequencies scanned in clockwise
direction, and frequency currently
being scanned is highlighted. One
cycle is completed in less than two
seconds.)
Current Position, Time
"M" appears when ship's
position is input manually.
Loudspeaker Volume Setting
(By graphic and figure)
DSC Routine Frequencies
(Frequencies scanned in
clockwise direction, and
frequency currently being
scanned is highlighted.)
8414.5
8436.5
35˚00.000N 135˚00.000E 23:59 M
DSC standby screen
2.3.2 Radiotelephone setting screen
The radiotelephone setting screen appears by pressing the [1/ RT/2182] key. This is where you
set up the radiotelephone.
MODE: TELEPHONE
CH: 12034
VOLUME 32
Tx: 12329.0
KHZ
Rx: 13176.00
KHZ
POWER: HIGH
TUNE
Communications Mode
Channel in Use
Tx Frequency
Rx Frequency
Tx Power
Tuning Status (OK or NG
(No Good) appears
after tuning)
Loudspeaker Volume
Setting
MODE: TELEPHONE
Radiotelephone setting screen
Note:
“Tx” pops out when the radiotelphone is transmitting.
Page 42
2-4
2.4 Panel Backlighting, LCD Contrast and
Brightness
1. At the DSC standby screen or radiotelephone setting screen, press the [9/ ] key. The
following display appears.
EXIT:[ENT]
8
29
DIMMER (1~8)
CONTRAST (0~63)
2. Use to increase the panel backlighting, LCD brightness; to lower it. Current
backlighting setting is shown in both digital and analog indications below DIMMER.
3. Use to lower the LCD contrast; to raise it. Current contrast setting is shown in both
digital and analog indications below CONTRAST.
4. Press the [ENT] key to finish and return to the screen previously in use.
Page 43

2-5
2.5 Loudspeaker, Buzzer On/Off
1. Display the DSC standby screen or radiotelephone setting screen.
2. P ress the [7/
] key to turn the loudspeaker and the alarm generated for ordinary messages
(others than distress and urgency) on/off. The message SOUND: ON or SOUND: OFF
appears with each pressing of the key. The indication OFF appears at the lower-right side of
the DSC standby and radiotelephone setting screens when the loudspeaker is turned off.
WATCH KEEPING
VOLUME
32
CH:12034
MODE : TELEPHONE
TX
TUNE
POWER
RX
: 12 329.0
KHZ
: 13 176.00
KHZ
: HIGH
SOUND : OFF
SOUND : ON
WATCH KEEPING
VOLUME
CH:12034
MODE : TELEPHONE
TX
TUNE
POWER
RX
: 12 329.0
KHZ
: 13 176.00
KHZ
: HIGH
OFF
Speaker OFF
WATCH KEEPING
VOLUME
32
CH:12034
MODE : TELEPHONE
TX
TUNE
POWER
RX
: 12 329.0
KHZ
: 13 176.00
KHZ
: HIGH
About two seconds later
Press [7/ ].
About two seconds later
Press [7/ ].
Speaker ON
3. When the loudspeaker is on, press to lower the vo lume; to raise it. The settin g r a ng e i s
0 to 63 . Current volume se tting is s h own by bot h bar graph and numeric at the bo ttom of th e
display.
Note: T he volume setting is set to 5 and the loudspeaker is ON whenever the unit is powered on.
Page 44

2-6
2.6 Starting, Stopping Scanning DSC Routine
Frequencies
Press the [6/SCAN] key at the DSC standby screen to start or stop scanning DSC routine
frequencies. The DSC routine frequencies to scan can be selected through the menu. Note that
scanning of DSC distress frequencies cannot be stopped.
35˚00.000N 135˚00.000E 23:59
WATCH KEEPING
2187.5
4207.5
6312.0
8414.512577.0
DISTRESS
ROUTINE
2177.0
4219.5
6331.0
8436.512657.0
VOLUME
32
AUTO ACK
DSC routine frequency
currently being
scanned is highlighted.
16804.5
16903.0
DSC distress frequency
currently being
scanned is highlighted.
Note:
DSC routine frequencies may not be received when optional receiver board (for receiving
DSC routine frequencies) is installed and you receive a distress signal when you are close to the
sender of the frequency.
Page 45
2-7
2.7 Automatic Acknowledge On/Off
The automatic acknowledge feature, when turned on, automatically transmits the acknowledge
back (ACK BQ) signal to the sender when an individual, position, or polling call is received. (For
position and polling calls, respective item on the AUTO ACK menu must be turned on to enable
automatic acknowledge.) It can be turned on or off at the DSC standby screen by pressing the
[5/ACK] key. The message AUTO ACK or MANUAL ACK appears at the top-right corner of the
DSC standby screen with each press of the key.
ACK : AUTO
35˚00.000N 135˚00.000E 23:59
WATCH KEEPING
2187.5
4207.5
6312.0
8414.516804.5 12577.0
DISTRESS
ROUTINE
2177.0
4219.5
6331.0
8436.516903.0 12657.0
VOLUME
32
MANUAL ACK
Press [ACK].
About two seconds later
35˚00.000N 135˚00.000E 23:59
WATCH KEEPING
2187.5
4207.5
6312.0
14.516804
DISTRESS
ROUTIN
2177.0
4219.5
6331.0
8436.516903.0 12657.0
VOLUME
32
AUTO ACK
ACK : MANUAL
35˚00.000N 135˚00.000E 23:59
WATCH KEEPING
2187.5
4207.5
6312.0
8414.512577.0
DISTRESS
ROUTINE
2177.0
4219.5
6331.0
8436.512657.0
VOLUME
32
AUTO ACK
16804.5
16903.0
Automatic
Acknowledge
Manual
Acknowledge
Press [ACK].
About two seconds later
Note 1: To give communications priority to own ship’s communications while own ship is
communicating, select MANUAL ACK.
Note 2: Automatic acknowledge is not possible under the following conditions:
Priority: Distress, Urgency or Safety
Com Type: Morse, Fax, Data, No Info
Com Freq: No Info
Off Hook
Page 46

2-8
2.8 Intercom On/Off
The built-in intercom permits voice communications between the DSC-60 and the SSB
radiotelephone to which it is connected.
1. Display the radiotelephone setting screen.
2. Off hook the handset.
3. Press the [4/IntCom] key. You can begin communications with the SSB radiotelephone.
MODE: TELEPHONE
CH: 12034
VOLUME 32
Tx: 12329.0
KHZ
Rx: 13176.00
KHZ
POWER: HIGH
TUNE
MODE: TELEPHONE
CH: 12034
VOLUME 32
Tx: 12329.0
KHZ
Rx: 13176.00
KHZ
POWER: HIGH
TUNE
INTERCOM Off INTERCOM On
MODE: TELEPHONE
MODE: TELEPHONE
INTERCOM
Press [4] key.
4. Hang up the handset when finished with communications to turn the intercom off. The
indication INTERCOM disappears from the radiotelephone setting screen when the intercom
is turned off.
Note:
If you are called from other onboard SSB radiotelephone, a beep sounds. Off hook the
handset and begin communications.
Page 47
2-9
2.9 Selection of On-screen Items
Menu and calling operations are executed by selecting on-screen items. The example below
shows how to select items and options from the Alarm menu.
1. Press the [#/SETUP] key to display the Setup menu.
****
Setup menu
****
SCAN FREQ
USER CH
VOLUME
TEST
SYSTEM
ALARM
AUTO ACK
ERASE
MESSAGE
POSITION
PRINT OUT
2. Use the Cursor Pad to select a menu and then press the [ENT] key. For example, select the
ALARM menu.
****
Alarm setup
***
RCVD CALL
OLD POSITION
POSITION OLDER
EXT ALARM: DSTRS/URG
: ON
: ON
: 4.0 H
INTERNAL AUDIO ALARM
3. Use or to select menu item desired and press the [ENT] key. For example, select
RCVD CALL. The following window appears, superimposed on the main window.
****
Alarm setup
***
RCVD CALL
OLD POSITION
POSITION OLDER
EXT ALARM : DSTRS/URG
: ON
: ON
: 4.0 H
INTERNAL AUDIO ALARM
ON
N
OFF
4. Use or to select option.
5. Press the [ENT] key to register your selection and the [CANCEL] key twice to return to the
DSC standby screen.
Page 48

2-10
2.10 Manual Entry of Position and Time
If there is no EPFS (Electronic Position-Fixing System) connected to the DSC-60 or the EPFS
connected is inoperative, manually enter position and time as follows:
1. At the DSC standby screen, press the [#/SETUP] key to display the Setup menu.
****
Setup menu
****
SCAN FREQ
USER CH
VOLUME
TEST
SYSTEM
ALARM
AUTO ACK
ERASE
MESSAGE
POSITION
PRINT OUT
2. Select POSITION and press the [ENT] key to display the Position menu.
** Position setup
**
INPUT TYPE: AUTO
LAT : 34˚ 41 NORTH
LON : 135˚ 30 EAST
TIME: 09: 00 UTC
3. Press the [ENT] key to open the INPUT TYPE menu.
** Position setup
**
INPUT TYPE: AUTO
LAT : 34˚ 41 NORTH
LON : 135˚ 30 EAST
TIME: 09: 00 UTC
AUTO
N
MANUAL
Note 1:
If, when AUTO is selected, input from the navigator is interrupted the message
“EPFS error!” appears. If this occurs check the navigator.
Note 2:
If, when MANUAL is selected, the message “Warning: Update position” appears at
set intervals to ask you to update position. For further details see page 7-2.
4. Press to select MANUAL and press the [ENT] key.
5. Press the [ENT] key to open the latitude entry window.
** Position setup
**
INPUT TYPE: MANUAL
34˚ 41
LON : 135˚ 30 EAST
TIME: 09: 00 UTC
Note: Use 6 to switch from
North to South and vice versa.
LAT : 34˚ 41 NORTH
12
34 ˚ 41 N
Page 49

2-11
6. Enter latitude in four digits and press the [ENT] key.
7. Press the [ENT] key to open the longitude entry window.
** Position setup
**
INPUT TYPE: MANUAL
LAT: 34˚ 41 NORTH
LON : 135˚ 30 EAST
TIME: 09: 00 UTC
Note: Use 6 to switch from
East to West and vice versa.
LAT : 34˚ 41 NORTH
LON : 135˚ 30 EAST
135˚00 E
8. Enter longitude in five digits and press the [ENT] key.
9. Press the [ENT] key to open the time entry window.
** Position setup
**
INPUT TYPE: MANUAL
LAT : 34˚ 41 NORTH
LON : 135˚ 30 EAST
TIME : 09: 00 UTC
LAT : 34˚ 41 NORTH
LON : 135˚ 30 EAST
TIME: 09: 00 UTC
12 : 34
10. Enter UTC time and press the [ENT] key. The Setup menu appears.
Page 50

2-12
2.11 Remote Control of FURUNO SSB
Radiotelephone
A FURUNO SSB radiotelephone can be controlled from the radiotelephone setting screen, which
may be displayed by pressing the [1/ RT/2182] key. You can enter desired frequency by
desi gnating channel as be low or ent ering Tx and Rx freque ncies as on the next page. The
handset may be ON HOOK or OFF HOOK.
Note1: To set the SSB radiotelephone to 2182 kHz/J3E, press the [1/ RT/2182] key more than 2
sec.
Note2: In RT screen, “INCOMING” appears at lower left-hand side of the RT screen when the
DSC message is received.
Mode selection
1. Press the [1/ RT/2182] key to display the radiotelephone setting screen.
2. Select the MODE field with the Cursor Pad and press the [ENT] key.
3. Select mode desired and press the [ENT] key.
TELEPHONE:Telephone
NBDP/DSC: NBDP Terminal, DSC Terminal
FAX: Facsimile
With MODE selected
press [ENT].
MODE: TELEPHONE
CH: 12034
VOLUME 32
Tx: 12329.0
KHZ
Rx: 13176.00
KHZ
POWER: HIGH
TUNE
MODE: TELEPHONE
CH: 12034
VOLUME 32
Tx: 12329.0
KHZ
Rx: 13176.00
KHZ
POWER: HIGH
TUNE
MODE: TELEPHONE
MODE: TELEPHONE
TELEPHONE
NBDP / DSC
FAX
Channel selection
Channel canno t be selected when the MODE is FAX.
1. Select the CH field and press the [ENT] key.
Select CH and
press [ENT].
TX:
-------
KHZ
RX:
---------
KHZ
POWER: HIGH
CH:12O34
MODE : TELEPHONE
VOLUME 24
TUNE
-----
-
Tx:
-------
KHZ
Rx:
---------
KHZ
POWER: HIGH
MODE : TELEPHONE
VOLUME 24
TUNE
CH: -----
2. Channel can be entered directly with the numeric keys, or with the cursor pad.
By numeric keys
Use the numeric keys to enter band and channel and then press the [ENT] key.
Page 51

2-13
By Cursor Pad
a) Press to shift the cursor to the band entry location.
b) Use or to set band. Band is displayed in the following sequence.
2 4 6 8 12 16 18 22 25 001 002----- 029
ITU band
User channel
c) Press.
d) Use or to set channel.
e) Press the [ENT] key. The Tx and Rx frequencies of the channel entered appear.
Setting Range
ITU Band: 2/4/6/8/12/16/18/24/25
User Band: 01-029
ITU Channel: XX001 - XX193
User Channel: XXX01 - XXX99
Tx/Rx frequency selection
Select the Tx or Rx field and press the [ENT] key. Enter desired frequency with the numeric keys.
Press the [ENT] key to finish.
Note
: If you enter the Tx frequency, the same frequency is entered to the Rx frequency.
Select Tx (or Rx)
and press [ENT].
POWER: HIGH
VOLUME
24
TUNE
Tx
:
12 329.0
KHZ
KHZ
POWER: HIGH
VOLUME
24
TUNE
Tx
Rx
:
12 329.0
KHZ
:
13 176.00
0. 00
KHZ
MODE: TELEPHONE
CH: 12034
MODE: TELEPHONE
CH: 12034
Rx
:
13 176.00
Power selection
Select the POWER field with the Cursor Pad and press the [ENT] key. Select power desired
among HIGH, MID and LOW with the Cursor Pad and press the [ENT] key.
Select POWER
and press [ENT].
POWER: HIGH
VOLUME 24
TUNE
: HIGH
POWER:
VOLUME 24
TUNE
: OK
:
Tx: 12329.0
KHZ
Rx: 13176.00
KHZ
Tx: 12329.0
KHZ
Rx: 13176.00
KHZ
MODE: TELEPHONE
CH: 12034
HIGH
MID
LOW
MODE: TELEPHONE
CH: 12034
Note:
Some FURUNO SSB radiotelephones do not provide the power selection HIGH, MID
or LOW.
Page 52
2-14
Tuning
Select the TUNE field with the Cursor Pad and press the [ENT] key. Tuning is automatically
executed, showing TUN ING while tuning. T h e resu l ts are show n as TUNE: O K or T U N E: NG (No
Good).
Select TUNE field
and press [ENT].
POWER: HIGH
VOLUME 24
TUNE
Tx: 12 329.0
KHZ
Rx: 13 176.00
KHZ
: NO TUN
POWER: HIGH
VOLUME
24
TUNE
TUNING
MODE: TELEPHONE
CH: 12304
Tx: 12 329.0
KHZ
Rx: 13 176.00
KHZ
MODE: TELEPHONE
CH: 12034
Note: When receivi ng di stress and sa fety calls with the radiotel e ph on e ON HOOK, spec ified
distress an d s a fety fr equency is selec te d automatically. When receivin g di s tr ess an d safety
call during with the radiotelephone OFF HOOK, only a corresponding message appears. To
answer the call, press the [5/ACK] key. To return to the radiotelephone setting screen, press
the [CANNEL] key.
Page 53

3-1
3. DISTRESS OPERATIONS
3.1 Sending Distress Alert
3.1.1 Sending distress alert by DISTRES S butt on
GMDSS ships carry a DSC terminal with which to transmit the distress alert in the event of a life
endangering situation onboard ship. A coast station receives the distress alert and sends the
distress alert acknowledge message to the ship in distress. Then, voice or telex communications
between the ship in distress and coast station begins, via the radiotelephone.
This equipment comes in two versions, International (default) and Russian, and the procedure
for sending the distress alert is different for each version.
Russian version
1) Alarm is released continuously after transmitting distress alert.
2) The [CANCEL] key can be used during the transmission of distress alert. The transmission
sequence is stopped at the end of the fifth transmission.
Transmission of the distress alert and receiving of distress alert acknowledgement are
completely automatic - simply press the [DISTRESS] button to initiate the sequence.
1. Open th e DISTRESS button c over and press and hold down the [DISTR ESS] button more
than three seconds. The button flashes in red and the buzzer sounds rapidly. The display
shows the contents of the distress alert call: your ship’s nature of distress and position, time,
and DSC freq ue ncy us ed to tr ans m it the alert.
The number of seconds t o c ontinue pressin g the [DISTRESS] button ap pe ar at the bo ttom of
the display. The buzzer sounds continuously and the lamp in the button lights when the
button has been pressed three seconds. You can release the button at that time.
KEEP PRESSED FOR 3S
NATURE: UNDESIGNATED
POS:
12˚34N 123˚45E AT 12:34
TELEPHONE
2182.0 KHZ
Distress button
pressed!
Displays number of seconds to continue
pressing the DISTRESS button to
transmit the distress alert.
DSC FREQ :
2187.5 KHZ
Nature of Distress
Position, Time
DSC Distress
Frequency used
to transmit the
distress alert
Page 54

3-2
2. T he display changes as below. It takes about 40 seconds to complete transmission of the
distress alert, and the number of seconds until transmission is completed is shown at the
bottom of the display.
At this time the output power of the radiotelephone is automatically set to maximum.
Distress
call in progress!
TIME TO GO : 38S
NATURE: UNDESIGNATED
POS:
12˚34N 123˚45E AT 12:34
TELEPHONE
2182.0 KHZ
DSC FREQ :
2187.5 KHZ
Time to go until distress
alert transmission is completed.
3. Af t er t he distress alert has been sent the display changes as below. This is where the
equipment waits to receive the distress acknowledge message from a coast station, which
usually takes about one minute to three minutes. (The [DISTRESS] button remains lit until
the DSC-60 receives the distress acknowledge message from a coast station.) The timer
counts down the number of minutes to wait, from 3.5 to 4.5 minutes, randomly set.
At this time the DSC-60 cannot receive any messages except the distress alert ac knowledge
message. Distress message is recorded in the Tx log.
Wait for distress
acknowledgement.
TIME TO GO: 3M10S
NATURE: UNDESIGNATED
POS:
12˚34N 123˚45E AT 12:34
TELEPHONE
2182.0 KHZ
DSC FREQ :
2187.5 KHZ
4. When the distress acknowledge call is received the audio alarm sounds and the display
changes as below.
SHIP IN DIST:
123456789
POS:
12˚34N 123˚45E AT 12:34
TELEPHONE
2182.0 KHZ
FROM COAST:
001234567
NATURE: UNDESIGNATED
Distress acknowledge
call received.
STOP ALARM
Note:
If you do not receive the distress alert acknowledge call, the DSC-60 re-transmits the
distress alert and then awaits the distress alert acknowledge call. This is repeated until the
distress alert is acknowledged.
Page 55

3-3
5. Silence t he alarm with the [CANCEL] or [ENT] key. The receive message appears as in the
figure below.
JUL-23-1999-23:59 ECC: OK
DISTRESS ACKNOWLEDGE
SHIP IN DIST:
123456789
POS:
12˚34N 123˚45E AT 12:34
TELEPHONE
2182.0 KHZ
FROM COAST:
001234567
NATURE: UNDESIGNATED
*
Received message
*
GO TO ALL VIEW
6. Communicate with the coast station via radiotelephone, which is automatically set to working
frequency and class of emission (telephone) specified in the distress acknowledge message.
a) Say MAYDAY three times.
b) Say “This is … “ name of your vessel a nd call sign three times.
c) Give nature of distress and assistance needed.
d) Give description of your vessel (ty pe, color, number of persons onboard, etc.).
3.1.2 Sending distress alert with nature of distress specified
If you have the time to designate the nature of distress, send the distress alert as follows:
1. O pen the DISTRESS button cover and press the [DISTRESS] button with a touch-andrelease action. The following display appears.
***
Send message
***
CALL TYPE
:Undesignated
POS.
COM.TYPE
DSC FREQ
: All ships
: 987654321
:
:
5
SINKING
DISABLE
ABANDONING
PIRACY
MAN OVERBOARD
NATURE
Use 6 to scroll
menu.
FIRE
FLOODING
COLLISION
GROUNDING
LISTING
6
UNDESIGNATED
2. Use !"or"# to select nature of distress and press the [ENT] key.
3. Press the [ENT] key to open the POS. menu. This is where you enter your position,
automatically or manually. If the positioning device is connected, INPUT TYPE is AUTO and
the position is correct, press the [ENT] key twice and go to step 12. Note that “INPUT TYPE:
MANUAL” appears when position is input manually.
** Position setup
**
INPUT TYPE: AUTO
LAT : 34˚ 41 NORTH
LON : 135˚ 30 EAST
TIME: 09: 00 UTC
Note:
If the message “NO POSITION DATA” appears when you change INPUT TYPE from
MANUAL to AUTO, confirm the navigation device and select AUTO again.
Page 56
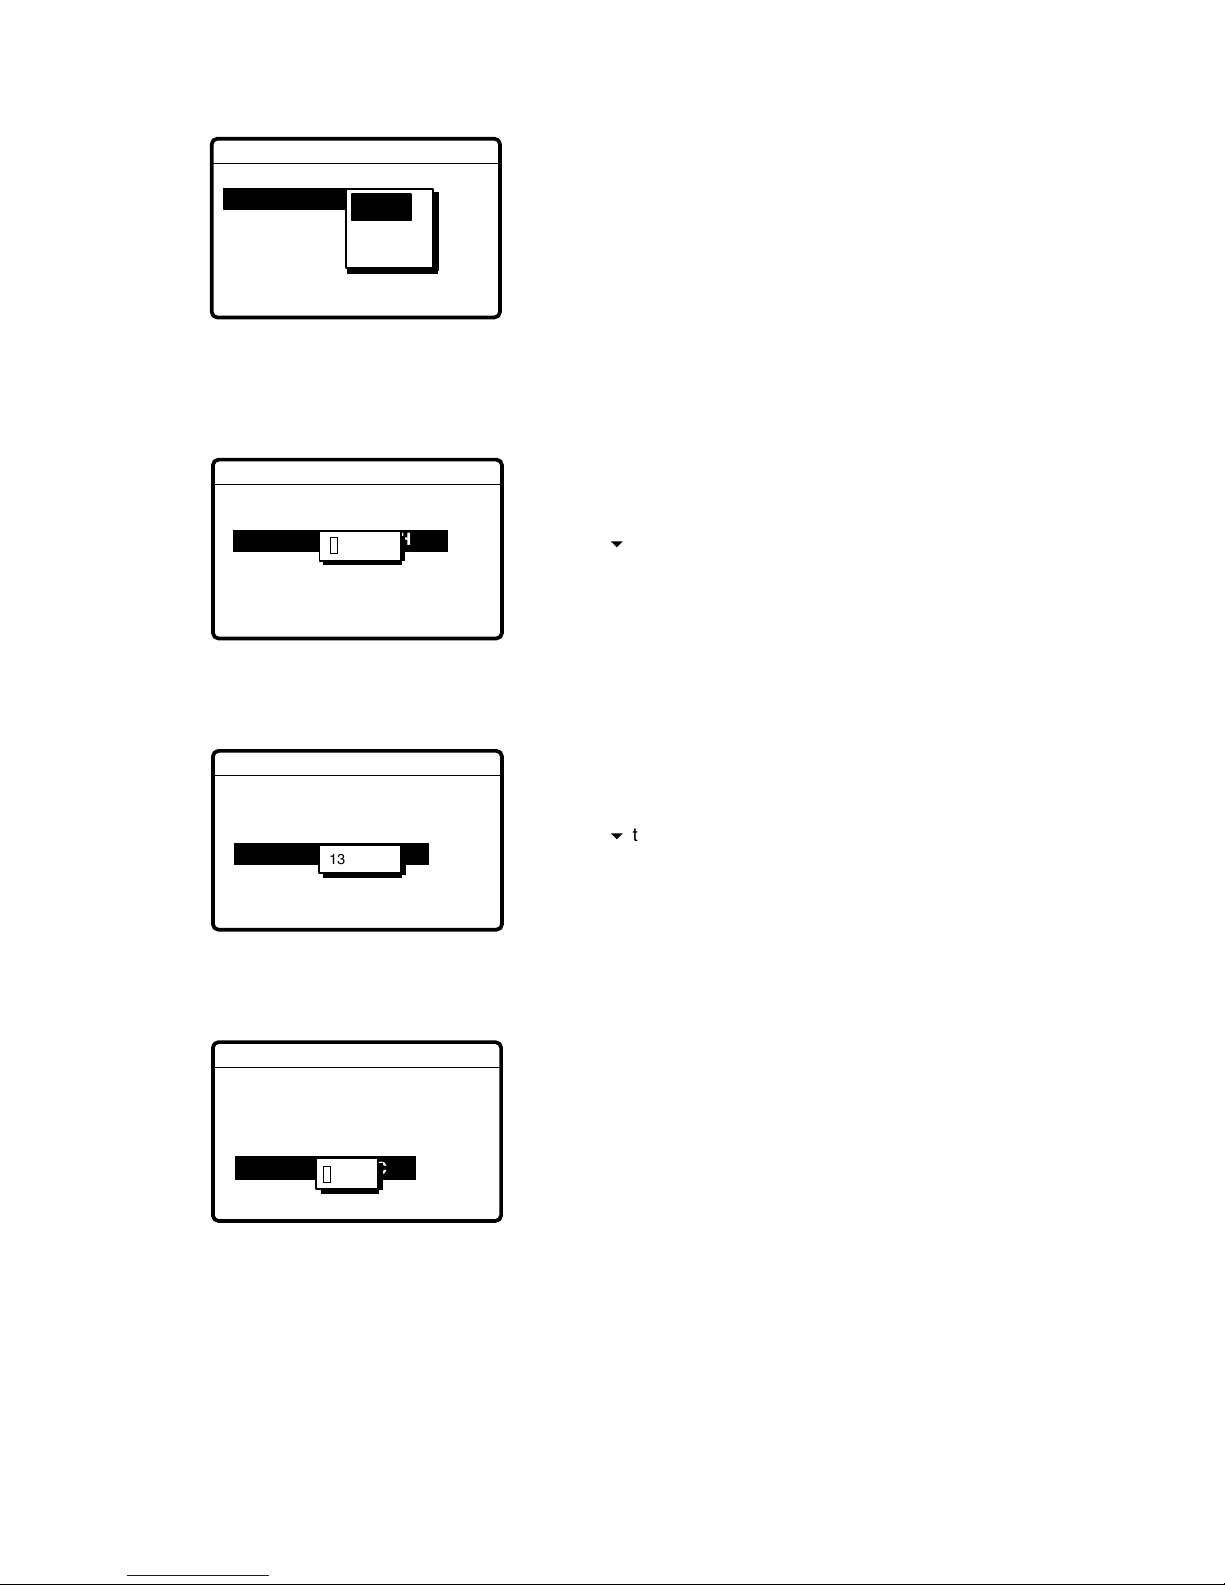
3-4
4. Press the [ENT] key to open the INPUT TYPE menu.
** Position setup
**
INPUT TYPE: AUTO
LAT : 34˚ 41 NORTH
LON : 135˚ 30 EAST
TIME: 09: 00 UTC
AUTO
N
MANUAL
NO INFO
5. Press ! to select MANUAL and press the [ENT] key. If you cannot confirm your position,
select NO INFO, press the [ENT] key and then go to step 10.
6. Press the [ENT] key to open the latitude entry window.
** Position setup
**
INPUT TYPE: MANUAL
34˚ 41
LON : 135˚ 30 EAST
TIME: 09: 00 UTC
Note: Use 6 to switch from
North to South and vice versa.
LAT : 34˚ 41 NORTH
12
34 ˚ 41 N
7. Key in latitude in four digits and press the [ENT] key.
8. Press the [ENT] key to open the longitude entry window.
** Position setup
**
INPUT TYPE: MANUAL
LAT: 34˚ 41 NORTH
LON : 135˚ 30 EAST
TIME: 09: 00 UTC
Note: Use 6 to switch from
East to West and vice versa.
LAT : 34˚ 41 NORTH
LON : 135˚ 30 EAST
135˚00 E
9. Key in longit ude in five digit s and press the [ENT] key.
10. Press the [ENT] key to open the time entry window.
** Position setup
**
INPUT TYPE: MANUAL
LAT : 34˚ 41 NORTH
LON : 135˚ 30 EAST
TIME : 09: 00 UTC
LAT : 34˚ 41 NORTH
LON : 135˚ 30 EAST
TIME: 09: 00 UTC
12 : 34
11. Key in UTC time and press the [ENT] key.
Note:
If you cannot confirm time, enter 88:88 to input NO INFO as the time in the distress
alert.
Page 57

3-5
12. The SEND MESSAGE screen is redisplayed. Press the [ENT] key to open the COM. TYPE
menu.
***
Send message
***
NATURE: FLOODING
POS: 35˚N 135˚00E AT 23:25
DISTRESS
CALL TYPE:
GO TO ALL VIEW
DSC FREQ : 2187.5 KHZ
COM. TYPE: TELEPHONE
NBDP-FEC
TELEPHONE
13. Select TELEPH ONE and press th e [ENT] key. (Telepho ne i s the usual mo de, howev er NBDP
may also be used.)
14. Press the [ENT] key to open the DSC FREQ menu.
***
Send message
***
NATURE: FLOSIGNATED
POS: 35˚N 135˚00E AT 23:25
DISTRESS
CALL TYPE:
GO TO ALL VIEW
COM. TYPE: TELEPHONE
DSC FREQ : 2187.5 KHZ
4207.5
6312.0
8414.5
12577.0
16804.5
2187.5
AUTO
15. Select a DSC frequency (normally 2187.5 kHz) and press the [ENT] key. (AUTO retransmits
the distress alert on 2 MHz, 8 MHz, 16 MHz, 4 MHz, 12 MHz and 6 MHz in sequence if the
distress alert is not acknowledged. The frequency and mode of emission should be set
manually on the radiotelephone when there is “No response: RT”
DSC SS B radiotelephone NBDP-FEC
2187.5 kHz
4207.5 kHz
6312.0 kHz
8414.5 kHz
12577.0 kHz
16804.5 kHz
2182.0 kHz
4125.0 kHz
6215.0 kHz
8291.0 kHz
12290.0 kHz
16420.0 kHz
2174.5 kHz
4177.5 kHz
6268.0 kHz
8376.5 kHz
12520.0 kHz
16695.0 kHz
16. The display chang es as bel ow.
***
Send message
***
NATURE: FLOODING
POS: 35˚N 135˚00E AT 23:25
DISTRESS
CALL TYPE:
COM. TYPE : TELEPHONE
DSC FREQ : 2187.5 KHZ
GO TO ALL VIEW
Page 58

3-6
17. Press the [DISTRESS] button more than three seconds to send the distress alert.
Distress
call in progress!
TIME TO GO : 38S
NATURE: FLOODING
POS:
12˚34N 123˚45E AT 12:34
TELEPHONE
2182.0 KHZ
DSC FREQ :
2187.5 KHZ
18. Follow steps 3-6 on page 3-2 and 3-3.
Page 59

3-7
3.2 Receiving a Distress Alert
When you receive a distress call from a ship in distress the audio alarm sounds and the message
"Distress call received." appears on the display. Press the [CANCEL] key to silence the audio
alarm. Wait for the distress acknowledge from a coast station. If you do not receive the distress
acknowledge from a coast station, which usu al l y takes about five mi n utes from r eception of a
distress alert, follow the appropriate flow chart in this section.
Note: An asterisk (*) ap pe ar i ng in a dis tr ess al ert messages indi cates error at asteri sk l oca ti o n.
Russian Version
If another distress alert or urgent message is received just after pressing the [CALL] key (for
distress alert relay and distress acknowledgement), the most recently received message has
priority.
3.2.1 Distress alert received on MF band
Do the following:
• Continue watching on 2182 kHz. Wait for coast station to acknowledge the distress call.
Distress communications continues until “SEELONCE FINI” is announced.
• If further DSC alerts are received from the same source and the ship in distress is beyond
doubt in vicinity, a DSC acknowledgement may, after consultation with an RCC or Coast
Station, be sent to terminate the call.
• In no case is a s hi p permitted to tr ansm i t a D SC di s tr es s relay call on receipt o f a DSC distr ess
alert on an MF channel.
Page 60
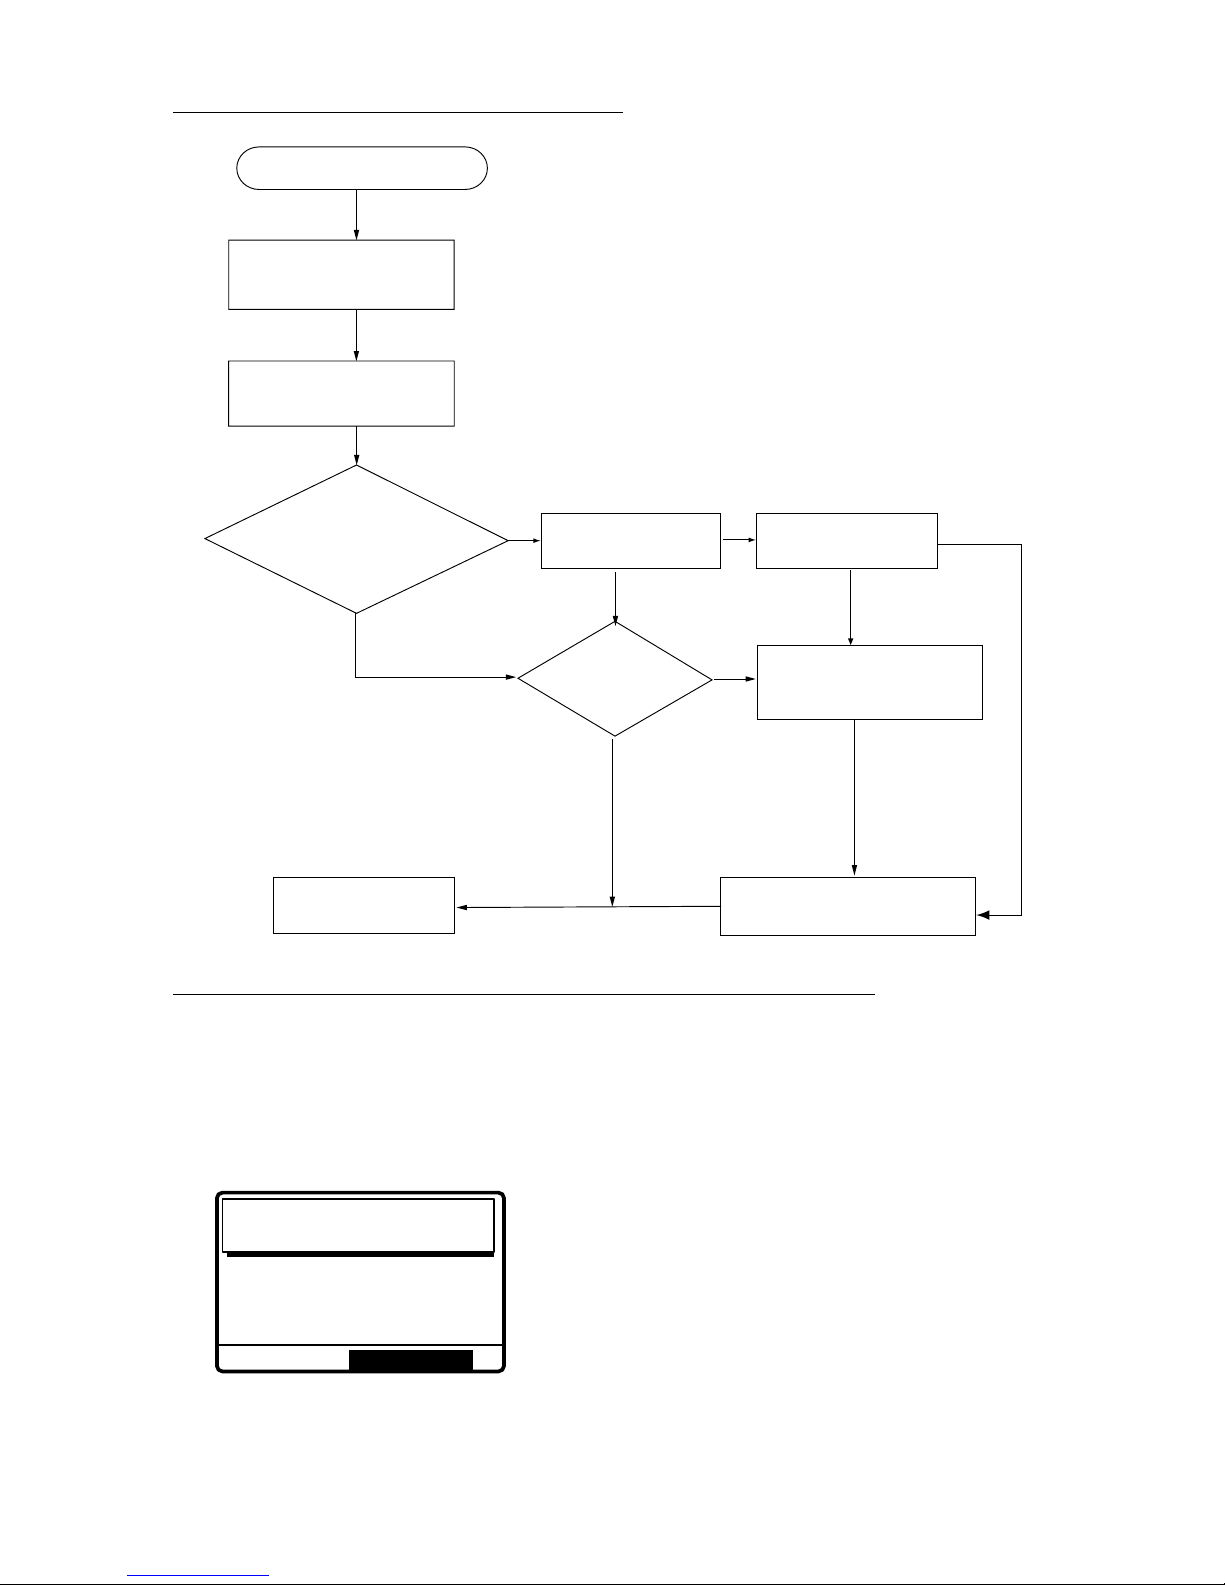
3-8
Action for ship receiving MF distress alert
Press [CANCEL] key to
silence alarm.
DSC Distress alert received.
Listen on 2182 kHz for
5 minutes.
Did you receive
acknowledge from
CS and/or RCC?
Is own
vessel able
to assist?
No
Is distress traffic
in progress?
No
Is distress call
continuing?
Acknowledge the alert by
radiotelphony to the ship
in distress on 2182 kHz.
Ye s
No
Inform CS and or RCC.
Ye s
Ye s
Ye s
Enter details in log.
No
CS = Coast Station
RCC = Rescue Co-ordination Center
Sending the distress acknowledge to ship in distress on MF band
Transmit the distress acknowledge signal to the ship in distress only when you do not receive it
from a coast station and you are able to aid the ship in distress. First, transmit the distress
acknowledge to the ship in distress by telephone. This will stop transmission of the distress alert.
1. The audio alarm sounds and the display shows the message “Distress call received.” When
your ship receives a distress call.
DISTRESS CALL
SHIP IN DIST:
123456789
NATURE: UNDESIGNATED
POS:
12˚34N 123˚45E AT 12:34
TELEPHONE
2182.0 KHZ
Distress
call received.
STOP ALARM
Page 61
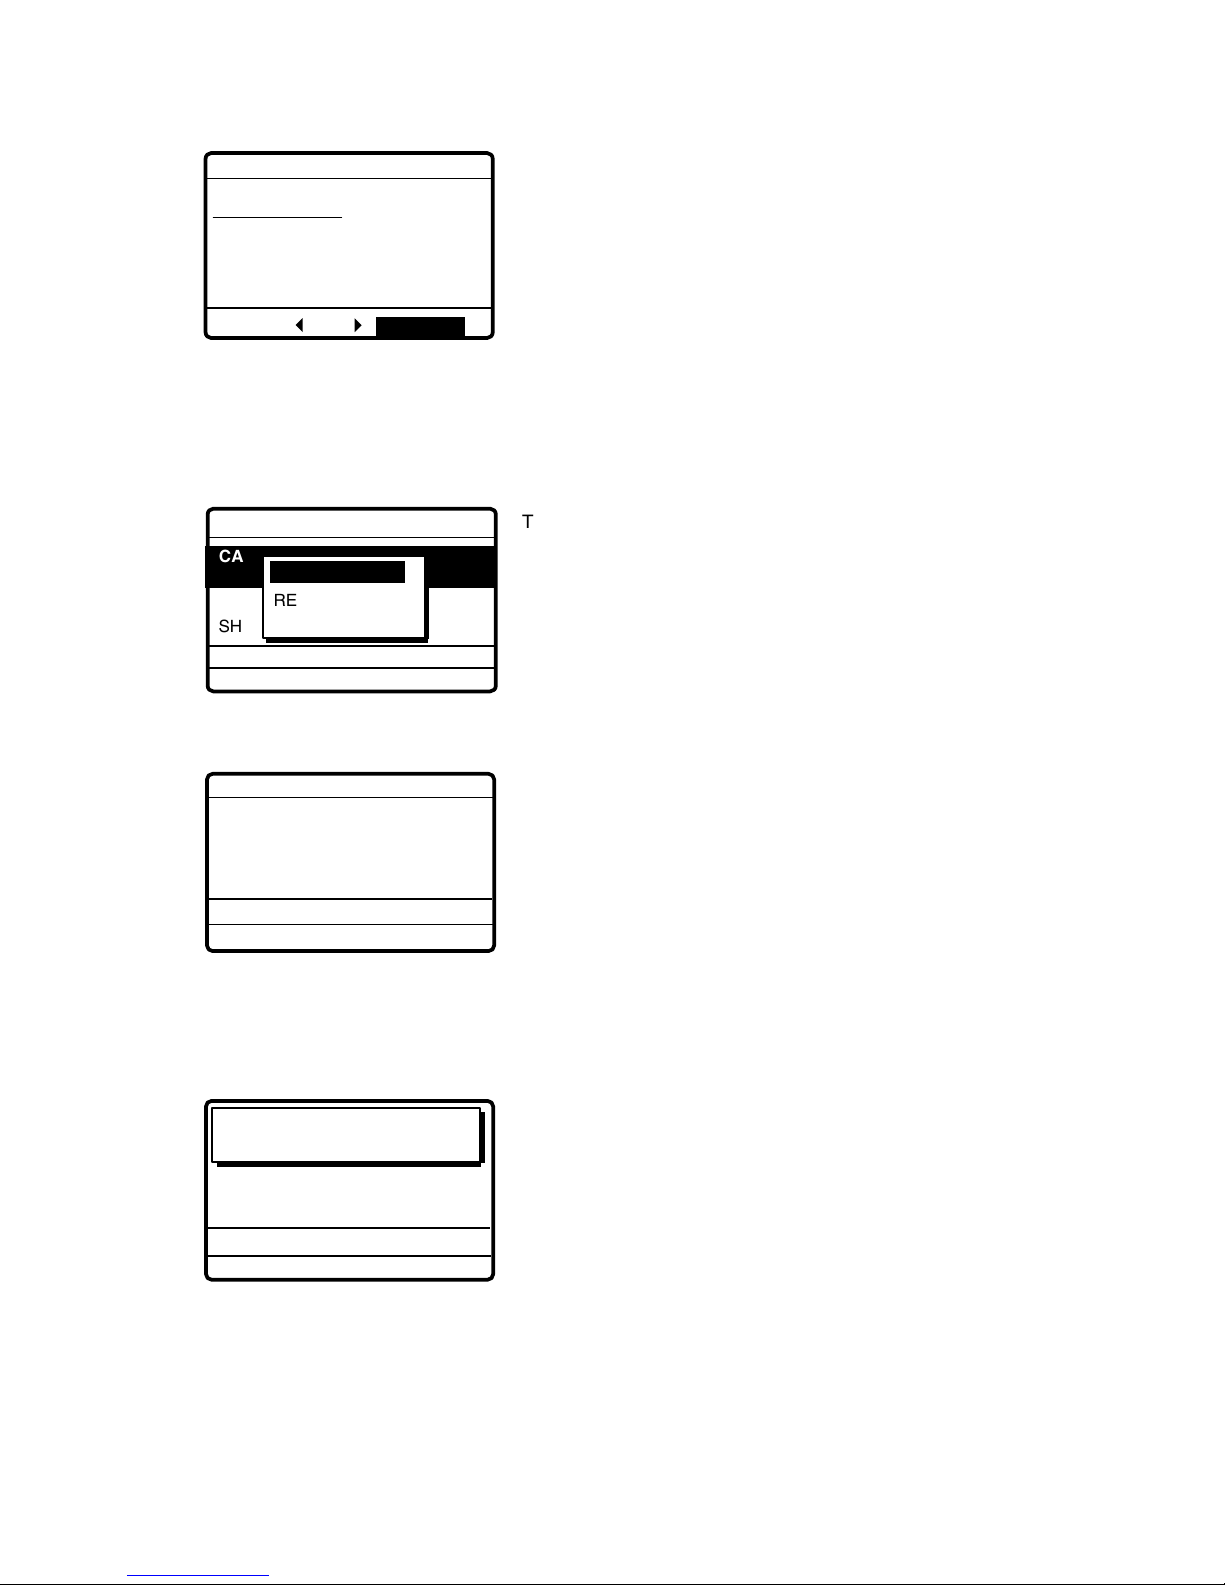
3-9
2. Press the [CANCEL] key to silence the audio alarm, and the display changes as below.
*
Received message
*
JUL-23-1999-23:59 ECC: OK
DISTRESS CALL
ANSWER
SHIP IN DIST:
123456789
NATURE: UNDESIGNATED
POS:
12˚34N 123˚45E AT 12:34
TELEPHONE
8414.5 KHZ
34
ALL VIEW
3.
If you do not receive the distress acknowledge from a coast station and you have
received the distress alert more than twice,
press $ to choose ANSWER and press the
[ENT] key to send the distress acknowledge signal to the ship in distress.
4. Press the [ENT] key to open the CALL TYPE menu.
The option ACKNOWLEDGE
does not appear in the following cases:
a) Distress alert received on HF band.
b) If, on MF band, more than 2 min. 45 sec.
elapses after the distress alert is received.
***
Send message
***
GO TO ALL VIEW
DSC FREQ : 2187.5 KHZ
COAST
SHIP IN DIST: 987654321
CALL TYPE: INDIVIDUAL
DISTRESS RELAY
RELAY COAST
ACKNOWLEDGE
RELAY ALL
COAS
5. Select ACKNOWLEDGE and press the [ENT] key. The following display appears.
CALL TYPE : ALL SHIPS
DISTRESS ACKNOWLEDGE
SHIP IN DIST :
123456789
DSC FREQ :
2187.5 KHZ
GO TO ALL VIEW
***
Send message
***
6. Press the [CALL] key to send the distress acknowledge call to the ship in distress. Note that
the distress acknowledge is immediately sent when the time elapsed between reception and
transmission of it is more than one minute. If the [CALL] key is pressed before one minute
has elapsed a timer appears and counts down the time remaining before the call is sent.
SHIP IN DIST :
123456789
Distress acknowledge
call in progress!
DSC FREQ :
2187.5 KHZ
GO TO ALL VIEW
Page 62

3-10
3.2.2 Distress alert received on HF band
If you receive a distress signal on HF band, the ALARM lamp lights and the audio alarm sounds.
Press the [CANCEL] key to silence the audio alarm. Wait for the distress acknowledge from a
coast station. If you do not receive it within five minutes do one of the following:
•
Watch on the distress frequency.
•
Relay the distress alert in the following cases.
•
You do not receive distress acknowledge call from coast station within five minutes after
receiving distress call.
•
You have not received distress relay from other ship.
•
You cannot receive distress communications from other ship over radiotelephone.
•
If it is clear the ship or persons in distress are not in the vicinity and/or other crafts are
better placed to assist, superfluous communications which could interfere with search
and rescue activities should be avoided. Details should be recorded in the appropriate
log book.
•
The ship should establish communications with the station controlling the distress as
directed and render such assistance as required and appropriate.
Action for ships receiving HF distress alert
Press [CANCEL] key to
silence alarm.
DSC Distress alert received.
Listen to associated RTF or
NBDP channel(s) for 5 minutes.
Is the alert
acknowledged or
relayed by CS and
or RCC?
Is own
vessel able
to assist?
No
Is distress communication in progress
on associated RTF
channels?
No
Transmit distress
relay on HF to coast
station and inform
RCC.
Contact RCC via most
efficient medium to offer
assistance.
Yes
Yes
Yes
Enter details in log.
No
CS = Coast Station
RCC = Rescue Co-ordination Center
HF DSC RTF AND NBDP CHANNELS (kHz)
DSC RTF NBDP
4207.5 4125 4177.5
6312.0 6215 6268
8414.5 8291 8376.5
12577.0 12290 12520
16804.5 16420 16695
Page 63

3-11
Sending the distress relay to coast station on HF band
1. The audio alarm sounds and the display changes as below when a distress call is received.
DISTRESS CALL
SHIP IN DIST:
123456789
NATURE: UNDESIGNATED
POS:
12˚34N 123˚45E AT 12:34
TELEPHONE
8291.0 KHZ
Distress
call received.
STOP ALARM
2. Pr ess the [CANCEL] key to silence the audio alarm, and the display changes as below.
*
Received message
*
JUL-23-1999-23:59 ECC: OK
DISTRESS CALL
ANSWER
SHIP IN DIST:
123456789
NATURE: UNDESIGNATED
POS:
12˚34N 123˚45E AT 12:34
TELEPHONE
8291.0 KHZ
34
ALL VIEW
3. Press ! to choose ANSWER and press the [ENT] key.
4. Press the [ENT] key to open the CALL TYPE menu.
***
Send message
***
GO TO ALL VIEW
DSC FREQ : 2187.5 KHZ
SHIP IN DIST: 987654321
CALL TYPE* INDVIDUAL
DISTRESS RELAY
RELAY COAST
RELAY ALL
5. Select RELAY COAST (if you know the ID of the nearest coast station) and press the [ENT]
key.
GO TO EASY VIEW
CALL TYPE : INDIVIDUAL
DISTRESS RELAY
DSC FREQ :
GO TO ALL VIEW
***
Send message
***
2187.5 KHZ
SHIP IN DIST:
COAST ID:
000000000
6. Key in ID of coast station where to send the distress relay and press the [ENT] key.
Page 64

3-12
7. Pr ess the [ENT] key to open the DSC FREQ. menu.
GO TO EASY VIEW
CALL TYPE : ALL SHIPS
DISTRESS RELAY
SHIP IN DIST :
***
Send message
***
VIEW
DSC FREQ KHZ
GO TO ALL VIEW
4207.5
6312.0
8414.5
12577.0
16804.5
MANUAL
2187.5
COAST ID:
MANUAL: For manual selection of frequency at the
radiotelephone when there is "remote control error."
8. Select appr opriate frequency and press the [ENT] key. You should first select 8414.5 kHz.
9. Press the [CALL] key to relay the distress call.
Note
: If a coast station acknowledges the distress alert call before the timer counts to zero,
press the [CANCEL] key to cancel your call. Further, If the call key is pressed before five
minutes has elapsed the time to wait until the distress relay is sent is shown at the bottom of
the display.
10. While the distress relay sel (to coast station) call is being sent the display shows the
following.
SHIP IN DIST: 123456789
Distress relay sel
call in progress!
DSC FREQ : 2 187.5 KHZ
TIME TO GO : 25S
11. After the call is transmitted the message “Wait for distress relay acknowledge!” appears.
When you receive distress acknowledgement from the coast station communicate with the
coast station by telephone, over the DSC frequency specified. If you do not receive the
distress acknowledgement from a coast station after the timer counts down to zero, repeat
the transmission on a different frequency.
Page 65

3-13
3.3 Sending Distress Relay on Behalf of a Ship in
Distress
3.3.1 Sending distress relay to coast station
You may send the distress relay to a coast station on behalf of a ship in distress in the following
cases:
• You are near the ship in distress and the ship in distress cannot transmit the distress alert.
• Another vessel requests you to transmit the distress re lay.
In these cases never use the [DISTRESS] button to transmit the distress relay.
Russian Version
If another distress alert or urgent message is received just after pressing the [CALL] key (for
distress alert relay and distress acknowledgement), the most recently received message has
priority.
1. Pre ss the [CALL] key and press the [ENT] key.
***
Send MESSAGE
***
STATION ID
PRIORITY
COM. TYPE
COM. FREQ
DSC FREQ
: All ships
: Safety
: Telephone
: 2187.5 kHz
RELAY SEL
POLLING
NEUTRAL
MEDICAL
RELAY ALL
DISTRESS
5
CALL TYPE
If this part of the menu
appears, use 5to scroll
the menu.
PSTN CALL
TEST CALL
ALL SHIPS
GROUP CALL
AREA CALL
POSITION
6
INDIVIDUAL
2. Select RELAY SEL and press the [ENT] key. Press the [ENT] key to open the COAST ID
entry window.
***
Send message
***
CALL TYPE: RELAY SEL
NATURE: UNDESIGNATED
POS: 34˚45N 13
COM. TYPE : TELEPHONE
DSC FREQ. : 8414.5 KHZ
COAST ID
00
-------
GO TO ALL VIEW
ID IN DIST
3. Key in COAST ID and ID and press the [ENT] key.
4. Press the [ENT] key to open the ID IN DIST window.
***
Send message
CALL TYPE
NATURE : UNDESIGNATED
POS.:
COM.TYPE : TELEPHONE
DSC FREQ : 8414.5 KHZ
GO TO ALL VIEW
: RELAY SEL
: ---------
:
--˚--N ---˚--
E
ID IN DIST
COAST ID:
---------
***
5. Key in ID of ship in distress and press the [ENT] key. If you do not know the ID leave the
window bla nk .
Page 66

3-14
6. Press the [ENT] key to open the NATURE menu.
COAST ID
***
Send message
***
CALL TYPE
ID IN DIST
:Undesignated
POS: ION.
COM.TYPE
DSC FREQ
: All ships
: 987654321
:
:
5
SINKING
DISABLE
ABANDONING
PIRACY
MAN OVERBOARD
EPIRB EMISSION
NATURE
Use 6 to scroll
menu.
FIRE
FLOODING
COLLISION
GROUNDING
LISTING
6
UNDESIGNATED
7. Select nature of distress and press the [ENT] key. (If you do not know the nature of distress,
select UNDESIGNATED.) Press the [ENT] key to open the POS. menu.
COAST ID
***
Send message
***
CALL TYPE
DISTRESS RELAY
ID IN DIST
NATURE : UNDESIGNATE
COM. TYPE
DSC FREQ : 2187.5 KHZ
: ALL SHIPS
: 987654321
:
POS:
LAT : 34°45 NORTH
LON : 135°22 EAST
TIME: 10:00 UTC
INPUT TYPE: AUTO
GO TO ALL VIEW
8. Enter position following 1), 2) or 3) below.
1) For automatic input,
press the [ENT] key twice.
2) For manual input,
press the [ENT] key to open the INPUT TYPE menu, select MANUAL
and press the [ENT] key. Enter latitude, longitude of ship in distress and time as follows:
a) Press ! to select LAT and press the [ENT] key. Enter latitude and press the [ENT] key.
b) Press ! to select LONG and press the [E NT] key. Enter longitude and press the [ENT] key.
c) Press ! to select TIME and press the [ENT] key. Enter UTC time and press the [ENT] key.
Note:
If you cannot confirm time, ent er 88: 88 t o i nput NO INFO as the time.
3) If you cannot confirm ship in distress position,
press the [ENT] key to open the
INPUT TYPE menu, select NO INFO and press the [ENT] key.
9. Press the [ENT] key to open the COM. TYPE menu.
TELEPHONE
***
Send message
***
NATURE : UNDESIGNATED
POS:
35 00N 135 00E AT 14:0
DSC FREQ
: 2187.5 kHz
TELEPHONE
NBDP-FEC
COM. TYPE
GO TO ALL VIEW
CALL TYPE : RELAY SEL
ID IN DIST : 123456789
COAST ID: 001234567
10. Select TELEPHONE and press the [ENT] key. (NBDP may also be used.) Press the [ENT]
key to open the DSC FREQ menu.
Page 67

3-15
3 45E
:2187.5 kHz
***
Send message
***
GO TO ALL VIEW
DSC FREQ : 2187.5 KHZ
CALL TYPE
ID IN DIST:
NATURE:
COM. TYPE:
POS:
4207.5
6312.0
8414.5
12577.0
16804.5
MANUAL
2187.5
MANUAL: For selection of frequency at radiotelephone
when there is "remote control error."
COAST ID:
DSC SSB radiotelephone NBDP-FEC
2187.5 kHz
4207.5 kHz
6312.0 kHz
8414.5 kHz
12577.0 kHz
16804.5 kHz
2182.0 kHz
4125.0 kHz
6215.0 kHz
8291.0 kHz
12290.0 kHz
16420.0 kHz
2174.5 kHz
4177.5 kHz
6268.0 kHz
8376.5 kHz
12520.0 kHz
16695.0 kHz
11. Select appr opriate DSC frequency and press the [ENT] key. The display now looks
something like the one below.
CALL TYPE : RELAY SEL
COAST ID :
001234567
ID IN DIST : NO INFO
NATURE : SINKING
POS
:
12˚34N 123˚45
***
Send message
***
DSC FREQ :
2187.5 KHZ
GO TO ALL VIEW
COM. TYPE
:
TELEPHONE
12. Press the [CALL] key to send the call.
Distress relay sel
call in progress!
DSC FREQ :
2187.5 KHZ
TO COAST :
001234567
SHIP IN DIST : NO INFO
POS :
12°34N 123°45 AT 12:34
TELEPHONE
2182.0 KHZ
TIME TO GO : 8S
13. The equipment then waits for acknowledgement of the distress relay, showing the following
message. If the distress relay is not acknowledged within five minutes the message “No
response. Try relay again.” appears. If this occurs send the relay again.
Wait for distress
relay acknowledge.
:
TIME TO GO : 4M59S
DSC FREQ
:
2187.5 KHZ
FROM COAST: 001234567
SHIP IN DIST: NO INFO
POS: 12˚34N 123˚45 AT 12:34
TELEPHONE: 2182.0 KHZ
14. The audio alarm sounds and the display looks something like the one below when the
distress relay acknowledge call is received.
Page 68
3-16
Distress relay ack
call received.
SHIP IN DIST : NO INFO
POS :
12°34N 123°45 AT 12:34
TELEPHONE 2187.5 KHZ
FROM COAST : 001234567
NATURE : SINKING
STOP ALARM
15. Press the [CANCEL] key to silence the alarm. The following display appears.
JUL-23-1999-23:59
GO TO ALL VIEW
SHIP IN DIST : NO INFO
POS :
12°34N 123°45 AT 12:34
TELEPHONE
2187.5 KHZ
FROM COAST :
001234567
NATURE : SINKING
DISTRESS RELAY ACK
*
Received message
*
ECC:OK
3.3.2 Sending distress relay to all ships
This procedure sends the distress relay to all ships
1. Press the [CALL] key .
***
Send MESSAGE
***
STATION ID
PRIORITY
COM. TYPE
COM. FREQ
DSC FREQ
: All ships
: Safety
: Telephone
: 2187.5 kHz
RELAY SEL
POLLING
NEUTRAL
MEDICAL
RELAY ALL
DISTRESS
5
CALL TYPE
If this part of the menu
appears, use 5to scroll
the menu.
PSTN CALL
TEST CALL
ALL SHIPS
GROUP CALL
AREA CALL
POSITION
6
INDIVIDUAL
2. Select RELAY ALL and press the [ENT] key.
3. Press the [ENT] key to open the ID IN DIST menu.
***
Send message
***
CALL TYPE: RELAY ALL
NATURE: UNDESIGNATED
POS: 34˚45N 13
COM. TYPE : TELEPHONE
DSC FREQ. : 2187.5 KHZ
ID IN DIST
---------
GO TO ALL VIEW
4. Key in ID of ship in distress (if known) and press the [ENT] key. (If you do not know the ID
enter leave the ID menu as it is.
5. Press the [ENT] key to open the NATURE menu.
Page 69
3-17
***
Send message
***
CALL TYPE
ID IN DIST
:Undesignated
POS: ION.
COM.TYPE
DSC FREQ
: All ships
: 987654321
:
:
5
SINKING
DISABLE
ABANDONING
PIRACY
MAN OVERBOARD
EPIRB EMISSION
NATURE
Use 6 to scroll
menu.
FIRE
FLOODING
COLLISION
GROUNDING
LISTING
6
UNDESIGNATED
6. Select nature of distress (if known) and press the [ENT] key. (If you do no the nature of
distress, select UNDESIGNATED.)
7. Press the [ENT] key to open the POS. menu, where you enter the position of the ship in
distress and time, manually or automatically.
***
Send message
***
CALL TYPE
DISTRESS RELAY
ID IN DIST
NATURE : UNDESIGNATE
COM. TYPE
DSC FREQ : 2187.5 KHZ
: ALL SHIPS
: 987654321
:
POS:
LAT : 34°45 NORTH
LON : 135°22 EAST
TIME: 10:00 UTC
INPUT TYPE: AUTO
GO TO ALL VIEW
8. Enter position following 1), 2) or 3) below.
1) For automatic input,
press the [ENT] key twice.
2) For manual input,
press the [ENT] key to open the INPUT TYPE menu, select MANUAL
and press the [ENT] key. Enter latitude, longitude of ship in distress and time as follows:
a) Press ! to select LAT and press the [ENT] key. Enter latitude and press the [ENT] key.
b) Press ! to select LONG and press the [E NT] key. Enter longitude and press the [ENT]
key.
c) Press ! to select TIME and press the [E NT] key. Enter UTC time and press the [ENT] key.
Note:
If you cannot confirm time, ent er 88: 88 t o i nput NO INFO as the time.
3) If you cannot confir m ship in distress position,
press the [ENT] key to open the
INPUT TYPE menu, select NO INFO and press the [ENT] key.
9. Press the [ENT] key to open the COM. TYPE menu.
CALL TYPE: RELAY ALL
ID IN DIST: 123456789
NATURE : NDESIGNATED
DSC FREQ : 2187.5 KHZ
POS: 34˚45N
COM. TYPE
GO TO ALL VIEW
***
Send message
***
: TELEPHONE
TELEPHONE
NBDP-FEC
10. Select TELEPHONE and press the [ENT] key.
Page 70

3-18
11. Press the [ENT] key to open the DSC FREQ menu.
3 45E
:
: Telephone
:2187.5 kHz
***
Send message
***
GO TO ALL VIEW
DSC FREQ : 2187.5 KHZ
CALL TYPE
ID IN DIST:
NATURE:
COM. TYPE
POS: 34˚45N
4207.5
6312.0
8414.5
12577.0
16804.5
MANUAL
2187.5
MANUAL: For selection of frequency at radiotelephone
when there is "remote control error."
12. Select appropriate frequency and press the [ENT] key. The display now looks something like
the one below.
***
Send message
***
CALL TYPE: RELAY ALL
ID IN DIST: 123456789
NATURE: UNDESIGNATED
POS: 34˚50N 135˚45E AT 09:30
COM TYPE : TELEPHONE
DSC FREQ : 2187.5 KHZ
GO TO ALL VIEW
13. Press the [CALL] key to send the distress relay call (transmission time: about 40 sec.). The
display shows the message "Distress relay all call in progress!".
Note
: If a coast station acknowledges the distress alert call before the timer counts to zero,
press the [CANCEL] key to cancel your call.
***
SEND MESSAGE
***
CALL TYPE : ALL SHIPS
SHIP IN DIST: 123456789
POS: 34˚50N 135˚45E AT 09:30
TELEPHONE 2182.0 KHZ
DSC FREQ
: 2187.5 KHZ
TIME TO GO: 29S
Distress relay all
call in progress!
14. After the call is sent the DSC standby screen automatically appears.
Page 71
3-19
3.4 Receiving Distress Relay All Ships from Ship
When you receive a distress relay continue monitoring distress and safety frequencies over the
SSB radiotelephone.
1. The audio alarm sounds and the display looks like the one below when a distress relay all
ships call is received.
Distress relay all
call received.
SHIP IN DIST:
123456789
POS:
12 34N 123 45E AT 12:34
TELEPHONE
NO INFO
FROM SHIP:
234567890
NATURE: UNDESIGNATED
STOP ALARM
2. Press the [CANCEL] key to silence the alarm, and the display changes as below.
JUL-23-1999-23:59 ECC: OK
SHIP IN DIST:
123456789
POS:
12 34N 123 45E AT 12:34
TELEPHONE
NO INFO
FROM SHIP:
234567890
NATURE: UNDESIGNATED
DISTRESS RELAY ALL
*
Received message
*
GO TO ALL VIEW
3. Watch distress/safety frequency.
3.5 Receiving Distress Relay from Coast Station
When you receive a distress relay cont inue monitoring distress and safety frequenc ies over the SSB
radiotelephone.
1. The audio alarm sounds and the display looks like the one in the left-hand figure below when
a distress relay is received from a coast station. Press the [CANCEL] key to silence the alarm,
and the display changes as in the right-hand figure below.
Distress relay all
call received.
SHIP IN DIST:
123456789
POS:
12 34N 123 45E AT 12:34
TELEPHONE
NO INFO
FROM COAST:
001234567
NATURE: UNDESIGNATED
STOP ALARM
JUL-23-1999-23:59 ECC: OK
SHIP IN DIST:
123456789
POS:
12 34N 123 45E AT 12:34
TELEPHONE
NO INFO
FROM COAST:
001234567
NATURE: UNDESIGNATED
DISTRESS RELAY ALL
*
Received message
*
GO TO ALL VIEW
Press the
[CANCEL] key.
Page 72
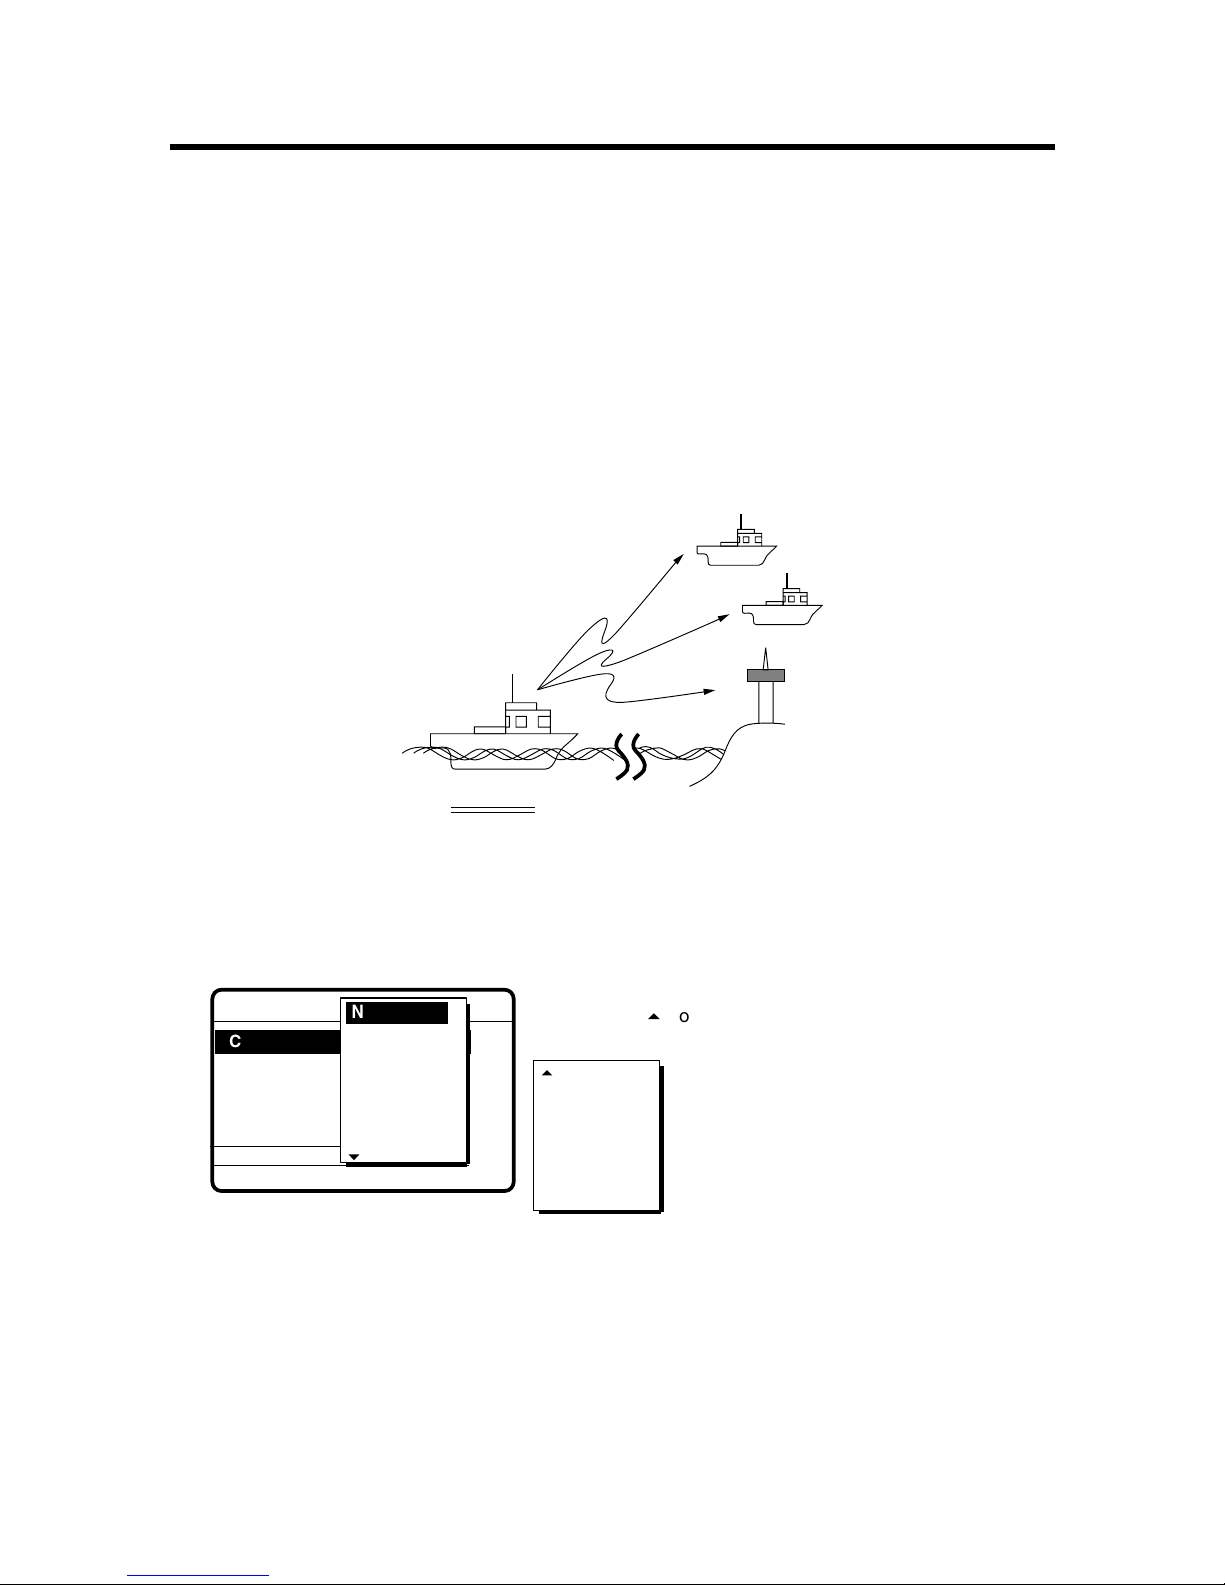
4-1
4. CALLING
This chapter provides the information necessary for general calling.
4.1 All Ships Call
When an urgent but not life endangering situation arises on your ship, for example, engine
trouble, send an all ships call to request assistance.
After sending the message, you can communicate by voice over the radiotelephone. Do the
following before beginning actual communications:
URGENCY priority: Say PAN three times followed by your call sign.
SAFETY priority: Say SECURITE three times followed by your call sign.
Own Ship
C oast
Station
4.1.1 Sending all ships call
1. At the DSC standby screen, press the [CALL] key followed by the [ENT] key to display the
CALL TYPE menu.
***
Send MESSAGE
***
STATION ID
PRIORITY
COM. TYPE
COM. FREQ
DSC FREQ
: All ships
: Safety
: Telephone
: 2187.5 kHz
RELAY SEL
POLLING
NEUTRAL
MEDICAL
RELAY ALL
DISTRESS
5
CALL TYPE
If this part of the menu
appears, use 5to scroll
the menu.
PSTN CALL
TEST CALL
ALL SHIPS
GROUP CALL
AREA CALL
POSITION
6
INDIVIDUAL
2. Use or to select ALL SHIPS and press the [ENT] key.
Page 73

4-2
3. Press the [ENT] key to display the PRIORITY menu.
***
Send message
***
CALL TYPE: ALL SHIPS
COM. TYPE : TELEPHONE
DSC FREQ : 2187.5 KHZ
GO TO ALL VIEW
PRIORITY
SAFETY
URGENCY
DISTRESS
4. Select SAFETY, URGENCY or DISTRESS as appropriate and press the [ENT] key.
5. Press the [ENT] key to open the COM. TYPE menu.
***
Send message
***
CALL TYPE: ALL SHIPS
PRIORITY : SAFETY
COM TYPE
DSC FREQ : 2187.5 KHZ
GO TO ALL VIEW
COM. TYPE
NBDP-FEC
TELEPHONE
6. Select communication type desired and press the [ENT] key.
7. Press the [ENT] key to open the DSC FREQ menu.
***
Send message
***
GO TO ALL VIEW
DSC FREQ
CALL TYPE : ALL SHIPS
PRIORITY : SAFETY
COM TYPE : TELEPHONE
2187.5KHZ
4207.5
6312.0
8414.5
12577.0
16804.5
MANUAL
2187.5
MANUAL: For manual selection of frequency at
radiotelephone when there is "remote control error."
8. Select frequency and press the [ENT] key.
9. Press the [CALL] key to send the call (transmission time: about 7 sec.). The display shows
"All ships call in progress!" while the call is being sent.
SAFETY
TELEPHONE
2182.0 KHZ
All ships
call in progress!
DSC FREQ :
2187.5 KHZ
TIME TO GO: 5S
10. The DSC standby screen automatically appears after the call is sent (timer counts down to
zero). The equipment is set up for telephone (or NBDP) and safety or urgency priority, using
DSC safety/urgency pair frequencies.
Page 74

4-3
4.1.2 Receiving all ships call
1. When an all ships call is received the audio alarm sounds and the display looks something
like the one shown below.
FROM SHIP:
123456789
SAFETY
TELEPHONE
2182.0 KHZ
All ships
call received.
STOP ALARM
2. Press the [CANCEL] key to silence the alarm. The display shows partial contents of the all
ships call as below.
*
Received message
*
JUL-23-1999-23:59 ECC: OK
ALL SHIPS CALL
FROM SHIP:
123456789
SAFETY
TELEPHONE
2182.0 KHZ
GO TO ALL VIEW
3. Press the [CANCEL] key again to return to the DSC standby screen. Watch for
communications about all ships call on the DSC-60 or SSB radiotelephone.
Page 75

4-4
4.2 Individual Call
The individual call is for sending a message to a specific station. After sending an individual
message, called ACK RQ transmission, wait to receive the acknowledge back (ACK BQ) signal
from the receiving station.
Coast
Station
Own Ship
DSC Message [Called Acknowledge
Request (ACK RQ) Signal]
Acknowledge Back (ACK BQ) Signal
Voice Communication
3
2
1
2
1
3
4.2.1 Sending individual call
1. At the DSC standby screen, press the [CALL] key followed by the [ENT] key to open the
CALL TYPE menu.
5
POLLING
NEUTRAL
MEDICAL
RELAY ALL
RELAY SEL
DISTRESS
STATION ID
PRIORITY
COM. TYPE
COM. FREQ
DSC FREQ
: INDIVIDUAL
: ---------
: ROUTINE
: TELEPHONE
: NO INFOR
: 2M-INTL
GO TO ALL VIEW
***
Send message
***
CALL TYPE
If this part of the menu appears
use 5 to scroll menu.
INDIVIDUAL
PSTN CALL
TEST CALL
ALL SHIPS
GROUP CALL
AREA CALL
POSITION
6
2. Use or to select INDIVIDUAL and press the [ENT] key.
3. Press the [ENT] key to open the STATION ID menu.
CALL TYPE
PRIORITY
COM. TYPE
COM. FREQ : NO INFO
DSC FREQ
: INDIVIDUAL
: ROUTINE
: TELEPHONE
: 2M-INTL
GO TO ALL VIEW
***
Send message
***
:
STATION ID
:
---------
How to input station ID automatically
If you have registered some station IDs (see page 6-1),
you can insert them into your message as follows:
1. Press the [FILE] key after completing step 2 in the
above procedure. The following display appears.
2. Select COAST STATION or SHIP STATION and
press the [ENT] key.
3. Select file which contains ID you want to use
(press
4
to show ID number).
4. Press the [ENT] key to insert ID number in message.
Select ID file
COAST STATION
SHIP STATION
Note: You can print the
Select ID file list by pressing
the [8/PRINT] key.
Page 76
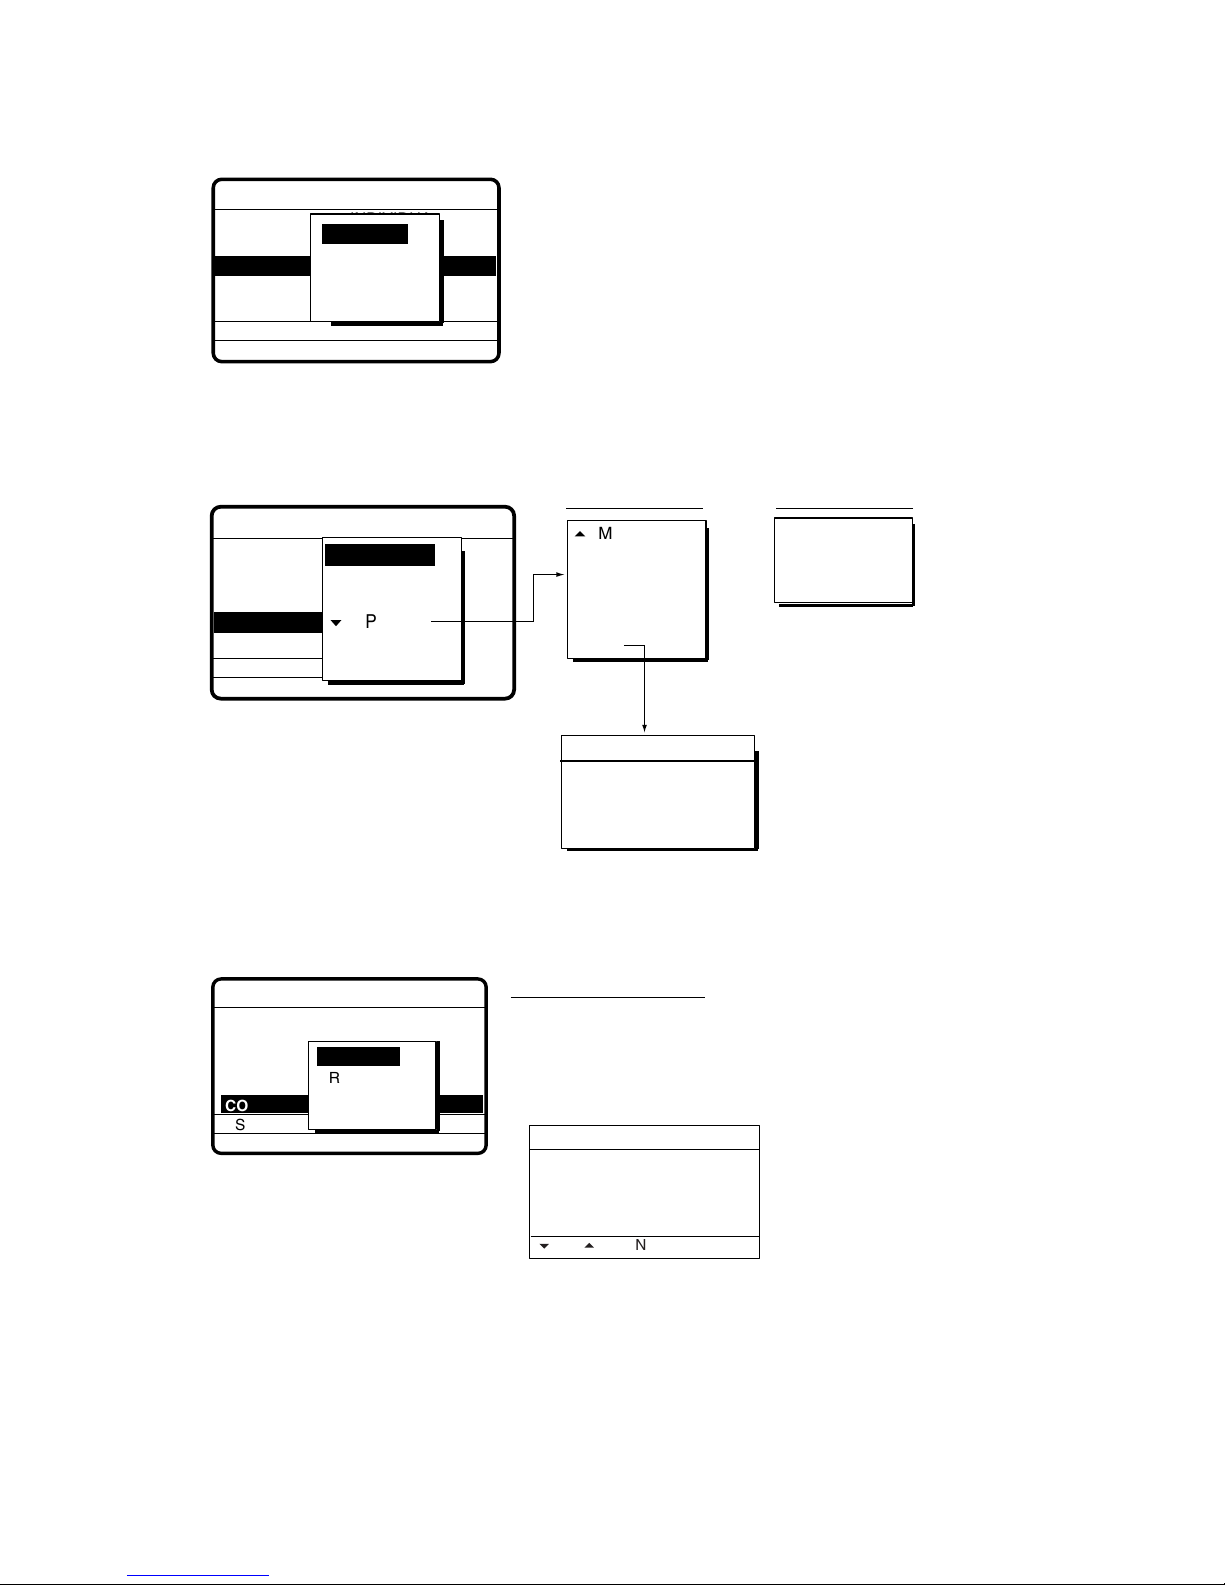
4-5
4. Key in ID of station where to send the message and then press the [ENT] key.
5. Press the [ENT] key to open the PRIORITY menu.
CALL TYPE
STATION ID
COM. TYPE
COM. FREQ
DSC FREQ
: INDIVIDUAL
: ---------
: TELEPHONE
: NO INFOR
: 2M-INTL
GO TO ALL VIEW
***
Send message
***
PRIORITY
:
BUSINESS
SAFETY
URGENCY
ROUTINE
6. Select appropriate priority (normally ROUTINE) and press the [ENT] key.
7. Press the [ENT] key to open the COM. TYPE menu.
CALL TYPE
STATION ID
PRIORITY
COM. FREQ
DSC FREQ
: INDIVIDUAL
: ---------
: ROUTINE
: NO INFOR
: 2M-INTL
***
Send message
***
TELEPHONE
NBPD-ARC
NBDP-FEC
Routine or
Business Priority
For Safety or
Urgency Priority
COM. TYPE
:
TTY RCV
TTY
MORSE KEY
MORSE TAPE
FACSIMILE
DATA
5
MAIN
V32
*
MODEM TYPE
*
V21
V26 BIS
V22
V26 TER
V22 BIS
V27 TER
V23
TELEPHONE
NBDP-ARQ
NBDP-FEC
6
SPECIAL
For SPECIAL items, the radiotelepho
is not controlled automatically. Set
frequency, class of emission, etc. at
the radiotelephone.
Press [ENT]
to display.
8. Select communications type desired and press the [ENT] key.
9. Press the [ENT] key to open the COM. FREQ menu.
***
Send message
***
CALL TYPE
STATION ID : 123456789
PRIORITY
COM. TYPE
DSC FREQ
: INDIVIDUAL
: 12M-INTL
COM. FREQ
FREQUENCY
CHANNEL
POSITION*
NO INFO
GO TO ALL VIEW
* POSITION is displayed if a coast
station is specified at step 3.
To select a user channel
If you have previously registered user channels (see page 7-10),
you can insert one into your message as follows:
1. Press the [FILE] key after completing step 8 in the
above procedure. The following display appears.
2. Select file and press the [ENT] key to insert channel no.
in message.
User channel file
00201. TX: 2301.0 RX: 2701.0
00202. TX: 2302.0 RX: 2702.0
00301. TX: 3301.0 RX: 3701.0
00302. TX: 3302.0 TX: 3702.0
Note: You can print the
User channel file list by pressing
the [8/PRINT] key.
6
UP 5DOWN
10. Select item desired and press the [ENT] key. For FREQUENCY and CHANNEL see “How to
Set Working Frequency” on the next page. NO INFO and POSITION lets the receiving
station set the working frequency. Select NO INFO or POSITION to send message to a coast
station. Select FREQUENCY or CHANNEL to send message to ship station.
Page 77

4-6
How to set working frequenc y
When you send a call set the working frequenc y as below to commun icate with the rece iver of
the messag e. The working fre qu enc y can be entered by Tx a nd Rx and frequencies as below or
channel no. as in “Channel” on the next page.
Routine or ship's business priority
For FREQUENCY or CHANNEL follow one of the sections below.
Frequency
a) Select FREQUENCY and press the [ENT] key.
KHZ
KHZ
RX: 0. 0
TX: 0. 0
b) Key in Tx frequency in five or six digits with the numeric keys and press . For example,
enter 12329.0 kHz. If you make a mistake, press the [CANCEL] key and then reenter data.
TX: 12329.0
KHZ
KHZ
RX: 0.0
Note: Working TX and RX fr eq ue nc i es in the message can be selected to 0.0 kHz s o t hat no
information about frequencies is sent out.
c) Enter Rx fr eq ue nc y an d press the [EN T] key. The Tx fre qu ency entere d appears in the COM.
FREQ field.
***
Send message
***
GO TO ALL VIEW
CALL TYPE:
STATION ID:
PRIORITY
COM. TYPE
COM. FREQ
DSC FREQ
INDIVIDUAL
123456789
: ROUTINE
: TELEPHONE
TX:12329.0 KHZ
: 12M-INTL
DSC FREQ : 12M-INTL
Page 78

4-7
Channel
a) Select CHANNEL and press the [ENT] key.
b) Key in channel no. in four or five digits and press the [ENT] key. For example, enter CH 1201.
Note that to enter user channel registered at Setup-user ch menu (page 7-11), press the
[FILE] key at the COM. FREQ field and select a desired channel from the user channel file.
CH: 0
CH: 1201
c) The channel entered appears in the COM. FREQ field.
GO TO ALL VIEW
***
Send message
***
CALL TYPE:
STATION ID:
PRIORITY
COM. TYPE
COM. FREQ
DSC FREQ
INDIVIDUAL
123456789
: ROUTINE
: TELEPHONE
: CH 1234
: 12M-INTL
DSC FREQ : 12M-INTL
Safety or urgency priority
For safety or urgency priority the communication frequency cannot be selected; it is
automatically set to the pair frequency as set for the DSC frequency.
Page 79

4-8
11. Press the [ENT] key to open the DSC FREQ menu. (The display below appears when
routine or business priority is selected.)
GO TO ALL VIEW
***
Send message
***
CALL TYPE
GROUP ID
PRIORITY
COM. TYPE
COM. FREQ
: Individual
: 001234567
: Routine
: Telephone
: No infor
CALL
E
ONE
DSC FREQ
:
12M-INTL
6
6 MHZ
8 MHZ
12 MHZ
4 MHZ
2 MHZ
6
16 MHZ
18 MHZ
22 MHZ
25 MHZ
OTHER
MANUAL
Use to scroll
menu.
OTHER: Special, private channels.
MANUAL: For selection of frequency at
radiotelephone when there is "remote control
error."
12. Select DSC frequency following the section below.
How to set DSC frequency
Routine or ship's business priority
a) Select DSC FREQ and press the [ENT] key.
GO TO ALL VIEW
***
Send message
***
CALL TYPE INDIVIDUAL
STATION ID 123456789
PRIORITY ROUTINE
COM. TYPE TELEPHONE
COM. FREQ NO INFO
: Individual
: 001234567
: Routine
: Telephone
: No infor
DSC FREQ TL
: 12M-INTL
16 MHZ
18 MHZ
22 MHZ
25 MHZ
5
OTHER
MANUAL
Use 6 to scroll
menu.
OTHER: Special, private channel
MANUAL: Manual setting at radiotelephone
6 MHZ
8 MHZ
6
12 MHZ
4 MHZ
2 MHZ
b) Select appropriate DSC band and press the [ENT] key. One of the menus shown on the next
page appears depending on the band selected here.
Page 80

4-9
GO TO ALL VIEW
CALL TYPE
Station ID
Priority
Com. type
COM. FREQ
: Individual
: 001234567
: Routine
: Telephone
: No infor
: 12M-INTL
6 MHz
8 MHz
12 MHz
4 MHz
5
USER CH1 :T12345.0/R12345.0
USER CH2
:
T12345.5/R12345.5
USER CH3
:
T12346.0/R12346.0
USER CH4
:
T12346.5/R12346.5
Use 6 to scroll
menu if user channels
are registered.
12MHz menu
INTL :T12577.5/R12657.0
LOCAL1 :T12578.0/R12657.5
LOCAL2 :T12578.5/R12658.0
16MHz menu
INTL :T16805.0/R16903.0
LOCAL1 :T16805.5/R16903.5
LOCAL2 :T16806.0/R16904.0
2MHz menu
INTL :T 2189.5/R 2177.0
4MHz menu
INTL :T 4208.0/R 4219.5
LOCAL1 :T 4208.5/R 4220.0
LOCAL2 :T 4209.0/R 4220.5
6MHz menu
INTL :T 6312.5/R 6331.0
LOCAL1 :T 6313.0/R 6331.5
LOCAL2 :T 6313.5/R 6332.0
8MHz menu
INTL :T 8415.0/R 8436.5
LOCAL : T 8415.5/R8437.0
LOCAL :T 8416.0/R8437.5
18MHz menu
INTL :T18898.5/R19703.5
LOCAL1 :T18899.0/R19704.0
LOCAL2 :T18899.5/R19704.5
22MHz menu
INTL :T22374.5/R22444.0
LOCAL1 :T22375.0/R22444.5
LOCAL2 :T22375.5/R22445.0
25MHz menu
INTL :T25208.5/R26121.0
LOCAL1 :T25209.0/R26121.5
LOCAL2 :T25209.5/R26122.0
Other menu
INTL :T 458.5/R 458.5
2 MHz
DSC FREQ
INTL :
T12577.5/R12657.0
LOCAL1 :
T12578.0/R12657.5
LOCAL2 :
T12578.5/R12658.0
6
***
Send message
***
LOCAL = Local channel
c) Select DSC frequency with or and press the [ENT] key. The display shows the DSC
frequency band selected.
***
Send message
***
CALL TYPE:
STATION ID:
PRIORITY
COM. TYPE
COM. FREQ
DSC FREQ
INDIVIDUAL
123456789
: ROUTINE
: TELEPHONE
: NO INFO
: 2M-INTL
GO TO ALL VIEW
Page 81

4-10
Safety or urgency priority
For safety or urgency priority the field COM. FREQ is automatically set to the same pair
frequency as the DSC frequency.
a) Select DSC FREQ and press the [ENT] key.
GO TO ALL VIEW
***
Send message
***
CALL TYPE:
STATION ID:
PRIORITY
COM. TYPE
INDIVIDUAL
001234567
: SAFETY
: TELEPHONE
DSC FREQ
: 2187.5 KHZ
COM. FREQ
: 2182.0KHZ
4207.5
6312.0
8414.5
12577.0
16804.5
MANUAL
2187.5
b) Select appropriate frequency with or and press the [ENT] key.
13. Press the [CALL] key to send the message (transmission time: about 7 sec.). The display
shows the message "Individual request call in progress!" while the message is being sent.
Individual request
call in progress!
TIME TO GO: 7S
TO SHIP:
123456789
DSC FREQ :
2187.5 KHZ
ROUTINE
TELEPHONE 2189.5 KHZ
Note: When the channel is in use,
"CH BUSY" appeares at the
lower left-hand side of the
screen.
Press [CALL] key for forced
transmission.
14. After the message is sent, the equipment waits for acknowledgement of the message,
showing the display below.
Waiting for
acknowledgement.
TIME TO GO: 4M30S
FROM SHIP: 123456789
DSC FREQ : 2187.5 KHZ
ROUTINE
TELEPHONE 2189.5 KHZ
15. The timer starts counting down the maximum time to wait for acknowledgement, 3.5-4.5
minutes, randomly set. One of the following three messages appears. (“No response! Try
calling ag ai n .” a ppears after the timer co unts down to zero. I t m ea ns t he s t ation calle d di d not
respond.)
No response!
Try calling again?
FROM SHIP: 123456789
ROUTINE
TELEPHONE 2189.5 KHZ
DSC FREQ :
2187.5 KHZ
RE-SEND
Able acknowledge
call received.
FROM SHIP: 123456789
ROUTINE
TELEPHONE 2189.5 KHZ
STOP ALARM
Unable acknowledge
call received.
STOP ALARM
FROM SHIP:
123456789
ROUTINE
NO REASON GIVEN
Able acknowledge call received Unable acknowledge call received No response from station
16. Do one of the following depending on the message shown in step 15.
Page 82

4-11
Able acknowledge call received
The audio alarm sounds; press the [CANCEL] key to silence it. The display changes as below.
Press the [CANCEL] key to return to the DSC standby screen. If you are using a FURUNO SSB
radiotelephone the working frequency is automatically set; you may start communications. For
other makes of radiotelephone set communication frequency and class of emission.
JUL-23-1999-23:59 ECC: OK
ABLE ACKNOWLEDGE
FROM SHIP:
123456789
ROUTINE
TELEPHONE NO INFO
*
Received message
*
GO TO ALL VIEW
Unable acknowledge call received
The alarm sounds; press the [CANCEL] key to silence the alarm, and the display looks
something like the one below. Send the call again later. If the coast station sends the message
“QUEUE INDICATION,” wait until your turn arrives.
JUL-23-1999-23:59 ECC: OK
NO REASON GIVEN
*
Received message
*
GO TO ALL VIEW
FROM SHIP:
123456789
ROUTINE
Reason for unable to acknowledge:
NO REASON GIVEN
CONGESTION AT SWITCHING CENTRE*
BUSY
QUEUE INDICATION*
STATION BARRED*
NO OPERATOR AVAILABLE*
OPERATOR TEMPORARILY UNAVAILABLE*
EQUIPMENT DISABLED
MODE NOT USABLE
CHANNEL NOT USABLE
* Coast station use
No response! Try calling again?
Re-send call:
Press the [ENT] key (the display shown in step 12 appears) followed by the
[CALL] key
Cancel call:
Press the [CANCEL] key to return to the DSC standby screen.
Page 83
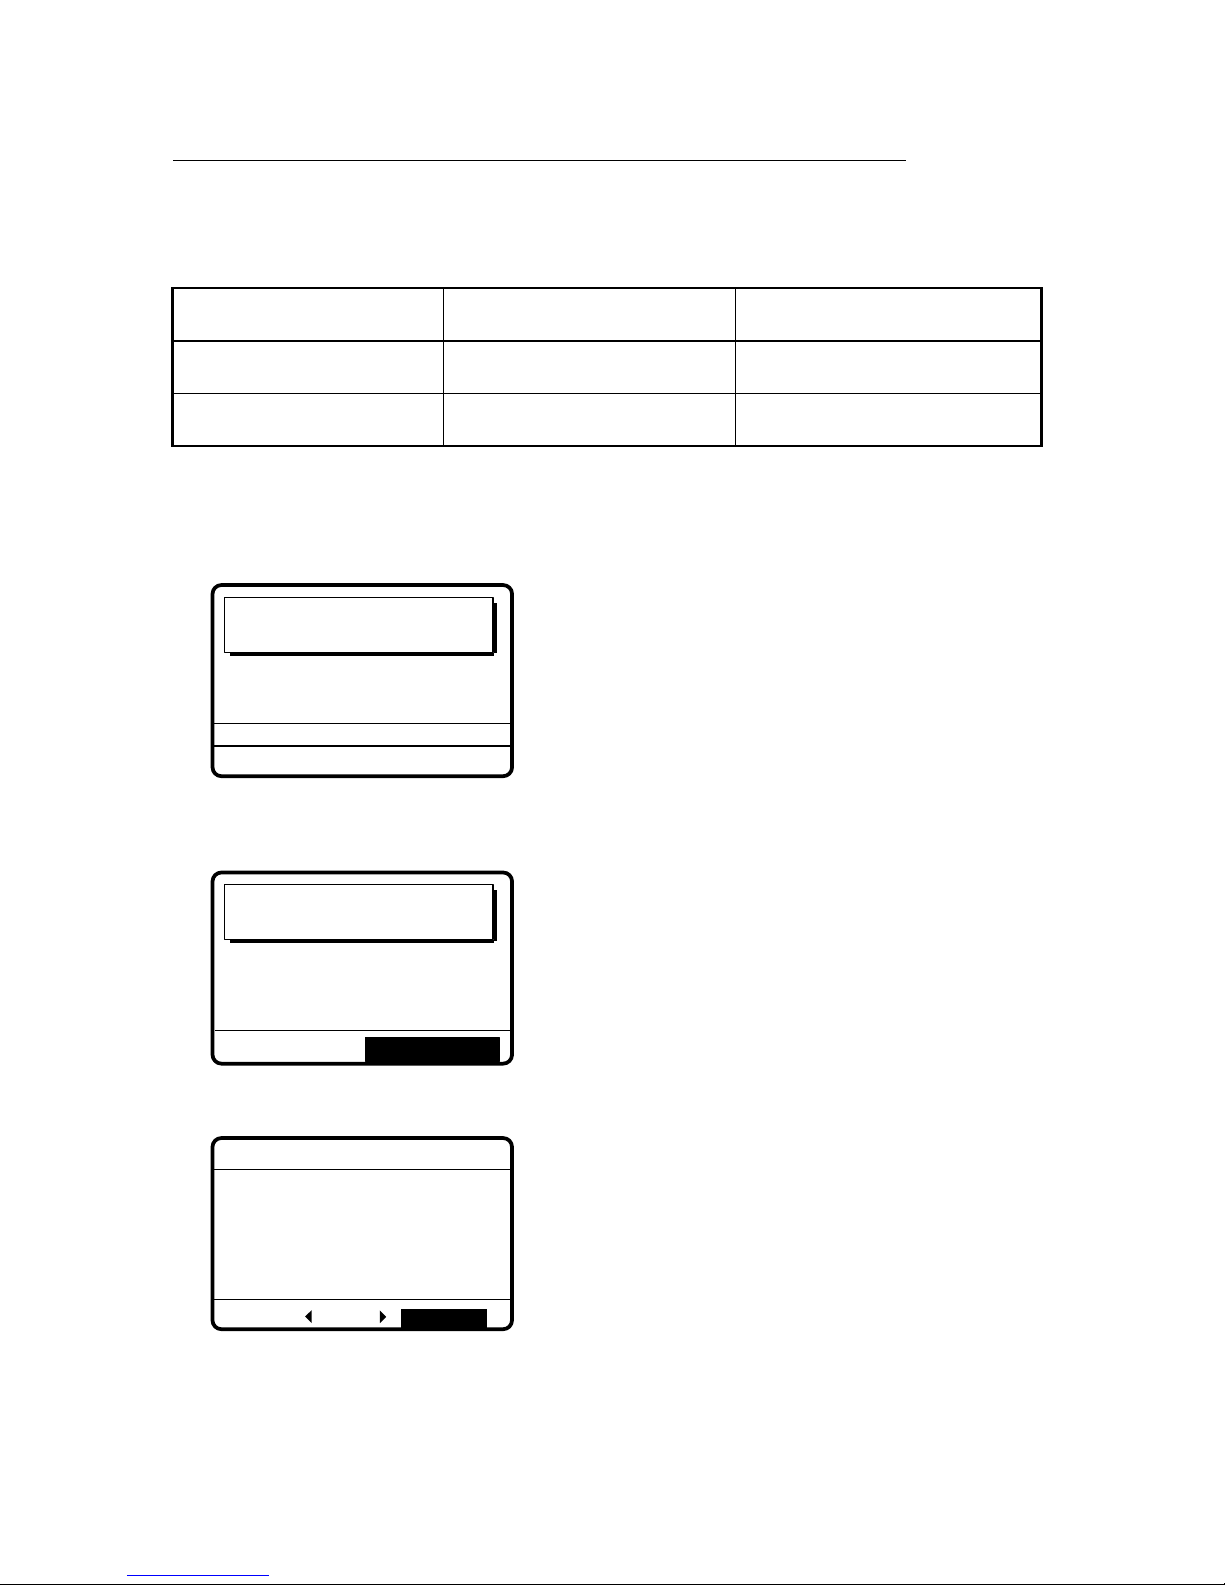
4-12
4.2.2 Receiving individual call
Sending automatic acknowledge (ACK BQ) with comply type “ABLE”
When own ship receives an individual call you may or may not be able to receive the call
depending on the comply type setting (on the Auto Ack menu) as below. The relationship
between comply type and automatic/manual acknowledge is as below.
Comply type, automatic
acknowledge
ABLE UNABLE
AUTO ACK Can send acknowledge
automatically
Can send UNABLE automatically.
MANUAL ACK
Can send acknowledge
manually
Can send UNABLE manually.
Note:
The handset must be on hook to enable automatic acknowledge.
1. When an individual call is received and the automatic acknowledge feature is active and
comply type is “ABLE”, the display shown below appears, indicating the auto acknowledge
call (ACK BQ) call is being sent.
Able acknowledge
call in progress!
TIME TO GO: 6S
DSC FREQ :
2177.0 KHZ
TO SHIP:
123456789
ROUTINE
TELEPHONE CH 201
2. It takes about 7 sec. to transmit the call, after which the audio alarm sounds and the following
message appears.
Able acknowledge
call transmitted.
TO SHIP:
123456789
ROUTINE
TELEPHONE CH 201
STOP ALARM
3. Press the [CANCEL] key to silence the alarm and the following display appears.
*
Xmitted message
*
JUL-23-1999-23:01
ABLE ACKNOWLEDGE
TO SHIP:
123456789
ROUTINE
TELEPHONE CH 201
RE-SEND
34
ALL VIEW
4. You can now communicate with party over frequency specified.
Page 84

4-13
5. If you want to re-send the message press
to select RE-SEND
and press the [ENT] key.
***
Send message
***
COM. FREQ : NO INFO
DSC FREQ : 2M-INTL
SHIP ID :
123456789
PRIORITY : ROUTINE
COM. TYPE : TELEPHONE
CALL TYPE : INDIVIDUAL
GO TO ALL VIEW
6. Press the [CALL] key to re-send the call.
Sending automatic acknowledge (ACK BQ) with comply type “UNABLE”
1. When an individual call is received and the automatic acknowledge feature and comply type
is “UNABLE,” the display shown below appears, indicating the auto acknowledge call with
UNABLE (ACK BQ) call is being sent.
Unable acknowledge
call in progress!
TIME TO GO : 6S
DSC FREQ : 12577.5 KHZ
BUSY
TO SHIP :
121234567
ROUTINE
2. It takes about 7 sec. to transmit the call, after which the audio alarm sounds and the following
message appears.
Unable acknowledge
call transmitted.
STOP ALARM
BUSY
TO SHIP :
121234567
ROUTINE
3. Press the [CANCEL] key to silence the alarm and the following display appears.
*
Xmitted message
*
JUL-23-1999-23:01
UNABLE ACKNOWLEDGE
ALL VIEW
RE-SEND
BUSY
TO SHIP :
121234567
ROUTINE
Page 85

4-14
4. If you want to send a proposal, press to select RE-SEND and press the [ENT] key.
***
Send message
***
COM. FREQ : NO INFO
DSC FREQ : 12M-INTL
GO TO ALL VIEW
STATION ID :
001234567
PRIORITY : ROUTINE
COM. TYPE : TELEPHONE
CALL TYPE : INDIVIDUAL
5. Prepare individual message and press the [CALL] key to send. If the receiving station
accepts your proposal, you can begin communications.
Manually acknowledging individual call with “AB LE”
1. When an individual call is received, the alarm sounds and the display looks like the one
below.
Individual request
call received.
FROM COAST:
001234567
ROUTINE
TELEPHONE CH 12034
STOP ALARM
2. Press the [CANCEL] key to silence the alarm, and the display changes as shown below.
JUL-23-1999-23:00:00 ECC: OK
INDIVIDUAL REQUEST
FROM COAST:
001234567
ROUTINE
TELEPHONE CH 12034
*
Received message
*
ANSWER
34
ALL VIEW
3. Press to select "ANSWER" and then press the [ENT] key.
***
Send message
***
TO COAST :
001234567
COM. TYPE : TELEPHONE
COM. FREQ : NO INFO
CALL TYPE : ABLE
ACKNOWLEDGEMENT
DSC FREQ : 12M-INTL
GO TO ALL VIEW
ABLE
UNABLE
Page 86
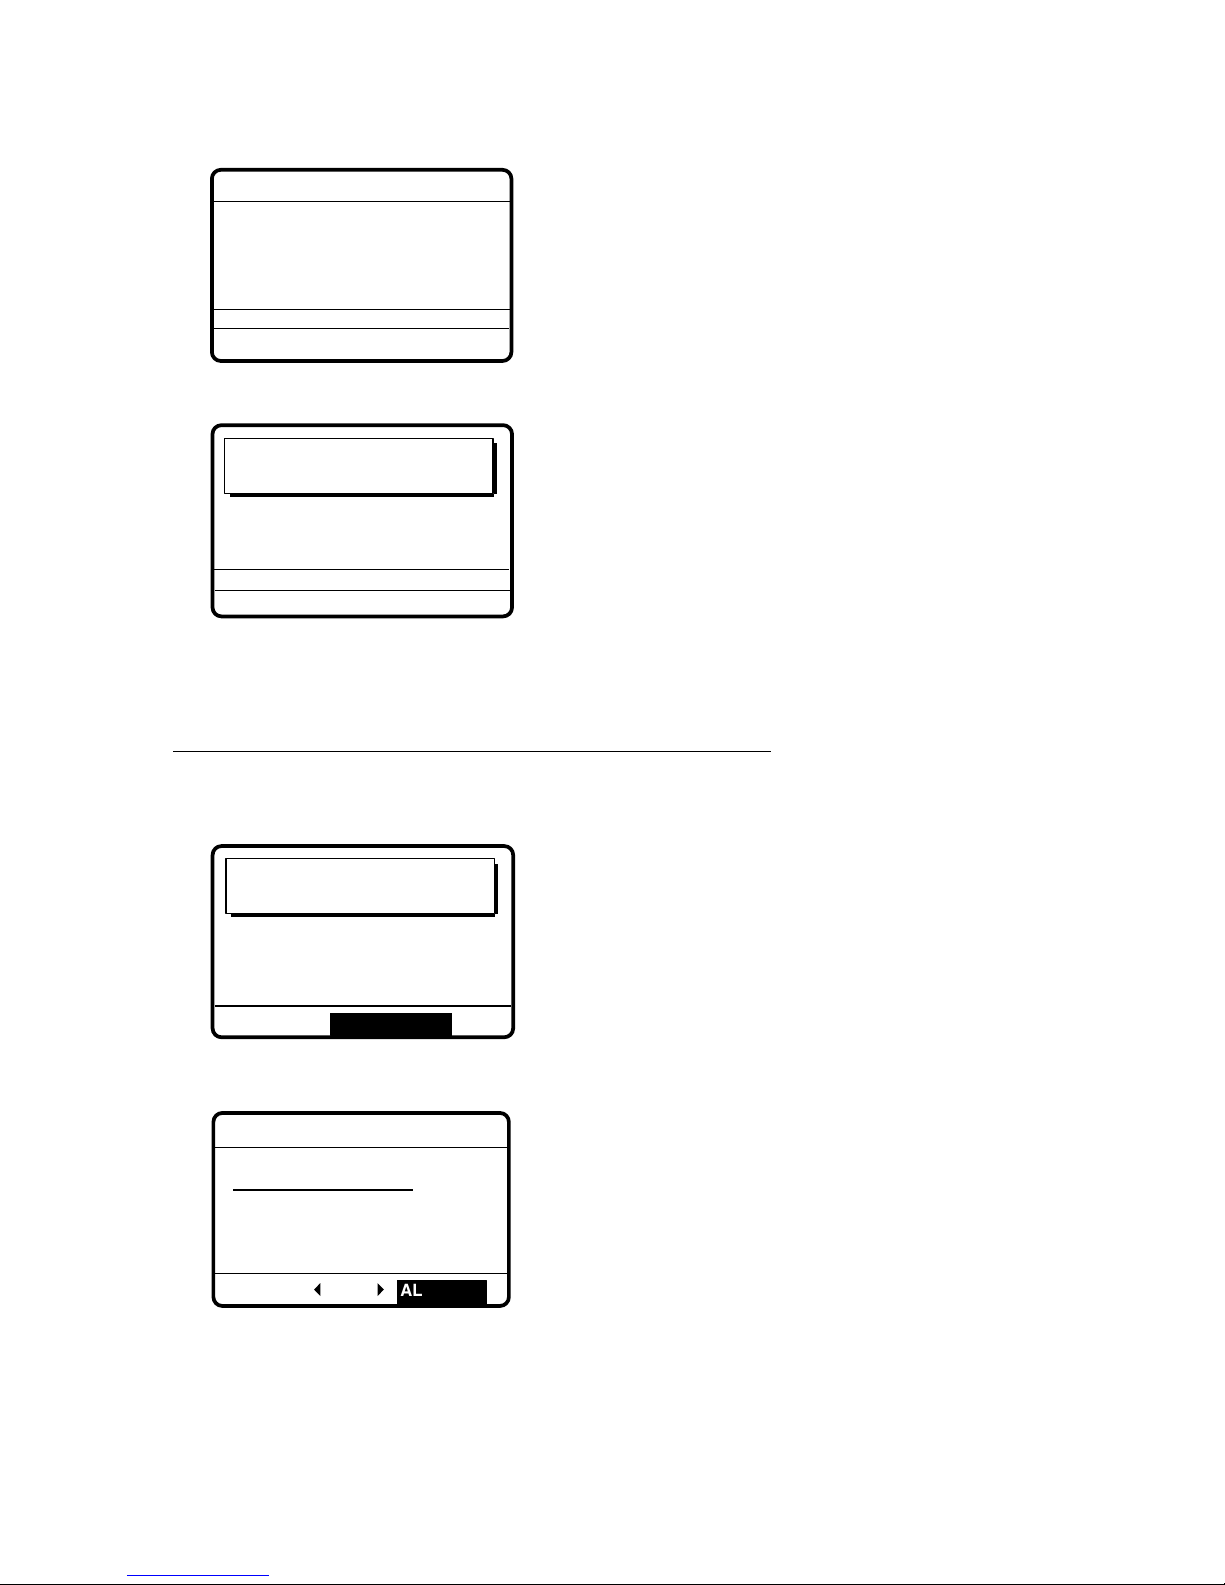
4-15
4. Select ABLE and press the [ENT] key. The display changes as below. (IF ABLE is sent,
working frequency is automatically set specified by other party.)
***
Send message
***
DSC FREQ:
12577.5 KHZ
GO TO ALL VIEW
TO COAST: 121234567
COM. TYPE: TELEPHONE
COM. FREQ: CH12034
CALL TYPE: ABLE
ACKNOWLEDGEMENT
5. Press the [CALL] key to send the call, and the display changes as below.
Able acknowledge
call in progress!
TIME TO GO: 7S
DSC FREQ : 12577.5
KHZ
TO COAST :
121234567
ROUTINE
TELEPHONE CH 12034
6. After the call is sent (transmission time: 7 sec.), you can begin voice communications as
soon as the message is completely transmitted.)
Manually acknowledging individual call with “UNABLE”
1. When an individual call is received the alarm sounds and the display shows the message
"Individual request call received."
Individual request
call received.
FROM SHIP:
121234567
ROUTINE
TELEPHONE CH 12034
STOP ALARM
2. Press the [CANCEL] key to silence the alarm, and the display changes as below.
JUL-23-1999-23:00:00 ECC: OK
INDIVIDUAL REQUEST
FROM SHIP:
121234567
ROUTINE
TELEPHONE CH 12034
*
Received message
*
ANSWER
34
ALL VIEW
3. Press to select ANSWER and press the [ENT] key.
Page 87
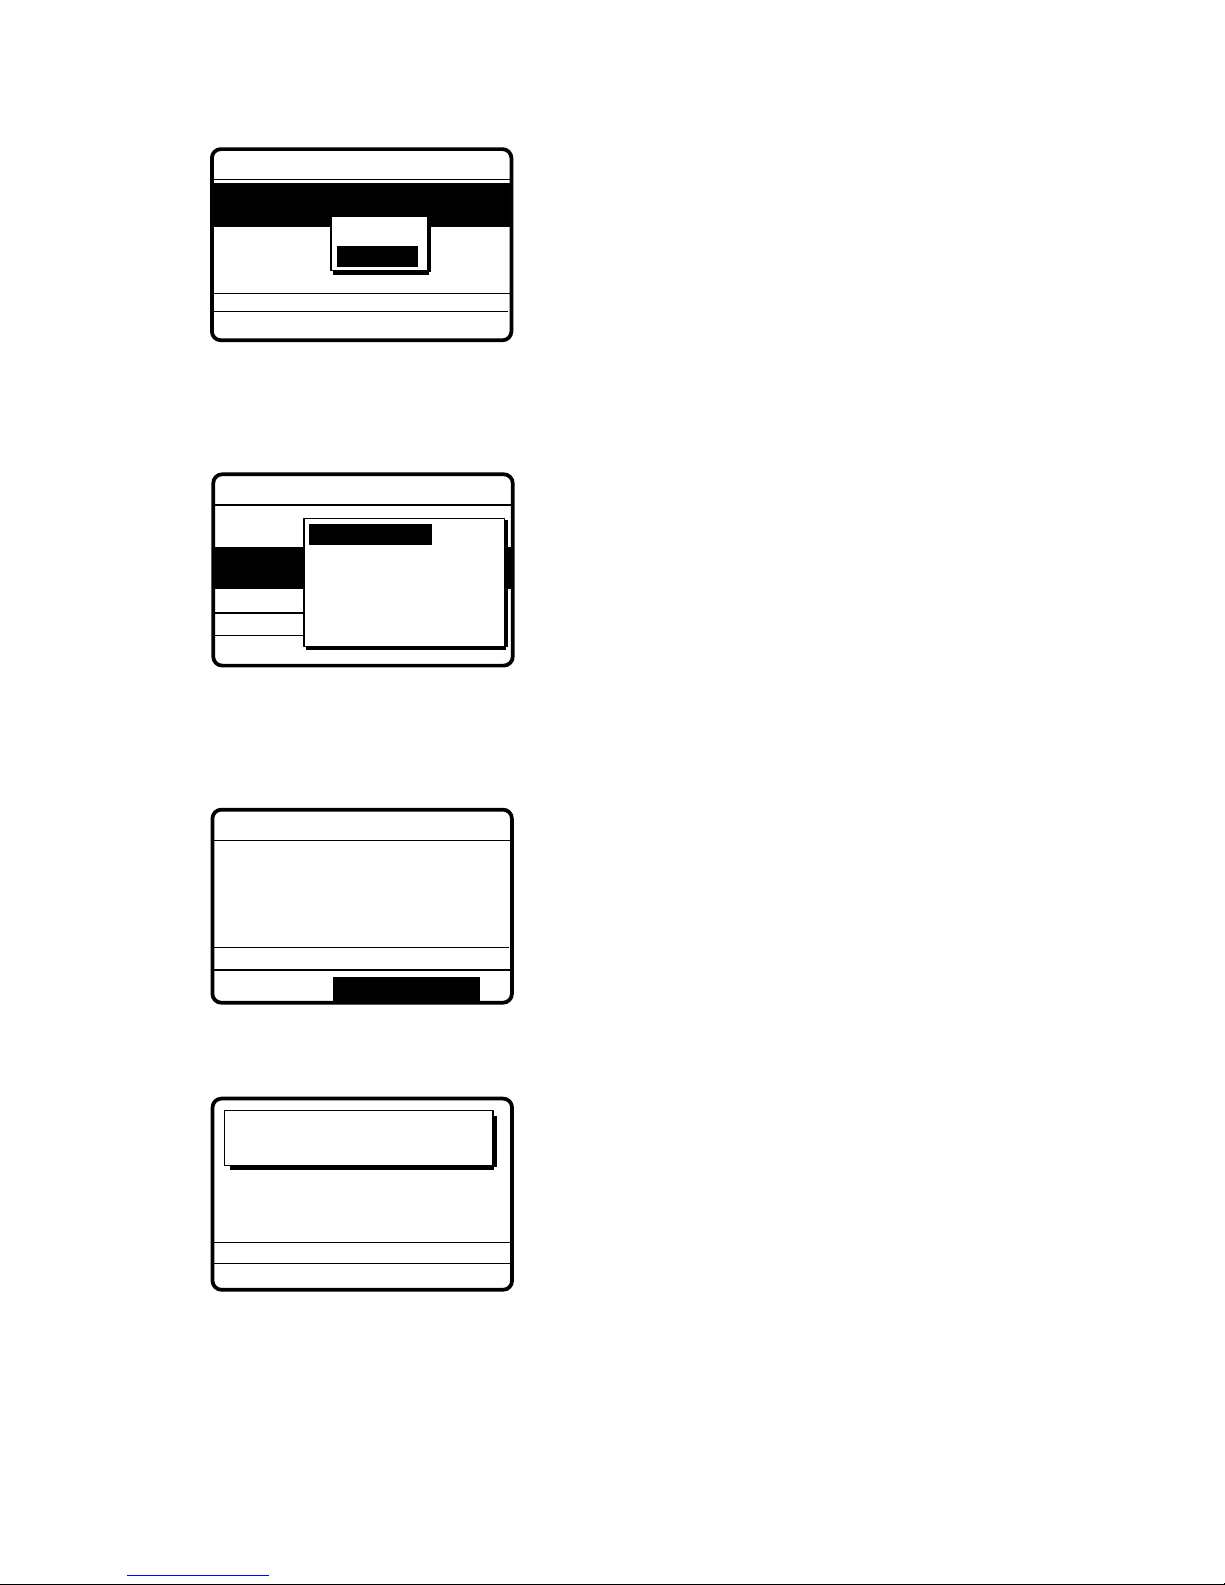
4-16
4. Press the [ENT] key to open the CALL TYPE menu.
***
Send message
***
TO SHIP :
001234567
COM. TYPE : TELEPHONE
COM. FREQ : CH12034
CALL TYPE : ABLE
ACKNOWLEDGEMENT
DSC FREQ: 1
2577.5 KHZ
GO TO ALL VIEW
ABLE
UNABLE
5. Select UNABLE and press the [ENT] key.
6. Press the [ENT] key. The display then prompts you for the reason you are unable to
acknowledge.
***
Send message
***
DSC FREQ :
12,577.5 KHZ
CALL TYPE : UNABLE
REASON : NO REASON
TO SHIP :
001234567
ACKNOWLEDGEMENT
GIVEN
NO REASON
BUSY
EQUIP DISABLED
MODE NOT USABLE
CH NOT USABLE
7. Select suitable reason and press the [ENT] key.
8. Press the [ENT] key to open the DSC FREQ menu. Select appropriate frequency and press
the [ENT] key. The display changes as below.
***
Send message
***
DSC FREQ :
12577.5 KHZ
GO TO ALL VIEW
CALL TYPE : UNABLE
REASON : CHANNEL
TO SHIP : 121234567
ACKNOWLEDGEMENT
NOT USABLE
9. Press the [CALL] key to send the call. The display shows "Unable acknowledge call in
progress!" while the call is being sent.
Unable acknowledge
call in progress!
TIME TO GO: 6S
DSC FREQ :
12577.5 KHZ
ROUTINE
TO SHIP:
121234567
CHANNEL NOT USABLE
10. The timer counts down the time remaining until the message is sent (transmission time:
about 7 sec.). The DSC standby screen automatically appears upon completion of
transmission.
Page 88
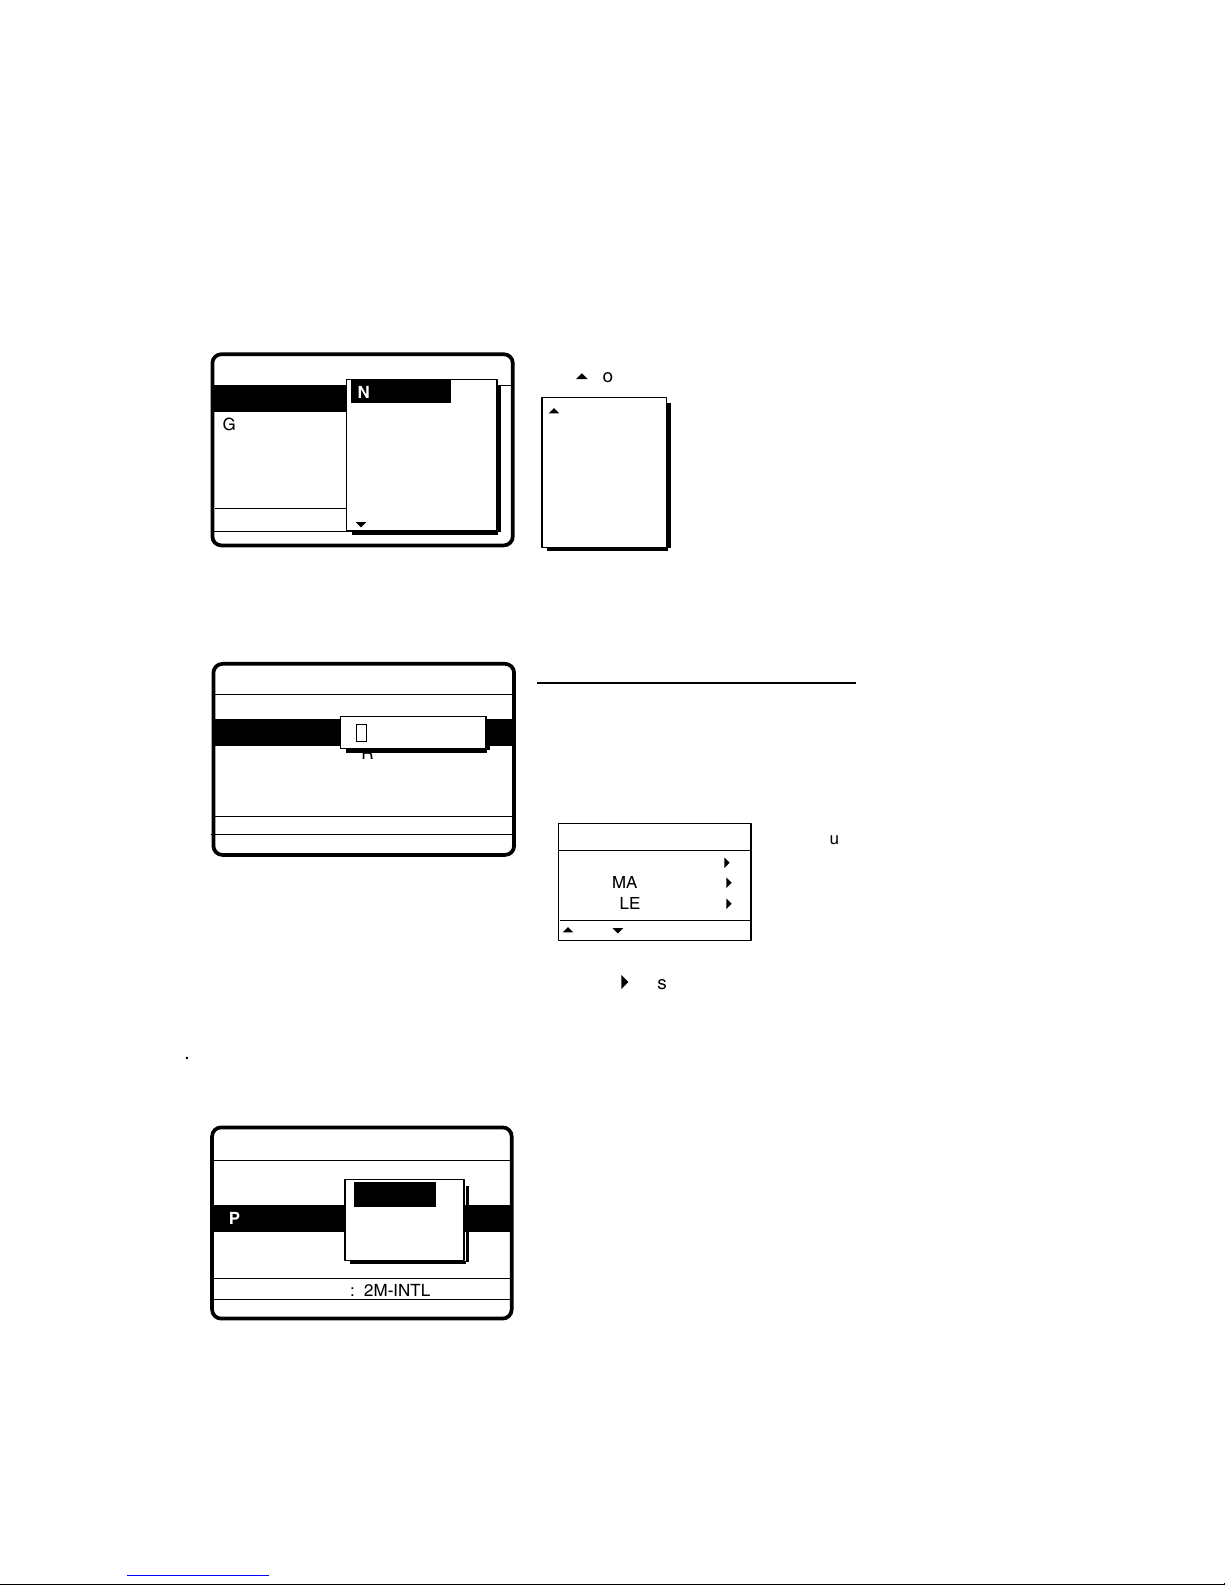
4-17
4.3 Group Call
A group call is for calling a specific group by entering its group ID.
4.3.1 Sending a group call
1. Press the [CALL] key at the DSC standby screen, and press the [ENT] key to open the CALL
TYPE menu.
***
Send message
***
RELAY SEL
POLLING
NEUTRAL
MEDICAL
RELAY ALL
DISTRESS
5
GROUP ID
PRIORITY
COM. TYPE
COM. FREQ
DSC FREQ
: Individual
PSTN CALL
TEST CALL
ALL SHIPS
GROUP CALL
AREA CALL
POSITION
6
INDIVIDUAL
CALL TYPE
If this part of the menu appears
use 5 to scroll the menu.
2. Use or to select GROUP CALL and press the [ENT] key.
3. Press the [ENT] key to open the GROUP ID menu.
GO TO ALL VIEW
***
Send message
***
CALL TYPE
PRIORITY
COM. TYPE
COM. FREQ
DSC FREQ
: GROUP CALL
: ROUTINE
: TELEPHONE
: NO INFO
: 2M-INTL
GROUP ID 000000000
How to input group ID automatically
If you have registered some group IDs (see page 6-4),
you can insert them into your message as follows:
1. Press the [FILE] key after completing step 2 in the
above procedure. The following display appears.
2. Select file which contains ID you want to use
(press
4
to show ID number).
3. Press the [ENT] key to insert ID number in message.
Group ID file
004. FURUNO 4
500. MARINE
4
777. ELECTRIC
4
Note: You can print the
Group ID file list by pressing
the [8/PRINT] key.
5
UP 6DOWN
4. Key in group ID (nine digits) where to send the message and press the [ENT] key.
5. Press the [ENT] key to open the PRIORITY menu.
GO TO ALL VIEW
***
Send message
***
CALL TYPE
GROUP ID
COM. TYPE
COM. FREQ NO INFO
DSC FREQ
: GROUP CALL
: 012345678
: 2M-INTL
PRIORITY
SAFETY
URGENCY
ROUTINE
6. Select priority desired and press the [ENT] key.
Page 89

4-18
7. Press the [ENT] key to open the COM. TYPE menu.
GO TO ALL VIEW
***
Send message
***
CALL TYPE
GROUP ID
PRIORITY
COM. FREQ
DSC FREQ
: GROUP CALL
: 012345678
: Routine
: Telephone
: No infor
: 2M-INTL
NBDP-FEC
SPECIAL
6
TELEPHONE
COM. TYPE
TTY RCV
TTY
MORSE KEY
MORSE TAPE
FACSIMILE
5
MAIN
For Routine
Use 6to
scroll menu.
TELEPHONE
NBDP-FEC
For Safety or Urgency
8. Select communication type desired and press the [ENT] key.
9. Press the [ENT] key to open the COM. FREQ menu.
***
Send message
***
CALL TYPE : GROUP
COM. FREQ :
2164.0 kHz
COM. TYPE : TELEPHONE
PRIORITY : ROUTINE
GROUP ID :
012345678
DSC FREQ : 2M-INTL
GO TO ALL VIEW
FREQUENCY
CHANNEL
NO INFO
GO TO ALL VIEW
To select a user channel
If you have previously registered user channels (see page 7-10),
you can insert one into your message as follows:
1. Press the [FILE] key after completing step 8 in the
above procedure. The following display appears.
2. Select file and press the [ENT] key to insert channel no.
in message.
User channel file
00201. TX: 2301.0 RX: 2701.0
00202. TX: 2302.0 RX: 2702.0
00301. TX: 3301.0 RX: 3701.0
00302. TX: 3302.0 TX: 3702.0
Note: You can print the
User channel file list by pressing
the [8/PRINT] key.
6
UP 5DOWN
10. Select communication frequency desired and press the [ENT] key. (See page 4-6 for details.)
11. Press the [ENT] key to open the DSC FREQ menu.
GO TO ALL VIEW
***
Send message
***
CALL TYPE
GROUP ID
PRIORITY
COM. TYPE
COM. FREQ
: Individual
: 001234567
: Routine
: Telephone
: No infor
CALL
E
ONE
DSC FREQ
:
12M-INTL
6
6 MHZ
8 MHZ
12 MHZ
4 MHZ
2 MHZ
6
16 MHZ
18 MHZ
22 MHZ
25 MHZ
OTHER
MANUAL
Use to scroll
menu.
OTHER: Special, private channels.
MANUAL: For selection of frequency at
radiotelephone when there is "remote control
error."
12. Select DSC band and then press the [ENT] key. Select DSC frequency and press the [ENT]
key. (See page 4-8 for details.)
Page 90

4-19
***
Send message
***
CALL TYPE : GROUP
COM. FREQ : 2164.0 KHZ
COM. TYPE : TELEPHONE
PRIORITY : ROUTINE
GROUP ID :
012345678
DSC FREQ : 2177.0 KHZ
GO TO ALL VIEW
13. Press the [CALL] key to send the group call (transmission time: about 7 sec.). The display
shows "Group call in progress" while the call is being sent.
GROUP ID :
012345678
Group
call in progress!
TIME TO GO : 6S
DSC FREQ :
2177.0 KHZ
TELEPHONE
ROUTINE
2164.0 KHZ
14. The DSC standby screen automatically appears after the message is sent.
4.3.2 Receiving a group call
Group ID must be registered in order to receive a group call. See note on page 6-4.
1. The audio alarm sounds and the display shows "Group call received" when a group call is
received.
FROM SHIP:
123456789
ROUTINE
TELEPHONE
2164.0 KHZ
Group
call received.
STOP ALARM
2. Press the [CANCEL] key to silence the alarm, and the display changes as below.
*
Received message
*
JUL-23-1999-23:59 ECC: OK
GROUP CALL
FROM SHIP :
123456789
ROUTINE
TELEPHONE
2164.0 KHZ
GO TO ALL VIEW
3. Press the [CANCEL] key to return to the DSC standby screen. Watch on the working
frequency.
Page 91

4-20
4.4 Geographical Area Call
The geographical area call sends a call to all ships within a specific area you designated in your
geographical area call message. In the figure below, for example, the call will be sent to all ships
within 10°S and 5°E of 34°N, 135°W.
Reference point
(For example,
34˚N 135˚W)
5˚
140 W
135 W
10˚
34 N
24 N
4.4.1 Sending a geographical area call
1. Press the [CALL] key at the DSC standby screen, and press the [ENT] key to open the CALL
TYPE menu.
RELAY SEL
POLLING
NEUTRAL
MEDICAL
RELAY ALL
DISTRESS
5
***
Send message
***
STATION ID
PRIORITY
COM. TYPE
COM. FREQ
DSC FREQ
: Individual
: 001234567
: Routine
: Telephone
: No inform
: 12M-INTEL
PSTN CALL
TEST CALL
ALL SHIPS
GROUP CALL
AREA CALL
POSITION
6
INDIVIDUAL
CALL TYPE
If this part of the menu
appears use 5to scroll.
2. Use or to select AREA CALL and press the [ENT] key.
3. Press the [ENT] key to open the AREA menu.
GO TO ALL VIEW
***
Send message
***
CALL TYPE
PRIORITY
COM. TYPE
COM. FREQ
DSC FREQ
: AREA CALL
: ROUTINE
: TELEPHONE
: NO INFO
: 2M-INTL
--
˚N
---
˚E ↓ --˚ → --˚
AREA
4. Enter latitude, longitude, southerly degrees and easterly degrees of area with the numeric
keys and press the [ENT] key. Use or to switch from North to South latitude and vice
versa and East to West longitude and vice versa.
Page 92
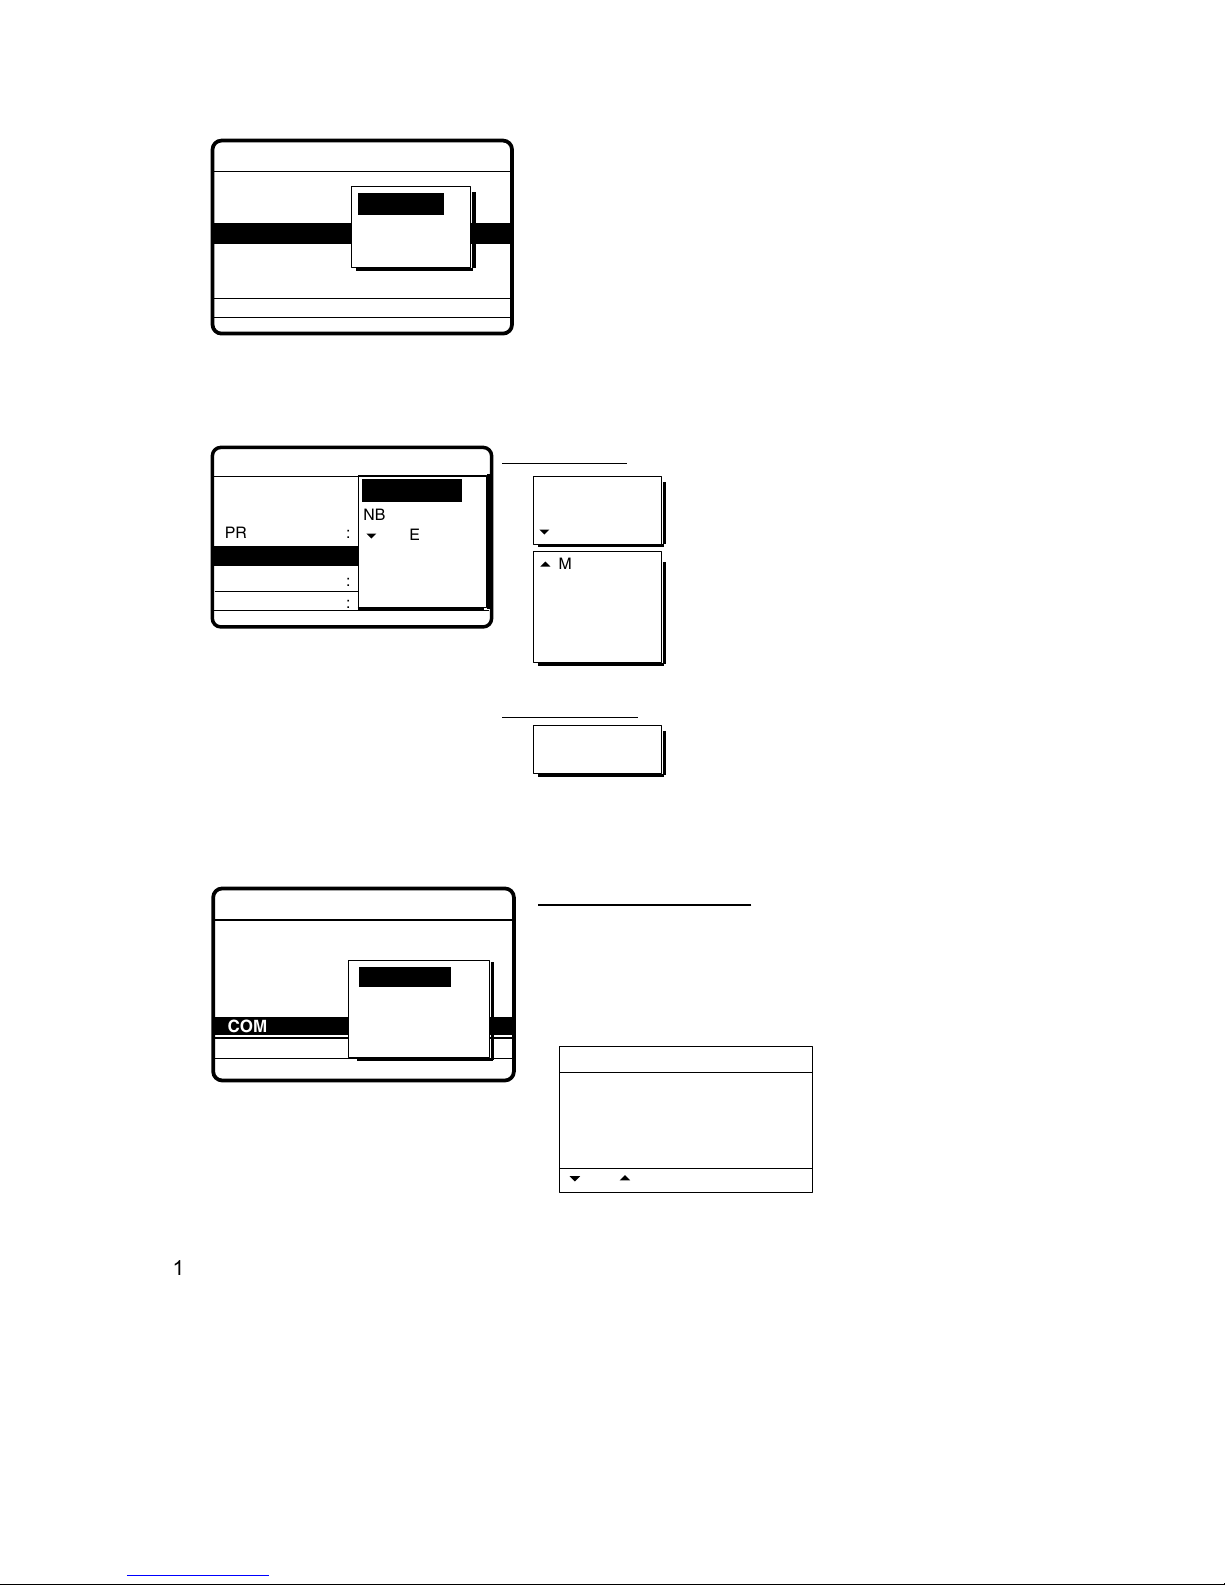
4-21
5. Press the [ENT] key to open the PRIORITY menu.
GO TO ALL VIEW
***
Send message
***
CALL TYPE
AREA :
12˚N 123˚W ↓12˚ → 12˚
COM. TYPE
COM. FREQ
DSC FREQ
: AREA CALL
: Routine
: Telephone
: NO INFO
: 2M-INTL
SAFETY
URGENCY
ROUTINE
PRIORITY
6. Select priority desired and press the [ENT] key.
7. Press the [ENT] key to open the COM. TYPE menu.
TELEPHONE
NBDP-FEC
6
SPECIAL
TTY RCV
TTY
MORSE KEY
MORSE TAPE
FACSIMILE
5
MAIN
For ROUTINE
TELEPHONE
NBDP-FEC
For SAFETY or
URGENCY
GO TO ALL VIEW
***
Send message
***
CALL TYPE
AREA :
12˚N 123˚W ↓12˚ → 12˚
PRIORITY
COM. FREQ
DSC FREQ
: AREA CALL
: Routine
: Telephone
: No infor
: 2M-INTL
NBDP-FEC
6
SPECIAL
TELEPHONE
COM. TYPE
8. Select communication type desired and press the [ENT] key.
9. Press the [ENT] key to open the COM. FREQ menu.
GO TO ALL VIEW
***
Send message
***
CALL TYPE
AREA:
12˚N 123˚W ↓12˚ → 12˚
PRIORITY
COM. TYPE
DSC FREQ
: AREA CALL
: 2M-INTL
COM. FREQ
FREQUENCY
CHANNEL
NO INFO
To select a user channel
If you have previously registered user channels (see page 7-10),
you can insert one into your message as follows:
1. Press the [FILE] key after completing step 8 in the
above procedure. The following display appears.
2. Select file and press the [ENT] key to insert channel no.
in message.
User channel file
00201. TX: 2301.0 RX: 2701.0
00202. TX: 2302.0 RX: 2702.0
00301. TX: 3301.0 RX: 3701.0
00302. TX: 3302.0 TX: 3702.0
Note: You can print the
User channel file list by pressing
the [8/PRINT] key.
6
UP 5DOWN
10. Select communication frequency desired and press the [ENT] key. (See page 4-6 for details.)
Page 93

4-22
11. Press the [ENT] key to open the DSC FREQ menu.
12M-INTL
GO TO ALL VIEW
***
Send message
***
CALL TYPE:
AREA:
PRIORITY
COM. TYPE
COM. FREQ
Individual
001234567
: Routine
: Telephone
: No infor
6 MHZ
8 MHZ
6
12 MHZ
4 MHZ
2 MHZ
DSC FREQ : TL
16 MHZ
18 MHZ
22 MHZ
25 MHZ
OTHER
MANUAL
Use to scroll
menu.
OTHER: Special, private channels.
MANUAL: For selection of frequency at
radiotelephone when there is "remote control
error."
12. Select DSC band and press the [ENT] key. Select DSC frequency and press the [ENT] key.
(See page 4-8 for details.) Your display should now look something like one below.
***
Send message
***
CALL TYPE : AREA CALL
AREA :
12˚N 123˚W ↓12˚ → 12˚
PRIORITY : ROUTINE
COM. TYPE : TELEPHONE
COM. FREQ :
2164.0 KHZ
DSC FREQ : 2177.0 KHZ
GO TO ALL VIEW
13. Press the [CALL] key to send the geographical area call (transmission time: about 7 sec.).
The display shows "Geographical area call in progress!" while the call is being sent.
AREA:
12˚N 123˚W ↓12˚ → 12˚
Geographical area
call in progress!
TIME TO GO : 7S
DSC FREQ :
2177.0 KHZ
TELEPHONE
2164.0 KHZ
ROUTINE
14. After the call is sent (timer counts down to zero), the DSC standby screen automatically
appears. You can now communicate with other party.
Page 94

4-23
4.4.2 Receiving a geographical area call
1. The alarm sounds and the display shows "Geographical area call received" when a
geographical area call is received.
Geographical area
call received.
FROM SHIP:
123456789
ROUTINE
TELEPHONE
12264.0 KHZ
STOP ALARM
2. Press the [CANCEL] key to silence the alarm. The display changes as below.
*
Received message
*
JUL-23-1999-23:59 ECC: OK
GEOGRAPHICAL AREA
FROM SHIP :
123456789
ROUTINE
TELEPHONE
12264.0 KHZ
GO TO ALL VIEW
3. Press the [CANCEL] key at any time to return to the DSC standby screen. Watch on the
working frequency specified in the geographic area call.
Page 95

4-24
4.5 Neutral Craft Call
This type of call informs all ships that your ship is not a participant in armed conflict, and position
and own ship ID are contained in the message. Send the call before entering an area of armed
conflict.
4.5.1 Sending a neutral craft call
1. Press the [CALL] key followed by the [ENT] key to display the CALL TYPE menu.
***
Send mESSAGE
***
STATION ID
PRIORITY
DSC FREQ
: Neutral
craft
: Safety
: 2187.5 kHz
INDIVIDUAL
PSTN CALL
TEST CALL
ALL SHIPS
GROUP CALL
AREA CALL
POSITION
6
RELAY SEL
NEUTRAL
MEDICAL
RELAY ALL
DISTRESS
5
POLLING
CALL TYPE
If this part of the menu appears
use 6 to scroll the menu.
2. Use or to select NEUTRAL and press the [ENT] key.
3. Press the [ENT] key to open the PRIORITY menu.
***
Send message
***
CALL TYPE
COM. TYPE
DSC FREQ
: NEUTRAL
craft
: Safety
: TELEPHONE
: 2187.5 KHZ
GO TO ALL VIEW
URGENCY
SAFETY
PRIORITY
4. Select appropriate priority and press the [ENT] key.
5. Press the [ENT] k ey to open the COM. TYPE menu.
6. Select communication type desired and press the [ENT] key.
7. Press the [ENT] ke y to open the DSC FRE Q menu.
***
Send MESSAGE
***
CALL TYPE
PRIORITY
COM. TYPE
VIEW
: Neutral
craft
: Safety
: Telephone
:2187.5 kHz
4207.5
6312.0
8414.5
12577.0
16804.5
MANUAL
2187.5
DSC FREQ KHZ
GO TO ALL VIEW
MANUAL: For selection of frequency at
radiotelephone when there is "remote control
error."
8. Select appropr iate frequency an d pr es s th e [ ENT ] k ey.
Page 96

4-25
9. The display cha ng es as below. Y ou are now ready to sen d t he ne utr al c r a ft cal l .
***
Send message
***
CALL TYPE : NEUTRAL
CRAFT
PRIORITY : SAFETY
COM. TYPE : TELEPHONE
GO TO ALL VIEW
DSC FREQ :
2187.5 KHZ
10. Press the [CALL] key to send the neutral craft call (transmission time: approx. 7 sec.).
Neutral craft
call in progress!
SAFETY
TELEPHONE
2182.0 KHZ
TIME TO GO: 7S
DSC FREQ :
2187.5 KHZ
11. After the call is sent (timer counts down to zero), the DSC standby screen automatically
appears. Inform all ships (by radiotelephone) that your ship is not a participant in armed
conflict.
4.5.2 Receiving a neutral craft call
1. When a neutral craft call is received the alarm sounds and the display changes as be low.
Neutral craft
call received.
FROM SHIP:
123456789
SAFETY
TELEPHONE
2182.0 KHZ
STOP ALARM
2. Press the [CANCEL] key to silence the alarm. The display changes as below.
*
Received message
*
JUL-23-1999-23:59 ECC: OK
NEUTRAL CRAFT
FROM SHIP:
123456789
SAFETY
TELEPHONE
2182.0 KHZ
GO TO ALL VIEW
Page 97

4-26
4.6 Medical Transport Call
The medical transport call informs all ships, by using the priority "urgency", that own ship carries
medical supplies.
4.6.1 Sending a medical transport call
1. Press the [CALL] key followed by the [ENT] key to open the CALL TYPE menu.
***
Send message
***
STATION ID
PRIORITY
DSC FREQ
: Medical
transport
: Urgency
: Telephone
: 2187.5 kHz
INDIVIDUAL
PSTN CALL
TEST CALL
ALL SHIPS
GROUP CALL
AREA CALL
POSITION
6
RELAY SEL
NEUTRAL
MEDICAL
RELAY ALL
DISTRESS
5
POLLING
CALL TYPE
If the part of the menu appears,
use 6 to scroll menu.
2. Use or to select MEDICAL and press the [ENT] key.
Note: PRIORITY is automatically selected to URGENCY.
3. Press the [ ENT] key to open the COM. TYPE menu.
4. Select communication type desired and press the [ENT] key.
5. Press the [ENT] key to open th e DSC FREQ me nu.
***
Send message
***
CALL TYPE
PRIORITY
COM. TYPE
VIEW
: Medical
transport
: Urgency
: Telephone
:2187.5 KHZ
4207.5
6312.0
8414.5
12577.0
16804.5
MANUAL
2187.5
DSC FREQ
GO TO ALL VIEW
MANUAL: For selection of frequency at
radiotelephone when there is "remote control
error."
6. Select appropriate frequency and press the [ENT] key. The display changes as below.
CALL TYPE : MEDICAL
TRANSPORT
PRIORITY : URGENCY
COM. TYPE : TELEPHONE
GO TO ALL VIEW
***
Send message
***
DSC FREQ :
2187.5 KHZ
Page 98
4-27
7. Press the [CALL] key to send the call (transmission time: about 7 sec.). The display shows
“Medical transport call in progress!” while the message is being sent.
URGENCY
TELEPHONE
2182.0 KHZ
Medical transport
call in progress!
TIME TO GO : 7S
DSC FREQ :
2187.5 KHZ
8. After the message is sent (timer counts down to zero) the DSC standby screen automatically
appears. Inform all ships that your ship is transporting medical supplies.
4.6.2 Receiving a medical transport call
1. When a med ical transport call is rece ived, the alarm soun ds and the display looks as below.
Medical transport
call received.
FROM SHIP:
123456789
URGENCY
TELEPHONE
2182.0 KHZ
STOP ALARM
2. Press the [CANCEL] key to silence the alarm. The display changes as below.
GO TO ALL VIEW
*
Received message
*
JUL-23-1999-23:59 ECC: OK
MEDICAL TRANSPORT
FROM SHIP:
123456789
URGENCY
TELEPHONE
2182.0 KHZ
GO TO ALL VIEW
Page 99

4-28
4.7 Polling Call
Polling means confirming if own station is within communicating range with other station. This
function only provides affirmative or negative response; it does not provide position information.
Note that simultaneous polling to more than one station is not possible.
1
Polling
2
Acknowledge
3
Polling
4
Acknowledge
4.7.1 Sending a polling call
1. Press the [CALL] key followed by the [ENT] key to open the CALL TYPE menu.
***
Send message
***
STATION ID
PRIORITY
DSC FREQ
: Polling
: 987654321
: Routine
INDIVIDUAL
PSTN CALL
TEST CALL
ALL SHIPS
GROUP CALL
AREA CALL
POSITION
6
CALL TYPE
If the part of the menu appears,
use 6 to scroll menu.
RELAY SEL
NEUTRAL
MEDICAL
RELAY ALL
DISTRESS
5
POLLING
2. Use or to select POLLING and press the [ENT] key.
3. Press the [ENT] key to open the STATION ID menu.
CALL TYPE
PRIORITY
DSC FREQ
: POLLING
: ---------
: ROUTINE
: 2M-INTL
GO TO ALL VIEW
***
Send message
***
---------
STATION ID
4. Key in ID of station where to send call and press the [ENT] key.
Page 100

4-29
5. Press the [ENT] key to open the PRIORITY menu.
CALL TYPE
STATION ID
DSC FREQ
: Polling
: 987654321
: Routine
: 12M-INTL
GO TO ALL VIEW
***
Send message
***
BUSINESS
SAFETY
URGENCY
ROUTINE
PRIORITY
6. Select priority desired (usually ROUTINE) and press the [ENT] key.
7. Press the [ENT] key to open the DSC FREQ menu.
***
Send message
***
CALL TYPE
STATION ID
PRIORITY
VIEW
: Medical
transport
: Urgency
: Telephone
:267.5 kHz
4 MHZ
6 MHZ
8 MHZ
12 MHZ
2 MHZ
DSC FREQ TL
6
16 MHZ
18 MHZ
22 MHZ
25 MHZ
OTHER
MANUAL
Use to scroll
menu.
OTHER: Special, private channels.
MANUAL: For selection of frequency at
radiotelephone when there is "remote control
error."
8. Select appropriate DSC band and press the [ENT] key. Select DSC frequency and press the
[ENT] key. The display changes as below.
CALL TYPE : POLLING
STATION ID :
123456789
PRIORITY : ROUTINE
***
Send message
***
DSC FREQ : 2M-INTL
GO TO ALL VIEW
9. Press the [CALL] key to send the call (transmission time: about 7 sec.), and the display
changes as below.
Polling request
call in progress!
TIME TO GO: 7S
DSC FREQ : 2177.0 KHZ
TO SHIP: 123456789
ROUTINE
 Loading...