

Page 1

P3PC-4452-15ENZ2
Advanced Operation Guide
(Windows)
Page 2

Contents
Reading of Model Information in This Manual........................................................................ 4
About This Manual ................................................................................................................. 5
Safety Information.................................................................................................................................. 6
Trademarks...........................................................................................................................................7
Manufacturer.........................................................................................................................................8
Arrow Symbols in This Manual.................................................................................................................9
Screen Examples in This Manual ........................................................................................................... 10
Abbreviations Used in This Manual ........................................................................................................ 11
How to Perform a Scan ........................................................................................................ 13
Selecting Operations from the Quick Menu .........................................................................15
Managing Documents in ScanSnap Home .............................................................................................. 22
Managing Files in ScanSnap Organizer ..................................................................................................23
Managing Business Cards in ScanSnap Home ........................................................................................24
Filing and Organizing Business Cards with CardMinder ............................................................................ 25
Managing Receipts in ScanSnap Home .................................................................................................. 27
Creating an Album in ScanSnap Home ................................................................................................... 28
Managing Scanned Images in a Specified Folder ..................................................................................... 29
Attaching Files to E-mail .......................................................................................................................31
E-mail Program Settings ................................................................................................................ 34
Using ScanSnap as a Copy Machine to Print Scanned Images with a Printer...............................................35
Managing Scanned Images in a Digital File Cabinet .................................................................................37
Managing Notes and Scanned Images Together ...................................................................................... 39
Saving Data to a Mobile Device .............................................................................................................40
Saving Data to Your Dropbox Folder ......................................................................................................43
Saving Documents to Evernote (as a PDF File)........................................................................................ 45
Saving Handwritten Notes to Evernote (as a JPEG File)............................................................................ 46
Saving Data to Google Drive .................................................................................................................47
Posting to Salesforce Chatter ................................................................................................................49
Saving Data to Your SugarSync Folder...................................................................................................52
Converting into Word, Excel, or PowerPoint Documents............................................................................ 54
Optical Character Recognition (OCR) Function of ABBYY FineReader for ScanSnap ............................ 55
Managing Scanned Images in SharePoint ............................................................................................... 58
Managing Scanned Images in the Picture Folder (as JPEG Files) .............................................................. 60
Profile ................................................................................................................................... 62
Using Profiles to Perform Scanning ........................................................................................................ 63
Profile Management ............................................................................................................................. 66
Adding Profiles .............................................................................................................................67
Changing Profiles ......................................................................................................................... 69
Renaming Profiles......................................................................................................................... 71
Changing the Display Order of Profiles ............................................................................................73
Deleting Profiles ........................................................................................................................... 75
ScanSnap Folder Operations...............................................................................................77
2
Page 3

Using ScanSnap Folder to Perform Scanning ..........................................................................................78
Enabling or Disabling ScanSnap Folder .................................................................................................. 82
Scan Settings for Your Intended Use...................................................................................83
Scanning Only One Side of a Document (iX1500, iX500, or S1300i) ........................................................... 84
Scanning Color Documents in Gray or Black & White ............................................................................... 85
Scanning Color Documents in High Compression .................................................................................... 86
Deleting Blank Pages (Not Applicable to SV600)...................................................................................... 87
Correcting Skewed Character Strings ..................................................................................................... 88
Rotating a Scanned Image to Its Correct Orientation ................................................................................ 90
Reducing Bleed-Through ......................................................................................................................92
Reducing the Effect of Lighting (SV600).................................................................................................. 94
Reducing Faded Colors and Blown-Out Highlights (SV600) ....................................................................... 96
Correcting Skewed Text (SV600) ........................................................................................................... 98
Saving Scanned Images in Multiple PDF Files ....................................................................................... 100
Saving the Scanned Images of a Book as Separate Single-Page Images (SV600) ..................................... 102
Creating Searchable PDF Files............................................................................................................ 104
Setting Keywords in PDF Files............................................................................................................. 107
How to Mark Character Strings ..................................................................................................... 111
Setting Passwords for PDF Files.......................................................................................................... 113
Creating PDF/A Files.......................................................................................................................... 118
Starting Scanning Automatically (SV600) .............................................................................................. 120
Setting ScanSnap Manager ............................................................................................... 125
How to Configure Scan Settings .......................................................................................................... 126
Quick Menu Settings .......................................................................................................................... 128
Changing Display Mode............................................................................................................... 129
Changing Display Order............................................................................................................... 130
Adding Applications to Favorites ................................................................................................... 133
Changing the Settings of Linked Applications ........................................................................................ 134
Managing Linked Applications ............................................................................................................. 135
Adding Applications..................................................................................................................... 136
Changing Application Settings ...................................................................................................... 140
Deleting Applications................................................................................................................... 142
Managing Custom Paper Sizes............................................................................................................ 143
Adding Paper Sizes..................................................................................................................... 144
Changing Paper Size Settings ...................................................................................................... 146
Deleting Paper Sizes................................................................................................................... 148
Automatic Linkage with Applications..................................................................................................... 149
Changing Automatic Linkage Mode ............................................................................................... 152
When Two ScanSnaps Are Connected to a Computer (SV600)................................................................ 153
Connecting the ScanSnap to a Wireless LAN (iX1500/iX500/iX100) ......................................................... 155
3
Page 4

Reading of Model Information in This Manual
Reading of Model Information in This Manual
If you are using iX1600 or iX1400, read the model information as follows.
l When you are using iX1600
Read the model name "iX1500" as "iX1600".
l When you are using iX1400
Read the model name "iX1500" as "iX1400".
However, iX1400 does not support the function for wireless LAN connection. Skip over
descriptions about wireless LAN.
References for Latest Information on the ScanSnap
l Information on Hardware
For the latest information on the setup procedure, basic operations, and the cleaning procedure
for the ScanSnap, refer to Basic Operation Guide.
l Information on Software
For details about the supported operating systems for the software, refer to here.
For details about the software that can be used with the ScanSnap, refer to here.
4
Page 5

About This Manual
l "Safety Information" (page 6)
l "Trademarks" (page 7)
l "Manufacturer" (page 8)
l "Arrow Symbols in This Manual" (page 9)
l "Screen Examples in This Manual" (page 10)
l "Abbreviations Used in This Manual" (page 11)
About This Manual
5
Page 6

Safety Information
Safety Information
The attached "Safety Precautions" manual contains important information about the safe and correct
use of the ScanSnap. Make sure that you read and understand it before using the ScanSnap.
6
Page 7

Trademarks
Trademarks
Adobe, Acrobat, and Reader are either registered trademarks or trade names of Adobe Systems
Incorporated in the United States and/or other countries.
ABBYY™ FineReader™ Engine © ABBYY. OCR by ABBYY
ABBYY and FineReader are trademarks of ABBYY Software, Ltd. which may be registered in some
jurisdictions.
Evernote is a trademark of Evernote Corporation.
Google, Android, Google Play, Google Drive, and Google Chrome are trademarks or registered
trademarks of Google LLC. Use of these registered trademarks or trademarks is subject to Google
Permissions.
Salesforce, the Salesforce logo, and Salesforce CRM are registered trademarks or trademarks of
salesforce.com, inc. in the United States and other countries.
Wi-Fi, Wi-Fi Protected Setup, and the Wi-Fi Protected Setup logo are trademarks of Wi-Fi Alliance.
ScanSnap, the ScanSnap logo, ScanSnap Home, ScanSnap Manager, ScanSnap Organizer, and
CardMinder are registered trademarks or trademarks of PFU Limited in Japan.
Other company names and product names are the registered trademarks or trademarks of the
respective companies.
7
Page 8

Manufacturer
Manufacturer
PFU Limited
YOKOHAMA i-MARK PLACE, 4-4-5 Minatomirai, Nishi-ku, Yokohama, Kanagawa, 220-8567, Japan
© PFU Limited 2013-2020
8
Page 9

Arrow Symbols in This Manual
Arrow Symbols in This Manual
Right-arrow symbols (→) are used to connect icons or menu options you should select in
succession.
Example: Select [Start] menu → [Computer].
9
Page 10

Screen Examples in This Manual
Screen Examples in This Manual
The screenshots used in this manual are the ones that are displayed when iX1500 is connected.
Microsoft product screenshots are reprinted with permission from Microsoft Corporation.
The screenshots used in this manual are of Windows 10 or Windows 7.
The actual windows and operations may differ depending on the operating system.
Icon in the Notification Area
The ScanSnap Manager icon
the notification area.
To have the ScanSnap Manager icon always displayed in the notification area, drag the icon
and drop it onto the notification area.
The notification area is located at the far right of the taskbar.
The explanations in this manual use the case in which the ScanSnap Manager icon is always
displayed in the notification area.
is displayed in the menu which appears when you click in
HINT
If the ScanSnap Manager icon is not displayed in the notification area, start ScanSnap Manager.
Start ScanSnap Manager in the following procedure.
l Windows 10
Select [Start] menu → [ScanSnap Manager] → [ScanSnap Manager].
l Windows 8.1
Click
[ScanSnap Manager] on the All apps screen.
l Windows 7
Select [Start] menu → [All Programs] → [ScanSnap Manager] → [ScanSnap Manager].
on the lower left side of the Start screen, and select [ScanSnap Manager] under
10
Page 11

Abbreviations Used in This Manual
Abbreviations Used in This Manual
When a ScanSnap model is referred to in this manual, "Color Image Scanner ScanSnap" is omitted.
Also, the following abbreviations are used in this manual.
Abbreviation Used Designation
Windows 10
Windows 8.1
Windows 7
Windows Windows 10, Windows 8.1, or Windows 7
Microsoft Office
Office 365
Word
Excel
PowerPoint
SharePoint
Internet Explorer
Outlook
.NET Framework
Adobe Acrobat
Adobe Reader
ABBYY FineReader for
ScanSnap
Google Drive
Windows® 10 Home operating system, English Version
Windows® 10 Pro operating system, English Version
Windows® 10 Enterprise operating system, English Version
Windows® 10 Enterprise LTSC 2019 operating system, English Version
Windows® 10 Enterprise 2016 LTSB operating system, English Version
Windows® 10 Education operating system, English Version
Windows® 8.1 operating system, English Version
Windows® 8.1 Pro operating system, English Version
Windows® 8.1 Enterprise operating system, English Version
Windows® 7 Professional operating system, English Version
Windows® 7 Enterprise operating system, English Version
Microsoft® Office
Office 365
Microsoft® Word
Microsoft® Excel
Microsoft® PowerPoint
Microsoft® SharePoint® Server
Microsoft® SharePoint® Foundation
Microsoft® SharePoint® Online
Internet Explorer
Microsoft® Outlook
Microsoft® .NET Framework
Adobe® Acrobat
Adobe® Acrobat® DC
Adobe® Reader
Adobe® Acrobat® Reader® DC
ABBYY FineReader for ScanSnap
All the descriptions in this manual assume the usage of ABBYY FineReader for
ScanSnap bundled with the ScanSnap. Unless otherwise specified, the term ABBYY
FineReader for ScanSnap refers to the ABBYY FineReader for ScanSnap bundled
with the ScanSnap.
Note that ABBYY FineReader for ScanSnap may be upgraded without notice. If the
descriptions in this manual differ from the actual displayed screens, refer to the
ABBYY FineReader for ScanSnap User's Guide.
Google Drive
®
®
®
®
®
®
®
™
™
Android
ScanSnap Color Image Scanner ScanSnap series (*1)
Android
™
11
Page 12

*1: The ScanSnap N1800 series is not included.
Abbreviations Used in This Manual
12
Page 13
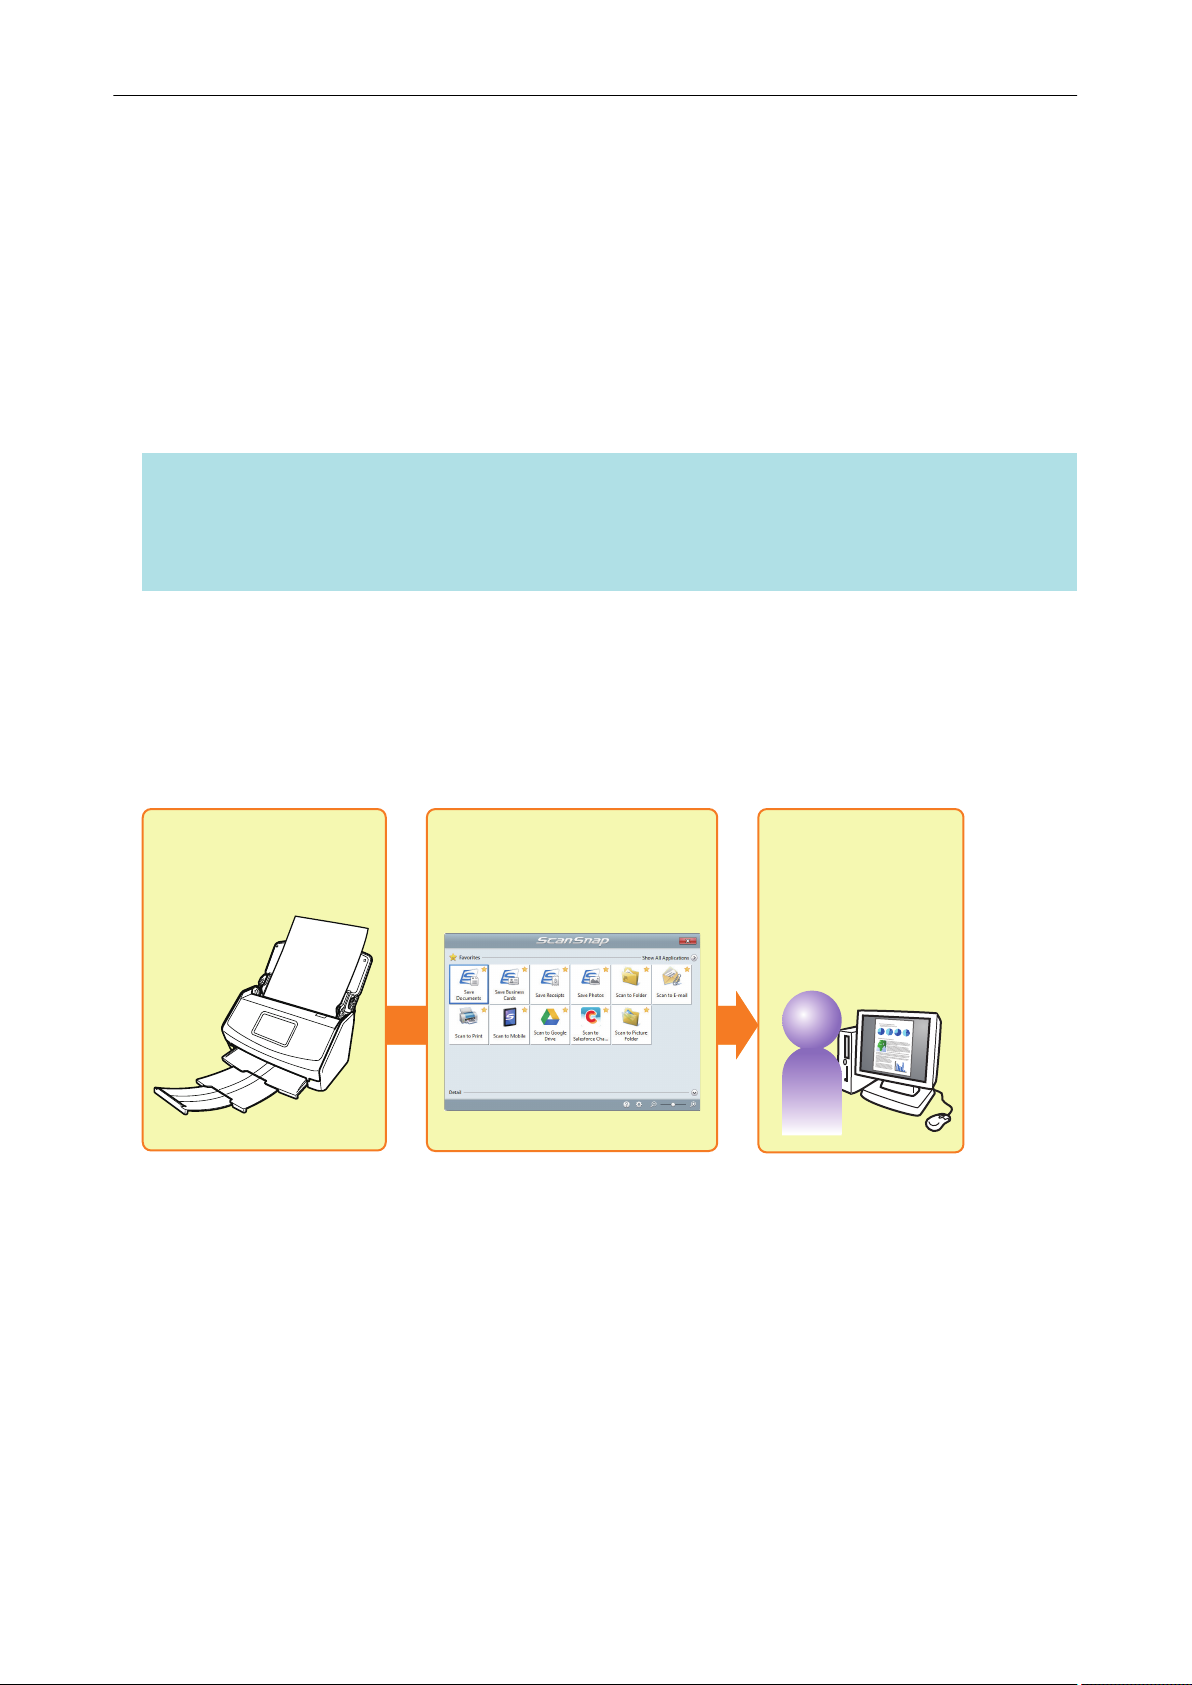
Select an application
from the Quick Menu
Scan
Save and use
the scanned image
How to Perform a Scan
How to Perform a Scan
This section explains how to use the ScanSnap to perform scanning.
You can scan documents in two different ways. Choose either way depending on your intended use
of the scanned image.
l "Scanning Using the Quick Menu" (page 13)
l "Scanning Using a Profile" (page 13)
l "Scanning Using ScanSnap Folder" (page 14)
HINT
For SV600, you can also perform the scanning of documents by using a foot pedal that supports
shortcut keys (keyboard shortcuts).
For details, refer to the ScanSnap Manager Help.
Scanning Using the Quick Menu
After scanning the document using the ScanSnap, you can simply select the application from the
displayed menu to save, send as e-mail, or print the scanned image, as well as link the ScanSnap
with an application or cloud services.
Scanning using the Quick Menu is set on default.
For details, refer to "Selecting Operations from the Quick Menu" (page 15).
Scanning Using a Profile
Select a previously set profile (scan settings and an application to be linked) and simply press the
[Scan] button to scan the document and link with the application.
It is convenient to use when you want to scan a document using the same scan settings repeatedly.
13
Page 14

Select a previously set
profile
Scan
Save and use
the scanned image
Select ScanSnap Folder
from the file selection window
Scan
Save and use
the scanned image
How to Perform a Scan
For details, refer to "Profile" (page 62).
Scanning Using ScanSnap Folder
By selecting ScanSnap Folder from the file selection window of the application, you can scan a
document from the ScanSnap. You can use the scanned document file directly in the application.
For details, refer to "ScanSnap Folder Operations" (page 77).
14
Page 15

Selecting Operations from the Quick Menu
Selecting Operations from the Quick Menu
The Quick Menu will allow you to start using the ScanSnap right away even if it is your first time.
Select an application from the Quick Menu to perform the following desired operations:
l "Using Scanned Images" (page 15)
l "Linking with Applications" (page 17)
l "Linking with Cloud Services" (page 20)
Using Scanned Images
Share the Scanned Document Files with Others.
Scan to Folder
Save the scanned image directly in a shared folder on a network after scanning, share the
scanned image with others and inform them of the destination folder path by an e-mail message
automatically created with the path stated.
15
Page 16

Selecting Operations from the Quick Menu
Send Document Files to Others via E-mail.
Scan to E-mail
Send an e-mail message to others with the scanned image file attached.
ATTENTION
Up to ten files can be attached to an e-mail message.
When you scan more than one document with the scan settings shown below, multiple files are
created. Pay attention to the number of documents to scan:
l File format: JPEG (*.jpg)
l [Generate one PDF file per (n) page(s)] checkbox is selected
Make Copies of a Paper Document.
Scan to Print
Print the scanned image with a printer.
Save Scanned Documents to a Mobile Device.
Scan to Mobile
Save the scanned image to a mobile device connected to the computer.
You can access the saved files through an application that can view PDF or JPEG files.
Displayed when .NET Framework 3.0 is installed.
Note that .NET Framework 3.0 is also included in .NET Framework 3.5 (SP1 or later). It is
recommended to install the latest update in the operating system and use .NET Framework 3.5
(SP1 or later).
If .NET Framework 4 or later is already installed, you need to install .NET Framework 3.0
separately because .NET Framework 3.0 is not included in .NET Framework 4 or later version.
Convert Catalogs and Pamphlets into Digital Data and Save Them.
Scan to Picture Folder
Save scanned images of catalogs and pamphlets directly into your Pictures folder.
16
Page 17

Selecting Operations from the Quick Menu
Linking with Applications
Organize and Manage the Scanned Document Files.
Save Documents
Scanned Images are saved in ScanSnap Home as content data records with [Documents] as the
document type. Content data records can be organized or managed in ScanSnap Home.
This is displayed when the following conditions are met.
l ScanSnap Home is installed
l ScanSnap Organizer, CardMinder, or ScanSnap Receipt is not installed
ATTENTION
l If both ScanSnap Manager and ScanSnap Home are installed, ScanSnap Home cannot be used
to scan documents.
l To use ScanSnap Home, you need to activate a license beforehand.
For details about how to activate a license, refer to here in the ScanSnap Home Help.
ScanSnap Organizer
Save the scanned images in a folder specified in ScanSnap Organizer, allowing you to organize
and manage the scanned images in ScanSnap Organizer.
Displayed when ScanSnap Organizer is installed.
File and Organize a Large Number of Business Cards.
Save Business Cards
Scanned Images are saved in ScanSnap Home as content data records with [Business Cards] as
the document type. Content data records can be organized or managed in ScanSnap Home.
This is displayed when the following conditions are met.
l ScanSnap Home is installed
l ScanSnap Organizer, CardMinder, or ScanSnap Receipt is not installed
ATTENTION
l If both ScanSnap Manager and ScanSnap Home are installed, ScanSnap Home cannot be used
to scan documents.
l To use ScanSnap Home, you need to activate a license beforehand.
For details about how to activate a license, refer to here in the ScanSnap Home Help.
Scan to CardMinder
Store and manage business cards in CardMinder.
Displayed when CardMinder is installed.
17
Page 18

Selecting Operations from the Quick Menu
HINT
When CardMinder is used for the linkage function, it is recommended that you select [Automatic
resolution] or [Best] for [Image quality] on the [Scanning] tab of the ScanSnap setup window.
ScanSnap Manager cannot link with CardMinder when [Image quality] is set to [Excellent].
Digitize Photos to Create an Album.
Save Photos
Scanned Images are saved in ScanSnap Home as content data records with [Photos] as the
document type. Content data records can be organized or managed in ScanSnap Home.
This is displayed when the following conditions are met.
l ScanSnap Home is installed
l ScanSnap Organizer, CardMinder, or ScanSnap Receipt is not installed
ATTENTION
l If both ScanSnap Manager and ScanSnap Home are installed, ScanSnap Home cannot be used
to scan documents.
l To use ScanSnap Home, you need to activate a license beforehand.
For details about how to activate a license, refer to here in the ScanSnap Home Help.
Convert Your Paper Documents into Digital Data to Conveniently
Organize Them.
Scan to Rack2-Filer Smart
Save the scanned images as PDF files in Rack2-Filer Smart to manage and organize them.
Displayed when Rack2-Filer Smart trial version or Rack2-Filer Smart is installed.
Scan to Rack2-Filer
Save the scanned images as PDF files in Rack2-Filer to manage and organize them.
Displayed when Rack2-Filer (sold separately) is installed (V5.0 or later recommended).
Convert Your Paper Documents into Digital Data to Conveniently
Organize Them (Magic Desktop).
Scan to Magic Desktop
Save the scanned images in Magic Desktop to manage and organize them.
Displayed when Magic Desktop trial version or Magic Desktop is installed.
18
Page 19

Selecting Operations from the Quick Menu
It is time-consuming to record a name and amount on a receipt for
each purchased item in a household account book.
Save Receipts
Scanned Images are saved in ScanSnap Home as content data records with [Receipts] as the
document type. Content data records can be organized or managed in ScanSnap Home.
This is displayed when the following conditions are met.
l ScanSnap Home is installed
l ScanSnap Organizer, CardMinder, or ScanSnap Receipt is not installed
ATTENTION
l If both ScanSnap Manager and ScanSnap Home are installed, ScanSnap Home cannot be used
to scan documents.
l To use ScanSnap Home, you need to activate a license beforehand.
For details about how to activate a license, refer to here in the ScanSnap Home Help.
Quote Text from Your Paper Documents.
ABBYY Scan to Word
ABBYY Scan to Excel(R)
ABBYY Scan to PowerPoint(R)
Have the scanned image text recognized and converted into a Word, Excel, or PowerPoint
document.
Displayed when ABBYY FineReader for ScanSnap (5.0 or later) is installed.
HINT
It is recommended that you select [Automatic resolution] or [Best] for [Image quality] on the
[Scanning] tab of the ScanSnap setup window.
Share the Scanned Document Files through Linkage with SharePoint.
Scan to SharePoint
Save the scanned image in SharePoint.
Displayed when Scan to Microsoft SharePoint is installed.
19
Page 20

Selecting Operations from the Quick Menu
Linking with Cloud Services
Manage Scanned Documents through Linkage with Dropbox.
Scan to Dropbox
Save scanned image files to your Dropbox folder.
Displayed when Dropbox for Windows 1.1.45 or later is installed.
Manage Scanned Documents through Linkage with Evernote.
Scan to Evernote (Document)
Save PDF files in Evernote.
Displayed when Evernote for Windows 3.5 or later is installed.
Manage Handwritten Notes through Linkage with Evernote.
Scan to Evernote (Note)
Save JPEG files in Evernote.
Displayed when Evernote for Windows 3.5 or later is installed.
Manage Scanned Documents through Linkage with Google Drive.
Scan to Google Drive
Save PDF files in Google Drive.
Displayed when .NET Framework 4 or an in-place upgrade for .NET Framework 4 is installed.
After installing .NET Framework, apply the updates in Windows Update.
Manage Scanned Documents through Linkage with Salesforce
Chatter.
Scan to Salesforce Chatter
Post scanned image files to Salesforce Chatter. You can use posted files with Salesforce CRM.
You need to install .NET Framework 4.5 or an in-place upgrade for .NET Framework 4.5.
20
Page 21

Selecting Operations from the Quick Menu
Manage Scanned Documents through Linkage with SugarSync.
Scan to SugarSync
Save scanned image files to your SugarSync folder.
Displayed when SugarSync Manager for Windows 1.9.28 or later is installed.
HINT
You can freely add applications to the Quick Menu. For details, refer to "Managing Linked Applications"
(page 135).
21
Page 22

Managing Documents in ScanSnap Home
Managing Documents in ScanSnap Home
This section explains how to save scanned images of documents together with the related
information in ScanSnap Home.
1. Click the [Save Documents] icon
a The main window of ScanSnap Home appears.
in the Quick Menu.
ATTENTION
l To use ScanSnap Home, you need to activate a license beforehand.
For details about how to activate a license, refer to here in the ScanSnap Home Help.
l You cannot start scanning when the Quick Menu is displayed. Wait until ScanSnap Manager links
with ScanSnap Home before scanning another document.
l Do not move, delete, or rename scanned images using other applications while the Quick Menu is
displayed.
l If both ScanSnap Manager and ScanSnap Home are installed, ScanSnap Home cannot be used to
scan documents.
HINT
l For details about the functions of ScanSnap Home and how to use it, refer to the ScanSnap Home
Help.
l Profiles can also be used for the linkage function. For details, refer to "Profile" (page 62).
22
Page 23

Managing Files in ScanSnap Organizer
Managing Files in ScanSnap Organizer
This section explains how to save the scanned image file in ScanSnap Organizer.
1. Click the [ScanSnap Organizer] icon in the Quick Menu.
a The [ScanSnap Organizer] window appears.
ATTENTION
l You cannot start scanning when the Quick Menu is displayed. Wait until ScanSnap Organizer links
before scanning another document.
l Do not move, delete, or rename scanned images using other applications while the Quick Menu is
displayed.
HINT
l For details about the functions of ScanSnap Organizer and how to use it, refer to the ScanSnap
Organizer Help.
l Profiles can also be used for the linkage function. For details, refer to "Profile" (page 62).
l ScanSnap Manager can link with ScanSnap Organizer automatically. For details, refer to
"Automatic Linkage with Applications" (page 149).
23
Page 24

Managing Business Cards in ScanSnap Home
Managing Business Cards in ScanSnap Home
This section explains how to save scanned images of business cards together with the related
information in ScanSnap Home.
1. Click the [Save Business Cards] icon
a The main window of ScanSnap Home appears.
in the Quick Menu.
ATTENTION
l To use ScanSnap Home, you need to activate a license beforehand.
For details about how to activate a license, refer to here in the ScanSnap Home Help.
l You cannot start scanning when the Quick Menu is displayed. Wait until ScanSnap Manager links
with ScanSnap Home before scanning another business card.
l Do not move, delete, or rename scanned images using other applications while the Quick Menu is
displayed.
l If both ScanSnap Manager and ScanSnap Home are installed, ScanSnap Home cannot be used to
scan documents.
HINT
l For details about the functions of ScanSnap Home and how to use it, refer to the ScanSnap Home
Help.
l Profiles can also be used for the linkage function. For details, refer to "Profile" (page 62).
24
Page 25

Filing and Organizing Business Cards with CardMinder
Filing and Organizing Business Cards with
CardMinder
This section explains how to store business card images and the related information in CardMinder.
ATTENTION
l Blank pages are not removed even if the [Blank page removal] is selected when you store scanned
images of business cards in CardMinder.
l Scanned images can be stored in CardMinder all at once as shown below.
- iX1500/iX500/S1300i
Up to 500 sheets (1,000 pages), including blank pages
- iX100/S1100i/S1100/SV600
Up to 1,000 pages, including blank pages
1. Click the [Scan to CardMinder] icon
a The [CardMinder] window appears.
in the Quick Menu.
2. Check the scanned card image and the text recognition result.
ATTENTION
l You cannot start scanning when the Quick Menu is displayed. Wait until ScanSnap Manager links
with CardMinder before scanning another document.
25
Page 26

Filing and Organizing Business Cards with CardMinder
l Do not move, delete, or rename scanned images using other applications while the Quick Menu is
displayed.
HINT
l For details about the functions of CardMinder and how to use it, refer to the CardMinder Help.
l Profiles can also be used for the linkage function. For details, refer to "Profile" (page 62).
l ScanSnap Manager can link with CardMinder automatically. For details, refer to "Automatic Linkage
with Applications" (page 149).
26
Page 27
Managing Receipts in ScanSnap Home
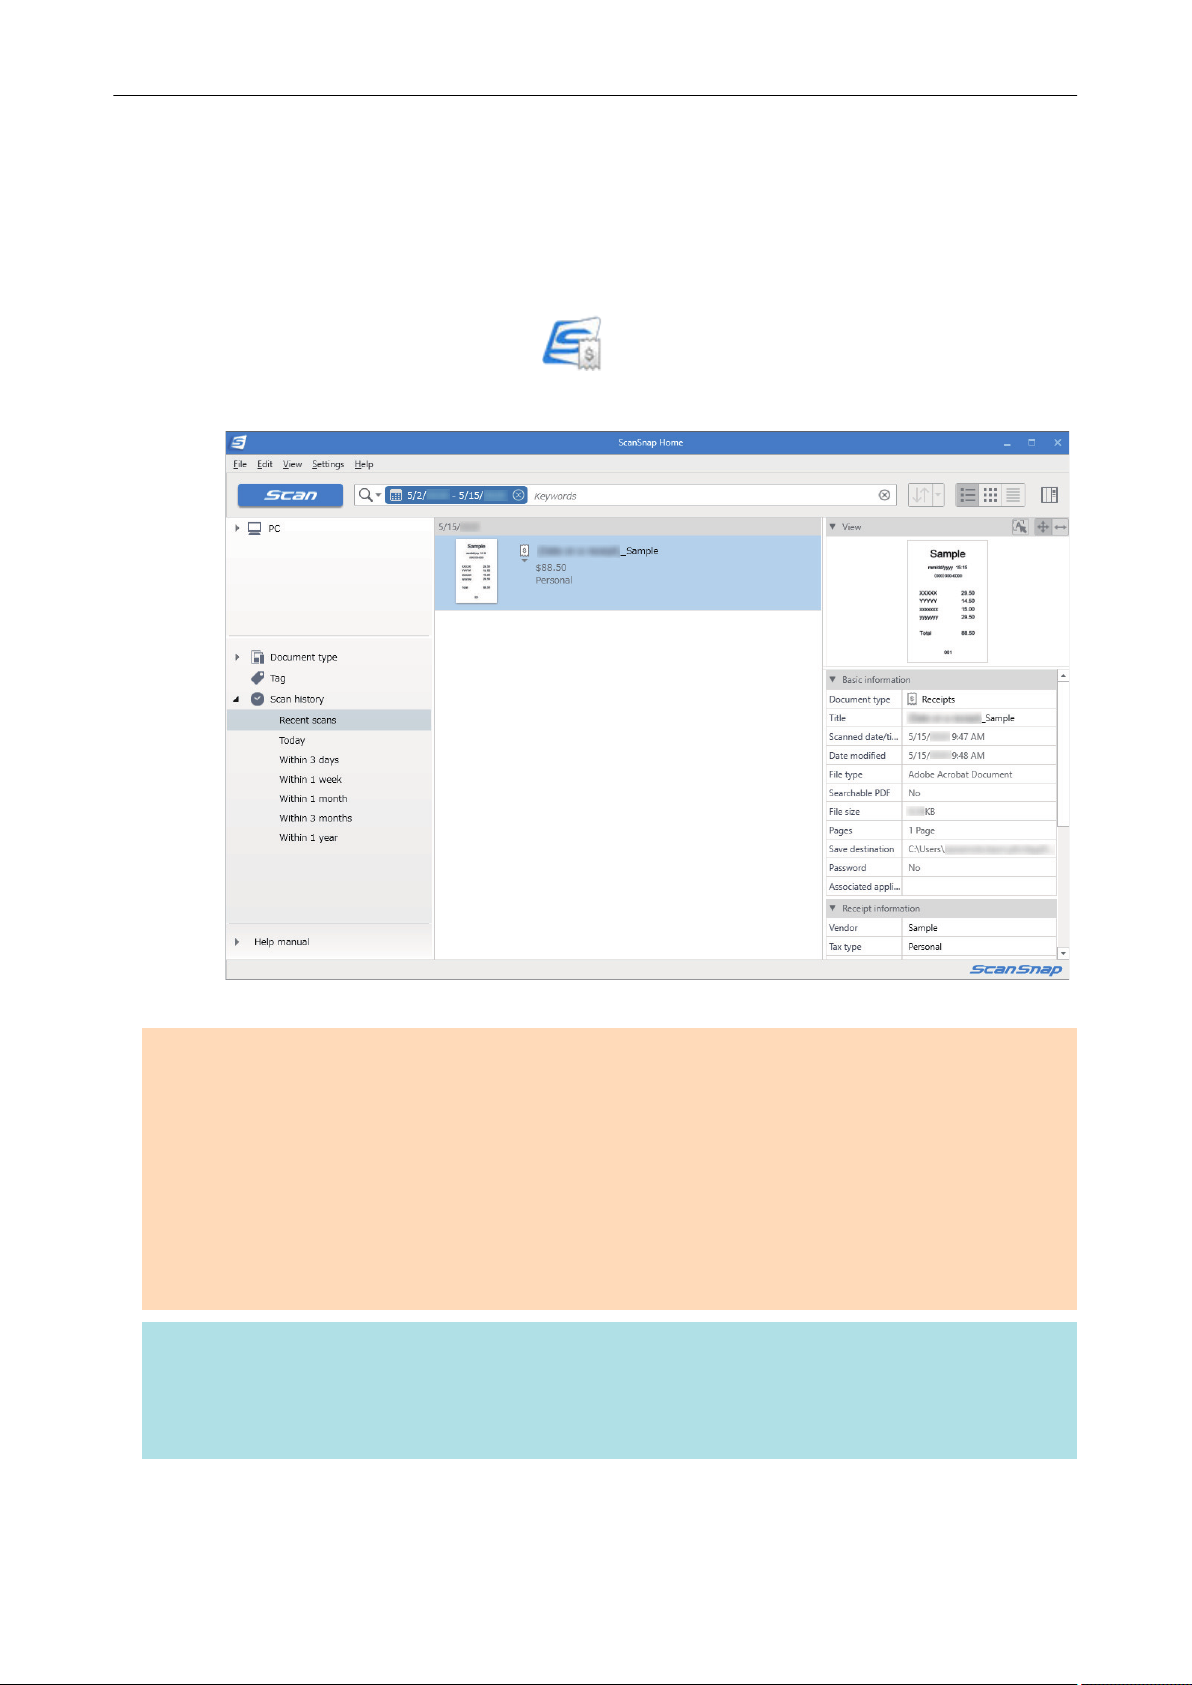
Managing Receipts in ScanSnap Home
This section explains how to save scanned images of receipts together with the related information
in ScanSnap Home.
1. Click the [Save Receipts] icon
a The main window of ScanSnap Home appears.
in the Quick Menu.
ATTENTION
l To use ScanSnap Home, you need to activate a license beforehand.
For details about how to activate a license, refer to here in the ScanSnap Home Help.
l You cannot start scanning when the Quick Menu is displayed. Wait until ScanSnap Manager links
with ScanSnap Home before scanning another receipt.
l Do not move, delete, or rename scanned images using other applications while the Quick Menu is
displayed.
l If both ScanSnap Manager and ScanSnap Home are installed, ScanSnap Home cannot be used to
scan documents.
HINT
l For details about the functions of ScanSnap Home and how to use it, refer to the ScanSnap Home
Help.
l Profiles can also be used for the linkage function. For details, refer to "Profile" (page 62).
27
Page 28

Creating an Album in ScanSnap Home
Creating an Album in ScanSnap Home
This section explains how to save scanned images of photos in ScanSnap Home.
1. Click the [Save Photos] icon in the Quick Menu.
a The main window of ScanSnap Home appears.
ATTENTION
l To use ScanSnap Home, you need to activate a license beforehand.
For details about how to activate a license, refer to here in the ScanSnap Home Help.
l You cannot start scanning when the Quick Menu is displayed. Wait until ScanSnap Manager links
with ScanSnap Home before scanning another photo.
l Do not move, delete, or rename scanned images using other applications while the Quick Menu is
displayed.
l If both ScanSnap Manager and ScanSnap Home are installed, ScanSnap Home cannot be used to
scan documents.
HINT
l For details about the functions of ScanSnap Home and how to use it, refer to the ScanSnap Home
Help.
l Profiles can also be used for the linkage function. For details, refer to "Profile" (page 62).
28
Page 29

Preview
Managing Scanned Images in a Specified Folder
Managing Scanned Images in a Specified Folder
This section explains how to save a scanned image file in a specified folder.
The scanned image file that is saved in a shared folder on the network can be shared with others. In
addition, you can inform others of the destination folder path easily by an e-mail message because
the path can be stated in the message automatically.
HINT
The default e-mail program is used as the e-mail program to link with.
The e-mail program may not properly link with ScanSnap Manager even if it is the default e-mail
program. In this case, contact the manufacturer of the e-mail software.
For details about setting an e-mail program to link with, refer to "E-mail Program Settings" (page 34).
1. Click the [Scan to Folder] icon in the Quick Menu.
a The [Scan to Folder] window appears.
2. Check the scanned image in the preview area.
In the [Scan to Folder] window, you can change files names or destination folders, and specify
whether to state a path to a destination folder in an e-mail message to notify others.
For details about the [Scan to Folder] window, refer to the ScanSnap Manager Help.
29
Page 30

3. Click the [Save] button.
a The scanned image file is saved in the specified folder.
HINT
When you select the [State a path to a destination folder in an E-mail message] checkbox in the
[Scan to Folder] window, a new message window appears listing the destination folder path
where the file is saved.
Managing Scanned Images in a Specified Folder
ATTENTION
l You cannot start scanning after the Quick Menu is displayed and before the [Scan to Folder]
window is closed. Close the [Scan to Folder] window before scanning the next document.
l Do not move, delete, or rename the scanned image in other applications after the Quick Menu is
displayed and before the [Scan to Folder] window is closed.
HINT
Profiles can also be used for the linkage function. For details, refer to "Profile" (page 62).
30
Page 31

Attaching Files to E-mail
Attaching Files to E-mail
This section explains how to attach the scanned image file to an e-mail message.
HINT
The default e-mail program is used as the e-mail program to link with.
The e-mail program may not properly link with ScanSnap Manager even if it is the default e-mail
program. In this case, contact the manufacturer of the e-mail software.
For details about setting an e-mail program to link with, refer to "E-mail Program Settings" (page 34).
1. Click the [Scan to E-mail] icon
a The [Scan to E-mail] window appears.
HINT
You can configure the settings to not show the [Scan to E-mail] window. If you configure the
settings to not show the [Scan to E-mail] window, a new message window appears with the file
attached.
For details about changing the settings, refer to "Changing the Settings of Linked Applications"
(page 134).
in the Quick Menu.
2. Check the scanned image in the preview area.
In the [Scan to E-mail] window, you can configure the settings for attaching scanned image to
e-mail.
For details about the [Scan to E-mail] window, refer to the ScanSnap Manager Help.
31
Page 32

Preview
Attaching Files to E-mail
3. Click the [Attach] button.
a A new e-mail message window appears with the file attached.
32
Page 33

Attaching Files to E-mail
HINT
When the [Set a "Document Open password" for PDF files] checkbox is selected in the [Scan to
E-mail - Options] window or the [Scan to E-mail] window, click the [Attach] button to display the
following [Scan to E-mail - Set a password] window.
Enter a password, and then click the [OK] button.
If you click the [Cancel] button, a confirmation message appears to continue processing without a
password. If you do not want to set a document open password, click the [Yes] button.
ATTENTION
l You cannot start scanning after the Quick Menu is displayed and before the [Scan to E-mail]
window is closed. Close the [Scan to E-mail] window before scanning the next document.
l Do not move, delete, or rename the scanned image in other applications after the Quick Menu is
displayed and before the [Scan to E-mail] window is closed.
HINT
l The settings for [Scan to E-mail] can be changed. For details, refer to "Changing the Settings of
Linked Applications" (page 134).
l Profiles can also be used for the linkage function. For details, refer to "Profile" (page 62).
l ScanSnap Folder can also be used to attach scanned images to e-mail. For details, refer to
"ScanSnap Folder Operations" (page 77).
33
Page 34

Attaching Files to E-mail
E-mail Program Settings
Configure e-mail program settings in the following procedure.
Windows 10
1. Click [Start] menu → [Windows System] → [Set your default programs] under
[Default Programs ].
a The [Set Default Programs] window appears.
2. Select an e-mail program to link with ScanSnap Manager from [Programs].
3. Select [Set this program as default] and click the [OK] button.
Windows 8.1
1. Click
programs] under [Default Programs].
a The [Set Default Programs] window appears.
on the lower left side of the Start screen, and click [Set your default
2. Select an e-mail program to link with ScanSnap Manager from [Programs].
3. Select [Set this program as default] and click the [OK] button.
Windows 7
1. Select [Start] menu → [Default Programs] → [Set your default programs].
a The [Set your default programs] window appears.
2. Select an e-mail program to link with ScanSnap Manager from [Programs].
3. Select [Set this program as default] and click the [OK] button.
Tested E-mail Programs
l Outlook 2019 (desktop version)
l Outlook for Office 365 (desktop version)
l Thunderbird version 68.5.0
34
Page 35

Using ScanSnap as a Copy Machine to Print Scanned Images with a Printer
Using ScanSnap as a Copy Machine to Print Scanned
Images with a Printer
This section explains how to print the scanned image with a printer.
When a printer links with ScanSnap Manager, the ScanSnap can be used as a copy machine.
ATTENTION
l Note that shadows around the edges of the document may appear as lines on the generated
scanned image, depending on the scanning method and paper conditions. If you print such an
image, the printed image will also have lines appearing in it.
l When [Normal] is selected for [Print quality] in the [Scan to Print] window, the scanned image is
always printed at a resolution of 150 dpi regardless of the setting for [Image quality] on the
[Scanning] tab of the ScanSnap setup window.
1. Click the [Scan to Print] icon in the Quick Menu.
a The [Scan to Print] window appears.
HINT
You can configure the settings to not show the [Scan to Print] window. If you configure the
settings to not show the [Scan to Print] window, printing is performed directly.
For details about changing the settings, refer to "Changing the Settings of Linked Applications"
(page 134).
2. Check the scanned image in the preview area.
In the [Scan to Print] window, you can specify the printer to be used, the number of copies and
size of the scanned image to be printed, and whether to save the scanned image in the folder
specified for [Image saving folder].
For details about the [Scan to Print] window, refer to the ScanSnap Manager Help.
35
Page 36

Preview
Using ScanSnap as a Copy Machine to Print Scanned Images with a Printer
3. Click the [Print] button.
a The scanned image is printed.
ATTENTION
l You cannot start scanning after the Quick Menu is displayed and before the [Scan to Print] window
is closed. Close the [Scan to Print] window before scanning the next document.
l Do not move, delete, or rename the scanned image in other applications after the Quick Menu is
displayed and before the [Scan to Print] window is closed.
HINT
l The settings for [Scan to Print] can be changed. For details, refer to "Changing the Settings of
Linked Applications" (page 134).
l Profiles can also be used for the linkage function. For details, refer to "Profile" (page 62).
36
Page 37

Managing Scanned Images in a Digital File Cabinet
Managing Scanned Images in a Digital File Cabinet
This section explains how to save the scanned image as a PDF file to the following:
l Rack2-Filer Smart
l Rack2-Filer
ATTENTION
The following settings in ScanSnap Manager are disabled when the scanned image is saved to Rack2Filer Smart or Rack2-Filer:
l Rename file after scanning
l Color high compression
1. Click the [Scan to Rack2-Filer Smart] icon or the [Scan to Rack2-Filer]
icon in the Quick Menu.
l Rack2-Filer Smart
A binder selection window appears.
- To save into an existing binder
Select your desired binder and click the [Selected Binder] button.
- To save into a new binder
Click the [New Binder] button.
Follow the instructions in the displayed window to save the PDF file created by the
ScanSnap to Rack2-Filer Smart.
37
Page 38

Managing Scanned Images in a Digital File Cabinet
l Rack2-Filer
Rack2-Filer starts up, and the PDF file created by the ScanSnap is saved in Rack2-Filer.
ATTENTION
l You cannot start scanning another document after the Quick Menu is displayed and before
importing to Rack2-Filer Smart or Rack2-Filer is completed. Save the scanned image to Rack2Filer Smart or Rack2-Filer before scanning another document.
l Do not move, delete, or rename the scanned image in other applications after the Quick Menu is
displayed and before importing to Rack2-Filer Smart or Rack2-Filer is completed.
HINT
l For SV600, when "Scan to Rack2-Filer Smart" is linked with ScanSnap Manager to scan a book,
you can digitally reproduce the actual book on your computer by scanning the cover and spine of
the book as well as its content.
For details, refer to here in the Basic Operation Guide.
l For details about the functions of Rack2-Filer Smart and how to use them, refer to the Rack2-Filer
Smart Your Guide.
l For details about the functions of Rack2-Filer and how to use them, refer to the Rack2-Filer User's
Guide.
l You can change the settings for [Scan to Rack2-Filer Smart] or [Scan to Rack2-Filer]. For details,
refer to "Changing the Settings of Linked Applications" (page 134).
l Profiles can also be used for the linkage function. For details, refer to "Profile" (page 62).
l ScanSnap Folder can also be used to save scanned images to Rack2-Filer Smart or Rack2-Filer.
For details, refer to "ScanSnap Folder Operations" (page 77).
l ScanSnap Manager can link with Rack2-Filer Smart or Rack2-Filer automatically. For details, refer
to "Automatic Linkage with Applications" (page 149).
38
Page 39

Managing Notes and Scanned Images Together
Managing Notes and Scanned Images Together
This section explains how to save the scanned image as a PDF or a JPEG file to Magic Desktop.
ATTENTION
When the scanned image is saved to Magic Desktop, the following settings in ScanSnap Manager are
disabled:
l Rename file after scanning
l Color high compression
1. Click the [Scan to Magic Desktop] icon in the Quick Menu.
a Magic Desktop starts up, and the scanned image created by the ScanSnap is saved in
Magic Desktop.
ATTENTION
l You cannot start scanning when the Quick Menu is displayed. Save the scanned image to Magic
Desktop before scanning another document.
l Do not move, delete, or rename scanned images using other applications while the Quick Menu is
displayed.
HINT
l For details about how to use Magic Desktop, refer to the Magic Desktop Your Guide.
l Profiles can also be used for the linkage function. For details, refer to "Profile" (page 62).
l ScanSnap Folder can also be used to save scanned images to Magic Desktop. For details, refer to
"ScanSnap Folder Operations" (page 77).
l ScanSnap Manager can link with Magic Desktop automatically. For details, refer to "Automatic
Linkage with Applications" (page 149).
39
Page 40

Saving Data to a Mobile Device
Saving Data to a Mobile Device
This section explains how to save the scanned image as a PDF or a JPEG file to a mobile device.
ATTENTION
l Only one mobile device can be connected to the computer.
l You need to have ScanSnap Connect Application installed in the mobile device in order to use this
function. Download ScanSnap Connect Application for the mobile device from an application store
such as the App Store or Google Play.
For details about the operating systems on which ScanSnap Connect Application for mobile
devices operates, refer to the following web page:
https://scansnap.fujitsu.com/g-support/en/
l The number of scanned image files and the maximum file size that can be sent to a mobile device
at once are as follows:
- Number of files: Up to 100
- File size: 2,048 MB
HINT
When [Scan to Mobile] is running, an icon is displayed in the notification area. For details, refer to
the Scan to Mobile Help.
1. Click the [Scan to Mobile] icon in the Quick Menu.
a The [Scan to Mobile] window appears.
40
Page 41

Saving Data to a Mobile Device
HINT
l On a window that appears when [Scan to Mobile] is started for the first time, click the [OK]
button to open the [Scan to Mobile - Basic] window. In the [Scan to Mobile - Basic] window,
enter a password to connect to the mobile device.
For details about other setting items, refer to the Scan to Mobile Help.
41
Page 42

Saving Data to a Mobile Device
l A firewall alert may be displayed. When the alert is displayed, click [Allow access] or
[Unblock] buttons to continue processing.
2. Connect to the computer from your mobile device.
For details about connecting to the computer from your mobile device, refer to the Basic
Operation Guide (Mobile Connection) for your mobile device.
a When the connection is established, the [Scan to Mobile] window appears showing the
mobile device that is currently connected to the computer. Then, the scanned image is sent
to the mobile device.
HINT
When you select the [Wait until the [Send] button is clicked] checkbox in the [Scan to Mobile Basic] window, the [Send] button appears in the [Scan to Mobile] window. Click the [Send] button
to send the image to the mobile device.
3. Click the [Close] button to close the [Scan to Mobile] window when sending
of the scanned image is completed.
HINT
The [Scan to Mobile] window closes automatically when the mobile device is disconnected from
the computer.
ATTENTION
l You cannot start scanning when the Quick Menu is displayed. Wait until ScanSnap Manager links
with [Scan to Mobile] before scanning another document.
l Do not move, delete, or rename scanned images using other applications while the Quick Menu is
displayed.
HINT
l For details about the features of ScanSnap Connect Application for mobile devices and how to use
it, refer to the Basic Operation Guide (Mobile Connection) for your mobile device.
l The settings for [Scan to Mobile] can be changed. For details, refer to "Changing the Settings of
Linked Applications" (page 134).
l Profiles can also be used for the linkage function. For details, refer to "Profile" (page 62).
l ScanSnap Manager can link with Scan to Mobile automatically. For details, refer to "Automatic
Linkage with Applications" (page 149).
42
Page 43

Saving Data to Your Dropbox Folder
Saving Data to Your Dropbox Folder
This section explains how to save the scanned image as a PDF or a JPEG file to your Dropbox
folder.
ATTENTION
l You need to have a Dropbox account.
l You can save up to 100 files to your Dropbox folder at once.
HINT
When you first log into Dropbox after installing Dropbox for Windows, the Dropbox folder is
automatically created.
The Dropbox folder is a sync folder used in Dropbox.
1. Click the [Scan to Dropbox] icon in the Quick Menu.
a The [Scan to Dropbox] window appears.
HINT
You can configure the settings to not show the [Scan to Dropbox] window. If you configure the
settings to not show the [Scan to Dropbox] window, scanned images are saved directly to the
Dropbox folder.
For details about changing the settings, refer to "Changing the Settings of Linked Applications"
(page 134).
2. Check the scanned image in the preview area.
In the [Scan to Dropbox] window, you can rename the file and specify your Dropbox folder.
For details about the [Scan to Dropbox] window, refer to the ScanSnap Manager Help.
43
Page 44

Preview
Saving Data to Your Dropbox Folder
ATTENTION
The file will not be synced with Dropbox unless you select the Dropbox folder as the destination
folder.
3. Click the [Save] button.
a The scanned image is saved to your Dropbox folder.
ATTENTION
l You cannot start scanning after the Quick Menu is displayed and before the [Scan to Dropbox]
window is closed. Close the [Scan to Dropbox] window before scanning the next document.
l Do not move, delete, or rename scanned images using other applications while the Quick Menu is
displayed.
HINT
l The settings for [Scan to Dropbox] can be changed. For details, refer to "Changing the Settings of
Linked Applications" (page 134).
l Profiles can also be used for the linkage function. For details, refer to "Profile" (page 62).
l ScanSnap Folder can also be used to save scanned images to Dropbox. For details, refer to
"ScanSnap Folder Operations" (page 77).
44
Page 45

Saving Documents to Evernote (as a PDF File)
Saving Documents to Evernote (as a PDF File)
This section explains how to save the scanned image as a PDF file to Evernote.
When you save a scanned image to Evernote after converting it into a searchable PDF, the PDF file
becomes searchable in Evernote.
ATTENTION
l You need to create an Evernote account (free or paid).
l To save a file to Evernote, you first need to sign in to Evernote for Windows.
1. Click the [Scan to Evernote (Document)] icon in the Quick Menu.
a Text recognition is performed.
HINT
l If [JPEG(*.jpg)] is selected for [File format] in the [File option] tab of the ScanSnap setup
window, a separate PDF file will be created from each JPEG file.
l Note that text recognition will be performed only on pages containing text which is not yet
recognized.
a Evernote for Windows starts up, and the PDF file is saved to Evernote.
ATTENTION
l You cannot start scanning when the Quick Menu is displayed. Save the PDF file to Evernote before
scanning the next document.
l Do not move, delete, or rename scanned images using other applications while the Quick Menu is
displayed.
HINT
l Even after the scanned image is saved to Evernote, the same file as the scanned image remains in
the folder specified for [Image saving folder] in the [Save] tab of the ScanSnap setup window.
Delete this file if unnecessary.
l The settings for [Scan to Evernote (Document)] can be changed. For details, refer to "Changing the
Settings of Linked Applications" (page 134).
l Profiles can also be used for the linkage function. For details, refer to "Profile" (page 62).
l ScanSnap Folder can also be used to save scanned images to Evernote. For details, refer to
"ScanSnap Folder Operations" (page 77).
45
Page 46

Saving Handwritten Notes to Evernote (as a JPEG File)
Saving Handwritten Notes to Evernote (as a JPEG
File)
This section explains how to save the scanned image as a JPEG file to Evernote.
When you save a JPEG file to Evernote, text recognition is performed on all text, including
handwritten characters, and the file becomes searchable in Evernote.
ATTENTION
l You need to create an Evernote account (free or paid).
l To save a file to Evernote, you first need to sign in to Evernote for Windows.
1. Click the [Scan to Evernote (Note)] icon in the Quick Menu.
a Evernote for Windows starts up, and the JPEG file is saved to Evernote.
HINT
l When you select [PDF(*.pdf)] for [File format] in the [File option] tab of the ScanSnap setup
window, a JPEG file is created from a PDF file. A single JPEG file is created for each page of
the PDF file.
l When you select [PDF(*.pdf)] for [File format] in the [File option] tab of the ScanSnap setup
window, a four-digit serial number is automatically added to the name of the file which is
saved to Evernote.
Example:
l Even after the scanned image is saved to Evernote, the same file as the scanned image
remains in the folder specified for [Image saving folder] in the [Save] tab of the ScanSnap
setup window. Delete it if unnecessary.
When the file name is [ScanSnap], the file is saved as:
ScanSnap_0001, ScanSnap_0002, ScanSnap_0003...
ATTENTION
l You cannot start scanning when the Quick Menu is displayed. Save the JPEG file to Evernote
before scanning the next document.
l Do not move, delete, or rename scanned images using other applications while the Quick Menu is
displayed.
HINT
l Profiles can also be used for the linkage function. For details, refer to "Profile" (page 62).
l ScanSnap Folder can also be used to save scanned images to Evernote. For details, refer to
"ScanSnap Folder Operations" (page 77).
46
Page 47
Saving Data to Google Drive
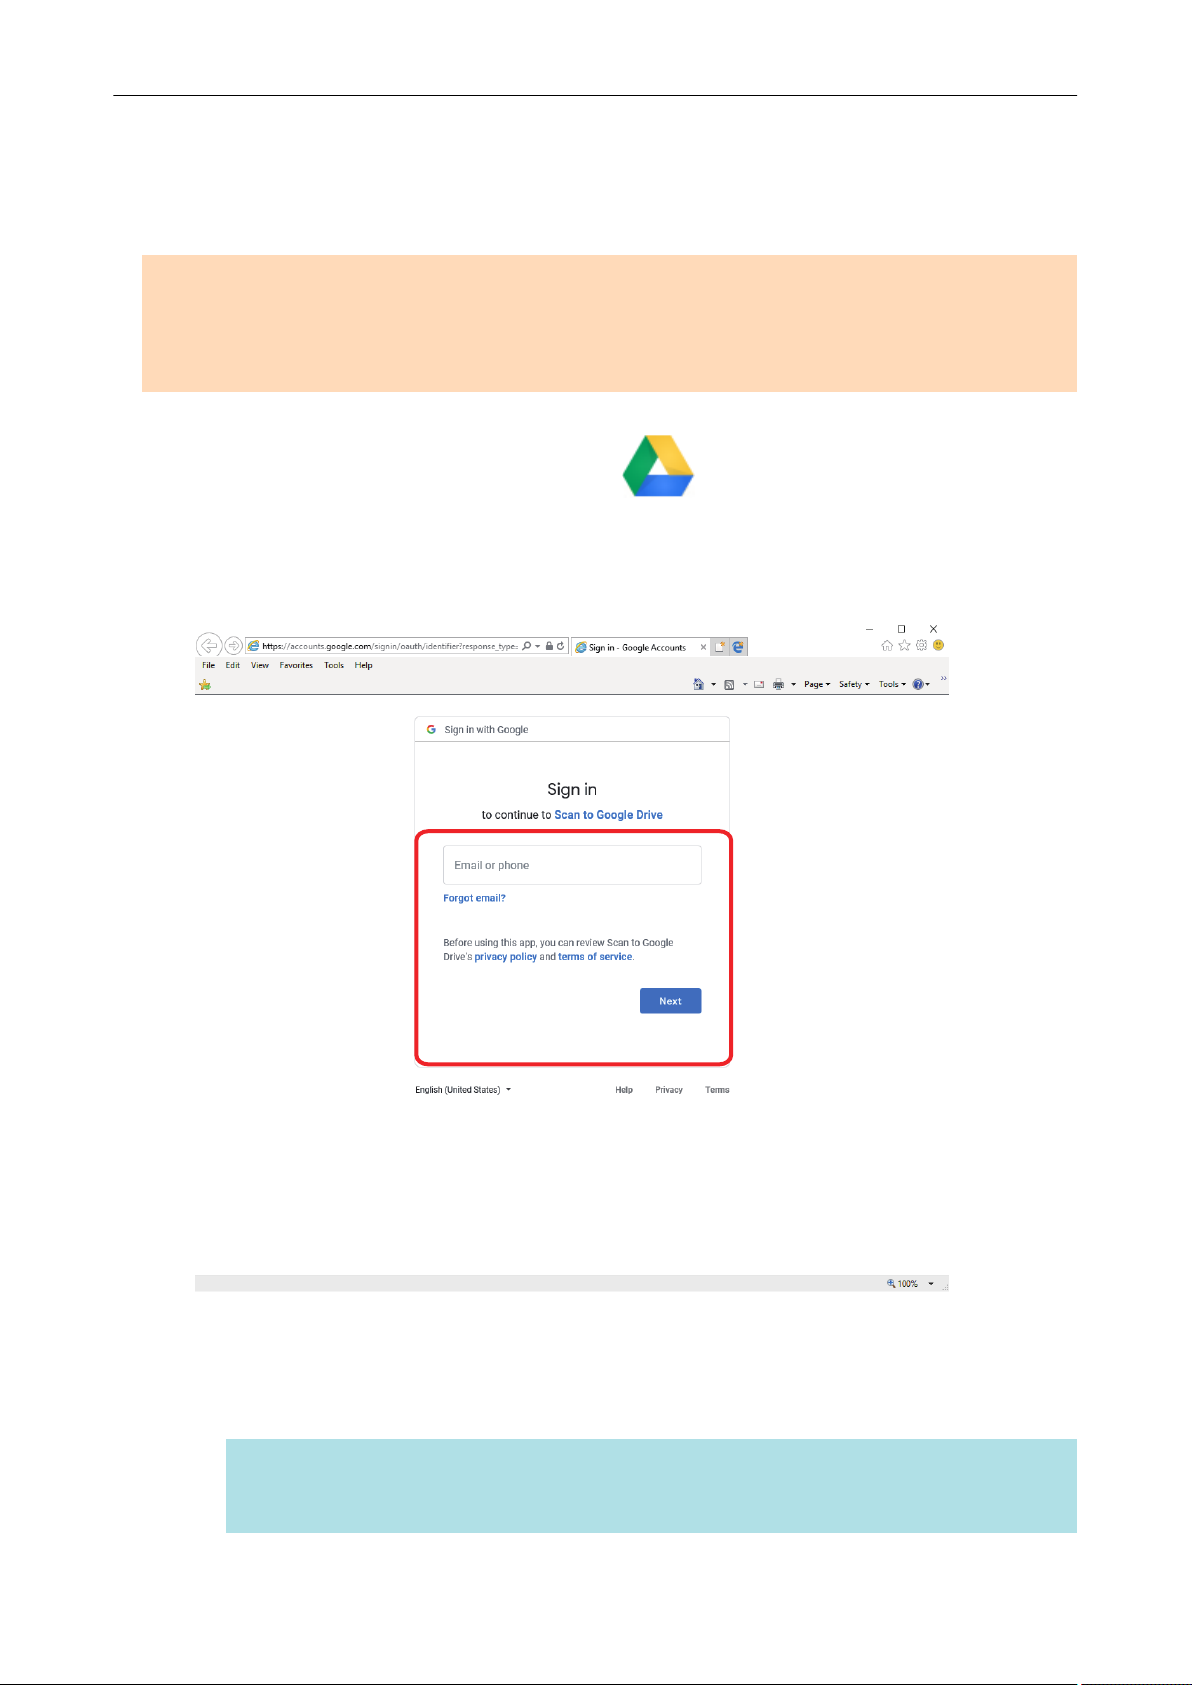
Saving Data to Google Drive
This section explains how to save the scanned image as a PDF file to Google Drive.
ATTENTION
l You need to create a Google account (free).
l [Scan to Google Drive] is not available in a proxy environment that requires authentication upon
connecting to the Internet.
1. Click the [Scan to Google Drive] icon in the Quick Menu.
a The [Scan to Google Drive] window appears.
2. Enter your e-mail address and password, and then click the [Sign in] button.
a A window appears.
3. Click the [Accept] button.
a Text recognition is performed.
HINT
l If [JPEG(*.jpg)] is selected for [File format] in the [File option] tab of the ScanSnap setup
window, a separate PDF file will be created from each JPEG file.
47
Page 48

Saving Data to Google Drive
l Note that text recognition will be performed only on pages containing text which is not yet
recognized.
a Saving to Google Drive starts.
4. Click the [Close] button to close the [Scan to Google Drive] window when the
saving is completed.
Google Drive does not start up after the saving has completed. To check the saved PDF file,
start a web browser and log into Google Drive.
ATTENTION
l You cannot start scanning when the Quick Menu is displayed. Save the PDF file to Google Drive
before scanning the next document.
l Do not move, delete, or rename scanned images using other applications while the Quick Menu is
displayed.
HINT
l The settings for [Scan to Google Drive] can be changed. For details, refer to "Changing the
Settings of Linked Applications" (page 134).
l Profiles can also be used for the linkage function. For details, refer to "Profile" (page 62).
l ScanSnap Folder can also be used to save scanned images to Google Drive. For details, refer to
"ScanSnap Folder Operations" (page 77).
48
Page 49

Posting to Salesforce Chatter
Posting to Salesforce Chatter
This section explains how to post a scanned image as a PDF or a JPEG file to Salesforce Chatter.
ATTENTION
l A Salesforce CRM license is required separately.
l ScanSnap Manager can link with the following Salesforce editions:
- Unlimited
- Enterprise
l A maximum of 100 scanned image files can be posted to Salesforce Chatter at once.
l [Scan to Salesforce Chatter] is not available in a proxy environment that requires authentication
upon connecting to the Internet.
1. Click the [Scan to Salesforce Chatter] icon
a The [Scan to Salesforce Chatter - Login] window appears.
in the Quick Menu.
2. Enter your user name and password, and then click the [OK] button.
Enter a security token if needed.
ATTENTION
If the computer is shared with other users, the shared environment automatically allows other
users to log into Salesforce when the [Save user account information] checkbox is selected.
To prevent this from happening, do not select the [Save user account information] checkbox.
a The [Scan to Salesforce Chatter] window appears.
3. Check the scanned image in the preview area.
49
Page 50

Preview
Posting to Salesforce Chatter
You can configure the settings for scanning to Salesforce Chatter in the [Scan to Salesforce
Chatter] window.
For details about the [Scan to Salesforce Chatter] window, refer to the ScanSnap Manager
Help.
4. Click the [Post] button.
a Posting to Salesforce Chatter starts.
5. Click the [Close] button to close the [Scan to Salesforce Chatter] window
when the posting is completed.
Salesforce does not start up after the posting has completed. To check the saved scanned
image file, start a web browser and log into Salesforce.
ATTENTION
l You cannot start scanning after the Quick Menu is displayed and before the [Scan to Salesforce
Chatter] window is closed. Close the [Scan to Salesforce Chatter] window before scanning the next
document.
l Do not move, delete, or rename scanned images using other applications while the Quick Menu is
displayed.
HINT
l The settings for [Scan to Salesforce Chatter] can be changed. For details, refer to "Changing the
Settings of Linked Applications" (page 134).
l Profiles can also be used for the linkage function. For details, refer to "Profile" (page 62).
50
Page 51

Posting to Salesforce Chatter
l ScanSnap Folder can also be used to send scanned images to Salesforce Chatter. For details,
refer to "ScanSnap Folder Operations" (page 77).
51
Page 52

Saving Data to Your SugarSync Folder
Saving Data to Your SugarSync Folder
This section explains how to save the scanned image as a PDF or a JPEG file to your SugarSync
folder.
ATTENTION
l You need to have a SugarSync account.
l You can save up to 100 files to your SugarSync folder at once.
HINT
When you first log into SugarSync after installing SugarSync Manager for Windows, the My SugarSync
folder is automatically created.
My SugarSync is a sync folder used in SugarSync.
1. Click the [Scan to SugarSync] icon in the Quick Menu.
a The [Scan to SugarSync] window appears.
HINT
You can configure the settings to not show the [Scan to SugarSync] window. If you configure the
settings to not show the [Scan to SugarSync] window, scanned images are saved directly to the
SugarSync sync folder.
For details about changing the settings, refer to "Changing the Settings of Linked Applications"
(page 134).
2. Check the scanned image in the preview area.
In the [Scan to SugarSync] window, you can rename the file and specify your SugarSync
folder.
For details about the [Scan to SugarSync] window, refer to the ScanSnap Manager Help.
52
Page 53

Preview
Saving Data to Your SugarSync Folder
ATTENTION
The file will not be synced with SugarSync unless you select a SugarSync folder as the
destination folder.
3. Click the [Save] button.
a The scanned image is saved to your SugarSync folder.
ATTENTION
l You cannot start scanning after the Quick Menu is displayed and before the [Scan to SugarSync]
window is closed. Close the [Scan to SugarSync] window before scanning the next document.
l Do not move, delete, or rename the scanned image in other applications after the Quick Menu is
displayed and before the [Scan to SugarSync] window is closed.
HINT
l You can change the settings for [Scan to SugarSync]. For details, refer to "Changing the Settings of
Linked Applications" (page 134).
l Profiles can also be used for the linkage function. For details, refer to "Profile" (page 62).
l ScanSnap Folder can also be used to save scanned images to SugarSync. For details, refer to
"ScanSnap Folder Operations" (page 77).
53
Page 54

Converting into Word, Excel, or PowerPoint Documents
Converting into Word, Excel, or PowerPoint
Documents
This section explains how to convert the scanned image into Word/Excel/PowerPoint files using
ABBYY FineReader for ScanSnap bundled with the ScanSnap.
ATTENTION
l The converted data is saved in one of the following formats.
- ABBYY Scan to Word: DOCX format (.docx)
- ABBYY Scan to Excel(R): XLSX format (.xlsx)
- ABBYY Scan to PowerPoint(R): PPTX format (.pptx)
l To view or check documents converted into Word, Excel, and PowerPoint files, complete the user
registration and license authentication for these applications so that they can be used on your
computer.
l For details about the applications that are supported by ABBYY FineReader for ScanSnap and their
versions, refer to the ABBYY FineReader for ScanSnap User's Guide. After installing a supported
application, enable the application.
l Do not use this function while you are working in Word, Excel, or PowerPoint. In addition, do not
use Word, Excel, or PowerPoint while this function is being executed. Otherwise, a message such
as "Call was rejected by callee" may appear and the conversion result may not be displayed.
l For details about the OCR function of ABBYY FineReader for ScanSnap, refer to "Optical
Character Recognition (OCR) Function of ABBYY FineReader for ScanSnap" (page 55).
1. In the Quick Menu, click the [ABBYY Scan to Word] icon
Scan to Excel(R)] icon
, or [ABBYY Scan to PowerPoint(R)] icon
, [ABBYY
.
a A window appears, which indicates that the scanned image is being converted into a Word,
Excel, or PowerPoint file. When the conversion is completed, Word, Excel, or PowerPoint
starts up, and the conversion result is displayed.
ATTENTION
l You cannot start scanning when the Quick Menu is displayed. Wait until the conversion is over to
scan another document.
l Do not move, delete, or rename scanned images using other applications while the Quick Menu is
displayed.
HINT
l The settings for [ABBYY Scan to Word], [ABBYY Scan to Excel(R)], or [ABBYY Scan to
PowerPoint(R)] can be changed. For details, refer to "Changing the Settings of Linked Applications"
(page 134).
l Profiles can also be used for the linkage function. For details, refer to "Profile" (page 62).
54
Page 55

Converting into Word, Excel, or PowerPoint Documents
Optical Character Recognition (OCR) Function of ABBYY FineReader for ScanSnap
This section explains about the OCR function of ABBYY FineReader for ScanSnap.
Overview of ABBYY FineReader for ScanSnap
ABBYY FineReader for ScanSnap is an application used exclusively with the ScanSnap. This
program can perform text recognition only for PDF files created by using the ScanSnap. It cannot
perform text recognition for files created using Adobe Acrobat or other applications.
Features of OCR Function
The OCR function has the following features. Before performing text recognition, check whether the
documents are suitable for text recognition by referring to the following guidelines:
Application Suitable for Text Recognition Not Suitable for Text Recognition
ABBYY Scan to
Word
Documents with simple layouts consisting
of single or double columns
Documents with complex layouts containing a
mixture of diagrams, tables, and texts (such as
brochures, magazines and newspapers)
55
Page 56

Converting into Word, Excel, or PowerPoint Documents
Application Suitable for Text Recognition Not Suitable for Text Recognition
ABBYY Scan to
Excel(R)
Documents with simple tables in which
every border connects to the outer frame.
Documents containing the following:
l Tables with no solid border lines
l Tables with complicated cell formats
l Complex tables containing subtables
l Diagrams
l Graphs
l Photos
l Documents containing vertical text
ABBYY Scan to
PowerPoint(R)
Documents containing text and simple
diagrams/tables on a white or light
monocolor background
l Documents with complex page layouts
comprised of characters, diagrams and
illustrations
l Documents with characters on photographs or
patterned background
l Documents with light colored characters on a
deep colored background
Parameters That Cannot Be Reproduced as They Are in the Original
Document
The following parameters may not be reproduced as they are in the original document. It is
recommended that you check the results of the text recognition in Word, Excel or PowerPoint and, if
necessary, edit the data.
l Character font and size
l Character and line spacing
l Underlined, bold and italic characters
l Superscript/subscript
Documents That Cannot Be Recognized Correctly
The following types of documents may not be recognized correctly. Better results in text recognition
may be achieved by changing the color mode or increasing the resolution.
56
Page 57

Converting into Word, Excel, or PowerPoint Documents
l Documents including handwritten characters
l Documents containing small characters (smaller than a font size of 10)
l Skewed documents
l Documents written in languages other than the specified language
l Documents with characters on an unevenly colored background
Example: Shaded characters
l Documents with many decorated characters
Example: Decorated characters (embossed/outlined)
l Documents with characters on a patterned background
Example:
l
Documents with many characters contacting underlines or borders
l Documents with a complex layout and documents with a large amount of image noise
(It may take extra time to process text recognition for these documents.)
Characters overlapping illustrations and diagrams
Other Considerations
l When you convert a document that is longer than the maximum size allowed by Word, the
maximum paper size available for Word may be used.
l When you convert a document to Excel files, if the recognition result exceeds 65,536 lines, no
more results are saved.
l When you convert a document to Excel files, information about the layout of the entire
document, diagrams, and length/width of graphs and tables is not duplicated. Only tables and
characters are reproduced.
l A converted PowerPoint document will not have the original background color and patterns.
l Documents placed upside down or in landscape orientation cannot be recognized correctly. Use
"Rotating a Scanned Image to Its Correct Orientation" (page 90), or place documents in the
correct orientation.
l If bleed-through reduction is enabled, the recognition rate may be lower. In that case, disable it
in the following procedure.
Right-click the ScanSnap Manager icon
the task bar, and from the Right-Click Menu, click [Scan Button Settings] → [Scanning] tab →
[Option] button to display the [Scanning mode option] window. Then, clear the [Scanning mode
option] checkbox (for SV600, the [Reduce bleed-through] checkbox is located in the [Image
quality] tab on the [Scanning mode option] window).
in the notification area located at the far right of
57
Page 58

Managing Scanned Images in SharePoint
Managing Scanned Images in SharePoint
This section explains how to save the scanned image in SharePoint.
ATTENTION
l To save a large file to SharePoint, the SharePoint setting needs to be changed. For details about
changing the SharePoint setting, contact the system administrator.
l Once you register the SharePoint site, ScanSnap Manager automatically connects to that site from
the next startup of Scan to Microsoft SharePoint. For more details, refer to the Scan to Microsoft
SharePoint User's Guide.
1. Click the [Scan to SharePoint] icon
a Scan to Microsoft SharePoint starts up.
in the Quick Menu.
2. From the sites list, select a document library in which you want to save the
scanned image.
a The Index Pane appears.
3. Enter information, such as the title, and click the [Accept] button.
58
Page 59

Managing Scanned Images in SharePoint
a The scanned image is saved in the specified document library.
ATTENTION
l You cannot start scanning when the Quick Menu is displayed. Wait until ScanSnap Manager links
with Microsoft SharePoint before scanning another document.
l Do not move, delete, or rename scanned images using other applications while the Quick Menu is
displayed.
HINT
l For details about Scan to Microsoft SharePoint, refer to the Scan to Microsoft SharePoint User's
Guide.
l You can change the settings for [Scan to SharePoint]. For details, refer to "Changing the Settings
of Linked Applications" (page 134).
l Profiles can also be used for the linkage function. For details, refer to "Profile" (page 62).
59
Page 60

Managing Scanned Images in the Picture Folder (as JPEG Files)
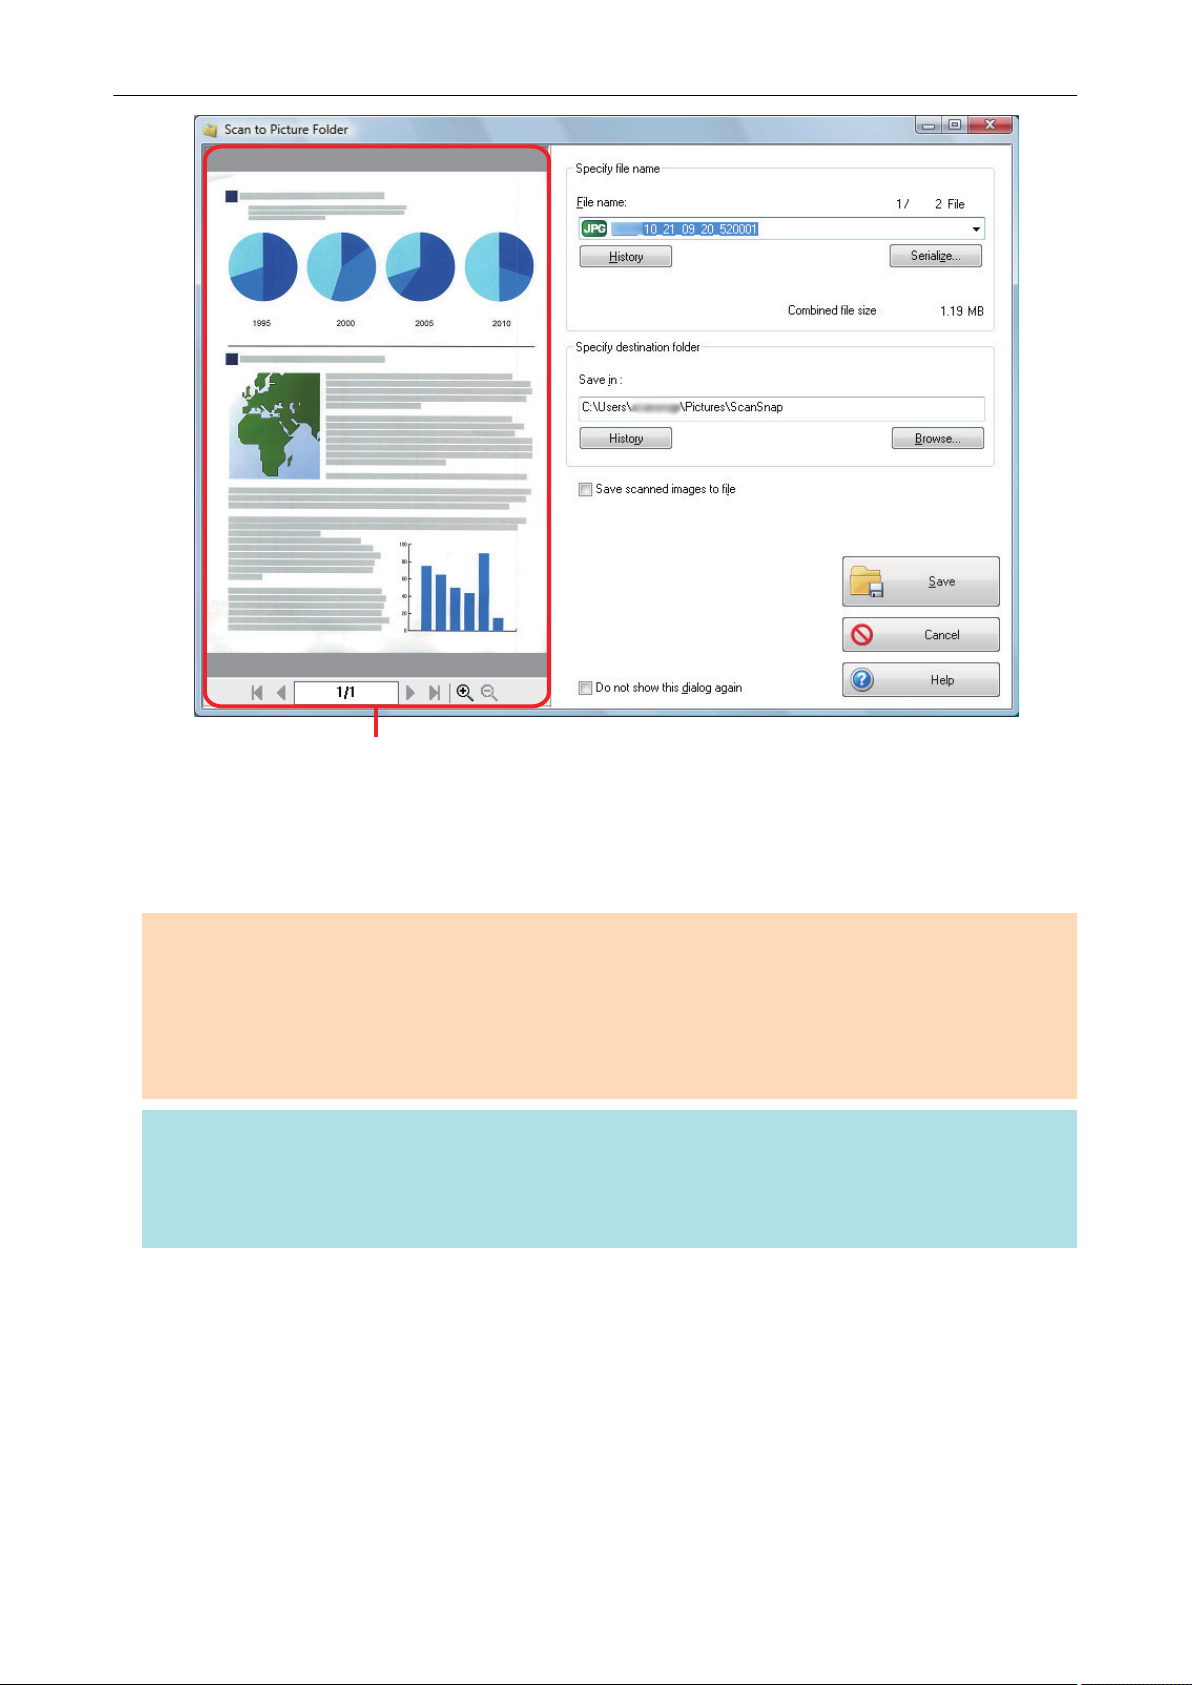
Managing Scanned Images in the Picture Folder (as
JPEG Files)
This section explains how to save the scanned image as a JPEG file to Picture Folder.
HINT
The following folder is set as the "Pictures folder" by default:
DriveName (such as C): \Users\UserName\Pictures\ScanSnap
1. Click the [Scan to Picture Folder] icon in the Quick Menu.
a The [Scan to Picture Folder] window appears.
HINT
You can configure the settings to not show the [Scan to Picture Folder] window. If you configure
the settings to not show the [Scan to Picture Folder] window, scanned images are saved directly
to Picture Folder.
For details about changing the settings, refer to "Changing the Settings of Linked Applications"
(page 134).
2. Check the scanned image in the preview area.
In the [Scan to Picture Folder] window, you can change file names or destination folders, and
specify whether to save the scanned image in the folder specified for [Image saving folder].
For details about the [Scan to Picture Folder] window, refer to the ScanSnap Manager Help.
60
Page 61
Preview
Managing Scanned Images in the Picture Folder (as JPEG Files)
3. Click the [Save] button.
a The scanned image is saved in the Pictures folder.
ATTENTION
l You cannot start scanning after the Quick Menu is displayed and before the [Scan to Picture
Folder] window is closed. Close the [Scan to Picture Folder] window before scanning the next
document.
l Do not move, delete, or rename the scanned image in other applications after the Quick Menu is
displayed and before the [Scan to Picture Folder] window is closed.
HINT
l You can change the settings for [Scan to Picture Folder]. For details, refer to "Changing the
Settings of Linked Applications" (page 134).
l Profiles can also be used for the linkage function. For details, refer to "Profile" (page 62).
61
Page 62

Profile
Left-click
Left-Click Menu
This section explains profiles.
Once the frequently used scan settings are saved as profiles, you can select a profile to easily
change scan settings depending on your scanning purpose.
You can manage up to 20 profiles.
Profile
To select a profile, left-click the ScanSnap Manager icon
to show the Left-Click Menu.
l How to use profiles to perform scanning
"Using Profiles to Perform Scanning" (page 63)
l How to configure scan settings for profiles depending on your intended use of the scanned
images
"How to Configure Scan Settings" (page 126)
HINT
l To use a profile, you need to clear the [Use Quick Menu] checkbox in the ScanSnap setup window.
l You can also select a profile from [Profile] in the ScanSnap setup window.
62
Page 63

Using Profiles to Perform Scanning
Using Profiles to Perform Scanning
This section explains how to use profiles to perform scanning.
The following explains an example in which the scanned image file is saved to ScanSnap Home.
1. Right-click the ScanSnap Manager icon in the notification area located
at the far right of the task bar, and from the Right-Click Menu, select [Scan
Button Settings].
a The ScanSnap setup window appears.
2. Clear the [Use Quick Menu] checkbox.
HINT
When you connect SV600 and another ScanSnap to a computer, a drop-down list for changing
the ScanSnap to use is displayed. For details, refer to "When Two ScanSnaps Are Connected to
a Computer (SV600)" (page 153).
3. Click the [OK] button to close the ScanSnap setup window.
4. Select [Standard] from the Left-Click Menu.
63
Page 64

Using Profiles to Perform Scanning
HINT
When you connect SV600 and another ScanSnap to a computer, the Left-Click Menu specific to
each ScanSnap is displayed. In that case, select a profile from the Left-Click Menu for the
ScanSnap model you use.
5. Scan documents with the ScanSnap.
For details about how to scan documents, refer to here in the Basic Operation Guide.
a When scanning is completed, the main window of ScanSnap Home appears.
64
Page 65

Using Profiles to Perform Scanning
65
Page 66

Profile Management
Profile Management
This section explains how to manage profiles.
For details about how to add, change, or delete profiles, refer to the following:
l "Adding Profiles" (page 67)
l "Changing Profiles" (page 69)
l "Renaming Profiles" (page 71)
l "Changing the Display Order of Profiles" (page 73)
l "Deleting Profiles" (page 75)
HINT
When you connect SV600 and another ScanSnap to a computer, you can change the settings for each
ScanSnap. For details, refer to "When Two ScanSnaps Are Connected to a Computer (SV600)" (page
153).
66
Page 67

Profile Management
Adding Profiles
This section explains how to add a profile.
Up to 20 profiles can be saved including the [Standard] profile.
1. Right-click the ScanSnap Manager icon in the notification area located
at the far right of the task bar, and from the Right-Click Menu, select [Scan
Button Settings].
a The ScanSnap setup window appears.
2. Clear the [Use Quick Menu] checkbox.
3. Configure the scan settings in each tab.
For details about each tab, refer to the ScanSnap Manager Help.
4. Select [Add Profile] from the [Profile].
67
Page 68

Profile Management
a The [Add new profile] window appears.
5. Type in a new profile name and click the [OK] button.
a The added profile appears in [Profile] in the ScanSnap setup window.
6. Click the [OK] button to close the ScanSnap setup window.
68
Page 69

Profile Management
Changing Profiles
This section explains how to change the scan settings for a profile.
1. Right-click the ScanSnap Manager icon in the notification area located
at the far right of the task bar, and from the Right-Click Menu, select [Scan
Button Settings].
a The ScanSnap setup window appears.
2. Clear the [Use Quick Menu] checkbox.
3. Select a profile to change from [Profile].
4. Configure the scan settings in each tab.
For details about each tab, refer to the ScanSnap Manager Help.
69
Page 70

Profile Management
5. When you finish changing the settings for the selected profile, click the [OK]
button.
a The overwrite confirmation window appears.
6. To overwrite the profile, click the [Yes] button. To save the settings as
"Standard", click the [No] button.
HINT
The confirmation message does not appear when the [Standard] profile is selected in step 3.
70
Page 71

Profile Management
Renaming Profiles
This section explains how to rename a profile.
You can rename other profiles than the [Standard] profile.
1. Right-click the ScanSnap Manager icon in the notification area located
at the far right of the task bar and select [Profile Management] from the
Right-Click Menu.
a The [ScanSnap Manager - Profile Management] window appears.
HINT
l If you cannot select [Profile Management] in the Right-Click Menu, clear the [Use Quick
Menu] checkbox in the ScanSnap setup window.
l You can also display the [ScanSnap Manager - Profile Management] window by selecting
[Profile Management] from [Profile] in the ScanSnap setup window.
2. Select a profile and click the [Rename] button.
a The [Rename] window appears.
71
Page 72

3. Type in a new name, and click the [OK] button.
a The profile is renamed.
Profile Management
4. Click the [Close] button to close the [ScanSnap Manager - Profile
Management] window.
72
Page 73

Profile Management
Changing the Display Order of Profiles
This section explains how to change the display order of profiles.
However, you cannot change the [Standard] display order.
1. Right-click the ScanSnap Manager icon in the notification area located
at the far right of the task bar and select [Profile Management] from the
Right-Click Menu.
a The [ScanSnap Manager - Profile Management] window appears.
HINT
l If you cannot select [Profile Management] in the Right-Click Menu, clear the [Use Quick
Menu] checkbox in the ScanSnap setup window.
l You can also display the [ScanSnap Manager - Profile Management] window by selecting
[Profile Management] from [Profile] in the ScanSnap setup window.
2. Select a profile from the list to arrange profiles in a different order.
3. Click the [Up] or [Down] button to move the profile to a desired position in
the list.
73
Page 74

Profile Management
4. Click the [Close] button to close the [ScanSnap Manager - Profile
Management] window.
74
Page 75

Profile Management
Deleting Profiles
This section explains how to delete a profile.
You can delete other profiles than the [Standard] profile.
1. Right-click the ScanSnap Manager icon in the notification area located
at the far right of the task bar and select [Profile Management] from the
Right-Click Menu.
a The [ScanSnap Manager - Profile Management] window appears.
HINT
l If you cannot select [Profile Management] in the Right-Click Menu, clear the [Use Quick
Menu] checkbox in the ScanSnap setup window.
l You can also display the [ScanSnap Manager - Profile Management] window by selecting
[Profile Management] from [Profile] in the ScanSnap setup window.
2. Select a profile and click the [Delete] button.
a The [Delete Profile] window appears.
75
Page 76

Profile Management
3. Click the [Yes] button.
a The selected profile is deleted.
4. Click the [Close] button to close the [ScanSnap Manager - Profile
Management] window.
76
Page 77
SNSSNS
CloudCloud
Web MailWeb Mail
ڦ
ڦ
ڦ
ڦ
ScanSnap to FolderScanSnap Folder
ScanSnap Folder Operations
ScanSnap Folder Operations
This section explains ScanSnap Folder.
"ScanSnap Folder" is a temporary folder where you can save images scanned with the ScanSnap to
upload the file to a Web application or attach the file to an e-mail.
ScanSnap Folder supports a wide range of applications including Web applications.
By selecting ScanSnap Folder from the file selection window of the application, you can scan a
document from the ScanSnap. You can use the scanned document file directly in the application.
l How to use ScanSnap Folder to perform scanning
"Using ScanSnap Folder to Perform Scanning" (page 78)
l How to configure scan settings depending on your intended use of the scanned images
"How to Configure Scan Settings" (page 126)
ATTENTION
You can use ScanSnap Folder with applications or cloud services that support the following:
l PDF files or JPEG files
l Those without a file format specified
HINT
The files in ScanSnap Folder will be deleted automatically after a set number of days because it is a
temporary folder. The number of days to keep the files can be changed. For details, refer to the
ScanSnap Manager Help.
77
Page 78

Using ScanSnap Folder to Perform Scanning
Using ScanSnap Folder to Perform Scanning
This section explains how to use ScanSnap Folder to perform scanning.
The following explains an example in which the scanned image file is attached to an e-mail in
Outlook.
1. Click [Insert] in the menu.
A ribbon is displayed.
2. Click [Attach File].
Click [Browse this PC].
3.
a The [Insert File] window appears.
4. Click [This PC].
78
Page 79

Using ScanSnap Folder to Perform Scanning
HINT
For Windows 8.1/Windows 7, when you select the ScanSnap Folder located in [Favorites],
scanning becomes available in some applications.
5. Select ScanSnap Folder.
a A notification appears from the ScanSnap Manager icon in the notification area, and
scanning becomes available.
ATTENTION
Selecting "ScanSnap Folder" from some applications may terminate those applications.
If your application ends, take an alternate measure. Use your application separately after starting
an application in the Quick Menu to process and save the scanned image.
79
Page 80

Preview
Using ScanSnap Folder to Perform Scanning
6. Scan documents with the ScanSnap.
For details about how to scan documents, refer to here in the Basic Operation Guide.
a When scanning is completed, the [ScanSnap Folder] window appears.
7. Check the scanned image in the preview area.
In the [ScanSnap Folder] window, you can rename the file and convert the file format.
For details about the [ScanSnap Folder] window, refer to the ScanSnap Manager Help.
8. Click the [Save] button.
a The file is saved to ScanSnap Folder.
80
Page 81
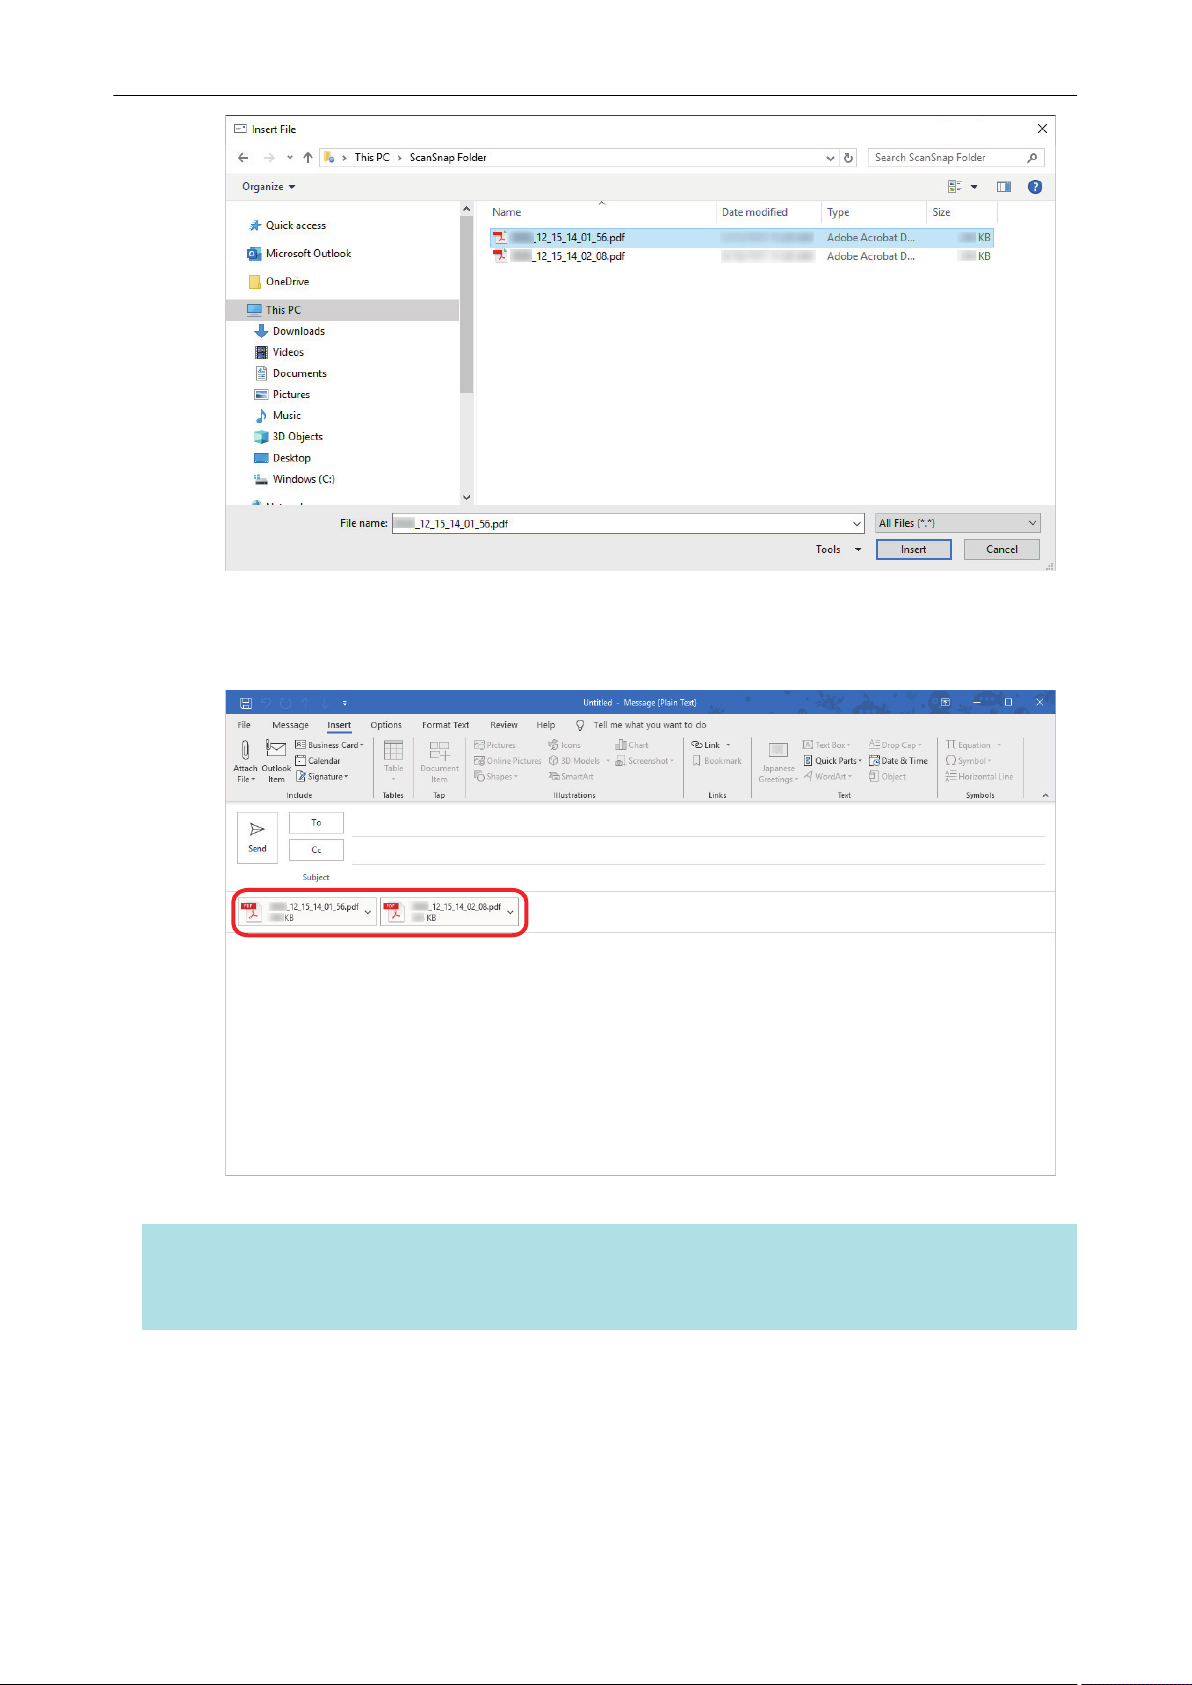
Using ScanSnap Folder to Perform Scanning
9. Select the file to be attached, and click the [Insert] button.
a The file is attached.
HINT
You can enable or disable ScanSnap Folder. For details, refer to "Enabling or Disabling ScanSnap
Folder" (page 82).
81
Page 82

Enabling or Disabling ScanSnap Folder
Enabling or Disabling ScanSnap Folder
You can enable or disable ScanSnap Folder.
Enabling or disabling ScanSnap Folder causes the following changes:
l Whether the "ScanSnap Folder" folder is displayed under [Computer]
l For Windows 8.1/Windows 7, whether there is a shortcut to the "ScanSnap Folder" folder in
[Favorites]
ATTENTION
To enable or disable ScanSnap Folder, log on as a user with Administrator privileges.
Enable or disable ScanSnap Folder in the following procedure.
1. Right-click the ScanSnap Manager icon in the notification area located
at the far right of the task bar, and from the Right-Click Menu, select
[ScanSnap Folder Settings].
a The ScanSnap setup window appears.
2. In the [Application] tab, click the [Application Settings] button.
a The [ScanSnap Folder - Options] window appears.
3. Click the [Enable] or [Disable] button.
a A message appears to confirm whether you want to switch the availability of ScanSnap
Folder.
4. Click the [Yes] button.
a ScanSnap Folder is enabled or disabled.
When enabling or disabling ScanSnap Folder is complete, a message is displayed to notify
that the operation is successfully completed.
HINT
For Windows 10/Windows 8.1/Windows 7, a confirmation message may appear after you click
the [Yes] button.
When a confirmation message appears, click the [Yes] button to enable or disable ScanSnap
Folder.
5. Click the [OK] button to close all the windows.
82
Page 83

Scan Settings for Your Intended Use
Scan Settings for Your Intended Use
This section explains how to configure scan settings for creating scanned images depending on your
intended use.
Scan settings can be configured in the ScanSnap setup window.
l "Scanning Only One Side of a Document (iX1500, iX500, or S1300i)" (page 84)
l "Scanning Color Documents in Gray or Black & White" (page 85)
l "Scanning Color Documents in High Compression" (page 86)
l "Deleting Blank Pages (Not Applicable to SV600)" (page 87)
l "Correcting Skewed Character Strings" (page 88)
l "Rotating a Scanned Image to Its Correct Orientation" (page 90)
l "Reducing Bleed-Through" (page 92)
l "Reducing the Effect of Lighting (SV600)" (page 94)
l "Reducing Faded Colors and Blown-Out Highlights (SV600)" (page 96)
l "Correcting Skewed Text (SV600)" (page 98)
l "Saving Scanned Images in Multiple PDF Files" (page 100)
l "Saving the Scanned Images of a Book as Separate Single-Page Images (SV600)" (page 102)
l "Creating Searchable PDF Files" (page 104)
l "Setting Keywords in PDF Files" (page 107)
l "Setting Passwords for PDF Files" (page 113)
l "Creating PDF/A Files" (page 118)
l "Starting Scanning Automatically (SV600)" (page 120)
83
Page 84

Scanning Only One Side of a Document (iX1500, iX500, or S1300i)
Scanning Only One Side of a Document (iX1500,
iX500, or S1300i)
To scan only one side of a document, in the [Scanning] tab of the ScanSnap setup window, select
[Simplex Scan] in the [Scanning side] drop-down list.
HINT
Right-click the ScanSnap Manager icon
bar, and when you select [Simplex Scan] from the Right-Click Menu, scanning is performed in simplex
mode even if [Duplex Scan] is specified for [Scanning side] in the [Scanning] tab.
in the notification area located at the far right of the task
84
Page 85

Scanning Color Documents in Gray or Black & White
Scanning Color Documents in Gray or Black & White
If you want to scan color documents and save them in gray or black & white, select [Gray] or [B&W]
from the [Color mode] drop-down list in the [Scanning] tab of the ScanSnap setup window.
85
Page 86

Scanning Color Documents in High Compression
Scanning Color Documents in High Compression
Large quantities of color documents can be scanned in high compression mode and saved as a
compact PDF file.
ATTENTION
When scanning in [Color high compression] mode, only the background is scanned in high
compression separated from the characters. Therefore, documents that are mainly made up of
characters can be scanned and saved as a smaller file without the image quality of the characters
being reduced. By contrast, documents that are made up of photographs and illustrations are
recognized as the background and scanned entirely in high compression, resulting in a reduction of
quality in the scanned image. Therefore, this function is not suitable for scanning color documents such
as photographs.
To scan color documents in high compression mode, select [Color high compression] from the [Color
mode] drop-down list in the [Scanning] tab of the ScanSnap setup window.
86
Page 87

Deleting Blank Pages (Not Applicable to SV600)
Deleting Blank Pages (Not Applicable to SV600)
The ScanSnap can detect and automatically delete blank pages from a scanned image. For
example, when you scan a mixed batch of double-sided and single-sided documents in duplex
mode, the images are generated without the back sides of the single-sided documents (blank
pages).
ATTENTION
Blank pages are not deleted when CardMinder is used.
To delete blank pages, select [Blank page removal] in the [Scanning] tab of the ScanSnap setup
window.
ATTENTION
The following documents may be detected as blank.
l Almost blank documents with only a few characters
l Documents of only one color (including black) and without any patterns, lines or characters
When you scan such documents, clear the [Blank page removal] checkbox.
Also make sure to check the image data for accidentally deleted pages when discarding the scanned
document.
87
Page 88

Correcting Skewed Character Strings
Correcting Skewed Character Strings
When documents with skewed character strings are scanned, the ScanSnap is able to detect the
skewed character strings and correct them.
ATTENTION
If the Carrier Sheet is used for scanning, skewed character strings are not corrected.
HINT
When [Automatic detection] is specified for [Paper size] in the [Paper] tab of the ScanSnap setup
window, the skew in the image is always corrected. Therefore, [Deskew by text on document] does not
have to be enabled.
1. In the ScanSnap setup window, select the [Scanning] tab, and click the
[Option] button.
a The [Scanning mode option] window appears.
2. Select the [Deskew by text on document] checkbox.
For SV600, the [Deskew by text on document] checkbox is located in the [Image quality] tab of
the [Scanning mode option] window.
88
Page 89

Correcting Skewed Character Strings
3. Click the [OK] button to close all the windows.
ATTENTION
l Up to ±5 degrees of skew can be corrected.
l Skewed characters are corrected based on the character strings printed on the document.
Therefore, the scanned image for the following types of documents may be adjusted at the wrong
angle.
In that case, clear the [Deskew by text on document] checkbox:
- Documents on which pitches between lines or characters are extremely narrow, or characters
are overlapped
- Documents with many outlined or decorated characters
- Documents with many images (such as photographs and figures) and few characters
- Documents with characters on a patterned background
Example:
- Documents with long diagonal lines
- Documents including handwritten characters
Characters overlapping illustrations and diagrams
89
Page 90

Rotating a Scanned Image to Its Correct Orientation
Rotating a Scanned Image to Its Correct Orientation
The ScanSnap is able to rotate each scanned image automatically or to a specified orientation.
In an office environment, it is often the case that a single batch contains same size documents of
different text orientations. Automatic detection of the text orientation is useful for such a document
batch.
To rotate the orientation of scanned images, select [Image rotation] in the [Scanning] tab of the
ScanSnap setup window.
ATTENTION
In the case of SV600, if you select [Select later] from [Document type] in the [Paper] tab of the
ScanSnap setup window to scan a document and then select [Correct and save double-page spread
document images (book/magazine)] in the [ScanSnap Manager - Image scanning and file saving]
window, the scanned image is not rotated automatically to its correct orientation.
ATTENTION
The correct orientation of the scanned image is determined by the character strings printed on the
document. Therefore, the scanned images for the following types of documents may not rotate when
[Automatic] is selected for [Image rotation].
In this case, do not select [Automatic].
l Documents with many extremely large or small characters
l Documents on which pitches between lines or characters are extremely narrow, or characters are
overlapped
l Documents with many characters contacting underlines or borders
l Documents with many images (such as photographs and figures) and few characters
l Documents with characters on an unevenly colored background
Example:
l Documents with many decorated characters
Example:
l Documents with characters on a patterned background
Example:
l Documents with characters printed in various directions such as drawings
Shaded characters
Decorated characters (embossed/outlined)
Characters overlapping illustrations and diagrams
90
Page 91

Rotating a Scanned Image to Its Correct Orientation
l Documents written using only capital letters
l Documents including handwritten characters
l Skewed documents
l Documents not written in the following languages
- English/French/German/Italian/Spanish/Portuguese
- Languages (Japanese, Chinese (simplified/traditional), Korean, and Russian) that are included
in the OCR pack that has been installed
- A language that is specified for [Language] by selecting the [Convert to Searchable PDF]
checkbox in the [File option] tab of the ScanSnap setup window
l Documents with complex layouts
l Documents with a large amount of image noise
l Documents with faint characters
l Documents with faded characters
91
Page 92

Reducing Bleed-Through
Reducing Bleed-Through
The bleed-through that appears in the scanned image when there is text or illustration on the back
side of the document can be reduced.
1. In the ScanSnap setup window, select the [Scanning] tab, and click the
[Option] button.
a The [Scanning mode option] window appears.
2. Select the [Reduce bleed-through] checkbox.
For SV600, the [Reduce bleed-through] checkbox is located in the [Image quality] tab on the
[Scanning mode option] window.
92
Page 93
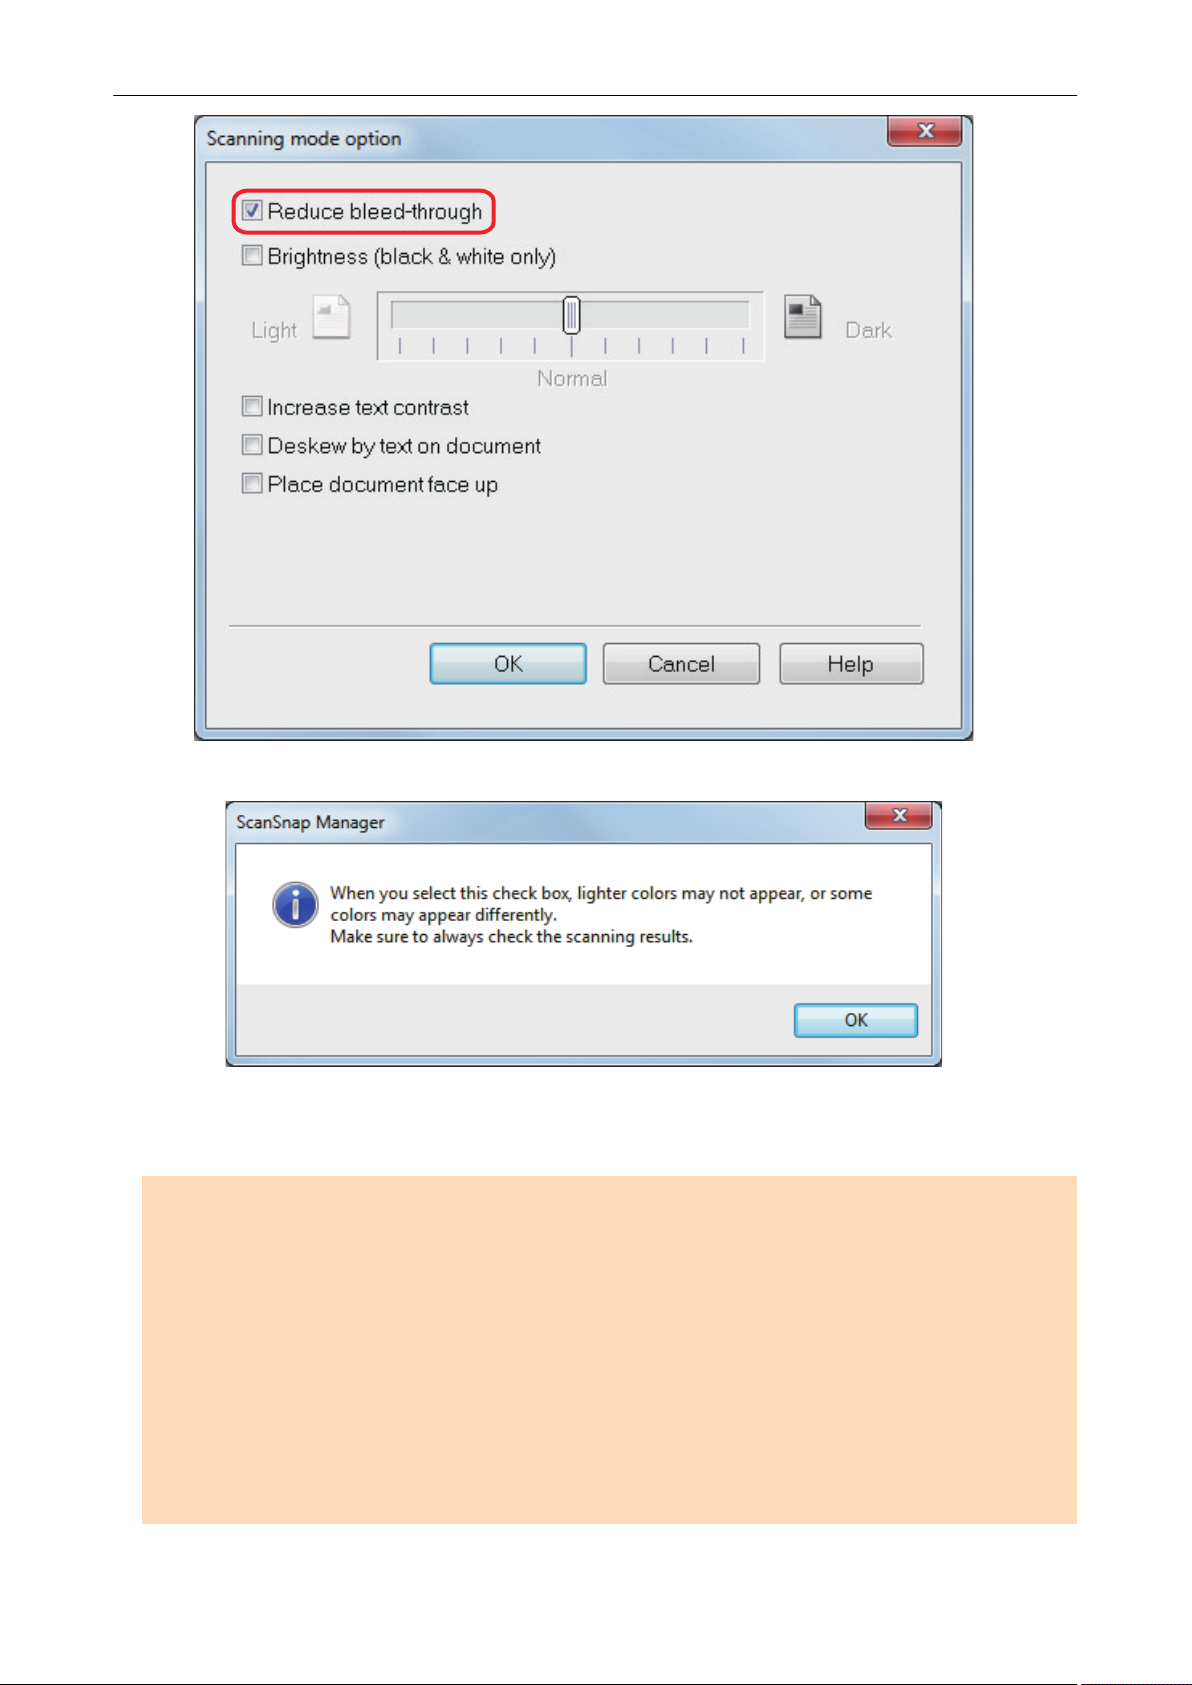
Reducing Bleed-Through
a The following message appears.
3. Click the [OK] button to close all the windows.
ATTENTION
For documents described below, bleed-through reduction may not function effectively. In that case,
clear the [Reduce bleed-through] checkbox.
l Documents with light colored letters or pictures/documents with thin letters or lines/documents with
a dark background color
The color may not be reproduced or the color may be changed. If you want to recognize the
marked character strings, the recognition rate for the characters may be lowered.
l Documents where the color for letters is light or the letters are thin
The recognition rate for the characters may be lowered.
l Documents with a lot of bleed-through
The bleed-through may be emphasized.
93
Page 94

Reducing the Effect of Lighting (SV600)
Reducing the Effect of Lighting (SV600)
Horizontal stripes caused by the effect of fluorescent or other lighting can be reduced in the scanned
image.
ATTENTION
l This process makes scanning speed slower than usual. It also makes the waiting time to start
scanning longer for continuous scanning.
l This process may take extra time depending on your computer system environment.
1. In the ScanSnap setup window, select the [Scanning] tab, and click the
[Option] button.
a The [Scanning mode option] window appears.
2. Click the [Image quality] tab, and select the [Reduce fluorescent lamp flicker]
checkbox.
94
Page 95
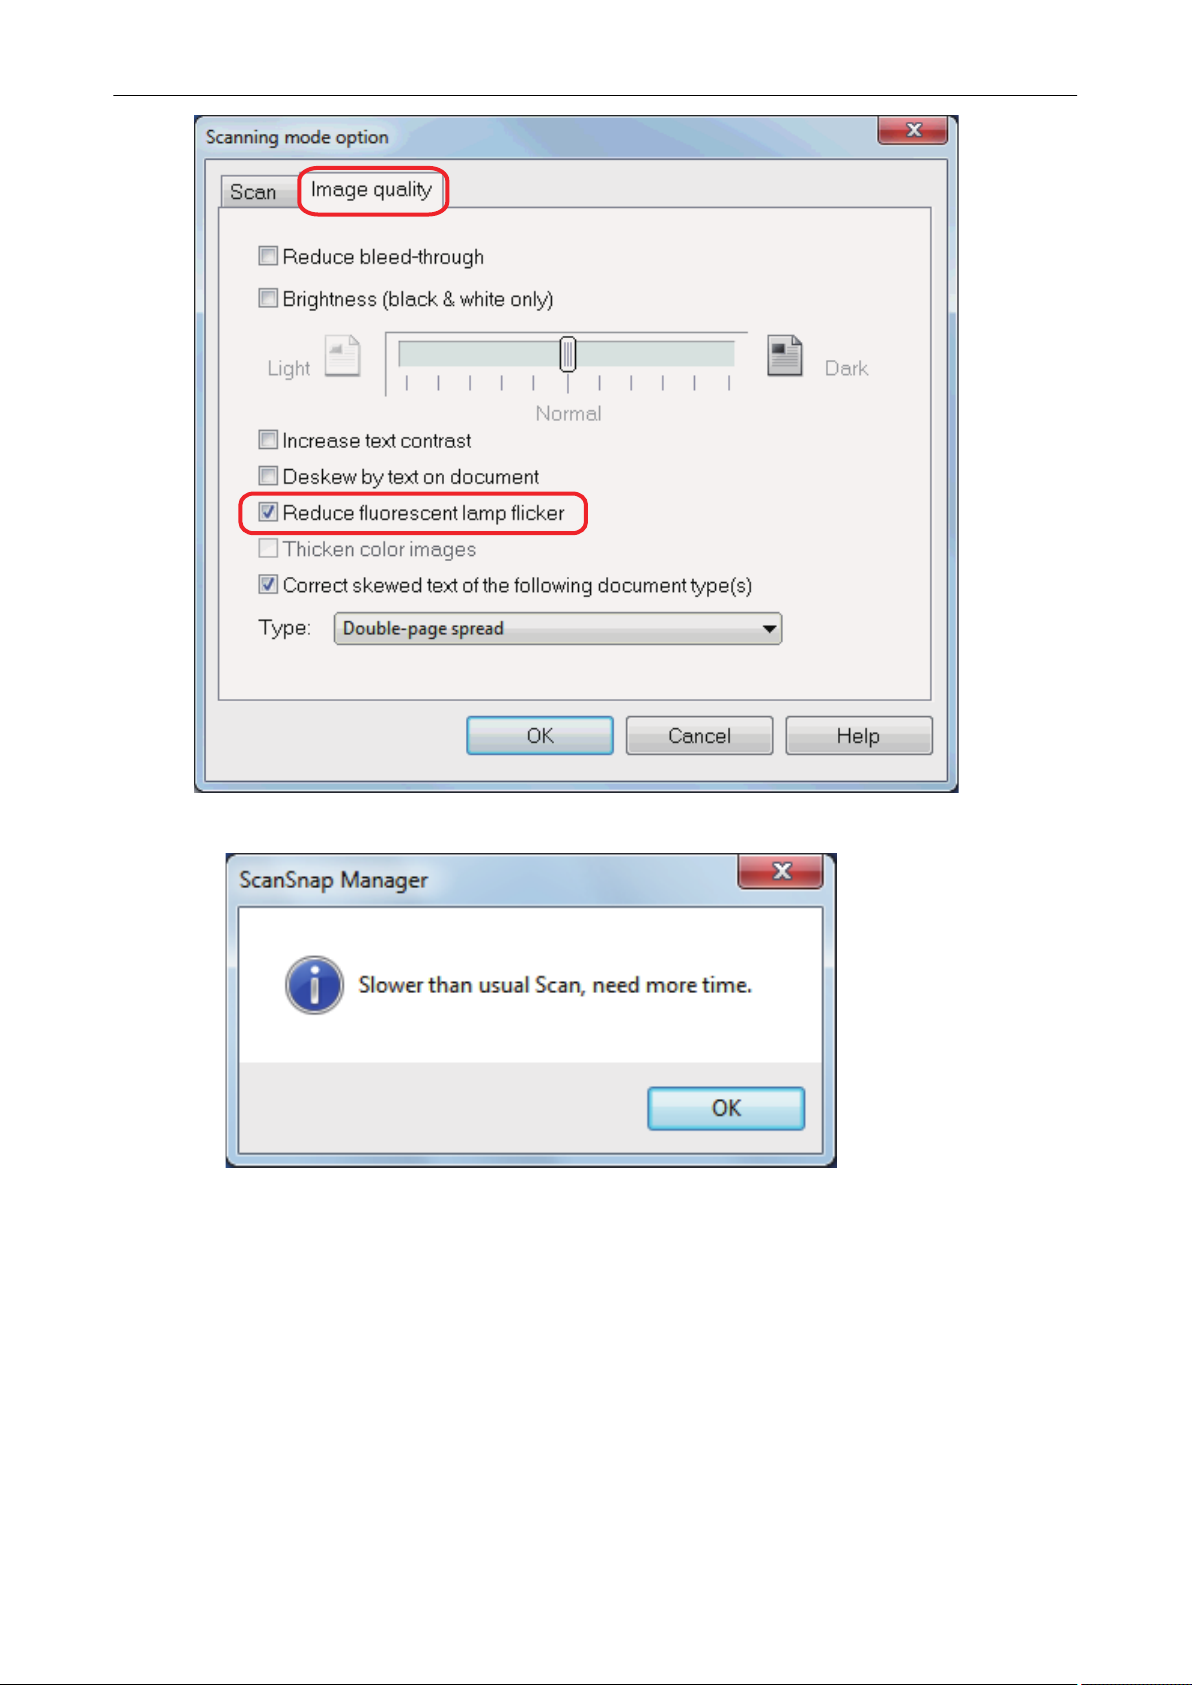
Reducing the Effect of Lighting (SV600)
a The following message appears.
3. Click the [OK] button to close all the windows.
95
Page 96

Reducing Faded Colors and Blown-Out Highlights (SV600)
Reducing Faded Colors and Blown-Out Highlights
(SV600)
Faded colors and blown-out highlights can be reduced in the scanned image.
ATTENTION
When the [Thicken color images] checkbox is selected, the following checkboxes are disabled:
l [Reduce bleed-through] checkbox
l [Brightness (black & white only)] checkbox
l [Increase text contrast] checkbox
1. In the ScanSnap setup window, select the [Scanning] tab, select [Color] for
[Color mode], and click the [Option] button.
a The [Scanning mode option] window appears.
2. Click the [Image quality] tab, and select the [Thicken color images]
checkbox.
96
Page 97

Reducing Faded Colors and Blown-Out Highlights (SV600)
a The following message appears.
3. Click the [OK] button to close all the windows.
97
Page 98

Correcting Skewed Text (SV600)
Correcting Skewed Text (SV600)
The horizontally skewed text, lines, or graphics in the scanned images can be corrected.
ATTENTION
In the following types of documents, skews are not corrected:
l Documents with no horizontal lines
l Documents with fine (less than 0.5 point thick), broken, dotted, wavy, or light-colored lines
1. In the ScanSnap setup window, select the [Scanning] tab, and click the
[Option] button.
a The [Scanning mode option] window appears.
2. Click the [Image quality] tab and select the [Correct skewed text of the
following document type(s)] checkbox, then select a document for correction
in [Type].
98
Page 99

Correcting Skewed Text (SV600)
3. Click the [OK] button to close all the windows.
HINT
When a book is scanned, the horizontally skewed text, lines, or graphics in the scanned image can be
corrected by selecting the [Correct skewed text] checkbox in the [Book Image Viewer] window.
99
Page 100

Saving Scanned Images in Multiple PDF Files
Saving Scanned Images in Multiple PDF Files
The ScanSnap is able to save scanned image in separate PDF files based on the specified number
of pages. For example, you can scan a batch of slips, and save each slip as a PDF file.
1. In the ScanSnap setup window, select the [File option] tab, and select [PDF
(*.pdf)] from the [File format] drop-down list. Then click the [Option] button.
a The [PDF file format option] window appears.
2. Select [Generate one PDF file per] and enter the number of pages to split.
One PDF is created every time the number of pages specified here has been saved.
100
 Loading...