

Fujitsu ESPRIMO X913, ESPRIMO X913-T, FUTRO X913, FUTRO X913-T, ESPRIMO X956 Operating Manual
...Page 1

System
Operating Manual
ESPRIMO X913 / X913-T
FUTRO X913 / X913-T
Page 2

Thank you for buying an inno
vative product from Fujitsu.
Latest information abo
ut our products, useful tips, updates etc. is available
on our website: "
http:
//www.fujitsu.com/fts/"
You can find driver upda
tes at: "
http://support.ts.fujitsu.com/download"
Should you have any te
chnical questions, please contact:
• our Hotline/Service
Desk (see Service Desk list or from the Internet at:
"
http://support.t
s.fujitsu.com/contact/servicedesk")
• Your sales partner
• Your sales office
We hope you enjoy using your new Fujitsu system!
Page 3

Page 4

Published by / Contact address in the EU
Fujitsu Te
chnology Solutions GmbH
Mies-van-der-Rohe-Straße 8
80807 Munich, Germany
"
http://
www.fujitsu.com/fts/"
Copyright
©Fujits
u Technology Solutions GmbH 2013. All rights reserved.
Publication Date
05/2013
Order No.: A26361-K1065-Z320-1-7619, edition 3
Page 5

ESPRIMO X913 / X913-T
FUTRO X913 / X913-T
Operating Manual
Your ESPRIMO / FUTRO 5
Ports and operating elements 7
Important notes 12
Getting started 19
Operation 31
Troubleshooting and tips 52
Technical data 58
Index 59
Page 6

Remarks
Information on the product description meets the design specifications of Fujitsu and
is provided for comparison purposes. Several factors may cause the actual results to
differ. Technical data is subject to change without prior notification. Fujitsu rejects any
responsibility with regard to technical or editorial mistakes or omissions.
Trademarks
Fujitsu, the Fujitsu logo and FUTRO are registered trademarks of Fujitsu Limited or its
subsidiaries in the United States of America and other countries.
Kensington and Microsaver a re registered trademarks of ACCO Brands.
Microsoft and Windows are trademarks or registered trademarks of the Microsoft
Corporation in the United Sta tes and/or other countries.
This product is protected by certain intellectual property rights of Microsoft. Use or distribution of
such technology outside of this product is prohibited without a license from Microsoft.
Teradici and PCoIP are trademarks of the Teradici Corporation in the United
States of America and/or other countries.
All other trademarks specified here are the property of their respective owners.
Copyright
No part of this publication may be copied, reproduced or translated without
the prior written consent of Fujitsu.
No part of this publication may be saved or transferred by any electronic means
without the written approval of Fujitsu.
Page 7

Contents
Contents
YourESPRIMO / FUTRO ................................................................ 5
Validityofthe ReferenceManual ......................................................... 5
Furtherinformation ...................................................................... 5
Notational conventions .................................................................. 6
Ports and operating elem
ents .........................................................
7
Front ................................................................................... 7
Leftside ................................................................................ 8
Right-hand side . . . ...................................................................... 9
Rearside(FUTRO) ..................................................................... 10
Rearside(ESPRIMO) ................................................................... 11
Important notes ........................................................................ 12
Generalsafety notes .................................................................... 12
Safetynotes for thesystem .............................................................. 13
Powercable ............................................................................ 14
Transporting thedevice .................................................................. 14
Cleaningthe device ..................................................................... 14
Energysaving, disposalandrecycling .................................................... 14
Explanatory information about standard ISO 9241 -307 . .................................... 15
CEmarking ............................................................................ 16
FCCCompliance Statement ............................................................. 17
FCCClassB ComplianceStatement .................................................. 17
FCCRadiation ExposureStatement .................................................. 17
Disposaland recycling .................................................................. 18
Getting star
ted .........................................................................
19
Unpacking an
dcheckingthe delivery .....................................................
19
Steps for ini
tialsetup ....................................................................
19
Setting up t
hedevice ....................................................................
20
Setting up a
n ergonomic video workstation ............................................
20
Setting up
thePC ...................................................................
22
Adjusting
height .....................................................................
23
Adjustin
gtheinclination ..............................................................
23
Connecti
ngthepower cable .............................................................
24
Connecti
ngexternaldevices .............................................................
25
Connect
ingthecables ...............................................................
25
Disconn
ectingthecables ............................................................
25
Ports on
thedevice ..................................................................
26
Connec
tingaUSB mouse ............................................................
27
Connec
ting a USB keyboard . . .......................................................
27
Conne
ctingexternaldevices totheUSB ports .........................................
27
Conne
ctinganexternal monitor .......................................................
28
Conne
ctingexternalaudio devices ....................................................
28
Swit
chingonforthefirst time: installingthe software .......................................
29
Swit
chingthedevice on ..............................................................
30
Inst
allingthesoftware ...............................................................
30
Operation .............................................................................. 31
Switchthedevice on .................................................................... 31
Switchingoffthedevice ................................................................. 31
Activatingpower-saving mode ........................................................ 31
Fujitsu 3
Page 8

Contents
LCDscreen ............................................................................ 32
Changing the monitor settings with the buttons of the control panel . . . ................... 32
Changing the monitor settings using the OSD menu . . .................................. 34
Adjustingthebrightness andcontrast ................................................. 35
Selectingtheapplication mode ....................................................... 36
Adjustingthepicture sizeand position ................................................ 36
Settingcolourtemperatureandcolours ................................................ 36
Settingfunctions .................................................................... 37
Displayinginformation ............................................................... 37
Notes on ergonomic colour adjustment . . . ............................................. 38
Preset opera ting modes . ............................................................ 38
Most frequent operating modes . . . . . . ................................................. 39
Indicatorsonthe device ................................................................. 40
Keyboard ............................................................................... 41
Important keys and keyboard shortcuts . . . ............................................. 41
Webcam module (optional) . . ............................................................ 43
Yourwebcam module ................................................................ 43
Presencesensor ........................................................................ 45
Wireless LAN/Bluetooth radio components (optional) . . . . . .................................. 46
Switching the wireless components on and off ......................................... 46
Power over Ethernet module for FUTR O X913/X913-T (optional) . . .......................... 47
SettingsinBIOS SetupUtility ............................................................ 48
StartingtheBIOS SetupUtility ........................................................ 48
OperatingBIOS SetupUtility ......................................................... 49
ExitingBIOS Setup Utility ............................................................ 49
Propertyanddata protection ............................................................. 49
UsingtheSecurity Lock .............................................................. 49
BIOSSetup security functions ........................................................ 50
SmartCard reader (optional) . . ........................................................ 51
Troubleshooting andtips .............................................................. 52
Helpifproblems occur ................................................................... 52
Troubleshooting . . ....................................................................... 52
Power-onindicator remainsunlitafter youhaveswitched onyourdevice ................. 52
The device cannot be switched off with the ON/OFF switch. . . .......................... 53
Monitorremains blank ............................................................... 53
Theexternalmonitor remainsblank ................................................... 54
Theexternalmonitor isblank or theimage is unstable .................................. 54
Nomouse pointer displayedon the screen ............................................ 55
Time and/or date is not correct . . . . . . ................................................. 55
SmartCard reader is not recognised. . ................................................. 55
SmartCardPIN forgotten ............................................................. 55
SmartCardlost ...................................................................... 56
User and/or supervisor SmartCard lost . . ............................................. 56
Errormessages on thescreen ........................................................ 56
Installingnewsoftware .................................................................. 56
Restoringthehard diskcontents ......................................................... 56
Tips .................................................................................... 57
Technicaldata ......................................................................... 58
Index .................................................................................. 59
4 Fujitsu
Page 9

Your ESPRIMO / FUTRO
Your ESPRIMO / FUTRO
Overview
... is available with various configuration levels which differ in terms of
hardware and software equipment.
This manual tells you how to start using your device and how to operate it in daily use.
This manual applies for all c onfiguration levels. Depending on the cho sen configuration
level, some of the hardware components described may not be ava ilable on your PC.
Please also read the notes about your operating system.
Depending on the selected co nfiguration, the operating system is preinstalled on your hard disk.
Further information on this device is provided:
• in the "Quick Start Guide" poster
• in the "Safety/regula
tions" manual
• in the "Warranty" manual
• in the op erating ma
nual for the monitor
• in the manual for the mainboard
• in your operating
system documentation
• in the information files (e.g. *.PDF, *.H T ML, *.DOC, *.CH M, *.TXT, *.HLP)
Some of the manuals listed can be found in electronic form on the "Drivers & Utilities" DVD.
You can access and view the required information using the Acrobat Reader
program, which is also included on the DVD. You can of course also
print out a copy of the manual if you prefer.
ValidityoftheReferenceManual
This Reference Manual is valid for the following systems:
• ESPRIMO X913
• ESPRIMO X913-T
• FUTRO X913
• FUTRO X913-T
Further information
For ergonomic reasons, we recommend a screen resolution of 1920 x 1080 pixels.
Because of the technology used (a ctive matrix) an LCD monitor provides a totally
flicker-free picture even with a refresh rate of 60 Hz.
Fujitsu 5
Page 10
Your ESPRIMO / FUTRO
Notational conventions
Pay particular attention to text marked with this symbol. Failure to observe
these warnings could pose a risk to health, damage the device or lead
to loss of data. The warranty will be invalidated if the device becomes
defective through failure to observe these warnings.
Indicates important informa
tion for the proper use of the device .
►
Indicates an activity t hat must be performed
Indicates a result
This font
indicates data e ntered
using the keyboard in a program dialogue or at
the command line, e.g.
your password (Name123) or a command used to
start a program (star
t.exe)
This font
indicates information that is displayed on the screen by a program, e.g.:
Installation is complete.
This font
indicates
• terms and texts used in a software interface, e.g.: Click on Save
• names of programs or files, e.g. Windows or setup.exe.
"This font"
indicates
• cross-references to another section, e.g. "Safety information"
• cross-references to an external s ource, e.g. a web address: For more
information, go to "
http://www.fujitsu.com/fts"
• Names of CD s, DVDs and titles or designations for other materials,
e.g.: "CD/DVD Drivers & Utilities" or "Safety/Regulations" manual
Key
indicates a key on the keyboard, e.g:
F10
This font
indicates terms a nd texts that are emphasised or highlighted, e.g.: Do
not switch off th e device
6 Fujitsu
Page 11
Ports and operating elements
Ports and operating elements
Ports
This chapter presents the individual hardware components of your device. This will provide
you with an overview of the ports and operating elements on the device. Please familiarise
yourself with these components before starting to work with your device.
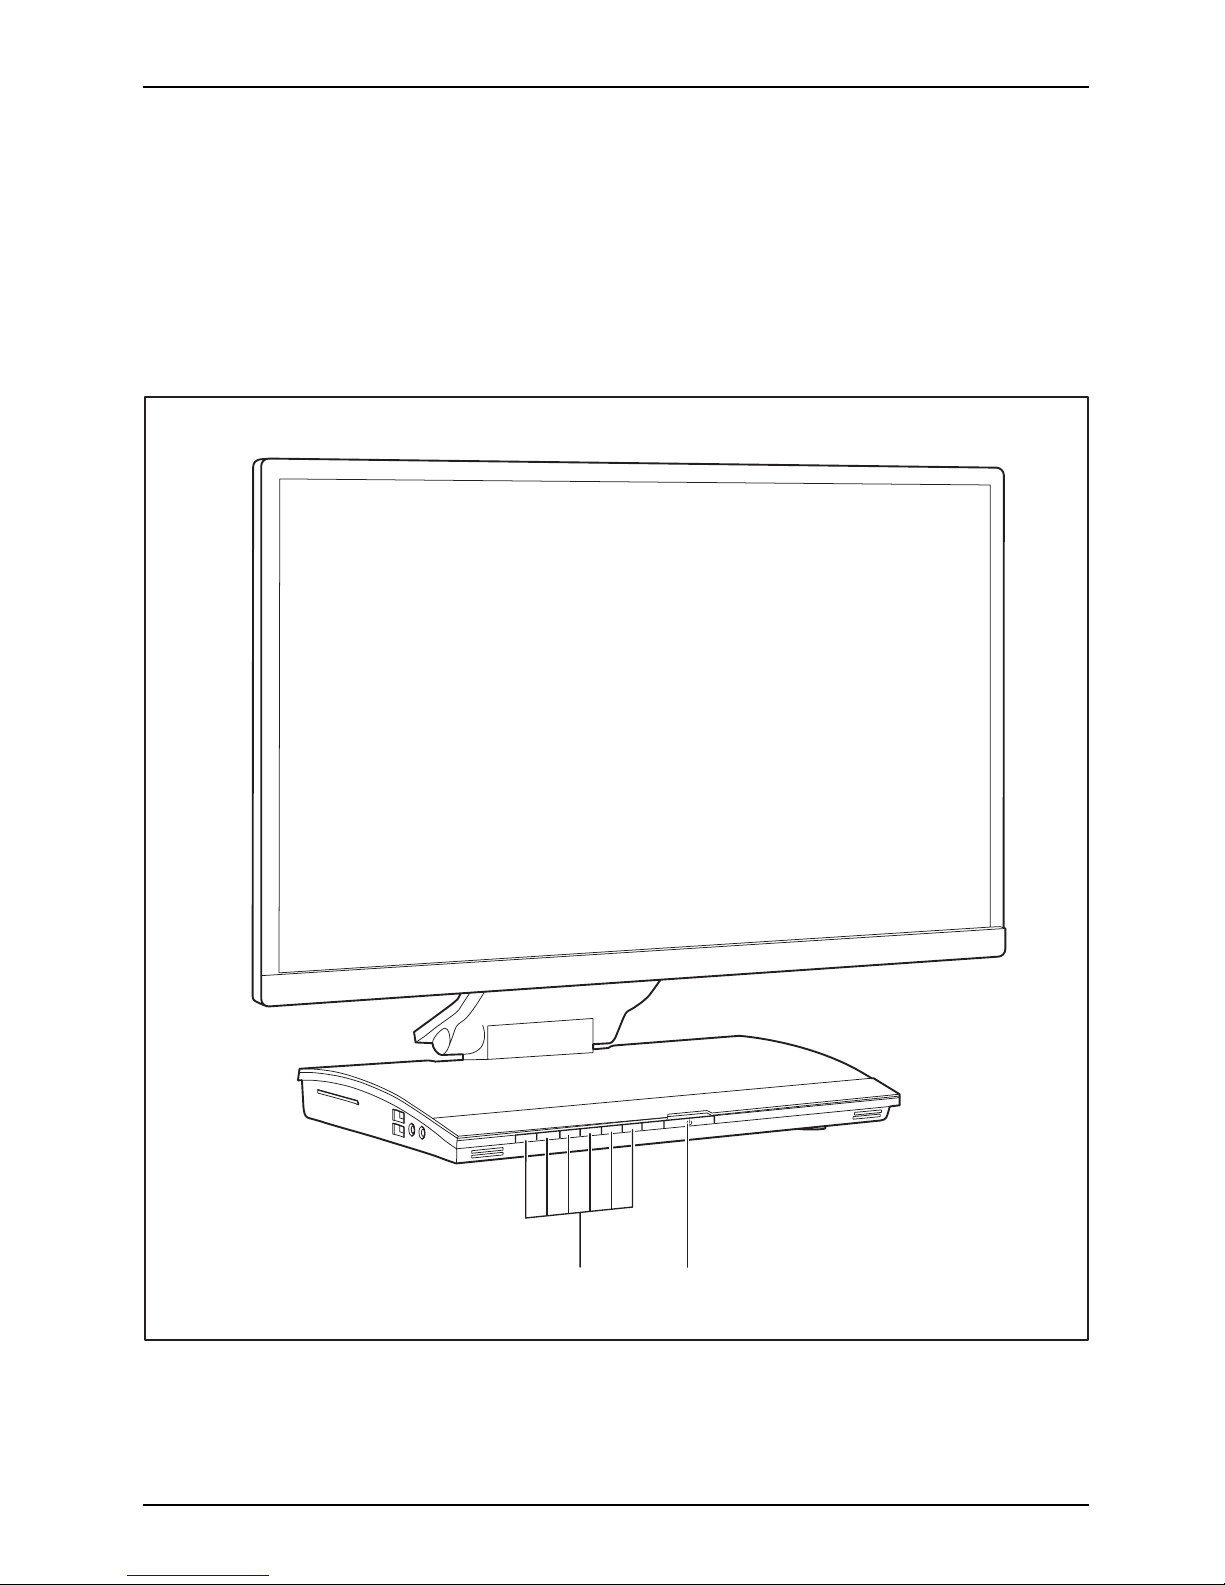
Front
21
1=Butt
ons for the OSD menu
(On
-Screen-display)
2=ON/O
FF switch
Fujitsu 7
Page 12
Ports a nd operating elements
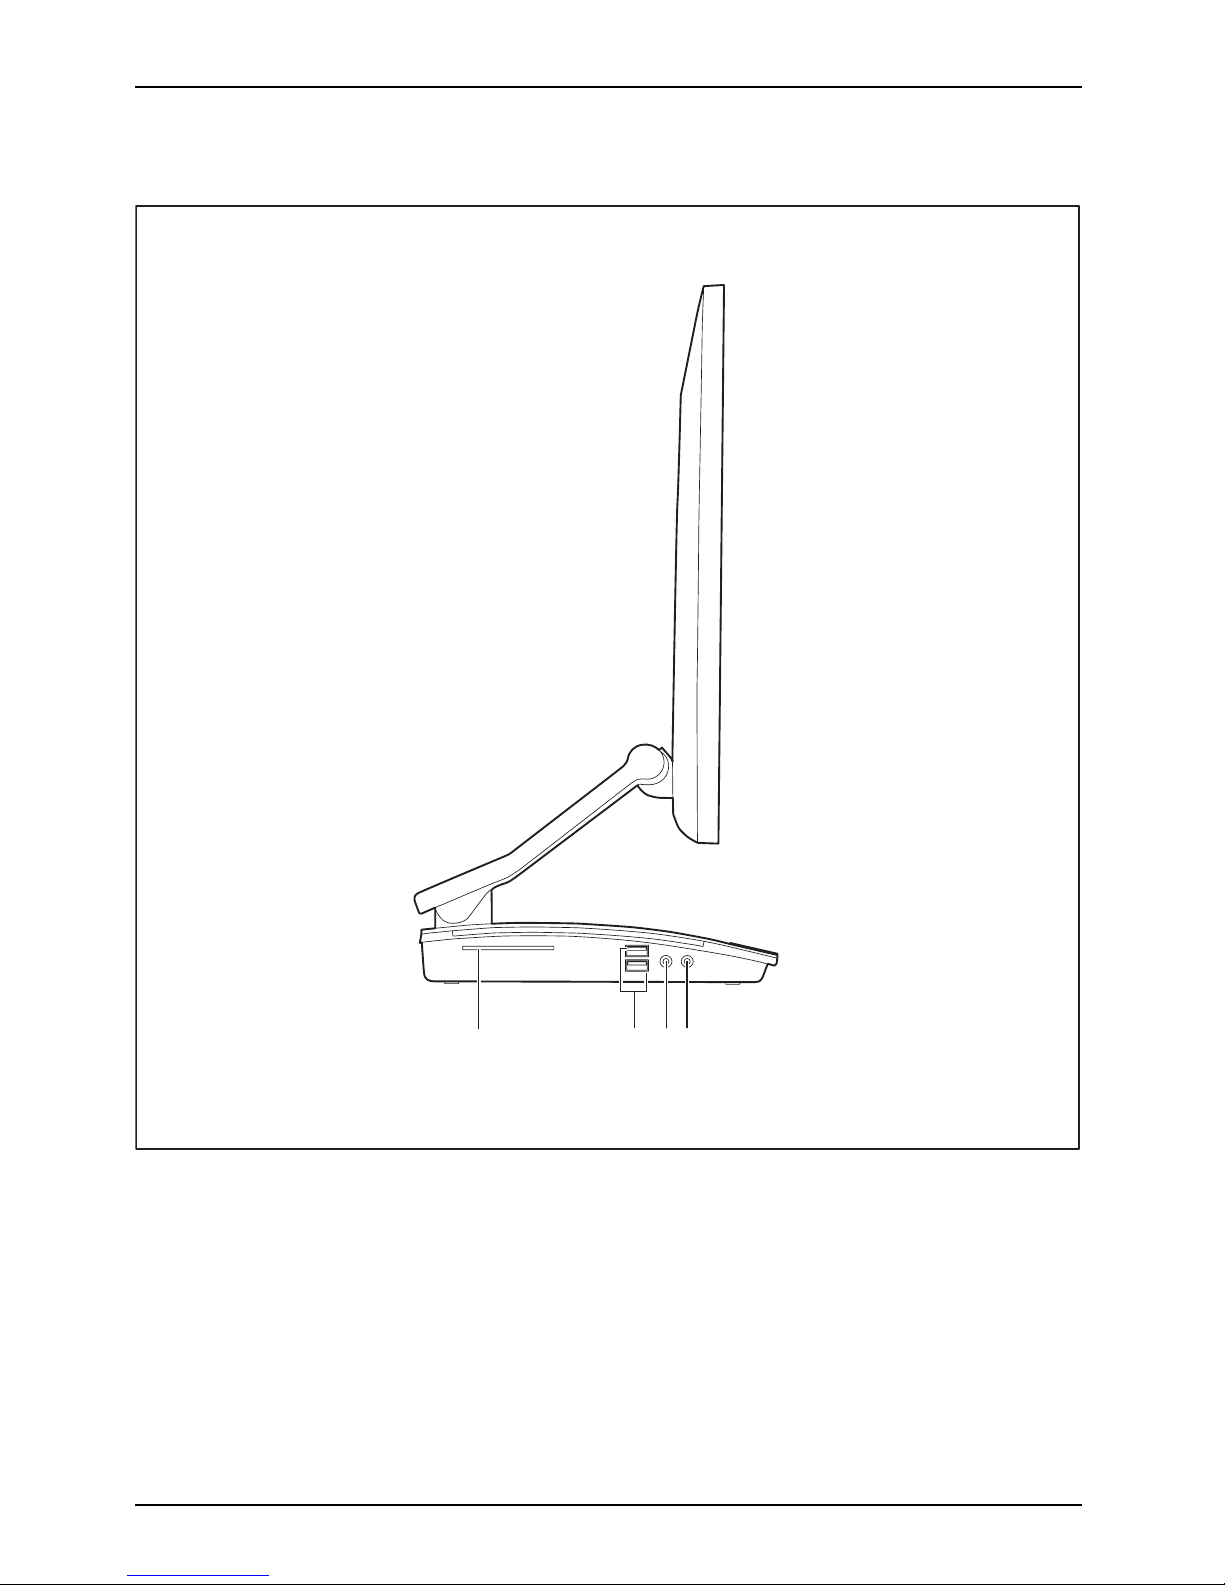
Left side
MicrophoneportHeadphonesportExpressCardslotUSBport
1 2
3
4
1 = SmartCard reader
2 = USB ports (ESPRIMO: USB 3.0,
FUTRO: USB 2 .0)
3 = Microphone port
4 = Headphones port
8 Fujitsu
Page 13

Ports and operating elements
Right-hand side
SecurityLockdevice
1
1 = Security Lock device / BIOS
Recovery bu tton
The internal BIOS Recovery button can be actuated through the Security Lock
device and protected against misuse by securing the Kensington lock.
Fujitsu 9
Page 14

Ports a nd operating elements
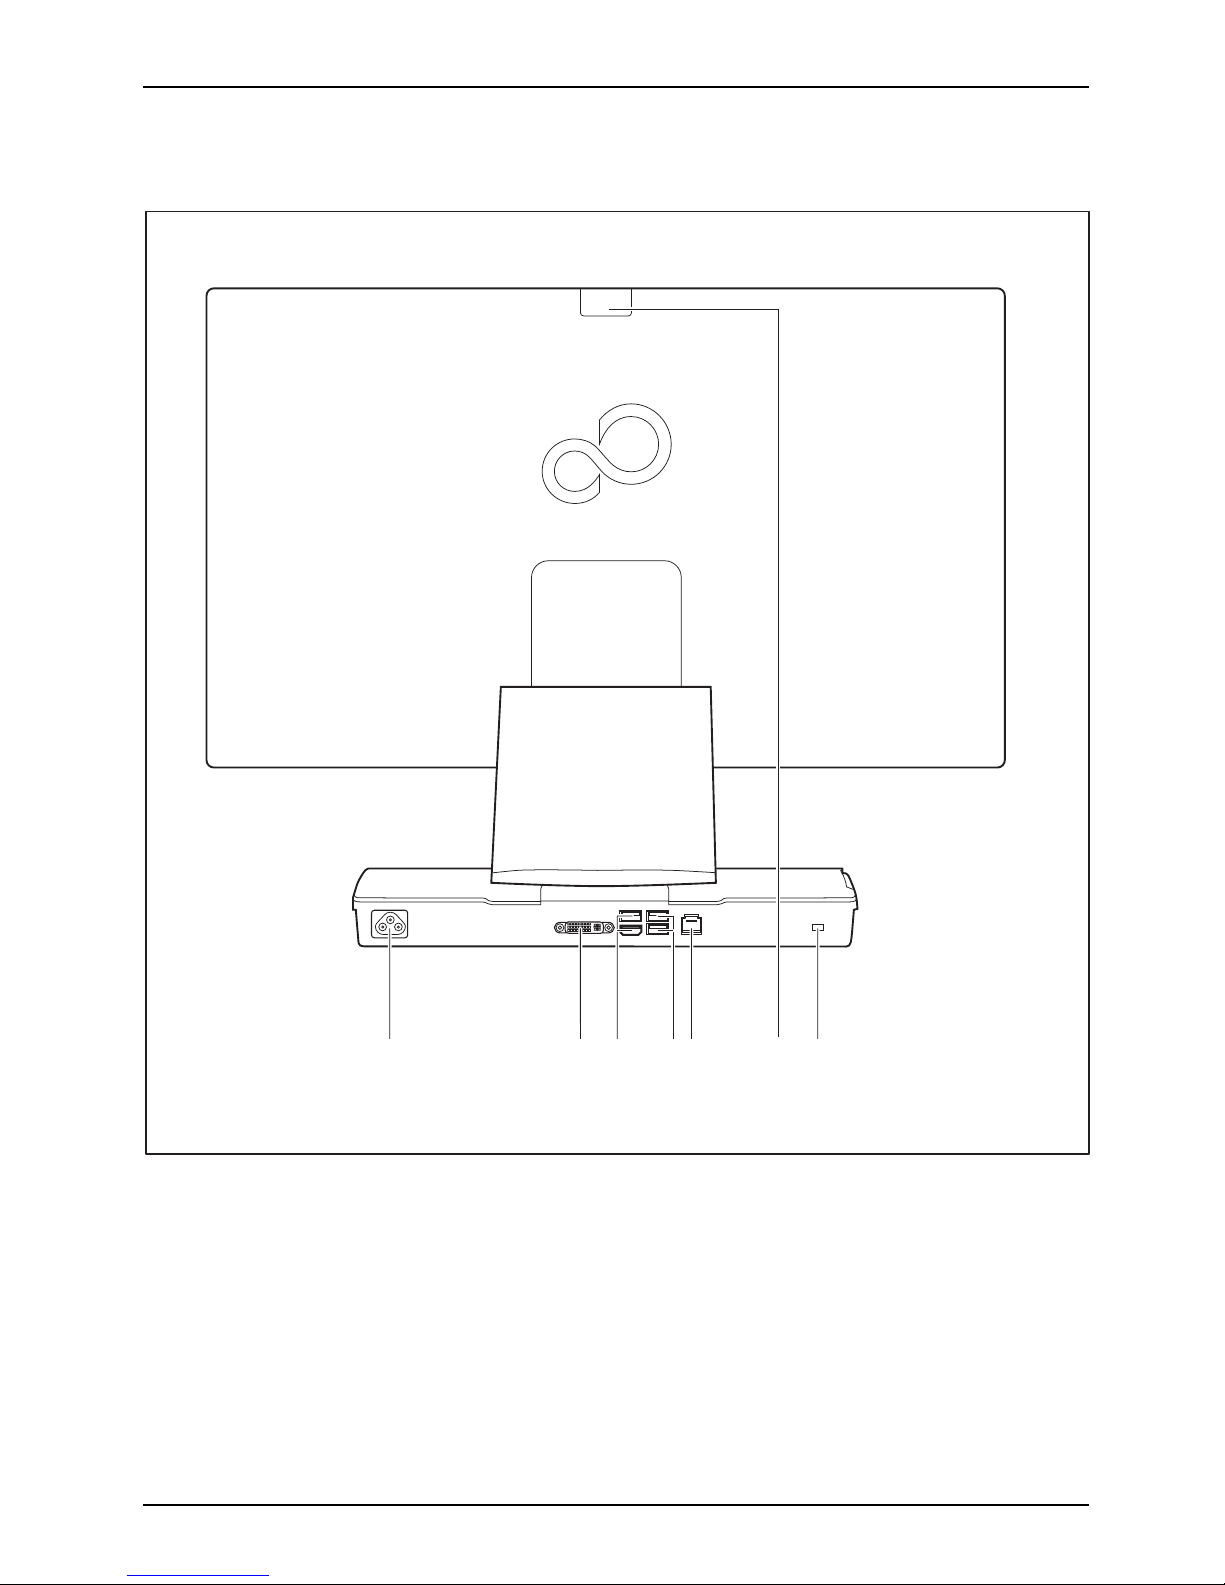
Rear side (FUTRO)
1 45672 3 98
1 = Power connection (AC IN)
2 = PS/2 mouse port
3 = PS/2 keyboard port
4 = Serial port
5 = DVI-I monitor port
6 = USB ports (USB 2.0)
7 = LAN port
8 = Webcam slot device
9 = Security Lock device
10 Fujitsu
Page 15
Ports and operating elements
Rear side (ESPRIMO)
1 245 763
1 = Power connection (AC IN)
2 = DVI-I monitor port
3 = USB ports (USB 3.0)
4 = USB ports (USB 2.0)
5 = LAN port
6 = Webcam slot d evice
7 = Security Lock device
Fujitsu 11
Page 16
Important notes
Important notes
ImportantnotesNotes
In th is chapter you will find information regarding safety which it is essen tial to
take note of when working with your device.
General safety notes
SafetyinformationNote
Please note the informat
ion provided in the "Safety/regulations" manual
andinthefollowingsafe
ty notes.
When installing and ope
rating the device, please observe the notes on
environmental conditi
ons in Chapter "
Technical data", Page 58 as well as
the instructions in Cha
pter "
Getting started", Page 19.
When setting up the dev
ice, make sure there is clearance all around it so that
the casing r eceives
enough ventilation. In order to avoid overheating, do not
cover the ventilati
on areas of the monitor or the device.
You must only opera
te the device if the rated vo ltage used by the
device is set to the
local mains voltage.
You m ust remove the
power plug f rom the power socket so that the
mains voltage is c
ompletely disconnected.
Caution, compone
nts in the system can get very hot.
The activities
described in these instructions must always be
performed with
the greatest care.
Repairs to the
device must only be performed by qualified technicians.
Incorrect rep
airs could put the user at great risk or cause serious damage
to the equipme
nt (electric shock, risk of fire).
Only op erate
the device with the casing closed.
12 Fujitsu
Page 17

Important notes
Safety notes for the system
This device co mplies with the relevant safety regulations for data processing equipment,
including electronic o ffice machines for use in an office environment. If you have
any questions about whether the device can be used in the intended environment,
please contact your sales office or our Service Desk.
• The display surface of the device is sensitive to pressure and scratches. You should therefore
be careful with the display surface in order to avoid lasting damage (scratches).
• If the device is brought into the installation site from a cold environment, condensation
can form. Before op erating the device, wait until it is absolutely dry and has reach ed
approximately the same temperature as the installation site.
• When installing and operating the device, please observe the notes on ambient
conditions in "
Technical data", Page 58 and the instructions in "Setting up
an ergonomic video workstation", Page 20.
• To ensure sufficient ventilation, the air inlet and outlet openings of the device mu st be kept clear.
• The device automatically sets itself to the correct voltage within the range from 100 V to 240 V.
Make sure that the local mains voltage is neither higher nor lower than this range.
• Ensure that the po wer socket on the device and the mains outlet are freely accessible.
• The ON/OFF switch does not disconnect the monitor from the mains v oltage. To disconnect
fully from the mains supply, disconnect the power plug from the socket.
• The device is equipped with a power cable that complies with safety standards.
• Use the supplied power cable only.
• Lay the cables in such a way tha t they do not create a hazard (danger of tripping)
and cannot be damaged. When connecting the device, observe the relevant notes
in chapter "
Connecting extern al devices", Page 25.
• No data transfer cables should be connected or disconnected during a thunderstorm.
• Make sure that no objects (e.g. jewe llery chains, paper clips, etc.) or liquids get
inside the device (danger of electric shock, short circuit).
• The device is not waterproof! N ever immerse the device in w ate r and protect
it from spray water (rain, sea water).
• In an emergency (e.g. damaged casing, operation controls or cables, penetration
of liquids or foreign matter), switch off the device, disconnect the power plug
and contact your sales outlet or our Service Desk.
• Repairs to the device must only be performed by qua lified technicians. Unauthorised opening
and incorrect repair may greatly endanger the user (electric shock, fire risk ).
• Only use the screen resolution settings an d refresh rates specified in C hapter
"
Technical data", Page 58. Otherwise you may damage the device. If you are in
any doubt, con tact your sales outlet or our Help Desk.
• Use a screen saver with moving images and activate the power management for
your monitor to prevent still images from "burning in".
• We recommend that you place your device on a durable, non-slip surface. In view
of the many different finishes and varnishes used on furniture, it is possible that the
feet of the device may mark the surface they stand on.
Fujitsu 13
Page 18

Important notes
Power cable
Use the supplied power cable only.
Use the following guidelines if it is nece ssary to replace the original cable set.
• The female/male receptacles of the cord set must meet IEC60320/CEE-22 requirements.
• The cable has to be HAR-certified or VDE-certified. The mark HAR or
VDE will appear on the outer sheath.
• For devices which are mounted on a desk or table, type SVT or SJT cable sets may be
used. For devices which sit on the floor, only SJT type cable sets may be used.
• The cable set must be selected according to the rated current for your device.
• If necessary, replace the original power cable with a regular grounded 3-core mains lead.
Transporting the device
Device,TransportationRetransportation
Transport all parts separately in their original packaging or in a packaging which
protects them from knocks and jolts, to the new site.
Do not unpack them until all transportation manoeuvres are completed.
If the device is brought from a cold environment into the room where it will be
used, condensation m ay occur. To avoid damaging the device, wait until it has
reached room temperature and is absolutely dry before initial startup.
Cleaning the device
Device,TransportationRetransportationSystemunit,seeDevice
Turn off all power and equipment switches and disconnect the power
plug from the mains outlet.
Do not clean any interior parts yourse lf, leave this job to a service technician.
Do not use any cleaning agents that contain abrasives or may corrode
plastic (alcohol, thinner or acetone).
Never clean the device with water! Water entering into th e device could
present a serious risk to users (e.g. electric shock).
Ensure that no liquid enters the system .
The surface of the m onitor is sensitive to pressure and scratches. Clean
it only u sing a soft, slightly moistened cloth.
The surface can be cleaned with a d ry cloth. If particularly dirty, use a cloth that has been
moistened in mild domestic detergent and then carefully wrung out.
Use disinfectant wipes to clean the keyboard and the mouse.
Energy saving, disposal and recycling
DisposalEnergysavingRecyclingDrivers&UtilitiesDVDUserDocumentationDVD
You ca
n find information on these subjects in chapte r "
Activating power-saving
mode
", Page 31, on the "Drivers & Utilities", the recovery DVD or on our website
("
ht
tp://www.fujitsu.com/fts/about/fts/environment-care/").
14 Fujitsu
Page 19

Important notes
Explanatory information about standard ISO 9241-307
Permanently unlit or lit pixels
Today’s production techniques cannot guarantee an absolutely fault-free screen display. Depending
on the total number of pixels (resolution), there may be a few constantly lit or u nlit pixels or subpixels.
Pixel
A pixel consists of 3 subpixe
ls, normally red, green and blue. A pixel is
the smallest element that
can be generated by complete functionality of
the display.
Subpixel
A subpixel is a separatel
y addressable internal structure within a pixel that
enhances the pixel func
tion.
The maximum permitted number o f faulty pixels is stipulated in the international standard ISO
9241-307. In accordance with standard ISO 9241-3, LCD displays by Fujitsu comply with Class II
for low resolutions and Class I for resolutions of 1680 x 1050 ( 1764000 pixel) and higher.
Examples:
A flat-screen monitor w ith a resolutio n of 1280 x 1024 has 1280 x 1024 = 1310720 pixels. Each pixel
consists of three s ubpixels (red, green and blue), so there are almost 3.9 million subpixels in total.
According to ISO 9241-3 (Class II), a maximum of 3 lit and 3 unlit pixels plus 7 lit or 13 unlit subpixels,
or a corresponding combination, may be faulty (1 lit subpixel counts as tw o unlit subpixels).
A flat-screen monitor w ith a resolutio n of 1920 x 1080 has 1920 x 1080 = 2073600 pixels. Each pixel
consists of three s ubpixels (red, green and blue), so there are almost 6.2 million subpixels in total.
According to ISO 9241-3 (Class I), a maximum o f 2 lit and 2 unlit pixels plus 5 lit or 10 unlit subpixels,
or a corresponding combination, may be faulty (1 lit subpixel counts as tw o unlit subpixels).
Fujitsu 15
Page 20

Important notes
CE marking
CEmarkingCEmarkingNotesElectromagneticcompatibilityLowvoltagedirective
The shipped version of this device complies with th e req uirements of European Union directives
2004/108/EC "Elektromagnetische Verträglichkeit", 2006/95/EC "Niederspannungsrich tlinie" and
2009/125/EC "Ökodesign Richtlinie".
CE marking for devices with radio component
This equipment complies with the requirements of Directive 1999/5/EC of the Europea n Parliament
and Commission from 9 M arch, 1999 governing Radio and Telecommunications Equipment
and mutual recognition of conformity.
This equipment can be used in the following countries:
Belgium Bulgaria Denmark
Germany
Estonia Finland France
Greece
UK Ireland Iceland Italy
Croatia
Latvia Liechtenstein Lithuania
Luxembourg Malta Netherlands Norway
Austria Poland Portugal Rumania
Sweden Switzerland Slovakia Slovenia
Spain Czech Republic
Hungary
Cyprus
Turkey
Contact the corresponding government office in the respective country for current information on
possible operating restrictions. If your country is not included in the list, then please contact
the corresponding supervisory authority as to whether the use of this product is permitted in
your country.
Informati
on on the "Ecodesign directive":
Regulatio
n 1275/2008, based on the EU Ecodesign Directive (2009/125/EC), defines requirements
for the po
wer consumption of electrical and electronic domestic and office devices in stand-by
and off mo
de. Please see chapter "
Activating power-saving m ode", Page 31.
16 Fujitsu
Page 21

Important notes
FCC C om pliance Statement
If the device complies with the FCC regulations, the FCC sign can be found on the type rating plate.
FCCClassBComplianceState
ment
DOC (IND USTRY CANADA) NOTICES
Notice to Users of Radios and Television:
This class B digital apparatus complies with Canadian ICES-003.
The following statement applies to the products covered in this manual, unless otherwise specified
herein. The statement for other pro ducts will appear in the a ccompan ying documentation.
NOTE:
This equipment has been tested and found to comply with the limits for a "Class B" digital
device, pursuant to Part 15 of the FCC rules and meets all requirements of the Canadian
Interference-Causing Equipment Standard ICES-003 for digital apparatus. These limits are
designed to provide reasonable protection against harmful interference in a residential installation.
This equipment generates, uses and can radiate radio frequency energy and, if not installed
and used in strict accordance with the instructions, may cause harmful interference to radio
communications. How ever, there is no guarantee that interference will not occur in a particular
installation. If this equipment does cause harmful interference to radio or television reception,
which c an be determined by turning the equipment off and on, the user is encouraged to
try to correct the interference by one or more of the following measures:
• Reorient or relocate the receiving ant enna.
• Increase the s
eparation between eq uipm ent and the receiver.
• Connect the equip ment into an outlet on a circuit different from that to
which the receiver is connected.
• Consult the d
ealer or an experienced radio/TV technician for help.
Fujitsu is not responsible for any radio or television interference caused by unauthorized
modifications of this equipment or the substitution or attachment of connecting cables and
equipment other than those s pecified by Fujitsu. The correction of interferences caused by such
unauthorized modification, substitution or attachment will be the r espo nsibility of the user.
The use of shielded I/O cables is required when connecting this equipment to any and all optional
peripheral or host devices. Fa ilure to do so may violate FCC and ICES rules.
FCC Radiation Exposure Statement
This equipment comp lies with FCC radiation exposure limits set forth for an uncontrolled environment.
The transmitters in this device must not be co-located or operated in conjunction
with any other antenna or transmitter.
To prevent radio interference to the licensed service, this device is intended to be
operated indoors and away from windows to provide maximum shielding. Equipment (or
its transmit antenna) that is installed outdoors is subject to licensing.
Users are not authorized to modify this produ ct. Any modifications i nvalidate the warranty.
This equipment may not be modified, altered, or changed in any way without signed
written permission from Fujitsu. Unauthorized modification will void the equipment
authorization from the FCC and Industry Canada and the warranty.
Fujitsu 17
Page 22

Important notes
Disposal and recycling
This device has been manufactured as far as possible from materials which can be recycled or
disposed of in such a way that the environment is not damaged. The device may be taken back after
use to be reused or recycled, provided that it is returned in a condition that befits its intended use.
Any components not reclaimed will be disposed of in an environmentally acceptable manner.
The device must be disposed of in accordance with the local regulations f or disposal of special waste.
If you have any questions on disposal, please contact your local sales office or our
Service Desk, or contact one of the following directly:
Germany
Belgium
Switzerland
Fujitsu Technology Solu
tions
GmbH
Remarketing and Recycl
ing
D-33106 Paderborn
Tel.: +49 5251 / 81 80 1
0
Fax: +49 5251 / 81 80 1
5
"
http://fujitsu.c
om/fts/remarketing"
RECUPEL
Boulevard Reyers, 80
B-1030 Brussels
Tel.: +32 2 / 706 86 16
Fax: +32 2 / 706 86 13
E-Mail: info@recup
el.be
"
http://www.recu
pel.be"
SWICO
Schweizerischer
Wirtschaftsverband
der Informations-,
Kommunikations- und
Organisationstechn
ik
AlistoftheSWICOac
ceptance
locations can be fou
nd at:
"
http://www.swic
o.ch"
Asia
USA
Taiwan:
Environmental Protection
Administration
Executive Yuan R.O.C.
"
http://recycle.epa.gov.tw"
Fujitsu America, Inc.
1250E. Arques Avenue
Sunnyvale, CA 94085 U.S.A.
Phone N o.: (408) 746-6000
You c a n also find more information on this at "http://www.fujitsu.com/fts/about/fts/environment-care/".
18 Fujitsu
Page 23

Getting started
Getting started
Gettingstarted
Please observe the safety information in the "Important notes", Page 12 chapter.
Unpacking and checking the delivery
The display surface of the device is sensitive to pressure and scratches.
Always hold the device by the casing!
It is recommended not to throw away the original packaging material! It may be
required for reshipment at some later date.
PackagingContentsofdeliveryPackaging,
The complete device package includes:
• one CD with software and documentation
• one Warranty Booklet
• one "Quick Start Guide"
• one "Safety" manual
► Unpack all the individual parts.
► Check the conten ts of the package for any visible damage caused during transport.
► Check whether the delivery conforms to the details in the delivery note.
► Should you discover that the delivery does not correspond to the delivery
note, notify your local sales outlet immediately.
Steps for initial setup
Preparingforfirstuse, overviewPreparingforuse,
Only a few steps are necessary to put you r new device into operation for the first time:
• Select a location for device and set up device
• Check the voltage at the mains outlet and connect the device to an elect rical outlet
• Switch the device on
You will learn more about the individual steps in the following sections.
External devices
If you have received other external devices in ad dition to your own device (e.g.
a printer), do not connect these until after the initial installation. The following
sections describe how to connect these external devices.
Fujitsu 19
Page 24
Getting started
Setting up the device
WorkstationErgonomicDevice
When installing your device, please read the recommendations and safety
notes in the "Safety/regulations" manual.
We recommend that you place your device on a surface which is not slippery. In
view of the man y different finishes and varnishes used on furniture, it is possible
that the rubber feet will mark the surface they stand on.
Depending on the location of your device, bothersome vibrations and noises may
occur. To prevent this, a distance of at least 10 mm / 0.39" should be maintained
from other devices on casing sides w ithout ventilation surfaces.
In order to avoid overheating, do not cover the ventilation areas
of the monitor or the device.
A minimum distance of 200 mm / 7.87" from the device m ust be
observed for ventilation areas.
Do not expose the device to extreme ambient conditions (see "
Technical data", Page 58,
section "Ambient conditions"). Protect the device against dust, humidity and heat.
When the lighting conditions are unfavourable (for instance direct sunlight), reflections
may occur which can cause the displayed characters to be difficult to read. Suitable
ambient lighting is necessary to avoid these kinds of reflections.
In addition, align your system according to the ambient lighting conditions, for instance
by changing the position of the display (horizontal or vertical angle).
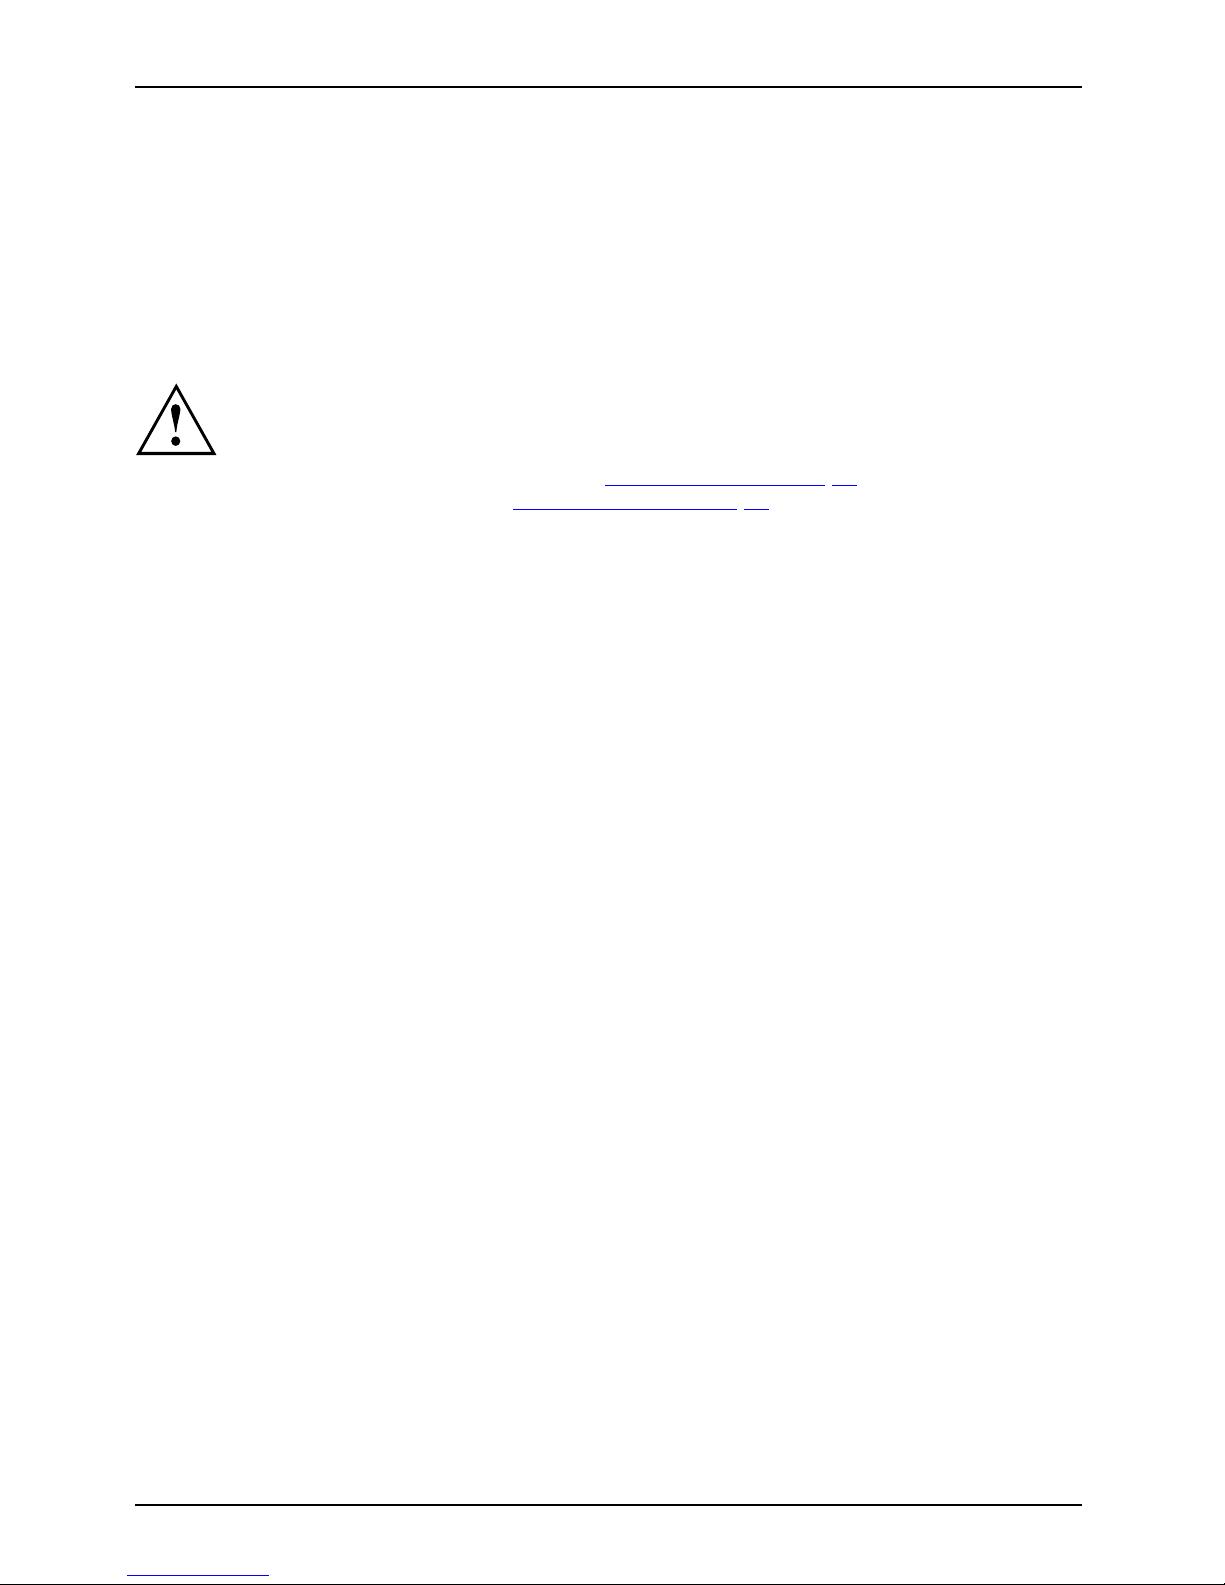
Setting up an ergonomic video workstation
1
► Do not position the video worksta tion
opposite a window (1).
20 Fujitsu
Page 25
Getting started
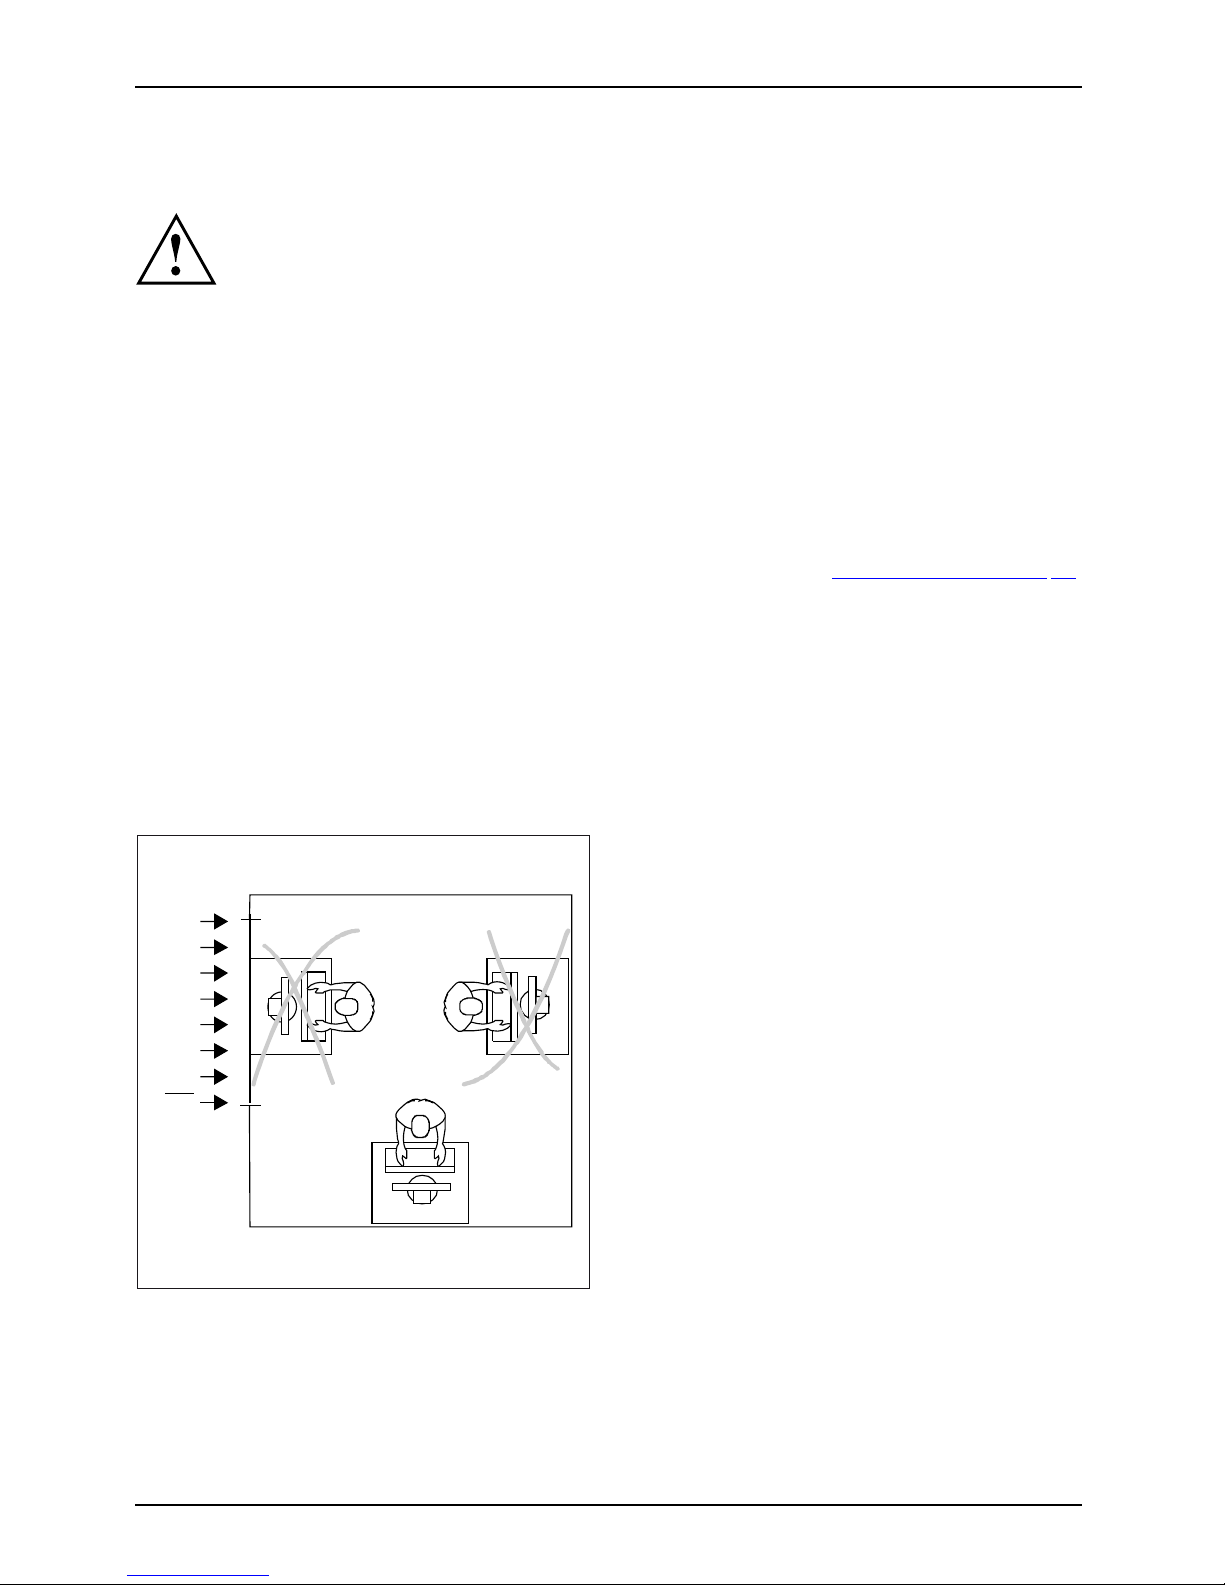
1
► Position the system outside the reach
of a light source (1).
1
► Position the keyboard where it is
easiest to reach (1).
1
50 cm
► Position the s
ystem so that the eye distance
to the sc reen (
1) is arou nd 50 cm / 19.69".
Fujitsu 21
Page 26
Getting started
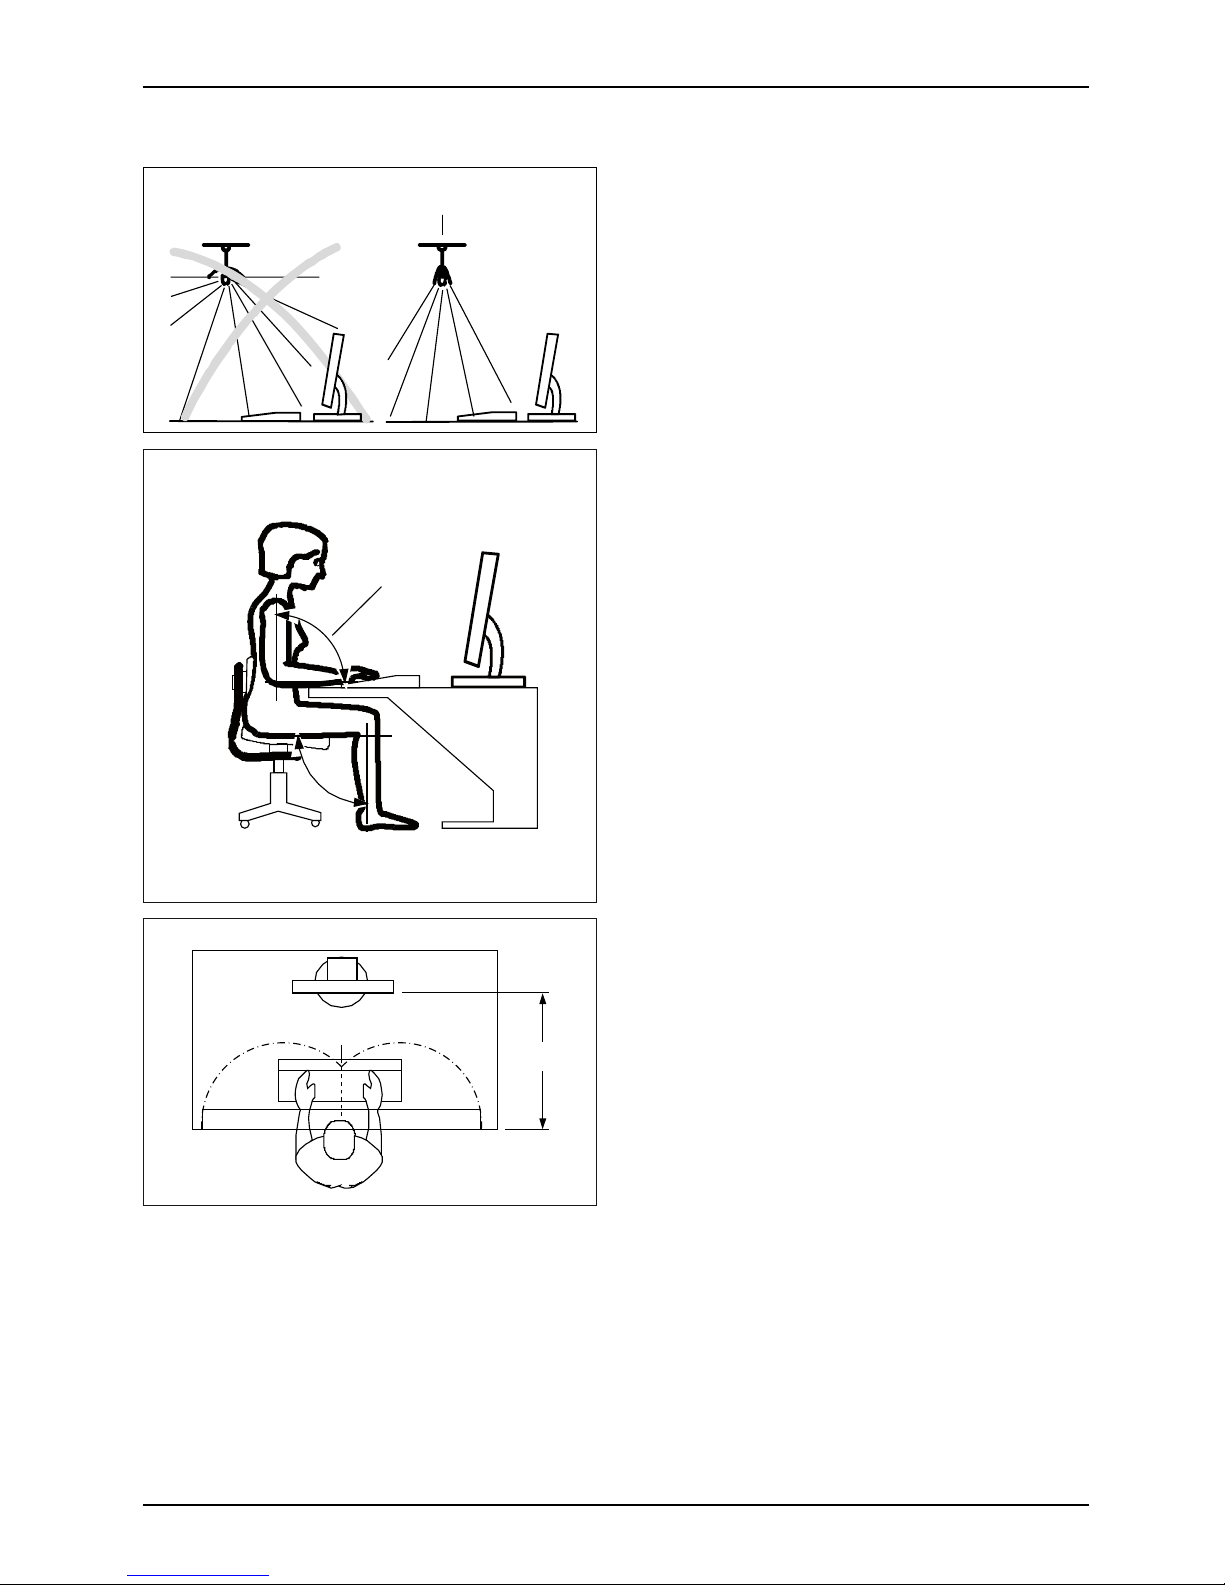
► Position the device for o ptimum viewing
(1). The monitor should not extend beyond
the accept able viewing range (2).
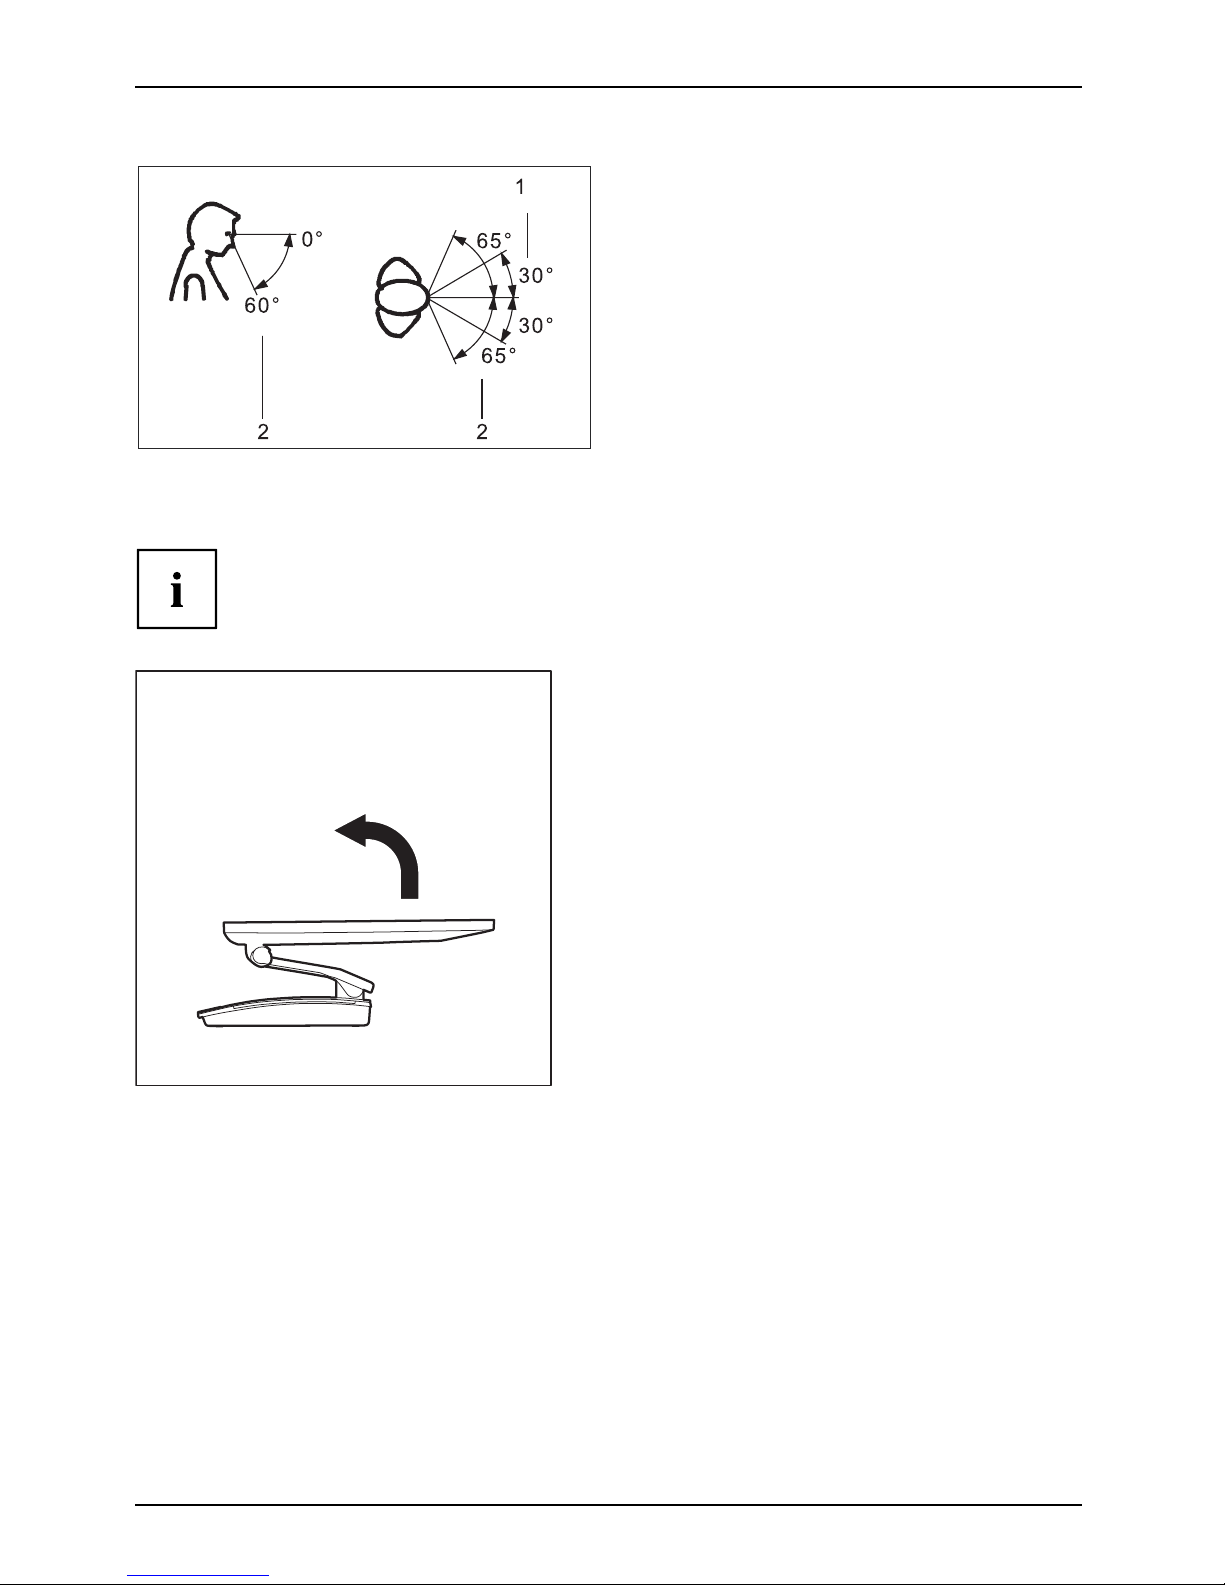
SettingupthePC
After unpacking the monitor, it will still be in transport position. The
monitor is s et to the lowest possible position.
1
► Place the monitor on a desk.
► Hold the monitor with both hands on the
left and right edges and pull it into working
position in the direction of the arrow (1).
22 Fujitsu
Page 27

Getting started
Adjusting height
The display is equipped with a synchronized hinge arm. This makes it possible
to retain the set monitor tilt for all height settings.
The height of the monitor can be adjusted by approximately 70 mm / 19.69".
1
► Hold the monitor with both hands on
the right and left edg e of the casing
and move it up or down (1).
Adjusting the inclination
The inclination of the monitor can be adjusted by 0° (forwards) and +25°
(backwards) from its vertical position.
► Hold the monitor with both hands on the left and right sides of the casing
and move it to the desired angle.
Fujitsu 23
Page 28

Getting started
Connecting the power cable
PreparingforoperationPowercable
Observe the safety notes in the enclosed "Safety/Regulations" m an ual.
The supplied pow er cable conforms to the requirements of the country in
which you purchased your device. Make sure that the power cable is approved
for use in the country in which you intend to use it.
1
2
► Connect the power cable (1) to the power connection (AC IN) of the device.
► Plug the mains
cable (2) into a mains outlet.
24 Fujitsu
Page 29

Getting started
Connecting external d e vices
Read the documentation on the external device before connecting it.
With the exception of USB devices, always remove all power plugs
before connecting external devices!
Do not connect or disconnect cables during a thunderstorm.
Always take hold of the actual plug. Never unplug a cable by pulling the cab le itself.
Connect and disconnect the cables in the order described below.
Connecting the cables
► Switch off all affected devices.
CordCable,
► Remove all power plugs from the grounded mains outlets.
► Connect all the cables to the device and the external devices. Please make sure that you
always observe the safety notes provided in "
Important notes", Page 12.
► Plug all data communication cables into the appropriate sockets.
► Plug all power cables into the g rounde d mains outlets.
USB devices a re hot-pluggable. This means you can connect and disconnect
USB cables while your device is switched on.
Additional information can be found in "
Connecting external devices to the USB
ports", Page 27 and in the documentation for the USB devices.
Disconnecting the cables
► Turn off all p
ower and equipment switches.
Cable,
► Remove all power plugs from the grounded mains outlets.
► Unplug all d
ata communication cables from the appropriate sockets.
► Disconnect all of the cables from the device and from the external devices.
Fujitsu 25
Page 30
Getting started
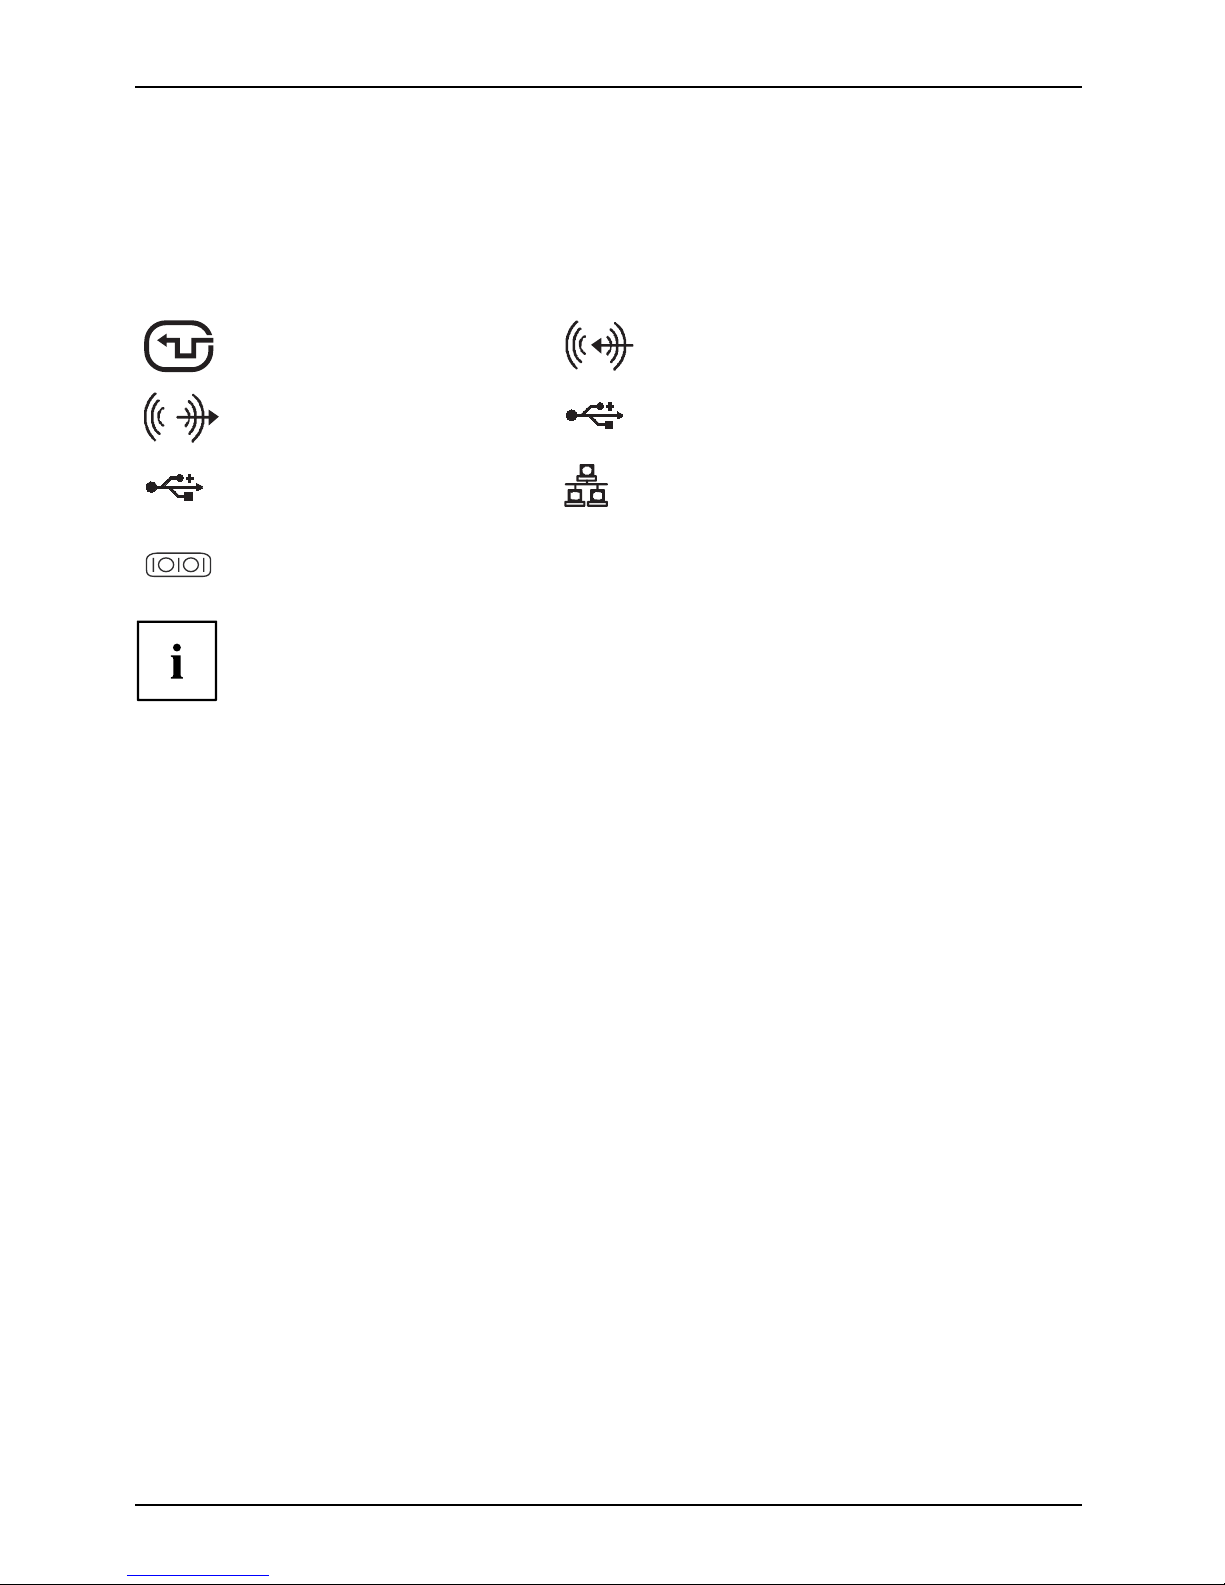
Ports on the d evice
PortsExternaldevicesDevice
The ports are located on the front and rear side of the device. The ports available on
your device depend on the configuration level you have selected. The standard ports are
marked with the symbols shown below (or similar). Detailed information on the location
of the ports is provided in the manual for the mainboard.
DVI-I m onitor port, white
Monitorport
Audio input (Line in)
Audioinput
Audio output (Line Out), light
green
AudiooutputLineout
USB 3.0 - Universal Serial Bus, blue
(device-dependent)
USB 2.0 - Universal Serial
Bus, black
UniversalSerialBus
LAN port
LANport
1
Serial port (device-dependent)
Serialport
Some of the connected devices require special software (e.g. drivers) (refer to the
documentation for the connected device and operating system).
26 Fujitsu
Page 31

Getting started
Connecting a USB mouse
► Connect the USB mouse to one of the USB ports on the device.
ConnectingaUSBmouseUSBport
Connecting a USB keyboard
Only use the keyboard cable sup plied with the keyboard (not within the delivery scope of the device).
USBportConnecting
► Plug the rectangular connector of the keyboard cable into the rectangular socket
on the und erside or on the rear of the keyboard.
► Insert the flat rectangula
r USB plug of the keyb oard cable into a USB port of the device.
USBport
Connecting external devices to the USB ports
USBdevices,USBport,Externaldevices,Devices,
You can connect a wide range of external devices to the USB ports (e.g.
printer, scanner, mod em or keyboard).
USB devices a re hot-pluggable. This means you can connect and disconnect
USB cables while your device is switched on.
Additional information can be found in the documentation for the USB devices.
► Connect the data cab
le to the external device.
► Connect the data cable t o one of the USB port s on your device.
Device drivers
The external USB devices that you connect to one of the USB ports usually
require no driver of their own, as the required software is already included
in the operating system. If the device requires separate software, please
note the information in the manufacturer’s manual.
To ensure the USB transmission capacity, the cable from the external USB device
to the USB port of your device must not be longer than 3 m.
Fujitsu 27
Page 32

Getting started
Connecting an external monitor
It is po ssible to connect a digital monitor to the DVI monitor port. Screen output is
limited to a ma ximum of two monitors at any one time (see "
Important keys and
keyboard shortcuts", Page 41, section "Toggle screen output").
MonitorMonitorport
Digital DVI monitor port
► Switch off the system.
► Plug the data cable of the external monitor into the monitor port.
► First switch on the external monitor and then the system.
You c an also switch back and forth between the external monitor and the LCD monitor
of the system, see chapter "
Important keys and keyboard shortcuts", Page 41.
You can display the same picture on the external monitor and the
system’s LCD monitor simultaneously.
Connecting external audio devices
Microphone port/Line In
Audiodevi
ces,connecting
AudioportsMicrophon
e,connecting
The microphone port/Line In allows you to connect an external microphone, a MiniDisc
player, MP3 player, CD player or a tape deck to your system.
► Connect the audio cable to the
external device.
► Connect the audio c able to the microphone
port/Line In of the system.
28 Fujitsu
Page 33

Getting started
Headphone port
ConnectingaudiodevicesAudioportsConnecting headphones
You can connect headphones or ext ernal loudspeakers to your system via the hea dphone po rt.
► Connect the audio cable to the
external device.
► Connect the audio cable to the headphones
port of the system.
The internal loudspeakers are disabled.
If you purchase a cable from a retailer, please note the following information:
The headphones port on y our system is a "3.5 mm jack socket".
If you wa nt to connect headphones or a speaker you will need a "3.5 mm jack plug".
Switchingonforthefirst time: installing the software
Installing,Software,Installing,
Once the installation ha s been started the device must not be switched
off, unless the installation has been completed.
During installation, the device may only be rebooted when you are requested to do so!
The installation will otherwise not be carried out correctly and the contents
of the hard disk must be completely restored.
If the device is integrated into a network, the user and server details as well as
the network pro toco l are required during the software installation.
Contact your network administrator if you have any questions about these settings.
When you switch on the device for the first time, the supplied software
is installed and configured. Plan a reasonable amount of time for this,
as this process must not be interrupte d.
You may ne ed the licence number for Windows during the installation. The licence
number is located on a sticker on your device.
Fujitsu 29
Page 34

Getting started
Switching the device on
In order to avoid overheating, do not cover the ventilation areas
on the monitor or the device.
1
► Press the ON/OFF switch on the fro nt of the device (1).
The operationa
l display will light up and the machine will start.
Installing the software
► During installation, follow the on-screen instructions.
Software,Installing,
► If anything is unclear regarding the data you are asked to input, read the
online Help in your operating s ystem.
You will find more information o n the system, as well as drivers, utilities and updates on
the "Drivers & Utilities" DVD and on the Internet at "
http://www.fujitsu.com/fts/support".
You can find information and help on the Windows operating system functions
on the Internet at "
http://windows.microsoft.com".
30 Fujitsu
Page 35

Operation
Operation
Switch the device on
► Press the ON/OFF switch on the front of the device.
The power indicator glows a
nd the device is started.
Switching off the device
► Shut down the operating system in a defined manner. In Windows: via the
Start menu and the Turn Off Com puter function.
Device,Monitor,
► If the operating syst
em does not automatically switch the device into energy-saving
mode or switch it off,
press the ON/OFF switch until the device switches off.
Warning, this could
lead to a loss of data!
If the device is switched off, the device consumes a minimum of energy.
The ON/OFF switch does not disconnect the device from the mains voltage. To
completely disconnect the mains voltage, remove the power plug from the power socket.
Activating pow
er-saving mode
Due to custome r requirements and requirements of the operating system, the "Wake-on-LAN"
(WoL) function is set by default. The WoL function increases the idle current slightly.
In order to me et the requirements of EU Directive “COMMISSION REGULATION
(EC) No 1275/2008 of 17 December 2008 implementing Directive 2005/32/EC”, the
default WoL settings must be changed as follows:
► To start the BIOS Setup Utility after system boot, pre ss function key
F2
.
► In the Powe
r sub-menu, select th e Low Power Soft Off setting and switch it to enabled.
► To save the setting and exit the BIOS Setup Utility, press function key
F4
.
After mak
ing this change, the system will achieve the lowest energy
saving m o
de during shut-down.
Fujitsu 31
Page 36

Operation
LCD screen
LCDscreenNotes
High-quality TFT monitors are installed in systems from F ujitsu Technology Solutions GmbH. For
technical reasons, TFT monitors are manufactured for a specific resolution. An op timal, clear
picture can only be ensured with the correct resolution intended for the relevant TFT monitor. A
screen resolution which differs from the specification can result in an unclear picture.
The screen resolution of the LCD monitor of your system is optimally set at the factory.
TFT monitors are operated with LED background lighting. The luminosity of
the background lighting can decrease during the period of use of the system.
However, you can set the brightness of your monitor individually.
Changing the monitor settings with the buttons
of the control panel
The buttons of the control panel have two functions. W hen the OSD menu is
active, the current meaning of the buttons is shown directly over the butto ns
on the edge of the screen (softkeys). With the OSD menu not activated,
you can make the following settings directly:
1
23
1 = Buttons for the OSD menu (On
Screen Display)
2=ON/OFF
switch
3 = Power sup ply indicator
32 Fujitsu
Page 37

Operation
Select OSD language
After switching on for the first time, the language selection menu of the display is displayed:
► Press the
(4th button from left) / button or the (5th button fr o m left)
/
button, to select the desired language.
► Press the
MENU
/ buttontoconfirm.
After selecting the OSD language for the first time, you can change
it at any time in the OSD.
Activating/deactiv
ating ECO operating mode
The power con sump tion of the device can be decreased by reducing
the brightness of the picture.
► To activate or deactivate ECO operating mode, press the
ECO
button.
The message ECO Mode on or ECO Mode off is displayed.
If you press the
ECO
button, the brightness of the monitor is reduced to an energy saving status.
After ending ECO mode, the previously set brightness is restored.
Locking the OSD menu
The OSD menu can be locked to prevent accidental or unauthorised changes to the monitor settings.
► Press the
ECO
and buttons (5th button from left) simultaneously for a few seconds.
The message OSD locked / unlocked is displayed.
Please proceed in the same manner to release the locked OSD menu again.
Fujitsu 33
Page 38

Operation
Changing the monitor settings using the OSD menu
With the buttons on the control panel, you can call up and use the integ rated
OSD (On-Screen Display) menu.
The English menu names are used in the following description (default setting).
► Press the
MENU
button to activate the OSD menu.
The main m enu appears, with icons for the setting functions.
The first symbol, (Brightness/Contrast), is highlighted and the associated functions
are visible in the right-hand menu field.
► To highlight another icon (e.g. Image adjust), press the
ECO
/ button or the / button.
► Press the
MENU
/ button to select the highlighted icon.
The Image adjust settings window is displayed.
► To exit the main menu, press the
(6th button from left) / button.
34 Fujitsu
Page 39

Operation
► To highlight a different function, press the
ECO
/ button or the / button.
► To change the settin
g, press the
(4th button from left) / button or
the
(5th button fro
m left) /
button.
► To highlight a different function, press the
ECO
/ button or the / button,
► to save the change, press the
MENU
/ button or the
(6th button from left) / button to exit the function without change.
If you want to change other settings, select the corresponding fun ction from the OSD
main menu. All possible adjustments of the main menu are described in the following.
Adjusting the brightness and contrast
Call up the B rightness/Contrast setting window
Brightness
Set the brightness of the display
With th is function you change the brightness of th e background lighting.
Contrast
Set the contrast of the display
With this function you modify the contrast of bright colour tones.
Black level
Set the brightness of the display
With this fun ction you modify the contrast of dark colour tones.
If the c ontrast is set too high, bright surfaces can no longer be distinguished from very
bright surfaces. If the contrast is set too low, the maximum brightness will not be achieved.
Fujitsu 35
Page 40
Operation
Selecting the application mode
Call up the Mode setting window
sRGB
Predefined settings for sRGB (reduced brightness)
Office
Office presets (the settings for colour and sharpness can be adjusted)
Photo
Predefined settings for photo (colour, sharpness, saturation)
Vide o
Predefined settings for video (colour, sharpness, saturation)
ACR = Dynamic contrast (on / off)
OD =Overdrive
Adjusting the picture size and position
Call the Image adjust setting window
Sharpness
Adjust the picture definition for Office, Ph oto and Vide o mode.
Saturation
Adjust the colour sa
turation for Office, Photo and Video mode.
Expansion
Adjust the picture
size
Full screen =sele
ction of full screen mode
Keep aspect =max
imum picture size without distortion (only for PC image)
Setting colou
r temperature and colours
Call the Colour setting window
Select the colour tem perature
The "warmth" of the screen colours is set using the colour te mperatu re. The
colour temperature is measured in K (= Kelvin). You can choose between
sRGB, 6500 K, 7500 K, 9300 K, Native and Custom Colour.
The options sRGB, Native and C ustom colo ur are only available in the Office
setting mode.
In the user-defined setting you can change the colour ratios of the basic
colours (red, green, blue) as required.
36 Fujitsu
Page 41

Operation
Setting functions
Call up the Setup settings window
Language
Set the language for the OSD menu
With this function you select the language for the O SD m enu.
The default setting is English.
Camera
(optional)
Activate/deactivate camera
On = Optional camera activated (default setting)
Off = Optional camera deactivated
Presence sensor
(optional)
Activate/deactivate presence sensor
On = Optional presence sensor activated (default setting)
Off = Optional presence sensor deactivated
DDC-CI
Activates/deactivates the DDC-CI function
On = The DDC-CI function is activated (default setting)
Off = The DDC-CI function is deactivated
OSDTimeout
Set the display duration of the OSD menu
With this function you se lect a value from 10 to 120 seconds.
If the s et time expires without a setting being made, the OSD menu
is automatically faded out.
Factory recall
Activate the factory settings
With this function all settings are reset to the factory settings without
prompting for confirmation.
The function is executed with the
button (5th button from left). The
language selection men u appears.
The settings functions for the camera and the presence sensor are only
displayed if the optional camera module is installed.
Displaying information
Call the Information setting window
This fu nction displays the resolution, application mode, colour temperature,
H/V frequency, AC R status and ECO mode.
Fujitsu 37
Page 42

Operation
Notes on ergonomic colour adjustment
If you select colours for the monitor in your application programmes,
take note of the inform a tion below.
The primary colours blue and red on a dark background do not produce the minimum
required contrast of 3:1 and are therefore not suitable for continuous text and data entry.
When using several colours for chara cters and background and giving the primary colours full
modulation, you can obtain very suitable colour combinations (see the following table):
Characters
Background
black white purple blue
cyan green
yellow red
black
++
-
+++
-
white
+++
---
+
purple
++
-----
blue
-
+
-
+
-
+
-
cyan
+
--
+
---
green
+
--
+
---
yellow
+
-
++
--
+
red
-
+
----
+
+ Colour combination very suitable
- Colour combination not suitable because colour hue s are too close together, thin characters
are not identifiable or rigorous focusing is demanded of the human eye.
Preset operating modes
The picture position and size have been set to optimum values at th e
factory for the operating modes listed above.
For ergonomic reasons, a screen resolution of 1920 x 1080 pixels is recommended.
Because of the technology used (active matrix), an LCD monitor provides a
totally flicker-free picture, even with a refresh rate of 60 Hz.
38 Fujitsu
Page 43

Operation
Most frequent operating modes
Horizontal frequency Refresh rate Screen resolution
31.5 kHz 70 Hz 720 x 400
31.5 kHz 60 Hz 640 x 480
37.5 kHz 75 Hz 640 x 480
37.9 kHz 60 Hz 800 x 600
46,9 kHz 75 Hz 800 x 600
48.4 kHz 60 Hz 1024 x 768
55,4 kHz 60 Hz 1440 x 900
60.0 kHz 75 Hz 1024 x 768
64,0 kHz 60 Hz 1280 x 1024
65.0 kHz 60 Hz 1680 x 1050
67.5 kHz 60 Hz 1920 x 1080
80.0 kHz 75 Hz 1280 x 1024
Fujitsu 39
Page 44

Operation
Indicators on the device
The indicators are on the front of the casing.
1
No. indicator Description
1 Power-on indicator
Caution:In energ
y saving mode, the device must not be
disconnected fro
m the mains supply as this can cause loss of data.
• The indicator i
s illuminated:
The device is switched on.
•Theindicator
is flashing:
The device is i n energ y-saving mode. After being sw itched on
with the ON/OFF switch, the device powers up or returns to the
state it was in before it entered energy-saving mode.
• The indicato
r is not illuminated:
The device is switched off (disconnected from the mains) or is
ready to operate. If the device is ready to operate, it can be
switched on with the ON/OFF switch.
In energy-saving mode the device must not be disconnected from the
mains supply, as data loss may occur.
40 Fujitsu
Page 45
Operation
Keyboard
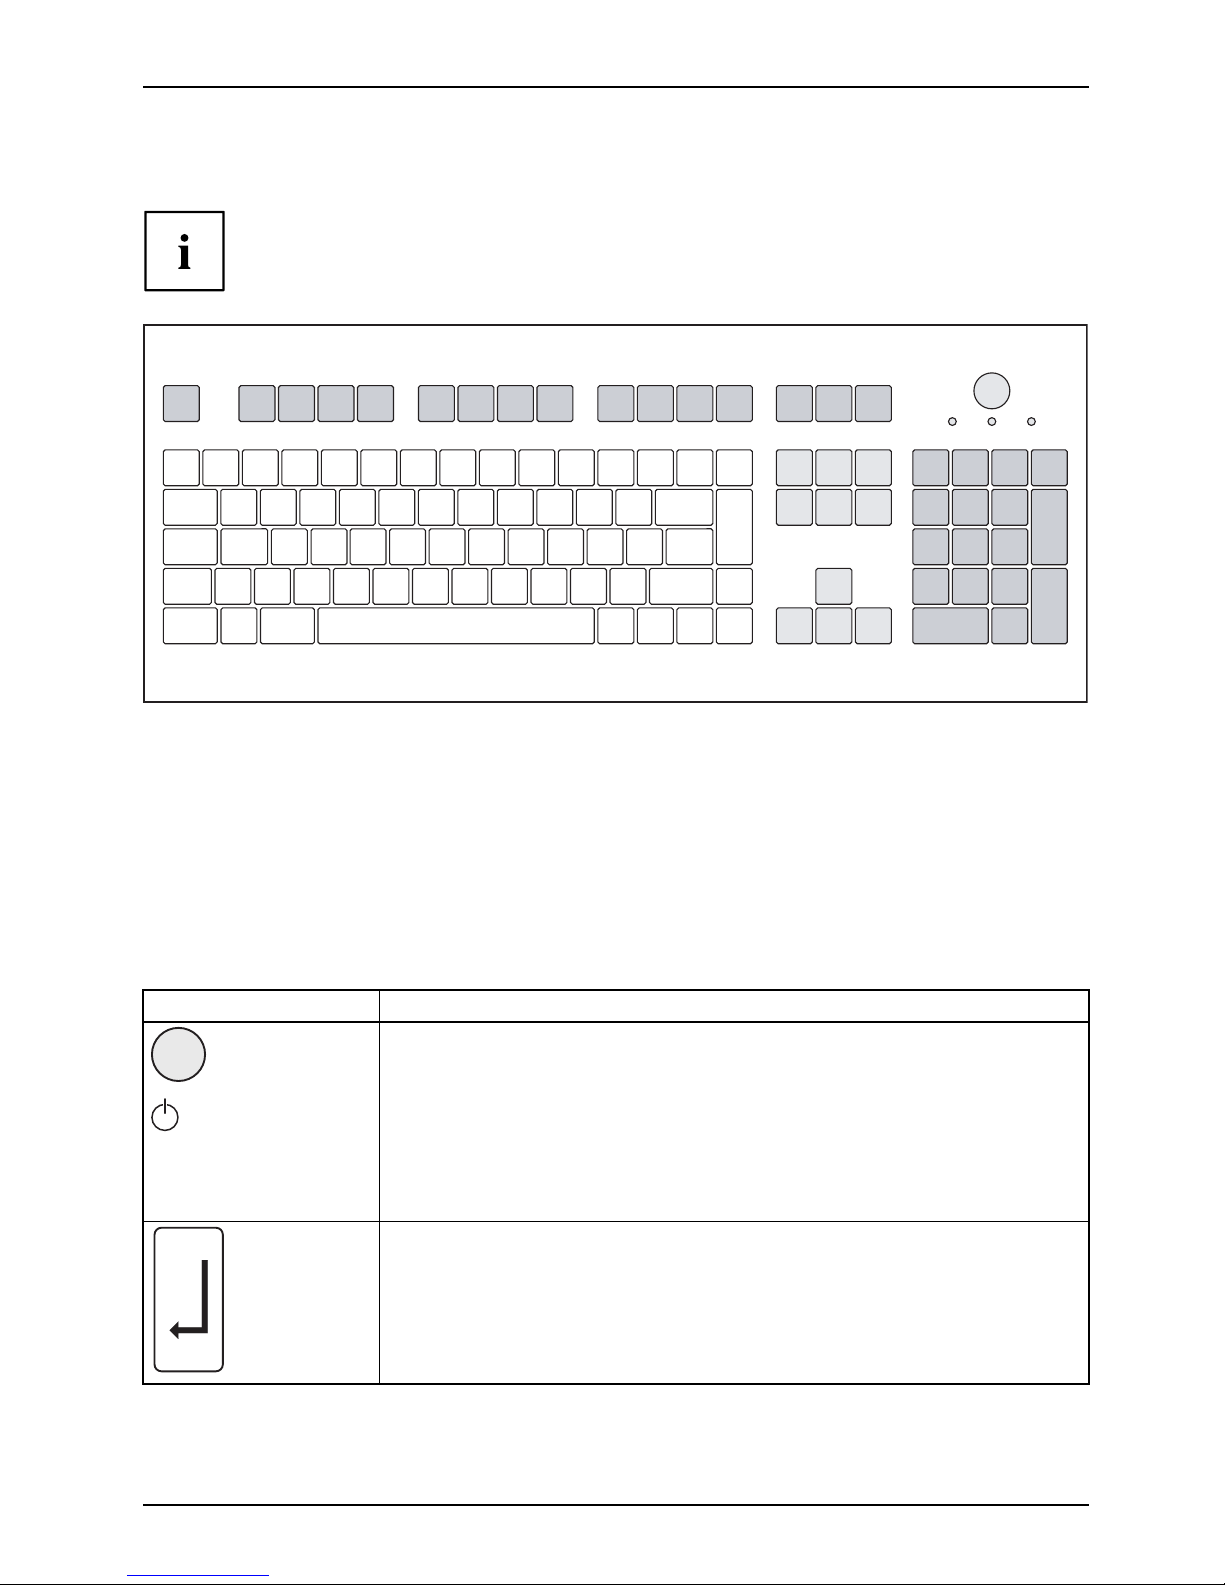
KeyboardKeyboard,Keyboar d,Keyboard,Keyboard,Keyboard,Alphanumerickey padCursorkeysKeys ,FunctionkeysNumerickey padNumerickeypad
The illustrated keyboard is an example and may differ from the model you use.
1 2
345
1 = Function keys
2 = On/off switch (optional)
3 = Alphanumeric keypad
4=Cursorkeys
5 = Numeric keypad (calculator keypad)
Important k
eys and keyboard shortcuts
Keyskeyboardshortcuts
The description of th e following keys and keyboard shortcuts applies to Microsoft
operating systems. Details of other keys and keyboard shortcuts can be found in
the documentation for the r elevant application program.
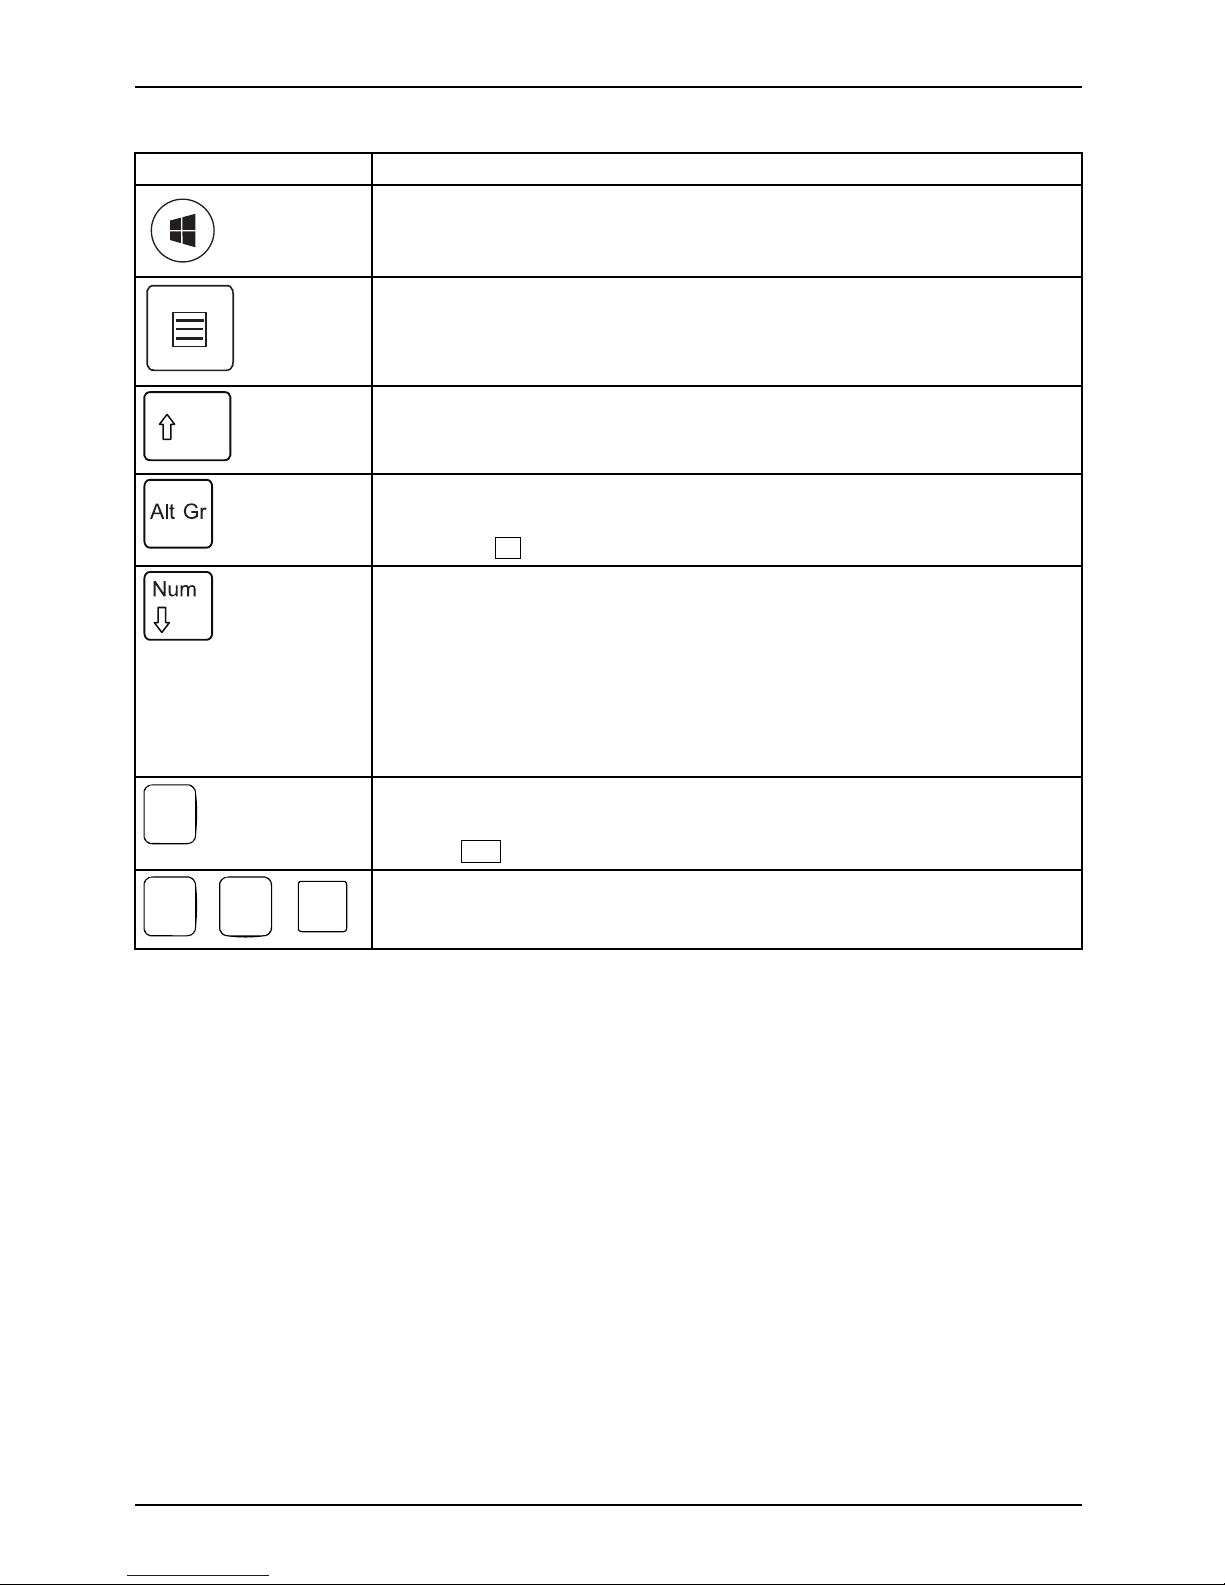
Key / key combination Description
On/off switch (optional)
ON/OFFsw
itch
Button,
Depending on the setting in the BIOS Setup, the device can be switched
on or off with th is switch. Some operating systems allow you to configure
additional functions of the ON/OFF switch in the Contro l Panel.
With some keyboards the ON/OFF switch can only be used w ith an ACPI
(Advanced Configuration and Power Management Interface). Otherwise
the key is inoperative . T he mainboard m ust support this function.
Enter key
Keys,Keys,Keys,
confirms the highlighted selection. The Enter key is a lso referred to as
the "Ret urn" key.
Fujitsu 41
Page 46
Operation
Key / key co mb ination Description
Windows button
Buttons
The Windows button switches between the start screen and the last
used application.
Menu key
Keys,
The menu button opens the menu for the active application.
Shift key
Keys,Keys,
enables upper-case letters and the upper key symbols to be displayed.
Alt Gr button (device-depen den t)
Keys,
produces a character shown on the bottom right of a key (e.g. the @
sign on the
Q
key).
Num Lock key
Keys,
By pressing the N um Lock key you switch between the upper- and
lower-case levels of the calculator keypad.
When the Num Lock indicator is lit the numeric keypad and arithmetic
keys are active.
When the Num Lock indicator is not lit the cursor control functions on the
Numeric keypad are active.
Ctrl
Ctrl key
Keys,KeysKeysKeys,
performs a special operation when pressed in conjunction with another
key. The
Ctrl
key is also called the "C ontrol" or "Control key".
AltCtrl
Del
++
Windows secur
ity/Task-Manager
Ctrl+Alt+DelCtrl+Alt+DelKeysKeyboardsho
rtcuts
This key comb
ination opens the Windows Security/Task Manager window.
42 Fujitsu
Page 47
Operation
Webcam module (optional)
Webcammodule
Your system can be equipped with a webcam module as an option.
No forces may be exerted on the webcam module, such as those which occur
during adjustment of the monitor or movement of the system.
The webcam module has the following functions:
• Webcam: for video recordings up to a resolution of 720 p
• Digital mono-microphone: for audio record ings
• Ultrasonic presence sensor
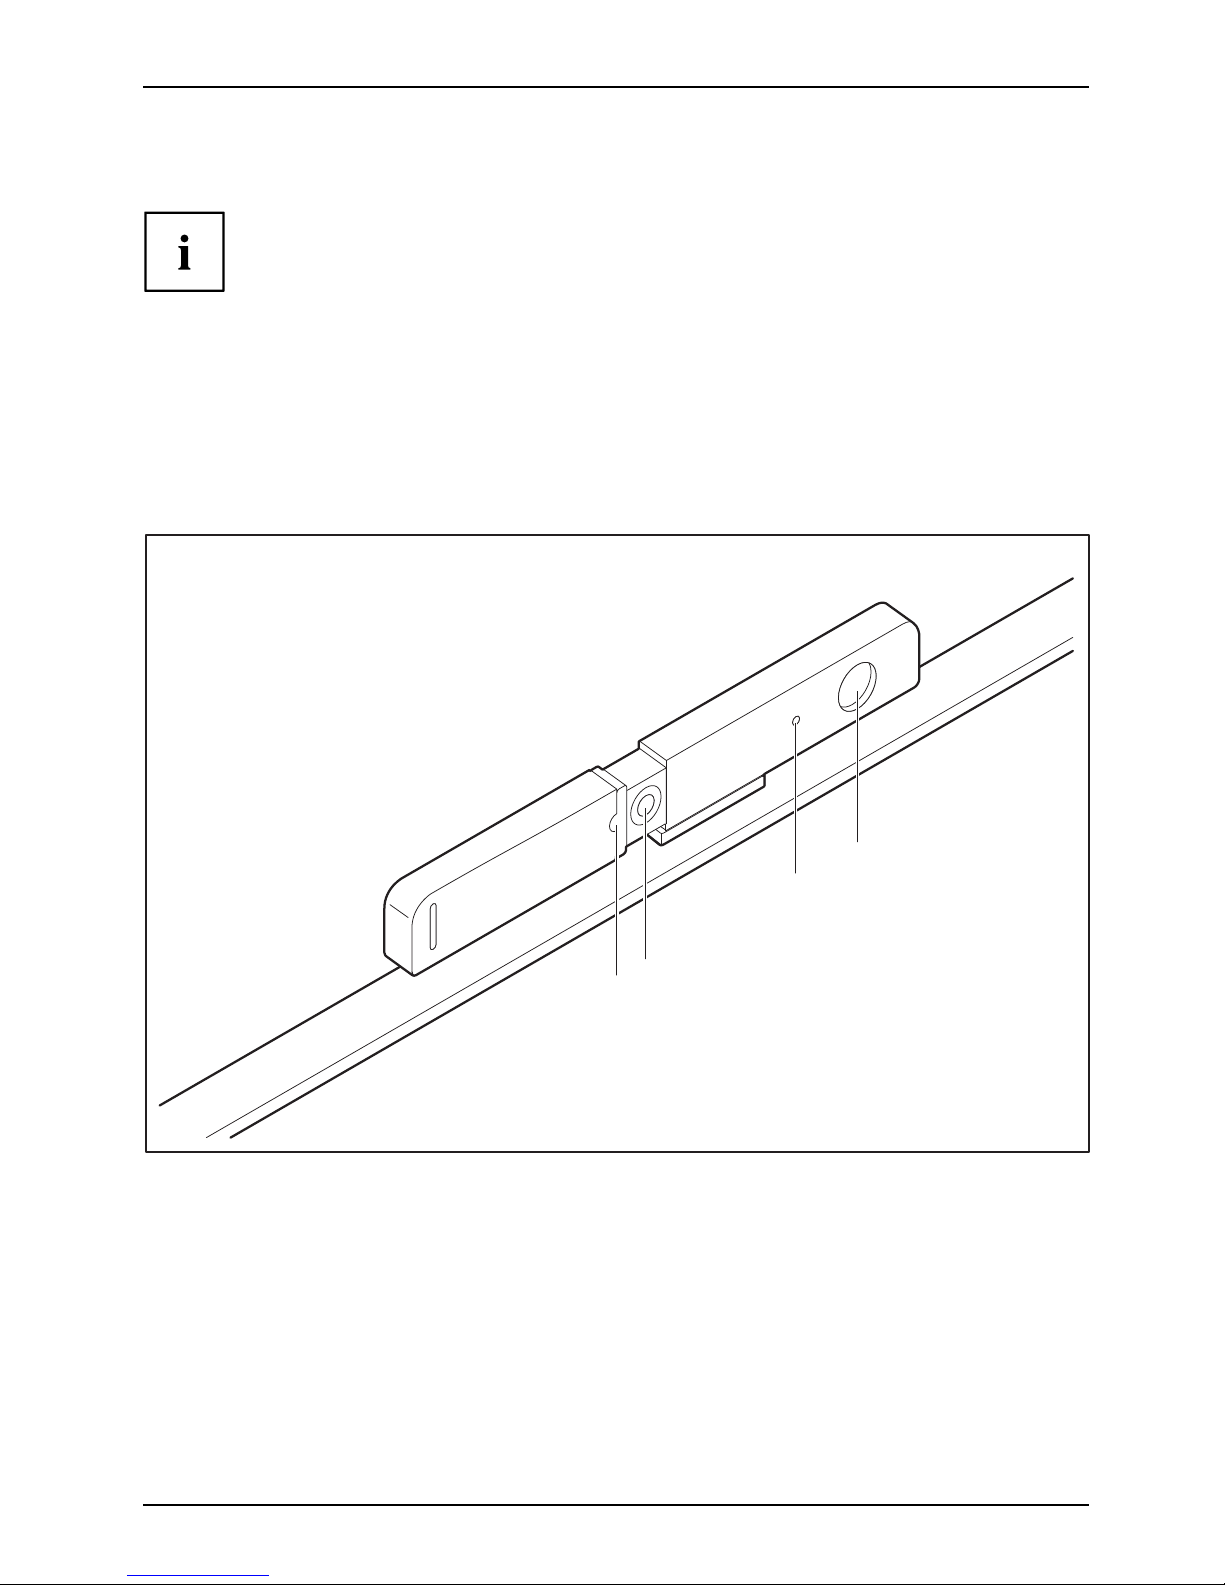
Your webcam module
3
4
1
2
1 = LED indicators
2 = Lens
3 = Mono-microphone
4 = Ultrasonic presence sensor
Fujitsu 43
Page 48

Operation
1
2
The webcam module can be activate d and deactivated via the sliding mechanism (1) or
adjusted upwards or downwards by tilting the viewing angle (2).
The webcam can be deregistered from the system either mechanically via
the sliding mechanism or via the OSD menu.
The presence sensor can be deactivated via the O SD menu.
The digital microphone can only be deactivated via the operating system.
The sliding mechanism only influences the webcam function.
Depending on the so ftware used, you can use this webcam module to take pictures,
record video clips or take part i n web chats.
The webcam module has a separate LED indicator. The LED indicator lights
up when the webcam is switched on.
• The picture quality depends on the lighting conditions and the software being used.
• You can
only operate the webcam module with a particular application (e.g. an Internet
teleph
ony program or a video conferencing program which supports a webcam).
• When using the webcam module, the system support (e.g. the table) should not
wobble o r vibrate, as this affects the picture quality.
•Thewe
bcam module automatically adjusts itself to the current light level. For this reason
the LC
D display may flicker while the light level is adjusted.
44 Fujitsu
Page 49

Operation
Further information on use of the webcam module and additional settings for your
webcam module can be found in the help function of the program using the webcam.
Presence sensor
Presencesensor
The presence sensor from Fujitsu ensures high operating comfort, good workplace security and
other energy saving options. This is enabled by individual and automatic system functions.
The sensor automatically detects the presence or absence of a person. The respective
detection status can be assigned various system settings.
Upon detection of the absence of a person:
• Dim or deactivate m onito r
• Activate screen saver
• Secure access to the system
• Switch system to Hibernate or Standby mode
Upon detection of the presence of a person:
• Activate the monitor
• Wake up the system
The presence sensor may have to be readjusted after adjustment of the height
or tilt of the monitor, in orde r to guarantee proper functioning.
Presencesensor
Fujitsu 45
Page 50

Operation
Wireless LAN/Bluetooth radio components (optional)
The installation of radio components not approved by Fujitsu will invalidate
the certifications issued for this device.
Operation of the module is not permitted in Taiwan.
The FUTRO system only has the wireless LAN radio components.
Switching the wireless components on and off
You can use the Devi
ce Manager program to switch the radio
components on and o
ff individually.
Pay attention to t
he additional safety notes for devices with radio components
provided in the "S
afety/Regulations" manual.
Details on using
Wireless LAN can be found in the online help system
included with t
he Wireless LAN software.
You ca n find mor
e information on how to use Bluetooth on the CD you
received with
your Bluetooth software.
46 Fujitsu
Page 51

Operation
Power over Ethernet module for FUTRO
X913/X913-T (optional)
Ethernetmodule
Your FUTRO can be equipped with an optional Power over Ethernet m odule.
Using the Power over E the
rnet adapter, you can operate the FUTRO via the LAN without an
additional power connec
tion. To do this, you will need a corresponding network infrastructure.
To operate the FUTRO via
the Power over Ethernet adapter, midspan devices (power supply via
intermediary sources,
such as PoE injector) with a power outp ut of 60 W and shielded CAT-5
network cable or highe
r quality cable are required. Endspan devices (direct power supply v ia
a PoE switch) are only s
upported in connection with a hardware classification.
Fujitsu recommends
the use of the following midspan devices:
• 1-port midspan from
Microsemi PD-9501G: S26361-F1744-L10
• 12-port midspan from Microsemi PD-9512G: S26361-F1744-L20
When operating the FUTRO via the Power over Ethernet adapter, the external
USB power output is limited to max. 5 watts.
Fujitsu 47
Page 52

Operation
Settings in BIOS Setup Utility
BIOSSetupUtilitySystemsettings,BIOSSetupUtilityConfiguration,BIOSSetupUtilitySetupSystem configurationHardwareconfiguration
The BIOS Setup Utility allows you to set the system functions and the
hardware configuration for your device .
When it is supplied, the device is set to factory default settings. You c an change
these settings in the BIOS Setup Utility menu. Any changes you make take effect
as soon as you save and exit the BIOS Setup Utility.
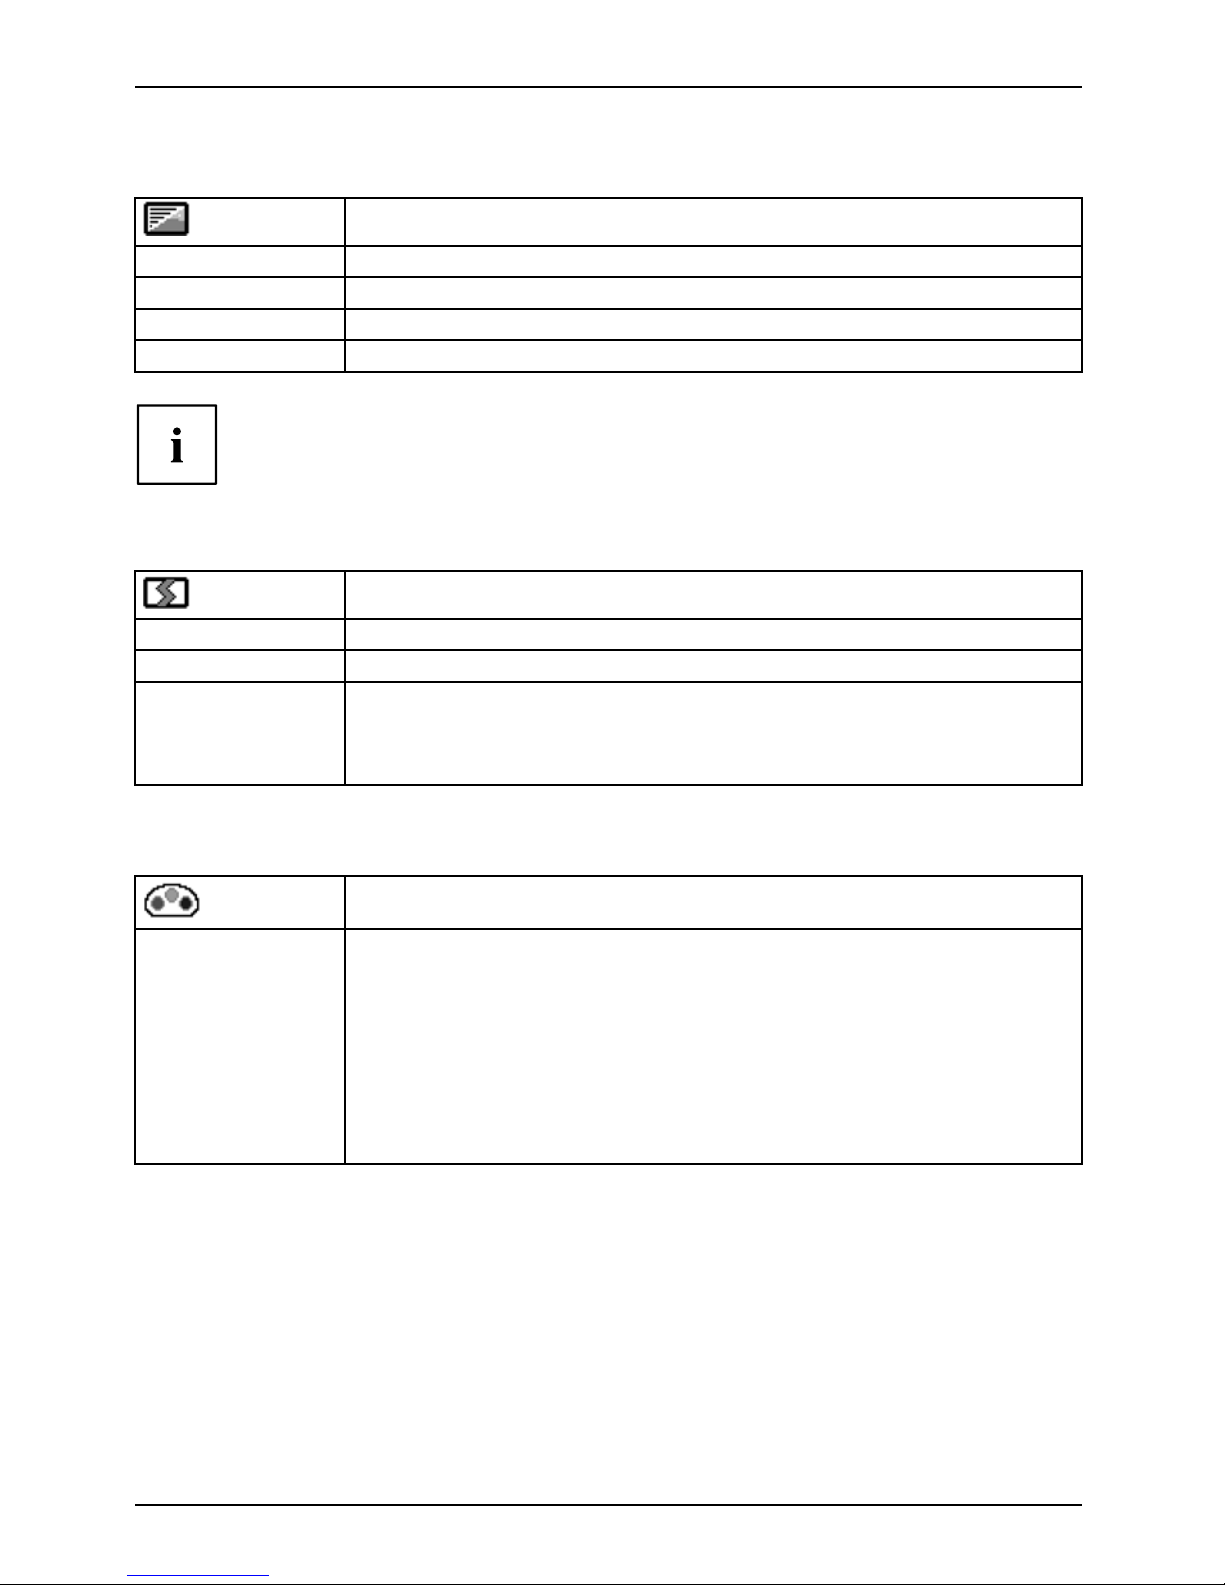
The BIOS Setu p Utility program contains the following menus:
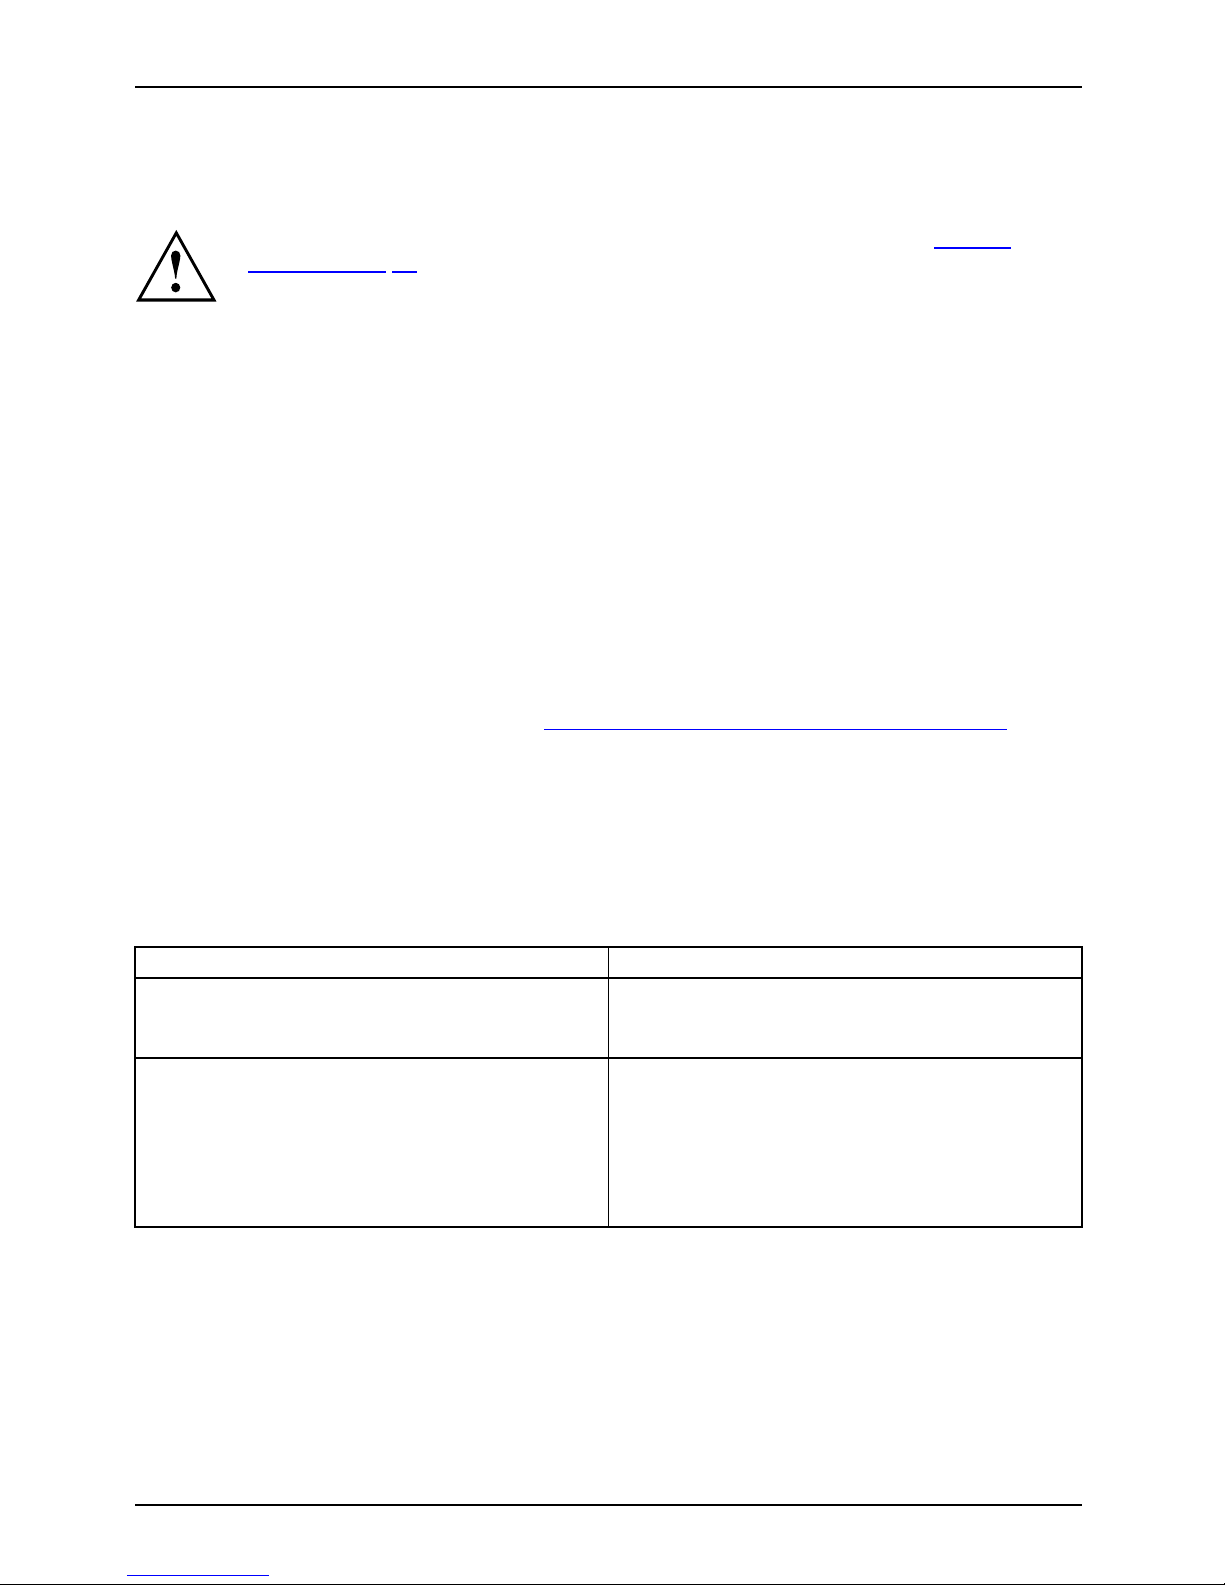
Menu Description
Main
System settings such as
time and date
Advanced
Advanced system setti
ngs
Security
Password settings and security functions
Power
Energy saving function
Event Logs
Protocol settings
Boot
Configuration of t
he start-up seque nce
Save & Exit
Exits the BIOS Se
tup Utility
The following function keys can also be used:
Key Description
Esc
To exi t t he BIOS Setup Utility.
The current settings are not saved.
F2
To reject changes and load the previous configuration of the BIOS Setup
Utility.
F3
To l o ad t he
default configuration of the BIOS Setup Utility.
F4
To exi t t he
BIOS Setup Utility.
The curre
nt settings are saved.
Starti
ng the BIOS Setup Utility
► Reboot the device (switch o ff/on or reboot the operating system).
BIOSSetupUtility
The fol
lowing or a similar display appears on the screen at start-up:
<F2> BIOS Setup <F12> Boot Menu
► Press the function key
F2
.
► If a p
assword has been assigned, enter the password and press the Enter key.
If y
ou have forgotten the password, contact your system administra tor
or c
ontact our customer service centre.
The BIO S Setup Utility starts.
48 Fujitsu
Page 53

Operation
Operating BIOS Setup Utility
BIOSSetupUtility
Press the
F1
key to display help on the ope ration of the BIOS Setup Utility. The description
of the individual settings is sh own in the right-hand window of the BIOS Setup Utility.
With the
F3
key you can load the default settings of the BIOS Se tup Utility.
► Use the cursor keys
←
or
→
to select the menu you wish to access to make changes.
The menu is displayed on the screen.
► Select the option you wa nt to change with the cursor keys
↑
or↓.
► Press the Enter key.
► Press the
ESC
key to exit the selected menu.
► For future reference, make a note of the changes you have made (for example, in this manual).
Exiting BIOS Setup Utility
BIOSSetupUtility
You need to select the desired option in the Save & Exit menu and activate it by pressing the Enter key:
Save Changes and Exit - Save the changes and exit the BIOS Setup Utility
► To save the current menu settings and exit the BIOS Setup Utility,select
Save Changes an d Exit and Yes.
The device is rebooted and the ne w settings come into effect.
Discard Changes and Exit - Discard changes and exit the BIOS Setup Utility
► Select Discard Changes and Exit and Ye s to discard the changes you have made.
The settings which applied when BI OS Setup Utility wascalledupremaineffective.
The BIOS Setup Utility is terminated and the device is rebooted.
Property and data protection
Property
protection
Dataprot
ection
Security
measures
Software functions and mechanical locking offer a broad range of functions for protecting your
device and your p ersonal data from unauthorised access. You can also combine these functions.
Using the
Security Lock
Your device has a Security Lock device. Using the Security Lock device and the
Kensington Lock cable (steel cable, accessory) y ou can protect your device against
theft. Consult the manual for your Kensington Lock Microsaver.
The Security Lock can also be used to protect the recovery button behind
it against unauthorized actuation. The recovery button is on the right-hand
side of the system behind the Security Lock device (2).
Fujitsu 49
Page 54

Operation
1
2
► Attach the Kensington Lock cable to the Security Lock device (1) or (2) on your device.
Usingth
eKensingtonLockCable
Securit
yLock
Mechani
calbackup
Anti-th
eftprotection
BIOS Setup security functions
The Security menu in the BIOS Setup offers you various options for protecting y our
personal data against unauthorized access, e.g.:
• Prevent unauthorised access to the system
• Prevent unauthorized access to the BIOS Se tup
Before using the various options for password protection in the BIOS Setup utility
to increase data security, please observe the following:
Make a note of passwo rds and keep them in a safe place. If you forget your supervisor
password you will no longer be able to access your device. Deleting passwords is
not covered by you r warranty and a charge w ill be m ad e for assistance.
Passwordprotection
50 Fujitsu
Page 55

Operation
Your password can be a m aximum of 32 characters long and can consist of letters
and numbers. No distinction is made between uppercase and lowercase.
SmartCard reader (optional)
Securityfunctions,Securityfunctions
SmartCards are not supplied as standard equipment. You can use all SmartCards that comply with
the ISO sta ndard 781 6-1, -2 or -3. These SmartCards are available from various manufacturers.
With the appropriate software you can use yo ur SmartCard as an alternative to password protection,
but also as a digital signature, for encrypting your e-mails or for home banking.
We recommend that you always use two SmartCards. Always keep one of the SmartCards
in a safe place if you are carrying the other SmartCa rd with you.
In order to be able to take advantage of all th e security features of your system, you
will need a CardOS SmartCard from Fujitsu Technology Solutions.
The SmartCard can only be used with a PIN, offering maximum protection even if
you lose the SmartCard. In order to maximise your security, the CardOS SmartCard
is disabled if three incorrect attempts are made to enter the PIN.
When you use the CardOS SmartCard for the first time, you will either need to enter the
preset PIN "12345678" or the PIN given to you by your systems administrator.
Inserting the SmartCard
Do not use force
when inserting and removing the SmartCard.
Make sure that f
oreign objects do not fall into the S martCard reader.
► Slide the SmartCard into the SmartCard
reader with the chip facing upwards (on
some variants it faces down) and to the front.
Fujitsu 51
Page 56
Troubleshooting and tips
Troubleshooting and tips
Refer to the safety notes in the "Safety/regulations" manual and in the "Getting
started", Page 19 chapter when co nnecting or disconnecting cables.
If a fault occurs, try to c
orrect it as described in the following documentation:
• in this chapter
• in the documentation for the connected devices
• in the help systems of th
esoftwareused
• in the documentation for your operating system
Help if problems occur
Should you encou nt
er a problem with your computer that you cannot resolve yourself:
► Note the ID number
of your device. The ID number can be found on the type
rating plate on th
e underside of the device.
► For further clarification of t he problem, c ontact the Service Desk for your country (see the
Service Desk list o r visit the Internet at "
http://support.ts.fujitsu.com/contac t/servicedesk"). When
you do this, please have ready the ID number and serial number of your system.
Troubleshooting
Power-on indicator remains unlit after you have
switched on your device
Cause
Troubleshooting
The mains voltage supply is faulty. ► Check that the power cable is properly
plugged into the device and into the mains
socket.
Internal power supply overloaded.
► Unplug the power plug of the device from
the mains socket.
► Wait app
rox. 3 min.
► Plug the power plug of the device into the
mains socket again.
► Switc
h the de vice on.
52 Fujitsu
Page 57

Troubleshooting and tips
The device cannot be switched off with the ON/OFF switch.
Cause
Remedy
System crash ► Keep the on/off switch pressed for at least 4
seconds un til the machine switches off.
Caution: This can lead to a loss of data!
This procedure does not allow the operating
system to shut down in an orderly w ay. The next
time the system is started there may well be
error messages.
Monitor remains blank
Cause
Remedy
Power saving has been activated (screen is
blank)
► Press any key on the keyboard.
or
► Deactivate the screen sa ver. If
necessary, enter the appropriate
password.
or
► Alter the brightness and/or contrast until
you get a picture.
Brightness control is set to dark ► Adjust the brightness control.
Wrong setting for the monitor
► Restart the device.
► Press
F8
while the system is booting.
► Start the system in protected mode.
► Set the correct value for the connected
monitor, as described in the operating
instructions for the monitor.
The screen display becomes darker
The backgr
ound lighting has a limited lifetime.
► If your scr
een display becomes too dark,
contact ou
r Service Desk.
With the passively cooled system variant
(FUTRO X913/X913-T), the background lighting
can decrease if the system environment does
not guarantee adequate dissipation of heat.
► Check the ambient temperature.
Message:
Frequency out of range:
##kHz/##Hz
Please change the display mode
to 1920 x 1080 with 60 Hz
The input signal (horizontal frequency and
refresh rate) does not correspond to the
technical monitor data.
► Adjust the video frequency range using the
computer software (see documentation for
your compute r or your display adapter)
► Adjust a different screen resolution using the
computer software (see documentation for
your computer or your display adapter).
Fujitsu 53
Page 58

Troubleshooting and tips
The external monitor remains blank
Monitor
Cause Troubleshooting
Monitor is switched off. ► Switch the external monitor on.
Power saving has been activated (monitor is
blank).
► Press any key to continue.
Brightness is set to dark.
► Adjust the brightness of the monitor.
Screen output is set to the system’s LCD
monitor.
► Press the key combination to switch the
screen out put, see "
Important keys and
keyboard sh ortcuts", Page 41.
The external monito r’s power cable or data
cable is not connected properly.
► Switch off the external monitor and the
system.
► Check whether the power cable is plugged
properly into the external monitor and into
the power socket.
► Check whether the data cable is properly
connected to the system and th e external
monitor (if it is plugged in with a c onnector).
► Switch on the external monitor and the
system.
The external monitor is blank or the image is unstable
ScreenMonitor
Cause Troubleshooting
The wrong external monitor has been selected
or the wrong scre en resolution has been set for
the application program.
► Terminate the application program in
Windows by pressing
Alt
+
F4
.Ifthe
error persists after terminating the program,
use the key combination for switching the
screen outp ut (see "
Important keys and
keyboard shortcuts", Page 41), in order to
switch to the LCD monitor of the system.
Change the following setting:
► Set the screen resolution: Set the screen
resolution as described in the documentation
foryouroperatingsystem.
54 Fujitsu
Page 59

Troubleshooting and tips
No mouse pointer displayed on the screen
Cause
Remedy
The mouse is not correctly connected.
► Shut down your operating system in the
proper manner, for instance using
Ctrl
+
Alt+Del
.
► Switch the device off.
► Check that the mouse cable is properly
connected to the system unit. If you use an
adapter or extension lead with the mouse
cable, check the connections.
► Make sure that only one mouse is
connected.
► Switch the device on.
Time and/or date is not correct
Cause
Remedy
Time and date are incorrect.
► Set the correct time and date within the
operating system you are using.
or
► Set the correct time and/or date in th e
BIOS Setup.
SmartCard reader is not recognised.
Cause
Troubleshooting
Chip card inserted incorrectly.
► Make sure you have inserted your
SmartCard into the SmartCard r eader with
the chip facing upwards.
► Check whethe
r the SmartCard you are using
is supporte
d. Your SmartCard must comply
with the ISO
standard 7816-1, -2, -3 and -4.
SmartCard
PIN forgotten
Cause
Troubleshooting
PIN forgotten ► If you are working in a network, con tact your
system administrator, who can unlock your
system with a Supervisor PIN.
Fujitsu 55
Page 60
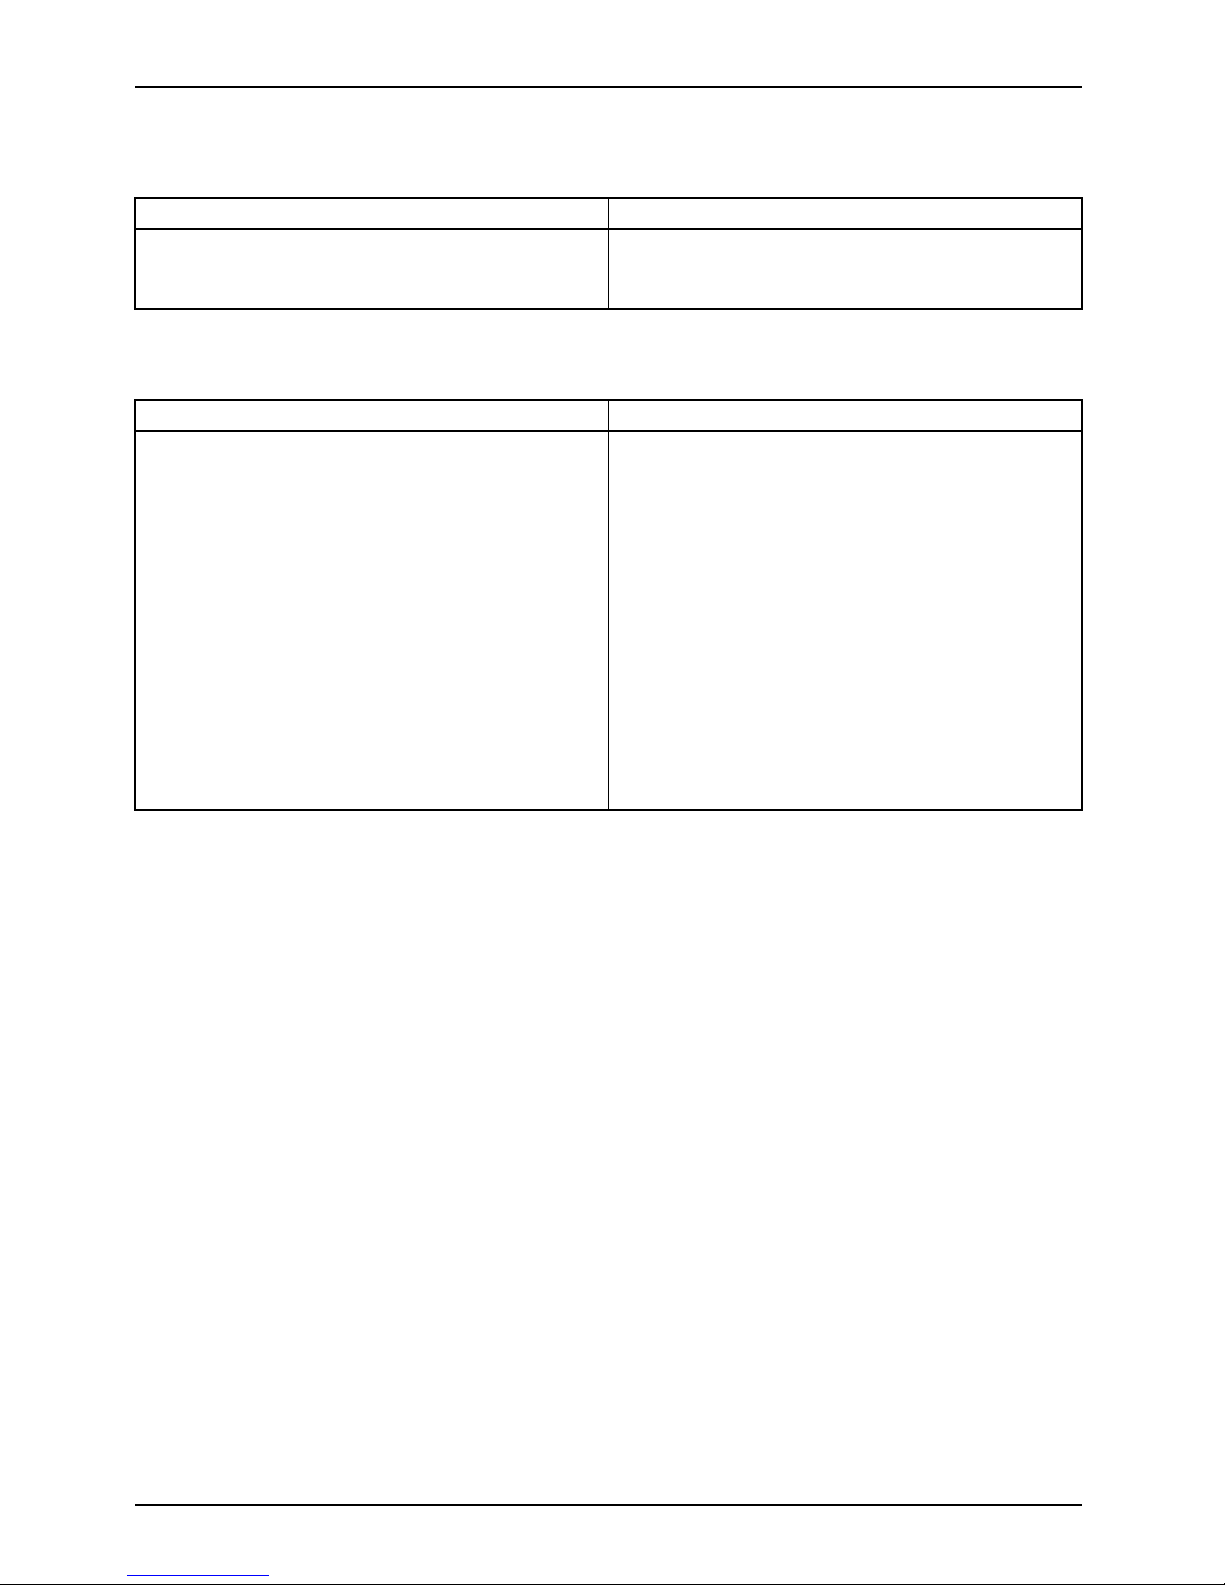
Troubleshooting and tips
SmartCard lost
Cause
Troubleshooting
SmartCard lost ► If you are working in a network, contact your
system administrator, who can boot your
system with a S upervisor SmartCard.
User and/or supervisor SmartCard lost
Cause
Troubleshooting
User and/or supervisor SmartCard lost ► If you have lost your User SmartC ard, you
can continue working with the Supervisor
SmartCard and initialise a new User
SmartCard or dea ctivate the SystemLock
function.
► If you have lost the Supervisor SmartCard,
you can continue working, but you no longer
have all your rights and can no longer
initialise a Supervisor SmartCard.
► If you have lost bo th SmartCards, you can
no longer bo ot your system. Please contact
our Service Desk. You must provide proof of
ownership for the device. Then the Service
Deskwillreferyoutoourservicepartner,
who w ill unlock your device (for a charge).
Error messages on the screen
Error m essa ges and their explanations are provided:
• in the technical manual for the mainboard
• in the documentation for the pro grams used
Installing new software
When installing programs or drivers, important files may be overwritten and modified. To
be able to access the original data in the event of any problems following installation,
you should backup your hard disk prior to installation.
Restoring the hard disk contents
You will find the instructions for restoring the contents of the hard disk in the "R eco very Guide" manual.
56 Fujitsu
Page 61
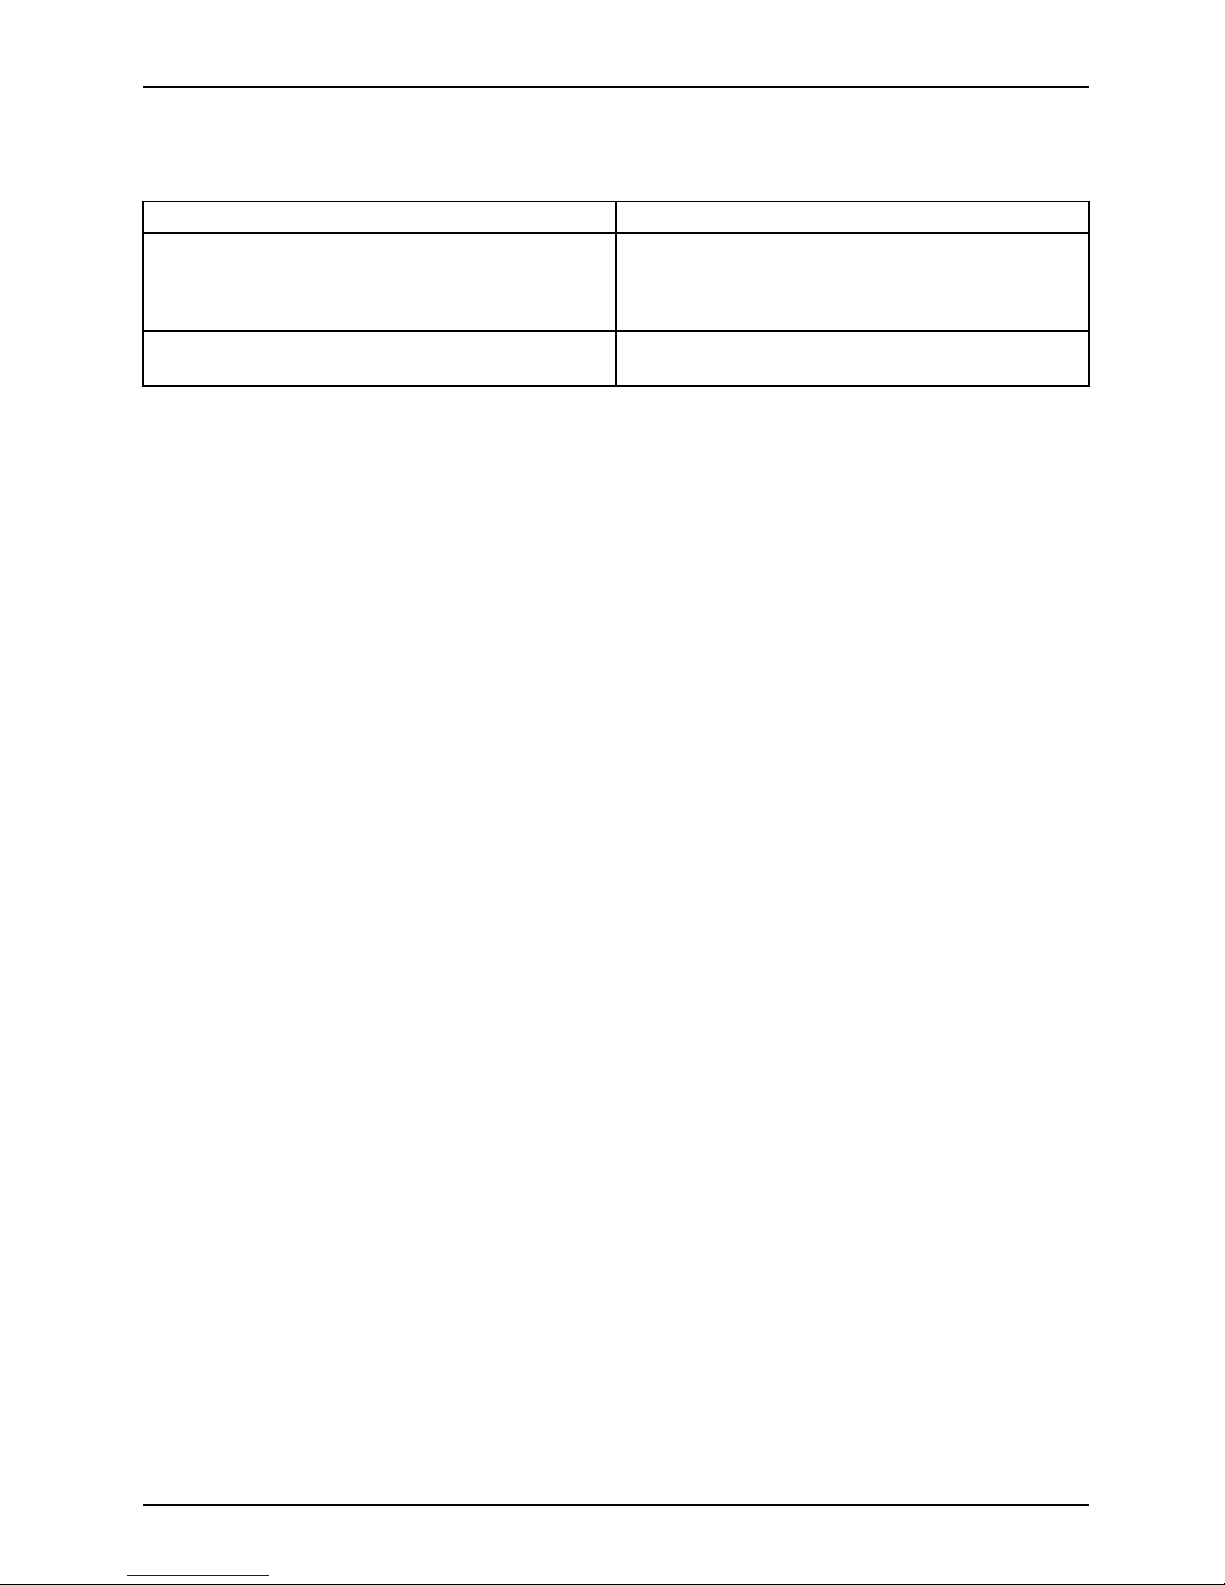
Troubleshooting and tips
Tips
Topi c Ti p
Outofsystemresources ► Close unnecessary applicatio
ns.
or
► Run the applications in a different order.
Other manuals Further manuals are provid
ed as PDF files on
the "Drivers & Utilities"
DVD.
Fujitsu 57
Page 62

Technical data
Technical data
Electrical d ata
Safety standards complied with: IEC 60950-1, EN 60950-1, UL
60950-1
CSA 22.2 No.60950-1
Protection class: II
Rated voltage range 100–240 V
Rated frequency 50–60 Hz (AC)
Max. rated current 1.2–0.6 A
Dimensions
with non-touch monitor
533 mm x 224 mm x 419 mm / 20.98"
x 8.82" x 16.50"
with touch monitor
554 mm x 225 mm x 433 mm /
21.18" x 8.86" x 17.05"
Width x Dept h x Height:
with touch monitor and
camera
554 mm x 225 mm x 456 mm /
21.18" x 8.86" x 17.95"
Weight
in basic configuration: approx. 1.8 kg / 3.97 lbs
with standard monitor
6.0 kg / 13.22 lbs
with touch monitor
8.9 kg / 19.62 lbs
Ambient conditions
Environment class 3K2
Environment class 2K2
DIN EN 60721-3-3
DIN EN 60721-3-2
Temperature
Operation (3K2) 15 °C .... 35 °C / 59 °F ... 95 °F
Transportation (2K2) –25 °C .... 60 °C / –13 °F ... 140 °F
The formation of condensation is not permitted while the device is in operation !
Clearance required to ensure adequate v entilation:
without air vents
with air vents
min. 10 mm / 0.39"
min. 200 mm / 7.87"
Maximum resolution 1920 x 1080
Pixel error class according to ISO 9241-307 Class I
The data sheets of these devices contain further technical data. You can find
the data sheets on the Intern et at "
http://www.fujitsu.com/fts".
58 Fujitsu
Page 63

Index
Index
A
Alphanumeric keypad 41
Anti-theft protection 50
Audio devices, connecting 2 8
Audio input 26
Audio output 26
Audio ports 28–29
B
BIOS Setup Utility
calling 48
exiting 49
operating 49
settings 48
Button,
ON/OFF switch 41
Buttons
Windows button 42
C
Cable,
connecting 25
disconnecting 25
CE marking 16
Configuration, BIOS Setup Utility 48
Connecting
USB keyboard 27
Connecting a USB mouse 27
Connecting audio devices 29
Connecting headp hones 29
Contents of delivery 19
Cord
see Cable 25
Ctrl+Alt+Del 42
Cursor keys 41
D
Data prote ction 49
Device
Ports 26
setting up 20
Device,
switching off 31
transporting 14
Devices,
connecting 27
Disposal 14
Drivers & Utilities DVD 14
E
Electromagnetic compatibility 16
Energy saving 14
Ergonomic
Workstation 20
Ethernet module 47
ExpressCard slot 8
External devices
Ports 26
External devices,
connecting 27
F
Function keys 41
G
Getting started 19
H
Hardware configuration 48
Headphones port 8
I
Important notes 12
Installing,
software 29–30
switching on for the first time 29
K
Keyboard 41
keyboard shortcuts 41
Keyboard shortcuts 42
Keyboard,
alphanumeric keypad 41
cursor keys 41
function keys 41
numeric keypad 41
Keys 41
Ctrl 42
Ctrl+Alt+Del 42
Fujitsu 59
Page 64

Index
Keys,
Alt Gr 42
Control 42
Ctrl key 42
cursor keys 41
Enter 41
Enter key 41
menu key 42
Num Lock 42
Return 41
shift 42
shift key 42
L
LAN port 26
LCD screen
notes 32
Line out 26
Low voltage directive 16
M
Mechanical backup 50
Microphone port 8
Microphone, connecting 28
Monitor
connecting 28
drifting display 54
remains blank 54
Monitor port 26, 28
Monitor,
switching off 31
N
Note
safety 12
Notes
CE marking 16
important 12
LCD screen 32
Numeric keypad 41
O
ON/OFF switch 41
Overview
Device 5
P
Packaging 19
Packaging,
unpacking 19
Password protection 50
Ports 7, 26
Power cable
connection 24
Preparing for first use, overview 1 9
Preparing for operation 24
Preparing for use,
overview 19
Presence sensor 45
Property protection 49
R
Recycling 14
Retransportation 14
S
Safety information 12
Screen
no screen display 54
Security functions
SystemLock 51
Security functions,
SmartCard 51
Security Lock 50
Security Lock device 9
Security measures 49
Serial port 26
Setup
see BIOS Setup Utility 48
Software,
installing 29–30
System configuration 48
System settings, BIOS Setup Utility 48
System unit, see Device 14
T
Transportation 14
U
Universal Serial Bus 26
USB devices,
connecting 27
USB po rt 8, 27
connecting keyboard 27
USB port,
connecting devices 27
User Documentation DVD 14
Using the Kensington Lock Cable 50
W
Webcam module 43
Workstation 20
60 Fujitsu
Page 65

Index
Fujitsu 61
 Loading...