

FUJIFILM FinePix F700 Service manual for PictBridge
DIGITAL CAMERA
F700
Service manual for PictBridge
US/EU/EG/GE/CA/AS-Model
WARNING
THE COMPORNENTS IDENTIFIED BY THE MARK “ ” ON THE SCHEMATHIC
DIAGRAM AND IN THE PARTS LIST ARE CRITICAL FOR SAFETY.
PLEASE REPLACE ONLY BY THE COMPONENTS SPECIFIED ON THE SCHEMATHIC
DIAGRAM AND IN THE PARTS LIST.
IF YOU USE WITH PART NUMBER UN-SPECIFIED, IT MAY RESULT IN A FIRE AND AN
ELECTORICAL SHOCK.
Ref.No.:ZM00533-100
FUJI PHOTO FILM CO.,LTD.
Printed in Japan 2003.12(T.S.)
FinePix F700 (US/EU/EG/GE/CA/AS) SERVICE MANUAL ( PictBridge )
SAFETY CHECK-OUT
After correcting the original problem, perform the following
safety check before return the product to the customer.
1. Check the area of your repair for unsoldered or poorly
soldered connections. Check the entire board surface
for solder splasher and bridges.
2. Check the interboard wiring to ensure that no wires are
“pinched” or contact high-wattage resistors.
3. Look for unauthorized replacement parts,
particularly transistors, that were installed during a
previous repair. Point them out to the customer and
recommend their replacement.
4. Look for parts which, though functioning, show obvious
signs of deterioration. Point them out to the customer and
recommend their replacement.
5. Check the B + voltage to see it is at the values specified.
6. Make leakage - current measurements to determine
that exposed parts are acceptably insulated from the
supply circuit before returning the product to the customer.
7. CAUTION: FOR CONTINUED
PROTECTION AGAINST FIRE
HAZARD, REPLACE ONLY WITH
SAME TYPE 2.5 AMPERES 125V
FUSE.
RISK OF FIRE-
2.5A125V
2.5A125V
8.
WARNING!
HIGH VOLTAGE
REPLACE FUSE
AS MARKED
ATTENTION: AFIN D'ASSURER
UNE PROTECTION
PERMANENTE CONTRE LES
RISQUES D'INCENDIE,
REMPLACER UNIQUEMENT
PAR UN FUSIBLE DE MEME,
TYPE 2.5 AMPERES, 125 VOLTS.
WARNING:
TO REDUCE THE ELECTRIC
SHOCK, BE CAREFUL TO
TOUCH THE PARTS.
2

FinePix F700 (US/EU/EG/GE/CA/AS) SERVICE MANUAL ( PictBridge )
CONTENTS
1. General
1-1. PictBridge overview................................................................................................... 4
1-2. PictBridge direct-printing functions and features ................................................... 4
1-3. Explanation of Terms ................................................................................................ 4
2. Download of firmware for PictBridge
2-1. Measuring Instruments Used.................................................................................... 5
2-2. Use Jig list.................................................................................................................. 5
2-3. Various downloading software decompressions, preservation methods, and notes ....... 5
2-4. Install the DSC jig driver and the PC adjustment software. .................................. 6
2-5. Initial Settings of the Adjustment Software ............................................................. 7
2-6. Starting the Adjustment Software ............................................................................ 9
2-7. [ P ] : Download of firmware for PictBridge........................................................... 11
2-8. [F12] : End Setting ................................................................................................... 13
Table of Contents
Page
3. Inspection & Parts List
3-1. Required Measuring Equipment............................................................................. 18
3-2. Connection of Measuring Equipment..................................................................... 18
3-3. Inspection method ................................................................................................... 18
4. MEMO
3

1.General
FinePix F700 (US/EU/EG/GE/CA/AS) SERVICE MANUAL
1. General
1-1. PictBridge overview
Enjoy easy digital printing without a PC! PictBridge was created to make printing digital photos even easier and more accessible. PictBridge allows you to connect a digital still camera (referred to hereafter as “digital camera”) directly to a printer without
a PC, enabling direct printing on the spot.
Due to the rapid market penetration of digital cameras, images can now be handled as digital data more easily then ever
before. However, digital image data traditionally required transfer to a PC using application software for printing: the process
was not exactly simple. A number of manufacturers have already proposed and marketed systems enabling certain digital
cameras to be connected directly to certain printers, but these only allow connection between a limited number of devices from
specific manufacturers, and have not come into widespread use as standard systems.
PictBridge is a new standard created for direct printing from digital cameras to printers, regardless of the make of either , an d a
large number of manufacturers have already announced their commitment to the standard. It is also being considered for other
applications in addition to printing from digital cameras.
1-2. PictBridge direct-printing functions and features
PictBridge allows you easily to print images captured by a digital camera without a PC. PictBridge includes a wide range of
functions, but the particular functions available will depend on the individual device specifications.
PictBridge products are capable of performing the following basic required functions.
- Connecting digital camera to printer
Y ou can connect a PictBridge digit al camera to a PictBridge printer with a USB cable. Direct connection est ablished regardless
of brand - without having to install software.
- Single image printing
The button controls can be used to print immediately an image displayed on the digital-camera LCD display.
- Error message
If an error occurs during printing, error message appears on the LCD screen or the corresponding function of the digital
camera.
Numerous other useful functions are also provided (e.g., printing multiple images, specifying the number of print copies,
printing trimmed images, specifying print size, displaying print status). These functions are only available if supported by the
devices connected.
1-3. Explanation of Terms
DPOF: Digital Print Order Format
DPOF is a format used for recording information on a storage media (image memory
card, etc.) that allows you to specify which of the frames shot using a digital camera are
to be printed and how many prints are made of each image.
Exif Print: Exif Print Format is a newly revised digital camera file format that contains a variety of
shooting information for optimal printing.
4
FinePix F700 (US/EU/EG/GE/CA/AS) SERVICE MANUAL ( PictBridge )
2. Adjustment
2. Download of firmware for PictBridge
2-1. Measuring Instruments Used
Measuring equipment Remarks
Regulated power supply For Download (The use of the AC adaptor is also possible.)
PC Used for various adjustments and operation checks
(PC-AT compatible, Windows 98Se / Me / 2000 / XP)
Printer Marketed commodity
2-2. Use Jig list
Pats.No Name Comment
FZ05282-100 USB cable This is bundled to the product
ZJ00580-100 POWER CABLE JIG Common with the FinePix3800/ S304
ZJ00668-104 FxF700 W PC Soft Ver.3.04 Operates only on English OS * Note1
ZJ00698-100 FxF700 W Pict_Upgrade PC Soft Operates only on English OS * Note1
ZJ00684-100. DSC jig driver setup Common with the All Digital Camera
FZ05211-100 AC adapter(AC-5VW) General adjustment This is bundled to the product
*Note1: Data available from WEB site.
2-3. Various downloading software decompressions, preservation methods, and notes
The PC adjustment software are in a specified Web server, and both of these are the compression of ZIP form files.
Therefore, after downloading these compression files from the Web server, the decompression of the file is necessary.
In the decompression software, if the decompression of the ZIP form can be done, any software is OK.
(Please prepare each one for the decompression software.)
The decompression and the preservation method of the PC adjustment software and the firmware are described to the following.
* The PC adjustment soft decompression and preservation method
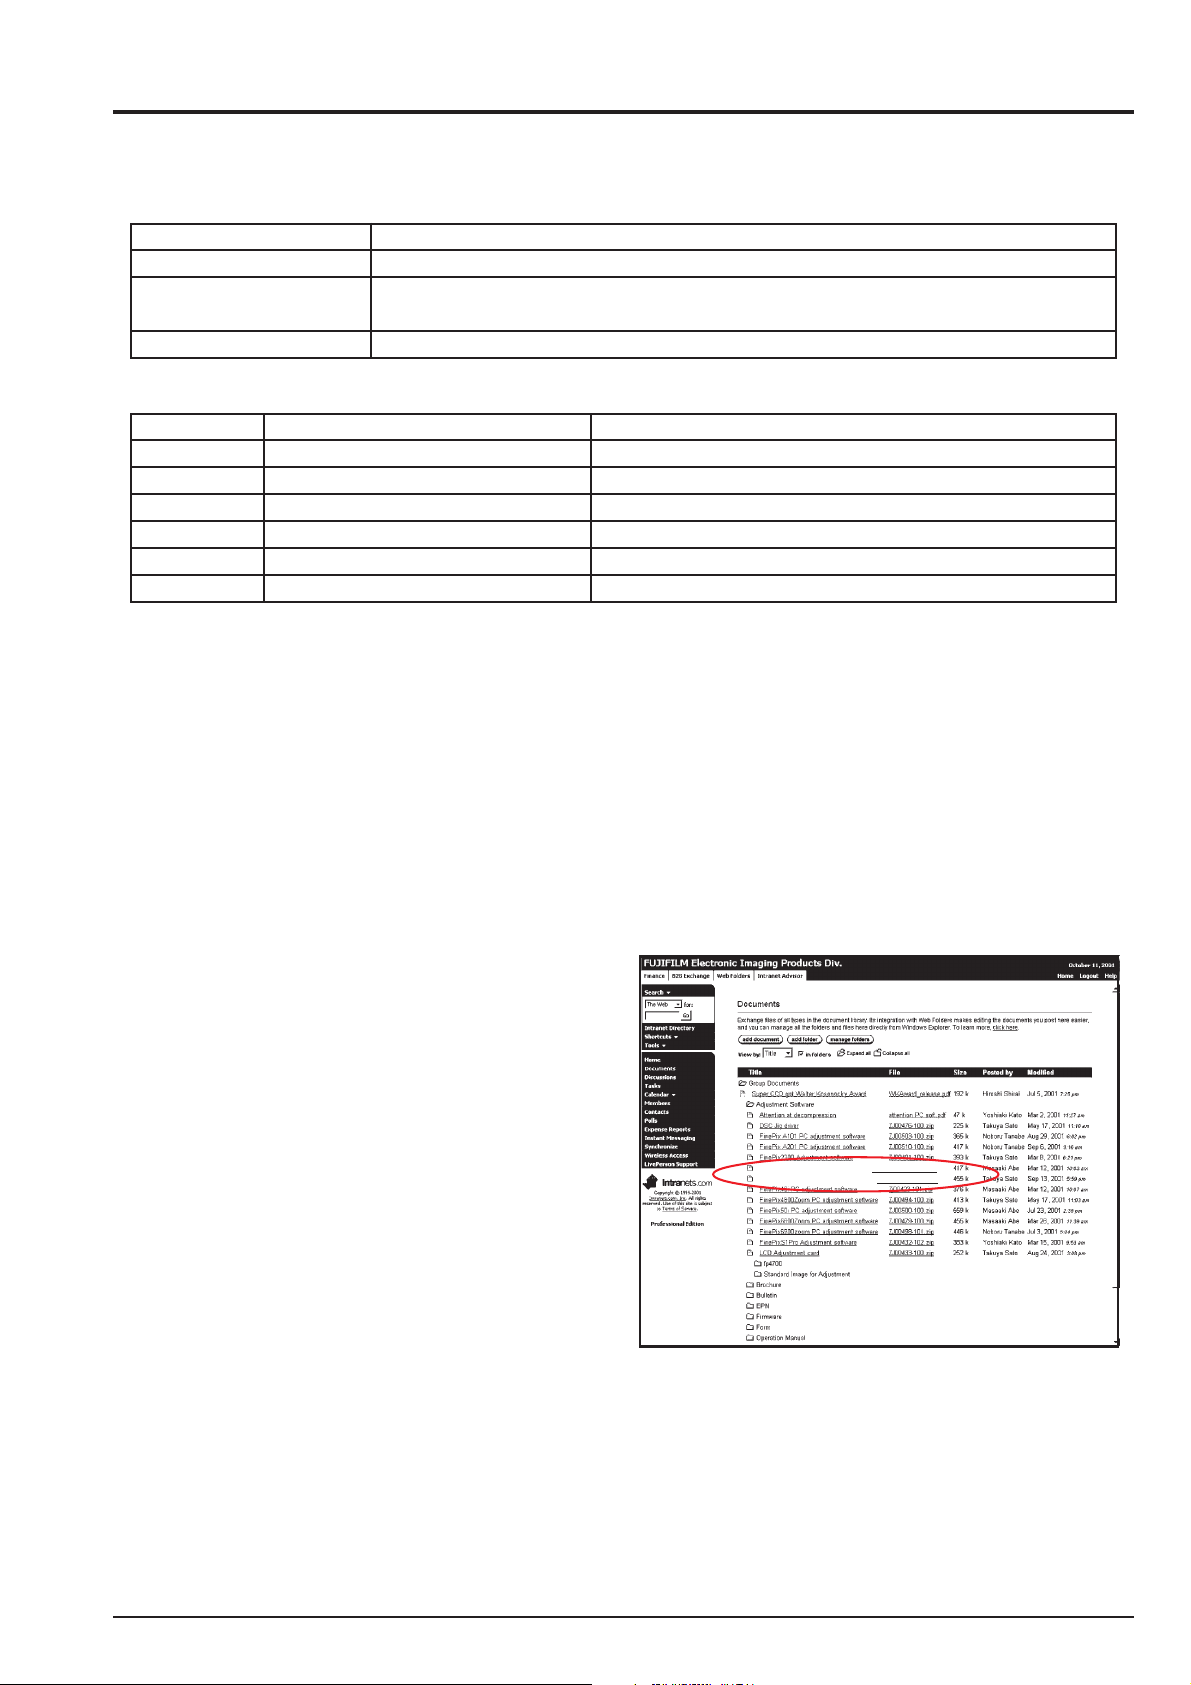
<Step1>
Download compressed PC adjustment software (ZJ00668-
104.ZIP & ZJ00698-100.ZIP) from Web server.
(http://fujifilm-di.intranets.com/). <Fig. 2>
FxF700 W PC Soft Ver.3.04
FxF700 W Pict_Upgrade PC Soft
ZJ00668-104.zip
ZJ00698-100.zip
<Step2>
<Fig. 2> Fujifilm-di.intranets Screen
Defrost the downloaded compression software.
(Note)
*Specify the preservation drive for C drive if it is decompression software which can specify the preservation drive.
*Similarly, defrost without making a new folder if it is decompression software which can be defrosted without making a new
folder.
*Defrost simply if the decompression software which you have cannot specify the drive specification and the folder making.
5

2. Adjustment
<Step3>
The folder named ZJ00698-100 can be made by defrosting
without specifying anything. <Fig. 3>
FinePix F700 (US/EU/EG/GE/CA/AS) SERVICE MANUAL ( PictBridge )
My Computer
3.5inch FD(A:)
(C:)
ZJ00698-100
FinePixF700_W_P
<Fig. 3>
Then, copy the folder named FinePixF700_W_P in this folder
in C drive.<Fig. 4>
The folder of ZJ00698-100 becomes unnecessary at the end,
and delete this folder.
* Process it as well as the above-mentioned after
ZJ00668-104 also deletes old software.
(Caution)[Important]
(a) PC adjustment software can not start when there is folder of
FinePixF700_W_P in folder named ZJ00698-100.(Fig. 4)
Please preserve the folder of FinePixF700_W_P right under C drive.(Fig. 4)
(b) Please do not change the foldername named FinePixF700_W_P.
PC adjustment software can not start when foldername is changed.
2-4.Install the DSC jig driver and the PC adjustment software.
* Since this camera uses the USB for communications with the personal computer, in order to start the PC adjustment software, [the DSC jig driver] needs to be installed in the personal computer beforehand.
My Computer
3.5inch FD(A:)
(C:)
ZJ00698-100
FinePixF700_W_P
<Fig. 4>
(1)
(1)Installation of DSC jig driver
<Step 1>
DSC jig driver(ZJ00684-100.ZIP) is downloaded from
Web server (http://fujifilm-di.intranets.com/).
<Step 2>
Defrost the downloaded compression software
<Step 3>
Double-click [FUJIFILM DSC JIG Driver Install.exe] in
the folder of defrosted ZJ00684-100 and install Fuji FILM
DSC Jig Driver as follows.
<Step 4>
Install the software in [C:\ProgramFiles\Fjig]
according to the instructions on the PC's screen.
(2)Startup of PC adjustment software
When the folder has been copied to the C drive, double-
click on the file C:\FinePixF700_W_P\ffw.exe (Fig.5(2))
to start the adjustment software.
_P
<Fig. 5>
6
 Loading...