

Page 1
DIGITAL CAMERA
FinePix F440
TROUBLESHOOTING GUIDE
z THE COMPONENTS IDENTIFIED BY THE MARK “
DIAGRAM AND IN THE PARTS LIST ARE CRITICAL FOR SAFETY.
PLEASE REPLACE ONLY BY THE COMPONENTS SPECIFIED ON THE SCHEMATIC
DIAGRAM AND IN THE PARTS LIST.
WARNING
US/CA/EU/EG/GE/AS-Model
” ON THE SCHEMATIC
z IF YOU USE PARTS NOT SPECIFIED, IT MAY RESULT IN A FIRE AND AN
ELECTRICAL SHOCK.
Ref.No.: ZM00554-400
FUJI PHOTO FILM CO., LTD.
Printed in Japan 2005. 01
Page 2
FinePix F440 TROUBLESHOOTING GUIDE
SAFETY CHECK-OUT
After correcting the original problem, perform the following
safety check before return the product to the customer.
1. Check the area of your repair for unsoldered or
poorly soldered connections. Check the entire
board surface for solder splasher and bridges.
2. Check the interboard wiring to ensure that no
wires are “pinched” or contact high-wattage
resistors.
3. Look for unauthorized replacement parts,
particularly transistors, that were installed during
a previous repair. Point them out to the customer
and recommend their replacement.
4. Look for parts which, though functioning, show
obvious signs of deterioration. Point them out to
the customer and recommend their replacement.
5. Check the B + voltage to see it is at the values
specified.
6. Make leakage - current measurements to
determine that exposed parts are acceptably
insulated from the supply circuit before returning
the product to the customer.
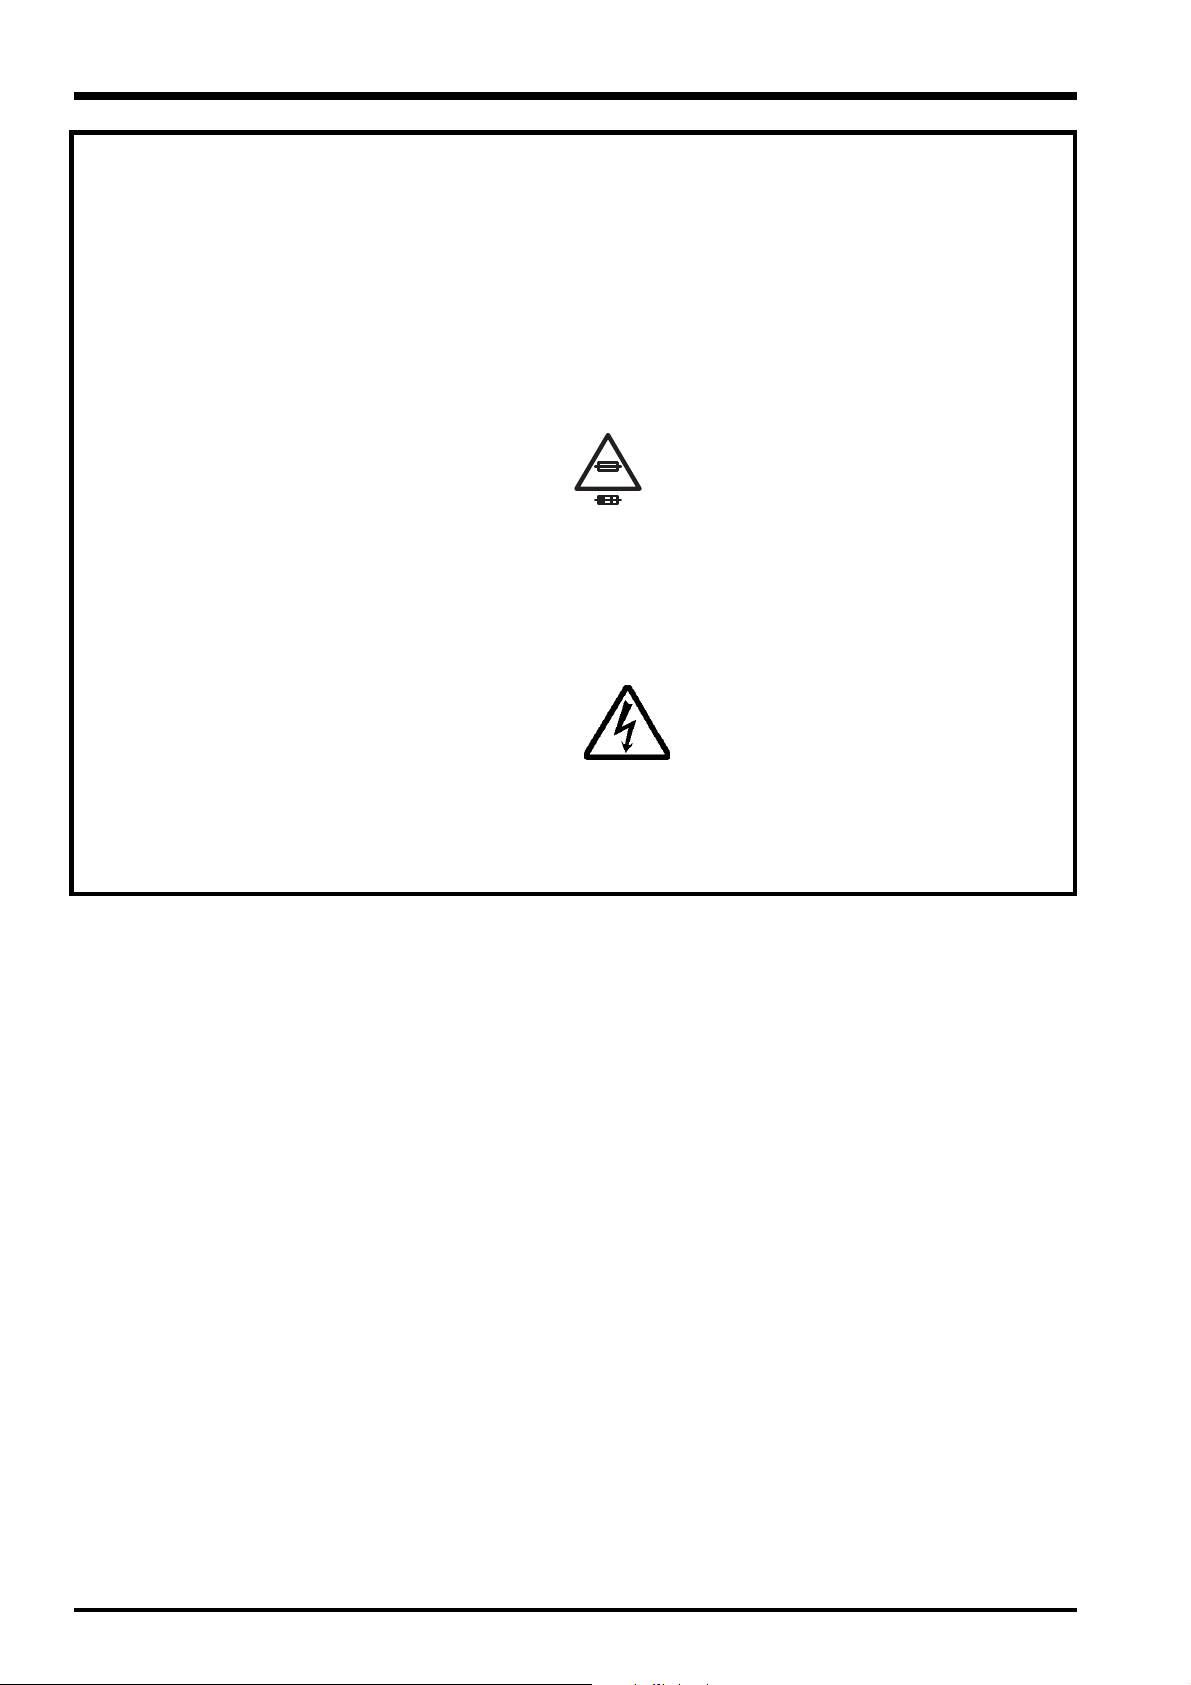
7.
2.5A 125V
2.5A 125V
8.
RISK OF FIREREPLACE FUSE
AS MARKED
WARNING!
HIGH VOLTAGE
CAUTION: FOR CONTINUED
PROTECTION AGAINST FIRE
HAZARD, REPLACE ONLY
WITH SAME TYPE 2.5
AMPERES 125V FUSE.
ATTENTION: AFIN
D'ASSURER UNE
PROTECTION PERMANENTE
CONTRE LES RISQUES
D'INCENDIE, REMPLACER
UNIQUEMENT PAR UN
FUSIBLE DE MEME, TYPE 2.5
AMPERES, 125 VOLTS.
WARNING:
TO REDUCE THE ELECTRIC
SHOCK, BE CAREFUL TO
TOUCH THE PARTS.
2
Page 3

FinePix F440 TROUBLESHOOTING GUIDE
TABLE CONTENTS
1. Image and trace ................................................................................................................................4
1-1. Live image and photographed image completely black .............................................................................................. 4
1-2. Live image and photographed image disrupted ......................................................................................................... 4
1-3. Live image and photographed image disrupted ......................................................................................................... 5
1-4. No image.................................................................................................................................................................... 6
1-5. Live image and photographed image completely black .............................................................................................. 6
2. LCD ....................................................................................................................................................7
2-1. LCD image defect (no image formed) ........................................................................................................................ 7
2-2. LCD image defect (Completely white) ........................................................................................................................ 7
2-3. LCD image defect (Completely white) ........................................................................................................................ 8
2-4. LCD image defect (Completely white) ........................................................................................................................ 8
2-5. LCD image defect (Horizontal white lines) ................................................................................................................. 9
2-6. Missing LCD pixels..................................................................................................................................................... 9
2-7. No image on the LCD (lower third white).................................................................................................................. 10
2-8. LCD split................................................................................................................................................................... 10
3. Power............................................................................................................................................... 11
3-1. Warning tone sounds and the power fails ................................................................................................................ 11
3-2. Power cannot be turned off (occasional) .................................................................................................................. 11
3-3. No power.................................................................................................................................................................. 12
3-4. No power.................................................................................................................................................................. 12
3-5. No power.................................................................................................................................................................. 12
3-6. No power.................................................................................................................................................................. 13
3-7. No power (Both AC adapter and battery) ................................................................................................................. 13
4. Strobe ..............................................................................................................................................14
4-1. Orange LED continues to flash when the camera is turned on in CAM mode .......................................................... 14
4-2. Flash does not fire.................................................................................................................................................... 14
4-3. Flash does not fire.................................................................................................................................................... 14
5. Exterior............................................................................................................................................ 15
5-1. Battery cover will not open ....................................................................................................................................... 15
5-2. R panel coating peeling off ....................................................................................................................................... 15
5-3. Battery lock hook dislodged ..................................................................................................................................... 16
5-4. Release button dislodged ......................................................................................................................................... 16
6. Lens .................................................................................................................................................17
6-1. Live image completely black .................................................................................................................................... 17
6-2. The camera will not focus......................................................................................................................................... 17
6-3. Zooming error occurs ............................................................................................................................................... 17
6-4. Lens fails to retract ................................................................................................................................................... 17
6-5. Lens fails to retract ................................................................................................................................................... 17
6-6. Horizontal lines on photographed images with white flaring ..................................................................................... 18
6-7. Horizontal lines on photographed images with white flaring ..................................................................................... 18
6-8. Lens barrier open/close defect (fails to fully close)................................................................................................... 19
6-9. Lens barrier open/close defect (fails to fully close)................................................................................................... 19
6-10. Lens barrier open/close defect (Fails to fully open) .................................................................................................. 20
6-11. Lens barrier open/close defect (Stays open) ............................................................................................................ 20
6-12. Lens barrier open/close defect (fails to fully close)................................................................................................... 20
6-13. Lens bent ................................................................................................................................................................. 21
6-14. Lens fails to retract ................................................................................................................................................... 21
7. Operation ........................................................................................................................................22
7-1. Control buttons do not work (UP, DOWN, LEFT and RIGHT) .................................................................................. 22
7-2. Zoom and Left/Right buttons do not work................................................................................................................. 22
8. Other................................................................................................................................................ 23
8-1. No sound.................................................................................................................................................................. 23
8-2. Does not turn on....................................................................................................................................................... 23
3
Page 4

FinePix F440 TROUBLESHOOTING GUIDE
1. Image and trace
1-1. Live image and photographed image completely black
Fault details:
Analysis results:
Repair details:
Resolder the CCD FPC
Live image and photographed image completely black.
Pressing on the MAIN PWB sometimes produces a normal image. This fault is due to
der lifting on pin 22 and 24 in CN101 (the CCD FPC connector). Resoldering remedies
sol
the problem.
are no visible signs of impacts on the outer casing. The cause is presumed to be
There
ess that was applied to the connector during assembly, rupturing the solder and leading
str
to
subsequent breakage.
CN101 24, 22PIN
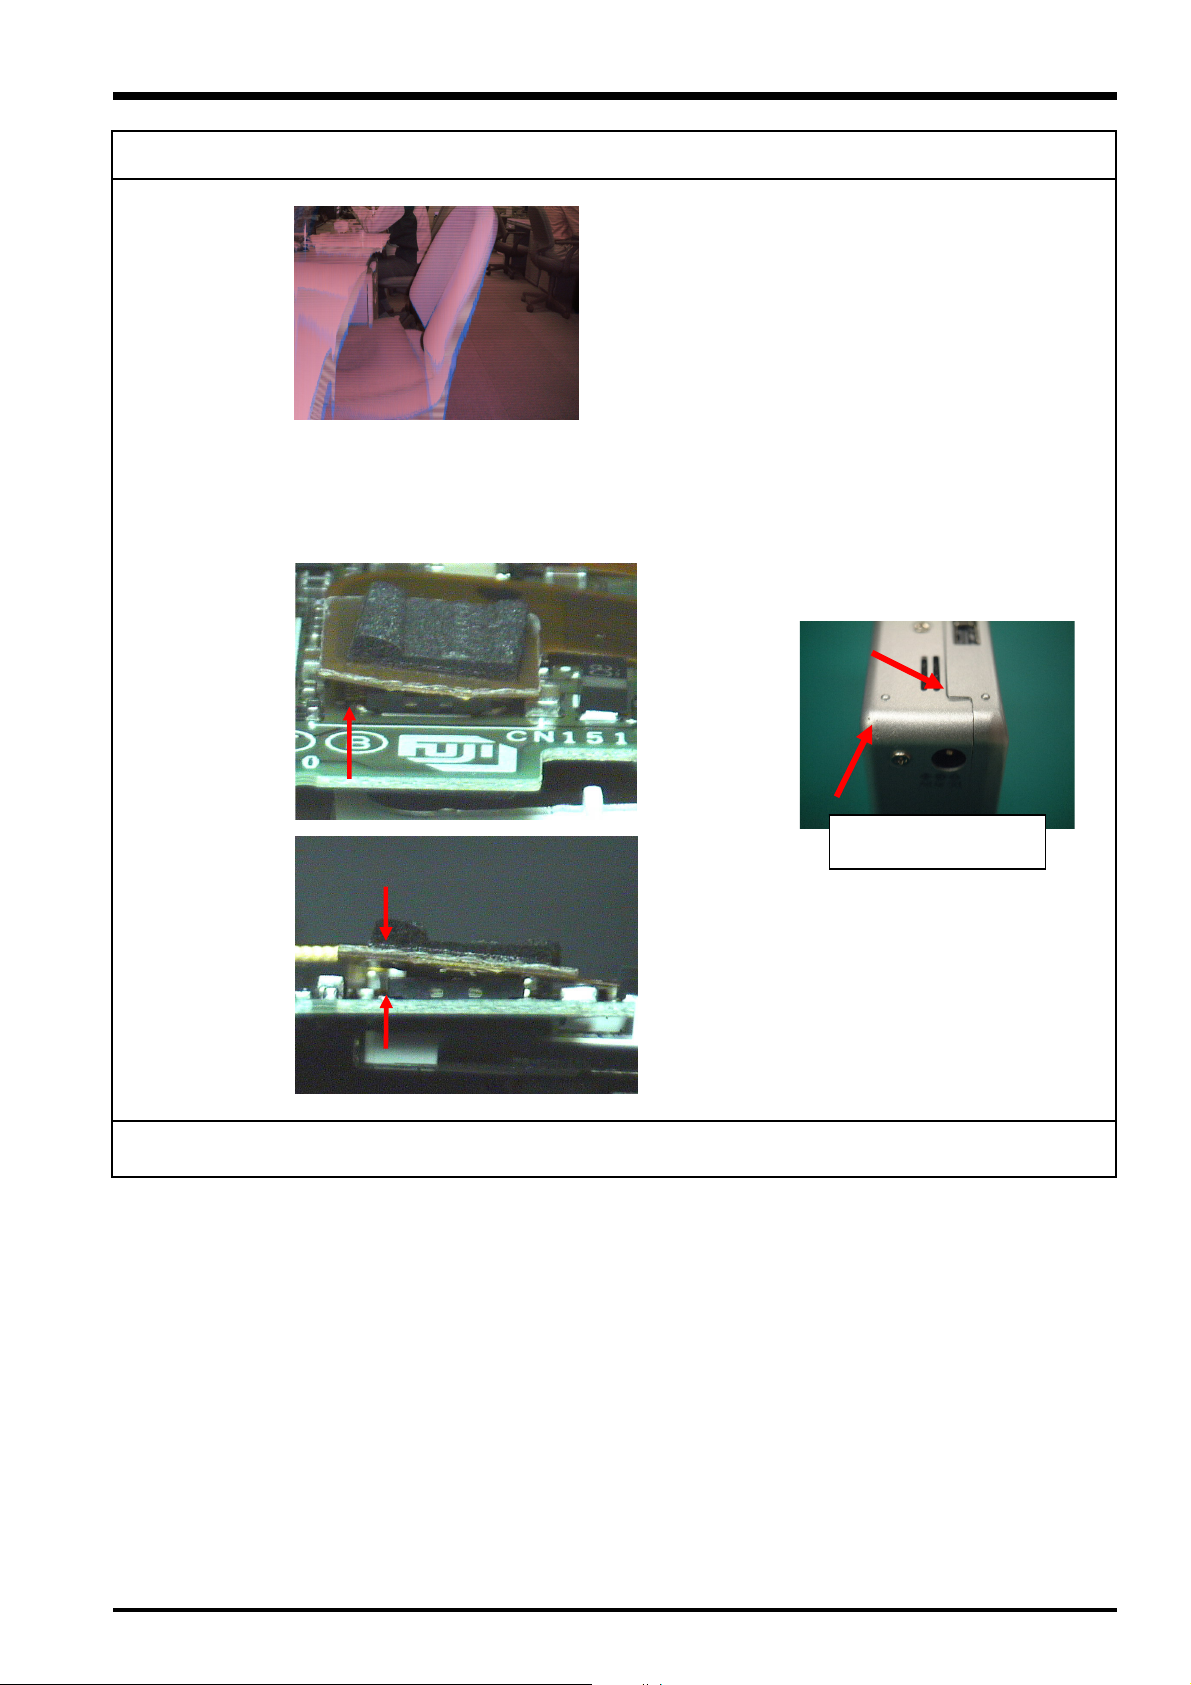
1-2. Live image and photographed image disrupted
Fault details:
Analysis results:
Live image and photographed image disrupted.
Light knocking sometimes produces a normal image. Internal disassembly and checking
ed that CN101 (the CCD FPC connector) was improperly connected (on an angle) to
reveal
MAIN PWB CN151 and defective connections were causing the above symptoms. We
the
confirmed that the fault did not recur once the parts were reconnected.
There
are no visible signs of impacts on the outer casing. It is unclear whether the fault
was caused by incomplete connection during assembly or something that occurred
bsequently. One end of the CCD FPC cushion (BB18414-100) was displaced and was
su
protrudi
ng from its mount (the work instructions specify no protrusion).
Protruding Cushion
Repair details:
CN101 adjustment
4
Side view of the
CN101
Page 5
FinePix F440 TROUBLESHOOTING GUIDE
1-3. Live image and photographed image disrupted
Fault details:
Analysis results:
Live image and photographed image disrupted.
Light knocking sometimes produces a normal image. Internal disassembly and checking
revealed that CN101 (the CCD FPC connector) was improperly connected (on an angle) to
the MAIN PWB CN151 and defective connections were causing the above symptoms. We
confirmed that the fault did not recur once the parts were reconnected.
There is an impact mark on the lower-right side of the outer casing and the cabinet seam
is skewed, indicating that the connector was dislodged by an impact of some kind.
Repair details:
Adjust CN101 and replace the cabinet
Impact mark and
skewed seam
5
Page 6
1-4. No image
FinePix F440 TROUBLESHOOTING GUIDE
Fault details:
Analysis results:
No image (Live image and photographed image completely black).
Light knocking sometimes produces a normal image. Internal disassembly and checking
reveal
ed that CN101 (the CCD FPC connector) was improperly connected (on an angle) to
MAIN PWB CN151 and defective connections were causing the above symptoms. We
the
confirmed that the fault did not recur once the parts were reconnected.
are no visible signs of impacts on the outer casing. It is unclear whether the fault
There
was caused by incomplete connection during assembly or something that occurred
subsequently.
Repair details:
CN101 adjustment
1-5. Live image and photographed image completely black
Fault details:
Analysis results:
Live image and photographed image completely black.
Internal disassembly and checking revealed that CN101 (the CCD FPC connector) was
nnected from the MAIN PWB CN151 and defective connections were causing the
disco
symptoms. We confirmed that the fault did not recur once the parts were
above
nected.
recon
are no visible signs of impacts on the outer casing. It is unclear whether the fault
There
was caused by incomplete connection during assembly or something that occurred
subsequently.
Repair details:
CN101 adjustment
6
Page 7
FinePix F440 TROUBLESHOOTING GUIDE
2. LCD
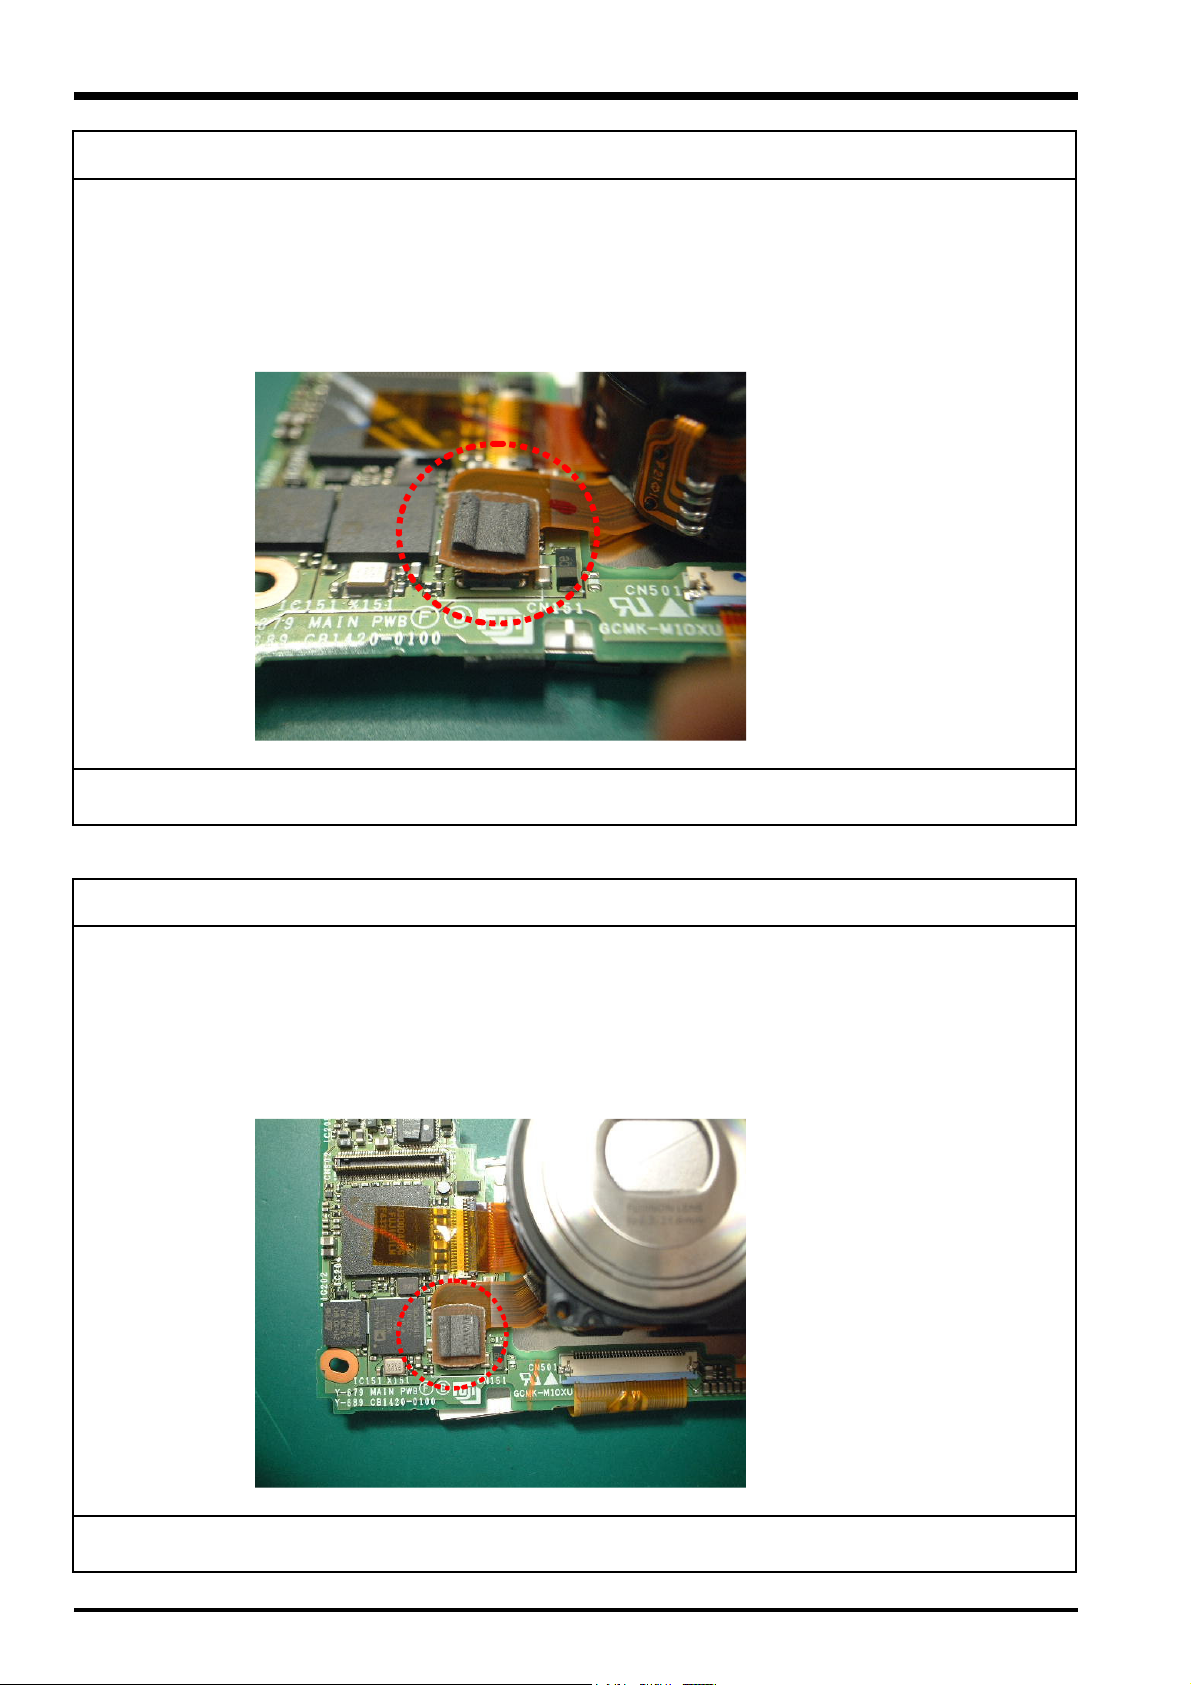
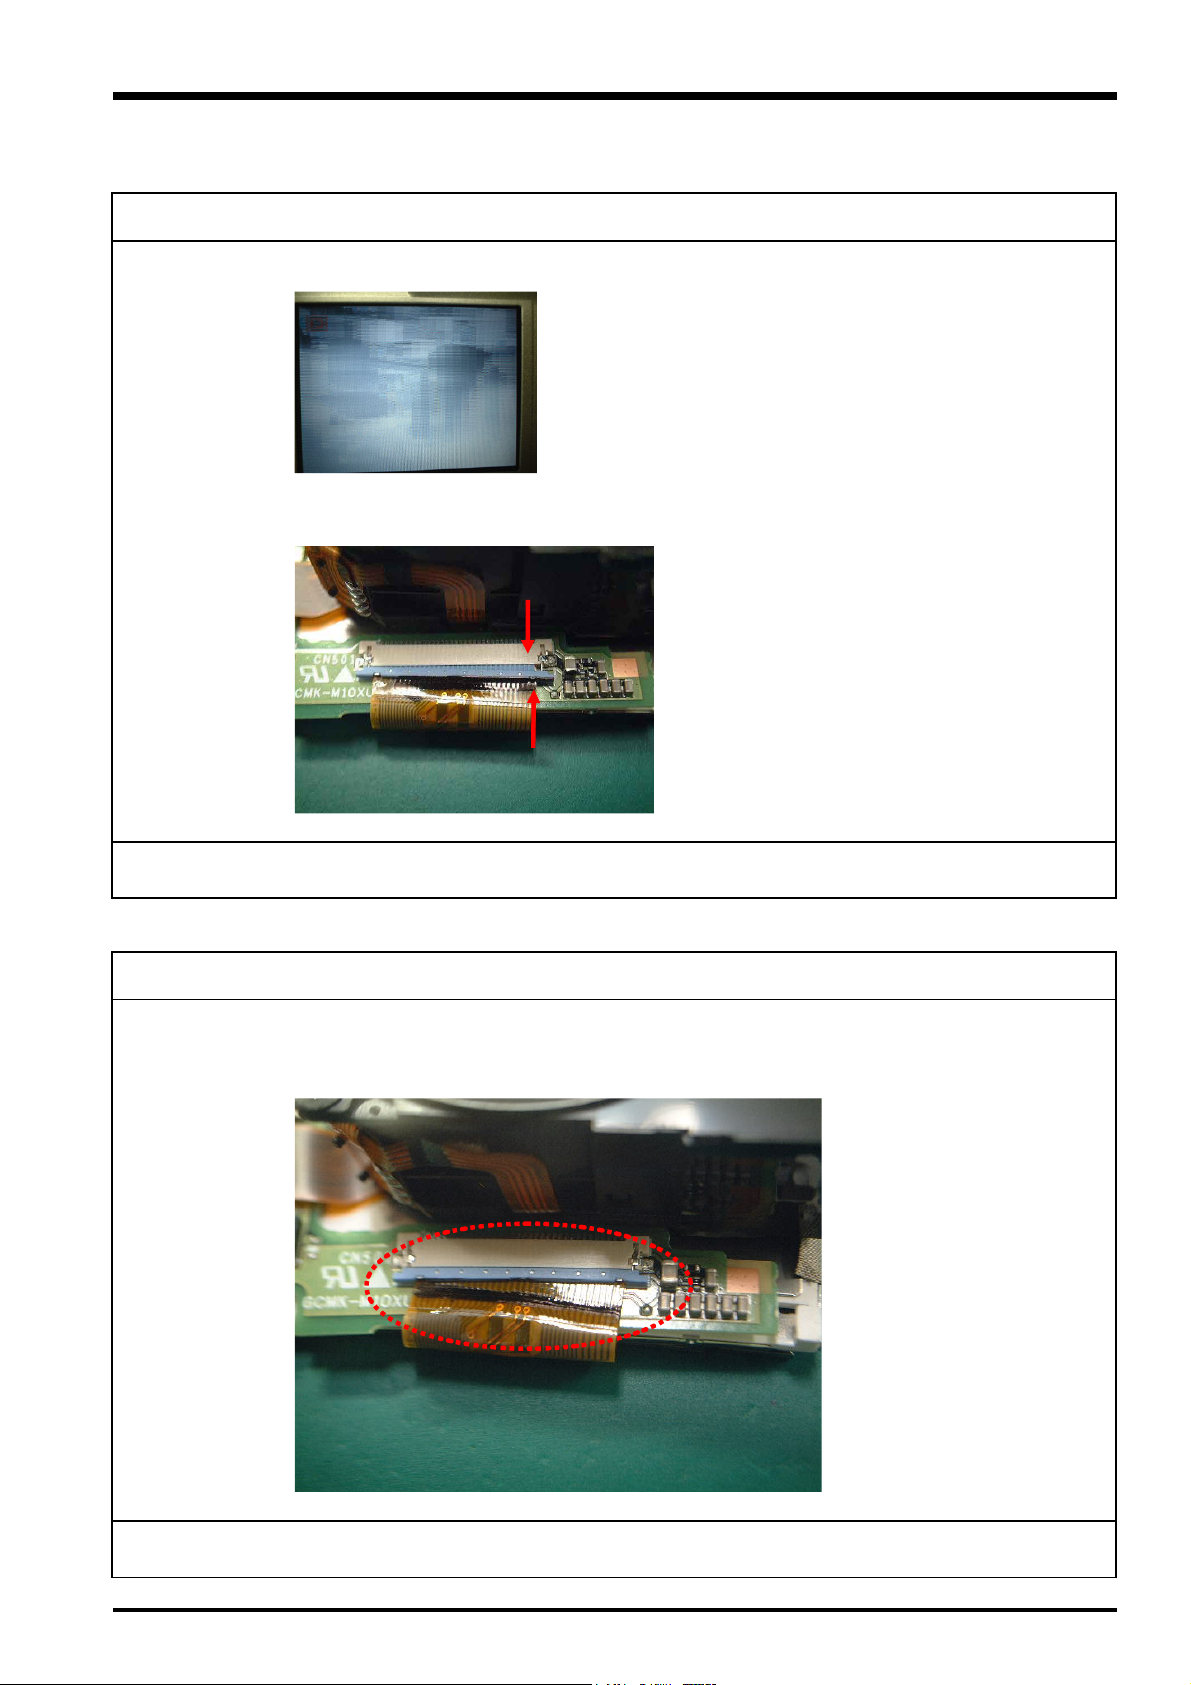
2-1. LCD image defect (no image formed)
Fault details:
Analysis results:
LCD image defect (No image is formed and pressing down on the outer casing changes
symptoms).
the
The connection problems are due to incomplete flexible cable locking on MAIN PWB
CN501
pro
(the flexible connector for the LCD). We confirmed that reconnecting the cable
duced a normal image.
Repair details:
CN501 adjustment
2-2. LCD image defect (Completely white)
Fault details:
Analysis results:
LCD image defect (Completely white).
The connection problems are due to incomplete flexible cable locking on MAIN PWB
CN501
pro
(the flexible connector for the LCD). We confirmed that reconnecting the cable
duced a normal image.
Repair details:
Re-insert the LCD flexible cable
7
Page 8
2-3. LCD image defect (Completely white)
FinePix F440 TROUBLESHOOTING GUIDE
Fault details:
Analysis results:
Repair details:
Replace the LCD CONST
No image on the LCD (completely white with faint horizontal lines).
Replacing the LCD CONST produces a normal image. Caused by LCD CONST
com
ponent defects.
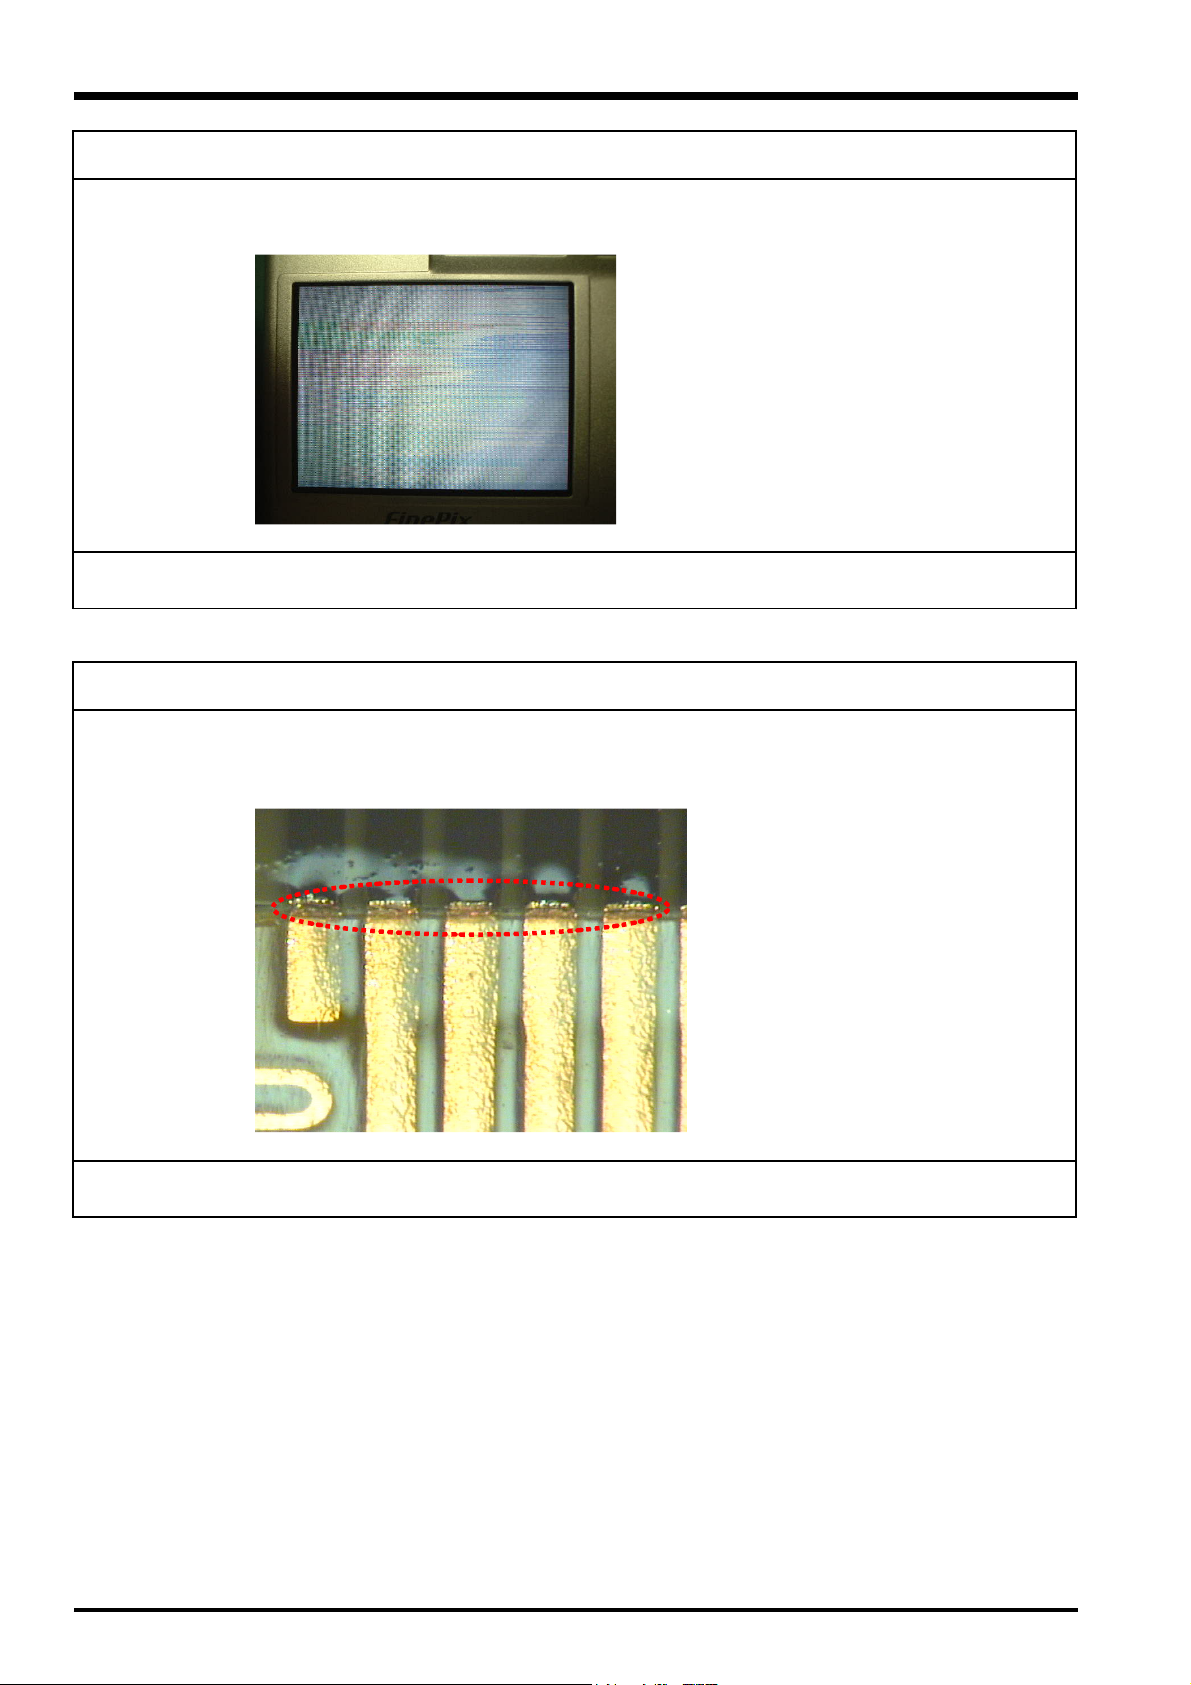
2-4. LCD image defect (Completely white)
Fault details:
Analysis results:
LCD image defect (Completely white. Remedied by light knocking.).
Pressing on the LCD flexible cable produces a normal image. Caused by broken wiring in
on where the LCD flexible cable is folded over at the LCD panel connection.
locati
Rep
lacing the LCD CONST remedies the problem.
Repair details:
Replace the LCD CONST
8
Page 9

FinePix F440 TROUBLESHOOTING GUIDE
2-5. LCD image defect (Horizontal white lines)
Fault details:
Analysis results:
Horizontal white lines appear on the LCD.
Horizontal white lines appear on the LCD. Caused by an LCD fault.
Repair details:
Replace the LCD CONST
2-6. Missing LCD pixels
Fault details:
Analysis results:
Missing LCD pixels.
Bright red dots slightly above the center of the LCD. Judged to be outside the specified
range.
Repair details:
Replace the LCD CONST
9
Page 10

2-7. No image on the LCD (lower third white)
FinePix F440 TROUBLESHOOTING GUIDE
Fault details:
Analysis results:
Repair details:
Replace the LCD CONST
No image on the LCD (lower third white).
Replacing the LCD CONST produces a normal image. Caused by LCD CONST
com
ponent defects.
2-8. LCD split
Fault details:
Analysis results:
LCD split.
There is an indentation in LCD section indicated in the illustration (just above the center)
cracks radiate out from the indentation. There are no flexure on the outer casing. The
and
cause is presumed to be breakage caused by unexpected pressure applied to the LCD
panel.
Repair details:
Replace the LCD CONST
10
Page 11

FinePix F440 TROUBLESHOOTING GUIDE
3. Power
3-1. Warning tone sounds and the power fails
Fault details:
Analysis results:
Repair details:
Replace the DCST PWB ASSY SW401
The power supply fails.
Very occasionally, in both CAM mode and playback mode, the camera beeps once and
loses power. When this problem occurs in CAM mode after a picture is taken and is
then
recorded onto the media, the camera emits several short warning beeps before
being
shutting
(SW
down. This results in chattering in the card cover open/close detection switch
401 DCST PWB).
3-2. Power cannot be turned off (occasional)
Fault details:
Analysis results:
The power sometimes cannot be turned off.
When the F panel was compared to a normal part, the ON/OFF operation when the lower
t of the power switch was moved was found to be particularly insecure. This was
par
because
disl
ON/OFF
the grip guide in the power switch slider on the M201 F PANEL ASSY was
odged from the guide and was moving up and down while sliding, resulting in insecure
operation in the PW SW (SW851) on the MULTI PWB ASSY.
Repair details:
Replace the F PANEL ASSY
Comparison with a
normal
part
11
Page 12

3-3. No power
FinePix F440 TROUBLESHOOTING GUIDE
Fault details:
Analysis results:
Repair details:
Replace the JACK FPC ASSY (M225)
No power.
Replacing the M225 (JACK FPC) corrects the problem. There was rust on the equivalent
co
nnecting (1) pin side and the connection was defective.
3-4. No power
Fault details:
Analysis results:
No power (Both AC adapter and battery).
85mA flows when the camera is turned on and continues to flow when it is turned off.
Caused by a MAIN PWB ASSY fault.
Repair details:
Replace the MAIN PWB ASSY
3-5. No power
Fault details:
Analysis results:
Repair details:
Replace the MAIN PWB ASSY
No power.
The power flows momentarily when the camera is turned on but the camera does not
up (with the AC adapter and battery, in both CAM and playback modes). Caused
start
by a MAIN PWB ASSY fault.
12
Page 13

FinePix F440 TROUBLESHOOTING GUIDE
3-6. No power
Fault details:
Analysis results:
No power.
The camera does not start up at all when turned on. Disassembly and checking revealed
that the PW SW (SW851/Power switch) lever on the multi FPC had broken off. We
confirmed that replacing the broken part resulted in normal operation.
In addition, from the fact that the SHEET F PANEL ASSY was split when it was stuck in
place and because the log used still remained in the log data, we concluded that SW851
was damaged because the inner block was assembled with the power switch set to OFF
when the camera was disassembled and reassembled after shipment.
Split SHEET F PANEL ASSY
Repair details:
Replace the MULTI PWB ASSY
Broken SW581
3-7. No power (Both AC adapter and battery)
Fault details:
Analysis results:
Replacing the DCST PWB ASSY remedied the problem.
Because the DCST PWB ASSY F402 (2A fuse, CAM 3.3 V, D3.3 V, DC 3.3 V power
circuit) is blown, when the assembly was replaced and the camera started up with the
current limit applied, the camera does not operate with the full-limit current flowing. This
is caused by a short-circuit (approx. 0.3Ω) in C422 (tantalum 100µ/6.3 V). Replacing
C422 remedies the problem. We measured the voltage waveform for the same part in
normal conditions (at room temperature and low temperature) but did not observe any
abnormal voltage that exceeded the withstand voltage, so we concluded that the
problem was due to a C422 component fault.
Repair details:
Replace the DCST PWB ASSY (C422, F402)
With power ON At release
13
Page 14

FinePix F440 TROUBLESHOOTING GUIDE
4. Strobe
4-1. Orange LED continues to flash when the camera is turned on in CAM mode
Fault details:
Analysis results:
Repair details:
Replace the TOP ASSY (M206)
Pictures cannot be taken. (The orange LED in the viewfinder continues to flash when the
camera is turned on in CAM mode.
Flash charging does not complete after the camera is turned on. The voltage does not rise
in the main capacitor.)
4-2. Flash does not fire
Fault details:
Analysis results:
Repair details:
Replace the DCST PWB ASSY
Flash does not fire.
After the camera is turned ON, the orange LED in the viewfinder flashes and then turns off
but the voltage does not rise in the main capacitor and the flash will not fire.
Occurs when the main capacitor is fully discharged. Caused by a fault in the DCST PWB
ASSY.
4-3. Flash does not fire
Fault details:
Analysis results:
The flexible cable connection for the flash in DCST PWB ASSY CN601 is loose. We
Repair details:
DCST CN601 adjustment
Flash does not fire.
Orange LED continues to flash after the camera is turned on and pictures cannot be taken
(voltage rises in the main capacitor).
confirmed that re-inserting the connection remedies the problem. Presumed to be caused
an installation defect during assembly.
14
Page 15

FinePix F440 TROUBLESHOOTING GUIDE
5. Exterior
5-1. Battery cover will not open
Fault details:
Analysis results:
Repair details:
Replace the battery cover and the F and R CABI ASSY
Battery cover will not open.
There is a large scratch in the battery cover and the R panel is pushed in. The F and R
ls are also deformed. There has been an impact to the battery cover due to the
pane
era being dropped, etc., pushing in the F and R panels and it is presumed that this is
cam
ca
using the malfunction.
5-2. R panel coating peeling off
Fault details:
Analysis results:
Repair details:
Replace the R CABI ASSY
R panel coating peeling off.
The R panel coating is peeling off. The camera log data indicates that it has hardly been
ed (shutter count: 3). We cannot determine whether the peeling is caused by an impact,
us
etc., or by a coating defect.
15
Page 16

5-3. Battery lock hook dislodged
FinePix F440 TROUBLESHOOTING GUIDE
Fault details:
Analysis results:
Battery lock hook dislodged.
Internal disassembly and checking revealed that the retaining component on the M215
(LOCK HOOK) on the battery lock part M217 (LOCK PLATE) is bent upwards. No
abnormality was observed in the dislodged LOCK HOOK. We concluded that the problem
was caused by the application of a strong force to the LOCK HOOK that bent the LOCK
PLATE at the same time as it broke off the LOCK HOOK.
M215
M217
Repair details:
Replace the M217 (LOCK PLATE), M215 (LOCK HOOK)
Comparison with a normal part
5-4. Release button dislodged
Fault details:
Analysis results:
Repair details:
Replace the release button unit and R CABI ASSY.
Release button dislodged.
There is a large impact mark in the R panel. There is also damage (scratched plating)
consistent with the use of excessive force to remove mount for the metal fitting of the
release button holder upwards. This suggests that the dislodged button was caused by the
application of excessive force to that component.
There is no twisting in the
release holder mount fitting.
16
Page 17

FinePix F440 TROUBLESHOOTING GUIDE
6. Lens
6-1. Live image completely black
Fault details:
Analysis results:
Repair details:
Replace the LENS CONST (M233)
Live image completely black.
The internal lens aperture blades do not open after the camera is turned on. The live
image and photographed images are completely black. Cause by lens damage. There are
no scratches, etc., on the lens or outer casing.
6-2. The camera will not focus
Fault details:
Analysis results:
Repair details:
Replace the LENS CONST (M233)
The camera will not focus (no focusing error or zooming error occurs).
There is a rattling noise when the lens is shaken (with the lens extended) suggesting that
there is a dislodged lens component. There are no traces of damage, etc., on the lens or
outer casing. Replacing the lens remedies the problem.
6-3. Zooming error occurs
Fault details:
Analysis results:
Repair details:
Replace the LENS CONST (M233)
Zooming error occurs (not reproduced).
On arrival, the lens barrier was completely open (with the lens retracted). Presumed to be
due to a lens fault. There are no visible scratches, damage marks, etc., on the outer
casing.
6-4. Lens fails to retract
Fault details:
Analysis results:
Repair details:
Replace the LENS CONST (M233)
Lens fails to retract (focusing error displayed).
Caused by a lens fault. There are no visible damage marks, etc., on the camera's outer
casing or on the lens.
6-5. Lens fails to retract
Fault details:
Analysis results:
Repair details:
Replace the LENS CONST (M233)
Lens fails to retract (When the camera is turned off, the lens does not retract, does not
focus and no zooming or focusing errors are displayed.).
The lens does not retract and the barrier does not close when the camera is turned off.
There is a rattling noise when the lens is shaken, suggesting a lens component fault.
There are no traces of damage, etc., on the outer casing.
17
Page 18

FinePix F440 TROUBLESHOOTING GUIDE
6-6. Horizontal lines on photographed images with white flaring
Fault details:
Horizontal lines on photographed images with white flaring.
Analysis results:
Repair details:
Replace the LENS CONST (M233)
Live images and movies are displayed normally. The photography information for
photographed images (shutter speed, F stop) is no different from that on comparison
models.
Replacing the lens remedies the problem but replacing the lens CCD only does not
improve the symptoms. A shutter malfunction occurs (the shutter stays open).
6-7. Horizontal lines on photographed images with white flaring
Fault details:
Horizontal lines on photographed images with white flaring.
Analysis results:
Repair details:
Replace the LENS CONST (M233)
Live images and movies are displayed normally. The photography information for
photographed images (shutter speed, F stop) is no different from that on comparison
models.
Remedied by replacing the lens. A shutter malfunction occurs (the shutter stays open).
Based on examples of initial follow-up for the same fault, we concluded that the problem is
due to the use of a wet-type lubricant on the shutter blades.
18
Page 19

FinePix F440 TROUBLESHOOTING GUIDE
6-8. Lens barrier open/close defect (fails to fully close)
Fault details:
Analysis results:
Repair details:
Replace the LENS CONST (M233)
Lens barrier open/close defect (fails to fully close).
The lower part of the lens barrier fails to close fully after the lens retracts when the camera
is
turned off. Caused by a lens fault.
6-9. Lens barrier open/close defect (fails to fully close)
Fault details:
Analysis results:
Lens barrier open/close defect (fails to fully close). Inconsistent operation during lens
extension/retraction.
Internal disassembly and checking revealed that there were many small grains of sand
de the camera body and lens, resulting in defects in lens extension, retraction and
insi
operation.
barrier
Repair details:
Replace the LENS CONST (M233)
19
Page 20

FinePix F440 TROUBLESHOOTING GUIDE
6-10. Lens barrier open/close defect (Fails to fully open)
Fault details:
Analysis results:
Repair details:
Replace the LENS CONST (M233)
Lens barrier open/close defect (Fails to fully open).
The lens barrier does not open fully when the camera is turned on and the lens extends.
Caused by a lens fault.
6-11. Lens barrier open/close defect (Stays open)
Fault details:
Analysis results:
Repair details:
Replace the LENS CONST (M233)
The lens cover stays open.
Upon arrival, the lens barrier was fully open, but closed when the camera was turned on
and off once. However, closing was slower than normal and the barrier was caught on
something as it closed. Caused by a lens fault.
6-12. Lens barrier open/close defect (fails to fully close)
Fault details:
Analysis results:
Repair details:
Replace the LENS CONST (M233)
Lens barrier open/close defect (fails to fully close).
The lens barrier does not open fully when the camera is turned on and the lens extends.
20
Page 21

FinePix F440 TROUBLESHOOTING GUIDE
6-13. Lens bent
Fault details:
Analysis results:
Lens bent (does not retract and a zooming error is displayed).
The lens is bent and scratched. Presumed to be due to lens damage caused by an impact,
etc, while the lens was extended.
Repair details:
Replace the lens
6-14. Lens fails to retract
Fault details:
Analysis results:
Repair details:
Replace the LENS CONST (M233)
Lens fails to retract (focusing error displayed).
Caused by lens damage. No scratches or impact marks were observed on the camera
casing or lens.
21
Page 22

FinePix F440 TROUBLESHOOTING GUIDE
7. Operation
7-1. Control buttons do not work (UP, DOWN, LEFT and RIGHT)
Fault details:
Analysis results:
Repair details:
Replace the KEY FPC ASSY (M237)
Control buttons do not work (UP, DOWN, LEFT and RIGHT).
The key detection UP, DOWN, LEFT and RIGHT buttons do not work at all. Replacing the
KEY FPC ASSY remedies the problem.
The voltage across R809 (quad resistors) (4) and (5) in the key detection RLDU (UP,
DOWN, LEFT, RIGHT) circuit with a split voltage of 3.3 V applied is almost the same, so
that the stipulated voltage is not applied to the RLDU lines when a button is pressed,
resulting in these symptoms. The measured resistance between R809 (4) and (5) is 1.7
KΩ, indicating that the problem is caused by a short-circuit around R809 (solder bridging,
etc.).
7-2. Zoom and Left/Right buttons do not work
Fault details:
Analysis results:
Repair details:
Replace the KEY FPC ASSY (M237)
Zoom and Left/Right buttons do not work.
We confirmed that replacing the components while mounted on the R panel KEY FPC
ASSY with a normal parts remedied the problem, but we were unable to reproduce the
problem.
We removed the KEY FPC ASSY and studied the condition of the solder but could not see
any abnormalities. We then reinstalled the assembly and could not reproduce the problem.
Because only the RLDU signal line on the KEY FPC ASSY failed to work, we presumed
that the cause is a metal layer short-circuit or a connection defect in the flexible connector
or in the circuits in the KEY FPC ASSY.
22
Page 23

FinePix F440 TROUBLESHOOTING GUIDE
8. Other
8-1. No sound
Fault details:
Analysis results:
Repair details:
Replace the SPEAKER ASSY
No sound.
Sound is sometimes produced. Replacing the speaker remedies the problem. Cause by a
speaker component fault. (
8-2. Does not turn on
Fault details:
Analysis results:
Does not turn on.
The camera does not start up at all when it is turned on. There is extensive rusting of the
internal components. Presumed to be due to corrosion and failure to operate caused by
immersion (probably in sea water judging by the degree of rusting).
∞
Ωbetween the terminals).
Repair details:
Replace the MULTI PWB ASSY
Rusting
23
Page 24

FUJI PHOTO FILM CO., LTD.
26-30, Nishiazabu 2-chome, Minato-ku, Tokyo 106-8620, Japan.
 Loading...