


 Loading...
Freecom ToughDrive
Rev. 531

Freecom ToughDrive
Dear user!
GB
Thank you for choosing the Freecom ToughDrive external hard drive. For optimal use and performance we advise you to read this manual carefully before using this product.
Freecom Technologies • Germany
www.freecom.com
Contents of the box
Please check the contents of the box; the following items should be included:
•external Freecom ToughDrive
•Power-to-USB cable *
•CD-ROM with manual, driver and application software
•Quick Install Guide
•Safety Manual for ToughDrive
* Use the included power-to-USB cable when the power provided by the USB port is not sufficient, or visit www.freecom.com/support for an optional AC adapter.
Warning !
All rights reserved. The products named in this manual are only used for identification purposes and may be trademarks or registered trademarks of the respective companies. This device was designed for home or office use.
Warning! This device is equipment complying with EN55022 class B.
Freecom cannot be made liable for any damages, loss of data or damage following thereof -whatsoever (including, without limitation, damages for loss of business profits, business interruption, loss of business information, or other pecuniary loss) arising out of the use of or inability to use this Freecom product, even if Freecom has been advised of the possibility of such damages.
We reserve the right to upgrade our products in keeping with technological advances.
2

Table of Contents |
||
User manual |
|
|
|
|
GB |
General Information ........................................................................... |
page |
4 |
Precautionary measures ..................................................................... |
page |
5 |
Freecom ToughDrive .......................................................................... |
page |
6 |
Chapter 1: |
|
|
Installation of the Freecom Personal Media Suite Software (PC) .... |
page |
7 |
Chapter 2: |
|
|
Hardware installation ......................................................................... |
page 11 |
|
Chapter 3: |
|
|
Driver installation (PC) ....................................................................... |
page 12 |
|
Chapter 4: |
|
|
Daily use of the Freecom ToughDrive with |
|
|
Freecom Personal Media Suite software (PC) ................................... |
page 15 |
|
Chapter 5: |
|
|
The User Interface of the Freecom Personal Media Suite (PC) ........ |
page 16 |
|
Chapter 6: |
|
|
Partitioning your Freecom ToughDrive (PC) ..................................... |
page 31 |
|
Chapter 7: |
|
|
Troubleshooting ................................................................................. |
page 45 |
|
© 2005 Freecom Technologies |
|
|
3

Freecom ToughDrive
General Information
GB
The following hardware and software requirements must be fulfilled to ensure trouble-free operation.
Hardware Requirements
In order to use the Freecom ToughDrive, following components are needed:
•Intel Pentium III / AMD Duron 700 MHz or higher
•128 MB RAM or higher
•CD-ROM drive for installing drivers and/or software
•Available USB 2.0 or USB 1.1 port*
•Internet connection for online warranty registration and driver/software updates and downloads
Software Requirements
•Windows 98 SE
•Windows ME
•Windows 2000
•Windows XP
Mac
•iMac, iBook, Mac G3 or Power Book G3 with USB interface
•Operating system: Mac OS X v10.1 or higher
*USB 2.0 is downwards compatible to USB 1.1. To achieve optimal performance from the Freecom ToughDrive your PC should be equipped with an USB 2.0 port. USB 2.0 PCI Host Controllers are separately available at www.freecom.com.
4

General Information
Precautionary measures
GB
To ensure that your Freecom ToughDrive functions properly, please take note of the following precautions. If these are not followed, you may void your warranty and damage the Freecom ToughDrive.
•Safely remove the Freecom ToughDrive via your operating system (the "unplug or eject hardware" option in the Windows taskbar) before disconnecting the USB cable or power cable and before switching off the device. Failing to do so may result in data loss.
•Do not drop the Freecom ToughDrive or expose it to other kinds of sudden mechanical shocks as this may result in data loss and damage to the hard drive.
•Do not use the Freecom ToughDrive when the ambient temperature is below 10°C or above 45°C.
•If the Freecom ToughDrive is moved from a cool environment to a warmer environment, please allow the drive to acclimatize to the ambient temperature before operating the device. Failing to do so may lead to condensation within the drive enclosure, which in turn may cause the drive to malfunction.
•Do not place liquids or drinks on the Freecom ToughDrive. When liquids are spilled and get in contact with the electronics within the drive enclosure, it will damage the drive and will cause the drive to malfunction.
•Do not use the Freecom ToughDrive in a dusty environment. Dust inside the enclosure may damage the internal electronics and result in drive malfunction.
•Only use the power adapter that was supplied with the ToughDrive.
•Opening the Freecom ToughDrive will void the warranty.
•Since USB 2.0 is backwards compatible with USB 1.1, the Freecom ToughDrive can be connected to all USB ports. When connected to a USB 1.1 port, however, the performance (data transfer rate) of the Freecom ToughDrive will be much lower than when the drive is connected to a USB 2.0 port.
•When using the Freecom SYNC software, please be aware that all files in the SYNC folder on the ToughDrive are linked to the original files on your PC or network. If you delete a file in the SYNC folder, its original will be deleted during the next synchronization, too! To avoid this, you have to ‘Split From Original’ the file prior to deleting it. Please refer to chapter 5 for further information on Freecom SYNC and Microsoft Briefcase.
5

Freecom ToughDrive
Freecom ToughDrive external hard drive
GB
The hi-speed data transfer through the USB 2.0 interface makes it ideally suitable for data-storage, file sharing, backup, archiving, audio playback and all applications that need fast file access.
For your convenience, the Freecom ToughDrive has been partitioned (1 partition) and pre-formatted (FAT32 file system). The FAT32 format ensures maximum interchangeability of the Freecom ToughDrive between different computers. Should you choose to format the Freecom ToughDrive in another file system (e.g. NTFS), please be aware of possible problems when connecting the Freecom ToughDrive to another computer than the one you used for formatting.
6
Installation of the Freecom Personal Media Suite software
Chapter 1: Installation of the Freecom Personal Media Suite software (PC only)
If you want to use the SYNC function on the Freecom ToughDrive, you need to install the Freecom Personal Media Suite software first.
Note: To use the functions of the Freecom Personal Media Suite described in this handbook, your Freecom ToughDrive has to be connected to your PC.
1.1 Installation of the Freecom Personal Media Suite
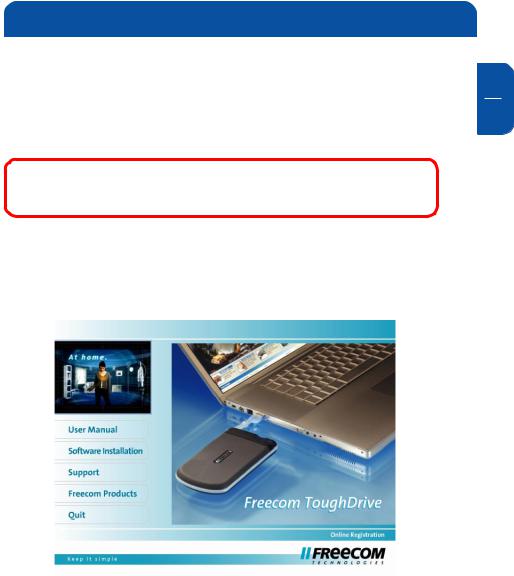
1.Insert the Freecom ToughDrive Software & Manual CD into your CD drive. The Freecom start menu opens:
In case the software does not open automatically, please click on "Start" in the main directory of the CD.
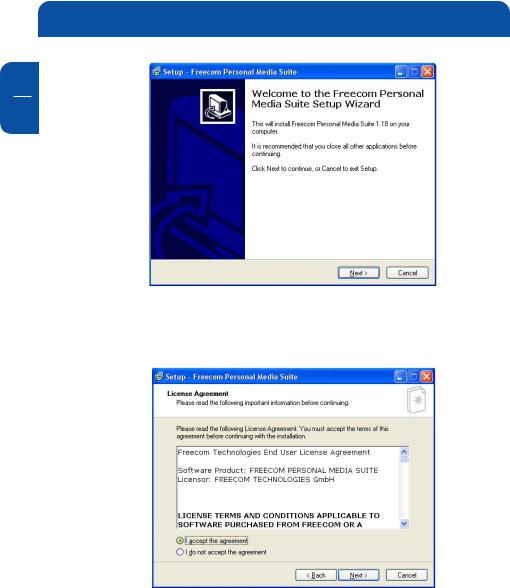
2.Click on "Freecom Personal Media Suite". The installation of the Freecom Personal Media Suite starts now. Follow the instructions on the screen, confirm with "Next" in order to continue with the installation.
GB
1
7
Freecom ToughDrive
GB
1
3.Please read the license agreement carefully. To accept the license agreement, confirm with "Yes". Note: Clicking on "No" ends the installation. Select the target folder and program folder in the start menu in which the Freecom Personal Media Suite symbol is to appear.
4.Default target folder is C:\Programs\Freecom Personal Media Suite. You can select a different target folder for the program files by selecting another folder on your hard drive.
8
Installation of the Freecom Personal Media Suite software
GB
1
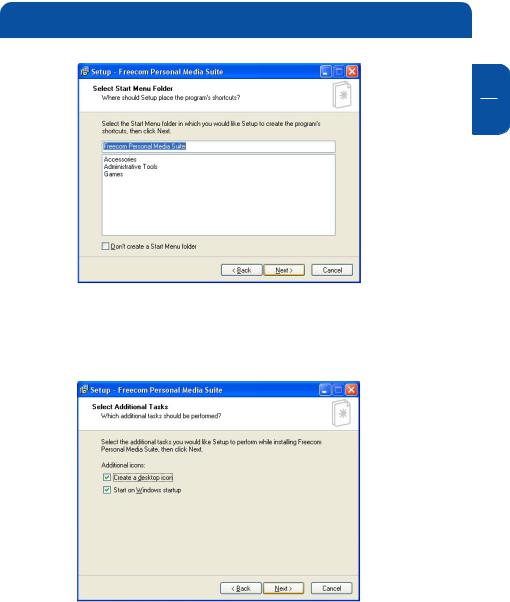
5.In the dialogue "Options" you can select whether to create a link to the Freecom Personal Media Suite Software on the desktop and whether the program should be started automatically when starting Windows. It is recommended to select both options for better operation of the Freecom Personal Media Suite.
6.Click on "Next" to start the installation. All necessary program files are now written on the hard drive of your computer.
7.In the last window, you will be asked whether you want to start Freecom Personal Media Suite now. It is recommended to select this option so that you can configure the software for your Freecom ToughDrive. Please click on "Finish".
9

Freecom ToughDrive
1.2 Deinstallation of the Freecom Personal Media Suite
GB
In order to remove the Freecom Personal Media Suite from your computer,
1please proceed as follows:
1.In the "Start" menu, please click on "Programs" - "Freecom Personal Media Suite".
2.Select "Uninstall Freecom Personal Media Suite". The software is now removed from your computer.
10
Hardware Installation
Chapter 2: Hardware Installation
2.
1.
Connect the interface cable to the
Freecom Hard Drive.
GB
2
Since USB 2.0 is backwards compatible with USB 1.1, the Freecom ToughDrive can be connected to all USB ports. When connected to a USB 1.1 port, however, the performance (data transfer rate) of the Freecom ToughDrive will be much lower than when the drive is connected to a USB 2.0 port.
11

|
Freecom ToughDrive |
GB |
Chapter 3: Driver installation (PC only) |
|
Under Windows ME / 2000 / XP a separate Freecom driver is not required. The
3drivers will be installed automatically by the operating system after plugging in the Freecom ToughDrive into the USB port of the computer.
Driver installation USB under Windows 98 SE
Note: Your Freecom ToughDrive is fully backwards compatible with USB 1.1. The installation for USB 1.1 is the same as described below for USB 2.0.
1.Insert the Freecom Manual and driver CD into the CD-ROM drive.
2.Connect your Freecom ToughDrive to the USB connector of your notebook or computer.
3.The "Add New Hardware Wizard" opens and a "USB 2.0 Device" (USB 2.0) or a "USB TO IDE" (USB 1.1) is found.
Click on "Next".
12
Driver Installation |
|
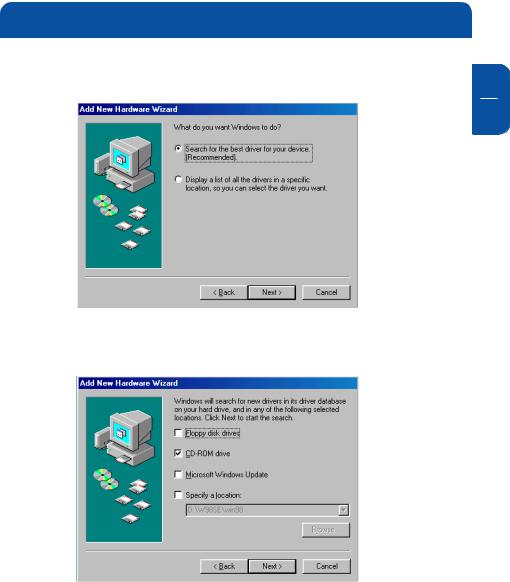
4. In the next window select "Search for the best driver for your device. |
GB |
(Recommended)". Click on "Next". |
3
5.Make sure that the checkbox "CD-ROM drive" is activated in the next window.
Continue by clicking on "Next".
13
Freecom ToughDrive
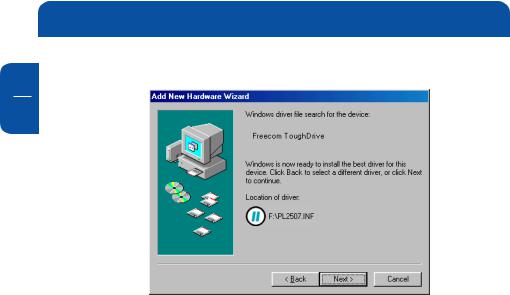
6. The Hardware Wizard finds a "Freecom ToughDrive".
GB
3
By clicking on "Next" the necessary files will be installed. Afterwards click on "Finish" to complete the installation. Congratulations! You’ve just finished to install the Freecom ToughDrive and the external hard drive is almost ready to use.
14
Loading...