

Page 1

FD 2052
AutoSeal
®
12/2007
OPERATOR MANUAL
FOURTH EDITION
Page 2
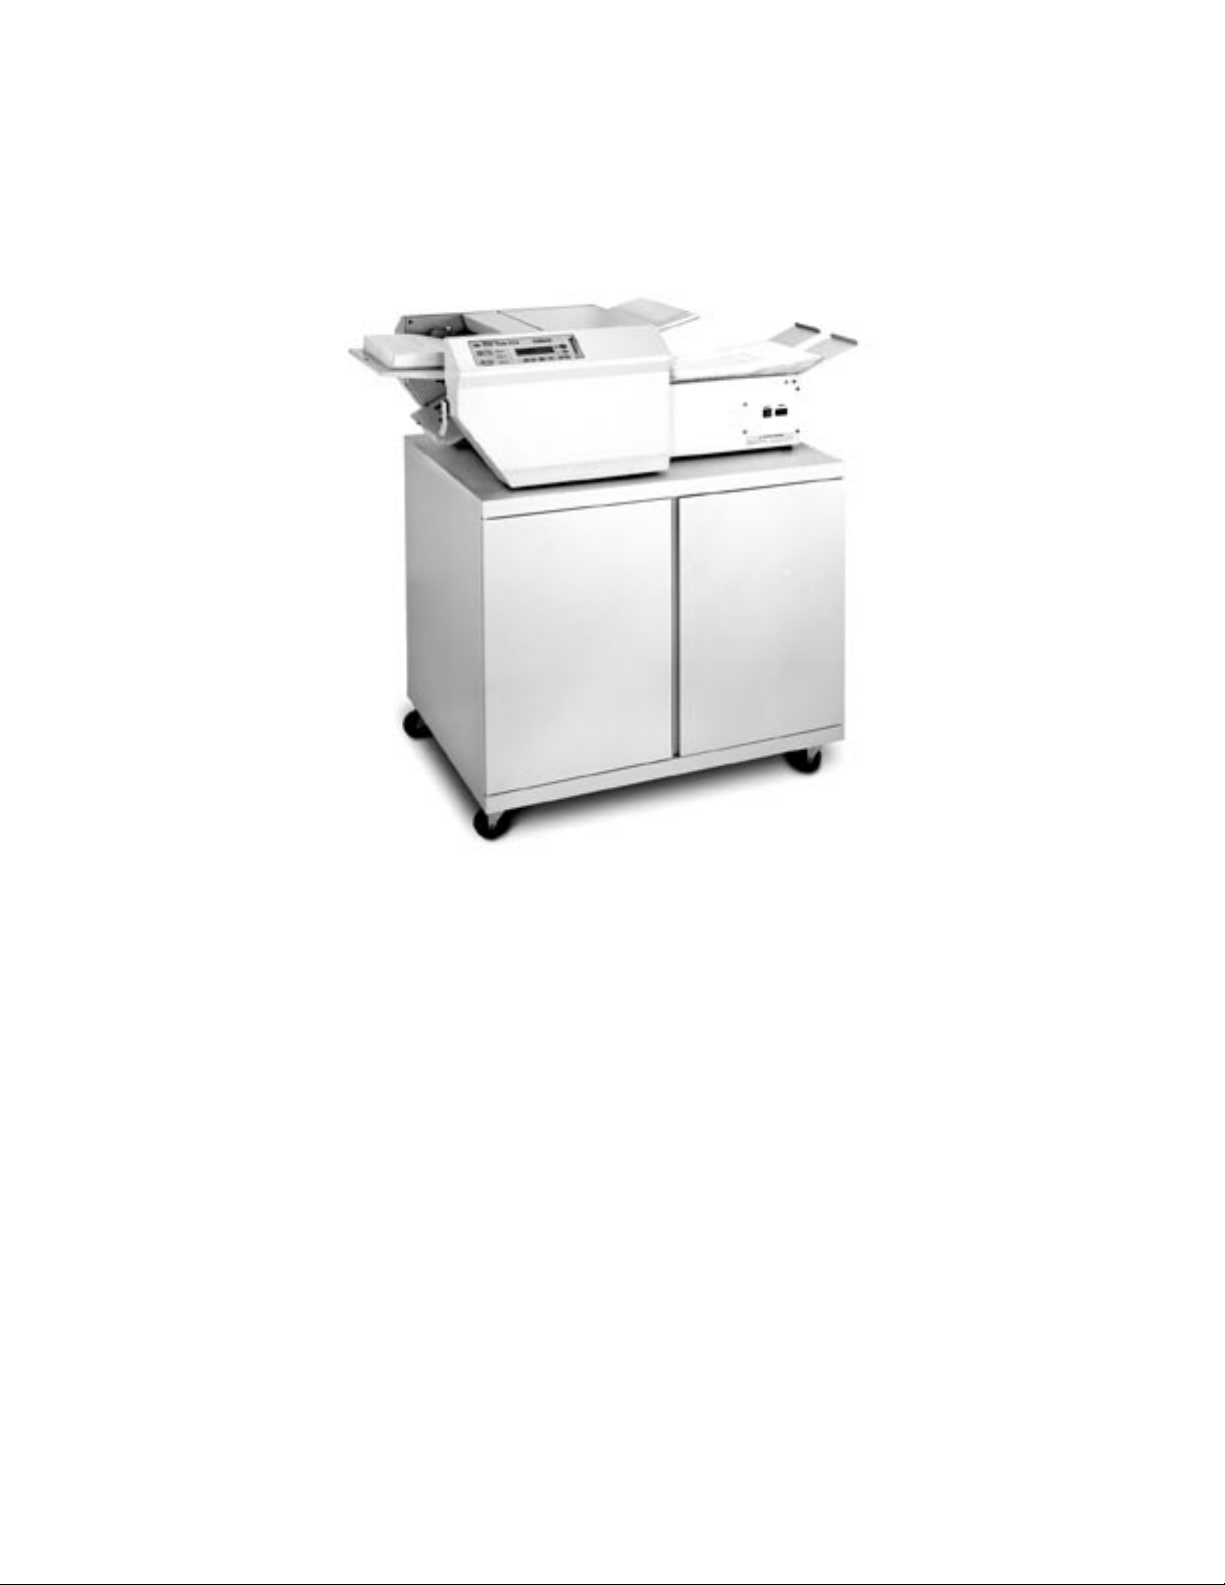
TABLE OF CONTENTS
DESCRIPTION 1
SPECIFICATIONS 1
UNPACKING AND SET-UP 1 - 2
CONTROLS 2
OPERATION 3
CUSTOM FOLDS 3 - 4
Measuring Fold Lengths 3
Custom Fold programming 4
BATCH COUNTING 4 - 5
DAILY MAINTENANCE 5
TROUBLESHOOTING 6 - 7
DETERMINING FOLD TYPE 8
TEST SHEET 9
OPTIONAL CONVEYOR INSTALLATION 10
Page 3
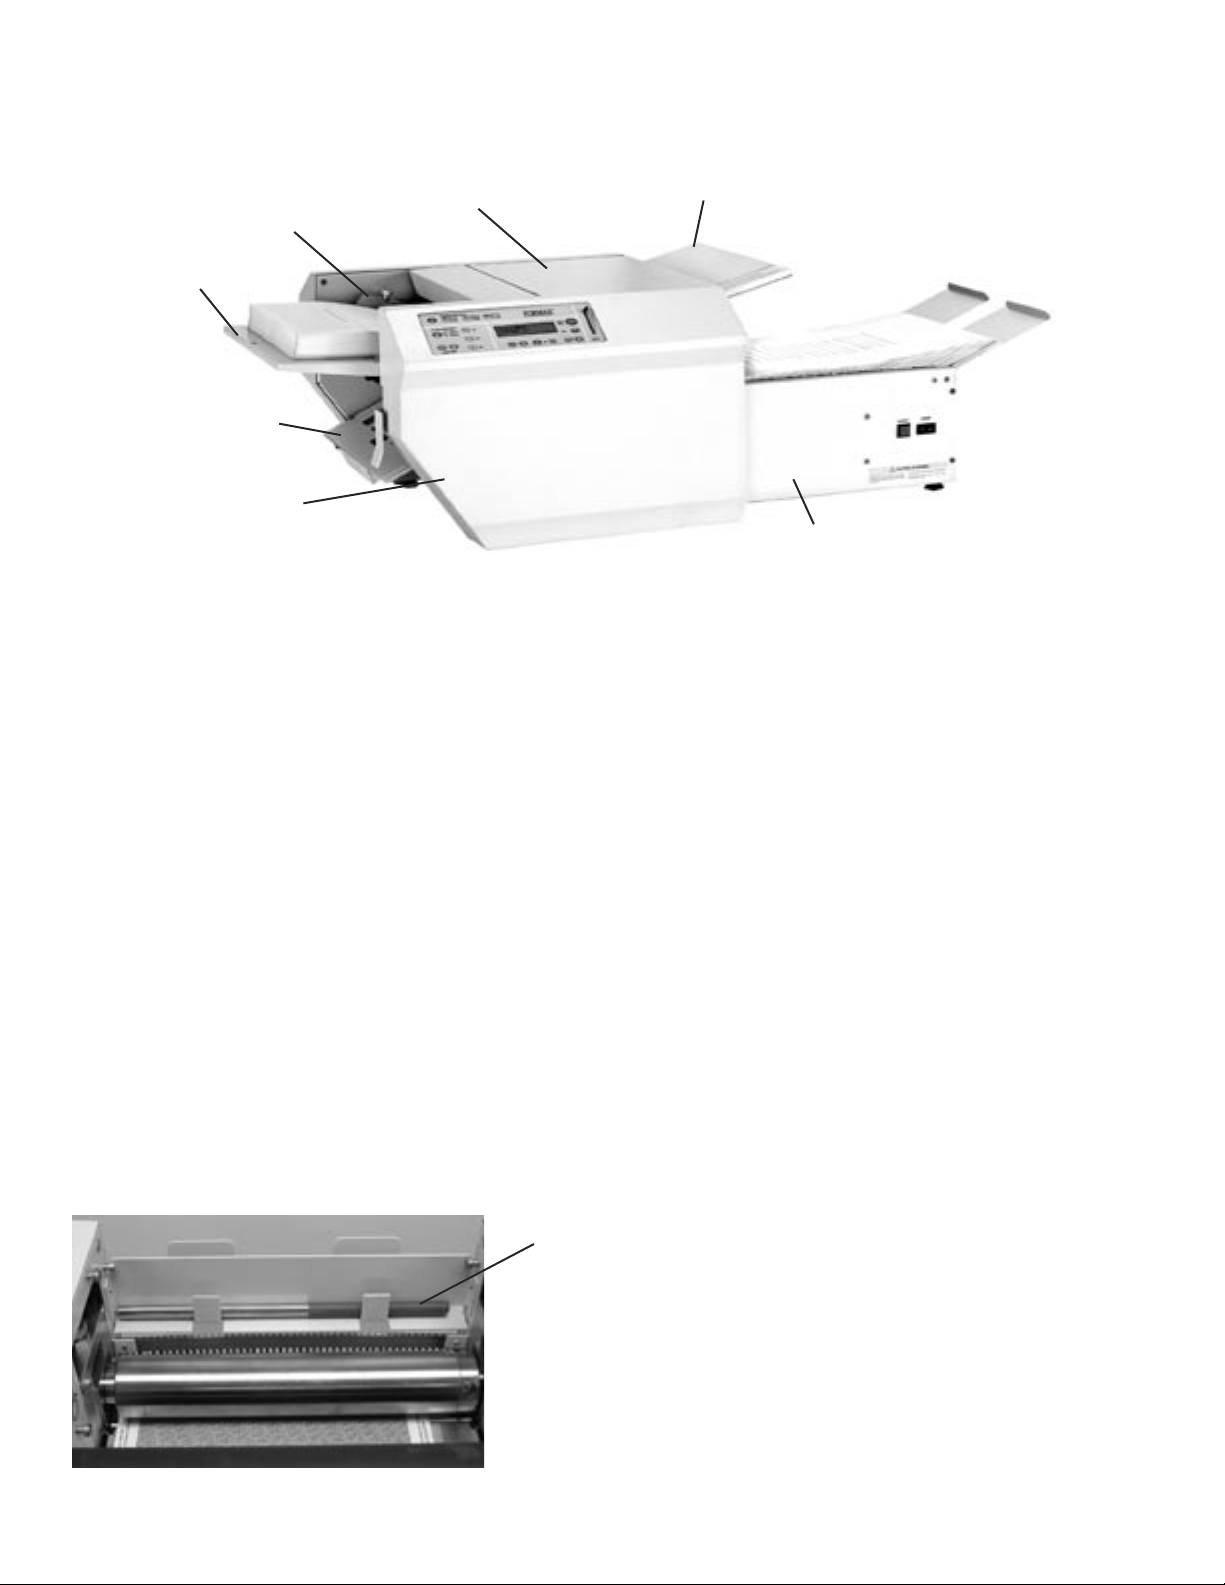
DESCRIPTION
Upper Fold PlateTop Cover
Paper Side Guides
Feed Table
Lower Fold Plate
Side Cover
Optional 18” Conveyor
FUNCTION
The 2052 folds and seals pressure sensitive forms with pre-applied glue lines into mail-ready pieces. Numerous
folds using several different paper sizes can be processed to meet your needs. For configurations and paper
sizes, see specifications.
SPECIFICATIONS
Maximum foldable paper size 17” length x 8.5” width
Fold styles “C”, “Z”, “V” and custom folds
Paper loading capacity Up to 350 sheets of 24 # pre-glued forms
Weight 90 lbs.
Power supply FD Model: 120 volts, 60 Hz, 3.5 amps.
FE Model: 240 volts, 50 Hz, 3.5 amps.
UNPACKING AND SETUP
1. Check package for shipping damage. If there is shipping damage, do not discard the box.
2. CAUTION: Two people must lift the machine out of the box.
3. Remove the accessory bag which is between the machine and the catch tray.
4. Place the jam clearing handle into the holder which is mounted to the machine. This is the jam clearing
handle’s proper location (figure 1).
Jam clearing handle location
Figure 1
1
Page 4
LOWER FOLD TABLE UPPER FOLD TABLE
Figure 2a
5. Install the lower fold table and plug the cord (figure 2a) into the fold plate receptacle.
6. Install the upper fold table and plug the cord (figure 2b) into the fold plate receptacle.
7. Plug machine into wall outlet.
CAUTION: Do not operate the machine without the fold tables plugged in.
NOTE: The display screen should read (COUNT: 0000) and a fold setting (i.e. Letter, ZigZag, Single or
custom #) when the machine is plugged in and the power is turned on.
Figure 2b
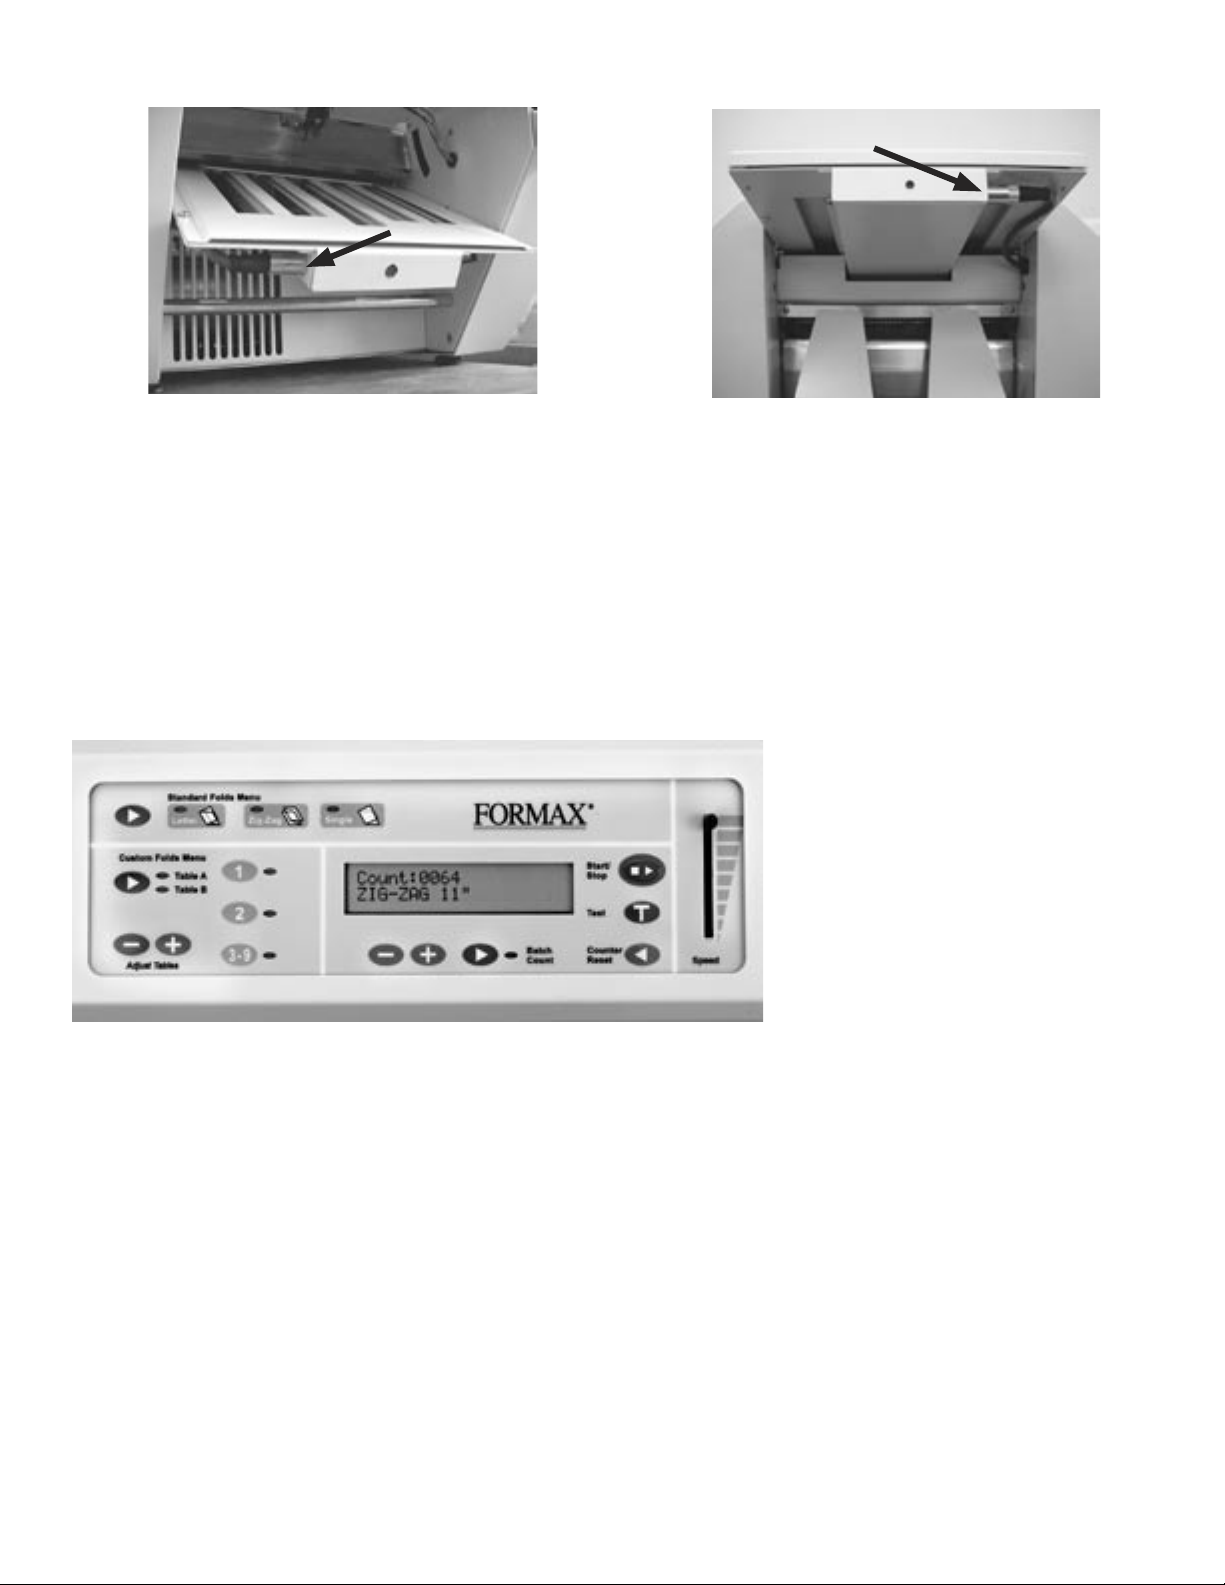
CONTROLS
Start/Stop...................Starts and stops the machine
Test.............................Allows one form to be folded
Counter Reset............Resets counter and resets faults
Display Screen...........Displays all current functions
Standard Folds Menu:
The Standard Folds Menu consists of three folds; Letter (C-fold), Zig-Zag (Z-fold), and Single (Half fold). By
pressing the green button in the Standard Folds Menu, you can toggle between the fold settings. An indicator
will light up on the fold type selected. These fold types are standard for 11” and 14” forms. The 2052 will
identify the form length 11” or 14” via a sensor.
Custom Folds Menu:
To use a custom fold setting press one of the custom fold buttons (1, 2, 3-9). Press the 3-9 button multiple
times to toggle through the 3rd and the 9th custom folds.
2
Page 5

OPERATION
1. Plug in cord and turn power on.
2. Lift load handle.
3. Load neatly stacked and squared paper into the hopper.
4. Adjust the side guides until they make light contact with the squared paper edges.
5. Make sure covers are closed properly.
6. Select the fold-type and press the test button to verify fold.
7. Press the start button to begin operation.
8. Set speed to desired setting.
SETTING CUSTOM FOLDS
The Custom Folds Menu allows you to program custom folds into memory. The 2052 can store up to nine
custom folds. To store a custom fold into memory, follow these steps:
1. Measuring Fold Lengths
Example 1: Uneven “Z”
a. Measure the length of panel “A”.
b. Measure the length of panel “B”
c. Enter these measurements according to the
instructions on next page.
Example 2: Uneven “C”
a. Measure the length of panel “A” + “B”
b. Measure the length of panel “B”
c. Enter these measurements according to the
instructions on next page
Panel A
Panel B
Panel A
Panel B
3
Page 6

1. Select the custom fold number you want to program.
2. Press the green button next to the Table A and Table B lights.
Note: The display will read “Tbls A: #.## B: #.## CUSTOM #”.
Table A adjusts the upper fold plate.
Table B adjusts the lower fold plate.
The “-“ and “+” buttons decrease and increase the fold numbers.
3. Press the “-” and/or “+” button to enter the length of the fold. Fine adjustments can be made with the
adjustment screw at the end of the plate.
4. Press the “Test” button to insure the proper folds have been entered.
5. Once the folds are correct, press and hold the “Custom Fold” green arrow button until the machine sounds
a tone. The fold has been memorized.
Note: The display screen will read “count # and custom #”. To run your custom fold without saving it, simply
press the “Start” button after step 4 above.
Batch Counting
MANUBATCH:
The “Manubatch” or “manual batch” feature allows you to program the number of sheets you would like to
process in a set. When the set is complete, the folder will stop and automatically reset the batch count to the
previously set number of sheets. It will then fold the next set when the “Start/Stop” button is pressed.
1. To enter the manual batch counting mode press the
“Batch Count” button and select “MANUBATCH” by
pressing the “+” button (Fig 3a) .
2. Select the number of sheets to be folded by pressing
the “+” or “-” buttons (Fig. 3c) , then press the “Start/
stop” button to start.
AUTOBATCHTM:
“Autobatch” or “automatic batch” allows you to batch count with automated features. In the Autobatch mode
you can program the number of sheets you would like to process in a set, the number of sets you would like
and the delay between each set. For example: you can program 10 sheets to be pulled to create a set, then
program 100 sets to be processed with a 3 second time delay between each set.
Figure 3a
4
Page 7

1. To enter the Autobatch mode press the “Batch
Count” button and select “AUTOBATCH” by pressing
the “-” button (Fig 3a).
2. Once you have entered the Autobatch mode press
the “+” or “-” button and “Sheets” (Fig. 3c) will blink.
Press the “+” or “-” buttons to increase or decrease the
number of sheets to be pulled.
3. When the sheet number is set wait 5 seconds and
“Sets” (Fig. 3c) will blink. Press the “+” or “-” buttons
to increase or decrease the number of sets to be
pulled.
4. When the number of sets has been selected wait 5
seconds and “Delay” (Fig. 3c) will blink. Press the “+”
or “-” buttons to increase or decrease the time delay
between the sets.
5.When the settings are correct press the “Start/Stop”
to start.
Figure 3b
Figure 3c
“Sheets” = Number of sheets of paper in a set
NOTE: The system will cycle through the settings until
the “Start/Stop” button is pressed.
NOTE: If a fault occurs during a set, the set will be
completed when the fault is reset.
NOTE: The batch counting program selected will
remain on after the job is processed. You must press
the Batch Counting button to turn off the light and
cancel the batch count setting.
“Sets” = Number of sets to be processed
“Delay” = Time between each set
“C” = Total number of sheets processed
DAILY MAINTENANCE
1. It is recommended to let forms cool for one-half hour, from the laser printer, before folding and sealing. This
allows toner to set on the forms, and static electricity to discharge. A 400 Series Jogger is recommended for
best results. The Jogger squares the forms and dissipates heat and static electricity created by laser printers.
2. If toner builds up on the metal sealer rollers, clean the rollers with a lint-free cloth dampened sparingly with a
mild household cleaner.
3. Clean in-feed wheels and fold rollers with Formax recommended roller cleaner & rejuvenator to remove
paper dust and toner. A damp cloth with water is the best alternative. CAUTION: Do not use any chemicals
other than the roller cleaner & rejuvenator or water.
5
Page 8

TROUBLESHOOTING
A. Clearing Paper Jams and Fault Signals on the Display Panel:
WARNING: Turn off machine and unplug cord from its receptacle.
1. If a jam occurs in a fold table, unplug and remove the fold table and remove paper. Reinstall and plug in fold
table and then press the counter reset button on the control panel to clear the fault signal.
2. If a jam occurs in between the metal sealing rollers, remove any remaining forms from the hopper. Open
the top cover and remove the upper fold table. Remove the jam-clearing tool (located under the top fold table),
apply the tool to the upper metal roller (fi gure 4) and turn clockwise until the paper jam is clear. (Caution: Do
not apply excessive force or rollers may be damaged.) (Caution: Do not turn counter-clockwise and force the
form(s) to exit the machine or the rollers may be damaged.) Remove the jammed form, return tool to holder
and reinstall the upper fold table. Reinstall cover and press the reset button.
Note: Press the black button (fi gure 5) near the power cord inlet to reset the breaker if necessary.
Figure 4
Figure 5
B. Paper Pulls Left or Right During Feeding:
1. Adjust the side guides to the edge of the forms.
2. Clean the three infeed wheels with a cloth dampened with a mild household cleaner.
C. Skewed Forms
1. If paper folds left or right adjust the skew adjuster. To adjust the skew, turn it left or right until the paper is
feeding correctly and folds squarely (fi gure 6)
Figure 6
2. Side guides should be adjusted so that the forms do not have free play between the guides.
6
Page 9

D. Machine Plugged in, no Power:
1. Turn machine on.
2. Check wall outlet.
3. Press the circuit breaker (figure 5).
4. If the display screen on the control board is not on, then check the green power light on the power board.
To view the green power light, open the operator side cover and look though the air slots in view of the
power board. If that light is on there’s a loose wire or connector not connected.
E. Power on, Machine does not Work:
1. If the green power light is not on at the power board check the circuit breaker (figure 5), then troubleshoot
back to where you have power.
2. If the display screen reads “COVER OPEN,” ensure that the operator and top covers are closed properly.
3. If the display screen reads “PAPER OUT,” load paper into hopper.
4. If the display screen reads “FAULT,” then the photo eye has detected the presence of paper for
more than half a second. Remove the jammed paper, then press the counter reset button to reset
the fault. If there is no paper jam, check for proper operation of the photo eye.
F. Photo Eye Adjustment:
There is a single photo eye, just upstream from the pressure rollers, used for both counting and fault detection
(doubles). There is another photo eye, at the end of the paper tray extension. This is used for detecting 11”
paper or 14” paper. There are 2 sets of lights that will allow you to adjust the sensitivity of the photo eyes.
The first set of lights on the left is used to adjust the photo eye sensitivity, for the fault detection. There are
three lights to help you do this. The first is a red light (low signal). The second is a green light (good signal).
The last is a red light (excess signal). These lights can be viewed by opening the operator side cover.
The second set of lights on the right is used to adjust the photo eye sensitivity, for the paper detection. There
are three lights to help you do this. The first is a red light (low signal). The second is a green light (good signal).
The last is a red light (excess signal). These lights can be viewed by opening the operator side cover.
The photo eyes can be adjusted using the two small blue square boxes on the control board. They have screw
slots in them for delicate adjustment. The first one on the left is for the fault detection and the second one to
the right is used for the 14” paper detection. To adjust, place a form on top of the photo eye and change the
setting on the small blue box until the red light (excess signal) just turns to the green light (good signal).
G. Misfeeding of Forms:
1. Clean the feeder wheels.
2. Adjust the skew adjust.
3. Turn forms upside down and rotate 180 degrees and place in hopper (Z” fold forms only).
H. Double Feeding:
If double feeding occurs, try the following steps:
1. Jog the forms to reduce static build up and to make sure the forms are not stuck together.
2. Clean the infeed wheels with a cloth dampened with a mild household cleaner.
3. Ask the technician to adjust the gate tip.
7
Page 10

DETERMINING FOLD TYPE
Two Standard Folds 11” “Z” & 11” “C”
Refer to Operator Manual for custom fold setup.
Leading glue edge
Glue
Glue
Glue
11” “Z” Fold
11” “Z” Fold
Leading glue edge
Glue
11” “C” Fold
11” “C” Fold
8
Page 11

Leading Edge
Make copies of this page on copy paper for fine tuning folds
Instruction For Lining Up Folds
1. Place a stack of these sheets into the feeder and fold
one (1) or two (2) sheets.
2. Take a folded sheet from the catch tray and lay it on
top of a pressure seal form lining the leading edge of
this sheet up with leading edge of the pressure seal
form.
3.
If the folds on this test sheet do not line up with the
perforated folds on the form, the fold plates need to
be adjusted up or down to make the folds line up.
Refer to Fig. 1 for a “Z” fold and Fig. 2 for a “C” fold.
-
If fold “A” on the test form is right of the perforation on
the pressure seal form move the top fold plate
stop up. If fold ”A” is below move the top fold plate
stop fold stop down.
-
If fold “B” on the test form is right of the perforation
on the pressure seal form move the bottom fold plate
stop down. If fold ”B” is to the left move the bottom
fold plate stop up.
Fold “A” Fold “B”
Fig. 1 “Z” fold Form
Fold “A” Fold “B” Leading Edge
Leading Edge
9
Fig. 2 “C” Fold Form
Page 12

OPTIONAL CONVEYOR INSTALLATION
To install the 18” conveyor, follow these steps:
1. Unplug the 2052 from the wall outlet.
2. Remove the catch tray from machine.
3. Remove the upper fold table.
4. Plug the power cord into the underside of the conveyor.
5. Install the conveyor mounting bolts (figure 7).
5. Attach the conveyor to the 2052.
6. Install the stacker wheel assembly into the holes indicated below (figure 8).
7. Adjust the stacker wheels to conveyor decal.
8. Plug the conveyor power cord into the power outlet on the 2052.
9. Reinsert the upper fold table.
10. Plug the 2052 into the wall outlet.
Figure 7
Mounting Bolts
Holes For Stacker Wheel
Assembly
Stacker Wheels
Figure 8
10
 Loading...