

Page 1

SECTION 206-00: Brak e System — General Information 1998 Expedition/Nav igator Workshop Man ual
Page
1
of 71998 Expedition/Navigator Workshop Manual
12/19/2010
http://www.fordtechservice.dealerconnection.com/pubs/content/~WSWJ/~MUS~LEN/19
...
GENERAL PROCEDUR ES
Procedure revision date: 02/11/2000
Bleeding
Special Tool(s)
Master Cylinder, In Vehicle
WARNING: Brake fluid contains polyglycol ethers and pol yglycols. Avoid contact with eyes. Wash hands thoroughl y after handling. If brake fluid contacts eyes, flush
eyes with running water for 15 minutes. Get medical atten tion if irritation persists. If tak en internally, drink water a nd induce vomiting. Get med ical attention immediately.
CAUTION: Do not allow the brake master cylinder reservoir to run dry during the bleedi ng operation. Keep the brak e master cylinder reservoir filled with the specified
brake fluid. Never reuse the brake fluid that has been drain ed from the hydraulic system.
CAUTION: Brake fluid is harm ful to painted and plastic su rfaces. If brake fluid is spilled onto a painted or plastic surface, immediately wash it with water.
NOTE: When any part of the hydraulic system has been disco nnected for repair or new inst allation, air may get into the sys tem and cause spongy brake pedal action. This requires bleeding
of the hydraulic system after it has been correctly connected. The hydraulic system can be bled manually or with pressure bleeding equipment.
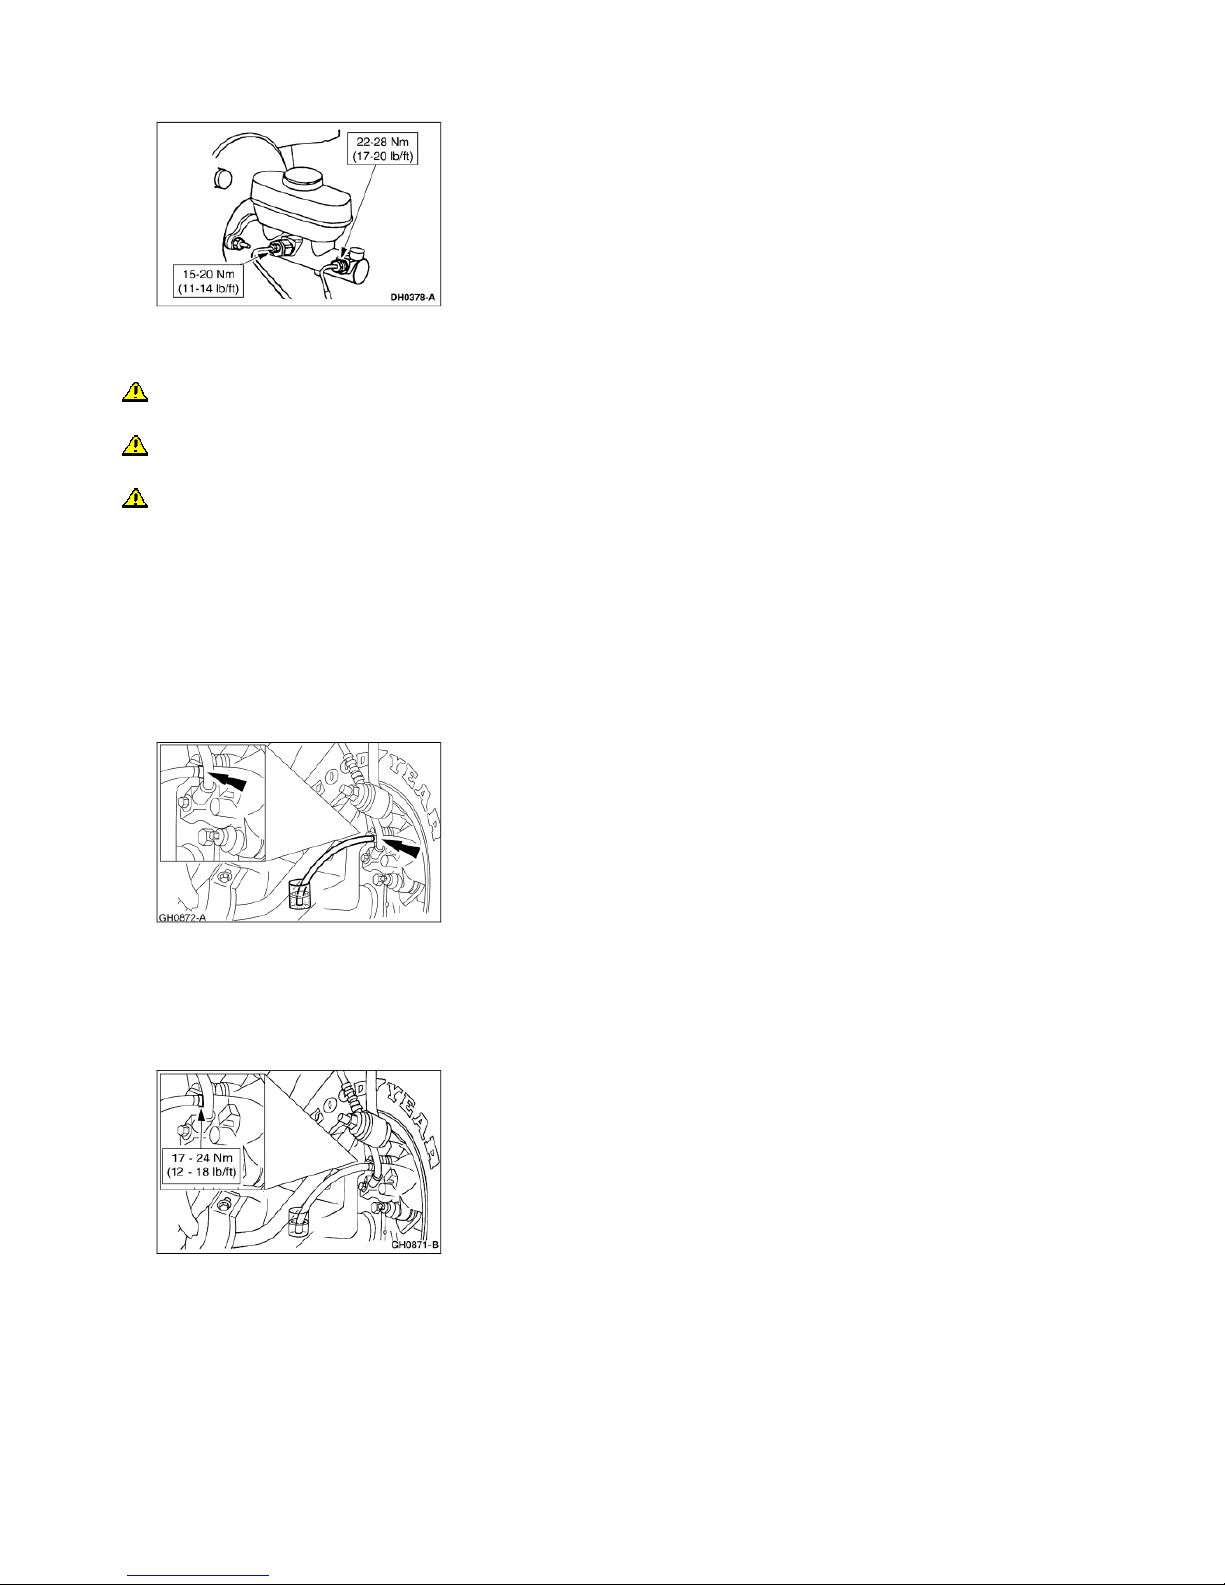
1. NOTE: When a new brake mast er cylinder has been installe d or the system has been emp tied, or partially emptied, it should be primed to prevent air from getting into the system.
Disconnect the brake master c ylinder outlet tubes.
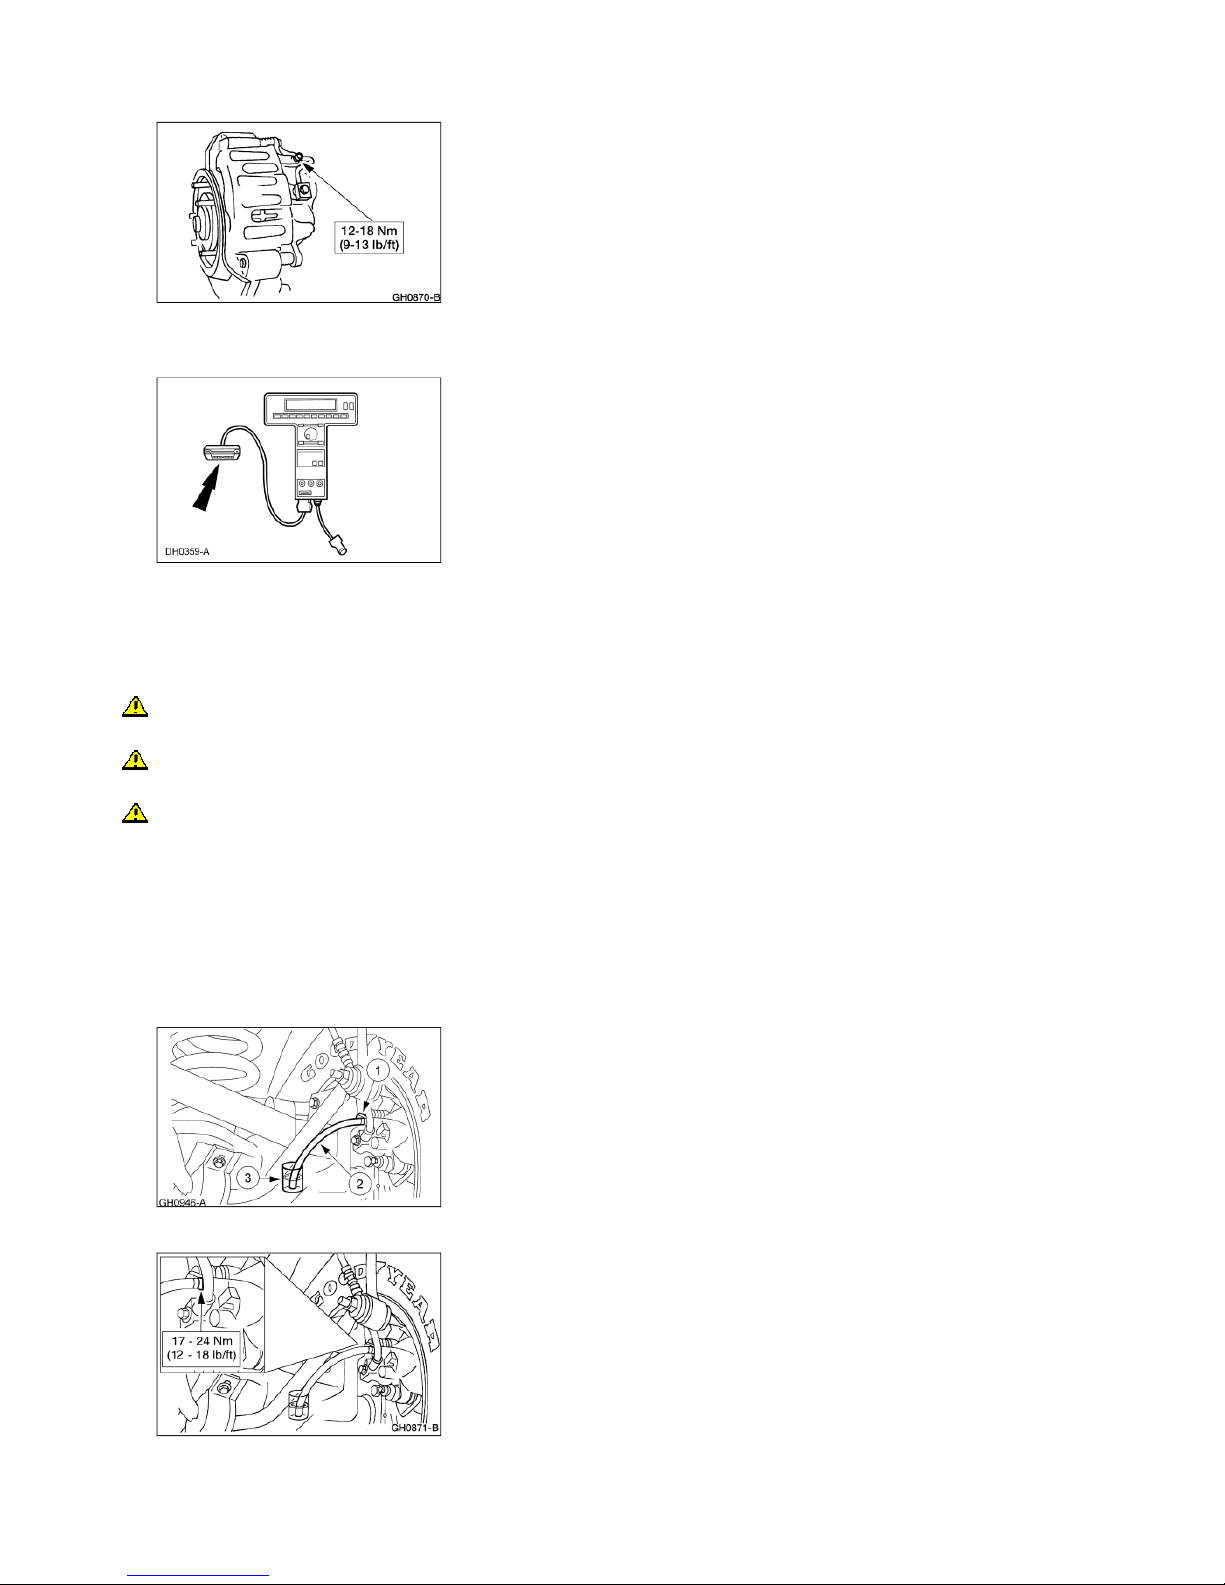
New Generation Star (NGS) Test er
418-F048 (007-00500) or Equivalent
NGS Flash Cable
418-F120 (007-00531) or Equivalent
2. Install short brake tubes with ends submerged in the brake master cylinder reservoir and fi ll the brake master cylinder reservoir with High Performance DOT 3 Brake Fluid C6AZ19542-AB or equivalent DOT 3 fluid meeting Ford specification ESA-M6C25-A.
3. Have an assistant pump the brake pedal until clear fluid flows from both brake tubes without air bubbles.
4. Remove the short brake tubes and install the brake outlet tubes.
5. Bleed each brake tube at the brake master cylinder as follows:
1. Have an assistant pump the brake pedal and then hold firm pressure on the brake pedal.
2. Loosen the rearmost brake tube fittings until a stream of brake fluid comes out. Have an assi stant maintain pressure on the brake pedal while tightening the brake tube fitting.
3. Repeat this operation until clear, bubble-free fluid comes out.
4. Refill the brake master cylinder reservoir as necessary. Repeat the bleeding operation at t he front brake tube.
6. While the assistant maintains pressure on the brake pedal, tighten the brake tubes.
Page 2
Page
2
of 71998 Expedition/Navigator Workshop Manual
12/19/2010
http://www.fordtechservice.dealerconnection.com/pubs/content/~WSWJ/~MUS~LEN/19
...
Four Wheel Anti-Lock Brake S ystem (4WABS)
WARNING: Brake fluid contains polyglycol ethers and pol yglycols. Avoid contact with eyes. Wash hands thoroughl y after handling. If brake fluid contacts eyes, flush
eyes with running water for 15 minutes. Get medical atten tion if irritation persists. If tak en internally, drink water a nd induce vomiting. Get med ical attention immediately.
CAUTION: Do not allow the brake master cylinder reservoir to run dry during the bleedi ng operation. Keep the brak e master cylinder reservoir filled with the specified
brake fluid. Never reuse the brake fluid that has been drain ed from the hydraulic system.
CAUTION: Brake fluid is harm ful to painted and plastic su rfaces. If brake fluid is spilled onto a painted or plastic surface, immediately wash it with water.
NOTE: When any part of the hydraulic system has been disco nnected for repair or new inst allation, air may get into the sys tem and cause spongy brake pedal action. This requires bleeding
of the hydraulic system after it has been correctly connected. The hydraulic system can be bled manually or with pressure bleeding equipment.
NOTE: This procedure must be performed if the 4 wheel ant i-lock brake (4WABS) hydraulic control unit (HCU) has been installed new.
NOTE: One conventional pressu re bleed cycle consists of advancing the brake pedal to its depressed position, opening the disc brake caliper bleeder screw, allowing fluid to be released
into the waste container, closing the disc brake caliper bleeder screw and releasing the brake pedal.
NOTE: Performing the NGS pro gram routine drives entrappe d air from the otherwise inaccessible lower section of the 4WABS valve into the upper sections (accessible by bleeding th e
brakes). Subsequent bleedings remove the air from the system .
NOTE: Add recommended brake fluid as necessary through out the procedure.
1. Connect a clear waste line to the RH rear disc brake caliper bl eeder screw and the other e nd in a container partially filled with recommended brake fluid.
2. Have an assistant pump the brake pedal and then hold firm pressure on the brake pedal.
3. Loosen the RH rear disc brake caliper bleeder screw until a stream of brake fluid comes ou t. Have an assistant maintain pressure on the brake pedal w hile tightening the RH rear
disc brake caliper bleeder screw .
Repeat until clear, bubble-free fluid comes out.
Refill the brake master cylinder reservoir as necessary.
4. Tighten the RH rear disc brake caliper bleeder screw.
5. Repeat Steps 1, 2, 3, and 4 for t he LH rear disc brake caliper bleeder screw, RH front disc bra ke caliper bleeder screw, an d the LH front disc brake caliper bleeder screw.
Page 3
Page
3
of 71998 Expedition/Navigator Workshop Manual
12/19/2010
http://www.fordtechservice.dealerconnection.com/pubs/content/~WSWJ/~MUS~LEN/19
...
6. NOTE: Go to the help menu in the NGS Tester.
Connect the NGS DCL cable adapter into the vehicle data link connector (DLC) under the dash and follow the NGS instruct ions.
7. Repeat the conventional bleed procedure as outlined in Step s 1 through 5.
8. If the brake pedal feels spongy, repeat the NGS service bleed procedure.
Gravity
WARNING: Brake fluid contains polyglycol ethers and pol yglycols. Avoid contact with eyes. Wash hands thoroughl y after handling. If brake fluid contacts eyes, flush
eyes with running water for 15 minutes. Get medical atten tion if irritation persists. If tak en internally, drink water a nd induce vomiting. Get med ical attention immediately.
CAUTION: Do not allow the brake master cylinder reservoir to run dry during the bleedi ng operation. Keep the brak e master cylinder reservoir filled with the specified
brake fluid. Never reuse the brake fluid that has been drain ed from the hydraulic system.
CAUTION: Brake fluid is harm ful to painted and plastic su rfaces. If brake fluid is spilled onto a painted or plastic surface, immediately wash it with water.
NOTE: When any part of the hydraulic system has been disco nnected for repair or new inst allation, air may get into the sys tem and cause spongy brake pedal action. This requires bleeding
of the hydraulic system after it has been correctly connected. The hydraulic system can be bled manually or with pressure bleeding equipment.
NOTE: When a new brake mast er cylinder has been installe d or the system has been emp tied, or partially emptied, it should be primed to prevent air from getting into the system.
1. Fill the brake master cylinder reservoir with High Performance DOT 3 Brake Fluid C6AZ-19542-AB or equivalent DOT 3 flu id meeting Ford specification ESA-M6C25-A.
2. Bleed the rear disc brake calipers.
1. Place a box end wrench on th e RH rear disc brake caliper bleeder screw.
2. Attach a rubber drain tube to the RH rear disc brake caliper bl eeder screw and submerge the free end of the tube in a cont ainer partially filled with clean brake fluid.
3. Open the bleeder screw and leave open until clear bubble-free brake fluid flows.
Repeat for LH rear disc brake caliper.
3. Tighten the rear disc brake caliper bleeder screws.
Page 4

4. Bleed the front disc brake calipers.
Page
4
of 71998 Expedition/Navigator Workshop Manual
12/19/2010
http://www.fordtechservice.dealerconnection.com/pubs/content/~WSWJ/~MUS~LEN/19
...
1. Place a box end wrench on th e RH front disc brake caliper bleeder screw.
2. Attach a rubber drain tube to the RH front disc brake caliper bleeder screw and submerge the free end of the tube in a container partially filled with clean brake fluid.
3. Open the bleeder screw and leave open until clear bubble-free brake fluid flows.
Repeat for LH front disc brake caliper.
5. Tighten the front disc brake caliper bleeder screws.
Manual
WARNING: Brake fluid contains polyglycol ethers and pol yglycols. Avoid contact with eyes. Wash hands thoroughl y after handling. If brake fluid contacts eyes, flush
eyes with running water for 15 minutes. Get medical atten tion if irritation persists. If tak en internally, drink water a nd induce vomiting. Get med ical attention immediately.
CAUTION: Do not allow the brake master cylinder reservoir to run dry during the bleedi ng operation. Keep the brak e master cylinder reservoir filled with the specified
brake fluid. Never reuse the brake fluid that has been drain ed from the hydraulic system.
CAUTION: Brake fluid is harm ful to painted and plastic su rfaces. If brake fluid is spilled onto a painted or plastic surface, immediately wash it with water.
NOTE: When any part of the hydraulic system has been disco nnected for repair or new inst allation, air may get into the sys tem and cause spongy brake pedal action. This requires bleeding
of the hydraulic system after it has been correctly connected. The hydraulic system can be bled manually or with pressure bleeding equipment.
1. Place a box end wrench on th e RH rear disc brake caliper bleeder screw. Attach a rubber dra in tube to the RH rear disc b rake caliper bleeder screw and submerge the free end of
the tube in a container partially filled with clean brake fluid.
2. Have an assistant pump the brake pedal and then hold firm pressure on the brake pedal.
3. Loosen the RH rear disc brake caliper bleeder screw until a stream of brake fluid comes ou t. Have an assistant maintain pressure on the brake pedal w hile tightening the RH rear
disc brake caliper bleeder screw .
Repeat until clear, bubble-free fluid comes out.
Refill the brake master cylinder reservoir as necessary.
4. Tighten the RH rear disc brake caliper bleeder screw.
Page 5

5. Repeat Steps 1, 2, 3, and 4 for t he LH rear disc brake caliper.
Page
5
of 71998 Expedition/Navigator Workshop Manual
12/19/2010
http://www.fordtechservice.dealerconnection.com/pubs/content/~WSWJ/~MUS~LEN/19
...
6. Place a box end wrench on th e RH front disc brake caliper bleeder screw. Attach a rubber drain tube to the RH front disc bra ke caliper bleeder screw a nd submerge the free end of
the tube in a container partially filled with clean brake fluid.
7. Have an assistant pump the brake pedal and then hold firm pressure on the brake pedal.
8. Loosen the RH front disc brake caliper bleeder screw until a stream of brake fluid comes o ut. Have an assistant maintain pressure on the brake pedal while tightening the RH front
disc brake caliper bleeder screw .
Repeat until clear, bubble-free fluid comes out.
Refill the brake master cylinder reservoir as necessary.
9. Tighten the RH front disc brake caliper bleeder screw.
10. Repeat Steps 6, 7, 8, and 9 for the LH front disc brake cali per bleeder screw.
11. If necessary, bleed the brak e master cylinder. For additional information, refer to Bleeding in this section.
Pressure
WARNING: Brake fluid contains polyglycol ethers and pol yglycols. Avoid contact with eyes. Wash hands thoroughl y after handling. If brake fluid contacts eyes, flush
eyes with running water for 15 minutes. Get medical atten tion if irritation persists. If tak en internally, drink water a nd induce vomiting. Get med ical attention immediately.
CAUTION: Do not allow the brake master cylinder reservoir to run dry during the bleedi ng operation. Keep the brak e master cylinder reservoir filled with the specified
brake fluid. Never reuse the brake fluid that has been drain ed from the hydraulic system.
CAUTION: Brake fluid is harm ful to painted and plastic su rfaces. If brake fluid is spilled onto a painted or plastic surface, immediately wash it with water.
NOTE: When any part of the hydraulic system has been disco nnected for repair or new inst allation, air may get into the sys tem and cause spongy brake pedal action. This requires bleeding
of the hydraulic system after it has been correctly connected. The hydraulic system can be bled manually or with pressure bleeding equipment.
NOTE: Bleed the longest line first. Be sure the bleeder tank contains enough specified brake fluid to complete the bleeding operation.
1. Clean all dirt from and remove the brake master cylinder filler cap and fill the brake master cylinder reservoir with the speci fied brake fluid.
2. NOTE: Master cylinder pressu re bleeder adapter tools are a vailable from various manufac turers of pressure bleeding equipment. Follow the instructions of the manufacturer when
installing the adapter.
Install the bleeder adapter to the brake master cylinder reservoir and attach the bleeder tank hose to the fitting on the adapter.
3. Place a box end wrench on th e RH rear disc brake caliper bleeder screw. Attach a rubber dra in tube to the RH rear disc b rake caliper bleeder screw and submerge the free end of
the tube in a container partially filled with clean brake fluid.
Page 6

Page
6
of 71998 Expedition/Navigator Workshop Manual
12/19/2010
http://www.fordtechservice.dealerconnection.com/pubs/content/~WSWJ/~MUS~LEN/19
...
4. Open the valve on the bleeder tank.
5. Loosen the rear disc brake caliper bleeder screw. Leave open until clear, bubble-free brake fluid flows, then tighten rear disc brake caliper bleeder screw and remove the rubber
hose.
6. Continue bleeding the rest of t he system, going in order from the LH rear disc brake caliper (2552) to the RH front disc brake caliper (2B121) ending with the LH front disc brake
caliper.
7. Close the bleeder tank valve and remove the tank hose from the adapter and remove the adapter.
8. Fill the brake master cylinder reservoir and install the brake m aster cylinder filler cap.
Master Cylinder, Bench
WARNING: Brake fluid contains polyglycol ethers and pol yglycols. Avoid contact with eyes. Wash hands thoroughl y after handling. If brake fluid contacts eyes, flush
eyes with running water for 15 minutes. Get medical atten tion if irritation persists. If tak en internally, drink water a nd induce vomiting. Get med ical attention immediately.
CAUTION: Do not allow the brake master cylinder reservoir to run dry during the bleedi ng operation. Keep the brak e master cylinder reservoir filled with the specified
brake fluid. Never reuse the brake fluid that has been drain ed from the hydraulic system.
CAUTION: Brake fluid is harm ful to painted and plastic su rfaces. If brake fluid is spilled onto a painted or plastic surface, immediately wash it with water.
NOTE: When any part of the hydraulic system has been disco nnected for repair or new inst allation, air may get into the sys tem and cause spongy brake pedal action. This requires bleeding
of the hydraulic system after it has been correctly connected. The hydraulic system can be bled manually or with pressure bleeding equipment.
1. Support the brake master cylinder body in a vise and fill the brake master cylinder reservo ir with specified brake fluid.
Use High Performance DOT 3 Brake Fluid C6AZ-19542-AB or equivalent DOT 3 fluid meeting Ford specification ESA-M6C25-A.
2. Install short brake tubes with the ends submerged in the brake master cylinder reservoir.
Page 7

Page
7
of 71998 Expedition/Navigator Workshop Manual
12/19/2010
http://www.fordtechservice.dealerconnection.com/pubs/content/~WSWJ/~MUS~LEN/19
...
3. Slowly depress the primary pist on until clear fluid flows from both brake tubes, without air bubbles.
4. Remove the short brake tubes.
 Loading...