

Page 1

Table of Contents
Introduction 4
Instrument Cluster 12
Warning lights and chimes 12
Gauges 17
Message center 19
Entertainment Systems 29
Auxiliary input jack (Line in) 38
USB port 40
Satellite radio information 44
Navigation system 47
SYNC威 47
Climate Controls 48
Manual heating and air conditioning 48
Navigation system based climate control 51
Rear window defroster 55
Lights 56
Headlamps 56
Turn signal control 61
Interior lamps 62
Bulb replacement 62
Driver Controls 70
Windshield wiper/washer control 70
Steering wheel adjustment 71
Power windows 75
Mirrors 78
Speed control 79
Locks and Security 96
Keys 96
Locks 102
Anti-theft system 112
2012 05+ Mustang (197)
Owners Guide, 3rd Printing
USA (fus)
1
Page 2

Table of Contents
Seating and Safety Restraints 118
Seating 118
Personal Safety System™ 129
Safety belt system 132
Airbags 143
Child restraints 155
Tires, Wheels and Loading 175
Tire information 175
Tire inflation 177
Tire Pressure Monitoring System (TPMS) 190
Vehicle loading 195
Trailer towing 202
Recreational towing 205
Driving 206
Starting 206
Brakes 212
AdvanceTrac威 213
Transmission operation 221
Reverse sensing system 226
Rear-view camera system 228
Roadside Emergencies 232
Getting roadside assistance 232
Hazard flasher control 233
Fuel pump shut-off 234
Fuses and relays 234
Changing tires 242
Temporary mobility kit 247
Wheel lug nut torque 256
Jump starting 257
Wrecker towing 260
Customer Assistance 262
Reporting safety defects (U.S. only) 269
Reporting safety defects (Canada only) 269
2
2012 05+ Mustang (197)
Owners Guide, 3rd Printing
USA (fus)
Page 3

Table of Contents
Cleaning 270
Maintenance and Specifications 278
Engine compartment 280
Engine oil 283
Battery 287
Engine coolant 289
Fuel information 295
Air filter(s) 309
Part numbers 312
Maintenance product specifications and capacities 313
Engine data 316
Accessories 320
Ford Extended Service Plan 323
Scheduled Maintenance 327
Normal scheduled maintenance and log 333
Index 345
The information contained in this publication was correct at the time of going to
print. In the interest of continuous development, we reserve the right to change
specifications, design or equipment at any time without notice or obligation. No
part of this publication may be reproduced, transmitted, stored in a retrieval
system or translated into any language in any form by any means without our
written permission. Errors and omissions excepted.
© Ford Motor Company 2011
2012 05+ Mustang (197)
Owners Guide, 3rd Printing
USA (fus)
3
Page 4

Introduction
CONGRATULATIONS
Congratulations on acquiring your new Ford. Please take the time to get
well acquainted with your vehicle by reading this handbook. The more
you know and understand about your vehicle, the greater the safety and
pleasure you will derive from driving it.
For more information on Ford Motor Company and its products visit the
following website:
• In the United States: www.ford.com
• In Canada: www.ford.ca
• In Australia: www.ford.com.au
• In Mexico: www.ford.com.mx
Additional owner information is given in separate publications.
This Owner’s Guide describes every option and model variant available
and therefore some of the items covered may not apply to your
particular vehicle. Furthermore, due to printing cycles it may describe
options before they are generally available.
Remember to pass on this Owner’s Guide when reselling the vehicle. It is
an integral part of the vehicle.
WARNING: Fuel pump shut-off: In the event of an accident
this feature will automatically cut off the fuel supply to the
engine. It can also be activated through sudden vibration (e.g. collision
when parking). To restart your vehicle, refer to Fuel pump shut-off in
the Roadside Emergencies chapter.
SAFETY AND ENVIRONMENT PROTECTION
Warning symbols in this guide
How can you reduce the risk of personal injury to yourself or others? In
this guide, answers to such questions are contained in comments
highlighted by the warning triangle symbol. These comments should be
read and observed.
4
2012 05+ Mustang (197)
Owners Guide, 3rd Printing
USA (fus)
Page 5

Introduction
Warning symbols on your vehicle
When you see this symbol, it is
imperative that you consult the
relevant section of this guide before
touching or attempting adjustment
of any kind.
Protecting the environment
We must all play our part in
protecting the environment. Correct
vehicle usage and the authorized
disposal of waste, cleaning and
lubrication materials are significant
steps toward this aim. Information in this respect is highlighted in this
guide with the tree symbol.
CALIFORNIA PROPOSITION 65 WARNING
WARNING: Engine exhaust, some of its constituents, and
certain vehicle components contain or emit chemicals known to
the State of California to cause cancer and birth defects or other
reproductive harm. In addition, certain fluids contained in vehicles and
certain products of component wear contain or emit chemicals known
to the State of California to cause cancer and birth defects or other
reproductive harm.
PERCHLORATE MATERIAL
Certain components of this vehicle such as airbag modules, safety belt
pretensioners, and button cell batteries may contain Perchlorate Material
– Special handling may apply for service or vehicle end of life disposal.
See www.dtsc.ca.gov/hazardouswaste/perchlorate.
BREAKING-IN YOUR VEHICLE
Your vehicle does not need an extensive break-in. Try not to drive
continuously at the same speed for the first 1,000 miles (1,600 km) of
new vehicle operation. Vary your speed frequently in order to give the
moving parts a chance to break in.
2012 05+ Mustang (197)
Owners Guide, 3rd Printing
USA (fus)
5
Page 6

Introduction
Drive your new vehicle at least 100 miles (160 km) before performing
extended wide open throttle maneuvers and at least 1,000 miles
(1,600 km) before towing a trailer or before performance/competition
conditions. For more detailed information about towing a trailer, refer to
Trailer towing in the Tires, Wheels and Loading chapter.
Do not add friction modifier compounds or special break-in oils since
these additives may prevent piston ring seating. See Engine oil in the
Maintenance and Specifications chapter for more information on oil
usage.
SPECIAL NOTICES
New Vehicle Limited Warranty
For a detailed description of what is covered and what is not covered by
your vehicle’s New Vehicle Limited Warranty, refer to the Warranty
Guide that is provided to you along with your Owner’s Guide.
Special instructions
For your added safety, your vehicle is fitted with sophisticated electronic
controls.
WARNING: Please read the section Airbag Supplemental
Restraint System (SRS) in the Seating and Safety Restraints
chapter. Failure to follow the specific warnings and instructions could
result in personal injury.
WARNING: Front seat mounted rear-facing child or infant seats
should NEVER be placed in front of an active passenger airbag.
DATA RECORDING
Service Data Recording
Service data recorders in your vehicle are capable of collecting and
storing diagnostic information about your vehicle. This potentially
includes information about the performance or status of various systems
and modules in the vehicle, such as engine, throttle, steering or brake
systems. In order to properly diagnose and service your vehicle, Ford
Motor Company, Ford of Canada, and service and repair facilities may
access or share among them vehicle diagnostic information received
through a direct connection to your vehicle when diagnosing or servicing
6
2012 05+ Mustang (197)
Owners Guide, 3rd Printing
USA (fus)
Page 7

Introduction
your vehicle. For U.S. only (if equipped), if you choose to use the SYNC威
Vehicle Health Report, you consent that certain diagnostic information
may also be accessed electronically by Ford Motor Company and Ford
authorized service facilities, and that the diagnostic information may be
used for any purpose. See your SYNC威 supplement for more information.
Event Data Recording
This vehicle is equipped with an event data recorder (EDR). The
main purpose of an EDR is to record, in certain crash or near
crash-like situations, such as an airbag deployment or hitting a
road obstacle; this data will assist in understanding how a
vehicle’s systems performed. The EDR is designed to record data
related to vehicle dynamics and safety systems for a short period
of time, typically 30 seconds or less. The EDR in this vehicle is
designed to record such data as:
• How various systems in your vehicle were operating;
• Whether or not the driver and passenger safety belts were
buckled/fastened;
• How far (if at all) the driver was depressing the accelerator
and/or the brake pedal; and
• How fast the vehicle was travelling; and
• Where the driver was positioning the steering wheel.
This data can help provide a better understanding of the
circumstances in which crashes and injuries occur.
Note: EDR data is recorded by your vehicle only if a non-trivial
crash situation occurs; no data is recorded by the EDR under
normal driving conditions and no personal data or information
(e.g., name, gender, age, and crash location) is recorded (see
limitations regarding 911 Assist and Traffic, directions and
Information privacy below). However, parties, such as law
enforcement, could combine the EDR data with the type of
personally identifying data routinely acquired during a crash
investigation.
2012 05+ Mustang (197)
Owners Guide, 3rd Printing
USA (fus)
7
Page 8

Introduction
To read data recorded by an EDR, special equipment is required,
and access to the vehicle or the EDR is needed. In addition to the
vehicle manufacturer, other parties, such as law enforcement,
that have such special equipment, can read the information if
they have access to the vehicle or the EDR. Ford Motor Company
and Ford of Canada do not access event data recorder
information without obtaining consent, unless pursuant to court
order or where required by law enforcement, other government
authorities or other third parties acting with lawful authority.
Other parties may seek to access the information independently
of Ford Motor Company and Ford of Canada.
Note: Including to the extent that any law pertaining to Event
Data Recorders applies to SYNC威 or its features, please note the
following: Once 911 Assist (if equipped) is enabled (set ON), 911
Assist may, through any paired and connected cell phone, disclose
to emergency services that the vehicle has been in a crash
involving the deployment of an airbag or, in certain vehicles, the
activation of the fuel pump shut-off. Certain versions or updates
to 911 Assist may also be capable of being used to electronically
or verbally provide to 911 operators the vehicle location (such as
latitude and longitude), and/or other details about the vehicle or
crash or personal information about the occupants to assist 911
operators to provide the most appropriate emergency services. If
you do not want to disclose this information, do not activate the
911 Assist feature. See your SYNC威 supplement for more
information.
Additionally, when you connect to Traffic, Directions and
Information (if equipped, U.S. only), the service uses GPS
technology and advanced vehicle sensors to collect the vehicle’s
current location, travel direction, and speed (“vehicle travel
information”), only to help provide you with the directions,
traffic reports, or business searches that you request. If you do
not want Ford or its vendors to receive this information, do not
activate the service. Ford Motor Company and the vendors it uses
to provide you with this information do not store your vehicle
travel information. For more information, see Traffic, Directions
and Information, Terms and Conditions. See your SYNC威
supplement for more information.
8
2012 05+ Mustang (197)
Owners Guide, 3rd Printing
USA (fus)
Page 9

Introduction
CELL PHONE USE
The use of mobile communications equipment has become increasingly
important in the conduct of business and personal affairs. However,
drivers must not compromise their own or others’ safety when using
such equipment. Mobile communications can enhance personal safety
and security when appropriately used, particularly in emergency
situations. Safety must be paramount when using mobile communications
equipment to avoid negating these benefits.
Mobile communication equipment includes, but is not limited to, cellular
phones, pagers, portable email devices, text messaging devices and
portable two-way radios.
WARNING: Driving while distracted can result in loss of vehicle
control, accident and injury. Ford strongly recommends that you
use extreme caution when using any device or feature that may take
your focus off the road. Your primary responsibility is the safe
operation of your vehicle.
We recommend against the use of any handheld device while driving
and that you comply with all applicable laws.
EXPORT UNIQUE (NON–UNITED STATES/CANADA) VEHICLE
SPECIFIC INFORMATION
For your particular global region, your vehicle may be equipped with
features and options that are different from the features and options that
are described in this Owner’s Guide. A market unique supplement may
be supplied that complements this book. By referring to the market
unique supplement, if provided, you can properly identify those features,
recommendations and specifications that are unique to your vehicle. This
Owner’s Guide is written primarily for the U.S. and Canadian Markets.
Features or equipment listed as standard may be different on units built
for Export. Refer to this Owner’s Guide for all other required
information and warnings.
2012 05+ Mustang (197)
Owners Guide, 3rd Printing
USA (fus)
9
Page 10
Introduction
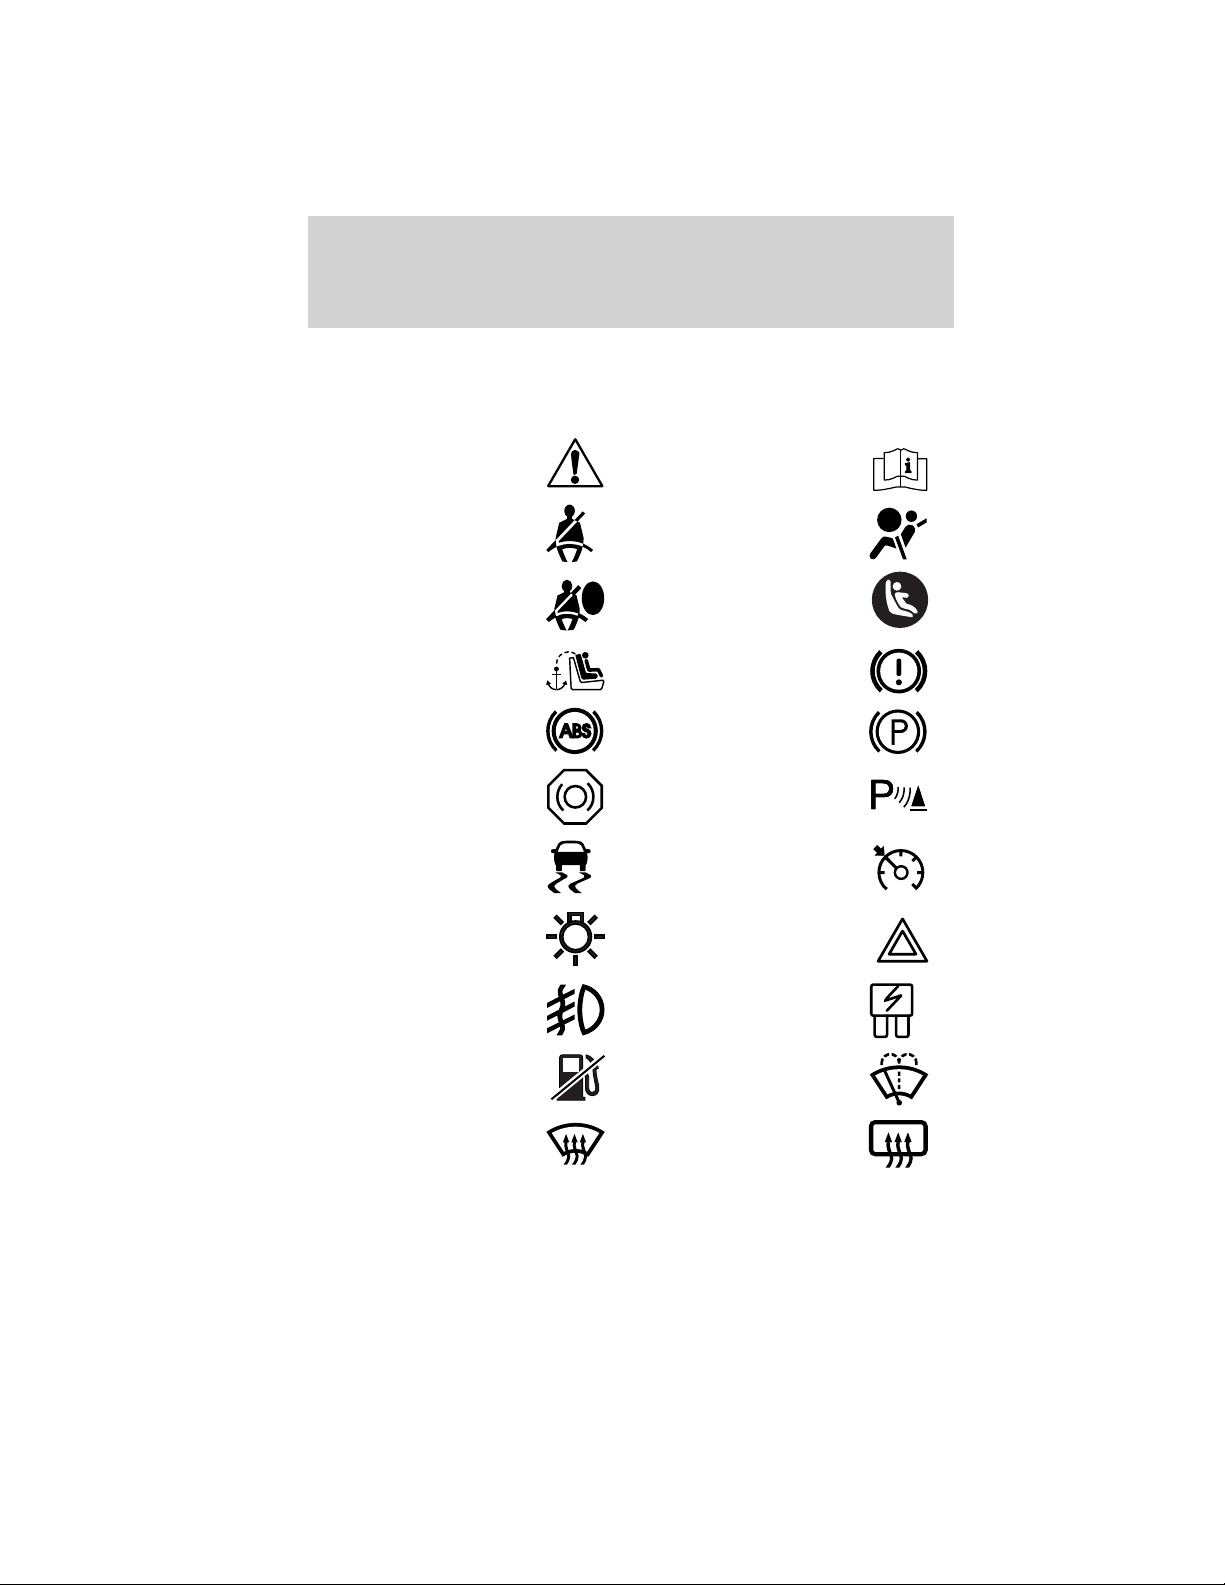
These are some of the symbols you may see on your vehicle.
Vehicle Symbol Glossary
Safety Alert
Fasten Safety Belt Airbag - Front
Airbag - Side
Child Seat Tether
Anchor
Anti-Lock Brake System Parking Brake System
Brake Fluid Non-Petroleum Based
Stability Control System Speed Control
Master Lighting Switch Hazard Warning Flasher
Fog Lamps-Front Fuse Compartment
See Owner’s Guide
Child Seat Lower
Anchor
Brake System
Parking Aid System
Fuel Pump Reset Windshield Wash/Wipe
Windshield
Defrost/Demist
10
Rear Window
Defrost/Demist
2012 05+ Mustang (197)
Owners Guide, 3rd Printing
USA (fus)
Page 11

Vehicle Symbol Glossary
Introduction
Power Windows
Front/Rear
Child Safety Door
Lock/Unlock
Power Window Lockout
Interior Luggage
Compartment Release
Panic Alarm Engine Oil
Engine Coolant
Engine Coolant
Temperature
Do Not Open When Hot Battery
Avoid Smoking, Flames,
or Sparks
Battery Acid
Explosive Gas Fan Warning
Power Steering Fluid
Maintain Correct Fluid
Level
Service Engine Soon Engine Air Filter
MAX
MIN
Passenger Compartment
Air Filter
Check Fuel Cap
2012 05+ Mustang (197)
Owners Guide, 3rd Printing
USA (fus)
Jack
Low Tire Pressure
Warning
11
Page 12

Instrument Cluster
WARNING LIGHTS AND CHIMES
Base V6 engine instrument cluster (standard measure shown,
metric similar)
OFF
Optional V6 and GT instrument cluster (standard measure shown,
metric similar)
OFF
Warning lights and gauges can alert you to a vehicle condition that may
become serious enough to cause extensive repairs. A warning light may
illuminate when a problem exists with one of your vehicle’s functions.
Many lights will illuminate when you start your vehicle to make sure the
bulbs work. If any light remains on after starting the vehicle, refer to the
respective system warning light for additional information.
12
2012 05+ Mustang (197)
Owners Guide, 3rd Printing
USA (fus)
Page 13

Instrument Cluster
Service engine soon: The service
engine soon indicator light
illuminates when the ignition is first
turned to the on position to check
the bulb and to indicate whether the vehicle is ready for
Inspection/Maintenance (I/M) testing. Normally, the service engine soon
light will stay on until the engine is cranked, then turn itself off if no
malfunctions are present. However, if after 15 seconds the service engine
soon light blinks eight times, it means that the vehicle is not ready for
I/M testing. See the Readiness for Inspection/Maintenance (I/M)
testing in the Maintenance and Specifications chapter.
Solid illumination after the engine is started indicates the on-board
diagnostics system (OBD-II) has detected a malfunction. Refer to
On-board diagnostics (OBD-II) in the Maintenance and Specifications
chapter. If the light is blinking, engine misfire is occurring which could
damage your catalytic converter. Drive in a moderate fashion (avoid
heavy acceleration and deceleration) and contact your authorized dealer
as soon as possible.
WARNING: Under engine misfire conditions, excessive exhaust
temperatures could damage the catalytic converter, the fuel
system, interior floor coverings or other vehicle components, possibly
causing a fire.
Brake system warning light: To
confirm the brake system warning
light is functional, it will
momentarily illuminate when the
ignition is turned to the on position
when the engine is not running, or in a position between on and start, or
by applying the parking brake when the ignition is turned to the on
position. If the brake system warning light does not illuminate at this
time, contact your authorized dealer as soon as possible. Illumination
after releasing the parking brake indicates low brake fluid level. Contact
your authorized dealer as soon as possible.
BRAKE
P!
13
2012 05+ Mustang (197)
Owners Guide, 3rd Printing
USA (fus)
Page 14

Instrument Cluster
WARNING: Driving a vehicle with the brake system warning
light on is dangerous. A significant decrease in braking
performance may occur. It will take you longer to stop the vehicle.
Contact your authorized dealer as soon as possible. Driving extended
distances with the parking brake engaged can cause brake failure and
the risk of personal injury.
Anti-lock brake system (if
equipped): If the ABS light stays
illuminated or continues to flash, a
malfunction has been detected.
Contact your authorized dealer as
soon as possible. Normal braking is still functional unless the brake
warning light also is illuminated.
Airbag readiness: If this light fails
to illuminate when the ignition is
turned to on, continues to flash or
remains on, contact your authorized
dealer as soon as possible. A chime will sound if there is a malfunction in
the indicator light.
Safety belt: Reminds you to fasten
your safety belt. A Belt-Minder威
chime will also sound to remind you
to fasten your safety belt. Refer to
the Seating and Safety Restraints
chapter to activate/deactivate the Belt-Minder威 chime feature.
Charging system: Illuminates when
the battery is not charging properly.
If it stays on while the engine is
running, there may be a malfunction
with the charging system. Contact your authorized dealer as soon as
possible. This indicates a problem with the electrical system or a related
component.
Engine oil pressure (if
equipped): Illuminates when the oil
pressure falls below the normal
range, refer to Engine oil in the
Maintenance and Specifications chapter.
14
ABS
2012 05+ Mustang (197)
Owners Guide, 3rd Printing
USA (fus)
Page 15

Instrument Cluster
Engine coolant temperature:
Illuminates when the engine coolant
temperature is high. Stop the
vehicle as soon as possible, switch off the engine and let cool. Refer to
Engine coolant in the Maintenance and Specifications chapter.
WARNING: Never remove the coolant reservoir cap while the
engine is running or hot.
Low tire pressure warning:
Illuminates when your tire pressure
is low. If the light remains on at
start up or while driving, the tire
pressure should be checked. Refer
to Inflating your tires in the Tires, Wheels and Loading chapter. When
the ignition is first turned to on, the light will illuminate for three
seconds to ensure the bulb is working. If the light does not turn on,
contact your authorized dealer as soon as possible. For more information
on this system, refer to Tire pressure monitoring system (TPMS) in
the Tires, Wheels and Loading chapter.
AdvanceTrac威/traction control
active: Flashes when the system is
active. If the light remains on a
malfunction has been detected;
contact your authorized dealer as soon as possible. Refer to the Driving
chapter for more information.
AdvanceTrac威/traction control
off light: Illuminates when the
system has been disabled (by the
driver or as a result of a system
failure). Refer to the Driving
chapter for more information.
Low fuel (if equipped):
Illuminates when the fuel level in
the fuel tank is at or near empty.
Refer to Fuel gauge in this chapter.
OFF
2012 05+ Mustang (197)
Owners Guide, 3rd Printing
USA (fus)
15
Page 16
Instrument Cluster
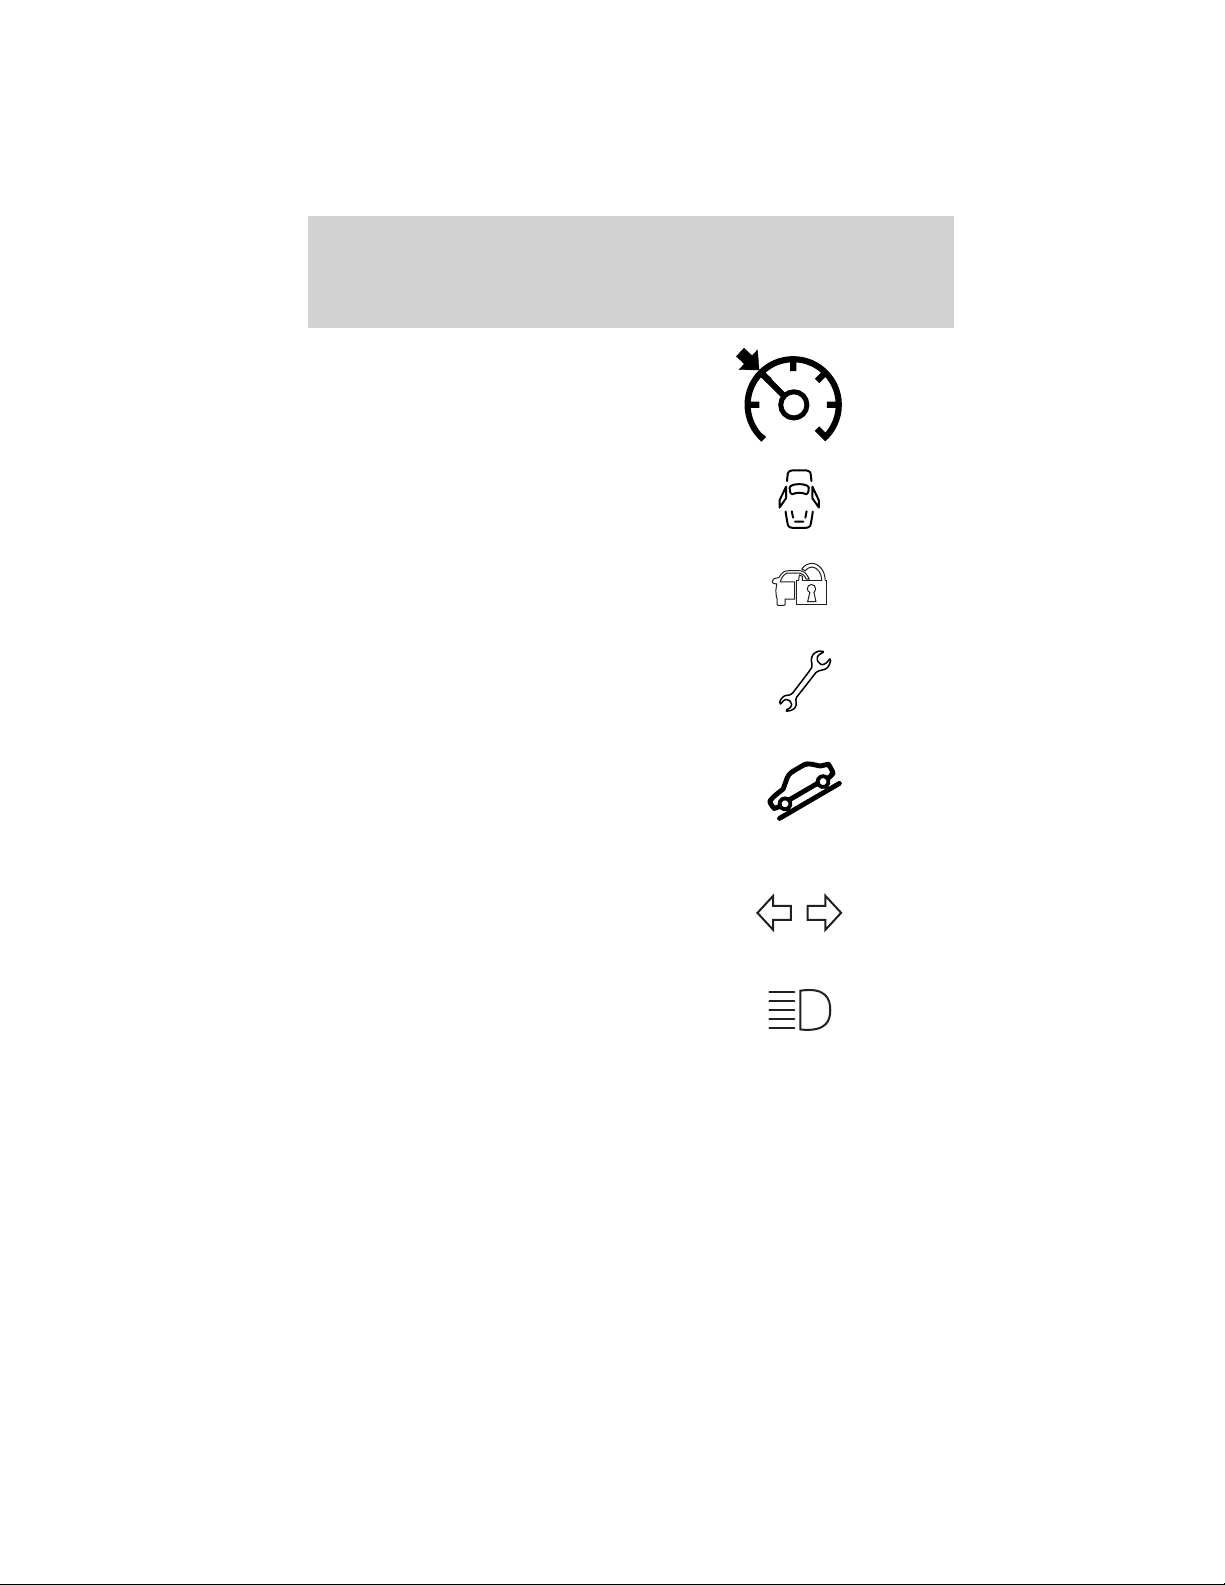
Speed control: Illuminates when
the speed control is engaged. Turns
off when the speed control system
is disengaged.
Door ajar: Illuminates when the
ignition is in the on position and any
of the doors or the hood/trunk are
not completely closed.
Anti-theft system: Flashes when
the SecuriLock威 passive anti-theft
system has been activated.
Electronic throttle control:
Illuminates when the engine has
defaulted to a “limp-home”
operation. Contact your authorized
dealer as soon as possible.
Grade assist (if equipped):
Illuminates when the overdrive
function of the transmission has
been turned off and the grade assist
function has been turned on, refer
to the Driving chapter.
Turn signal: Illuminates when the
left or right turn signal or the
hazard lights are turned on. If the
indicators stay on or flash faster, check for a burned out bulb.
High beams: Illuminates when the
high beam headlamps are turned on.
Key-in-ignition warning chime: Sounds when the key is left in the
ignition in the off or accessory position and the driver’s door is opened.
Headlamps on warning chime: Sounds when the headlamps or parking
lamps are on, the ignition is off (the key is not in the ignition) and the
driver’s door is opened.
16
2012 05+ Mustang (197)
Owners Guide, 3rd Printing
USA (fus)
Page 17

Instrument Cluster
GAUGES
Base V6 engine instrument cluster (standard measure shown,
metric similar)
1 2 3 4
2012 05+ Mustang (197)
Owners Guide, 3rd Printing
USA (fus)
17
Page 18

Instrument Cluster
Optional V6 and GT instrument cluster (standard measure shown,
metric similar)
1 2 3 4
6 5
Refer to Message center in this chapter to select preset colors or user
definable colors (MyColor威) for the nighttime gauge backlighting.
1. Speedometer: Indicates the current vehicle speed.
2. Fuel gauge: Indicates approximately how much fuel is left in the fuel
tank (when the ignition is in the on position). The fuel gauge may vary
slightly when the vehicle is in motion or on a grade. The fuel icon and
arrow indicates which side of the vehicle the fuel filler door is located.
3. Engine coolant temperature gauge: Indicates engine coolant
temperature. At normal operating temperature, the needle will be in the
normal range (between H and C). If it enters the red section, the
engine is overheating. Stop the vehicle as soon as safely possible,
switch off the engine and let the engine cool.
4. Tachometer: Indicates the engine speed in revolutions per minute.
Driving with your tachometer pointer continuously at the top of the scale
may damage the engine.
18
2012 05+ Mustang (197)
Owners Guide, 3rd Printing
USA (fus)
Page 19
Instrument Cluster
5. Engine oil pressure gauge (optional V6 and GT cluster only):
Indicates engine oil pressure. The needle should stay in the normal
operating range (between L and H). If the needle falls below the normal
range, stop the vehicle, turn off the engine and check the engine oil
level. Add oil if needed. If the oil level is correct, have your vehicle
checked at your authorized dealer.
6.
Indicates the battery voltage when the ignition is in the on position. If
the pointer moves and stays outside the normal operating range, have
the vehicle’s electrical system checked as soon as possible.
Odometer and trip odometer: The odometer is displayed in the
message center and registers the distance of individual journeys. For trip
odometer, refer to Message center in this chapter.
MESSAGE CENTER
Your vehicle’s message center allows you to configure/personalize certain
vehicle options to suit your needs.
The message center is also capable of monitoring many vehicle systems
and will alert you to potential vehicle problems and various conditions
with an informational message followed by a long indicator chime.
The message center display is located in the instrument cluster.
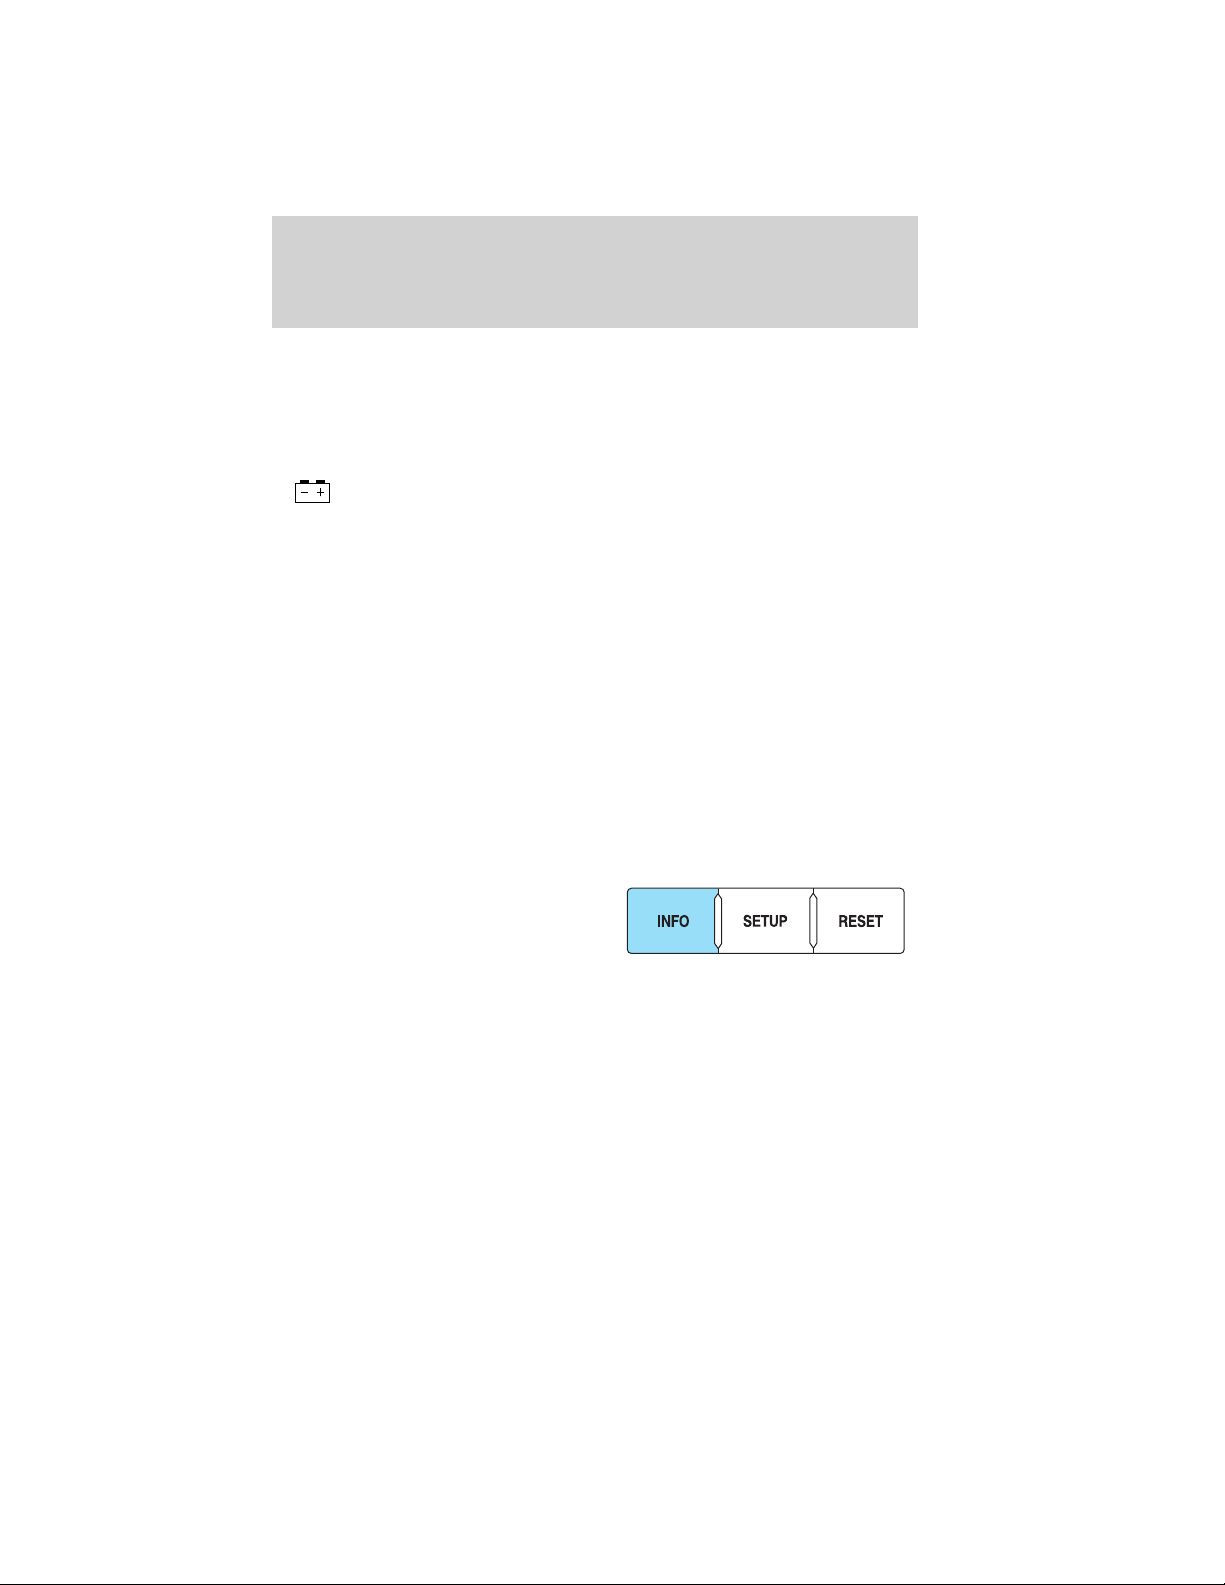
Info
Press INFO repeatedly to cycle
through the following features:
Battery voltage gauge (optional V6 and GT cluster only):
TRIP A/B
Registers the distance of individual journeys. Press and release INFO
until the A or B trip appears in the display (this represents the trip
mode). Press and hold RESET for two seconds to reset.
Refer to UNITS later in this section to switch the display from Metric to
English.
2012 05+ Mustang (197)
Owners Guide, 3rd Printing
USA (fus)
19
Page 20

Instrument Cluster
MYKEY MILES (km)
For more information, refer to MyKey威 in the Locks and Security
chapter.
MILES (km) TO E
This displays an estimate of approximately how far you can drive with
the fuel remaining in your tank under normal driving conditions.
Remember to turn the ignition off when refueling to allow this feature to
correctly detect the added fuel.
LOW FUEL LEVEL will display when you have approximately 50 miles
(80 km) to empty. Press RESET to clear this warning message. It will
return at approximately 25 miles (40 km), 10 miles (16 km) and 0 miles
(0 km) miles to empty.
Distance to empty is calculated using a running average fuel economy,
which is based on your recent driving history of 500 miles (800 km).
This value is not the same as the average fuel economy display. The
running average fuel economy is re-initialized to a factory default value if
the battery is disconnected.
AVG MPG (L/100 km)
Average fuel economy displays your average fuel economy in miles/gallon
or liters/100 km.
If you calculate your average fuel economy by dividing distance traveled
by gallons of fuel used (liters of fuel used by 100 kilometers traveled),
your figure may be different than displayed for the following reasons:
• Your vehicle was not perfectly level during fill-up
• Differences in the automatic shut-off points on the fuel pumps at
service stations
• Variations in top-off procedure from one fill-up to another
• Rounding of the displayed values to the nearest 0.1 gallon (liter)
To determine your average highway fuel economy, do the following:
1. Drive the vehicle at least 5 miles (8 km) with the speed control
system engaged to display a stabilized average.
2. Record the highway fuel economy for future reference.
It is important to press the RESET button (press and hold RESET for
two seconds in order to reset the function) after setting the speed
control to get accurate highway fuel economy readings.
For more information refer to Essentials of good fuel economy in the
Maintenance and Specifications chapter.
20
2012 05+ Mustang (197)
Owners Guide, 3rd Printing
USA (fus)
Page 21

Instrument Cluster
MPG (L/km)
This displays instantaneous fuel economy as a bar graph ranging from ↓
poor economy to ↑ excellent economy.
Your vehicle must be moving to calculate instantaneous fuel economy.
When your vehicle is not moving, this function shows ↓, one or no bars
illuminated. Instantaneous fuel economy cannot be reset.
TIMER
Timer displays the trip elapsed drive time.
To operate, do the following:
1. Press and release RESET in order to start the timer.
2. Press and release RESET to pause the timer.
3. Press and hold RESET until the timer resets.
Blank Screen
The message center display will be blank after cycling through all of the
Info menu items.
System check and vehicle feature customization
*Press the SETUP button repeatedly
to cycle the message center through
the following features:
*Note: Not all personalization items
will appear unless your vehicle is so
equipped.
RESET FOR SYSTEM CHECK
When this message appears, press
the RESET button and the message
center will begin to cycle through
the following systems and provide a
status of the item if needed.
1. XXX% OIL LIFE
2. CHARGING SYSTEM
3. DOORS STATUS
4. TRUNK STATUS
5. BRAKE SYSTEM
6. FUEL LEVEL
21
2012 05+ Mustang (197)
Owners Guide, 3rd Printing
USA (fus)
Page 22

Instrument Cluster
7. MYKEY DISTANCE (if MyKey威 is programmed)
8. MYKEY(S) PROGRAMMED
9. ADMIN KEYS PROGRAMMED
Note: Some systems show a message only if a condition is present.
OIL LIFE
This displays the remaining oil life.
An oil change is required whenever indicated by the message center and
according to the recommended maintenance schedule. USE ONLY
RECOMMENDED ENGINE OILS.
To reset the oil monitoring system to 100% after each oil change perform
the following:
1. Press and release SETUP to display “OIL LIFE XXX% HOLD RESET =
NEW”.
2. Press and hold RESET for two seconds and release to reset the oil life
to 100%.
STEERING FEEL
This feature allows three modes of steering feel.
Press RESET to cycle through the settings of:
• STANDARD– Provides a balance between a comfort and sport feel.
• SPORT– Slightly higher effort required for steering with more road
force felt through the steering wheel. See note below.
• COMFORT– Slightly less effort required for steering with less road
force felt through the steering wheel.
Note: When AdvanceTrac威 sport mode is on or when AdvanceTrac威 and
traction control are off, the steering feel will be locked in sport mode.
The display will show STEERING FEEL <SPORT> LOCKED and the
steering feel will not be selectable.
See AdvanceTrac威 stability enhancement system and Steering in the
Driving chapter for more information.
HALO LIGHT
Turns the halo lighting around the gauges on or off.
Press and hold RESET to turn the feature on or off.
AMBIENT LIGHT
Turns the ambient lighting on or off. Ambient lighting provides accent
lighting in various locations such as footwell areas, cup holders and the
center console bin. The parking lamps/headlamps must be on to use
ambient lighting.
22
2012 05+ Mustang (197)
Owners Guide, 3rd Printing
USA (fus)
Page 23

Instrument Cluster
Press and hold RESET to turn the feature on or off.
AMBIENT DIM
Use this to adjust the brightness of the ambient lighting.
Press RESET to choose the various settings.
GAUGE COLOR, AMBIENT COLOR, HALO COLOR
GAUGE COLOR: The instrument cluster gauges are backlit with white
backlighting when the headlamps are off. When the headlamps are on,
you can select one of the preset colors for the nighttime gauge
backlighting or create up to three custom colors using the MyColor威
feature.
Note: A gauge in a warning condition will be lit red when the headlamps
are on.
AMBIENT COLOR: You can select one of the preset colors for ambient
lighting or create up to three custom colors using the MyColor威 feature.
HALO COLOR: You can select one of the preset colors for halo lighting
or create up to three custom colors using the MyColor威 feature.
Note: Headlamps or parking lamps must be on to set up colors.
To choose colors for the gauges, halo color or ambient lighting do the
following:
1. Press SETUP to reach the GAUGE COLOR, AMBIENT COLOR, or
HALO COLOR menu.
2. Press RESET to scroll through the following color options:
•ICE BLUE •BLUE
•WHITE •ORANGE
•GREEN •RED
•PURPLE •MYCOLOR 1, 2, 3 (See HOLD
RESET TO SET MY COLOR 1, 2,
3 following, to save personalized
color combinations)
HOLD RESET TO SET MYCOLOR 1, 2, 3 (Saving your own colors)
Apart from the preset colors, you can create your own color by adjusting
the levels of the three primary colors (red, green, and blue) through the
MyColor威 feature to achieve any of 125 different combinations. You can
save up to three custom colors in MyColor威.
2012 05+ Mustang (197)
Owners Guide, 3rd Printing
USA (fus)
23
Page 24

Instrument Cluster
To enter the MyColor威 adjust mode, do the following (vehicle must be
stationary):
1. Press and hold RESET for three seconds at the MyColor 1, 2 or 3
menu option to reach the MyColor威 adjust mode.
2. Press SETUP to scroll through the R (red), G (green), B (blue) and
Exit options.
3. Press RESET to blend in more of the color being adjusted.
4. To save and exit, hold RESET for three seconds when prompted.
Pressing RESET for less than three seconds will cycle back through the
colors.
UNITS
Displays the current units English or Metric.
Press RESET to change from English to Metric.
AUTOLAMP (SEC)
This feature keeps your headlights on for up to three minutes after the
ignition is switched off.
Press RESET to select the new Autolamp delay values of 0, 10, 20, 30,
60, 90, 120 or 180 seconds.
AUTOLOCK
This feature automatically locks all vehicle doors when the vehicle is
shifted into any gear and driven.
For more information refer to Autolock in the Locks and Security
chapter.
Press RESET to turn autolock on or off.
AUTOUNLOCK
This feature automatically unlocks all vehicle doors when the driver’s
door is opened within 10 minutes of the ignition being turned off.
Press RESET to turn autounlock on or off.
REAR PARK AID
This feature sounds a warning tone to warn the driver of obstacles near
the rear bumper, and functions only when R (Reverse) gear is selected.
Press RESET to turn it off or on.
24
2012 05+ Mustang (197)
Owners Guide, 3rd Printing
USA (fus)
Page 25

Instrument Cluster
CREATE MYKEY / MYKEY SETUP/ CLEAR MYKEY
For more information refer to MyKey威 in the Locks and Security
chapter.
LANGUAGE = ENGLISH / SPANISH / FRENCH
Allows you to choose which language the message center will display in.
Selectable languages are English, Spanish, or French.
Waiting four seconds or pressing the RESET button cycles the message
center through each of the language choices.
Press and hold RESET for two seconds to set the language choice.
System warnings
System warnings alert you to possible problems or malfunctions in your
vehicle’s operating systems.
In the event of a multiple warning situation, the message center will
cycle the display to show all warnings by displaying each one for several
seconds.
The message center will display the last selected feature if there are no
more warning messages. This allows you to use the full functionality of
the message center after you acknowledge the warning by pressing the
RESET control and clearing the warning message.
Warning messages that have been reset are divided into three categories:
• They will not disappear until a condition is changed.
• They will reappear on the display 10 minutes from the reset.
• They will not reappear until an ignition off/on cycle has been
completed.
This acts as a reminder that these warning conditions still exist within
the vehicle.
CHECK BRAKE SYSTEM — Displayed when the brake system needs
servicing. If the warning stays on or continues to come on, contact your
authorized dealer as soon as possible.
DRIVER DOOR AJAR — Displayed when the driver’s door is not
completely closed.
PASSENGER DOOR AJAR — Displayed when the passenger side door
is not completely closed.
FUEL LEVEL LOW — Displayed as an early reminder of a low fuel
condition.
25
2012 05+ Mustang (197)
Owners Guide, 3rd Printing
USA (fus)
Page 26

Instrument Cluster
CHECK FUEL FILL INLET — Displayed when the fuel fill inlet may
not be properly closed. Refer to Easy Fuel威 “no cap” fuel system in the
Maintenance and Specifications chapter.
CHECK CHARGING SYSTEM — Displayed when the electrical system
is not maintaining proper voltage. If you are operating electrical
accessories when the engine is idling at a low speed, turn off as many of
the electrical loads as soon as possible. If the warning stays on or comes
on when the engine is operating at normal speeds, contact your
authorized dealer as soon as possible.
CHECK PARK AID (if equipped) — Displayed when the transmission
is in R (Reverse) and the reverse sensing system (park aid) is disabled.
Refer to Rear park aid in this section to enable.
BRAKE FLUID LEVEL LOW — Indicates the brake fluid level is low
and the brake system should be inspected immediately. Refer to Brake
fluid in the Maintenance and Specifications chapter.
LOW TIRE PRESSURE — Displayed when one or more tires on your
vehicle has low tire pressure. Refer to Inflating your tires in the Tires,
Wheels and Loading chapter.
TIRE PRESSURE MONITOR FAULT — Displayed when the tire
pressure monitoring system is malfunctioning. If the warning stays on or
continues to come on, contact your authorized dealer as soon as
possible.
TIRE PRESSURE SENSOR FAULT — Displayed when a tire pressure
sensor is malfunctioning, or your spare tire is in use. For more
information on how the system operates under these conditions, refer to
Tire Pressure Monitoring System (TPMS) in the Tires, Wheels and
Loading chapter. If the warning stays on or continues to come on,
contact your authorized dealer as soon as possible.
POWER STEERING ASSIST FAULT — The power steering system
has disabled power steering assist due to a system error; service is
required.
SERVICE POWER STEERING — The power steering system has
detected a condition that requires service.
SERVICE POWER STEERING NOW — The power steering system
has detected a condition that requires service immediately.
26
2012 05+ Mustang (197)
Owners Guide, 3rd Printing
USA (fus)
Page 27

Instrument Cluster
SERVICE ADVANCETRAC — Displayed when the AdvanceTrac威
system has detected a condition that requires service.
ENGINE OIL CHANGE SOON — Displayed when the engine oil life
remaining is 10% or less.
OIL CHANGE REQUIRED — Displayed when the oil life left reaches
0%.
TO STOP ALARM START VEHICLE — Displayed when the perimeter
alarm system is armed and the vehicle is entered using the key on the
driver’s side door. In order to prevent the perimeter alarm system from
triggering, the ignition must be turned to start or on before the
12 second chime expires. See Perimeter alarm system in the Locks and
Security chapter.
SECURITY EVENT OCCURRED (if equipped) — Displayed when
the active anti-theft system (if equipped) was activated since the prior
ignition cycle.
MYKEY ACTIVE DRIVE SAFELY — Displayed at startup when
MyKey威 is in use. Refer to MyKey威 in the Locks and Security chapter
for more information.
KEY COULD NOT PROGRAM — Displayed when an attempt is made
to program a spare key using two existing MyKeys. Refer to MyKey威 in
the Locks and Security chapter for more information.
VEHICLE SPEED 80 MPH MAX — Displayed when a MyKey威 is in
use and the Admin has enabled the MyKey speed limit and the vehicle
speed is 80 mph (130 km/h). Refer to MyKey威 in the Locks and
Security chapter for more information.
SPEED LIMITED TO 80 MPH — Displayed when starting the vehicle
and MyKey威 is in use and the MyKey speed limit is on. Refer to MyKey威
in the Locks and Security chapter for more information.
CHECK SPEED DRIVE SAFELY — Displayed when a MyKey威 is in
use and the optional setting is on and the vehicle exceeds a preselected
speed. Refer to MyKey威 in the Locks and Security chapter for more
information.
VEHICLE NEAR TOP SPEED — Displayed when a MyKey威 is in use
and the MyKey speed limit is on and the vehicle speed is approaching
80 mph (130 km/h). Refer to MyKey威 in the Locks and Security
chapter for more information.
2012 05+ Mustang (197)
Owners Guide, 3rd Printing
USA (fus)
27
Page 28

Instrument Cluster
TOP SPEED MYKEY SETTING — Displayed when a MyKey威 is in use
and the MyKey speed limit is on and the vehicle speed is 80 mph
(130 km/h). Refer to MyKey威 in the Locks and Security chapter for
more information.
BUCKLE UP TO UNMUTE AUDIO — Displayed when a MyKey威 is in
use and Belt-Minder威 is activated. Refer to MyKey威 in the Locks and
Security chapter for more information.
ADVTRAC ON MYKEY SETTING — Displayed when a MyKey威 is in
use when trying to disable the AdvanceTrac威 system and the optional
setting is on. Refer to MyKey威 in the Locks and Security chapter for
more information.
TRACKEY ACTIVE TRACK USE ONLY (Boss威 302 only) —
Displayed when a trackey is in use. Refer to the Boss威 302 supplement
for more information.
TRACKEY IDLE ENABLED (Boss威 302 only) — Displayed when a
trackey is in use. Refer to the Boss威 302 supplement for more
information.
1→4 SHIFT FOR FUEL ECONOMY — Displayed on manual
transmission vehicles when the vehicle determines that shifting directly
to 4th gear from 1st gear will improve fuel economy. Refer to Manual
transmission operation in the Driving chapter for more information.
28
2012 05+ Mustang (197)
Owners Guide, 3rd Printing
USA (fus)
Page 29

Entertainment Systems
AUDIO SYSTEMS
AM/FM Single CD/MP3 satellite-compatible sound system
WARNING: Driving while distracted can result in loss of vehicle
control, accident and injury. Ford strongly recommends that
drivers use extreme caution when using any device or feature that may
take their focus off the road. Your primary responsibility is the safe
operation of the vehicle. We recommend against the use of any
handheld device while driving, encourage the use of voice-operated
systems when possible and that you become aware of applicable state
and local laws that may affect use of electronic devices while driving.
Accessory delay: Your vehicle is equipped with accessory delay. With
this feature, the radio and other electrical accessories may be used for
up to 10 minutes after the ignition is turned off or until either front door
is opened.
Setting the clock
To set the time, press CLOCK. The
display will read SET TIME. Use the
memory preset numbers (0–9) to
enter in the desired time–hours and minutes and press OK. The clock
will then begin from that time.
Note: If your vehicle is equipped with a navigation system, refer to
Setting the clock in your Navigation supplement.
2012 05+ Mustang (197)
Owners Guide, 3rd Printing
USA (fus)
29
Page 30

Entertainment Systems
AM/FM radio
/ VOL (Power/Volume): Press
to turn the radio on/off. Turn the
knob to increase/decrease volume.
If the volume is set above a certain
level and the ignition is turned off,
the volume will come back on at a nominal listening level when the
ignition switch is turned back on.
AM/FM: Press repeatedly to select
AM/FM1/FM2 frequency band.
TUNE: Turn the knob to go
up/down the frequency band in
individual increments.
DIRECT: Press DIRECT and then
select the desired radio frequency
(i.e. 93.9) using the memory preset
numbers (0–9).
SEEK: Press
access the previous/next strong
radio station.
SEEK to
SCAN: Press for a brief sampling of
all strong radio stations.
MEMORY PRESETS (0–9): When
tuned to any station, press and hold
a preset button until sound returns
and PRESET # SAVED appears in the display. You can save up to 30
stations, 10 in AM, 10 in FM1 and FM2.
Saving presets automatically: Autoset allows you to set the strongest
local radio stations without losing your original manually set preset
stations for AM/FM1/FM2.
To activate the autoset feature: Press MENU repeatedly until AUTO
PRESET ON/OFF appears in the display. Use
AUTO PRESET to ON, and either wait five seconds for the search to
30
SEEK to turn
2012 05+ Mustang (197)
Owners Guide, 3rd Printing
USA (fus)
Page 31
Entertainment Systems
initiate or press OK to immediately initiate the search. If you press
another control within those five seconds, the search will not initiate.
The 10 strongest stations will be filled and the station stored in preset 1
will begin playing.
If there are fewer than 10 strong stations, the system will store the last
one in the remaining presets.
Note: In order to re-run the autoset features, you must first select
AUTO PRESET OFF and press OK. Then, select AUTO PRESET ON and
press OK.
RDS radio
Available only in FM mode. This feature allows you to search
RDS-equipped stations for a certain category of music format: CLASSIC,
COUNTRY, JAZZ/RB, ROCK, etc.
To activate: Press MENU repeatedly until RDS (ON/OFF) appears in the
display. Use
OFF, you will not be able to search for RDS equipped stations or view
the station name or type.
CAT (Category) / FOLD
(Folder): This feature allows you
to select from various music
categories.
To change RDS categories: Press MENU repeatedly until RDS ON/OFF
appears in the display. Use
ON/OFF. Press CAT. PRESS UP OR DOWN TO CHANGE RDS
CATEGORY will appear in the display. Press
through all possible categories. When the desired category appears in the
display, press
selection or press SCAN for a brief sampling of all stations playing that
category of music.
CD/MP3 player
CD: Press to enter CD/MP3 mode. If
a disc is already loaded into the
system, CD/MP3 play will begin
where it ended last. If no CD is loaded, NO DISC will appear in the
display.
SEEK to switch RDS ON and OFF. When RDS is
SEEK to toggle RDS between
SEEK to scroll
SEEK to find the next station playing that
31
2012 05+ Mustang (197)
Owners Guide, 3rd Printing
USA (fus)
Page 32
Entertainment Systems
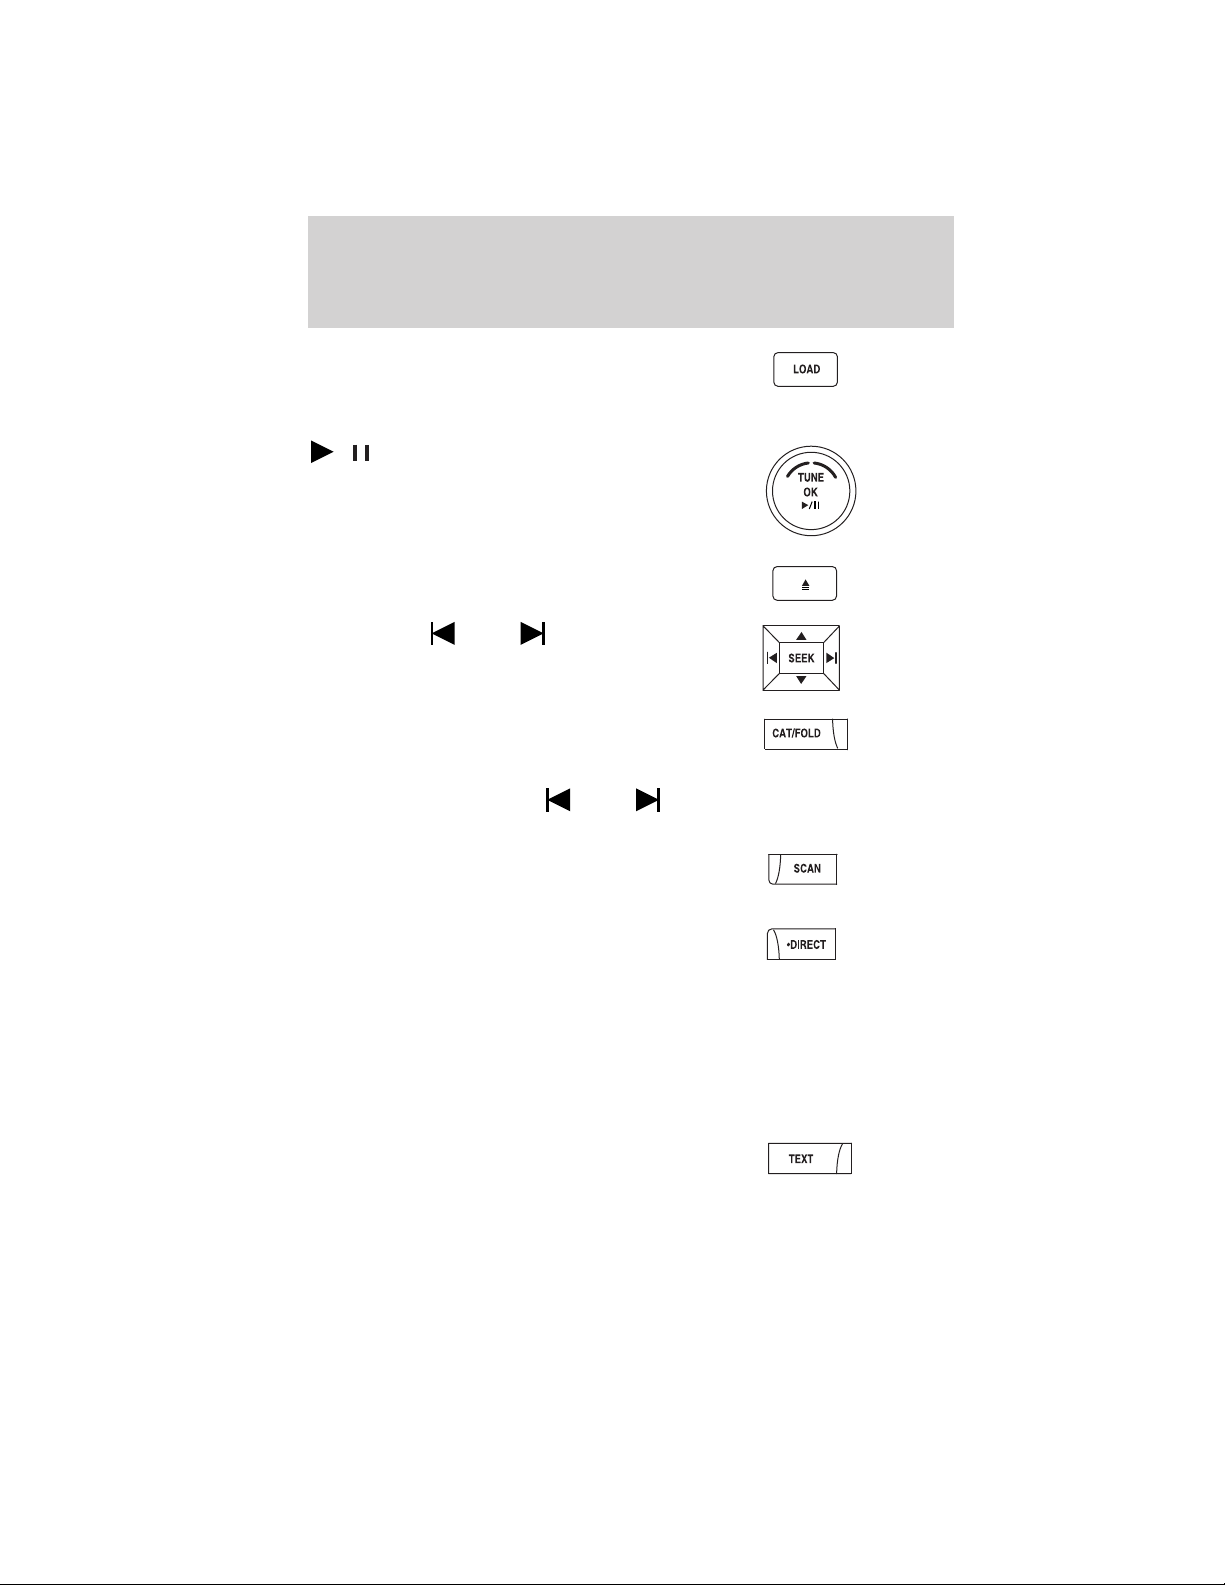
LOAD: This control is not
operational. To load a CD, simply
insert the disc, label side up, into
the CD slot.
/ Play/Pause: Press to
play/pause a track when playing a
CD.
EJECT: Press to eject the CD.
SEEK: Press
access the previous/next track.
CAT (Category) / FOLD
(Folder):
In MP3 mode only– Press
CAT/FOLD and then press
folder.
SCAN: Press for a brief sampling of
all tracks on the current disc or
MP3 folder.
DIRECT:
In CD mode– Press DIRECT. The
display will read DIRECT TRACK
MODE SELECT TRACK. Enter the desired track number using the
memory preset buttons (0–9). The system will then begin playing that
track.
In MP3 folder mode– Press DIRECT and the memory preset buttons
(0–9) of the desired folder. The system will advance to that specific
folder.
TEXT:
In MP3 mode only– Press TEXT
repeatedly to view Album (AL),
Folder (FL), Song (SO) and Artist (AR) in the display, if available.
32
SEEK to
SEEK to access the previous/next
2012 05+ Mustang (197)
Owners Guide, 3rd Printing
USA (fus)
Page 33
Entertainment Systems
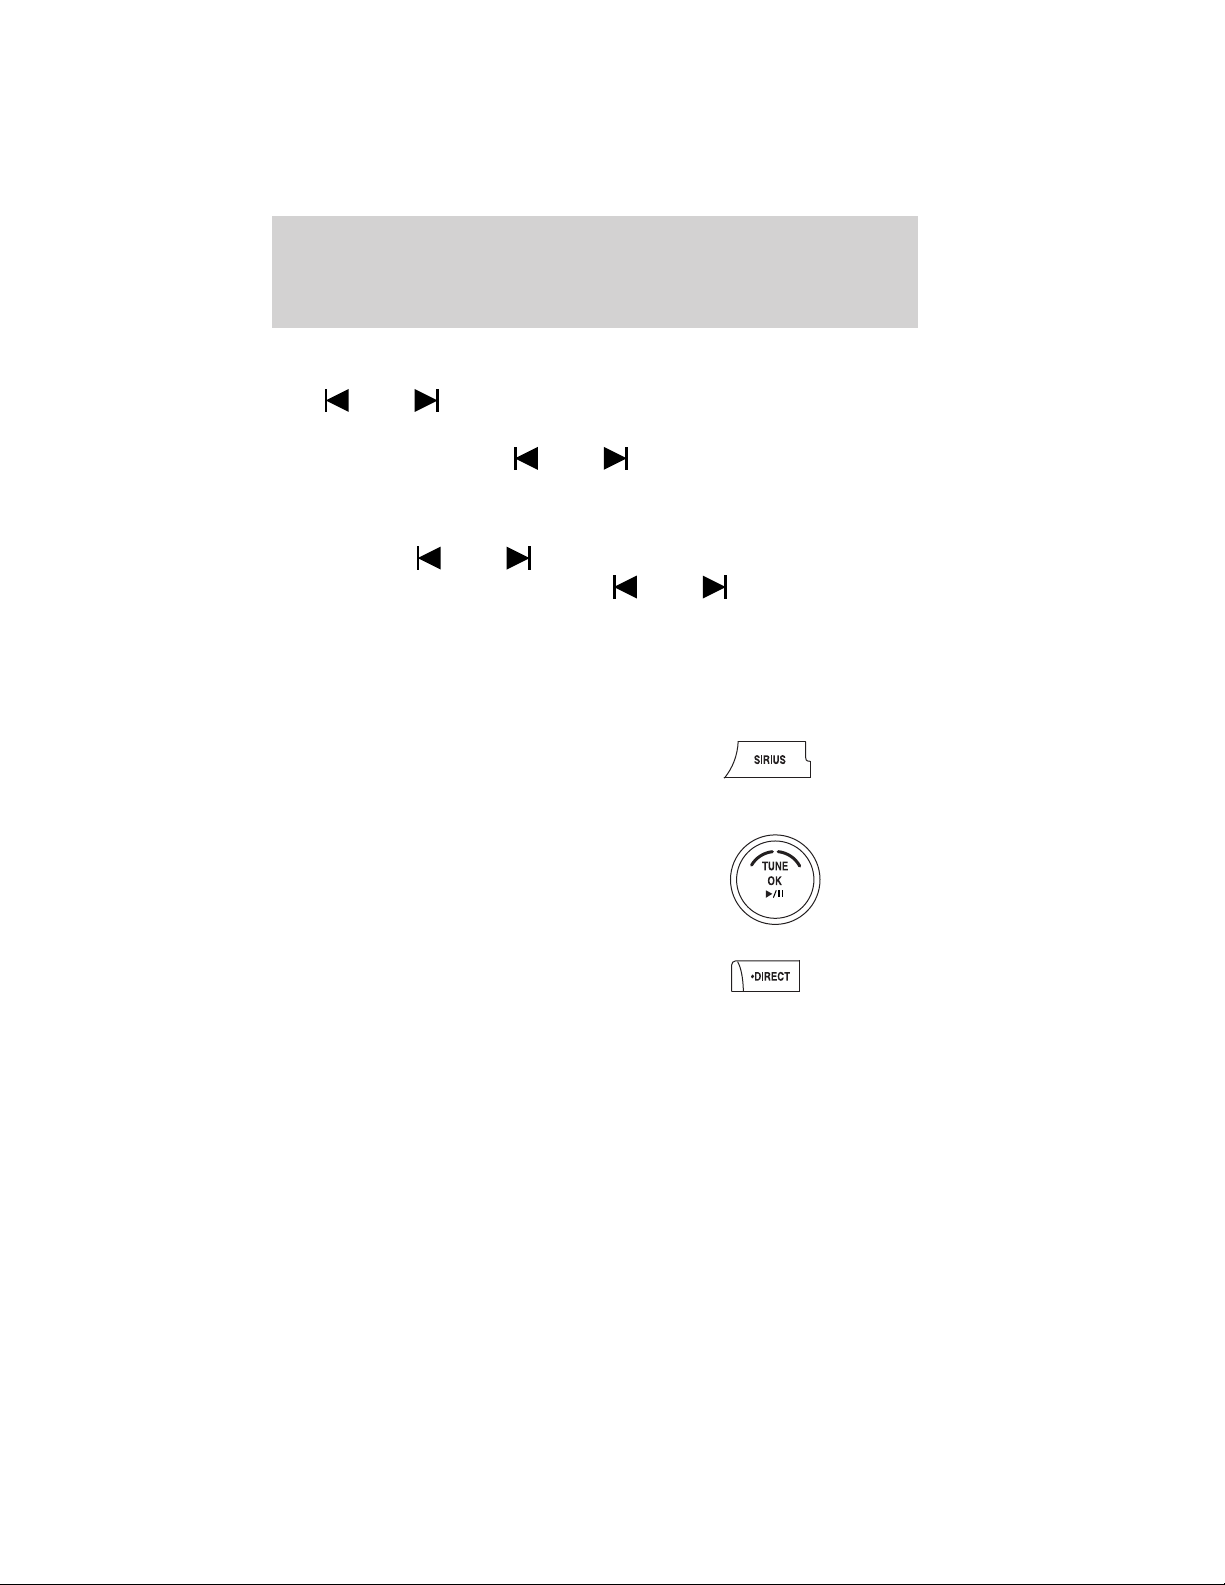
In TEXT MODE: Sometimes the display requires additional text to be
displayed. When the</>indicatorisactive,pressTEXT and then
press
COMPRESSION: Press MENU repeatedly until COMPRESSION ON/OFF
appears in the display. Use
When COMPRESSION is ON, the system will bring the soft and loud CD
passages together for a more consistent listening level.
SHUFFLE: Press MENU repeatedly until SHUFFLE ON/OFF appears in
the display. Use
engage shuffle mode right away, press
play. Otherwise, random play will begin when the current track is
finished playing. The system will only shuffle the disc currently playing.
Satellite radio (if equipped)
Satellite radio is available only with a valid SIRIUS威 radio
subscription. Check with your authorized dealer for availability.
SIRIUS: Press repeatedly to access
satellite radio mode, if equipped.
Press repeatedly to cycle through
SAT1, SAT2 and SAT3 modes.
TUNE: Turn to go to the next /
previous available SIRIUS威 satellite
station.
SEEK to view the additional display text.
SEEK to switch between ON/OFF.
SEEK to switch between ON/OFF. If you wish to
SEEK to begin random
DIRECT: Press DIRECT then enter
the desired channel (i.e. 002) using
the memory preset buttons (0–9). If
you only enter one digit, press OK
and the system will go to that satellite channel. If you enter three digits,
the system will automatically go to that channel, if available. You may
cancel your entry by pressing DIRECT. If an invalid station number is
entered, INVALID CHANNEL will appear in the display and the system
will continue playing the current station.
2012 05+ Mustang (197)
Owners Guide, 3rd Printing
USA (fus)
33
Page 34
Entertainment Systems
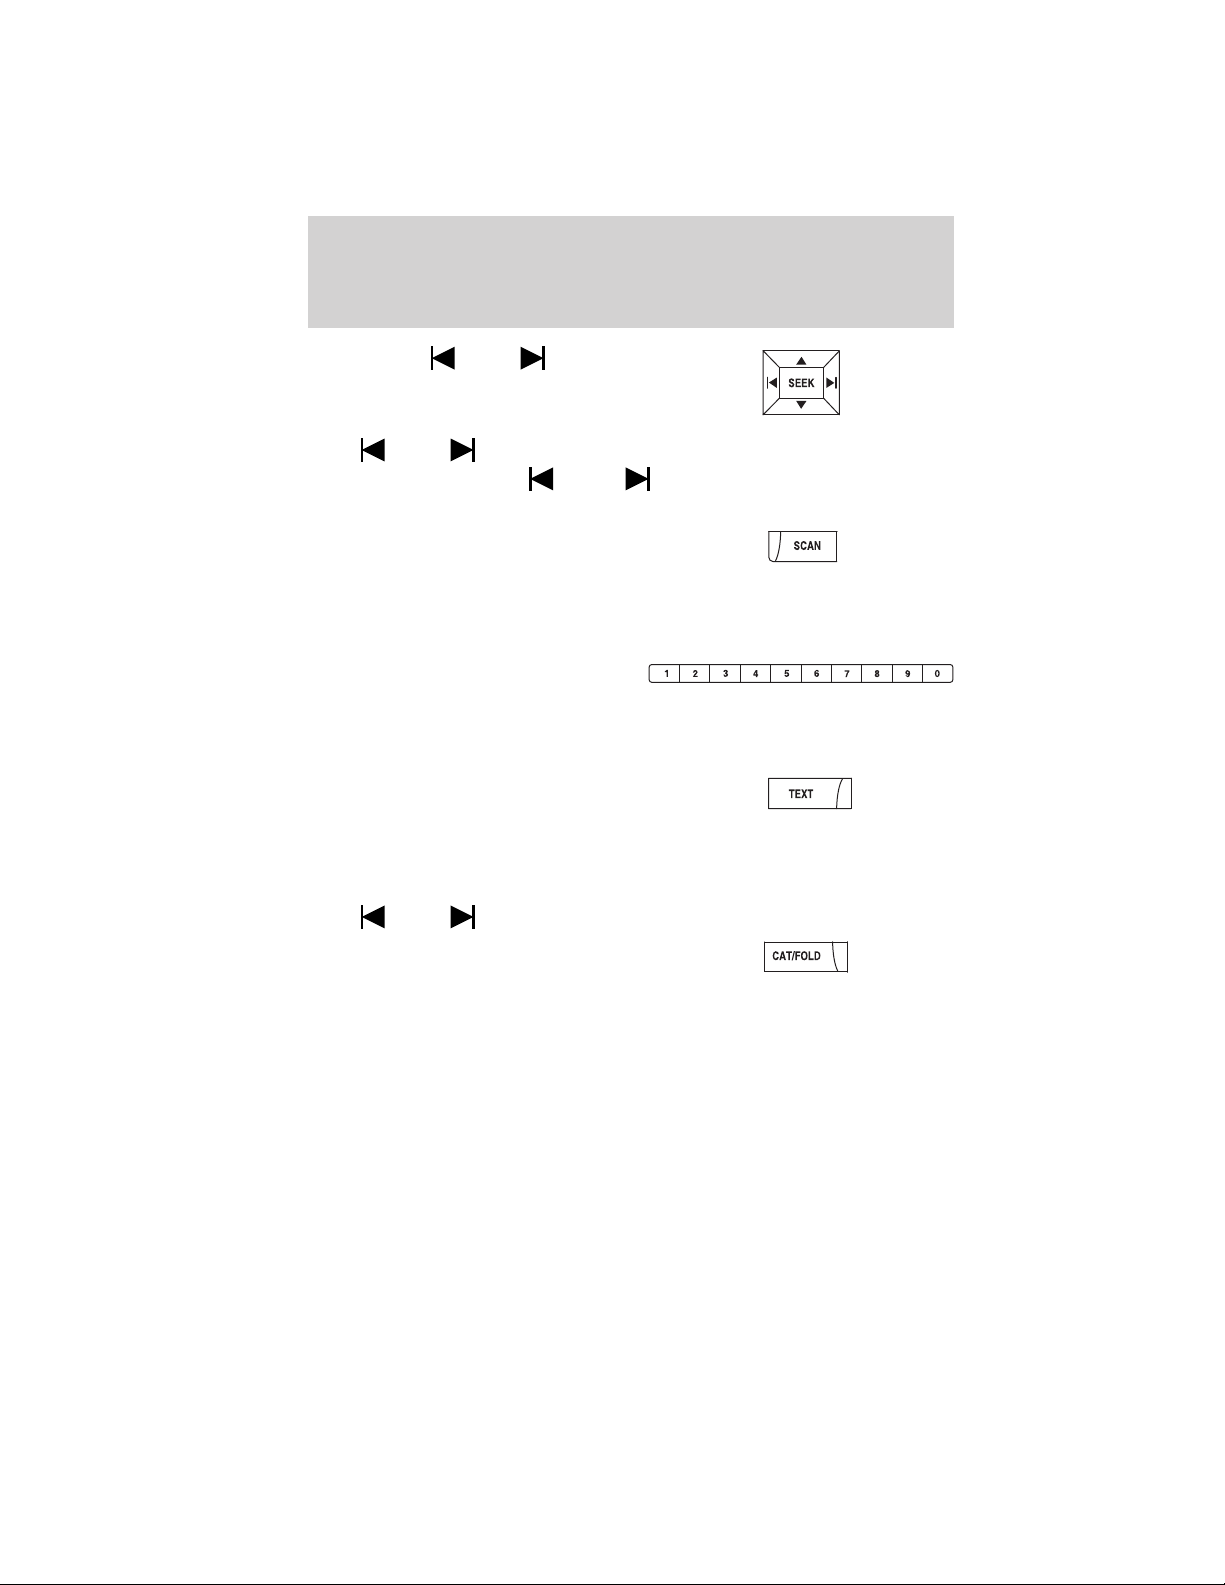
SEEK: Press SEEK to seek
to the previous/next channel. If a
specific category is selected, (Jazz,
Rock, News, etc.),
press
category. Press and hold
previous/next channels.
SCAN: Press SCAN for a brief
sampling of all available SIRIUS威
satellite channels. If a specific
category is selected, (Jazz, Rock, News, etc.) press SCAN for a brief
sampling of all available SIRIUS威 satellite channels within the selected
category.
MEMORY PRESETS (0–9): There
are 30 available presets, 10 each for
SAT1, SAT2 and SAT3. To save
satellite channels in your memory presets, tune to the desired channel
then press and hold a memory preset number (0–9) until sound returns.
TEXT: Press and release to display
the artist and song title. While in
TEXT MODE, press again to scroll
through the Artist (AR), Song (SO), Channel (CH) and Category (CA).
In TEXT MODE: Sometimes the display requires additional text to be
displayed. When the</>indicatorisactive,pressTEXT and then
press
CAT (Category) / FOLD
(Folder): Press to switch between
turning the most recently selected
satellite radio category on or off. The category icon (CAT) will illuminate
in the display when a specific category is selected (the icon will not
illuminate during CATEGORY ALL). If no category has ever been
selected, NO CATEGORY SELECTED will display.
Note: Separate categories can be set for SAT1, SAT2 or SAT3.
Refer to Satellite radio menu for further information on selecting a
satellite radio category.
SEEK to seek to the previous/next channel in the selected
SEEK to fast seek through the
SEEK to view the additional display text.
34
2012 05+ Mustang (197)
Owners Guide, 3rd Printing
USA (fus)
Page 35
Entertainment Systems
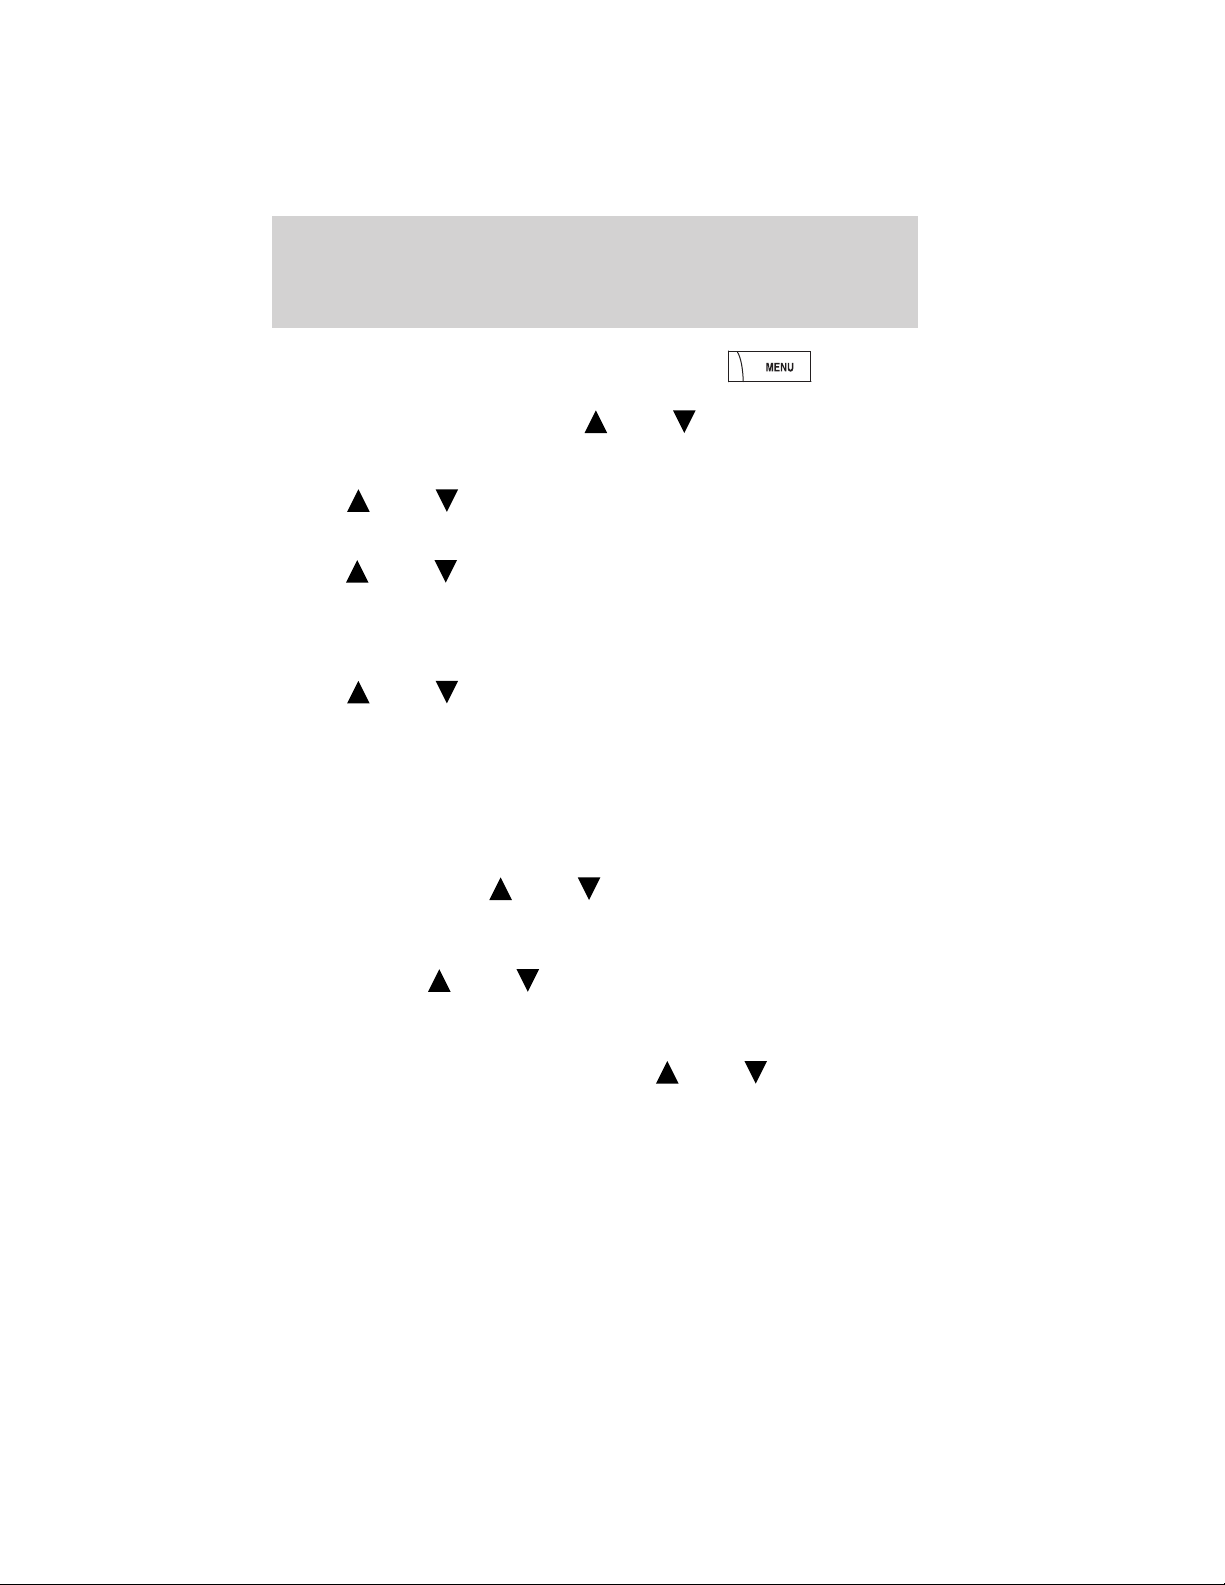
SATELLITE RADIO MENU: Press
MENU when satellite radio mode is
active to access. Press OK to enter
into the satellite radio menu. Press
following options:
• CATEGORY MENU- Press OK to enter category mode.
Press
channel Categories (Pop, Rock, News, etc.) Press OK when the
desired category appears in the display. After a category is selected,
press
only (i.e. ROCK). You may also select CATEGORY ALL to seek all
available SIRIUS威 categories and channels. Press OK to close and
return to the main menu.
• SONG SEEK MENU- Press OK to enter song seek menu.
Press
a. SAVE THIS SONG?: Press OK to save the currently playing song’s
title in the system’s memory. (If you try to save something other than
a song, CANT SAVE will appear in the display.) When the chosen song
is playing on any satellite radio channel, the system will alert you with
an audible prompt. Press OK while SONG ALERT is in the display and
the system will take you to the channel playing the desired song. You
can save up to 20 song titles. If you attempt to save more than 20
titles, the display will read REPLACE SONG? Press OK to access the
saved titles and press
When the song title appears in the display that you would like to
replace, press OK. SONG REPLACED will appear in the display.
b. DELETE A SONG?: Press OK to delete a song from the system’s
memory. Press
the song appears in the display that you would like to delete, press
OK. The song will appear in the display for confirmation. Press OK
again and the display will read SONG DELETED. If you do not want
to delete the currently listed song, press
RETURN or CANCEL.
Note: If there are no songs presently saved, the display will read NO
SONGS.
SEEK to scroll through the list of available SIRIUS威
SEEK to search for that specific category of channels
SEEK to scroll through the following options:
SEEK to cycle through the saved titles.
SEEK to cycle through the saved songs. When
SEEK to cycle through the
SEEK to select either
2012 05+ Mustang (197)
Owners Guide, 3rd Printing
USA (fus)
35
Page 36

Entertainment Systems
c. DELETE ALL SONGS?: Press OK to delete all song’s from the
system’s memory. The display will read ARE YOU SURE? Press OK to
confirm deletion of all saved songs and the display will read ALL
DELETED.
Note: If there are no songs presently saved, the display will read NO
SONGS.
d. DISABLE ALERTS/ENABLE ALERTS?: Press OK to
enable/disable the satellite alert status which alerts you when your
selected songs are playing on a satellite radio channel. (The system
default is disabled.) SONG ALERTS ENABLED/DISABLED will appear
in the display. The menu listing will display the opposite state. For
example, if you have chosen to enable the song alerts, the menu
listing will read DISABLE as the alerts are currently on, so your other
optionistoturnthemoff.
e. RETURN: Press OK when RETURN is displayed to exit back to the
satellite radio menu.
• CHANNEL LOCKOUT MENU- Press OK to enter the Channel
Lockout menu. Press the
options:
a. LOCK/UNLOCK THIS CHANNEL: Press OK when
LOCK/UNLOCK THIS CHANNEL is displayed and the display will read
ENTER PIN. Enter your four-digit PIN number (initial PIN is 1234)
and the system will lock/unlock the channel and CHANNEL LOCKED
or UNLOCKED will be displayed.
Note: you must be tuned to the specific channel you want to
lock/unlock when using this feature.
b. CHANGE PIN: Press OK when CHANGE PIN is displayed. The
display will read ENTER OLD PIN. Enter your current (old) PIN
number and when the system accepts your entry it will display
ENTER NEW PIN. Enter your new four-digit PIN and the system will
save the new PIN and PIN SAVED will display.
c. UNLOCK ALL CHANNELS: Press OK when UNLOCK ALL
CHANNELS is displayed and the display will read ENTER PIN. Enter
your four-digit PIN and the system will unlock all channels and the
display will read CHANNEL UNLOCKED.
SEEK to scroll through the following
36
2012 05+ Mustang (197)
Owners Guide, 3rd Printing
USA (fus)
Page 37
Entertainment Systems
d. RESET PIN: Press OK when RESET PIN is displayed. The display
will read ARE YOUR SURE. Press OK again to automatically reset the
PIN to its initial password setting (1234). PIN RESET TO DEFAULT
PIN will be displayed.
e. RETURN: Press OK when RETURN is displayed and the system
will exit back to the satellite radio menu.
Sound adjustments
Press SOUND repeatedly to cycle
through the following features:
• Shaker mode (if equipped): Press
mode on/off.
• BASS: Press
TUNE knob.
• TREBLE: Press
the TUNE knob.
• BALANCE: Press
(L) and right (R) speakers or turn the TUNE knob.
• FADE: Press
and front (F) speakers or turn the TUNE knob.
• SPEED COMPENSATED VOLUME: With this feature on, radio
volume automatically gets louder with increasing vehicle speed to
compensate for road and wind noise. The default setting is off..
Use
Recommended level is 1–3; SPEED OFF turns the feature off and
level 7 is the maximum setting.
• ALL SEATS (Occupancy Mode, if equipped): Press
to select and optimize sound for ALL SEATS, DRIVERS SEAT or
REAR SEATS.
• DSP MODE (if equipped): Press
STEREO SURROUND mode and STEREO mode.
SEEK to adjust between SPEED OFF and levels 1–7.
SEEK to adjust the level of bass or turn the
SEEK to adjust the level of treble, or turn
SEEK to adjust the audio between the left
SEEK to adjust the audio between the back (B)
SEEK to turn Shaker
SEEK
SEEK to choose between
2012 05+ Mustang (197)
Owners Guide, 3rd Printing
USA (fus)
37
Page 38
Entertainment Systems
Extra features
AUX: Press repeatedly to cycle
through LINE (auxiliary audio
mode) and SYNC威 (if equipped).
For auxiliary jack location and further information on auxiliary audio
mode, refer to Auxiliary input jack later in this chapter.
If your vehicle is equipped with SYNC威, please refer to the SYNC威
information included with your vehicle for further information.
/ Play/Pause: Press this
control to play or pause the current
CD.
OK: Your vehicle may be equipped
with special phone and media
features which will require you to confirm commands by pressing OK.
For further information, refer to the SYNC威 information included with
your vehicle.
PHONE: If your vehicle is equipped with SYNC威, press to access SYNC
PHONE features. For further information, please refer to the SYNC威
information included with your vehicle.
If your vehicle is not equipped with SYNC威, the display will read NO
PHONE.
Auxiliary input jack (Line in)
WARNING: Driving while distracted can result in loss of vehicle
control, accident and injury. Ford strongly recommends that
drivers use extreme caution when using any device or feature that may
take their focus off the road. Your primary responsibility is the safe
operation of the vehicle. We recommend against the use of any
handheld device while driving, encourage the use of voice-operated
systems when possible and that you become aware of applicable state
and local laws that may affect use of electronic devices while driving.
38
2012 05+ Mustang (197)
Owners Guide, 3rd Printing
USA (fus)
Page 39
Entertainment Systems
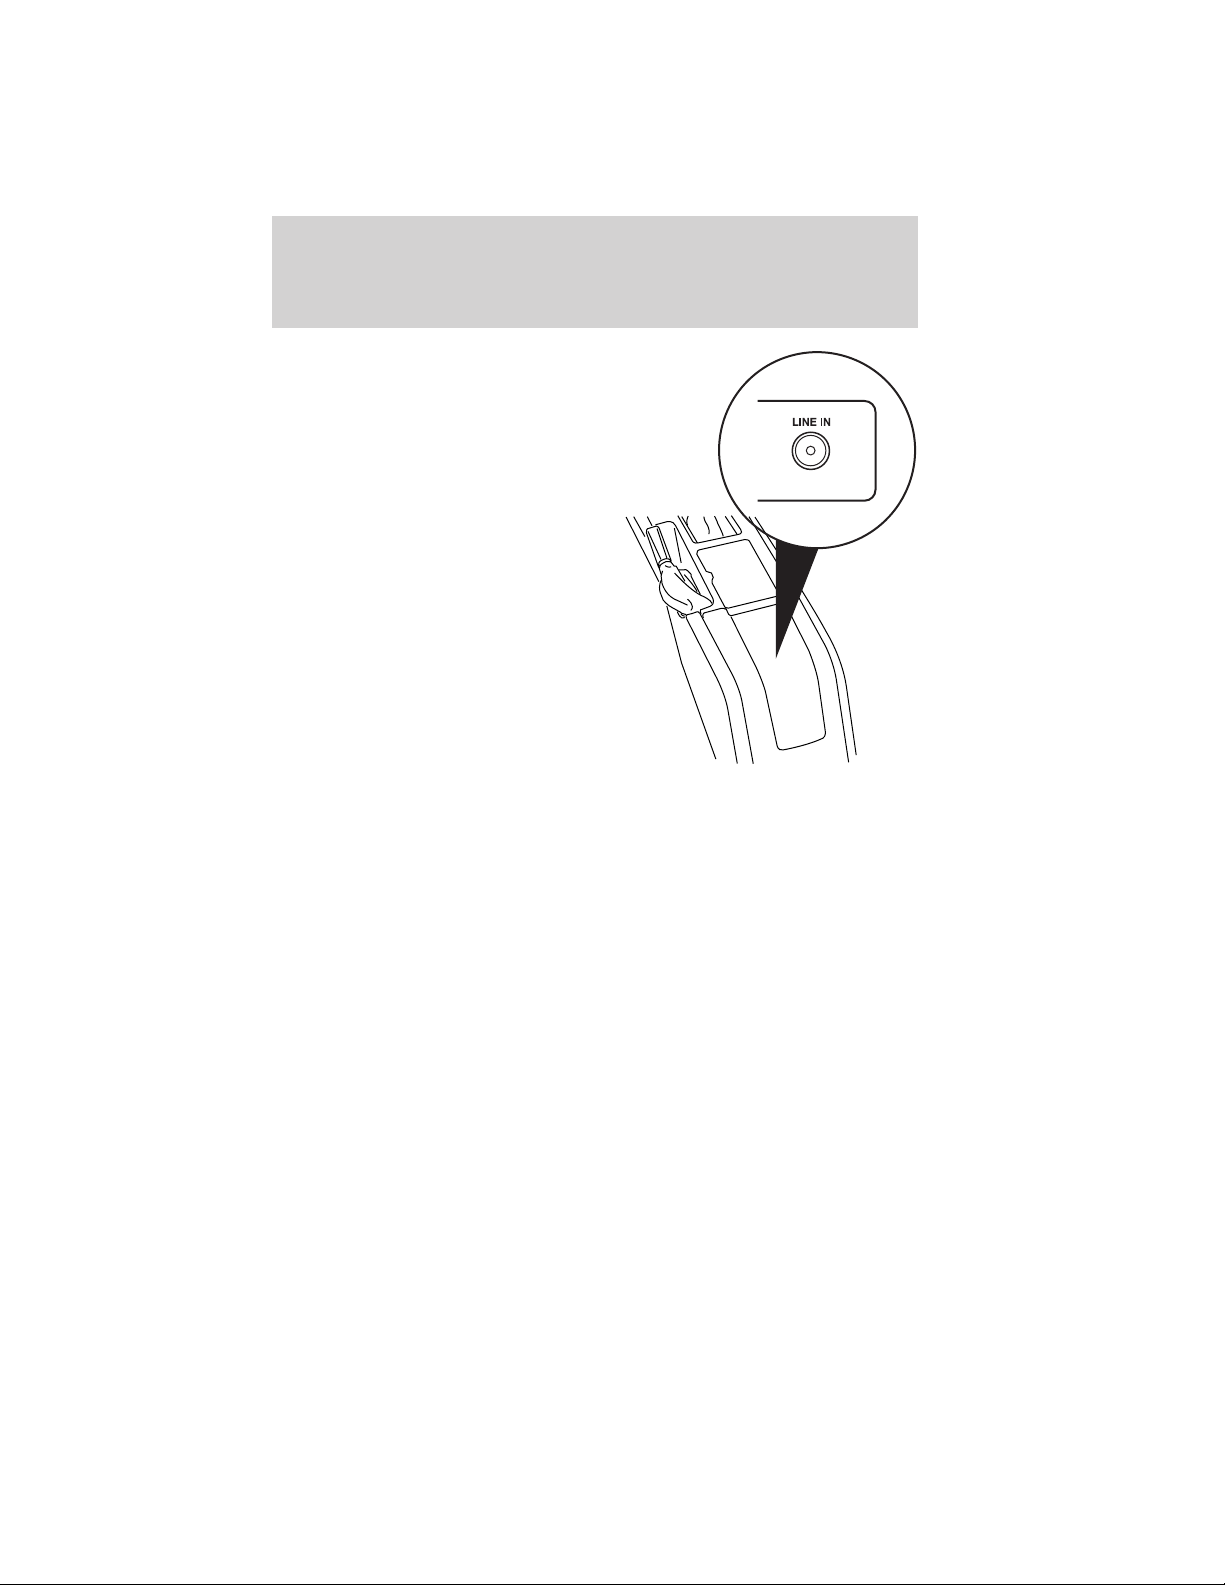
Your vehicle is equipped with an
auxiliary input jack (AIJ) located in
the center console. The auxiliary
input jack provides a way to connect
your portable music player to the
in-vehicle audio system. This allows
the audio from a portable music
player to be played through the
vehicle speakers with high fidelity.
To achieve optimal performance,
please observe the following
instructions when attaching your
portable music device to the audio
system.
If your vehicle is equipped with a
navigation system, refer to
Auxiliary input jack section in the
Audio features chapter of your
Navigation System supplement.
Required equipment:
1. Any portable music player designed to be used with headphones
2. An audio extension cable with stereo male 1/8 in. (3.5 mm)
connectors at each end
To play your portable music player using the auxiliary input jack:
1. Begin with the vehicle parked and the radio turned off.
2. Ensure that the battery in your portable music player is new or fully
charged and that the device is turned off.
3. Attach one end of the audio extension cable to the headphone output
of your player and the other end of the audio extension cable to the AIJ
in your vehicle.
4. Turn the radio on, using either a tuned FM station or a CD loaded into
the system. Adjust the volume to a comfortable listening level.
5. Turn the portable music player on and adjust the volume to 1/2 the
volume.
6. Press AUX on the vehicle radio repeatedly until LINE, LINE IN or
SYNC LINE IN appears in the display.
You should hear audio from your portable music player although it may
be low.
39
2012 05+ Mustang (197)
Owners Guide, 3rd Printing
USA (fus)
Page 40

Entertainment Systems
7. Adjust the sound on your portable music player until it reaches the
level of the FM station or CD by switching back and forth between the
AUX and FM or CD controls.
Troubleshooting:
1. Do not connect the audio input jack to a line level output. Line level
outputs are intended for connection to a home stereo and are not
compatible with the AIJ. The AIJ will only work correctly with devices
that have a headphone output with a volume control.
2. Do not set the portable music player’s volume level higher than is
necessary to match the volume of the CD or FM radio in your audio
system as this will cause distortion and will reduce sound quality. Many
portable music players have different output levels, so not all players
should be set at the same levels. Some players will sound best at full
volume and others will need to be set at a lower volume.
3. If the music sounds distorted at lower listening levels, turn the
portable music player volume down. If the problems persists, replace or
recharge the batteries in the portable music player.
4. The portable music player must be controlled in the same manner
when it is used with headphones as the AIJ does not provide control
(play, pause, etc.) over the attached portable music player.
5. For safety reasons, connecting or adjusting the settings on your
portable music player should not be attempted while the vehicle is
moving. Also, the portable music player should be stored in a secure
location, such as the center console or the glove box, when the vehicle is
in motion. The audio extension cable must be long enough to allow the
portable music player to be safely stored while the vehicle is in motion.
USB port (if equipped)
WARNING: Driving while distracted can result in loss of vehicle
control, accident and injury. Ford strongly recommends that
drivers use extreme caution when using any device or feature that may
take their focus off the road. Your primary responsibility is the safe
operation of the vehicle. We recommend against the use of any
handheld device while driving, encourage the use of voice-operated
systems when possible and that you become aware of applicable state
and local laws that may affect use of electronic devices while driving.
40
2012 05+ Mustang (197)
Owners Guide, 3rd Printing
USA (fus)
Page 41
Entertainment Systems
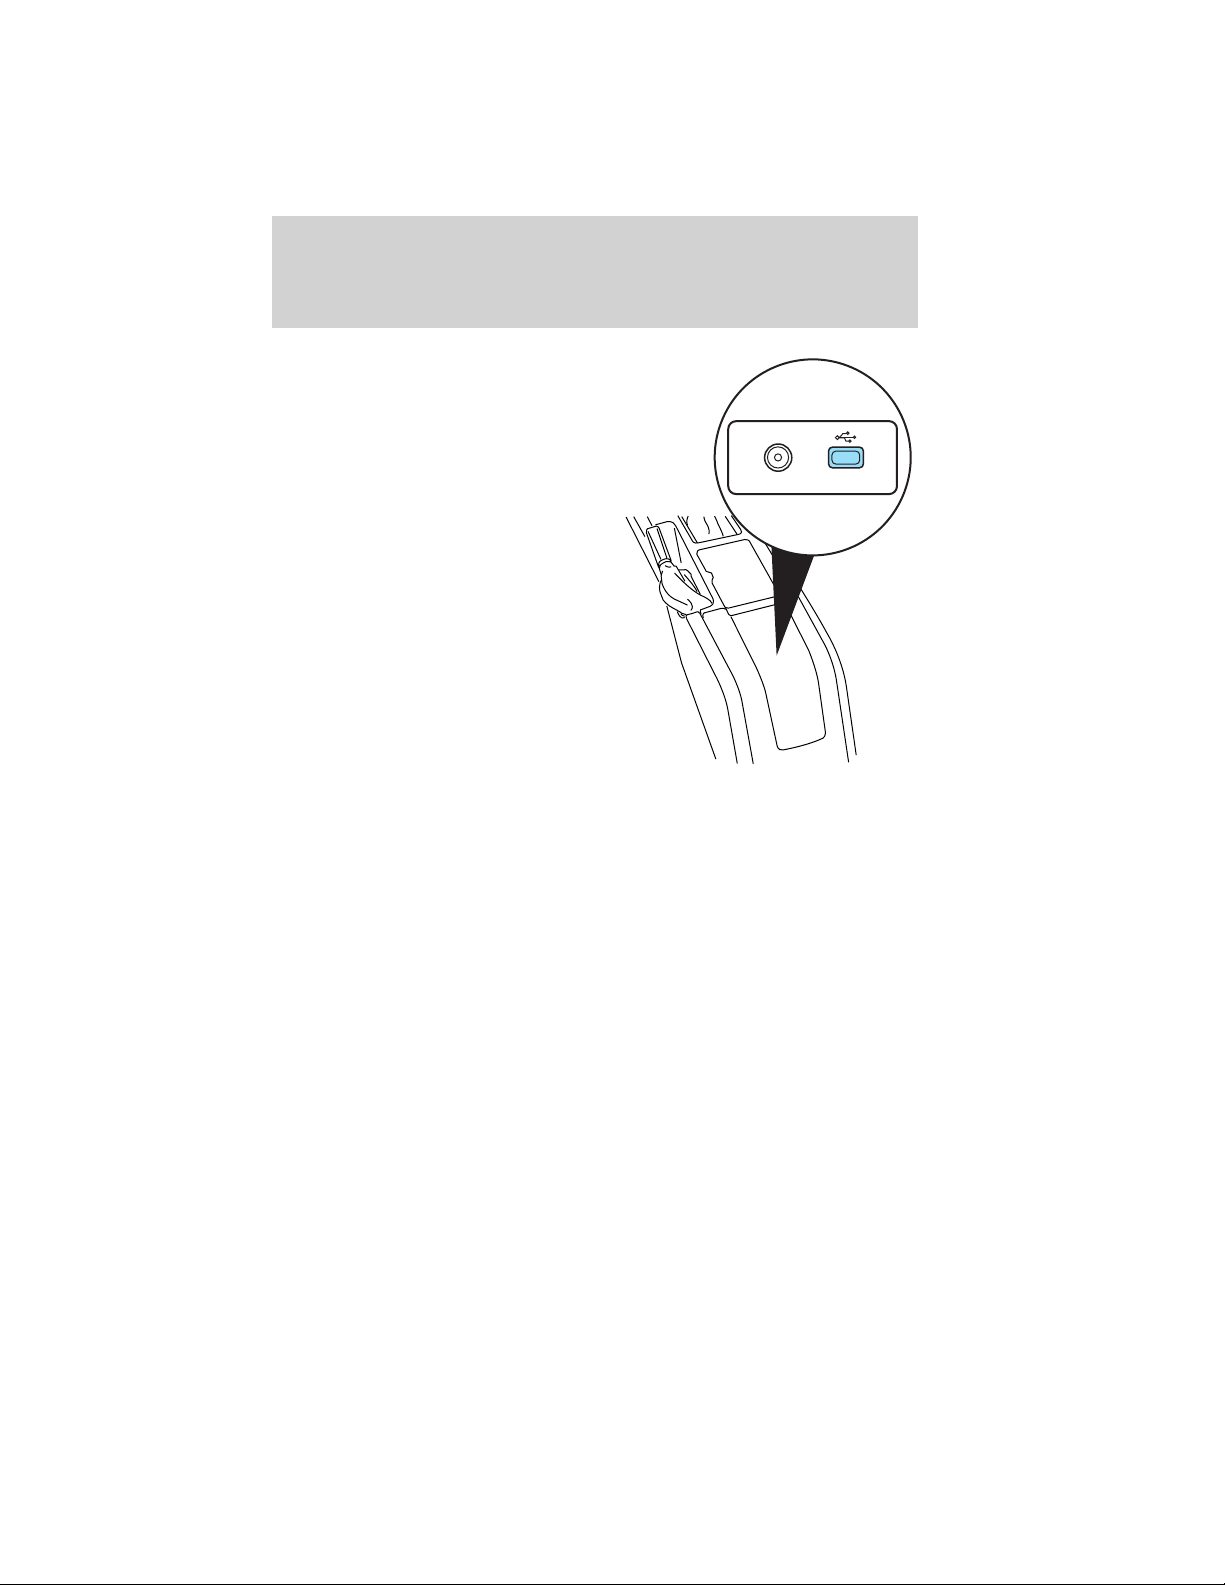
Your vehicle may be equipped with a
USB port inside your center console.
This feature allows you to plug in
media playing devices, memory
sticks, and also to charge devices if
they support this feature. For
further information on this feature,
refer to Accessing and using your
USB port in the SYNC威 supplement
or Navigation System supplement.
GENERAL AUDIO INFORMATION
Radio frequencies:
AM and FM frequencies are established by the Federal Communications
Commission (FCC) and the Canadian Radio and Telecommunications
Commission (CRTC). Those frequencies are:
AM: 530, 540–1700, 1710 kHz
FM: 87.7, 87.9–107.7, 107.9 MHz
Radio reception factors:
There are three factors that can affect radio reception:
• Distance/strength: The further you travel from an FM station, the
weaker the signal and the weaker the reception.
• Terrain: Hills, mountains, tall buildings, power lines, electric fences,
traffic lights and thunderstorms can interfere with your reception.
• Station overload: When you pass a broadcast tower, a stronger signal
may overtake a weaker one and play while the weak station frequency
is displayed.
LINE IN
2012 05+ Mustang (197)
Owners Guide, 3rd Printing
USA (fus)
41
Page 42
Entertainment Systems
CD/CD player care
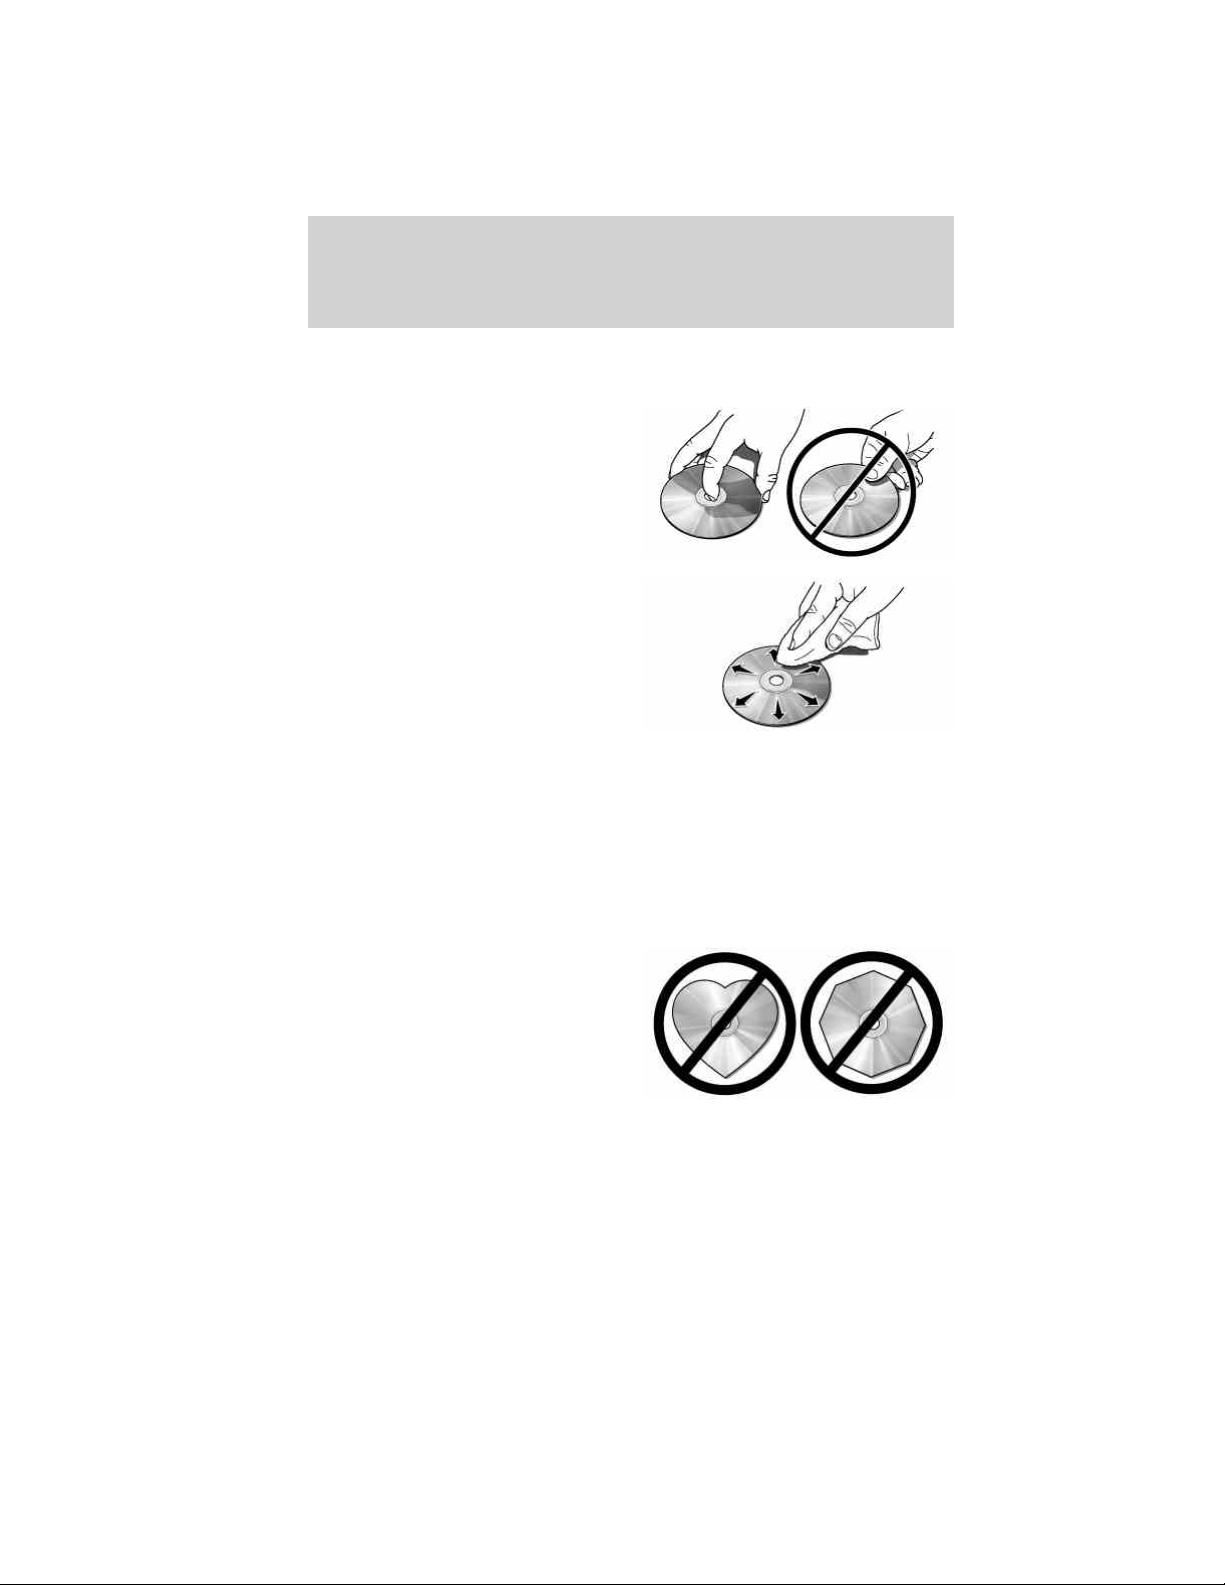
Do:
• Handle discs by their edges only.
(Never touch the playing
surface).
• Inspect discs before playing.
• Clean only with an approved CD
cleaner.
• Wipe discs from the center out.
Don’t:
• Expose discs to direct sunlight or heat sources for extended periods
of time.
• Clean using a circular motion.
CD units are designed to play commercially pressed 4.75 in
(12 cm) audio compact discs only. Due to technical
incompatibility, certain recordable and re-recordable compact
discs may not function correctly when used in Ford CD players.
Do not use any irregular shaped
CDs or discs with a scratch
protection film attached.
42
2012 05+ Mustang (197)
Owners Guide, 3rd Printing
USA (fus)
Page 43
Entertainment Systems
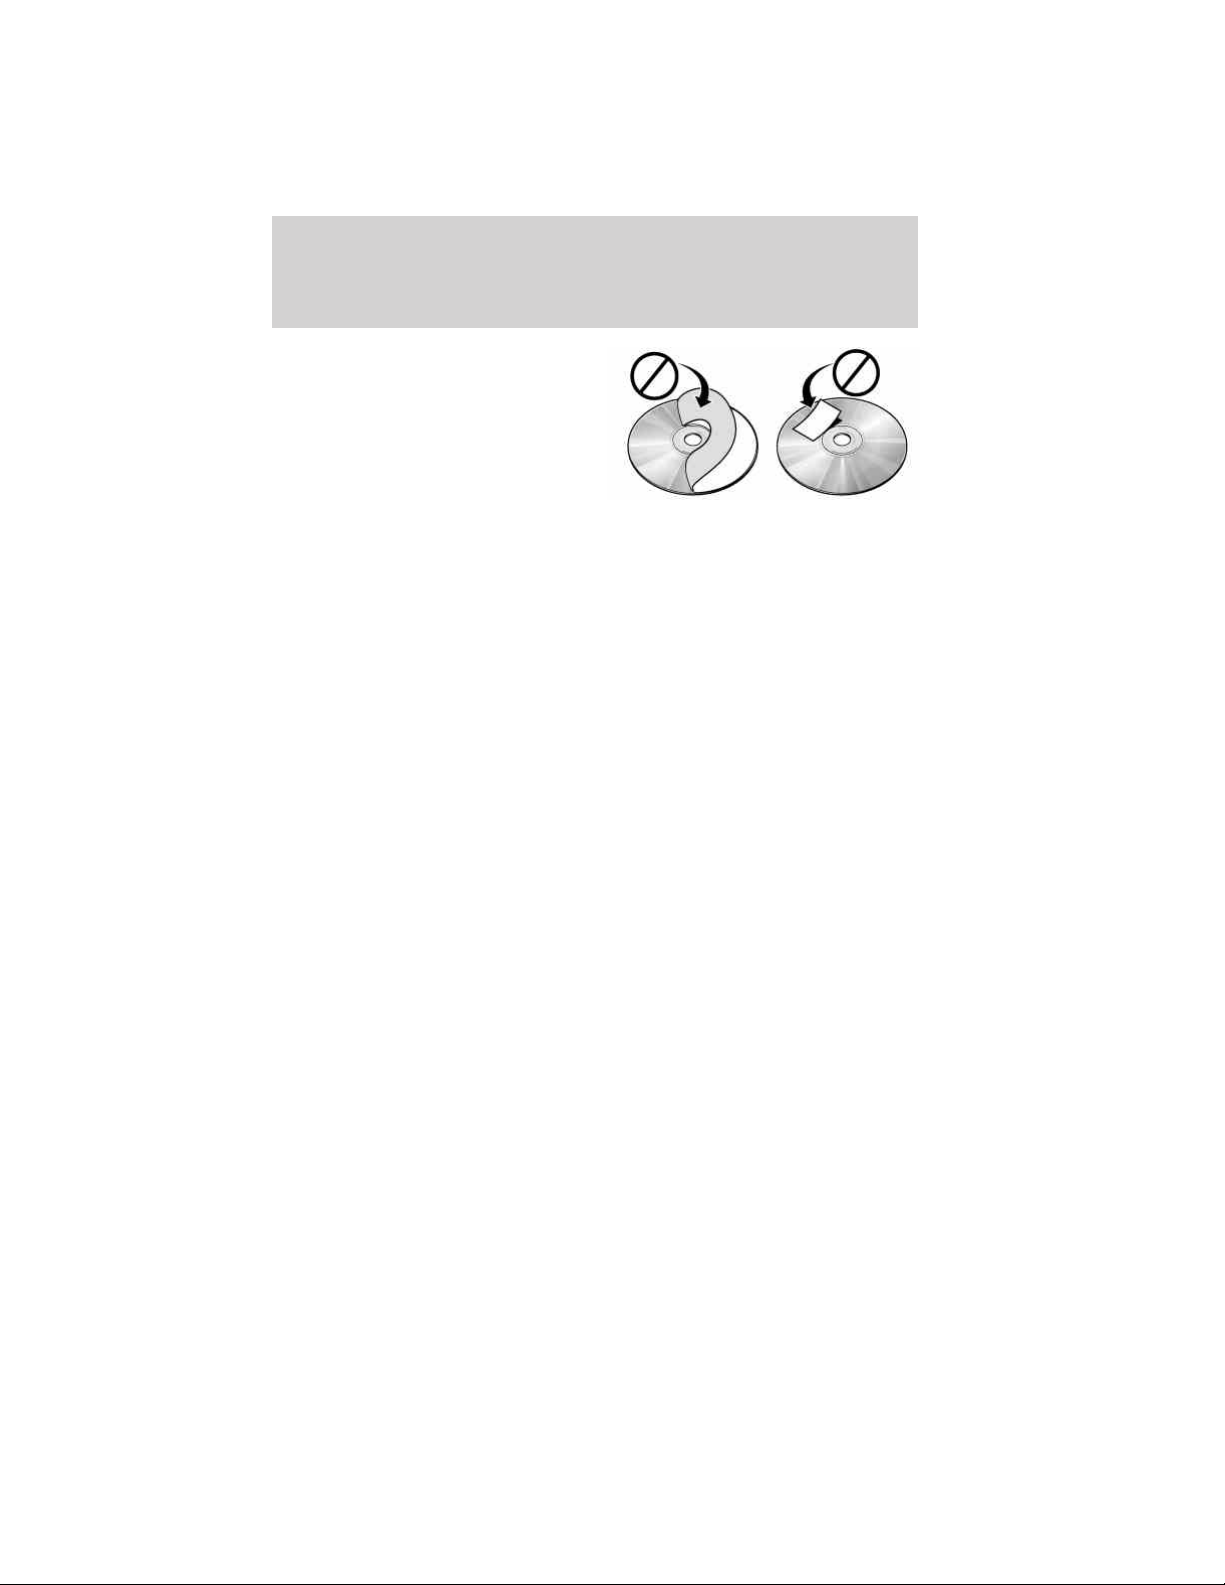
CDs with homemade paper
(adhesive) labels should not be
inserted into the CD player as
the label may peel and cause the
CD to become jammed. It is
recommended that homemade
CDs be identified with
permanent felt tip marker rather
than adhesive labels. Ballpoint pens may damage CDs. Please
contact your authorized dealer for further information.
Audio system warranty and service
Refer to the Warranty Guide for audio system warranty information. If
service is necessary, see your dealer or qualified technician.
MP3 track and folder structure
Your MP3 system recognizes MP3 individual tracks and folder structure
as follows:
• There are two different modes for MP3 disc playback: MP3 track mode
(system default) and MP3 folder mode. For more information on track
and folder mode, refer to Sample MP3 structure in the following
section.
• MP3 track mode ignores any folder structure on the MP3 disc. The
player numbers each MP3 track on the disc (noted by the .mp3 file
extension) from T001 to a maximum of T255.
Note: The maximum number of playable MP3 files may be less
depending on the structure of the CD and exact model of radio
present.
• MP3 folder mode represents a folder structure consisting of one level
of folders. The CD player numbers all MP3 tracks on the disc (noted
by the .mp3 file extension) and all folders containing MP3 files, from
F001 (folder) T001 (track) to F253 T255.
• Creating discs with only one level of folders will help with navigation
through the disc files.
2012 05+ Mustang (197)
Owners Guide, 3rd Printing
USA (fus)
43
Page 44
Entertainment Systems
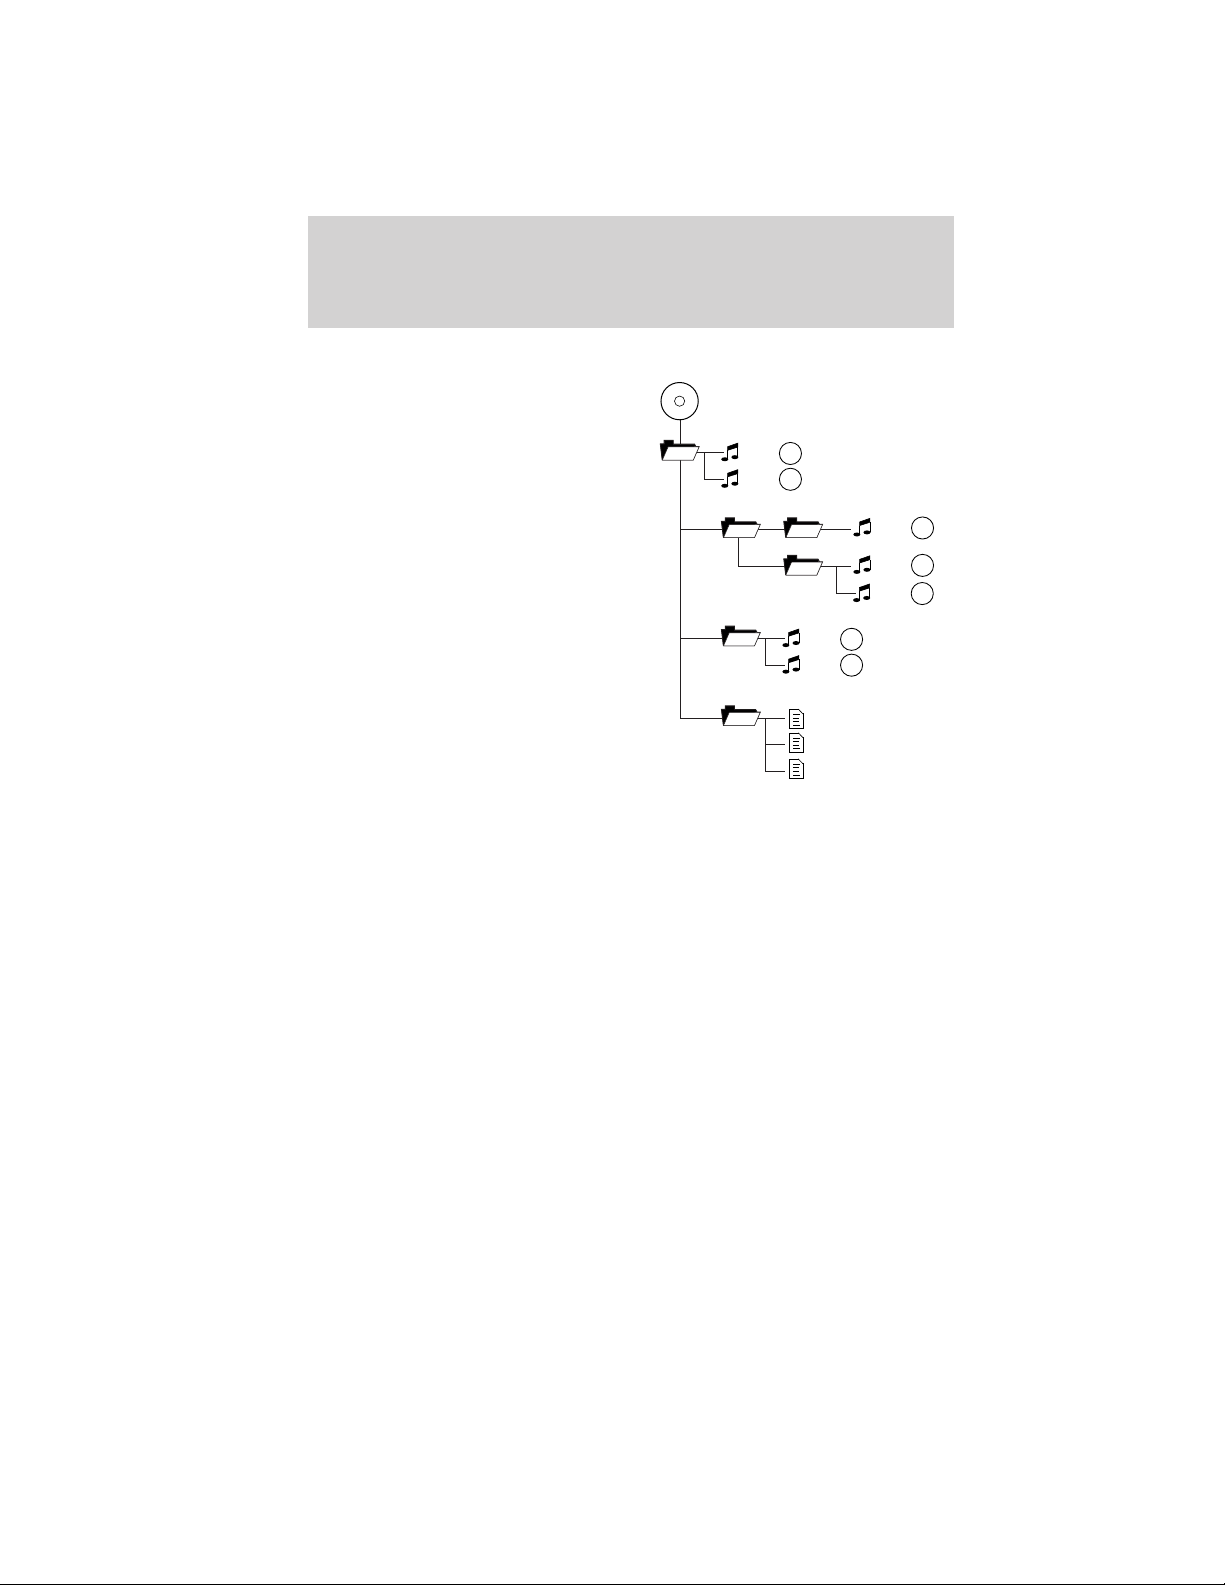
Sample MP3 structure
If you are burning your own MP3
discs, it is important to understand
how the system will read the
structures you create. While various
files may be present, (files with
extensions other than mp3), only
files with the .mp3 extension will be
played. Other files will be ignored
by the system. This enables you to
use the same MP3 disc for a variety
of tasks on your work computer,
home computer and your in-vehicle
system.
In track mode, the system will display and play the structure as if it were
only one level deep (all .mp3 files will be played, regardless of being in a
specific folder). In folder mode, the system will only play the .mp3 files
in the current folder.
.mp3
.mp3
11
2
2
3
.mp3
.mp3
.doc
.ppt
.xls
3
.mp3
4
.mp3
5
.mp3
64
7
Satellite radio information (if equipped)
Satellite radio channels: SIRIUS威 broadcasts a variety of music, news,
sports, weather, traffic and entertainment satellite radio channels. For
more information and a complete list of SIRIUS威 satellite radio channels,
visit www.sirius.com in the United States, www.siriuscanada.ca in
Canada, or call SIRIUS威 at 1–888–539–7474.
Satellite radio reception factors: To receive the satellite signal, your
vehicle has been equipped with a satellite radio antenna. Like AM/FM,
there are several factors that can affect satellite radio reception
performance:
• Antenna Obstructions: For optimal reception performance, keep the
antenna clear of snow and ice build-up and keep luggage and any
material as far away from the antenna as possible.
44
2012 05+ Mustang (197)
Owners Guide, 3rd Printing
USA (fus)
Page 45

Entertainment Systems
• Terrain: Hills, mountains, tall buildings, bridges, tunnels, freeway
overpasses, parking garages, dense tree foliage and thunderstorms can
interfere with your reception.
• Station overload: When you pass a ground based broadcast repeating
tower, a stronger signal may overtake a weaker one and result in an
audio mute.
Unlike AM/FM audible static, you will hear an audio mute when there is
a satellite radio signal interference. Your radio display may display NO
SIGNAL to indicate the interference.
SIRIUS威 satellite radio service: SIRIUS威 satellite radio is a
subscription based satellite radio service that broadcasts music, sports,
news and entertainment programming. A service fee is required in order
to receive SIRIUS威 service. Vehicles that are equipped with a factory
installed SIRIUS威 satellite radio system include:
• Hardware and limited subscription term, which begins on the date of
sale or lease of the vehicle.
For information on extended subscription terms, the online media player
and other SIRIUS威 features, please contact SIRIUS威 at 1–888–539–7474.
Note: SIRIUS威 reserves the unrestricted right to change, rearrange, add
or delete programming including canceling, moving or adding particular
channels, and its prices, at any time, with or without notice to you. Ford
Motor Company shall not be responsible for any such programming
changes.
Satellite Radio Electronic Serial Number (ESN): This 12-digit
Satellite Serial Number is needed to activate, modify or track your
satellite radio account. You will need this number when communicating
with SIRIUS威. While in satellite radio mode, you can view this number on
the radio display by pressing SIRIUS and the preset 1 control
simultaneously.
2012 05+ Mustang (197)
Owners Guide, 3rd Printing
USA (fus)
45
Page 46
Entertainment Systems
Radio Display Condition Action Required
ACQUIRING Radio requires more
than two seconds to
produce audio for the
selected channel.
SAT FAULT Internal module or
system failure
present.
INVALID CHNL Channel no longer
available.
UNSUBSCRIBED Subscription not
available for this
channel.
NO TEXT Artist information not
available.
NO TEXT Song title information
not available.
NO TEXT Category information
not available.
46
No action required.
This message should
disappear shortly.
If this message does
not clear within a short
period of time, or with
an ignition key cycle,
your receiver may have
a fault. See your
authorized dealer for
service.
This previously
available channel is no
longer available. Tune
to another channel. If
the channel was one of
your presets, you may
choose another channel
for that preset button.
Contact SIRIUS威 at
1–888–539–7474 to
subscribe to the
channel, or tune to
another channel.
Artist information not
available at this time on
this channel. The
system is working
properly.
Song title information
not available at this
time on this channel.
The system is working
properly.
Category information
not available at this
time on this channel.
The system is working
properly.
2012 05+ Mustang (197)
Owners Guide, 3rd Printing
USA (fus)
Page 47
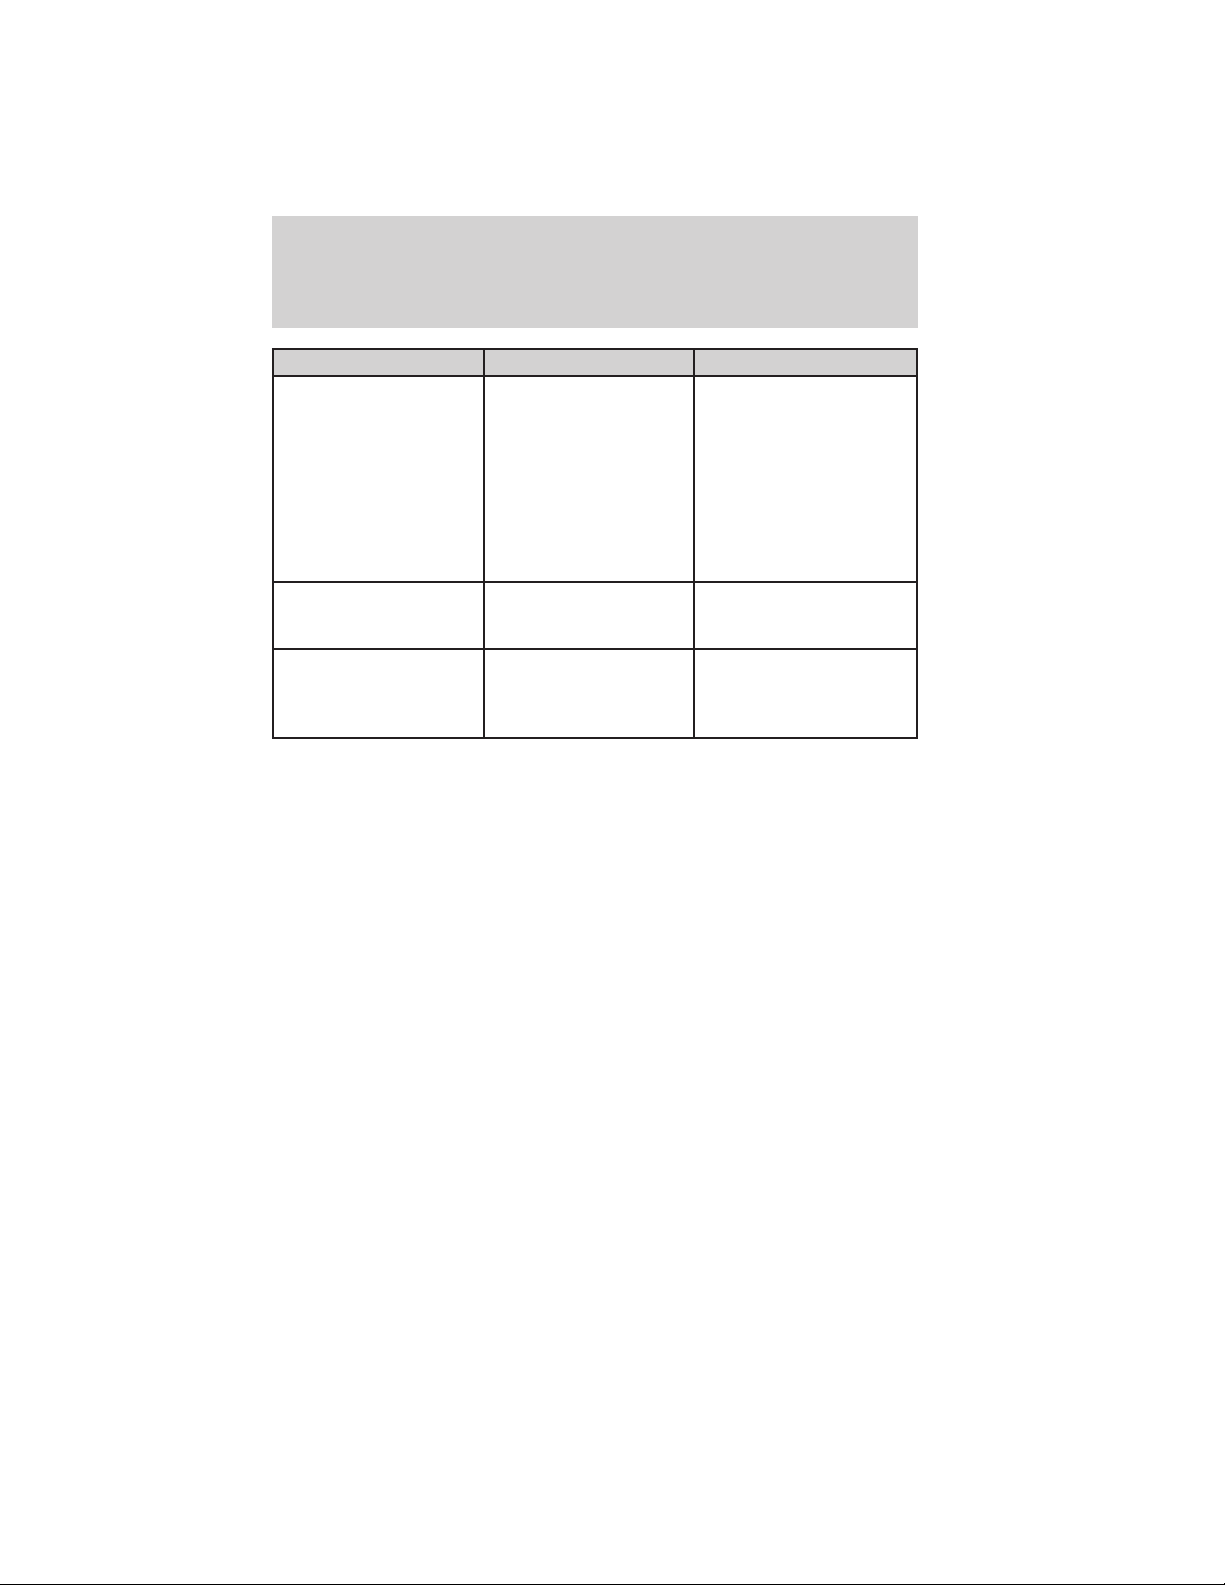
Entertainment Systems
Radio Display Condition Action Required
NO SIGNAL Loss of signal from
UPDATING Update of channel
CALL SIRIUS威
1–888–539–7474
NAVIGATION SYSTEM (IF EQUIPPED)
Your vehicle may be equipped with a navigation system. Refer to the
Navigation System supplement for further information.
SYNC姞 (IF EQUIPPED)
Your vehicle may be equipped with SYNC威, a hands-free communications
and entertainment system with special phone and media features. For
more information, please refer to the SYNC威 supplement or to the
SYNC威 section in the Navigation System supplement (if equipped).
the SIRIUS威 satellite
or SIRIUS威 tower to
the vehicle antenna.
programming in
progress.
Satellite service has
been deactivated by
SIRIUS威 satellite
radio.
You are in a location
that is blocking the
SIRIUS威 signal (i.e.,
tunnel, under an
overpass, dense foliage,
etc). The system is
working properly. When
you move into an open
area, the signal should
return.
No action required. The
process could take up
to three minutes.
Call SIRIUS威 at
1–888–539–7474 to
re-activate or resolve
subscription issues.
2012 05+ Mustang (197)
Owners Guide, 3rd Printing
USA (fus)
47
Page 48
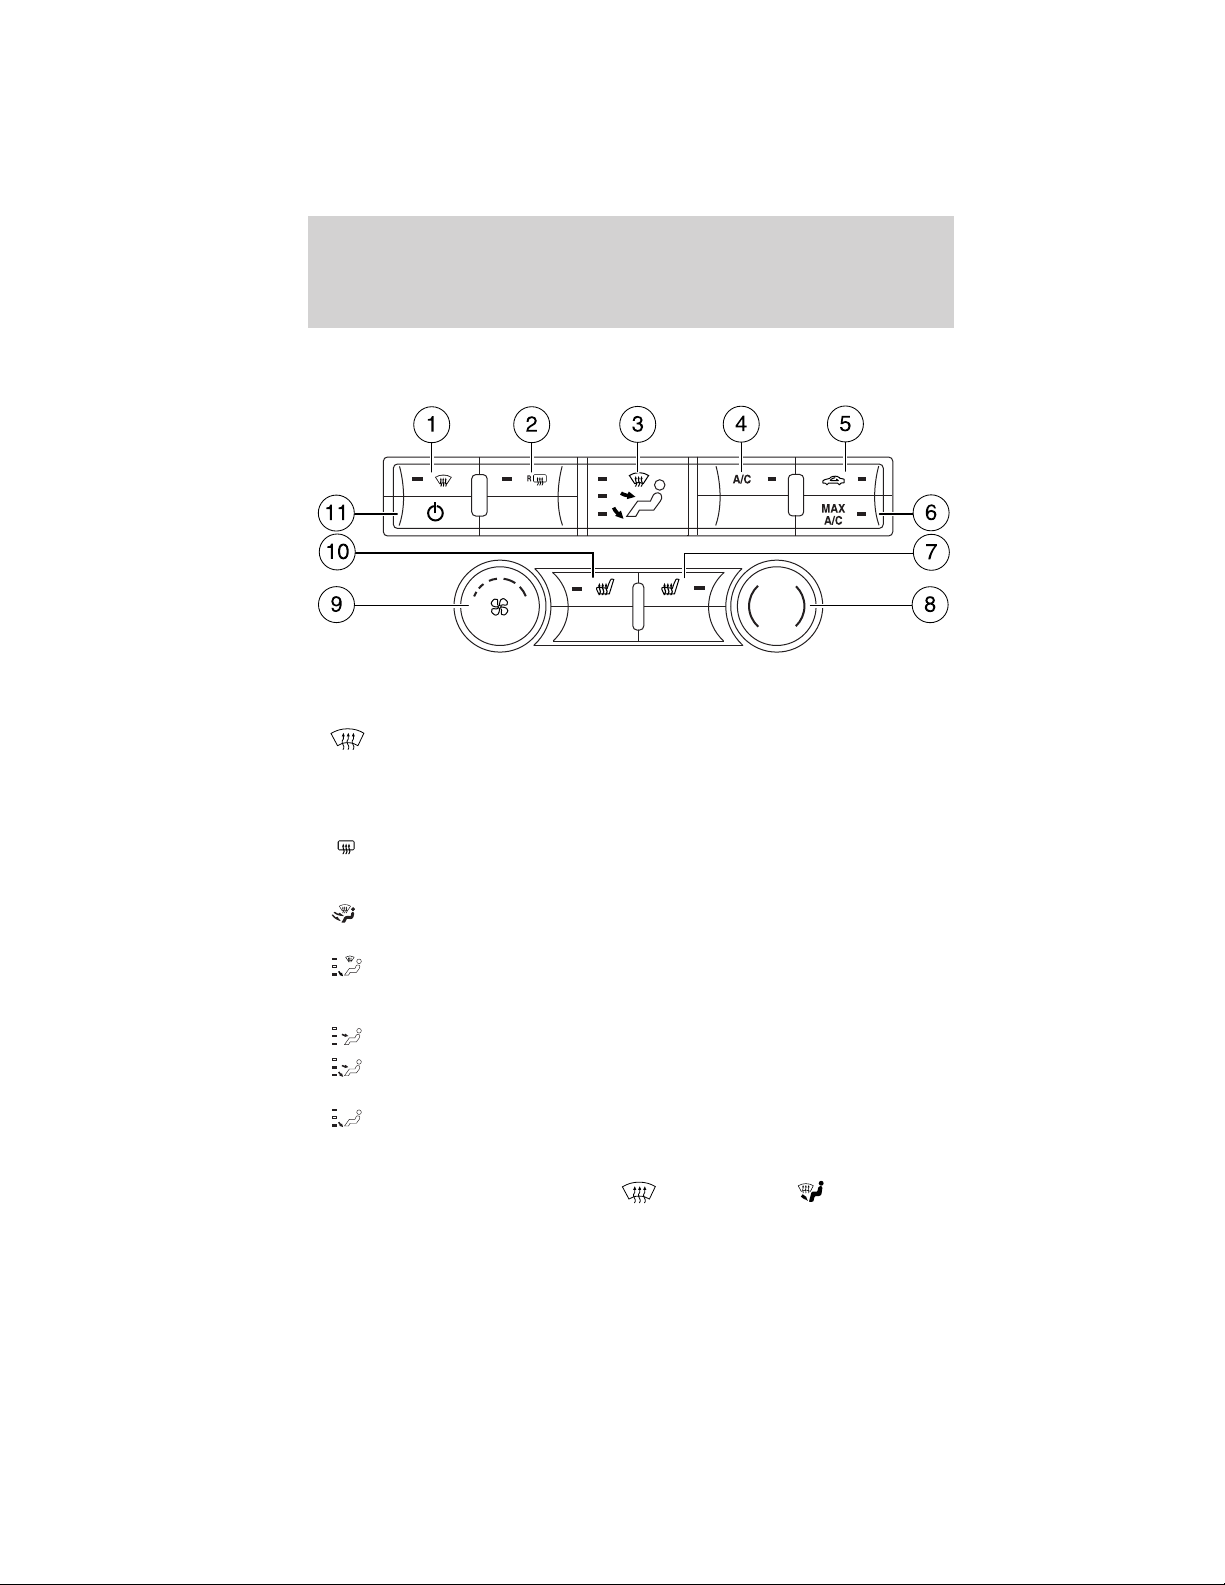
Climate Controls
MANUAL HEATING AND AIR CONDITIONING SYSTEM
(IF EQUIPPED)
Temperature conversion: To switch between Fahrenheit and Celsius,
refer to Message center in the Instrument Cluster chapter.
1.
vents and de-mister vents. Can be used to clear the windshield of fog
and thin ice. The system will automatically provide outside air to reduce
window fogging. Press this button again to return to the previous air flow
selection.
2.
defroster. Refer to Rear window defroster later in this chapter for more
information.
3.
settings to choose:
•
•
•
•
4. A/C: Press to activate/deactivate air conditioning. Use with
recirculated air to improve cooling performance and efficiency. A/C
engages automatically in MAX A/C,
(floor/defrost).
48
Defrost: Distributes outside air through the windshield defroster
R
Rear defroster: Press to activate/deactivate the rear window
Multifunction control: Press repeatedly to cycle through the
: Distributes air through the windshield defroster vents, de-mister
vents and floor vents. The system will automatically provide outside
air to reduce window fogging.
: Distributes air through the instrument panel vents.
: Distributes air through the instrument panel vents, floor vents,
and de-mister vents.
: Distributes air through the floor vents.
(defrost) and
2012 05+ Mustang (197)
Owners Guide, 3rd Printing
USA (fus)
Page 49

Climate Controls
5. Recirculated air: Press to activate/deactivate air recirculation in
the vehicle. Recirculated air may reduce the amount of time needed to
cool down the interior of the vehicle and may also help reduce undesired
odors from reaching the interior of the vehicle. Recirculated air engages
automatically when MAX A/C is selected or can be engaged manually in
any airflow mode except
turned off and back on, the climate system will return to the recirculated
air mode only if the A/C button LED is illuminated and the air
distribution selection is either
6. MAX A/C: Distributes recirculated air through the instrument panel
vents to cool the vehicle. This re-cooling of the interior air is more
economical and efficient. Recirculated air may also help reduce
undesirable odors from entering the vehicle. Press the MAX A/C button
again for normal A/C operation.
Passenger heated seat control (if equipped): Press to control
7.
the passenger heated seat. Refer to Heated seats in the Seating and
Safety Restraints chapter for more information.
8. Temperature control: Controls the temperature of the airflow in the
vehicle.
Fan speed adjustment: Turn to select the desired fan speed.
9.
10.
driver seat. Refer to Heated seats in the Seating and Safety Restraints
chapter for more information.
11.
When the system is off, outside air is prevented from entering the
vehicle.
Driver heated seat control (if equipped): Press to control the
Power: Press to activate/deactivate the climate control system.
(defrost). When the ignition switch is
(panel) or (panel/floor).
Operating tips
• To reduce fog build-up on the windshield during humid weather,
select
increased to improve clearing.
• To reduce humidity build-up inside the vehicle, do not drive with the
system off or with recirculated air engaged.
• Do not put objects under the front seats that will interfere with the
airflow to the back seats.
• Remove any snow, ice or leaves from the air intake area at the base of
the windshield.
(defrost). Temperature and/or fan speed can also be
2012 05+ Mustang (197)
Owners Guide, 3rd Printing
USA (fus)
49
Page 50

Climate Controls
• To improve the A/C cool down, drive with the windows slightly open
for 2-3 minutes after start up or until the vehicle has been “aired out.”
• A small amount of air may be felt from the floor vent regardless of the
air distribution setting that is selected.
During extreme high ambient temperatures when idling stationary for
extended periods of time in gear, it is recommended to run the A/C in
the MAX A/C mode, adjust the blower fan speed to the lowest setting
and put the vehicle’s transmission into the P (Park) position (automatic
transmission only) to continue to receive cool air from your A/C system.
For maximum cooling performance in MAX A/C mode:
1. Move temperature control to the coolest setting.
2. Set the fan to the highest speed initially, then adjust to maintain
comfort.
For maximum cooling performance in panel or panel/floor modes:
1. Move temperature control to the coolest setting.
2. Select A/C and
3. Set the fan to the highest speed initially, then adjust to maintain
comfort.
To aid in side window defogging/demisting in cold weather:
1. Select
2. Select A/C.
3. Adjust the temperature control to maintain comfort.
4. Set the fan speed to the highest setting.
5. Direct the outer instrument panel vents towards the side windows.
6. To increase airflow to the outer instrument panel vents, close the
vents located in the middle of the instrument panel.
.
(recirculated air) to provide colder airflow.
50
2012 05+ Mustang (197)
Owners Guide, 3rd Printing
USA (fus)
Page 51
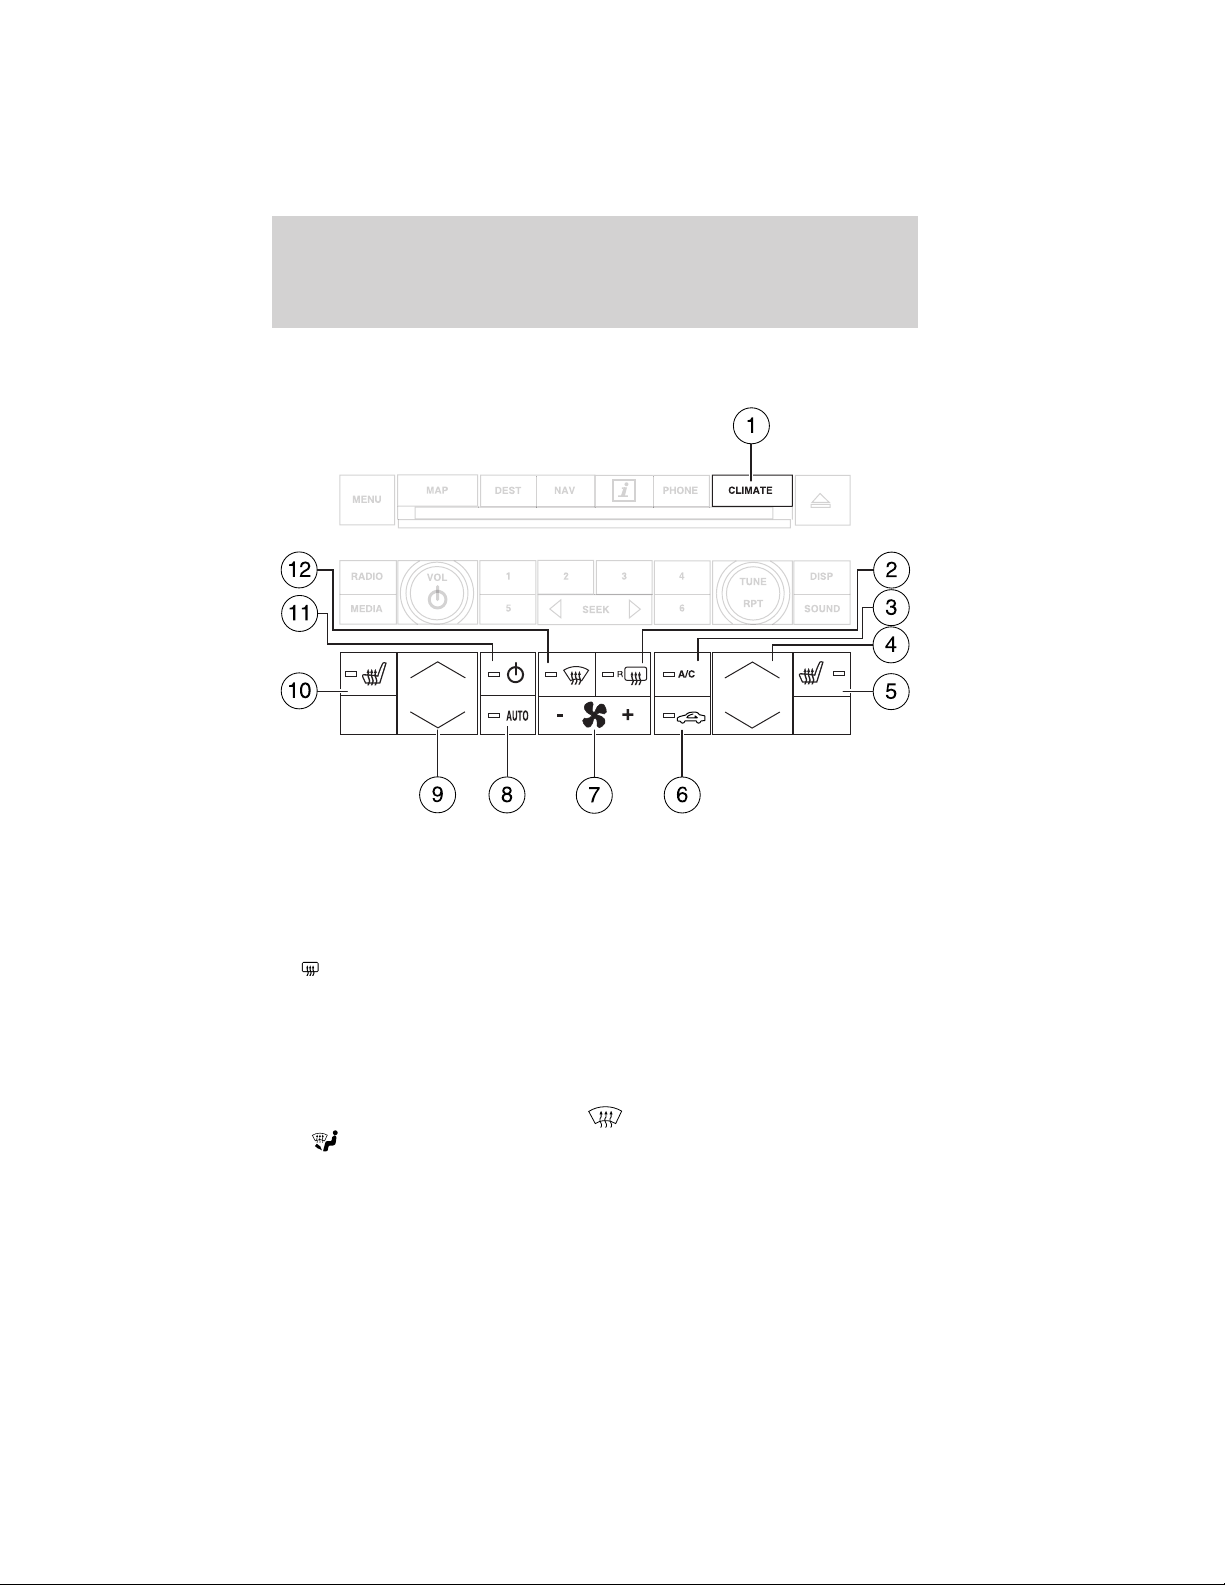
Climate Controls
DUAL ZONE AUTOMATIC TEMPERATURE CONTROL
(NAVIGATION-BASED) (IF EQUIPPED)
Temperature conversion: To switch between Fahrenheit and Celsius,
refer to Message center in the Instrument Cluster chapter.
1. CLIMATE: Press to control the climate control system through the
touch display screen. See Touchscreen functions later in this section.
R
Rear defroster (if equipped): Press to activate/deactivate the
2.
rear window defroster. Refer to Rear window defroster later in this
chapter for more information. If your vehicle is equipped with both rear
defroster and heated mirrors, the same button will activate both.
3. A/C: Press to activate/deactivate air conditioning. Use with
recirculated air to improve cooling performance and efficiency. A/C
engages automatically in Max A/C,
and
4. Passenger temperature: Press to activate separate passenger
temperature control to increase/decrease the air temperature on the
passenger side of the vehicle.
(floor/defrost).
(defrost)
51
2012 05+ Mustang (197)
Owners Guide, 3rd Printing
USA (fus)
Page 52

Climate Controls
5. Passenger heated seat (if equipped): Press to control the
passenger heated seat. Refer to Heated seats in the Seating and Safety
Restraints chapter for more information.
6.
the vehicle. Recirculated air may reduce the amount of time needed to
cool down the interior of the vehicle when used with A/C and may also
help reduce undesired odors from reaching the interior of the vehicle.
Recirculated air engages automatically when Max A/C is selected or can
be engaged manually in any airflow mode except
Recirculation may turn off automatically in all airflow selections except
Max A/C.
7. –
8. AUTO: Press to engage full automatic operation. Select the desired
temperature using the temperature control. The system will
automatically determine fan speed, airflow location, A/C on or off, and
outside or recirculated air, to heat or cool the vehicle to reach the
desired temperature.
9. Driver temperature: Press to increase/decrease the air temperature
for the driver side of the vehicle. This control also adjusts the passenger
side temperature when dual zone operation is disengaged.
10.
heated seat. Refer to Heated seats in the Seating and Safety Restraints
chapter for more information.
11.
When the system is off, outside air is prevented from entering the
vehicle. The climate status in the touchscreen will also be turned off.
When the power is turned back on, the system defaults to full automatic
control.
12.
defroster vents and de-mister vents. Can be used to clear the windshield
of fog and thin ice. The system will automatically provide outside air to
reduce window fogging. Press this button again to return to the previous
air flow selection. To return to full automatic control, press AUTO.
Recirculated air: Press to activate/deactivate air recirculation in
(defrost).
+ Fan speed control: Press to decrease/increase the fan speed.
Driver heated seat (if equipped): Press to control the driver
Power: Press to activate/deactivate the climate control system.
Defrost: Distributes outside air through the windshield
52
2012 05+ Mustang (197)
Owners Guide, 3rd Printing
USA (fus)
Page 53
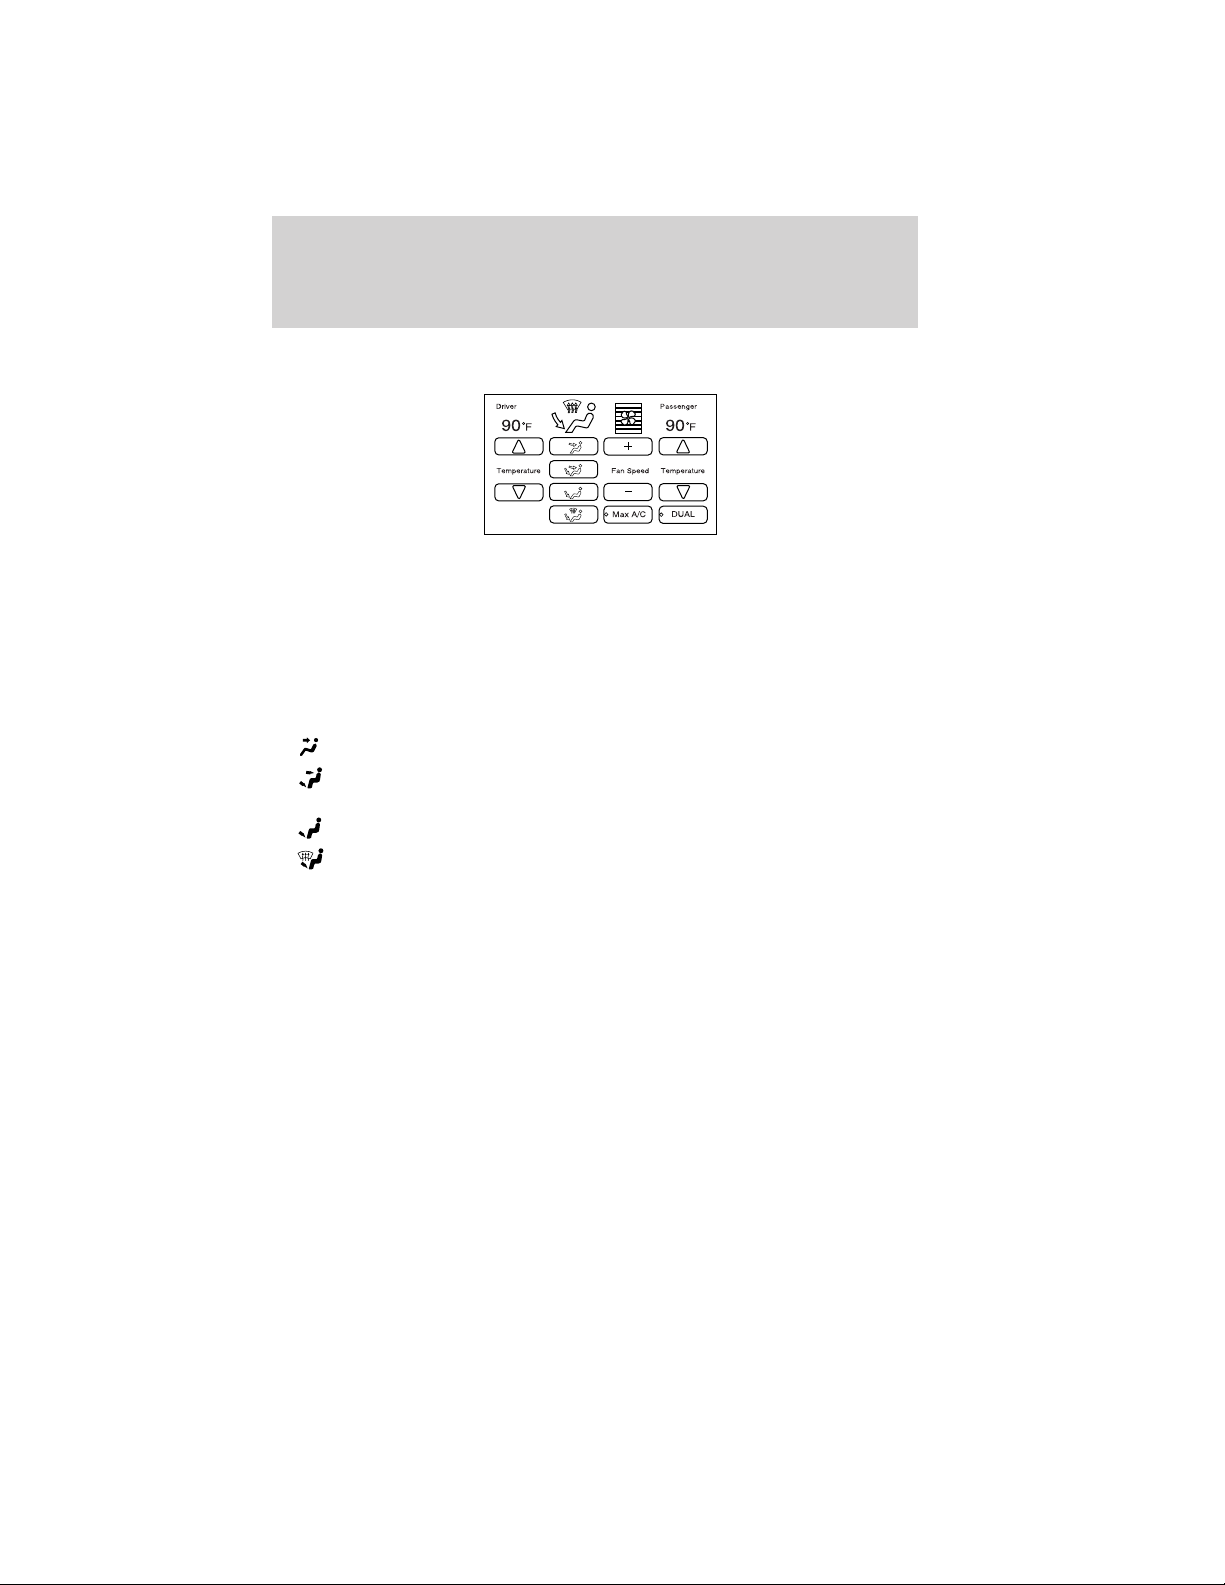
Climate Controls
TOUCHSCREEN FUNCTIONS
Temperature conversion: To switch between Fahrenheit and Celsius,
refer to Message center in the Instrument Cluster chapter.
Temperature: Press the up and down arrows on the left side of the
screen to increase/decrease the airflow temperature for the driver side of
the vehicle. This control also adjusts the passenger side temperature
when dual zone operation is disengaged. Press the up and down arrows
on the right side of the screen to increase/decrease the airflow
temperature for the passenger side of the vehicle.
•
: Distributes air through the instrument panel vents.
•
•
•
Fan Speed: Press to decrease/increase the fan speed.
Dual: Press to activate/deactivate separate driver and passenger
temperature controls.
Max A/C: Distributes recirculated air through the instrument panel
vents to cool the vehicle. This re-cooling of the interior air is more
economical and efficient. Recirculated air may also help reduce
undesirable odors from entering the vehicle. Press Max A/C again for
normal operation.
: Distributes air through the instrument panel vents, floor vents,
and de-mister vents.
: Distributes air through the floor vents.
: Distributes air through the windshield defroster vents, de-mister
vents, and floor vents. The system will automatically provide outside
air to reduce window fogging.
To return to full automatic control, press AUTO on the main bezel.
VOICE COMMANDS IN CLIMATE MODE
Please refer to the Voice commands in climate mode section of the
Navigation Supplement for more information on using voice commands
with the climate control system.
2012 05+ Mustang (197)
Owners Guide, 3rd Printing
USA (fus)
53
Page 54

Climate Controls
Operating tips
• To reduce fog build-up on the windshield during humid weather,
select
increased to improve clearing.
• To reduce humidity build-up inside the vehicle: do not drive with the
system off or with
• Do not put objects under the front seats that will interfere with the
airflow to the back seats.
• Remove any snow, ice or leaves from the air intake area at the base of
the windshield.
• To improve the A/C cool down, drive with the windows slightly open
for 2-3 minutes after start up or until the vehicle has been “aired out.”
• A small amount of air may be felt from the floor vent regardless of the
air distribution setting that is selected.
If you are driving during extreme high ambient temperatures and idling
for extended periods of time in gear, it is recommended to run the A/C
in the MAX A/C mode, adjust the blower fan speed to the lowest setting
and put the vehicle’s transmission in P (Park) to continue to receive cool
air from your A/C system.
For maximum cooling performance MAX A/C in AUTO:
1. Press AUTO control.
2. Set to desired temperature.
For maximum cooling performance MAX A/C in manual override
control
1. Choose
2. Set the temperature to 60°F (16°C).
3. Set the fan to the highest blower setting.
To aid in side window defogging/demisting in cold or humid
weather:
1. Select
performance select (defrost).
2. Select A/C.
3. Adjust the temperature control to maintain comfort.
4. Set the fan speed to the highest setting.
54
(defrost). Temperature and/or fan speed can also be
(recirculated air) engaged.
(panel), A/C, and MAX A/C controls.
(defrost) or (floor/defrost) modes. To maximize
2012 05+ Mustang (197)
Owners Guide, 3rd Printing
USA (fus)
Page 55

Climate Controls
REAR WINDOW DEFROSTER
Press the control to clear the rear window of thin ice and fog. The LED
will illuminate.
The rear window defroster turns off automatically after 15 minutes, or
when the ignition is turned off. To manually turn off the defroster before
15 minutes have passed, press the control again.
The vehicle must be running to use this feature.
Do not use razor blades or other sharp objects to clean the inside
of the rear window or to remove decals from the inside of the
rear window. This may cause damage to the heated grid lines and
will not be covered by your warranty.
CABIN AIR FILTER
Your vehicle is equipped with a cabin air filter, which is located just in
front of the windshield under the cowl grille on the passenger side of the
vehicle.
The particulate air filtration system is designed to reduce the
concentration of airborne particles such as dust, spores and pollen in the
air being supplied to the interior of the vehicle. The particulate filtration
system gives the following benefits to customers:
• Improves the customer’s driving comfort by reducing particle
concentration
• Improves the interior compartment cleanliness
• Protects the climate control components from particle deposits
For more information regarding the interval at which you should replace
the cabin air filter, refer to your scheduled maintenance information.
For additional cabin air filter information, or to replace the filter, see an
authorized dealer.
R
2012 05+ Mustang (197)
Owners Guide, 3rd Printing
USA (fus)
55
Page 56
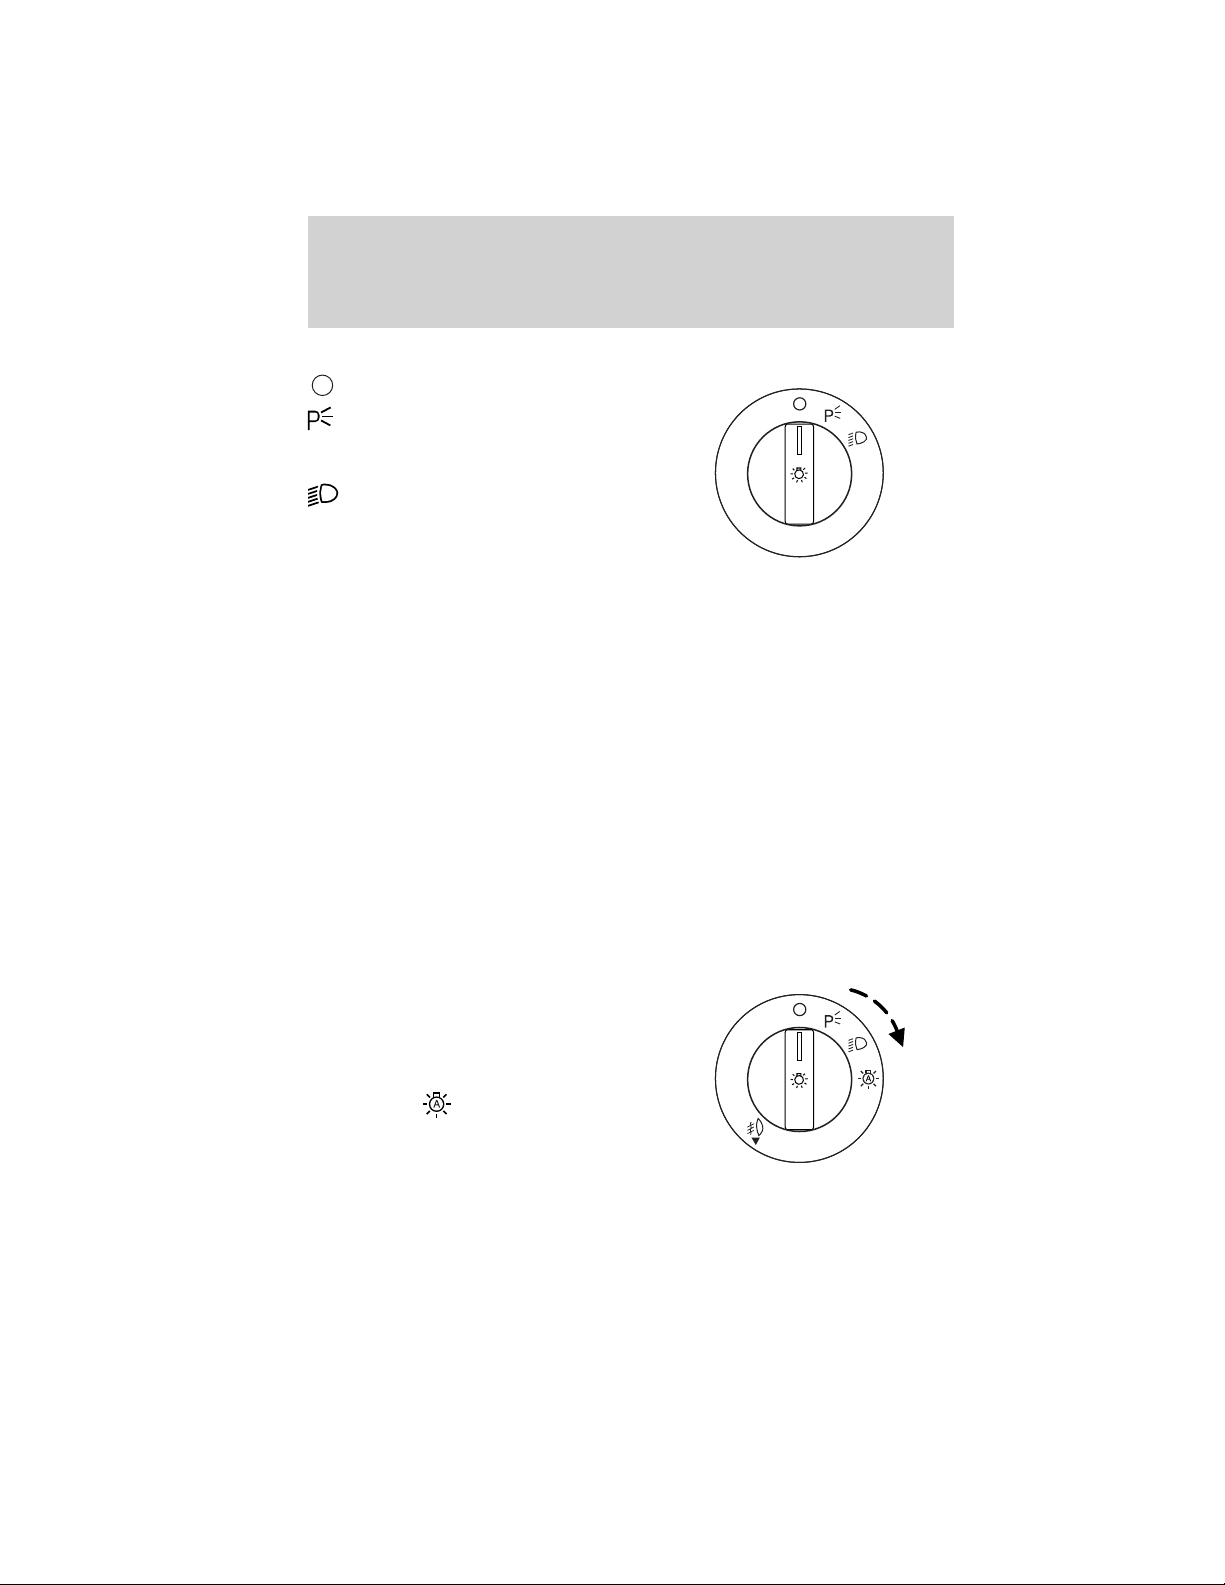
Lights
HEADLAMP CONTROL
Turns the lamps off.
Turns on the parking lamps,
instrument panel lamps, license
plate lamps and tail lamps.
Turns the low beam headlamps
on.
Automatic instrumentation illumination
A light sensor in your vehicle monitors the outside lighting conditions
and automatically sets the instrument panel illumination to one of the
following modes:
• If the headlamps and parking lamps are off, the vehicle will be in
daytime illumination mode.
• If the headlamps or parking lamps are on and daylight is detected, the
vehicle will be in daytime illumination mode.
• If the headlamps or parking lamps are on and nighttime conditions are
detected, the vehicle will be in nighttime illumination mode.
Note: The panel dimmer control works only in nighttime illumination
mode. It has no effect in daytime illumination mode. Also, selectable
features such as gauge color and halo color will not be available in
daytime illumination mode.
Autolamp control (if equipped)
The autolamp system provides light
sensitive automatic on-off control of
the exterior lights normally
controlled by the headlamp control.
• To turn autolamps on, rotate the
control to
• To turn autolamps off, rotate the
control from the autolamp
position.
56
.
2012 05+ Mustang (197)
Owners Guide, 3rd Printing
USA (fus)
Page 57
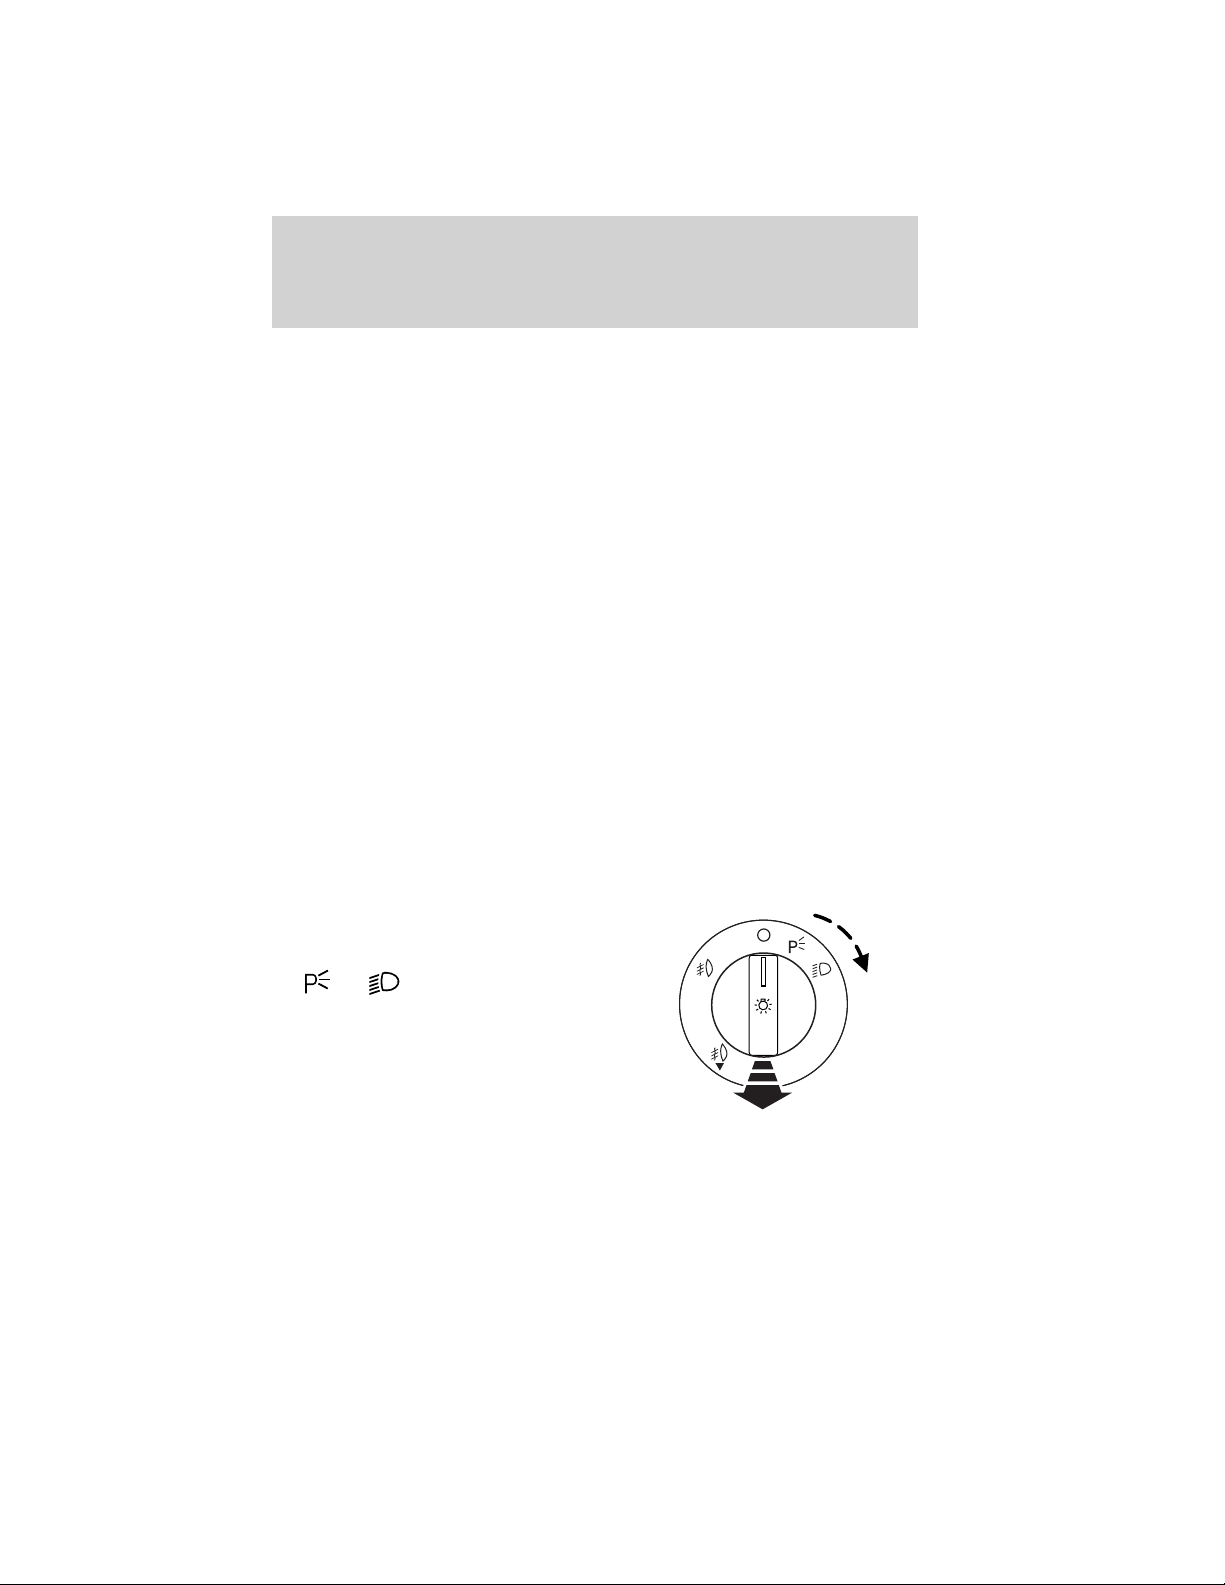
Lights
The autolamp system also keeps the lights on for a predetermined
amount of time after the ignition switch is turned to off. You can change
the amount of time the lamps stay on by using the programming
procedure that follows:
Note: If the vehicle is equipped with autolamps, it will have the
headlamps on with windshield wipers feature. If the windshield
wipers are turned on, the exterior lamps will turn on with the headlamp
control in the autolamp position.
Autolamps - programmable exit delay
Programmable exit delay allows the length of the autolamp exit delay to
be changed.
To program the auto lamp exit time delay:
1. Start with the ignition off and the headlamp control in the autolamp
position.
2. Turn the headlamp control to off.
3. Turn the ignition on and then back to off.
4. Turn the headlamp control to the autolamp position. The headlamps
will turn on.
5. Wait the desired amount of time for the exit delay you want (up to
three minutes), then turn the headlamps off.
Fog lamp control (if equipped)
The fog lamps can be turned on
when the ignition is in the on
position, the headlamp control is in
the
high beams are not on.
Pull the headlamp control towards
you to turn on the fog lamps. The
indicator light under the fog lamp
symbol will illuminate.
or position and the
2012 05+ Mustang (197)
Owners Guide, 3rd Printing
USA (fus)
57
Page 58
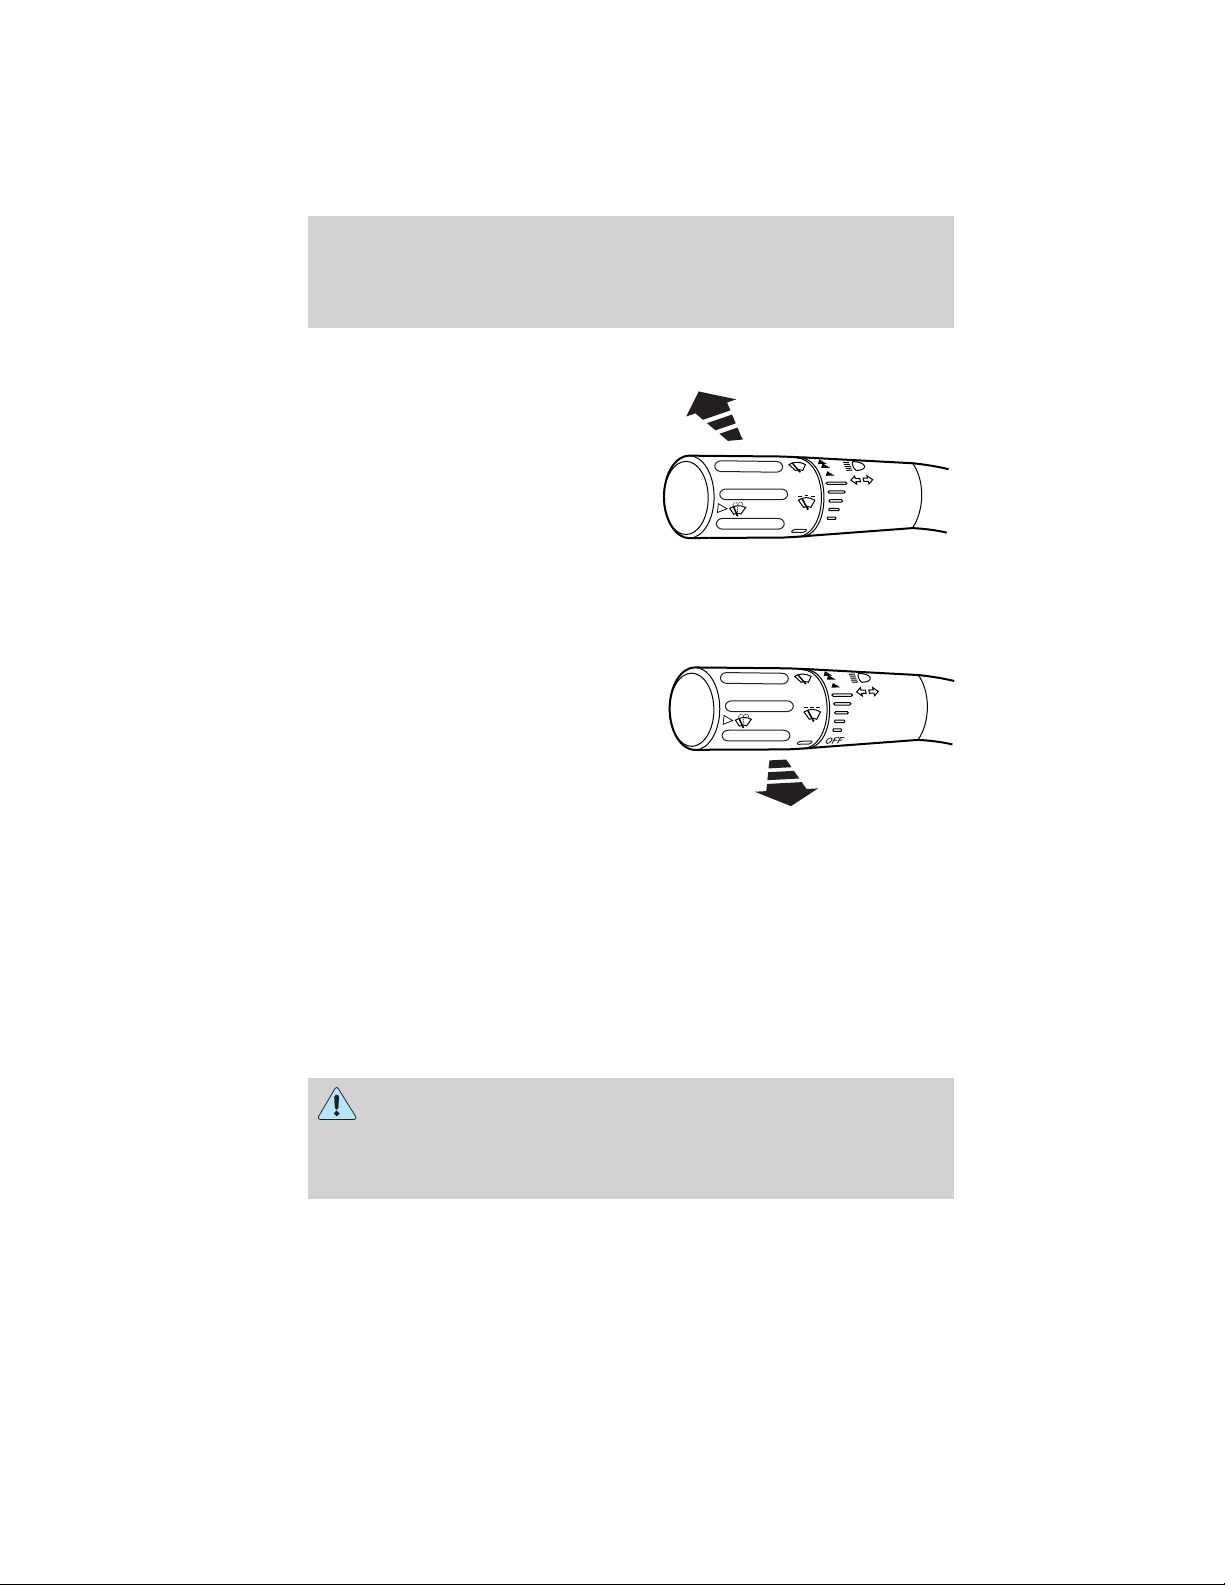
Lights
High beams
• Push the lever toward the
instrument panel to activate.
• Pull the lever toward you to
deactivate.
F
F
O
Flash-to-pass
Pull toward you, to the first detent,
to activate and release to deactivate.
Note: Vehicles equipped with HID
headlamps will hear an audible click
when activating this feature.
Daytime running lamps (DRL) (if equipped)
Turns the headlamps on with a reduced output (vehicles equipped with
halogen headlamps) or turns the front fog lamps on (vehicles equipped
with HID headlamps).
To activate:
• the ignition must be in the on position,
• the headlamp control is in the off or parking lamp position and
• the parking brake must be disengaged.
WARNING: Always remember to turn on your headlamps at
dusk or during inclement weather. The Daytime Running Lamp
(DRL) system does not activate the tail lamps and generally may not
provide adequate lighting during these conditions. Failure to activate
your headlamps under these conditions may result in a collision.
58
2012 05+ Mustang (197)
Owners Guide, 3rd Printing
USA (fus)
Page 59
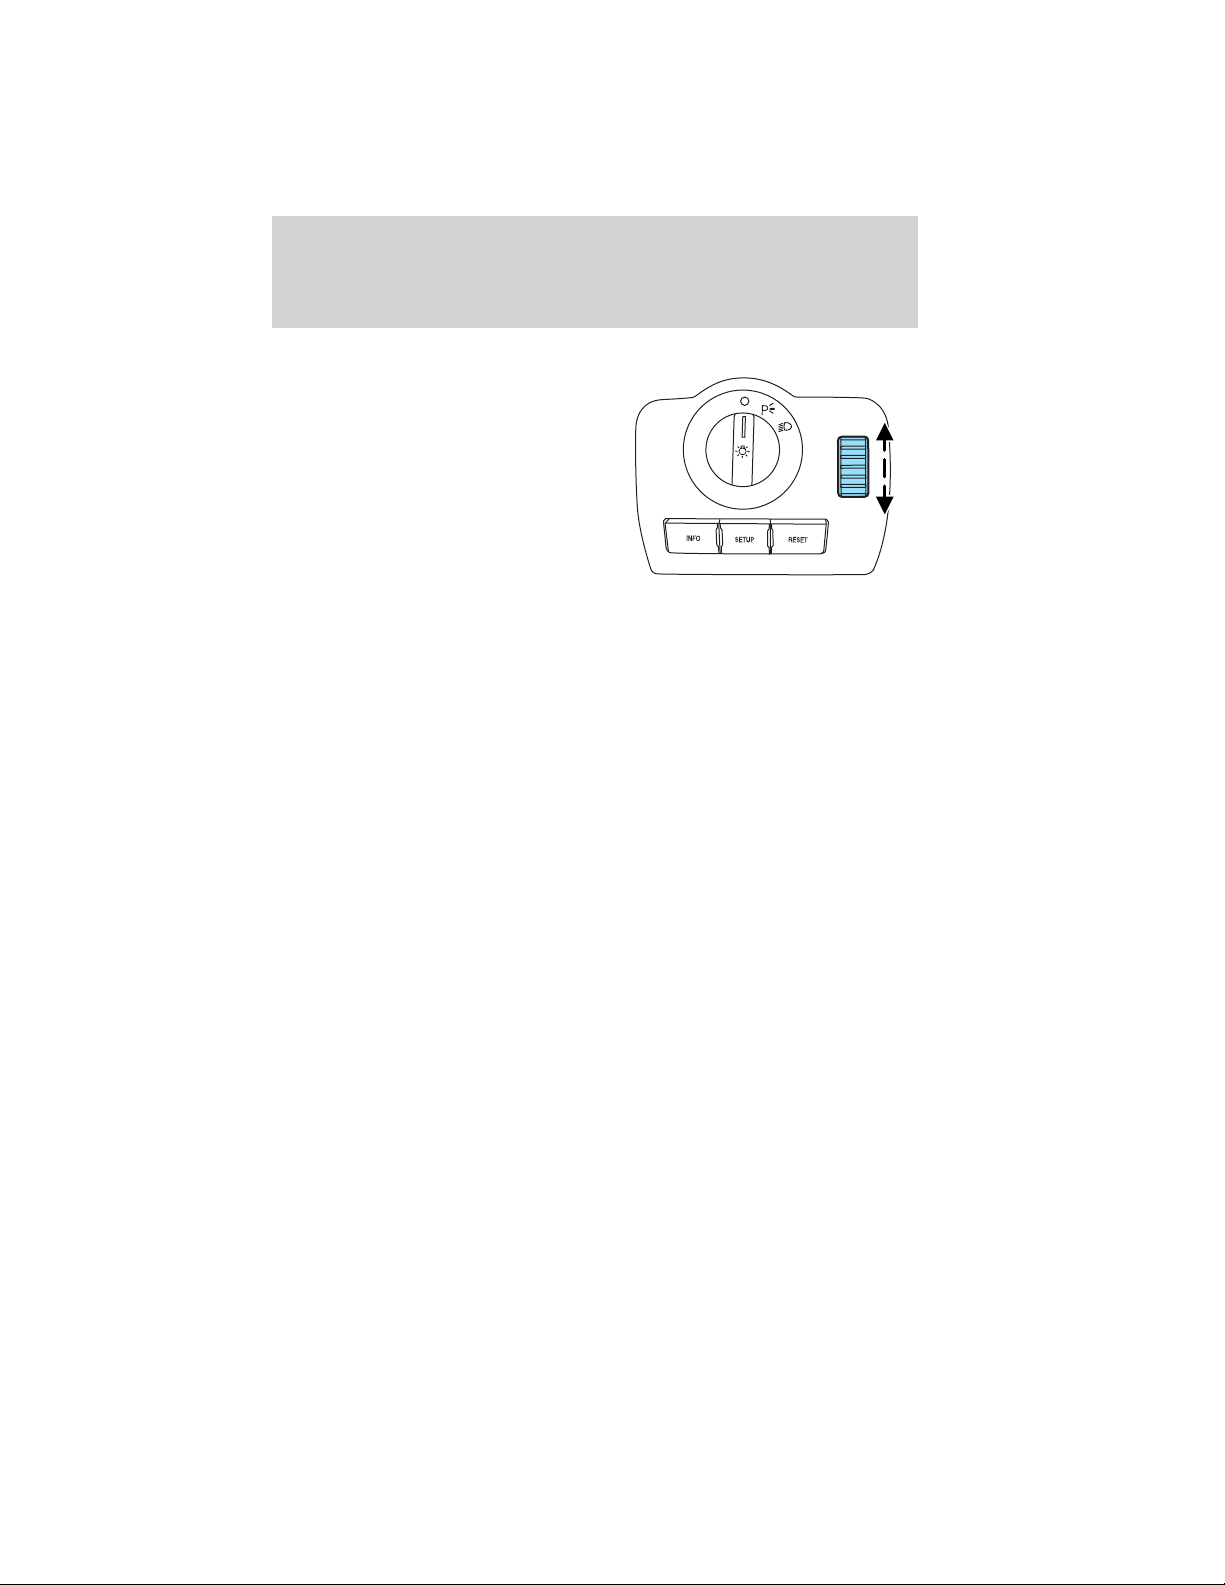
Lights
PANEL DIMMER CONTROL
Use to adjust the brightness of the
instrument panel and all applicable
switches in the vehicle during
headlamp and parking lamp
operation.
• Move the control to the full
upright position, past detent, to
turn on the interior lamps.
• Move the control down, past
detent, to turn off the interior
lights.
• Move the control to the full downward position, to dim the interior
lights to their minimum. The instrument panel/switch lighting will
remain lit.
Note: If the battery is disconnected, discharged, or a new battery is
installed, the dimmer switch requires re-calibration. Rotate the dimmer
switch from the full dim position to the full dome/on position to reset.
This will ensure that your displays are visible under all lighting
conditions.
AIMING THE HEADLAMPS
The headlamps on your vehicle are properly aimed at the assembly plant.
If your vehicle has been in an accident the alignment of your headlamps
should be checked by your authorized dealer.
2012 05+ Mustang (197)
Owners Guide, 3rd Printing
USA (fus)
59
Page 60
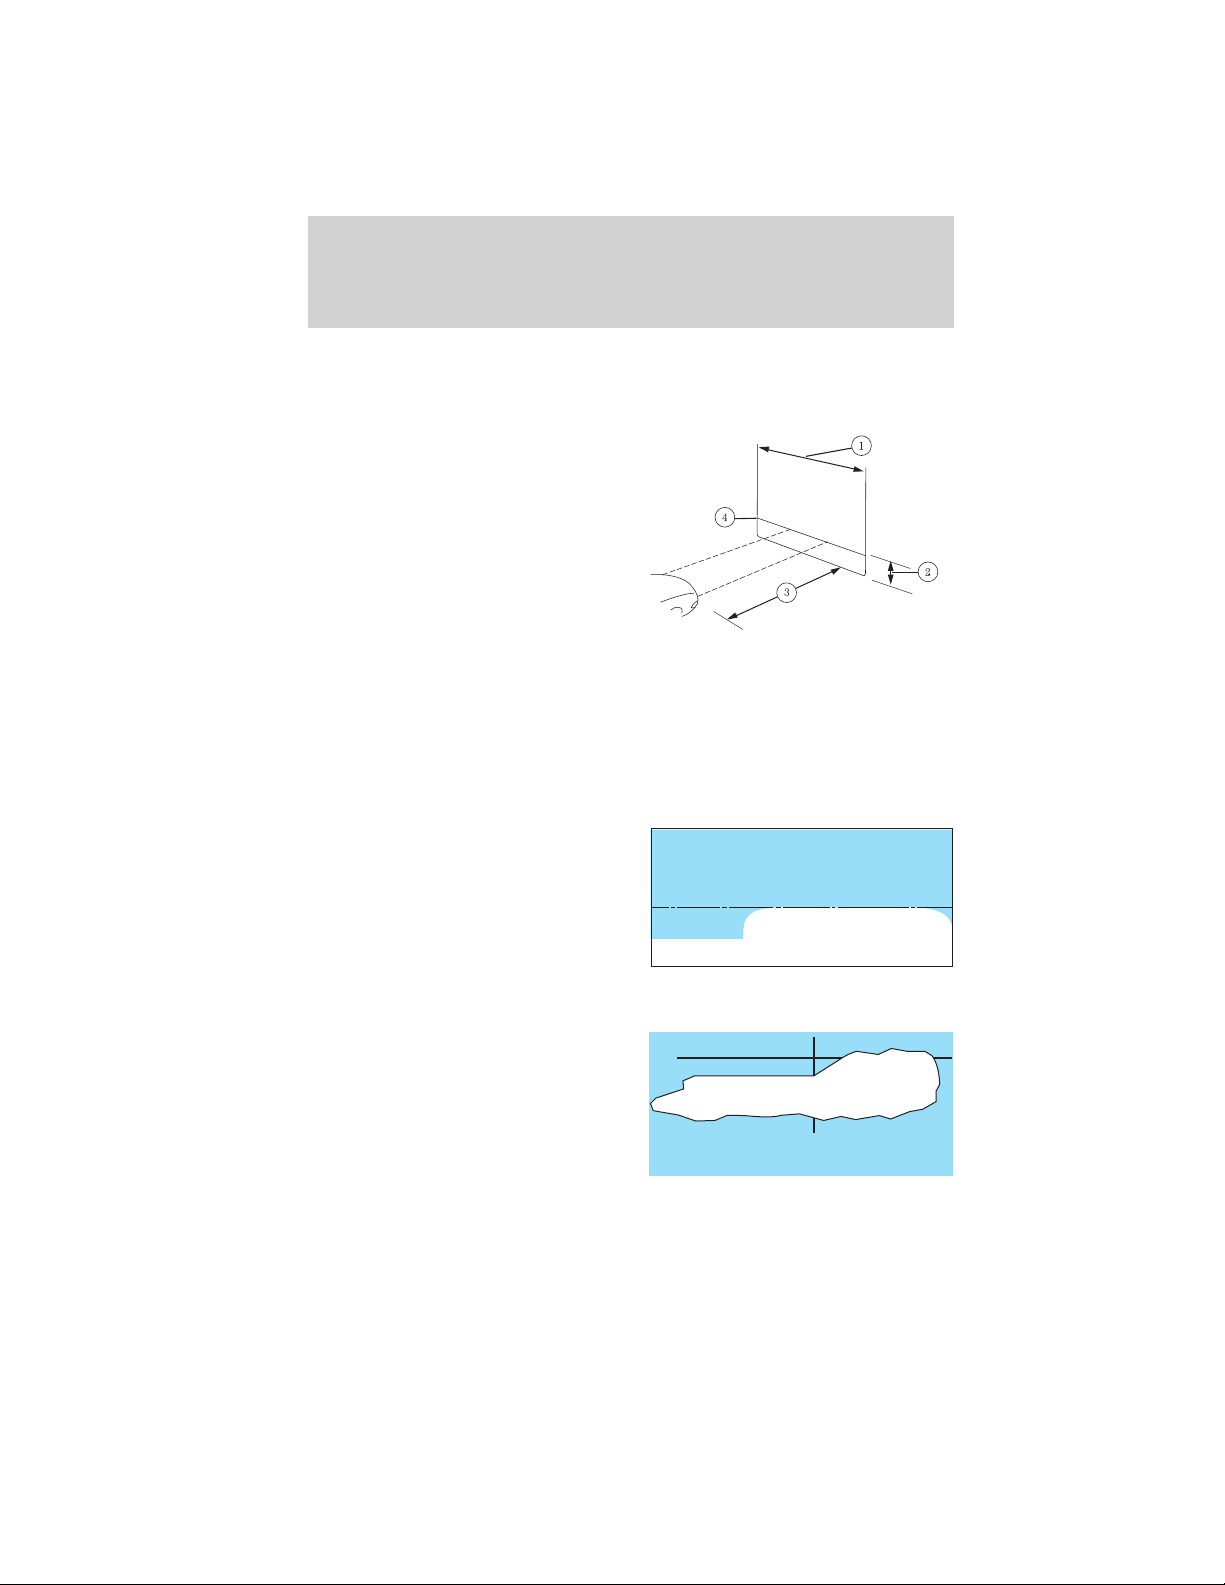
Lights
Vertical aim adjustment
1. Park the vehicle directly in front of a wall or screen on a level surface,
approximately 25 feet (7.6 meters) away.
• (1) 8 feet (2.4 meters)
• (2) Center height of lamp to
ground
• (3) 25 feet (7.6 meters)
• (4) Horizontal reference line
2. Measure the height from the
center of your headlamp to the
ground and mark an 8 foot
(2.4 meter) horizontal reference line
on the vertical wall or screen at this
height (a piece of masking tape works well). The center of the lamp is
marked bya3mmcircleontheheadlamp lens.
3. Turn on the low beam headlamps to illuminate the wall or screen and
open the hood. To see a clearer light pattern for adjusting, block the
light from one headlamp while adjusting the other.
For vehicles with halogen headlamps:
On the wall or screen you will
observe a flat zone of high intensity
light located at the top of the right
hand portion of the beam pattern. If
the top edge of the high intensity
light zone is not at the horizontal
reference line, the headlamp will
need to be adjusted.
For vehicles with HID headlamps:
There is a distinct cut-off (change
from light to dark) in the left
portion of the beam pattern. The
top edge of this cut-off should be
positioned two inches (50.8 mm)
below the horizontal reference line.
60
2012 05+ Mustang (197)
Owners Guide, 3rd Printing
USA (fus)
Page 61
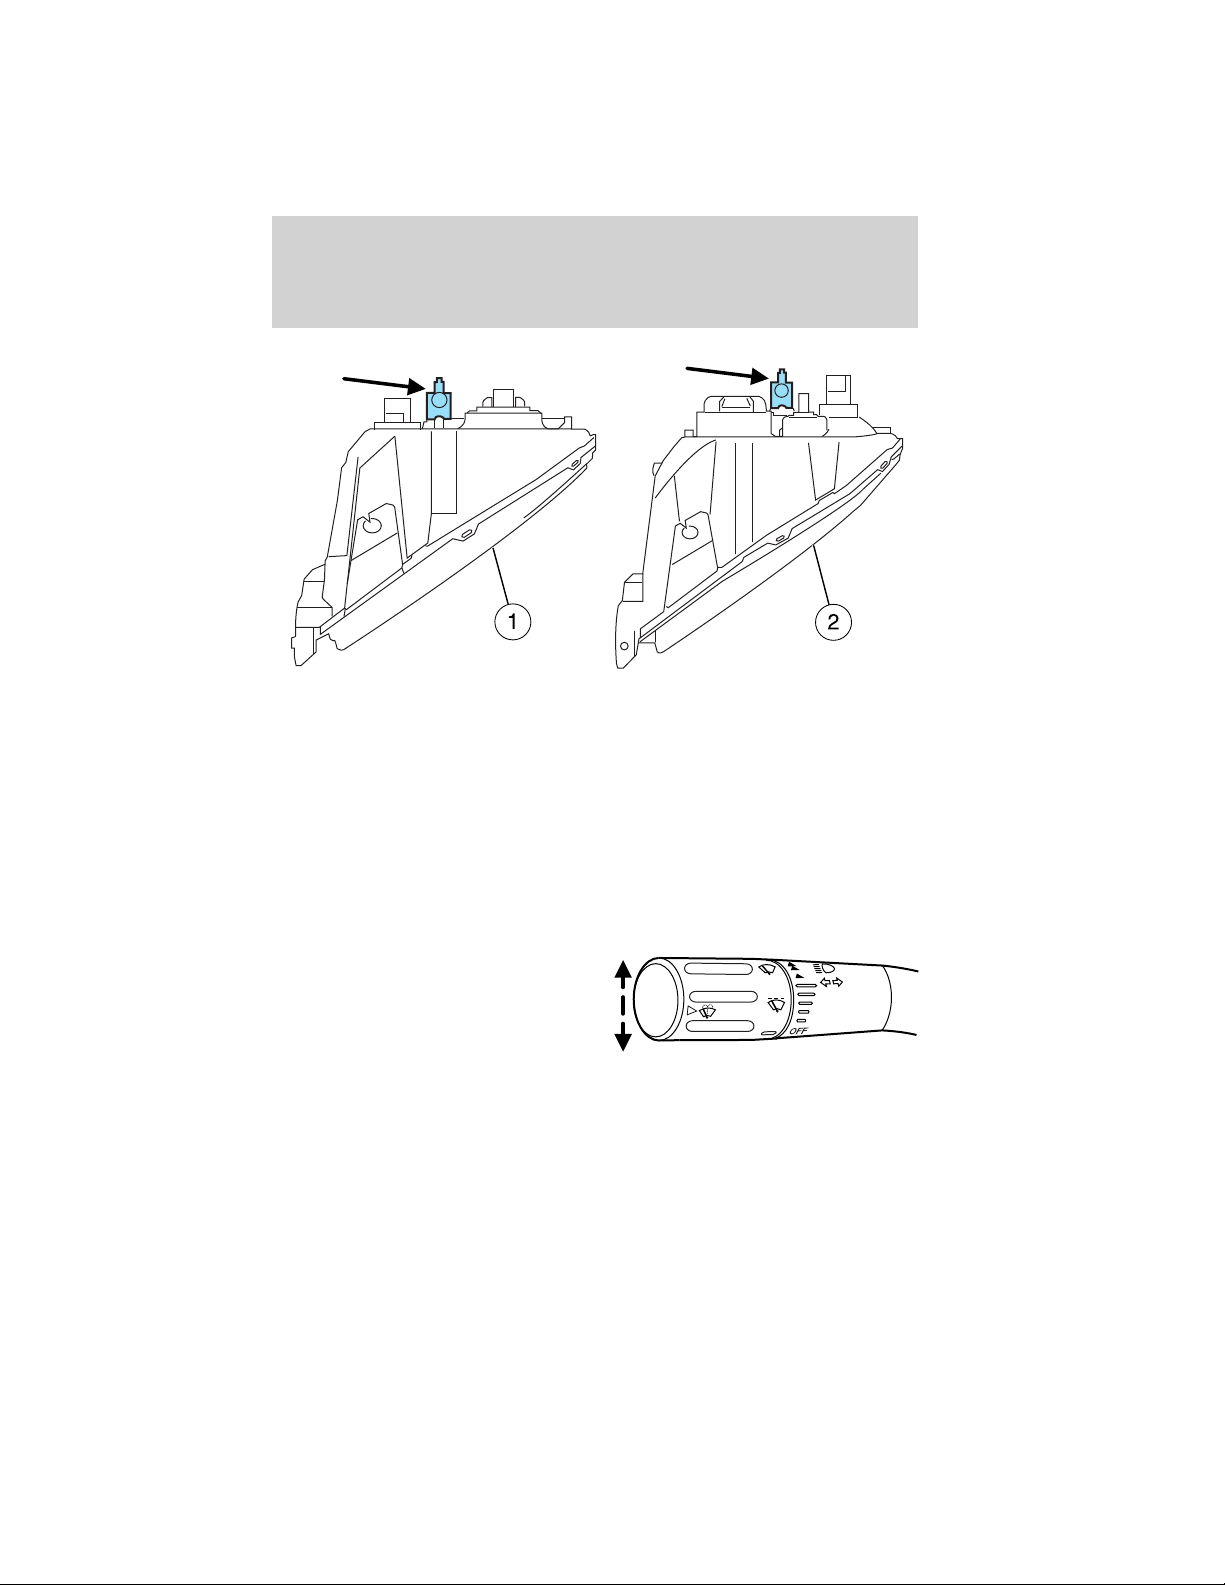
Lights
4. Locate the vertical adjuster on each headlamp.
• Halogen headlamp (1)
• HID headlamp (2)
5. Then usea7mmAllenwrench or a Phillips screwdriver to adjust the
headlamp up or down. HORIZONTAL AIM IS NOT REQUIRED FOR THIS
VEHICLE AND IS NON-ADJUSTABLE.
6. Close the hood and turn off the lamps.
TURN SIGNAL CONTROL
• Push down to activate the left
turn signal.
• Push up to activate the right turn
signal.
The flash rate of the turn signal indicator will speed up considerably if
any of the turn signal lamps are out.
Note: For sequential rear turn signal lamps, an outage of the inner most
of the three compartments will result in this rapid flash rate.
2012 05+ Mustang (197)
Owners Guide, 3rd Printing
USA (fus)
61
Page 62
Lights
INTERIOR LAMPS
Dome/Map lamps
The dome lamp lights when:.
• any door is opened.
• any of the remote entry controls
are pressed and the ignition is
off.
• the instrument panel dimmer
switch is rotated up, past the
detent, until the courtesy lamps
come on.
The map lamps are activated by
pressing the controls on either side of the lamp.
BULB REPLACEMENT
Lamp assembly condensation
Exterior lamps are vented to accommodate normal changes in pressure.
Condensation can be a natural by-product of this design. When moist air
enters the lamp assembly through the vents, there is a possibility that
condensation can occur when the temperature is cold. When normal
condensation occurs, a thin film of mist can form on the interior of the
lens. The thin mist eventually clears and exits through the vents during
normal operation. Clearing time may take as long as 48 hours under dry
weather conditions.
Examples of acceptable condensation are:
• Presence of thin mist (no streaks, drip marks or droplets)
• Fine mist covers less than 50% of the lens
Examples of unacceptable moisture (usually caused by a lamp water
leak) are:
• Water puddle inside the lamp
• Large water droplets, drip marks or streaks present on the interior of
the lens
Take your vehicle to a dealer for service if any of the above conditions of
unacceptable moisture are present.
62
2012 05+ Mustang (197)
Owners Guide, 3rd Printing
USA (fus)
Page 63
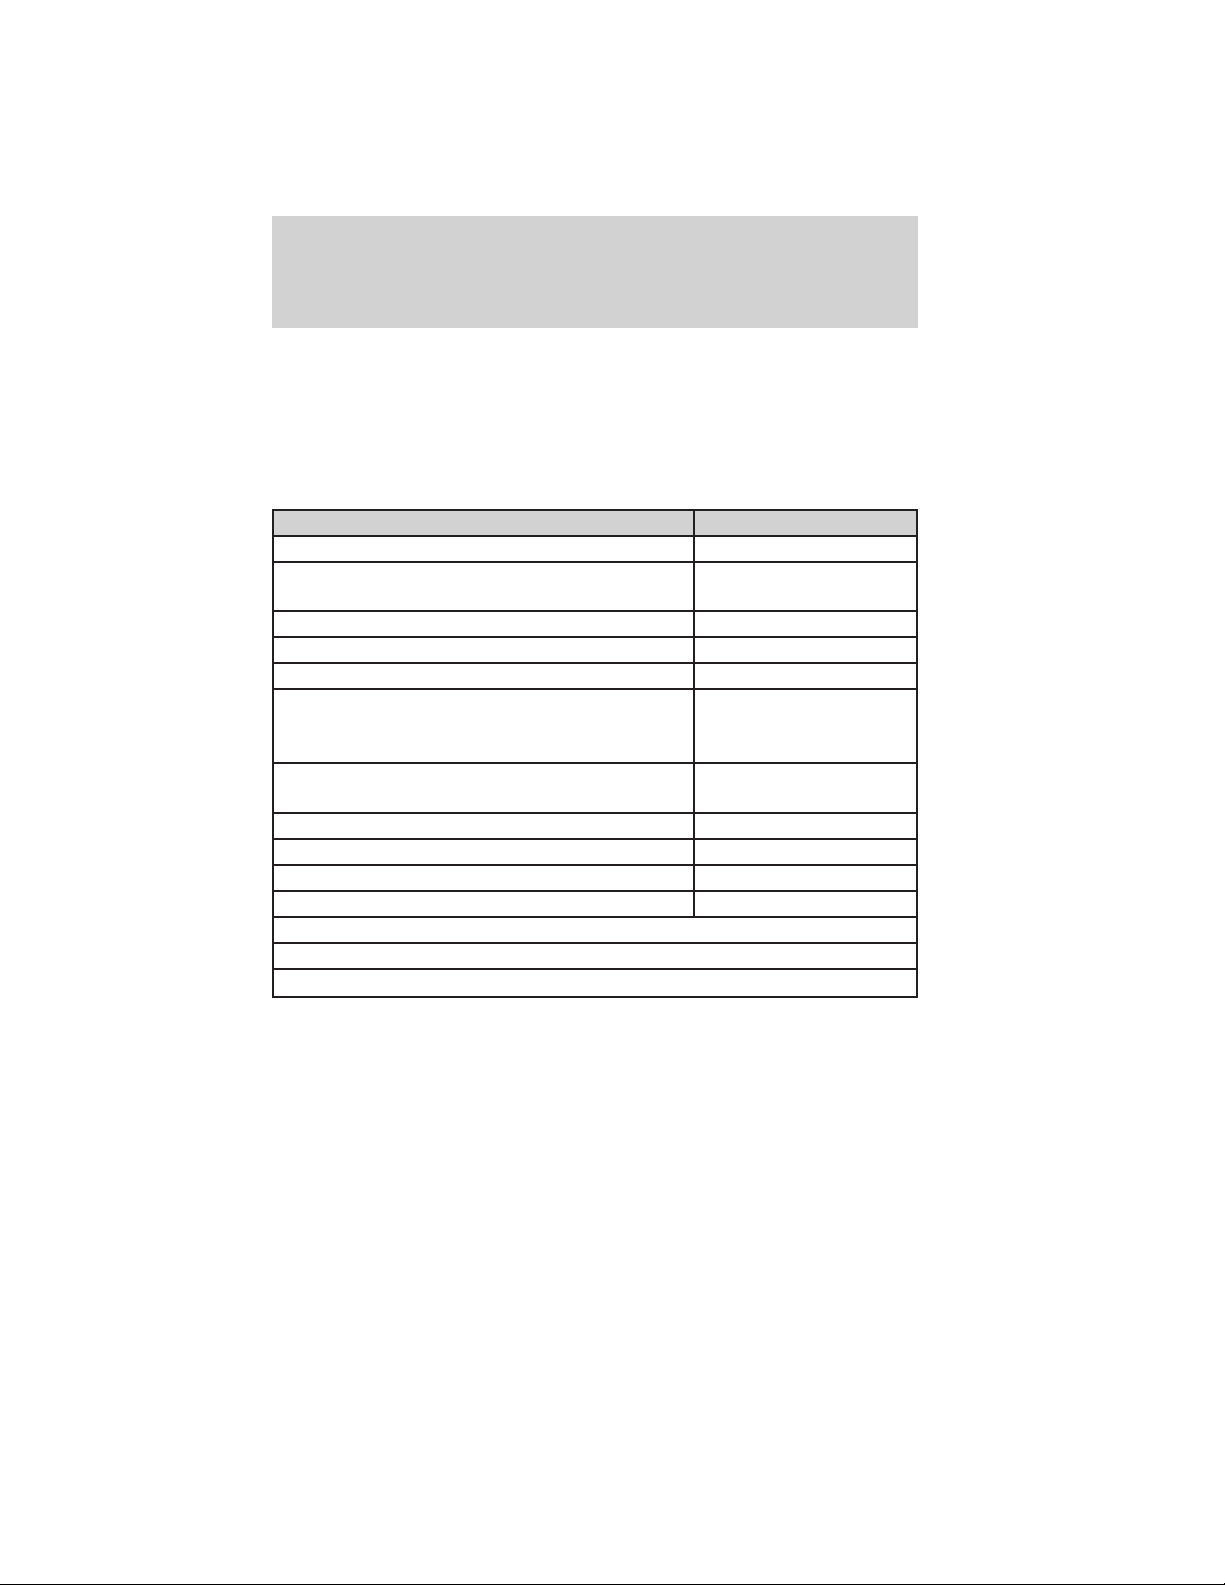
Lights
BULB SPECIFICATION CHART
Replacement bulbs are specified in the chart below. Headlamp bulbs
must be marked with an authorized “D.O.T.” for North America and an
“E” for Europe to ensure lamp performance, light brightness and pattern
and safe visibility. The correct bulbs will not damage the lamp assembly
or void the lamp assembly warranty and will provide quality bulb burn
time.
Function Trade Number
Headlamp (halogen) H13
* HID (high intensity discharge) headlamp
(if equipped)
Front park lamp, turn lamp (halogen) 3457 or 3457K
Front park, turn lamp (HID) 3457AK (amber)
Sidemarker (front/rear) 194
9145–GT or H11–Pony
Fog lamp
Tail lamp, brake lamp, turn lamp (LED)
* High-mount stoplamp (LED) Non-replaceable LEDs
Backup lamp 912
License plate lamp C5WL
Dome/Map lamp 168
All replacement bulbs are clear in color except where noted.
To replace all instrument panel lights - see your authorized dealer.
* To replace these lamps - see your authorized dealer.
(V6) or GT Cal Special
D3S
(if equipped)
L1230R-3N and
L3230R-4CX
Replacing interior bulbs
Check the operation of all bulbs frequently.
Replacing exterior bulbs
Check the operation of all bulbs frequently.
2012 05+ Mustang (197)
Owners Guide, 3rd Printing
USA (fus)
63
Page 64
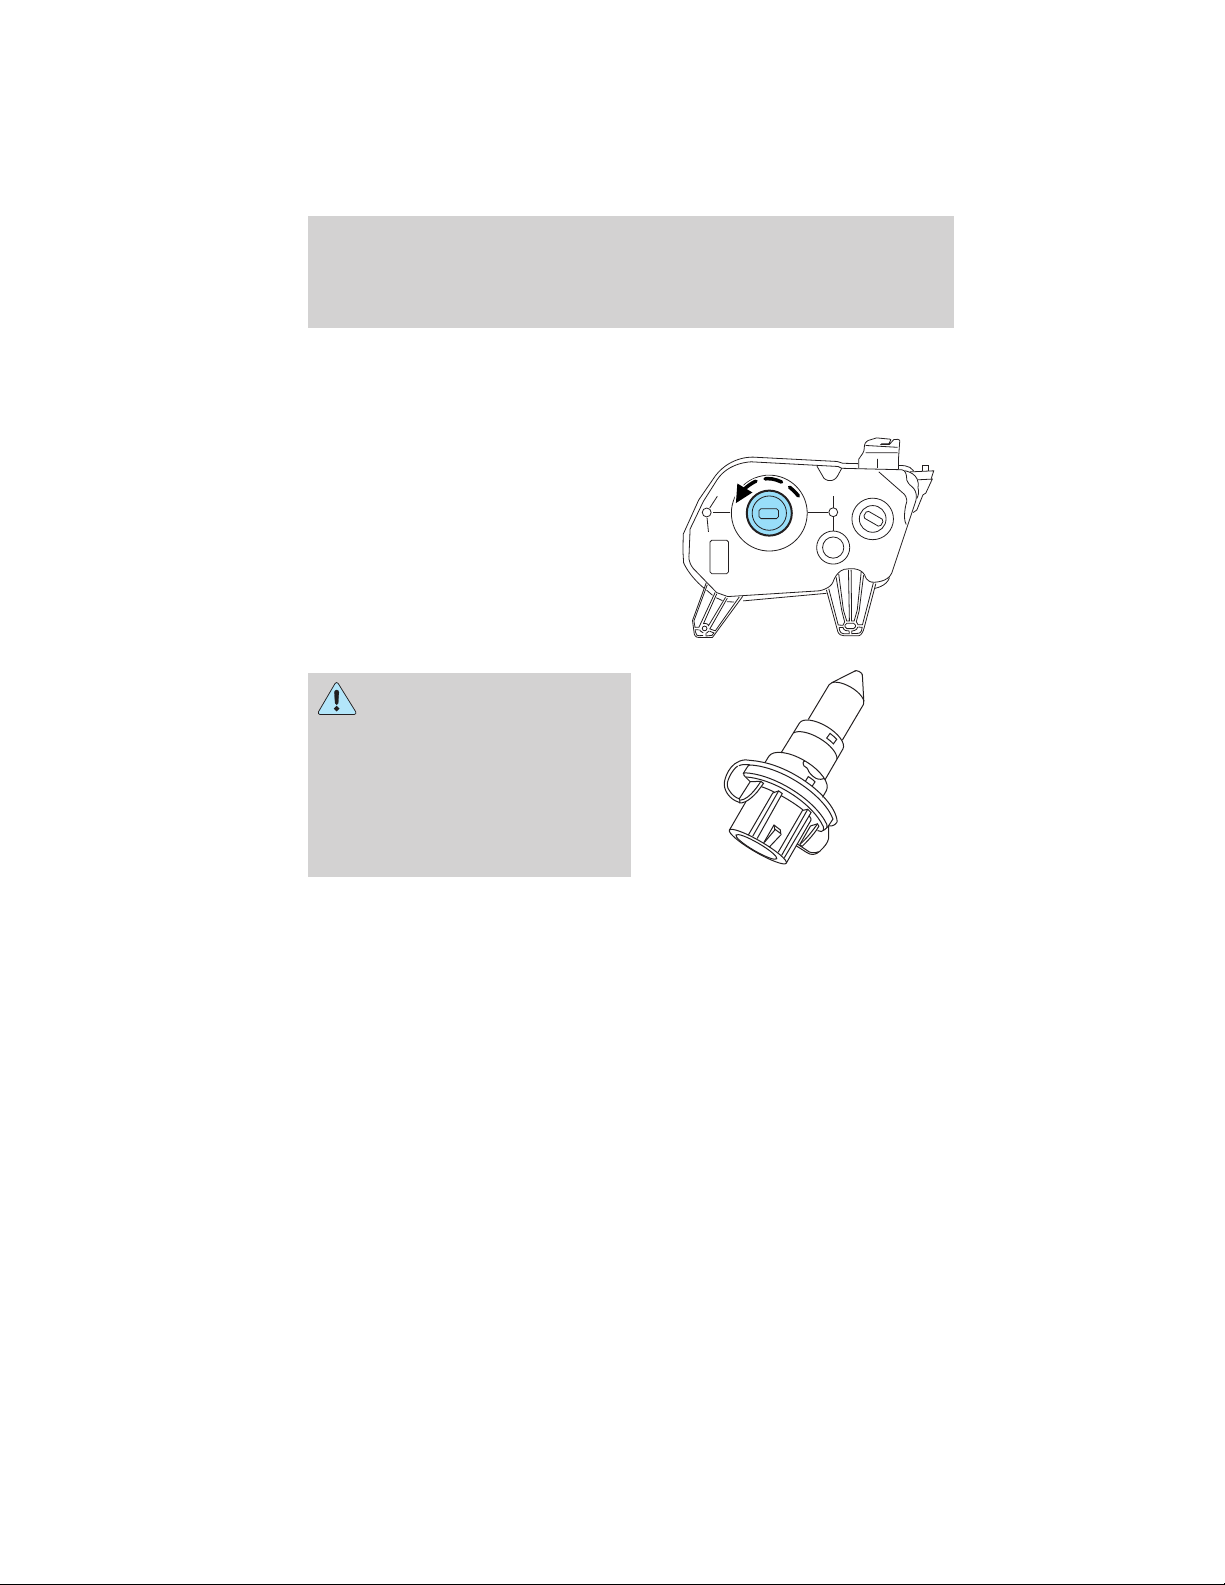
Lights
Replacing headlamp bulbs
To remove the headlamp bulb:
1. Make sure headlamp switch is in the off position, then open the hood.
2. Disconnect the electrical
connector from the bulb by
depressing the retainer clip and
pulling rearward.
3. Remove the bulb by rotating it
counterclockwise and pulling it
straight out.
WARNING: Handle a
halogen headlamp bulb
carefully and keep out of
children’s reach. Grasp the bulb
only by its plastic base and do not
touch the glass. The oil from your
hand could cause the bulb to
break the next time the
headlamps are operated.
Install the new bulb in reverse order.
Replacing HID headlamp bulbs (if equipped)
The headlamps on your vehicle use a “high intensity discharge” source.
These lamps operate at a high voltage. When the bulb is burned out, the
bulb and starter capsule assembly must be replaced by your authorized
dealer.
64
2012 05+ Mustang (197)
Owners Guide, 3rd Printing
USA (fus)
Page 65
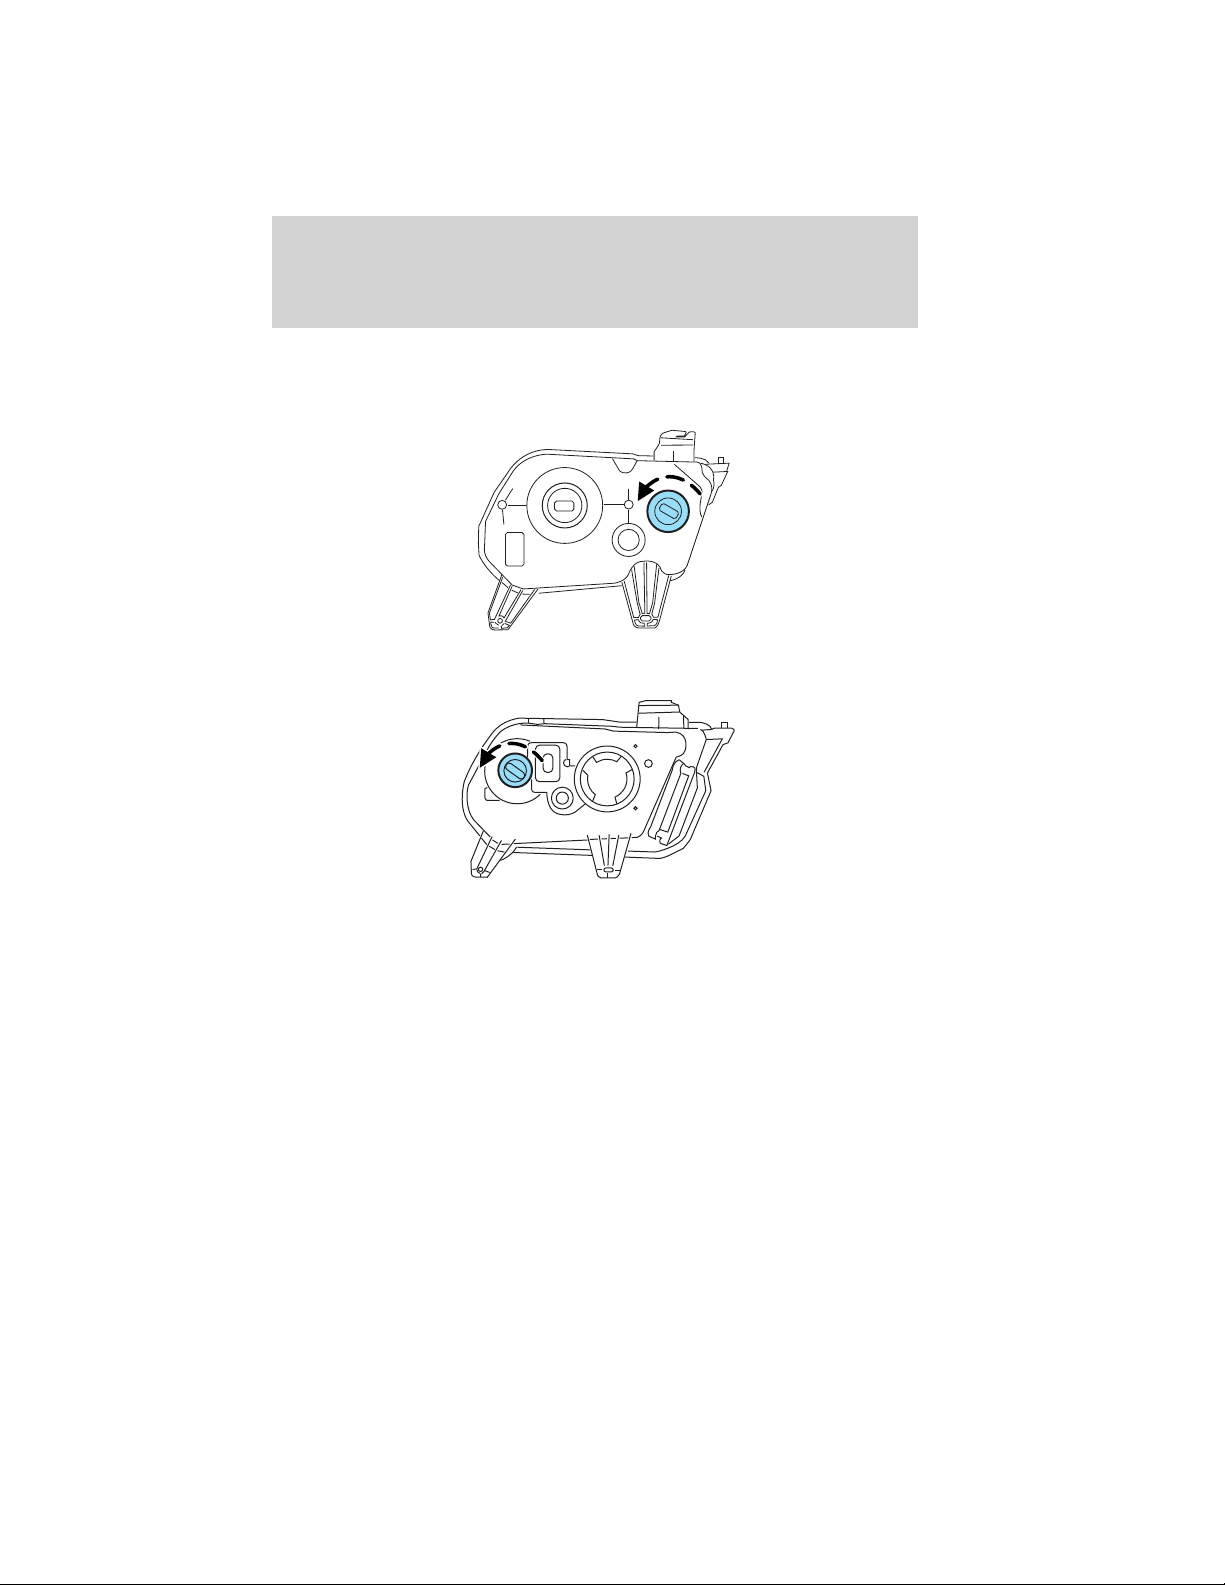
Lights
Replacing front parking lamp/turn signal bulbs
1. Make sure the headlamp control is in the off position and open the
hood.
Halogen headlamp
HID headlamp
2. Remove the hex head screws attaching the underbody forward
aeroshield and remove to gain access to the front parking lamp/turn
signal assembly.
3. Rotate the socket counterclockwise and remove from the lamp
assembly.
4. Carefully pull the bulb straight out of socket.
Install the new bulb in reverse order.
2012 05+ Mustang (197)
Owners Guide, 3rd Printing
USA (fus)
65
Page 66
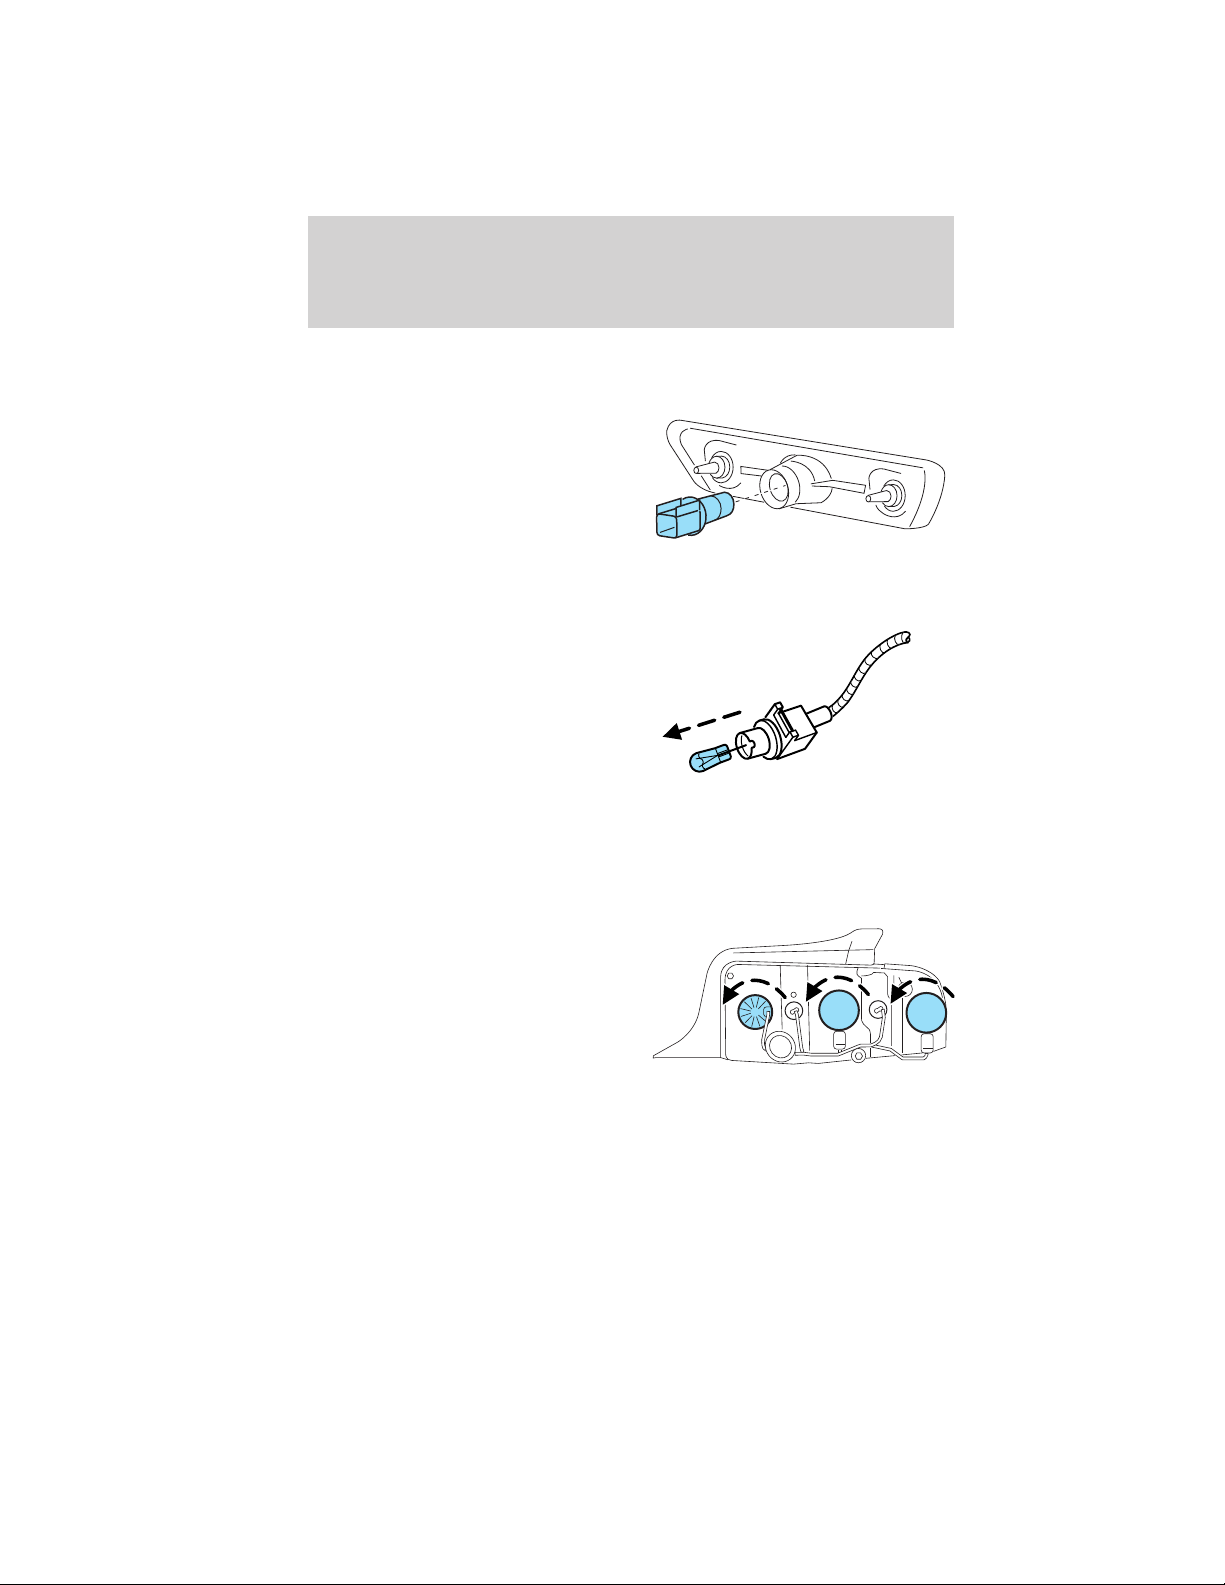
Lights
Replacing front sidemarker bulb
1. Make sure the headlamp control is in the off position.
2. Remove the hex head screws
attaching the underbody forward
aeroshield and remove to gain
access to the front sidemarker
assembly.
3. Rotate the socket counterclockwise and remove from the lamp
assembly.
4. Carefully pull the bulb straight
out of socket.
Replacing tail lamp/brake/rear turn signal lamps
See your authorized dealer for replacement LED assembly.
The tail lamp, the brake lamp and the turn signal lamp are located in the
tail lamp assembly. Follow the same steps to replace these lamps.
1. Make sure the headlamp switch is
in the off position, then open the
trunk.
2. Carefully remove the fasteners
around the lamp area and then
remove the interior trunk trim.
66
2012 05+ Mustang (197)
Owners Guide, 3rd Printing
USA (fus)
Page 67
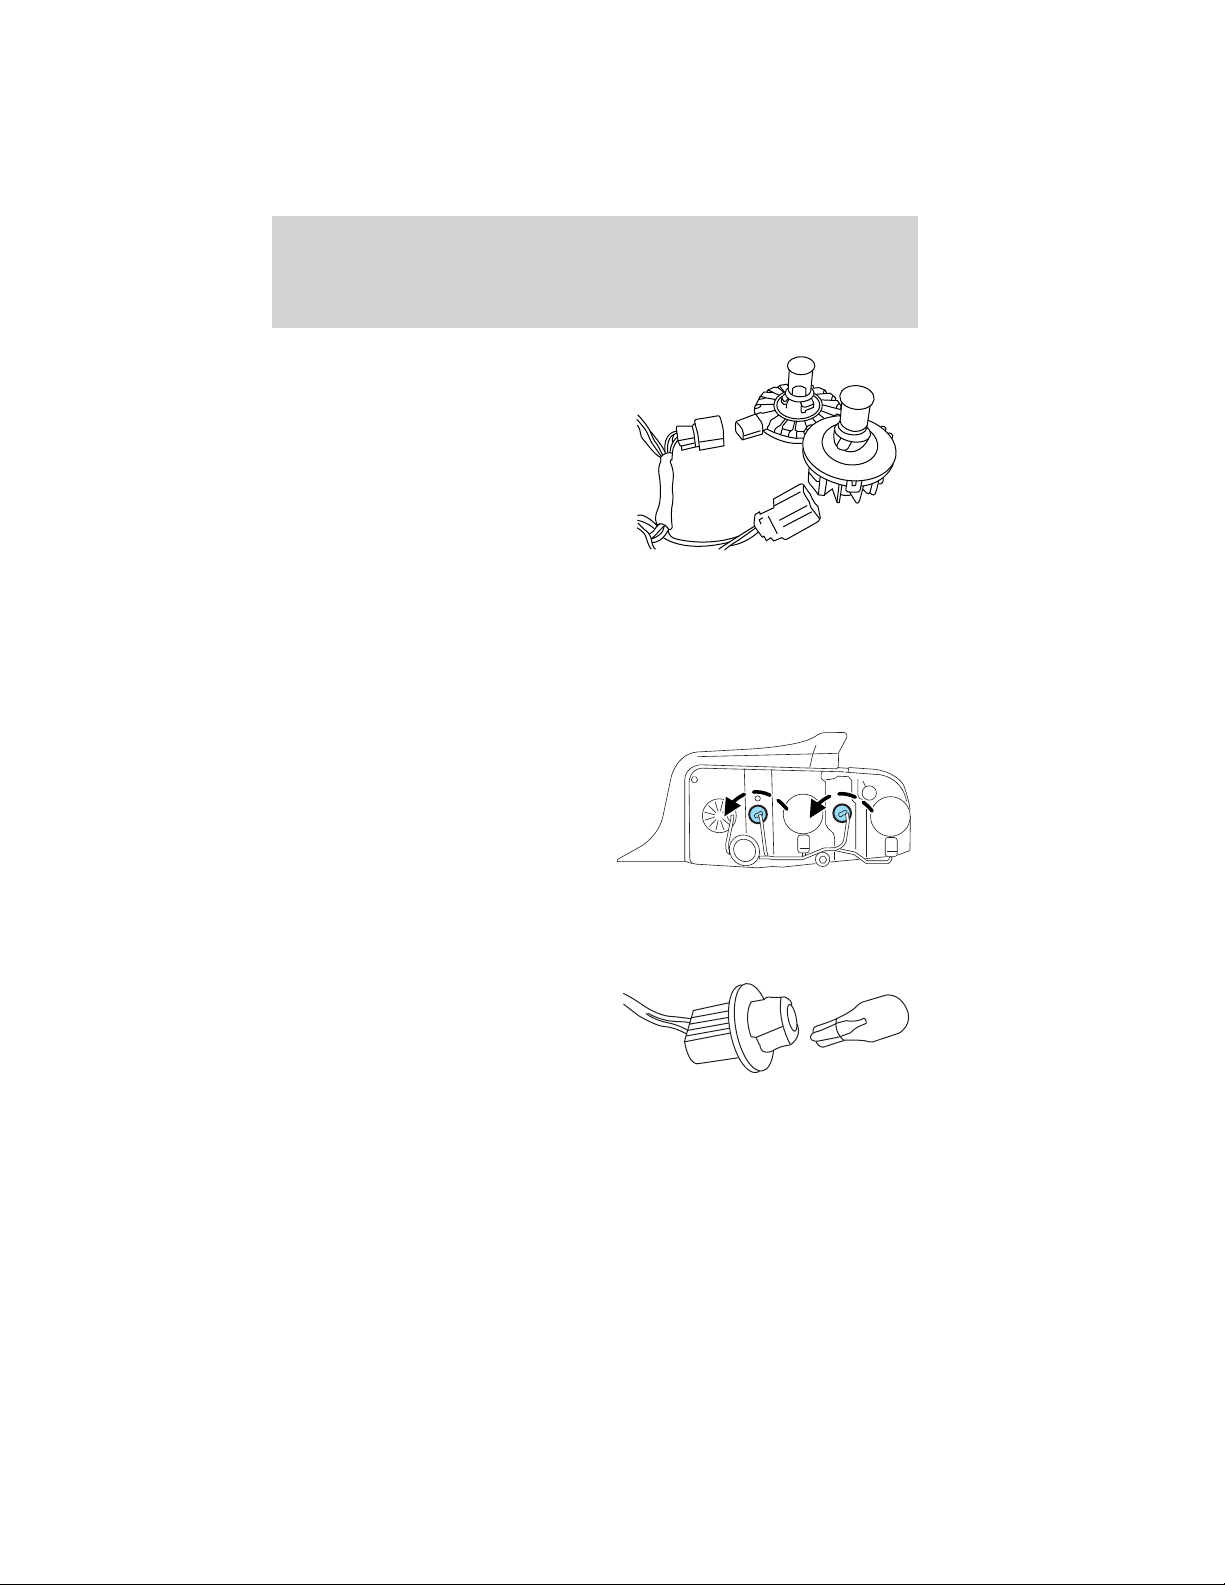
Lights
3. Unbolt the three tail lamp
attachment nuts and remove the
lamp assembly.
4. Rotate the LED assembly
counterclockwise and remove it
from the lamp assembly.
5. Disconnect the LED assembly
from the electrical connector and
replace the LED assembly.
6. Install new LED assembly in
reverse order.
Replacing backup bulbs
The backup lamps are located in the tail lamp assembly. Follow the same
steps to replace either bulb.
1. Make sure the headlamp switch is
in the off position, then open the
trunk.
2. Carefully remove the fasteners
around the lamp area, then remove
the interior trunk trim.
3. Unbolt the three tail lamp
attachment nuts and remove the
lamp assembly.
4. Rotate the bulb socket
counterclockwise and remove it from the lamp assembly.
5. Pull the bulb straight out from
the socket.
Install the new bulb in reverse
order.
2012 05+ Mustang (197)
Owners Guide, 3rd Printing
USA (fus)
67
Page 68
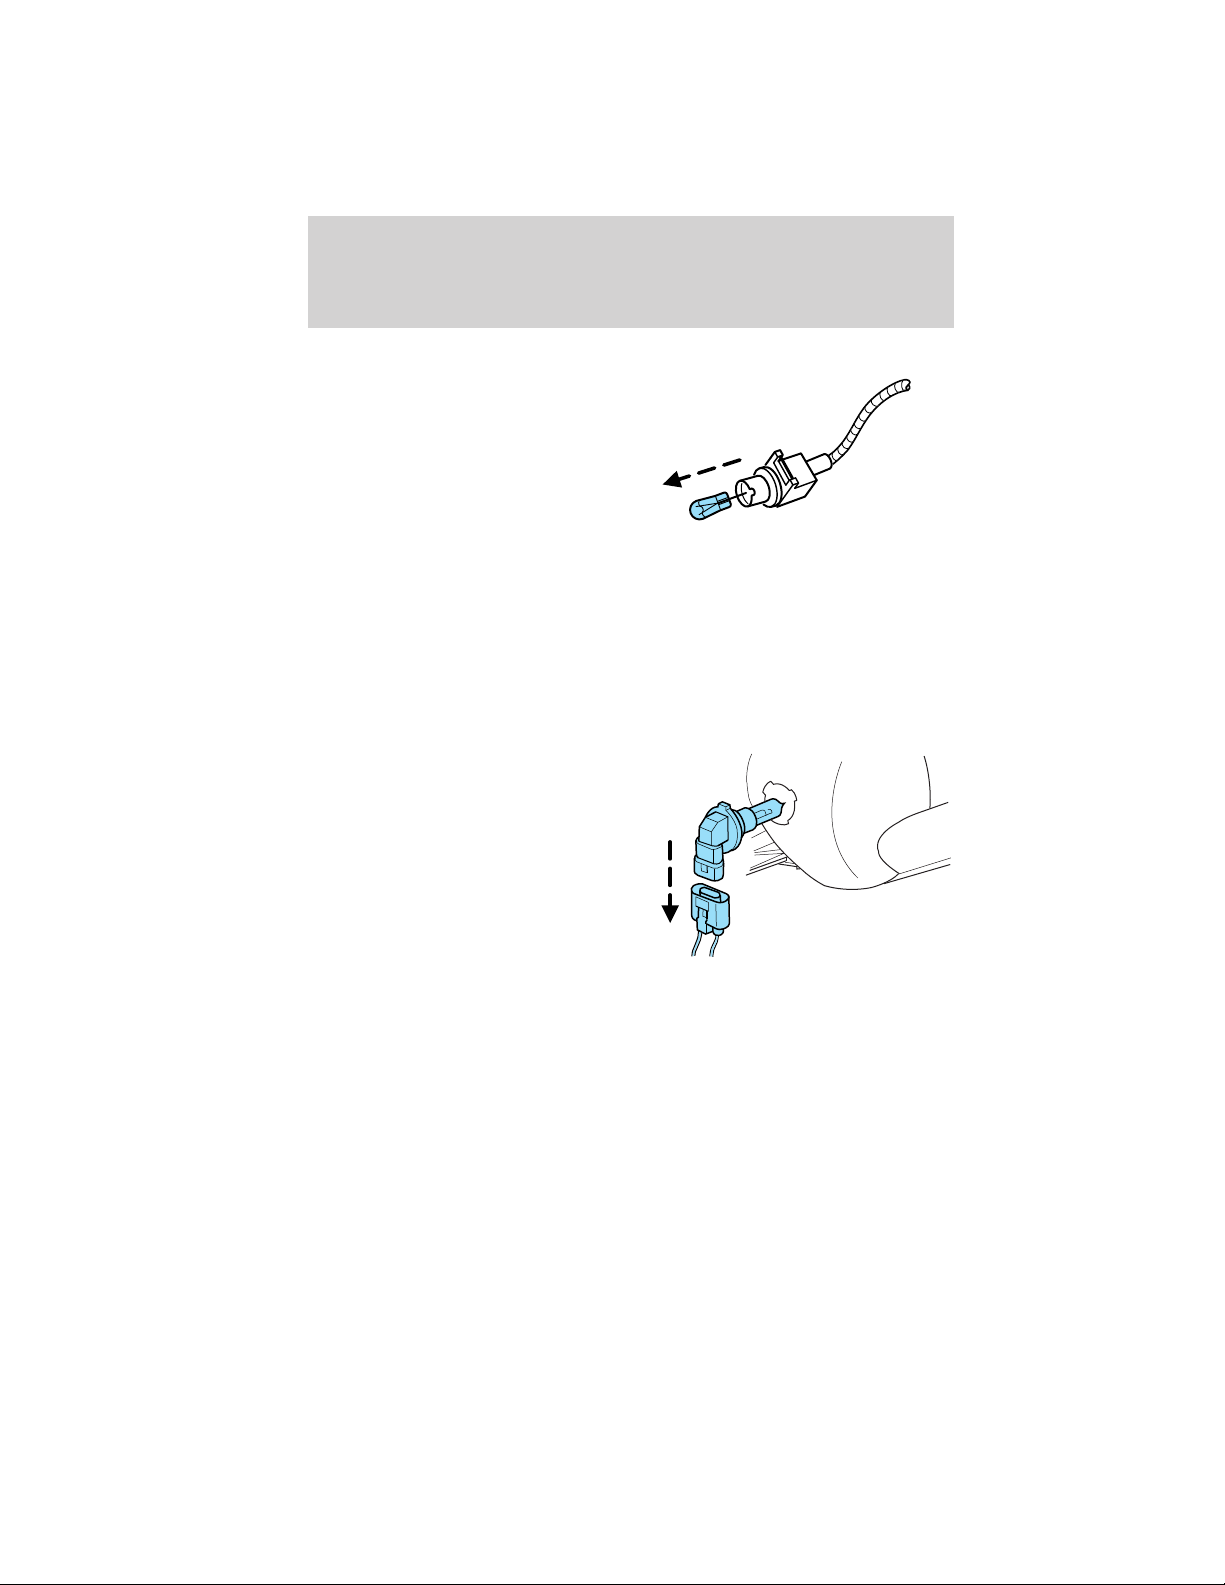
Lights
Replacing rear sidemarker lamp bulbs
1. Make sure the headlamp switch is
in the off position and locate the
sidemarker on the rear bumper
fascia.
2. Insert a flathead screwdriver
between the rear of the sidemarker
lens and the bumper fascia.
3. Push the screwdriver to the front
of the vehicle and then slide it towards you to pop out the lamp
assembly.
4. Carefully pull the bulb straight out of socket.
Install the new bulb in reverse order.
Replacing fog lamp bulbs (GT) (if equipped)
1. Make sure the headlamp control is in the off position and open the
hood.
2. Remove the sight shield by
loosening the fasteners with a
flathead screwdriver.
3. Remove the two underhood bolts
attaching the bumper cover next to
the grill and then pull the
cover/grille/fog lamp assembly
forward to access the fog lamp
bulbs.
4. Disconnect the electrical
connector from the bulb by pulling it straight off.
5. Rotate the bulb counterclockwise and remove from the lamp assembly.
Install the new bulb in reverse order.
68
2012 05+ Mustang (197)
Owners Guide, 3rd Printing
USA (fus)
Page 69
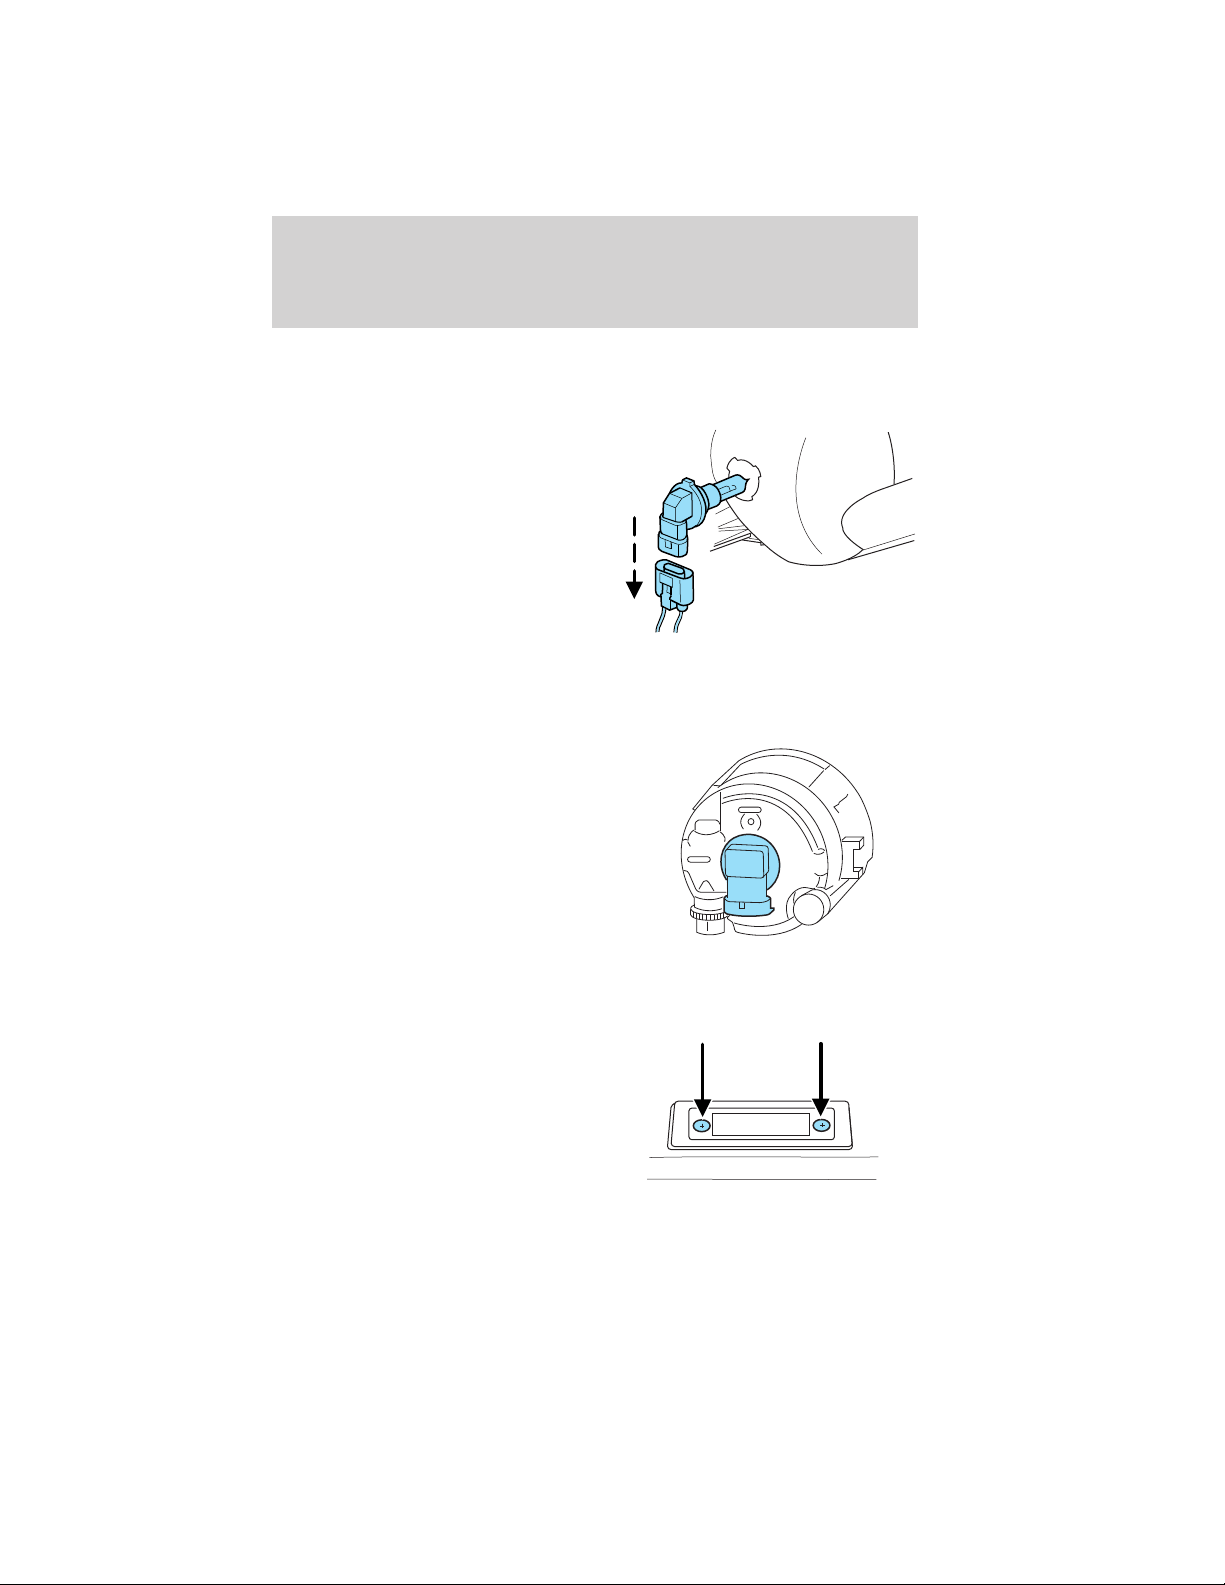
Lights
Replacing fog lamp bulbs (GT-CS) (if equipped)
1. Make sure the headlamp control is in the off position and open the
hood.
2. Remove the underbody air
deflector panel screws and panel.
3. Disconnect the electrical
connector from the bulb by pulling
it straight off.
4. Rotate the bulb counterclockwise
and remove from the lamp assembly.
Install the new bulb in reverse
order.
Replacing fog lamp bulbs (V6) (if equipped)
1. Make sure the headlamp control is in the off position and open the
hood.
2. Remove the hex head screws
attaching the underbody forward
aeroshield and remove to gain
access to the fog lamp assembly.
3. Disconnect the electrical
connector from the bulb by pulling
it straight off.
4. Rotate the bulb counterclockwise
and remove from the lamp assembly.
Install the new bulb in reverse
order.
Replacing license plate lamp bulbs
1. Make sure the headlamp switch is
in the off position.
2. Remove the two screws and the
lens from the license plate lamp
assembly.
3. Carefully pull the bulb straight
out from the lamp assembly.
Install new bulb(s) in reverse order.
69
2012 05+ Mustang (197)
Owners Guide, 3rd Printing
USA (fus)
Page 70
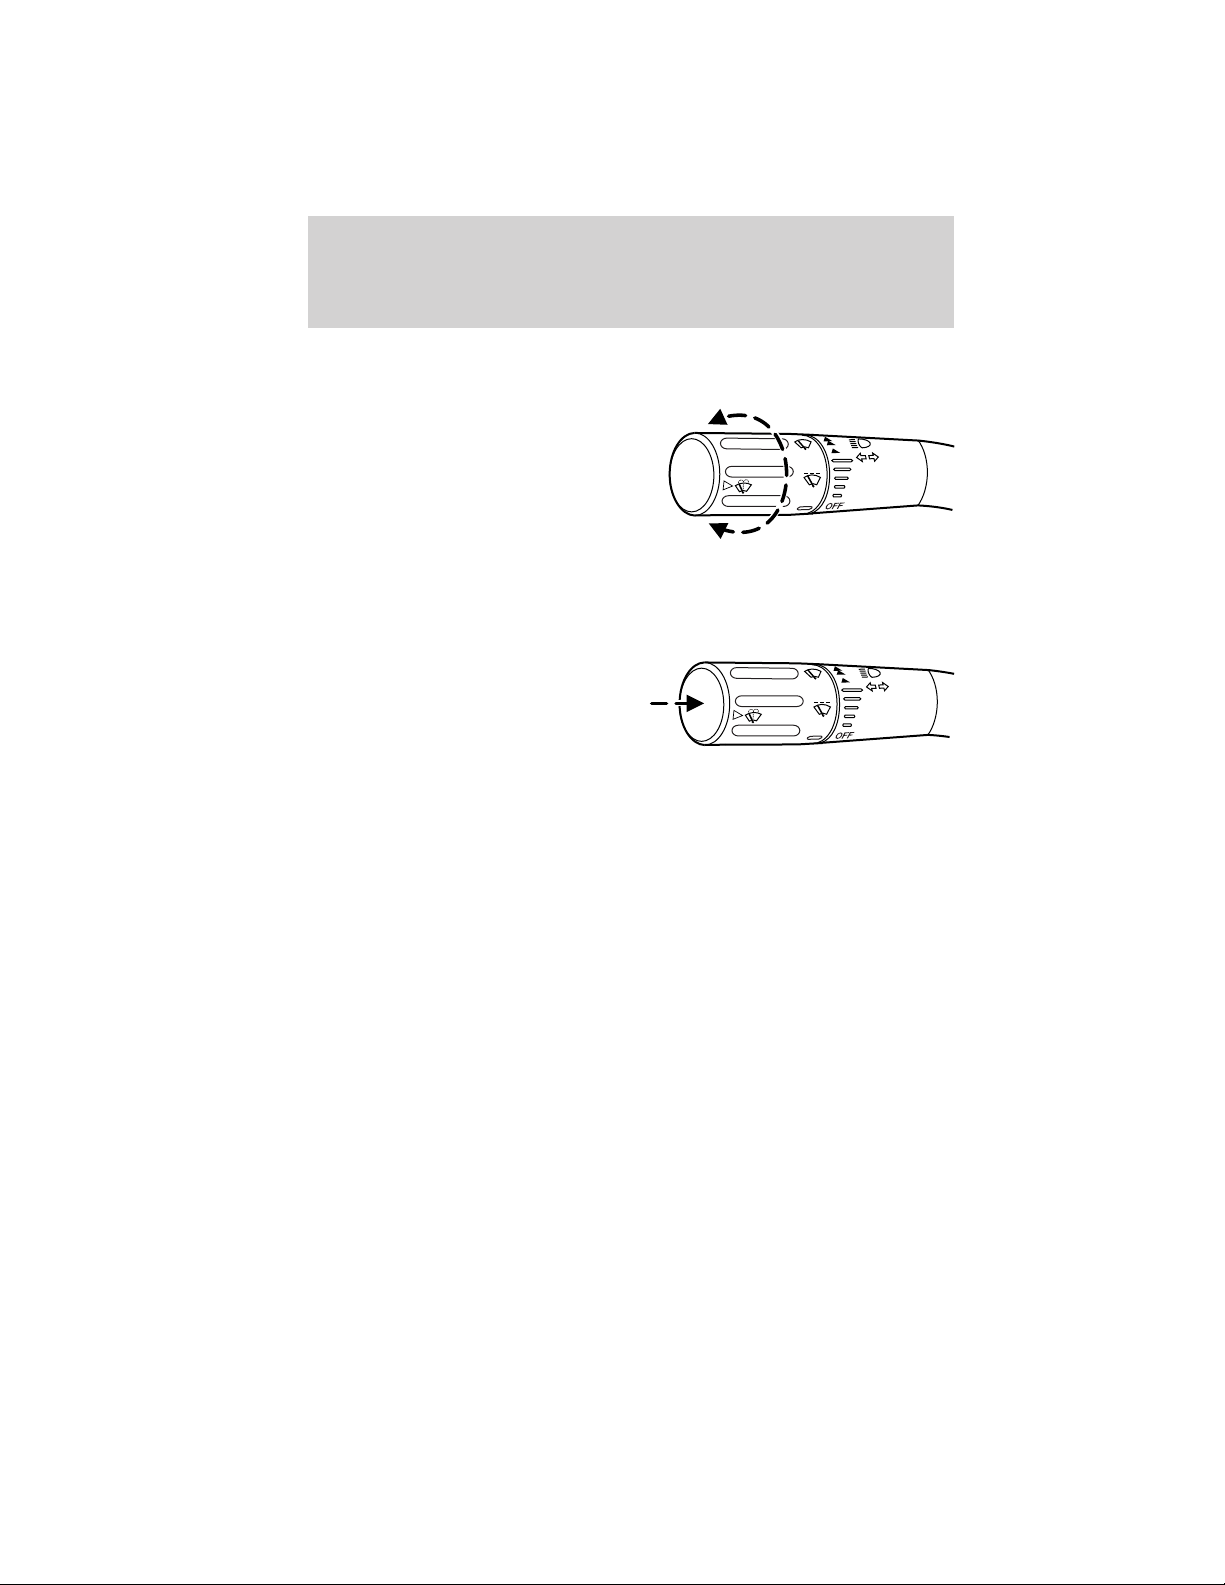
Driver Controls
MULTI-FUNCTION LEVER
Windshield wiper: Rotate the end
of the control away from you to
increase the speed of the wipers;
rotate towards you to decrease the
speed of the wipers.
Windshield washer: Press the end
of the stalk:
• briefly: causes a single swipe of
the wipers without washer fluid.
• a quick press and hold: the
wipers will swipe three times with
washer fluid.
• a long press and hold: the wipers
and washer fluid will be activated
for up to ten seconds.
Courtesy wipe feature: One extra wipe will occur a few seconds after
washing the front window to clear any excess washer fluid remaining on
the windshield.
Note: Do not operate the washer when the washer reservoir is empty.
This may cause the washer pump to overheat. Check the washer fluid
level frequently. Do not operate the wipers when the windshield is dry.
This may scratch the glass, damage the wiper blades and cause the wiper
motor to burn out. Before operating the wiper on a dry windshield,
always use the windshield washer. In freezing weather, be sure the wiper
blades are not frozen to the windshield before operating the wipers.
Windshield wiper rainlamp feature (if equipped with autolamp)
When the windshield wipers are turned on during daylight, and the
headlamp control is in the autolamp position, the exterior lamps will turn
on after a brief delay and will remain on until the wipers are turned off.
70
2012 05+ Mustang (197)
Owners Guide, 3rd Printing
USA (fus)
Page 71
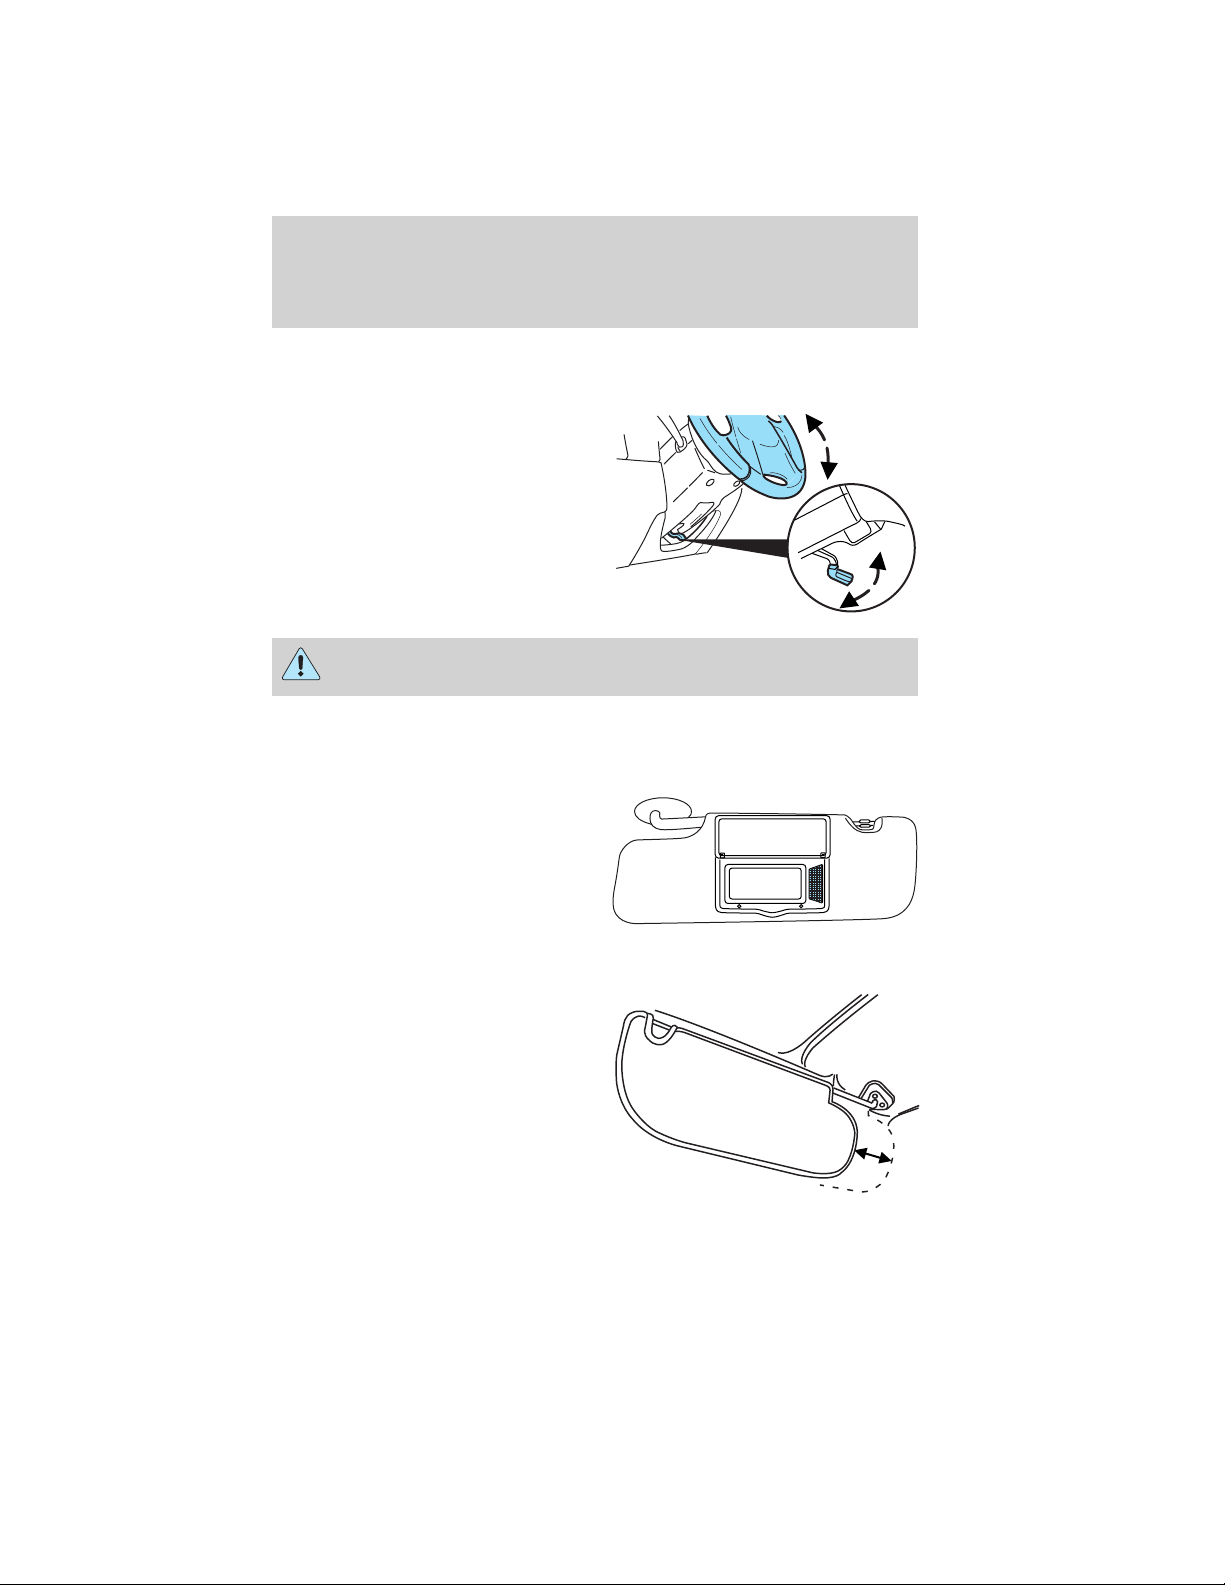
TILT STEERING WHEEL
To adjust the steering wheel:
1. Hold the steering wheel with one
hand. With the other hand, push the
lever down to unlock the steering
column.
2. Tilt the steering column to its
desired position.
3. While holding the steering wheel,
pull the lever up to its original
position to lock the steering column.
WARNING: Never adjust the steering wheel when the vehicle is
moving.
ILLUMINATED VISOR MIRROR (IF EQUIPPED)
Lift the mirror cover to turn on the
visor mirror lamp.
Driver Controls
Slide-on-rod feature
Rotate the visor towards the side
window and extend it rearward for
additional sunlight coverage.
Note: To stow the visor back into
the headliner, visor must be
retracted before moving it back
towards the windshield.
2012 05+ Mustang (197)
Owners Guide, 3rd Printing
USA (fus)
71
Page 72
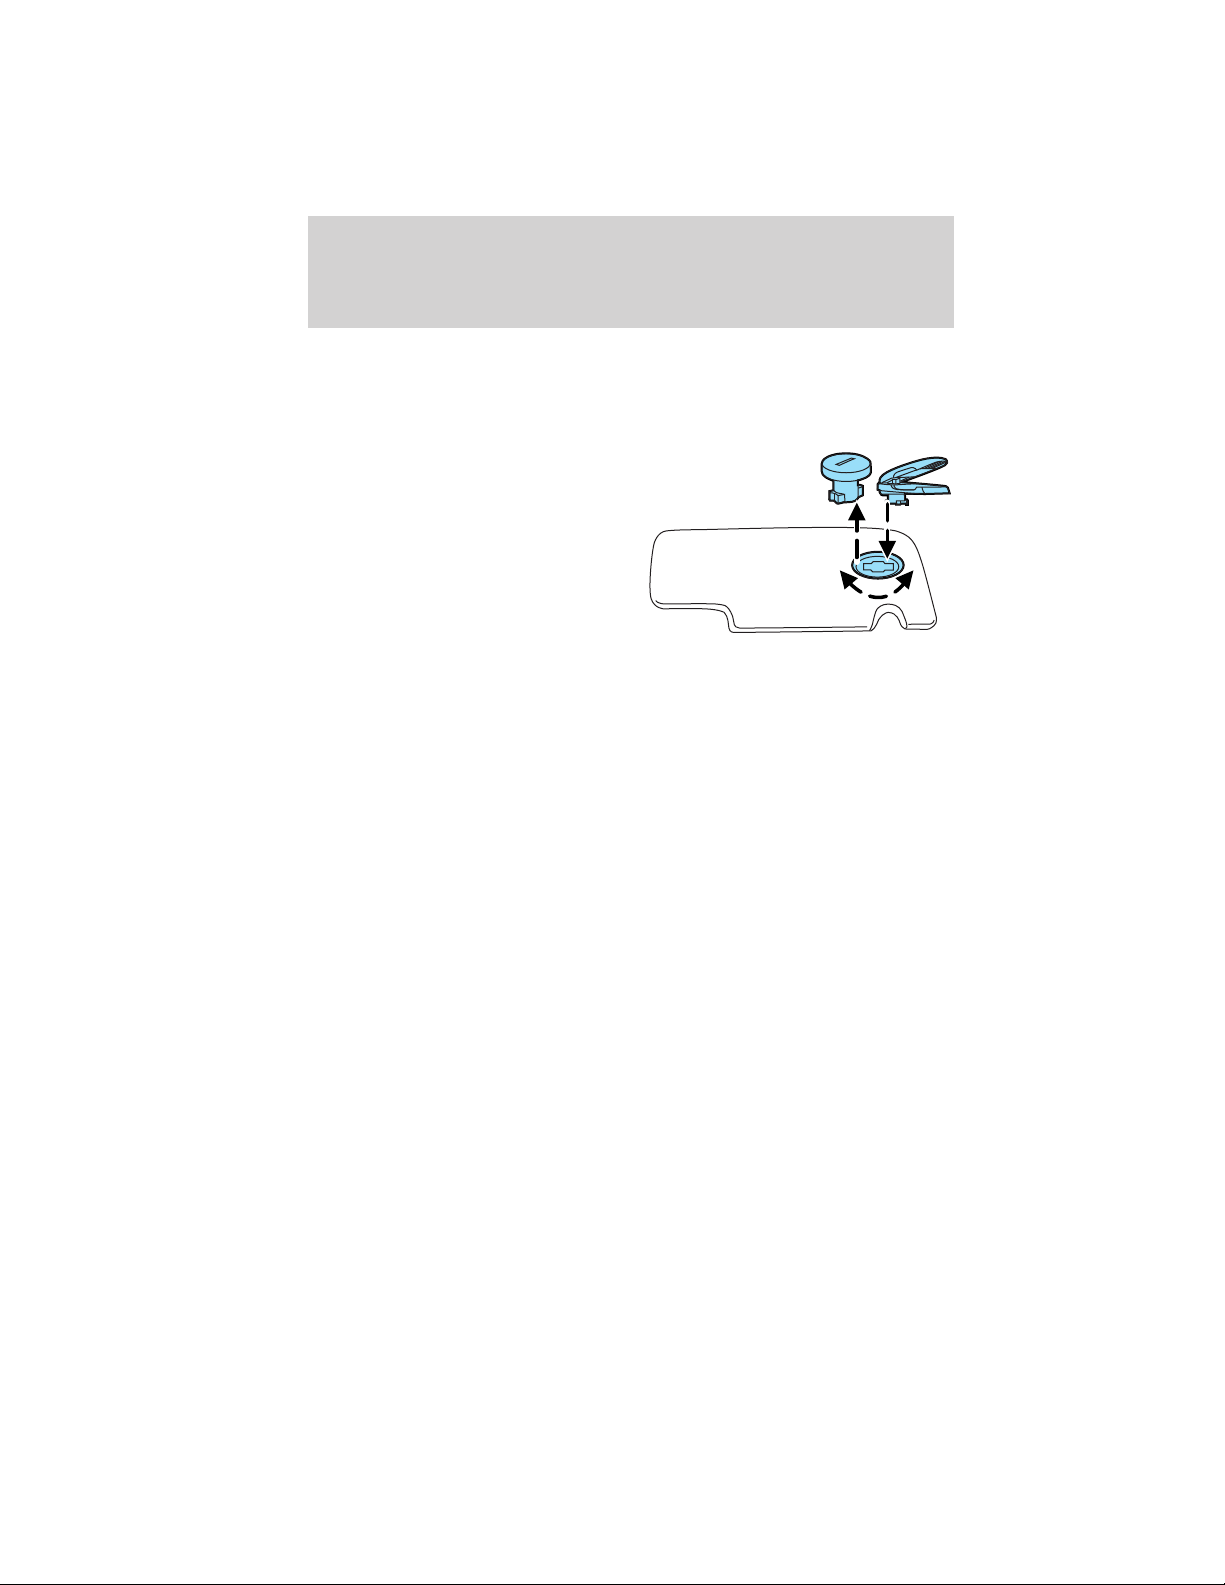
Driver Controls
Flexible visor storage system (if equipped)
Visors equipped with the flexible visor storage system can accommodate
various storage accessories. A sunglass clip and multi-function clip are
provided.
To attach one of the accessories, do
the following:
1. Insert the provided removal tool
(on the accessory holder) or a coin
into the slot on the plug and turn
1/4-turn in either direction to
remove. It may be necessary to
rotate the visor until the plug drops
away from the opening. When not in
use, place the plug in the provided
holder.
2. Remove the accessory from the holder and insert the end of the
storage accessory into the visor opening. Turn 1/4-turn in either direction
until the accessory snaps into place. For best results, ensure the open
end of the accessory is facing away from the windshield.
3. Reverse the procedure to remove the accessory and replace the cap or
change to a different accessory.
Additional accessories are available from your authorized dealer. See the
Accessories chapter for more information.
ELECTRONIC COMPASS (IF EQUIPPED)
The compass heading is displayed in the center integrated display (CID).
The compass reading may be affected when you drive near large
buildings, bridges, power lines and powerful broadcast antenna. Magnetic
or metallic objects placed in, on or near the vehicle may also affect
compass accuracy.
Usually, when something affects the compass readings, the compass will
correct itself after a few days of operating your vehicle in normal
conditions. If the compass still appears to be inaccurate, a manual
calibration may be necessary. Refer to Compass calibration
adjustment.
Most geographic areas (zones) have a magnetic north compass point that
varies slightly from the northerly direction on maps. This variation is four
degrees between adjacent zones and will become noticeable as the
vehicle crosses multiple zones. A correct zone setting will eliminate this
error. Refer to Compass zone adjustment.
72
2012 05+ Mustang (197)
Owners Guide, 3rd Printing
USA (fus)
Page 73
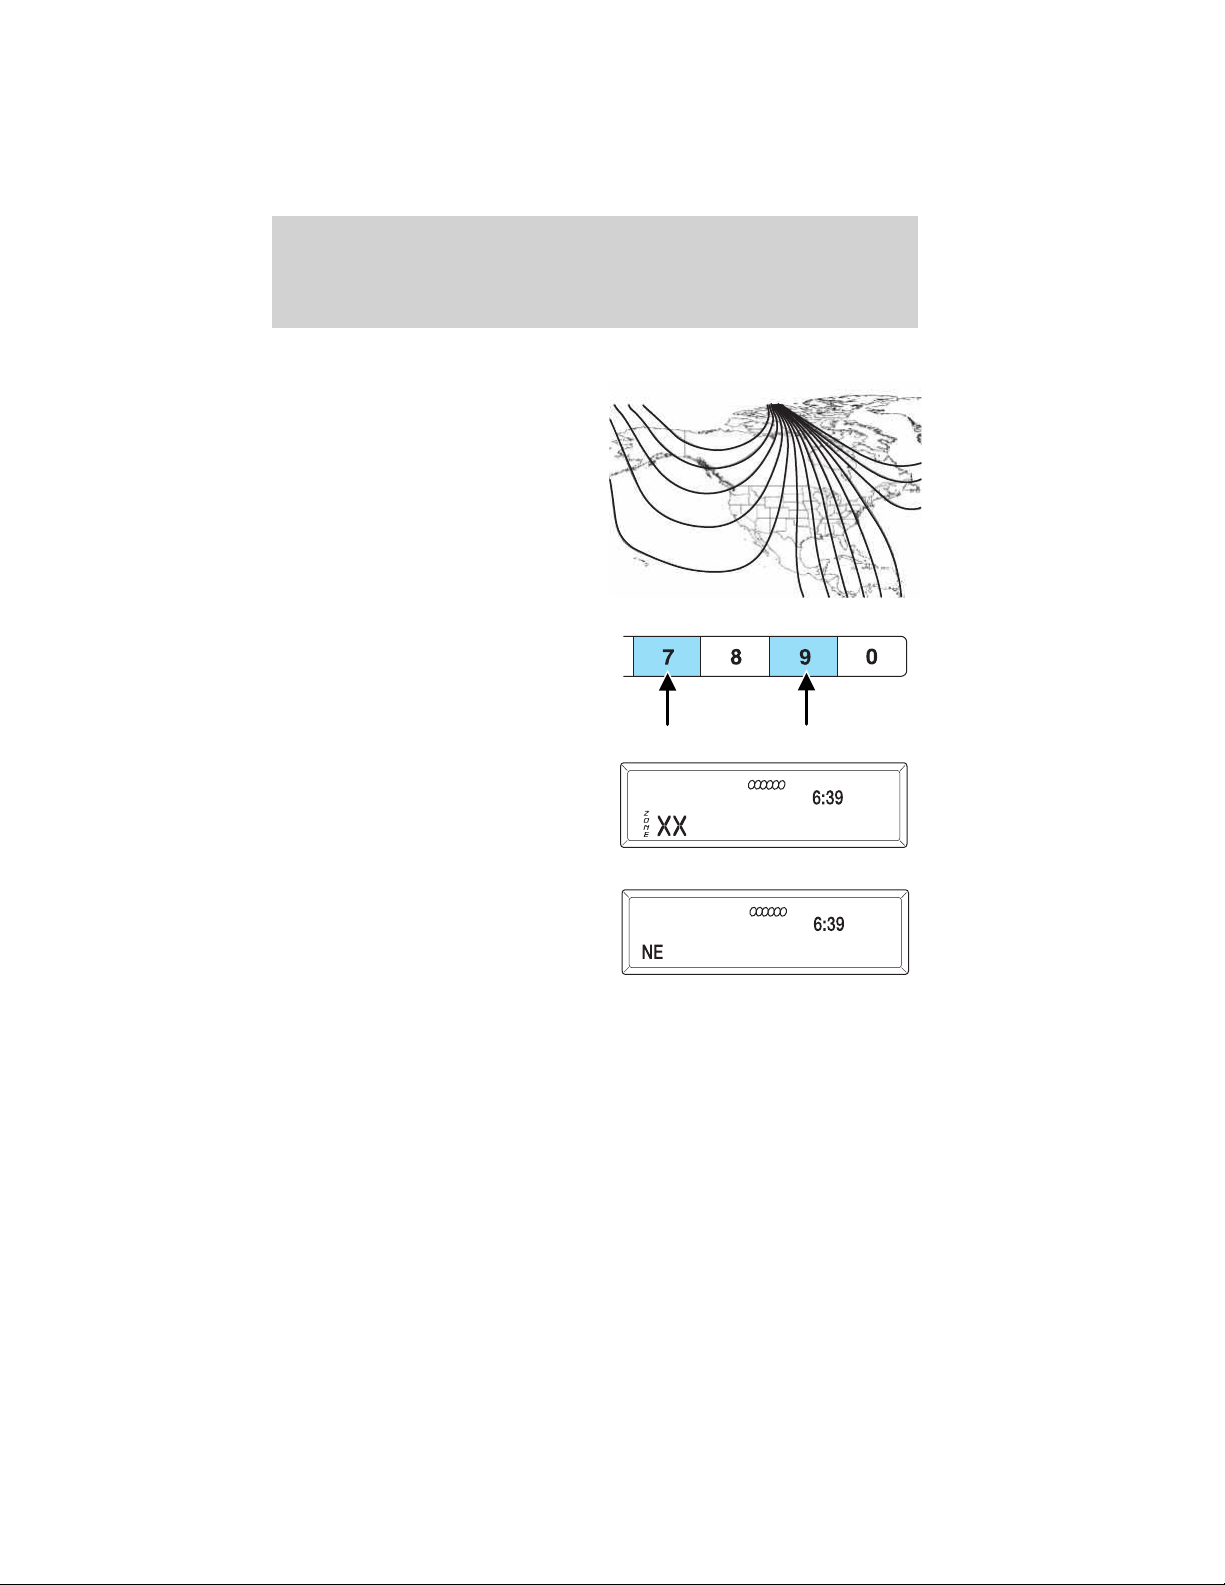
Compass zone adjustment
1. Determine which magnetic zone
you are in for your geographic
location by referring to the zone
map.
2. Turn ignition to the on position.
3. Press and hold the 7 and 9 radio
preset buttons together for
approximately five seconds until
ZONE XX appears in the CID.
4. Press and release the 7 and 9
radio preset buttons together,
repeatedly until ZONE XX changes
to the correct zone (1–15) in the
CID.
5. The direction will display after
the buttons are released. The zone
is now updated.
Driver Controls
123
4
5
6 7 8 9 1011
15
14
13
12
Compass calibration adjustment
Perform compass calibration in an open area free from steel structures
and high voltage lines. For optimum calibration, turn off all electrical
accessories (heater/air conditioning, wipers, etc.) and make sure all
vehicle doors are shut.
1. Start the vehicle.
2012 05+ Mustang (197)
Owners Guide, 3rd Printing
USA (fus)
73
Page 74
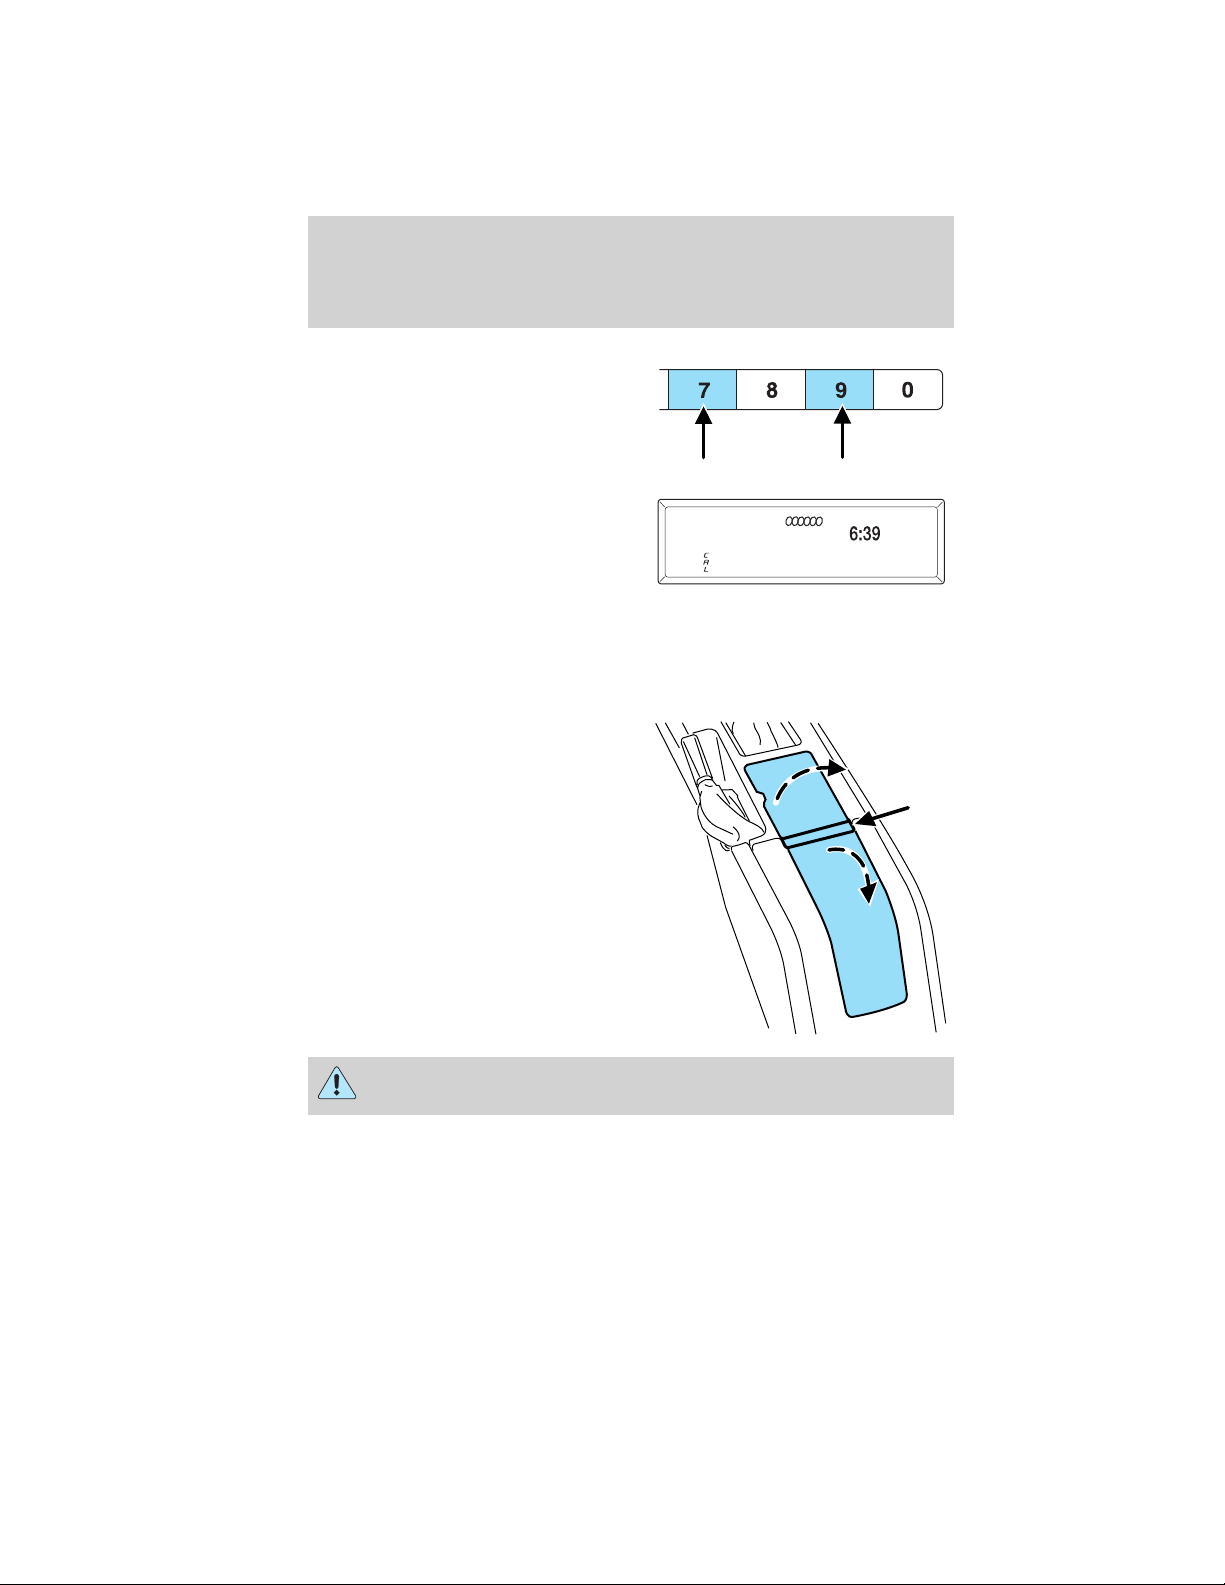
Driver Controls
2. To calibrate, press and hold the 7
and 9 radio preset buttons together
for approximately 10 seconds until
CAL appears. Release the buttons.
3. Slowly drive the vehicle in a
circle (less than 3 mph [5 km/h])
until the CAL display changes to the
direction value (N, S, E, W, etc.). It
may take up to five circles to
complete calibration.
4. The compass is now calibrated.
CENTER CONSOLE
Your vehicle is equipped with a
variety of console features. These
include:
• Dual cupholders in front of
console (pull door open to
access)
• Lockable storage bin (use ignition
key to lock/unlock the console bin
and press the latch to open the
console)
• Auxiliary power point
• Coin holder slots
• Audio input jack
• USB port (if equipped)
WARNING: Use only soft cups in the cupholder. Hard objects
can injure you in a collision.
74
2012 05+ Mustang (197)
Owners Guide, 3rd Printing
USA (fus)
Page 75

Driver Controls
AUXILIARY POWER POINT (12V DC)
Power outlets are designed for accessory plugs only. Do not insert
any other object in the power outlet as this will damage the
outlet and blow the fuse. Do not hang any type of accessory or
accessory bracket from the plug. Improper use of the power
outlet can cause damage not covered by your warranty.
Auxiliary power points can be found in the following locations:
• On the instrument panel
• Inside the center console storage bin
Do not use the power point for operating the cigarette lighter element (if
equipped).
Note: Do not plug optional electrical accessories into the cigarette
lighter socket (if equipped). Improper use of the lighter can cause
damage not covered by your warranty, and can result in fire or serious
injury.
To prevent the fuse from being blown, do not use the power point(s)
over the vehicle capacity of 12VDC/180W/15A. If the power point or cigar
lighter socket is not working, a fuse may have blown. Refer to Fuses and
relays in the Roadside Emergencies chapter for information on
checking and replacing fuses.
To have full capacity usage of your power point, the engine is required to
be running to avoid unintentional discharge of the battery. To prevent
the battery from being discharged:
• do not use the power point longer than necessary when the engine is
not running,
• do not leave battery chargers, video game adapters, computers and
other devices plugged in overnight or when the vehicle is parked for
extended periods.
Always keep the power point caps closed when not being used.
POWER WINDOWS
WARNING: Do not leave children unattended in the vehicle and
do not let children play with the power windows. They may
seriously injure themselves.
2012 05+ Mustang (197)
Owners Guide, 3rd Printing
USA (fus)
75
Page 76
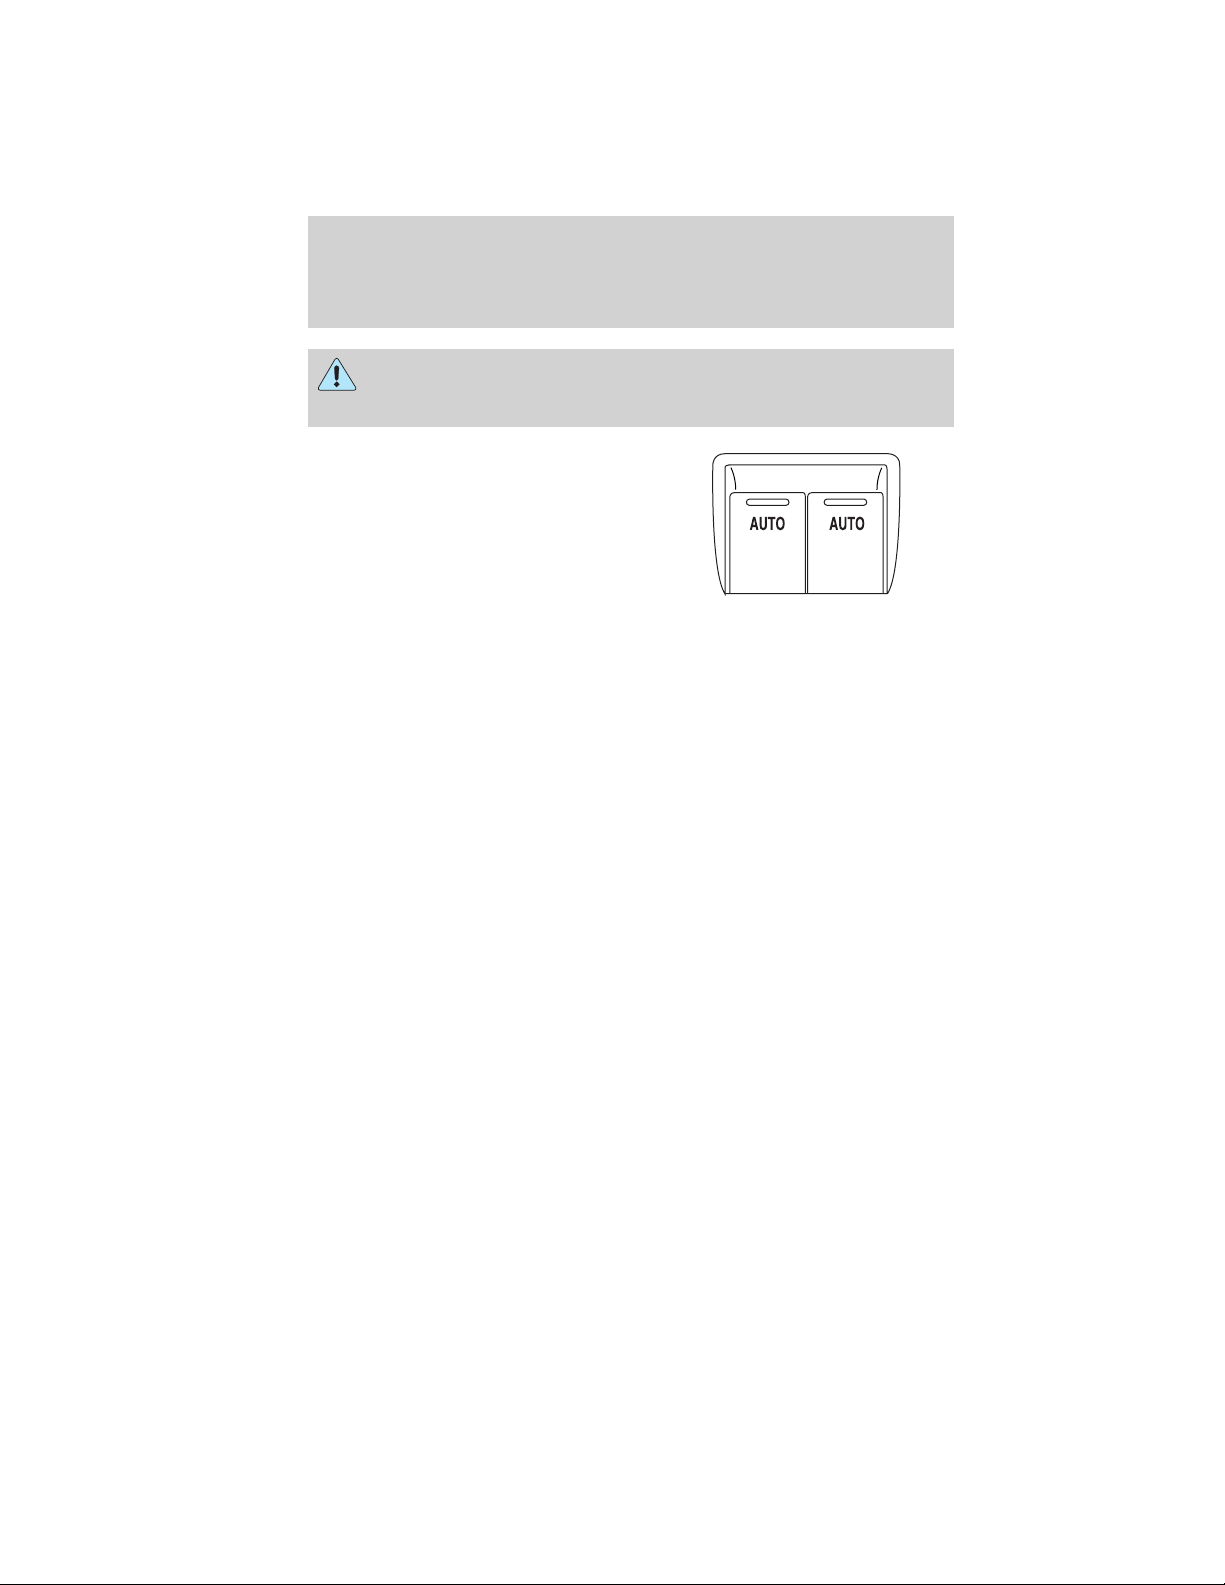
Driver Controls
WARNING: When closing the power windows, you should verify
they are free of obstructions and ensure that children and/or
pets are not in the proximity of the window openings.
Press and pull the switches to open
and close windows.
• Press down (to the first detent)
and hold the switch to open.
• Pull up (to the first detent) and
hold the switch to close.
One-touch up or down (front windows only)
This feature allows the driver or passenger’s window to open or close
fully without holding the control down.
To operate one-touch down, press the switch completely down to the
second detent and release quickly. The window will open fully.
Momentarily press the switch to any position to stop the window
operation.
To operate one-touch up, pull the switch completely up to the second
detent and release quickly. The window will close fully. Momentarily
press the switch to any position to stop the window operation.
Restoring the one-touch up functionality (front windows only)
Under low battery power conditions, one-touch up only functionality may
be lost. To reset this function after restoring full battery power, pull the
switch to the one-touch up position, hold the switch until the glass
reaches the stall position and continue to hold for two seconds. Press the
window switch down and operate the window to the full down position.
One-touch up will now be functional. Perform one-touch up
re-calibration with the door closed only. Calibrating with the door
open will cause the window to continuously bounce back.
Bounce-back (front windows only)
When an obstacle has been detected in the window opening as the
window is moving upward, the window will automatically move down and
stop.
76
2012 05+ Mustang (197)
Owners Guide, 3rd Printing
USA (fus)
Page 77

Driver Controls
Bounce-back override (front windows only)
To override bounce-back, within two seconds after reaching bounce-back
position, if the switch is moved from the neutral to the one-touch up
position the window will travel up with no bounce-back protection.
If the switch is released before the window reaches fully closed position,
the window will stop. For example: bounce-back override can be used to
overcome the resistance of ice on the window or seals.
Short drop glass (front windows only)
In order to improve door efforts and sealing, your vehicle is equipped
with short drop glass. This feature lowers the glass when either door is
opened. The glass returns to its closed position when the door is closed.
Proper operation of the short drop glass requires that the windows be
calibrated. Though your windows will have been calibrated before
your vehicle is delivered to you, it is possible for the windows to
lose calibration. If a window loses its calibration, your short drop
feature will lower the window, but will not raise it again when the door is
closed. To re-calibrate the window, pull the switch up to raise the
window until it completes its travel and hold the switch up for two
seconds. Another possible effect of lost calibration is that the feature
may not lower the window. To re-calibrate the window in this case, lower
the window until it completes its travel and hold the switch down for
two seconds. Immediately after releasing the window switch, pull the
switch up to raise the window until it completes its travel and hold the
switch up for two seconds. Perform short drop re-calibration with
doors closed only. Re-calibrating with doors open will cause the
window to continuously bounce back.
Rear power windows (convertible only)
The rear quarter windows are operated by a single window switch
located at the driver door window controls. Press and pull the window
switch to open and close the windows.
• Press down and hold the switch to open.
• Pull up and hold the switch to close.
2012 05+ Mustang (197)
Owners Guide, 3rd Printing
USA (fus)
77
Page 78

Driver Controls
Rear power windows manual override (convertible only)
The rear quarter window switch will not operate under the following
conditions:
• Convertible top is moving
• Convertible top is not completely up or down
In the event that the rear quarter window switch does not operate when
the convertible top is completely up or down, the rear quarter windows
can be manually raised up.
The following procedure must be performed within two minutes:
1. Turn the ignition key to the off position, then turn back to the on
position.
2. Press the rear window switch down three times.
3. Turn the ignition key to the off position, then turn back to the on
position.
4. Pull and hold the rear window switch up and hold for three seconds,
the rear windows will begin to start moving up.
Accessory delay
With accessory delay, the window switches, convertible top (if equipped)
and radio may be used for up to 10 minutes after the ignition switch is
turned to the off position or until either front door is opened.
INTERIOR MIRROR
The interior rearview mirror has two pivot points on the support arm
which lets you adjust the mirror up or down and from side to side.
WARNING: Do not adjust the mirror while the vehicle is in
motion.
Automatic dimming interior rear view mirror (if equipped)
The interior rear view mirror has an auto-dimming function. The
electronic day/night mirror will change from the normal (high reflective)
state to the non-glare (darkened) state when bright lights (glare) reach
the mirror. When the mirror detects bright light from behind the vehicle,
it will automatically adjust (darken) to minimize glare.
The mirror will automatically return to the normal state whenever the
vehicle is placed in R (Reverse) to ensure a bright clear view when
backing up.
78
2012 05+ Mustang (197)
Owners Guide, 3rd Printing
USA (fus)
Page 79
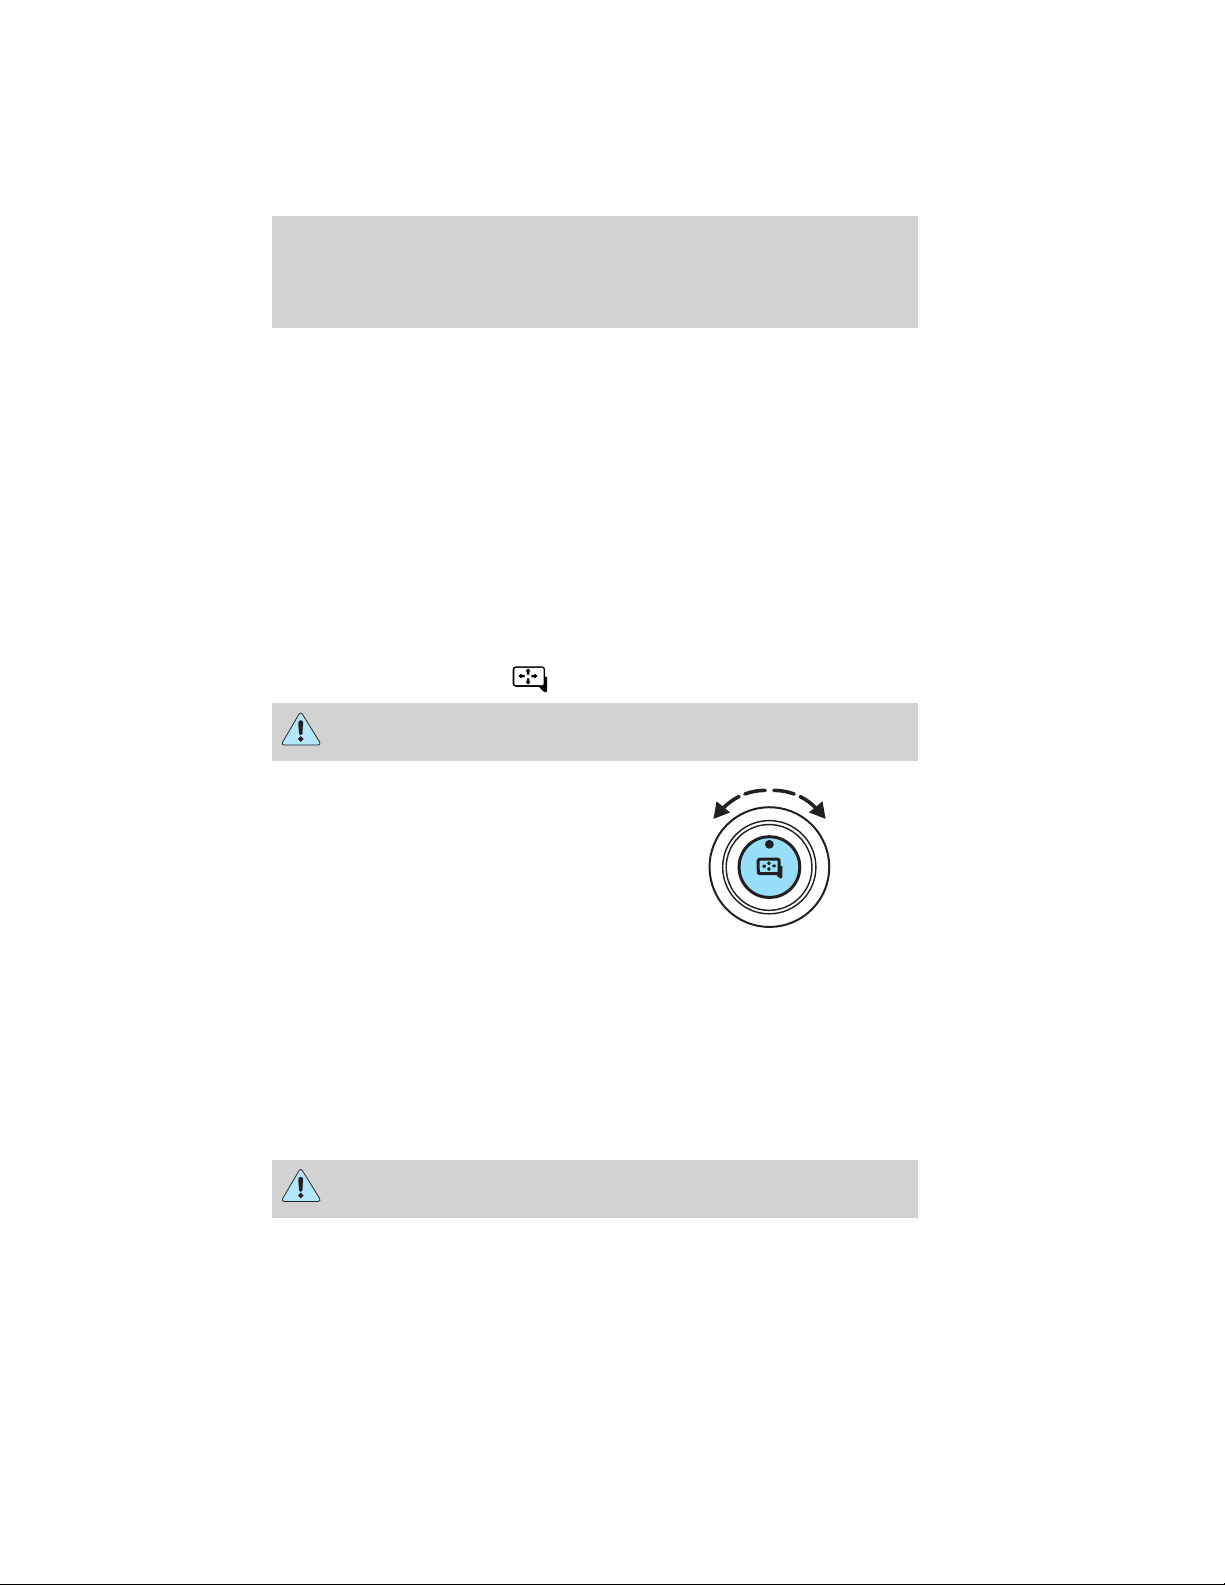
Driver Controls
Do not block the sensors on the front and back of the interior
rear view mirror since this may impair proper mirror
performance.
Note: A rear center passenger and/or raised rear center headrest (if
equipped) may also block the light from reaching the sensor.
Do not clean the housing or glass of any mirror with harsh
abrasives, fuel or other petroleum-based cleaning products.
Note: If equipped with a rearview camera system, a video image will
display in the mirror or the navigation system display (if equipped) when
the vehicle is put in R (Reverse). As you shift into any other gear from R
(Reverse), the image will remain for a few seconds and then turn off.
Refer to Rearview camera system in the Driving chapter.
EXTERIOR MIRRORS
Power side view mirrors
WARNING: Do not adjust the mirror while the vehicle is in
motion.
To adjust your mirrors:
1. Rotate the control clockwise to
adjust the right mirror and rotate
the control counterclockwise to
adjust the left mirror.
2. Move the control in the direction
you wish to tilt the mirror.
3. Return to the center position to lock mirrors in place.
Blind spot mirrors (if equipped)
Your vehicle may be equipped with blind spot mirrors. Refer to Blind
spot mirrors in the Driving chapter.
SPEED CONTROL
With speed control set, you can maintain a set speed without keeping
your foot on the accelerator pedal.
WARNING: Do not use the speed control in heavy traffic or on
roads that are winding, slippery or unpaved.
2012 05+ Mustang (197)
Owners Guide, 3rd Printing
USA (fus)
79
Page 80
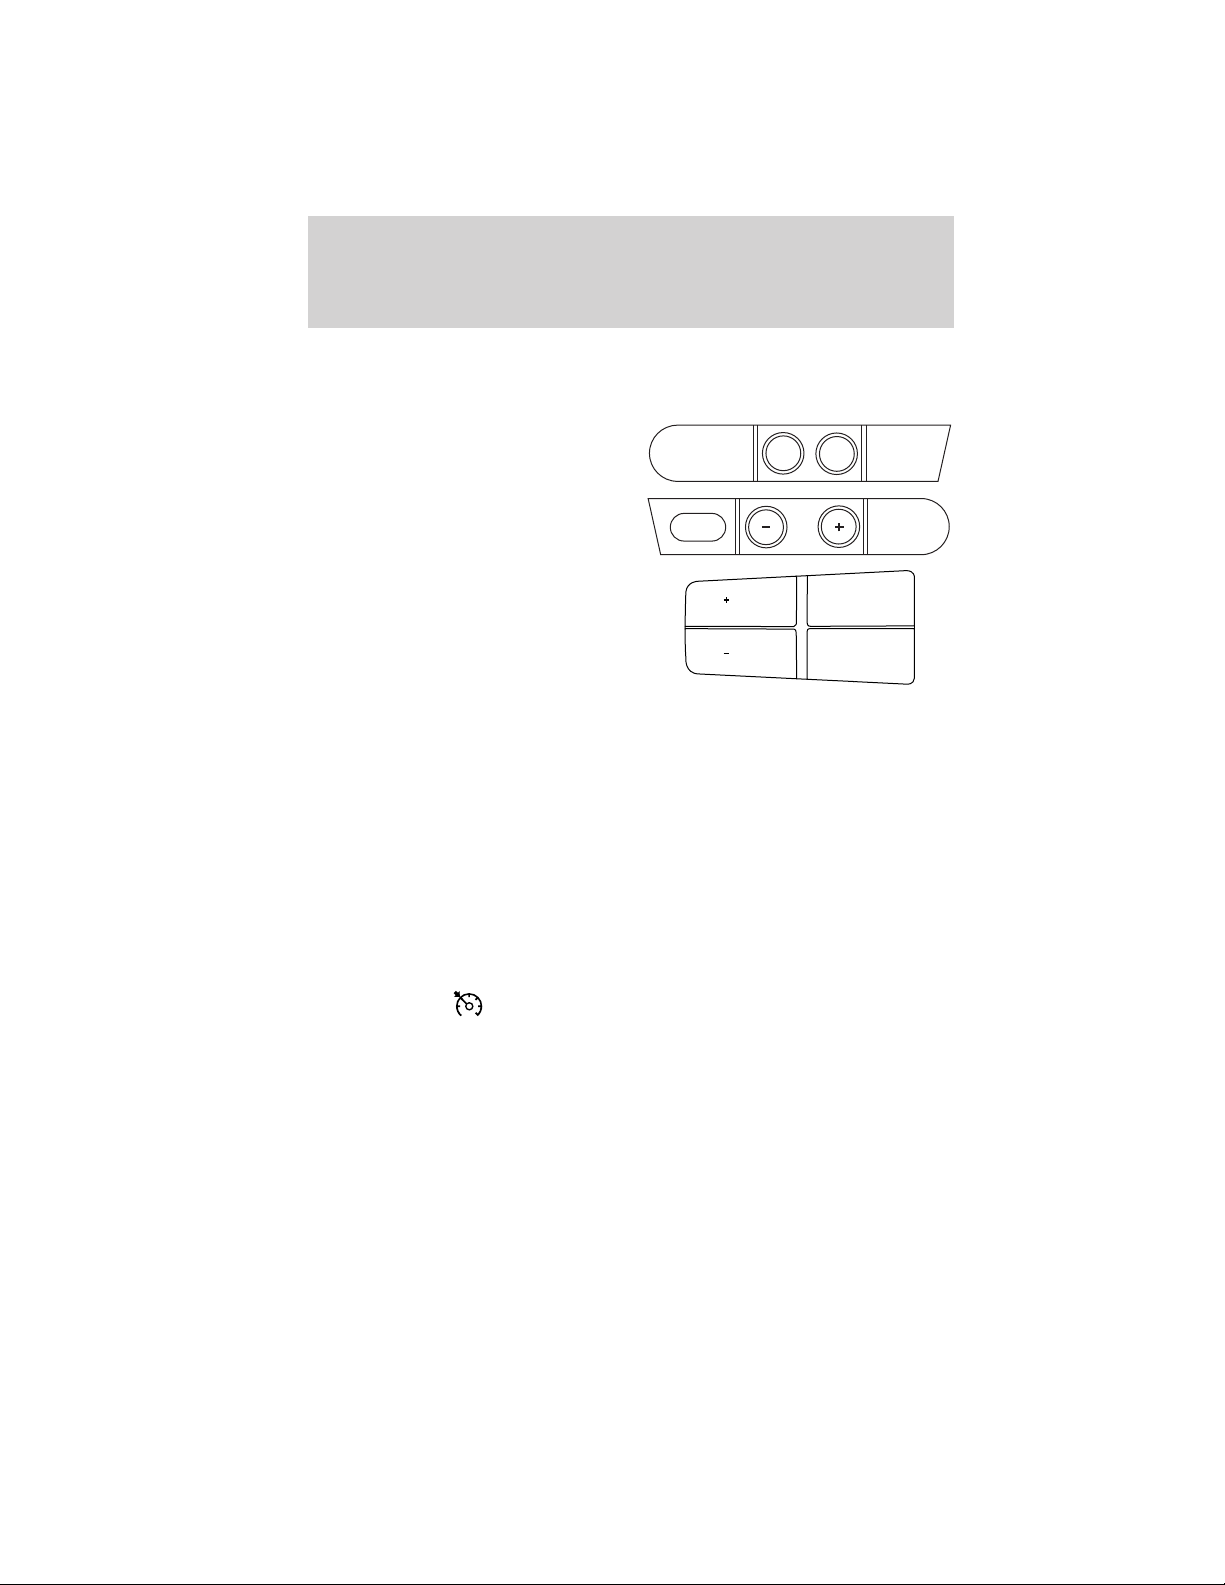
Driver Controls
Using speed controls
The speed controls are located on the steering wheel. The following
buttons work with speed control:
Base controls
OFF
ON
RES
SET
Optional controls
SET
SET
RESUME
OFF ON
ON/OFF: Press to turn the system on or off.
SET (+): Press to set a speed or to increase a set speed.
SET (–): Press to decrease a set speed.
RES / RESUME: Press to resume a set speed.
Setting speed control
The set speed control:
1. Press and release ON.
2. Accelerate to the desired speed.
3. Press and release SET (+).
4. Take your foot off the accelerator pedal.
5. The indicator
light on the instrument cluster will turn on.
Note:
• Vehicle speed may vary momentarily when driving up and down a
steep hill.
• If the vehicle speed increases above the set speed on a downhill, you
may want to apply the brakes to reduce the speed.
• If the vehicle speed decreases more than 10 mph (16 km/h) below
your set speed on an uphill, your speed control will disengage.
80
2012 05+ Mustang (197)
Owners Guide, 3rd Printing
USA (fus)
Page 81

Driver Controls
Disengaging speed control
To disengage the speed control, tap the brake pedal or clutch pedal (if
equipped).
Disengaging the speed control will not erase previous set speed.
Resuming a set speed
Press and release RES / RESUME. This will automatically return the
vehicle to the previously set speed.
Increasing speed while using speed control
To increase the set speed:
• Press and hold SET (+) until you get to the desired speed, then
release. You can also use SET (+) to operate the tap-up function.
Press and release SET (+) to increase the vehicle set speed in
approximately 1 mph (2 km/h) increments.
• Use the accelerator pedal to get to the desired speed then press and
release SET (+).
Reducing speed while using speed control
To reduce the set speed:
• Press and hold SET (–) until you get to the desired speed, then
release. You can also use SET (–) to operate the tap-down function.
Press and release SET (–) to decrease the vehicle set speed in
approximately 1 mph (2 km/h) increments.
• Press the brake pedal until the desired vehicle speed is reached then
press and release SET (+).
Turning off speed control
To turn off the speed control, press OFF or turn off the ignition.
Note: When you turn off the speed control or the ignition, your speed
control set speed memory is erased.
2012 05+ Mustang (197)
Owners Guide, 3rd Printing
USA (fus)
81
Page 82
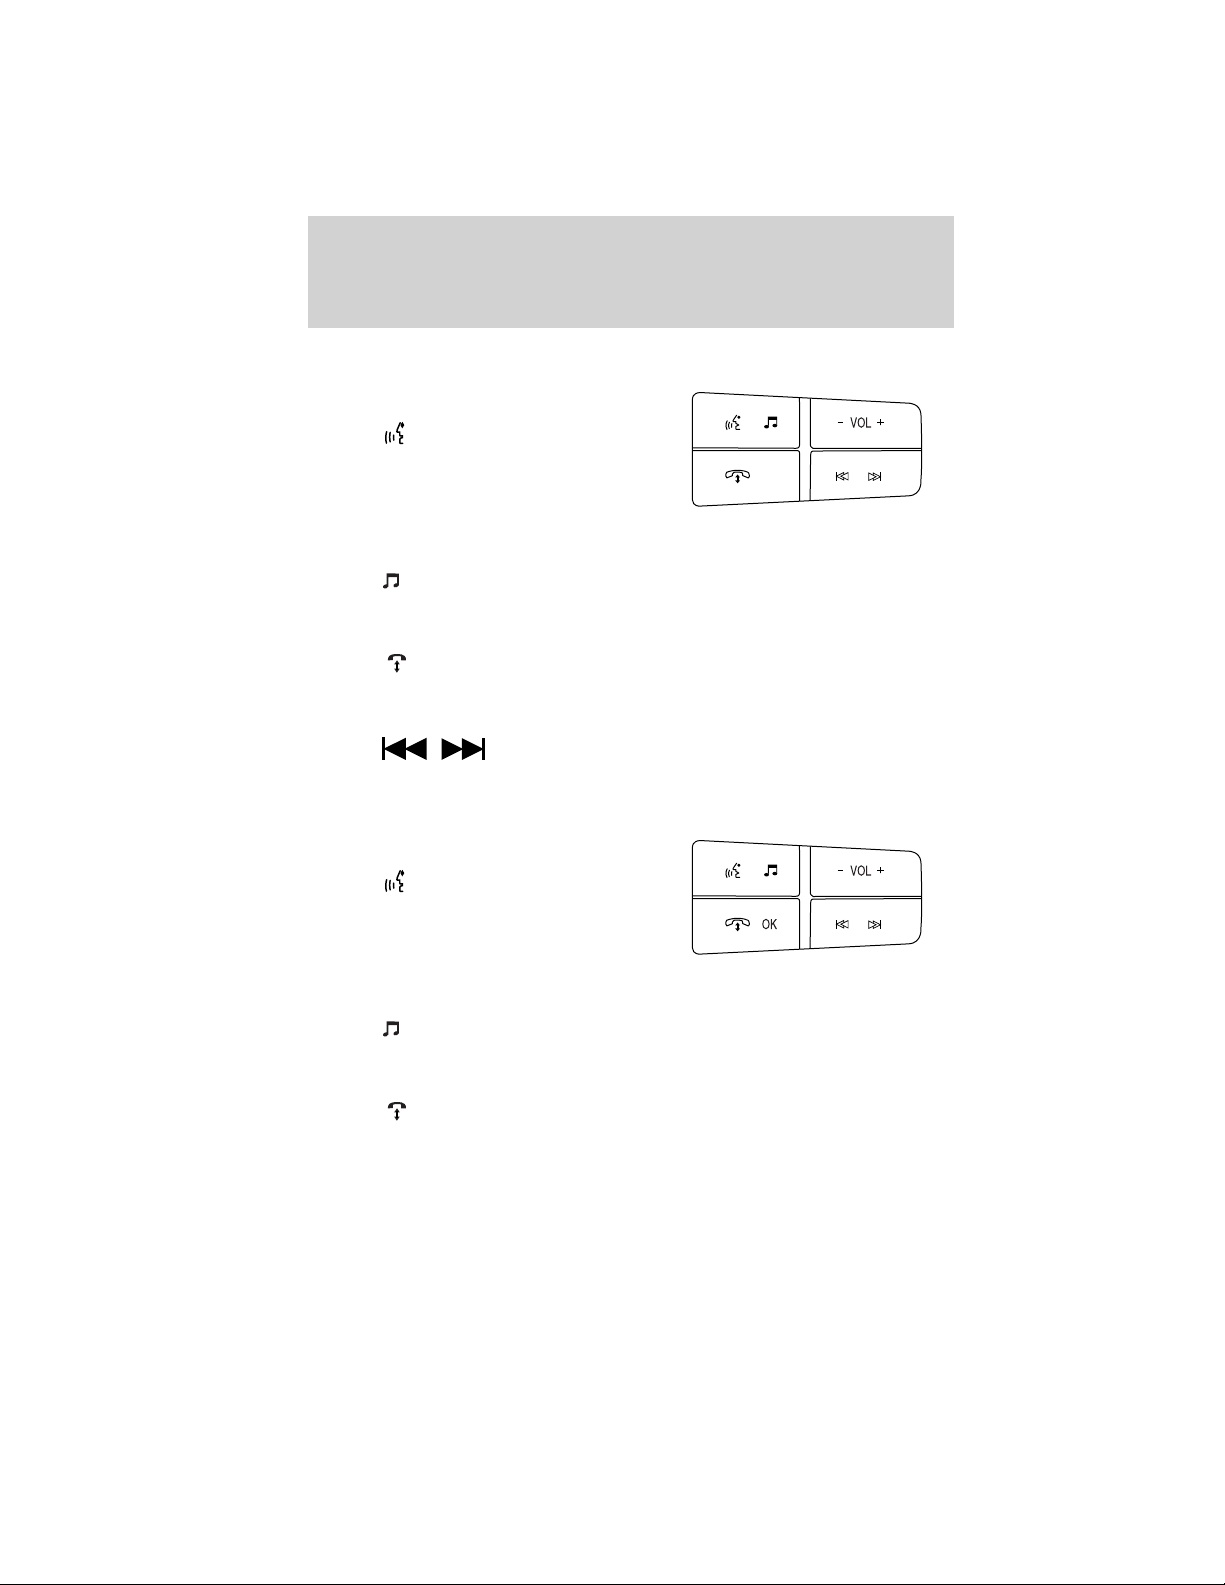
Driver Controls
STEERING WHEEL CONTROLS (IF EQUIPPED)
With navigation system
(if equipped)
• Press
command features.
For further information on using
voice commands with the
navigation system, refer to the
Navigation System supplement.
• Press
etc.).
• Press – VOL + to adjust the volume in any mode.
• Press
Refer to the Navigation System supplement for more information on
using phone features.
• Press
Refer to the Navigation System supplement for more information on
using this feature.
With SYNC威 system
(if equipped)
• Press
command features.
For further information on using
voice commands with the SYNC威
system, refer to the SYNC威
supplement.
• Press
etc.).
• Press – VOL + to adjust the volume in any mode.
• Press
Refer to the SYNC威 supplement for more information on using phone
features.
to use the voice
to select the entertainment playing media (radio, CD, line in,
to activate phone mode.
to change radio stations/CD tracks.
to use the voice
to select the entertainment playing media (radio, CD, line in,
to activate phone mode.
82
2012 05+ Mustang (197)
Owners Guide, 3rd Printing
USA (fus)
Page 83
Driver Controls
• Press OK to confirm selections various audio and SYNC威 selections.
For further information on the SYNC威 system, refer to the SYNC威
supplement.
• Press
UNIVERSAL GARAGE DOOR OPENER (IF EQUIPPED)
Your vehicle may be equipped with a universal garage door opener which
can be used to replace the common hand-held transmitter.
Car2U姞 Home Automation System (if equipped)
The Car2U威 Home Automation
System is a universal transmitter
located in the driver’s visor that
includes two primary features – a
garage door opener and a platform
for remote activation of devices
within the home. The Car2U威
system’s garage door opener
function replaces the common
hand-held garage door opener with a three-button transmitter that is
integrated into the interior of your vehicle. After being programmed for
garage doors, the Car2U威 system transmitter can be programmed to
operate security devices and home lighting systems.
WARNING: Make sure that people and objects are clear of the
garage door or security device you are programming. Do not
program the Car2U威 system with the vehicle in the garage.
to change radio stations/CD tracks.
Do not use the Car2U威 system with any garage door opener that lacks
safety stop and reverse features as required by U.S. Federal Safety
Standards (this includes any garage door opener manufactured before
April 1, 1982).
Be sure to keep the original remote control transmitter for use in other
vehicles as well as for future Car2U威 system programming. It is also
recommended that upon the sale or lease termination of the vehicle, the
programmed Car2U威 system buttons should be erased for security
reasons. Refer to Erasing the Car2U威 Home Automation System
buttons later in this section.
Read the instructions completely before attempting to program the
Car2U威 system. Because of the steps involved, it may be helpful to have
another person assist you in programming the transmitter.
2012 05+ Mustang (197)
Owners Guide, 3rd Printing
USA (fus)
83
Page 84
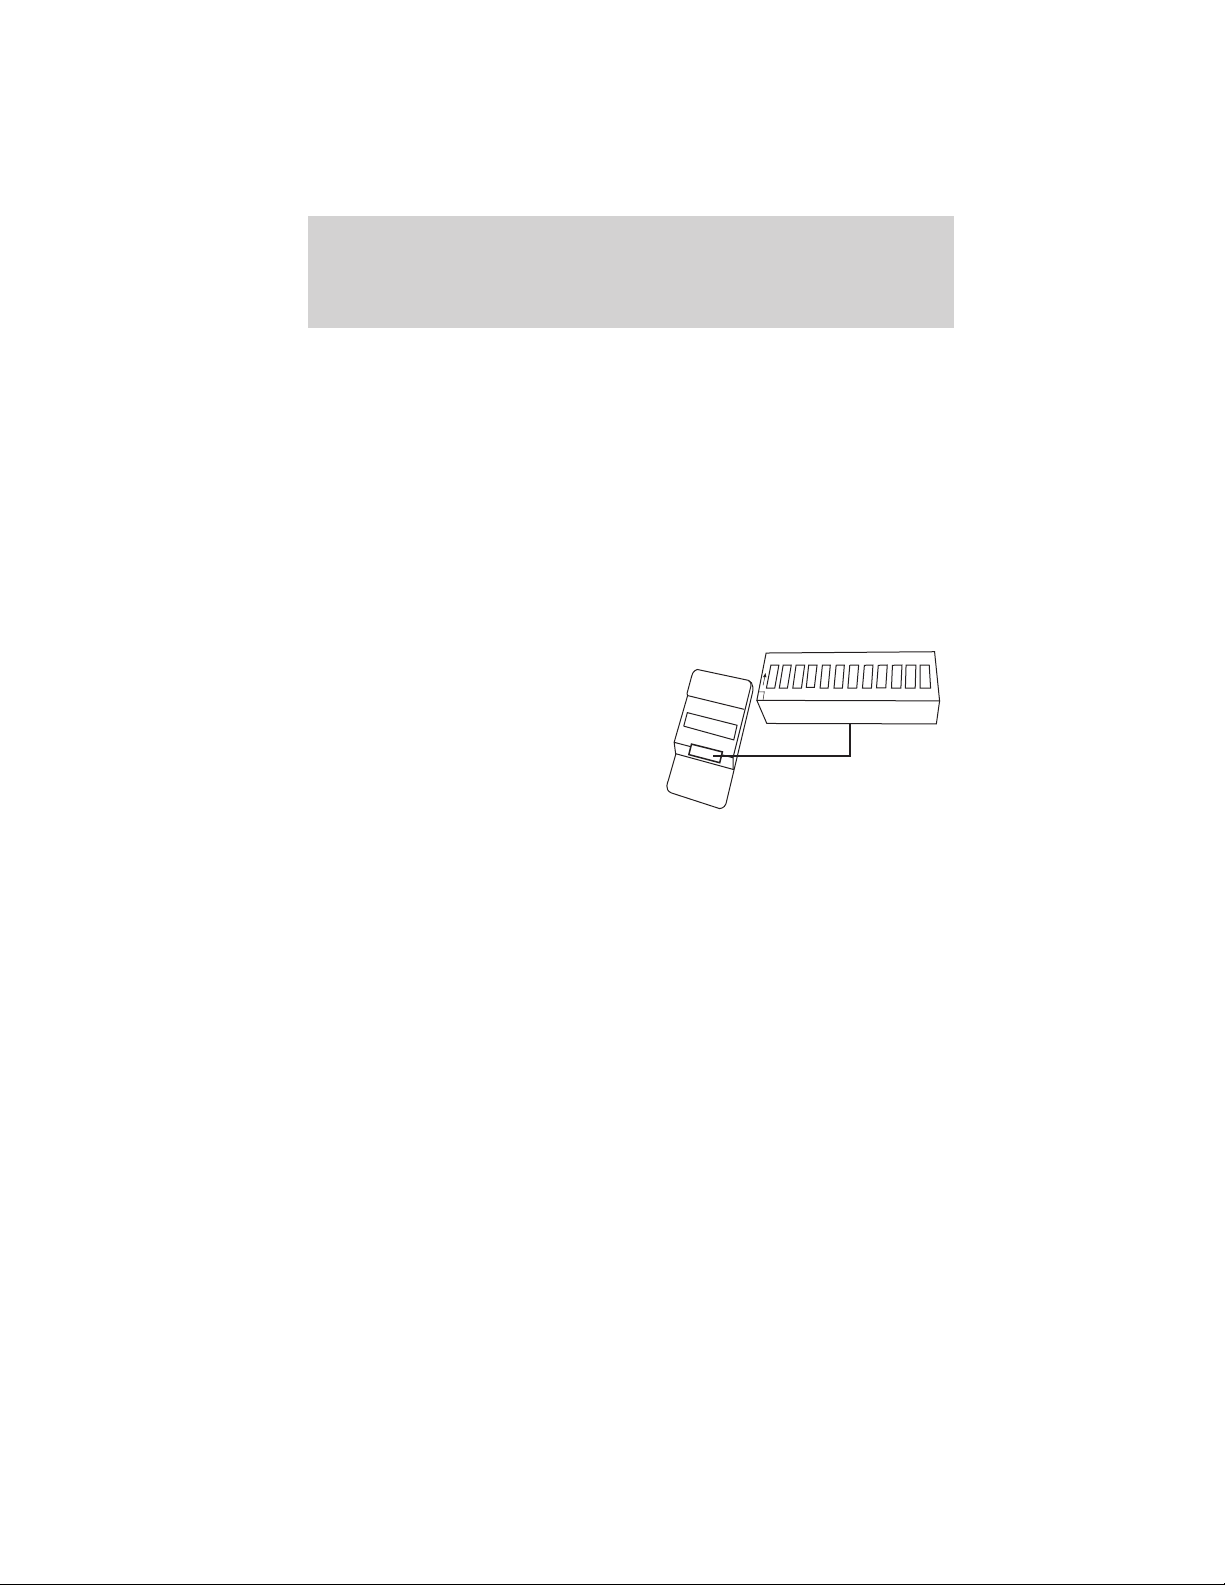
Driver Controls
Additional Car2U威 system information can be found on-line at
www.learcar2U.com or by calling the toll-free Car2U威 system help line at
1-866-572-2728.
Types of garage door openers (rolling code and fixed code)
The Car2U威 Home Automation System may be programmed to operate
rolling code and fixed code garage door openers.
• Rolling code garage door openers were produced after 1996 and are
code protected. Rolling code means the coded signal is changed every
time your remote control garage door opener is used.
• Fixed code garage door openers were produced prior to 1996. Fixed
code uses the same coded signal every time. It is manually
programmed by setting DIP switches for a unique personal code.
If you do not know if your garage
door opener is a rolling code or
fixed code device, open your garage
door opener’s remote control battery
O
1
N
C
T
S
2
4
3
206-12 T
124
5
6
cover. If a panel of DIP switches is
present your garage door opener is
a fixed code device. If not, your
garage door opener is a rolling code
device.
Note: Programming the Car2U威 system to a community gate will require
a unique set of instructions depending on the gate system model.
Contact the Car2U威 help line at 1-866-572-2728 to program your Car2U威
system.
Note: Accidentally entering the program mode may override previously
programmed buttons. This can happen by pressing and releasing the
outer two buttons, or all three buttons, simultaneously. If this happens,
do not press any button until the module times out after approximately
2.5 seconds and resets to normal mode. When time-out occurs, all three
LEDs will flash rapidly for a few seconds then turn off. Any settings
should remain as previously set.
Rolling code programming
Note: Programming the rolling code garage door opener involves
time-sensitive actions. Read the entire procedure prior to beginning so
you will know which actions are time-sensitive. If you do not follow the
time-sensitive actions, the device will time out and you will have to
repeat the procedure.
84
1
1
9
1
2
8
7
1
0
2012 05+ Mustang (197)
Owners Guide, 3rd Printing
USA (fus)
Page 85
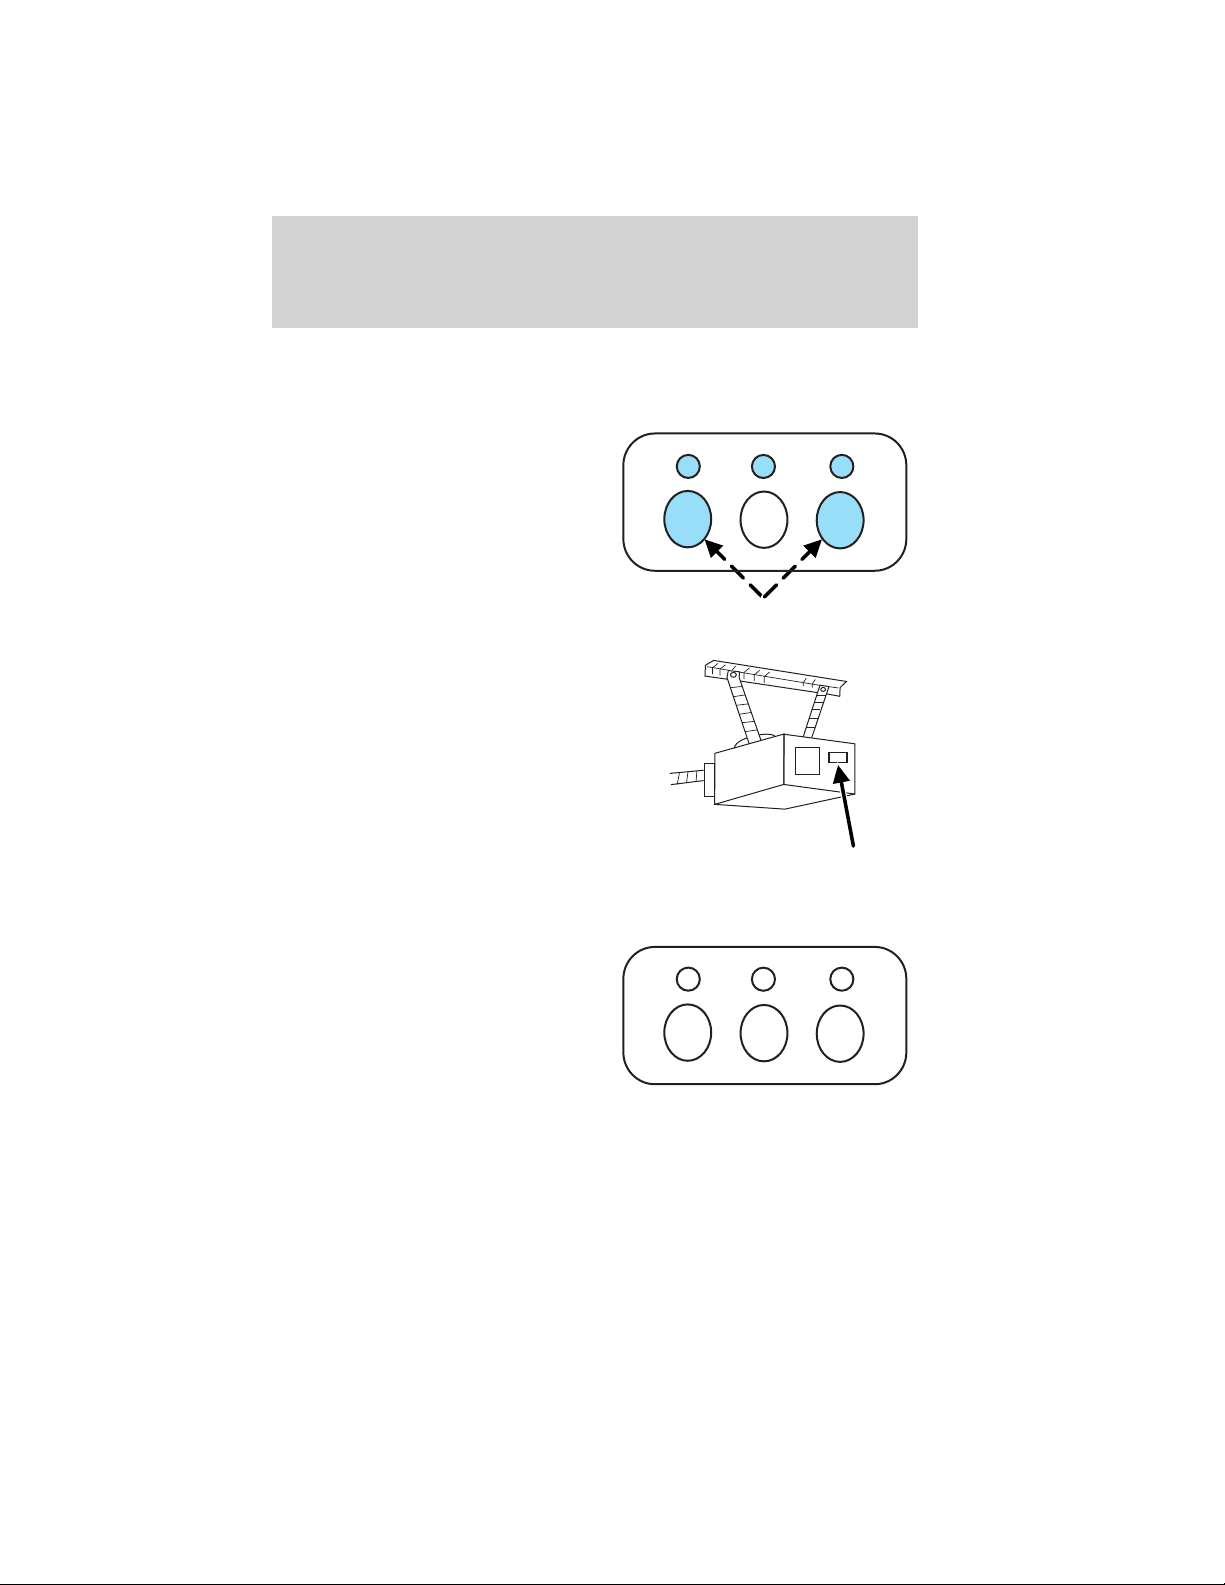
Driver Controls
Note: Do not program the Car2U威 system with the vehicle in the garage.
Make sure that your key is on and engine off while programming the
transmitter.
1. Firmly press the two outer
Car2U威 system buttons for
1–2 seconds, then release.
2. Go to the garage to locate the
garage door opener motor and its
“learn” button. You may need a
ladder to reach the unit and you
may need to remove the unit’s cover
or light lens to locate the “learn”
button. Press the “learn” button,
after which you will have
10–30 seconds to return to your
vehicle and complete the following
steps. If you cannot locate the
“learn” button, refer to the Owner’s Guide of your garage door opener or
call the toll-free Car2U威 system help line at 1-866-57Car2U
(1-866-572-2728).
3. Return to your vehicle. Press and
hold the Car2U威 system button you
would like to use to control the
garage door. You may need to hold
the button from 5–20 seconds,
during which time the selected
button indicator light will blink
slowly. Immediately (within
1 second) release the button once the garage door moves. When the
button is released, the indicator light will begin to blink rapidly until
programming is complete.
4. Press and release the button again. The garage door should move,
confirming that programming is successful. If your garage door does not
operate, repeat the previous steps in this section.
85
2012 05+ Mustang (197)
Owners Guide, 3rd Printing
USA (fus)
Page 86
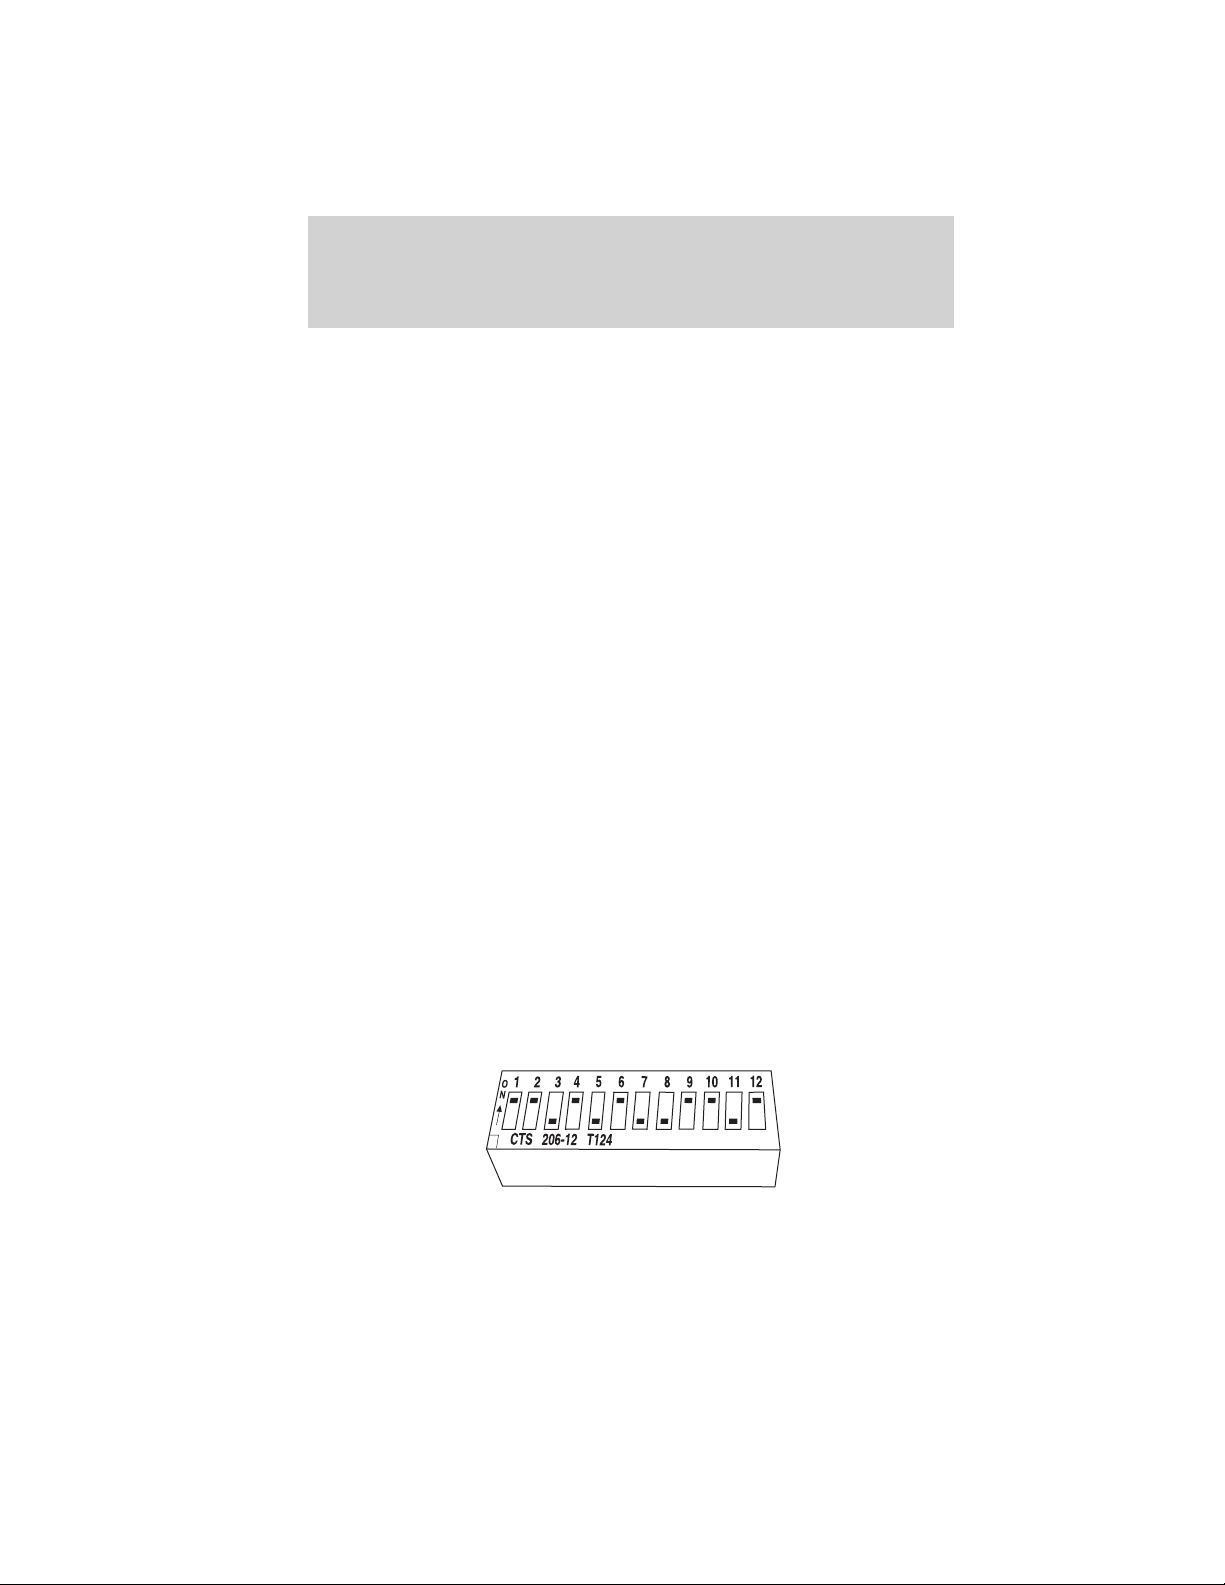
Driver Controls
After successful programming, you will be able to operate your Car2U威
system by pressing the button you programmed to activate the opener.
The indicator light above the selected button will turn on to confirm that
the Car2U威 system is responding to the button command.
To program another rolling code device such as an additional garage door
opener, a security device or home lighting, repeat Steps 1 through 4
substituting a different function button in Step 3 than what you used for
the garage door opener. For example, you could assign the left-most
button to the garage door, the center button to a security device, and
the right-most button to another garage door opener.
Note: The Car2U威 system allows for three devices to be programmed. If
you need to change or replace any of the three devices after it has been
initially programmed, it is necessary to erase the current settings using
the Erasing the Car2U威 Home Automation System buttons procedure
and then programming all of the devices being used.
Fixed code programming
Note: Do not program the Car2U威 system with the vehicle in the garage.
Make sure that your key is on and engine off while programming the
transmitter.
1. To program units with fixed code DIP switches, you will need the
garage door hand-held transmitter, paper and a pen or pencil.
2. Open the battery cover and record the switch settings from left to
right for all 8 to 12 switches. Use the figure below:
When a switch is in the up, on, or + position, circle “L.”
When a switch is in the middle, neutral, or 0 position, circle “M.”
When a switch is in the down, off, or – position, circle “R.”
86
2012 05+ Mustang (197)
Owners Guide, 3rd Printing
USA (fus)
Page 87
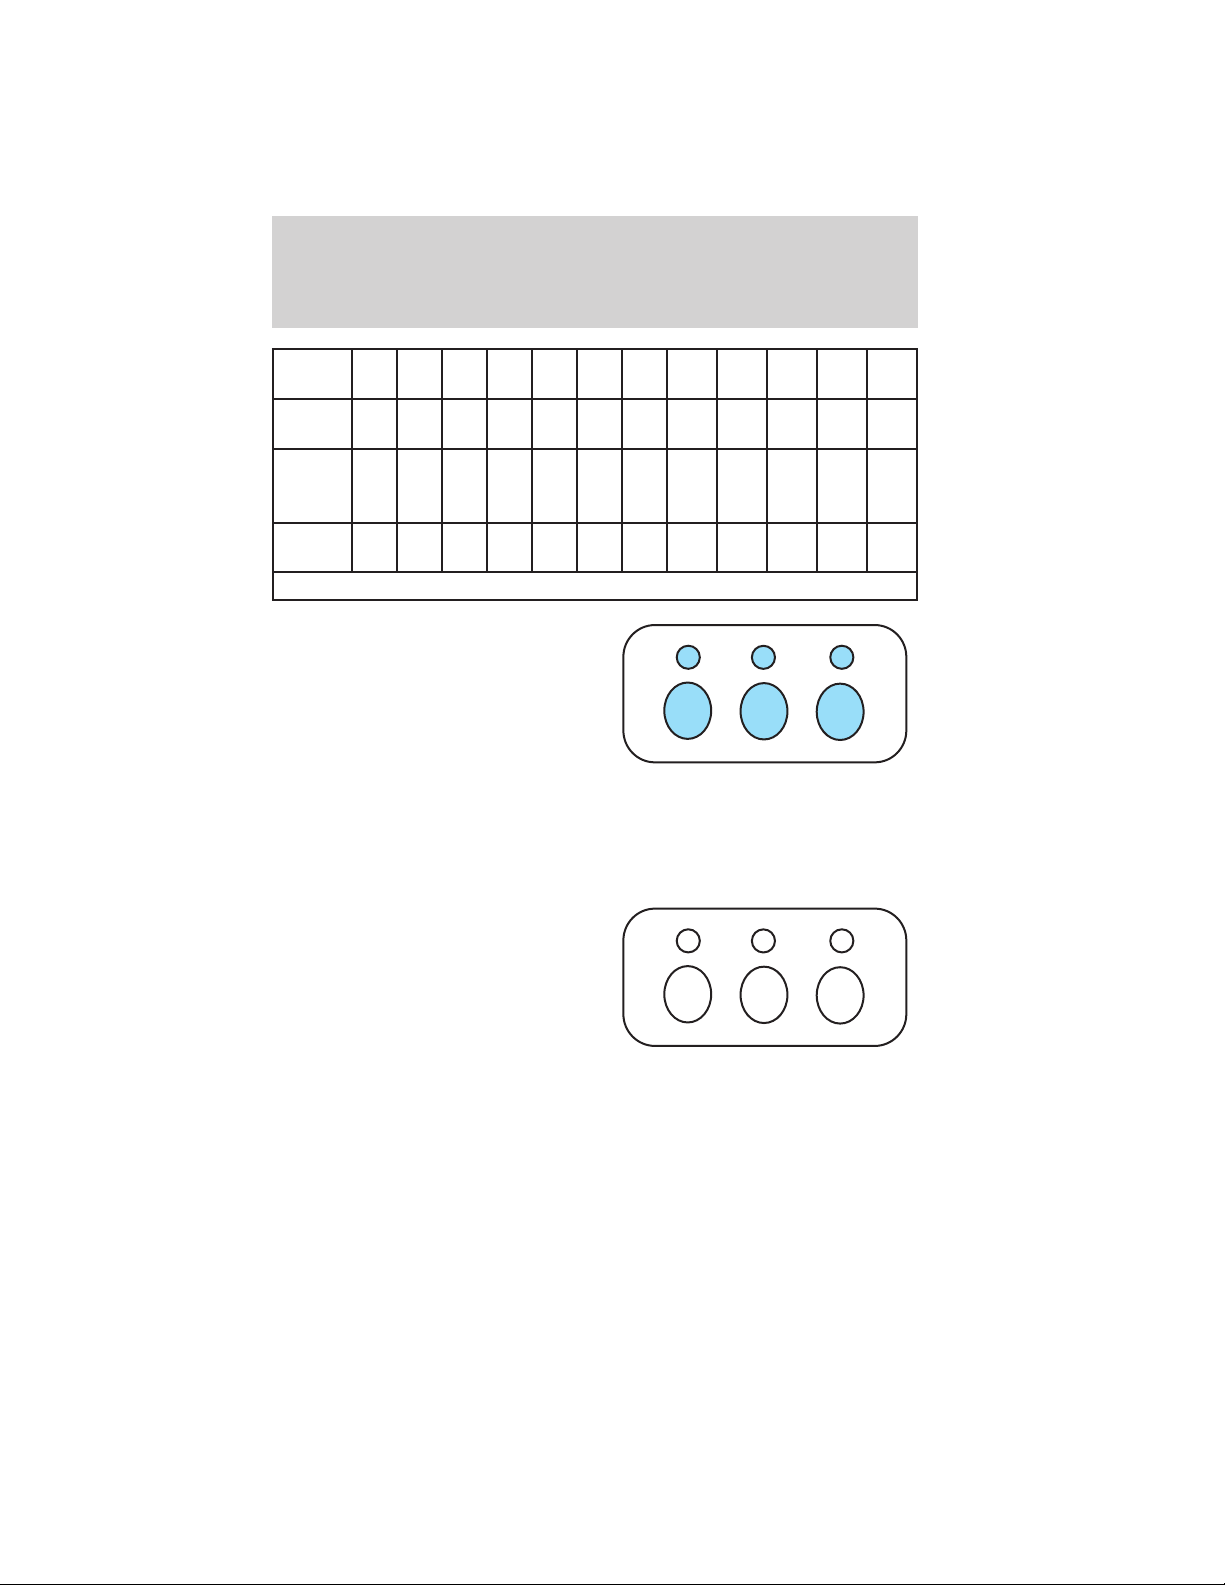
Driver Controls
Switch
position 12345678 9101112
Up, on
or +
Middle,
neutral
or 0
Down,
offor–
L=left; M=middle; R=right
3. To input these positions into the
Car2U威 system, simultaneously
press all three Car2U威 system
buttons for a few seconds and then
release to put the device into
programming mode. The indicator
lights will blink slowly. Within
2.5 minutes enter your
corresponding DIP switch settings
from left to right into your Car2U威 system by pressing and releasing the
buttons corresponding to the settings you circled.
4. After inputting switch settings, simultaneously press and release all
three Car2U威 system buttons. The indicator lights will turn on.
5. Press and hold the Car2U威
system button you would like to use
to control the garage door.
Immediately (within 1 second)
release the button once the garage
door moves. During this time the
selected button indicator light will
blink slowly. Do not release the
button until you see the garage door move. Most garage doors open
quickly. You may need to hold the button from 5–55 seconds before
observing movement of the garage door.
6. The indicator light will (begin to) blink rapidly until programming is
complete. If your garage door opener does not operate following these
steps, repeat Steps 2 through 6. Otherwise, call the toll-free Car2U威 help
line at 1-866-57Car2U (1-866-572-2728).
LLLLLLLLLLLL
MMMMMMMMMMMM
RRRRRRRRRRRR
87
2012 05+ Mustang (197)
Owners Guide, 3rd Printing
USA (fus)
Page 88
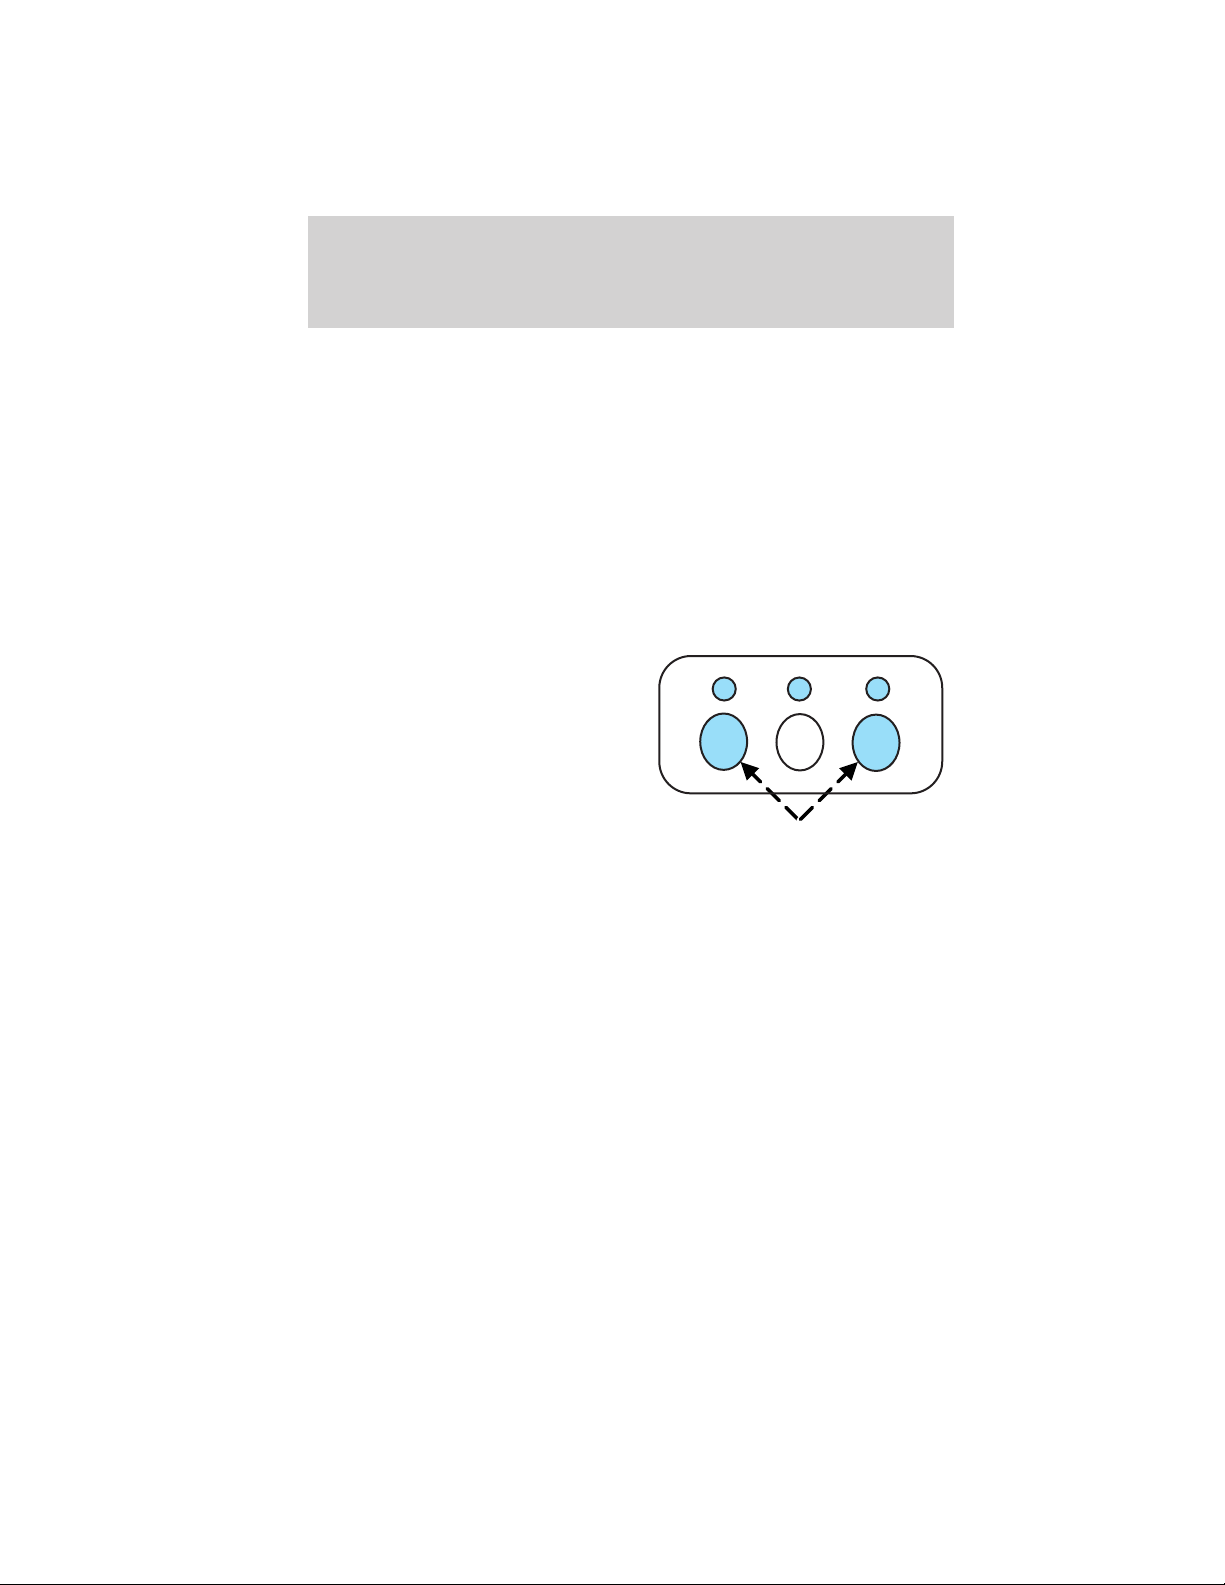
Driver Controls
After successful programming, you will be able to operate your Car2U威
system by pressing the button you programmed to activate the opener.
The indicator light above the selected button will turn on to confirm that
the Car2U威 system is responding to the button command.
Erasing the Car2U姞 Home Automation System buttons
Note: The system allows for three devices to be programmed. If you
need to change or replace any of the three devices after it has been
initially programmed, it will be necessary to erase the current settings
using the procedure below and then reprogramming all of the devices
being used.
To erase programming on the Car2U威 system (individual buttons cannot
be erased), use the following procedure:
1. Firmly press the two outside
Car2U威 system buttons
simultaneously for approximately
20 seconds until the indicator lights
begin to blink rapidly. The indicator
lights are located directly above the
buttons.
2. Once the indicator lights begin to
blink, release your fingers from the
buttons. The codes for all buttons
are erased.
If you sell your vehicle equipped with the Car2U威 system, it is
recommended that you erase the programming for security reasons.
FCC and RSS-210 Industry Canada Compliance
The Car2U威 system complies with Part 15 of the FCC rules and with
RSS-210 of Industry Canada. Operation is subject to the following two
conditions: (1) This device may not cause harmful interference, and (2)
This device must accept any interference received including interference
that may cause undesired operation.
Changes and modifications to the Car2U威 system transmitter by other
than an authorized service facility could void authorization to use the
equipment.
88
2012 05+ Mustang (197)
Owners Guide, 3rd Printing
USA (fus)
Page 89
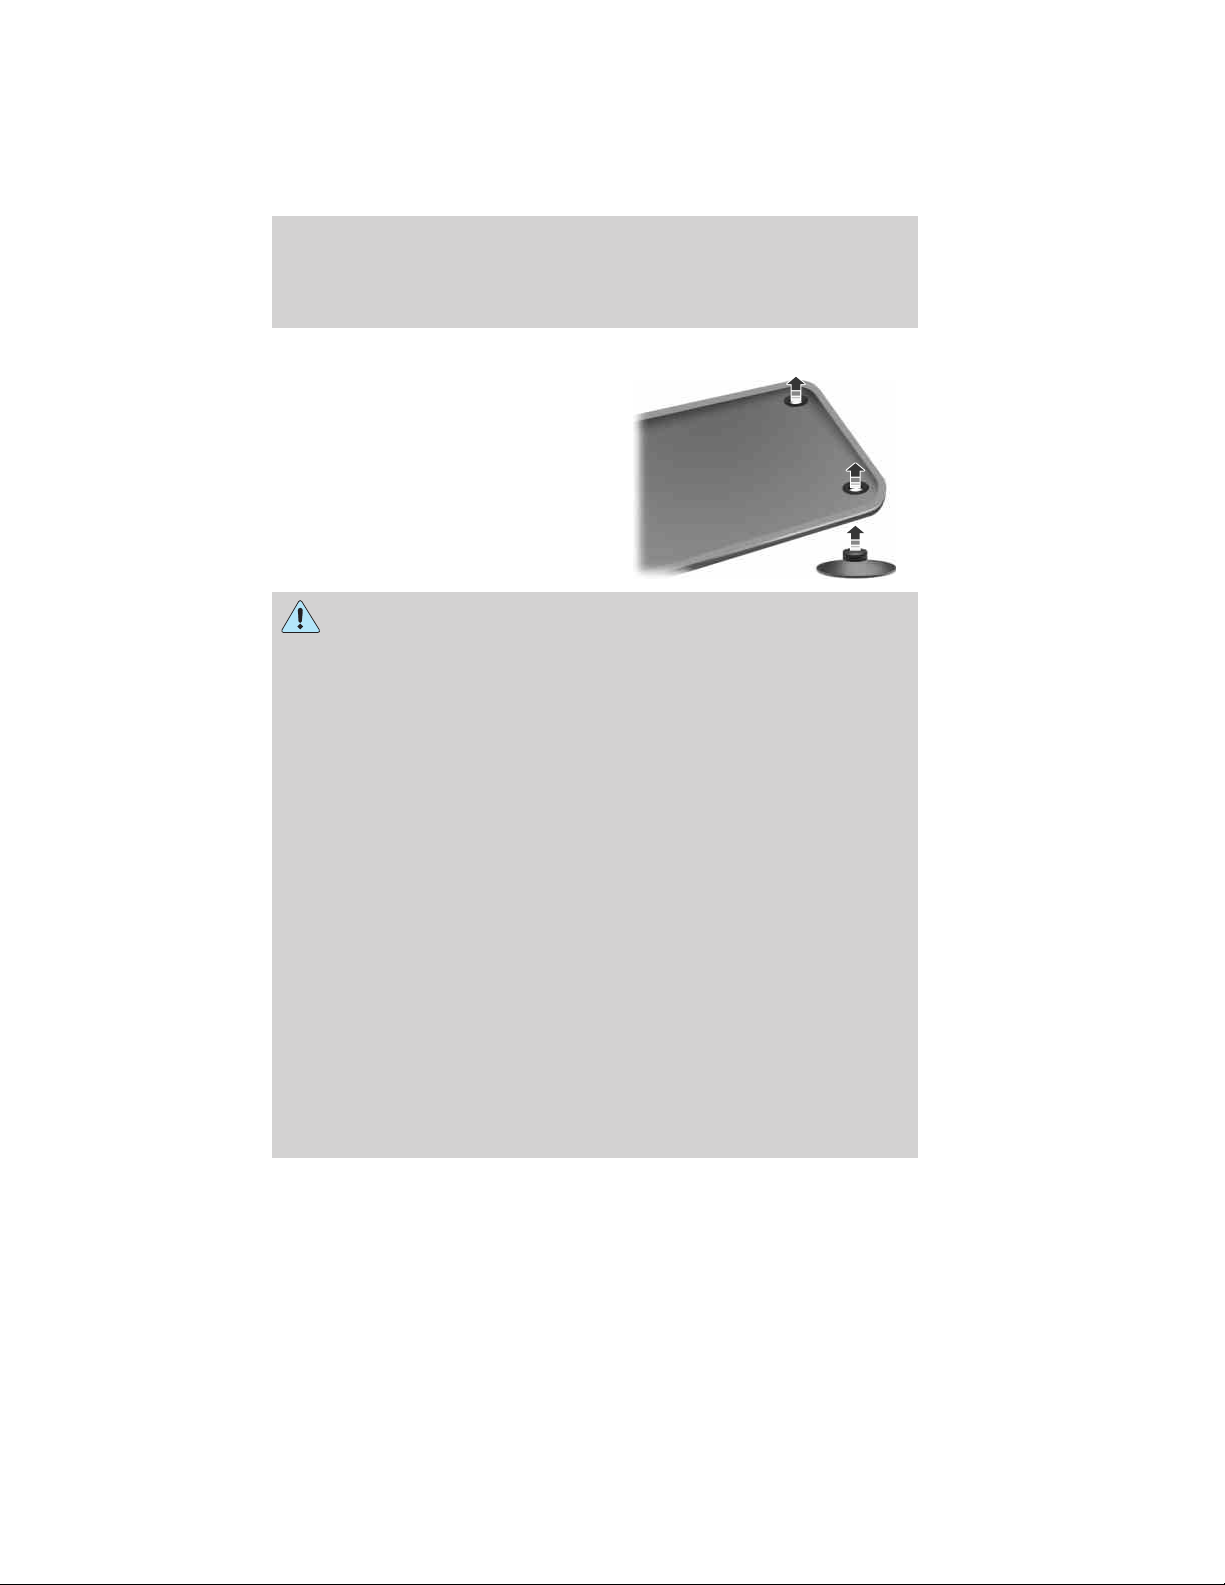
Driver Controls
POSITIVE RETENTION FLOOR MAT
WARNING: Always use floor mats that are designed to fit the
foot well of your vehicle. Only use floor mats that leave the pedal
area unobstructed. Only use floor mats that are firmly secured to
retention posts so that they cannot slip out of position and interfere
with the pedals or impair safe operation of your vehicle in other ways.
• Pedals that cannot move freely can cause loss of vehicle control and
increase the risk of serious personal injury.
• Always make sure that the floor mats are properly attached to the
retention posts in the carpet that are supplied with your vehicle.
Floor mats must be properly secured to both retention posts to
ensure mats do not shift out of position.
• Never place floor mats or any other covering in the vehicle foot well
that cannot be properly secured to prevent them from moving and
interfering with the pedals or the ability to control the vehicle.
• Never place floor mats or any other covering on top of already
installed floor mats. Floor mats should always rest on top of vehicle
carpeting surface and not another floor mat or other covering.
Additional floor mats or any other covering will reduce the pedal
clearance and potentially interfere with pedal operation.
• Check attachment of floor mats on a regular basis. Always properly
reinstall and secure floor mats that have been removed for cleaning
or replacement.
• Always make sure that objects cannot fall into the driver foot well
while the vehicle is moving. Objects that are loose can become
trapped under the pedals causing a loss of vehicle control.
2012 05+ Mustang (197)
Owners Guide, 3rd Printing
USA (fus)
89
Page 90

Driver Controls
WARNING (Continued)
• Failure to properly follow floor mat installation or attachment
instructions can potentially cause interference with pedal operation
causing loss of control of vehicle.
• To install floor mats, position the floor mat so that the eyelet is over
the retention post and press down to lock in.
• To remove the floor mat, reverse the installation procedure.
CONVERTIBLE (IF EQUIPPED)
Do not store articles behind rear seat. Articles stored in the convertible
top stowage compartment may break the rear glass window when the top
is lowered.
Lowering the convertible top
The convertible top can be lowered with the side windows down. The
windows will automatically lower when lowering or raising the top.
The convertible top will not operate unless the vehicle is traveling
under 3 mph (5 km/h).
Note: Lowering the convertible top when the top material is wet may
cause mold or mildew.
To lower the convertible top:
1. Bring vehicle to a complete stop. Key must be in the on position. It is
recommended that the vehicle’s engine is running when lowering the top
to prevent draining the battery.
2. Check the convertible top stowage compartment behind the rear seat
to be sure it is empty and ready to receive the top. Check the
convertible top outer surface to be sure it is free of leaves and debris.
90
2012 05+ Mustang (197)
Owners Guide, 3rd Printing
USA (fus)
Page 91
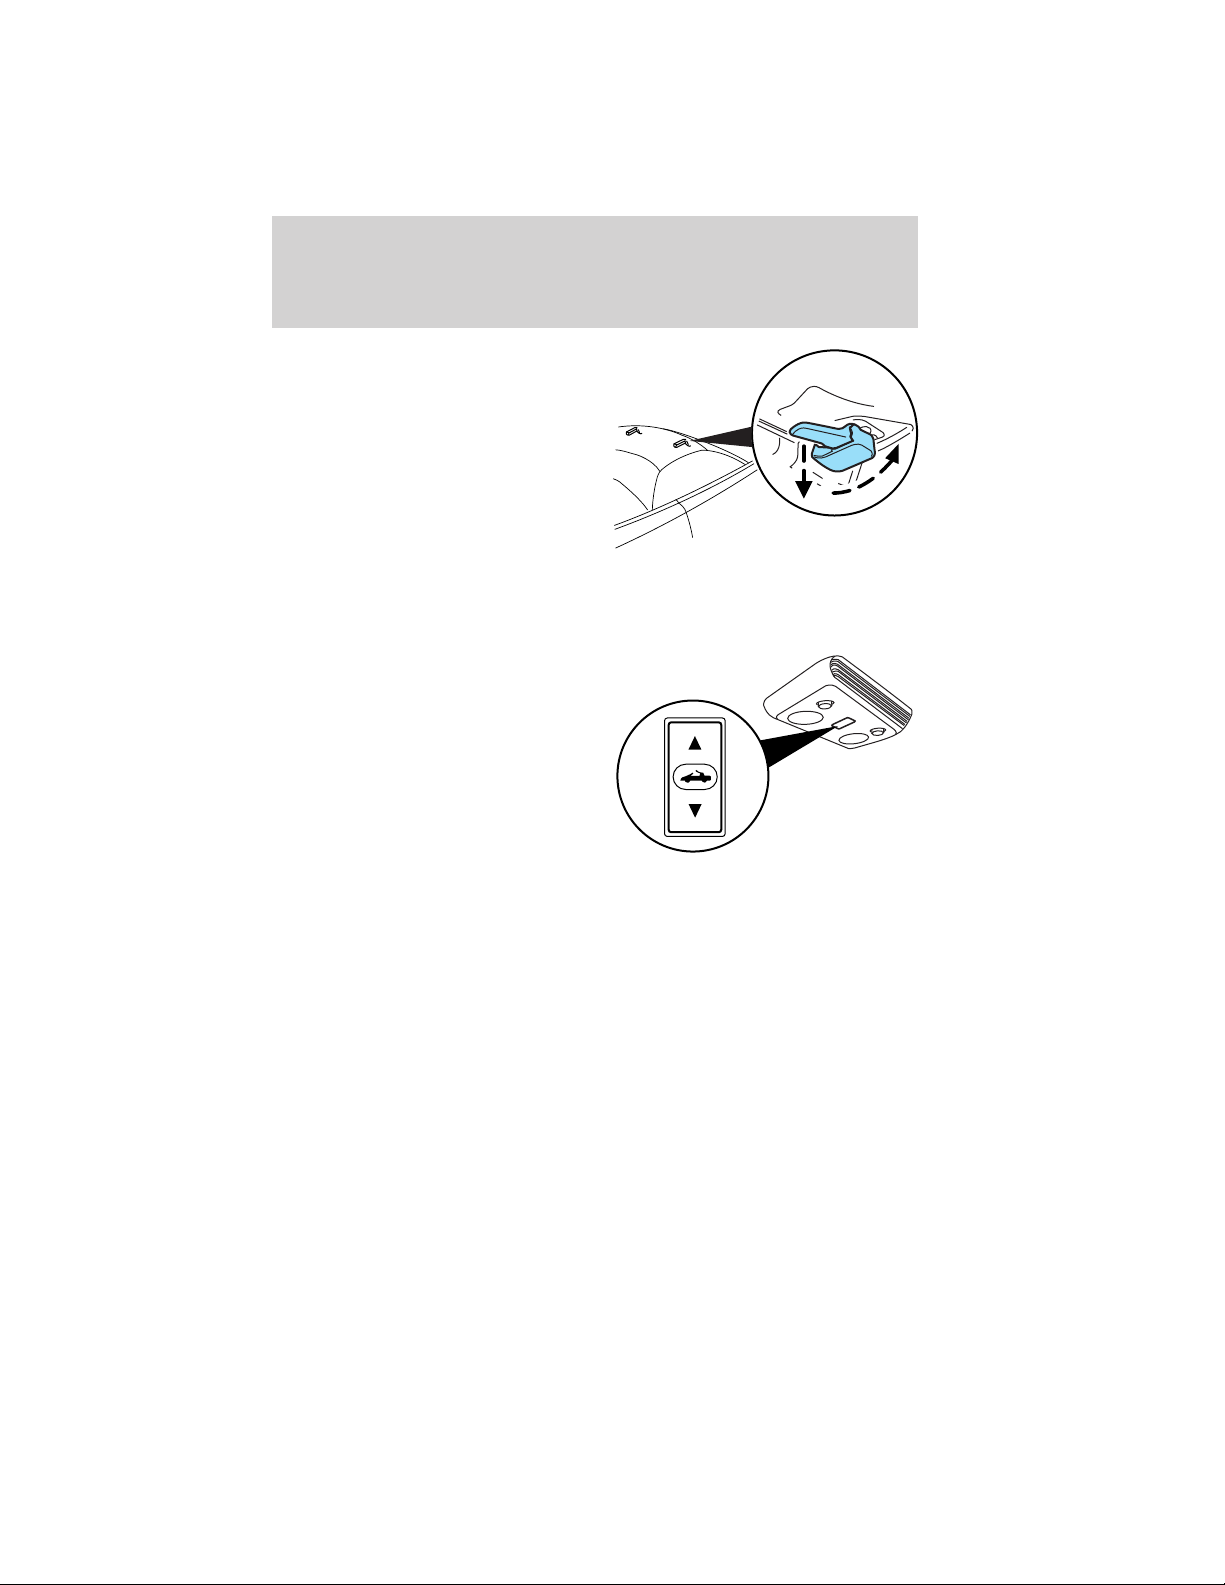
Driver Controls
Note: The latch handles must be
pulled downward fully to allow the
latch to fully rotate into the open
position.
3. Unclamp the top from the
windshield header by pulling each
latch handle down and then rotating
the latch to the rear until it clears
the header.
Note: If the top has not been lowered for some time and sticks to the
windshield header, push the front of the top up slightly with your hand
to loosen it.
4. Press the convertible top switch
on the overhead console and hold
until the windows are completely
down and the top is completely
stored.
2012 05+ Mustang (197)
Owners Guide, 3rd Printing
USA (fus)
91
Page 92
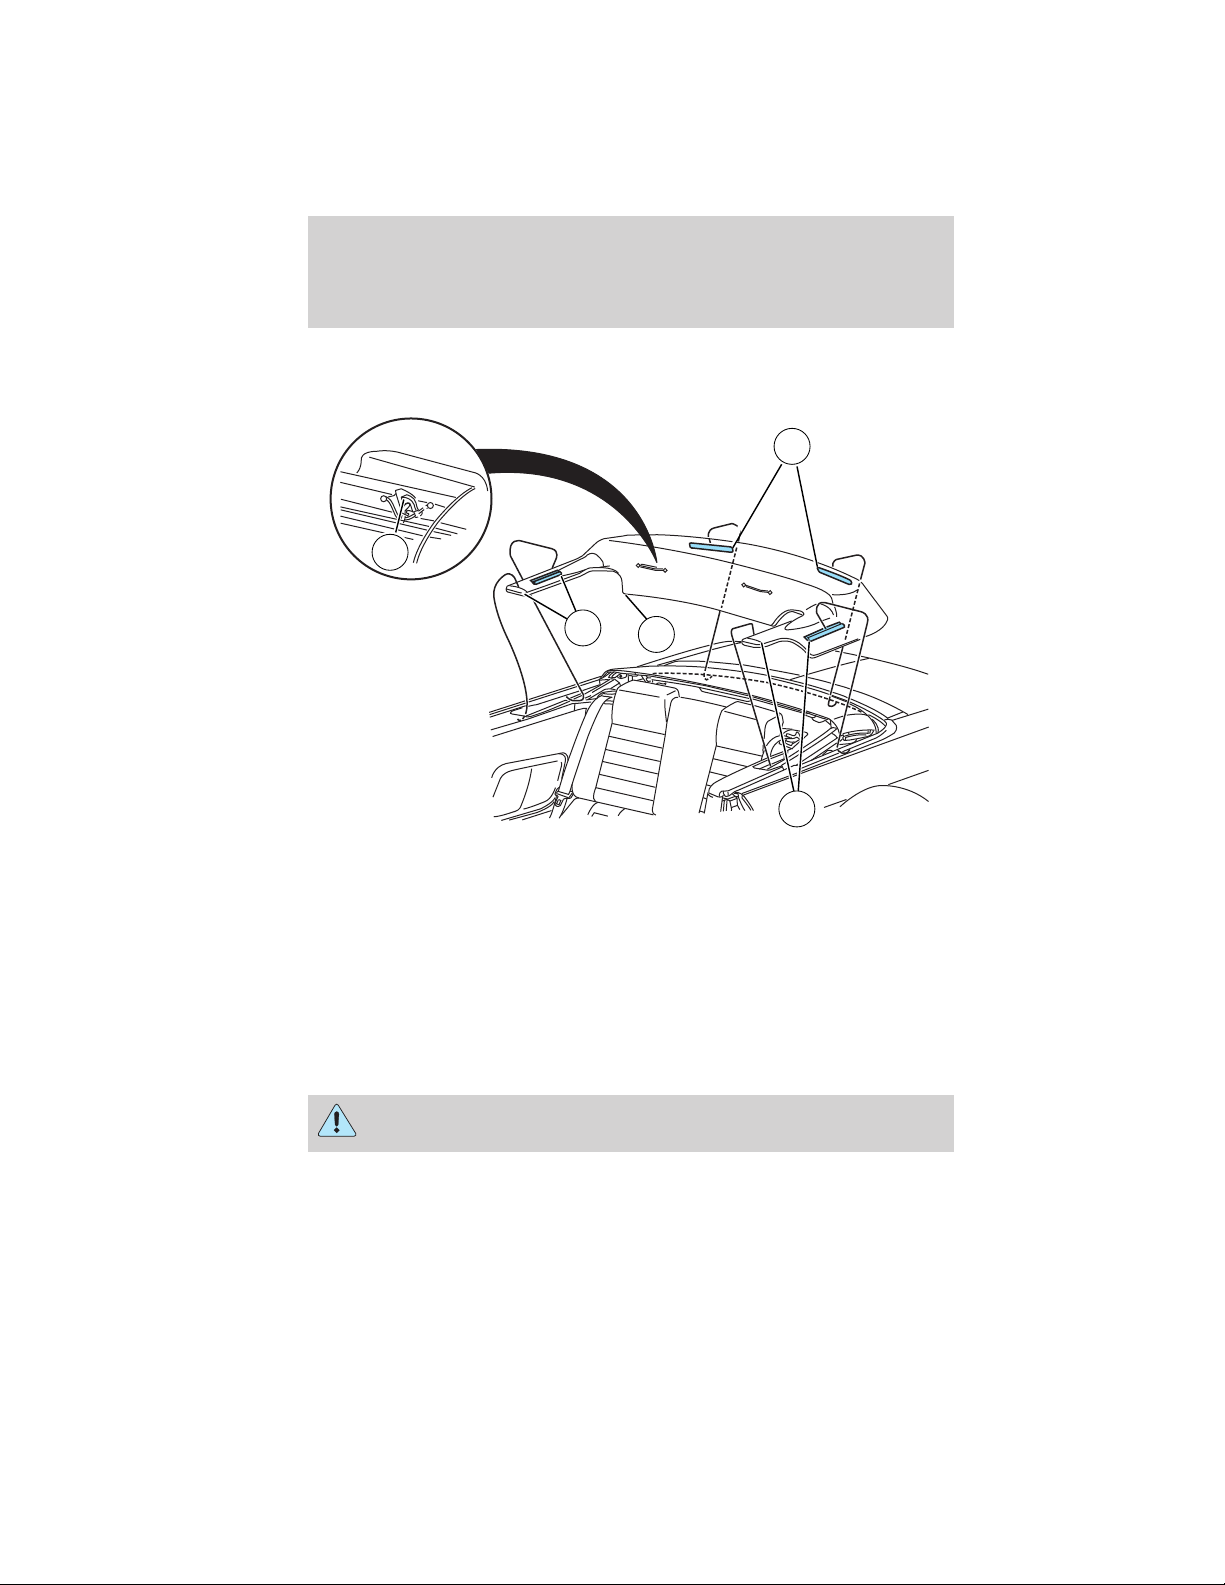
Driver Controls
Installation of the boot (if equipped)
Be sure the boot is secure on the vehicle before driving.
1
5
2
4
3
1. Install the boot on the vehicle by hooking the boot retaining clips on
the back panel.
2. Install the boot on the right side tucking in the front part of the boot
in the quarter panel and hooking the retaining clip on the side.
3. Install the boot on the left side tucking in the front part of the boot in
the quarter panel and hooking the retaining clip on the side.
4. Tuck the boot corners behind the shoulder belts.
5. Secure the boot straps on the rear seat hooks behind the rear seat.
Note: Improper installation can result in loss and/or damage of the boot
while driving.
WARNING: Always secure the retaining clips and boot straps on
the vehicle or the boot may come loose while driving.
To remove, unhook the boot straps from the rear seat hooks and push
the boot down slightly unhooking the boot retaining clips from the
vehicle and lift off.
92
2012 05+ Mustang (197)
Owners Guide, 3rd Printing
USA (fus)
Page 93
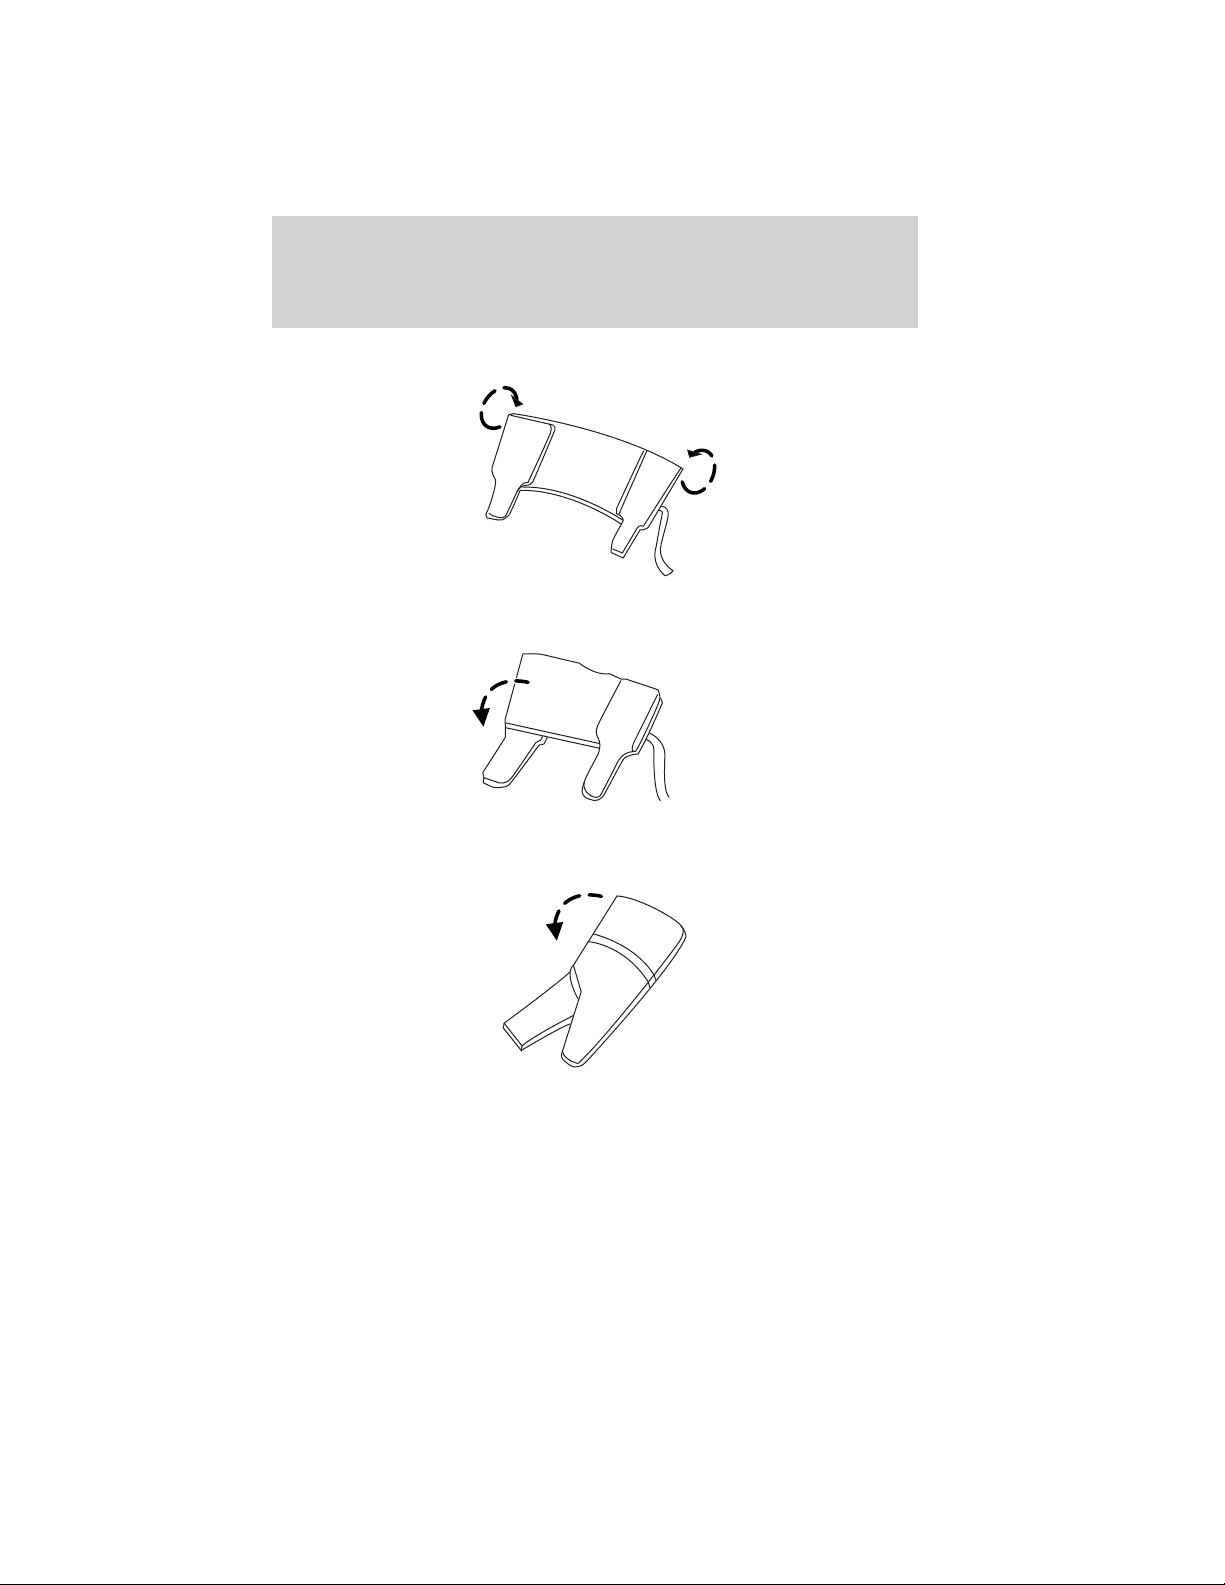
Driver Controls
Storing the boot
1. Position the boot right-side up and fold each side of the boot inward.
2. Turn the boot upside down and fold the left side of the boot inward.
3. Fold the right side inward and secure the boot with the strap.
Stow the boot in the trunk.
Raising the convertible top
The convertible top will not operate unless the vehicle is traveling
under 3 mph (5 km/h).
2012 05+ Mustang (197)
Owners Guide, 3rd Printing
USA (fus)
93
Page 94
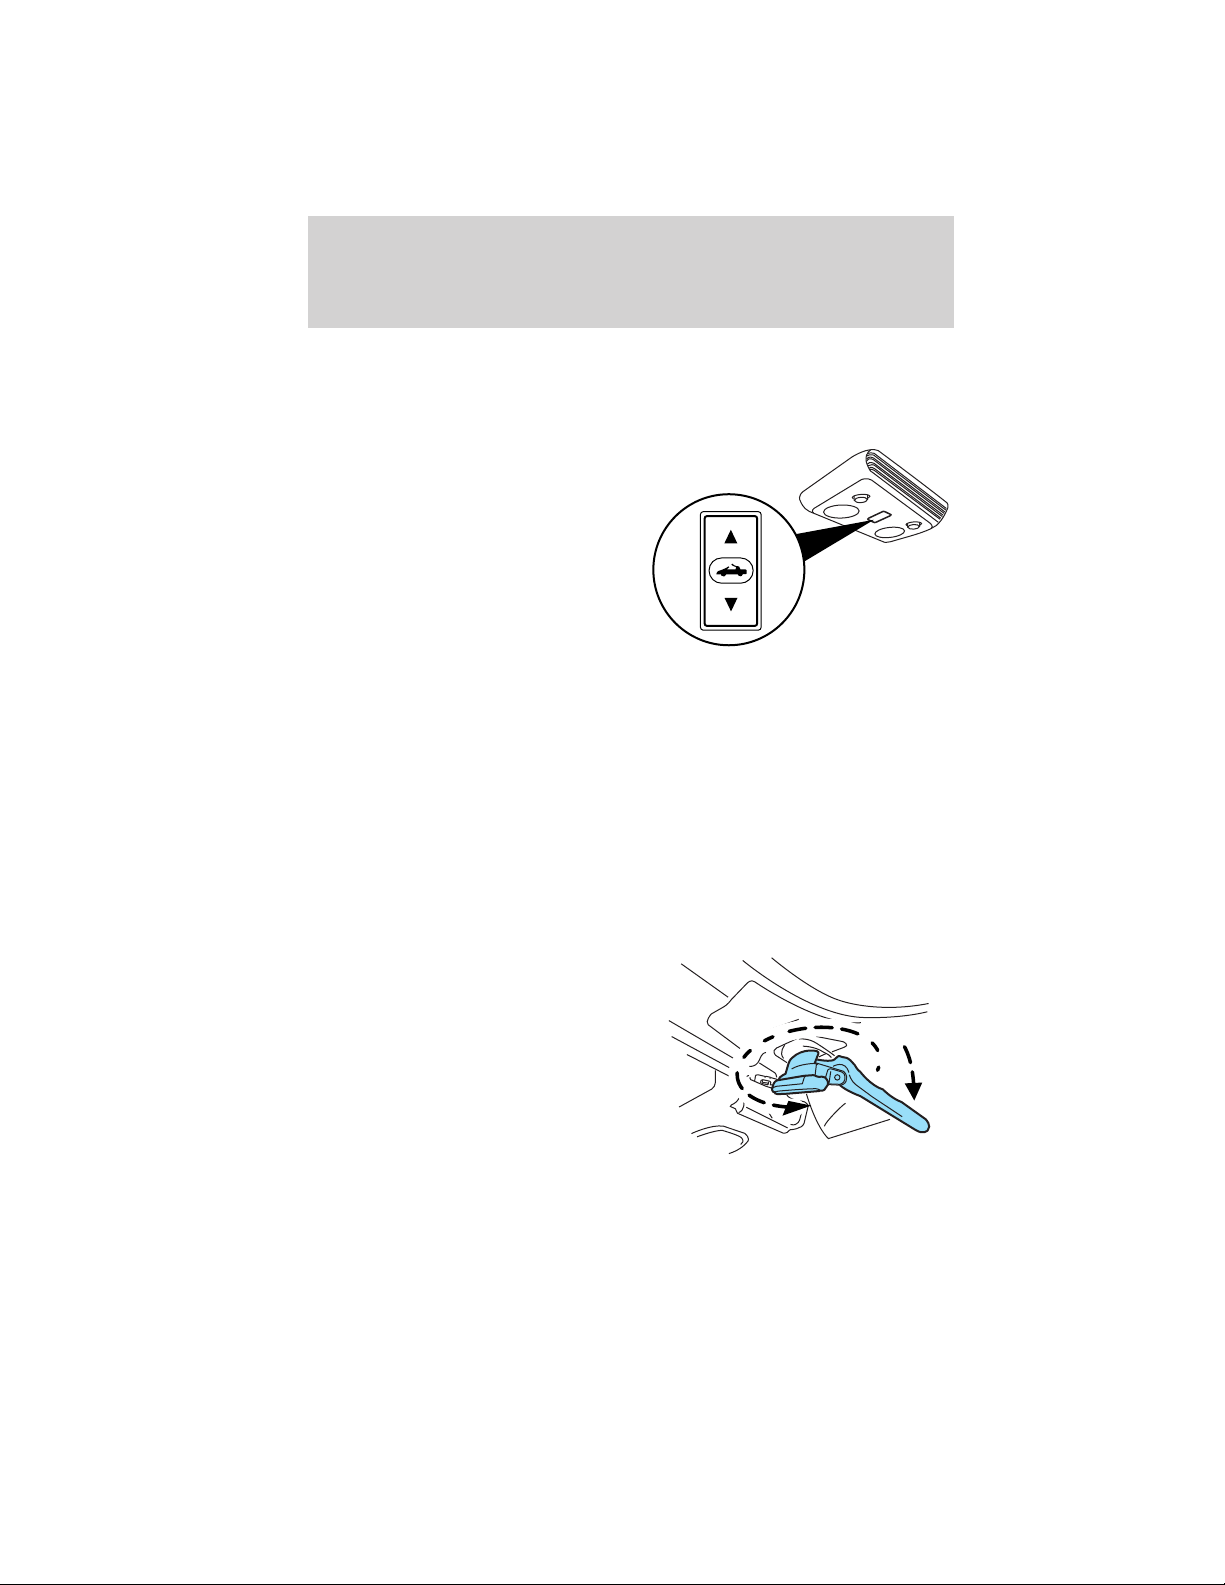
Driver Controls
To raise the convertible top:
1. Bring the vehicle to a complete stop. Key must be in the on position.
It is recommended that the vehicle’s engine is running when raising the
top to prevent draining the battery.
2. Press the convertible top switch,
holding it until the windows lower
completely and the top unfolds and
moves forward toward the
windshield header.
3. You can release the convertible
top switch to open both latch
handles before the top meets the
windshield header. Note: Make sure
the latch handles are pulled down
fully for hand clearance and are
swung to the fully open position.
Note: If the top has been in the down position for an extended period or
if the temperature is low, the top material may shrink a small amount.
Pull down on the latch handles and at the center grip in the header to
fasten the top.
4. Continue to use the convertible top switch to raise the top until it has
reached the fully closed position flush to the header.
Note: The two pins under the forward edge of the top should seat
themselves in the matching holes in the header.
Note: The latch handles must be pulled downwards fully to allow the
latch to fully rotate into the closed position.
5. Secure the driver’s side latch first,
then secure the passenger side. Pull
down firmly on the latch handles
before rotating them into the
windshield header until they reach
the full forward position. Pull down
on the latch handles and at the
center grip in the header to fasten
the top. Press the latch handles up
into the stowed position once the
latch is rotated into the full forward
position.
6. Raise the rear windows first and then raise the front windows.
94
2012 05+ Mustang (197)
Owners Guide, 3rd Printing
USA (fus)
Page 95
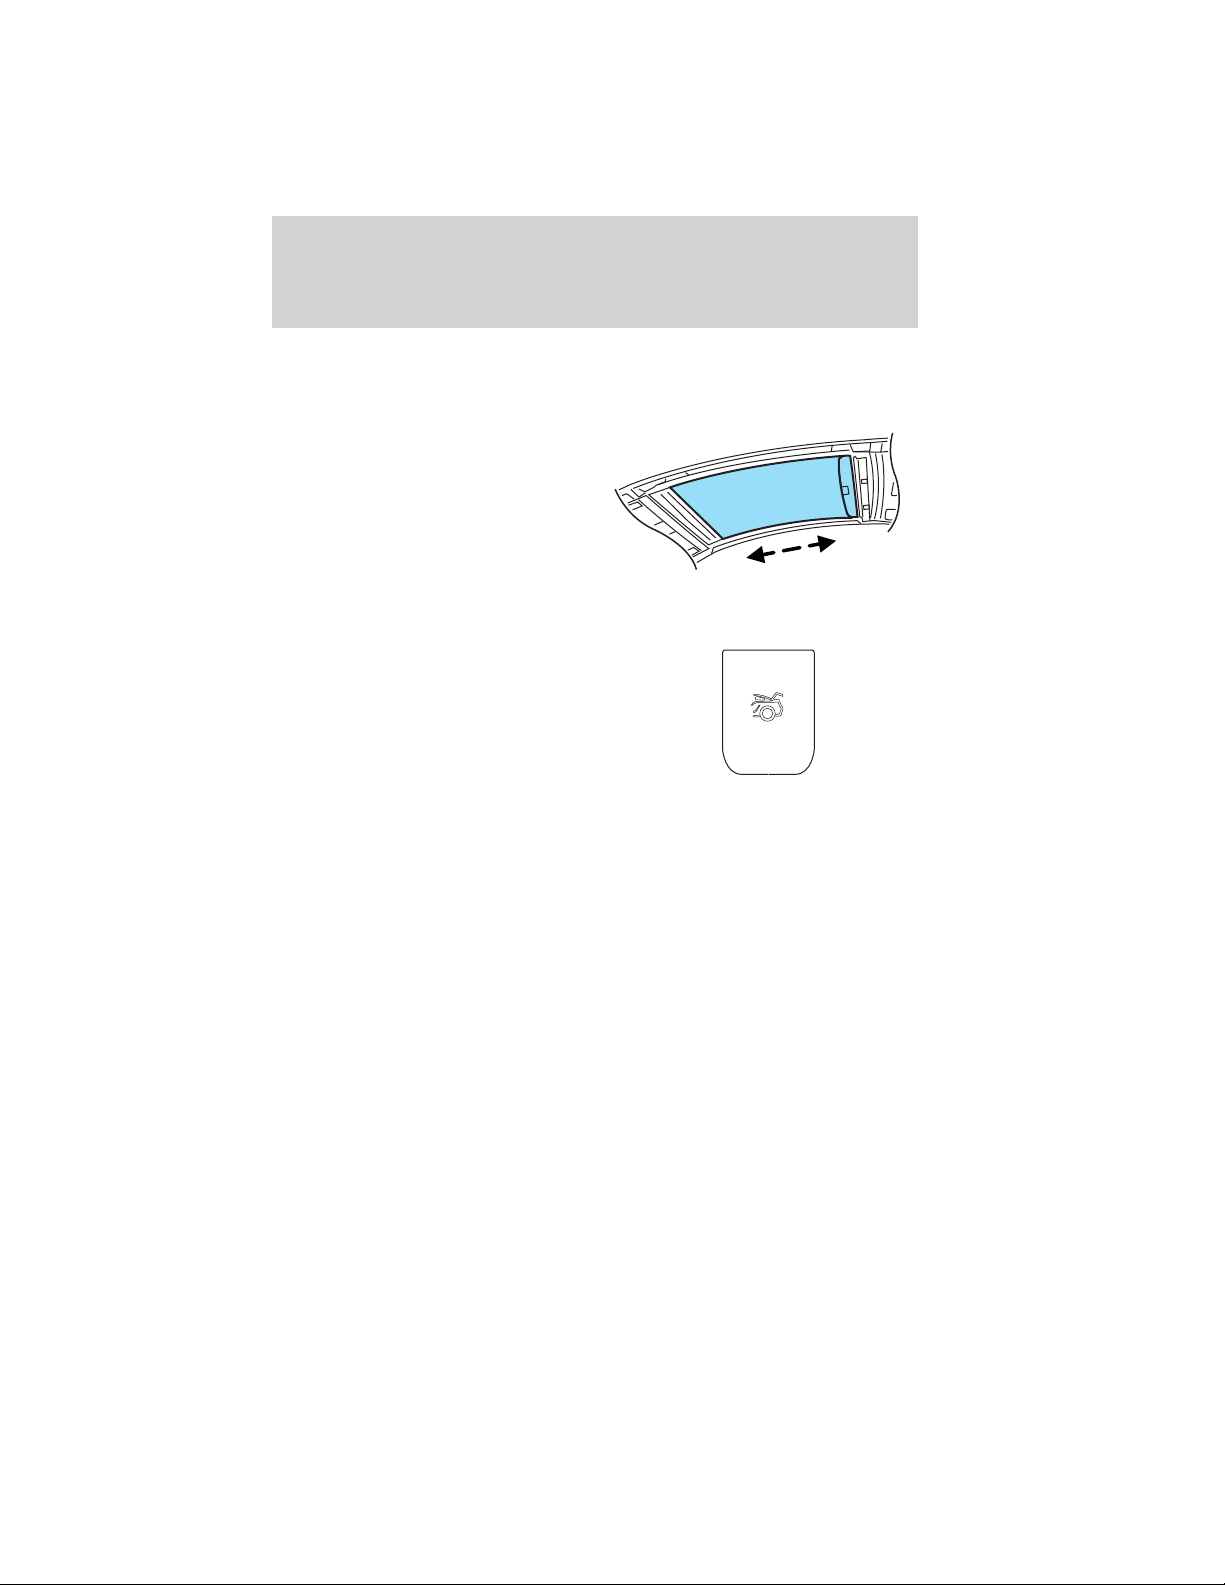
Driver Controls
ROLLER BLIND SUN SHADE (IF EQUIPPED)
If your vehicle is equipped with a glass roof, the roller blind sun shade
will cover the glass roof inside your vehicle.
Use the center-mounted cup handle
to slide the shade open or closed.
INTERIOR TRUNK CONTROL
The remote trunk release button is
located on the instrument panel.
Press the button to unlatch the
trunk.
Interior trunk control lockout (convertible vehicles only)
This feature helps prevent unauthorized access to the trunk when the
convertible top is open, by disabling the interior trunk control.
This is useful when you want to leave the convertible top open, but still
prevent access to the trunk.
To operate this feature (the vehicle must be off and accessory power
delay not active):
Lock the vehicle using the integrated keyhead transmitter or the power
door lock switch. The interior trunk control will now be disabled.
To enable the interior trunk control:
• use the integrated keyhead transmitter to unlock the vehicle,
• or turn the ignition on.
The interior trunk control will now work normally.
2012 05+ Mustang (197)
Owners Guide, 3rd Printing
USA (fus)
95
Page 96
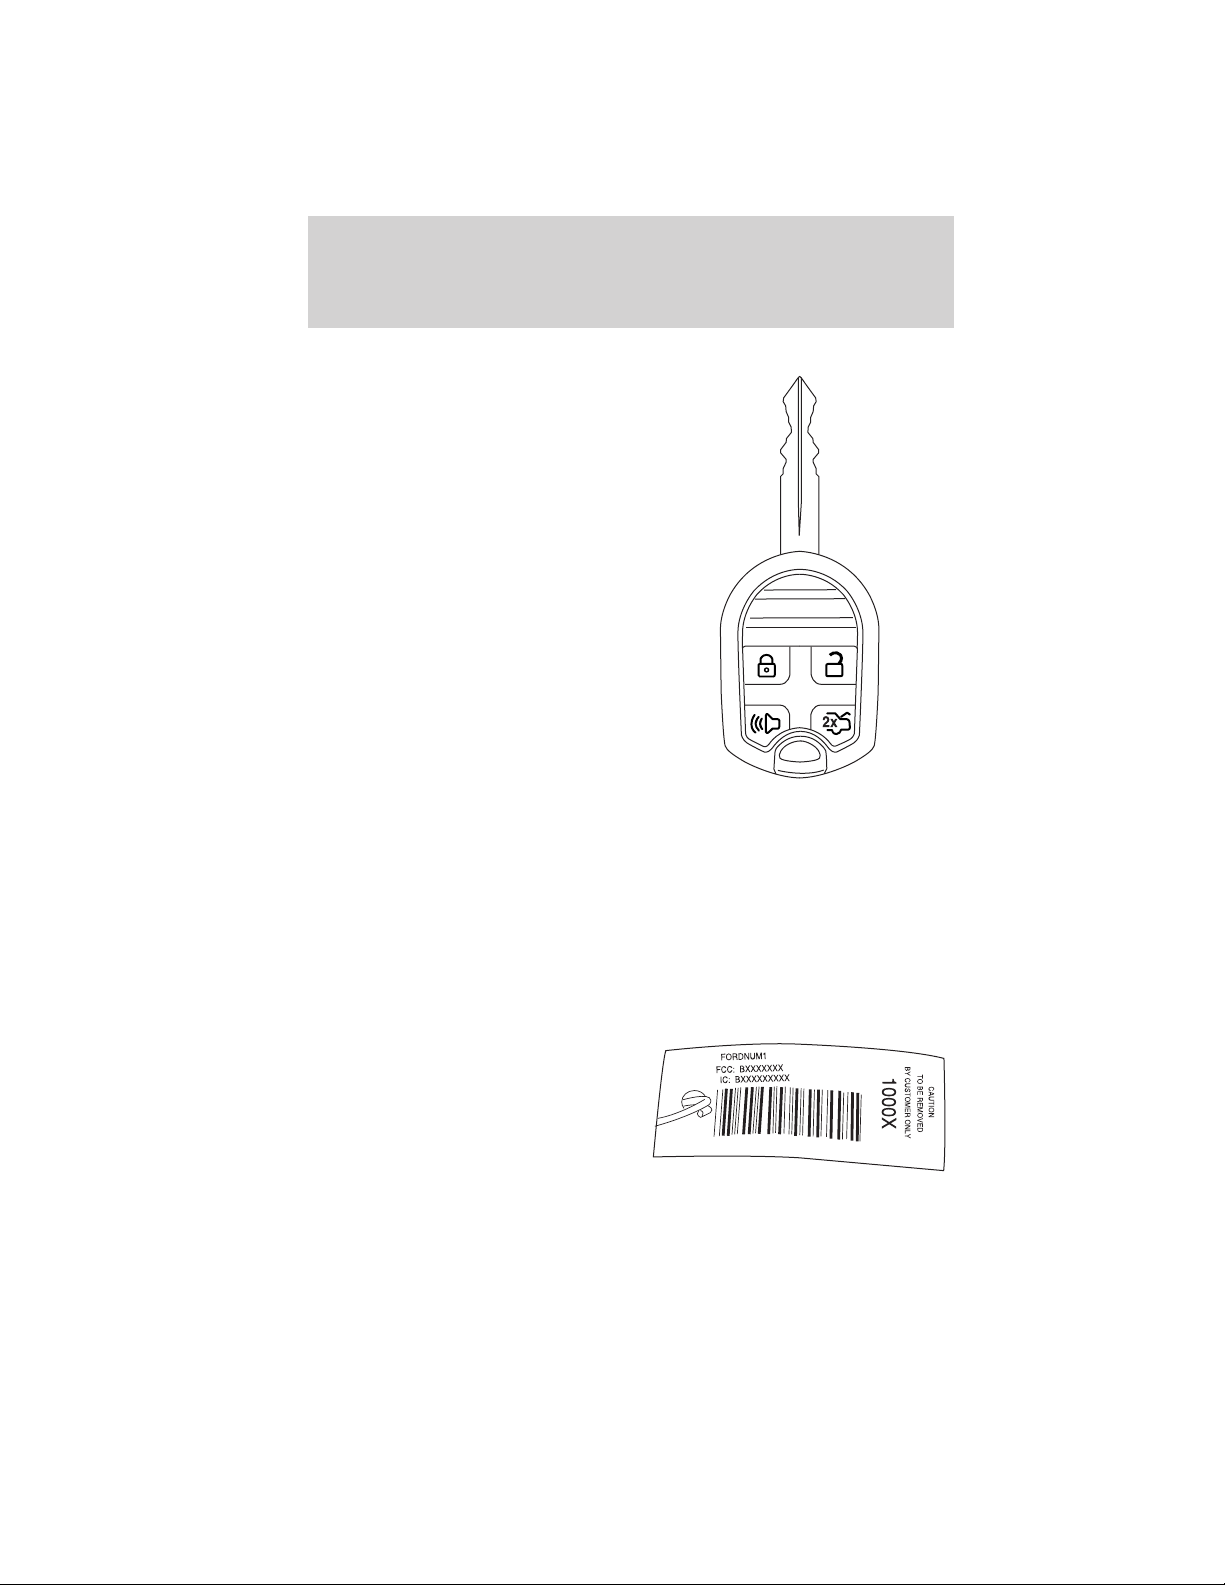
Locks and Security
KEYS
Your vehicle may be equipped with
two integrated keyhead transmitters
(IKTs). The key blade functions as a
programmed key which starts the
vehicle and unlocks/locks all the
doors. The transmitter portion
functions as the remote entry
transmitter.
Your IKTs are programmed to your vehicle; using a non-programmed key
will not permit your vehicle to start. If you lose your authorized dealer
supplied IKTs, replacement IKTs are available through your authorized
dealer. Standard SecuriLock威 keys without remote entry transmitter
functionality can also be purchased from your authorized dealer if
desired.
Always carry a spare key with you in case of an emergency.
For more information regarding programming replacement IKTs, refer to
the SecuriLock威 passive anti-theft system section later in this chapter.
Note: Your vehicle’s IKTs were
issued with a security tag that
provides important vehicle key cut
information. It is recommended that
you keep the tag in a safe place for
future reference.
96
2012 05+ Mustang (197)
Owners Guide, 3rd Printing
USA (fus)
Page 97

Locks and Security
MYKEY姞
The MyKey威 feature allows you to program a restricted driving mode to
promote good driving habits. All but one of the keys programmed to the
vehicle can be activated as a MyKey威. The key will remain restricted
until MyKey威 is cleared. Any remaining keys are referred to as an
“administrator key” or admin key. The admin key can be used to create a
MyKey威, program optional MyKey威 settings, and clear the MyKey威
feature. When the MyKey威 feature is enabled the user can use system
check in the message center to see how many MyKeys威 and admin keys
are programmed to the vehicle, and see the total distance the vehicle has
been driven with the MyKey威 active.
MyKey威 restricted features
Standard settings – these settings cannot be changed
• Belt-Minder cannot be disabled. The audio system will be muted
whenever Belt-Minder威 is activated until the safety belts are buckled.
Refer to the Seating and Safety Restraints chapter for a detailed
description of Belt-Minder威 operation.
• Low fuel warnings are displayed in the message center followed by a
chime when the distance to empty value reaches 75 miles (120 km).
• The following systems, if equipped, cannot be turned off: reverse
sensing system, blind spot information system (BLIS威) with cross
traffic alert and collision warning system.
Optional settings – these settings can be changed
• Vehicle speed is limited to 80 mph (130 km/h). Visual warnings are
displayed followed by a chime when the vehicle speed has reached
80 mph (130 km/h).
• Visual warnings are displayed followed by a chime when a preselected
vehicle speed of 45, 55 or 65 mph (75, 90, or 105 km/h) is exceeded.
• The maximum volume of the audio system is limited to 45%. MYKEY
VOLUME LIMITED will be displayed in the audio system display when
attempting to exceed the limited volume.
• The AdvanceTrac威 system cannot be turned off. When this optional
setting is on, the MyKey威 user will not be able to deactivate the
system. Note: It may be beneficial to deactivate the AdvanceTrac威
system if the vehicle is stuck in snow, mud or sand.
2012 05+ Mustang (197)
Owners Guide, 3rd Printing
USA (fus)
97
Page 98

Locks and Security
Create a MyKey威
To program MyKey威 on one of the keys programmed to the vehicle,
insert the key that you want to make a MyKey威 into the ignition. For
vehicles equipped with push button start, put the intelligent access key
in the backup slot; see the Driving chapter for the location of the
backup slot. Turn the ignition on. Use the message center buttons to do
the following:
1. Press SETUP until PRESS RESET TO CREATE MYKEY is displayed.
2. Press and release the RESET button. HOLD RESET TO CONFIRM
MYKEY will be displayed.
3. Press and hold the RESET button for two seconds until MARK THIS
AS RESTRICTED is displayed.
4. Wait until KEY RESTRICTED AT NEXT START is displayed.
MyKey威 is successfully programmed. Make sure you label it so you can
distinguish it from the admin keys. Note: To program the optional
settings go to Step 2 in the Programming MyKey威 Optional Settings
section. If your vehicle is equipped with remote start, see the Using
MyKey威 with Remote Start Systems section.
Note: The MyKey威 can be cleared within the same key cycle that it was
created, otherwise a standard key (administrator key) is required to
clear the MyKey威 programming. To clear all MyKeys威 go to Step 2 in the
Clear MyKey威 section.
Programming MyKey威 Optional Settings
Turn the ignition on using an admin key. To program the optional
settings, use the message center buttons to do the following:
1. Press SETUP until RESET FOR MYKEY SETTINGS is displayed.
2. Press and release the RESET button to display MyKey setup menus.
The first menu shown is:
MYKEY MAX MPH <80 MPH> OFF
3. If you don’t want to change the maximum speed setting, press the
SETUP button to display the next menu. The remaining menus appear as
follows with the default settings shown:
MYKEY MPH TONES 45 55 65 <OFF>
MYKEY VOLUME LIMIT <ON> OFF
MYKEY ADVTRAC CTRL ON <OFF>.
4. On any of the menus press RESET to highlight your choice with the
<…>.
98
2012 05+ Mustang (197)
Owners Guide, 3rd Printing
USA (fus)
Page 99

Locks and Security
5. Press SETUP to enter your choice. The next optional setting will be
displayed.
6. Repeat Steps 4 and 5 until you are done changing the optional
settings.
Clear MyKey威
To reset all MyKeys威 as admin keys, do the following:
1. Turn the vehicle on using the admin key.
2. Press SETUP until PRESS RESET TO CLEAR MYKEY is displayed.
3. Press and release the RESET button. HOLD RESET TO CONFIRM
CLEAR is displayed.
4. Press and hold the RESET button for two seconds until ALL MYKEYS
CLEARED is displayed.
Check MyKey威 system status
The vehicle system check will provide the status of the following MyKey威
parameters:
• MYKEY MILES — This odometer only tracks mileage when a MyKey威
is used. If mileage does not accumulate as expected, then the MyKey威
is not being used by the intended user. The only way to reset this
odometer to zero is by clearing MyKey威. If this odometer is lower than
the last time you checked, then the MyKey威 system has been recently
cleared.
• # MYKEY(S) PROGRAMMED — Indicates how many MyKeys威 are
programmed to the vehicle. Can be used to detect deletion of a
MyKey威.
• # ADMIN KEYS PROGRAMMED — Indicates how many admin keys
are programmed to the vehicle. Can be used to detect if an additional
spare key has been programmed to the vehicle.
Refer to Message center in the Instrument Cluster chapter for MyKey威
system warnings displays.
Using MyKey威 with remote start systems
MyKey威 is not compatible with non-Ford approved aftermarket remote
start systems. If you choose to install a remote start system please see
your authorized dealer for a Ford approved remote start system.
2012 05+ Mustang (197)
Owners Guide, 3rd Printing
USA (fus)
99
Page 100

Locks and Security
Vehicles equipped with traditional keys:
When using a Ford-approved remote start system, the default settings
will recognize the remote start system as an additional admin key with
its associated privileges. Owners of vehicles equipped with traditional
keys should program the remote start system as a MyKey威 in addition to
the key that they have already programmed as a MyKey威. To program
the remote start system as MyKey威, do the following:
1. Enter the vehicle and close all doors.
2. Remote start the vehicle using a remote start fob.
3. Follow Steps 1-4 in the Create a MyKey威 section.
Vehicles equipped with an intelligent access key (push button
start)
• It is not possible to program the remote start system as a MyKey威 on
vehicles equipped with intelligent access key (push button start).
Therefore, you should treat the remote start fob as you would any
other admin key. When the vehicle is started using remote start, the
system will stall the engine when you either enter the vehicle or shift
the vehicle into gear. Prior to the engine stall, the vehicle will have
administrative privileges. When you restart the engine, the vehicle will
identify the user as an admin or MyKey威 driver depending on the
settings of the actual key used to start the vehicle.
Note: For all vehicles, the number of MYKEY(S) PROGRAMMED or
ADMIN KEYS PROGRAMMED that is displayed in the MyKey威 system
status menus will include the remote start system as an additional key in
the total count. See the Check MyKey威 system status section.
Note: For all vehicles with remote start installed, it is possible to
program all ’real’ keys as MyKeys威, in which case, you will need to use
your remote start system to reset all MyKeys威 as admin keys by doing
the following:
1. Enter the vehicle, close all doors.
2. Remote start the vehicle using your remote start fob.
3. Follow Steps 1-4 in the Clear MyKey威 section.
100
2012 05+ Mustang (197)
Owners Guide, 3rd Printing
USA (fus)
 Loading...