

FoodSaver Vac 300 User Manual
EspañolFrançais English
User Manual
The Original Home Vacuum Packaging System
™
Vac 300

Welcome
THE FOODSAVER USER MANUAL
You have just purchased an appliance that will soon
have you wondering how you ever got by without it.
The FoodSaver Vac 300 is so convenient and versatile,
you’ll find yourself using it every day. We guarantee
that if you make room for it on your countertop,
you will quickly see how indispensable it becomes
in your kitchen.
You’ll Save Money, Time, and Effort.
◗ Meats, poultry, fish, and produce stay fresh and
flavorful 3-5 times longer in your freezer.
◗ No more freezer burn.
◗ Foods stay fresh longer in your refrigerator.
◗ Dry ingredients stay fresh in the pantry, too.
◗ Buy in bulk to reduce your grocery bills.
◗ Repackage your purchases in portions sized for
your family’s needs.
◗ Prepare meals in advance so when you don’t have
time to cook, you and your family will still have
great-tasting homemade meals.
◗ Take bags right from the freezer or refrigerator and
boil or microwave.
◗ Reduce waste and spoilage.
◗ Great for storing non-food items to keep them dry
and free of dust and mold.
◗ Stop silver from tarnishing because the metal is not
exposed to air.
Table of Contents
THE FOODSAVER USER MANUAL
1
Welcome
2 The FoodSaver Vac 300
Operating Instructions: How to...
4 Make a Bag with FoodSaver Rolls
6 Vacuum Package Using Ready-Made and Custom-Made
FoodSaver Bags
8 Care and Cleaning Instructions
9
Food Preparation and Storage Guide
16 Important Safeguards
17 Troubleshooting
20 Warranty and Ser vice Information
English
THE FOODSAVER USER MANUAL
3
About Vacuum Packaging
Air is left in most food storage
containers and plastic bags even
when sealed tightly. Oxygen in the
air is one of the main reasons that
food goes bad. It starts a chemical
change – robbing food of its nutritional value, texture, color, flavor,
and overall quality. The FoodSaver
Vac 300 removes the air from our
FoodSaver Bags and then seals the
bags so air cannot reenter.
FoodSaver Bags and Rolls
◗ FoodSaver Bags and Rolls are made
from a patented, 3-ply plastic
material with special channels that
remove the air. The outer layer of
nylon seals freshness in, while
locking air and moisture out.
◗ FoodSaver Bags and Rolls can go
straight from the freezer and
refrigerator to the microwave or
boiling water. They are reusable,
washable (including in the dishwasher), and recyclable.
◗ FoodSaver Bags are ready-made
in quart and gallon sizes to offer
convenient, one-step storage.
◗ FoodSaver Rolls come in two
widths, 8 inches and 11 inches,
which allow you to make customsized bags.
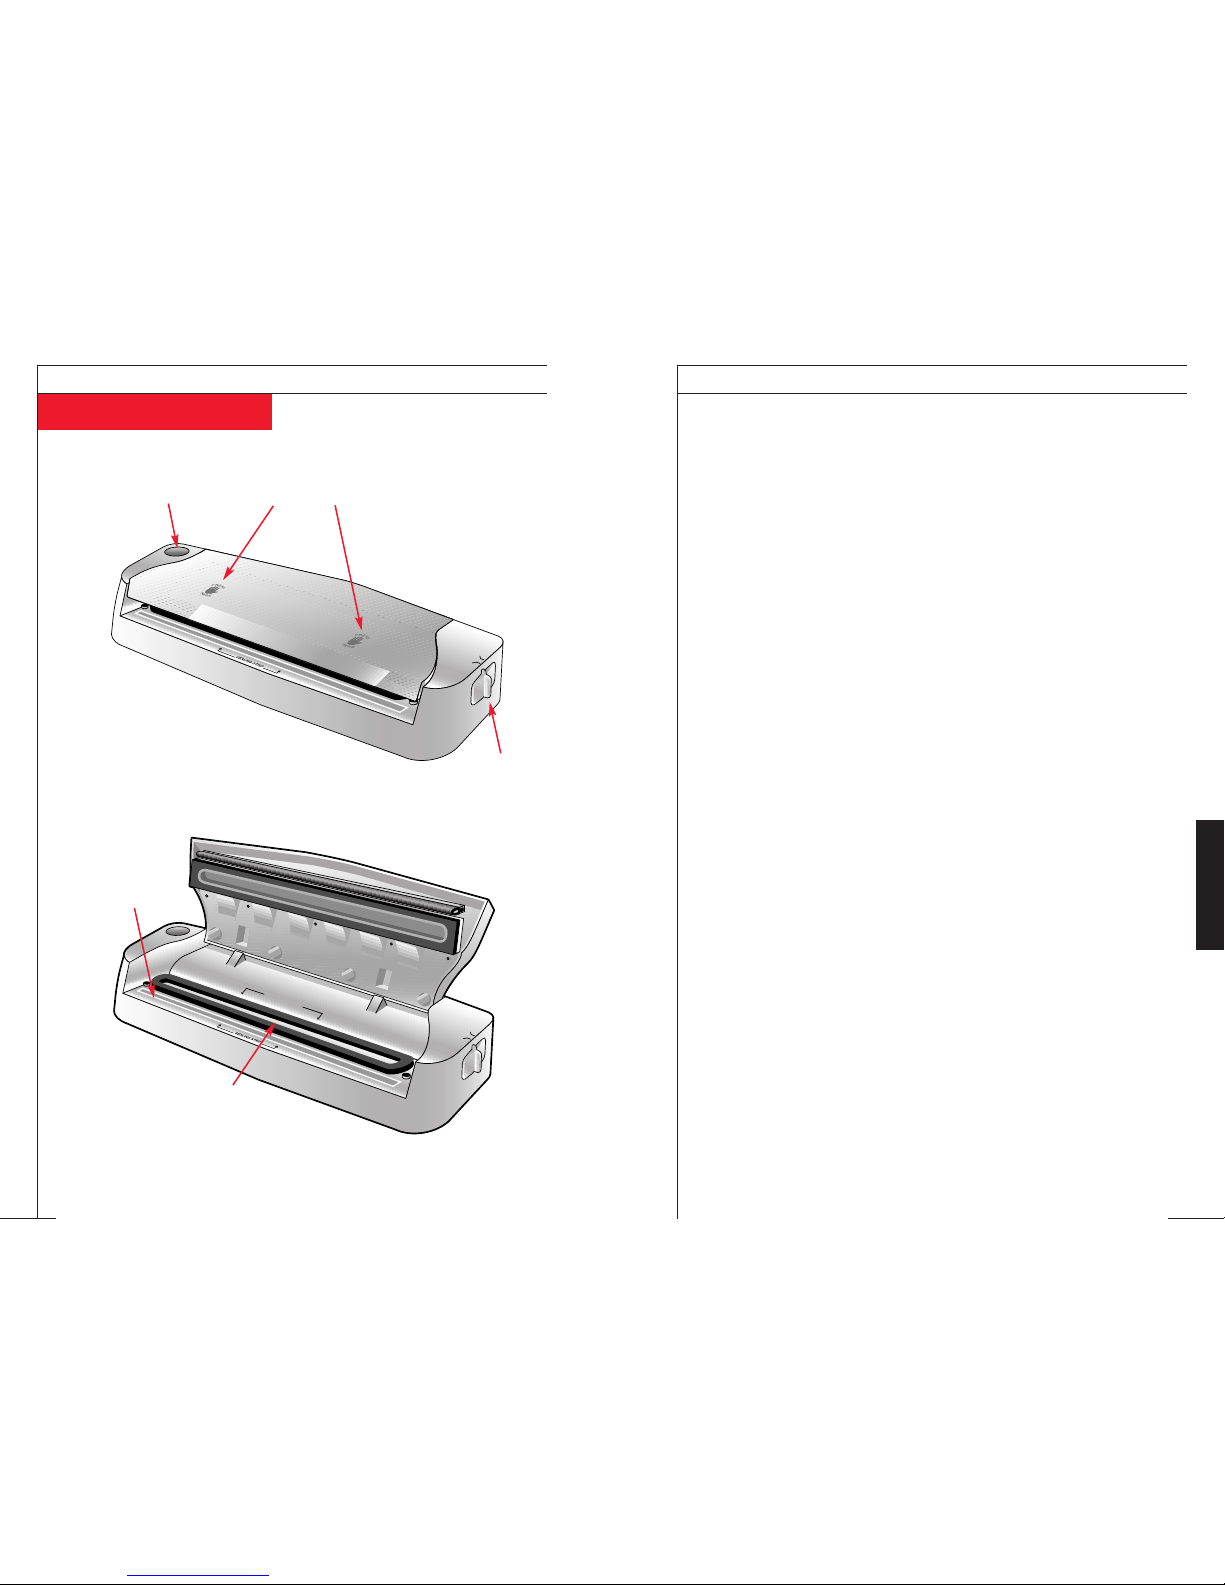
The FoodSaver Vac 300
THE FOODSAVER USER MANUAL
2
Seal O
nly
Vacuum
& Seal
V
A
C
U
U
M
C
H
A
N
N
E
L
S
e
a
l O
n
ly
V
a
c
u
u
m
&
S
e
a
l
Sealing Light
Selector
Switch
Sealing Strip
Vacuum
Channel
“Press Here” Icons
English
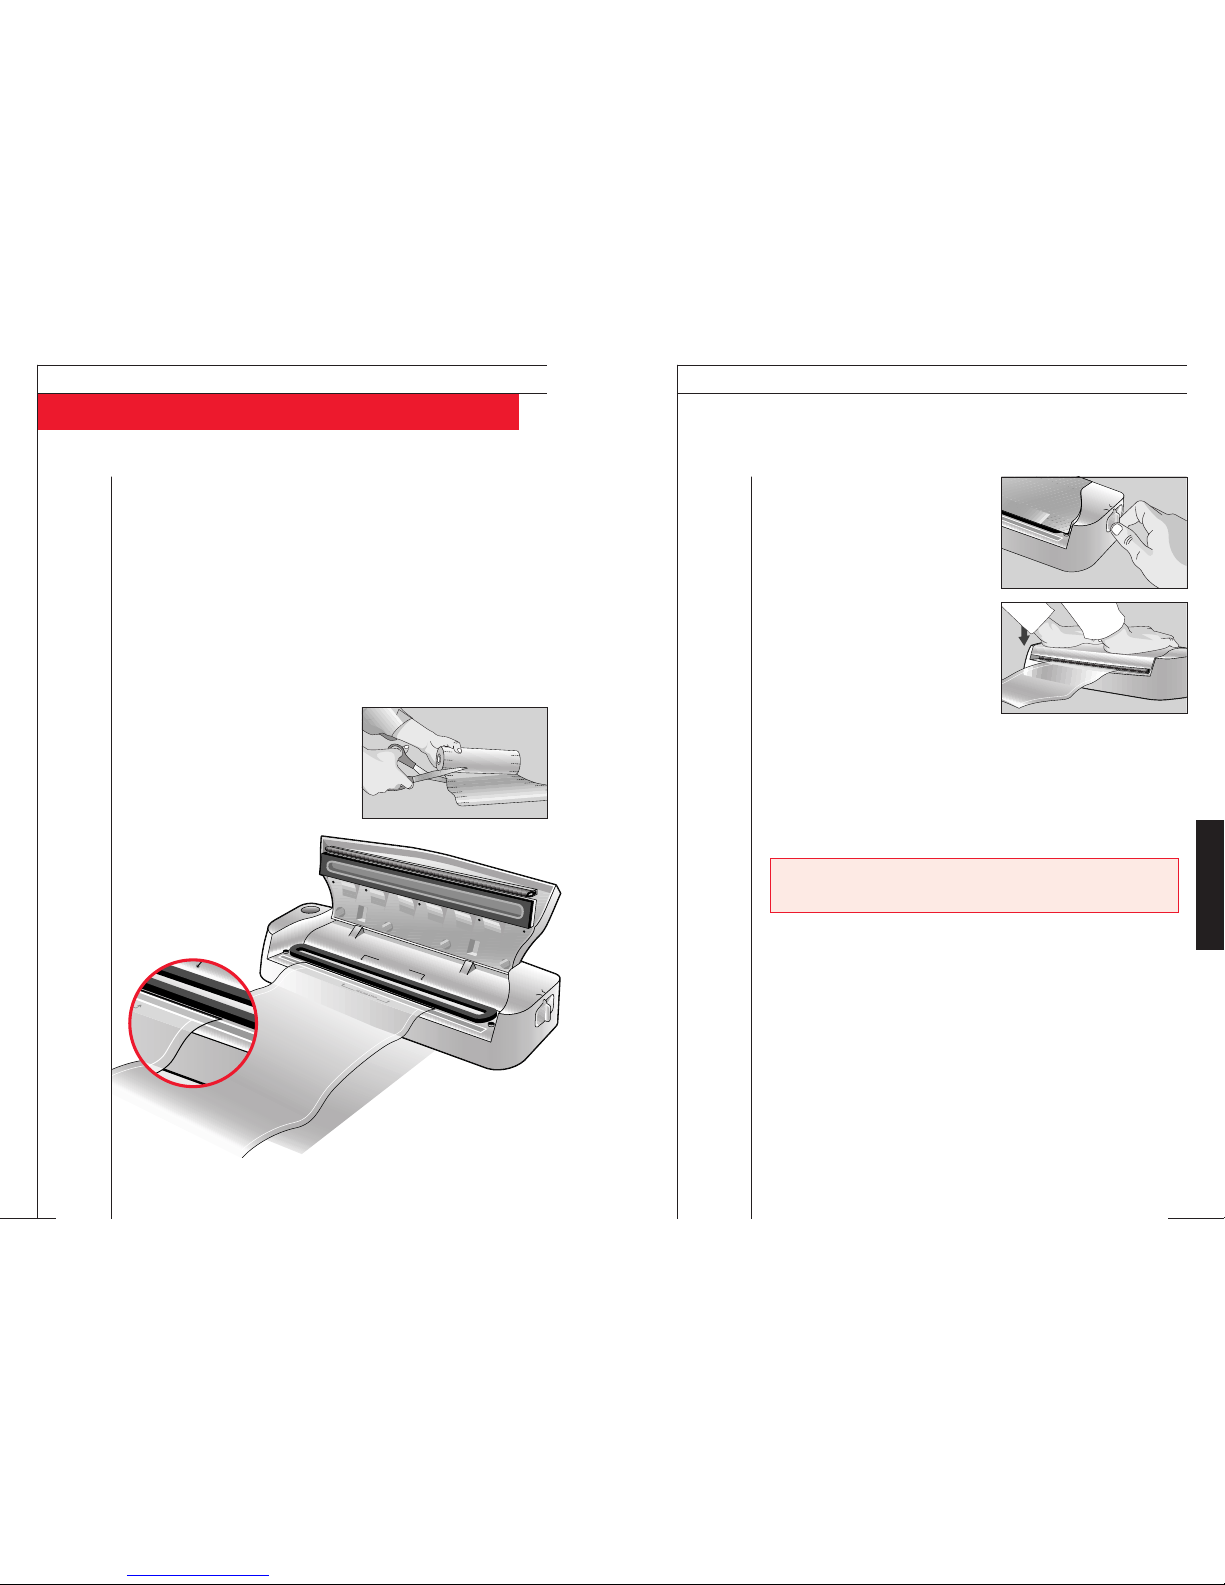
How to Make a Custom-Made Bag with FoodSaver Rolls
THE FOODSAVER USER MANUAL
4
THE FOODSAVER USER MANUAL
5
6 Close the lid.
7 Move the Selector Switch to the
“Seal Only” position.
8 Place your hands on the lid where
it says “PRESS HERE.” Press
down on the lid with both hands
and hold. The light will go on as
the Vac 300 seals the bag.
Wait
until the light turns off before
releasing the lid.
9
Lift up the lid and remove the bag.
10 You now have a custom-sized FoodSaver Bag.
You are now ready to vacuum package. Just follow the instructions
on page 6.
NOTE: Let the Vac 300 cool down for at least 20 seconds before
using it again.
S
e
a
l
O
n
l
y
V
a
c
u
u
m
&
S
e
a
l
English
When using FoodSaver Rolls you first need to make a bag, then
vacuum package your food in the bag. (If you are using readymade FoodSaver Bags, go to page 6.)
1 Place the Vac 300 on a flat, dry surface and plug the power cord
into a standard electrical outlet.
2 Lay the item(s) you want to vacuum package near the
FoodSaver Roll so you can see where to cut the bag material.
Leave at least 3 extra inches at one end of the bag and more if
you want to reseal or reuse the bag. (One inch per reseal.)
3 Cut the FoodSaver Roll to the
desired length, making sure you
cut straight. The marks on the side
of the roll are at 3" intervals and
will assist you in cutting straight.
4 Open the lid of the
Vac 300.
5 Place one end of the bag
on the sealing strip.
S
e
a
l O
n
ly
V
a
c
u
u
m
&
S
e
a
l
V
A
C
U
U
M
C
H
A
N
N
E
L
 Loading...