

Page 1

Fluke 434-II/435-II/437-II
Three Phase Energy and Power Quality Analyzer
Service Manual
PN 4822 872 05408
Febr. 2013
© 2013 Fluke Corporation, All rights reserved.
All product names are trademarks of their respective companies.
Page 2

Page 3

Table of Contents
Chapter Title Page
Safety Instructions ..........................................................................................1-1
1.1 Introduction..................................................................................................1-3
1.2 Safety Precautions........................................................................................1-3
1.3 Caution and Warning Statements ................................................................1-3
1.4 Symbols .......................................................................................................1-3
1.5 Impaired Safety............................................................................................1-4
1.6 General Safety Information .........................................................................1-4
1.7 Safe Handling and Use of Li-ion battery pack ............................................1-4
Characteristics.................................................................................................2-1
2.1 Introduction..................................................................................................2-3
List of Replaceable Parts................................................................................3-1
3.1 Introduction..................................................................................................3-3
3.2 How to Obtain Parts.....................................................................................3-3
3.3 Service Centers............................................................................................3-3
3.4 Final Assembly Parts...................................................................................3-4
3.5 Accessories ..................................................................................................3-7
Performance Verification................................................................................4-1
4.1 Introduction..................................................................................................4-3
4.2 Equipment Required for Verification ..........................................................4-4
4.3 Relation between Characteristics and Performance Test.............................4-4
4.4 General Instructions.....................................................................................4-5
4.5 Operating Instructions..................................................................................4-5
Resetting the Analyzer ..................................................................................4-5
4.6 Display and Backlight Test..........................................................................4-5
4.7. Verification of Current Inputs.....................................................................4-5
4.7.1 Preparation............................................................................................4-5
4.7.2 Accuracy...............................................................................................4-6
4.7.3 Bandwidth check of current channels (*).............................................4-7
4.8 Voltage Inputs..............................................................................................4-8
4.8.1 Introduction ..........................................................................................4-8
4.8.2 Verification of voltage inputs in 120 V range......................................4-9
4.8.3 Verification of voltage inputs in 230 V range......................................4-11
4.8.4 Verification of voltage inputs in 400 V range......................................4-13
4.8.5 Verification of voltage inputs in 6 kV range (Transients)....................4-15
4.9 Channel Isolation (*) ...................................................................................4-17
i
Page 4

Fluke 434-II/435-II/437-II
Service Manual
Calibration Adjustment................................................................................... 5-1
5.1 General.........................................................................................................5-3
5.2 Calibration Procedure Steps.........................................................................5-4
5.3 Starting The Calibration...............................................................................5-4
5.4 Contrast Calibration Adjustment .................................................................5-6
5.5 Warming Up ................................................................................................5-7
5.6 Final Calibration..........................................................................................5-8
5.7 Save Calibration Data And Exit...................................................................5-12
Disassembling the Analyzer .......................................................................... 6-1
6.1. Introduction.................................................................................................6-3
6.2. Disassembly & Reassembly Procedures.....................................................6-3
5.1.1 Introduction ..........................................................................................5-3
5.1.2 Calibration number and date ................................................................5-3
5.1.3 General instructions..............................................................................5-3
5.1.4 Equipment required for calibration ......................................................5-4
5.6.1 Warming Up Final................................................................................5-8
5.6.2 Offset adjustment..................................................................................5-8
5.6.3 Low voltage and current gain adjustment ............................................5-10
5.6.4 Current gain 10x...................................................................................5-10
5.6.5 Voltage gain adjustment.......................................................................5-10
6.2.1 Required Tools .....................................................................................6-3
6.2.2 Removing the Tilt Stand, Hang Strap, and Side Strap .........................6-4
6.2.3 Opening the Analyzer, Removing the Battery Pack.............................6-4
6.2.4 Getting access to Top Side of PCA......................................................6-5
6.2.5 Getting access to Bottom Side of PCA.................................................6-5
6.2.6 Getting access to LCD, Keypad Foil and Keypad................................6-5
6.2.7 Pictures Showing Disassembly Steps...................................................6-6
ii
Page 5

Chapter 1
Safety Instructions
Title Page
1.1 Introduction..................................................................................................1-3
1.2 Safety Precautions........................................................................................1-3
1.3 Caution and Warning Statements ................................................................1-3
1.4 Symbols .......................................................................................................1-3
1.5 Impaired Safety............................................................................................1-4
1.6 General Safety Information .........................................................................1-4
1.7 Safe Handling and Use of Li-ion battery pack ............................................1-4
1-1
Page 6

Page 7
Safety Instructions
1.1 Introduction 1
1.1 Introduction
Read these pages carefully before beginning to install and use the Analyzer.
The following paragraphs contain information, cautions and warnings which must be
followed to ensure safe operation and to keep the Analyzer in a safe condition.
Warning
Servicing described in this manual is to be done only by
qualified service personnel. To avoid electrical shock, do not
service the Analyzer unless you are qualified to do so.
1.2 Safety Precautions
For the correct and safe use of this Analyzer it is essential that both operating and service
personnel follow generally accepted safety procedures in addition to the safety
precautions specified in this manual. Specific warning and caution statements, where
they apply, will be found throughout the manual. Where necessary, the warning and
caution statements and/or symbols are marked on the Analyzer.
1.3 Caution and Warning Statements
Caution
Used to indicate correct operating or maintenance procedures
to prevent damage to or destruction of the equipment or other
property.
Warning
Calls attention to a potential danger that requires correct
procedures or practices to prevent personal injury.
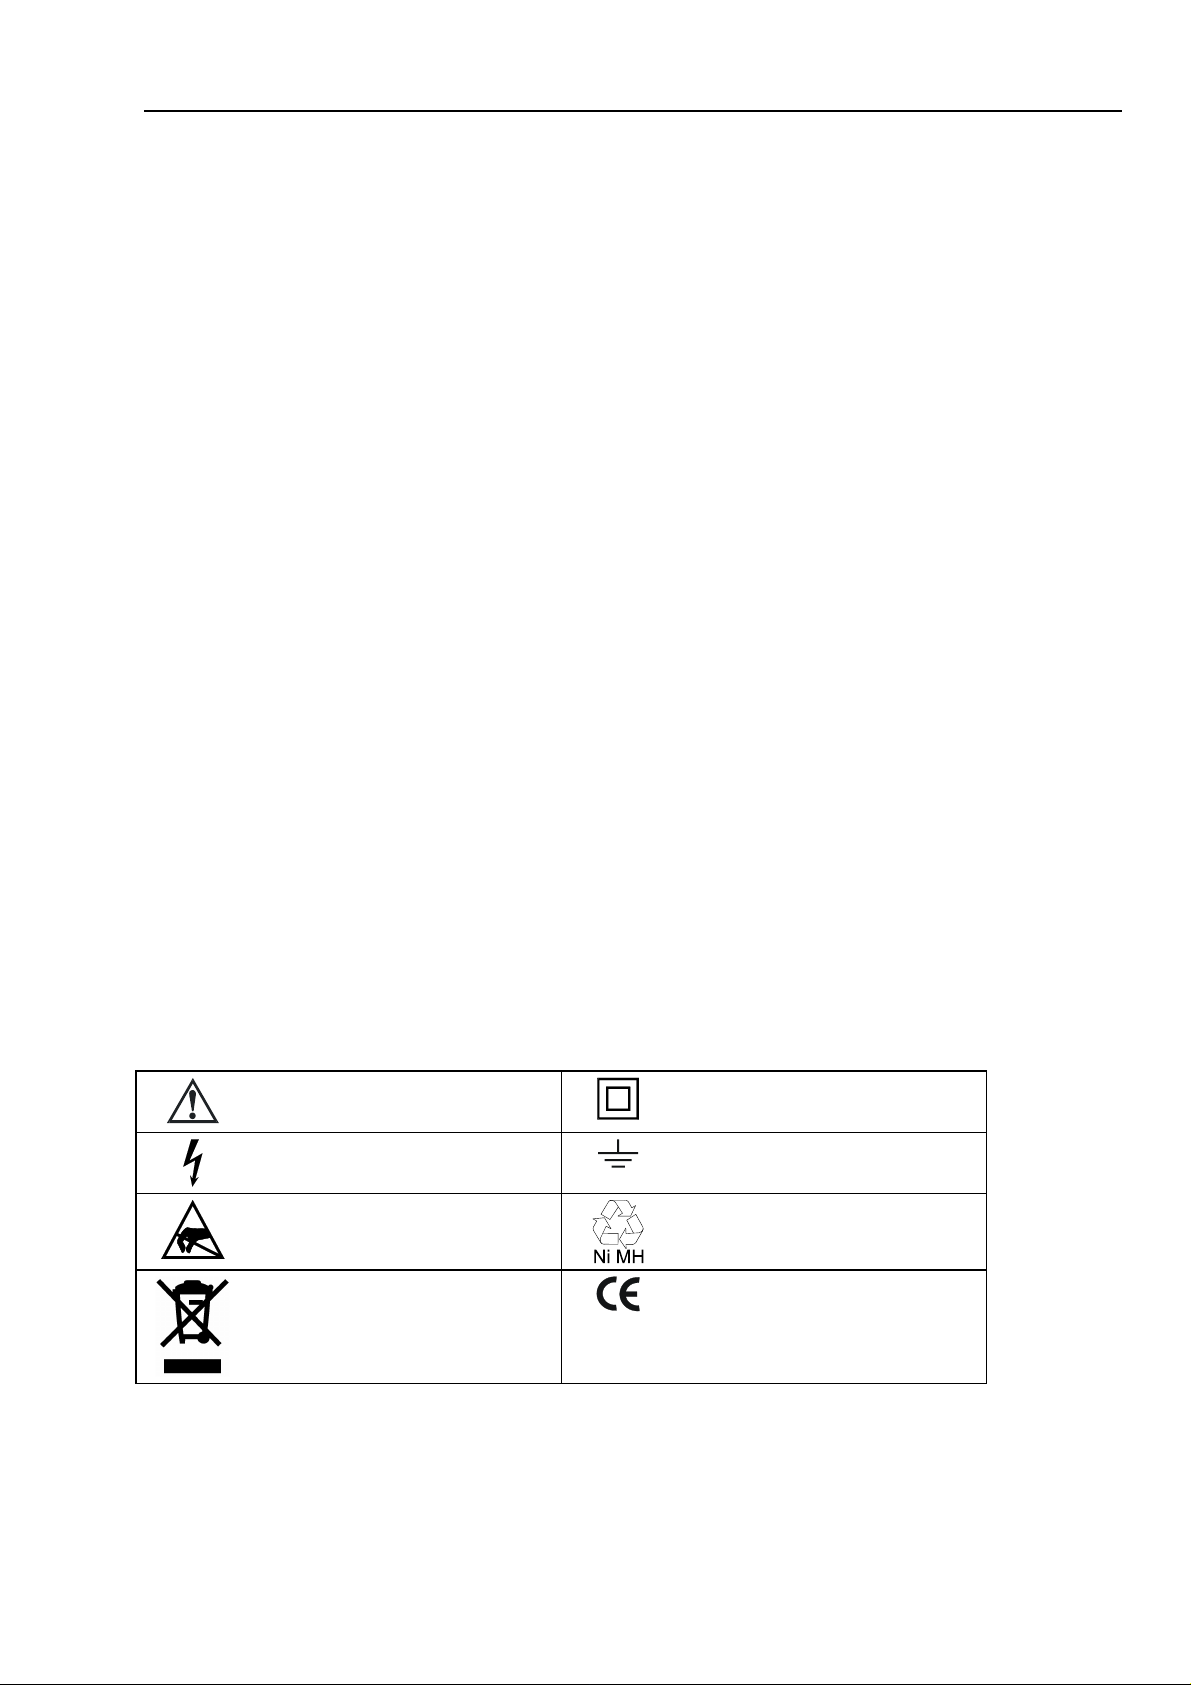
1.4 Symbols
The following symbols are used on the Analyzer, in the Users Manual, in this Service
publication, or on spare parts for this Analyzer.
See explanation in Users Manual
Live voltage
Static sensitive components
(black/yellow).
Do no dispose of this product as
unsorted municipal waste. Go to
Fluke’s website for recycling
information
DOUBLE INSULATION (Protection
Class)
Earth Ground
Recycling information
Conformité Européenne
1-3
Page 8

Fluke 434-II/435-II/437-II
Service Manual
Battery Safety Approval
Safety Approval
RoHS China
1.5 Impaired Safety
Whenever it is likely that safety has been impaired, the Analyzer must be turned off and
disconnected from line power. The matter should then be referred to qualified
technicians. Safety is likely to be impaired if, for example, the Analyzer fails to perform
the intended measurements or shows visible damage.
1.6 General Safety Information
Warning
Removing the Analyzer covers or removing parts, except those
to which access can be gained by hand, is likely to expose live
parts and accessible terminals which can be dangerous to life.
Conforms to relevant Australian
standards
Safety Approval
Current Clamp
The Analyzer shall be disconnected from all voltage sources before it is opened.
Capacitors inside the Analyzer can hold their charge even if the Analyzer has been
separated from all voltage sources.
When servicing the Analyzer, use only specified replacement parts.
1.7 Safe Handling and Use of Li-ion battery pack
The Analyzer uses a rechargeable Li-ion battery pack model BP290 (26 Wh, standard) or
BP291 (52 Wh, optional).
For instructions how to safely handle and use this battery pack refer to Chapter 1,
General Aspects, Paragraph ‘Safe Use of Li-ion Battery Pack’ in the Users Manual of
Fluke 434-II/435-II/437-II.
The Users Manual can be downloaded from Fluke’s website.
1-4
Page 9

Chapter 2
Characteristics
Title Page
2.1 Introduction..................................................................................................2-3
2-1
Page 10

Page 11

Characteristics
2.1 Introduction 2
2.1 Introduction
Performance Characteristics
For the specifications refer to the “Characteristics” Chapter 27 in the Fluke 434-II/435II/437-II Users Manual.
The Users Manual can be downloaded from Fluke’s website.
Specifications are based on a one year calibration cycle.
2-3
Page 12

Fluke 434-II/435-II/437-II
Service Manual
2-4
Page 13

Chapter 3
List of Replaceable Parts
Title Page
3.1 Introduction..................................................................................................3-3
3.2 How to Obtain Parts.....................................................................................3-3
3.3 Service Centers............................................................................................3-3
3.4 Final Assembly Parts...................................................................................3-4
3.5 Accessories ..................................................................................................3-7
3-1
Page 14

Fluke 434-II/435-II/437-II
Service Manual
3-2
Page 15

List of Replaceable Parts
3.1 Introduction 3
3.1 Introduction
This chapter contains an illustrated list of replaceable parts for the models 434-II, 435-II,
and 437-II Power Quality Analyzer Series II.
Parts are listed by assembly; alphabetized by item number or reference designator. Each
assembly is accompanied by an illustration showing the location of each part and its item
number or reference designator. The parts list gives the following information:
• Description
• Ordering code
Caution
Electrical components and in particular active components
such as IC’s, transistors and diodes may be damaged by static
discharge.
Handling and servicing static sensitive components and
assemblies should be done only at a static free workstation by
qualified personnel.
3.2 How to Obtain Parts
In the event that the part ordered has been replaced by a new or improved part, the
replacement will be accompanied by an explanatory note and installation instructions, if
necessary.
To ensure prompt delivery of the correct part, include the following information when
you place an order:
• Instrument model (for example Fluke 435-II), 12 digit instrument code (9444 ... ....),
and serial number (15500001). The items are printed on the type plate on the bottom
cover.
• Ordering code
• Description
• Quantity
3.3 Service Centers
To locate an authorized service center, call Fluke using any of the phone numbers listed
below, or visit on the World Wide Web: www.fluke.com
USA and Canada: 1-888-99-FLUKE (1-888-993-5853)
Europe: +31-40-2675200
Anywhere in the world: +1-425-446-5500
3-3
Page 16

Fluke 434-II/435-II/437-II
Service Manual
3.4 Final Assembly Parts
See Table below. In Chapter 6 – Disassembling the Analyzer, pictures are present giving
an impression on how the instrument is constructed.
Dedicated pictues with item numbers are scheduled for a future revision of this Service
Information.
Part or Kit Ordering Code Consists of Following Parts Figure/Item nr
Case Set 43x-II 4161577 Front case (excl. lens/decal) 3-2/21
Inner lens (for double isolation) -- Dustseal long (2x, around screen) -- Dustseal short (2x, around screen) -- Case seal (white) 3-2/27
Bottom case assy 3-1/3
Battery door 3-1/16
Adhesive foam (for battery door) -- Quarter turn screw (2x) -- Standup bracket 3-1/18
Quarter turn screw 948609 For battery door (1x) --Decal Set for Input
Sockets, Colored
Decal Set for Input
Sockets, Black &
White
Li-ion Battery Pack BP290 (standard) 26 Wh, 10.8 V 3-1/17
Li-ion Battery Pack BP291 (optional) 52 Wh, 10.8 V 3-1/17
Lens/decal 434-II
Lens/decal 435-II
Lens/decal 437-II
LCD assy Flk 43x-II
and Flk-190-II
Topholster 43x-II (Input
Cover)
Mounting Material Set
43x-II
Dowel (6 pcs/instr, to fix side strap +
Steel plate for Kensington lock (1
Selftapping screw blank (6 pcs/instr,
Screw M3x6 (2 pcs/instr, to fix
Square nut M3 (2 pcs/instr, to fix
Selftapping screw blank (6 pcs/instr,
Table 3-1. Final Assembly Parts and Kits
4137197 Supplied with Analyzer as standard
accessory
4137201 Stuck on Analyzer at delivery ---
4161589
4161592
4161605
3981844 LCD module
LCD fixation foam
4161610 Excluding decals 3-1/1
4161622
Selftapping screw black (2 pcs/instr,
to fix bottom case and battery door
to fix Main PCA module to Front
--- ---
--- ---
--- ---
Flat cable
to fix topholster)
hang strap)
pce/instr)
detection)
bottom holster)
bottom holster)
---
3-2/23
3-1/2
3-1/5
3-1/9
3-1/4
3-1/8
3-1/12
3-1/12
3-2/22
3-4
Page 17

List of Replaceable Parts
Part or Kit Ordering Code Consists of Following Parts Figure/Item nr
Case)
Side Strap 3945370 Can be fixed on Left or Right side ---
Hang Strap 946769 Can be fixed op Top Side of
Instrument
Bottom Holster Set
43x-II
Cover for USB, yellow/black 3-1/10
Cover for right side, yellow 3-1/11
Connector Set 43x-II 4161654 Mini USB connector J1300 ---
Faston pin to battery (5 pcs/instr) -- Cushion (Fits around faston pin) -- Sealing piece USB, black (1
Sealing piece, right side, black(1
Battery Door Detection (opto device) 3-1/6
Power Connector DC -- Keyboard connector 24p J1000 -- LCD connector 20p J1201 -- LCD backlight conn 4p J1200 ---
Keypad 43x-II 4161679 --- 3-2/26
Keypad Foil 43x-II 4161687 (Incl. Flat Cable) 3-2/20
Cable DB-9 to Mini-
USB
Input Socket Block
43x-II
4161646 Bottom Holster assy 3-1/7
pce/instr)
pce/instr)
4161693 For use of GPS 430 option with Flk
43x-II
4161668
BNC black (4 pcs/instr)
Banana jack black (4 pcs/instr)
Banana jack green (1 pce/instr)
O-ring 11x1 mm
O-ring 12x2 mm
Sealing strip, flexible, fits around
inputs
3.4 Final Assembly Parts 3
---
3-2/25
3-2/24
---
3-1/14
---
---
---
---
3-1/13
Note
The Analyzer contains a Li-ion battery. Do not mix with the
Li-Ion
3-5
solid wastestream. Spent batteries should be disposed of by a
qualified recycler or hazardous materials handler.
Page 18

Fluke 434-II/435-II/437-II
Service Manual
Figure 3-1. Parts and kits 1.
Figure 3-2. Parts and kits 2.
3-6
Page 19

List of Replaceable Parts
3.5 Accessories 3
3.5 Accessories
Refer to the Fluke 434-II/435-II/437-II Users Manual, Chapter 26 – Tips and Maintenance, for a
list with standard and optional accessories.
The Users Manual can be downloaded from the Fluke website.
3-7
Page 20

Fluke 434-II/435-II/437-II
Service Manual
3-8
Page 21

Chapter 4
Performance Verification
Title Page
4.1 Introduction..................................................................................................4-3
4.2 Equipment Required for Verification ..........................................................4-4
4.3 Relation between Characteristics and Performance Test.............................4-4
4.4 General Instructions.....................................................................................4-5
4.5 Operating Instructions..................................................................................4-5
Resetting the Analyzer ..................................................................................4-5
4.6 Display and Backlight Test..........................................................................4-5
4.7. Verification of Current Inputs.....................................................................4-5
4.7.1 Preparation............................................................................................4-5
4.7.2 Accuracy...............................................................................................4-6
4.7.3 Bandwidth check of current channels (*).............................................4-7
4.8 Voltage Inputs..............................................................................................4-8
4.8.1 Introduction ..........................................................................................4-8
4.8.2 Verification of voltage inputs in 120 V range......................................4-9
4.8.3 Verification of voltage inputs in 230 V range......................................4-11
4.8.4 Verification of voltage inputs in 400 V range......................................4-13
4.8.5 Verification of voltage inputs in 6 kV range (Transients)....................4-15
4.9 Channel Isolation (*) ...................................................................................4-17
4-1
Page 22

Fluke 434-II/435-II/437-II
Service Manual
4-2
Page 23

Performance Verification
4.1 Introduction 4
4.1 Introduction
Warning
Procedures in this chapter should be performed by qualified
service personnel only. To avoid electrical shock, do not
perform any servicing unless you are qualified to do so.
The Fluke 434-II/435-II/437-II Three Phase Energy & Power Quality Analyzer (referred
to as Analyzer) should be calibrated and in operating condition when you receive it.
The following performance tests are provided to ensure that the Analyzer is in a proper
operating condition. If the Analyzer fails any of the performance tests, calibration
adjustment (see Chapter 5) and/or repair in a Fluke Service Center is necessary.
The Performance Verification Procedure is based on the specifications, listed in the
“Characteristics” Chapter 26 in the Fluke 434-II/435-II/437-II Users Manual. The Users
Manual can be downloaded from Fluke’s website. Specifications are based on a one year
calibration cycle.
The values given here are valid for ambient temperatures between 15 °C and 35 °C.
Analyzer performance can be checked with single phase 50 and 60 Hz test signals such
as generated by a Calibrator Fluke 5700A.
The tests mainly verify accuracy and offset of voltage and current inputs.
Tests indicated with (*) are optional. They can be done to check if the Analyzer’s
hardware (analog input channels) is OK. Bear in mind that the outcome of these checks is
rather influenced by hardware sanity than by Calibration Adjustment.
Accuracy of all other Analyzer functions is linked to input accuracy and is embedded in
the Analyzer’s software. This link is tested extensively for each new software release.
This testing is done with the Fluke 6100A Electrical Power Standard and 6101A
Auxiliary units. This setup allows multiphase operation and direct testing of measuring
functions such as flicker, harmonics, interharmonics, fluctating harmonics, dips & swells,
unbalance and also compounds of these disturbances.
Fluke 6100A and 6101A are recommended for those who want to test all measuring
functions of Fluke 434-II/435-II/437-II.
Tests are done in V/A/Hz mode (unless indicated otherwise).
All indicated voltages and currents are rms values.
The Performance Verification Procedure is a quick way to check most of the Analyzer’s
specifications. Because of the highly integrated design of the Analyzer, it is not always
necessary to check all features separately.
Always put the Analyzer in STBY (Stand By) mode before changing test leads.
Fluke 5700A has a toggle key OPR/STBY with function indication in the display.
Important: during all tests, signal must be applied to voltage channel A/L1. A/L1 is the
reference channel.
The verification procedure assumes that the test engineer is familiar with the operation of
Analyzer and Calibrator.
4-3
Page 24

Fluke 434-II/435-II/437-II
Service Manual
4.2 Equipment Required for Verification
The primary source instrument used in the verification procedures of Fluke 434-II/435II/437-II is the Fluke 5700A. If not available, you can substitute another Calibrator as
long as it meets the minimum test requirements.
• Fluke 5700A Calibrator.
• Test Leads (4x), as supplied with the Calibrator.
• Extra set of test leads capable to withstand 1000 V rms.
• 50Ω Coax Cables (3 pieces required), Fluke PM9092 (0.5m, set of 3).
• Male BNC to Dual Female BNC adapter (3 pieces required), Fluke PM9093.
• Dual Banana Jack to female to male BNC (1 piece required), Fluke PM9082.
• 50Ω feed through termination (4 pieces required): Fluke PM9585.
• Battery Charger as supplied with the Analyzer.
4.3 Relation between Characteristics and Performance Test.
Test limits used are based upon the specifications in the Analyzer’s Users Manual. This
manual can be downloaded from www.fluke.com
Note: for good recognition it is recommended to use a black lead between the
Calibrator’s LO and the Analyzer’s Ground banana input.
.
Accuracy requirements are as follows:
• Accuracy of current channels (Arms AC+DC):
0.5% of measurement ± 5 counts.
Note: 5 counts equals 5 A @ Amps Scaling x1 AC+DC; 5 counts equals 0.5 A @
Amps Scaling x10 AC only.
• Accuracy of voltage channels Fluke 434-II (Vrms AC+DC):
0.5% of nominal voltage Vnom as adjusted under SETUP, Vnom (120 V, 230 V, or
400 V) @ input voltage range 1 ... 1000 Vrms.
• Accuracy of voltage channels Fluke 435-II/437-II (Vrms AC+DC):
0.1% of nominal voltage Vnom as adjusted under SETUP, Vnom (120 V, 230 V, or
400 V) @ input voltage range 1 ... 600 Vrms.
Input voltage range 600 ... 1000 Vrms: accuracy 0.1% of reading.
• Accuracy of voltage channels 6 kV (Transient capture rms reading):
2.5% of nominal voltage Vnom (e.g. 400 V).
• Bandwidth of current channels (Arms, Absolute):
5% of measurement ± 5 counts.
Note: Bandwidth measurement is based on the accuracy of the harmonics mode. The
Analyzer can measure harmonics up to the 50th. A nominal fundamental frequency
of 60 Hz requires a bandwidth of 50 x 60 = 3000 Hz.
Note: 5 counts equals 5 A @ Amps Scaling x1 AC+DC; 5 counts equals 0.5 A @
Amps Scaling x10 AC only.
• Bandwidth of voltage channels (Vrms, Absolute):
434-II/435-II/437-II: 5% of measurement (if applied voltage is ≥ 1 % of nominal
voltage).
Note: Bandwidth measurement is based on the accuracy of the harmonics mode. The
Analyzer can measure harmonics up to the 50th. A nominal fundamental frequency
of 60 Hz requires a bandwidth of 50 x 60 = 3000 Hz.
• Channel Isolation (Cross talk, Voltage to current input, x1, AC+DC):
Cross Talk from voltage into current channels: - 95 dB (= 56,234 times).
4-4
Page 25

Performance Verification
4.4 General Instructions 4
4.4 General Instructions
Follow these general instructions for all tests:
• It is recommended to remove the SD memory card from the Analyzer during the
performance test to avoid that measuring data is written on it during the test. The SD
card is located behind the battery door.
• For all tests, power the Analyzer with its power adapter. The battery pack must be
installed and charged sufficiently.
• Allow the Calibrator to satisfy its specified warm-up period.
• For each test point , wait for the Calibrator to settle.
• Allow the Analyzer a minimum of 30 minutes to warm up.
• One division on the LCD consists of 25 pixels (1 pixel = 0.04 division).
4.5 Operating Instructions
Resetting the Analyzer
Proceed as follows:
• Press
• Press and hold
• Press and release
to turn the Analyzer off.
SAVE
SCREEN
.
to turn the Analyzer on.
• Wait until the Analyzer has beeped twice, and then release
Analyzer has beeped twice, the RESET was successful. This reset is used as start
condition for the tests.
• If the SD card has been removed, press
F1
• Next press
- CANCEL.
4.6 Display and Backlight Test
Proceed as follows to test the display and the backlight:
1. Press
Language selection screen.
2. Disconnect the Power Adapter, and verify that the backlight is dimmed.
3. Connect the Power Adapter and verify that the backlight brightness increases.
to turn the Analyzer on. Press
F5
F5
- CLOSE.
- CLOSE and
SAVE
SCREEN
F1
. When the
to remove the
4.7. Verification of Current Inputs
4.7.1 Preparation
Proceed as follows:
F1
• Reset the Analyzer and press
SETUP
• Press
. Then press F4 – MANUAL SETUP and use arrow keys and ENTER
key to set the Analyzer to 3-phase WYE, 60 Hz, 120 V.
4-5
- CANCEL.
Page 26

Fluke 434-II/435-II/437-II
A
A
R
Service Manual
• Set the Analyzer in DEMO mode: press SETUP, press F1 - USER PREF, and select
4.7.2 Accuracy
Proceed as follows:
1. Must be checked for all phases A/L1, B/L2, C/L3, and N(eutral).
2. Set the Calibrator to 1 V, 60 Hz and STBY.
3. Connect the LO output (black) with the Ground (green) input of the Analyzer.
Set Clamp for Phase and Neutral (select with F4) to 1 mV/A, 1000 A, x1, 1:1. To
confirm press F5 – BACK.
DEMO ON with F2. Demo mode gives increased sensitivity at the voltage inputs.
Warning: input voltage must not exceed 2 V rms in DEMO mode!
Connect the HI output (red) with all current (BNC) inputs and the A/L1, B/L2, C/L3,
and N voltage banana inputs of the Analyzer. Refer to Figure 4.2.
CALIBRATOR
NORMAL
HI
LO
POWER
DAPTER
BC 430
NALYZE
INPUT
BLOCK
RED
A/L1
PM 9093 PM 9093 PM 9093
PM 9082
B/L2 C/L3
A/L1
B/L2 C/L3
PM 9092
Figure 4-1. verification of Current Inputs
N
GND
N
4. Set the Calibrator to OPR (Operate, indicated by a green LED in the OPR key or on
the display).
5. On the Analyzer press MENU, select Volts/Amps/Hertz, press F5 – OK to enter the
function.
6. Use the up/down arrow keys to get A rms readout in the screen area. Check for an A
rms readout between 990 ... 1010 A (tolerance 5 + 5 A = 10 A).
7. Set the Calibrator to 0 Hz, 0 V and then to OPR.
8. On the Analyzer check for a current readout A rms between 0 ... 5 A.
4-6
Page 27

Performance Verification
4.7. Verification of Current Inputs 4
9. Press
SETUP
. Then press F4 – MANUAL SETUP and use arrow keys and ENTER
key to set the Analyzer to Current Clamp sensitivity (Phase and Neutral: select with
F4) to 1 mV/A, 100 A, x10 AC only, 1:1.
10. On the Analyzer press MENU, select Volts/Amps/Hertz, press F5 – OK to enter the
function.
11. Set the Calibrator to 100 mV, 60 Hz and OPR.
12. Use the up/down arrow keys to get A rms readout in the screen area. Check for an A
rms readout between 99.0 ... 101.0 A (tolerance 0.5 + 0.5 A = 1.0 A).
4.7.3 Bandwidth check of current channels (*)
Is an optional test. Proceed as follows:
1. Set the Calibrator to 100 mV, 60 Hz and OPR.
2. The current channels must be checked one by one. Use the Calibrator’s edit field
function (AMPL/FREQ key) to adjust a readout of 1000 A for the current channel to
be checked.
3. Increase the frequency to 3 kHz. Check for a readout of 94.5 A or more (table 4-1).
Table 4-1. Bandwidth Check of Current Channels (x10, AC only)
Current Channel to be verified Readout at 60 Hz (adjust
Calibrator with EDIT FIELD)
A/L1 100.0 A 94.5 A or more
B/L2 100.0 A 94.5 A or more
C/L3 100.0 A 94.5 A or more
N 100.0 A 94.5 A or more
Readout at 3 kHz
4. Set the Calibrator to STBY.
5. Press
SETUP
. Then press F4 – MANUAL SETUP and use arrow keys and ENTER
key to set the Analyzer to Current Clamp sensitivity (Phase and Neutral: select with
F4) to 1 mV/A, 1000 A, x1 AC + DC, 1:1.
6. The current channels must be checked one by one.
Set the Calibrator to 1 V, 60 Hz. Use the Calibrator’s edit field function
(AMPL/FREQ key) to adjust a readout of 1000 A for the current channel to be
checked.
7. Increase the frequency to 3 kHz. Check for a readout of 945 A or more (table 4-2).
4-7
Page 28

Fluke 434-II/435-II/437-II
Service Manual
Table 4-2. Bandwidth Check of Current Channels (x1, AC + DC)
Current Channel to be verified Readout at 60 Hz (adjust
Calibrator with EDIT FIELD)
A/L1 1000 A 945 A or more
B/L2 1000 A 945 A or more
C/L3 1000 A 945 A or more
N 1000 A 945 A or more
Readout at 3 kHz
8. Set the Calibrator to STBY.
9. Switch the Analyzer’s DEMO mode to OFF.
10. Disconnect the leads from the current inputs.
4.8 Voltage Inputs
4.8.1 Introduction
WARNING
Dangerous voltages will be present on the calibration source
and connecting cables during the following steps. Ensure that
the Calibrator is in standby mode before making any
connection between the Calibrator and the Analyzer.
Proceed as follows:
1. Press SETUP, press F1 - USER PREF, and select DEMO OFF with F2.
2. To check the A/L1, B/L2, C/L3 inputs, connect the N input to Ground (See Figure 4-
3). N now will give zero reading.
4-8
Page 29

Performance Verification
A
A
R
A
A
R
CALIBRATOR
NORMAL
HI
LO
POWER
DAPTER
A/L1
B/L2 C/L3
N
GND
BC 430
4.8 Voltage Inputs 4
A/L1
B/L2 C/L3
N
NALYZE
INPUT
BLOCK
Figure 4-2. Checking the A/L1, B/L2, and C/L3 voltage inputs
3. To check the N input, connect the N input with the adjacent C/L3 input. A/L1, B/L2,
C/L3 now will give zero reading. Refer to Figure 4-4.
CALIBRATOR
NORMAL
HI
LO
POWER
DAPTER
A/L1
B/L2 C/L3
N
GND
BC 430
A/L1
B/L2 C/L3
N
NALYZE
INPUT
BLOCK
Figure 4-3. Checking the N (Neutral) voltage input
4.8.2 Verification of voltage inputs in 120 V range
Accuracy Check of Channel A/L1, B/L2, C/L3:
4-9
Page 30

Fluke 434-II/435-II/437-II
Service Manual
1. Set the Analyzer to 120 V, 60 Hz nominal (SETUP menu, arrow and ENTER keys).
2. To check the A/L1, B/L2, C/L3 inputs: connect the N input to Ground (See Figure 4-
3. Set the Calibrator to 60 Hz, 60 V and then to OPR.
4. Fluke 434-II: check for a voltage readout V rms between 59.4 ... 60.6 V.
5. Check the 120 V range according to the table below.
Set Calibrator to Readout at Voltage Channels
60 V, 60 Hz, OPR Fluke 434-II: 59.4 ... 60.6 V
120 V, 60 Hz, OPR Fluke 434-II: 119.4 ... 120.6 V
240 V, 60 Hz, OPR Fluke 434-II: 239.4 ... 240.6 V
Press MENU, select Volts/Amps/Hertz, press F5 - OK.
3).
Fluke 435-II/437-II: check for a voltage readout V rms between 59.88 ... 60.12 V.
Table 4-3. Accuracy Check of Voltage Channels A/L1, B/L2, C/L3
Fluke 435-II /437-II: 59.88 ... 60.12 V
Fluke 435-II /437-II: 119.88 ... 120.12 V
Fluke 435-II /437-II: 239.88 ... 240.12 V
6. Set the Calibrator to STBY.
Optional Test. Bandwidth Check of Channel A/L1, B/L2, C/L3 (*):
7. Set the Calibrator to 120 V, 60 Hz and OPR.
8. Now check the voltage channels one by one. Use the Calibrator’s field edit function
(AMPL/FREQ key) to adjust the Calibrator to an Analyzer readout of 120.0 V /
120.00 V.
9. Increase the frequency to 3 kHz.
Fluke 434-II: check for a readout of 114.0 V or more.
Fluke 435-II/437-II: check for a readout of 114.00 V or more.
Check the channels according to the table below.
Table 4-4. Bandwidth Check of Voltage Channels A/L1, B/L2, C/L3
Voltage Channel to be verified Readout at 60 Hz (adjust
Calibrator with EDIT FIELD)
A/L1 Fluke 434-II: 120.0 V
Fluke 435-II /437-II: 120.00 V
B/L2 Fluke 434-II: 120.0 V
Fluke 435-II /437-II: 120.00 V
Readout at 3 kHz
Fluke 434-II: ≥ 114.0 V
Fluke 435-II /437-II: ≥ 114.00 V
Fluke 434-II: ≥ 114.0 V
Fluke 435-II /437-II: ≥ 114.00 V
4-10
C/L3 Fluke 434-II: 120.0 V
Fluke 435-II /437-II: 120.00 V
10. Set the Calibrator to STBY.
Fluke 434-II: ≥ 114.0 V
Fluke 435-II /437-II: ≥ 114.00 V
Page 31

Performance Verification
4.8 Voltage Inputs 4
Accuracy Check of Channel N (Neutral):
11. Connect the N input with the C/L3 input (See Figure 4-4). A/L1, B/L2, C/L3 now
give zero reading.
12. Set the Calibrator to 60 Hz / 60 V and then to OPR.
13. Fluke 434-II: check for a voltage readout V rms between 59.4 ... 60.6 V.
Fluke 435-II/437-II: check for a voltage readout V rms between 59.88 ... 60.12 V.
14. Check the 120 V range according to the table below.
Table 4-5. Accuracy Check of Voltage Channel N (Neutral)
Set Calibrator to Readout at Voltage Channel N
60 V, 60 Hz, OPR Fluke 434-II: 59.4 ... 60.6 V
Fluke 435-II /437-II: 59.88 ... 60.12 V
120 V, 60 Hz, OPR Fluke 434-II: 119.4 ... 120.6 V
Fluke 435-II /437-II: 119.88 ... 120.12 V
240 V, 60 Hz, OPR Fluke 434-II: 239.4 ... 240.6 V
Fluke 435-II /437-II: 239.88 ... 240.12 V
15. Set the Calibrator to STBY.
Optional test. Bandwidth Check of Channel N (*):
16. Set the Calibrator to 120 V, 60 Hz and OPR.
17. Now check the voltage channel N. Use the Calibrator’s field edit function
(AMPL/FREQ key) to adjust the Calibrator to an Analyzer readout of 120.0 V /
120.00 V.
18. Increase the frequency to 3 kHz.
Fluke 434-II: check for a readout of 114.0 V or more.
Fluke 435-II/437-II: check for a readout of 114.00 V or more.
19. Set the Calibrator to STBY.
4.8.3 Verification of voltage inputs in 230 V range
Accuracy Check of Channel A/L1, B/L2, C/L3:
1. Set the Analyzer to 230 V, 50 Hz nominal (SETUP menu, arrow and ENTER keys).
Press MENU, select Volts/Amps/Hertz, press F5 - OK.
2. To check the A/L1, B/L2, C/L3 inputs: connect the N input to Ground (See Figure 4-
3).
3. Set the Calibrator to 50 Hz, 115 V and then to OPR.
4. Fluke 434-II: check for a voltage readout V rms between 113.8 ... 116.2 V.
Fluke 435-II/437-II: check for a voltage readout V rms between 114.77 ... 115.23 V.
5. Check the 230 V range according to the table below.
4-11
Page 32

Fluke 434-II/435-II/437-II
Service Manual
Set Calibrator to Readout at Voltage Channels
115 V, 50 Hz, OPR Fluke 434-II: 113.8 ... 116.2 V
230 V, 50 Hz, OPR Fluke 434-II: 228.8 ... 231.2 V
460 V, 50 Hz, OPR Fluke 434-II: 458.8 ... 461.2 V
6. Set the Calibrator to STBY.
Optional Test. Bandwidth Check of Channel A/L1, B/L2, C/L3 (*):
7. Set the Calibrator to 215 V, 50 Hz and OPR
8. Now check the voltage channels one by one. Use the Calibrator’s field edit function
Table 4-6. Accuracy Check of Voltage Channels A/L1, B/L2, C/L3
Fluke 435-II /437-II: 114.77 ... 115.23 V
Fluke 435-II /437-II: 229.77 ... 230.23 V
Fluke 435-II /437-II: 459.77 ... 460.23
(AMPL/FREQ key) to adjust the Calibrator to an Analyzer readout of 215.00 V
9. Increase the frequency to 3 kHz.
Fluke 434-II: check for a readout of 204.2 V or more.
Fluke 435-II/437-II: check for a readout of 204.25 V or more.
Check the channels according to the table below.
Table 4-7. Bandwidth Check of Voltage Channels A/L1, B/L2, C/L3
Voltage Channel to be verified Readout at 50 Hz (adjust
Calibrator with EDIT FIELD)
A/L1 Fluke 434-II: 215.0 V
Fluke 435-II /437-II: 215.00 V
B/L2 Fluke 434-II: 215.0 V
Fluke 435-II /437-II: 215.00 V
C/L3 Fluke 434-II: 215.0 V
Fluke 435-II /437-II: 215.00 V
10. Set the Calibrator to STBY.
Accuracy Check of Channel N (Neutral):
11. Connect the N input with the C/L3 input (See Figure 4-4). A/L1, B/L2, C/L3 now
give zero reading.
Readout at 3 kHz
Fluke 434-II: ≥ 204.2 V
Fluke 435-II /437-II: ≥ 204.25 V
Fluke 434-II: ≥ 204.2 V
Fluke 435-II /437-II: ≥ 204.25 V
Fluke 434-II: ≥ 204.2 V
Fluke 435-II /437-II: ≥204.25 V
4-12
12. Set the Calibrator to 50 Hz / 115 V and then to OPR.
13. Fluke 434-II: check for a voltage readout V rms between 113.8 ... 116.2 V.
Fluke 435-II/437-II: check for a voltage readout V rms between 114.77 ... 115.23 V.
14. Check the 230 V range according to the table below.
Page 33

Performance Verification
Table 4-8. Accuracy Check of Voltage Channel N (Neutral)
Set Calibrator to Readout at Voltage Channel N
115 V, 50 Hz, OPR Fluke 434-II: 113.8 ... 116.2 V
Fluke 435-II /437-II: 114.77 ... 115.23 V
230 V, 50 Hz, OPR Fluke 434-II: 228.8 ... 231.2 V
Fluke 435-II /437-II: 229.77 ... 230.23 V
460 V, 50 Hz, OPR Fluke 434-II: 458.8 ... 461.2 V
Fluke 435-II /437-II: 459.77 ... 460.23 V
4.8 Voltage Inputs 4
15. Set the Calibrator to STBY.
Optional Test. Bandwidth Check of Channel N (*):
16. Set the Calibrator to 215 V, 50 Hz and OPR.
17. Now check the voltage channel N. Use the Calibrator’s field edit function
(AMPL/FREQ key) to adjust the Calibrator to an Analyzer readout of 215.0 V /
215.00 V.
18. Increase the frequency to 3 kHz.
Fluke 434-II: check for a readout of 204.2 V or more.
Fluke 435-II/437-II: check for a readout of 204.25 V or more.
19. Set the Calibrator to STBY.
4.8.4 Verification of voltage inputs in 400 V range
Accuracy Check of Channel A/L1, B/L2, C/L3:
1. Set the Analyzer to 400 V, 50 Hz nominal (SETUP menu, arrow and ENTER keys).
Press MENU, select Volts/Amps/Hertz, press F5 - OK.
2. To check the A/L1, B/L2, C/L3 inputs: connect the N input to Ground (See Figure 4-
3).
3. Set the Calibrator to 50 Hz, 200 V and then to OPR.
4. Fluke 434-II: check for a voltage readout V rms between 198.0 ... 202.0 V.
Fluke 435-II/437-II: check for a voltage readout V rms between 199.60 ... 200.40 V.
5. Check the 400 V range according to the table below.
4-13
Page 34

Fluke 434-II/435-II/437-II
Service Manual
Set Calibrator to Readout at Voltage Channels
200 V, 50 Hz, OPR Fluke 434-II: 198.0 ... 202.0 V
400 V, 50 Hz, OPR Fluke 434-II: 398.0 ... 402.0 V
800 V, 50 Hz, OPR Fluke 434-II: 798.0 ... 802.0 V
6. Set the Calibrator to STBY.
Optional Test. Bandwidth Check of Channel A/L1, B/L2, C/L3 (*):
7. Set the Calibrator to 215 V, 50 Hz and OPR.
8. Now check the voltage channels one by one. Use the Calibrator’s field edit function
Table 4-9. Accuracy Check of Voltage Channels A/L1, B/L2, C/L3
Fluke 435-II /437-II: 199.60 ... 200.40 V
Fluke 435-II /437-II: 399.60 ... 400.40 V
Fluke 435-II /437-II: 799.20 ... 800.80 V
(AMPL/FREQ key) to adjust the Calibrator to an Analyzer readout of 400.0 V /
215.00 V.
9. Increase the frequency to 3 kHz.
Fluke 434-II: check for a readout of 204.2 V or more.
Fluke 435-II/437-II: check for a readout of 204.25 V or more.
Check the channels according to the table below.
Table 4-10. Bandwidth Check of Voltage Channels A/L1, B/L2, C/L3
Voltage Channel to be verified Readout at 50 Hz (adjust
Calibrator with EDIT FIELD)
A/L1 Fluke 434-II: 215.0 V
Fluke 435-II /437-II: 215.00 V
B/L2 Fluke 434-II: 215.0 V
Fluke 435-II /437-II: 215.00 V
C/L3 Fluke 434-II: 215.0 V
Fluke 435-II /437-II: 215.00 V
10. Set the Calibrator to STBY.
Accuracy Check of Channel N (Neutral):
11. Connect the N input with the C/L3 input (See Figure 4-4). A/L1, B/L2, C/L3 now
give zero reading.
Readout at 3 kHz
Fluke 434-II: ≥ 204.2 V
Fluke 435-II /437-II: ≥ 204.25 V
Fluke 434-II: ≥ 204.2 V
Fluke 435-II /437-II: ≥204.25 V
Fluke 434-II: ≥ 204.2 V
Fluke 435-II /437-II: ≥ 204.25 V
4-14
12. Set the Calibrator to 50 Hz / 200 V and then to OPR.
13. Fluke 434-II: check for a voltage readout V rms between 198.0 ... 202.0 V.
Fluke 435-II/437-II: check for a voltage readout V rms between 199.60 ... 200.40 V.
14. Check the 400 V range according to the table below.
Page 35

Performance Verification
Table 4-11. Accuracy Check of Voltage Channel N (Neutral)
Set Calibrator to Readout at Voltage Channel N
200 V, 50 Hz, OPR Fluke 434-II: 198.0 ... 202.0 V
Fluke 435-II /437-II: 199.60 ... 200.40 V
400 V, 50 Hz, OPR Fluke 434-II: 398.0 ... 402.0 V
Fluke 435-II /437-II: 399.60 ... 400.40 V
800 V, 50 Hz, OPR Fluke 434-II: 798.0 ... 802.0 V
Fluke 435-II /437-II: 799.20 ... 800.80 V
4.8 Voltage Inputs 4
15. Set the Calibrator to STBY.
Optional Test. Bandwidth Check of Channel N (*):
16. Set the Calibrator to 215 V, 50 Hz and OPR.
17. Now check the voltage channel N. Use the Calibrator’s field edit function
(AMPL/FREQ key) to adjust the Calibrator to an Analyzer readout of 400.0 V /
215.00 V.
18. Increase the frequency to 3 kHz.
Fluke 434-II: Check for a readout of 204.2 V or more.
Fluke 435-II/437-II: Check for a readout of 204.25 V or more.
19. Set the Calibrator to STBY.
4.8.5 Verification of voltage inputs in 6 kV range (Transients)
Note: this test is not required for Fluke 434-II.
Set the Analyzer to Transients mode (Analyzer remains in 400 V, 50 Hz nominal).
Press MENU, press F2 – PAGE 2, select Transients, then F5 – OK.
In the START screen: Voltage Swell must be on; the other 4 functions must be off.
Then press F5 - RUN.
Accuracy Check of Channel A/L1, B/L2, C/L3:
1. To check the A/L1, B/L2, C/L3 inputs: connect the N input to Ground (See Figure 4-
3).
2. Set the Calibrator to 50 Hz, 400 V and then to OPR.
3. Check for a voltage readout V rms between 390.0 ... 410.0 V in the screen header.
4. Check the 6 kV range according to the table below.
Table 4-12. Accuracy Check of Voltage Channels A/L1, B/L2, C/L3
Set Calibrator to Readout at Voltage Channels
400 V, 50 Hz, OPR 390.0 ... 410.0 V
1000 V, 50 Hz, OPR 990.0 ... 1010 V
4-15
Page 36

Fluke 434-II/435-II/437-II
Service Manual
5. Set the Calibrator to STBY.
Optional Test. Bandwidth Check of Channel A/L1, B/L2, C/L3 (*):
6. Set the Calibrator to 215 V, 50 Hz and OPR.
7. Now check the voltage channels one by one. Use the Calibrator’s field edit function
8. Increase the frequency to 3 kHz.
(AMPL/FREQ key) to adjust the Calibrator to an Analyzer readout of 215 V.
Fluke 435-II/437-II: check for a readout of 204.2 V or more.
Check the channels according to the table below.
Table 4-13. Bandwidth Check of Voltage Channels A/L1, B/L2, C/L3
Voltage Channel to be verified Readout at 50 Hz (adjust
Calibrator with EDIT FIELD)
A/L1 Fluke 435-II /437-II: 215 V Fluke 435-II /437-II: ≥ 204.2 V
B/L2 Fluke 435-II /437-II: 215 V Fluke 435-II /437-II: ≥ 204.2 V
C/L3 Fluke 435-II /437-II: 215 V Fluke 435-II /437-II: ≥ 204.2 V
Readout at 3 kHz
9. Set the Calibrator to STBY.
Accuracy Check of Channel N (Neutral):
10. Connect the N input with the C/L3 input (See Figure 4-4). A/L1, B/L2, C/L3 now
give zero reading.
11. Set the Calibrator to 50 Hz / 400 V and then to OPR.
12. Check for a voltage readout V rms between 390.0 ... 410.0 V.
13. Check the 6 kV range according to the table below.
Table 4-14. Accuracy Check of Voltage Channel N (Neutral)
Set Calibrator to Readout at Voltage Channels N
4-16
400 V, 50 Hz, OPR 390.0 ... 410.0 V
1000 V, 50 Hz, OPR 990.0 ... 1010 V
14. Set the Calibrator to STBY.
Optional Test. Bandwidth Check of Channel N (*):
15. Set the Calibrator to 215 V, 50 Hz and OPR.
16. Now check the voltage channel N. Use the Calibrator’s field edit function
(AMPL/FREQ key) to adjust the Calibrator to an Analyzer readout of 400 V / 215 V.
Page 37

Performance Verification
17. Increase the frequency to 3 kHz.
Fluke 435-II/437-II: check for a readout of 204.2 V or more.
18. Set the Calibrator to STBY.
Note: bandwidth will be slightly higher than in V/A/Hz mode because a low pass filter in
the analog input channel is off during Transients mode.
4.9 Channel Isolation (*) 4
4.9 Channel Isolation (*)
This optional test verifies cross talk from voltage channels to current channels. Voltage
channels normally get high voltages while the current channels have a sensitivity of a
couple of volts. This way of testing verifies the most critical situation.
Proceed as follows:
1. Connect the Analyzer’s A/L1, B/L2, C/L3, and N voltage inputs with the HI output
of the Calibrator.
Connect the Analyzer’s GND input with the LO output of the Calibrator.
2. Set all current channels (Phase and Neutral) to 1 mV/A, 1000 A, x1 AC + DC, 1:1
(SETUP key, F4 – MANUAL SETUP, use arrow and ENTER keys).
Put the Analyzer in 3-phase WYE, 50 Hz, 400V, and V/A/Hz mode.
3. Short-circuit the four current inputs with a termination piece of 50 Ω or lower. Refer
to Figure 4-5.
4. Set the Calibrator to 800 V, 50 Hz, and OPR.
5. Check that the readout on all current channels does not exceed 19 A (this includes the
5 A basic error of the current channels).
6. Set the Calibrator to STBY.
7. Disconnect all test leads.
8. If removed, install the SD memory card again.
4-17
Page 38

Fluke 434-II/435-II/437-II
A
A
R
Service Manual
CALIBRATOR
NORMAL
HI
LO
A/L1
B/L2 C/L3
POWER
DAPTER
N
GND
BC 430
A/L1
50 OHM
PIECE
B/L2 C/L3
50 OHM
PIECE
50 OHM
PIECE
N
50 OHM
PIECE
NALYZE
INPUT
BLOCK
Figure 4-4. Checking the Channel isolation.
4-18
Page 39

Chapter 5
Calibration Adjustment
Title Page
5.1 General.........................................................................................................5-3
5.1.1 Introduction ..........................................................................................5-3
5.1.2 Calibration number and date ................................................................5-3
5.1.3 General instructions..............................................................................5-3
5.1.4 Equipment required for calibration ......................................................5-4
5.2 Calibration Procedure Steps.........................................................................5-4
5.3 Starting The Calibration...............................................................................5-4
5.4 Contrast Calibration Adjustment.................................................................5-6
5.5 Warming Up ................................................................................................5-7
5.6 Final Calibration..........................................................................................5-8
5.6.1 Warming Up Final................................................................................5-8
5.6.2 Offset adjustment .................................................................................5-8
5.6.3 Low voltage and current gain adjustment ............................................5-10
5.6.4 Current gain 10x...................................................................................5-10
5.6.5 Voltage gain adjustment.......................................................................5-10
5.7 Save Calibration Data And Exit...................................................................5-12
5-1
Page 40

Page 41

Calibration Adjustment
5.1 General 5
5.1 General
5.1.1 Introduction
The following information, provides the complete Calibration Adjustment procedure for
the Fluke 434-II/435-II/437-II Energy & Power Quality Analyzer (referred to as
Analyzer). The Analyzer allows closed-case calibration using known reference sources.
It measures the reference signals, calculates the correction factors, and stores the
correction factors in RAM. After completing the calibration, the correction factors are
stored in FlashROM so that they stay available are disconnection from all power sources.
The Analyzer should be calibrated after repair, or if it fails the performance test. The
Analyzer has a normal calibration cycle of one year.
5.1.2 Calibration number and date
When storing valid calibration data in FlashROM after performing the calibration
adjustment procedure, the calibration date is set to the actual Analyzer date, and
calibration number is raised by one. To display the calibration date and - number:
1. Press
2. Press
F1
F2
to leave the Language selection menu. Then
to see the Version & Calibration data (see Figure 5.1).
F5
to return to exit the Version & Calibration screen.
Figure 5-1. Version & Calibration data.
5.1.3 General instructions
SETUP
, and then press
Follow these general instructions for all calibration steps:
• Allow the Calibrator to satisfy its specified warm-up period. After each change of
output conditions, wait for the Calibrator to settle
. It may take a couple of seconds for
the output voltage to stabilize!
• The required warm up period for the Analyzer is included in the Warming Up period
(Calibration step CL 0200).
• Ensure that the Analyzer battery is charged sufficiently.
5-3
Page 42

Fluke 434-II/435-II/437-II
Service Manual
• Power the Analyzer via the BC430 Power Adapter (or any other type that is
5.1.4 Equipment required for calibration
The primary source instrument used in the calibration procedures for Fluke 434-II/435II/437-II (Series II) is the Fluke 5700A Calibrator. If the required type is not available,
you can substitute another Calibrator as long as it meets the minimum test requirements.
• Fluke 5700A Calibrator.
• Stackable safety test leads (4x), as supplied with the Calibrator.
• Extra set of test leads capable to withstand 1000 V rms.
• 50Ω Coax Cables (3 pieces required): Fluke PM9092 (0.5m, set of 3, 1 set required).
• Male BNC to Dual Female BNC adapter: Fluke PM9093 (3 pieces required).
• Dual Banana Jack to female to male BNC: Fluke PM9082 (1 piece required).
• Power Adapter: BC430.
recommended by Fluke as suitable).
Note: for good recognition it is advised to use a black lead between the Calibrator’s
LO output and the Analyzer’s Ground banana input.
5.2 Calibration Procedure Steps
To do a complete calibration adjustment you must do all following steps:
1. Select the Calibration Mode, section 5.3
2. Do the Contrast Calibration Adjustment, section 5.4
3. Do the Warming Up, section 5.5
4. Do the Final Calibration, section 5.6
5. Save the Calibration Data and Exit the calibration mode, section 5.7
5.3 Starting The Calibration
Follow the steps below to start the calibration:
1. Power the Analyzer via the power adapter input using the BC430 power adapter.
2. With the Analyzer in off position, keep
Analyzer on. A double beep indicates that the Analyzer is has been set to default
settings. Next release
F1
3. Press
, then
Analyzer date. If necessary adjust the date (the calibration date will become the
Analyzer date when saving the calibration data):
SETUP
SAVE
SCREEN
. Use the default position to start calibration adjustment.
and then
SAVE
SCREEN
pressed. Press to turn the
F4
- MANUAL SETUP and check the actual
5-4
• Operate
• Press
ENTER
• Operate
to highlight the Date.
to open the SETUP DATE menu.
to select in sequence Year, Month, and Day.
Page 43

Calibration Adjustment
5.3 Starting The Calibration 5
• Operate to adjust each selected item Year, Month, and Day.
F5
• Press
to leave the SETUP DATE menu.
4. Select the calibration mode.
The Calibration Adjustment Procedure uses built-in calibration setups, that can be
accessed in the calibration mode.
To enter the calibration mode proceed as follows:
• Press and hold
The display shows the
, press and release
MAINTENANCE screen (Calibration Adjustment mode).
The display shows the calibration step
:IDLE (valid) or :IDLE (invalid) , and the soft key menu.
F5
, then release .
Warming Up (CL 0200) , the calibration status
Continue as indicated in section 5.2.
You can leave the calibration mode without changing the calibration data by turning the
Analyzer off.
Explanation of screen messages and key functions.
When the Analyzer is in the calibration Mode, only the
F1
to
F5
soft keys, the
and the key can be operated, unless otherwise stated.
The calibration adjustment screen shows the actual calibration step (name and number)
and its status:
Cal Name
(CL nnnn) Number of the calibration step
Status (...) can be:
IDLE (valid) After (re)entering this step, the calibration process is not started.
Cal Name (CL nnnn) :Status (...)
Name of the selected calibration step, e.g. Warming Up
The calibration data of this step are valid. This means that the
last time this step was done, the calibration was successful. It
does not necessarily mean that the unit meets the specifications
related to this step!
IDLE (invalid) After (re)entering this step, the calibration process is not started.
The calibration data are invalid. This means that the last time this
step was done, the calibration was not successful. Most probably
the unit will not meet the specifications if the actual calibration
data are saved.
BUSY aaa% bbb% Calibration adjustment step in progress; progress % for Input A
and Input B. During Warming Up the elapsed time is shown.
READY Calibration adjustment step finished.
5-5
Page 44

Fluke 434-II/435-II/437-II
Service Manual
Functions of the keys F1-F4 are:
F1
F2
F3
F5
PREV select the previous step
NEXT select the next step
CAL start the calibration adjustment of the actual step
EXIT leave the calibration mode
5.4 Contrast Calibration Adjustment
After entering the calibration mode the display shows:
WarmingUp (CL 0200):IDLE (invalid)
F3
Do not press
calibration mode again.
Proceed as follows to adjust the maximum display darkness (CL 0100), the default
contrast (CL 0110) , and the maximum display brightness (CL 0120).
1. Press
2. Press
F1
F3
3. Using
pattern is only just visible (up = lighter, down = darker).
4. Press
5. Press
6. Press
F2
F2
F3
now! If you did, turn the Analyzer off and on, and enter the
three times to select maximum darkness calibration Contrast (CL 0100):
CALIBRATE . The display will show a dark test pattern, see Figure 5-2
adjust the display to the maximum darkness at which the test
to return to the soft key menu.
to select default contrast calibration Contrast (CL 0110):
CALIBRATE. The display shows the test pattern at default contrast.
7. Using
set the display to optimal (becomes default) contrast (up = lighter,
down = darker).
Press
F2
to return to the soft key menu.
F2
to select maximum brightness calibration Contrast (CL 0120):
F3
CALIBRATE. The display shows a bright test pattern.
adjust the display to the maximum brightness, at which the test
8. Press
9.
10. Press
11. Using
pattern is only just visible.
F2
12. Press
to return to the soft key menu (up = lighter, down = darker).
13. Now do the complete calibration. Press
and continue at Section 5.5.
F2
to select the next step (Warming Up),
5-6
Page 45

Calibration Adjustment
Figure 5-2. Version & Calibration data.
5.5 Warming Up 5
5.5 Warming Up
The Warming Up state will be entered after entering the calibration mode (section 5.3),
or after selecting the next step if you have done the Contrast Calibration step CL 120
(section 5.4). The display will show
WarmingUp (CL 0200):IDLE (valid) or (invalid).
Unless you want to calibrate the display contrast only, you must always start the
calibration adjustment at the
Warming Up (CL 0200) step. Starting at another step will
make the calibration invalid!
The Warming Up consists of a 30 minutes warming-up period.
Proceed as follows to do the Warming Up:
1. Remove all input connections from the Analyzer.
F3
2. Press
to start the Warming-Up.
The display shows the calibration step in progress, and its status.
The display shows
WarmingUp (CL 0200) :BUSY 00:29:59 . The warming-up
period is counted down from 00:29:59 to 00:00:00
3. Wait until the display shows
Warmingup: READY
If you turn off the Analyzer now by accident, turn it on again immediately; now you
can select the calibration mode, and continue with step 4 below (press
F2
several times, see 5.6).
If you turn off the instrument now, and you do not turn on immediately, the Analyzer
has cooled down, and you must repeat the Warming Up (select the calibration mode
and start at CL 0200).
F2
4. Press
NEXT and continue at Section 5.6.
NEXT
5-7
Page 46

Fluke 434-II/435-II/437-II
Service Manual
5.6 Final Calibration
Before starting the final calibration you must have done the Warming Up (section 5.5)!
The final calibration is simple and straightforward and consists of the following
elements:
- Offset adjustment of voltage and current inputs (0 V input signal).
- Low voltage adjustment of voltage and current inputs (0.67 V rms, 50 Hz input signal).
- Low voltage adjustment of gain x10 of current inputs (0.2 V rms, 50 Hz input).
- Voltage gain adjustment of voltage inputs (120/230/480/600 V rms, 50 Hz input).
The final calibration requires input conditions that will be described in each step. You
must always start the Final Calibration at the first step, see Section 5.6.1. Starting at
another step will make the calibration invalid!
If you proceeded to calibration step N (for example step CL 0320), then return to a
previous step (for example step CL 0310) , and then calibrate this step, the complete final
calibration becomes invalid; then you must repeat the calibration starting at 5.6.1.
It is allowed to repeat a step that shows the status
5.6.1 Warming Up Final
Proceed as follows to do the Warming Up Final adjustment:
F2
1. Press
NEXT to select Calibration step CL 0201. Do NOT apply any input
signal (open inputs).
F3
2. Press
CALIBRATE.
3. Wait until the display shows
4. Press
F2
NEXT and continue at section 5.6.2.
5.6.2 Offset adjustment
Proceed as follows to do the Offset adjustment of all inputs:
5. Connect the Analyzer to the Calibrator as shown in Figure 5-3.
:READY.
:READY by pressing
F3
again.
5-8
Page 47

Calibration Adjustment
C
A
A
R
ALIBRATOR
NORMAL
HI
LO
POWER
DAPTER
A/L1
PM 9093 PM 9093 PM 9093
A/L1
B/L2 C/L3
B/L2 C/L3
N
GND
N
BC 430
NALYZE
INPUT
BLOCK
5.6 Final Calibration 5
RED
PM 9082
Figure 5-3. Offset, Low Voltage, and Current Gain Adjustment
PM 9092
2. The display must show step CL 0300.
If it does not, then press
F1
or
F2
to select the first calibration step in Table 5-
1.
3. Set the Calibrator output to source the signal 0 Hz, 0 V required for the calibration
steps in Table 5-1.
4. Set the Calibrator in operate (OPR) or standby (STBY) as indicated.
F3
5. Press
6. Wait until the display shows calibration status
7. Press
to start the calibration.
:READY .
F2
to select the next calibration step, and start the calibration.
Continue through all calibration points of Table 5-1.
8. When you are finished, set the Calibrator to Standby (STBY).
9. Continue at Section 5.6.3.
5-9
Page 48

Fluke 434-II/435-II/437-II
Service Manual
Cal step Description Calibrator Setting
CL 0300 OffsetLowVolt 0 V, 0 Hz, OPR
CL 0310 Offset125Volt 0 V, 0 Hz, OPR
CL 0320 Offset250Volt 0 V, 0 Hz, OPR
CL 0330 Offset500Volt 0 V, 0 Hz, OPR
CL 0340 Offset6KVolt 0 V, 0 Hz, OPR
--- --- STBY
5.6.3 Low voltage and current gain adjustment
Proceed as follows to do the Low Voltage and Current Gain Adjustment:
1. Press
2. Keep the Analyzer connected to the Calibrator as shown in Figure 5-3.
3. Set the Calibrator to source 0.67 V, 50 Hz .
Table 5-1. Offset Adjustment of all Inputs
F2
to select calibration step CL 0400.
4. Set the Calibrator to operate (OPR).
F3
5. Press
to start the calibration.
6. Wait until the display shows calibration status
7. Set the Calibrator to Standby (STBY).
5.6.4 Current gain 10x
Proceed as follows to do the Current 10x Gain Adjustment:
F2
3. Press
4. Connect the Analyzer to the Calibrator as shown in Figure 5-3.
8. Set the Calibrator to source 0.2 V, 50 Hz .
9. Set the Calibrator to operate (OPR).
10. Press
11. Wait until the display shows calibration status
12. Set the Calibrator to Standby (STBY).
13. Continue at section 5.6.5.
to select calibration step CL 0405.
F3
to start the calibration.
:READY .
:READY .
5-10
5.6.5 Voltage gain adjustment
Proceed as follows to do the Voltage gain Adjustment.
F2
1. Press
2. Connect the Analyzer to the Calibrator as shown in Figure 5-4: disconnect the current
inputs!
to select the first calibration step in Table 5-2 (CL 0410).
Page 49

Calibration Adjustment
A
A
R
CALIBRATOR
NORMAL
HI
LO
POWER
DAPTER
A/L1
B/L2 C/L3
N
GND
BC 430
5.6 Final Calibration 5
A/L1
B/L2 C/L3
N
NALYZE
INPUT
BLOCK
Figure 5-4. Voltage Gain Adjustment
3. Set the Calibrator to supply 120 V, 50 Hz.
Warning
Dangerous voltages will be present on the calibration source
and connection cables during the following steps. Ensure that
the Calibrator is in standby (STBY) mode before making any
connection between the Calibrator and the Analyzer.
4. Set the Calibrator to operate (OPR).
5. Press
6. Wait until the display shows calibration status
7. Press
8. Set the Calibrator to STBY (Standby).
F3
to start the calibration.
:READY.
F2
to select the next calibration step, set the Calibrator to the next
calibration point, and start the calibration. Continue through all calibration points of
Table 5-2.
5-11
Page 50

Fluke 434-II/435-II/437-II
Service Manual
Cal step Description Calibrator Setting
CL 0410 Gain125Volt 120 V, 50 Hz, OPR
CL 0420 Gain250Volt 230 V, 50 Hz, OPR
CL 0430 Gain500Volt 480 V, 50 Hz, OPR
CL 0440 Gain6KVolt 600 V, 50 Hz, OPR
--- --- STBY
9. Continue at section 5.7
5.7 Save Calibration Data And Exit
Proceed as follows to save the calibration data, and to exit the Maintenance mode:
1. Remove all test leads from the Analyzer inputs.
2. Press
Table 5-2. Voltage Gain Adjustment
F5
EXIT. The Analyzer will display:
Calibration data valid.
Save data and exit maintenance mode?
Note
Calibration data valid indicates that the calibration adjustment procedure
is performed correctly. It does not necessarily mean that the Analyzer
meets the characteristics listed in the Analyzer’s Users Manual (Refer to
Chapter 2).
3. Press
F5
YES to save and exit.
Note 1
After saving the calibration data, the calibration number and - date will be
updated if the calibration data have been changed and the data are valid.
The calibration number and - date will not change if:
- the calibration mode is entered and left without doing a calibration adjustment.
- only the contrast calibration adjustment (5.4) and/or the probe calibration is
done.
Note 2
If you press
either calibrate the Analyzer again, or press
F4
NO ,the Analyzer returns to the calibration mode. You can
F5
EXIT ,
F5
YES to save
and exit.
5-12
Possible error messages.
The following messages can be shown on the Analyzer display:
WARNING: Calibration data not valid.
Save data and exit maintenance mode?
Page 51

Calibration Adjustment
5.7 Save Calibration Data And Exit 5
Proceed as follows:
• If you did the Warming Up and Pre-Calibration successfully (section 5.5), and you
want to store the Pre-Calibration data before continuing with the Final Calibration:
⇒ Press
F5
YES.
When turning the Analyzer off and on again, it will show the message:
The instrument needs calibration.
Please contact your service center.
The calibration date and number will not be updated. You must continue with the Final
Calibration!
• To return to the Maintenance mode, if you want to repeat the complete calibration:
F4
⇒ Press
NO.
Now press
F1
until the display shows Warming Up (CL 0200):IDLE, and
calibrate the Analyzer, starting at section 5.5.
• If you want to exit and maintain the old calibration data:
Turn the Analyzer off.
5-13
Page 52

Fluke 434-II/435-II/437-II
Service Manual
5-14
Page 53

Chapter 6
Disassembling the Analyzer
Title Page
6.1. Introduction.................................................................................................6-3
6.2. Disassembly & Reassembly Procedures.....................................................6-3
6.2.1 Required Tools .....................................................................................6-3
6.2.2 Removing the Tilt Stand, Hang Strap, and Side Strap .........................6-3
6.2.3 Opening the Analyzer, Removing the Battery Pack.............................6-4
6.2.4 Getting access to Top Side of PCA......................................................6-5
6.2.5 Getting access to Bottom Side of PCA.................................................6-5
6.2.6 Getting access to LCD, Keypad Foil and Keypad................................6-5
6.2.7 Pictures Showing Disassembly Steps...................................................6-6
6-1
Page 54

Page 55

Disassembling the Analyzer
6.1. Introduction 6
6.1. Introduction
This section provides the required disassembling procedures. The printed circuit
assembly removed from the Analyzer must be adequately protected against damage.
The Analyzer contains static sensitive components. Handling and servicing these
components should be done only at a static free workstation by qualified personnel.
The Analyzer contains a Li-ion battery pack. Refer to the Fluke 434-II/435-II/437-II
(Series II ) Users Manual ‘Safety Information’ Chapter (page 1-7 onwards) for
instructions how to safely handle and use this battery pack. The Users Manual can be
downloaded from Fluke’s website.
In the Analyzer a number of selftapping screws are used. When mounting these screws
again it is advised to use a hand-operated screwdriver and reisert them into the ‘tracks’
already present in the plastic. This assures a longer life of the plastic parts of the housing.
At the end of this chapter a number of pictures shows the various stages of
disassembling.
Warning
To avoid electric shock, disconnect test leads, probes and
power supply from any live source and from the Analyzer itself.
Always remove the battery pack before completely
disassembling the Analyzer. Only qualified personnel using
customary precautions against electric shock should work on a
disassembled unit with power on.
Important: the Analyzer has a battery door that is fixed with 2 quarter turn screws.
Behind the door are located the Li-ion battery and the SD memory card.
If the SD card is not installed, only momentary measurements such as a meter screen can
be done. Measurements over time such as Monitor or trend are not possible then.
If the battery is not installed the Analyzer can work on the Power Adapter BC430. The
battery itself is provided with a 'Fuel Gauge' LCD display with 5 segments each
representing about 20 % of the battery's total capacity.
The battery door has optical detection device that prevents the Analyzer from starting up
if the door is not closed.
6.2. Disassembly & Reassembly Procedures
6.2.1 Required Tools
To access all the assemblies, you need the following:
• Static-free work surface, and anti-static wrist wrap.
• #10 Torx screwdriver.
• A small screwdriver or pair of tweezers to unlock flatcables from their connector.
• Cotton gloves (to avoid contaminating the lens, and the PCA).
6.2.2 Removing the Tilt Stand, Hang Strap, and Side Strap
To separate the Tilt Stand from the Rear Case: gently bend one rotation point away from
the Rear Case and move the stand away from the housing. There is no need to remove
screws or other fixing devices.
6-3
Page 56

Fluke 434-II/435-II/437-II
Service Manual
Before opening the Analyzer, you must remove the Hang Strap and the Side Strap. How
to remove and install the Hang Strap is explained in the Users Manual in Chapter 4. The
grip of the Side Strap consists of two halves kept together with Velcro tape. After having
opened it, the straps can be taken apart and be removed from their fixing dowels in the
side of the Analyzer. Before doing this, take careful notice on the correct position of the
strap. To install work in reverse order.
6.2.3 Opening the Analyzer, Removing the Battery Pack
Proceed as follows (Figure 6-1):
1. Remove the battery access door with a standard blade screwdriver by turning the
plastic battery door screws one-quarter turn counterclockwise.
2. Take the battery and the SD memory card out of the instrument. The correct
insert position of the memory card is indicated with an arrow in the
compartment. When installing the SD card, press it into its slot until a click is
experienced. This click indicates that the card is locked into its slot.
Note: take care not to short circuit the battery’s contacts. Never open or damage
the battery’s housing. Do not touch the contacts of the memory card in order to
avoid contanination.
3. When present, take off the Hang Strap and the Side Strap (refer to 6.2.2.).
4. Loosen the two black selftapping screws about 12 mm long (total length) that fix
the grey/yellow Input Cover (Topholster) that is around the BNC-input (and
banana) sockets.
5. Take the Input Cover (Topholster) off.
Note: when reinstalling the Input Cover (Topholster) do not forget to reinstall the
flexible Sealing Strip around the input sockets! The holes in this strip are
arranged in such a way that there is only one correct position possible.
Note: when reinstalling the Input Cover, do not forget to reinstall 4 steel pins
(2x17 mm) in the left and right side of the instrument. The pins are used to attach
the Hang Strap and the Side Strap.
6. Remove 2 screws M3x7 from the Bottomholster. The screws fit into square nuts
that in turn fit into the Rear Case. Take care that the square nuts are not lost.
7. Take the Bottomholster off.
Note: when reinstalling the Holster, take care to reinstall 2 steel pins (2x17 mm)
in the left and right side of the instrument. The pins are used to attach the Side
Strap. Take care that the yellow covers of USB-input and on the right side are
correctly in place.
8. Remove four selftaping screws 16.5 mm long (total length) that attach the Rear
Case. Two of these screws are located inside the battery compartment.
9. Take the Bottom Case off. Unplug the connector of the battery door detection.
Note: when reinstalling the Bottom Case, do not forget to put the steel plate
16x17 mm in place again. This plate is present in the cavity on the right-hand
side of the instrument and its purpose is to attach a Kensington Lock.
Note: when reinstalling the Bottom Case, do not forget to reinsert the connector
of the battery door detection.
Note: when reinstalling the bottom case, take care that flat cables to LCD,
6-4
Page 57

Disassembling the Analyzer
keyboard and wiring of battery door detection are not damaged inbetween case
parts.
6.2. Disassembly & Reassembly Procedures 6
6.2.4 Getting access to Top Side of PCA
During disassembly, take careful notice of the position of isolation foils in so that you are
able to install them in their original position. This is very important for the Analyzer’s
safety. To get access to the top side, remove the upper plate (Shielding Lid): remove 4
pcs. M3 screws (total length of 6 mm). Refer to figure 6-2.
6.2.5 Getting access to Bottom Side of PCA
Important: to avoid contaminating the flex cable contacts with grease from your fingers,
do not touch these contacts (or wear cotton gloves). Contaminated contacts may not
cause immediate instrument faillure. Faillures typically show up when contaminated
instruments are operated in humid areas. Refer to figure 6-3.
1. Unlock both flat cables by shifting the connector latch at the left and right edge with
a small screwdriver. The latch is an integral part of the connector body. The figure
below shows this.
2. Remove the flat cables from connector J1201 (to LCD), J1000 (to keyboard), J1200
(to LCD backlight).
3. Remove 7 pcs. M3 screws (total length 9 mm) that fix the PCA to the lower chassis
(Shielding Assy).
4. Take notice of the position of 2 black rubber sealing pieces of which one fits around
the USB-connector. These sealing pieces are esential for the Analyzer’s safety.
5. Unlock the PCA at the side with BNC’s/banana inputs and separate it from the lower
chassis plate.
6.2.6 Getting access to LCD, Keypad Foil and Keypad
Proceed as follows (Figure 6-4, 6-5):
1. Unlock both flat cables by shifting the connector latch at the left and right edge using
a small screwdriver. The latch is an integral part of the connector body.
2. Remove the flat cables from connector J1201 (to LCD), J1000 (to keyboard), J1200
(to LCD backlight).
3. Remove 4 selftapping screws 10.5 mm long (total length) that fix the Main PCA
module to the top case assembly. The screws are grouped around the Analyzer’s
LCD.
6-5
Page 58

Fluke 434-II/435-II/437-II
Service Manual
4. Remove the remaining 2 selftapping screws 8.5 mm long (total length) that fix the
5. Separate the Main PCA module from the top case.
6. Now you have access to LCD-module, keypad foil and keypad. They can be
6.2.7 Pictures Showing Disassembly Steps
Note: pictures may be subject to minor changes without prior notice.
Fig. 6-1. Dismantling step 1 (bottom case removed)
Main PCA module to the top case assembly. The screws are located at the bottom
side of the keyboard.
separated from top case without the removal of screws or clamps. Do not touch
contact areas with your hands in order to avoid contamination (or wear cotton
gloves).
Note: when installing the LCD-module into the top case, take care that no dust or dirt
is present between module and the window/decal.
6-6
Page 59

Disassembling the Analyzer
6.2. Disassembly & Reassembly Procedures 6
Fig. 6-2. Dismantling step 2 (Top side of PCA attainable)
Fig. 6-3. Dismantling step 3 (PCA separated from chassis)
6-7
Page 60

Fluke 434-II/435-II/437-II
Service Manual
Fig. 6-3. Dismantling step 4 (Main PCA Module separated from front case)
Fig. 6-5. Dismantling step 5 (Main PCA Module separated from front case, keypad foil
removed)
6-8
 Loading...