

Fluidmaster UNIVERSAL FAUCET User Manual
20"
UNIVERSAL
FAUCET
CONNECTOR
CONECTOR DE GRIFO UNIVERSAL
EASY TO INSTALL / FÁCIL DE INSTALAR
INSTALLATION INSTRUCTIONS
1) Turn off water supply at shutoff valve.
2) Remove old supply connector and clean all connection threads.
3) Determine which adapter fits the shutoff valve by placing each adapter
onto the shutoff valve threads to find best fit. Remove adapter and
carefully thread into the nut of the connector with the flat side facing out.
Note: For 1/2" iron pipe, no adapter is needed.
DE 50,8 CM
No cutting, flaring or bending required.
No requiere cortar, ensanchar o doblar.
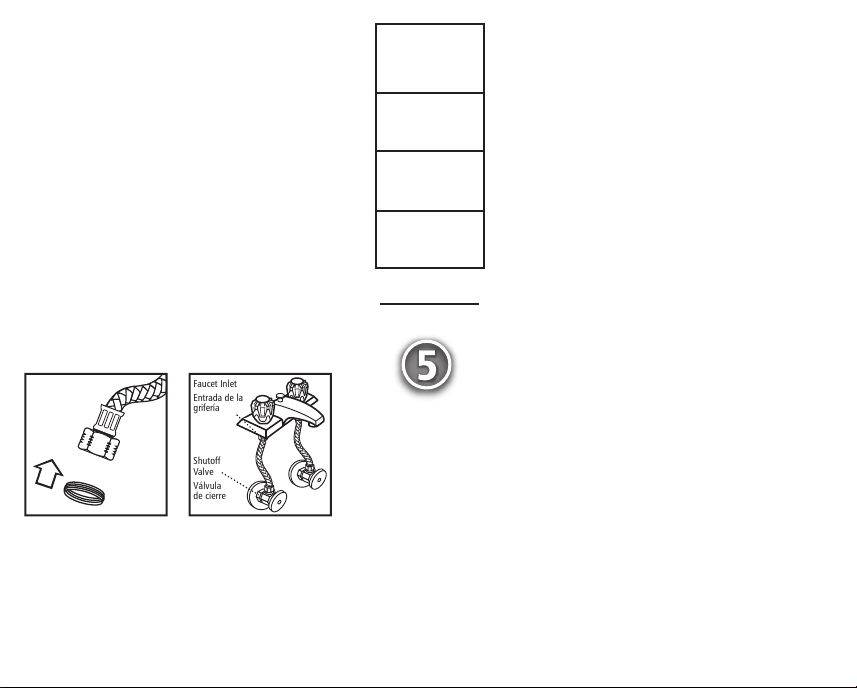
Faucet Inlet
Entrada de la
grifería
Shutoff
Valve
Válvula
de cierre
Fits-All® Thread
Adapters
Adaptadores para
toda clase de rosca
®
Fits-All
3/8"
GOLD
DORADO
1/2"
SILVER
PLATEADO
7/16"
BRONZE
DE BRONCE
5 YEAR WARRANTY
5 AÑOS DE GARANTIA
WARRANTY: This
Fluidmaster® product
has a limited warranty
for a period of 5 years.
For complete warranty
details, please visit our
website at
www.fluidmaster.com.
GARANTÍA: Este
producto Fluidmaster
tiene garantía limitada
por un período de 5
años. Para consultar los
detelles completos de la
garantía, por favor
visite nuestro sitio web
www.fluidmaster.com.
4) After adapter is secure, thread the connector nut onto the shutoff valve.
Thread the other end of the connector into the faucet inlet. Tighten 1/2 turn
beyond hand-tight with wrench or pliers. DO NOT OVERTIGHTEN. DO NOT
CLEAN WITH OR EXPOSE TO HOUSEHOLD CHEMICAL PRODUCTS. Exposure
to such products can damage connector, causing flooding.
5) Slowly turn on water at the shutoff valve.
6) Carefully check for leaks at shutoff valve and faucet inlet. If leak appears,
tighten nut just enough to provide a leak-free joint.
DO NOT OVERTIGHTEN.
INSTRUCCIONES DE INSTALACIÓN
1) Corte el suministro de agua con la llave de paso.
2) Quite el conector de suministro viejo y limpie todas las roscas
de conexión.
3) Determine qué adaptador se adecua a la válvula de cierre al colocar
cada adaptador sobre las roscas de cierre para encontrar el que mejor se
adapta. Quite el adaptador y enrosque cuidadosamente sobre la tuerca
del conector con el lado plano portando hacia fuera.
NOTA: Para tubos de hierro de 1/2", no se necesitan adaptadores.
4) Luego que el adaptador está firme, enrosque la tuerca del conector a la
llave de paso. Enrosque el otro extremo del conector a la entrada del grifo.
Apriete dándole hasta la mitad de giro más que el ajuste manual con la
llave inglesa o pinzas. NO APRIETE DEMASIADO. Para tuerca de metal,
apriete dándole hasta la mitad de giro más que el ajuste manual. NO
LIMPIE CON O EXPONGA A PRODUCTOS QUÍMICOS DE USO DOMÉSTICO.
La exposición a estos productos puede dañar el conector, provocando una
inundación.
5) Abra lentamente el suministro de agua con la llave de paso.
6) Verifique cuidadosamente si gotean la llave de paso
®
y la entrada del grifo. Si gotean, ajuste las tuercas solamente
lo suficiente para que no goteen las uniones.
NO AJUSTE EN EXCESO.
 Loading...