

Page 1
Getting started
FLIR Cx series
1 Thank you!
Thank you for choosing a camera from FLIR Systems. We hope that the camera will
meet your expectations and that you will consider us again for future needs.
The package consists of the following items:
• Infrared camera.
• Battery (inside camera).
• Lanyard.
• Power supply/charger with EU, UK, US, CN, and Australian plugs.
• Printed Getting started guide (this publication).
• USB memory stick with documentation.
• USB cable.
Note
FLIR Systems reserves the right to discontinue models, parts or accessories, and other items, or to
change specifications at any time without prior notice.
2 User documentation
Note
Before operating the device, you must read, understand, and follow all instructions, warnings, cautions,
and legal disclaimers.
User documentation is available on the USB memory stick.
Translated manuals will be placed on http://support.flir.com once they become available.
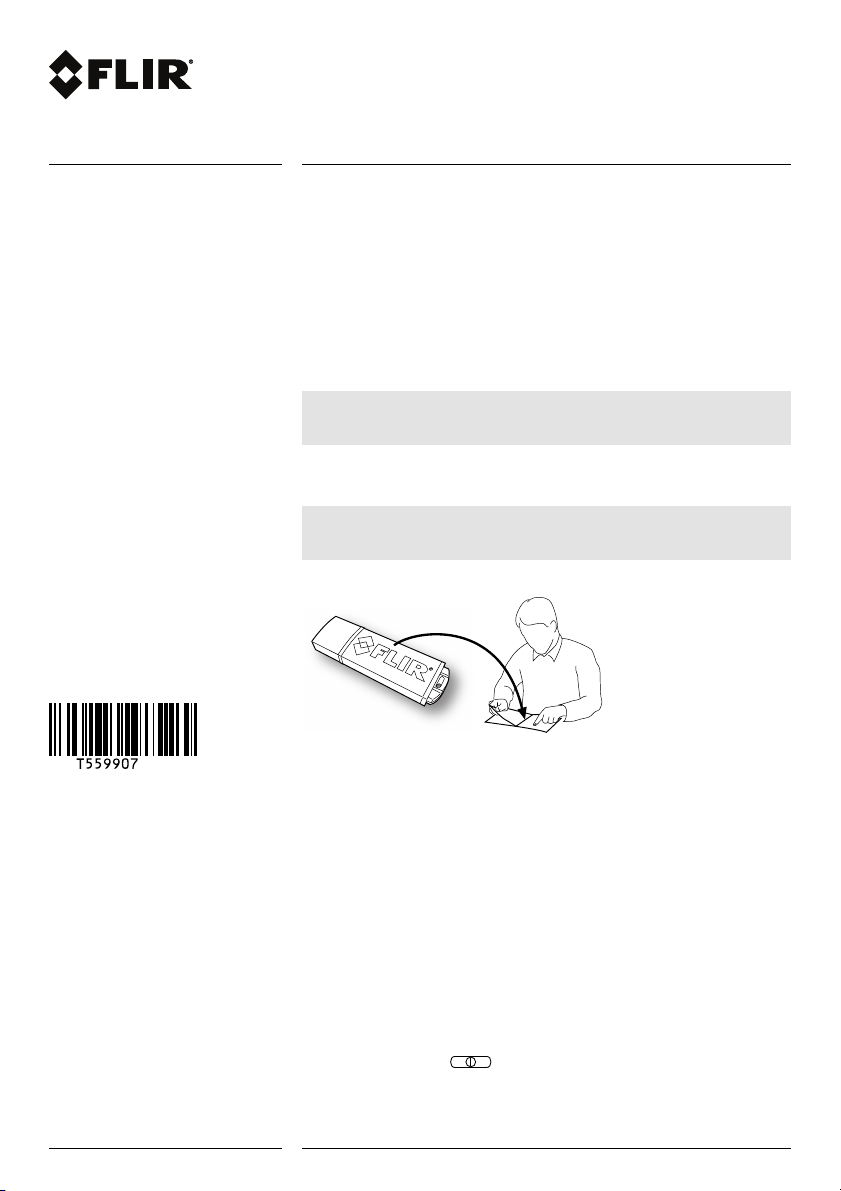
3 FLIR Tools
FLIR Tools lets you quickly create professional inspection reports that clearly show decision-makers what you’ve found with your infrared camera. Import, analyze, and fine tune
images easily. Then incorporate them into concise documents to share findings and justify repairs.
To download FLIR Tools, click the following link:
http://support.flir.com/tools
4 Quick Start Guide
4.1 Procedure
Follow this procedure:
1. Charge the battery for approximately 1.5 hours, using the FLIR power supply.
2. Push the On/off button
to turn on the camera.
3. Aim the camera toward your target of interest.
4. Push the Save button to save an image.
Copyright
© 2014, FLIR Systems, Inc.
All rights reserved worldwide. Names and marks
appearing herein are either registered trademarks
or trademarks of FLIR Systems and/or its
subsidiaries. All other trademarks, trade names or
company names referenced herein are used for
identification only and are the property of their
respective owners.
Document identity
Publ. No.: T559907
Release: AA
Commit: 20775
Head: 20775
Language: en-US
Modified: 2014-11-17
Formatted: 2014-11-17
Corporate Headquarters
FLIR Systems, Inc.
27700 SW Parkway Ave.
Wilsonville, OR 97070
USA
Telephone: +1-503-498-3547
Website
http://www.flir.com
Customer support
http://support.flir.com
Disclaimer
Specifications subject to change without further
notice. Models and accessories subject to
regional market considerations. License
procedures may apply. Products described herein
may be subject to US Export Regulations. Please
refer to exportquestions@flir.com with any
questions.
1 (4)
www.flir.com
Page 2
Getting started
FLIR Cx series
© 2014, FLIR Systems, Inc.
#T559907; r. AA/20775/20775; en-US
(Optional steps)
5. Install FLIR Tools on your computer.
6. Start FLIR Tools.
7. Connect the camera to your computer, using the USB cable.
8. Import the images into FLIR Tools.
9. Create a PDF report in FLIR Tools.
5 Description
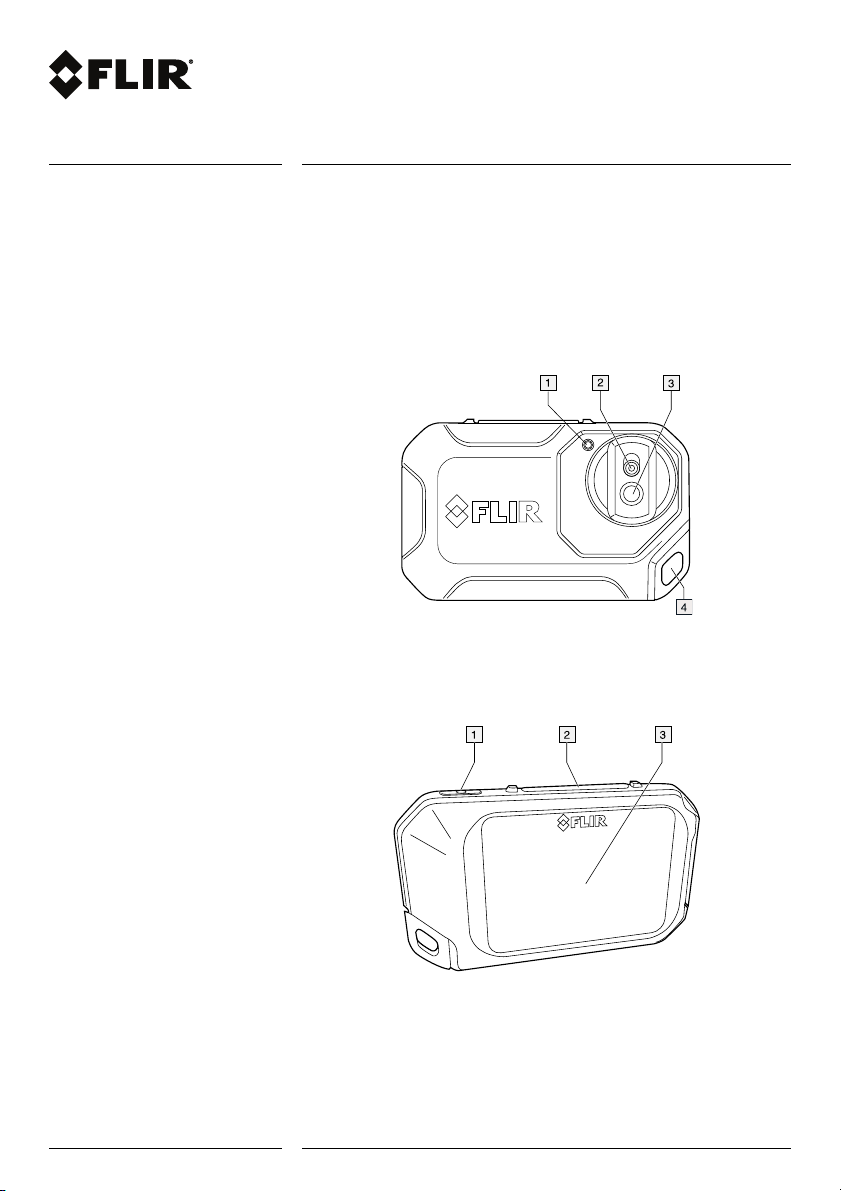
5.1 View from the front
1. Camera lamp.
2. Digital camera lens.
3. Infrared lens.
4. Attachment point.
5.2 View from the rear
1. On/off button.
2. Save button.
3. Camera screen.
2 (4)
www.flir.com
Page 3
Getting started
FLIR Cx series
© 2014, FLIR Systems, Inc.
#T559907; r. AA/20775/20775; en-US
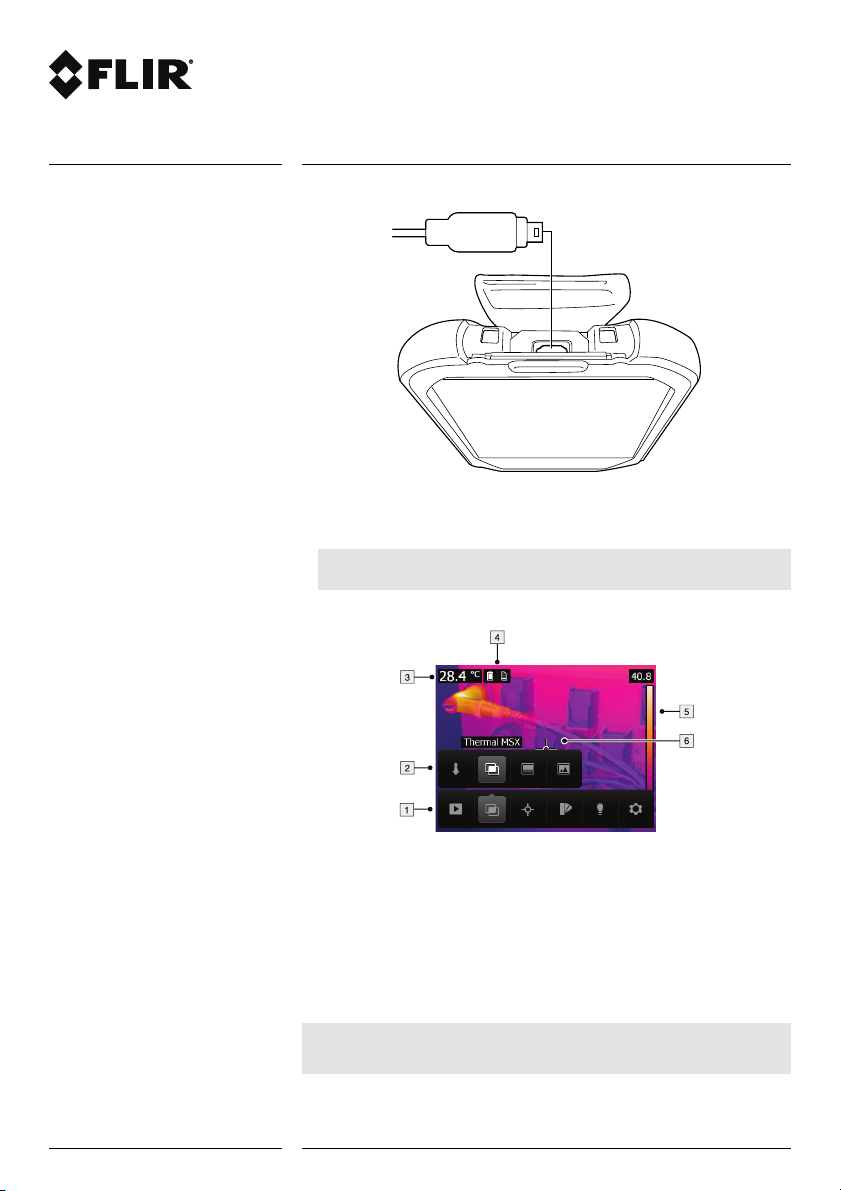
5.3 Connector
The purpose of this USB Micro-B connector is the following:
• Charging the battery using the FLIR power supply.
• Moving images from the camera to a computer for further analysis in FLIR Tools.
Note
Install FLIR Tools on your computer before you move the images.
5.4 Screen elements
1. Main menu toolbar.
2. Submenu toolbar.
3. Result table.
4. Status icons.
5. Temperature scale.
6. Spotmeter.
5.5 Auto-orientation
The camera has an auto-orientation feature, which means that the camera automatically
adjusts the measurement information on the display to the vertical or horizontal position
of the camera.
Note
The auto-orientation feature is enabled by a setting. Select Settings > Device settings > Auto orientation > On.
3 (4)
www.flir.com
Page 4
Getting started
FLIR Cx series
© 2014, FLIR Systems, Inc.
#T559907; r. AA/20775/20775; en-US
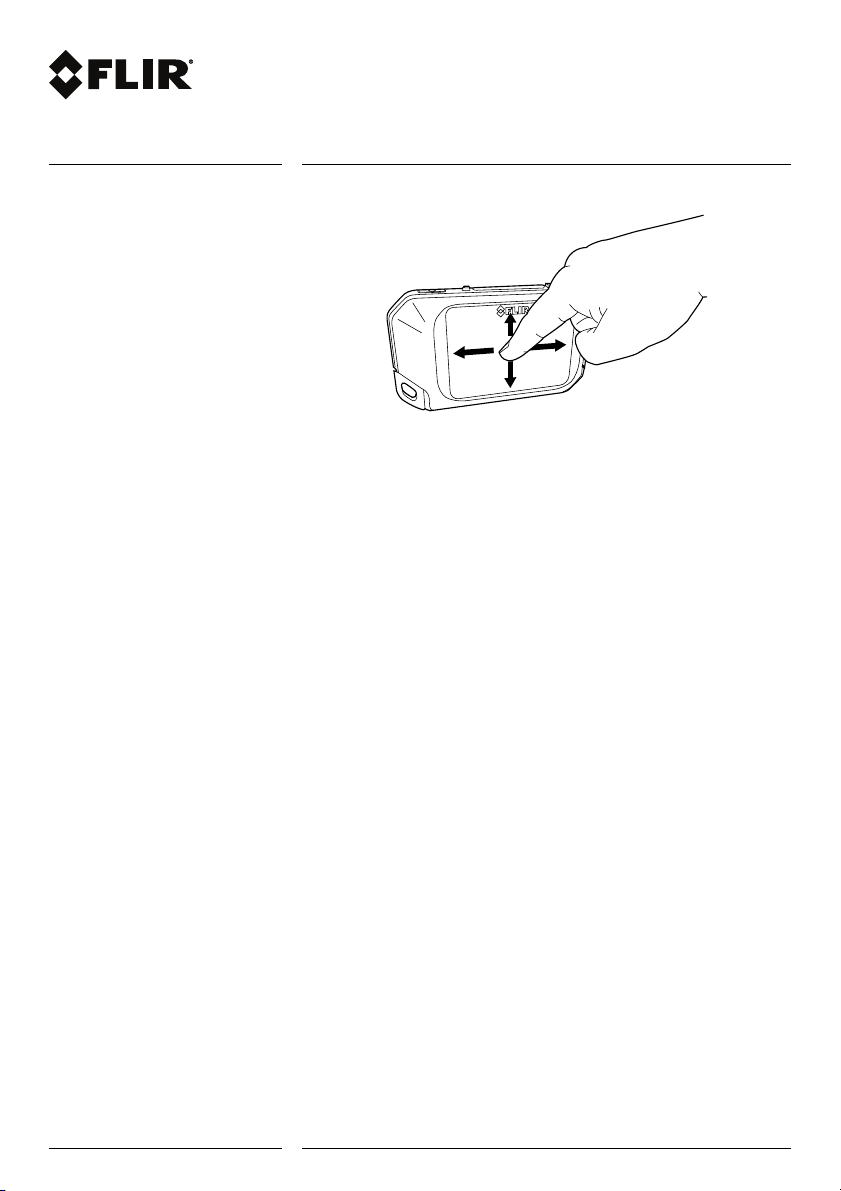
5.6 Navigating the menu system
The camera has a touch screen. You can use your index finger or a stylus pen specially
designed for capacitive touch usage to navigate the menu system.
Tap the camera screen to bring up the menu system.
6 Customer support
Do not hesitate to contact our Customer Support Center at http://support.flir.com if you
experience problems or have any questions about your product.
4 (4)
www.flir.com
 Loading...