

Page 1
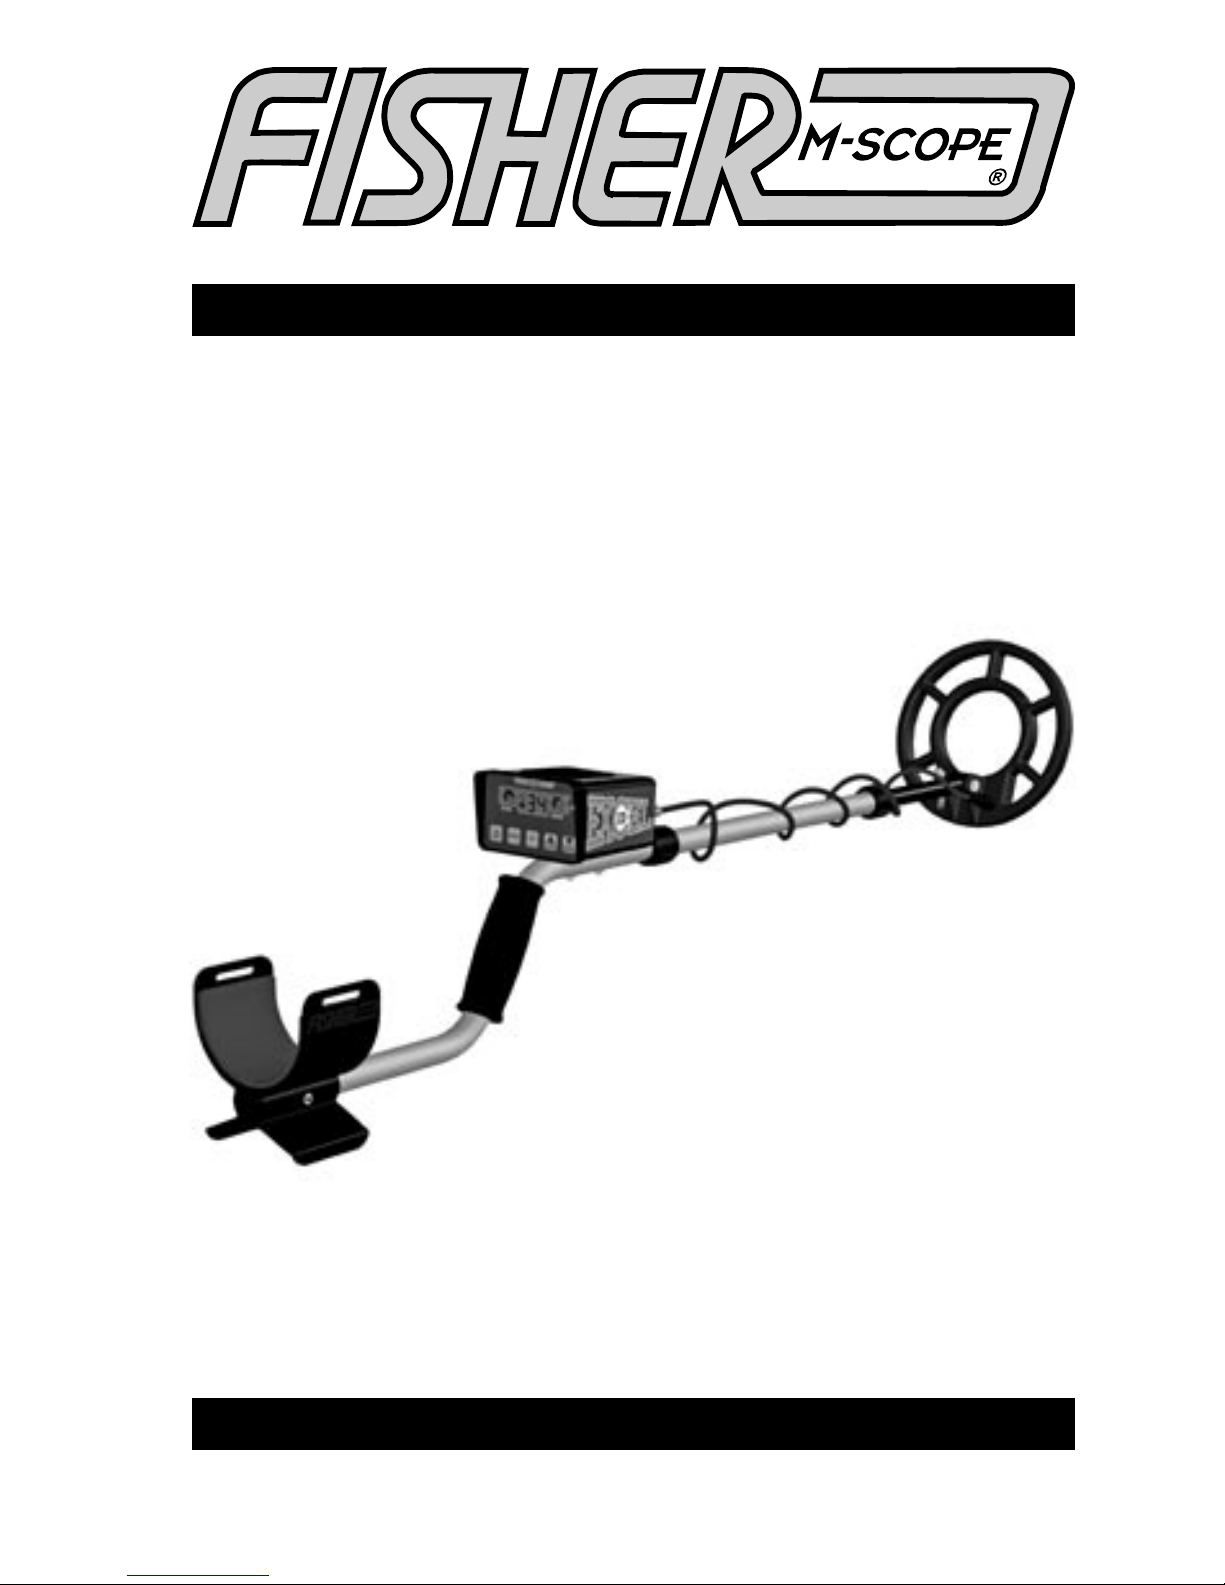
ID Excel
Target I.D. Metal Detector
F I S H E R R E S E A R C H L A B O R A T O R Y
Hot Digital Technology
NEW FOR 2004!
Operating Manual
Page 2

CONTENTS
About Your Detector ............................................................... pg. 1
Setting Up ................................................................................. pg. 2
Control Panel ........................................................................... pg. 4
Factory Preset Mode .............................................................. pg. 6
4 Tone Audio System ............................................................... pg. 7
Pinpointing ............................................................................... pg. 7
LCD Identification System ....................................................... pg. 8
Auto Ground Balance ............................................................. pg. 9
Additional Features ................................................................. pg. 10
Searching ................................................................................. pg. 11
Battery Replacement .............................................................. pg. 13
Maintenance ...........................................................................pg. 14
Treasure Hunter’s Code of Ethics ........................................... pg. 14
Specifications .......................................................................... pg. 15
Page 3

1
ABOUT YOUR DETECTOR
Your ID Excel is the hottest digital technology on
the market. It was designed to give you maximum
performance, superior target separation, and a 4
tone audio ID - all in an easy to use, lightweight
package.
Read this instruction manual thoroughly,
practice often and you will be ready for some
exciting and rewarding treasure hunting. Drop us
a line if you have any questions, comments or good
finds to tell us about. In the meantime...
Happy Hunting!
Fisher Labs
Page 4
2
SETTING UP
Your Fisher ID Excel is built to last for years. Handle it carefully, care
for it regularly, and it will give you years of dependable service.
The ID Excel requires little assembly.
1. Unpack your ID Excel carefully and save the
carton: it may come in handy if you ever have to
return the instrument for service.
2. Slip the lower stem into the middle stem.
3. Adjust the stem length and coil angle so that the
search coil rests flat on the ground about 6 to 12
inches in front of and slightly to the right of your right
foot (to the left of your left foot for left handers). Your
arm should be straight and relaxed, the grip held
loosely (see drawing on next page). The stem length
is adjusted by loosening the lower lock nut and
allowing the spring clip to snap into one of the
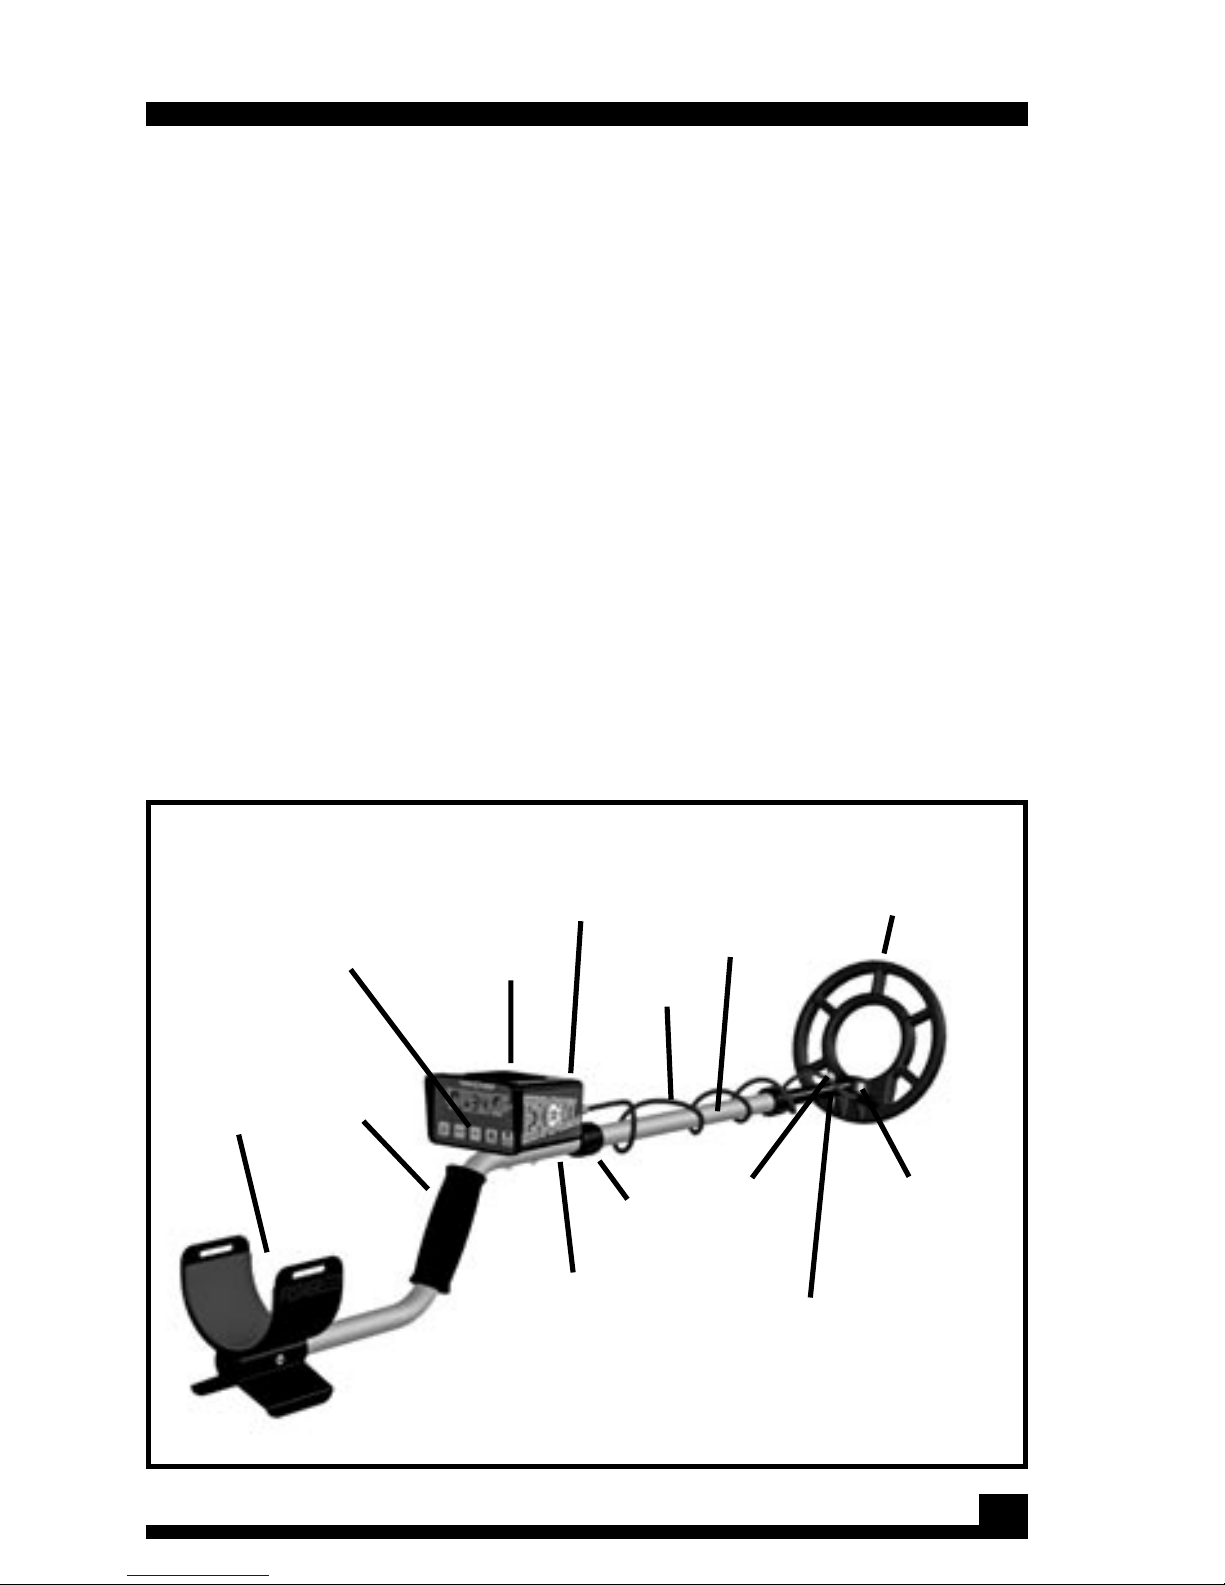
Lower
lock nut
Center
stem section
Adjustable,
fiberglass
filled, nylon
lower stem
Upper
lock nut
Search
coil cable
Control
housing
Touch pads
Padded
Arm rest
Foam
hand grip
Nylon wing nut
(with replaceable
Duro-Neoprene
bushings)
Upper stem
8” Spider Coil
Headphone Jack: located on
the back of the control panel.
Page 5

3
holes in the center stem. The coil angle is adjusted
by loosening the nylon wing nut on top of the
search coil.
NOTE: Remember, the longer the shaft, the more you’ll have to
bend your elbow to keep the coil off the ground and the sooner
your arm will get tired. The ID Excel is balanced for comfortable
searching in a tight semicircle around the front of the operator.
4. With the stem length properly adjusted,
wrap the search coil cable snugly around the
lower stem and the center section. Leave just
enough slack near the coil to allow it to be tilted
completely backward and forward.
NOTE: A loose cable near the search coil may cause false signals,
but don’t wrap it so tightly that it pulls against the housing or the
coil.
SETTING UP
5. Reconnect the coil cable to the control housing.
Be careful not to cross thread it and make sure it’s
snug, but hand tightened only.
6. With the shaft length and coil angle properly
adjusted, you should be able to move into your
search position by leaning forward very slightly and
raising the angle so the coil rests flat on the ground
about 6 to 12 inches in front of your arm.
Adjust the stem length and coil angle so the coil rests flat on
the ground about 6 to 12 inches in front of your foot. Move
into your “search” position by leaning slightly and raising the
coil about 2 inches off the ground. This should put the coil
about 12 to 18 inches in front of your lead foot.
Page 6
CONTROL PANEL
4
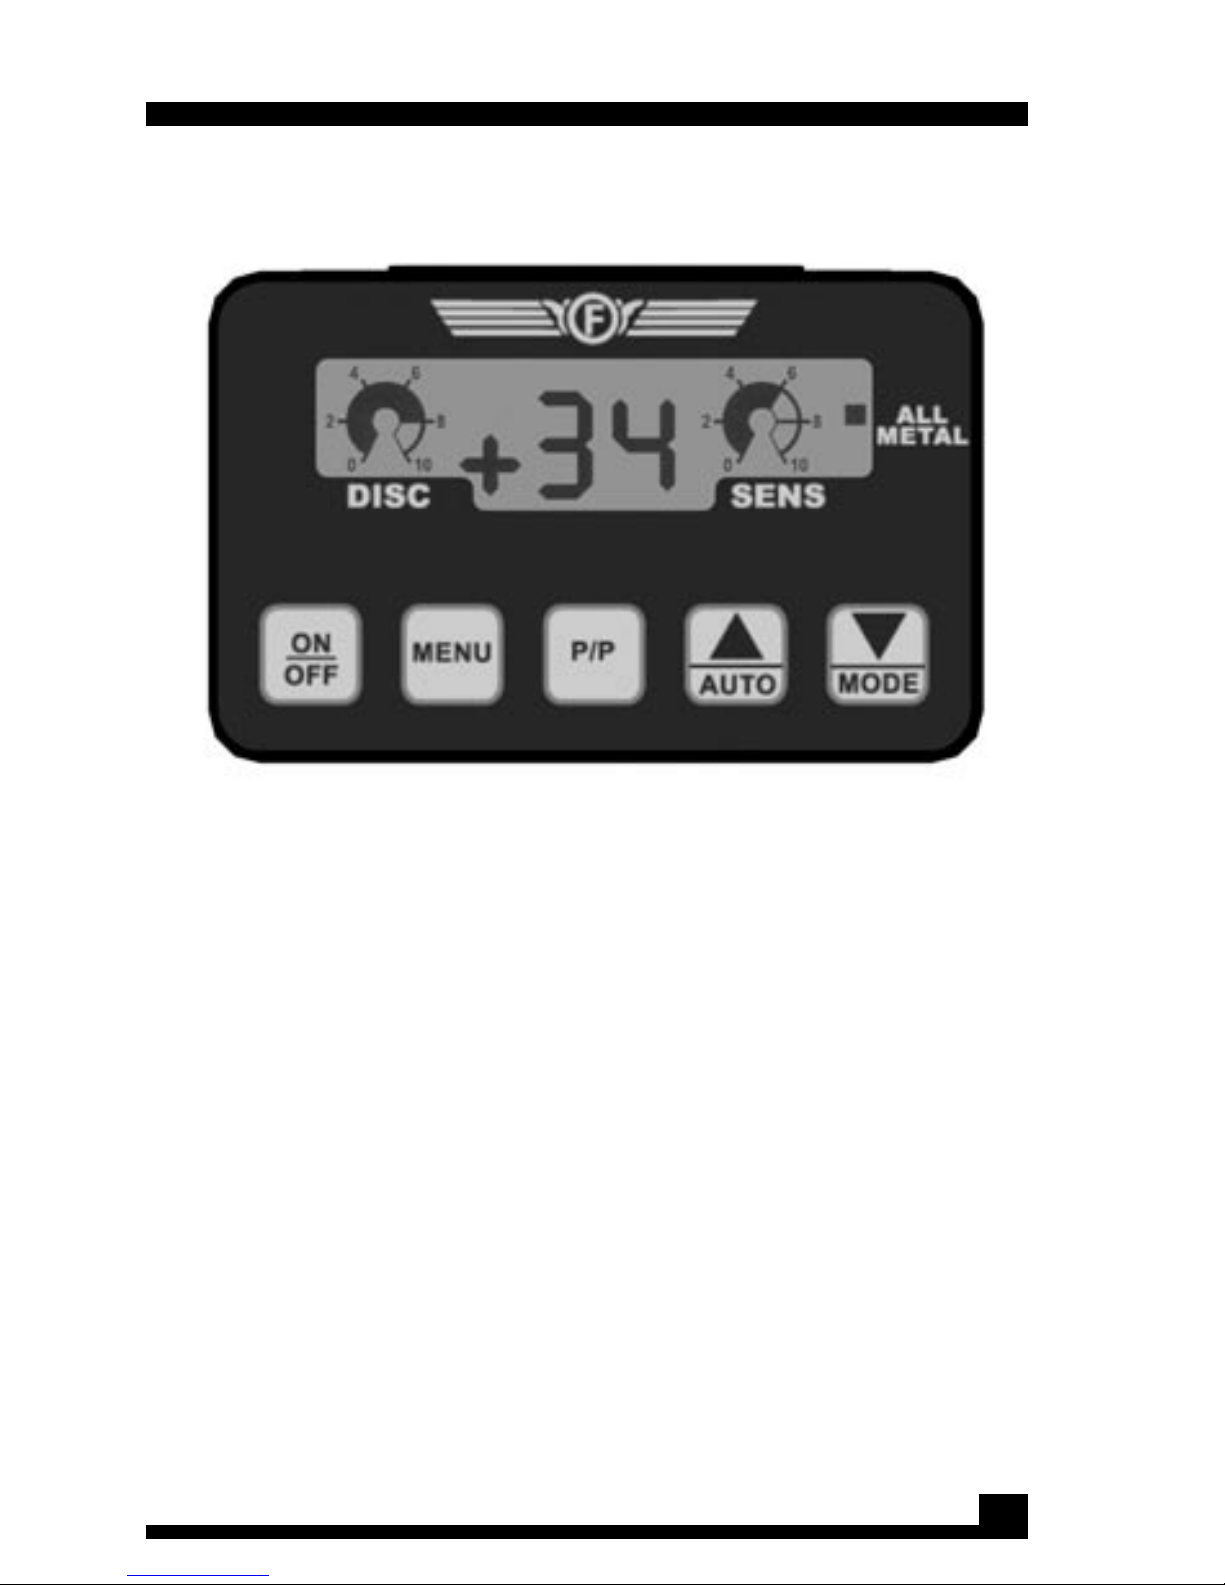
The ID Excel control panel is an all new digital I/O System. The LCD
Display provides you with a constant control readout showing you
all of your current settings.
1. The POWER button turns the unit ON and OFF. One of the first
things you will notice when you turn on your ID Excel is the battery
level display. Fresh batteries will show 9 volts; when the battery
level is down to 6 volts, you have about an hour of battery life
left. The detector will not turn on if the search coil is not properly
connected. This can prove to be a timesaving safeguard.
2. The MENU button enables you to enter the “menu mode,” in
which you can adjust the discrimination and sensitivity controls
with the UP/DOWN arrow buttons. Notice that when the MENU
button is pushed, the active control blinks — this is the control that
can be adjusted with the UP or DOWN arrow buttons. To move
to the next control, just press the MENU button again. When you
have all your settings completed, press the P/P (Pinpoint) button
to return to the search mode.
Page 7

5
CONTROL PANEL
A. The DISCRIMINATION control can be varied from a setting of
-36 to +22 with the arrow buttons when the DISC icon is flashing.
+7
0
-36
+11
+14
+18
+17
+22
+36
IRON
ZINC
PENNY
SILVER
& COPPER
PULL TABS
LOW
TONE
LOW-MID
TONE
MID-HIGH
TO
NE
HIGH
TONE
FOIL
NICKELS
DISCRIMINATION CHART (APPROXIMATE)
BRASS
B. The SENSITIVITY control can be varied from a setting of 1 to
a maximum of 10 with the arrow buttons when the SENS icon is
flashing. As with most detectors, set the sensitivity higher for best
depth performance in soils that are low in mineralization. As the
mineralization gets worse, lower the sensitivity setting as needed.
Please note that a SENS setting of 1 will still yield excellent results.
Remember, to exit the MENU mode at any time, simply press &
release the P/P button to return to the SEARCH mode
Page 8

3. The P/P (Pinpoint) button is used to return to the search mode
after you set all your current settings when it is pushed and
released. As mentioned above, If the P/P (Pinpoint) button is
pushed and held while hunting, the Precision Visual Pinpoint Mode
will be activated.
4. The MODE button enables you to toggle between two operating
modes: a “true” all metal detecting mode or, with an advanced
discrimination system activated. To switch betweeen the two
modes while hunting, press the arrow down/mode button.
Fisher recommends that for a quick start setup and while you
are learning to hunt with your ID Excel that you use the factory
preset mode. Factory preset mode can be set by pressing the
MENU button until the FP icon fl ashes on the LCD display. When
the FP appears, press and hold the P/P (Pinpoint) button until
you hear a brief tone. This activates the factory preset setting of
discrimination at +5 to reject ferrous targets and Sensitivity at 6 in
the disc mode.
FACTORY PRESET MODE
CONTROL PANEL
6
Page 9

4 TONE AUDIO SYSTEM
The four-tone audio system provides you with more information
per sweep, acting as a target I.D. system in the “discrimination”
mode. While sweeping the ID Excel search coil over a target, you
will hear one of four tones:
LOW TONE = Iron objects (ferrous)
LOW/MID TONE = Foil, Nickel, Round Tabs
MID/HIGH TONE = Square Tabs, Zinc Pennies
HIGH TONE = Copper, Clad, Silver Coins
If a bell tone audio is heard, accompanied by an “OL” on the
LCD, the coil has encountered a larger or shallow target and the
search coil must be lifted to avoid overload and inaccurate I.D.
When hunting in the ALL Metal mode, a single tone will be heard
for any metal object the coil is swept over. This mode responds
much like the “auto tune”mode of previous detectors.
Pinpointing
When the P/P (Pinpoint) button is pushed and held, the non-motion
pinpoint mode is activated. This pinpoint mode may be familiar in
some ways (when the target is approached, the audio intensity
increases), but different in others (the digital numeric indicator). The
two digit (0-99) LCD will help you to accurately pinpoint your target
by increasing in value as the center of the target is approached.
This gives you much more resolution in pinpointing than a “depth
estimation” system, and allows you to characterize size, shape,
and location of your target better.
7
Page 10

LCD IDENTIFICATION SYSTEM
The LCD will also show you an indication of the type of target you
have found, in conjunction with the audio tones, by showing you
a number preceded by a “-” or “+” sign. The target identification
system works as follows:
When in either search mode (ALL METAL or DISC), a target
will produce a number between 0 and 36 indicating target
type.
In addition, the - or + sign in front of the number
indicates whether the target is ferrous in nature
(an iron target) “-” / or nonferrous (a non-iron target) “+”.
The target I.D. numbers correspond
to the following target types:
All negative (-) numbers: Iron
+0 to +8: Foil
+9 to +11: Nickel
+17 to +18: Square Tab/Brass
+20 to +22: Zinc Pennies
+28 to +30: Copper pennies, dimes
+30 to +34: Quarters
+34 to +36 Silver
Remember, this Numeric I.D. system is activated in either
the All-Metal or Disc. modes (although the 4-tone audio
I.D. is only active in the Disc. mode).
Also, the discriminator can silence the audio for certain
targets, but the two-digit I.D. will always reveal the target
identity.
8
Page 11

AUTO GROUND BALANCE:
The precision automatic ground balance system will provide
ground balance accuracy that exceeds any setting achieved
manually. The procedure is quite simple: After you have set up
your controls and are back in the search mode, lower the search
coil to the ground in an area completely void of metal. Next, press
the AUTO button and hold it for about 2 seconds. Then, while still
holding the AUTO button down, lift the coil about 6 inches off the
ground, hold for a second, and release the button. The ID Excel
will give you a brief tone to let you know the ground balance has
been achieved. This procedure can be repeated at any time, as
you change your settings or ground conditions change. It is fast
and accurate. If the detector gives you 4 brief tones, it is letting you
know it has not ground balanced due to the presence of metal
under the coil. If this happens, move to another location and try
the auto ground balancing procedure again.
9
STEP #1 - Lower to ground
6 INCHES
STEP #3 - [while still pressing AUTO]
Lift coil 6” off ground & release button.
Listen for a brief tone.
*WHEN TONE SOUNDS,
THE UNIT IS PROPERLY
GROUND BALANCED
STEP #2 - Press & hold for 2 seconds
Page 12

10
ADDITIONAL FEATURES
AUTOMATIC LOW BATTERY WARNING: The ID E xcel wil l let
you know when a low battery condition will begin to effect
performance — the batteries must be changed at this time.
When the batteries get too weak, the audio system will produce
a wavering tone to alert you to the low battery condition.
AUTOMATIC SIGNAL OVERLOAD WARNING: The ID Excel will
alert you to the presence of a large metal object in close proximity
to the search coil by sounding off an audio bell tone. This lets you
know that the object is too close to the coil for the 4-tone audio
or LCD systems to accurately identify the object.
CONSTANT CONTROL READOUT: Unlike many digital detectors,
the ID Excel LCD shows you the control settings at all times while
in the search mode. The control icons are similar to the knobs of
older detectors, constantly showing where the settings are at in
one easy glance. In addition, even more accurate information
regarding the control settings can be obtained by entering the
MENU mode and observing the two-digit number accompanying
each control, showing improved resolution of each control.
Page 13

11
SEARCHING
Good search techniques are every bit as important as having a
good detector.
1. Once your controls are properly set, press and
release the P/P touch pad, and move into your
search position. Begin your search by walking slowly
and sweeping the search coil in a tight semicircle.
2. Keep the coil parallel to the ground and as
close to the ground as practical. This is extremely
important for maximum coverage and depth. If
you’re searching on a lawn, you may set the coil
right on the grass and lightly “scrub it.”
3. Overlap your sweeps by at least 50 percent.
Remember that your coil’s search pattern is conical
and if you don’t overlap each sweep you’ll miss the
deeper targets.
4. Search in a methodical manner. Pay close
attention to where you’re going and where you’ve
been so that you don’t retrace your steps or miss
any productive areas.
Keep the search coil
as close to the ground
as possible for greater
penetration, and make
sure the search coil
remains parallel to the
ground as you search.
Page 14

12
The conical search
pattern of the ID Excel
search coil means
you’ll get better ground
penetration and
coverage by overlapping
your sweeps.
5. Keep the search coil moving at a comfortable
rate.
6. Take your time. If you walk too fast you can
overlap your sweeps and you’ll miss a lot of ground.
If you swing your coil too fast, you could lose some
sensitivity to deep and/or small targets.
7. The illustration below shows the ID Excel search
coil pattern and how it is effected by sweep speed,
ground mineralization and search mode.
1. Minimum depth
a. Very slow or very fast sweep speed
b. Highly mineralized soil.
2. Good depth
a. Moderate sweep speed
b. Moderately mineralized soil
3. Maximum depth
a. Moderate sweep speed
b. Non-mineralized soil
4. Missed target
Many targets well within the range
of your ID Excel will not be detected
unless you overlap your sweeps.
Effects of sweep speed,
ground mineralization
and search mode
1
2
3
4
Unlike other metal detectors, the discrimination settings have little if any effect on
the depth capability of the ID Excel. Depth is also determined by the size, shape
and conductivity of the target as well as the sensitivity setting of the ID Excel.
SEARCHING
Page 15

BATTERY REPLACEMENT
Battery replacement is simple with the ID Excel drop-in battery
compartments: just pop the doors open. Two 9-volt transistor
batteries are located in separate compartments at the rear of the
housing. When it’s time to replace the batteries, always replace
both of them.
1. To open the battery compartments, press gently
down and out on the battery door latch. The doors
are tethered; do not attempt to completely remove
them.
2. Tilt the housing gently and the batteries will slide
out.
3. Insert the new batteries. Make sure the contact
end goes in first and that you match the polarity
markings on the control housing.
13
Page 16

14
TREASURE HUNTER’S CODE OF ETHICS
LETS PRESERVE OUR TREASURED SPORT!
Laws governing the use of metal detectors are becoming more and
more common. In many countries, the use of metal detectors is illegal
or severely restricted. Don’t let this happen in your area.
ALWAYS get permission to hunt on private property.
ALWAYS leave a site cleaner than you found it. Take at least some
trash with you or, if you can, take it all.
ALWAYS fill in your holes neatly whether you’re in a city park or remote
wilderness. Leave the land as it was before you disturbed it.
ALWAYS obey all laws relating to Treasure Hunting.
ALWAYS return valuable property if you can locate the original owner.
Your ID Excel doesn’t require a lot of care. It’s built with high-quality
materials. But there are a few things you should do to keep it in
peak operating condition.
1. If you’re not going to be using it for a while,
take the batteries out. Acid damage caused by
leaking batteries can be severe.
2. Avoid extreme temperatures. Don’t leave it inside
a closed car that’s sitting in the sun. Or even worse,
the trunk of a car.
3. If you “scrub” the search coil on the ground, you’ll
eventually wear through the bottom of the coil.
Replacement coils are expensive. Instead, invest in
a coil cover; they’re cheap.
4. Keep your ID Excel dry and clean. If you’ve been
working in or around dust, wipe it down with a damp
cloth and dry it with a hair dryer (low or no heat) or a
dry cloth. Remove and clean the lower stem. Keep
the lock nuts free of sand and dirt.
MAINTENANCE
Page 17

SPECIFICATIONS
ACCESSORIES
NOTES
Standard Items:
8" Spider Coil with cable
Operating manual
Optional Items:
Carrying Bag
Coil covers
Hard Carrying Case
Fisher Phones
Stereo Phones
WEIGHT
• ID discrimination with 4 tone audio
& high resolution numeric target ID
4
• True ALL-Metal mode with single tone
& high resolution numeric target ID
4
• Pinpoint - no motion mode with
precision numeric readout
FREQUENCY
Complete ......................................... 2.76 lbs
Extended................. 52” Collapsed 3................ 42”
Type ..............................................Concentric, Co-planar Spider
Diameter .......................................8"
Shielding .......................................100% ESI
6
Submersible Coil ..........................Yes
1. Operating Frequency...................... 6.5 KHz
2. Audio Target Response:
Iron ID .......................................... (LOW TONE)
Foil, Nickel, Rnd. Tabs ..................... (MID LOW TONE)
SquareTabs, Zinc ............................ (MID/HIGHTONE)
Copper, Clad, Silver Coin ................. (HIGH TONE)
Drop-in, no wires ............................Yes
Automatic Low Battery Alert .......... Yes
Type ........................ ...................... Two, 9-Volt Alkaline 5
Life ................................................ 20-25 hours (Alkaline)
2
LENGTH
OPERATING MODES
SEARCH COIL
BATTERIES
Lifetime Limited Warranty*
*warranty may vary outside of the United States,
see your dealer for details
WARRANTY
1. Subject to improvement or modification without notice.
2. Approximate.
3. The ID Excel disassembles to fit into an optional carrying case measuring approximately 6"x 21" x 15".
4. The ID Excel is a motion detector in the All Metal and Target ID modes.
The search coil must be moving at least slightly to detect a target.
5. For maximum performance and battery life, always use Alkaline Batteries. .
6. ESI: Electro-Static Insulated to eliminate certain types of false signals.
SPECIAL FEATURES
Controls .....................................keypad with tactile response
Display ....................................... LCD w/ constant control readout
DISC control .............................. Yes
SENS control .............................Yes
Automatic Ground Balance ......... Yes
Programmed Coin/Relic Mode ..... Yes (FP)
Audio Output Stereo Jack ...........Stereo Headphones (Optional)
15
Page 18

Page 19

Page 20

QUALITY
Fisher detectors are renowned for their quality.
Each instrument is hand crafted in the USA with pride
PERFORMANCE
Our detectors are durable, dependable, and search deeper.
REPUTATION
Fisher produced the first patented metal detector in 1931. For
over 70 years, the Fisher logo has been a mark of excellence.
LIFETIME WARRANTY
Fisher believes in the products we produce and backs this belief with
a Limited Lifetime Warranty for a Lifetime of Service & Satifaction,!
*Warranty may vary outside the United States. See your dealer for details
SERVICE
Fisher is committed to providing you, our valued customer, with
superior service. Each and every instrument is rigidly tested
& carefully inspected during assembly and before shipment.
Should you have any questions or problems, contact:
EXPORT DEPARTMENT
282 State Street
North Haven, CT 06473 USA
Tel 203.288.1638 Fax 203.287.8099
email: fisher@exportdept.com
FISHER RESEARCH LABORATORY
200 West Willmott Road.,
Los Banos, California 93635
Tel 209.826.3292 Fax 209.826.0416
www.fisherlab.com email: info@fisherlab.com
FRL#8730020-A
 Loading...