


Important Safet y Instructions
fender.com
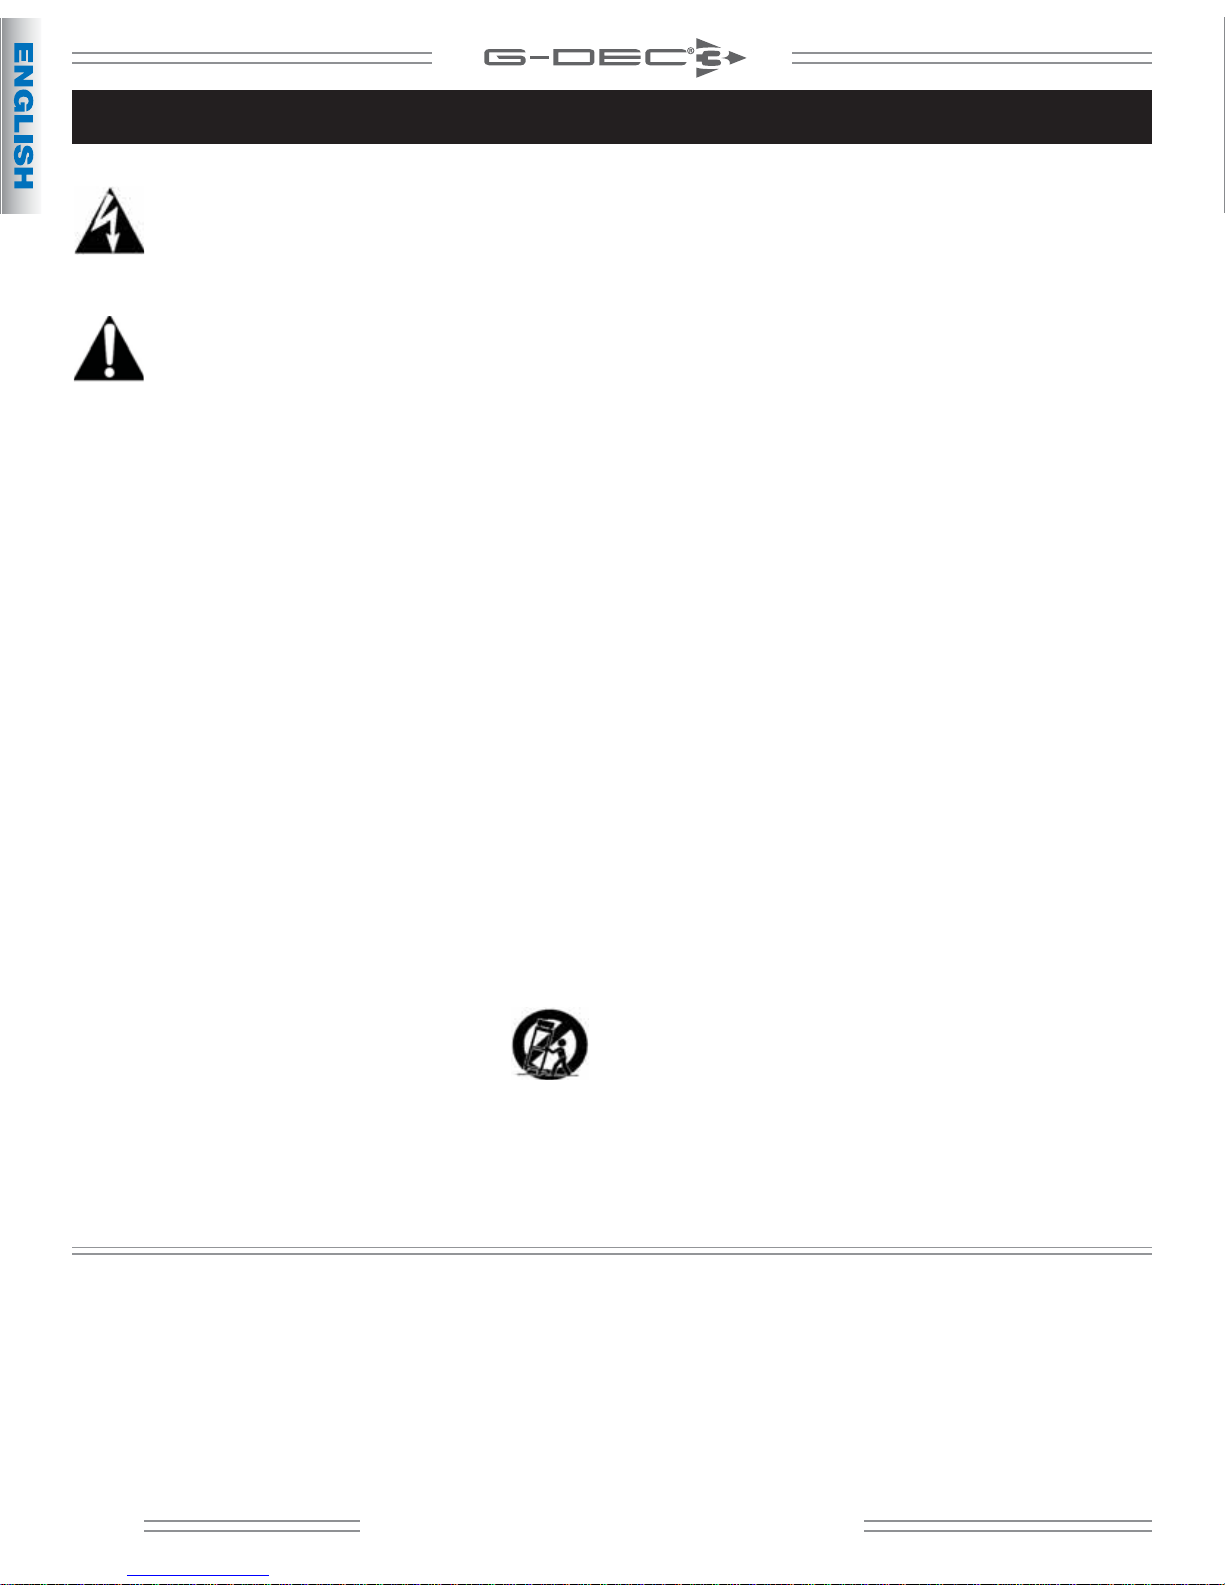
The lightning flash with arrowhead symbol within an
equilateral triangle is intended to alert the user to the
presence of uninsulated “dangerous voltage” within the
product’s enclosure that may be of sufficient magnitude
to constitute a risk of electric shock to persons.
The exclamation point within an equilateral triangle is
intended to alert the user to the presence of important
operating and maintenance (servicing) instructions in the
literature accompanying the product.
1) Read these instructions.
2) Keep these instructions.
3) Heed all warnings.
4) Follow all instructions.
5) Do not use this apparatus near water.
6) Clean only with dry cloth.
7) Do not block any ventilation openings. Install in accordance
with the manufacturer’s instructions.
8) Do not install near any heat sources such as radiators, heat
registers, stoves, or other apparatus (including amplifiers) that
produce heat.
9) Do not defeat the safety purpose of the polarized or groundingtype plug. A polarized plug has two blades with one wider
than the other. A grounding type plug has two blades and
a third grounding prong. The wide blade or the third prong
are provided for your safety. If the provided plug does not fit
into your outlet, consult an electrician for replacement of the
obsolete outlet.
10) Protect the power cord from being walked on or pinched
particularly at plugs, convenience receptacles and the point
where they exit from the apparatus.
11) Only use attachments/accessories specified by the
manufacturer.
12) Use only with the cart, stand, tripod, bracket, or
table specified by the manufacturer or sold with the
apparatus. When a cart is used, use caution when
moving the cart/apparatus combination to avoid
injury from tip-over.
13) Unplug this apparatus during lightning storms or when unused
for long periods of time.
14) Refer all servicing to qualified service personnel. Servicing is
required when the apparatus has been damaged in any way,
such as power-supply cord or plug is damaged, liquid has been
spilled or objects have fallen into the apparatus, the apparatus
has been exposed to rain or moisture, does not operate normally,
or has been dropped.
15) To completely disconnect this apparatus from the AC mains,
disconnect the power supply cord plug from the AC receptacle.
16) The mains plug of the power supply cord shall remain readily
operable.
17 ) WARNING – To reduce the risk of fire or electric shock, do not
expose this apparatus to rain or moisture.
18) Do not expose this equipment to dripping or splashing and
ensure that no objects filled with liquids, such as vases, are
placed on the equipment.
19) Maintain at least 6 inches (15.25 cm) of unobstructed air space
behind the unit to allow for proper ventilation and cooling of
the unit.
20) CAUTION – For rack mounted power amplifiers, keep all wiring
and materials away from the sides of the unit and allow the
unit to cool down for 2 minutes before pulling from a rack
enclosure.
21) Amplifiers and loudspeaker systems, and ear/headphones (if
equipped) are capable of producing very high sound pressure
levels which may cause temporary or permanent hearing
damage. Use care when setting and adjusting volume levels
during use.
22) FCC Part 15 Compliance Statement (for digital products, as
applicable) - Part 15.21: Changes or modifications not expressly
approved by the party responsible for compliance could void
the user’s authority to operate the equipment. NOTE: The
manufacturer is not responsible for any radio or TV interference
caused by unauthorized modifications to this equipment. Such
modifications could void the user’s authority to operate the
equipment.
23) WARNI NG – To maintain product safety, products with internal
or external (battery pack) batteries: •Batteries and/or the
product in which they are installed, shall not be exposed to
excessive heat such as sunshine, fire or the like. •There may be
a danger of explosion if the battery is incorrectly connected/
replaced. Replace only with the same or equivalent type battery
specified in the instructions or on the product.
24) CAUTION – Unplug unit and allow it to cool before touching/
replacing vacuum tubes.
FENDER MUSICAL INSTRUMENTS CORPORATION
This product is covered by one or more of the following patents: R.O.C. Taiwan I290002; UK Pat. GB2435368B
Fender®, G–DEC® , Blackface™, Fender® FUSE™ and Dyna–Touch™ are trademarks of FMIC.
Other trademarks are property of their respective owners.
2
A PRODUCT OF:
CORONA, CALIFORNIA, USA
Copyright © 2010 FMIC. All rights reserved.
fender.com
Create — Connect — Configure
fender.com
CREATE
…your arsenal of guitar tones from a warehouse full of amps and effects.
CONNECT
…via USB to your computer to download & upload backing tracks, and edit, store, and tweak your amp’s performance parameters
with the exclusive Fender® Fuse™ interface. Then share your stuff with other users!
CONFIGURE
…by mixing and matching your presets with onboard backing tracks for exciting solo jam sessions in every conceivable musical style.
Features
G–DEC® 3 THIRTY
• 30 Watt Guitar amp with 10” Special Design speaker and high-frequency tweeter
• 100 factory user presets with digital amp modeling & DSP effects
• MP3 / Wav and MIDI file storage & playback
• AMAZING onboard artist presets and loop content so YOU can jam with the greatest players on the planet
• USB connection for user programming and audio recording output & monitoring
• USB cable included
• SD card slot for unlimited storage of presets and audio content
• Line Out jacks for stereo output to sound reinforcement or recording equipment
G–DEC® 3 FIFTEEN
• 15 Watt Guitar amp with 8” Special Design speaker
• 100 factory user presets with digital amp modeling & DSP effects
• MP3 / Wav and MIDI file storage & playback
• AMAZING onboard artist presets and loop content so YOU can jam with the greatest players on the planet
• USB connection for user programming and audio recording output & monitoring
• USB cable included
• SD card slot for unlimited storage of presets and audio content
fender.com
3
Control Panel Overview
fender.com
START-
STOP
QUICK
TAP
HOLD FOR
ACCESS
TUNER
DUB
SAVE
EXIT
HOLD FOR
SD
PHONES
USB
UTIL
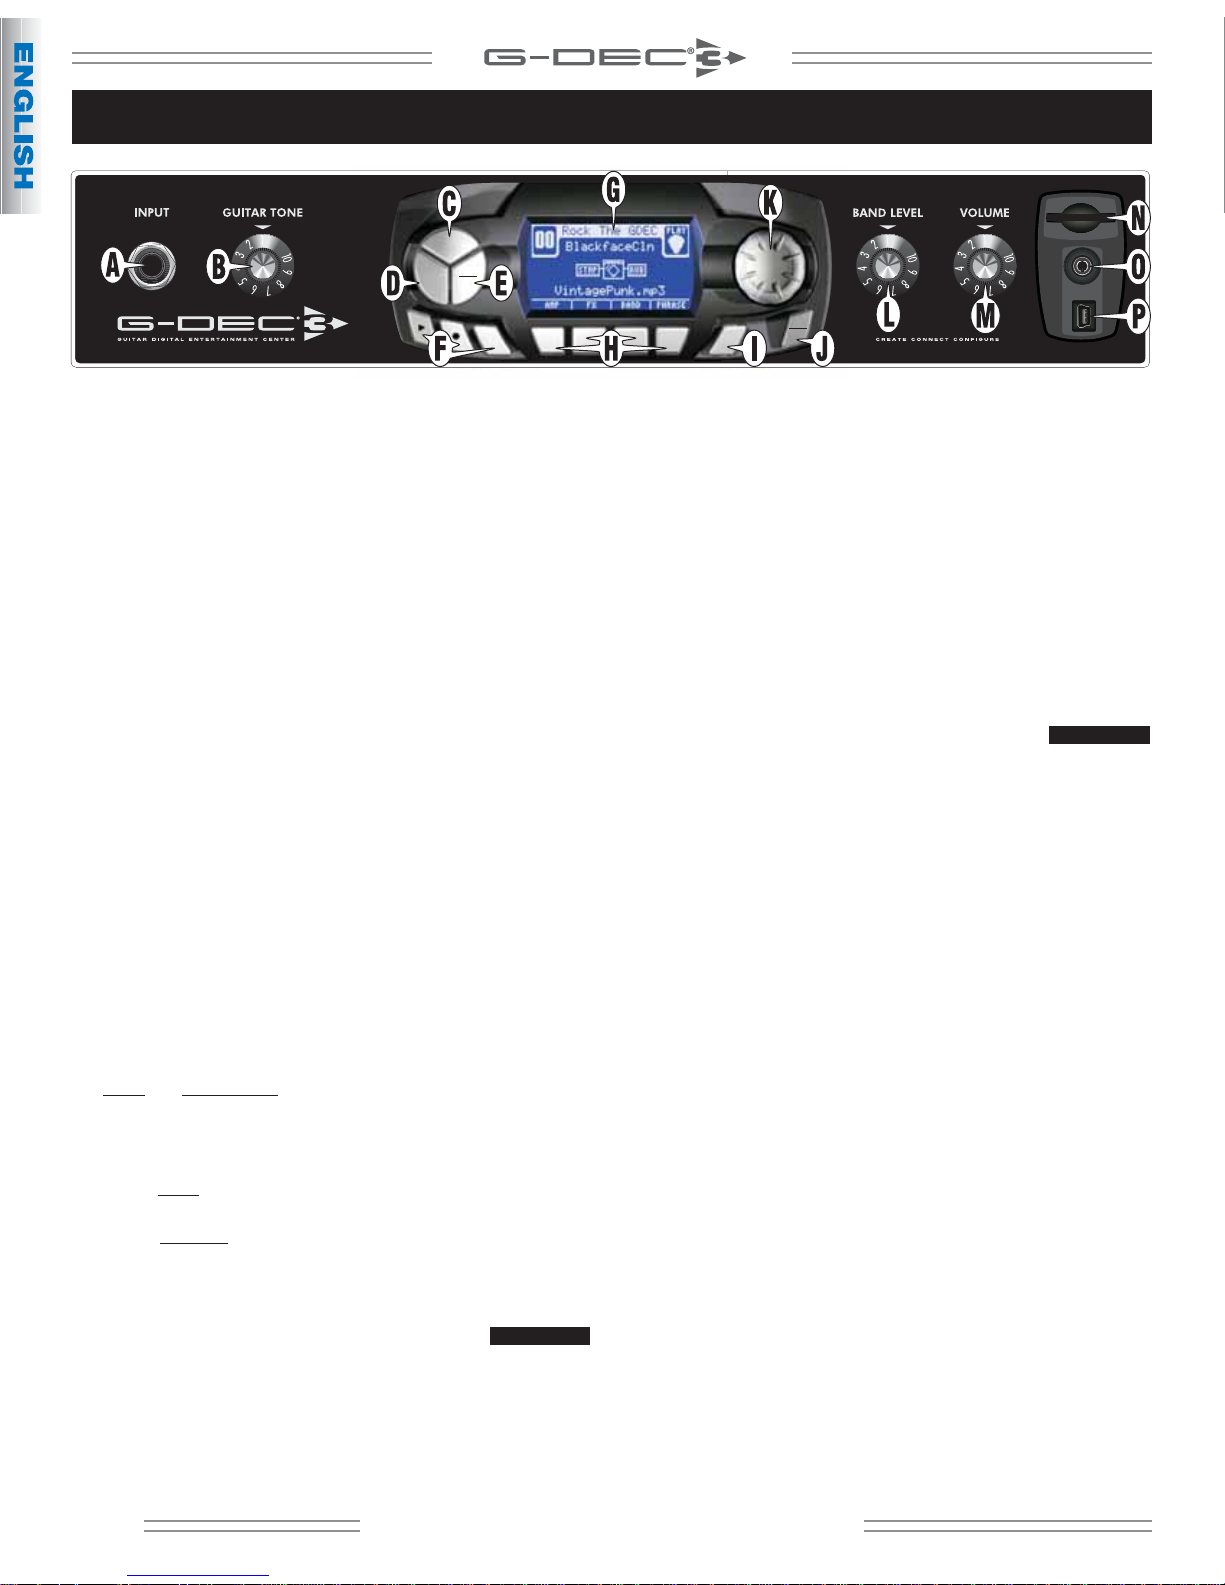
A. INPUT — Plug your guitar in here.
B. GUITAR TONE — Adjusts the tone of your guitar. This does not
affect the sound of the Band or Auxiliary input.
C. START-STOP — Press to start the Band track so that you can play
along on guitar. Press again to stop the Band. The title of the
Band track is displayed on screen. See Band Mode on page 7 to
learn how to change the Band track and modify a variety of Band
parameters.
D. QUICK ACCESS (QA) — Press to enter Quick Access (QA) mode.
Press QUICK ACCESS repeatedly to change the file type and
location of the Band tracks displayed. Press EXIT {J} to leave QA
mode.
In QA mode you can assign three presets to soft keys {H} for quick
access to your favorites. To assign a QA preset, press and hold a
QA1, QA2 or QA3 soft key while turning the ENCODER knob {K}.
One of the cool things you can do in QA mode is scroll through
all your Band tracks and instantly play them with any of your QA
presets simply by pressing START-STOP. Press the LOOP soft key
to play the Band track repeatedly.
E. TAP / TUNER — Press and hold this key to activate the TUNER.
Strike an open string on your guitar and the Tuner displays the
nearest note and the tuning needle shows if you are in tune.
TAP : You can also use this key to tap "by feel" the delay interval
of delay effects (while in FX mode, Delay Time menu) and the
tempo of MIDI tracks (while in Band mode, Temp o menu) rather
than selecting the time values using the ENCODER knob.
F. P H R A S E SA M PLER — Use the Phrase Sampler to record G-DEC 3
audio for a variety of sampling and overdubbing functions.
Press: To start/stop...
Playback of a sampled phrase
Sampling (recording) a new phrase
DUB Overdubbing (adding layers) to original phrase
Phrase input levels are affected by your guitar volume level and
the BAND LEVEL {L} setting.
Phrase playback level is adjusted in the Phrase mode PHRASE
LEVEL menu and is also affected by VOLUME {M}.
See Phrase Mode on page 7.
G. SCREEN — The screen displays everything that's going on with
the G-DEC 3. Turn the ENCODER knob to edit the
highlighted
item on screen.
H. SOFT KEYS — The function of each key is displayed on screen.
In Play mode for example, pressing the soft keys will take you to
Amp, FX, Band and Phrase modes.
I. SAVE — The SAVE key will turn red to indicate that you have
made changes to the current preset. Press SAVE if you want to
keep your changes. It's a two step process:
1. Press SAVE once. From this screen you can select any preset to
overwrite. To change the name of the preset: Press soft keys to
move the cursor, select case/number or insert space, then turn
the ENCODER knob to change the highlighted character.
2. Press SAVE a second time to complete the save process.
J. EXIT / UTILITY MODE — Press EXIT to return to Play mode from
other modes.
Press and hold EXIT to enter Utility mode where you can perform
system functions like importing presets and monitoring memory
usage. See Utility Mode on page 8.
K. ENCODER KNOB — Turn this knob to edit the
highlighted
item on screen. In Play mode for example, the preset name is
highlighted and therefore the ENCODER knob changes presets.
L. BAND LEVEL — Adjusts the volume level of the Band track as
well as the Auxiliary input levels.
M. VOLUME — Adjusts the overall loudness of the G-DEC 3.
N. SD CARD SLOT — You can use an SD flash memory card to have
additional Band tracks available to the G-DEC 3. You can use MP3
or WAV files (stereo/mono 16 bit, 44.1k) or MIDI files (type 0 or
type 1 ). You can also import and export presets to the SD card.
Insert an empty SD card in the G-DEC 3 and the G-DEC will
automatically create the appropriate folders for you. Then you
can load MP3 or WAV files from your computer onto the SD card
"Audio" folder to use as Band tracks. Presets, phrase and MIDI
tracks go in their respective folders.
NOTE: For reliable performance use only premium quality SD
cards. Log on to fender.com for a list of approved brands.
O. PHONES — Plug in your headphones, ear buds, or power
speakers to enjoy the G-DEC 3's stereo features. This jack may
also be used as a stereo recording output. The amp's internal
speaker will be muted.
P. US B — You can connect the G-DEC 3 to your computer and use
Fender® Fuse™ software (included) to transfer/edit presets and media
files beyond what the G-DEC 3 is capable of alone. See the Fender
Fuse software owner's manual on the G-DEC 3 DVD for details.
The USB connection can also be used to stream stereo 16 bit,
44.1k audio (playback and recording). The included G-DEC 3 DVD
contains Ableton® Live Lite 8 Fender Edition recording software
and drivers.
NOTE: While recording through the USB connection the Phrase
Sampler and Band track functions are disabled. Do not connect
the G-DEC 3 through a USB hub.
4
fender.com