

Espa SILEN ST Instruction Manual
RPM4 pressure monitor,
Fan replacement instructions
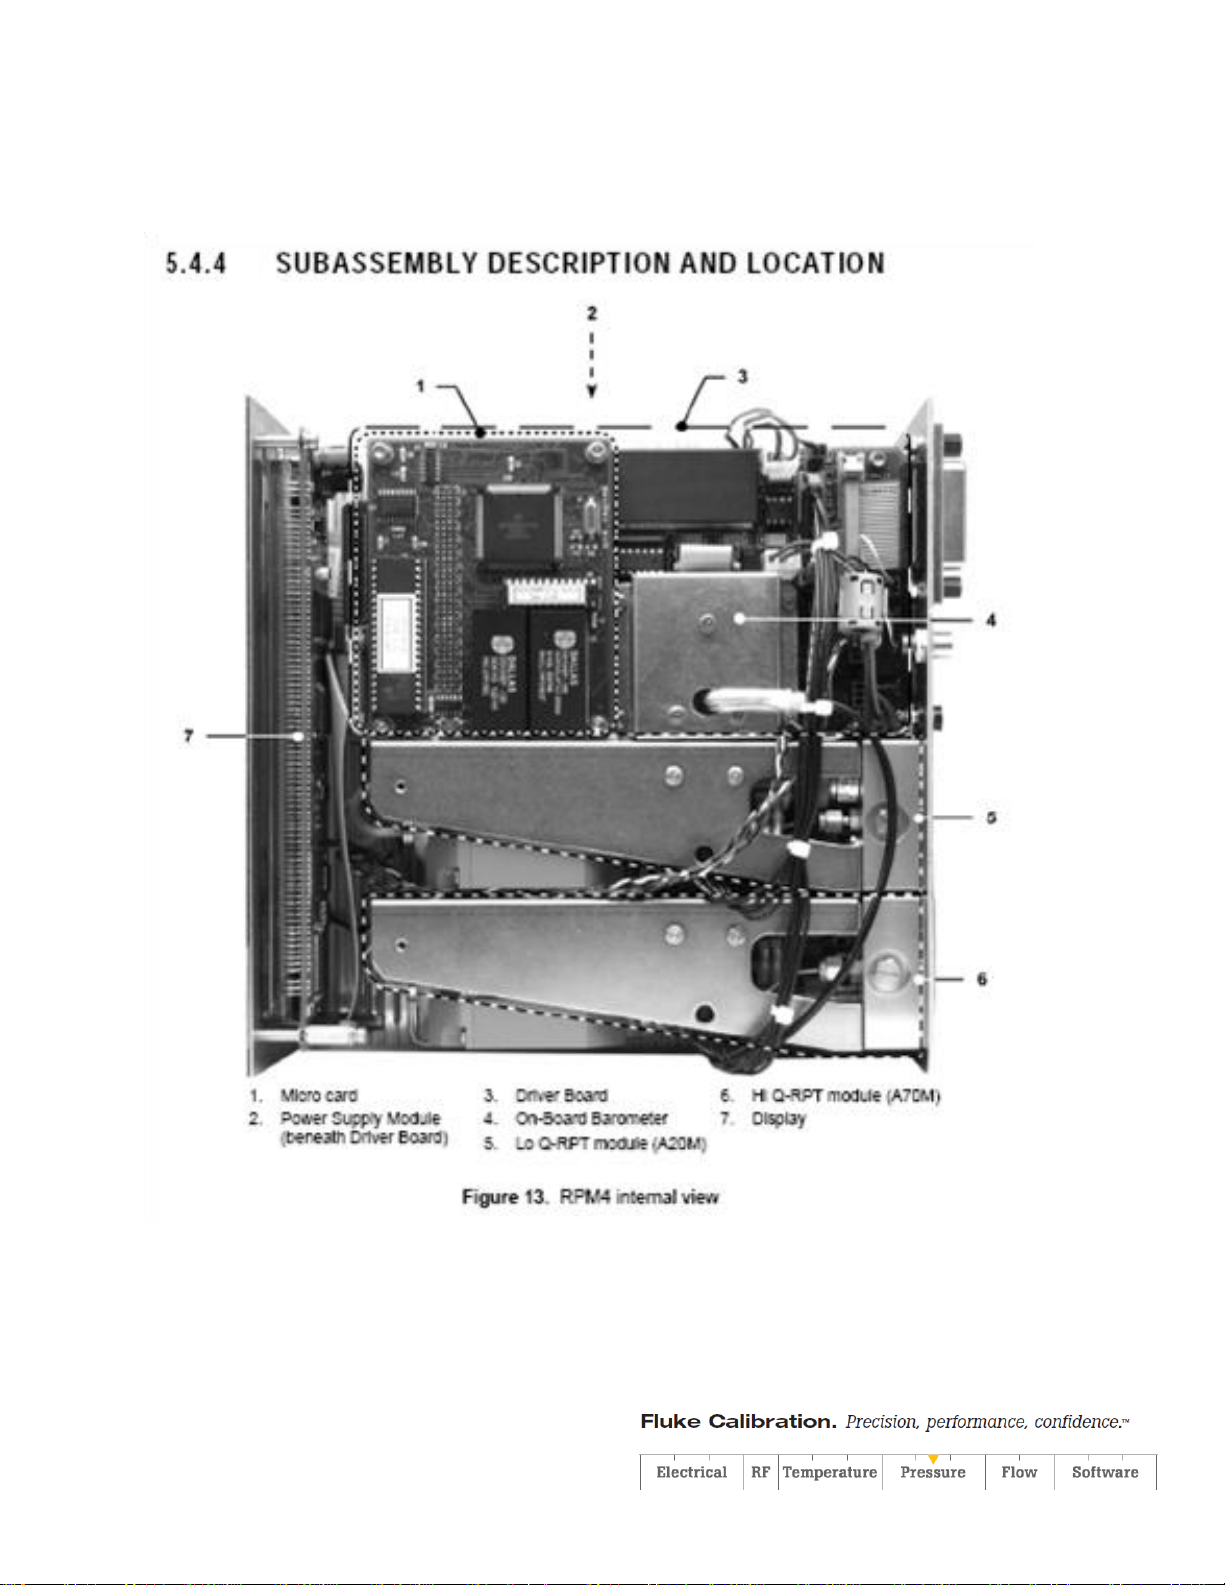
See the RPM4 Operators Manual for more information on the operation and use of the RPM4 pressure
monitor
Part Number: 3140519
Description: 103282,FAN,12V,25X25X100,1.3CFM
1. Remove the feet from the RPM4
2. Remove the enclosure from the RPM4. Don't let the front panel fall on its face when removing the enclosure
3. Remove the Q-RPT module(s) by removing the four screws on the back panel that hold them in
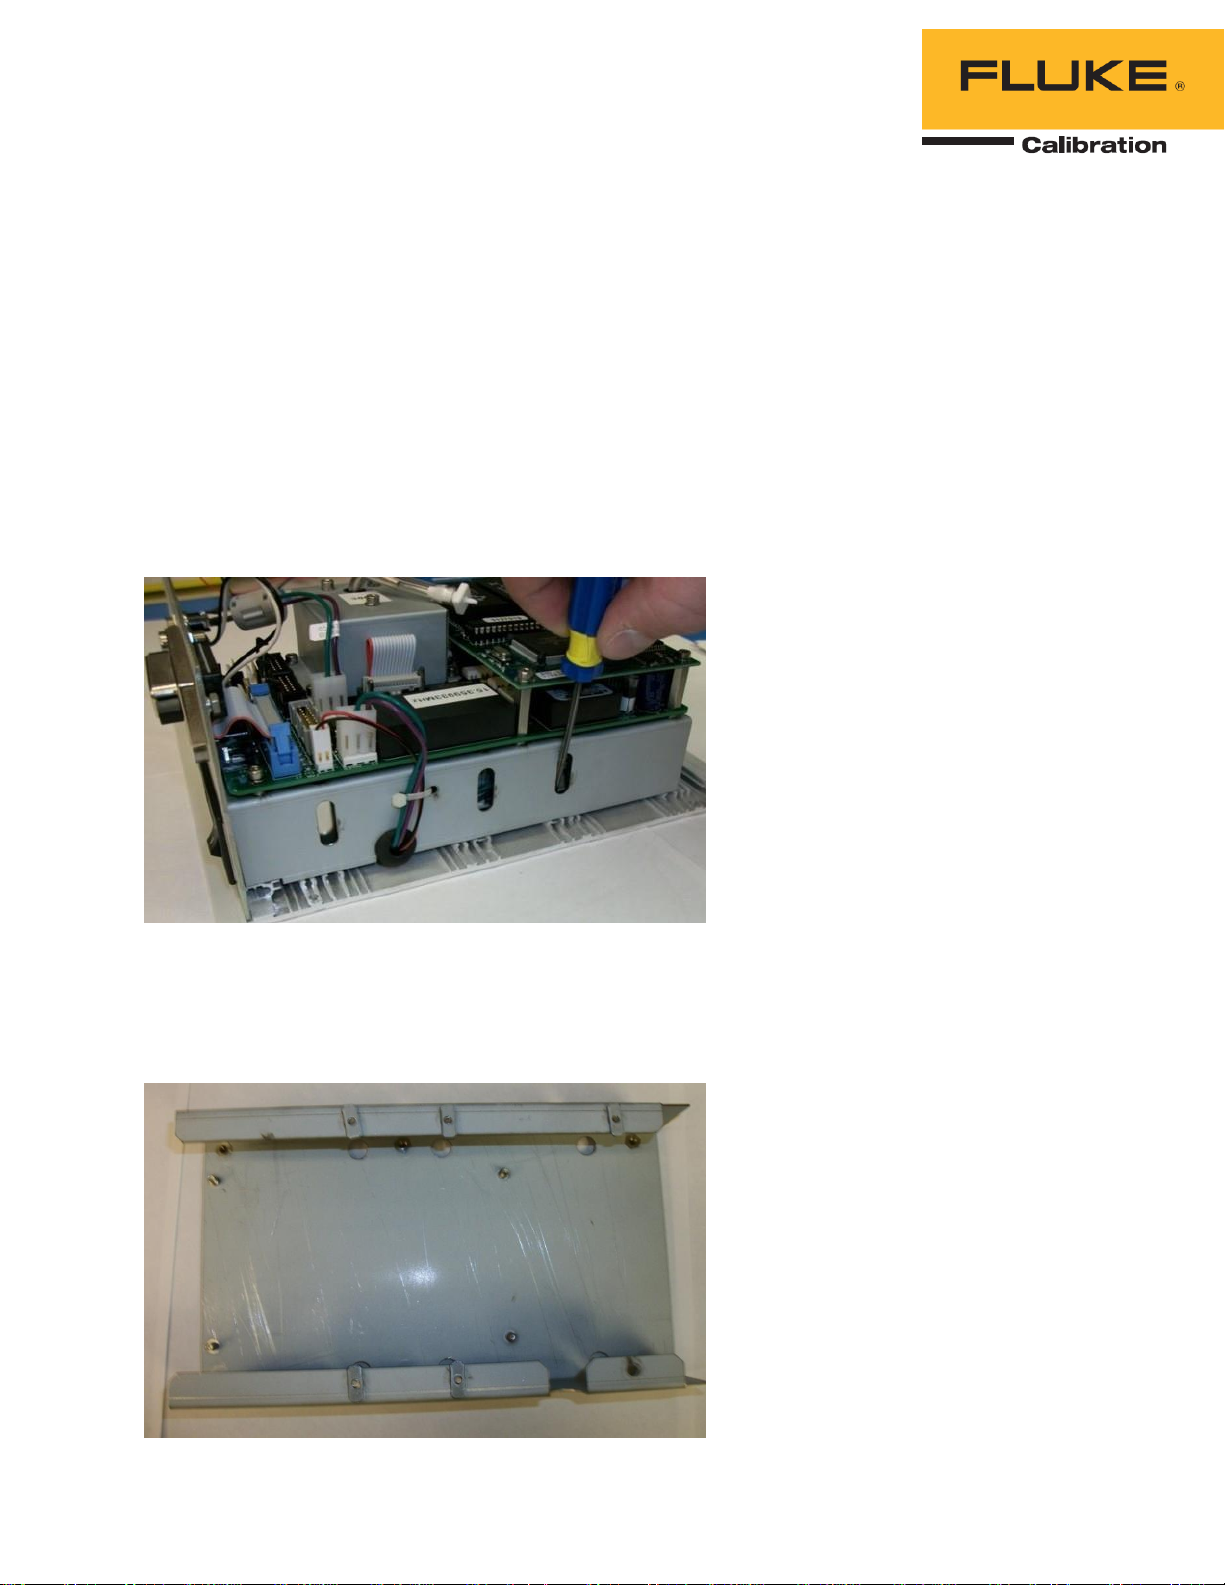
4. Loosen the screws (don’t remove them) that hold the electronic chassis (power supply, driver board, micro-board and
barometer) to the bottom enclosure panel
5. Slide the electronic chassis out of the retaining rails to access and replace the fan
6. If you loosen the screws too much, attach the mounting nuts back onto the M3x5 screws and washers. Turn the
chassis upside down to hold the lock washers on the screws if you have to. Leave the screws loose
7. Align the mounting nuts so they will slide into the enclosure rails and slide the chassis into the rails. Secure the
mounting nuts making sure there is even spacing on each side where the rear panel meets the enclosure
8. Install the Q-RPTs
For more information call:
27 July 2016 In the U.S.A. (877) 355-3225
 Loading...