

Ergotech One-Touch Free Stand User Manual
INNOVATIVE ERGONOMIC SOLUTIONS
One Touch Free Stand
Assembly
Instructions
Warning: Never operate unit with more than two monitors without securing the unit to the desk.
The unit could possibly tip over causing bodily injury or product damage.
Contact Ergotech for more information:
8 Westchester Plaza
Elmsford, NY 10523
914.347.3800
Visit us online at www.ergotechgroup.com
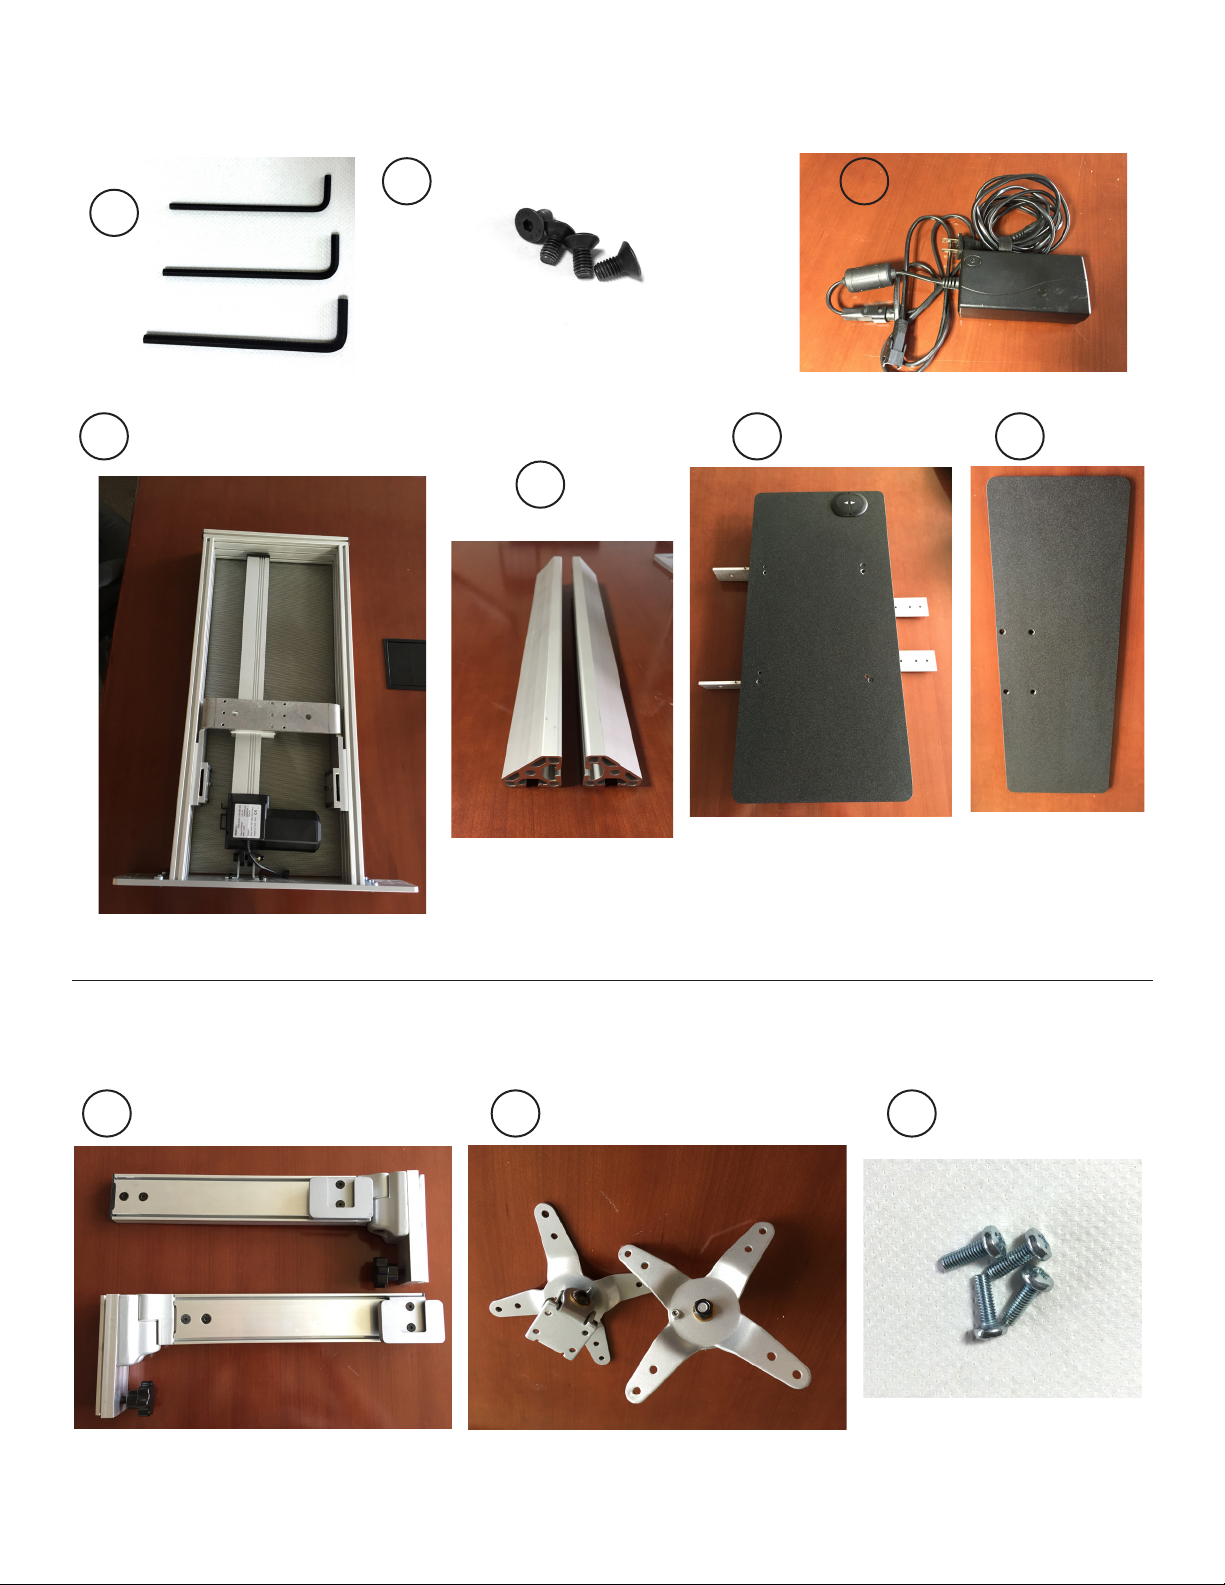
Included Parts:
Power Box w/Cord
A
4,5,6mm Allen Keys
D
B
Lower Work Surface Screws
C
F G
E
Legs
Base Unit/Lift Assembly
Additional Parts Included with Dual Bundle ONLY:
H
I J (x8)
Upper Work Surface
Lower
Work Surface
Right & Left Monitor Arms Pivots
Pivot Screws
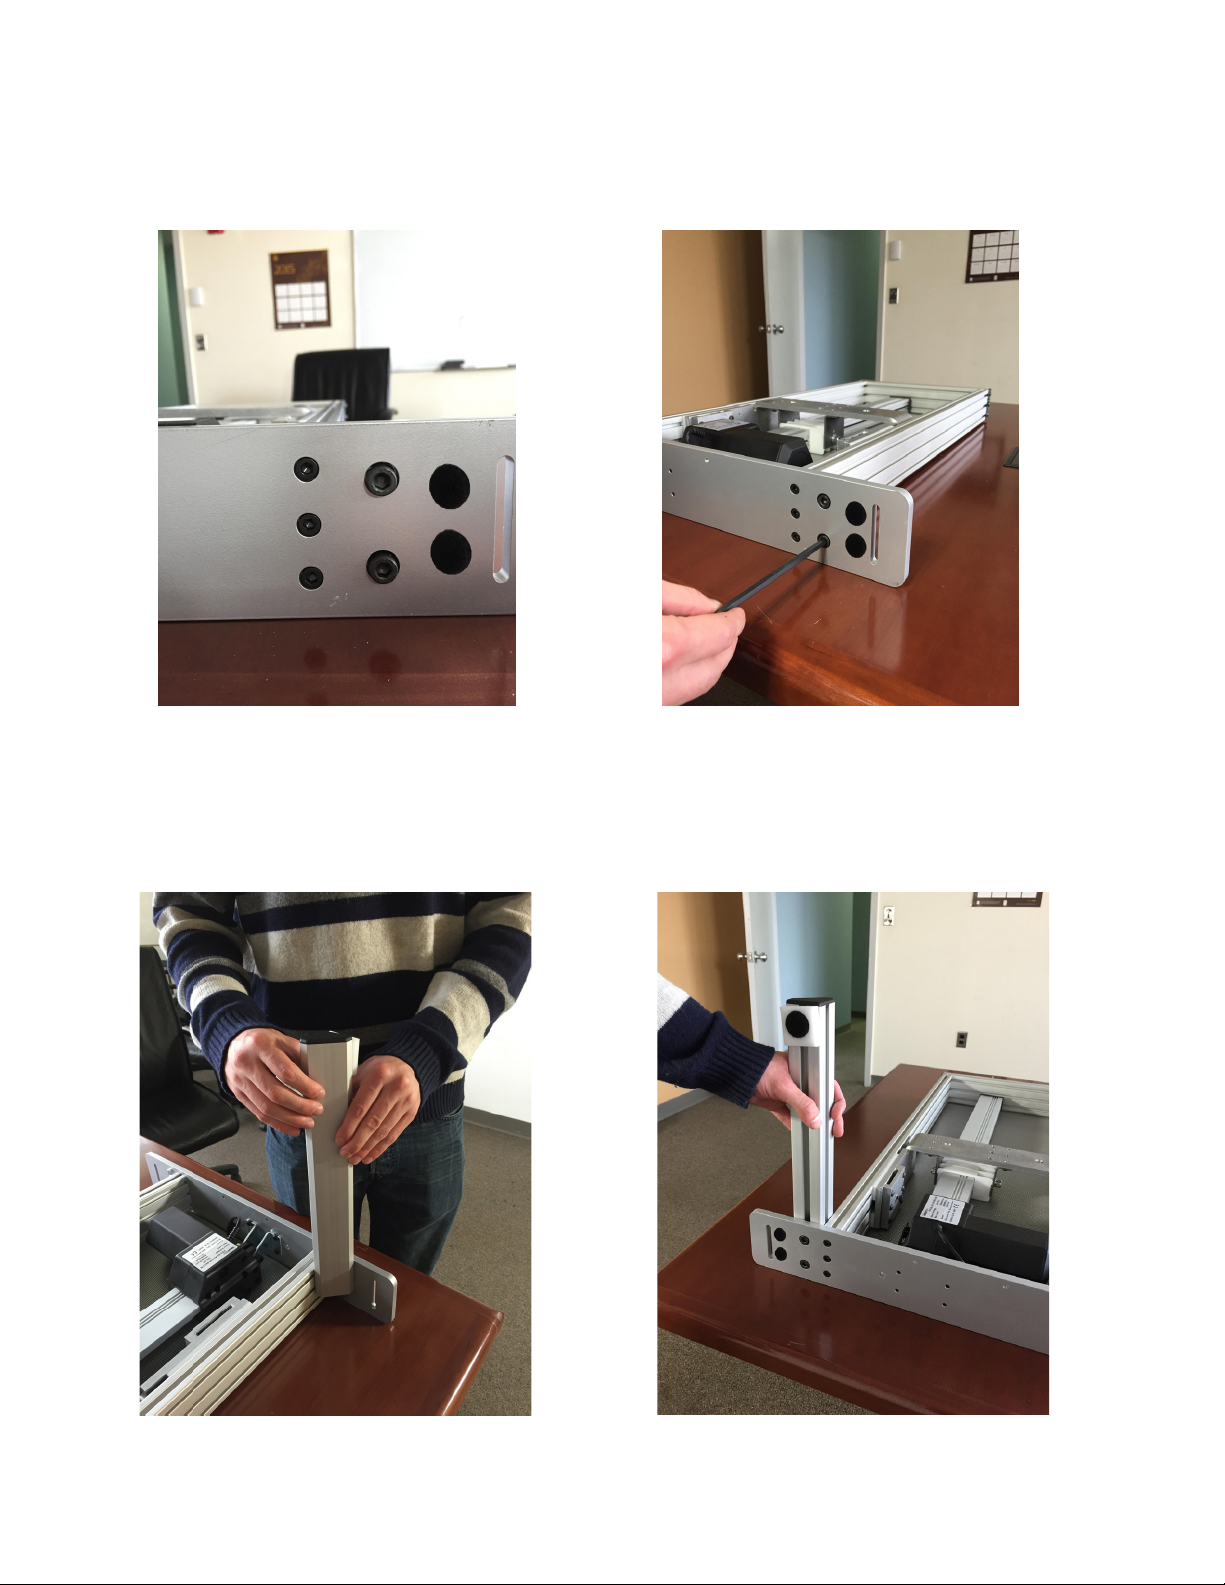
Step 1. Lay unit down face up on a solid, sturdy hard surface. Use provided allen key (A) to loosen the four 6mm allen screws that come pre-assembled on the underside of the lift assembly.
Step 2. Slide the legs (E) on the lift assembly D), making sure rubber pads are on the underside
of the legs and the base of the lift assembly, where they will be touching the desk in the upright
position.
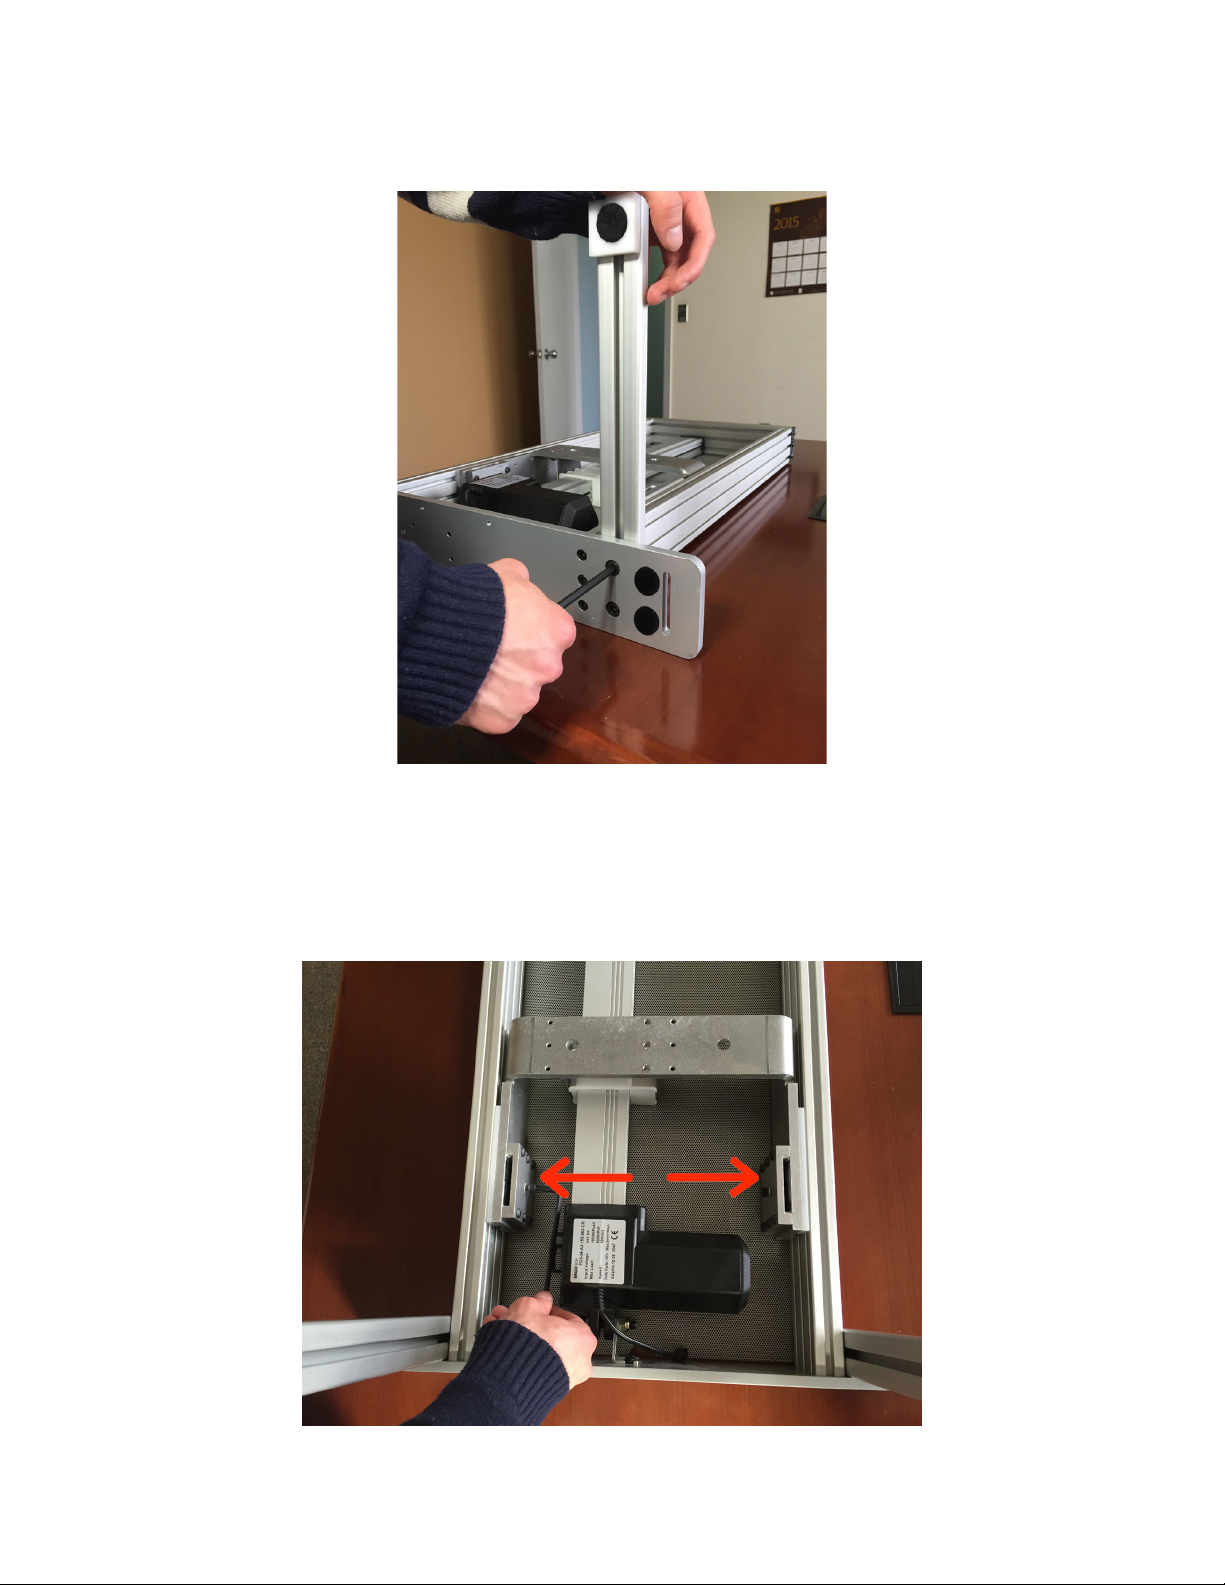
Step 3. Re-tighten the screws at the base of the unit to secure the legs to the base.
Step 4. Loosen the screws in the middle of the work surface support brackets as shown here.
These screws may be loosened with the included #5 allen key or by hand based on preference.
 Loading...