

Page 1
User's Guide
4012394
XXX-00
Page 2

®
EPSON Scan Server &
EPSON TWAIN Pro Network
SCANNER UTILITY PROGRAMS
All rights reserved. No part of this publication may be reproduced, stored in a retrieval
system, or transmitted in any form or by any means, electronic, mechanical, photocopying,
recording, or otherwise, without the prior written permission of SEIKO EPSON
CORPORATION. No patent liability is assumed with respect to the use of the information
contained herein. Neither is any liability assumed for damages resulting from the use of the
information contained herein.
Neither SEIKO EPSON CORPORATION nor its affiliates shall be liable to the purchaser of
this product or third parties for damages, losses, costs, or expenses incurred by purchaser or
third parties as a result of: accident, misuse, or abuse of this product or unauthorized
modifications, repairs, or alterations to this product.
SEIKO EPSON CORPORATION and its affiliates shall not be liable against any damages or
problems arising from the use of any options or any consumable products other than those
designated as Original EPSON Products or EPSON Approved Products by SEIKO EPSON
CORPORATION.
EPSON is a registered trademark of SEIKO EPSON CORPORATION.
IBM and PS/2 are registered trademarks of International Business Machines Corporation.
Microsoft and Windows are registered trademarks of Microsoft Corporation in the United
States of America and other countries.
Apple, Macintosh, Mac, iMac, and Power Macintosh are registered trademarks of Apple
Computer, Inc.
General Notice: Other product names used herein are for identification purposes only and may be
trademarks of their respective companies.
Copyright © 2000 by SEIKO EPSON CORPORATION, Nagano, Japan.
User’s Guide
Page 3

ii
Page 4

Contents
Introduction
Features. . . . . . . . . . . . . . . . . . . . . . . . . . . . . . . . . . . . . . . . . . . . . . . . 1
About This Guide . . . . . . . . . . . . . . . . . . . . . . . . . . . . . . . . . . . . . . . 3
References . . . . . . . . . . . . . . . . . . . . . . . . . . . . . . . . . . . . . . . . . . . . . . 4
Chapter 1 Installing the Software
System Requirements . . . . . . . . . . . . . . . . . . . . . . . . . . . . . . . . . . . . 1-2
Software for Scanning over a Network . . . . . . . . . . . . . . . . . . . . . 1-3
Installing EPSON Scan Server . . . . . . . . . . . . . . . . . . . . . . . . . . . . .1-3
Setting the default scanner for Windows 2000 and
Windows 98 Users . . . . . . . . . . . . . . . . . . . . . . . . . . . . . . . .1-10
Changing the start up mode . . . . . . . . . . . . . . . . . . . . . . . . . . 1-13
Installing EPSON TWAIN Pro Network . . . . . . . . . . . . . . . . . . . . 1-14
For Windows. . . . . . . . . . . . . . . . . . . . . . . . . . . . . . . . . . . . . . . 1-14
For Macintosh . . . . . . . . . . . . . . . . . . . . . . . . . . . . . . . . . . . . . .1-20
Calibrating Your Screen . . . . . . . . . . . . . . . . . . . . . . . . . . . . . . . . . . 1-23
Chapter 2 Network Scanning Basics
Network Scanning Procedure . . . . . . . . . . . . . . . . . . . . . . . . . . . . .2-2
Starting EPSON Scan Server . . . . . . . . . . . . . . . . . . . . . . . . . . . . . .2-2
Starting EPSON TWAIN Pro Network . . . . . . . . . . . . . . . . . . . . .2-4
Scanning an Image . . . . . . . . . . . . . . . . . . . . . . . . . . . . . . . . . . . . . .2-6
Using the EPSON TWAIN Pro Network dialog box
on the client computer. . . . . . . . . . . . . . . . . . . . . . . . . . . . . 2-6
Using the Start button on the scanner. . . . . . . . . . . . . . . . . . 2-8
Using the Start button in the EPSON Scan Server
dialog box . . . . . . . . . . . . . . . . . . . . . . . . . . . . . . . . . . . . . . . 2-9
Getting Information From Online Help . . . . . . . . . . . . . . . . . . . . . 2-11
iii
Page 5

Chapter 3 Troubleshooting
Problems and Solutions. . . . . . . . . . . . . . . . . . . . . . . . . . . . . . . . . . 3-2
Appendix A Scanner Server PC Setup
Setting up the Scanner Server PC. . . . . . . . . . . . . . . . . . . . . . . . . . A-2
Installing the TCP/IP protocol (Windows 2000) . . . . . . . . A-2
Installing the TCP/IP protocol (Windows 98, 95) . . . . . . . A-6
Installing the TCP/IP protocol (Windows NT 4.0) . . . . . . A-9
Setting the scanner server PC's IP address . . . . . . . . . . . . . A-11
Glossary
Index
iv
Page 6

Introduction
Features
EPSON Scan Server and EPSON TWAIN Pro Network software
work together to directly control all of the features of your EPSON
scanner on a network. Through the use of these software
packages, you can share one or more scanners among the users
in a network and allow scanned images to be imported into any
TWAIN-compliant application.
EPSON Scan Server software is installed on a PC running on
Windows which is connected to an EPSON scanner (hereafter, the
PC is called the scanner server PC), and makes the EPSON scanner
shareable in the network. The scanner can be accessed from all
client computers (Windows or Macintosh) which have EPSON
TWAIN Pro Network software installed.
EPSON TWAIN Pro Network software controls the functions of
your scanner just like EPSON TWAIN Pro software and can be
used on a network. On the other hand, EPSON TWAIN Pro
software is designed to be used only in a stand-alone
configuration in which only one computer is connected to an
EPSON scanner.
Introduction
1
Page 7
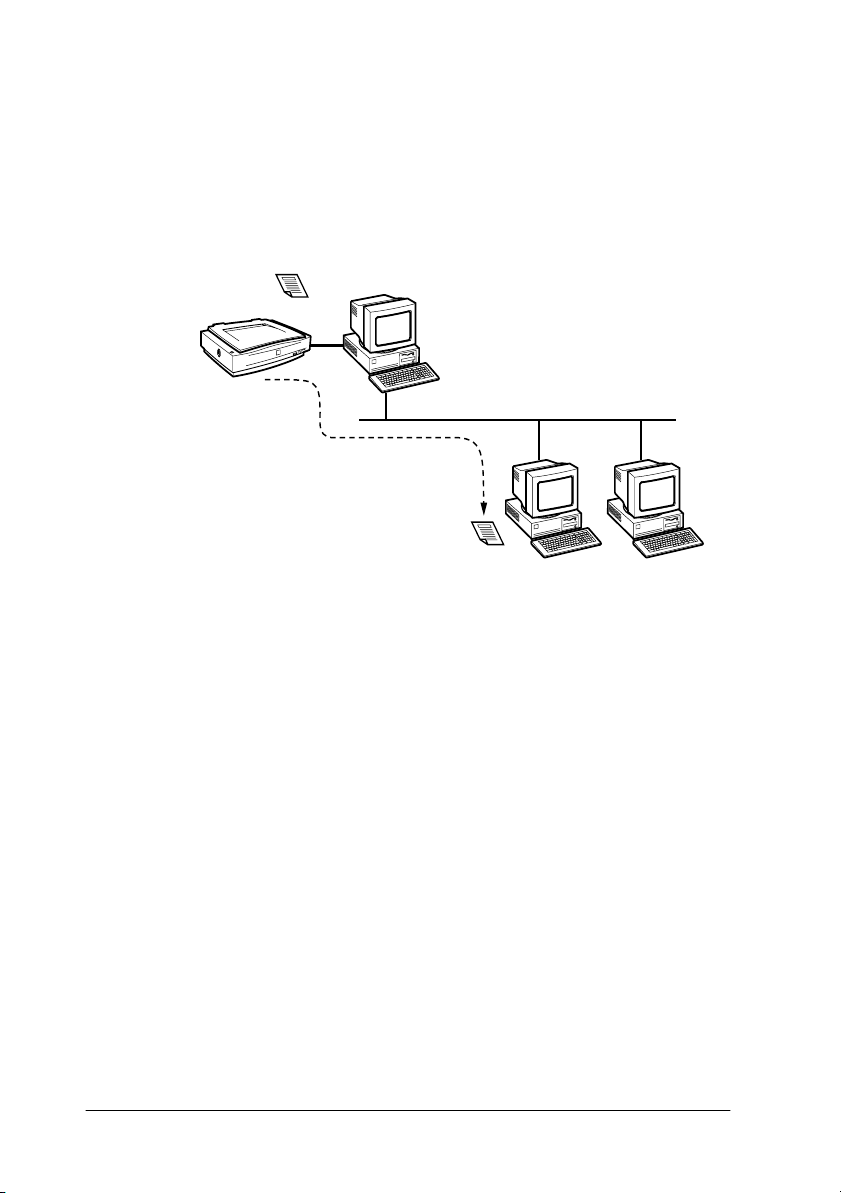
The illustration below shows a sample network configuration in
which network scanning is available. One of the clients can be
connected to the scanner server PC and import a scanned image
from the scanner. After disconnecting, another client can access
the scanner server PC.
Document to
be scanned
Scanner Server PC
EPSON Scan Server
Scanner
Network
Scanned
Image
EPSON TWAIN
Pro Network
Client
computer
Client
computer
If there are multiple EPSON scanners and scanner server PCs in
the network, you can select which scanner to use in the EPSON
TWAIN Pro Network Setup dialog box on the client. To share an
EPSON scanner by clients in the network, only one EPSON
scanner can be connected to one scanner server PC.
2
Introduction
Page 8

About This Guide
This User's Guid e provides detailed instructions for installing and
using EPSON Scan Server and EPSON TWAIN Pro Network
software.
❏ Chapter 1 contains information about installing EPSON Scan
Server and EPSON TWAIN Pro Network software.
❏ Chapter 2 provides basic information about network
scanning.
❏ Chapter 3 contains troubleshooting information.
❏ The Appendix describes the procedure for initially setting up
a computer to be a scanner server.
Notes in this Guide contain important information and useful tips on
operating your scanner or software.
This User's Guide assumes that you have a basic understanding
of the Windows or Macintosh operating system.
In this guide, the word “Windows” generally includes
Window 95, 98, 2000 and NT 4.0 versions. Furthermore, screen
displays of Windows 98 are used to represent displays of all
versions of Windows unless the operating procedure differs
between versions. When explanations cover specific versions of
Windows, phrases such as “Windows 95,” “Windows 2000,” or
“Windows NT 4.0” will be used to identify the version.
Introduction
3
Page 9

References
There are other detailed user guides which contain useful
information for scanning. Please refer to those manuals to achieve
the best quality scanned images.
EPSON Scanner Online Reference Guide
Provides basic information about scanning and detailed reference
on the setting and functions of EPSON TWAIN Pro and other
EPSON scanner utility software. Since the settings and functions
for EPSON TWAIN Pro and EPSON TWAIN Pro Network are the
same, please refer to this guide for details on the settings and
functions of EPSON TWAIN Pro Network.
User's Guide for your EPSON scanner
Leads you through scanner setup and options installation, tells
you how to use the scanner and how to make basic scans. Be sure
to read this guide before connecting your scanner to a computer
running EPSON Scan Server.
4
Introduction
Page 10

Chapter 1
Installing the Software
System Requirements . . . . . . . . . . . . . . . . . . . . . . . . . . . . . . . . . . . . 1-2
Software for Scanning over a Network . . . . . . . . . . . . . . . . . . . . . 1-3
Installing EPSON Scan Server . . . . . . . . . . . . . . . . . . . . . . . . . . . . .1-3
Setting the default scanner for Windows 2000 and
Windows 98 Users . . . . . . . . . . . . . . . . . . . . . . . . . . . . . . . .1-10
Changing the start up mode . . . . . . . . . . . . . . . . . . . . . . . . . . 1-13
Installing EPSON TWAIN Pro Network . . . . . . . . . . . . . . . . . . . . 1-14
For Windows. . . . . . . . . . . . . . . . . . . . . . . . . . . . . . . . . . . . . . . 1-14
For Macintosh . . . . . . . . . . . . . . . . . . . . . . . . . . . . . . . . . . . . . .1-20
Calibrating Your Screen . . . . . . . . . . . . . . . . . . . . . . . . . . . . . . . . . . 1-23
1
Installing the Software
1-1
Page 11

System Requirements
Computer: for EPSON Scan Server
IBM PC/AT compatible computer
(Intel Pentium or faster processor is
recommended)
for EPSON TWAIN Pro Network
IBM PC/AT compatible computer
(Intel Pentium or faster processor is
recommended), or Apple Power
Macintosh
Operating System: for EPSON Scan Server
Windows 2000/98/95, or Windows NT 4.0
for EPSON TWAIN Pro Network
Windows 2000/98/95, or Windows NT 4.0
or Mac OS 8.0 or later
Note:
The included software cannot be used with the
Multiple Users function of Mac OS 9.
System
Configuration:
Scanner: EPSON EXPRESSION 1640XL
Hardware Interface
for scanner:
Hardware Interface
for networking:
Ethernet
Communication
Protocol:
1-2
Installing the Software
Minimum two computers in a network.
SCSI, USB, IEEE1394
10BaseT/100BaseTX, 10Base5,
10base2
TCP/IP
Page 12

Software for Scanning over a Network
To use EPSON scanners on a network and send scanned images
to client machines, you need to install the following software:
❏ EPSON Scan Server on the PC connected to the EPSON
scanner you want to use
❏ EPSON TWAIN Pro Network on network clients
Note:
❏ EPSON Scan Server must be installed on Microsoft Windows 2000,
98, 95 or NT 4.0. EPSON TWAIN Pro Network supports both
Windows and Macintosh. See System Requirements in this chapter
for details.
❏ To install the scanner software in Windows 2000 or NT 4.0, you
need to log on to Windows as an Administrator.
Installing EPSON Scan Server
Note:
EPSON Scan Server will only run on Windows 2000, 98, 95, or NT 4.0.
1
Before installing EPSON Scan Server, you need to do the
following:
1. Connect your scanner to the scanner server.
2. Turn on the scanner, then the scanner server.
Installing the Software
1-3
Page 13
3. Insert the EPSON Scanner Software CD in the CD-ROM drive.
If Windows 2000, Windows 98 or Windows 95 is used, it
automatically detects the connected scanner and starts the
New Hardware Found Wizard.
Type X:\EPSON\language\Win2000 if you are using
Windows 2000, X:\EPSON\language\Win98 if you are
using Windows 98, or X:\EPSON\language\Win95 if you
are using Windows 95 as the location, where X is the drive
letter of the CD-ROM drive and language is your language
such as English or French.
On Windows 2000 and Windows 98, EPSON TWAIN Pro is
installed. On Windows 95, the .inf file is installed.
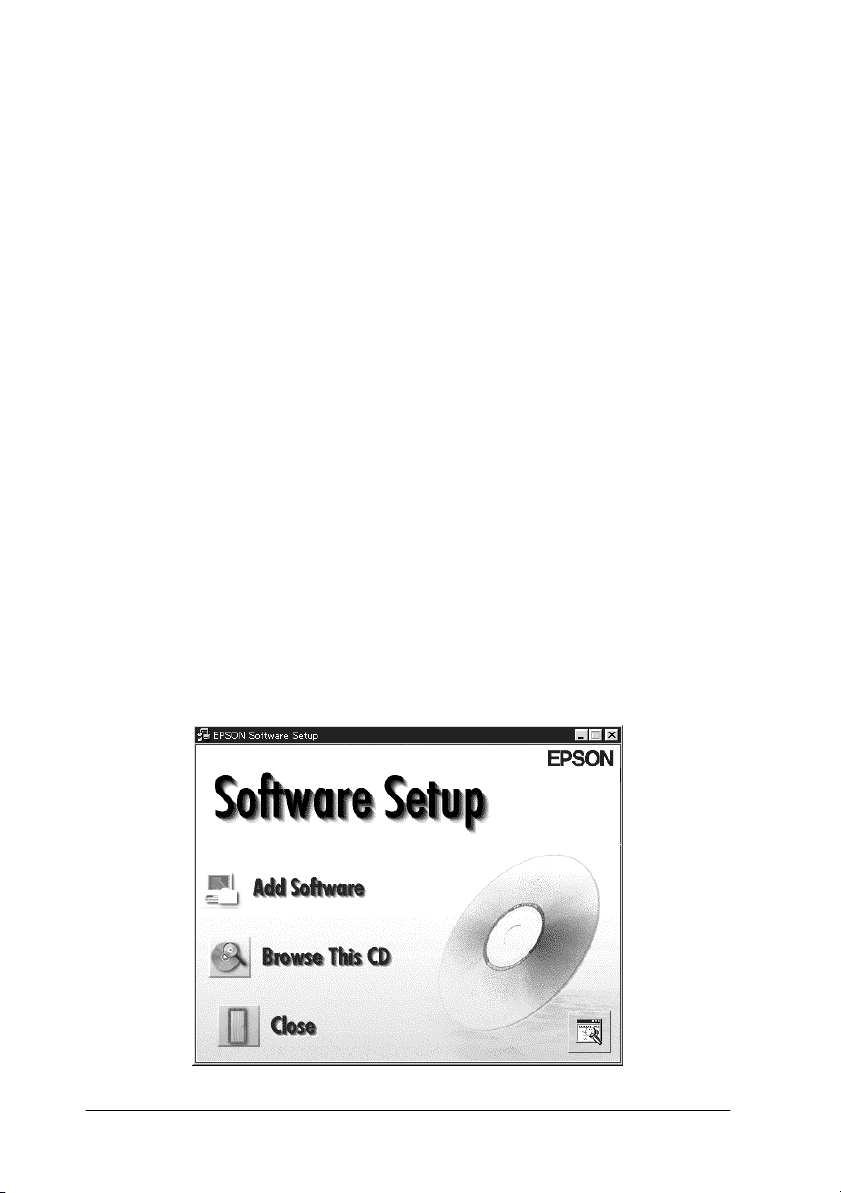
4. Start the Windows Explorer and double-click Cdsetup.exe
in the CD-ROM drive.
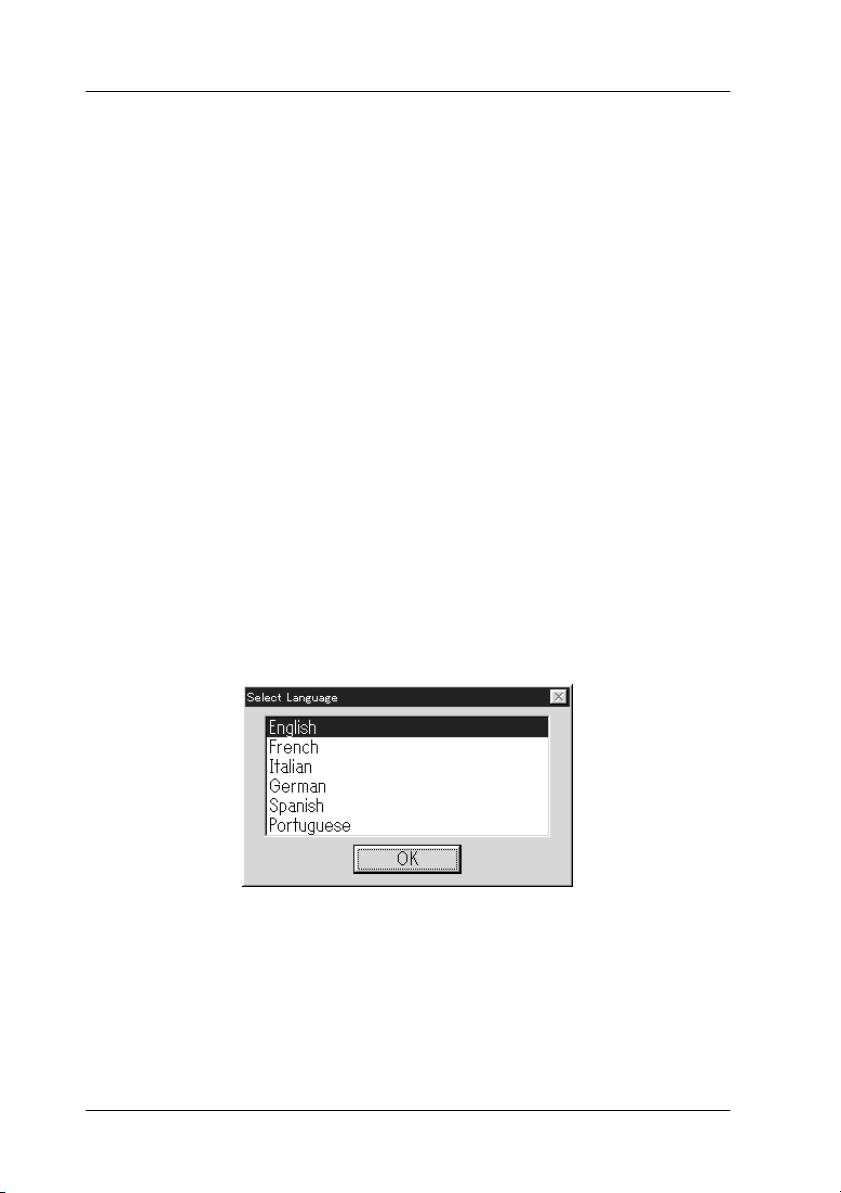
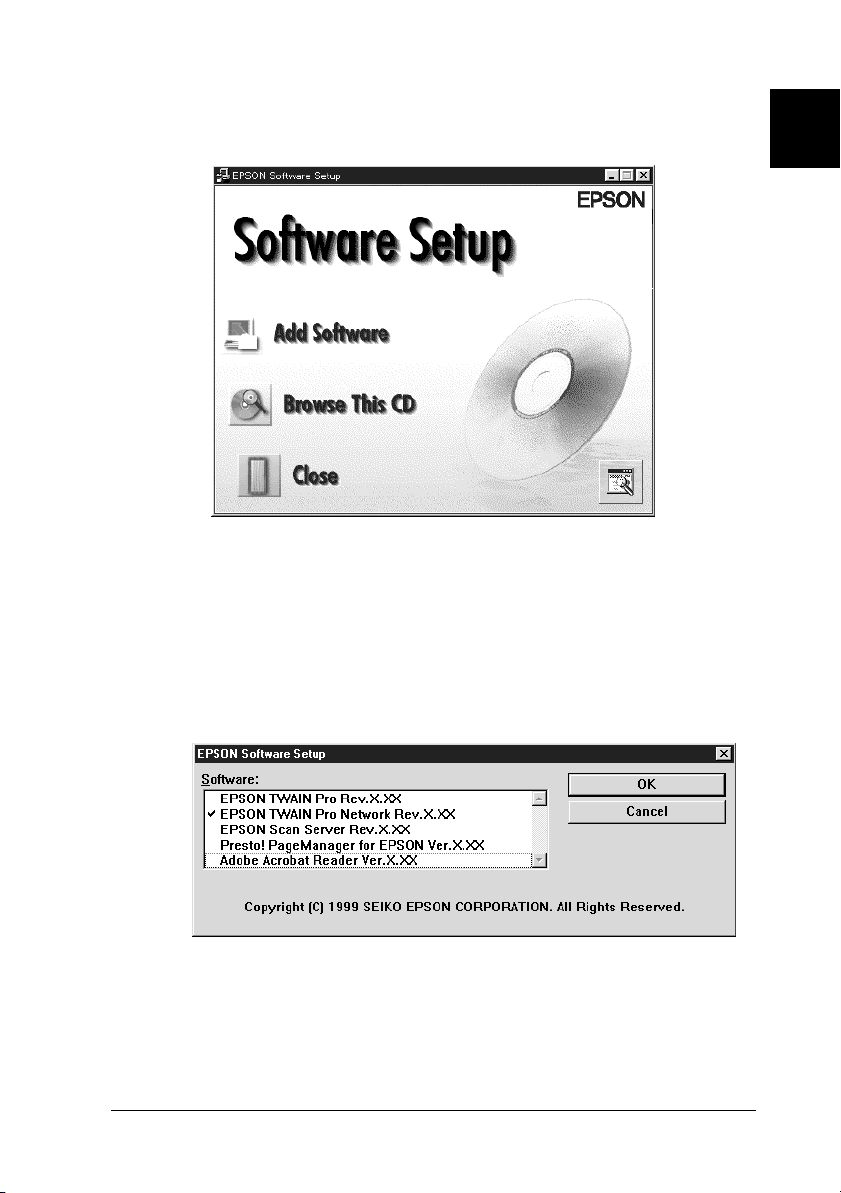
5 . S e le ct t he la ng u ag e t h at yo u wa nt to u se in t he Se l ec t l a ng ua ge
dialog box and click OK.
The EPSON Software Setup dialog box appears.
6. Click Add Software in the EPSON Software Setup dialog
box.
1-4
Installing the Software
Page 14
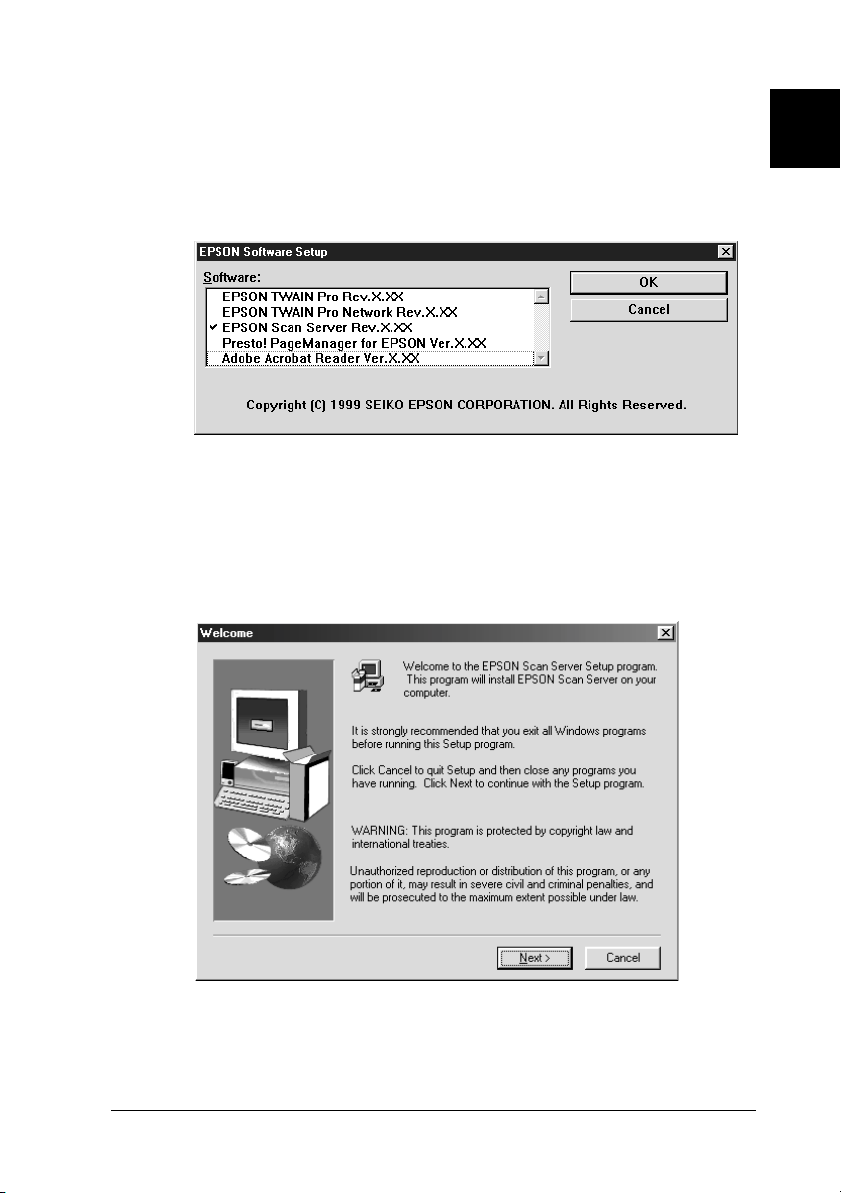
7. Select EPSON Scan Server by checking to the left of the name
in the EPSON Software Setup dialog box. At this point, you
can select other software to be installed. Make sure to remove
the check mark from software which is already installed on
the scanner server PC.
8. Click OK to start the installation of selected software.
The Welcome dialog box appears.
9. Click Next to continue.
1
The File Copy Progress bar appears. After files are copied, the
Question dialog box appears.
Installing the Software
1-5
Page 15
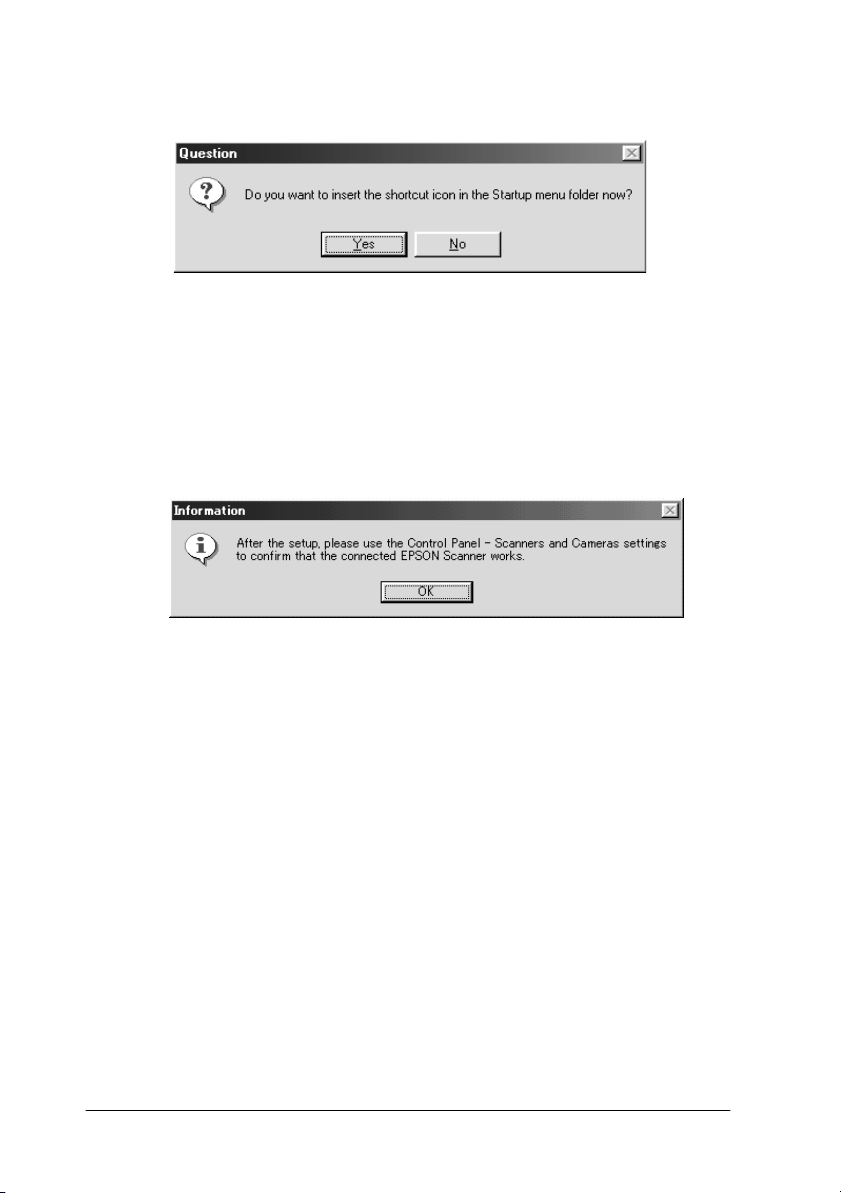
10. Click Yes or No.
11. Find your version of Windows below and follow the
appropriate instructions.
For Windows 2000 and Windows 98 users:
The information dialog box appears. Click OK, then go to step
16 to finish the setup procedure.
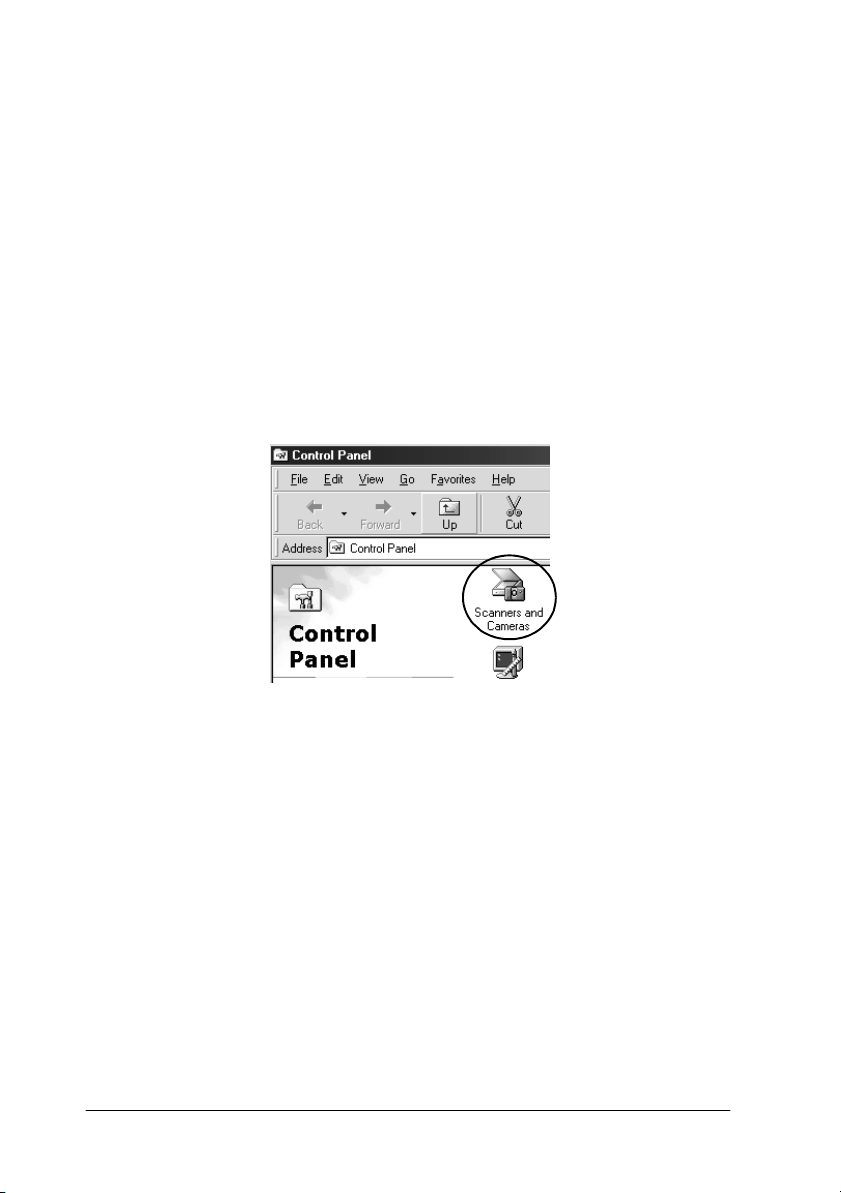
Note:
After you finish the setup procedure, be sure to double-click the
Scanners and Cameras icon on the Control Panel and select
EPSON Expression 1640XL in the Scanners and Cameras
Properties list. See “Setting the default scanner for Windows 2000
and Windows 98 Users” on page 1-10 for details.
1-6
Installing the Software
Page 16
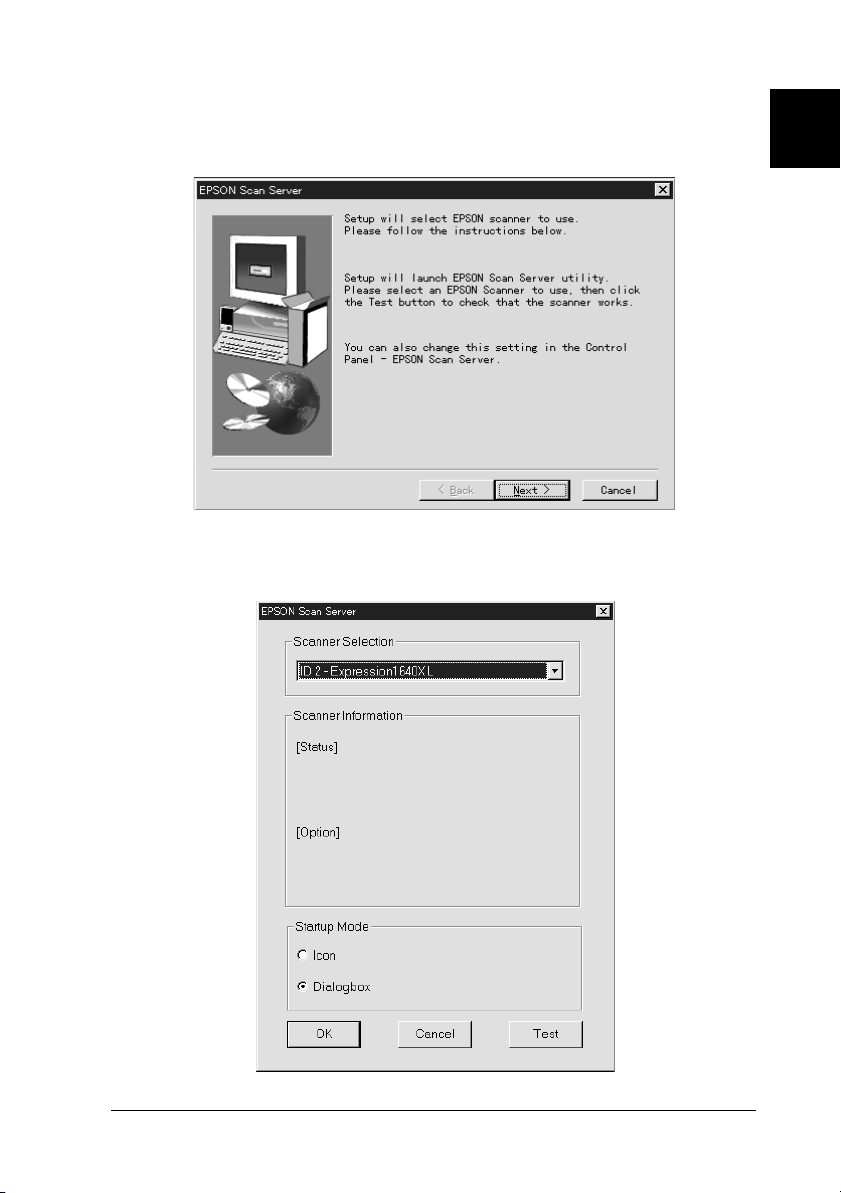
For Windows 95 and Windows NT 4.0 users:
The EPSON Scan Server dialog box appears.
Click Next, the EPSON Scan Server setup dialog box appears.
1
Installing the Software
1-7
Page 17
12. Select the scanner to be used from the Scanner Selection box.
Note:
If the EPSON TWAIN Pro software or device information file is not
already installed on the scanner server PC using Windows 95, no
available scanners will appear on the list at this point. In this case,
skip selection of the scanner name and continue the installation.
Then proceed with the installation of the EPSON TWAIN Pro
software. After the installation, select EPSON Scan Server from
the Control Panel. Now the scanner name is on the list and can be
selected.
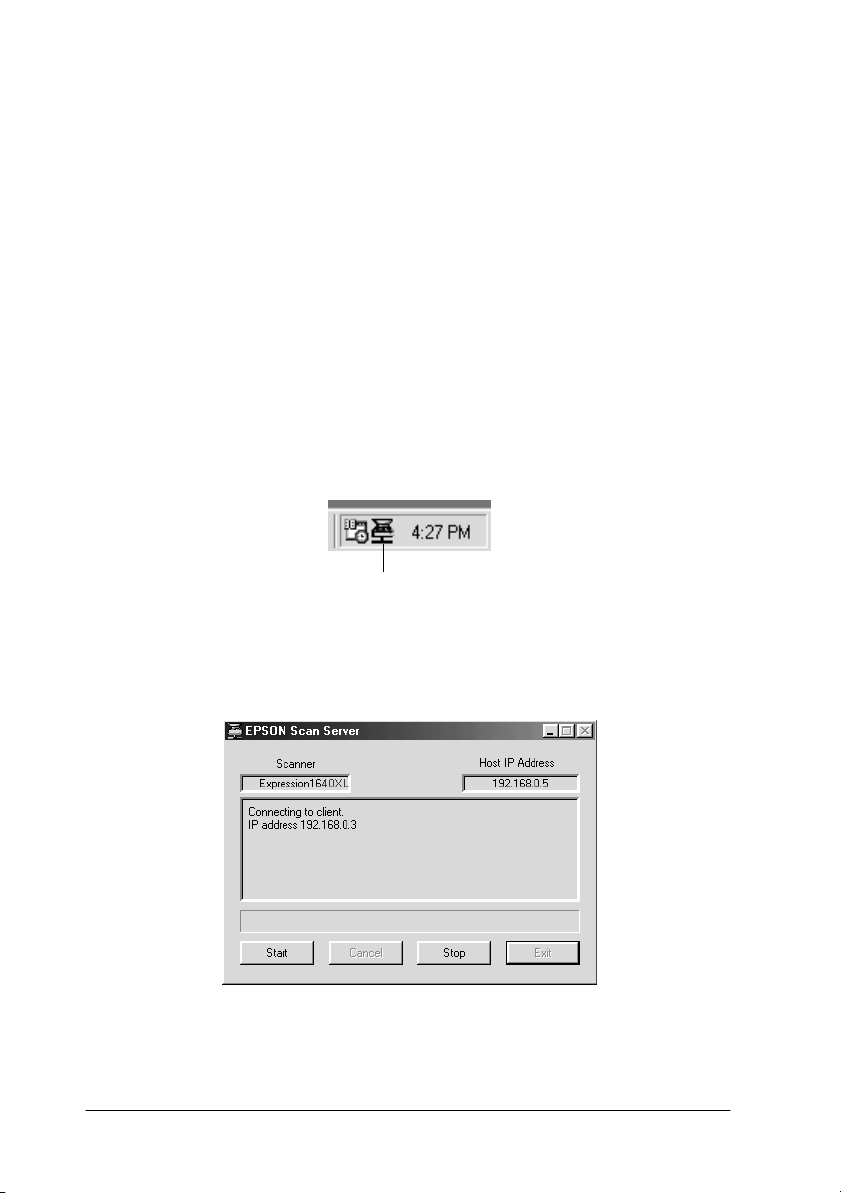
13. Select the desired start up mode between Icon or Dialog box.
In icon start up mode, the EPSON Scan Server icon appears
in the Taskbar tray when Scan Server starts as shown below.
EPSON Scan Server icon
In dialog box mode, the following dialog box appears when
Scan Server starts.
1-8
Installing the Software
Page 18
14. To test the status of the scanner, click Test.
After the test is completed, information about the scanner
status is displayed below the [Status] heading.
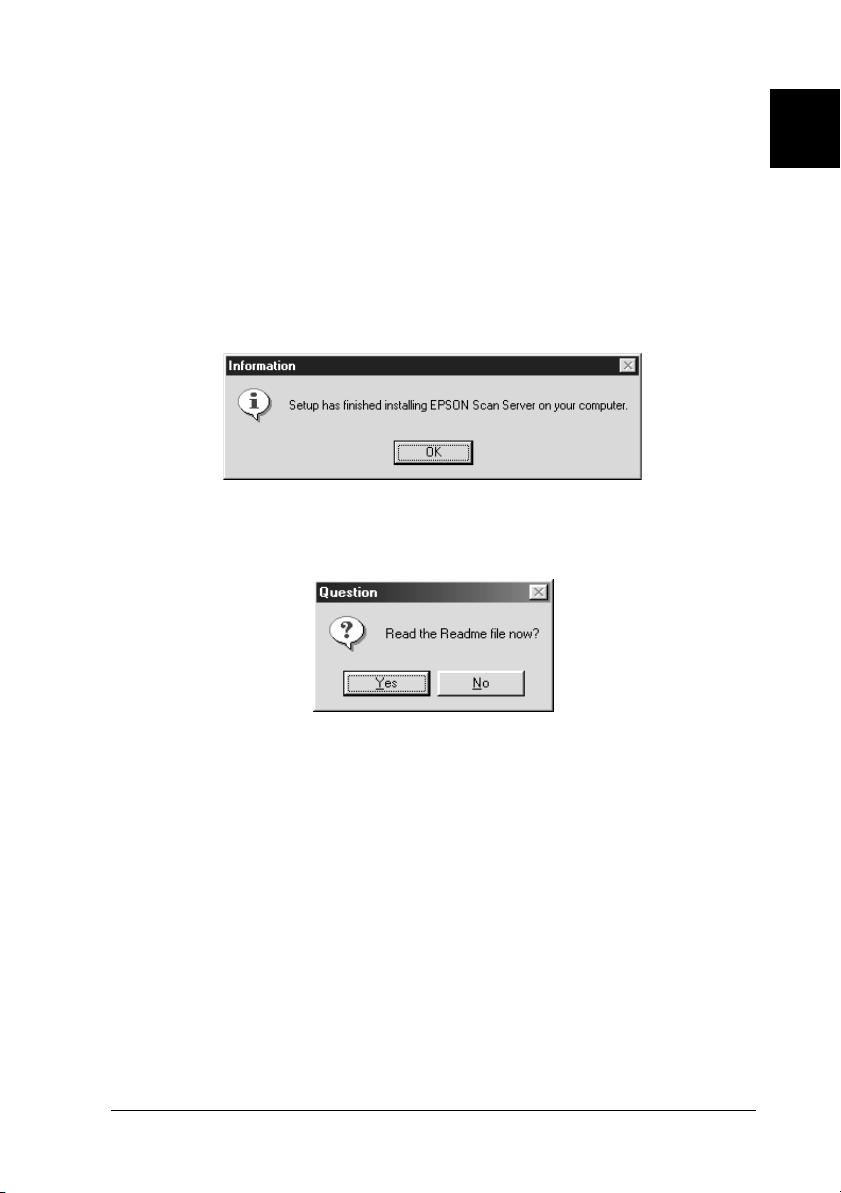
15. After setting this dialog box, click OK.
The Setup Complete dialog box appears.
16. Click OK.
17. Click Yes or No.
1
Installation of EPSON Scan Server is complete.
Installing the Software
1-9
Page 19
Setting the default scanner for Windows 2000
and Windows 98 Users
Windows 2000 and Windows 98 users can select the default
scanner they want to use from Scanners and Cameras on the
Control Panel once they have installed EPSON Scan Server. The
following describes how to select the default scanner.
1. Make sure you have completed installation of EPSON Scan
Server as described on pages 1-4 to 1-9.
2. Double-click the Scanners and Cameras icon on the
Control Panel.
1-10
The Scanners and Cameras Properties dialog box appears
showing a list of scanners and cameras installed on your
computer.
Installing the Software
Page 20
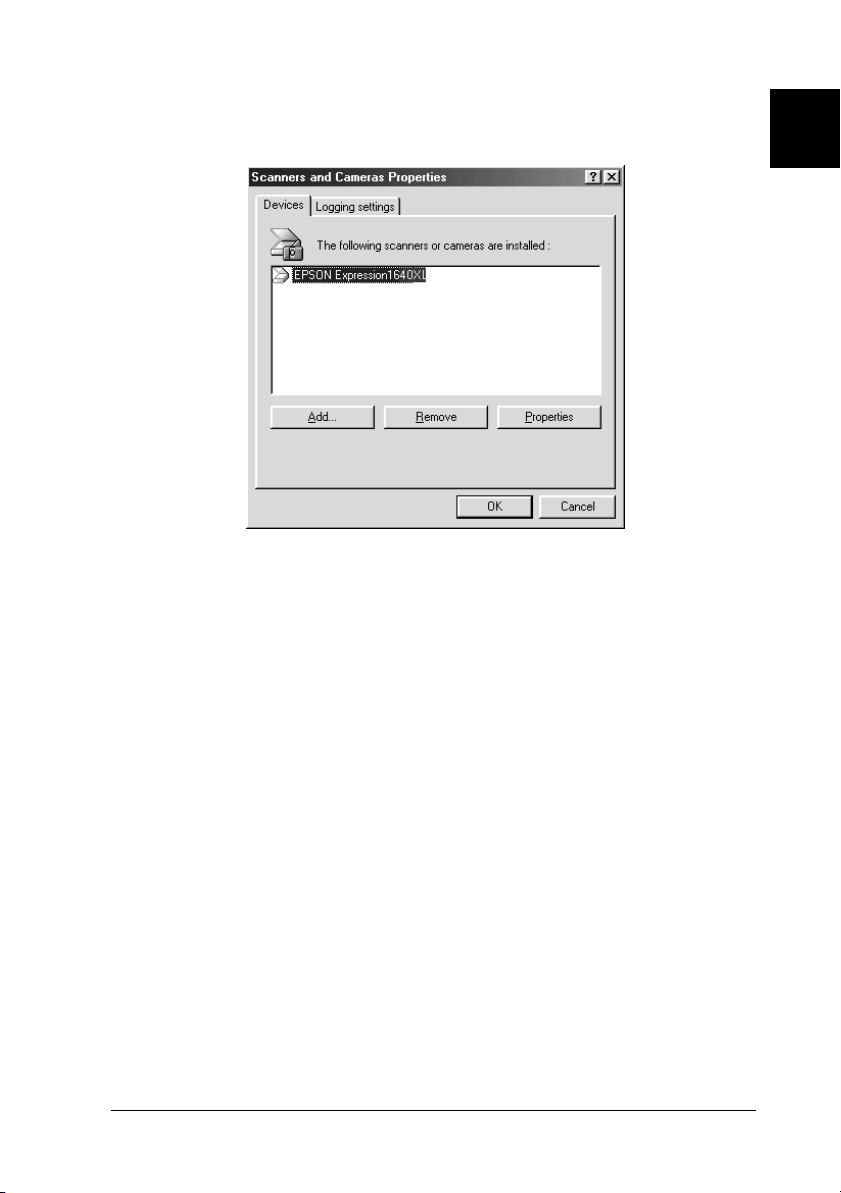
3. Select EPSON Expression 1640XL and click the Properties
button.
The EPSON Expression 1640XL Properties dialog box
appears.
1
Installing the Software
1-11
Page 21
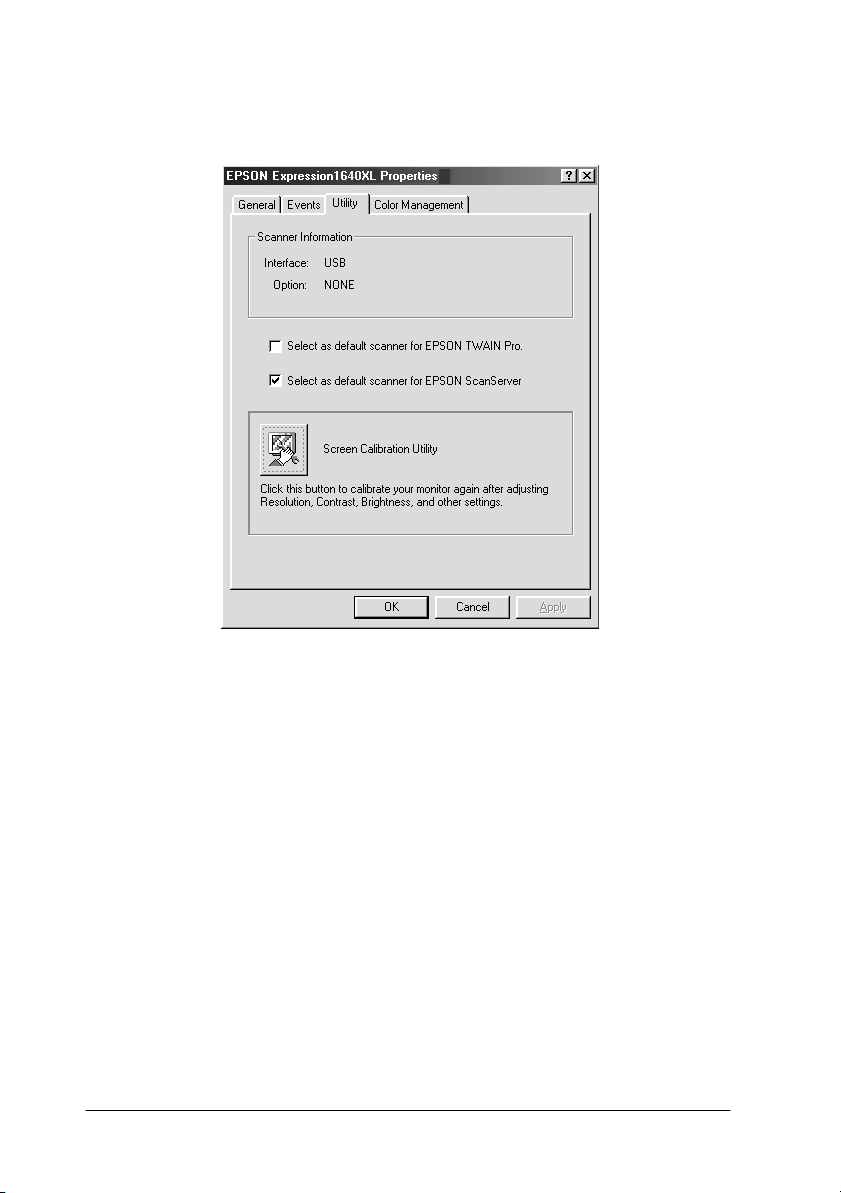
4. Click the Utility tab, make sure Select as default scanner for
EPSON Scan Server is checked and then click OK.
5. Click OK.
1-12
Installing the Software
Page 22

Changing the start up mode
Dialog box to Taskbar icon:
To change from the dialog box start up mode to the Taskbar icon
start up mode, click the scanner icon in the upper left corner of
the EPSON Scan Server dialog box and select Taskbar Icon from
the drop down menu. A check mark will appear next to Taskbar
Icon.
Taskbar icon to dialog box:
To change from the Taskbar icon start up mode to the dialog box
start up mode, right-click the Scan Server icon in the Taskbar
tray and click Taskbar Icon to remove the check mark.
Your settings will take effect the next time you start EPSON Scan
Server.
1
Installing the Software
1-13
Page 23
Installing EPSON TWAIN Pro Network
EPSON TWAIN Pro Network supports Windows 2000,
Windows 98, Windows 95, Windows NT 4.0 and Power
Macintosh computers. Install and use EPSON TWAIN Pro
Network on a client machine that is connected to your network.
Make sure you know the IP address or host name of the computer
on which you installed EPSON Scan Server as you will need it
while installing EPSON TWAIN Pro Network.
For Windows
1. Insert the EPSON Scanner Software CD in the CD-ROM drive.
The installer automatically starts and the Select language
dialog box appears. If the dialog box doesn't appear, start
Windows Explorer and double-click Cdsetup.exe in the CDROM drive.
2. Select the language that you want to use in the Select
Language dialog box and click OK.
1-14
The EPSON Software Setup dialog box appears.
Installing the Software
Page 24
3. Click Add Software in the EPSON Software Setup dialog
box.
4. Select EPSON TWAIN Pro Network by clicking to the left of
the name in the EPSON Software Setup dialog box. A check
mark will appear to indicate that EPSON TWAIN Pro
Network is selected. You can also select other software to
install. Make sure to clear the check mark next to software
already installed on your computer.
1
Installing the Software
1-15
Page 25

5. Click OK to start installation of selected software.
6. Click Next.
7. Click Next.
1-16
Installing the Software
Page 26

The EPSON TWAIN Pro Network setup dialog box appears.
Note:
To change the settings in the EPSON TWAIN Pro Network setup
dialog box anytime after setup is complete, click Start and point to
Settings then select Control Panel. Then double-click the
EPSON TWAIN Pro Network icon.
1
8. Enter the IP address or host name of the scanner server PC in
the Network Scanner Address box.
Note:
❏ A host name can be used on networks that use the DNS, WINS
or LMHOSTS naming services.
❏ To delete the IP address or host name, select it and then click
Delete.
Installing the Software
1-17
Page 27

9. Specify the Timeout Setting. Normally you do not need to
change this value. Valid values range from 30 to 300 seconds.
For screen calibration, see “Calibrating Your Screen” on page
1-23.
10. To test the status of the scanner, click Test.
After the test is complete, information about the scanner's
status is displayed below the heading Scanner Status.
11. After setting this dialog box, click OK.
The Screen Calibration dialog box appears.
12. Click Next.
1-18
Installing the Software
Page 28

The Screen Calibration dialog box appears.
13. Move the slide bar right or left until the shades of gray of the
two sets of horizontal stripes match, then click OK. For details,
refer to “Calibrating Your Screen” on page 1-23.
14. Click OK.
1
Installation of EPSON TWAIN Pro Network is complete.
Installing the Software
1-19
Page 29

For Macintosh
1. Insert the EPSON Scanner Software CD in the CD-ROM drive.
2. Double-click the EPSON TWAIN Pro Network folder.
The EPSON TWAIN Pro Network folder contains multiplelanguage versions of software. Double-click the folder of your
preferred language.
3. Double-click the EPSON TWAIN Pro Network Installer icon.
4. The installer software shows a dialog box. Click Install in the
dialog box that appears, and follow the instructions on the
screen.
1-20
Installing the Software
Page 30

5. When you finish installation, a message will appear on the
screen. Click Quit.
The Screen Calibration dialog box appears.
6. Move the slider bar right or left until the shades of gray of the
two sets of horizontal stripes match and click OK. For details,
refer to “Calibrating Your Screen” on page 1-23.
1
The EPSON TWAIN Pro Network Setup dialog box appears.
Installing the Software
1-21
Page 31

7. Enter the IP address or host name of the scanner server PC in
the Network Scanner Address box.
Note:
❏ A host name can be used on networks that use the DNS naming
service.
❏ To change the settings in the EPSON TWAIN Pro Network
Setup dialog box anytime after setup is complete, click Apple
Menu and point to Control Panels. Then select EPSON
TWAIN Pro NET.
❏ To delete the IP address or host name, select it and then click
Delete.
8. Specify the Timeout Setting. Normally you do not need to
change this value. Valid values range from 30 to 300 seconds.
9. To test the status of the scanner, click Test.
After the test is complete, information about the scanner's
status is displayed below the heading Scanner Status.
1-22
Installing the Software
Page 32

10. After setting this dialog box, click OK.
Installation of EPSON TWAIN Pro Network is complete.
Calibrating Your Screen
You need to calibrate your screen so that scanned images will be
reproduced on the screen as closely as possible to the original.
During the installation of EPSON TWAIN Pro Network software,
the calibration utility automatically starts and you can calibrate
your screen at that point.
To manually start the calibration utility, follow the instructions
for your system shown below.
For Windows 2000 or Windows 98 users:
Click Start and point to Settings, then select Control Panel. Then
double-click the Scanners and Camera icon. Select EPSON
Expression 1640XL from the list when the Scanners and Cameras
Properties dialog box appears, then click the Properties button.
When the EPSON Expression 1640XL Properties dialog box
appears, click the Utility tab and then the Screen Calibration
Utility button.
1
For Windows 95 or Windows NT 4.0 users:
Click Start and point to Settings, then select Control Panel. Then
double-click the EPSON TWAIN Pro Network icon and click the
Calibration Utility button in the EPSON TWAIN Pro Network
Setup dialog box.
For Macintosh users:
Open the EPSON Network Scanner folder and double-click the
EPSON Screen Calibration utility icon.The Screen Calibration
dialog box appears.
Installing the Software
1-23
Page 33

To calibrate your screen follow the steps below:
1. Move the slider to the right or left until the shades of gray of
the two sets of horizontal stripes match.
Note:
View the screen from a slight distance. The gray stripes will not
blend together perfectly; the objective is to make adjustments until
the different tones match as closely as possible.
2. Click OK to register the calibration setting.
You will not need to change the screen calibration again as
long as you continue to use the same monitor.
1-24
Installing the Software
Page 34

Chapter 2
Network Scanning Basics
Network Scanning Procedure . . . . . . . . . . . . . . . . . . . . . . . . . . . . .2-2
Starting EPSON Scan Server . . . . . . . . . . . . . . . . . . . . . . . . . . . . . .2-2
Starting EPSON TWAIN Pro Network . . . . . . . . . . . . . . . . . . . . .2-4
Scanning an Image . . . . . . . . . . . . . . . . . . . . . . . . . . . . . . . . . . . . . .2-6
Using the EPSON TWAIN Pro Network dialog box
on the client computer. . . . . . . . . . . . . . . . . . . . . . . . . . . . . 2-6
Using the Start button on the scanner. . . . . . . . . . . . . . . . . . 2-8
Using the Start button in the EPSON Scan Server
dialog box . . . . . . . . . . . . . . . . . . . . . . . . . . . . . . . . . . . . . . . 2-9
Getting Information From Online Help . . . . . . . . . . . . . . . . . . . . . 2-11
2
Network Scanning Basics
2-1
Page 35

Network Scanning Procedure
You need to perform the following procedures to use your
EPSON scanner on a network and to send scanned images to a
client computer.
1. Start the EPSON Scan Server software and specify which
EPSON scanner is to be used from the scanner server PC.
2. Specify the scanner server PC to be used by using the EPSON
TWAIN Pro Network setup dialog box in the Control Panel
on the client computer.
3. Start the TWAIN-compliant application and open EPSON
TWAIN Pro Network from the application on the client
computer.
This chapter describes the above procedures in detail.
Starting EPSON Scan Server
1. Turn on the scanner to be used for network scanning.
2. Turn on the scanner server PC.
The Enter Network Password dialog box appears.
2-2
Network Scanning Basics
Page 36

3. Enter your password for the network in the Password box and
click OK.
Windows will automatically launch EPSON Scan Server and
display the EPSON Scan Server dialog box or its icon on the
Windows taskbar (if you have included the software in the
Start up folder of Windows).
To manually start EPSON Scan Server from Windows 2000,
98, 95, or NT 4.0, click Start and point to EPSON Scan Server,
then select EPSON Scan Server.
2
Note:
❏ Make sure no other interface is used.
❏ To exit EPSON Scan Server, click Exit on the EPSON Scan Server
dialog box. Make sure that no client is using the scanner before
attempting to quit.
Network Scanning Basics
2-3
Page 37

Starting EPSON TWAIN Pro Network
Note:
Windows 2000 or NT 4.0 users who use the NTFS file system and do
not have Administrator privileges need to have permission to modify the
following folder and subfolder:
C:\WINNT\TWAIN_32\EPFBPRON
1. From the client Computer, start the TWAIN-compliant
application you want to use, such as Microsoft Imaging for
Windows or Adobe Photoshop.
Refer to the User's manual of the application to check if the
application supports TWAIN.
2. From the TWAIN-compliant application's menu, select
EPSON TWAIN Pro (32bit) Network as the TWAIN data
source and open EPSON TWAIN Pro Network using a
command such as Acquire. The exact procedure depends on
the application. Refer to the User's Guide or documentation
included with the application.
2-4
Network Scanning Basics
Page 38

The EPSON TWAIN Pro Network dialog box appears.
3. Select the appropriate scanning settings (Image Type or
Resolution, etc.) for your purpose from this dialog box and
click OK. For details on how to choose the correct settings,
refer to “Understanding EPSON TWAIN Pro Features” in the
EPSON Online Expression 1640XL Scanner Software Reference
Guide.
2
Network Scanning Basics
2-5
Page 39

Scanning an Image
To use network scanning, all of devices (the EPSON scanner, the
scanner server, and the client) must be on and EPSON Scan
Server, a TWAIN-compliant application and EPSON TWAIN Pro
Network must be started.
There are several ways to begin scanning a document. The basic
method is to click the Scan button on the EPSON TWAIN Pro
Network dialog box on the client. You can also start scanning by
pushing the
the Start button on the EPSON Scan Server dialog box.
Using the EPSON TWAIN Pro Network dialog box on the client computer
1. Place the document on the document table, or a stack of
documents in the Automatic Document Feeder.
2. Start EPSON TWAIN Pro Network from a TWAIN-compliant
application and choose the appropriate settings for your
document in the EPSON TWAIN Pro Network dialog box on
the client PC. If you use an optional Automatic Document
Feeder or Transparency Unit, remember to select the
appropriate setting for the Document Source. If necessary,
click Preview and check the scanned image in the preview
window.
Start button on the EPSON scanner or by clicking
=
2-6
Network Scanning Basics
Page 40

3. Click Scan or Scan All in the EPSON TWAIN Pro Network
dialog box. Scan All is available only if you have drawn more
than one marquee in the preview window.
Scanning starts and the Progress bar indicates how much of
the document has been scanned.
2
Note:
❏ To cancel scanning, click Cancel on the Progress bar.
❏ When you are using the Automatic Document Feeder, do not
open it until scanning is completed.
After the scanning is finished, the scanned image is displayed
in the application.
4. Remember to remove the document(s) from the scanner.
Network Scanning Basics
2-7
Page 41

Using the Start button on the scanner
1. Start EPSON TWAIN Pro Network from a TWAIN-compliant
application and choose appropriate settings for your
document in the EPSON TWAIN Pro Network dialog box. If
you use the Automatic Document Feeder or the Transparency
Unit, remember to select an appropriate setting in the
Document Source.
2. Place the document on the document table, or a stack of
documents in the Automatic Document Feeder.
3. Press the
Scanning starts and the Progress bar indicates how much of
the document has been scanned.
Note:
❏ To cancel scanning, click Cancel in the EPSON Scan Server
dialog box on the server, or Cancel on the Progress bar from
the client machine.
❏ Clicking Stop in the EPSON Scan Server dialog box breaks the
connection between the scanner server and the client and exits
EPSON TWAIN Pro Network on the client. To start scanning
again, you will have to restart EPSON TWAIN Pro Network
on the client.
Start button on the scanner.
=
Press the start button
2-8
❏ When you are using the Automatic Document Feeder, do not
open it until scanning is completed.
Network Scanning Basics
Page 42

4. After the scanning is finished, remember to remove the
document(s) from the scanner.
When you return to the client Computer, the scanned images
will already be opened in the target application.
Note:
When you are using EPSON Scanner Monitor (in Windows 95,
Windows NT 4.0) or Scanner Events (in Windows 2000,
Windows 98), starting EPSON Scan Server disables those
functions, so pressing the
functions. After closing EPSON Scan Server, you can then start
EPSON Scanner Monitor.
Start button does not activate those
=
Using the Start button in the EPSON Scan Server dialog box
1. Start EPSON TWAIN Pro Network from a TWAIN-compliant
application and choose appropriate settings for your
document in the EPSON TWAIN Pro Network dialog box. If
you use the Automatic Document Feeder or the Transparency
Unit, remember to select an appropriate setting in the
Document Source.
2
2. Place the document on the document table, or a stack of
documents in the Automatic Document Feeder.
Network Scanning Basics
2-9
Page 43

3. Click the Start button in the EPSON Scan Server dialog box.
Scanning starts and the Progress bar indicates how much of
the document has been scanned.
Note:
❏ To cancel scanning, click Cancel in the EPSON Scan Server
dialog box on the scanner server PC.
❏ Clicking Stop in the EPSON Scan Server dialog box breaks the
connection between the scanner server and the client, and exits
EPSON TWAIN Pro Network on the client. To start scanning
again, you will have to restart EPSON TWAIN Pro Network
on the client.
❏ When you are using the Automatic Document Feeder, do not
open it until scanning is completed.
4. After scanning is finished, remember to remove the
document(s) from the scanner.
When you return to the client PC, the scanned images will
already be opened in the target application.
2-10
Network Scanning Basics
Page 44

Getting Information From Online Help
Online Help is available from the main dialog box of EPSON
TWAIN Pro Network. You can get information about the
scanning procedure, how to choose settings, and other topics.
To display Online Help on the client computer, click ? or Help
button in the EPSON TWAIN Pro Network dialog box.
The Help for EPSON TWAIN Pro Network window appears.
2
Network Scanning Basics
2-11
Page 45

2-12
Network Scanning Basics
Page 46

Chapter 3
Troubleshooting
Problems and Solutions . . . . . . . . . . . . . . . . . . . . . . . . . . . . . . . . . .3-2
3
Troubleshooting
3-1
Page 47

Problems and Solutions
Most problems you will encounter while operating your scanner
and software have simple solutions. Read the appropriate section
to find the problem, then follow the recommended steps.
Refer also to the Online Reference Guide for solutions to problems
with the appearance of scanned images.
If you cannot find the solution to your problem below, contact
your dealer or a qualified customer support person for assistance.
You cannot install EPSON TWAIN Pro Network and/or
EPSON Scan Server
Cause What to do
Incorrect system
configuration
3-2
Troubleshooting
Check that both your computer and
operating system match the system
requirements on page 1-2.
Make sure your computer has enough
memory (RAM) to run the
application.
Page 48

For Windows 98 and Windows 2000:
Status: unavailable appears under the General tab of the
EPSON Expression 1640XL Properties dialog box.
For Windows 95 and NT 4.0:
The scanner does not appear in the Scanner Selection box in
the EPSON Scan Server setup dialog box.
Cause What to do
Connection problem Turn off the scanner and computer
and check that they are connected
properly.
Unavailable scanner Make sure that a scanner supported
by EPSON Scan Server and EPSON
TWAIN Pro Network is connected to
the scanner server PC.
SCSI ID number conflict Change the scanner's SCSI ID number
to one that is not being used by any
other SCSI device.
Connection sequence
problem
(Windows 2000 and
Windows 98)
EPSON TWAIN Pro is not
installed on the scanner
server PC
Check the connection sequence and
make sure the scanner's terminator
switch is set correctly. Refer to the
User's Guide that came with your
scanner for details.
Install EPSON TWAIN Pro (Version
1.75 or later) on the scanner server (the
PC which is connected to the EPSON
scanner).
3
Troubleshooting
3-3
Page 49

You cannot start up EPSON Scan Server.
Cause What to do
Scanner is off Turn on the scanner and then your
computer.
Connection problem Turn off the scanner and computer
and check that they are connected
properly.
Cable problem Make sure the interface cable meets
the requirements of your interface
board. See the documentation that
came with the interface board.
Interface board problem Make sure the interface board is
installed correctly.
Unavailable scanner Make sure that a scanner supported
by EPSON Scan Server and EPSON
TWAIN Pro Network is connected to
the scanner server PC.
(Windows 2000 and
Windows 98)
EPSON TWAIN Pro is not
installed on the scanner
server PC
3-4
Troubleshooting
Install EPSON TWAIN Pro (version
1.75 or later) on the scanner server (the
PC which is connected to the EPSON
scanner).
Page 50

You cannot select optional equipment for your scanner.
Cause What to do
Installation problem Make sure the optional equipment is
installed correctly. Refer to the
documentation that came with the
equipment for details.
You cannot scan from the Automatic Document Feeder.
Cause What to do
3
The Document Source
setting in EPSON TWAIN
Pro Network is incorrect.
The Automatic Document
Feeder is open.
Paper is jammed. Take the jammed paper out and
Make sure Auto Document Feeder
is selected.
Close the Automatic Document
Feeder and try again. If the Automatic
Document Feeder is opened while
scanning, remove any jammed paper,
reload any document which has not
yet been scanned and restart EPSON
TWAIN Pro Network.
reload the document, then restart
EPSON TWAIN Pro Network.
Troubleshooting
3-5
Page 51

EPSON TWAIN Pro Network dialog box does not appear on
the client machine when you try to start EPSON TWAIN Pro
Network from a TWAIN-compliant application.
Cause What to do
Scanner and/or scanner
server is off
Connection problem Make sure that TCP/IP is selected as
Network cable problem Make sure that the cables which
Network interface card
problem
IP address for the scanner
server PC is not entered in
the EPSON TWAIN Pro
Network setup dialog box or
incorrect IP address is
entered.
Host name is entered instead
of the IP address for the
Scanner Server PC in the
EPSON TWAIN Pro
Network setup dialog box
where no network naming
service is available.
Turn on the scanner then the scanner
server.
the networking protocol. Refer to
“Installing the TCP/IP protocol” in
the Appendix of this guide.
connect the EPSON scanner, the
scanner server PC and the client PC
meet system requirements and are
properly connected.
Make sure the interface card is
installed correctly.
Enter the correct IP address in the
EPSON TWAIN Pro Network setup
dialog box.
Make sure that at least one naming
service, such as DNS, WINS, or
LMHOSTS, is used in your network.
Otherwise use the IP address to
specify the Scanner Server PC in the
TWAIN Pro setup dialog box.
3-6
Troubleshooting
Page 52

Network connection is terminated before the scanned image
is transferred to the client machine.
Cause What to do
Timed out Check the time out setting and
increase the value, if necessary.
Refer to page 1-17 of this manual to
change the time out setting.
3
Troubleshooting
3-7
Page 53

3-8
Troubleshooting
Page 54

Appendix A
Scanner Server PC Setup
Setting up the Scanner Server PC . . . . . . . . . . . . . . . . . . . . . . . . . . A-2
Installing the TCP/IP protocol (Windows 2000) . . . . . . . . . A-2
Installing the TCP/IP protocol (Windows 98, 95) . . . . . . . . A-4
Installing the TCP/IP protocol (Windows NT 4.0) . . . . . . . A-7
Setting the scanner server PC's IP address . . . . . . . . . . . . . .A-10
A
Scanner Server PC Setup
A-1
Page 55

Setting up the Scanner Server PC
To allow networking, the scanner server PC and the client PCs in
the network require a Network Interface Card and a Network
Interface Card (NIC) driver. Install the Network Interface Card
and Network Interface Card (NIC) driver in the scanner server
and the clients. For installation procedures, refer to the
corresponding manuals included with the card.
Installing the TCP/IP protocol (Windows 2000)
To install the TCP/IP protocol on the scanner server PC and client
PCs on the network, follow the instructions below.
1. Right-click the My Network Places icon and select
Properties.
A-2
Scanner Server PC Setup
Page 56

2. Double-click Local Area Connection.
3. Click Property.
A
Scanner Server PC Setup
A-3
Page 57

4. Check that Internet Protocol (TCP/IP) is included in the
Local Area Connection Properties list box.
If the Internet Protocol (TCP/IP) appears in the list box,
proceed to “Setting the scanner server PC's IP address” on
page A-11. Otherwise, proceed to step 5.
5. Click Install. The Select Network Component Type box
appears.
A-4
Scanner Server PC Setup
Page 58

6. Select Protocol from the list and click Add.
7. Select Internet Protocol (TCP/IP) in the Network Protocol
list box and click OK.
A
8. Check that Internet Protocol is installed and click Close. After
you finish this setup, proceed to “Setting the scanner server
PC's IP address” on page A-11.
Scanner Server PC Setup
A-5
Page 59

Installing the TCP/IP protocol (Windows 98, 95)
To install the TCP/IP protocol on the scanner server PC and client
PCs in the network:
1. Click Start and point to Settings, then select Control Panel.
The Control Panel window appears.
2. Double-click the Network icon in the Control Panel window.
The Network dialog box appears.
3. Click the Configuration tab to bring it to the top of the dialog
box.
A-6
Scanner Server PC Setup
Page 60

4. Check that TCP/IP protocol is included in the The following
network components are installed list box.
If the TCP/IP protocol appears in the list box, proceed to
“Setting the scanner server PC's IP address” on page A-11.
Otherwise, proceed to step 5.
A
5. Click Add. The Select Network Component Type dialog box
appears.
6. Select Protocol from the list and click Add.
Scanner Server PC Setup
A-7
Page 61

7. Select Microsoft from Manufacturers box and TCP/IP from
Network Protocols, and click OK.
8. Follow the instructions displayed on the screen. After you
finish this step, proceed to “Setting the scanner server PC's IP
address” on page A-11.
A-8
Scanner Server PC Setup
Page 62

Installing the TCP/IP protocol (Windows NT 4.0)
To install the TCP/IP protocol on the scanner server PC and client
PCs in the network:
1. Click Start and point to Settings, then select Control Panel.
The Control Panel window appears.
2. Double-click the Network icon in the Control Panel window.
A
3. Click the Protocols tab to bring it to the top of the dialog box.
Scanner Server PC Setup
A-9
Page 63

4. Check that TCP/IP protocol is included in the Network
Protocols: list box.
If TCP/IP already appears in the list box, proceed to “Setting
the scanner server PC's IP address” on page A-11. Otherwise,
proceed to step 5.
5. Click Add. The Select Network Protocol dialog box appears.
A-10
Scanner Server PC Setup
Page 64

6. Select TCP/IP Protocol from the list and click OK.
7. Follow the instructions displayed on the screen. After you
finish this step, proceed to “Setting the scanner server PC's IP
address” below.
Setting the scanner server PC's IP address
To use EPSON scanners in a network environment, you need to
assign IP addresses to the scanner server and client computers.
A
If EPSON scanners are installed on an internal LAN (Local Area
Network), and not connected to the Internet, the following IP
addresses can be assigned to the scanner server.
Note:
If you use IP addresses from these ranges, you will not be able to connect
this LAN to the Internet in the future without changing the IP addresses.
10.0.0.0 - 10.255.255.255
172.16.0.0 - 172.31.255.255
192.168.0.0 - 192.168.255.255
If you plan to use a scanner server PC in a network connected to
the Internet, you should acquire a formal IP address for the
scanner server PC from the Internet organization of your country.
Scanner Server PC Setup
A-11
Page 65

Assigning an IP address to a scanner server PC on
Windows 2000
1. Right-click the My Network Places icon, then select
Properties and double-click Local Area Connection.
2. Click Property, and then double-click Internet Protocol
(TCP/IP).
3. Make sure that Internet Protocol (TCP/IP) is included in the
Local Area Connection Properties list box.
A-12
Scanner Server PC Setup
Page 66

4. Select Use the following IP address, then enter the IP
address. Click OK to close the dialog box.
Note:
❏ Make the settings appropriate for your network.
A
❏ Confirm the IP address and other network settings with your
network administrator.
5. Click OK to close the Local Area Connection Properties dialog
box, then click Close to close the Local Area Connection
Status dialog box.
Scanner Server PC Setup
A-13
Page 67

Assigning an IP address to a scanner server PC on
Windows 98, 95
1. Click Start and point to Setting, then select Control Panel
and double-click the Network icon in the Control Panel
window.
The Network dialog box appears with Configuration tab on
the top.
2. Select TCP/IP in the list box and click Properties. The TCP/IP
Properties dialog box appears.
3. Click the IP Address tab. The IP Address dialog box appears
on the top.
A-14
Scanner Server PC Setup
Page 68

4. If you are using a DHCP server in your network, you can
assign an IP address to your scanner server PC automatically
by selecting Obtain an IP address automatically and
clicking OK. To manually assign an IP address, select Specify
IP address then enter the IP Address and Subnet Mask. Click
OK.
A
Scanner Server PC Setup
A-15
Page 69

Assigning an IP address to a scanner server PC on
Windows NT 4.0
1. Click Start and point to Settings, then select Control Panel
and double-click the Network icon in the Control Panel
window.
The Network dialog box appears with the Identification tab
on the top.
2. Click the Protocols tab.
3. Select TCP/IP Protocol in the list box and click Properties....
A-16
The Microsoft TCP/IP Properties dialog box appears.
Scanner Server PC Setup
Page 70

4. If you are using a DHCP server in your network, you can
assign an IP address to your scanner server PC by selecting
Obtain an IP address from DHCP server and clicking OK.
To manually assign an IP address, select Specify an IP
address then enter the IP Address, Subnet Mask and Default
Gateway. Click OK.
A
Scanner Server PC Setup
A-17
Page 71

A-18
Scanner Server PC Setup
Page 72

Glossary
bit
Sho rt fo r bin ary dig it. Th e sm alle st uni t of da ta in compu ter pr ocess ing. A bit c an
represent two values: on and off, or 1 and 0.
bit/pixel
The unit that indicates the number of bits allocated for a pixel. The larger the bit
value, the more detail of a pixel will be reproduced.
daisy chain
A SCSI bus arrangement that allows several devices to be connected
simultaneously in a line to a single computer. See SCSI.
default
A set of values used when no other selections have been made. These are
sometimes called factory defaults if the original values have not been changed
since the scanner left the factory.
Default Gateway (Address)
The IP address of a special device used to route data from one part of a network
using TCP/IP to another. See also IP address, TCP/IP, and Internet.
DHCP
Dynamic Host Configuration Protocol, A TCP/IP network protocol that enables
hosts to obtain temporary IP addresses from one or more centrally administered
servers.
DHCP server
Dynamic Host Configuration Protocol server, A computer which has been
configured to respond to DHCP requests from other computers on the network.
DNS
Domain Name System, a naming service which allows the looking up of IP
addresses based on host (domain) names.
document
The item, such as a sheet of paper or a book, that is placed on the document table
for the scanner to read.
dpi
Short for dots per inch. A unit of measurement for resolution. The higher the
value, the higher the resolution.
interface
A piece of hardware, a method, or a standard used for connection between or
among computer devices.
Glossary
1
Page 73

Internet
A worldwide network of computers and communication devices, the largest of
its kind, originally conceived as a research project of the US government. The
Internet is composed of many different types of connections, including electrical
and fiber optic cabling as well as wireless communications.
IP address
Internet Protocol address, A numeric address which uniquely identifies a
computer connected to a network using TCP/IP, such as the Internet. See also
Internet and TCP/IP.
Network Interface Card
A name for the adapter (printed circuit board), installed in a PC, that enables it
to communicate over a LAN.
LAN
Short for Local Area Network, a computer network in which the attached devices
are in close proximity (like in the same office or building).
LMHOSTS
A file of IP addresses and their associated host (domain) names. An IP address
and its associated host (domain) name can be found by referring to this file.
port
An interface channel through which data is transmitted between devices.
scan
An operation performed by the sensor and the carriage. The image is divided
into pixels by scanning.
scanning area
The physical size of the image that can be scanned by the scanner.
screen calibration
Adjustment of the monitor display to reproduce as closely as possible the original
image data.
SCSI
Small Computer System Interface. This is one method used to connect your
computer to peripherals such as scanners, hard disk drives, CD-ROM drives, and
others.
SCSI ID
The numbers that all devices in a SCSI connection (see daisy chain) use to identify
ea ch oth er. I f the same ID numb er is u sed by two de vice s in t he sa me dai sy ch ain,
the devices cannot operate properly.
Subnet mask
A num er ic desi gna tio n, with the same fo rma t as a n I P ad dr es s, w hi ch d etermi nes
how much of an IP address is used to partition a network using TCP/IP into
smaller entities called subnets. See also IP address, TCP/IP, and Internet.
2
Glossary
Page 74

TCP/IP
A widely used family of protocols for communicating data between computers
in a network.
USB
Universal Serial Bus. Enables users to connect up to 127 peripheral devices (such
as keyboards, mice, printers and scanners) to the computer through a single,
general purpose port. The use of USB hubs allows you to add additional ports.
WINS
Windows Internet Naming Service, a naming service which allows the looking
up of IP addresses based on host (domain) names.
Glossary
3
Page 75

4
Glossary
Page 76

Index
A
Assigning an IP address to a scanner
server
Windows 2000, A-12
Windows 95, A-14
Windows 98, A-14
Windows NT 4.0, A-15
C
Calibrating
monitor, 1-23
screen, 1-23
Cancel, scanning, 2-7
Cdsetup.exe, 1-4
Client, 2
D
Definition, scanner server, 2
E
Entering host name, 1-17
Entering IP address, 1-17
EPSON Scanner Software CD, 1-4, 1-14
EPSON Scan Server
dialog box, 1-8
features, 1
icon, 1-8
installing, 1-3
starting, 2-2
EPSON TWAIN Pro Network
dialog box, 2-5
features, 1
installing, 1-14
starting, 2-4
Ethernet, 1-2
F
Features
EPSON Scan Server, 1
EPSON TWAIN Pro Network, 1
G
Glossary, 1
H
Hardware interface, 1-2
I
Installing
EPSON Scan Server, 1-3
EPSON TWAIN Pro Network, 1-14
Installing the TCP/IP protocol
Windows 2000, A-2
Windows 95, A-6
Windows 98, A-6
Windows NT 4.0, A-9
Internet, A-11
IP address, A-11, A-12, A-14, A-15
L
LAN, A-11
M
Monitor, calibrating, 1-23
N
Network environment, 2
NTFS file system, 2-4
IN-1
Page 77

O
T
Online EPSON Scanner Software
Reference Guide, 4
Online Help, 2-11
P
Preview window, 2-7
Problems and solutions, 3-2
R
References, 4
S
Scanner models, 1-2
Scanner selection box, 1-8
Scanner server
definition, 2
setting up, A-2
Scanning, 2-6
Scanning, cancel, 2-7
Screen, calibrating, 1-23
Selecting, language, 1-4, 1-14
Selecting, startup mode, 1-8
Setting the server’s IP address, A-11
Setting up, scanner server, A-2
Specifying, timeout setting, 1-18
Start button
in the EPSON Scan Server dialog
box, 2-10
on the scanner, 2-8
Starting
EPSON Scan Server, 2-2
EPSON TWAIN Pro Network, 2-4
Startup mode, selecting, 1-8
System requirements, 1-2
TCP/IP protocol, A-2, A-6, A-9
Testing the status of the scanner, 1-9
Timeout setting, specifying, 1-18
TWAIN compliant application, 2-2
U
Using the EPSON TWAIN Pro
Network dialog box on the client
machine, 2-6
Using the Start button
in the EPSON Scan Server dialog
box, 2-9
on the scanner, 2-8
W
Windows 2000
assigning an IP address to a
scanner server, A-12
installing the TCP/IP protocol, A-2
Windows 95
assigning an IP address to a
scanner server, A-14
installing the TCP/IP, A-6
Windows 98
assigning an IP address to a
scanner server, A-14
installing the TCP/IP protocol, A-6
Windows NT 4.0
assigning IP address to a scanner
server, A-15
installing the TCP/IP protocol, A-9
IN-2
Page 78

User's Guide
Pinted in Japan
XX.XX.XX
 Loading...