

Page 1
EPSON Scanner Utility Program
EPSON TWAIN Pro
User’s Guide
English
4009630-00
B02-00
Page 2

®
TWAIN Pro
SCANNER UTILITY PROGRAM
All rights reserved. No part of this publication may be reproduced, stored in a retrieval
system, or transmitted in any form or by any means, electronic, mechanical, photocopying,
recording, or otherwise, without the prior written permission of SEIKO EPSON
CORPORATION. No pate nt liability is assu med with respe ct to the use of the information
contained here in. Nei ther is any liabil ity assu med for dam ages res ulting fr om the use of the
information contained herein.
Neither SEIKO EPSON CORPORATION nor its affiliates shall be liable to the purchaser of
this product or third parties for damages, losses, costs, or expenses incurred by purchaser or
third parties as a result of: accident, misuse, or abuse of this product or unauthorized
modifications, repairs, or alterations to this product.
SEIKO EPS O N CORPORATION and its affiliates shall not be liable against any damages or
problems arising from the use of any options or any consumable products other than those
designated as Original EPSON Products or EPSON Approved Products by SEIKO EPSON
CORPORATION.
EPSON is a registered trademark of SEIKO EPSON CORPORATION.
IBM and PS/2 are registered trademarks of International Business Machines Corporation.
Macintosh is a registered trademark of Apple Computer, Inc.
Microsoft and Windows are registered trademarks of Microsoft Corporation in the United
States of Ame rica and other countries.
General Notice: Other product names used herein are for identification purposes only and may be
trademarks of their respective companies.
Copyright © 1998 by SEIKO EPSON CORPORATION, Nagano, Japan.
User’s Guide
Page 3

ii
Page 4

Contents
Introduction
Features. . . . . . . . . . . . . . . . . . . . . . . . . . . . . . . . . . . . . . . . . . . . . . . .1
About This Guide . . . . . . . . . . . . . . . . . . . . . . . . . . . . . . . . . . . . . . .2
Chapter 1
System Requirements . . . . . . . . . . . . . . . . . . . . . . . . . . . . . . . . . . . .1-2
Installing the Scanner Software for Windows. . . . . . . . . . . . . . . .1 - 4
For Windows 95 and Windows NT 4.0 users. . . . . . . . . . . .1-4
For Windows 98 us ers . . . . . . . . . . . . . . . . . . . . . . . . . . . . . . .1-11
Upgrading from Wind o ws 9 5 to Windows 98. . . . . . . . . . .1-17
For Windows NT 3.51 user s . . . . . . . . . . . . . . . . . . . . . . . . . .1-22
Installing the Scanner Software for Macintosh . . . . . . . . . . . . . . .1 - 23
Calibrating Your Screen . . . . . . . . . . . . . . . . . . . . . . . . . . . . . . . . . .1-25
Chapter 2
Starting EPSON TWA IN Pro . . . . . . . . . . . . . . . . . . . . . . . . . . . . . .2-2
Scanning an Image . . . . . . . . . . . . . . . . . . . . . . . . . . . . . . . . . . . . . .2-3
Saving the Scanned Image . . . . . . . . . . . . . . . . . . . . . . . . . . . . . . . .2-4
Getting Information From On line Help . . . . . . . . . . . . . . . . . . . . .2-4
Optimizing Image Scanning . . . . . . . . . . . . . . . . . . . . . . . . . . . . . .2-4
Order of adjustments for manually optimizing images. . .2-5
Displaying the Preview window . . . . . . . . . . . . . . . . . . . . . .2-5
Adjusting the Highlight setting . . . . . . . . . . . . . . . . . . . . . . .2 -6
Adjusting the Shadow setting. . . . . . . . . . . . . . . . . . . . . . . . .2-7
Adjusting the Gamma sett ing. . . . . . . . . . . . . . . . . . . . . . . . .2-7
Applying a preset tone curve . . . . . . . . . . . . . . . . . . . . . . . . . 2 -8
Adjusting the Gray Balance Intensity setting. . . . . . . . . . . .2-8
Adjusting the Saturation setting. . . . . . . . . . . . . . . . . . . . . . . 2 -9
Using the tone curve . . . . . . . . . . . . . . . . . . . . . . . . . . . . . . . .2-9
Optimizing OCR Scanning. . . . . . . . . . . . . . . . . . . . . . . . . . . . . . . .2-13
Installing the Software
Scanning Basics
Contents
iii
Page 5

Scanning text . . . . . . . . . . . . . . . . . . . . . . . . . . . . . . . . . . . . . . 2-13
Improving character recognition . . . . . . . . . . . . . . . . . . . . . 2-14
Text difficult to recognize . . . . . . . . . . . . . . . . . . . . . . . . . . . 2-14
Chapter 3
Overview . . . . . . . . . . . . . . . . . . . . . . . . . . . . . . . . . . . . . . . . . . . . . . 3-3
The EPSON TWAIN Pro D i alog Bo x. . . . . . . . . . . . . . . . . . . . . . . 3-4
Document Source . . . . . . . . . . . . . . . . . . . . . . . . . . . . . . . . . . 3-4
Image Type. . . . . . . . . . . . . . . . . . . . . . . . . . . . . . . . . . . . . . . . 3-6
Destination . . . . . . . . . . . . . . . . . . . . . . . . . . . . . . . . . . . . . . . . 3-10
Resolution. . . . . . . . . . . . . . . . . . . . . . . . . . . . . . . . . . . . . . . . . 3-13
Source . . . . . . . . . . . . . . . . . . . . . . . . . . . . . . . . . . . . . . . . . . . . 3-13
Target . . . . . . . . . . . . . . . . . . . . . . . . . . . . . . . . . . . . . . . . . . . . 3-14
Scale. . . . . . . . . . . . . . . . . . . . . . . . . . . . . . . . . . . . . . . . . . . . . . 3-14
Preview Window . . . . . . . . . . . . . . . . . . . . . . . . . . . . . . . . . . . . . . . 3 -16
Preview Buttons . . . . . . . . . . . . . . . . . . . . . . . . . . . . . . . . . . . . . . . . 3-18
Zoom preview button . . . . . . . . . . . . . . . . . . . . . . . . . . . . . . . 3-18
Return to full preview button . . . . . . . . . . . . . . . . . . . . . . . . 3-18
Return to zoom preview button . . . . . . . . . . . . . . . . . . . . . . 3-19
Marquees . . . . . . . . . . . . . . . . . . . . . . . . . . . . . . . . . . . . . . . . . . . . . . 3-19
Making and modifying ma rqu ees . . . . . . . . . . . . . . . . . . . . 3-19
Delete marquee button . . . . . . . . . . . . . . . . . . . . . . . . . . . . . . 3-21
Duplicate marquee button . . . . . . . . . . . . . . . . . . . . . . . . . . . 3-22
Auto locate button. . . . . . . . . . . . . . . . . . . . . . . . . . . . . . . . . . 3-22
Marquee number indicator . . . . . . . . . . . . . . . . . . . . . . . . . . 3-23
Adjust buttons. . . . . . . . . . . . . . . . . . . . . . . . . . . . . . . . . . . . . . . . . . 3-24
Auto exposure button. . . . . . . . . . . . . . . . . . . . . . . . . . . . . . . 3-24
Image controls button. . . . . . . . . . . . . . . . . . . . . . . . . . . . . . . 3-24
Tone correction button . . . . . . . . . . . . . . . . . . . . . . . . . . . . . . 3-27
Color adjustment button . . . . . . . . . . . . . . . . . . . . . . . . . . . . 3-29
Reset button . . . . . . . . . . . . . . . . . . . . . . . . . . . . . . . . . . . . . . . 3-30
Auto focus button . . . . . . . . . . . . . . . . . . . . . . . . . . . . . . . . . . 3-31
Manual focus button . . . . . . . . . . . . . . . . . . . . . . . . . . . . . . . . 3-31
Settings. . . . . . . . . . . . . . . . . . . . . . . . . . . . . . . . . . . . . . . . . . . . . . . . 3-34
Configuration . . . . . . . . . . . . . . . . . . . . . . . . . . . . . . . . . . . . . . . . . . 3-35
Scan. . . . . . . . . . . . . . . . . . . . . . . . . . . . . . . . . . . . . . . . . . . . . . . . . . . 3-37
Scan All . . . . . . . . . . . . . . . . . . . . . . . . . . . . . . . . . . . . . . . . . . . . . . . 3-38
Understanding EPS ON TWAIN Pro Features
iv
Contents
Page 6

Chapter 4
Calibrating Your Screen . . . . . . . . . . . . . . . . . . . . . . . . . . . . . . . . . .4-3
Using ICM (For Windo ws 95, 98 Users) . . . . . . . . . . . . . . . . . . . . .4-4
For Windows 95 us ers . . . . . . . . . . . . . . . . . . . . . . . . . . . . . . .4-5
For Windows 98 us ers . . . . . . . . . . . . . . . . . . . . . . . . . . . . . . .4-5
Using ColorSync (For Macintosh Users) . . . . . . . . . . . . . . . . . . . .4-6
Calibrating Your System
Chapter 5
Problems and Solutions . . . . . . . . . . . . . . . . . . . . . . . . . . . . . . . . . .5-2
Troubleshooting
Glossary
Index
Contents
v
Page 7

vi
Contents
Page 8

Introduction
Features
The EPSON TWAIN Pro scanne r software i s the perfect
companion for your EPSON scanner. With this software you can
scan images in color, grayscale, or black-and-white and obtain
professional quality results.
EPSON TWAIN Pro directly controls all of the features of your
EPSON scanner. This program is the standard cross-platform
interface for other applicati on programs, and automatically starts
when you scan from another application.
Additionally, EPSON Screen Calibration utility allows you to
match your scanner and display monitor to reproduce images so
that they are identical to the originals. Calibration is one of the
most important f actors fo r precisely r eproducing s canned images
on display monitors.
Introduction
1
Page 9

About This Guide
This
User’s Guide
using EPSON TWAIN Pro. It also prov ides a complete r efer en ce
to all software features .
❏ Chapter 1 con tains inf ormation about insta lling th e softw are.
Be sure to read this c hapter first.
❏ Chapter 2 provides basic information about scanning.
❏ Chapter 3 is a reference with deta i led information abo u t the
settings and functions of EPSON TWAIN Pro.
❏ Chapter 4 tells you how to calibrate your system for use with
EPSON TWAIN Pro and your scanner.
❏ Chapter 5 contains troubleshooting information.
in this
Notes
on operating your scanner or software.
provides detailed instructions for in stalling and
User’s Guide
contain important information and useful tips
2
Introduction
Page 10

Chapter 1
Installing the So ftware
System Requirements . . . . . . . . . . . . . . . . . . . . . . . . . . . . . . . . . . . . .1-2
Installing the Scanner Software for Windows. . . . . . . . . . . . . . . . . 1-4
For Windows 95 and Windows NT 4.0 users. . . . . . . . . . . . . 1-4
For Windows 98 us ers . . . . . . . . . . . . . . . . . . . . . . . . . . . . . . . .1-11
Upgrading from Wind o ws 9 5 to Windows 98. . . . . . . . . . . . 1-17
For Windows NT 3.51 user s . . . . . . . . . . . . . . . . . . . . . . . . . . . 1-22
Installing the Scanner Software for Macintosh . . . . . . . . . . . . . . . . 1-23
Calibrating Your Screen . . . . . . . . . . . . . . . . . . . . . . . . . . . . . . . . . . .1-25
1
Installing the Software
1-1
Page 11

System Requ irements
Before installing the scanner software, make sure th at your
system meets the following requirements.
Scanner EPSON GT-9600, GT-12000, Exp ression 800,
Expression 836XL
For Windows user s
System:
Microsoft® Windows® 95, Windows 98,
Windows NT
®
3.51, or Windows NT 4.0
Interface: EPSON bi direction al parallel inte rface or
Adaptec
Display: Color monitor, 800 ×
higher recommended), and 65,000 colors (or
higher recommended)
®
SCSI adapter
600 screen resolu tion (or
Note:
Color and tone repro d uc tion are subject to the
display capability of your computer system,
including the video card, display monitor, and
software. See the manuals for those products for
details.
1-2
Installing the Software
Page 12

For Macintosh users
System:
Interface: Macintosh standard (SCSI).
Display: Color m onitor, 800 ×
EPSON TWAIN Pro supports the Apple ColorSync™ 2.0 color
management system and QuickTime™.
Apple® Macintosh® comput er wi t h Po werP C
processor running System 7.5.x or later
Note:
You cannot use a serial interface.
600 screen resolut ion (or
higher recommended), and 32,000 c ol ors (or
higher recommended)
Note:
Color and tone reproduction are subjec t to the
display capability of y our computer system,
including the video card, display monitor, and
software. See the manuals for those products for
details.
1
Installing the Software
1-3
Page 13

Installing the Scanner Software for Windows
After connecting the scanner to your computer, install the EPSON
TWAIN Pro software from the floppy disks or CD-ROM that
comes with it. The steps you should perform depend on the
version of Windows you are using.
❏ Windows 95 and NT 4.0 users ... pag e 1-4
❏ Windows 98 users ... page 1-11
❏ Upgrading from Windows 95 to Windows 98 ... page 1-17
❏ Windows NT 3.51 users ... page 1-22
Note:
If you are using the floppy disk version of the software, make a backup
copy of the scanner softwa re before you begin installati on.
For Windows 95 and Windows NT 4.0 users
1. Make sure that the scanner is turned on.
2. Turn on the computer, and start Windows.
1-4
If you are using the parallel int er face or if you are u sing
Windows NT 4.0, insert the scanner software CD in the CDROM drive. (If you are installing from floppy disks, insert
Disk 1 in the floppy drive.) Go to step 3.
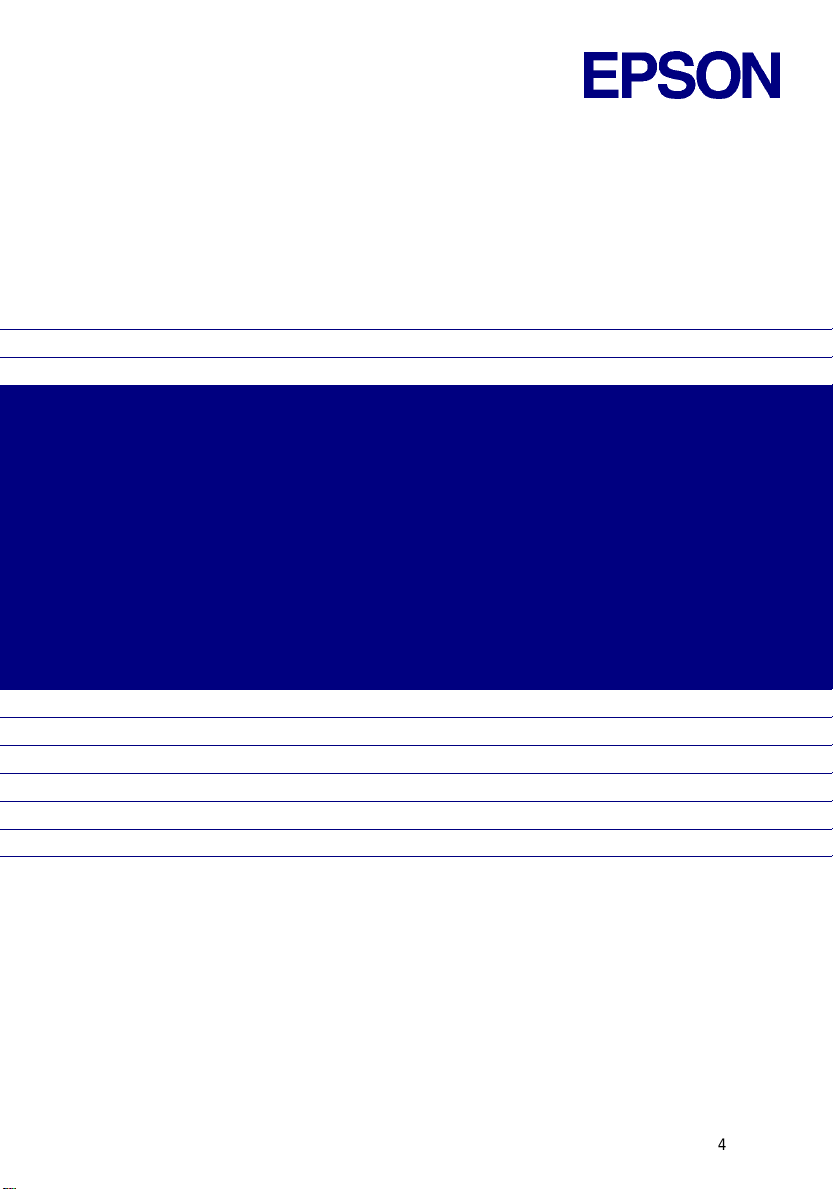
If you are using Windows 95 with the SCSI interface, either of
the following dialog boxes may appear.
Installing the Software
Page 14
❏ If the dialog box below appears, insert the scanner software
CD in the CD-ROM drive. (If you are installing from floppy
disks, insert the PnP Disk in the floppy drive.)
Driver from disk provided b y hardware
Select
manufacturer
Select the CD-ROM drive and PnP_Disk folder (or floppy disk
drive), and
, then click
Win95
folder, then click OK. Go to step 3.
OK
, and
Browse
.
1
Installing the Software
1-5
Page 15
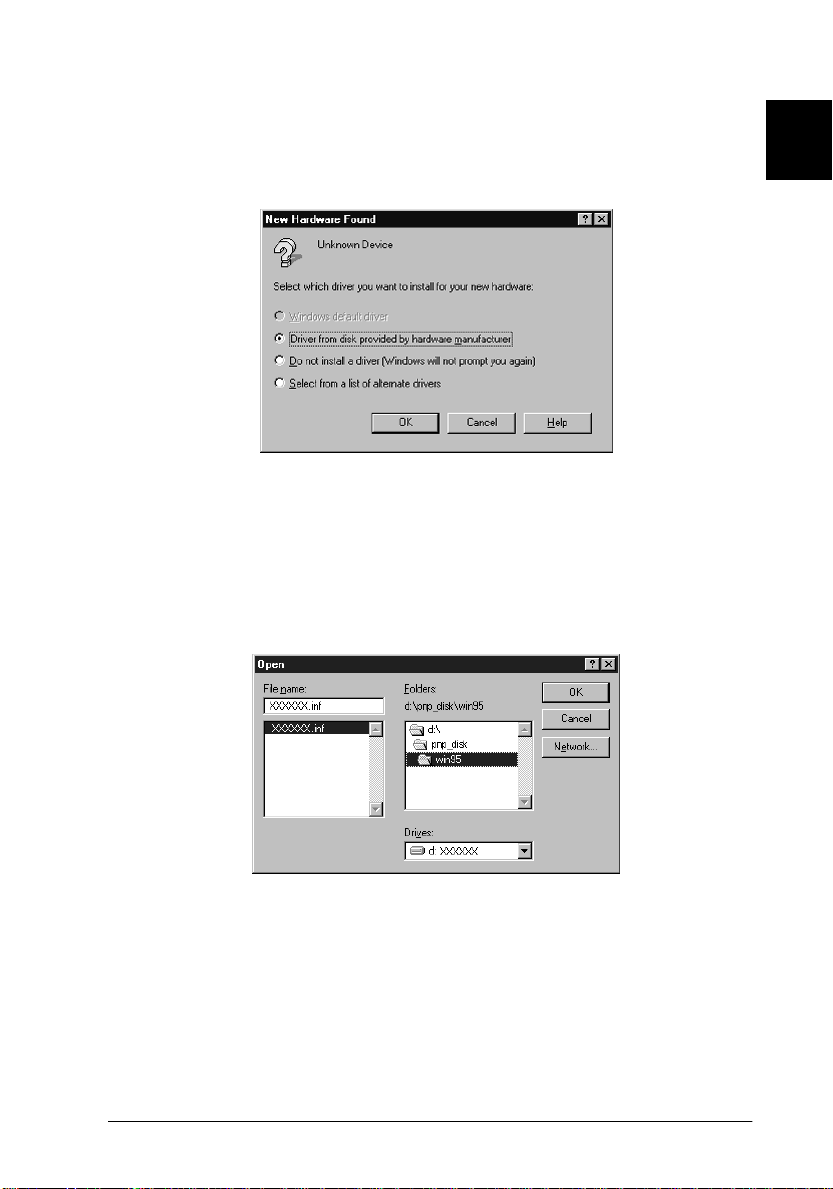
❏ If the dialog box below appears, insert the scanner software
CD in the CD-ROM drive (If you are installing from floppy
disks, insert the PnP Disk in the floppy drive), then click
When you are asked for the drive and folder, select the CDROM drive and PnP_Disk folder (or floppy disk drive), and
Win95 folder. An example is shown below.
Next
.
1-6
Installing the Software
Page 16
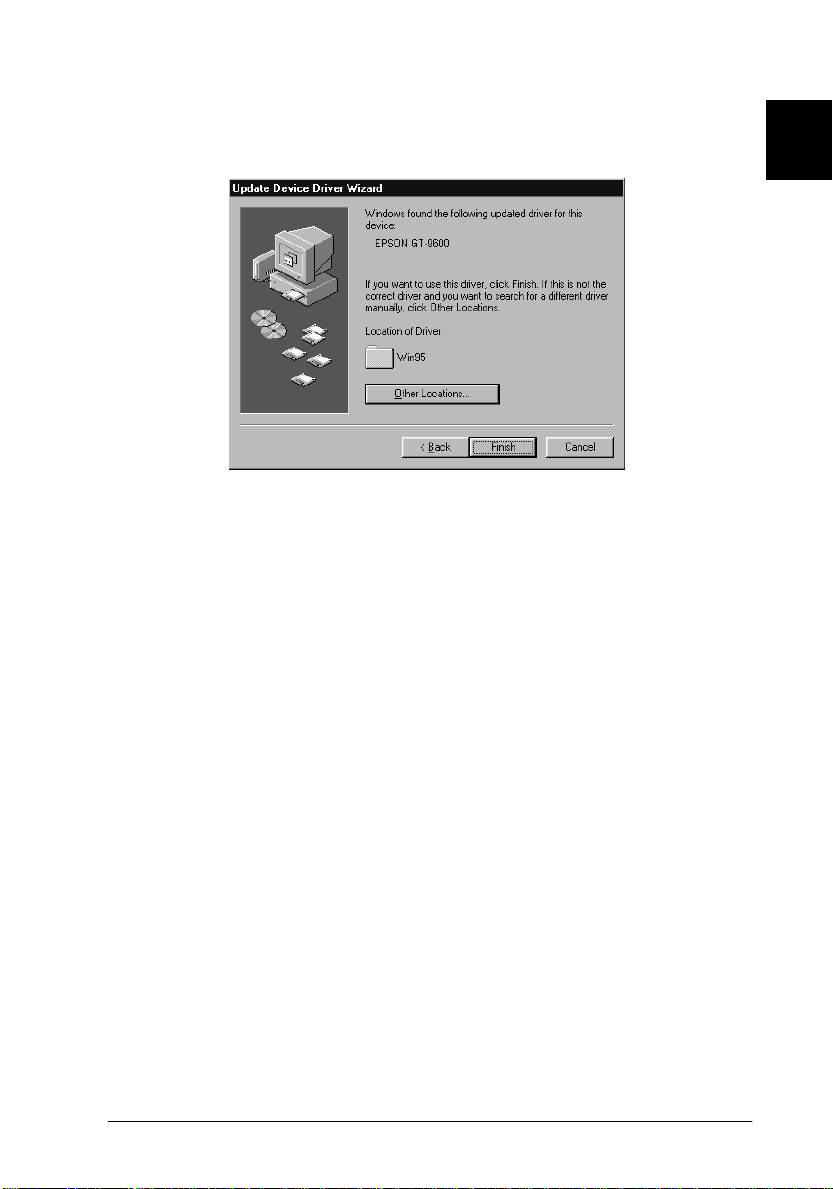
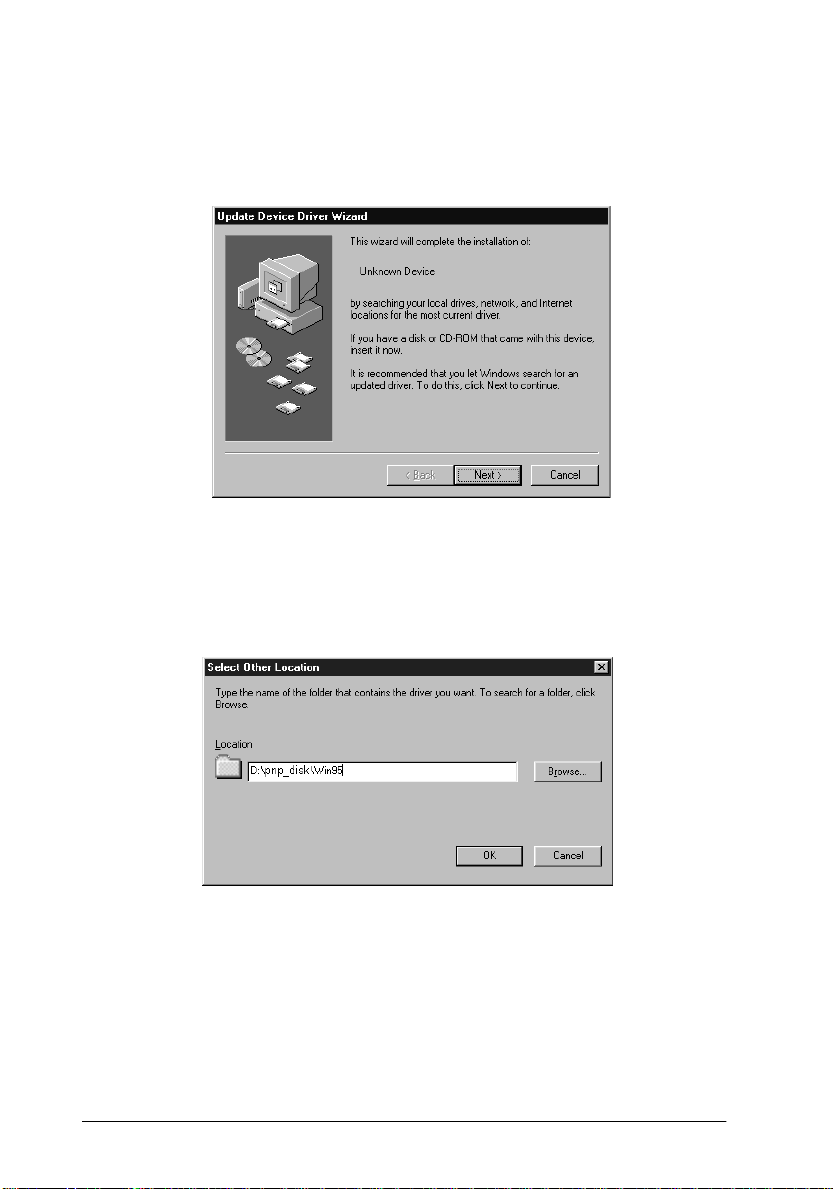
When the following dialog box, or similar appears, click
Finish
.
1
3. Double-click the
from floppy disks, insert Disk 1 into the flopp y disk drive.
4. Double-click the floppy disk drive or CD-ROM drive icon.
Note:
If the folder contains a RE ADME file, double-click it and read it.
This file contains important information and any updates regarding
this software.
5. Double-click the
1 disk. Fol low the instructions on the scr een.
My Comp uter icon
SETUP.EXE
icon in the Disk 1 folder or Disk
. If you are installing
Installing the Software
1-7
Page 17
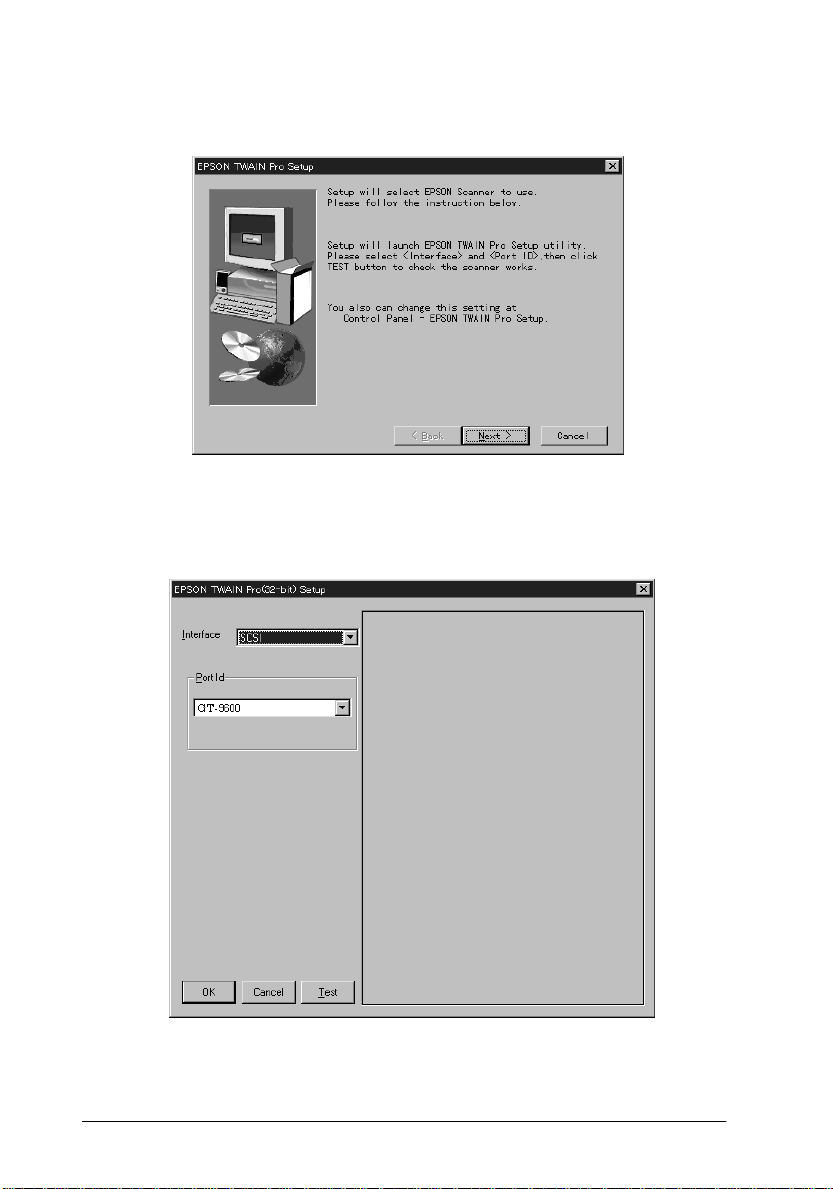
6. When the following dialog box appears, click
Next
.
7. After EPSON TWAIN Pro is installed, the following dialog
box appears.
1-8
Installing the Software
Page 18

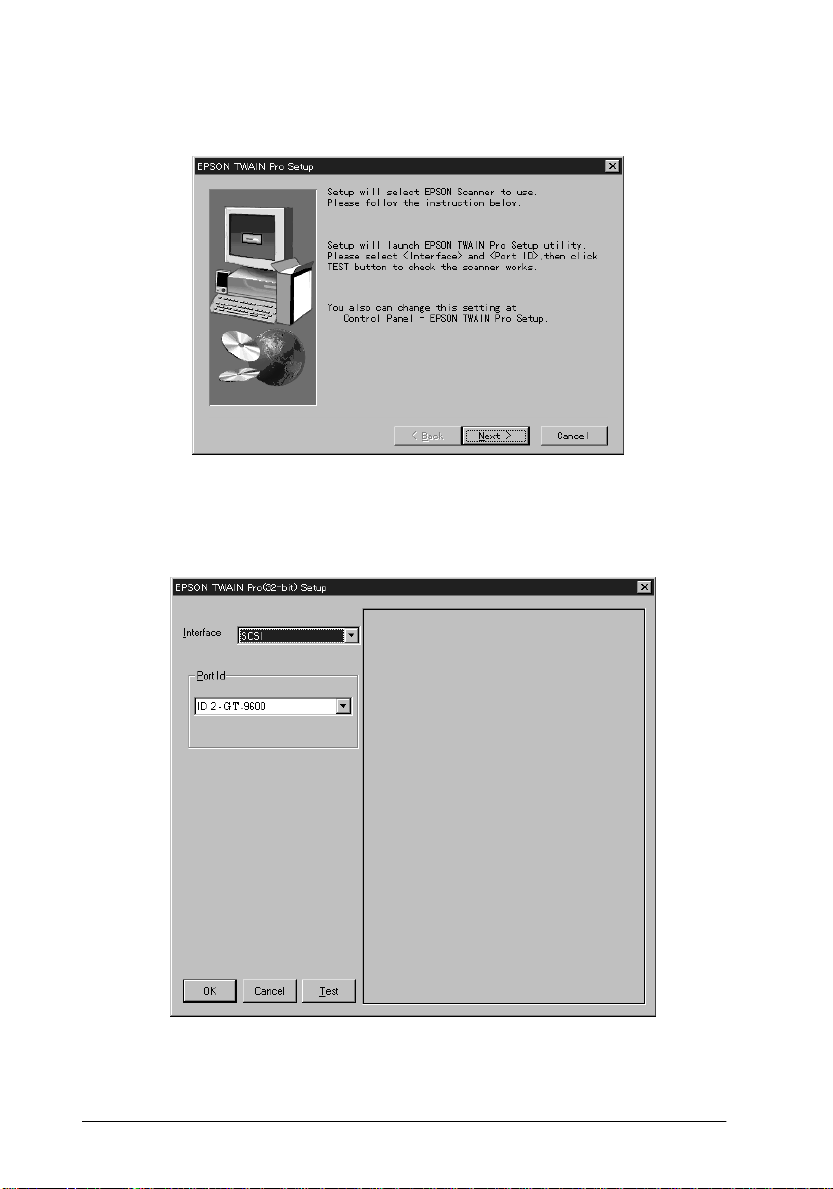
8. The next step you should perform depends on whether you
have a parallel interface model or a SCSI interface model.
For the SCSI interf ace mo del
Make sure that
Make sure your EPSON scanner appears in the Port ID list.
For the parallel interf ace model
Make sure that
up list.
Make sure that the port address setting matches the port
address of the interface board as shown below. (Use the port
address yo u wrote down when you ins ta l led the parall el
interface board.)
Interface board Port setting in the EPSON TWAIN Pro
Note:
❏
You do not need to change the port address setting if you install
the parallel interface bo ard p ac ked with your scanner wi thout
changing jumper settin g s.
SCSI
is selected in the Interface pop-up list.
BiD Parallel
LPT1 Port 378
LPT2 Port 278
is selected in the Interface pop-
Setup dialog box
1
❏
For information on I/O p ort add resses, see the
that came with the para llel interface board.
9. Place a document on the document table of the scanner.
Installing the Software
User's Guide
1-9
Page 19

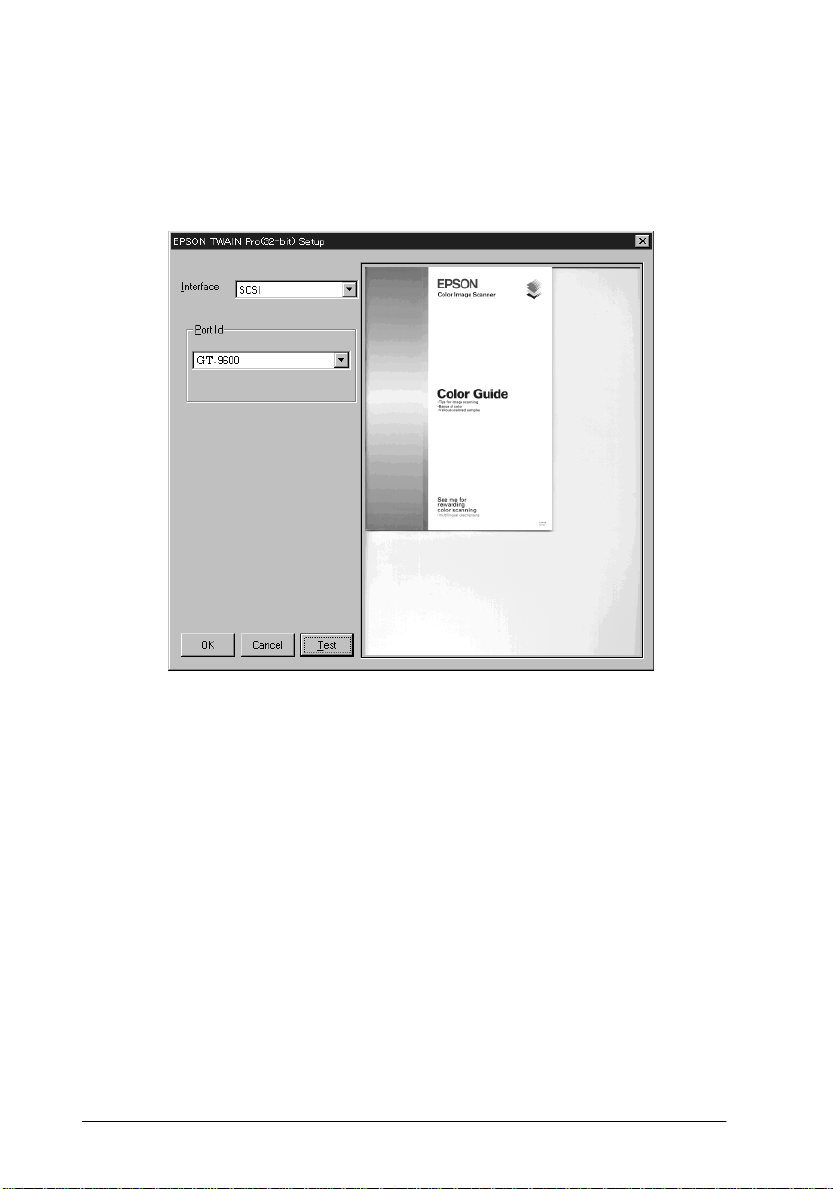
10. Click
Test
to check the connection. The scanner scans the
document and a scanned reproduction appears i n the right
window of the dialog box if everything is properly installed
and connected.
11. Click OK to close the EPSON TWAIN Pro Setup dialog box.
The EPSON Screen Calibration utility automatically starts.
Go to page 1-25.
Note:
It may take some time after clickin g OK to start the EPSON Screen
Calibration ut ility depending on the Windows version.
1-10
Installing the Software
Page 20
For Windows 98 users
1. Make sure that the scanner i s turned on.
2. Turn on the computer and start Windows.
If you are using the pa rallel inte rfa ce, insert the scan ne r
software CD in the CD- ROM drive. (If y ou are installi ng from
floppy disks, insert Disk 1 in the floppy drive.) Go to step 8.
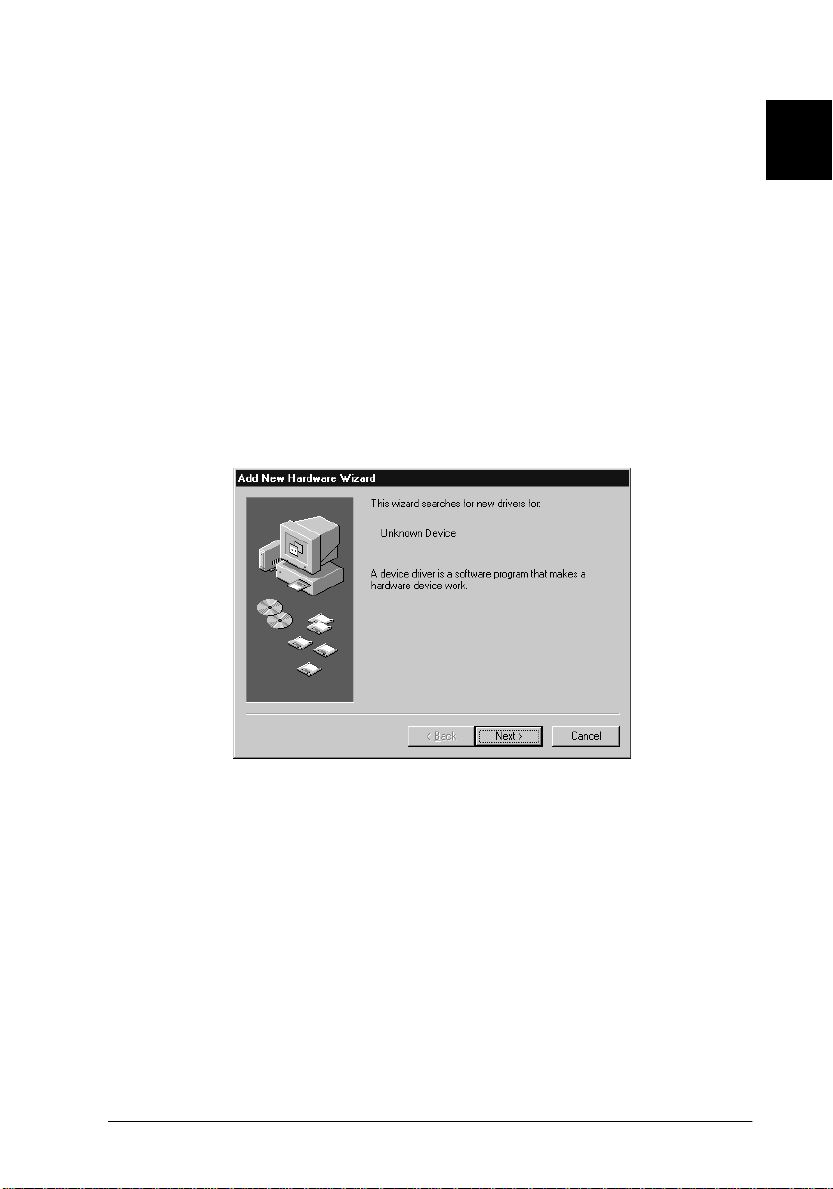
3. The first time you turn on th e compute r after turni ng on the
scanner, the di alog box below appea rs. Insert the P nP Disk in
the floppy disk drive, or CD in the CD-ROM drive, then click
Next
.
1
Installing the Software
1-11
Page 21
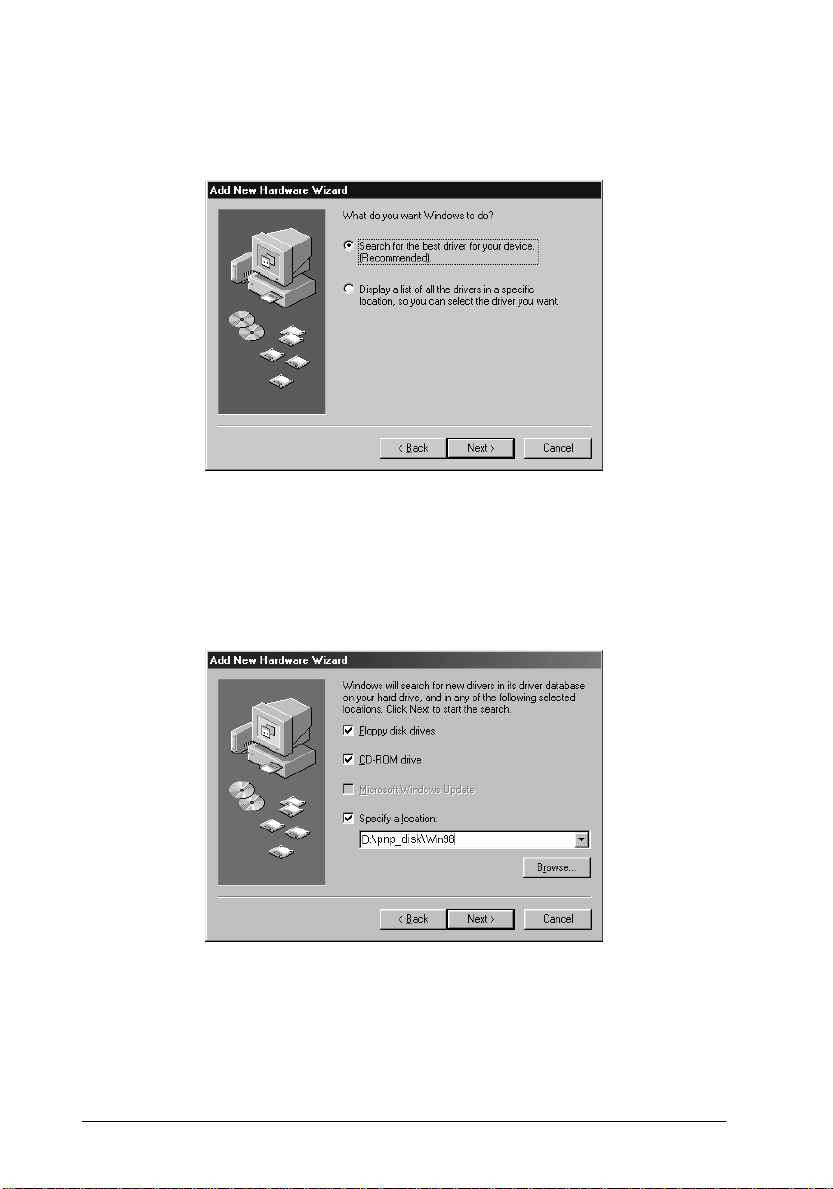
4. Select
Next
Search for the best driver for your device
.
, then click
5. Select
Specify a location
the drive letter and
Win98
folder if you are using CD-ROM, as the location, as
shown below, and click
then browse and select or type in
Win98
folder, or PnP_Disk folder and
Next
.
1-12
Installing the Software
Page 22
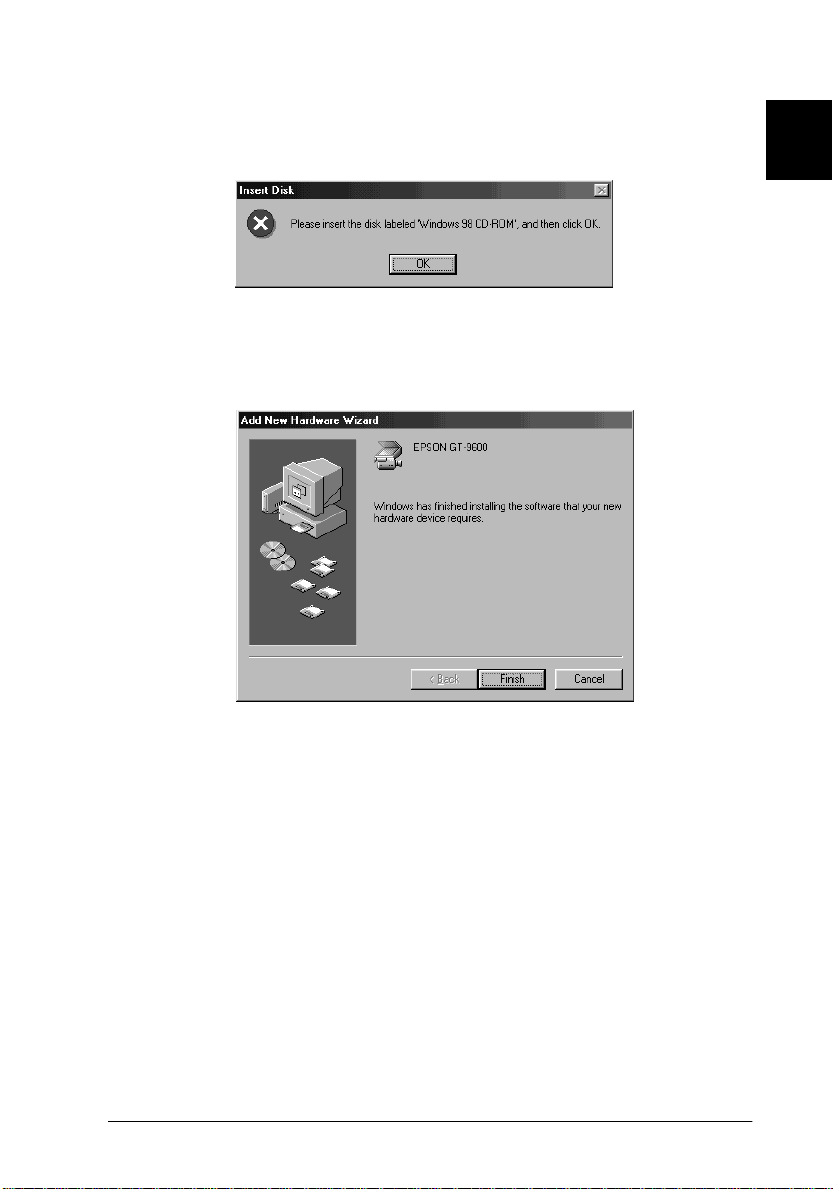
6. Follow the in structions on the screen. You may be asked to
insert the Windows 98 CD-ROM.
7. When the following dialog box or similar is displayed, click
Finish
.
1
8. Double-click the
from floppy disks, insert Disk 1 into the flopp y disk drive.
9. Double-click the floppy disk drive or CD-ROM drive icon.
10. Double-click the
1 disk. Fol low the instructions on the scr een.
My Comp uter icon
SETUP.EXE
icon in the Disk 1 folder or Disk
Installing the Software
. If you are installing
1-13
Page 23
11. When the following dialog box appears, click
Next
.
12. After EPSON TWAIN Pro is installed, the following dialog
box appears.
1-14
Installing the Software
Page 24

13. The next step you should perform depends on whether you
have a parallel interface model or a SCSI interface model.
For the SCSI interf ace mo del
Make sure that
Make sure your EPSON scanner appears in the Port ID list.
For the parallel interf ace model
Make sure that
up list.
Make sure that the port address setting matches the port
address of the interface board as shown below. (Use the port
address yo u wrote down when you ins ta l led the parall el
interface board.)
Interface board Port setting in the EPSON TWAIN Pro
Note:
❏
You do not need to change the port address setting if you install
the parallel interface bo ard p ac ked with your scanner wi thout
changing jumper settin g s.
SCSI
is selected in the Interface pop-up list.
BiD Parallel
LPT1 Port 378
LPT2 Port 278
is selected in the Interface pop-
Setup dialog box
1
❏
For information on I/O p ort add resses, see the
that came with the para llel interface board.
14. Place a document on the document table of the scanner.
Installing the Software
User's Guide
1-15
Page 25
15. Click
Test
to check the connection. The scanner scans the
document and a scanned reproduction appears i n the right
window of the dialog box if everything is properly installed
and connected.
16. Click OK to close the EPSON TWAIN Pro Setup dialog box.
The EPSON Screen Calibration utility automatically starts.
Go to page 1-25.
Note:
It may take some time after clickin g OK to start the EPSON Screen
Calibration ut ility depending on the Windows version.
1-16
Installing the Software
Page 26
Upgrading from Windows 95 to Windows 98
If you were u si ng your scanner with Wi ndows 95 and have
update d your system to Windows 98, follow the instructions
below to up date your scanner software.
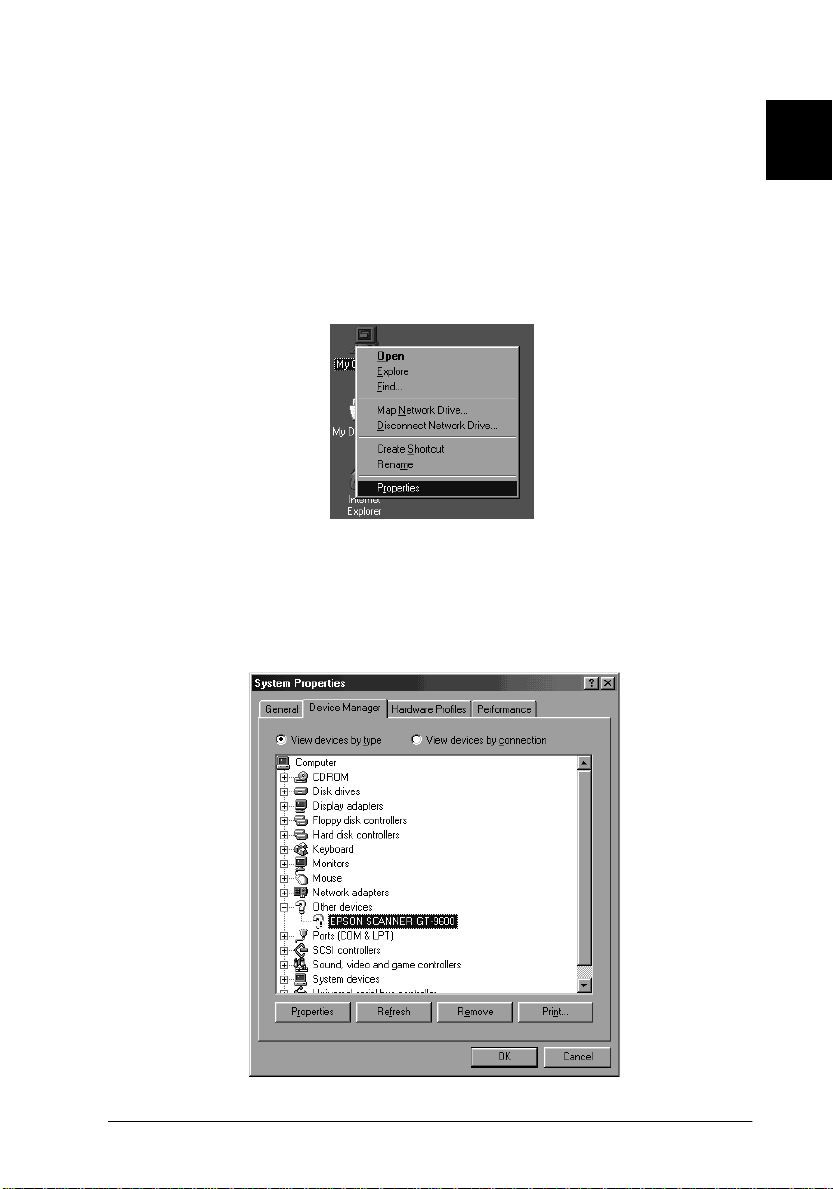
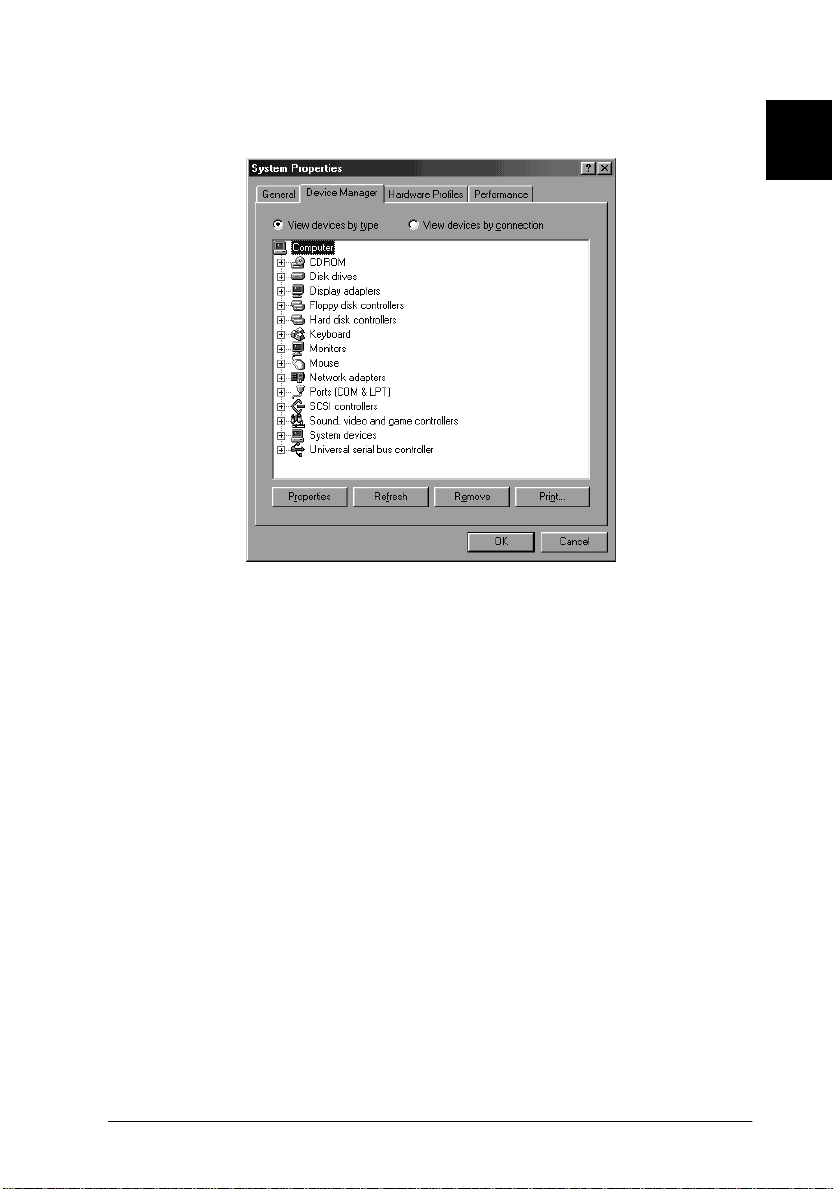
1. Use the right mouse button to click
Properties
2. In the
Manager
Scanners
.
System Properties
tab, double-clic k
, then double-c lick your EPSON scanner’s n am e .
dialog box, select the
My Computer
Other devices or EPSON
, then select
Device
1
Installing the Software
1-17
Page 27

3. Select the
Driver
tab, then click
Update Driver
.
4. Click
1-18
Next
in the dialog box below.
Installing the Software
Page 28
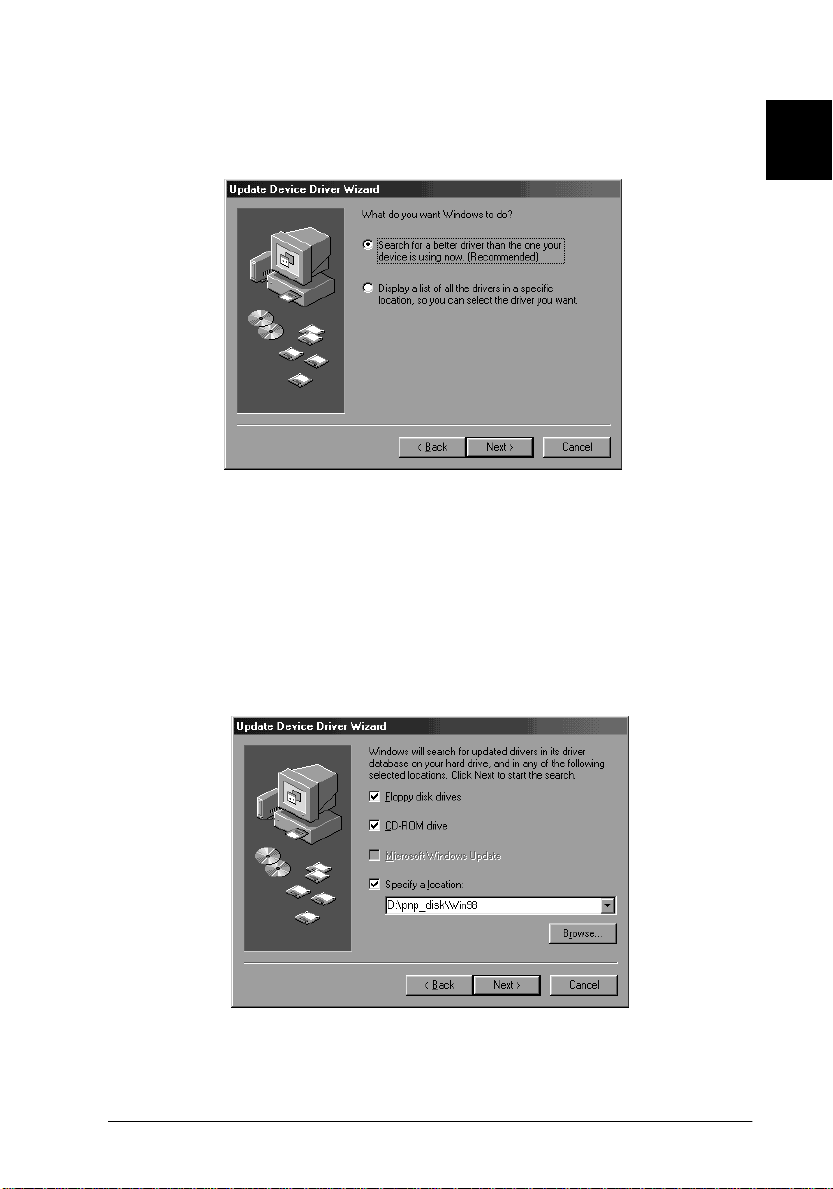
5. Select
6. Insert the PnP Disk in the floppy disk drive, or CD in the CD-
Search for a better driver than the one your device
is using now
ROM drive.
, and click
Next
.
1
7. Select
Specify a location
the drive letter and
Win98
folder if you are using CD-ROM, as the location, as
shown below, and click
Win98
Next
then browse and select or type in
folder, or PnP_Disk folder and
.
Installing the Software
1-19
Page 29

8. Follow the instructions on the screen. You may be asked to
insert the Windows 98 CD-R OM.
9. Click
Close
in the scanner properties dialog box.
1-20
Installing the Software
Page 30
10. Click OK in the System Properties dialog box.
1
11. Double-click the
floppy disk drive, or insert the CD-ROM in the CD-ROM
drive.
12. Double-click the floppy disk drive or CD-ROM drive icon.
13. Double-click the
1 disk. Fol low the instructions on the scr een.
After th e scanner softwa re is installed, calibrate y our screen
as described on page 1-25.
14. Restart your computer.
My Comput er
SETUP.EXE
icon in the Disk 1 folder or Disk
icon. Insert Disk 1 into the
Installing the Software
1-21
Page 31

For Windows NT 3.51 users
1. Make sure that the scanner is turned on.
2. Turn on the computer and start Windows.
3. Insert the scan ner soft ware CD in the CD-RO M drive. (I f you
are installing from floppy disks, insert Disk 1 in the floppy
drive.)
4. Choose
5. Click
6. Choose
click OK. Follow the instruc tions on th e screen.
7. When the following dialog box appears, follow the steps on
page 1-8 from step 6.
Run
from the File menu.
Browse
. Then select the CD-ROM (or floppy ) drive.
SETUP.EXE
in the Disk 1 directory or Disk 1 disk, then
1-22
Installing the Software
Page 32

Installing the Scanner Software for Macintosh
After connecting the scanner to your Macintosh computer, install
the scanner software (EPSON TWAIN Pro) from the floppy disk
or CD-ROM. Follow the steps below.
1. Make sure your scanner is on. T hen t urn o n the computer.
2. Insert the CD in t he CD-ROM drive. If you are i nstalling fr om
floppy disks, insert the EPSON TWAIN Pro disk in the floppy
drive.
3. Double-click the disk icon to open it.
1
4. Double-click the
EPSON TWAIN Pr o folder if you are installing f rom the CDROM).
EPSON TWAIN Pro Installer
icon (in the
Installing the Software
1-23
Page 33
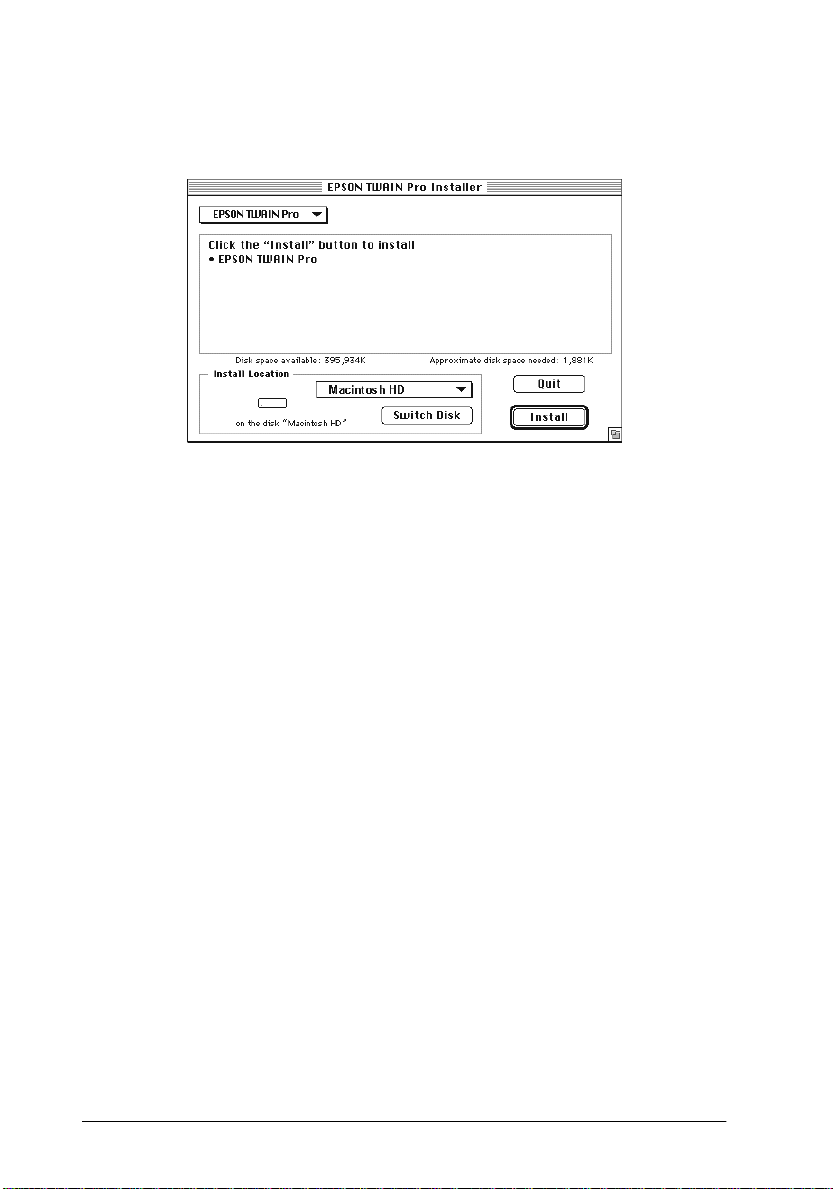
5. The installer software shows a dialog box. Click
follow the instructions on the screen.
Install
, then
When you have finished the entire installation, th e EPSON Screen
Calibration utility automatically starts. Go to the next page.
Note for Macintosh u sers:
Most of the illustrations shown in the following sections are for
Windows, so they may be a bit different from the dialog boxes that appear
on your screen. All settings and functions are the same for both operating
systems, however, and you sh ould easily be able to follow these
instructions on your Macintosh as well.
1-24
Installing the Software
Page 34
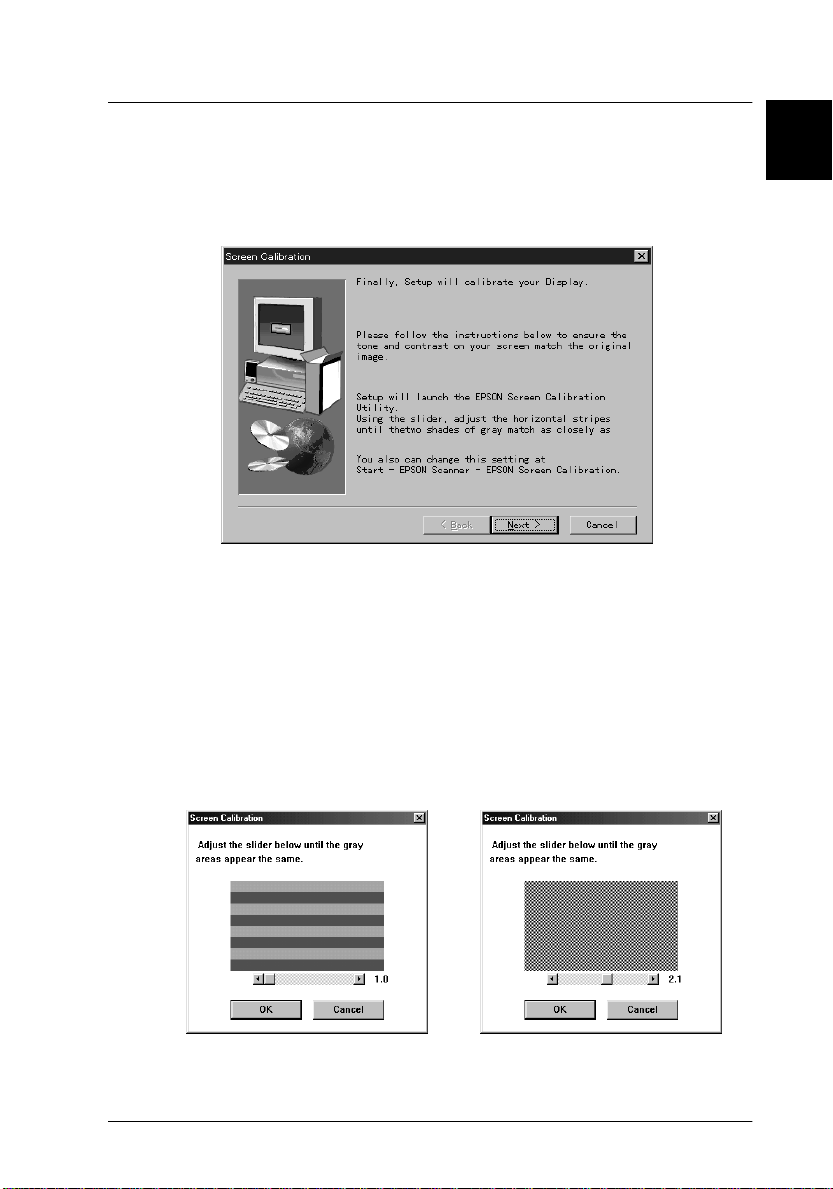
Calibrating Your Screen
After th e scannin g softwa re has been installed , the following
dialog box appears.
You must calibrate your scre en and scanner to r eproduce images
identical to the originals. Follow the steps below.
1
1. Click
2. In the following window, move the slider to the right or left
Next
.
until the shades of gray of the two sets of horizontal stripes
match.
D
Installing the Software
1-25
Page 35

Note:
View the screen from a slight distance. The gray stripes will not
perfectly blend together; the objective is to make the different tones
match as closely as possible.
3. Click
4. When the message “Setup is completed” appears, click
OK
to register the calibration setting.
OK
You will not need to change the screen calibration again so long
as you continue to use the same display.
.
1-26
Installing the Software
Page 36

Chapter 2
Scanning Basics
Starting EPSON TWA IN Pro . . . . . . . . . . . . . . . . . . . . . . . . . . . . . . . 2-2
Scanning an Image . . . . . . . . . . . . . . . . . . . . . . . . . . . . . . . . . . . . . . .2-3
Saving the Scanned Image . . . . . . . . . . . . . . . . . . . . . . . . . . . . . . . . .2-4
Getting Information From On line Help . . . . . . . . . . . . . . . . . . . . . . 2-4
Optimizing Image Scanning . . . . . . . . . . . . . . . . . . . . . . . . . . . . . . . 2-4
Order of adjustments for manually optimiz ing im ages . . . . 2-5
Displaying the Preview window . . . . . . . . . . . . . . . . . . . . . . .2-5
Adjusting the Highlight setting . . . . . . . . . . . . . . . . . . . . . . . .2-6
Adjusting the Shadow setting. . . . . . . . . . . . . . . . . . . . . . . . . . 2- 7
Adjusting the Gamma sett ing. . . . . . . . . . . . . . . . . . . . . . . . . . 2-7
Applying a preset tone curve . . . . . . . . . . . . . . . . . . . . . . . . . .2-8
Adjusting the Gray Balance Intensity setting. . . . . . . . . . . . . 2-8
Adjusting the Saturation setting. . . . . . . . . . . . . . . . . . . . . . . . 2- 9
Using the tone curve . . . . . . . . . . . . . . . . . . . . . . . . . . . . . . . . . 2-9
Optimizing OCR Scanning. . . . . . . . . . . . . . . . . . . . . . . . . . . . . . . . .2-13
Scanning text . . . . . . . . . . . . . . . . . . . . . . . . . . . . . . . . . . . . . . . .2-13
Improving character recog nition . . . . . . . . . . . . . . . . . . . . . . . 2 -14
Text difficult to recognize . . . . . . . . . . . . . . . . . . . . . . . . . . . . .2-14
2
Scanning Basics
2-1
Page 37

Starting EPSON TWAIN Pro
Before you can start scanning you must first install the EPSON
TWAIN Pro software, as described in Chapter 1, and an
application that supports EPSON TWAIN Pro.
Next, perform the following steps.
Note:
The location of the commands described in the following procedure may
be different in the applicatio n you are using. See your app lication’s
documentation fo r details about how to select a TWAIN data source.
1. Turn on the scanner an d pl ace a doc ument on the doc u ment
table. See the scanner’s
to turn it on and to place a document correctly.
Note:
The software may not work properly if you start up your computer
and EPSON TWA IN P ro before turning on the scanner.
2. Start up the applica tion you wa nt to scan from. The
application must be one that supports EPSON TW A I N Pro.
User’s Guide
for instructions on how
3. In the application , choose
In the dialog box that appears, make s ure that
Pro (32-bit)
on the Macintosh), and then click
Macintosh).
Note:
You normally need to perform the above step only the first time you
use the scanner with EPSON TWAIN Pro.
4. In the application , choose
to open EPSON TWAIN Pro.
The EPSON TWAIN Pro dialog box appears.
2-2
Scanning Basics
is selected as the data source (
TWAIN Sour ce
TWAIN Acquire
from the File menu.
EPSO N TWAIN Pr o
Select (OK
from the File menu
EPSON TWAIN
on the
Page 38

Scanning an Image
This section describes the basic steps you need to perform to
actually scan an image. See Chapter 3, "Understanding EPSON
TWAIN Features" for more information about how you can use
more advanced feature s that give you greater control over your
scanning operations.
2
1. Select
2. Select the
Document Source.
The default for this setting is
on page 3-4.
Image Type
The defaul t for this setting is
Type" on page 3-6.
.
Flatbed
24-bit Color
. See "Document Source"
(Std). See "Image
Scanning Basics
2-3
Page 39

3. Select the
Destination
.
The default for this setting is
on page 3-10.
4. Preview the image.
5. Use a marquee to specify the scan area.
6. Make fine adjustments to the zoom preview range.
screen.
Scan
to scan the image and dis play it on your computer
7. Click
Screen Vivid
. See "Destination"
Saving the Scanned Image
Save the scanned image using
you are using. See the documentation that comes with your
application for information about saving files.
Save
Save As
or
in the application
Getting Information From Online Help
Click the help button in the EPSON TWAIN Pro dialog box.
Optimizing Image Scanning
EPSON TWAIN Pro can automatically adjust and optimize
exposures and colors of the scanned images when scanning.
However, you can make adjus tments manually with the
powerful image q uality adjustment tools in E PSON TWAIN Pro.
This section provides ge neral informa tion on optimizing images
with thes e tools.
2-4
Scanning Basics
Page 40

Order of adjustments for manually optimizing images
To manually optimize images, adjust the following EPSON
TWAIN Pro settings in the order specified below.
Adjust the brightness and contrast
1. Adjust the Highlight and Shadow settings.
2. Adjust the Gamma setting.
3. Adjust the tone curve with a predefined tone correction
setting.
Make color adjustments
4. Adjust the Gray Balance Intensity setting.
5. Adjust the Saturation setting.
6. Manually adjust the tone curve for individual colors.
The following sections explai n how to make these adjustments in
EPSON TWAIN Pro.
Displaying the Preview window
The P review window shows y ou how y our adj ustment s aff ect th e
image as soon as you make them. The Preview window is also
the starting poin t from whi ch you access the Image Control s and
Color Adjustment dialog boxes that contain the tools for
optimizing your image.
2
Note:
See "Preview Window" on page 3-16 for Preview window operations,
and "Configuration" on page 3-35 for information about how to control
previewing image quality.
Scanning Basics
2-5
Page 41
1. After se lecting the
Destination
2-3, click
image of the document appears on your screen.
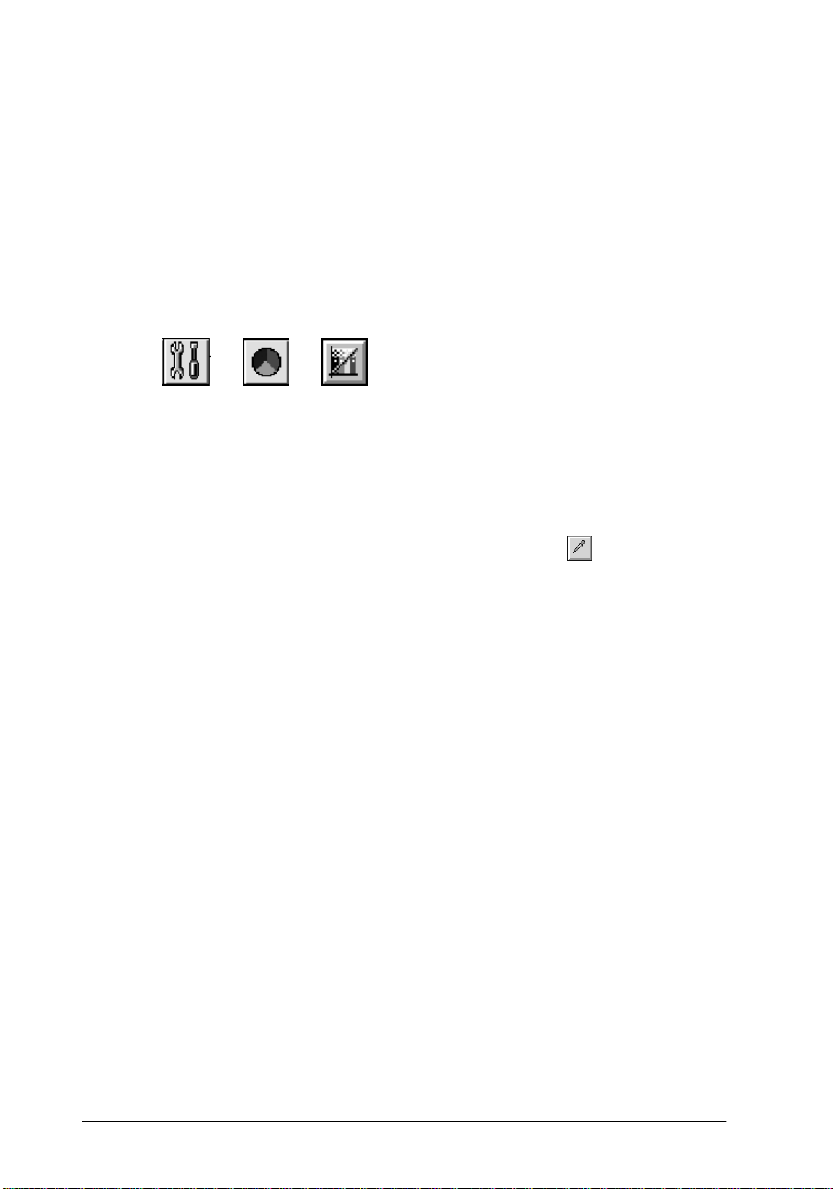
2. In the Preview window, click one of the butt ons below to
display the dialog box that contains the image optimization
tools you need.
as described under "Scanning an Image " on page
Preview
Document Source, Image Type
to open the Preview window. A preview
Adjusting the Highlight setting
Highlights are the brightest areas of an image.
1. In the Image Controls dialog box, click the button under
Highlight
This causes the cursor to change to an eyedropper, whose
movement is restricted to within the im age in the Pre view
window.
.
, and
2. Move the e yedropp er icon to the location you want to select
as the highlight point, and then click.
The brightness of the pi xel at the po int you click is se t as the
highlight level , and the ot her parts of t he image are adj u sted
accordingly.
3. To change the highlight level (brightne ss) of the point you
Highlig ht
slider left or right, or type a value
2-6
selected, move the
in the text box.
You can set a value in the range of 61 to 490.
Scanning Basics
Page 42

Note:
See "Image controls button" on page 3-24 for full details on
adjusting the highlight level.
Adjusting the Shadow setting
Shadows, the darkest areas of an image, are the opposite of
highlights.
1. On the Image Controls dialog box, click the button unde r
Shadow
This causes the cursor to change to an eyedropper located
within the image in the Preview window.
2. Move the eyedroppe r i con to the location you want to select
as the shadow point, and then click.
The brightness of th e pixel at the po int you click is set as the
shadow level, and the other parts of the image are adjusted
accordingly.
3. To change the shadow level (darkness) of the point you
selected, move the
in the tex t box.
You can set a value in the range of 0 to 60 for shadow.
.
Shadow
slider left or right, or type a value
2
Note:
See "Image controls button" on page 3-24 for full details on
adjusting the shadow level.
Adjusting the Gamma setting
Gamma is the difference in contrast between the light tones a nd
dark tones of an image. Any change you make in the gamma level
only affects the midtones of the image.
Scanning Basics
2-7
Page 43

To change the gamma level of the image, move the
slider left or right, or type a value in the text box.
You can set a value in the range of 50 to 500 for gamma.
Note:
See "Image controls button" on page 3-24 for full d e ta ils on adjusting
the gamma level.
Gamma
Applying a preset tone curve
The f ine a djust ments beyo nd the Auto E xposu re or sett ing s in th e
Image Controls dialog box can be made by applying one of the
preset tone curves. The tone correction list on the Tone Correcti on
dialog box provides the six most common tone correction curves.
Note:
See "Using the tone c urv e" on page 2-9 and 3-27 for details o n t one
correction.
Adjusting the Gray Balance Intensity setting
Gray balance ma kes it possible to remove a color cast (tintin g)
from a specific color.
1. In the Col or Adjustment di alog box, click t he button under
Gray Balance Intensity
This causes the cursor to change to an eyedropper located
within the image in the Preview window.
2. Move the e yedroppe r icon to the location that contains the
color whose gray balance intensity you want to adjust, and
then click.
The color you click appears in the two boxes below the
Balance Intensity
2-8
Scanning Basics
.
slider .
Gray
Page 44

3. To change the gray balance intensity level of the color you
selected, move the slider left or right, or type a value in the
text box.
You can set a value in the range of 0 to 100. Changing the value
causes the color in the right hand box to change accordingly.
Your changes are also reflected in the image in the Preview
window.
Note:
See "Color adjust ment button" on page 3-29 for full details on
adjusting the gray balance intensity level.
Adjusting the Saturation setting
Saturati on is the density of a color. Great er density makes the
color appear richer, while less density makes it appear paler.
2
To change the saturation level of the image, move the
slider left or right, or input a value in the text box.
You can set a value in the range of -100 (lowest color density) to
100 (highest color density) for saturation.
Note:
See "Color adju stment button" on page 3-29 for full de tails on adjusting
the saturation level.
Using the tone curve
The tone curve pr ovides you w ith a v ersatile means for adjusting
the intensity of the colors of the image being scanned. You can
adjust the sh adow, midtone, a nd highlight va lues, which hel ps to
ensure well-balanced coloring of the image.
Scanning Basics
Saturation
2-9
Page 45

Note:
❏
Use of the tone curve is recommended for fine adjustments after you
have previewed the image and made highlight and shadow
adjustments using auto exposure and the Image Controls dialog box.
Use of the tone curve to mak e initial settings is not recom m e nd ed .
❏
The button is dimmed whenever
the Pixel Depth and
None
is selected as the Halftone.
Black & White
is selected as
The tone curve is located in the Tone Correction dialog box, which
appears when you click the button in the Preview window.
How you can use each of the controls in the Tone Cor re ction
dialog box is described below.
channels
tone curve editor
tone correction list
Channels
output
values
Click an option button under channels to select the color whose
tone curve you want to adjust. When the ma ster channel at the
top is selected, your adjustments affect all three colors. Selecting
one of the other channels causes your adjustments to affect red,
green, or blue only.
2-10
Scanning Basics
Page 46

Tone curve editor
Moving the mouse pointer into the tone curve editor causes it to
change to a finger. Use this pointer to dra g any one of the five
points in the curve and change its shape. The x-axis of the curve
is the brightness of the original (input values) while the y-axis
brightness of the scanned image (output values).
2
To change the tone c u rve back to its initial default, select
in the tone correcti on list.
Output va lues
These are the curre nt values fo r output data in accordance with
the curre nt locati ons of the points in side the tone curve editor.
These values change when you drag points in the tone curve
editor, or you can type in values here to change the shape of the
tone curve. Values can be within th e range of 0 to 255.
Note:
❏
Each output value name has a check box to the left. Highlight and
Shadow are always selected, but you can select and clear 1/4 Tone,
Midtone, and 3/4 Tone by clicking their check boxes.
❏
When a value’s check box is clear, its point on the tone curve editor
automatically shifts to smooth out the tone curve when one of the
other points is moved.
❏
When a value’s check box is selected, it means that its point is fixed
and so it does not shift when ot her po int s are moved.
Linear
Scanning Basics
2-11
Page 47

Tone correction list
Use this list box to selec t a pre set tone curve. There ar e six preset
tone curve s shown below, and you can add your o wn curves to
the list using the procedure in the next section, "Saving Your Own
Tone Curve".
Curve
Name
Linear 245 192 128 64 8 Default curve
Lighten
Darken
Flat
Contrast
High
Contrast
Open
Shadow
Highlight 1/4
245 193 133 74 4
245 152 82 38 11
245 182 129 72 2
245 204 129 51 2
245 193 129 80 5
Tone
Midtone 3/4
Tone
Shadow Descrip ti on
Lightens dark
image
Darkens bright
image
Reduces contrast
Increases
contrast
Lightens dark
shadows
When you select a curve from the tone correction list, the settings
in the Tone Correction dialog box change accordingly.
Saving y our own tone cur ve
Use the following procedure to assign a name to a tone curve you
created and save it f or later use .
1. Make the tone curve settings you want. This causes the name
shown in the tone correctio n list to change to
User Defined
.
2. After th e tone curve is the way you want it, type in up to 32
characters in the list box to name the curve.
3. Click
Save
to save y our settings under the name y ou
specified.
2-12
Scanning Basics
Page 48

Deleting a user tone curve
Use the following procedure to delete a tone curve you created.
You cannot delete any of the six preset tone patterns.
1. Use the tone correction list to select th e user ton e c urve you
want to d e lete.
2. Click
3. In the confirmation dial og box that appears, click
Delete
the curve.
.
Yes
Closing the Tone Correction dialog box
You can close the Tone Correction dialog box by clicking either
OK
❏ Clicking OK applies the current Tone Correction dialog box
❏ Clicking
Cancel
or
settings and closes the dialog box.
current dialog box settings. Clicking the close button in the
upper right corner of the dialog box has the same af fect as
clicking
.
Cancel
Cancel
closes the dialog box without applyin g the
.
Optimizing OCR Scanning
2
to del ete
This section describes steps you should perform and settings you
can try in order to im prove OC R (o ptical character rec ognition)
scanning results.
Scanning text
Perform the steps under " Scanning an Image" on page 2-3 to s can
the text . Make sure you select
Destination
in the EPSON TWAIN Pro dialog box.
OCR
for both
Image Type
Scanning Basics
and
2-13
Page 49

If the recognition rate is not compatible with the default settings,
perform the following steps.
Improving character recognition
1. In the EPSON TWAIN Pro dialog box, make sure
selected in both the Image Type and Destination list boxes.
Then click the
Type dialog box to appear.
2. In the Image Type dialog box, select
and then click OK.
3. In the EPSON TWAIN Pro dialog box, click
click the button to display the Image Controls dialog box.
4. Use the
monitori ng the resul ts of your changes on the Previe w
window. Increasing the threshold value can make characters
thicker and easier to recognize.
5. If you sti ll have p roblems, t ry usi ng the enhanc ement tools of
your OCR software to make a djustments and improve
recognition.
Threshold
Image Type
slider to change the threshold value,
button. This causes the Image
None
for
Preview
B/W Option
Text difficult to recognize
The quality of the text in your original document greatly effects
OCR results.
OCR
. Then
is
,
The following types of originals can cause problems and should
be avoiled if possible.
❏ Copies of copies
❏ Faxes
❏ Text wi th tight cha racters or line pitch
2-14
Scanning Basics
Page 50

❏ Text that is in tables or underlined
❏ Cursive or italic fonts, and font sizes less than 8 points
Remember that OCR s o ftwa re cannot recognize handwritten
characters.
2
Scanning Basics
2-15
Page 51

2-16
Scanning Basics3Understanding EPSON TWAIN Pro Features
Page 52

Chapter 3
Understanding EPSON TWAIN Pro Features
Overview . . . . . . . . . . . . . . . . . . . . . . . . . . . . . . . . . . . . . . . . . . . . . . . 3 -3
The EPSON TWAIN Pro Dialog Box . . . . . . . . . . . . . . . . . . . . . . . .3-4
Document Source . . . . . . . . . . . . . . . . . . . . . . . . . . . . . . . . . . . . 3- 4
Image Type . . . . . . . . . . . . . . . . . . . . . . . . . . . . . . . . . . . . . . . . .3-6
Destination. . . . . . . . . . . . . . . . . . . . . . . . . . . . . . . . . . . . . . . . . . 3-1 0
Resolution . . . . . . . . . . . . . . . . . . . . . . . . . . . . . . . . . . . . . . . . . .3-13
Source. . . . . . . . . . . . . . . . . . . . . . . . . . . . . . . . . . . . . . . . . . . . . . 3-13
Target . . . . . . . . . . . . . . . . . . . . . . . . . . . . . . . . . . . . . . . . . . . . . . 3-14
Scale . . . . . . . . . . . . . . . . . . . . . . . . . . . . . . . . . . . . . . . . . . . . . . .3-14
Preview Window. . . . . . . . . . . . . . . . . . . . . . . . . . . . . . . . . . . . . . . . . 3-16
Preview Buttons. . . . . . . . . . . . . . . . . . . . . . . . . . . . . . . . . . . . . . . . . . 3 - 1 8
Zoom preview button . . . . . . . . . . . . . . . . . . . . . . . . . . . . . . . . 3-1 8
Return to full preview button. . . . . . . . . . . . . . . . . . . . . . . . . .3-18
Return to zoom preview button . . . . . . . . . . . . . . . . . . . . . . . . 3-19
Marquees. . . . . . . . . . . . . . . . . . . . . . . . . . . . . . . . . . . . . . . . . . . . . . . .3-19
Making and modifying ma rquees . . . . . . . . . . . . . . . . . . . . . .3-19
Delete marquee button . . . . . . . . . . . . . . . . . . . . . . . . . . . . . . .3-21
Duplicate marquee button . . . . . . . . . . . . . . . . . . . . . . . . . . . . 3 -22
Auto locate button . . . . . . . . . . . . . . . . . . . . . . . . . . . . . . . . . . . 3-2 2
Marquee number indicator . . . . . . . . . . . . . . . . . . . . . . . . . . . . 3-23
Adjust buttons . . . . . . . . . . . . . . . . . . . . . . . . . . . . . . . . . . . . . . . . . . .3-24
Auto exposure button . . . . . . . . . . . . . . . . . . . . . . . . . . . . . . . .3-24
Image controls button . . . . . . . . . . . . . . . . . . . . . . . . . . . . . . . .3-24
Tone correction button . . . . . . . . . . . . . . . . . . . . . . . . . . . . . . . .3-27
Color adjustment button . . . . . . . . . . . . . . . . . . . . . . . . . . . . . . 3-29
Reset button. . . . . . . . . . . . . . . . . . . . . . . . . . . . . . . . . . . . . . . . . 3-3 0
Auto focus button. . . . . . . . . . . . . . . . . . . . . . . . . . . . . . . . . . . .3-31
Manual focus button . . . . . . . . . . . . . . . . . . . . . . . . . . . . . . . . . 3- 3 1
Settings . . . . . . . . . . . . . . . . . . . . . . . . . . . . . . . . . . . . . . . . . . . . . . . . . 3-34
3-1
Page 53

Configuration . . . . . . . . . . . . . . . . . . . . . . . . . . . . . . . . . . . . . . . . . . . 3-35
Scan. . . . . . . . . . . . . . . . . . . . . . . . . . . . . . . . . . . . . . . . . . . . . . . . . . . . 3-37
Scan All . . . . . . . . . . . . . . . . . . . . . . . . . . . . . . . . . . . . . . . . . . . . . . . . 3-38
3-2
Understanding EPSON TWAIN Pro Features
Page 54

Overview
When yo u start EPSON TWA IN Pro through a com patible
application, the following window appears.
3
The following sections describe EPSON TWAIN Pro's features
Note:
Some settings may be dimmed and cannot be selected because they have
been overridden by other settings or are not supported by your scanning
application.
Understanding EPSON TWAIN Pro Features
.
3-3
Page 55

The EPSON TWAIN Pro Dialog Box
Document Source
If you have inst alled the optional Au tomatic Document Feeder or
the Transparency Unit on the scanner, you need to select a
docume nt source from the Document Sourc e list. Otherwise,
leave the Document Source set to
Select any of the following setti ngs from the Document Source
list:
Flatbed:
Select this se tting when you use the scanner document
table.
Flatbed
.
Auto Document Feeder:
Select this se tting when using the optiona l Automatic
Document Feeder that can take only single sided
documents. This setting is available only when the
optional Automatic Document Feeder has been in stalled.
ADF -Sing le-sided:
Select this setting to scan sing le sided documents on the
optional Automatic Document Feeder that can take single
and d ouble-side d docum ents . This se tting is available
only when the optional Automatic Document Feeder has
been installed.
3-4
Understanding EPSON TWAIN Pro Features
Page 56

ADF - Double-sided:
Select this setting to scan double sided documents on the
optional Automatic Document Feeder that can take single
and double-sided documents. This setting is available
only when the optional Automatic Document Feeder has
been installed.
TPU for Neg. Film:
Select this settin g when using the optional Transparency
Unit with negative film. This setting is available only
when the optional unit has been installed.
TPU for Pos. Film:
Select this settin g when using the optional Transparency
Unit with positive film. This setting is available only
when the optional unit has been installed.
Note:
Uninstalled options cannot be selected.
Multi-page Support with Automatic D ocument Fee der
If you select Auto Document Feeder, ADF - single-sided, or ADF
- double-sid ed as the Document Sourc e and click the
the following dialog box appears.
Scan
button,
3
If you select
Document Feeder and scanned.
Single Page
Understanding EPSON TWAIN Pro Features
, only one page is f ed from the Automatic
3-5
Page 57

If you select
All Pages
(default), all the pages are fed from the
Automatic Document Feeder and are scanned. Depending on
your appli ca ti on, the All Pages option may not wo rk correctl y.
Image Type
You always need to se lect the type of image to be s canned with
the Image Type list or button. Click the arrows on the right to view
all the available settings.
Select a predefined choice from the list. Click the
Image Type
button to make and save the custom s etti ngs as descri bed on the
next page. The following predefined settings are available:
36-bit Color (H iFi):
36-bit colors, high quality
Note:
This setting is available onl y i n c erta in app lications, such as
®
Adobe
PhotoShop®.
24-bit Color (Std) :
24-bit colors, high quality
24-bit Color De-screening :
24-bit colors, high quality, and de-screening
3-6
Understanding EPSON TWAIN Pro Features
Page 58

12-b it Gr ay (HiFi):
12-bit gray, high quality
Note:
This setting is available only in certain applications, such as
Adobe PhotoShop.
8-bit Gray (Std):
256 grays, high quality, and de-screening
Line Art:
Black-and-white, draft quality and fast
OCR:
Black-and-white, high quality, and Text Enhancement
Technology
Copy & Fax:
Black-and-white, draft quality and fast, Auto Area
Segmentation
3
Understanding EPSON TWAIN Pro Features
3-7
Page 59

Clicking
you to customize the Image Type settings.
Image Type Name:
Image Type
Names of the predefined settings and any custom setti ngs
you have saved appear in the Image Type Name list.
opens the following dialog box, allowing
Pixel Depth:
Scanning Mode:
3-8
Understanding EPSON TWAIN Pro Features
Select sc anning col ors from the Pixel Depth menu. Your
choices are 36-bit Color, 24-bit Color, 12-bit Gray, 8-bit
Gray, and Black & White.
Use this se tting to s elect between s peed and qual ity.
provides the best quality image, while
faster scanning with some loss of quality. Note tha t you
can also change t he scanni ng mode of t he preview im age
using the procedure under "Configuration " on page 3-35.
Draft
provides
Best
Page 60

De-screening:
Use this setting to turn de-screening on or off. Descreening removes moiré patterns that appear when
printed images are scanned. Since this is a software
operation, it takes much longer to produce an image
when de-screening is turned on.
Dropout:
Use this list to select any color you do not want to scan.
Your choices are None, Red, Green, and Blue.
Note:
If Pixel Depth has been set to any co lor set ting , Dropout is
dimmed and cannot be selec ted. Dropout is available only for
Gray or Black & White.
B/W Options:
Select the options you want to scan f rom this lis t. This
menu is available only when Pixel Depth is set to
& White
Technology, Auto Area Segmentation, and None .
Text Enhancement Technology:
This function eliminates the document background and
raises recognition acc u ra cy during OCR (Optica l
Character Recognition) scanning.
Auto Area Segmentation:
This functi on separate s text fro m graphics so that
grayscale images will be clearer and text recogniti on more
accurate.
3
Black
. Your choices are Text Enhancement
None:
None
Select
nor the Auto Area Segmentation feature is needed.
if neither the Text Enhancement Technology
Understanding EPSON TWAIN Pro Features
3-9
Page 61

Halftone:
Select a halftone or dither setting from this list to optimize
the reproduction of your image . Halftones are p atterns of
dots. Your choices ar e Mode A (Hard Tone), Mode B (Soft
Tone), Mode C (Net Screen), Dither A (4 ×
B (4 × 4 Spiral), Dither C (4 × 4 Net Screen), Dither D (8 × 4
Net Screen), and None.
Note:
Halftone is available only when Pixel Depth is set to
White
.
After you customize your settings, type a new name in the Image
Type Name box, click the
enable your custom settings for the current scanning operation.
Clicking the
state.
To delete an Image Type setting, select the setting name in the
Image Type Name
Cancel
Save
button and then the OK button to
button returns the settings to their original
list and click
Delete
.
4 Bayer), Dither
Destination
Black &
Select the destinat ion or ou tput device w here t he sc anned i mage
is to be printed or displayed with the Destination list or button.
Select a predefined or custom choice from the list. Click the
Destination
described later in this section. The following predefined settings
are available:
3-10
Understanding EPSON TWAIN Pro Features
button to make and save custom settings as
Page 62

Screen, Screen Vivid (default), Prepress 175 lpi, Prepress 150
lpi, Prepress 133 lpi, Prepress 120 lpi, LineWork Scan, InkJet
Printer, Las er Printe r, FAX, OCR,
and EPSON Printers
If you click
Destination Name:
Resolution:
Destination
Names of the predefined and custom settings appear in
this list.
Select a scanning resolution from t his list for line
drawings and halftone images, or photos.
, the following dialog box appears.
3
Note:
❏
When the Pixe l Depth setting in t he Image Type dialo g box
is set to
Halftone setting takes effect and the Photo setting becomes
irrelevant. For other Pixel Depth settings, the Photo setting
takes effect and the Drawing/Halftone setting becomes
irrelevant.
8-bit Gray
Understanding EPSON TWAIN Pro Features
Black & White
or
, the Drawing/
3-11
Page 63

❏
❏
❏
Sharpness:
You can select fr om -2 (s oft focus) to 2 (sh arp focus ) in the
list.
To print your scanned do cument when Resolution is s et to
Drawing/Ha lftone
from the list as you selected in the printer driver. To print
your scanned document when Resolution is set to
select the resolution setting that is approximately 1/3 of the
resolution you selected in the printer driver; otherwise the
Photo
setting requires longer to print, but does not improve
the output quality.
, select the same resolution setting
Photo
,
The Resolution setting is closely related to the Image Size
and Scale settings. If you change them a rbitrarily, the
resulting image may not be what you expected.
The availability of th e resolut ion value depends on yo ur
scanner.
To apply the settings you made, click
click
Cancel
.
OK
. To cancel the settings,
To save the settings you made, type a new name in the Destination
Name box, and then click
Save
.
To delete a Destination setting, select the target setting nam e to
be deleted in the Destination Name list, then click
3-12
Understanding EPSON TWAIN Pro Features
Delete
.
Page 64

Resolution
This pop-up menu provides easy access to resolution options. The
default resolution options are 50, 72, 200, 240, 266, 300, 350, 360,
400, 600, 720, 8 00, 120 0, 320 0, 4800, an d 6400 d pi. 12800 dpi is also
available depending on your scanner model.
You can also type a value in the Resoluti on dialog box. The value
has a range of 50 to 3200 dpi (or 6400 dpi, depending on your
scanner model) in increments of 1 dpi.
Source
These values indicate t he width and height of all or a selected part
of the source im age in the specif ied unit of measurement . You can
type in a new width and height to specify h ow much of the image
you want to select. You can also define a specific scan area using
the marquee.
From the list box, you can specify one of the following units of
measurement for the Source and Target values: pixels, inches, or cm.
3
Note:
❏
The Image Size values are ignored if you click t h e
without previewing the im age.
❏
The Image Size setting is closely related to the Resolution and Scale
settings. Changing one ma y chan g e the oth ers, and the resulting
image may not be what you expected.
Understanding EPSON TWAIN Pro Features
Scan
button
3-13
Page 65

Target
Use these settings to specify the width and height of the output
image in relation to the scale you selected in the Resolution pulldown menu.
Target size can be locked using the
You can use the Source list box to specify the unit of measurement
for Target values.
The File Size indicator on the right shows the approximat e size of
the scanned image in KB or MB.
LOCK
button.
Scale
The Scale value indicates the amount by which an image is
enlarged or reduced during scanning.
Note:
❏
The Scale feature is disabled i f y ou click the
previewing the imag e.
❏
The Scale setting is closely related to the Resolution and Image Size
settings. Changing one may change the others, and the resulting
image may not be what you expected.
Scan
button without
3-14
Understanding EPSON TWAIN Pro Features
Page 66

Scale bar:
An image can be reduced or enlarged by moving the Scale
slider. You can als o click th e left or right arrow to c hange
the image size in increments of 1%.
Note:
The range of the possible reduction or en largement varies
depending on the current resolution setting.
Scale indicato r:
The percentage of enlargement or reduction is indicated
in the Scale indicator field. You can type a new value
directly in this field. When you move the Sc ale slider , the
value changes in this field.
3
Understanding EPSON TWAIN Pro Features
3-15
Page 67

Preview Window
The Preview feature displays your image in the Preview window
and allows you to see the effects of your settings before scanning.
You can also use the Preview feature to determine the width and
height of the scanning image and the file size of the image to be
saved. See the section on Image Size in this chapter.
Note:
You cannot preview an image that exceeds available memory or disk
space.
To preview an image, click
main dialog box.
Preview button
Preview
on the EPSON TWAIN Pro
3-16
Understanding EPSON TWAIN Pro Features
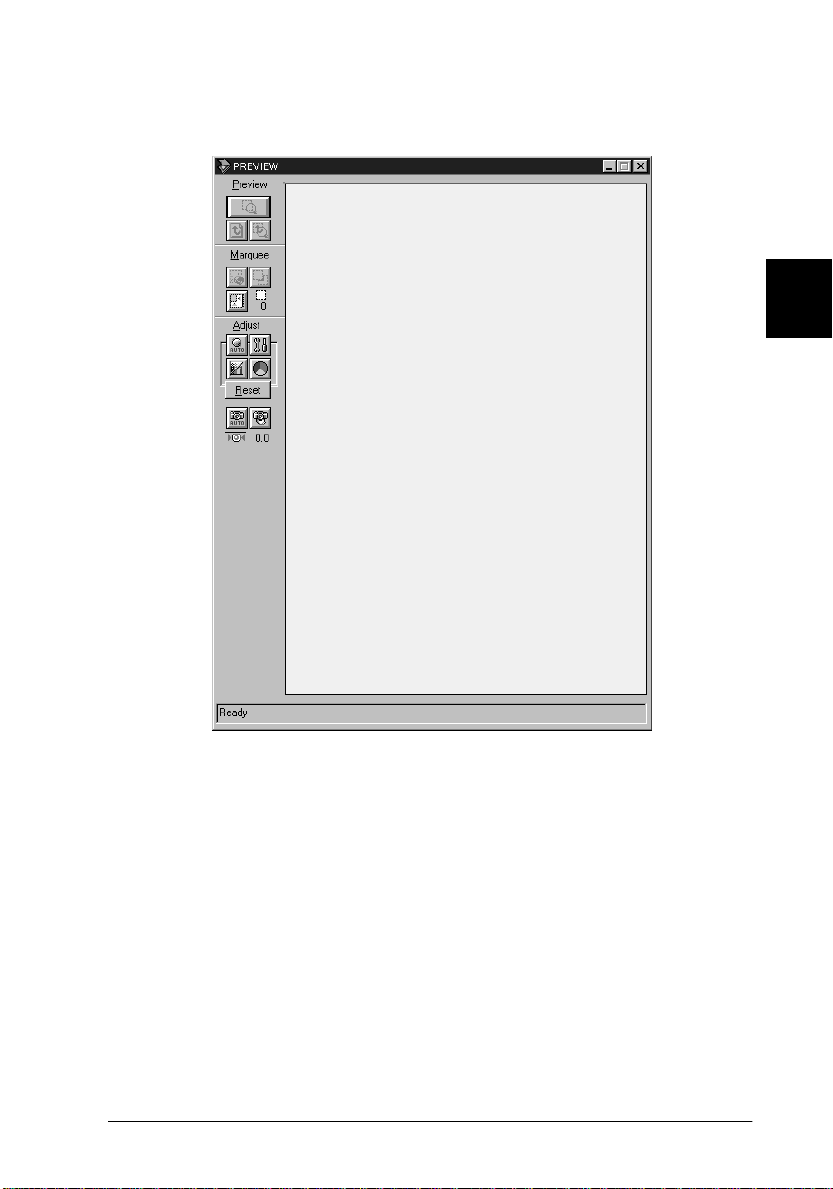
Page 68
The following window appears.
3
You can see the effects to the preview image of any of the
following settings.
❏ Pixel Depth, Halftone, and Drop out in the Image Type di alog
box
❏ Sharpness in the Destination dialog box
❏ Exposure, Gamma, Hig hlight, Sha dow, and Thres hold in the
Image Controls dialog box
❏ Tone Correction in the Tone Correction dialog box
Understanding EPSON TWAIN Pro Features
3-17
Page 69
❏ Gray Balanc e, and Satu ration in the Color Adjustmen t dialog
box
Note:
Although the image in the Preview window changes as you make
settings, the settings do not affect the real image until you scan or rescan
the image.
For more information on ima ge settings, see the sections on Image
Controls, Color Adjustment, and Configuration in this chapter.
Preview Buttons
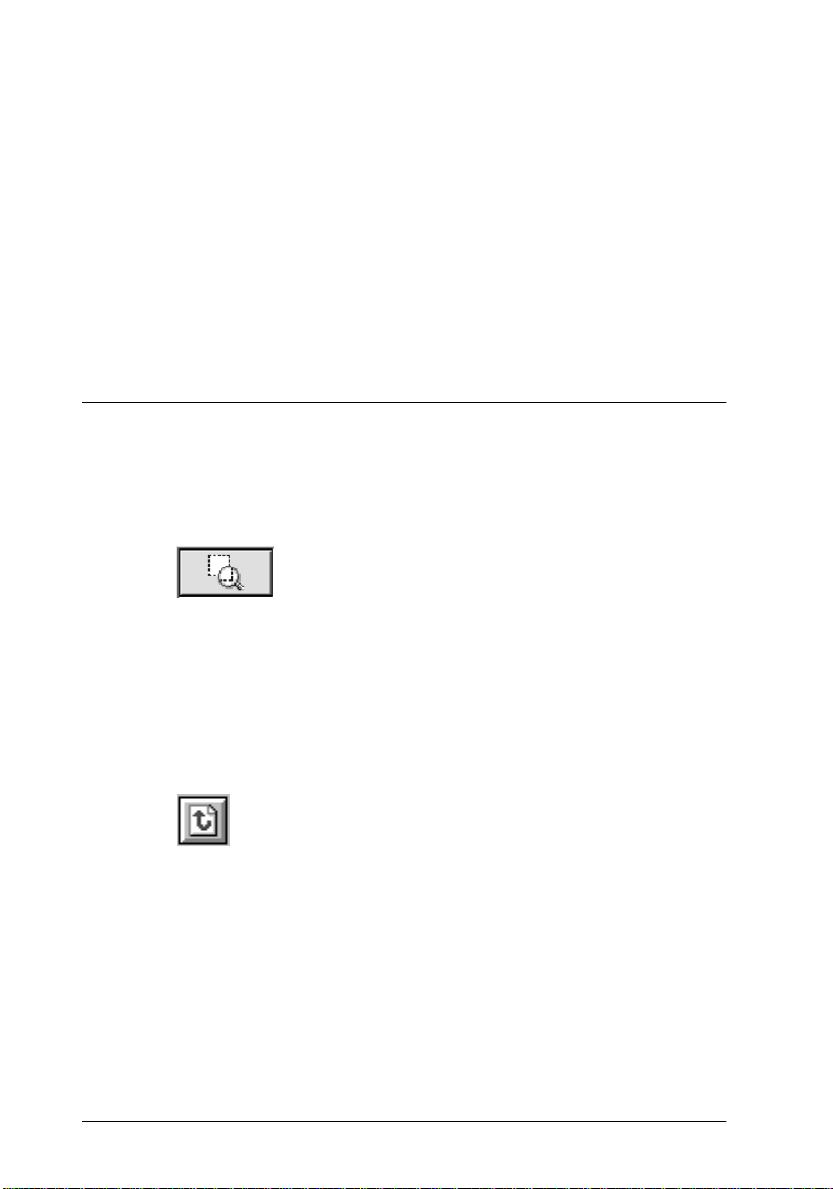
Zoom preview button
Clicking the zoom preview button enlarges the active marquee.
See the next page for information about marquees.
Return to full preview button
Clicking the return to full preview button restores the image to a
full preview. This button is available only when the marquee is
zoomed as described in the previous section.
3-18
Understanding EPSON TWAIN Pro Features
Page 70

Return to zoom preview button
Clicking the ret urn to zoom pre view button r estores the im age to
the previous zoom. This button is a vailable only when a marquee
has been previously zoomed. This restores the zoom preview
from memory, which is quicker than rescanning the same zoom
by clicking the zoom preview button again.
Marquees
A marquee is a frame around an entire im age, or just a certain part
of an image. Marquees are often used in scanning and imageediting so ftware to se lect only the mo st importa nt part of a n
image.
Making and modifying marquees
3
Move the pointer over the image in the Preview window, and the
pointer becomes cross-hairs. Drag (move the mouse while
holding down the mouse button) the cross-hair s over any area of
the image, and a frame appears. The point where you first clicked
is anchored, but the rest of t he frame is sizable and movable. After
you finish creating a marquee, you can resize and move it as
described below.
Understanding EPSON TWAIN Pro Features
3-19
Page 71
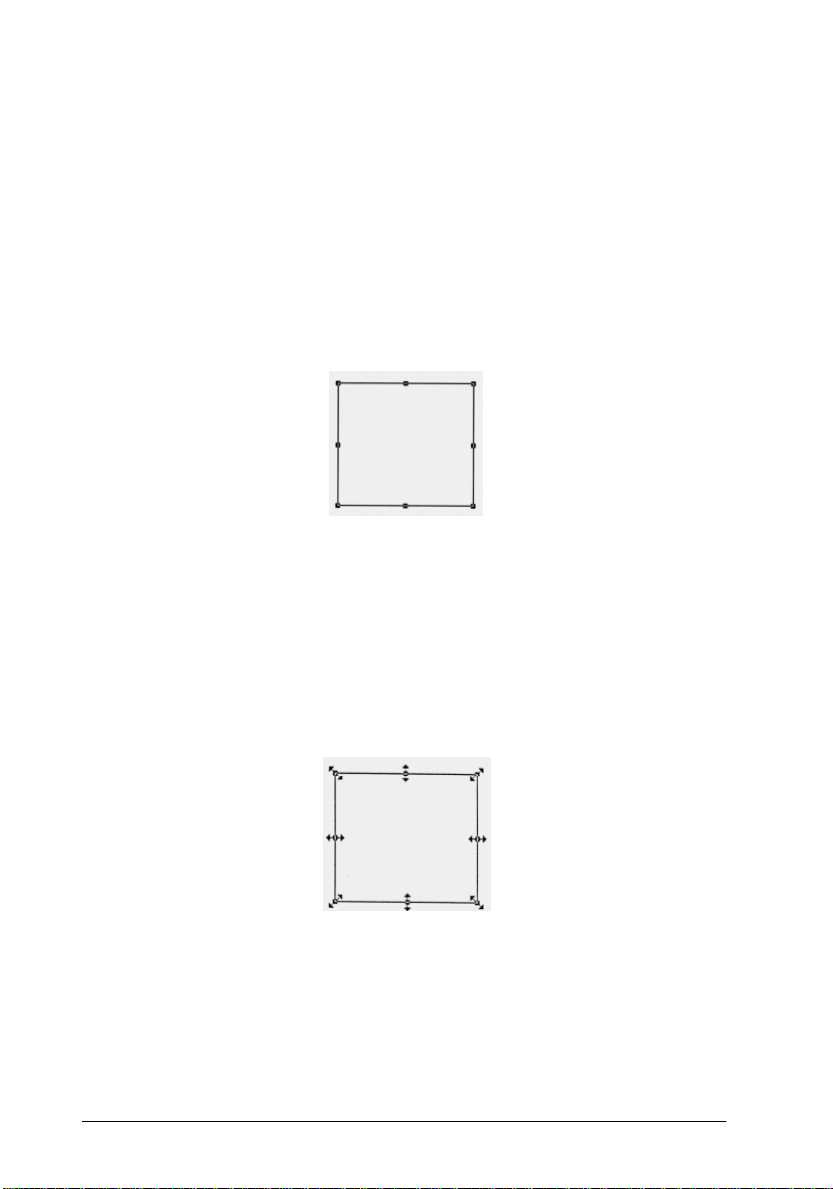
Multiple marquees
You can make multiple marquees in one image to scan the most
important parts while ignoring the rest. Marquees can be different
sizes, and they can overlap. Extra marquees can be made
anywhere except on the frame of another marquee. You can begin
a marquee anywhere the pointer appears as cross-hairs. To
distinguish the acti ve marquee fr om othe r marquees, look at the
marquee frames. The active marq uee has eight small boxes on the
frame as shown below.
Resizing marquees
When you move the pointer over any of the eight boxes, the
pointer will change to a double-headed arrow as shown below.
You can then resize the marquee selection by dragging a box up,
down, sideways, or diagonally. The double-headed arrows only
appear on the active marquee.
If you drag an arrow while pressing the
will be resized proportionally.
3-20
Understanding EPSON TWAIN Pro Features
Shift
key, the marquee
Page 72
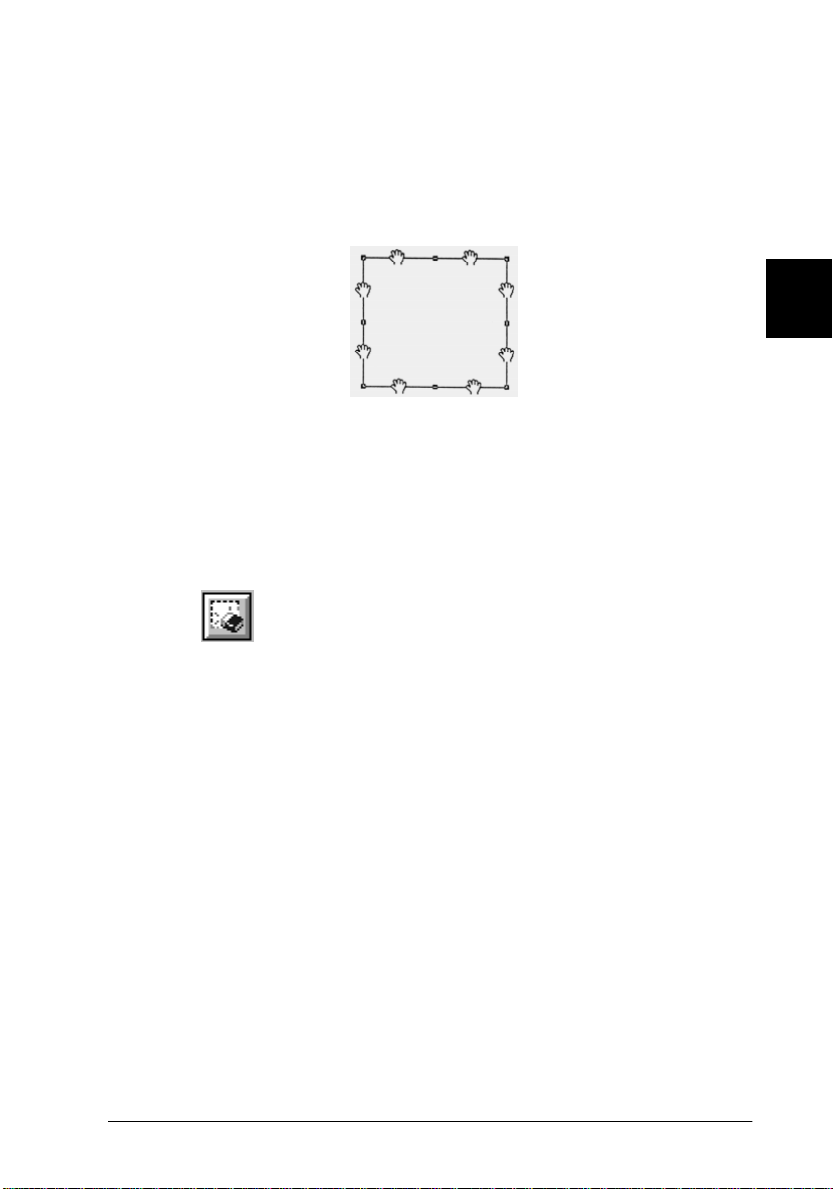
Moving marquees
To move a marquee, move the pointer along the frame of the
marquee, and whe n the pointer changes int o a hand, drag the
marque e to move it .
3
If yo u d r a g a hand while p r e ssing the
be limited to vertical or horizontal movement.
Shift
key, the marquee will
Delete marquee button
Clicking the delete marquee button removes the active marquee.
Note:
You can also delete the active marquee by pressing the
your keyboard.
Delete
key on
Understanding EPSON TWAIN Pro Features
3-21
Page 73

Duplicate marquee button
Clicking the duplicate marquee button creates another marquee
the sam e size as the active marquee. Use this button to make
multiple marquees.
Clicking the duplicate marquee button while holding down the
keys noted in the table below causes the active marquee to be
duplicated in a specific direction.
Horizont al
Windows Ctrl key Alt key
Macintosh Command key option key
Vertical
Auto locate button
Click ing the au to lo cat e butt on aut oma tical ly l ocates the imag e in
the preview window, and c uts off any white borders surround ing
it.
3-22
Understanding EPSON TWAIN Pro Features
Page 74

Note:
The auto locate feature is automatically enable d if you c lic k
without previewing the im age.
If a document contains more than one image, select the target
image by dragging the mouse pointer over the image. You do not
have to be precise when selecting the size and position of the
image; a rough estimate will do. Then click the auto locate button.
The exact location and size of the image are automatically
determined, an d the image is displayed in th e pre view window.
Marquee number indicator
Scan
3
This shows the number of marquees in th e Prev iew window. To
create more marquees, see "Duplicate marquee button" on page
3-22.
Understanding EPSON TWAIN Pro Features
3-23
Page 75

Adjust buttons
Auto exposure button
Clicking the auto expo sure button autom atically adjusts the
exposure for an image . This means the Exposure , Hi ghlight,
Gamma, and Shadow settings in the Image Controls dialog box
and the Gray Balance Intensity in the Color Adjustment dialog
box are auto mat ically se t.
Image controls button
Clicking the image controls button caus e s the follow i ng dialog
box to appear.
3-24
Understanding EPSON TWAIN Pro Features
Page 76

Note:
❏
The auto exposure feature overrides any Image Controls setting you
make.
❏
If the Pixel Depth setting is set to
setting is set to
Gamma, Highlight, and Shado w settings are dimmed and cannot be
selected.
❏
The effects of settings you make appear in the Preview window.
Exposure:
You can select from -10 (darkest) to 20 (brightest) by
moving the slider or clicking the lef t or right arr ow.
Exposure works as a combination of the Highlight and
Shadow settings to determine the overall brightness or
darkness of an image.
Gamma:
You can select from 50 (lowest ) to 500 (highest) by moving
the slider or clicking the left or right arrow. Gamma is the
contrast between the light tones and the dark tones in an
image.
Highlight:
You can select from 61 (lightest) to 490 (darkest) by
moving the slider or clicking the lef t or right arr ow.
Highlight determines the amount of detail that is visible
in the br ight areas o f your image.
None
in the Image Type dialog box, the Exposure,
Black & White
and the Ha lftone
3
If you click the button below the slide bar, the mouse
pointer changes to an eyedropp er icon. You can now
select an area of specific brightness to be used as the
highlight l e vel for the entire image.
Understanding EPSON TWAIN Pro Features
3-25
Page 77

Shadow:
You can selec t from 0 (li ghtest) to 60 (d arkest) b y moving
the slider or clicking the left or right arrow. Shadow
determines the amount of detail that is visible in the dark
areas of your image.
If you click the button below the slide bar, the mouse
pointer change s to an eyedropper ic on, which allows y ou
to select a shaded area to be used as t he shadow level for
the entire image.
Threshold:
Note:
The Threshold setting is only a vailable when the Pixel D ep th
setting is set to
to
You can select from 0 to 255 by moving the slider or
clicking the l eft or righ t arrow. Th re shold dete rmines
what shade of gray is used as the cutoff point to
differentiate what will be scanne d as bla ck and what will
be white.
None
Black & White
.
and the Halftone setting is set
3-26
Understanding EPSON TWAIN Pro Features
Page 78

Tone correction button
When you click the tone correction button, the following dialog
box appears.
3
channels
tone curve editor tone correction list
Note:
You can see the effects of the To ne Correct ion settings in the Preview
window.
The tone va lue represents the contrast in the tonal relationshi p
between an original image and its reproduction on the display
monitor o r printer.
Tone curve editor:
The editor allows you to customize tone correction. Drag
points on the tone curve to adjust the tone value. You can edit
up to five tonal elements.
output
values
Understanding EPSON TWAIN Pro Features
3-27
Page 79

Output op tions:
If you select the check box for a specific point, such as 1/4
Tone or Midtone, that p oint will remain in place; i t will not be
affected by the m ovement of othe r p oints on th e curve . If the
check box is clear, the point will be aff ected by the movement
of other points.
Channels options:
You can select the combined red, green, and blue (RGB)
channel to modify all colors, or s elect the se color s separately.
Note:
If Pixel Depth i s set to
Black & White
8-bit Gray
or
in the Ima ge
Type dialog box, you can only select the combined RGB channel
option.
Tone correction list:
Select a tone correction setting from this list. The custom
settings you have saved ap pear in t h is li st.
Save button:
3-28
After you correct tone,
the tone correction list and click
type a n ame f or you r cu sto m set tin gs i n
Save
.
To delete a setting, select the name you want to delete in the
tone correction list and click
Cancel
click
Understanding EPSON TWAIN Pro Features
.
Delete
. To cancel the operation,
Page 80
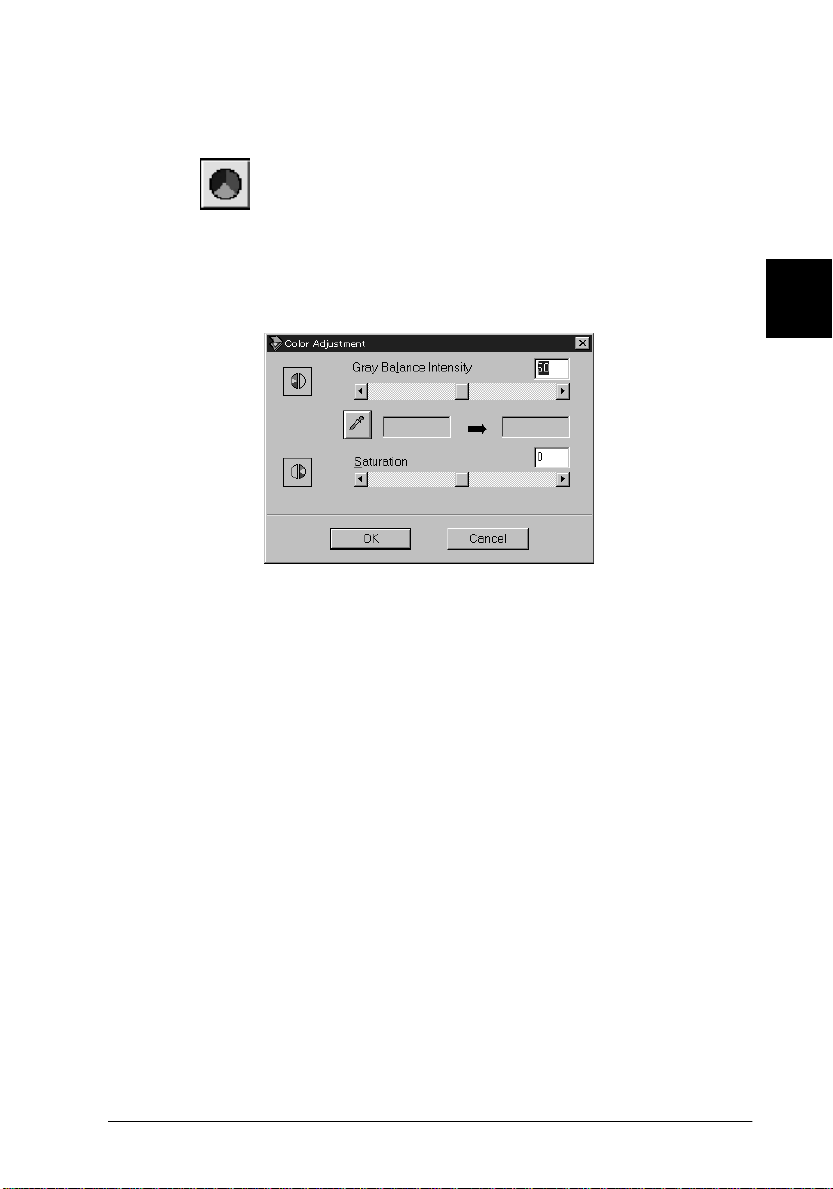
Color adjustment button
When you click the color adjustment button, the following dialog
box appears so you can adjust color attributes.
Note:
❏
If Pixel Depth is set to 12-bit Gra y , 8-bit Gray, or Black & White,
the color adjust ment button is dimm ed, meaning it cannot be
selected.
3
❏
You can see the effects of the Color Adjustment settings in the
Preview window.
Understanding EPSON TWAIN Pro Features
3-29
Page 81

Gray Balance Intensity:
Adjusts the amount of gray in a color combination that
appears neutral gray by removing color casts from the
selected color.
Click the eye dropper button beneath the slide bar, and
the mouse pointer changes to an eyedropper icon. Then
click the color you want to modify. The eyedropper
“picks up” the color and displays it in the box beside the
eyedropper button. You can then correct the cast level for
that color from 100 to 0 (neutral gray) by moving the
slider. The corrected color appears in the box on the right,
and the effect shows up immediately in the preview
image. Click
Saturation:
Select the saturation level for colors from -100 (less color)
to 100 (more color) by moving the slider or clicking the
left or right arrow.
The scanner scans the strength of colors using this
saturation setting. Saturation is the property that defines
a color as pale or rich.
Cancel
to restore the original image.
Reset button
Click this button to return all Imag e Controls, Tone Correction,
Color A djustmen t, and Aut o Exposure settings to their initial
factory defaults.
3-30
Understanding EPSON TWAIN Pro Features
Page 82

Auto focus button
Clicking the auto focus button uses the de fault setting to adj ust
the focus posi tion.
Manual focus button
Clicking the manua l focus button le ts you determine where the
focus should be. This may help improve the quality of your image.
When you click this button, the following window appears.
3
Understanding EPSON TWAIN Pro Features
3-31
Page 83

Auto focus button:
Clicking this button adjust s the focus position
automatically. This works exactly the same way the auto
focus butto n on the pre view win do w works.
Focus Po sition:
Use this slider to set the focus position to a value in the
range of -2.0 to 6.0 i n steps of 0.1. By adjusting t his setting,
you can reduce the occurrence of moiré patterns in your
scanned images.
Note:
TPU
If
(for Neg. Film or fo r Pos. Film) is selected in the
Document Source, the value of the Focus Position is
automatically set to 2.5. If
Double-sided) is selected, th e value is automatically set to 0.
Selected area for focusing window:
This window shows a preview image of the active
marquee. If there is no marquee in t he Previe w window,
the focus marquee window shows a full preview image.
To change the image in the focus marquee window,
change the marquee or the image in the Preview window.
Flatbed
or
ADF
(Single-sided or
Focus line:
Confirm:
3-32
The focus line appears at the center of the foc us marquee
window (default). If you move the cursor over the focus
line, the cursor will change to a “hand” cursor. You can
then move the focus line by clicking and dragging the
“hand” cursor to a new part of the image.
Click this button to compare the new image that you just
modified (shown in the Result windo w) with the
unmodified image (shown in the Before window).
Understanding EPSON TWAIN Pro Features
Page 84

Result window:
This window s hows t h e i mage whose f ocus li ne posit io n
you just modified.
Before window:
This window shows the image with the focus line in the
default pos i tion. The focus line determines the point of
the image that is used.
3
Understanding EPSON TWAIN Pro Features
3-33
Page 85
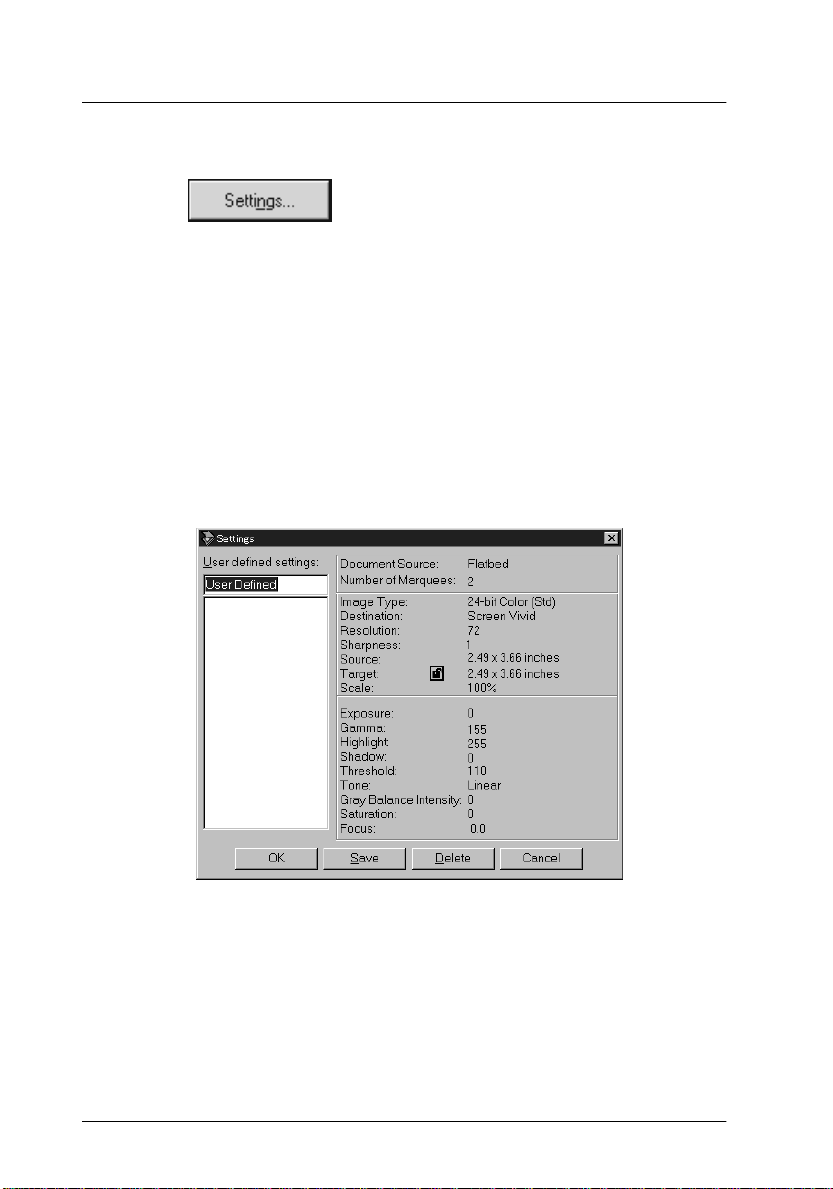
Settings
Click the
you can save all of the currently selected settings as a group of
custom settings with a name you specify. Note tha t only u ser
defined settings related to the Document Source currently
selected will appear in the User defined settings field.
Depending on your sca nne r model, the preset settings for using
film holders with positive films may appear in the User defined
settings field when the optional Transparency Unit is installed.
Settings
button to ope n the Settings dialog bo x, where
To save the curren t settings, type a new name into the
defined settings
To apply saved settings, select their name from the
settings
settings you apply.
3-34
list, and then click OK. The preview image will reflect the
Understanding EPSON TWAIN Pro Features
field, and then click
Save
User
.
User defined
Page 86
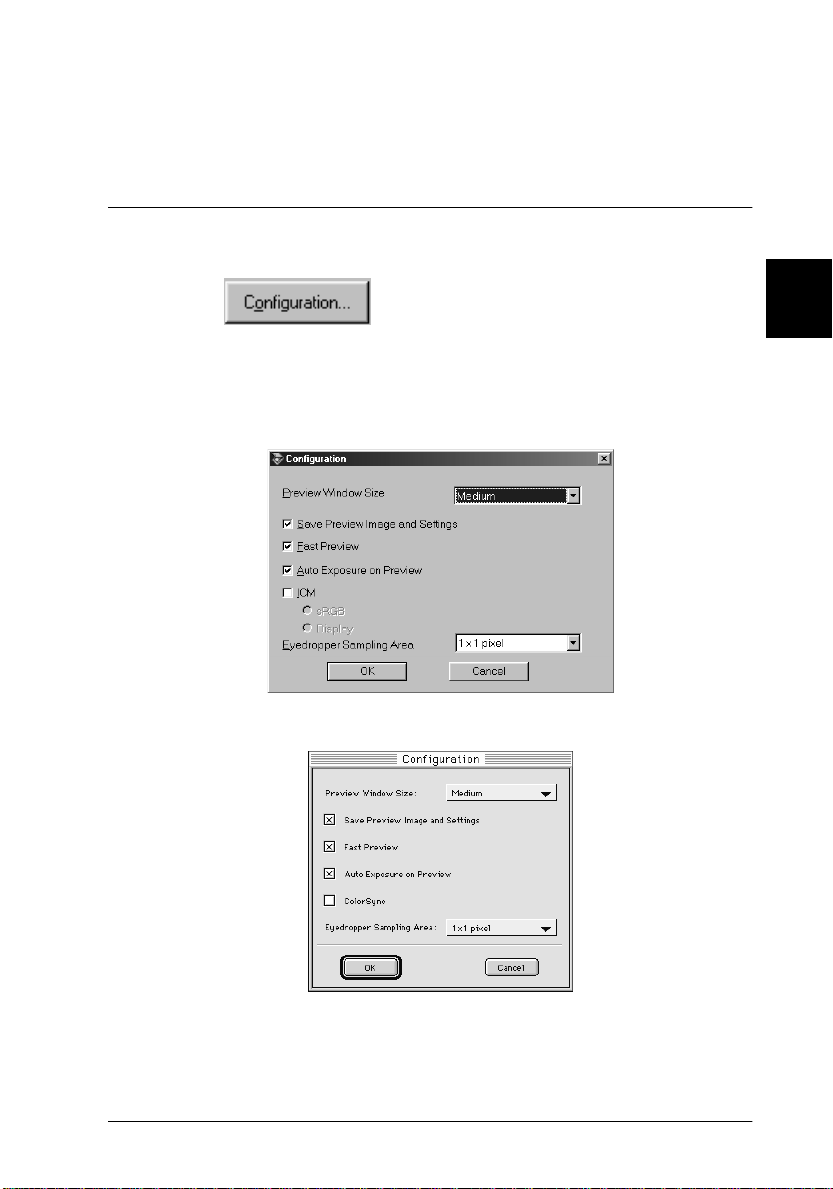
To delete settings, select th eir name from the li st, and then click
Delete
.
Configuration
3
Click the
You can make settings that aff e ct the Preview window.
Configuration
button to view t he following dial og box.
Windows
Macintosh
Understanding EPSON TWAIN Pro Features
3-35
Page 87

Preview Window Size:
Select the size of the Preview window. Your choices are
Large , Medium, and Small.
Save Preview Image and Settings:
Select this check box to automati cally save the preview
image and all the image settings when you exit EPSON
TWAIN Pro (quit scanning). The next time you restart
EPSON TWAIN Pro, the last p review image and sett ings
will reappear.
Fast Preview:
Enables high-speed loading of the preview image. Do not
use this feature (clear the check box) when qualit y is more
important than speed .
Auto Exposure on Preview:
Displays the preview image having automatically
optimized exposure settings. The resu lt is the same as if
you clicked the auto exposure button.
ICM:
3-36
Dependi ng on your Windows version, thi s setting ma y
not be available or may have options. Select
reproduce the colors in yo ur image using the Wi ndows
ICM color ma nagement system. If your o utput device s
(printer and monitor) do not support ICM, make sure this
check box is cleared.
Understanding EPSON TWAIN Pro Features
ICM
to
Page 88

For Windows 98 users:
When the sRGB option is selected, the sRGB profile is
used to reproduce colors. When the Display option is
selected, the color profil e selected for your monitor in the
Display Properities dialog box is used to reproduce
colors.
ColorSync:
Reproduces t he co lors in your im age using ColorS ync
color management system. Color Sync uses a special color
matching scheme to make sure the colors in your output
match the colors in the origina l image. Thi s setting
appears only in Macintosh. If your output devices
(printer and monitor) do not s u pport Col orSync, make
sure this check box i s cl e ared.
Eyedropper Sampling Area:
Allows you to select one of the three following size
settings fo r the Eyed ropper Samp ling Area: 1 ×
3 × 3 pixel, and 5 × 5 pixel. The Eyedropper feature can
sample the average Highli g ht , Shadow, and Gray Balance
Intensity values of the target area.
Scan
3
1 pixel,
Clicking the
the Previ ew window. The sca nned ima ge is transferred to the
application softwa re you used to open EPSON TWAIN Pro so that
you can work with the image from within that application.
While scanning, a progress indicator appears. If necessary, click
Cancel
the
Scan
button scans the image or active marquee in
button to cancel the operation.
Understanding EPSON TWAIN Pro Features
3-37
Page 89
Note:
❏
You cannot scan an image whose size exceeds available memory or
disk space. If you attempt to scan an image that is too large, an error
message appears on the screen.
❏
Before you begin scanning, you should calibrate your display
monitor. For more informat ion, see Chapter 4.
❏
After an image is scanned, be sure to save it. For informa tio n on
saving files, see Chapter 2.
Scan All
Clicking the
images, one at a time. This button is available only when there are
multiple marquees.
3-38
Understanding EPSON TWAIN Pro Features
Scan All
button scans all of the marquees as separate
Page 90

Chapter 4
Calibrating Your S y stem
Calibrating Your Screen . . . . . . . . . . . . . . . . . . . . . . . . . . . . . . . . . . .4-3
Using ICM (For Windo ws 95, 98 Users) . . . . . . . . . . . . . . . . . . . . . . 4-4
For Windows 95 us ers . . . . . . . . . . . . . . . . . . . . . . . . . . . . . . . .4-5
For Windows 98 us ers . . . . . . . . . . . . . . . . . . . . . . . . . . . . . . . .4-5
Using ColorSync (For Macintosh Users) . . . . . . . . . . . . . . . . . . . . . 4-6
4
Calibrating Your Sys tem
4-1
Page 91

The EPSON Screen Calibration utility is automatically installed
when you install EPSON TWAIN Pro.
EPSON Screen Calibration
tone and contrast on your screen closely match the original image.
Be sure to calibrate your screen before start ing to use your sc anner.
calibrates your mo ni tor to ensur e the
For information regarding color and output device calibration,
see the
Color Guide
.
4-2
Calibrating Your System
Page 92

Calibrating Your Screen
You need to calibrate your screen only when you first install the
scanner software, and any time you switch to a different monitor.
For Windows 95, 98, and NT4.0 users:
1. Click
2. Point to
For Windows NT3.51 users:
1. Open the EPSON Scanner group.
2. Double-click the
For Macintosh users:
1. Open the EPSON Scanner folder.
2. Double-click the
Start
EPSON Scanner
Calibration
and then
.
Programs
EPSON Screen Calibration
EPSON Screen Calibration
.
and then click
4
EPSON Scree n
icon.
icon.
Calibrating Your Sys tem
4-3
Page 93

The following di alog box , or a s imil ar on e, app ear s on the sc ree n.
1. Look at the screen from a distance and move the slider right
or left until the two tones clo sely matc h.
2. Click
Note:
The gray stripes will not perfectly blend together; however, try to make
the different tones matc h as closely as possible.
The setti ng is automatically saved as the Screen profil e in the
Calibration list in EPSON TWAIN Pro's Destination dialog box.
The screen profile contains calibration information for the
preview image as well as the scanned image.
OK
to finish calibrating your scanner and monitor.
Using ICM (For Windows 95, 98 Users)
If you use Windows 95 or 98 and your output devi ces (printer and
monitor) support the ICM color management system, you can use
the ICM calibration method.
4-4
Calibrating Your System
Page 94

For Windows 95 users
Note:
If your output devices do not support ICM, leave the check box empty.
Follow the steps below:
1. Startup the application you want to scan from and choose
Acquire
2. Click
dialog box.
3. Make any other settings you desire.
4. Click
from the File menu to open EPSON TWAIN Pro.
Configuration
Scan
.
, and then select
ICM
in the Configuration
For Windows 98 users
Note:
If your output devices do not support ICM, leave the check box empty.
Follow the steps below:
1. Startup the application you want to scan from and choose
Acquire
2. Click
dialog box.
3. Select either the sRGB or Display option.
from the File menu to open EPSON TWAIN Pro.
Configuration
, and then sel ect
sRGB
in the Configuration
TWAIN
4
TWAIN
When the sRGB option is selected, the sRGB profile is used to
reproduce colors. When the Display option is selected, the
color profile selected for your monitor in the Display
properties dialog box i s used to reproduce colo rs.
4. Make any other settings you desire.
5. Click
Scan
.
Calibrating Your Sys tem
4-5
Page 95

Using ColorSync (For Macintosh Users)
If your output devic e s (printer and moni tor) support the
ColorSync color management s ystem, you c an use the ColorSync
calibrati on meth od .
Note:
If your output devices do not support ColorSync, leave the check b ox
empty.
Follow the basic steps below:
1. Startup the application you want to scan from and choose
Acquire
2. Click
dialog box.
from the File menu to op e n EPSON TWAIN Pro.
Configuration
, check
ColorSync
in the Configuration
TWAIN
3. Make any o ther settings you desire.
4. Click
Scan
.
When the scanned image is printed or displayed with the output
device calibrated for the scanner, the image reproduced is
identica l to the or iginal.
4-6
Calibrating Your System
Page 96

Chapter 5
Troubleshooting
Problems and Solutions . . . . . . . . . . . . . . . . . . . . . . . . . . . . . . . . . . . 5-2
5
Troubleshooting
5-1
Page 97

Problems and Solutions
Most problems you encounter while operating your scanner and
software have simple solutions. Read the appropriate section to
find your problem, then follow the recommended steps.
Note:
Some EPSON TWAIN Pro settings may be dimmed and cannot be
selected, because they have been overridden by other settings or are not
supported by your scanner.
If you cannot solve your problem, contact your dealer or a
qualified customer support person for assistance.
You cannot install EPSON TWAIN Pro.
Cause What to do
Wrong system configuration Check that your computer and
operating system matches t he system
requirements on page 1-2.
Make sure your computer has enough
memory to ru n th e ap p li c at i o n .
The scanner does not appear in the Port list of the EPSON
TWAIN Pro Setup dialog box.
Cause What to do
Connection problem Turn off the scanner and computer
and check the connection between the
scanne r a nd co mputer .
SCSI ID number conflict Change the scanner’s SCSI ID number
to one that is not being used by any
other SCSI device.
5-2
Troubleshooting
Page 98

Connection sequence
problem
Check the connection se quenc e and
make sure the scanner’s terminator
switch is set correctly. See the s canner
manual for details.
No image appears after you cl ick Test in the EPSON TWAIN
Pro Setup dialog box when using a PC.
Cause What to do
No document on the
document table
Connection problem Turn off the scanner and computer
Cable problem Make sure the interface cable meets
Interface board problem Make sure the interf ace board is
Power on se quence p ro b le m Turn off the scanner a n d co m p u te r .
SCSI driver problem Make sure the SCSI driver is properly
SCSI ID number conflict Change the scan ner’s SCSI ID number
Turn on the scanner and place a
docume nt on the docu m e nt ta b le .
and check the connection between the
scanner and computer.
the requirements of your interface
board. See the documentation that
came with the interface board.
installed correctly.
Turn on the scanner and then turn on
the computer.
installed.
to one that is not being used by any
other SCSI device.
5
Troubleshooting
5-3
Page 99

Connection seque nc e
problem
Check the connection sequence and
make sure th e scanner’s terminator
switch is set correctly. See the scanner
User’s Guide
for details.
You can’t start up EPSON TWAIN Pro.
Cause What to do
Scanner is off Turn on the scanner and then your
computer.
Connection problem Turn off the scanner and computer
and check the connection between the
scanne r a nd co mputer .
Cable problem Make sure the interface cable meets
the requirements of your interface
board. See the documentation that
came with the interface board.
Interface board problem Make sure the interface board is
installed correctly.
You can’t select optional equipment (Automatic Document
Feeder, Transparency Unit)
Cause What to do
Installation problem Make sure the optional equipment is
installed correctly. See the
documentation t hat came wit h th e
equipment for details.
5-4
Troubleshooting
Page 100

Image is dark, with little or no detail.
Cause What to do
Screen calibration Calibrate the screen as described
under "Calibrating Your Screen" on
page 1-25.
Destination setting Select
Destination (page 3-10). Selecting a
printer may cause onscreen colors to
be diffe rent from the colors of the
original.
Screen
Screen Vivid
or
as the
You cannot scan an image or you only get a few dots for the
scanned image.
Cause What to do
No document on the
document table
Threshol d
scanning
setting for OCR
Make sure you have a document on
the documen t ta b l e .
OCR
When
Type, try changing the
setting in th e I mag e Controls dialog
box. See "Image controls button" on
page 3-24.
is selected as the Image
Threshold
Moiré (crosshatch) patterns appear in the scanned image
during halftone scanning.
5
Cause What to do
Image Type set ting Turn on the De-screening setting on
the Image Type dialog box.
Troubleshooting
5-5
 Loading...