

Page 1
LQ- 510 DOT- MATRIX PRINTER
1
Printer Specifications
Printing
Print method:
Print speed:
Quality
Draft
I
LO
X-pin impact dot matrix
Characters per inch Characters/second/line
10
12
10
12
1
150
180
50
60
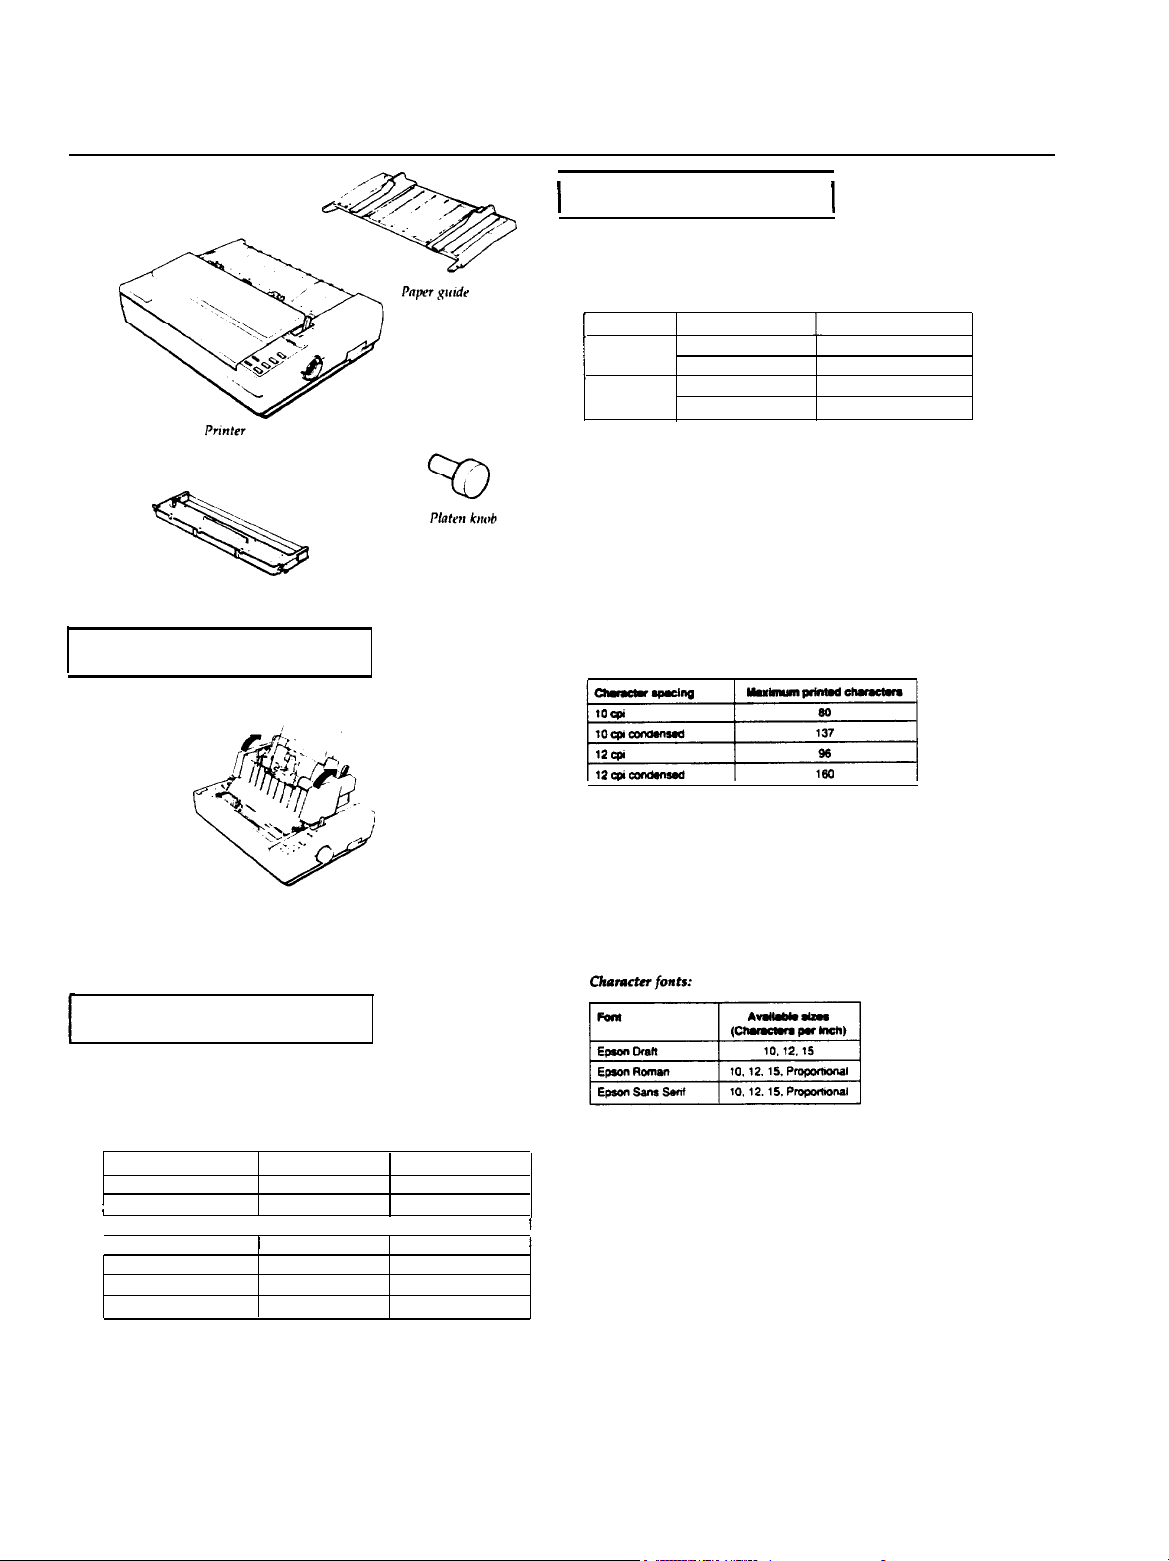
Ribbon cartridge
The Cut Sheet Feeder
The optional cut sheet feeder (C806122) makes it possible to handle
single-sheet paper more easily and more efficiently. Up to 150 sheets
of standard bond paper can be fed automatically into the printer
without reloading.
The Multi- Font Module
Printing direction:
Lime spacing:
Paper feed speed:
(continuous feed)
Printable columns:
Input buffer:
Optional
fonts:
Bidirectional logic-seeking for text
printing. Unidirectional for graphics (can
also be switched to bidirectional by using
the proper software command when DIP
switch 2-6 is on).
1/6 inch or programmable in increments of
1/360th of an inch
Single sheet:
2.2 inches per set
(100 ms/line)
Continuous:2.2 inches per sec
(100 ms/line)
8 KB/l KB /
(DIP switch selectable)
LQ Epson Courier
LQ Epson Prestige
LQ Epson Script
LQ Epson OCR-B
LQ Epson OCR-A
LQ Epson Orator
LQ Epson Orator-S
The optional Multi-Font Module gives you an easy way to have
access to seven more fonts for your printer. After you install the
Multi-Font Module in its slot, you can use any one of the following
fonts as your default font when the printer is turned on and any of
the others optionally by sending a command to the printer.
Font name
Courier
;
Prestige
Script
i OCR-B
OCR-A
0rator
Orator-S
24 - Pin Printers
Family number
2
3
I
I
4
5
6
7 10
8
Characters per inch
10.
12.15
10.
I
12.15
10. 12.15
I 10I
10
10
5/1/89
Characters:
96 standard ASCII character set (including
italic characters)
15 international character sets
Epson Extended Graphics character set
I
Paper
Paper
width:
Single sheet
Continuous
7.2 to 10.1 inches
(182
to 257 mm)
4 to 10 inches
(101 to 254 mm)
Envelope
Labels
inches
(166 or 240 mm)
2 l/2 x 15/16 inches
(continuous (minimum)
(63.5 x 23.8 mm)
7.2 to 14.3 inches
(182
to 364 mm)
Paper Length:
only)
Single sheet
LQ-510-1
Page 2
LQ - 510 DOT- MATRIX PRINTER
0.51 inches (13 mm) or more (both sides) when the 4 to 9.5 inch
(101 mm to 242 mm) width paper is used.
0.98 inches (25 mm) or more (both sides) when the 10 inch (254 mm)
width paper is used.
Envelope
_A
‘1 Il.87
mchrs 122 mmJ
Ribbon:
Life expectancy
of ribbon:
MCBF:
MTBF:
Print head life:
Dimensions and
weight: (excluding knobs and paper guides)
Electrical
Voltage:
Dielectric strength
(between AC line and
chassis):
120 VAC ± 10%
100 watts maximum
50 ± 0.5 Hz, 60 ± 0.5 Hz
10 Mohms between AC power line
and chassis
Can withstand 1.25 kV rms
applied for one minute
Environment
Temperature:
Humidity:
Shock:
operation angle:
Operation:
Storage:
Operation: 10% to 80% (noncondensing)
storage:
Operation:
Storage:
Operation:
Storage:
Cartridge ribbon, available in black:
#7753
#7753: 2,000,000 characters
(in Letter Quality characters,
at 48 dots/character)
For all components excluding print head:
3,000,000 lines
4000 power on hours (duty 25%)
200,000,000 strokes/wire
Height:
Width:
Depth:
Weight:
Less than 15° (without cut sheet feeder)
0° (with cut sheet feeder)
5.51 inches (139.9 mm)
16.46 inches (418.0 mm)
13.66 inches (347.0 mm)
13 lbs (6
kg
approx.)
40°F to 95°F (5°C to 35°C)
-22°F to 140°F (-30°C to 60°C)
5% to 85% (noncondensing)
Up to 1 G within 1 ms
Up to 2 G within 1 ms
Up to 0.25 G at up to 55 H
Up to 0.50 G at up to 55 Hz
Z
Note:
Envelope printing is only available at normal temperature.
Load the envelope with its long side horizontal.
Paper weight:
Paper thickness:
Copy
Capacity:
Note:
Label printing is available only at normal temperature.
Single Sheet
Continuous
Multi-part
forms
Envelope
Single Sheet
Continuous
Envelope
Label
(with
backing)
Up to 3 sheets including the original.
Total thickness must not exceed 0.01 inches
(0.25
14 lb to 24 lb
14 lb to 22 lb
12 lb to 15 lb per sheet.
Maximum number sheets = 3
12 lb to 24 lb
0.0025 to 0.0055 inches
(0.065 to 0.14 mm)
0.0025 to 0.01 inches
(0.065 to 0.25 mm)
0.0063 to 0.0197 inches
(0.16 to 0.52 mm)
0.01 inches
(Maximum 0.28 mm)
mm).
Mechanical
Paper feeding methods; Friction
LQ-510-2
Push tractor
Cut sheet feeder (optional)
Pull tractor (optional)
Interface Timing
The figure below shows the timing for the parallel interface.
Compatible Interfaces
The following is a list of Epson interfaces that are compatible with
your LQ-510 printer.
5/1/89
24 - Pin Printers
Page 3
LO- 510 DOT- MATRIX PRINTER
Printing Enabled/Disabled Signals and Control Conditions
The table below shows the relationship between printing being
enabled or disabled, the on line/off line status, and the receipt of the
data on/off control characters, DC1 or DC3.
l While printing is disabled, character data is being received and
acknowledged so that the printer
can
look for another DC1
character, which would allow it to resume printing.
Setting the DIP Switches
23
Country
0 USA
1
Frame
2Germany
UK
3
4Denmark
5Sweden
6
Italy
7
Spain
24405B5C
ASCII coda hex
607B7C
5D5E
I#$@[
\ 1
7D7E
-‘(
i
I-/ONiONiON
In addition to the eight character sets shown above, the seven
international character sets that follow can be selected with a
software command: ESC R. For more information, see the
command summary
8Japan
9Norway
10Denmark II
11
Spain II
12
Latin America
13Korea
64 Legal
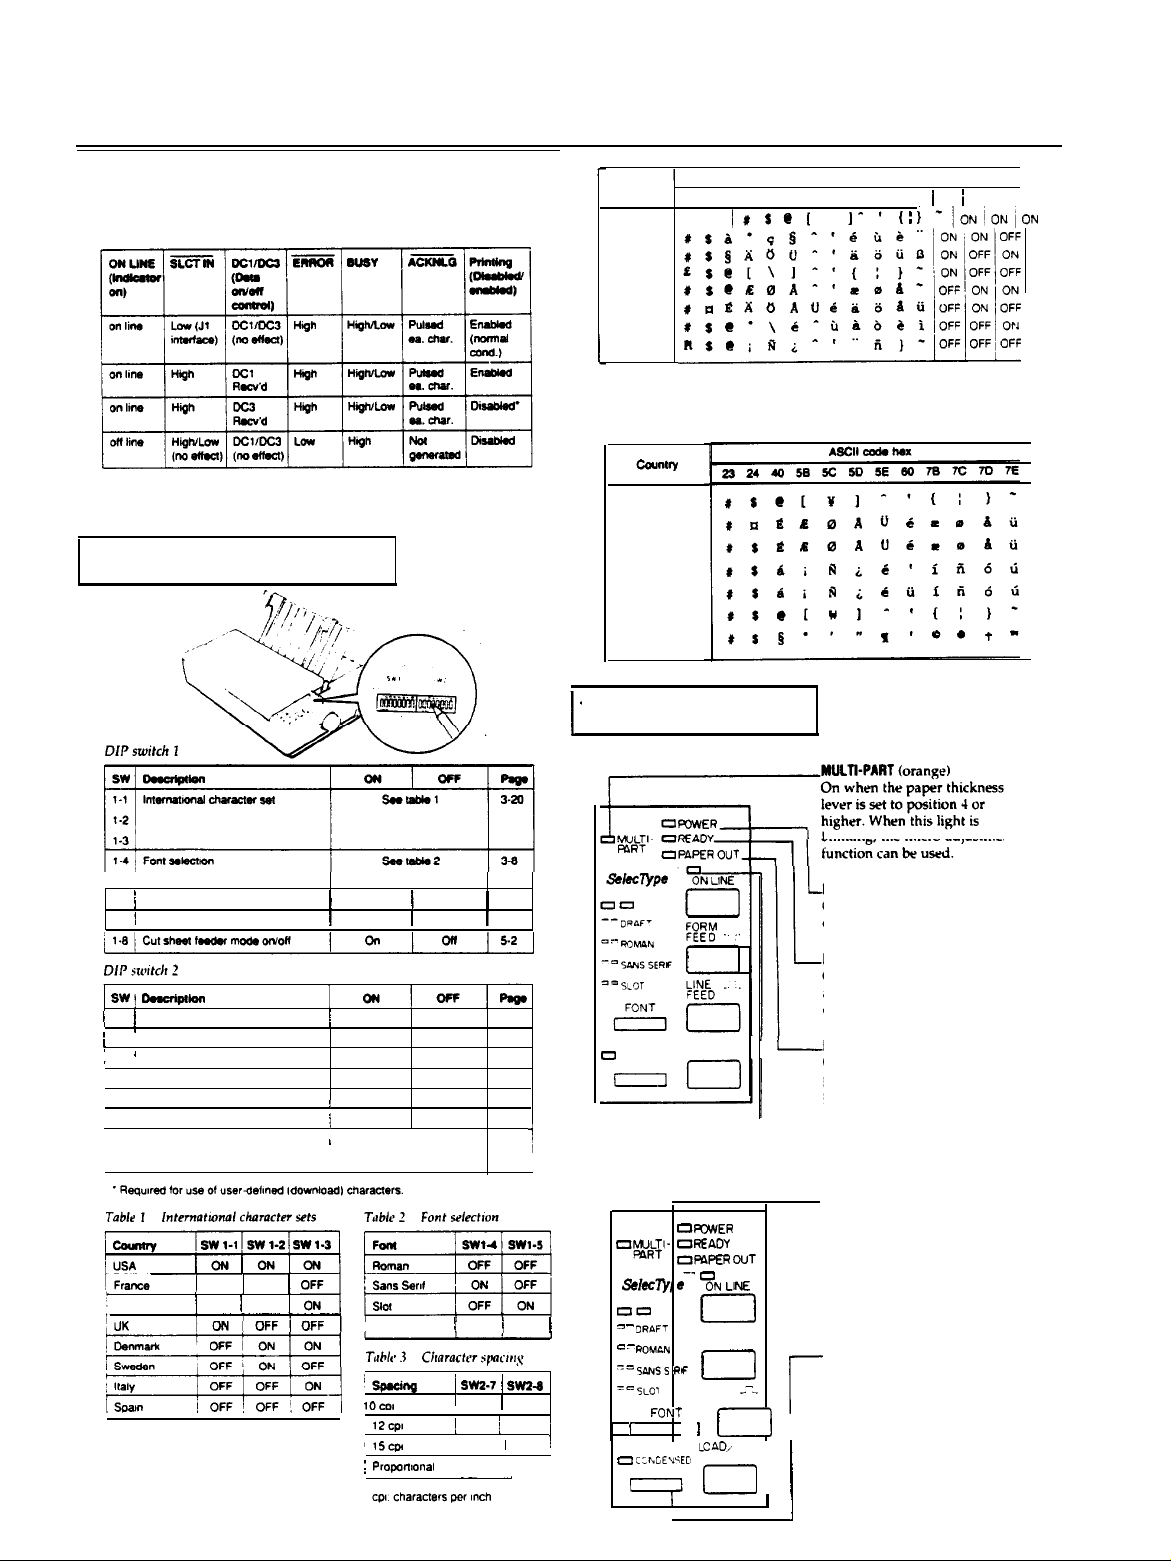
The Control Panel
Lights
I DIP SW
/
1-1
1-2 1-3
i
1-6/ Condensed mode on/off
1-7/ Character table
SW! -h
I
2-1
Page length
,/I
j
2-2 Tear-off mode
:
2-3’ 1-inch skip overperforation
2-4
Auto line feed
2-5
Input buffer capacity
2-6
Graphics print direction
2-7 Character spacing
2-8
1
ON 1 ON
j
Germany
ON / OFF
24 - Pin Printers
1
Condensedj Normal
i
Graphics
12 inches 11 inches
/
;
8KB
j
Bidirect
I
I
I
1
1
On Off
on off
on off
See table 3
I Draft
I%=@
1Ocol
12cp1
115cpi OFF I ON ~
~
Propallonal
Italics
1 KB
Unidirect
1
ON 1 ON
i ~~2.7 / ~~24
I
OFF 1 OFF
1
ON 1 OFF
ON ON
-
1
3-19
1
3-22
3-10
3-9
3-11
3-9
3-9
3-9
1
3-8
5/1189
1
1
blinking, the micro-adjustment
POWER (green)
On when the POWER switch is
on and power is supplied.
READY (green)
On when the printer IS ready to
accept input data. Flickers
during printing.
0
CONDENSED
OAD/
EJECT
PAPER
On when the printer is out of
L
paper or when continuous
paper is in the standby position.
ON LINE (green)
On when the printer is on line
and ready to accept data.
SelecType
OW;‘-
I
OKWER
OFiEADY
OFWEFt WT
&/d)‘J em‘ ?N LM
on
= - %wFT
= 7 ROMCN
-=sANss RF
‘=sLol
’ FoNT ’ 0
0 CLb.CEY’ED
I
I
0
FORM
FEED ---
0
LINE
FEED
LCAD,
EJECT
..-+
FONT
This button is used to select LQ
ROMAN, LQ SANS SERIF, DRAFT
mode, or a cartridge font (if
installed). The two orange
indicator lights show the selected
font. See Selecting Typestyles
later in this chapter.
CONDENSED
This button is used to turn the
condensed mode on and off. The
orange indicator light is on when
r
the printer is in the condensed
mode. In the condensed mode, all
I
characters are Printed at
approximately 60 percent of their
I
normal width.
I
I ]
OUT (red)
LQ-510-3
Page 4

LO- 510 DOT- MATRIX PRINTER
dll
LINE
This button controls the printer’s
on line and off line status. Press
this button to put the printer on
line or to take it off line. When the
printer is on line, the ON LINE light
is on and the printer can receive
and print data from the computer.
FORM FEED
When
the printer is off line, press
this button to eject a single sheet
of
paper or to advance continuous
paper to the top of the next page.
LINE FEED
When the printer is off line, press
this button to advance the paper
one line, or hold it down to
advance the paper continuously.
LOAD/EJECT
This button is used to feed paper
to the loading position or to eject
paper that is already loaded.
Paper is ejected forward if the
paper release lever is set to the
single-sheet position and
backward tout of the paper path)
if the release lever is set to the
continuous paper position.
Other control panel features
The control panel of your printer also gives you access to several
special functions.
Self test:
Micro-adjustment: By pressing the FORM FEED button immediately
Data dump
Both a draft and Letter Quality self test function
are built into the printer. The self test printout
lets you check the current DIP switch settings
and operating status of the printer. You can start
the printer’s self test by holding down the LINE
FEED button or the FORM FEED button while
turning on the printer. See the section on the self
test in Chapter 1 for more information.
after loading paper or when using short tear-off,
you can make fine adjustments to the loading
and short tear-off positions. These positions can
only be adjusted while the MULTI-PART light is
blinking. See the sections on adjusting the
loading position and using the short tear-off
function later in this chapter.
By holding down both the LINE FEED and FORM
FEED buttons while you switch on the printer,
you turn on the data dump mode. This feature
allows advanced users to locate the source of
communications problems between the
computer and printer.
Commands in Numerical Order
Hex. Description
ASCII
BEL
BS
HT
LF
VT
FF
CR
so
SI
DC1
DC2
DC3
DC4
CAN
DEL
ESC SO
ESC SI
ESC EM
ESC SP
ESC!
ESC #
ESC $
ESC %
Zf-
Esc’
Er
ESC /
Ei
Ex3
E:
ESC 6
ESC 7
ESC:
ESC<
ESC=
zr
ESC@
ESC A
ESC B
ESC C
ESC C0
ESC D
ESC E
ESC F
ESC G
EEI”
ESC K
ESC L
ESC M
Dec.
7
8
9 09
10
11
12
13
14
15
17
18
19 13
20
24
127
14
15
25
32
33
35
36
37
38
40
42 2A
43
45 2D
47
48 30
50 32
51
52 34
53
54 36
55
58
60 3C
61
62
63
64
65
66 42
67
67
68 44
69
70 46
71
72
74
75 4B
76
77
Beeper
07
08
0A
OB
0C
0D
0E
OF
11
12
14
18
7F
0E
0F
19
20
21
23
24
25
26
28
2B
2F
33
35
37
3A
3D
3E
3F
40
41
43
43
45
47
48
4A
4C
4D
......................
Backspace
Tab Horizontally
Line Feed
Tab Vertically
Form Feed
Carriage Return..............
Select Double-wide Mode
(one line)
Select Condensed Mode.......
select Printer.................
Cancel Condensed Mode......
Deselect Printer
Cancel Double-wide Mode
(one line)
Cancel Line
Delete Character
Select Double-wide Mode
(one line)
Select Condensed Mode.......
Control Cut Sheet Feeder......
Set Intercharacter Space
Master Select
Cancel MSB Control..
Set Absolute Print Position.....
Select User-defined Set
Define User-defined Characters 9-36
Select Score
Select Graphics
Set n/360-inch Line Spacing.
Turn Underline Mode
On/Off......................
Select Vertical Tab Channel
Select 1/8-inch Line Spacing
Select 1/6-inch tine Spacing...
Set n/180-inch Line Spacing
Select Italic Mode
Cancel Italic
Enable Printable Characters....
Enable Upper Control Codes...
Copy ROM to RAM
Select Unidirectional Mode
(one line)
Set MSB to 0
Set MSB to 1
Reassign Graphics Mode
Initialize Printer
Set n/60-inch Line Spacing
Set Vertical Tabs.
Set Page Length in Lines
Set Page Length in Inches......
Set Horizontal Tabs
Select Emphasized Mode......
Cancel Emphasized Mode
Select Double-strike Mode
Cancel Double-strike Mode
Perform n/180-inch Line Feed.
Select Single-density Graphics
Mode
Select Double-density Graphics
Mode
Select 12 CPI
...................
.............
....................
................
...................
....................
..............
....................
..................
..............
....................
.................
..................
Mode
.............
Mode
............
....................
.................
.................
..............
.............
.......................
.......................
.................
.........
.........
...........
.......
........
...
....
...
....
......
.......
.....
....
Page
9-12
9-20
9-21
9-14
9-17
9-13
9-12
9-26
9-25
9-8
9-26
9-9
9-27
9-12
9-9
9-27
9-26
9-10
9-33
9-23
9-11
9-20
9-37
9-31
9-39
9-15
9-32
9-18
9-15
9-15
9-16
9-34
9-35
9-37
9-37
9-36
9-9
9-11
9-11
9-40
9-8
9-16
9-17
9-13
9-13
9-22
9-28
9-28
9-29
9-29
9-16
9-38
9-38
9-24
LQ-510-4
5/1/89
24 - Pin Printers
Page 5

LQ - 510 DOT - MATRIX PRINTER
Dec.
ASCII
ESC N
ESC O
Ez:
ESC R
ESC S0
ESC l
ESC T
ESC U
ESC W
ESC Y
ESC Z
ESC\
ESCa
ESCb
ESGg
ESCk
ESCl
ESCp
ESCq
ESCt
ESCw
ESCx
Hex. Description
78 4E
79
4F
50
80
81 51
82 52
53
83
53
83
54
84
85 55
87 57
89 59
90 5A
92
5C
97
98
:
103
67
6B
107
108
6C
112
70
71
113
74
116
77
119
120
78
Set Skip Over Perforation
cancel skip over Perforation. ..
Select 10 CPI
.................
Set Right Margin
Select an International
Character Set.
................
Select Superscript Mode
Select Subscript Mode
Cancel
Superscript/Subscript
Mode .......................
......
.............
.......
.........
Turn Unidirectional Mode
on/off......................
Turn Double-wide Mode
On/Off.. ....................
Select High-speed Double-density
Graphics Mode ...............
Select Quadruple-density
Graphics Mode ...............
Set Relative Print Position
Select Justification
Set Vertical Tabs in Channels
Select 15 CPI
.................
Select Typestyle Family
Set Left Margin
...............
.....
............
........
Turn Proportional Mode
on/Off ......................
Select Character Style
Select Character Table.
Turn Double-high Mode
......................
on/off
.........
........
Select Letter Quality or Draft
Italic Character Table
CODE 0 1 2 3 4 5 6 7 8 9 A B C D E F
...
...
Page
9-14
9-14
9-24
9-19
9-35
9-29
9-30
9-30
9-10
9-27
9-38
9-39
9-21
9-33
9-18
9-24
9-23
9-19
9-25
9-32
9-34
9-28
9-22
Epson Extended Graphics Character Table
0
2
3
4
5
6
7
8
9
A
B
C
D
E
F
oe
! 1AQaqtizi ATat
” 2
B R b r C f
k3CScsi6iltLn<
$4DTdtC6Rj--L[
BZSEUeu66AftyaJ
CGFVfviialtrp+
’ ?C wg
(8HXhri9i,~+)’
)91YigYO-jr’e*
*
:JZjziti-I*rP-
+
;ti[k(YctlT~b;
,~L\l:iffJ)~=*
-=M]~liV;‘-)a~
. >N -n -
/ ?O -0
P’
pCEi
u~il!zl~tr=
Aa<~*IEB
Af’,A=”
6
L*az
TTrL
24 - Pin Printers
S/1/89
LQ-510-5
Page 6

LQ- 510 DOT- MATRIX PRINTER
Installation/Support Tips
Software
The type of printer installed on your system must be
identified for each software package. This is usually done
through a setup menu. If this printer is not listed in your
program, look in the printer User’s Manual for the next- best
model selection.
DIP Switch Settings
The default settings will usually work for most applications,
but they should be checked before using the printer This
will avoid unexpected results.
Cut - Sheet Feeder/ Single - Sheet Operation
The page length will have to be adjusted (shortened) to 61
lines per page if your software does not properly support
cut-sheet paper. There will be lines from the first page
printed at the top of the second page if the page length is
not set correctly.
LQ-510-6
5/1/89
24 - Pin Printers
Page 7

Information Reference List
Engineering Change Notices
None.
Product Support Bulletins
None.
Related Documentation
LQ- 510 DOT- MATRIX PRINTER
M-TM-LQ510
M-PL-LQ510
Y56799102000
Technical Information Bulletins
None.
LQ - 510 Technical Manual
LQ-510 Parts List
LQ-510 User’s Manual
24 - Pin Printers
5/1/89
LQ-510-7
 Loading...