

Page 1
Page 2

This Quick Reference contains information on clearing
paper jams, understanding printer error messages, and
changing the imaging cartridge.
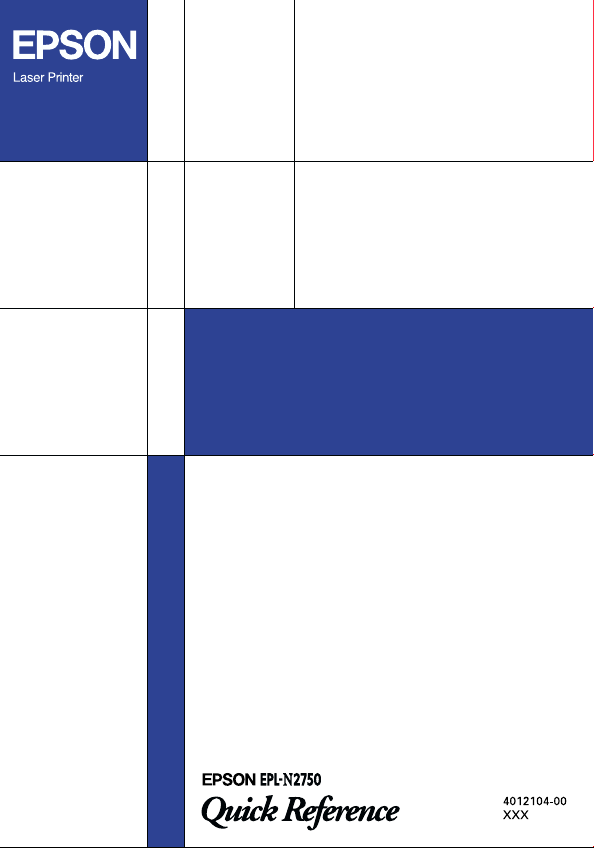
As a convenient place to keep this guide, attach the
included storage box to the side of your printer as shown
below.
If the 10-Bin Multi-Purpose Unit is installed, attach the
guide storage box to the back of the printer as shown
below.
For more details on the items in this guide and about
your printer in general, see the Reference Guide or Online
Guide.
Page 3

Preventing Paper Feed and Paper Jam Problems
To prevent frequent paper feed or paper jam problems,
use this checklist of corrective measures.
Use a high quality paper that is not too thin or too
❏
rough.
Fan the stack of paper and tap its edges to align it
❏
before loading.
Be sure that you do not load too much paper into
❏
the paper cassettes.
Be sure to adjust the paper guides so that paper can
❏
slide in and out freely.
Never let more than 500 sheets accumulate in the
❏
output tray on top of the printer.
Try turning over the stack of paper in the tray. Most
❏
paper packages indicate the top side of the paper
with an arrow at the side of the package.
Clearing paper jams
When a paper jam occurs, a Jam xxx xxx xxx xxx
message appears on the LCD panel. Xxx indicates areas
where jams may be occurring, such as LC1 (standard
lower cassette) or A (cover A). See the messages in this
section for instructions on clearing paper jams.
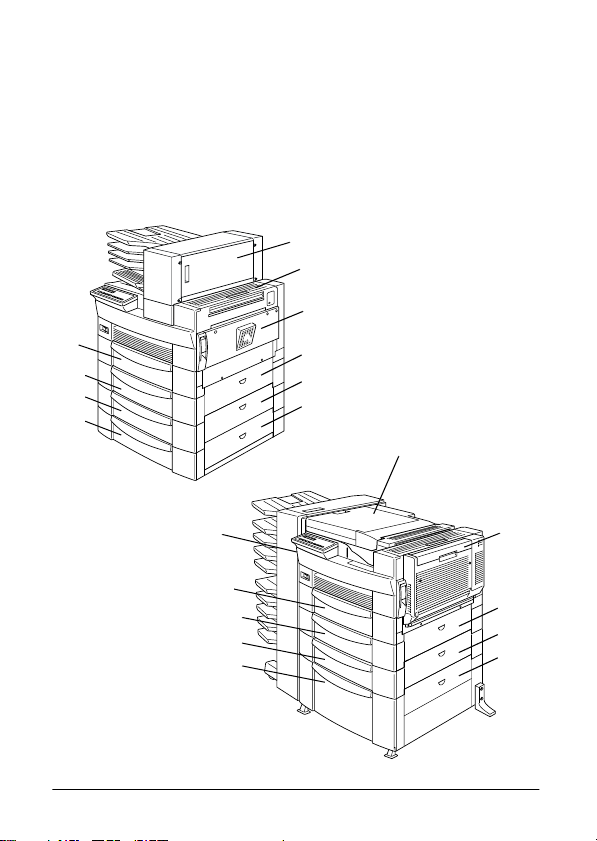
Paper Jam Problems
1
Page 4
MP
LC1
LC2
LC3
Note:
Check for jams at all paper sources or paths indicated on
❏
the LCD panel. The printer cannot resume printing until
all the jams are cleared.
The LCD panel displays up to four paper sources or paths
❏
at the same time. Other areas where jams may be
occurring will be shown on the LCD panel after you have
checked all indicated jams.
E
B
A
C1
C2
C3
F
G
MP
LC1
LC2
LC3
2
D
C1
C2
C3
Page 5

Jam LC2, Jam LC3
These messages indicate that paper has jammed in one
of the optional lower cassettes. The standard lower
cassette, located directly beneath the MP tray, is always
numbered LC1, and any optional 500-Sheet Lower
Cassette Units and the Large Capacity Paper Unit are
numbered LC2, LC3, and so on from top to bottom.
Follow these steps to clear paper jammed in the optional
lower cassettes:
1. Pull out the cassette indicated on the LCD panel.
2. Carefully remove any paper you find jammed
inside the cassette or printer.
3. Remove the stack of paper from the cassette. Even
its edges by tapping the paper on a flat surface. Then
reinsert the stack into the cassette, making sure the
paper is evenly aligned and rests below the
maximum paper mark.
Make sure you are using the correct paper size and
that your paper meets the specifications for this
printer.
4. Push in the cassette.
5. Clear other paper jams that are indicated on the
LCD panel, until all error messages disappear.
Paper Jam Problems
When the paper jam is cleared completely, the jammed
page’s print data is automatically reprinted.
3
Page 6

Jam A, Jam B
This message indicates that there may be a paper jam
inside cover A or cover B on the right side of the printer.
Follow these steps to clear paper jammed inside cover
A or B:
1. Open cover A gently.
Note:
Because the toner on the paper inside the printer may not
have been fixed on the page, toner may come off on your
hands when you remove the paper. If you spill toner on
your clothing, rinse it off with cold water. Using hot
water may leave a permanent stain.
Warning:
When opening the printer, do not touch the hot
w
areas indicated by caution labels inside cover A.
CAUTION
Hot Surface
Avoid Contact
4
Page 7
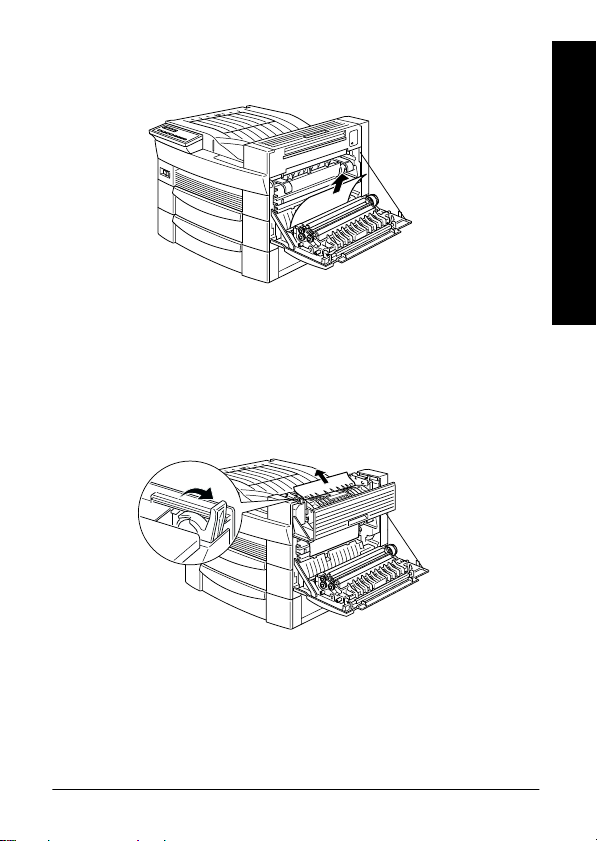
2. Remove any paper you find jammed inside the
printer.
3. If you do not see any paper inside cover A, open
cover B.
4. Remove the paper inside cover B. If the paper is
difficult to remove, use the gear lever inside cover
B as shown below. Push the lever up and down to
feed the jammed paper back out through cover B.
Paper Jam Problems
5. Close covers B and A.
When the paper jam is cleared completely, the jammed
page’s print data is automatically reprinted.
5
Page 8

Jam C1, Jam C2, Jam C3
This message indicates that there may be a paper
jammed inside cover C1, C2, or C3 on the right side of
the lower cassettes.
Follow these steps to clear paper jammed inside the right
covers of the lower cassettes:
1. Open the cover indicated on the LCD panel. The
names of the cassettes are indicated on each
cassette.
Note:
Because the toner on the paper inside the printer may not
have been fixed on the page, toner may come off on your
hands when you remove the paper. If you spill toner on
your clothing, rinse it off with cold water. Using hot
water may leave a permanent stain.
2. Remove the paper inside the cover.
6
Page 9

Note:
If the paper jam is in the Large Capacity Paper Unit, you
may find it easier to remove the jammed paper if you open
both the cover and the cassette.
When the paper jam is cleared completely, the jammed
page’s print data is automatically reprinted.
Jam D
This message indicates that there may be a paper jam
inside the cover of the Duplex Unit, which is also known
as cover D.
Follow these steps to clear paper jammed inside the
cover of the Duplex Unit:
1. Open cover D.
Note:
Because the toner on the paper inside the printer may not
have been fixed on the page, toner may come off on your
hands when you remove the paper. If you spill toner on
your clothing, rinse it off with cold water. Using hot
water may leave a permanent stain.
Paper Jam Problems
7
Page 10
2. Remove the paper inside the cover.
When the paper jam is cleared completely and the cover
closed, the jammed page’s print data is automatically
reprinted.
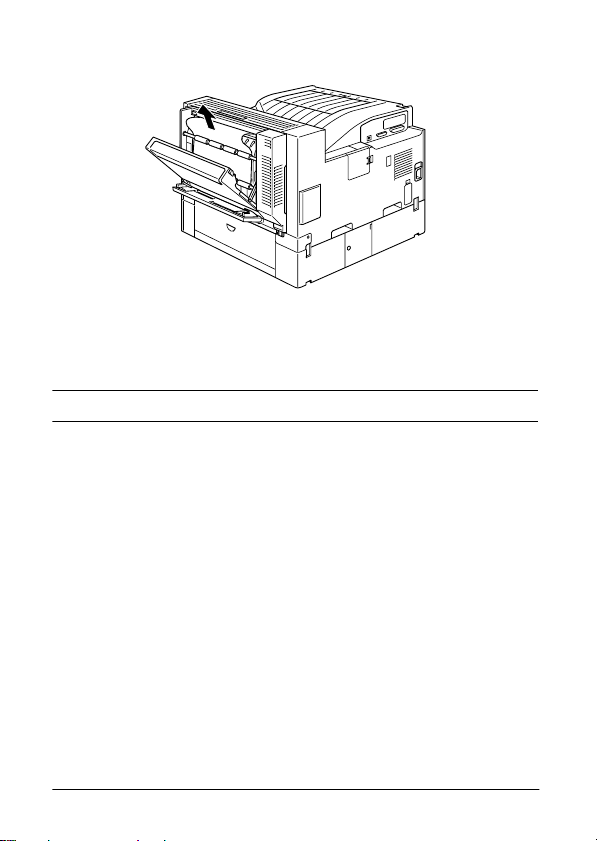
Jam E
This message indicates that there may be a paper jam
inside cover E on the back of the 5-Bin Multi-Purpose
Unit.
Follow these steps to clear paper jammed inside the
cover of the 5-Bin Multi-Purpose Unit:
1. Open cover E.
Note:
Because the toner on the paper inside the printer may not
have been fixed on the page, toner may come off on your
hands when you remove the paper. If you spill toner on
your clothing, rinse it off with cold water. Using hot
water may leave a permanent stain.
8
Page 11

2. Remove the paper inside the cover.
When the paper jam is cleared completely and the cover
closed, the jammed page’s print data is automatically
reprinted.
Jam F
This message indicates that there may be a paper jam
inside cover F on the paper guide of the 10-Bin MultiPurpose Unit.
Follow these steps to clear paper jammed inside the 10Bin Multi-Purpose Unit’s paper guide:
1. Open cover F.
Note:
Because the toner on the paper inside the printer may not
have been fixed on the page, toner may come off on your
hands when you remove the paper. If you spill toner on
your clothing, rinse it off with cold water. Using hot
water may leave a permanent stain.
Paper Jam Problems
9
Page 12

2. Remove the paper inside the cover.
When the paper jam is cleared completely and the cover
closed, the jammed page’s print data is automatically
reprinted.
Jam G
This message indicates that there may be a paper jam
inside the upper or lower portion of cover G on the back
of the 10-Bin Multi-Purpose Unit.
Follow these steps to clear paper jammed at the back of
the 10-Bin Multi-Purpose Unit:
1. Move the 10-Bin Multi-Purpose Unit away from the
printer.
2. Open cover G on the back of the 10-Bin MultiPurpose Unit.
10
Page 13

Note:
Because the toner on the paper inside the printer may not
have been fixed on the page, toner may come off on your
hands when you remove the paper. If you spill toner on
your clothing, rinse it off with cold water. Using hot
water may leave a permanent stain.
3. Remove the paper inside the cover.
4. Close cover G and reattach the 10-Bin MultiPurpose Unit to the printer.
When the paper jam is cleared completely, the jammed
page’s print data is automatically reprinted.
Paper Jam Problems
11
Page 14

Status and Error Messages
This section contains an alphabetical list of status, error,
and warning messages that appear on the LCD panel.
Can t Print Duplex
In your printer driver, select the Duplex Print Unit check
box in the Optional Settings dialog box, then select the
Duplex check box in the Layout tab. Press the Continue
button on the control panel to clear the message. If this
doesn’t solve the problem, one of the conditions below
has occurred and needs to be fixed.
Paper Size is incorrectly set to CTM, MON, C10, DL,
❏
C5 or C6; set this option to a supported paper size.
Paper Type is set to something other than Plain; set
❏
this to Plain.
The Duplex Unit is not installed properly; reinstall
❏
the Duplex Unit.
To clear the error message, (1) press Continue or (2)
reset the printer by pressing the ALT and Reset buttons
at the same time.
12
Page 15

Check Duplex-P Size
This message appears when the paper you loaded
differs from the paper size selected in the printer driver’s
Basic Settings tab or SelecType. Load the correct paper
size, or change the paper size setting, then open the
Duplex Unit cover and remove any jammed paper.
Close the cover of the Duplex Unit, and the printer
resumes printing.
Check Paper Size
The Paper Size setting in the printer driver’s Basic
Settings tab, or in SelecType, is different from the size of
paper loaded in the printer. Make sure the correct size
of paper is loaded in the printer; then press the
Continue button to clear the message.
Check Paper Type
The Paper Type setting in the printer driver’s Basic
Settings tab, or in SelecType, is different from the type
of paper loaded in the printer. Make sure the correct type
of paper is loaded in the printer; then press the
Continue button to clear the message.
Collate was disabled
The printer does not have sufficient memory to collate
print jobs. Only one set of copies will be printed. Reduce
the contents of your print jobs or add more memory to
the printer.
Press the Continue button to clear the message.
Status and Error Messages
13
Page 16

Cover A Open
Cover A, on the right side of the MP tray, is open. Pull
up the latch on cover A, then close the cover firmly.
Warning:
Do not touch the hot areas indicated on the caution
w
labels inside cover A.
If you still cannot close the cover, the imaging cartridge
may not be installed correctly. Reinstall the imaging
cartridge as described in “Replacing the Imaging
Cartridge” on page 26.
Cover C1, C2, C3 Open
The cover on the right side of the standard lower
cassette, an optional 500-Sheet Lower Cassette Unit, or
the Large Capacity Paper Unit is open. Pull the latch on
the cover indicated by the message and then close the
cover firmly. (The numbers indicate the order in which
the cassettes are stacked from top to bottom).
Cover D Open
Cover D, on the back of the Duplex Unit, is open. Pull
the latch on cover D and then close the cover firmly.
Cover E Open
Cover E, on the back of the 5-Bin Multi-Purpose Unit, is
open. Pull the latch on cover E and then close the cover
firmly.
14
Page 17

Cover F Open
Cover F, on the paper guide of the 10-Bin Multi-Purpose
Unit, is open. Pull the latch on cover F and then close the
cover firmly.
Cover G Open
Cover G, on the back of the 10-Bin Multi-Purpose Unit,
is open. Move the 10-Bin Multi-Purpose Unit away from
the printer, then pull the latch on cover G and close the
cover firmly.
Duplex Mem Overflow
There is not enough memory for duplex printing. The
printer prints only on the top side and ejects the paper.
To correct this error, follow the directions below.
If Auto Cont is set to Off in the SelecType Config Menu,
(1) press the Continue button or (2) reset the printer by
pressing the ALT and Reset buttons at the same time.
If Auto Cont is set to On in the SelecType Config Menu,
the error is corrected automatically.
Face-down Full
Status and Error Messages
The face-down tray is full of printed sheets. Remove the
sheets from the face-down tray and press Continue.
15
Page 18

Format Error ROM A
A ROM module which is not formatted is installed in
slot A. If the ROM had been written to, it is possible that
the writing was not completed. Also, the ROM’s
memory may no longer be accessible, in which case you
should replace it.
To correct this error, (1) press the Continue button, or
(2) turn off the printer, then remove the ROM module
from slot A.
Format Error ROM B
A ROM module which is not formatted is installed in
slot B. If the ROM had been written to, it is possible that
the writing was not completed. Also, the ROM’s
memory may no longer be accessible, in which case you
should replace it.
To correct this error, (1) press the Continue button, or
(2) turn off the printer, then remove the ROM module
from slot B.
Form Feed
When the printer is offline and data remains in the
printer’s memory, press the Form Feed button to print
out the data and clear the buffer. After printing, Ready
appears on the LCD panel.
HDD CHECK
The printer is checking the optional Hard Disk Drive.
16
Page 19

Image Optimum
The printer cannot print at the requested quality level
because of insufficient memory, and the printer reduces
the quality automatically so that it can continue printing.
Check to see if the printout is acceptable. If not, add more
memory (for a permanent solution) or temporarily set
the Print Quality setting to Low in the printer driver.
Insert Imaging Crtg
The imaging cartridge is not correctly installed. See
“Replacing the Imaging Cartridge” on page 26 to
reinstall it.
Invalid AUX I/F Card
An interface card not supported by this printer is
installed. Turn off the printer, then remove the card.
Invalid HDD
A hard disk drive that cannot be used with this printer
is installed. Turn off the printer and remove the drive.
Invalid Option
Status and Error Messages
An option not supported by this printer is installed, or
a supported option is installed incorrectly. See “Using
Options” in the Reference Guide to make sure you are
using options made for this printer or to reinstall the
options.
17
Page 20

Invalid PS3
A PostScript 3 ROM module not supported by this
printer is installed, or a supported module is installed
incorrectly. Make sure you are using the correct
PostScript 3 ROM module. If you are, try reinstalling the
module.
Invalid ROM A
The ROM module in slot A is not supported by this
printer, or a supported module is installed incorrectly.
Make sure you are using a suitable ROM module for this
printer. If you are, try reinstalling the module.
Invalid ROM B
The ROM module in slot B is not supported by this
printer, or a supported module is installed incorrectly.
Make sure you are using a suitable ROM module for this
printer. If you are, try reinstalling the module.
Jam xxx xxx xxx xxx
Paper is jammed in the tray, cassettes, covers, or other
devices indicated by xxx. Remove the jammed paper.
See “Clearing paper jams” on page 1 for help with
clearing the jam. See “Preventing Paper Feed and Paper
Jam Problems” on page 1 for advice on preventing this
problem.
18
Page 21

Job Cancel
The print job sent to your printer is canceled.
Manual Feed xxx yyy
Manual feed mode is specified for the current print job.
Make sure the indicated paper size (xxx) is loaded in the
indicated paper source (yyy), then press the On Line
button. The printer feeds paper according to the Paper
Source setting.
If you do not want to print this job in the manual feed
mode, press Continue.
Mem Overflow
The printer has insufficient memory available for the
current task. To correct this error, do one of the
following: 1) press the Continue button, or 2) reset the
printer by pressing the ALT and Reset buttons at the
same time.
You can also clear this error by turning the printer off
and back on again. However, it may be necessary to
reduce the number or size of fonts, reduce the number
or size of graphics, lower the resolution, or add more
memory to the printer.
Status and Error Messages
19
Page 22

Menus Locked
SelecType, which is usually accessible from the printer’s
control panel, has been disabled. This setting can be
cleared by using the EPSON WebAssist utility. Clear the
Panel Lock setting in the Configuration-Printer-PrintSetup Menu.
Multibin <N> Full
The bin indicated by <N> (1 to 10) on an optional
multibin unit is full. Remove the sheets from the bin and
press Continue.
Multibin is Removed
The 10-Bin Multi-Purpose Unit is not installed properly,
or is not firmly attached to the printer. Install the unit as
instructed in “Installing the 10-Bin Multi-Purpose Unit”
in the Reference Guide, then press Continue.
Need Memory
Your printer lacks the printer memory required to print
your print job. Reduce the amount of images or text in
the print job, or install an optional memory module. See
“Memory Modules” in the Reference Guide.
Offline
The printer is not ready to print.
20
Page 23

Outbin Select Error
The printer cannot feed paper to the output tray you
selected, because of a paper size discrepancy. The
printed sheet is fed to the Face-down Tray (or Bin 1) of
the Multi-Purpose Unit.
Press the Continue button to clear this message. Select
Face-down Tray (Bin 1) as the Output Tray setting in
the printer driver. If you want to output to another tray
instead of Bin 1, change the Paper Size setting of your
document.
Paper Out xxx yyy
There is no paper in the specified paper source (xxx).
Load paper of the indicated size (yyy) into the source.
See “Basic Printing Operations” in the Reference Guide
for instructions on loading paper.
Paper Set xxx yyy
The paper loaded in the indicated tray (xxx) does not
match the indicated paper size (yyy). Replace the paper
with the correct size of paper and press Continue.
Print Overrun
Status and Error Messages
The time required to process data exceeds the print
engine speed because the volume of data is too great.
Press Continue to resume printing. If this message
appears again, change the Page Protect setting in the
SelecType Config Menu.
21
Page 24

PS3 Hard Disk Full
The writing of PostScript 3 commands on the optional
Hard Disk Drive is no longer possible as the amount of
space allocated to PostScript 3 on the Hard Disk Drive
is used up.
Ready
The printer is ready to receive data and print.
Remove Output Paper
This message appears when the Multibin Mode setting
has been changed and paper remains in an optional
multibin unit. Remove all the paper in the multibin unit.
Reset
The printer’s current interface has been reset and the
buffer is cleared. However, other interfaces are still
active and retain their settings and data.
Reset All
All printer settings have been reset to the user default
configuration, or to the last settings that were saved.
22
Page 25

Reset to Save
You have changed the SelecType setting but the new
setting was not activated immediately after exiting
SelecType. To activate the new setting, do one of the
following: 1) exit SelecType by pressing Continue or
On Line (the new setting is activated after the current
print job is finished), or 2) reset the printer by pressing
the ALT and Reset buttons at the same time.
ROM CHECK
The printer is checking the ROM.
RAM CHECK
The printer is checking the RAM.
Self Test
The printer is performing a quick internal check.
Service Req xxxx
A controller error or a print engine error has been
detected. Write down the error number listed on the
LCD panel (xxxx) and turn off the printer. Wait at least
five seconds and then turn it back on. If the error
message still appears, turn off the printer, unplug the
power cord, and contact a qualified service
representative.
Status and Error Messages
23
Page 26

Standby
The printer is in its low power state; however, it is still
online if the On Line light is on.
Toner Low
The printer is almost out of toner. Prepare a new
imaging cartridge to replace the current one.
Toner Out
You must replace the imaging cartridge. See “Replacing
the Imaging Cartridge” on page 26.
Press Continue to print one more page.
Warming Up
The printer is warming up. When the printer is ready,
this message will change to Ready.
Write Error ROM A
There is no ROM module installed in slot A, or the
installed module cannot be written to. It is also possible
that writing to the ROM in slot A began, but was not
completed.
To correct this error, do one of the following: 1) turn off
the printer and remove the ROM, then turn on the
printer, 2) reset the printer by pressing the ALT and
Reset buttons at the same time.
24
Page 27

Write Error ROM P
The program ROM cannot be written to. It is also
possible that writing to the ROM was not completed.
To correct this error, do one of the following: 1) turn off
the printer, then turn it on again, 2) press the Continue
button, or 3) reset the printer by pressing the ALT and
Reset buttons at the same time.
Writing ROM A
The printer is writing data into the ROM module in slot
A.
Writing ROM P
The printer is writing data onto the program ROM.
Status and Error Messages
25
Page 28

Replacing the Imaging Cartridge
The imaging cartridge prints up to 15,000 pages
depending upon the complexity of your print jobs.
If your printed images become faint, enter the SelecType
Setup Menu and use the Toner function to find out
approximately how much toner remains in the imaging
cartridge. For instructions, see “SelecType Settings” in
your Reference Guide.
Once the toner level is displayed on the LCD panel,
simply count the asterisks between the E (empty) and
the F (full). Each asterisk represents about 25% of the
total toner capacity. If you see only one asterisk on the
LCD panel, prepare a replacement imaging cartridge.
Replace the cartridge with the S051068 imaging
cartridge even if the cartridge you remove has a different
part number. The S051068 cartridge is specially
designed for your high-quality 600-dpi printer.
Follow these steps to replace the imaging cartridge:
1. Make sure the printer is turned on.
2. Open the printer cover A.
26
Page 29

Warning:
When opening the printer, do not touch the hot
w
areas indicated by the caution labels inside cover
A.
CAUTION
Hot Surface
Avoid Contact
3. Remove the imaging cartridge by pulling the
handles on the front of the cartridge toward you.
Replacing the Consumables
4. Dispose of the used imaging cartridge as a
nonburnable item.
Warning:
Do not dispose of used imaging cartridges in fire,
w
as they can explode and cause injury. Dispose of
them according to local regulations.
27
Page 30

5. While holding the new imaging cartridge
horizontally, gently shake it a few times to
distribute the toner evenly.
Caution:
Do not turn the imaging cartridge upside
c
❏
down.
Do not expose the imaging cartridge to
❏
room light any longer than necessary.
Overexposing the cartridge may cause
abnormally dark or light areas to appear on
the printed page and reduce the life of the
cartridge.
protective cover
28
Page 31

6. To release the spring-loaded carrying handles on
the sides of the new cartridge, hold down each
handle with your hand and remove the tape, then
take your hand away slowly.
Warning:
When you remove the tape, the handle may spring
w
up quickly eno ugh to hurt your fingers. To avoid
this, hold the handle firmly while peeling off the
tape.
7. Pick up the imaging cartridge by the carrying
handles and insert the cartridge all the way into the
printer.
Replacing the Consumables
29
Page 32

8. Close cover A by pushing it up and into the printer.
Caution:
Never transport the printer with the imaging ca rtridge
c
installed.
30
Page 33

31
Replacing the Consumables
Page 34

 Loading...