

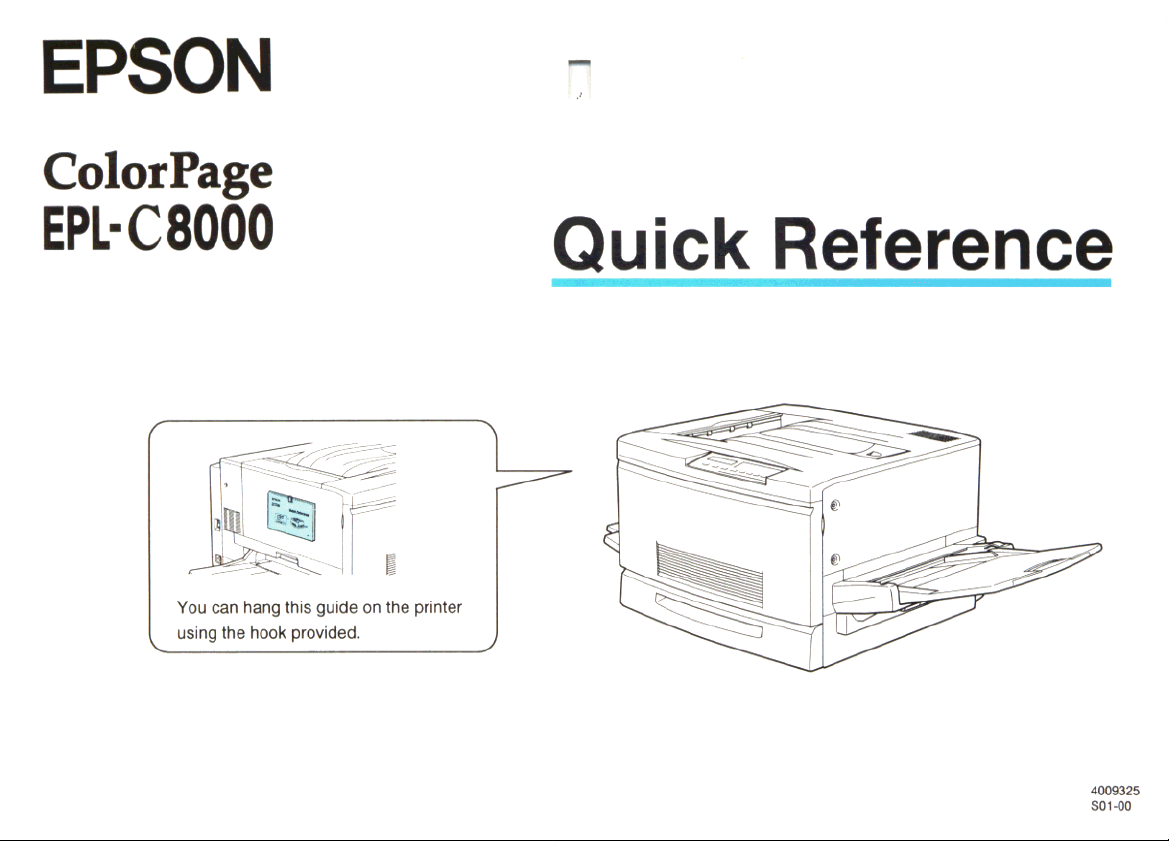
Page 1
Page 2
Replacing Consumable Products
You need to replace the following consumable products
when you are given a notice message on the control
panel display or in EPSON Status Monitor 2.
Toner Cartridge (Yellow) S050016
Toner Cartridge (Magenta) S050017
Toner Cartridge (Cyan) S050018
Toner Cartridge (Black) S050019
Waste Toner Collector S050020
Photoconductor Unit S051061
Fuser Oil Roll S052002
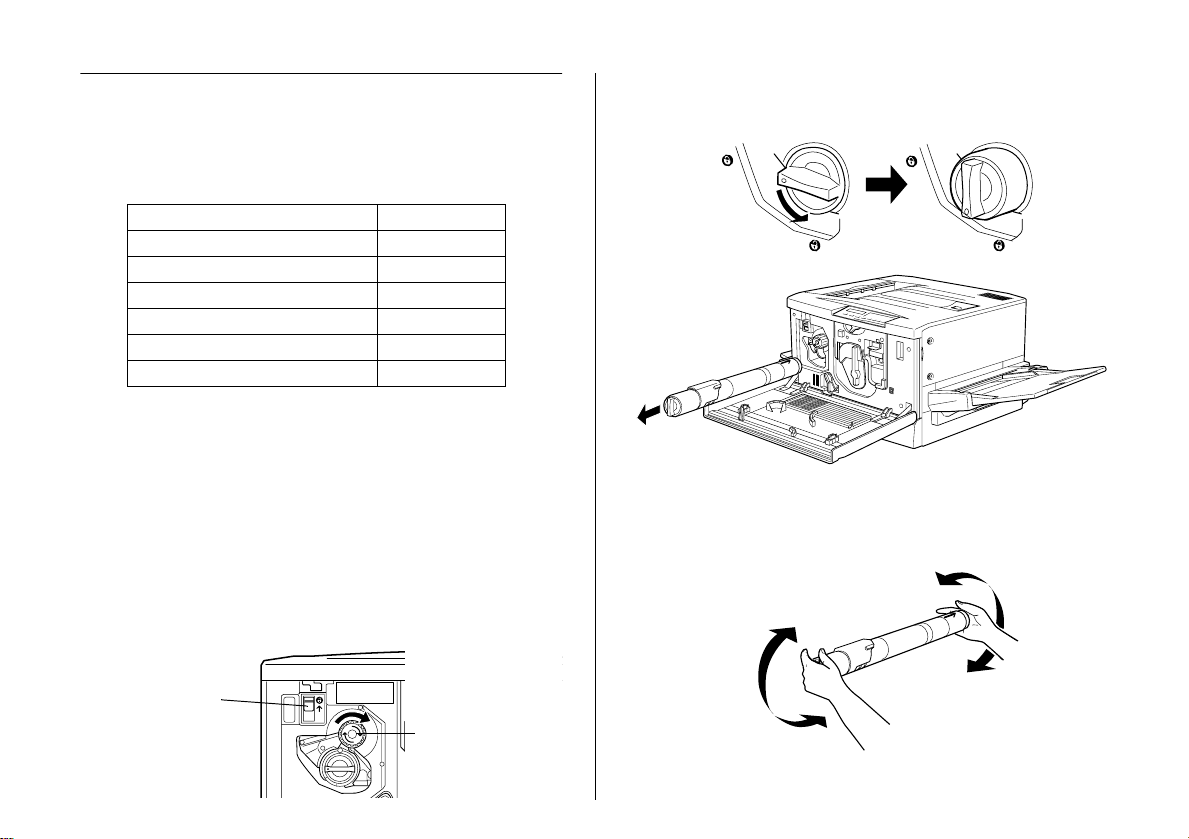
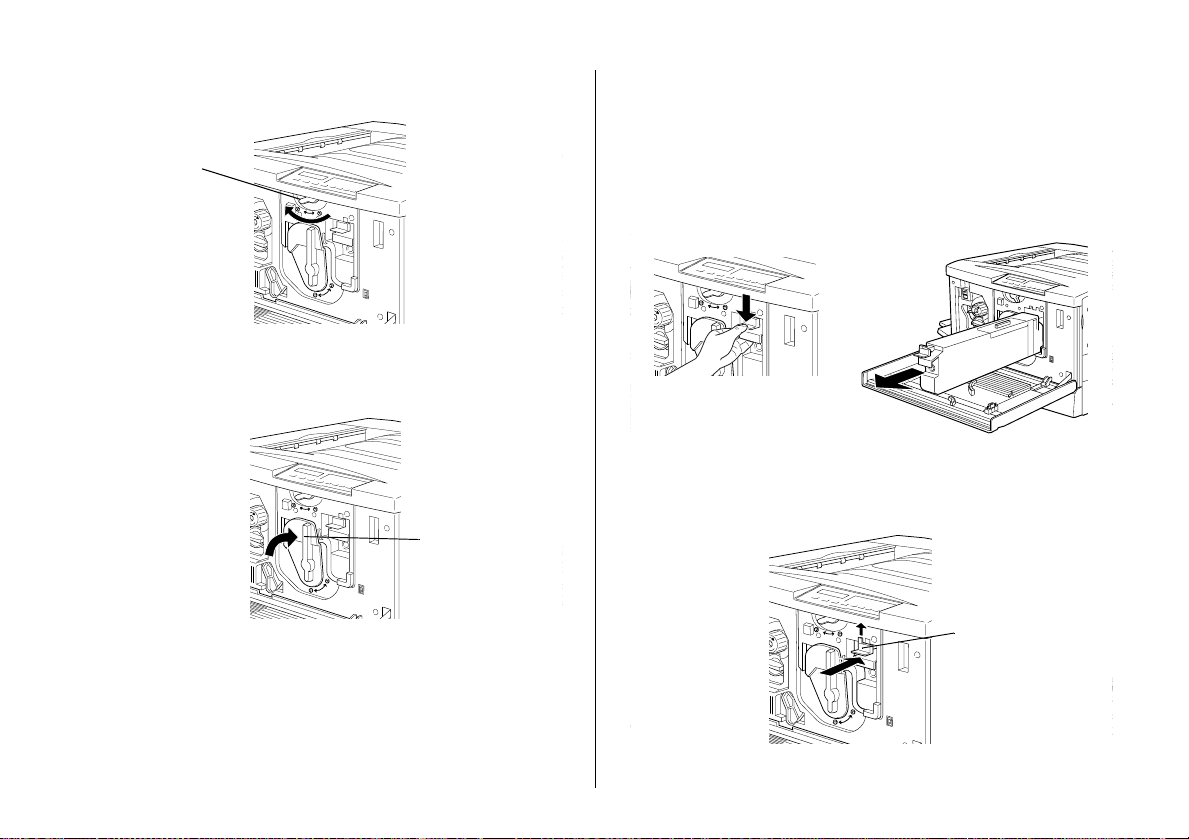
Replacing a toner cartridge
1. Open the front cover. If you can see the color that
you need to replace in the install window, go to st ep
3. If you see a different color, go to the next step.
2. Push the switch up, then release it to unlock the
cartridges. Turn the round knob until it stops.
Repeat until the cartridge you want to replace
appears.
3. Turn the cartri dge knob counterclockwise 90
degrees. Then pull the cartridge out of the slot.
4. Take a new cartridge o ut of package and gently
shake it back and forth and front to back.
Switch
Knob
2
Page 3
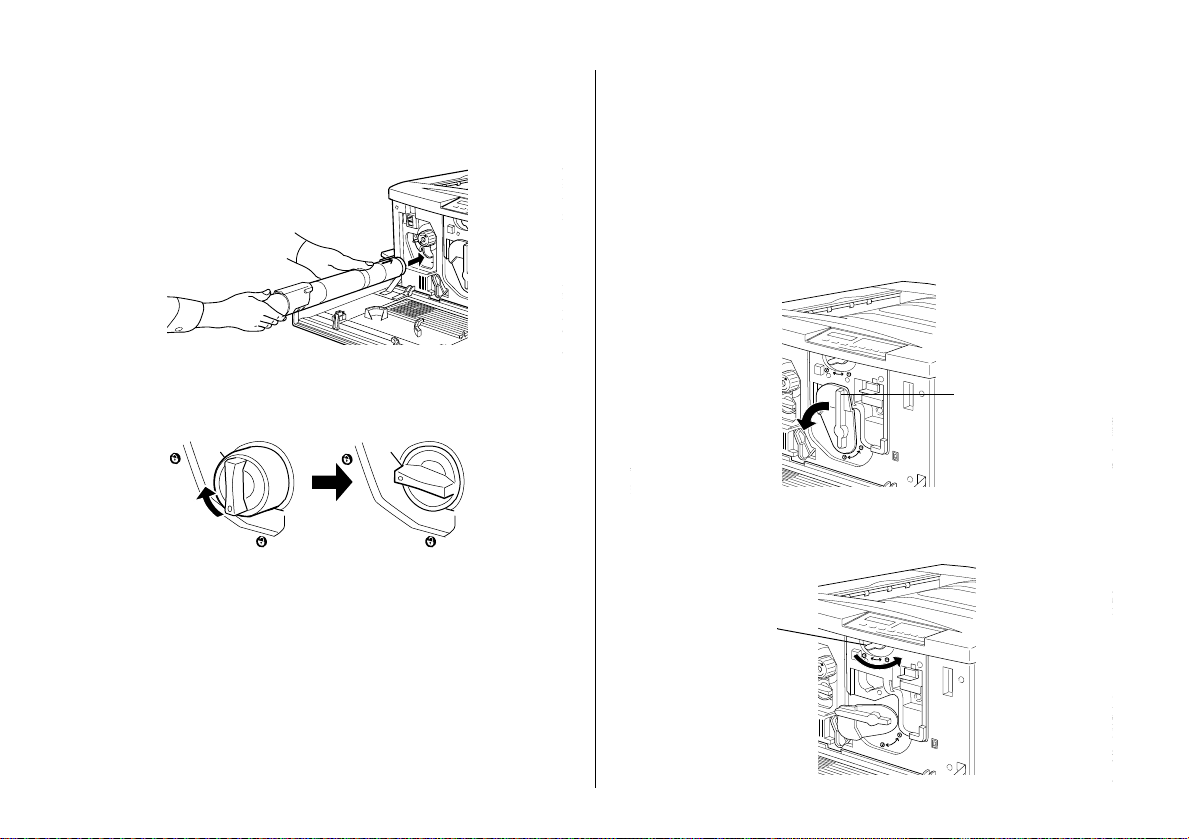
5. Hold the cartridge arrow side up and insert it all
Large lever
Small lever
the way into the cartridge slot. Then turn the
cartridge knob clockwise 90 degrees.
6. If you need to replace another cartridge, repeat
steps 2 to 5.
7. Close the front cover.
Replacing the phot oconductor unit
1. Turn off the printer and open the front cover.
Note:
When rep lacing the ph otoconduct or unit, mak e sure to
turn off the print er .
2. Turn the large lever counterclockwise 90 degrees.
3. Turn the small lever to the right.
3
Page 4
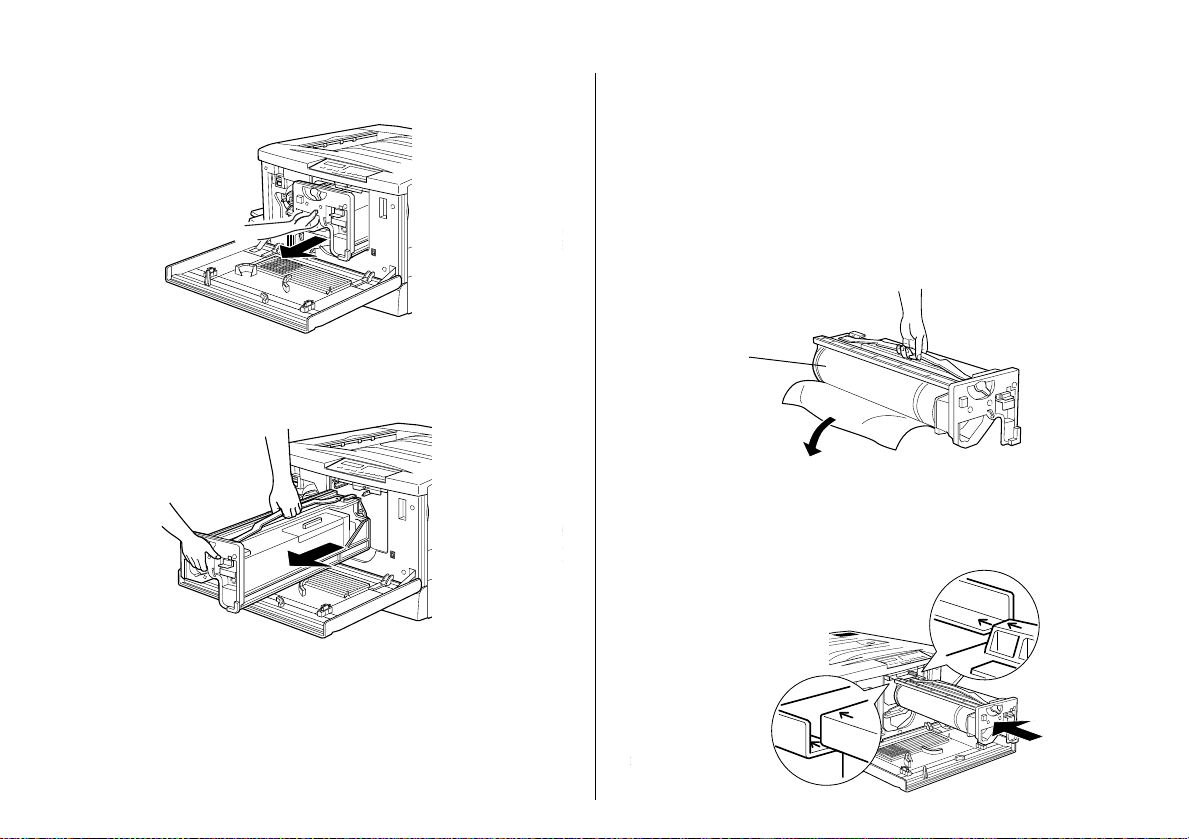
4. Pull the photoconductor unit out about 30 cm.
Drum
5. Grab the handle at the top of the photoconductor
unit and gently pull it all the way out.
6. Tak e a new phot oco nduc tor u nit ou t of its pack age
and remove the protective sheet.
Caution:
c
7. Hold the handle at the top of the photoconductor
unit and place the unit on the guide rails. Insert it
all the way into the prin ter .
❏ Be sure no t to t ouc h or sc ra tch t he s urf ace
of the drum.
❏ When repl acing the pho toconductor unit,
avoid e xposi ng i t to roo m li ght an y longe r
than nec e ss ary,
4
Page 5
8. Turn the small lever left.
Tab
Replacing the wa ste t oner collector
1. Open the front cover.
Small le v e r
9. Turn the large lever clockwise 90 degrees. Then
close the front cover.
Large lever
2. Grasp the handle and tab of the waste toner
collector to release the lock. Then pull out the
collector.
3. Take out a new waste toner collector. Hold the
handle of the collector and insert it into the slot all
the way until the tab clicks.
4. Close the front cover.
5
Page 6

Replacing the fuser oil ro ll
1. Pull down the face-up tray. Hold the handle of the
fuser unit and pull it all the way out.
2. Grab the handle of the fuser oil roll and remove it.
Warning:
w
Be carefu l not to touc h th e fu s er , which is
marked CAUTION! HIGH TEMPERATURE
or the adjoining areas. If the printer has been in
use, th e fuser an d the ar ea aro und it ca n be very
hot.
3. Take a new fuser oil roll from the box and remove
the cover and two shipping pins.
4. Hold the roll handle and insert it into the fuser unit ,
matching the green marks on the roll and unit.
6
Page 7

5. Push the roll down firmly until it clicks into place.
Paper cassette
Paper path unit
6. Push the fuser unit into the printer until it clicks.
Clearing Jammed Paper
Make sure into follow these points when you clear
jammed paper:
❏
Do not remove jammed paper by force. Pull it
gently in order to avoid tearing the paper which
can cause pieces to remain in the printer.
❏
If jammed paper is torn and remains in the printer,
or if paper is jammed in an area not mentioned in
this manual, contact your dealer.
w
Warning:
Be carefu l not to touc h th e fu s er , which is marked
CAUTION! HIGH TEMPERATURE or adjoining
areas. If the pri nter has been in use , the fu ser and t he
area around it can be very hot.
Clearing the paper cassette
1. Pull the paper cassette out slowly until it stops.
Remove any jammed paper.
2. Replace the paper stock in the paper cassette and
close i t.
3. Pull the paper path unit out slowly until it stops.
Pull any jammed paper out from the bottom of the
paper path unit.
4. Close the paper path unit.
7
Page 8

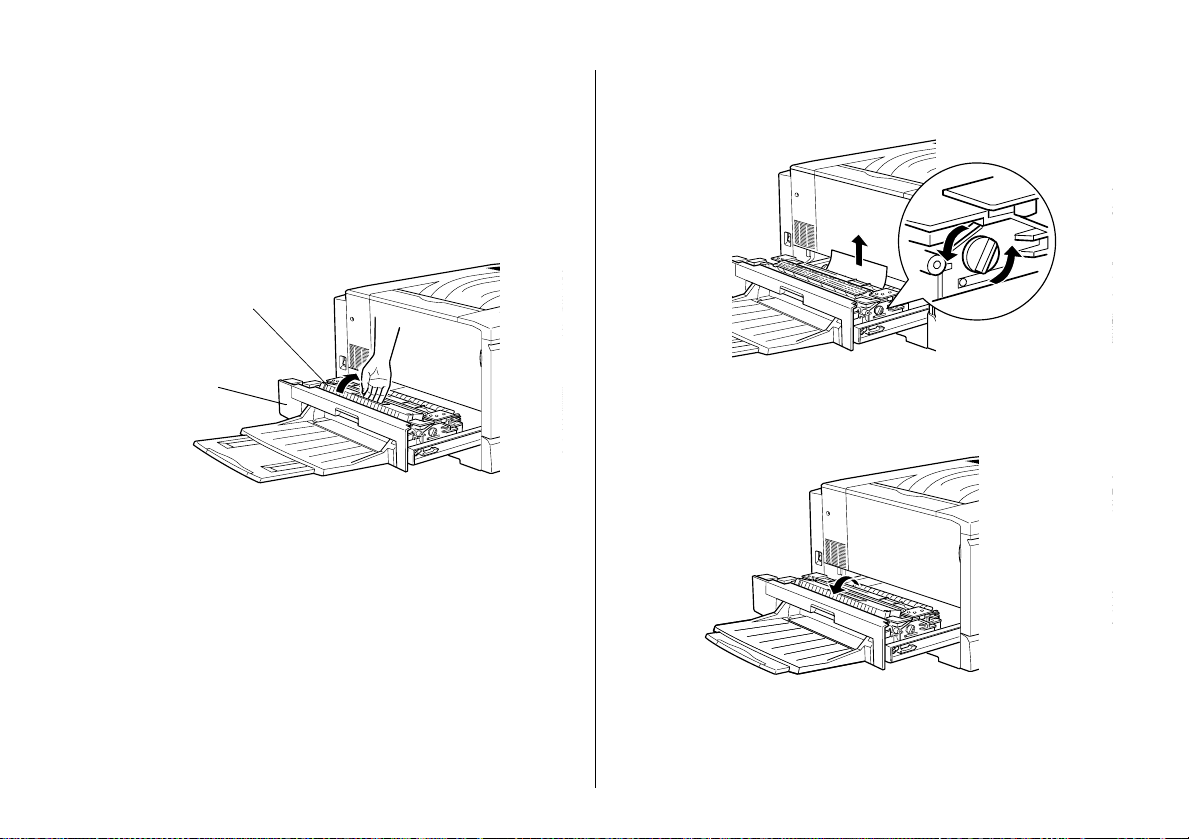
Clearing the MP tray
1. Pull the jammed paper out gently.
2. Pull the paper path unit out until it stops. Open the
cover inside the unit by grasping the handle and
pulling upwards.
3. Turn the knob on the unit. The jammed paper
comes out. After the jammed paper is ejected
halfway, pull the paper up and out.
MP tray
Cover
4. Close the unit cover.
Paper path unit
5. Close the paper path unit firmly.
8
Page 9
Clearing the fuser unit
Caution:
c
1. Pull the fuser unit out gently until it stops. Grasp
When paper is jammed the path to the face-up tray,
clear it from the fuser unit.
the handle of the fuser oil roll and remove it.
Fuser oil roll
2. Turn the knob in the fuser unit to eject any jammed
paper. Pul l out th e jam me d pap er.
Fuser unit
w
Warning:
❏ Be careful not to touch the fuser, which is
marked CAUTION! HIGH
TEMPERATURE or the adjoining area s.
If the pri nter h as been i n use, the fu ser and
the area a round it can be ve ry hot.
❏ Reattach the fuser oil roll as soon as you
clear th e jammed p aper.
❏ The roll should be always kept
horizontally. Do no t tilt it or pl ace it
against something, as it can cause oil
leakage and reduced pri n t quality.
3. Reattach the fuser oil roll.
4. Close the fuser unit firmly.
9
Page 10
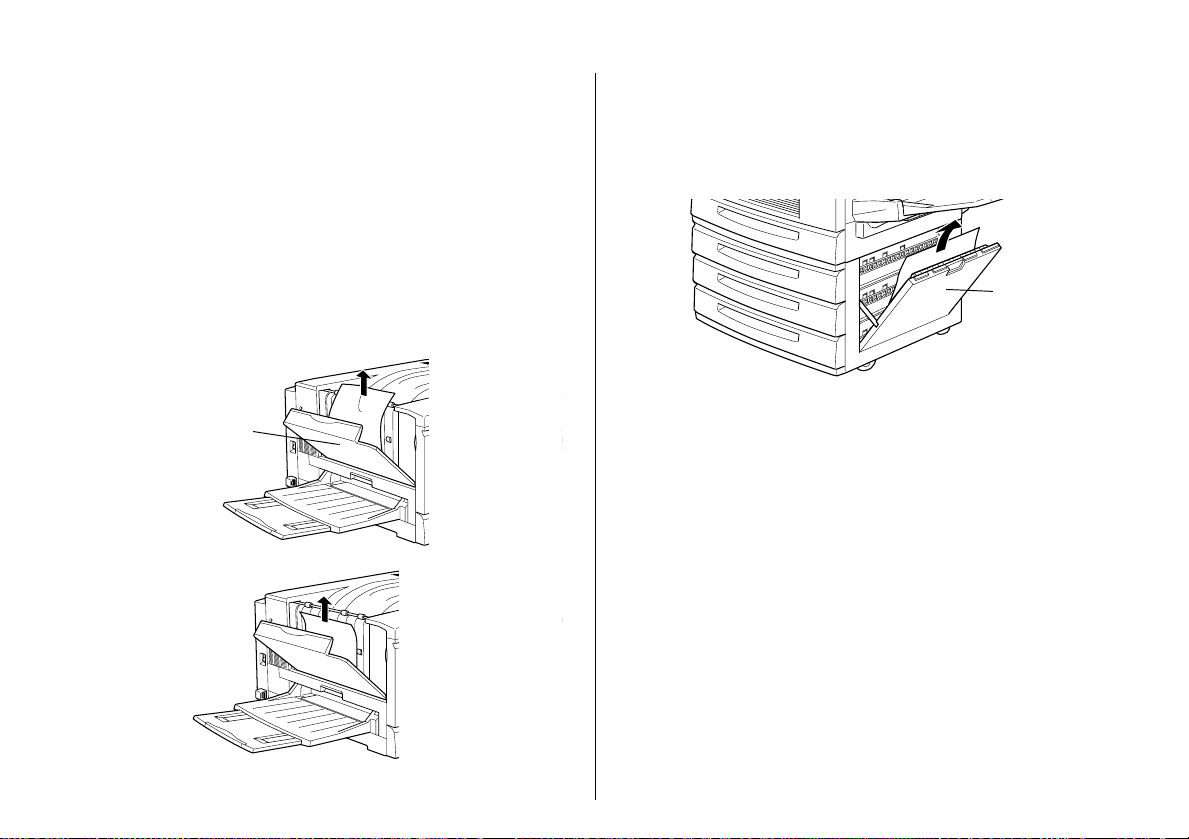
Clearing the output path cover
Feeder cover
Clearing optional large capacity paper unit
Caution:
c
1. Open the outp u t pat h cove r at the left side of the
2. Remove all jammed paper . If paper h as jammed at
Output path cover
When pape r is jammed the path to the fa ce-down tray ,
clear it from the fuser unit.
printer.
the top of the output path, gently lift it up. If it has
jammed near the bottom of the output path cover,
carefully pull it out of the printer.
1. Open the feeder cover on the right side of the p aper
unit. Pull any jammed paper out gently.
2. Close the feeder cover.
Note:
If the paper is jammed in the paper cass ette mounted on the
paper unit, see "Clearing the paper cassette".
3. Close the output path cover.
10
Page 11

Control Panel Messages
Status message list
Messages Description
Form Feed The printer is feeding paper.
Ready The printer is ready to print.
Reset The printer's current interface
has been reset and the buffer
is cleared.
Reset All All printer settings have been
reset to the user default
configulat ion, the last settings
that were saved.
Reset to Save You should reset the printer to
save the current settings.
Self Test The printer is running a self-
diagnostic program.
Standby Level X
(X = 1 or 2)
Warming Up The printer is warming up.
Writing DIMM A The printer is writing the
The printer is turned on, but is
in energy- saving mode.
settings to ROM module A.
Error message list
Messages Description
Check OHP
Sheet
Check Paper
Size
Exiting Pape r
Jam
Exit Cover Open The output path cover is open.
Feed J am Paper is jam med at a lo a d ing
You have l oad tr ans pa rencie s
facing the wrong direction or
with the wrong side up, or you
tried to load a transparency
other than EPSON Color Laser
Transparencies. The printer
stops l oading in order t o av oid
damage. You must clear any
jammed sheets from the MP
tray and pa per path unit.
The paper size setting is
differe nt from the size loaded
in the printer. Check to see if
the correct size of paper is
loaded in the tray; then press
the Continue button.
Paper is jamm ed at an
ejection area like the face-up
tray.
Close it.
entrance area like the paper
cassette or MP tray.
11
Page 12

Messa g e s Descript i on
Messages Description
Feeder Cover
Open
Format Error
DIMM A
Front Cover
Open
Fuser Unit Ope n The fuser unit is open. Close it.
Illegal Aux I/F
Card
Illegal DIMM A The printer cannot read the
The feeder cover of the
optional la rge capacity p aper
unit is open. Close it.
An unformatted DIMM has
been inserted. If the DIMM has
been format ted, but is
unreadable, fo rma t the DIMM
again. If, after reform atting,
the DIMM is still unreadabl e,
take it to you r de aler for rep air
or replacement.
To clear this error either press
the Continue b utton or t urn off
the printer and remove the
DIMM.
The front cover is open. Close
it.
The printer cannot
communicate with the
installed optional interface
card. Turn off the printer and
remove the card, then reinstall
it.
installed optional DIMM. Turn
off the prin ter and rem ov e th e
DIMM.
Image Opti mum There is insufficien t memory to
print the page using the
specified print quality. The
printer automatically reduces
the print quality so it can
continue printing. If the
printout is not acceptable, try
simplifyin g the pa ge by limit ing
the number of graphics or
reducing the number of fonts
or font sizes.
Turn off t he printe r then re send
the print data.
Turn the Image Optimu m
setting of f on the Con fig menu
of SelecType.
Insert Oil Roll Th e fuser oil roll is not installed
Insert
Photocondctr
Insert Waste T Box The waste toner collector is not
or is in st a ll e d in c o r rectly .
The photoco nductor unit is not
installed, or is instal led
incorrectly. Turn off the printer,
then install or reinstall the
photoconductor unit.
installed or is installed
incorre ct ly .
12
Page 13

Messages Description
Messages Description
Insert XXX
XXX:
The selected paper
source is indicated.
The indicated (XXX) paper
source is open. Close it.
Irregular Density You have tried to print a
document with too-great a
density. The printer stops
loading paper in order to
avoid damage. You need to
clear any jammed paper from
the MP tray and paper path
unit.
Maintenance
Req XXXX
XXXX:
Number is
indicated.
Manual Feed
XXX YYYY
XXX:
The selected paper
source is indicated.
YYYY:
The selected paper
size is indicated.
A part insi de the printer need
to be replaced. Contact your
dealer and repor t what
number (XXXX) appears.
The prin ter is wa itin g fo r m edi a
to be inserted manually.
Mem Overflow The printer has insufficient
memory available for the
current task. To correct the
error, press the Continue
button on the control panel. If
the message remains, reset the
printer. You can also clear this
message by turning the printer
off, waiting 10 seconds, and
then turning it back on.
Menus Locked This message appears if you try
to change a printer setting
when th e buttons have been
locked.
Need Memory The printer has insufficient
memory available for the
current task. Add more
memory to your printer.
Oil Roll Near
Empty
There is litt le oil remaining in the
fuser oil rol l. Early replace ment
with the new fuser oil roll is
recommended.
Paper Jam Pape r is jammed at the fuser
unit.
13
Page 14

Messages Description
Messages Description
Paper Out XXX
YYYY
XXX:
The selected paper
source is indicated.
YYYY:
The selected paper
size is indicated.
Paper Set XXX
YYYY
XXX:
The selected paper
source is indicated.
YYYY:
The selected paper
size is indicated.
There is no paper in the
specified paper source (XXX).
Load paper of the indicated
size (YYYY) into the source.
The paper loaded in the
specified paper source (XXX)
does not match the required
paper si ze (YYYY). Repl ace the
loaded paper with the correct
size and press Continue.
If you press Continue without
replacing paper, the printer
prints on th e loaded paper
although it does not match the
required size.
Paper Unit Open The paper path unit is open.
Close it.
Photocondctr
Trouble
The installed photoconductor
unit has a problem. Turn off the
printer, then remove the
photoconductor unit and
install the new
photoconductor unit.
Print Overrun The required time to process
the print data exceeds the
print engine speed because
the current page is too
complex. Press the Continue
button to resume printing. If this
message appears again, tu rn
on Page Protect in the Config
Menu of th e Sel ecTyp e set ti ng.
If you continue to receive this
message when printing a
particula r page, try s i mplifyin g
the page by limiting the
number of graphics or
reducing the number and size
of fonts.
Replace Oil Roll No oil remain in the fuser oil r oll.
Replace it with a new fuser oil
roll.
Replace
Photocondctr
The photoconductor unit has
reached the end of its service
life. Turn off the printer, then
remove the photoconductor
unit and ins tall the new
photoconductor unit.
Replace Waste T
Box
The waste toner collector has
become full. Replac e it wit h a
new waste toner collector.
14
Page 15

Messages Description
Messages Description
Service req
eXXXX
XXXX:
Number is
indicated.
A controller error or a print
engine error has been
detected. Wri te down the er ror
number listed on the display
and turn of f the printer. Wait at
least 10 seconds and then turn
it back on. If this error still
occurs, turn of f the pri nte r,
unplug the power cord, and
contact a qualified service
person.
Turn Paper Paper is lo aded in the in correct
direction (you ma y hav e
loaded the paper short ed ge
first). Turn paper 90 degrees
and reload it (you need to
load paper the long-edge
first.)
Warning
Photocondctr
The photoconductor unit is
approachi ng the end of its
service life. Early replacement
is recommended to maintain
print quality.
Waste T Box
Nearfull
The waste toner collector is
almost full of toner. Early
replacem ent wi th the new
waste toner c ollector is
recommended.
Write Error DIMM
A
Wrong
Photoconductor
XXXX Toner Crtg
Out
XXXX:
Letter(s) of Y, M, C,
and/or K is
indicated.
XXXX Toner Low
XXXX:
Letter(s) of Y, M, C,
and/or K is
indicated.
XXXX Toner Out
XXXX:
Letter(s) of Y, M, C,
and/or K is
indicated.
This message indicates an
internal error in the printer.
Reset the printer. If this error
persists, consult your EPSON
dealer.
You have installed a
photocondu ctor not designed
for this printer. Turn off the
printer. Remove the
photoconductor unit and
install a photocondcutor unit
designed fpr your printer
(S051061).
Indicated (XXXX) toner
cartridge is not installed in the
printer . Inst all t he pr oper t oner
cartridge.
Little toner remains in the
indicated (XXXX) toner
cartridge(s). Early
replacem ent with the new
toner cartridge is
recommended.
There is no toner remaining in
the indicated (XXXX) toner
cartridge(s). Replace it with
the new to ner cartridge.
Copyright © 1998 by SEIKO EPSON CORPORATION, Nagano, Japan
15
Page 16

 Loading...