

Page 1

Page 2

Where to Find Information
Unpacking Guide
Provides you with information and instructions on how to
unpack and place the printer. Before using the printer, you need
to remove all protective materials as described in the instructions
contained in this guide.
Setup Guide (this manual)
Provides you with information on assembling the printer’s parts
and insta lling the printer’s software.
User's Guide
Provides you with de tailed info rmation o n the printer’s
functions, maintenance, troubleshooting, and technical
specifications.
Quick Reference
Provides you with information on replacing consumables,
clearing jammed paper, and a panel message list. This guide can
be hung on the printer with a hook provided.
Online Help
Provide you with detailed information and instructions on the
printer software that controls your printer (online help will be
automatically installed when you install the printer’s software).
Page 3

Æ
Color Laser Printer
All rights reserved. No part of this publication may be reproduced, stored in a retrieval
system, or transmitted in any form or by any means, mechanical, photocopying, recording,
or otherwise, without the prior written permission of SEIKO EPSON CORPORATION. No
patent liability is assumed with respect to the use of the information contained herein.
Neither is any liability assumed for dam ages resulting from the use of the in formation
cont a ined he rein.
Neither SEIKO EPSON CORPORATION nor its affiliates shall be liable to the purchaser of
this product or third parties for damages, losses, costs, or expenses incurred by purchaser
or third parties as a result of: accident, misuse, or abuse of this product or unauthorized
modifications, repairs, or alterations to this product, or (excluding the U.S.) failure to strictly
comply with SEIKO EPSON CORPORATION's operating and maintenance instructions.
SEIKO EPS ON CORPO RATION sh all no t be lia ble ag ainst an y dama ges or p roble ms aris ing
from the use of any options or any consumable products other than those designated as
Original Epson Products or Epson Approved Products by SEIKO EPSON CORPORATION.
EPSON is a registe red tradema rk of SEIKO EPSON CORPORATION.
Microsoft and Windows are registered trademarks of Microsoft Corpora tion in the United
States of America and other countries.
General Notice:
may be trademarks of their respective owners. EPSON disclaims any and all rights in those
marks.
Copyright © 1998 by SE IK O EPSON CORPORATION, Naga no, Japan
Other product names used herein are for identification purposes only and
Setup Gui de
Page 4

Declaration of Conformity
According to ISO/IEC Guide 22 and EN 4501 4
Manufacturer: SEIKO EPSON CORPO RA TION
Address: 3-5, Owa 3-chome, Suwa-shi,
Nagano-ken 392 Japan
Representative: EPSON EUROPE B.V.
Address: Prof. J. H. Bavincklaan 5 1183
AT Amstelveen
The Netherlands
Declares that the Product:
Product Name:Color Laser Printer
Model: YBB-1
Conforms to the following Directive(s) and Norm(s):
Directive 89/336/EEC:
EN 55022 Class B
EN 50082-1
IEC 801-2
IEC 801-3
IEC 801-4
Directive 73/23/EEC:
September 1998
H. Horiuchi
President of EPSON EURO PE B.V.
ii
EN 60950
Page 5

Contents
Safety Instructions . . . . . . . . . . . . . . . . . . . . . . . . . . . . . . . . .1
Safety Information. . . . . . . . . . . . . . . . . . . . . . . . . . . . . . . . . . . . . . .1
Laser Printer Precautions . . . . . . . . . . . . . . . . . . . . . . . . . . . . . . . . .5
Important Safety Instructions . . . . . . . . . . . . . . . . . . . . . . . . . . . . .8
ENERGY STAR Compliance . . . . . . . . . . . . . . . . . . . . . . . . . . . . . .10
For United Kingdom Us ers . . . . . . . . . . . . . . . . . . . . . . . . . . . . . . .10
Warnings, Cautions, and N otes. . . . . . . . . . . . . . . . . . . . . . . . . . . .11
System Requirements. . . . . . . . . . . . . . . . . . . . . . . . . . . . . . .12
For Windows 95/98. . . . . . . . . . . . . . . . . . . . . . . . . . . . . . . . . . . . . .12
For Windows NT 4.0 . . . . . . . . . . . . . . . . . . . . . . . . . . . . . . . . . . . . .13
Assembling the Printer . . . . . . . . . . . . . . . . . . . . . . . . . . . . .14
Installing the Expansion Tray . . . . . . . . . . . . . . . . . . . . . . . . . . . . .14
Installing the Face-Up Tray . . . . . . . . . . . . . . . . . . . . . . . . . . . . . . .15
Installing the Ton e r Cartridges . . . . . . . . . . . . . . . . . . . . . . . . . . . . 17
Installing the Photoconductor Unit . . . . . . . . . . . . . . . . . . . . . . . .22
Installing the Fuser Oil Roll . . . . . . . . . . . . . . . . . . . . . . . . . . . . . . .25
Installing the Options . . . . . . . . . . . . . . . . . . . . . . . . . . . . . .29
Installing the 250 Sheet Lower Paper Cassette Unit (A3W) . . . .29
Installing the Large Capacity Paper Unit. . . . . . . . . . . . . . . . . . . .31
Precautions before installing. . . . . . . . . . . . . . . . . . . . . . . . . .31
Unpacking and remo vin g th e p rotective materials. . . . . . .32
Installing the unit on the printer . . . . . . . . . . . . . . . . . . . . . .34
Installing Memory Modu le . . . . . . . . . . . . . . . . . . . . . . . . . . . . . . .39
Installing the ROM Modu le . . . . . . . . . . . . . . . . . . . . . . . . . . . . . . .43
Installing an Interface Card . . . . . . . . . . . . . . . . . . . . . . . . . . . . . . .4 7
iii
Page 6

Plugging in the Pr inter . . . . . . . . . . . . . . . . . . . . . . . . . . . . . 50
Testing the Printer . . . . . . . . . . . . . . . . . . . . . . . . . . . . . . . . . . . . . . 51
Loading paper . . . . . . . . . . . . . . . . . . . . . . . . . . . . . . . . . . . . . 51
Printing a status sheet. . . . . . . . . . . . . . . . . . . . . . . . . . . . . . . 51
Connecting to the Compu ter . . . . . . . . . . . . . . . . . . . . . . . . . . . . . 53
Installing the Printer Software . . . . . . . . . . . . . . . . . . . . . . 54
For All Windows Users . . . . . . . . . . . . . . . . . . . . . . . . . . . . . . . . . . 55
Installing EPSON Font Manager. . . . . . . . . . . . . . . . . . . . . . 57
For DOS programs . . . . . . . . . . . . . . . . . . . . . . . . . . . . . . . . . . . . . . 58
Making Basic Printer Settings. . . . . . . . . . . . . . . . . . . . . . . . . . . . . 5 9
For Windows 95/98 U ser s . . . . . . . . . . . . . . . . . . . . . . . . . . . . . . . 60
Using your printer on a network . . . . . . . . . . . . . . . . . . . . . 60
Setting the installed option . . . . . . . . . . . . . . . . . . . . . . . . . . 62
For Windows NT 4.0 U sers . . . . . . . . . . . . . . . . . . . . . . . . . . . . . . . 64
Using your printer on a network . . . . . . . . . . . . . . . . . . . . . 64
Setting the installed option . . . . . . . . . . . . . . . . . . . . . . . . . . 66
Accessing Online Help. . . . . . . . . . . . . . . . . . . . . . . . . . . . . 69
Accessing from the Windows Printer Driver . . . . . . . . . . . . . . . . 69
Accessing from Window s Applications . . . . . . . . . . . . . . . . . . . . 69
Printing with Windows . . . . . . . . . . . . . . . . . . . . . . . . . . . . 70
Starting to print. . . . . . . . . . . . . . . . . . . . . . . . . . . . . . . . . . . . . . . . . 70
Cancelling to Print . . . . . . . . . . . . . . . . . . . . . . . . . . . . . . . . . . . . . . 72
iv
Page 7

Safety Instructio ns
Safety Information
Laser safety
This printer is certified as a Class 1 laser product under the U.S.
Department of Health and Hu ma n Services (DHHS) Radiation
Performance Standard according to the Radiation Control for
Health and Safety Act of 1968. This means that the printer does
not produce hazardous laser radiation.
Since radiation emitted by the laser is completely confined within
protectiv e housing s a nd external covers, the laser be am cannot
escape from the machine during any phase of user operation.
For European users
United Kingdom
The EPSON ColorPage EP L-C8000 is a page pr inter which utilizes
a semiconducto r laser.
There is no possibility of danger from the laser, provided the
printer is operated ac cording to the instr u ctions in t he guides
provided.
Since radiation emitted by the laser is completely confined within
protective housings, the laser beam cannot e scape from the
machine during any phase of user operation.
Warning:
w
Use of controls or adjustments or perfo rm ance of proc edures oth er
than those specified in this guide, may result in hazardous radiation
exposure.
Safety Instructions
1
Page 8

This is a semiconductor laser. The maximum power of the laser
diode is 5.0 ×
CDRH regulations
The Center for Devices and Radiological Health (CDRH) of the
U.S. Food and Drug Administrati on implemented regulations for
laser products on August 2, 1976. Compliance is mandatory for
products marketed in the United States. The label shown below
indicates compliance with the CDRH re gulations and mus t be
attached to laser products marketed in the United States.
10-3 W and the wavelength is 785 + 10/-15 nm.
Laser safety labels
Warning:
w
2
Safety Instructions
Use of controls, adjustments, or performance of procedures other
than those specified in th is guide may result in hazardous
radiation exposure.
Page 9
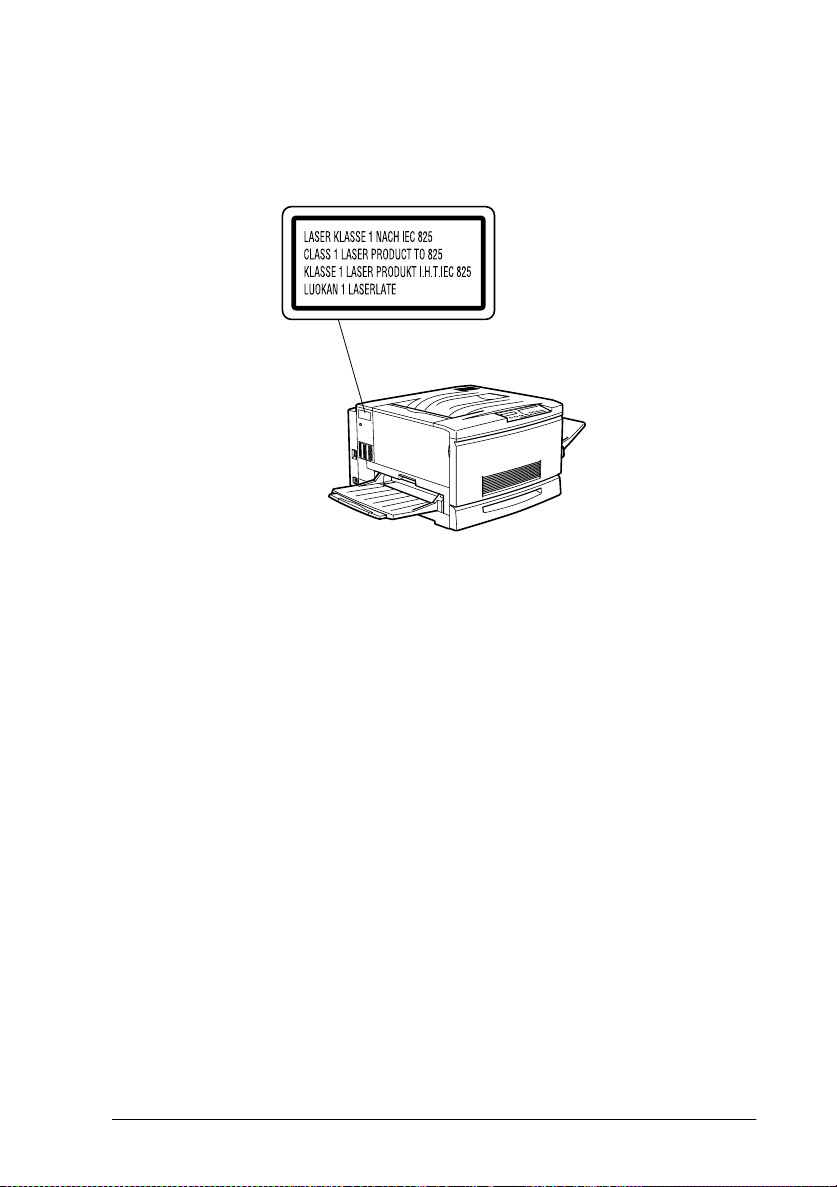
Your printer is a Class 1 laser product as defined in IEC 825
specifications. The label shown below is attached in countries
where required.
Internal laser radiation
Max. Radiation Power 5.0 ×
-3
0
1
W
Wave Length
785 + 10/-15 nm
This is a Class IIIb Laser Diode Assembly that has an invisible
laser beam. The printer head unit is NOT A FIELD SERVICE
ITEM. Therefore, the printer head unit should not be opened
under any circumsta nces.
Ozon e safet y
Ozone emission
Ozone gas is generated by laser printers as a by- p roduct of the
printing process. Ozone is produced only when the printer is
printing.
Safety Instructions
3
Page 10

Ozone exposure limit
The print engine shall not exceed 0.02 ppm ozone concentration
TWA (Time Waited Average).
Minimize the risk
To minimize the r isk of ex posure to ozone, you should av oid the
following conditions:
❏ Use of multiple las er printers in a confined are a (see above)
❏ Operation in conditions of extremely low humidity
❏ Poor room ventilation
❏ Long, continuous printing together with any of the above
Printer lo cation
The printe r should be lo cated so that th e exhaust gases and heat
generated are:
❏ Not blown directly into the user's face
❏ Vented directly out of the building whenever possible
4
Safety Instructions
Page 11
Laser Printer Precautions
This printer uses laser technology. The following list of
precautions applies whenever you use the laser printer.
Even if you are familia r with other type s of printers, be sure
to follow these precautions carefully to ensure safe, efficient
operation.
❏ Because the print er weighs approximately 70 kg (154 l b), you
should not lift or carry it b y yourself. Four people should carry
it, lifting from the correct position. Refer to the instructions in
Unpacking Gu ide.
❏ Be careful not to touch the fuser, which is marked CAUTION!
HIGH TEMPERATURE. If the printer has been in use, the
fuser can be very hot.
CAUTION! HIGH TEMPERATURE
❏ Avoid touchin g the comp onents inside the printer unless
instructe d to do so in this guid e.
❏ Never force the printer's components into place. Although the
printer is designed to be sturdy, rough handling can damage
it.
❏ When handling the toner cartridges, always set it on a clean,
smooth surface.
Safety Instructions
5
Page 12
❏ Do not attempt to modify or take apart the toner cartridge. It
cannot be refilled.
❏ Try not to touch the toner and avoid all contact with your eyes.
❏ Do not d ispose of the used ton e r cartridges, fuser oil roll, or
waste toner collecto r in fire, as they can explode and cause
injury. Dispose o f them acco rding to lo cal regul ations.
❏ Do not use a toner cartridge for at least one hour after moving
it from a cool to a warm environment.
❏ Keep the f u ser oil roll horizonta l at all tim es. Do not ti lt it or
place it against something, as it can cause oil leakage and
reduce print quality.
❏ When removing the photoconductor unit, avoid exposing it
to room light any longer than necessary. The unit contains a
light-sensitive drum, which is the green cylinder that can be
seen thr ough the openings to the unit. Ex posure to light can
damage the drum, causi ng dark or light a re as to appear o n
the printed page and reducing the service life of the drum. If
you need to keep the unit out of the printer for long periods,
cover it with an opaque cloth.
6
Safety Instructions
Page 13

❏ Be sure no t to scratch the surfa ce of the drum. When you
remove the photocondu ctor unit fr om the printer , always set
the unit on a clean, sm ooth s urf ace. Al so, a void touc hing the
drum, since oils from your skin can permanently damage its
surface and may affect print quality.
❏ To get the best print quality, do not store the photoconductor
unit in an area subject to direct sunlight, dust, salty air, or
corrosive gasses (such as ammonia). Avoid locations subject
to extremes or rapid changes of heat or humidity. Also, be
sure to keep the consumable components out of the reach of
children.
❏ Do not leave jammed paper i n the printe r. It can cause the
printer to over heat.
Hinweis:
Die Geräteanschlußleitung muß den einshlägigen Normen genügen.
Es muß eine dreiadrig e Leitung verwend et we rden.
Die Anshlußleitung darf nicht leichter als H05VV-F order H05VVH2-F
sein.
Maschinenlärminformations-Verordnung-3. GSGV, 18. 01. 1991: Der
arbeitsplatzbezogene sc h alldruckpegel beträgt 70 dB (A) oder weniger
gemäß ISO 7779.
Safety Instructions
7
Page 14

Important Safety Instructions
Read all of these instructions before operating your printer.
❏ Follow all warnings and instructions marked on the printer.
❏ Unplug th is printer from the wall outlet before cle aning.
Use a damp cloth for cleaning and do not use liquid or aer osol
cleaners.
❏ Do not us e this printer near water.
❏ Do not place the printer on an unstable cart, stand, or table.
❏ Slots and openings in the cab in et and t he back or b ottom are
provided for v e ntila ti on. Do not bloc k or cov er t hem. Do not
put the printer on a bed, sofa, rug, or other similar surface or
in a built-in install ation unless proper ven tilation is provid ed.
❏ Use the type of power source indicated on the label. If you are
not sure of the type of p ower available, c onsult your dealer or
local power company.
❏ If you are unable to insert the plug into the outlet, contact your
electrician.
❏ Do not put your printer where the cord will be walked on.
❏ Avoid using outlets that other appliances are plugged into.
❏ Only use an outlet that meets the power requirements of this
printer.
❏ Never push objects of any kind th rough c abinet sl ot s as th ey
may touc h dangerous voltage points or s hort out parts that
could res u l t in fire or electric shock.
❏ Never spill liquid of any kind on the printer.
8
Safety Instructions
Page 15

❏ Except as specifica lly ex plain ed i n this g uide, d o not att empt
to service this product yoursel f. Openin g or removing those
covers that ar e marked “ Do Not Re move” may ex pose you to
dangerous voltage points or other risks. Ref er all s ervicing in
those compartments to service personnel.
❏ Unplug the printer a nd refer servicing to qua l ified service
personnel under the following conditions:
If t he po wer cord or plug i s d amage d; i f l iquid has en tered the
printer; if t he printer ha s be en dropped or the cabi net
damaged; if the printer does not operate normally or exhibits
a distinct change in performanc e. Adjust only those c ontr ols
that are co vered by th e operatin g instructions.
❏ If you plan to use the printer in Germany, observe the
following:
To provide adequate short-circuit protection and overcurrent protection fo r this printer, the buildin g installation
must be protected by a 16 Amp circuit breaker.
Bei Anschlu
sichergestellt werden, daß die Gebäudeinstallation mit einem 16
A-Überstromschalter abgesichert ist.
ß des Druckers an die Stromversorgung muß
Safety Instructions
9
Page 16

NERGY STAR Compliance
E
As an Internationa l
EPSON has determined that this pr oduct meets the
International
for energy efficiency.
The International ENERGY STAR Office Equipment Program is
a voluntary partnership with the computer and office equipment
industry to promo te the introduct ion of energy-effi cient person al
computers, monitors, printers, fax machines, copiers, and
scanners, in an effort to redu ce air polluti on caused by power
generatio n.
E
E
NERGY STAR Partner,
NERGY STAR Program guidelines
For United Kingdom Users
Use of options
Epson (UK) Limited shall not be liable against any damages or
problems arising from the use of any options or consumable
products other than those designated as Original EPSON
Products or EPSO N Appr oved P rod uct s b y Eps on (UK ) Lim it ed.
Safety information
Warning:
for voltage and check that the appliance voltage corresponds to
the supply voltage.
Important:
in accordance with the following code:
Green and yellow—Earth
Blue—Neutral
Brown—Live
10
Safety Instructions
This appliance must be earthed. Refer to rating plate
The wires in the mains lead fitted to this appliance are coloured
Page 17

If you need to fit a plug:
As the colours of the mai ns lead of this appliance may not match any
coloured markings used to identify the terminals in a plug, please proceed
as follows:
❏ The green and yellow wire must be connected to the terminal
in the plug which is marked with the l etter E or the Earth
symbol (
❏ The blue wire must be connected to the te rminal in the plug
marked wi th the letter N .
❏ The brown wire must be connected to the terminal in the plug
marked wi th the letter L.
If damage occurs to the plug, re place the cord set or co nsult a
qualified electrician.
Replac e f uses only with a fuse of the co rrect size a nd rating .
G
).
Warnings, Cautions, and Notes
Warnings
must be followed carefully to avoid bodily injury.
w
Cautions
must be observed to avoid damage to your equipment.
c
contain important information and useful tips on the operation of
Notes
your printer.
Safety Instructions
11
Page 18

System Requirements
To use your printer with a PC, you need MicrosoftWindow s95,
98, or Windows NT
4.0; and a shielded, twisted-pair parallel
cable.
To install and use the printer software (printer driver and utiliti es)
included on the CD-ROM or floppy disk packed with your
printer, your system should meet the following requirements:
For Windows 95/98
Operating system: Windows 95 or Windows 98
Minimum system Recommended system
i486/25 MHz for Windows 95
i486/66 MHz for Windows 98
16MB RAM 32MB RAM or more
10MB hard disk space 50MB or more free disk space
600 pixel monitor Gr e a ter tha n 80 0 × 600 pixel monitor
800
×
Note:
Depending on the size of yo ur printer data, you may need mo re memory
and hard disk space than above.
Pentium or higher processor
12
System Requirements
Page 19

For Windows NT 4.0
Operating system: Windows NT 4.0
Minimum system Recommended system
i486/25 MHz Pentium or higher processor
16MB RAM 64MB RAM or more
20MB hard disk space 100MB or more free disk space
600 pixel monitor Greater than 800 × 600 pixel monitor
800
×
Note:
Depending on the size of your printer data, you may need more memory
and hard disk space than above.
System Requirements
13
Page 20
Assembling the Printer
Before as sembling the printer, make sure that all protective
materials packed around and inside your printer are removed.
Follow the instructions in the Unpacking Guide to remove these
materials .
Installing the Expansion Tray
The expansion tray is used for the wide-size paper setting. To
install the expansion tray on the right side of the printer, follow
the instructions below.
1. Hold the e xpansion tra y vertical ly. Then insert its right leg
into the ho llow of the M P tray to fi t the pin on the leg to the
hole on the MP tray. Make sure the gears of both trays fit
properly.
.
14
Assembling the Printer
Page 21

2. While holding th e expansion tray ver tically, insert the le ft l eg
into the MP tray until the pin clicks in the hole on the MP tray.
Installing the Face-Up Tray
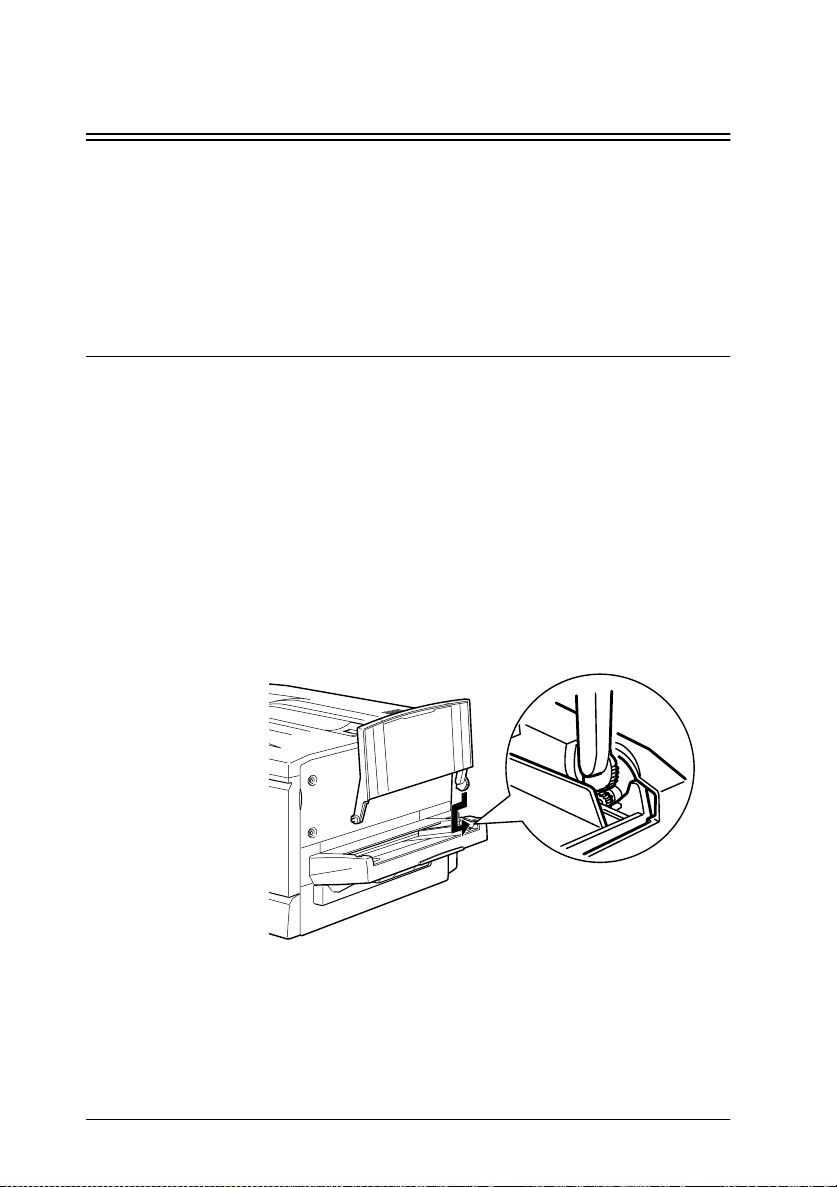
Install the face-up tra y to the left side of th e printer as f ollows:
1. Locate the output slot on the left side of the printer.
2. Squeeze the metal spring on the right side of the face-up tray
so that the end of the spring is folded down against the tray.
(as shown in the illustration below)
Assembling the Printer
15
Page 22
3. Insert the plastic mounting pin on the right side of the
face-up tra y into the c orresponding hole inside the output
slot.
4. Insert the left mountin g pin on the face-u p tray into the hole
on the left side of the output slot.
16
Assembling the Printer
Page 23
5. Release the spring so that the end rests against the outer case
of the printer as shown in the illustration below.
Caution:
c
Do not insert the metal spring into the output slot or any holes
in the printer case. Doing so may damage the face-up tray or your
printer.
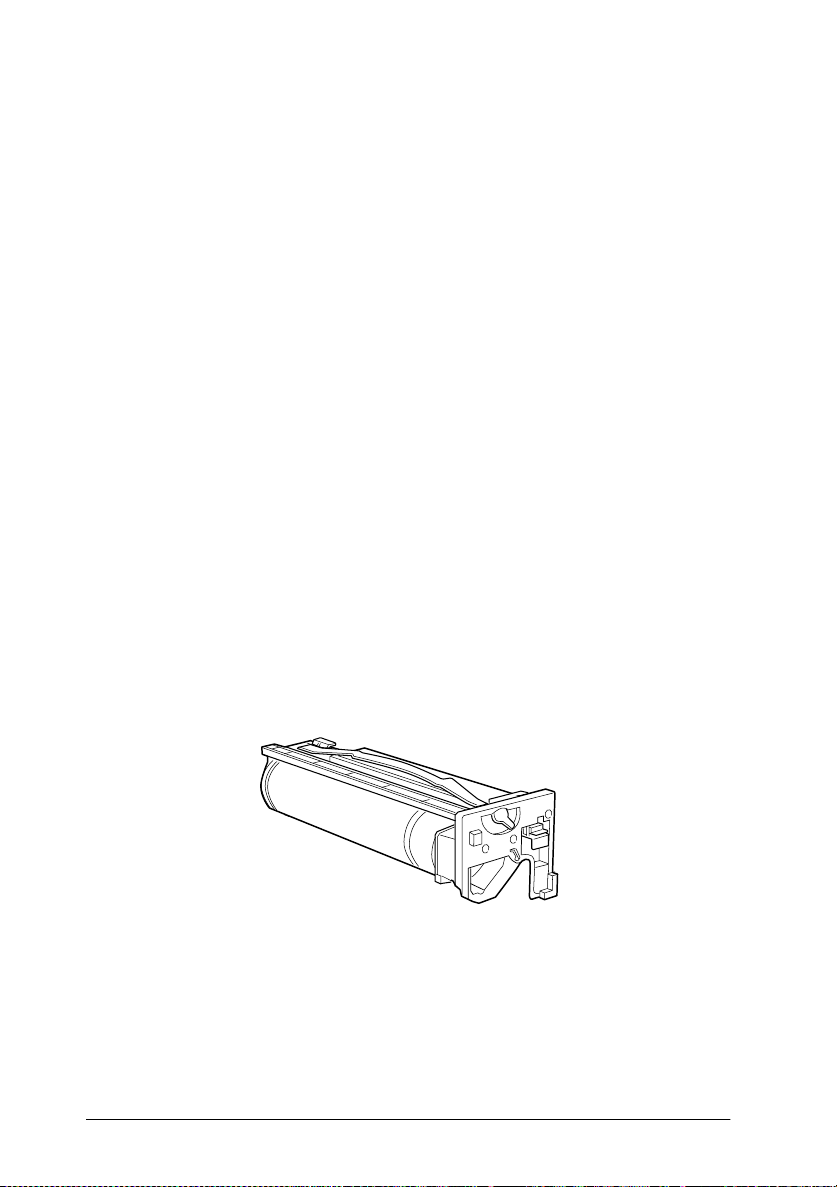
Installing the Toner Cartridges
You need to install fo ur cartri dges in the pri nter.
Note:
❏
If the toner gets on your skin or clothes, wash it off with soap and
water immediately.
❏
Do not install a cartrid ge for at least on hour after moving it from
a cool to a warm environment.
Assembling the Printer
17
Page 24
1. Open the front cover.
2. Check which color appears in the cartridge installment
window and prepar e a cartridge with the same color.
Black
Yellow
18
Assembling the Printer
Cyan
Magenta
Page 25
3. Take the cartridg e out of the pack age and gently shake i t back
and forth an d from front to back a s shown below to distribut e
toner evenly.
4. Hold the cartridge the arrow side up. Insert it all the way into
the cartridge slot.
Assembling the Printer
19
Page 26
5. Turn the cartridg e knob clockwise 90 degrees so that the
symbol on the knob is in the positi on shown below. By turning
the knob, the cartridge is pressed into the slot and installed
completely.
Caution:
c
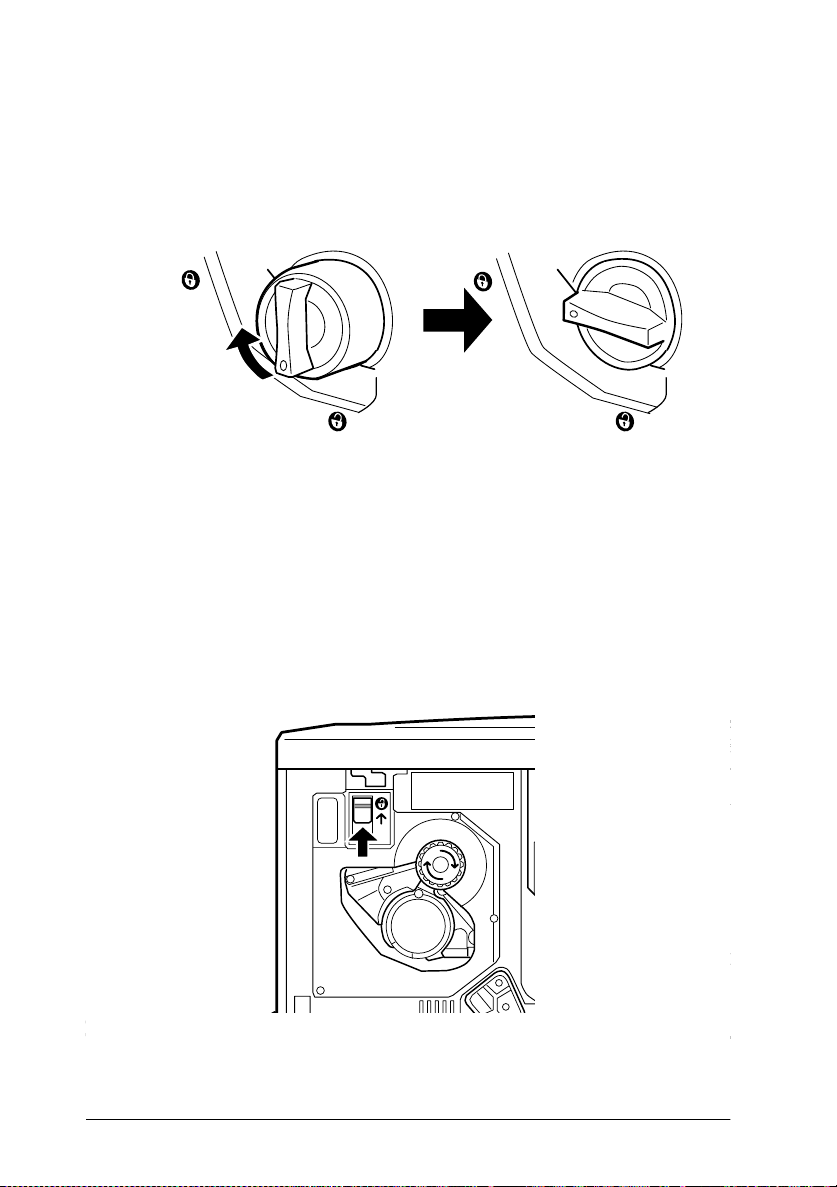
6. Push the switch located a t the upper left up, then release it.
Make sure to turn the knob all the way to the setting position;
otherwise, you may have toner problems or leakage.
O
20
Assembling the Printer
Page 27

7. Turn the round knob located just abo ve the insta llment
window clockwise until it stops. The switch drops down to
lower pos ition automatically and the ne xt cartridge slot
appears in the installation window.
Note:
If the knob can not be moved, first check if the switch is in the upper
position. Do not turn the knob by force.
8. Install the cartridges as described steps 2 to 7 (for the last
cartridge, you do not need step 7).
9. See the next section for instructions on how to install the
photoconductor unit.
Assembling the Printer
21
Page 28

Installing the Photoconductor Unit
Before installi ng the fuser oil roll, read the fol lowing precaut ions:
❏ When installing the photoconductor unit, avoid exposing it
to room light any longer than necessary.
❏ Be sure not to scratch the surface of the drum. A lso avoid
touching the drum, since oils from your skin can permanently
damage its surface and may affect print quality.
To install the photoconductor unit:
1. Open the front cover.
2. Turn the large lever counte rclockwise 90 d egrees.
22
Assembling the Printer
Page 29

3. Take a photoconductor unit out of its pac kage and remove the
protective sheet by holding the handle as shown below.
Caution:
c
4. Hold the handle on top of the pho toconductor unit and plac e
the unit on the guide rails. Insert it all the way into the printer.
Be sure not to touch or scratch the su rface of the drum.
Assembling the Printer
23
Page 30

5. Turn the small l e ve r on the photocond uctor unit to the left.
6. Turn the large lever clockwise 90 degrees.
24
Assembling the Printer
Page 31

7. Close the front cover.
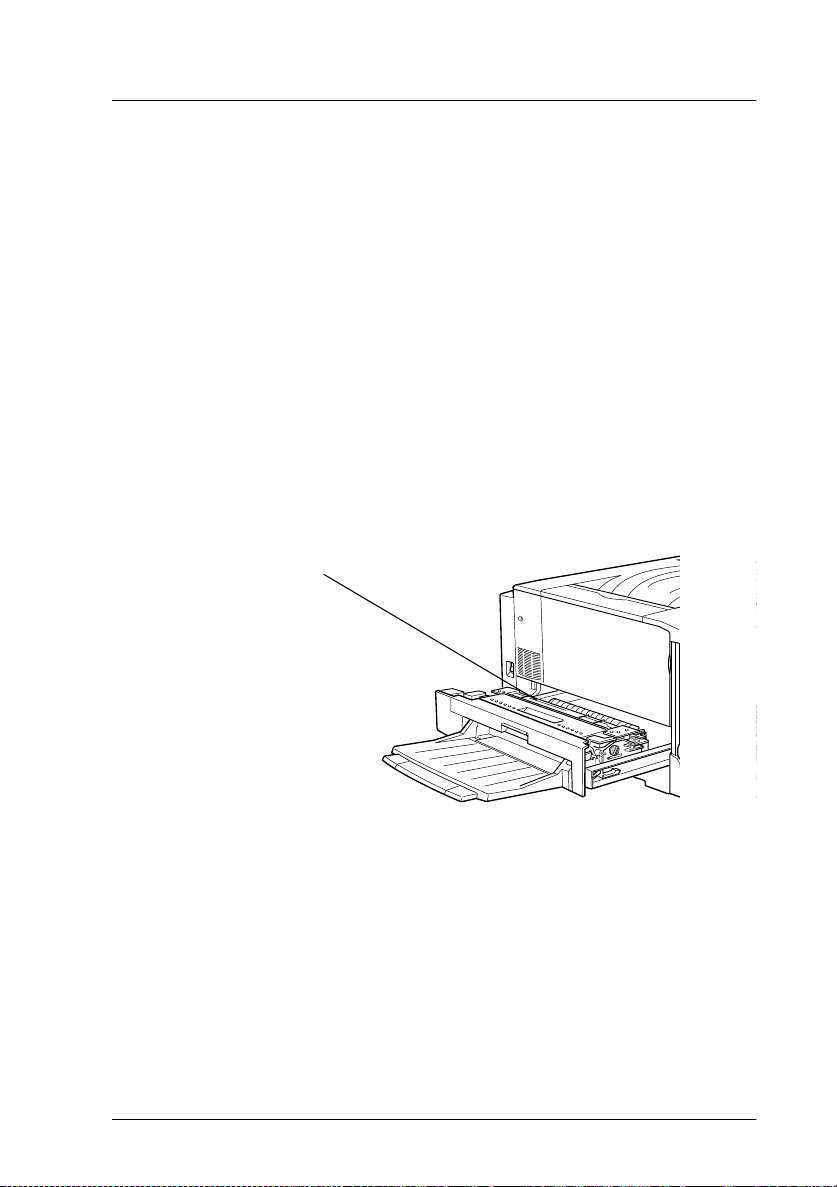
Installing the Fuser Oil Roll
Before installing the fu ser oil r oll, read the fol lowing precaut ions:
❏ Do not t ouch the w hite roll surface.
❏ If the oil gets your skin or clothes, wash it off immediately.
❏ The roll should b e always k ept horizontally. Do not tilt or
place it against something. It can cause oil leakage and
reduced print quality.
Assembling the Printer
25
Page 32

To install the fuser oil roll, follow the steps below:
1. Pull do wn the face up tray.
2. Hold the handle of the fuser unit and pull it all the way out.
.
3. Take the fuser oil roll from the box and remove the cover and
two pins as shown below:
Note:
Do not touch the white roll surface.
26
Assembling the Printer
Page 33

4. Hold the roll handle and insert it into the fuser unit matching
the green marks on the roll and unit.
5. Push the roll down firmly until it clicks into place.
Assembling the Printer
27
Page 34

6. Push the fuser unit into th e printer until it clicks.
28
Assembling the Printer
Page 35

Installing the Options
If you purchased any options with the printer, install them before
plugging in the printer .
Installing the 250 Sheet Lower Paper Cassette Unit
(A3W)
This cassette is designed for A3W size paper only. You can load
up to 250 sheets.
1. Remove the protective mate rials from the cass ette.
Installing the Options
29
Page 36

2. Pull the printer’s lower paper cassette unit all the way out and
remove it by lifting up.
3. Put both legs of the optional lower paper cassette unit (A3W)
on the printer’s slot guide, then insert it into the printer. Push
the cass e tte unit al l the way in .
.
30
Installing the Options
Page 37

Installing the Large Capacity Paper Unit
The optional large capacity paper unit has three paper cassettes.
Note:
The optional lower paper cassette unit (C81302✽) cannot be mo unted
on the lar ge capaci ty pa per un it. I f you tr y it, the uni ts may be d amaged.
Precautions before installing
Before installing the large capacity paper unit, read the following
precautions:
❏ Two or more people shoul d carry this unit because it s weighs
approximately 24 kg (53 lb).
❏ When installing this unit with the printer, lock all casters at
the bottom of the unit . Al so when you do not nee d to move
the unit (with the printer), lock all c asters. Otherwise, t he unit
may cause an acciden t.
❏ Four people should lift the printer to install the unit because
the printer weighs approximately 70 kg (1 54 lb). Make sure t o
lift it from the correct position as follows:
2
1
3
4
If you lift the printer improperly, it can fall and injure you.
Installing the Options
31
Page 38

Unpacking and removing the protective materials
1. Open the box that c ontains the unit. Have two or m ore people
lift the unit.
Lift with these bars
Caution:
c
2. Pull out the top cassette and remove the protective materials
in the following order: 1) car dboard, 2) foam material, 3) tape
and plastic material. Then remove the cassette from the unit
by gently lifting it up.
Two or more people sh ould lift the unit because it we ig h s
approximately 24 kg (53 lb).
32
Installing the Options
Page 39

3. For the middle and lower cassettes, remove the protective
materia ls in the same way as in step 2. Then remove the
casset tes from the unit.
4. Remove the two pieces of cardboard from the inside of the
unit.
5. Return the cassettes to the unit. Lift the cassettes slightly to
slide onto the guide-rails, then pu sh the casset tes all the way
into the unit.
Installing the Options
33
Page 40

Installing the unit on the printer
1. Lock the casters at the bottom of the unit.
Caution:
c
2. Remove the face up tray located on the left side of the printer
and fold up the expansion tray located on the right side of the
printer.
You should lock all cast ers before installing. Otherw ise the
unit may move and cause an accident.
34
Installing the Options
Page 41

3. Lift the pri nter up.
Caution:
c
Four people should lift the printer from the correct positions
as shown be low:
1
3
2
4
Installing the Options
35
Page 42

4. Keep the printer horizontal. Put it down softly on the unit so
that the t hre e pins on t op the unit of fit into the holes on the
bottom of the printer.
Note:
To fit the pins and holes easily, match the front and side of the printer
and the unit cases.
5. Remo ve the top cassette from th e unit.
36
Installing the Options
Page 43

6. Tighten two screws on the upper side of the unit to secure the
printer and unit.
7. Retu rn the top cassette t o the unit.
8. Open the cover at the back of the unit, then re move the
connecto r cover at the back of the pri nter by sliding it down.
Installing the Options
37
Page 44

9. There are two sets of cables and connectors. Be sure that the
connector size is different between the two connectors. Check
the connector size first and connect each cable to the samesize connector.
10. Attach the cables on the left side and close the cover of the
unit to hold the cables down. Then attach the connector cover
on the printer.
38
Installing the Options
Page 45

Installing Memory Module
You can increase printer memory up to 256 MB (including printer
default 64 MB) by installing the optional DIMM (Dual In-line
Memory Module). This printer has two slots for the optional
DIMMs.
You can purchase DIMMs from various vendors. Be sure to meet
the following requirements:
DRAM type Synchronous Dynamic RAM Double In -line
Capacity 32MB, 64MB, or 128MB
Type 168-pin type, 64 bit, with SPD
Access speed 66.66 MHz or higher (15 ns or less)
Height Less than 40 mm
Caution:
c
w
Before you install the m odule, be sure to discharge any sta tic
electricity by touching a grounded piece of metal. Otherwise, you
may damage static-sensitive comp onents.
Warning:
Be careful when working inside the printer as some pieces are
sharp and may cause injury.
Memory Module (SD RAM DIMM)
Installing the Options
39
Page 46

1. Open th e printer cover a nd pull out the pa per path unit a t
least 10 cm (4 inches).
2. Rem ove the sc re ws on the right side cover.
40
Installing the Options
Page 47

3. Open the front side of the right cover side until the pin on the
cover comes out the hole. Then remove the cover by sliding it
back.
4. Check the position of the slots for optional DIMMs.
Caution:
c
You should not remove any modules from the circuit board.
If you remove them, the printer will not work.
Installing the Options
41
Page 48

5. Insert the modul e into the slot straigh t (e i ther slot is OK) as
shown below. The clips on the slot fasten the DIMM when it
is inserted correctl y.
Caution:
❏
c
6. To replace the right cover; first insert the cover’s hook in the
slot at the back side of the pri nter, then close the front side
making s ure to fit th e cover pin to the printer hole.
Do not apply force when insert ing the DIMM.
❏
Make sure to insert the DIMM facing the correct way.
42
Installing the Options
Page 49

7. Secu re the cover with the screws. Close the front cover and
the paper p ath unit.
Installing the ROM Module
In some locations, there are optional ROM modules that can
expand your printer’s fea tures.
Caution:
c
Before you install the m odule, be sure to discharge any sta tic
electricity by touching a grounded piece of metal. Otherwise, you
may damage static-sensitive comp onents.
w
Warning:
Be careful when working inside the printer as some pieces are
sharp and may cause injury.
Installing the Options
43
Page 50

1. Open th e printer cover a nd pull out the pa per path unit a t
least 10 cm (4 inches).
2. Rem ove the sc re ws on the right side cover.
44
Installing the Options
Page 51

3. Open the front side of the right cover side until the pin on the
cover comes out the hole. Then remove the cover by sliding it
back.
4. Check the position of the slots for a ROM module.
Caution:
c
You should not remove any modules from the circuit board.
If you remove them, the printer will not work.
Installing the Options
45
Page 52

5. Insert the module all the way into the slot A, making sure that
the gold contact side of the module should be lower. The X
tab at the bottom of the sl ot will jut o ut when the module is
inserted correctly.
Caution:
❏
c
6. To replace the right cover; first insert the cover’s hook in the
slot at the back side or the printer, then close the front side
making s ure to fit th e cover pin to the printer hole.
Do not apply force w he n inserting the module.
❏
Make sure to insert the module facing the correct way.
46
Installing the Options
Page 53

7. Secu re the cover with the screws. Close the front cover and
the paper p ath unit.
Installing an Interface Card
Follow the steps below to install an optional interface card.
Caution:
c
Before you install the in terfa c e card , be sure t o disc h arge any
static electricity by to uc hing a grounded piece of metal.
Otherwise, you may d am age static-sensitive comp onents.
1. Be sure to set any switches and jumpers on the card, as
necessary. See the interface card’s manual for details.
Installing the Options
47
Page 54

2. Remove the screws from the shield plate on the back of the
printer and re move the plate.
Note:
❏
You can install the ca rd to either slot.
❏
Store the shield plate in a safe place; you will need to reattach it
if you remove the interface card later.
3. Slide the interface card along the slots on both sides of the
interface compartment. Push the card in firmly to make sure
the connector at the back of the interface card is fully inserted
into the pri nter’s internal sock et.
48
Installing the Options
Page 55

4. Rep lace the two screws and tighten the m.
Installing the Options
49
Page 56

Plugging in the Printer
1. Check the label on the left side of t he printer to make sure the
voltage required by the printer matches that of the electrical
outlet it will be plugged into. Also, make sure that you have
the correc t power cable for your po we r source.
Caution:
c
2. Make sure the printer is turned off. It is off whe n the
of the power switch on the left side of the printer is pushed in.
It is not possible to chan ge th e p r inter’s voltage. If the
required voltage and your ou tlet volt age d o not match,
contact your dealer for assistance. Do not plug in the power
cord.
N
side
3. Connect the power cord to the AC inlet on the left side of the
printer.
4. Plug the power cord into a properly grounded electrical
outlet.
50
Plugging in the Printer
Page 57

Testing the Printer
To test whether the printer is set up correctly, print a status sheet.
The status sheet contain s information about the pri nter, including
the current settings. Follow the steps below.
Loading paper
1. Fan a stack of A4 or Letter-size paper; then tap it on a flat
surface to even the edges.
2. Make sure to load paper into the MP tray long edge first. Load
the stack of paper with the printable surface up and left edge
of the paper resting against the left paper guide of the MP tray.
Then slide the right paper guide against the right edge of the
paper.
Printing a status sheet
1. Turn the power swi tch at the left side of the printer on. The
lights and the di splay messages are c hanged in the fol lowing
order:
All lights come on once and then turn off. The disp lay shows
ROM check.
Plugging in t h e Pr inter
51
Page 58

The disp lay sh ows RAM check XXXMB, with the actual memory
size of your printer, including the memory size of optional
memory module if installed, is displayed in place of XXX.
The disp lay sh ows SelfTest then shows Warming Up. The
Line
light comes on.
After about five m inutes, th e display shows Ready.
2. Press the
3. Press the
flashing and the prin te r start printing the status sheet.
4. Check the following points in the printed status sheet:
❏ The printer can print the status sheet clearly.
❏ The information on the options installed to the printer is
Note:
If you installed an optional memory module,
shows the total size including both default 64MB and optional
module’s size. However, if you installed two 128MB-DIMMs, the
status sheets shows 256 MB because the maximum memory size for
this printer is 256 MB.
Enter
button. The display shows Status Sheet.
Enter
button again. The message on the display start
printed correctly. If you can find the installed option’s
name under
that the printer can recognize t he installed option
properly.
Hardware Configurations
Installed Memory
title, it means
On
If the printer cannot print the status sh eet or you find any proble m
with the printing re sult of the status sheet, contact your dealer.
52
Plugging in the Printer
Page 59

Connecting to the Computer
To conne ct your computer to your printer’s built-in parallel
interface, you need a shielded, twisted-pair parallel cable with
IEEE-1284 compatible.
Note:
If you installed the op tio nal interface card, you need a different type of
the cable. Check the optional interface card’s documentation.
1. Make sure both the printer and the computer are off.
2. Plug the cable co nnector se curely into the printe r’s interface
connector, and squeeze the wire clips together until they lock
in place on both sides of the connect or.
Note:
If your cable has a ground wire, connect it to the printer’s ground
connector as shown below .
3. Plug the other end of the cable into the computer. (If the cable
has a ground wire at the computer end, attach it to the ground
connecto r at the back of the comp ute r.)
After you conne ct th e pr inte r to your compu ter, inst all the print er
driver software as described in the next section.
Plugging in t h e Pr inter
53
Page 60

Installing the Printer Software
After connecting the printer to your computer, install the printer
softwa re . It is included on the “Printer Software for EPSON
EPL-C8000” CD-ROM shipped with your printer.
Your printer software includ e s:
❏ Printer driver
The printe r driver gives you complete control over your
printer w ith the Micro soft
operating systems. With it, you can make settings such as
print quality, color setting, and paper size.
❏ EPSON Status Monitor 2 utility (for Windows 95 and 98)
The EPSON Status Monitor 2 allows you to view printer status
information such as the amount of toner remaining and check
for any prin te r errors.
❏ EPSON Font Manager
The EPSON Font Manager provides you 31 printer fon ts and
65 software fonts.
®
Window s® 95, 98 or NT® 4.0
❏ Online help
Online h elp gives you inst ant on-screen acce ss to detailed
information and instructions on printer setti ngs.
Note:
❏
If you wish to mak e a fl o ppy di sk v ersi on of the pri n ter s o ftwa re o n
your CD-ROM, you can use the driver disk creation utility included
on the CD.
❏
If you are running DOS, you must use a driver other than the one
included with the printer. See p age 5 8 .
54
Installing the Printer Software
Page 61

For All Windows Users
Follow these steps to install the p rinter driver for Windows 95, 98
or NT 4.0.
Note:
Installing the printer driver for Windows NT 4.0 may require network
administration privileges. Ask your network administrator fo r m ore
information.
1. Make sure the printer is off and Wi ndows i s running.
2. Insert the CD-ROM that comes with your prin ter into your
CD-ROM drive (this is usually drive D).
3. Click
4. Type
Start
, then choose
D:\EPSETUP
Run
.
; then click OK (if the CD-ROM drive letter
is not D, substitute the appropriate driv e letter).
5. In the dialog box that appears, double-click
Driver/Utility
Driver/Utility
Double-click
here to install.
Double-click
here to make a
floppy dis k
version of the
printer
software.
; or you can also inst all by selecting
and then clicking the arrow on the top right.
Install Printer
Install Printer
Click here to
quit.
Click here to
get help.
Installing the Printer Software
55
Page 62

If this dialog box does not appear, double-click the
Computer
If this dialog box appears, double-click
Utility
icon, then double-click the CD-ROM drive icon.
Install Printer Driver/
.
My
If this dialog box still does not appear, double-click the
Setup.exe
icon. Yo u may need to use the arrows to sc roll
through the folder to find it.
6. In the dialog box that appears, select
Advanced
and click OK. The printer driver is installed
EPSON EPL-C8000
automatically.
7. When installation is complete, click
OK
.
8. For Windows 95 and 98, the EPSON Status Monitor 2 utility
installation starts automatically.
Note:
❏
You can stop the EPSON Status Monitor 2 utility installation
by clicking the
Cancel
button. If you want to install it later,
see "Installing the EPSO N Status Monitor 2 uti lity" sec tion
in Reference Guide.
❏
Installation time varies, depending on your computer system.
The printer driver is now installed on your computer. The
installation program automatical ly selects this printer as the
default printer for Windows applications.
56
Installing the Printer Software
Page 63

If you installed the options to the printer or use your printe r on a
network, you need to make some settings after installing the
driver. See page 60 for Windows 95/98 or page 64 for Windows
NT 4.0.
Before using the printer software, read the README file located
in the EPS O N (Printers) folder. For information on opening and
using the see the d escription late r in this manual or Chapter 4 and
Chapter 5 in
User’s Guide.
Installing EPSON Font Manager
Follow these steps to install EPSON Font Manager:
1. Make sure Windows is running and the printer is turned off.
2. Insert the CD-ROM that comes with your prin ter into your
CD-ROM driver.
3. Click
4. Type
Start
; then choose
D:\EPSETUP
is not D, substitute the appropriate driv e letter).
Run
.
; then click OK (if the CD-ROM drive letter
Installing the Printer Software
57
Page 64

5. In the dialog box that appears, double-click
Manager
Manager
; or you can install by selecting
and then cl ic ki ng the arrow at the top right.
Install Font
6. Follow the on-screen instructions.
Install Font
Double-click
here to install.
7. When installation is complete, click OK.
The EPSO N Fo nt Manager are now install e d on your computer.
For DOS programs
When usin g this printer with DOS programs, only bla ck-white
printing is available.
Sinc e DOS applicati on programs differ in their driver selection
procedures, there is no standard way to select the printer driver.
See your software manual for information on how to select the
printer.
58
Installing the Printer Software
Page 65

When asked to select a printer, pick the first printer available in
the list below.
EPL-C8000
EPL-5700
EPL-5500/5500+
EPL-N1600
EPL-N1200
EPL-N2000
EPL-5600
EPL-3000
EPL-5200/5200+
HP LaserJet III/IIIP/IIID
HP LaserJet III Si
HP LaserJet 4L
EPL-9000
HP LaserJet 4
If you choose a printer o ther t han the E PL-C8000, you may not be
able to us e some printer features.
Making Basic Printer Settings
When you install options in the printer or use your printer on a
network, you need to make some settings before you start
printing .
In addition, y ou shou ld mak e sur e t ha t th e d river se ttin gs m atch
your document requirements. While many Windows
applications override the printer settings made w ith the driver,
some do not.
Installing the Printer Software
59
Page 66

For Windows 95/98 Users
Using your printer on a network
To use your printer over a network with Windows 95/98, you
must set up the computer to which the pri nter is conne cted (the
print server) and also set up the other computers on the network
which will use the computer (the client computers). T o set up the
print server so th at the printe r is shared across the network, see
your Windows 95/98 documentation.
The in structi o ns below ex p l ai n ho w t o se t up y o ur Windows 95/
98 as a client computer to use your printer, after you have set up
the print server.
1. Make sure your printer softw are is i nstalled ( see pag e 55 i f it
is not installed).
2. Double-click the
Printers
3. Right-c lick the icon o f your printer, and click
60
Installing the Printer Software
folder.
My Computer
icon and double-click the
Properties
.
Page 67

4. Click the
Details tab
Details
tab. Then click the
Add Port
button.
Add Port
button
5. In the following dialog box, click
Installing the Printer Software
Browse
.
Browse bu tton
61
Page 68

6. Double-click the icon of the computer that is directly
connected to the printer. Then click the icon of the printer you
plan to use on the network.
7. Click OK and follow the messages on the screen.
Now you can use the printer connected to th e print server over
the network from your client computer.
Setting the installed option
If you installed any options in the printer, you need to make
optional settings in your printer driver before using your option.
Note:
When the EPSON Status Monitor 2 is run and the printer is turned on,
the information on the installed option is automatically transmitted to
the computer and its information appears in your d riv er’s screen.
1. Double-click the
Printers
2. Right-c lick the icon o f your printer, and click
62
Installing the Printer Software
folder.
My Computer
icon and double-click the
Properties
.
Page 69

3. Click the
Option
Optional Settings
tab
Note:
When the EPSON Status Monitor 2 is run and the printer is turned
on, information on the installed option is automatically transmitted
to the computer. In this case, the
Check if the option name y ou installed appears in the option list,
click OK.
Optional Settings
window.
tab; then click
Setting
button does not appear.
Setting
Setting button
in the
4. The
Option Setting
dialog box appears. Make settings
depending on the option installation. Then click OK.
Installing the Printer Software
63
Page 70

For Windows NT 4.0 Users
Using your printer on a network
To use your printer over a network with Windows NT 4.0, you
must set up the computer to which the pri nter is conne cted (the
print server) and also set up the other computers on the network
which will use the printer (the client computers). To set up the
print server so th at the printe r is shared across the network, see
your Windows NT 4.0 documentation.
The instructions below explain how to set up you r Windows NT
4.0 as a client computer to use your printer, after you have set up
the print server.
1. Make sure your prin ter soft ware is installed (s ee page 55) if it
is not installed).
2. Click
3. Double-click the
4. Click the Network printer serv er radio butto n. Click
5. Select the print queue where print jobs destined for this
64
Installing the Printer Software
Start
, point to
printer w ill be se nt, or select the network path to the printer.
Note:
Be sure to confirm all n etw ork settings with the netwo r k
administrator.
Settings
Add Printer
, and click
icon.
Printers
.
Next
.
Page 71

6. If the following dialog box appears, click OK and go to the
next step. If the dialog box does n ot appear, your print er is set
up and ready to accept print jobs over the network.
7. Click
Have Disk
.
8. Insert the printe r software CD in the appropriate drive.
9. Type
D:\EPSETUP
and click OK. (If you ins erted the CD in a
drive ot he r than drive "D", substitute the appropria te letter.)
10. Select your print er in the dialog b ox and follow the on-s creen
instructions.
Notes for problem so lvin g:
If your prin ter does no t pri nt correctl y a s a remote printer, the
following procedure may help you solve the problem.
1. Install the Windows NT 4.0 printer software in your computer
as described on page 55.
2. Click
Start
, and select
3. Right-click the icon of your printer, and click
4. Select a printer port other than
Settings
Printers
and
LPT1
in the Port menu.
.
Properties
5. From the DOS prompt, type the network path to your printer,
for example;
.
C:\net use lpt2: \\epserver\printer
Installing the Printer Software
65
Page 72

then press the
in step 4, substitute this port for "
You should also sub sti tute the na me of your print server for
epserver
"
print server, for "
6. Restart your computer.
Note:
If you need to cancel this setting, typ e
to your printer in step 5, for exam p le,
Enter
key. If you selected a port other than lpt2:
lpt2
" in the command above.
", and the name of the printer, as defined on the
printer
".
/ d
instead of the network path
C:\net use lpt2: /d
Setting the installed option
If you have installed any opt ions in the printer, you need to make
optional settings in your printer driver before using your option.
Note:
When the EPSON Status Monitor 2 is run and the printer is turned on,
the information on the installed option is automatically transmitted to
the computer and its information appears in your d riv er’s screen.
.
1. Click
2. Right-c lick the icon o f your printer, and click
66
Installing the Printer Software
Start
, an d se lect
Settings
and
Printers
.
Properties
.
Page 73

3. Click the
your option installation. Then click OK.
Note:
When the EPSON Status Monitor 2 is run and the printer is turned
on, the information on the in sta lled option is aut om atically
transmitted to the computer. In this c ase, you do not need to set
anything.
Optional Set tings
tab. Make settings depending on
Installing the Printer Software
67
Page 74

4. Click the
paper source.
Printer Setting
tab. Selec t the paper size for each
Note:
When the EPSON Status Monitor 2 is run and the printer is turned on,
the information on the installed option is automatically transmitted to
the computer. In this case, you do not need to set a ny thing.
68
Installing the Printer Software
Page 75

Accessing Online Help
Your Windows printer driver has an extensive online help feature
that includes detailed informati on and instructions on the driver
settings. Online help will answer most of your questions about
the driver.
Note:
Online help is no t a vailable for DOS ap p lications.
Accessing from the Windows Printer Driver
To access online help from the printer driver, follow the
instructions on page 59 to access the driver; then click the
button at the bottom of the window that appears .
Accessing from Windows Applications
To access help from your application, open the File menu and
choose
or
buttons) depending on the software you are using. Then click the
?
Print
Properties
Help
or
Print Setup
or
(you may need to click a combination of these
button in the window that appears.
. Then click
Printer, Setup, Options
Help
,
Accessing Online Help
69
Page 76

Printing wi th Windows
This section explains how to print your documents from your
Windows application or how to cancel printing.
Starting to print
To get starte d with printing right away, follow the printin g
method explained below, which is typical of many Windows
applications. The actual way you print may vary depending on
the application you use. See your application manual for details.
Note:
While many Windows applications override the settings made with the
printer driver, some do not, so you must verify the settings to get the
results you expect.
1. From your application, open the document you want to print.
2. Click
dialog box) appears.
70
Printing with Windows
Print
on the File menu. The Print d ialog box (or a s imilar
Page 77

3. Make sure your p rinter is selected an d t hen cl ick
Setup, Properties
than one of these buttons in differen t dialog boxes. The printer
software window appears.
4. Make the settings in each menu depending on your document
type. Refer to the driver’s online help or the description in
Chapter 4 in
User’s Guide
, or
Options
. You may need to click more
for the details of eac h setting.
Printer
,
5. After making all settings , cl ick OK at the bottom of the
window. You return to the Pri nt dialog box (or a similar dialog
box).
6. Click
Close, OK
than one of these buttons in different dialog boxes.
, or
Print
to print. You may need to click more
Printing with Windows
71
Page 78

Cancelling the Print
When you want to cancel printing, follow the instructions below:
1.Press the
On Line
On Line
button on the printer’s control panel. The
light turns off.
ContinueForm FeedOn Line
Paper Source
AltReset
RITech
Menu
Page Size
Copies
Item
Manual Feed
MP Tray Size
Value
Orientation
Note:
If your computer continues the printing job, canc el it as follows:
Double-click the printer icon in the task bar at the right bottom. Then
click the printing job that you want to cancel and click
Jobs
2.Check that the
in the
Printer
Form Feed
menu.
is on (not blinking). If this light is
Purge Print
blinking, the printer is receiving the data from the computer.
In this case, wait until the printer re ceives all data and the
Form Feed
light comes on.
Out Bin
Enter
^
72
Printing with Windows
Page 79

3. Hold down the
Alt
and
Reset
button s a t th e sa me time until
Reset appears on the display. The received data is cleared.
c
Paper Source
ContinueForm FeedOn Line
AltReset
RITech
Menu
Page Size
Copies
Item
Manual Feed
MP Tray Size
Value
Orientation
Out Bin
Enter
^
Caution:
Be careful not to hold the buttons for more than five seconds.
If you do so,
Reset All
appears on the display and the
printer settings are returned to the default value in addition
to clearing the print jo b and printer memory.
Printing with Windows
73
Page 80

74
Printing with Windows
Page 81

Index
A
Accessing
driver, 70
online help, 69
Assembling the printer, 14
B
Basic printer settings, 59
C
Cancelling to print, 72
Connecting to the computer, 53
D
DOS, 58
E
Energy Star, 10
EPSON Font Manager, 54
EPSON Status Monitor 2, 54
Expansion tray, 14
F
Face-up tray, 15
Fuser oil roll, 25
I
Installing
250 sheet lower paper cassette uni t,
29
EPSON Font Manager, 57
expansio n t r ay, 14
face-up tray, 15
fuser oil roll, 25
interface card, 47
large c a pacity paper un it, 31
memory module, 39
options, 29
photoconduc tor unit, 22
printer software, 54
ROM module, 43
toner cartridges, 17
Interfac e cable, 53
Interface card, 47
L
Large c a pacity paper unit
installing, 34
precautions, 31
removing the protective material,
32
unpacki ng , 32
Laser printer precautions, 5
Laser safety, 1
Loading paper, 51
Lower paper cassette unit, 29
M
Memory module, 39
N
Network
for Windows 95/98 users, 60
for Windows NT 4.0 users, 64
IN-
1
Page 82

O
Online help, 54, 69
Options
250 sheet lower paper cassette unit,
29
large cap acity paper uni t, 31
setting in the printer driver, 62, 66
Ozone safety, 3
P
Photoconductor unit, 22
Plugging in th e prin ter , 50
Power sw itch, 50
Precautions
large cap acity paper uni t, 31
laser printer, 5
Printer driver, 54, 55
Printing
status sheet, 51
with Windows, 70
R
ROM module, 43
S
Safety information, 1
Safety instructions, 1, 8
Status sheet, 51
System requirements, 12
T
Testing the printer, 51
Toner cartridges, 17
IN-2
Page 83

EPSON OVERSEAS MARKETING LOCATIONS
EPSON AMERICA, INC.
20770 Madrona Ave.
P.O. Box 2842
Torrance, CA 90509-2842
Phone: (800) 922-8911
Fax: (310) 782-5220
EPSON DEUTSCHLAND GmbH
Zülpicher Straße 6,
40549 Düsseldorf Germany
Phone: (0211) 56030
Fax: (0211) 5047787
EPSON AUSTRALIA PTY. LTD.
70 GIBBES STREET, CHATSWOOD 2067 NSW.
Phone: 2-9903-9000
Fax: 2-9903-9177
EPSON HONG KONG LTD.
Rooms 4706-10, 47/F,
China Resources Bldg.,
26 Harbour Road, Wanchai, Hong Kong
Phone: 2585-4300
Fax: 2827-7083
EPSON ITALIA S.p.A.
V.le F.lli Casiraghi 427
20099 Sesto S.Giovanni
MI, Italy
Phone: 2-262331
Fax: 2-2440750
EPSON UK LTD.
Campus 100, Maylands Avenue,
Hemel Hempstead, Herts,
HP2 7TJ, U.K.
Phone: (+44) 01442 261144
Fax: (+44) 01442 227227
EPSON FRANCE S.A.
68 bis, rue Marjolin
92300, Levallois-Perret, France
Phone: 33.1.40.87.37.37
Telex: 610657
EPSON SINGAPORE PTE. LTD.
No. 1 Temasek Avenue #36-00
Millenia Tower, Singapore 039192
Phone: (065) 33 77 911
Fax: (065) 33 41 185
EPSON TAIWAN TECHNOLOGY &
TRADING LTD.
10F, No. 287 Nanking E. Road, Sec. 3,
Taipei, Taiwan, R.O.C.
Phone: (02) 717-7360
Fax: (02) 712-9164
EPSON IBERICA S.A.
Av. de Roma, 18-26
08290 Cerdanyola del Valles
Barcelona, Spain
Phone: 582. 15.00
Fax: 582. 15.55
SEIKO EPSON CORPORATION
(Hirooka Office)
80 Harashinden, Hirooka
Shiojiri-shi, Nagano-ken
399-0785 Japan
EPSON PORTUGAL, S.A.
R. do Progresso, 471, 1º Perafita
4460 Matosinhos, Portugal
Phone: (02) 996 14 02
Fax: (02) 996 14 11
1998 February
Page 84

 Loading...