

Page 1
ELPIU03
Interactive Unit
Quick Setup Guide
This product is an Interactive Unit for EB-435W/EB-430/EB-425W/EB-420/PowerLite 435W/PowerLite 430/
PowerLite 425W/PowerLite 420.
You can attach and use this product with a projector that has been mounted on a wall or hung from a ceiling.
This book explains how to mount the Interactive Unit when the projector is mounted on a wall using the wall
mount (ELPMB27). When hanging from a ceiling, see also the
plate (ELPPT04).
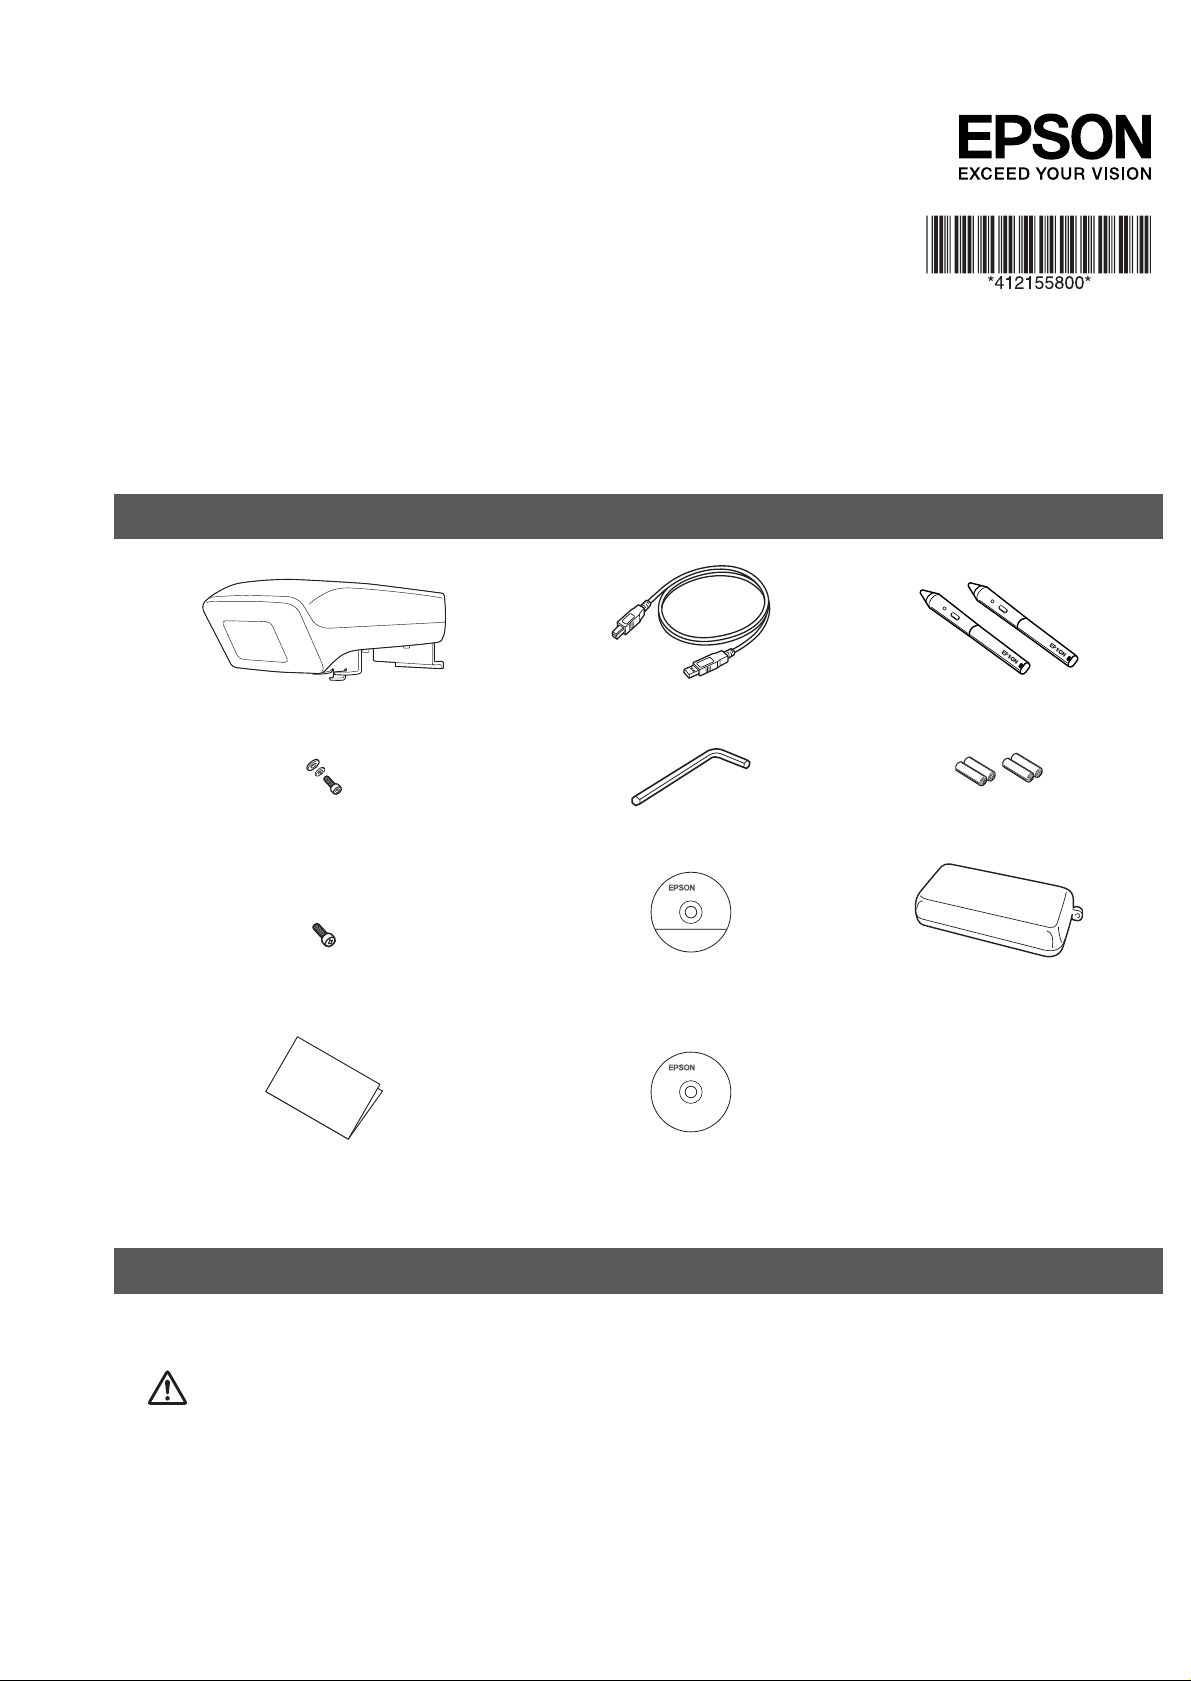
Included Items
Installation Guide
supplied with the attachment
Interactive Unit
M4 x 10 mm hexagon socket head cap bolt
with washer and spring washer
(x1)
M3 x 8 mm cross-head screw
(x1)
Quick Setup Guide (this guide)
Prepare other tools as necessary.
Installing the Interactive Unit
USB cable
M4 hexagonal wrench
Epson Projector Software for
Easy Interactive Function CD
Document CD-ROM
Easy Interactive Pen (x2)
AAA batteries (x4)
Pen tray
Before attaching the Interactive Unit to the projector, install the ELPMB27 wall mount. See the
Manual
supplied with ELPMB27, and complete all steps up to step 8.
Warning:
Attachment to the projector should be performed by quali ed technicians using only approved mounting •
equipment.
Follow the steps below to attach this product. Incomplete or incorrect installation could cause the •
product to fall and cause personal injury or property damage.
Installation
Page 2
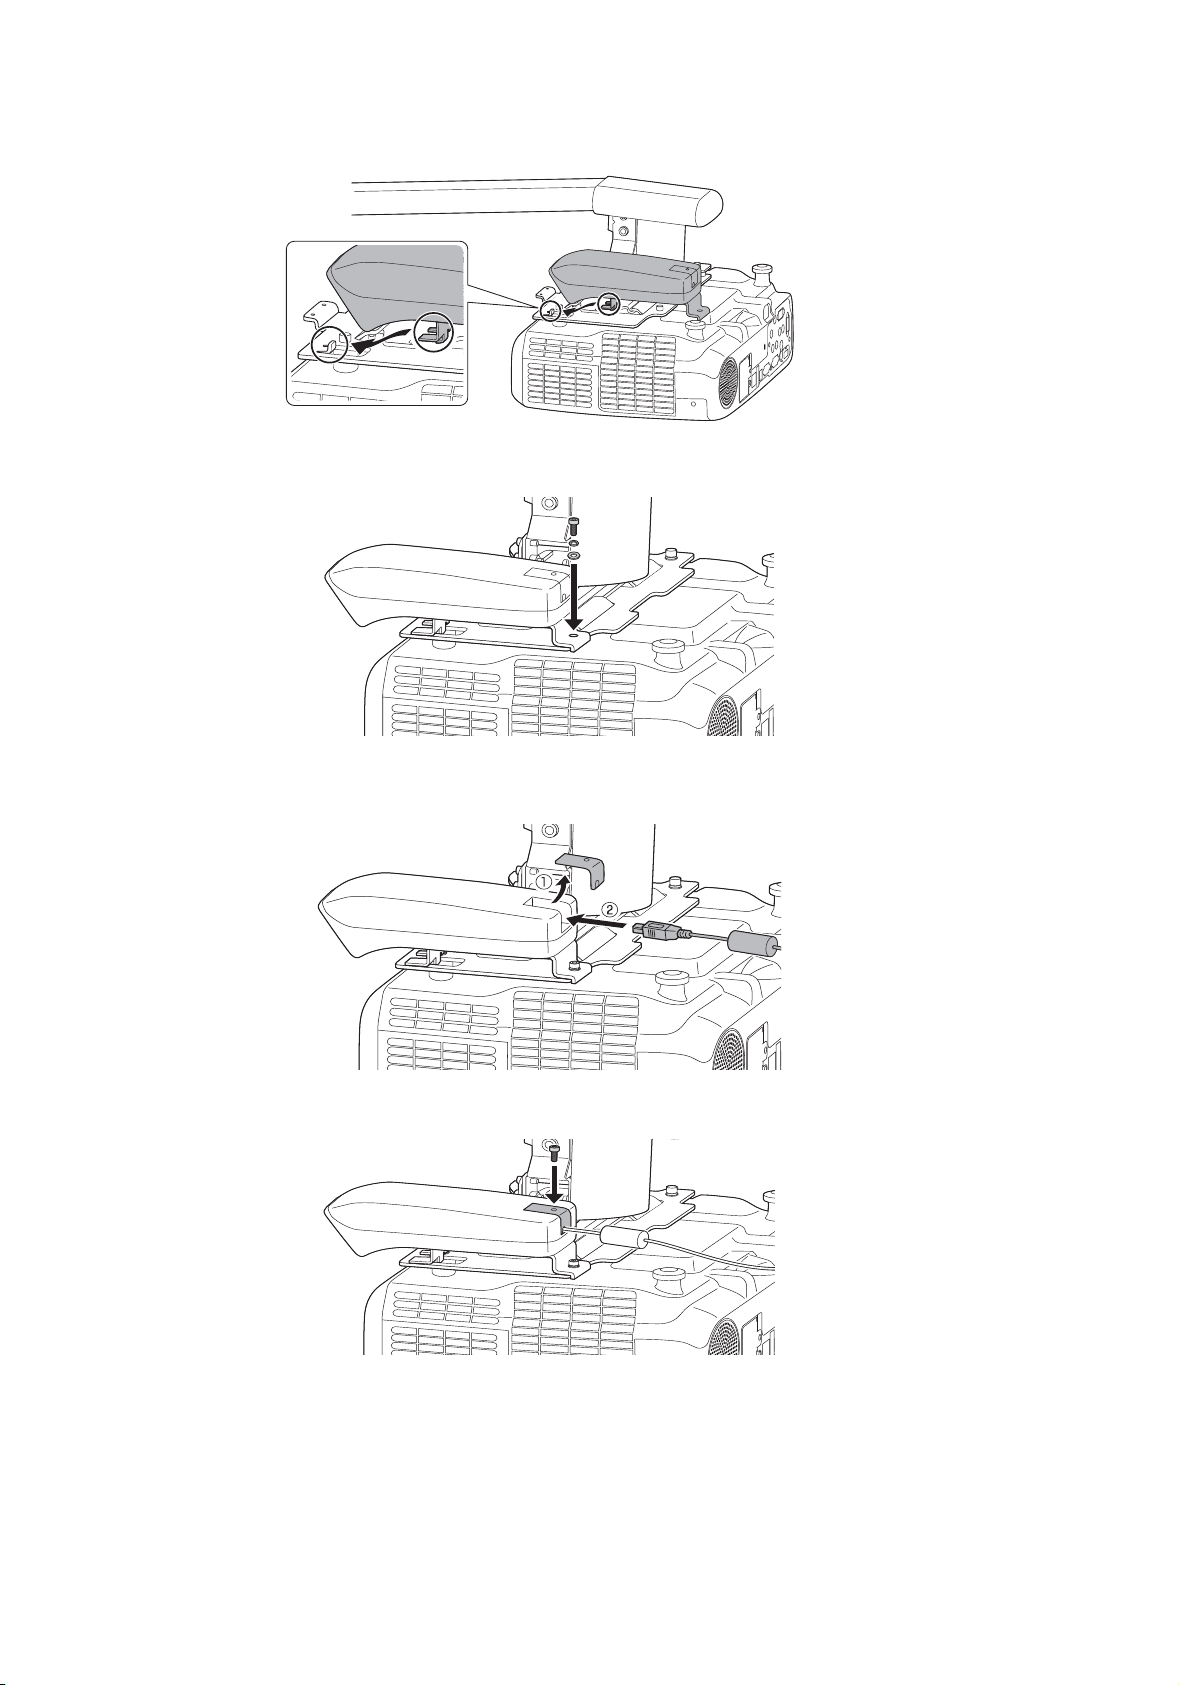
Insert the Interactive Unit into the ELPMB27 attachment plate.
a
Use the M4 x 10 mm bolt with washer and spring washer to secure the Interactive Unit.
b
Remove the USB cover, and then connect the USB cable.
c
Attach the USB cover, and then secure it using the M3 x 8 mm cross-head screw.
d
Adjust the length of the USB cable.
e
Next, go to step 9 in the ELPMB27
position, then install the interface cover bracket and covers.
Installation Manual
and install the ELPMB27 arm cover, adjust the screen
Page 3

Getting Ready to Use the Interactive Unit
Install the Easy Interactive Driver ❏
Turn on the computer.
a
Insert the CD labeled "Epson Projector Software for Easy Interactive Function" in your computer.
b
Follow the on-screen instructions to install the software. When installation is complete, click
to close the installation screen.
c
Install the Easy Interactive Pen Batteries ❏
Remove the battery cover by pressing down on the tab, and then install the two batteries.
a
To reattach the battery cover, press the cover until you hear it click into place.
b
Finish
Connect to a Computer ❏
Connect the projector's VGA computer cable to the computer's monitor out port.
a
Connect the Interactive Unit's USB cable to the computer's
USB port.
b
Adjust the Position of the Projection Screen (Calibration) ❏
You need to perform calibration to match the position of the Easy Interactive Pen to the position of the
mouse cursor on the projection surface.
By performing calibration, the computer can accurately detect the position of the Easy Interactive Pen on the
projection surface.
Launch the Easy Interactive Driver.
a
For Windows
Select
Start
-
All Programs
(or
Programs
) -
Epson Projector
-
Easy Interactive Driver
.
Page 4

For Mac OS X
Open the Applications folder, and then select
For Windows
b
Click the pen icon on the taskbar, and then select
For Mac OS X
Click the
(Normal)
Click
OK
when the start calibration message is displayed.
pen icon in the Dock, select
or
Calibrate (Advanced)
.
c
A ashing circle is displayed in the upper left corner of your projected image.
Tap the center of the circle with the tip of the pen.
d
The circle stops ashing. The next circle is displayed on the right.
Easy Interactive Driver
Calibrate (Normal)
Calibrate
from the menu bar, then select
.
or
Calibrate (Advanced)
Calibrate
.
Tap the center of the circle again, then repeat. When the circle reaches the right-hand side of the
e
image, the next circle is displayed on the next row.
Continue until all of the circles stop ashing.
f
Caution:
Because this product uses infrared communication, it could interfere with infrared communication from •
other product(s). If this does happen, move the other product(s) out of the detection area.
Do not stand between the Interactive Unit and the projected image while using the pen. If there are any •
obstacles between the Interactive Unit and the pen, it does not operate correctly.
Note:
http://www.epson.com
Check •
periodically as updates may be available for the Easy Interactive Driver.
You can use any interactive whiteboard software, or download •
website at
sure to read the software license agreement.
For more information, see the •
http://www.epson.com
User's Guide
. Before using any software applications with the Interactive Unit, be
on the Document CD-ROM included with this product.
Easy Interactive Tools
Copyright © Seiko Epson Corporation 2011. All rights reserved.
Printed in China.
from the Epson
 Loading...