

Page 1
Instruction for EPSON CX7300
You are welcomed to use continue Ink Supply System which will greatly reduce your cost. And
it is the ideal products suiting for Color Inkjet Printer. Pls Please look over the instruction
carefully before using it, which will make you use this system easily, safely and stably.
1. General Guide
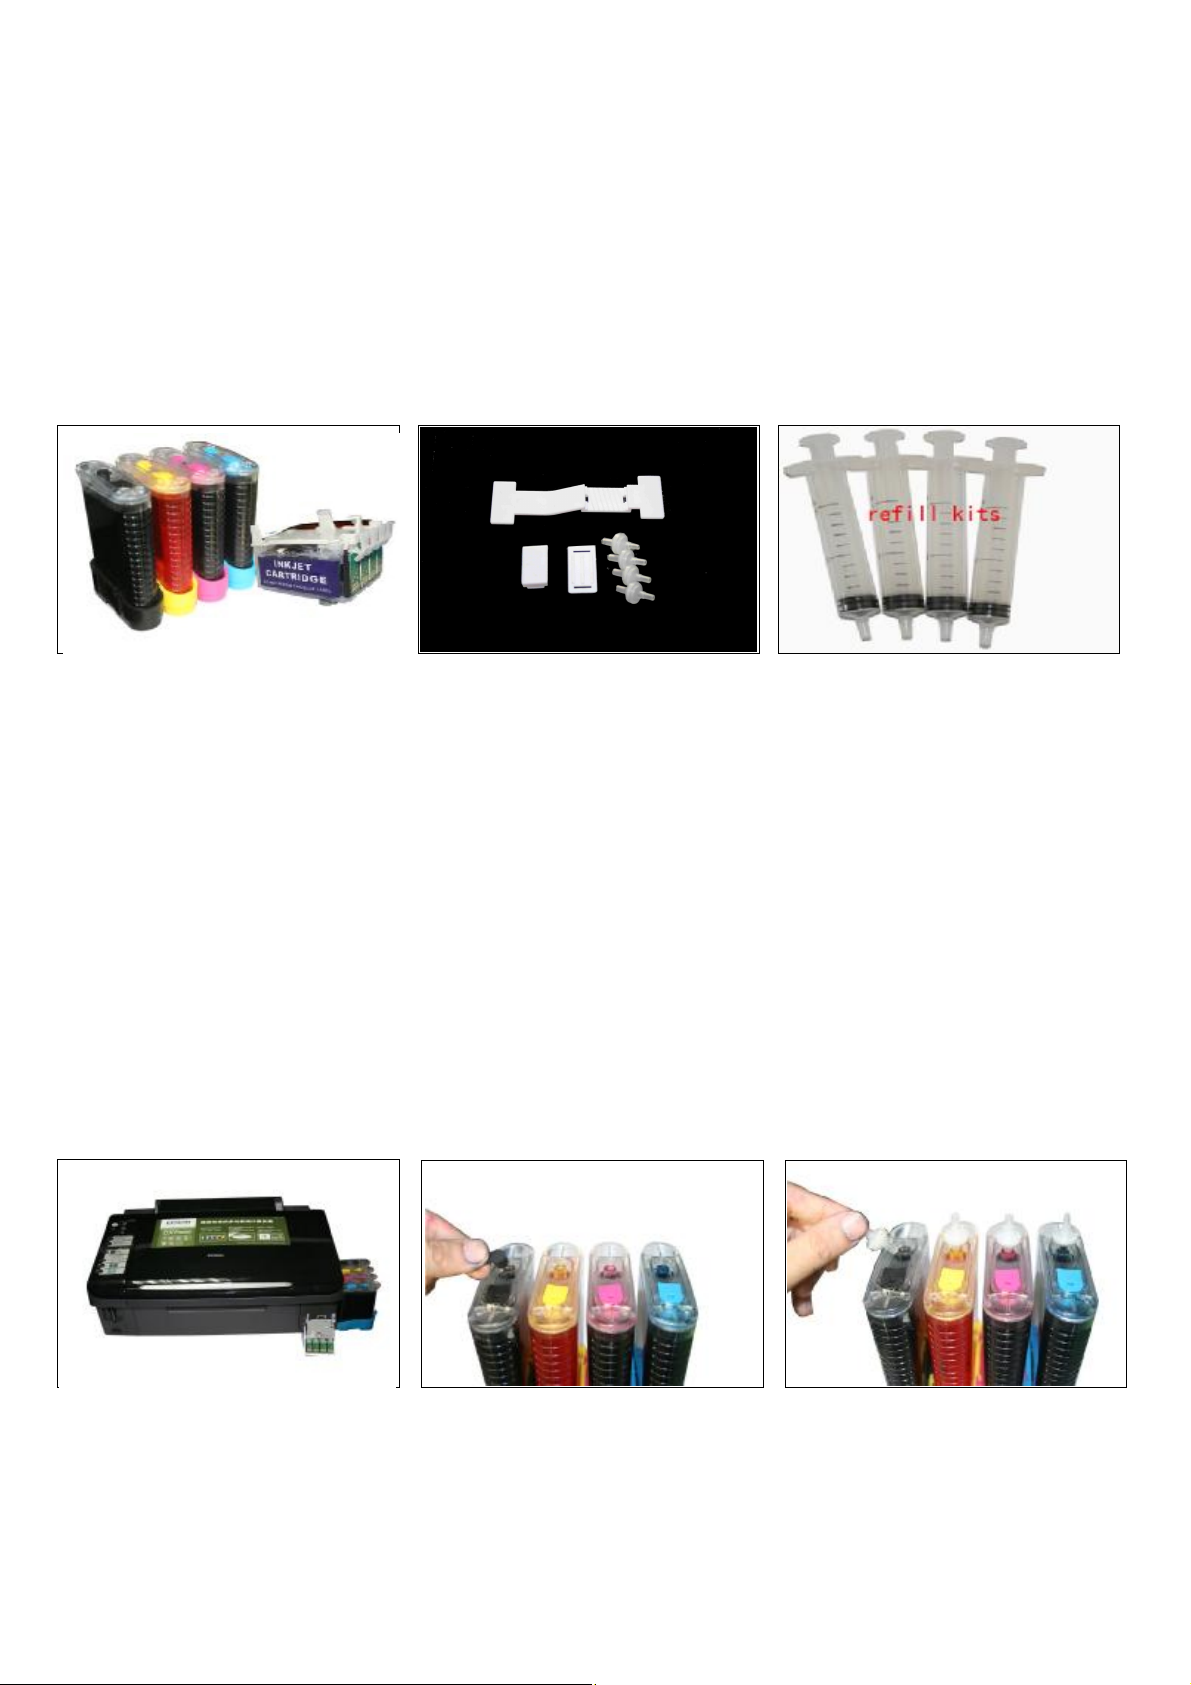
1、Components
a、CIS System 1set b、Air Filters 6pcs c、Support Arm 1set
d、Standby Refill Kit 6pcs e、Instruction CD 1pc
2、Opening box inspection
a、Check whether all the accessories are ready before installing.
b、Check whether there's the leakage of the CISS, whether some tubes have been separated from the CISS
2. Printer Testing
1) Check whether the printer is in normal condition, like mechanical status, lubrication status etc.
2) Print testing lines to ensure the printing head is good condition.
3) Print pictures to see whether the printing image is good or not..
Please use this CIS System easily, it will not reduce or raise the accurateness of the printer. If the testing result is
abnormal, please consult the local dealer for this products.
3. Installation Procedures
Step 1: Preparation
Put the CISS on the right side of the printer. Pull out the small rubber plug from the Place 6pcs of air filters into
and place all the tubes at correct position. air hole as picture shown above.
Step 2: Take out the original cartridges
air holes,
Page 2
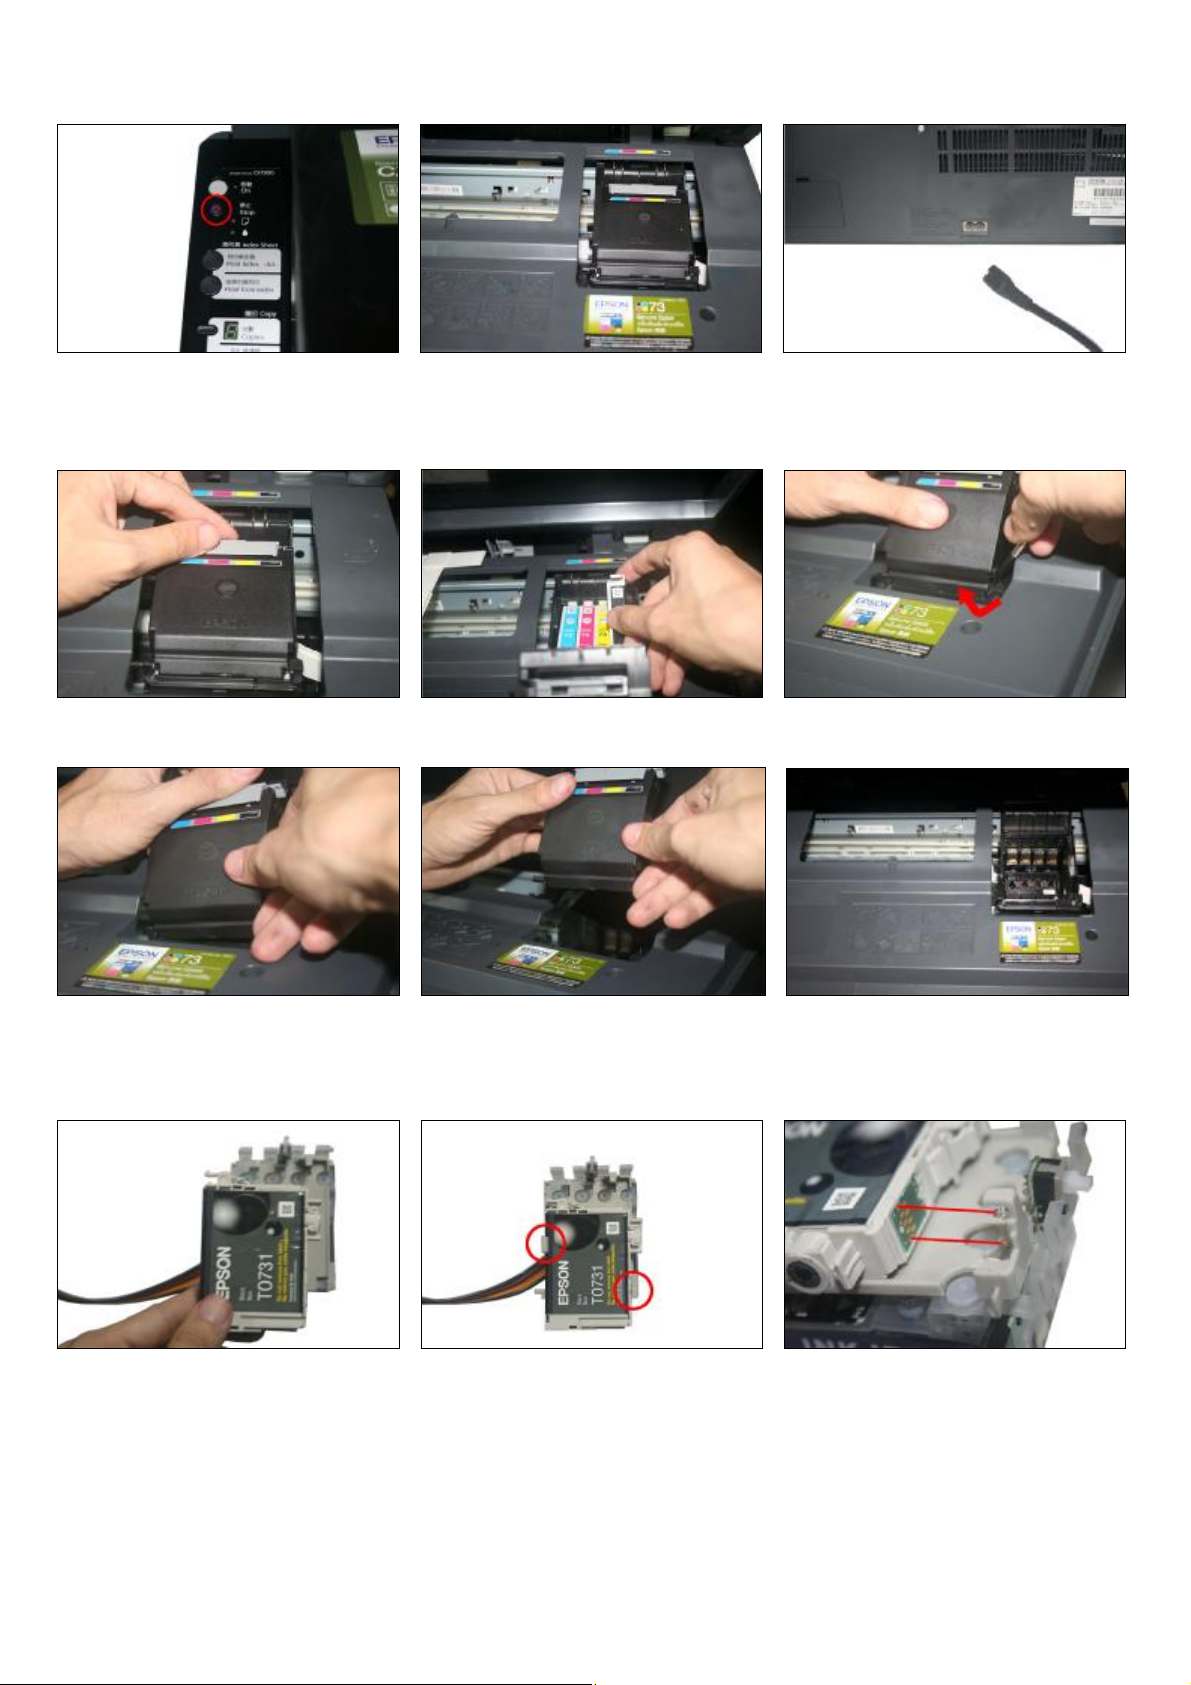
Press the ink-changing button Carriage move out Pull out the power line of the printer and
move the carriage to the right side.
Step 3: Remove the cartridge cover
Open the cartridge cover Take out the original cartridges prize the cover lightly along with the gap with
screwdriver
Take one side first. Then take out the whole cover Carriage is empty and get ready for putting in
the new CISS
Step 4: Install Original Cartridges
Put the original cartridge above the CIS Press the cartridge down until it is locked The two metal sheets at the top and bottom
Cartridges. by the two clips. Should match the two springs.
Page 3

Push it upside until it is locked by the third clip in the red circle.
① reset button. ② switch.
If the switch is turned to up place,then CISS
should work with original cartridge.
If the switch is turned to down palce, then CISS
Can work without original cartridge.
Step 5: Install CIS Catridges
Move the carriage to the left side Make the cartridge round the printer cover as above show Move the carriage back to the
original position
Put in the special cartridge of CISS according to A sound Da will heard when the clip locks the cartridge completely
the color mark and lock the cartridge.
Step 6: Fix the Support Arm and Tube line
Fit the support arm like the picture shown Fix the balance arm on the support arm. Fix the tube on the support arm as the above
picture
Page 4

Tube went through the flute Clip the tube on the tubing holder by claspers.
Step 7: Adjust Tube Line
Adjust the tube length and move the Stimulate the move of the cartridge car. Adjustment is finished.
cartridge car. Insure there's plenty length Insure there will no block when the
of tube to make the cartridge cart can tubes moving with cartridge car and
thoroughly move to the left side. abnormal phenomena for the printer.
Too long Twist Perfect
Step 8:
Connect the power cord. Turn on the power and check whether the
printer can work well.
Page 5

Step 9: Check the nozzle
Nozzle is ok
Print test lines. If it is OK, then you can begin using.
Broken Lines
If there is broken lines, then pls clean the printer head.
Enter Checking Nozzle Panel
Broken lines may be caused by air entering the nozzles. If there is still some broken lines after cleaning printer head repeatedly,
especially for single color, then you can leave the printer for about 1 hour. Then the broken lines may disappear. If there is still such
problem, then pls contact local dealer.
4. Chip Reset
If ink-lacking light of the printer is flashing, it is aimed to remand you to change the cartridges. Press ink-changing button two times
until the carriage stops at the
ink-changing place.
Page 6

Press the reset button Press the ink-changing button again Press the ink-changing button again, then
you will find the cartridges are full of ink.
And you can print again.
Another reset method is: turn down the printer for one minute and then turn it on.
5. Refill Ink
Please pay attention to the ink level in the reservoirs; if the ink level is below 1CM as the picture shown above, please use refill kits to fill
ink into Reservoir bottles. Carefully pull out the rubber plugs from the ink refill holes (There is possibility of ink spattering. Pls be careful.)
Refill ink according to the colors. Then re-cap the rubber. (Please keep the printer and the reservoir bottles at the same horizontal line
during the process of refilling ink.)
6. Attention for Maintenance:
Take out the CISS including the inner cartridges and other components. Then remove support arm from printer, and
re-install original cartridges. Please inquire local dealer before sending to maintenance.
7. Notice:
1. Please don’t take out cartridge at random after installing the CIS system. Keep the reservoir bottles on the same
level with the printer.
2. Try to keep at least 1/2 inch of ink in the bottles.
3. Don’t place the Reservoir Bottles too much higher or lower than the printer.
4. Suggested using in a dry place between 15 and 35 degree. Avoid exposure to direct sunlight.
5. Don’t reverse or lean the continuous ink supply systems during shipping. Please make sure all the ink filling holes
and ventilation holes are closed tightly during transportation. Otherwise, the ink may leak.
6. Don’t sway the cartridge frequently. It may cause ink leakage.
7. Don’t pull out the connector of cartridge and don’t tear off adhesive tape at the bottom of cartridge.
8. Warning:
1. Not drinkable; keep it out reach of children.
Page 7

2. Avoid exposure to direct sunshine and don’t keep it in high or freezing temperature.
3. Avoid collision and fallen down.
 Loading...