

Page 1
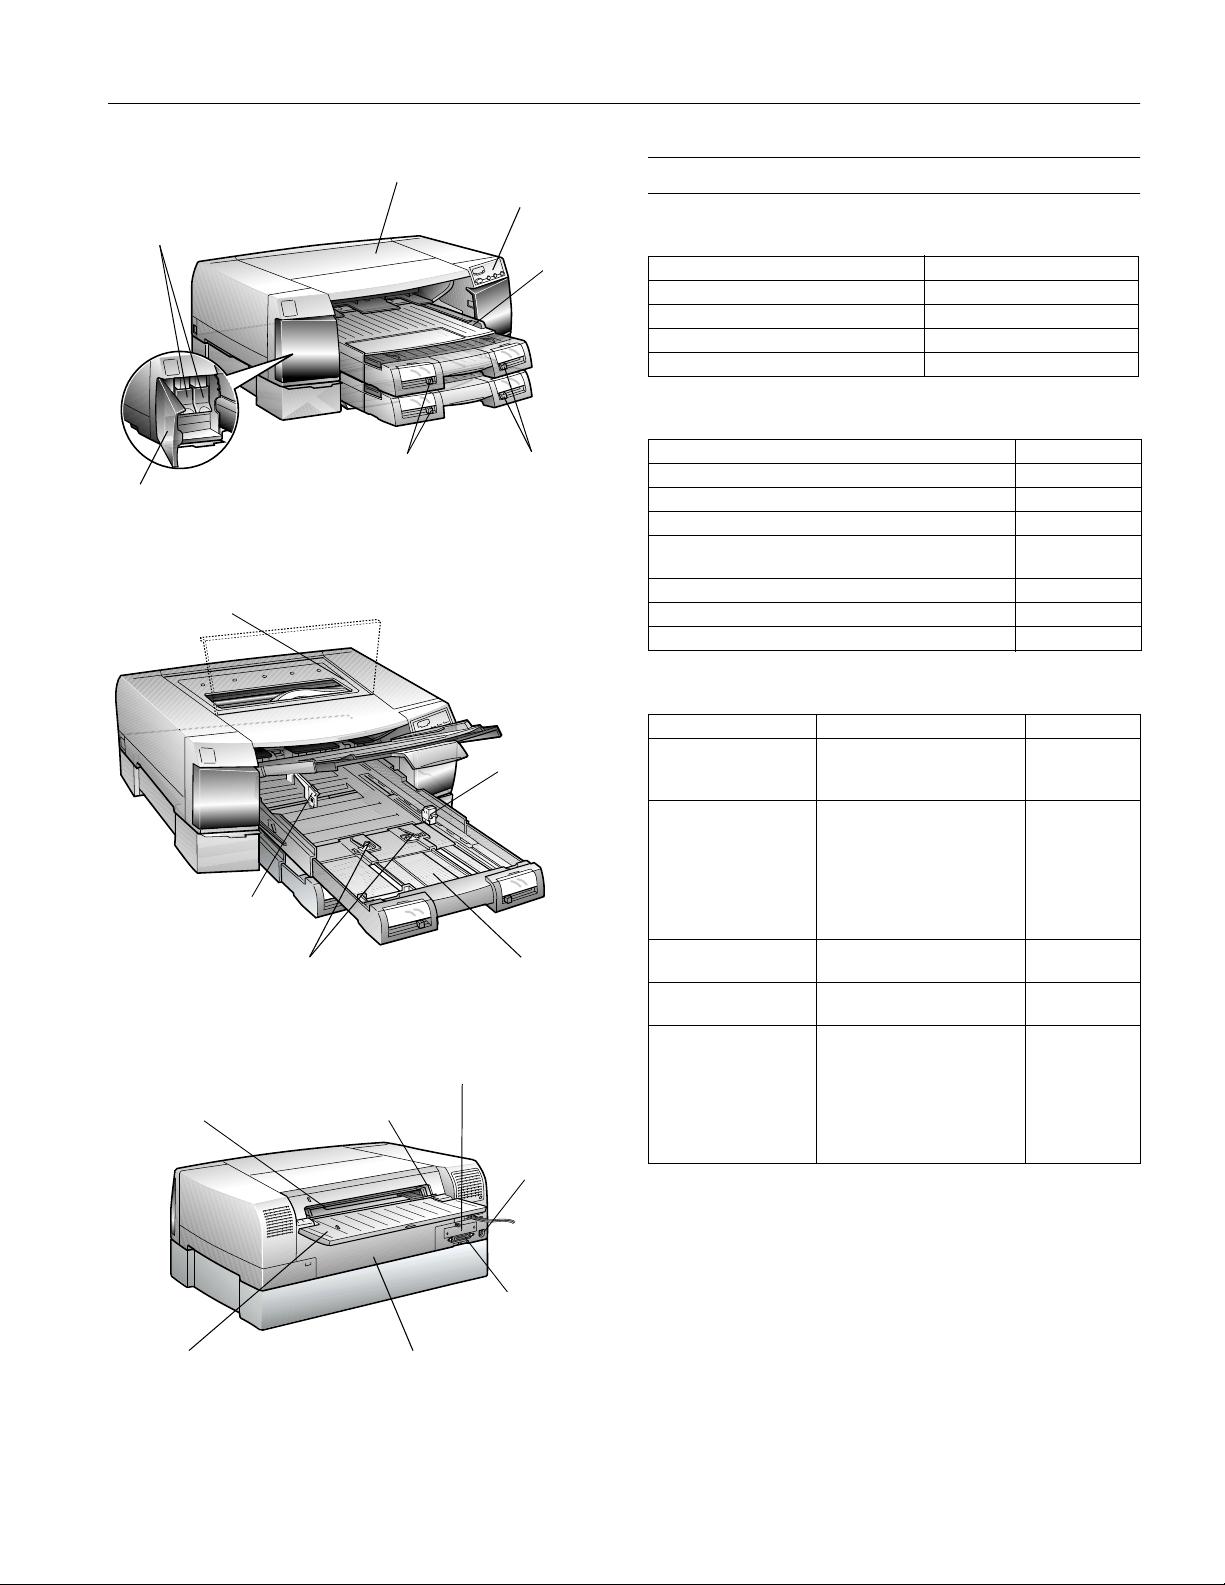
ink cartridge
i
clamps
nter cover
pr
control
panel
edge
guide
EPSON Stylus Pro 5500
Accessories
Ink Cartridges
Cartridge Part number
Black ink cartridge T486011
Cyan/light cyan ink cartridge T489011
Magenta/light magenta ink cartridge T488011
Yellow ink cartridge T487011
Options
ink cartridge
compartment door
print head
(under cover)
left edge
guide
rear manual feed slot
paper size
levers
paper tray extension
release levers
edge guide
media type
levers
front edge
guide
paper tray
extension
optional interface
card slot
USB
interface
Item Part Number
250-sheet lower paper cassette and tray C813611
Replacement 250-sheet paper tray C813621
EPSON Type B IEEE-1394 (FireWire
EPSON Type B 10/100 BaseT Ethernet
Card
®
Fiery® Spark Professional RIP software TBD
EFI
One-year Service Plan EPP55B1
Two-year Service Plan EPP55B2
®
) Interface Card C823722
™
Interface
C823632A
Media
Media name Size Part number
Archival Matte Paper Letter (8.5 × 11 inches)
Premium Glossy
Photo Paper
Professional Glossy
Paper
Watercolor Paper Radiant White
Premium Luster Paper Letter (8.5 × 11 inches)
A3 (297 × 420 mm)
Super A3/B (13 × 19 inches)
Letter (8.5 × 11 inches)
A3 (297 × 420 mm)
Super A3/B (13 × 19 inches)
8.3 in. × 32 ft roll (to cut to
lengths up to 44 inches)
13 in. × 32 ft roll (to cut to
lengths up to 44 inches)
Letter (8.5 × 11 inches) S041456
Super A3/B (13 × 19 inches) S041351
A3 (297 × 420 mm)
Super A3/B (13 × 19 inches)
8.3 in. × 32 ft roll (to cut to
lengths up to 44 inches)
13 in. × 32 ft roll (to cut to
lengths up to 44 inches)
S041341
S041343
S041339
S041286
S041288
S041289
S041376
S041378
S041405
S041406
S041407
S041408
S041409
rear manual feed
slot cover
parallel interface
paper path cover
2/01 EPSON Stylus Pro 5500
- 1
Page 2
EPSON Stylus Pro 5500
Printer Specifications
Printing
Special papers distributed by EPSON are usable only under these
**
conditions:
Temperature: 59 to 77 °F (15 to 25 °C)
Humidity: 40 to 60% RH
Printing method On-demand ink jet
Nozzle configuration 96 nozzles × 6 (black, cyan, magenta,
yellow, light cyan, light magenta)
Resolution Maximum 2880 × 720 dpi
Ink type EPSON Archival ink (pigment
based)
Print direction Bidirectional with logic seeking
Control code ESC/P Raster
™
Line spacing 1/6 inch (default), programmable in
1/720-inch increments
Paper feed speed 79 milliseconds per 1/6-inch line
152 mm per second in continuous
feeding
Electrical
Specification 120V Model 220−240V Model
Input voltage range 99 to 132V 198 to 264V
Rated frequency range 50 to 60 Hz
Input frequency range 49.5 to 60.5 Hz
Rated current 1.0A
Power consumption Approx. 26W (ISO/IEC 10561 Letter Pattern)
10W or less in standby mode
Paper
Size Paper types* Thickness Weight
Letter
(8.5 × 11 in.)
A3 (11.7 × 16.5 in.)
A4 (8.3 × 11.7 in.)
A5 (5.8 × 8.3 in.)
A6 (4.1 × 5.8 in.)
Legal (8.5 × 14 in.)
Half Letter
(5.5 × 8.5 in.)
Executive
(7.5 × 10 in.)
Super A3/B
(13 × 19 in.)
US B (11 × 17 in.)
B4 (10.1 × 14.2 in.)
B5 (7.2 × 10.1 in.)
Plain bond
paper and
special ink jet
papers
distributed by
EPSON**
Plain paper:
0.003 to 0.004
inch
(0.08 to 0.11
mm)
Plain paper:
17 to 24 lb
(64 to 90 g/m
2
)
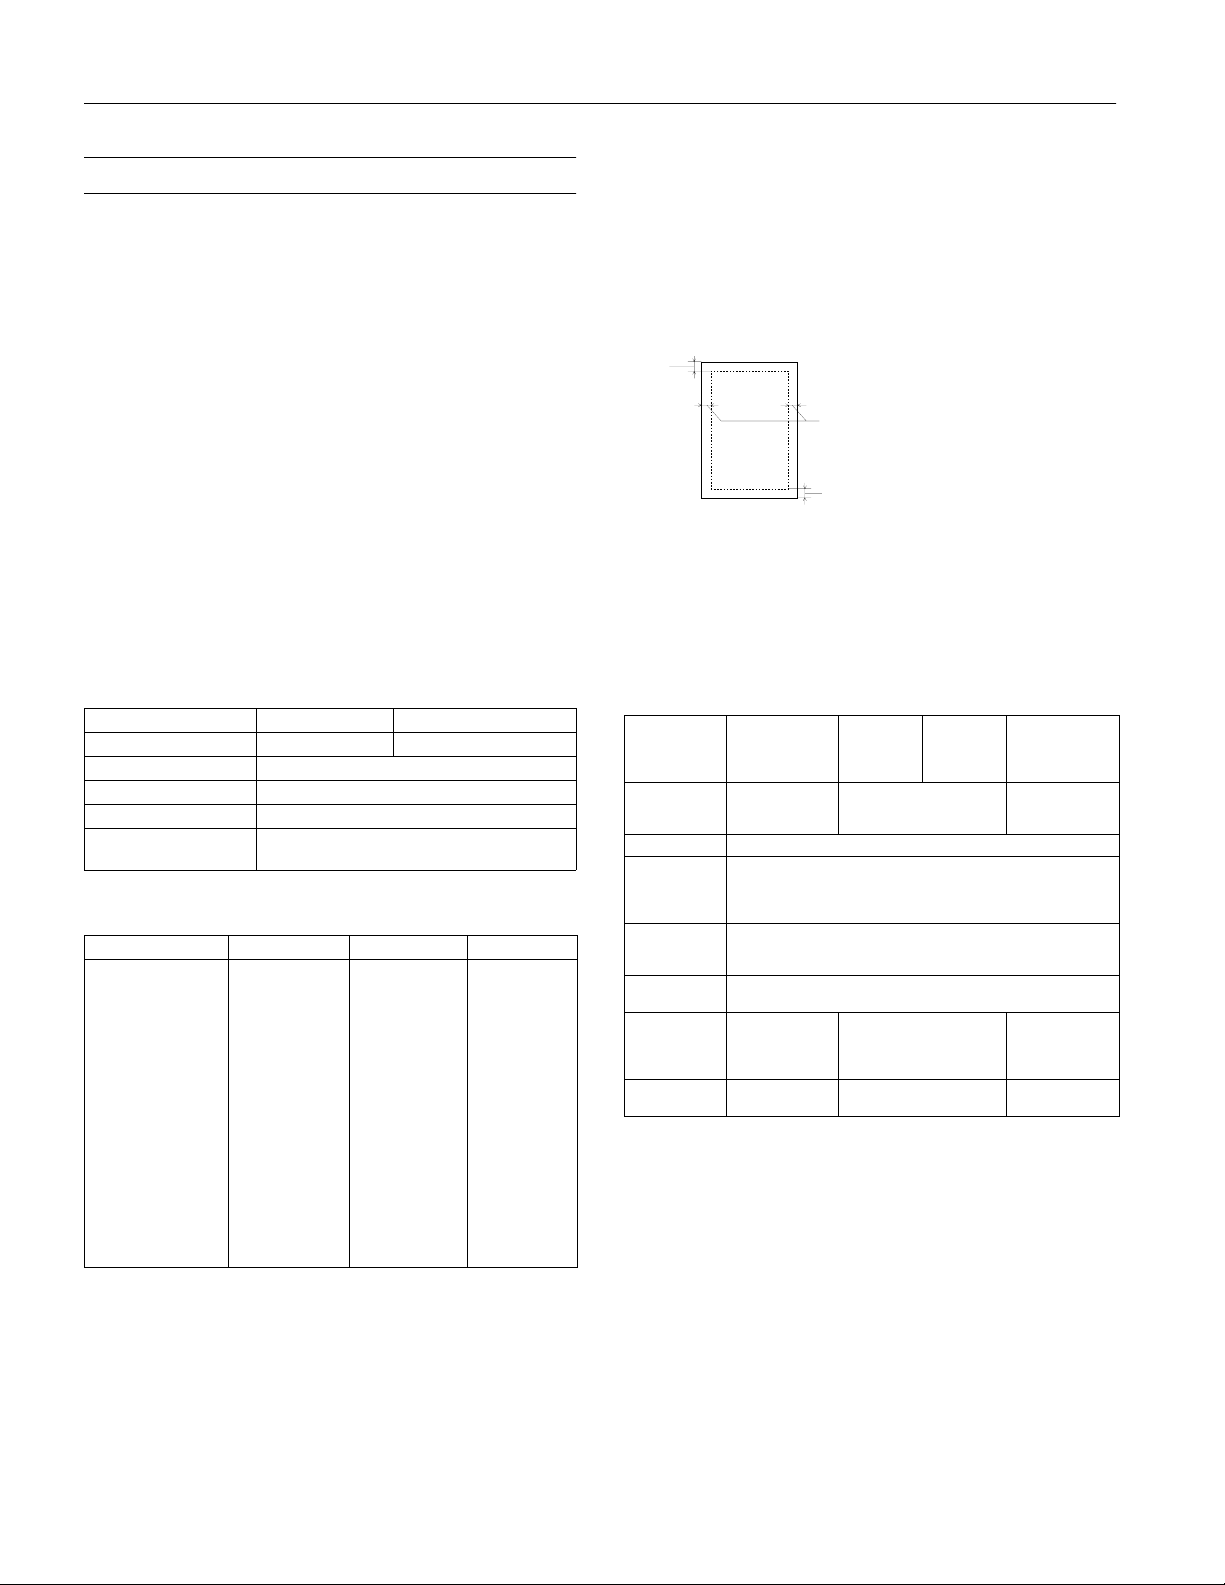
Printable areas
Single sheets
A
BL
A: The minimum top margin is 0.12 inch (3 mm).
B: The minimum left and right margins are 0.12 inch (3 mm).
C: The minimum bottom margin is 0.55 inch (14 mm).
Note:
The maximum printable width is 12.7 inches (416 mm).
BR
C
Ink Cartridges
Specification
Print capacity* 2500 pages
Cartridge life 2 years from production date
Storage
temperature
Transit
temperature
Freezing
temperature**
Dimensions
(W × D × H)
Weight
(approximate)
* The print capacity may vary, depending on how often you run cleaning cycles.
** Ink thaws and is usable after approximately 3 hours at 77 °F (25 °C).
Black
(T486011)
(A4, 720 dpi,
5% coverage)
0.99 × 5.5 × 4.2
inches
25.1 × 139.6 ×
105.3 mm
7.05 oz (200 g) 8.8 oz (250 g) 7.05 oz (200 g)
Cyan, light
cyan
(T489011)
5% coverage each color)
Installed: –4 to 104 °F (–20 to 40 °C),
1 month at 104 °F (40 °C)
Uninstalled: –22 to 104 °F (–30 to 40 °C),
1 month at 104 °F (40 °C)
–22 to 140 °F (–30 to 60 °C)
1 month at 104 °F (40 °C)
120 hours at 140 °F (60 °C)
1.4 × 5.6 × 4.2 inches
35.1 × 140.9 × 105.3 mm
Caution:
To ensure good results, use genuine EPSON ink cartridges. Other
products may cause damage to your printer not covered by
EPSON’s warranty.
Magenta,
magenta
(T488011)
2400 pages
(A4, 720 dpi,
5 °F (–15 °C)
light
Yellow
(T487011)
2500 pages
(A4, 720 dpi,
5% coverage)
0.99 × 5.5 × 4.2
inches
25.1 × 139.6 ×
105.3 mm
Since the quality of any particular brand or type of paper may be
*
changed by the manufacturer at any time, EPSON cannot attest to
the quality of any non-EPSON brand or type of paper. Always test
samples of paper stock before purchasing large quantities or
printing large jobs. Poor quality paper may reduce print quality and
cause paper jams and other problems. If you encounter problems,
switch to a higher grade of paper.
2 - EPSON Stylus Pro 5500
Don’t use an ink cartridge if the date on the package has expired.
2/01
Page 3

EPSON Stylus Pro 5500
Mechanical
Paper feed method Friction
Paper path Paper tray, front and rear manual feed
slots, optional lower paper cassette
Paper tray capacity 250 sheets of 17 pound (64 g/m
2
) plain
paper (for EPSON media capacity, see
page 10)
Output tray capacity 75 sheets of 24 lb (90 g/m
2
) plain paper
Dimensions Storage:
Width: 25.2 inches (640 mm)
Depth: 17.3 inches (439 mm) maximum
Height: 8.8 inches (224 mm)
Printing
(A3 size paper)
Width: 25.2 inches (640 mm)
Depth: 27.7 inches (704 mm) maximum
Height: 8.8 inches (224 mm)
Printing
(A4 size paper, optional lower paper
cassette installed)
Width: 25.2 inches (640 mm)
Depth: 23 inches (584 mm) maximum
Height: 12.5 inches (318 mm)
Weight 48.5 pounds (22 kg) without the ink
cartridges
Environmental
Temperature Operation: 50 to 95 °F (10 to 35 °C)
Storage:
–
4 to 140 °F (–20 to 60 °C),
stored in shipping container
1 month at 104 °F (40 °C)
120 hours at 140 °F (60 °C)
Humidity Operation: 20 to 80% RH
Storage: 5 to 85% RH (stored in
shipping container, without
condensation)
Safety Approvals
Safety standards UL 1950, CSA C22.2 950
Interfaces
Parallel Interface
Compatibility
mode
ECP mode Transmission mode: IEEE-1284 ECP mode
USB Interface
Standard Based on Universal Serial Bus
Bit rate 12 Mbps (full speed device)
Adaptable
connector
Recommended
cable length
Forward channel
Data format: 8-bit parallel, IEEE-1284
compatibility mode
Synchronization:
STROBE
Handshake timing:
BUSY
pulse
and
ACKNLG
signals
Signal level: TTL compatible
Connector: 57-30360 Amphenol connector
or equivalent
Reverse channel
Transmission mode: IEEE-1284 Nibble
mode
Synchronization: Refer to IEEE-1284
specification
Handshaking: Refer to IEEE-1284
specification
Signal level: IEEE-1284 Level 1 device
Data transmission timing: Refer to IEEE1284 specification
Connector: 57-30360 Amphenol connector
or equivalent
Synchronization: Refer to IEEE-1284
specification
Handshaking: Refer to IEEE-1284
specification
Signal level: IEEE-1284 Level 1 device
Data transmission timing: Refer to IEEE1284 specification
Connector: 57-30360 Amphenol connector
or equivalent
Specifications Revision 1.1, Universal
Serial Bus Device Class Definition for
Printing Devices Version 1.1
USB Series B
6.6 ft (2 m)
EMC FCC part 15 subpart B class B
CSA C108.8 class B
2/01 EPSON Stylus Pro 5500
- 3
Page 4
EPSON Stylus Pro 5500
Control Panel Lights
black and cyan
ink out lights
standard and
lower tray
lights
Operate light
manual feed
tray light
magenta and
yellow ink out
lights
Ink Out
Paper Out
Paper Size/Type
lights
When the control panel lights come on or flash, you need to replace consumables or solve a problem, as described in the following
table:
Control panel lights Problem Response
Paper Out light on and standard or optional
lower paper tray light on
or
Paper Out light flashing and all paper tray lights
flashing
Paper out or incorrectly loaded Load paper, or make sure paper is loaded correctly, in the
corresponding tray.
Paper tray not installed Make sure the indicated tray is installed correctly.
Paper jam Turn off the printer and remove the jammed paper.
Paper path cover is open Close the paper path cover.
Ink Out light flashing and one or more
lights flashing
Ink Out light on and one or more
lights on
H
4 - EPSON Stylus Pro 5500
ink out
H
ink out
Corresponding ink cartridge nearly
empty
Corresponding ink cartridge empty or
not installed
2/01
Obtain a replacement ink cartridge.
Replace the ink cartridge (or make sure it’s installed
correctly).
Page 5

EPSON Stylus Pro 5500
Control panel lights Problem Response
Paper Size/Type light flashing and one or both
paper tray lights flashing
Paper Size and/or Media Type setting
doesn’t match lever settings
Make sure the Paper Size and Media Type settings in your
printer software match the lever settings on the paper tray.
(Press the Eject/Continue button to force print.)
Ink Out, Paper Out, and Paper Size/Type lights
on and all paper tray and
Ink Out, Paper Out, and Paper Size/Type lights
flashing, but the paper tray and
are off
Paper Out and
Out and Paper Size/Type light on, all paper tray
lights flash, and
POperate lights flashing, Ink
H
ink out lights flashing
H
ink out lights
H
ink out lights are on
Print head is too hot Turn off the printer, wait a few moments, then turn it back
on. Run a nozzle check and, if necessary, clean the print
head.
Maintenance will be required soon Turn off the printer and contact EPSON.
Maintenance required now Turn off the printer and contact EPSON.
All control panel lights flashing Unknown error Turn off the printer and remove any foreign objects or paper
2/01 EPSON Stylus Pro 5500
that may be obstructing print head movement. Then turn on
the printer again. If you still see the error indicators, turn off
the printer and contact EPSON.
- 5
Page 6

EPSON Stylus Pro 5500
Installing Ink Cartridges for the First Time
Always use new ink cartridges. Reinstalling partially empty ink
cartridges prevents the ink counter from accurately indicating
the amount of ink remaining.
1. Plug in the printer and turn it on by pressing the
P
Operate
second until the P
and main paper tray light come on and all the H ink out
lights flash.
Note:
The first time you plug in the printer, the power supply may cycle the
fan and then turn off. This is normal operation.
button. Press the button and hold it for a
Operate
light comes on. The
Ink Out
Operate
button
5. Lift up the ink cartridge clamp for the corresponding ink
slot.
6. Hold the ink cartridge with the arrow mark face-up and
pointing to the rear of the printer, and fully insert the
cartridge into the slot.
2. Open the left and right ink cartridge compartment doors.
black
cyan/
light cyan
light magenta
yellowmagenta/
3. Open one of the ink cartridge packages and shake the
cartridge gently, as shown.
4.
Caution:
You can install the ink cartridges in any order; however, each slot can
only hold the specified ink color.
Warni ng:
If ink gets on your hands, wash them thoroughly with soap and
water. If ink gets in your eyes, flush them immediately with water.
To avoid injury, do not reach into the ink cartridge compartments.
7. Close the clamp until it clicks into place. The
corresponding H ink out light goes out. Repeat steps 3
through 6 for the other ink cartridges.
8. Make sure all the H ink out lights are off, then close the ink
compartment doors.
The printer begins charging the advanced ink delivery
system. The P
Operate
light flashes and the printer makes
various sounds. Charging takes about 6 minutes. Do not
turn off the printer or interrupt this process or you’ll use
up more ink than necessary. The P
Operate
light stops
flashing when the ink charging process is finished.
6 - EPSON Stylus Pro 5500
2/01
Page 7

EPSON Stylus Pro 5500
Caution:
Never turn off the printer or open the paper path cover when the
P Operate light is flashing. However, if the light is still flashing
after 15 minutes and the printer is not moving or making noise, you
may turn off the printer.
Running a Printer Check
You can run a printer check to make sure that your printer is
operating correctly. Follow these steps:
1. Make sure the printer is turned off.
2. Make sure letter-size (or larger) paper is loaded in the main
paper tray.
3. Hold down the
button to turn on the printer. Release both buttons when
Operate
the
P
After a few moments, the printer prints one page showing
the version of your printer’s ROM, a nozzle check pattern,
and the printer’s default settings, as shown below:
Reset
button and press the
light begins flashing.
P
Operate
Aligning the Print Head
Before you use the printer, you should align the print head to
ensure accurate, clean printouts.
Before you begin, load several sheets of one of these types of
paper, letter-size or larger, in the main paper tray:
❏ Archival Matte Paper
❏ Premium Glossy Photo Paper, or
❏ Professional Glossy Paper
There are two ways to align the print head:
❏ Using the Print Head Alignment utility in your printer
software (not available if you’re accessing the printer over a
network)
❏ Using the printer’s control panel buttons
Using the Print Head Alignment Utility
1. Make sure the printer is turned on but not printing, and the
paper described above is loaded in the main paper tray.
2. If you have an application running, access the printer
settings dialog box.
4. Press the
P
Operate
button to turn off the printer.
5. Check the printout.
❏ If the printout looks like the example above, your
printer is operating correctly.
❏ If the pattern has missing segments, as in the following
example, your printer may have a clogged ink nozzle.
Run a cleaning cycle (see page 12).
❏ If nothing prints at all, make sure your ink cartridges are
correctly installed. Then run a cleaning cycle (see
page 12).
Or, with Windows, click
Printers
select
. Right-click the
printer icon. Then select
Document Defaults
Me),
Preferences
(Windows 2000).
Start
, point to
EPSON Stylus Pro 5500
Properties
Settings
(Windows 95, 98, or
(Windows NT), or
, and
Printing
3. Macintosh: Click the utility button.
Utility
Windows: Click the
4. Click the
Print Head Alignment
tab.
button.
5. Follow the instructions on the screen to print a test page.
Printing takes several minutes. You see an alignment
window.
6. On the printed page, select the pattern that shows the two
vertical lines most precisely printed on top of each other.
Select one pattern each for rows 1, 2, and 3. Then enter the
number of the best pattern for each row in the
corresponding boxes on the screen.
Note:
You may want to check the alignment patterns using a standard
8X loupe so they’re easier to see. You’ll probably need to align
the print head at least twice when you first set up the printer.
7. Click
Realignment
to print another test page. Make sure
the pattern numbered 8 in each row is the best aligned. If
not, repeat steps 6 and 7.
8. When you’re finished, click
Finish
.
2/01 EPSON Stylus Pro 5500
- 7
Page 8

EPSON Stylus Pro 5500
Using the Control Panel
1. Turn off the printer, if necessary.
2. Hold down both the
Reset
Eject/Continue
and
buttons while you press and hold the P
button to turn on the printer. Release all three
buttons when the P
Operate
light starts flashing.
The printer enters print head alignment mode and
three patterns like those to the right are printed (this
may take up to seven minutes to print):
3. Check the printout and select the numbered
pattern, from #1 to #3, that is the most misaligned.
(If more than one pattern is misaligned, select the
most misaligned one.)
For example, pattern #2 here is the most misaligned.
4. Press the
button repeatedly until the H ink
Reset
out light representing the misaligned pattern comes
on. For example, press
until the cyan H ink out light
Reset
comes on to indicate pattern #2.
Ink out light indicators for misaligned pattern
Pattern # Black
1On ——
2 — On —
3 —— On
5. Press the
HHHH ink out Cyan HHHH ink out Magenta HHHH ink out
Eject/Continue
button to enter your selection.
The printer prints 15 patterns, similar to the ones below.
The P
Operate
light flashes while they print. This takes a
couple of minutes.
Operate
7. Press the
button (to move backward) until the H ink out
Reset
Eject/Continue
button (to move forward) or the
light(s) representing the correctly aligned pattern come(s)
on. See the table below.
Ink out light indicators for correctly aligned pattern
Black
Pattern #
1On —— —
2 — On ——
3On On——
4 ——On —
5On — On —
6 — On On —
7On OnOn —
8 ———On
9On —— On
10 — On — On
11 On On — On
12 ——On On
13 On — On On
14 — On On On
15 On On On On
HHHH ink out
Cyan
HHHH ink out
Magenta
HHHH ink out
Yellow
HHHH ink out
For example, to select pattern 8 from the sample above,
press the
Eject/Continue
or
button until the
Reset
yellow H ink out light comes on.
8. Press the
Cleaning
button to enter your selection. The
printer returns to print head alignment mode.
9. If other numbered patterns on the first printout (shown in
step 3) are misaligned, repeat steps 2 through 9.
6. Check the printout and select the numbered pattern that is
correctly aligned. For example, pattern 8 here is aligned.
8 - EPSON Stylus Pro 5500
10. When you’re finished aligning the print head, press the
P
Operate
button to save the alignment setting and turn
off the printer.
2/01
Page 9

EPSON Stylus Pro 5500
Replacing an Ink Cartridge
When the
Ink Out
the cartridge indicated by the H ink out light is low on ink. This
is a good time to make sure you have a replacement cartridge.
When the
Ink Out
the H ink out light is empty and you need to replace it.
Use only the following EPSON ink cartridges:
❏ Black: T486011
❏ Cyan/light cyan: T489011
❏ Magenta/light magenta: T488011
❏ Yellow: T487011
Caution:
To ensure good results, use genuine EPSON cartridges and do not
refill them. Other products may cause damage to your printer not
covered by EPSON’s warranty.
Always leave the empty cartridge installed in the printer until you
are ready to replace it with a new one.
1. Make sure the printer is turned on, and determine which
cartridge needs to be replaced by checking the control panel
lights.
light on the printer’s control panel flashes,
light stays on, the cartridge indicated by
3. Lift up the clamp for the empty cartridge, then carefully
pull the cartridge straight out of the printer.
Warni ng:
If ink gets on your hands, wash them thoroughly with soap and
water. If ink gets in your eyes, flush them immediately with water.
To avoid injury, do not reach into the ink cartridge compartments.
4. Make sure the replacement cartridge is the correct color,
then remove it from its package.
5. Shake the new cartridge gently, as shown.
2. Open the appropriate ink cartridge compartment door.
The compartment for the black and cyan cartridges is on
the left; the compartment for magenta and yellow is on the
right.
Warni ng:
Don’t shake the cartridge you remove; ink may leak out.
6. Insert the ink cartridge with the arrow mark face-up and the
pointing into the printer.
7. Lower the clamp until it clicks into place.
8. Make sure the corresponding
H ink out light goes off.
If it remains on, the cartridge may not be installed correctly.
Remove the cartridge and reinsert it as described above.
9. Close the compartment door and resume printing.
2/01 EPSON Stylus Pro 5500
- 9
Page 10

EPSON Stylus Pro 5500
Selecting a Paper Path
You can use the 250-sheet auto feed paper trays for the lettersize or larger papers you print on most often. The front manual
slot gives you a convenient way to feed individual Executive-size
or larger sheets. The rear manual slot provides a straightthrough paper path for papers of all sizes and weights, up to
44 inches long.
The following illustrations show the paper paths available:
Standard paper tray:
Optional lower paper tray:
Front manual feed slot:
Rear manual feed slot:
The following table indicates the paper sizes you can print from
the four paper paths:
Substrate sizes and paper paths
Substrate Sizes Standard
Half letter/A5
or less
Executive
10 in.)
(7.5 ×
Letter/A4 OK OK OK OK
Letter/A4 landscape OK OK OK OK
Legal OK OK OK OK
Ledger/tabloid/A3/B
(11 ×
17 in.)
Super A3/B
19 in.)
(13 ×
Panoramic, banner,
or paper longer than
19 in.
paper tray
———OK
——OK OK
OK OK OK OK
OK OK OK OK
———OK
Optional
lower
paper tray
Front
manual
slot
Rear
manual
slot
Using the Standard and Optional Paper Trays
You can use these trays for most sizes of paper up to 13 × 19
inches. However, the trays can’t handle paper shorter than
11 inches (letter-size).
To determine how many sheets of your paper type you can load
in the paper trays, see the next section.
When you load paper in either of the trays, you need to set the
paper size and media type levers to match the paper you’re
using, as described on page 11. This allows your software to
verify that the print settings for a project are correct for the
paper you’re using. If the print settings don’t match the lever
settings, you’ll get an error message, and your job won’t print.
Note:
You can disable verification by setting the levers to Other. However,
the purpose of paper size and media type verification is to help you
avoid printing errors, and you should take advantage of this help
whenever possible.
Paper Tray Loading Capacities and Guidelines
The loading capacity of the paper trays depends on the type of
paper you’re loading. Use this table to determine the number of
sheets you can load:
Paper type Paper tray capacity Additional information
Archival Matte Paper 50 (A4 or letter size)
Premium Glossy
Photo Paper
Professional Glossy
Paper
Premium Luster
Photo Paper
Plain paper 250 Use the rear manual
20 (A3 or Super A3/B
size)
20 —
20 —
20 —
Use the support sheet
packed with the paper
feed slot for paper
smaller than letter size
10 - EPSON Stylus Pro 5500
Note:
You can’t load Watercolor Paper - Radiant White or card stock in the
paper trays. Use the rear manual feed slot only.
2/01
Page 11

EPSON Stylus Pro 5500
When you’re loading the paper trays, follow these guidelines:
❏ Don’t touch the printable surface of the substrate.
Fingerprints may affect print quality.
❏ Keep unused media in its packaging and store it in a cool,
dry place to avoid a decline in quality. Avoid storing media
or printouts where they will be exposed to high
temperature, humidity, or direct sunlight.
❏ Place the printable side of the paper face-down in the tray.
If you’re using preprinted paper, such as letterhead or
forms, load it with the top edge leading into the printer.
❏ Some EPSON special media have cut corners to help you
determine the correct loading position for the paper path
you are using:
Paper tray and front manual feed slot:
Rear manual feed slot:
❏ Load paper before you send your print job. If the paper runs
out during a print job, you can have the printer
automatically switch to the other tray. (The paper size and
media type levers must be set the same for both trays, or the
on the lower tray. See the next
levers must be set to
Other
section for instructions.)
❏ Always choose the correct Media Type setting in your
printer software before you send your print job.
❏ Press the
Eject/Continue
button if you need to remove a
sheet of paper.
❏ To keep your printouts looking their best, store them in a
resealable plastic bag or other airtight covering.
Media type lever settings
Paper Media type lever setting
Plain paper Plain Paper
Archival Matte Paper Archival Matte Paper
Premium Glossy Photo Paper Premium Semigloss Photo Paper
Professional Glossy Paper Glossy Paper - Photo Weight
Premium Luster Photo Paper Premium Luster Photo Paper
Use only if ink smears Thick Paper
Use for unlisted substrates Other
Note:
For any substrates not on this list, set the lever to Other.
The following table identifies the paper size lever settings:
Paper size lever settings
Media size Paper size lever setting
13 × 19 in. Super A3/B
297 × 420 mm A3
Ledger/tabloid/11 × 17 in. LGR
Legal/11 × 14 in. LGL
210 × 297 mm A4
Letter/8.5 × 11 in. LTR
No. 10/DL/C5/C6 envelopes Other
Any other size Other
1. Load your paper. The trays can hold 250 sheets of plain
paper (24 lb bond, for example). Follow the guidelines for
tray capacities on page 10 when you use EPSON media or
similar papers.
2. Set the media type and paper size levers according to the
guidelines in the tables above.
Setting the Paper Tray Levers
For best printing results, you need to set the media type and
paper size levers correctly when you load paper. You should also
use the media type and paper size cards to identify the substrate
loaded in each tray. This helps all users to be aware of what’s in
the printer at a glance, and also prevents anyone from
inadvertently changing the lever positions.
The table to the right identifies the media type settings for
EPSON media and similar papers.
3. Find the paper size and media type cards for the paper you
loaded, open the clear plastic covers above the levers, and
insert the cards.
storage
pocket
paper
size
media type
If you change paper type or size in one of the trays, be sure you
change the lever settings and cards. Store unused cards in the
pocket behind the left card slot.
2/01 EPSON Stylus Pro 5500
- 11
Page 12

EPSON Stylus Pro 5500
Loading Paper in the Optional Lower Tray
Always pull the paper tray completely out of the lower paper
cassette before you insert paper.
Note:
If you use paper longer than letter size in the lower tray, pull out the
tray and cover extensions of the upper paper tray, so your printouts
will be supported when they come out of the printer.
To print on paper in the lower tray, select
or
Auto Select
in your printer software before you send the
print job.
Paper Tray (Lower)
Or, with Windows, click
select
Printers
. Right-click the
printer icon. Then select
2000),
Document Defaults
Preferences
(Windows 2000).
, point to
Start
EPSON Stylus Pro 5500
Properties
(Windows 95, 98, or
(Windows NT), or
3. Macintosh: Click the utility button.
Windows: Click the
4. On the Utility menu, click the
Utility
tab.
Head Cleaning
5. Follow the instructions on the screen to clean the print
head. Cleaning takes about 90 seconds, during which the
printer makes some noise and the P
Caution:
To avoid damaging the printer, never turn it off while the
P
Operate
made any noise for more than five minutes.
6. When the P
light is flashing—unless the printer hasn’t moved or
Operate
light stops flashing, run a nozzle
Operate
check to confirm the print head nozzles are clean. Make
sure paper is loaded in the printer, then:
Macintosh: Click
Windows: Click
.
Print
Confirmation
Print nozzle check pattern
, then click Next.
The nozzle check pattern prints.
Settings
button.
light flashes.
, then click
, and
Printing
Cleaning the Print Head
If your printed image is unexpectedly light or faint or dots are
missing from the image, you may need to run a cleaning cycle.
This unclogs the print head nozzles so they can deliver ink
properly.
The cleaning cycle uses ink, so you should run it only if print
quality declines. You can run a printer check or the Nozzle
Check utility to determine if the cleaning cycle has been
successful, or if you need to run it again.
There are two ways to run a cleaning cycle:
❏ Using the Head Cleaning utility in your printer software
(not available if you’re accessing the printer over a network)
❏ Using the printer’s control panel buttons
Using the Head Cleaning Utility
Follow these steps to run the Head Cleaning utility:
1. Make sure the printer is turned on but not printing, and the
Ink Out
light is off. If the
Ink Out
you need to replace the ink cartridge(s)—indicated by the
H ink out lights—instead. See page 12 for instructions.
2. If you have an application running, access the printer
settings dialog box.
light is flashing or on,
7. If the nozzle check pattern has no gaps in its dots, click
.
Finish
If the pattern is missing dots, click
to clean the print
Clean
head again. If you don’t see any improvement after cleaning
three or four times, check the solutions in your Printer
Guide. You can also turn the printer off and wait
overnight—this allows any dried ink to soften—and then
try cleaning the print head again.
Cleaning the Print Head Using the Control Panel
Clean the print head using the control panel buttons if you’re
accessing the printer over a network or not using the EPSON
printer driver and utilities. Follow these steps:
1. Make sure the printer is turned on but not printing, and the
Ink Out
light is off. If the
Ink Out
you need to replace the ink cartridge(s)—indicated by the
H ink out lights—instead. See page 12 for instructions.
2. Press the
Cleaning
button and hold it down for three
seconds.
The P
Operate
light begins flashing, and the printer ejects
any paper in the paper path. The cleaning cycle takes about
90 seconds.
light is flashing or on,
12 - EPSON Stylus Pro 5500
2/01
Page 13

EPSON Stylus Pro 5500
Caution:
To avoid damaging the printer, never turn it off while the
P Operate light is flashing—unless the printer hasn’t moved or
made any noise for more than five minutes.
3. After the
Operate
P
light stops flashing, print a few lines
or run a printer check (as described on page 7) to confirm
that the nozzles are clean.
If you don’t see any improvement after cleaning three or four
times, check the solutions in your Printer Guide. You can also
turn the printer off and wait overnight—this allows any dried
ink to soften—and then try cleaning the print head again.
Transporting the Printer
If you need to ship your printer, you must prepare it for
transportation and repack it in the original box. You must also
remove the ink cartridges, to avoid the possibility of ink leakage.
However, if you are moving the printer only a short distance,
for example, from one table to another, you don’t need to
remove the cartridges.
Be sure to keep the printer level whenever you move it.
1. Turn on the printer.
Warni ng:
The printer weighs approximately 50 lb. Do not try to lift or carry the
printer alone.
7. If the optional lower paper cassette is installed, unscrew it
and lift the printer off of the cassette.
8. Insert the protective materials you removed when you
unpacked the printer.
9. Repack the printer, paper tray, and any other parts in the
original boxes.
2. Remove any paper in the printer and in the paper trays.
Press the
Eject/Continue
button to eject any paper that has
been fed into the printer.
3. If you’re shipping the printer or moving it a long distance,
remove all four of the ink cartridges and store them in
separate, resealable plastic bags. Close the ink cartridge
clamps and compartment covers.
Caution:
You must remove the ink cartridges before shipping the printer to
prevent leakage. Remove the ink cartridges while the printer is
turned on, and then turn off the printer using the Operate button.
This will properly close and seal the ink supply valves.
Don’t turn off the printer by unplugging it or turning off a power
strip. This will not properly lock the print head in the home position,
causing ink to leak out and damage the printer.
4. Turn off the printer and make sure the print head is in the
home (far right) position.
If it’s not, turn the printer back on, wait until the print head
stops moving and is in the home position, then turn off the
printer. After you turn it off, the
Operate
P
light may
flash for a while. Do not unplug the power cord until the
light goes off.
5. Unplug the power cord from the electrical outlet, then
disconnect the interface cable from the printer.
6. Remove the standard paper tray. If the optional lower paper
cassette is installed, remove the lower tray too.
Remember to keep the printer level during transport.
To set up the printer after transporting it, follow the
instructions in Chapter 1 of the Printer Guide, except:
❏ Turn off the printer before reinstalling the cartridges, if you
removed them before transporting the printer. It is best to
install new cartridges because your printer’s ink counter will
be reset and able to report the remaining ink level
accurately.
❏ The first time you print after transporting the printer, the
print head nozzles may be clogged. You may need to run a
cleaning cycle, as described on page 12.
Related Documentation
EPSON Stylus Pro 5500 Printer Guide CPD-11338
EPSON Stylus Pro 5500 CD-ROM CPD-12055
EPSON Stylus Pro 5500 Service Manual TM-SPro5500
EPSON Stylus Pro 5500 Parts Price List PL-SPro5500
2/01 EPSON Stylus Pro 5500
- 13
 Loading...