

Page 1

Quick Reference Guide
About This Guide
This guide provides the
information you need to keep
your EPSON color printer
operating at its best. Use it to:
■
Replace consumable parts
■
Clear jammed paper
■
Understand control panel
status and error messages
Your printer displays a message on
the control panel when a
consumable component needs to
be replaced or if an error has
occurred. See the list of messages
at the back of this guide for more
information.
EPSON ColorPage 8000
EPSON
CPD-7703
®
Page 2
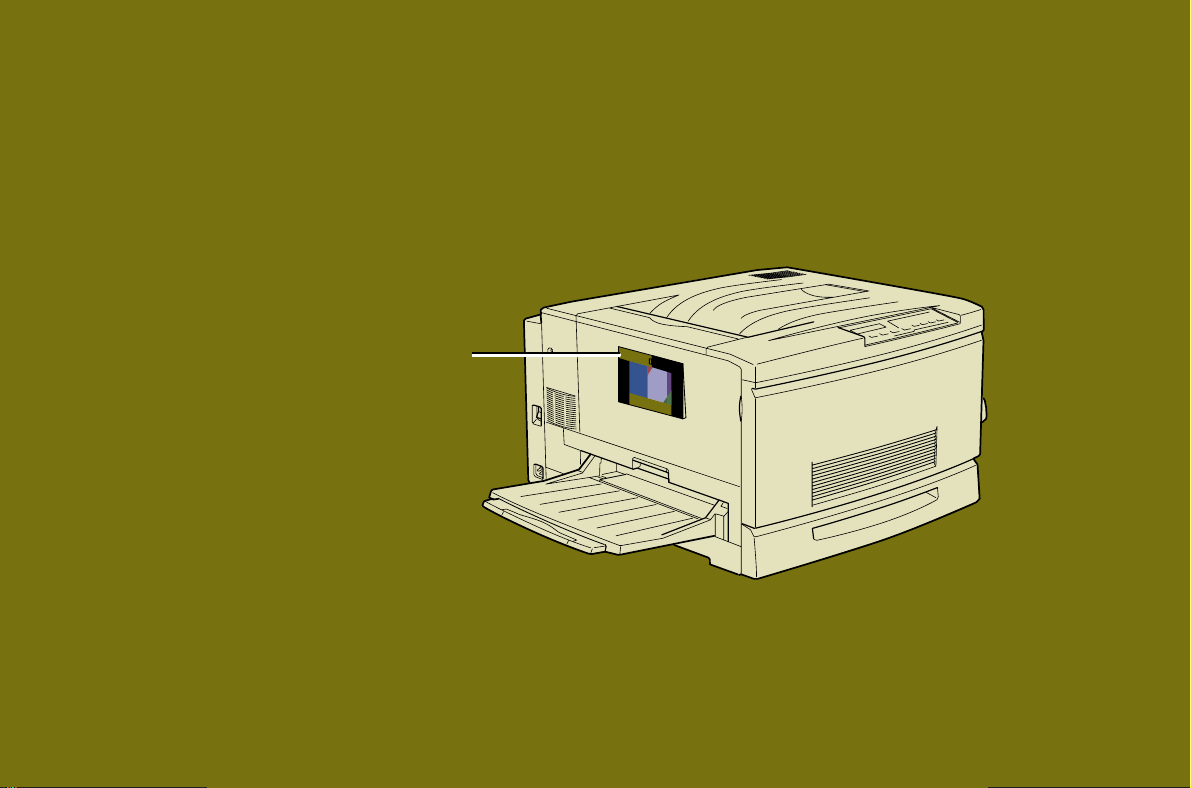
Hang this guide on
the printer using the
hook provided.
Page 3

Replacing a Toner Cartridge
Replacing a Toner Cartridge
installation
window
control panel
display
Toner Cartridge (Cyan) S050018
Toner Cartridge (Magenta) S050017
Toner Cartridge (Yellow) S050016
front cover
When the printer runs out of toner, the control panel
display indicates the color of the toner cartridge that needs
to be replaced. Make sure you have the correct replacement
cartridge, as shown in the table, and then follow these steps.
Avoid touching the toner. If toner gets in your
eyes, flush them immediately with cold water. If
it gets on your skin or clothes, wash it off with
soap and cold water. Keep toner cartridges out of
the reach of children.
1 Open the front cover.
2 Check which of the four colors appears in the cartridge
installation window. If you see the color that you need
to replace, go to step 4. If you see a different color, go
to the next step.
switch
knob
3 Push up the switch
located above the
cartridge, then release it.
Turn the knob until it
stops. Repeat this step
until the cartridge you
want to replace appears
in the window.
Toner Cartridge (Black) S050019
5 Take a new cartridge out of its package and gently
shake it back and forth and front to back to distribute
the toner evenly.
6 Hold the cartridge with the arrow facing up and insert
it as far as possible into the cartridge slot.
7 Turn the cartridge clockwise 90 degrees, pushing it the
rest of the way into the slot. Then close the front
cover.
4 Turn the cartridge
counterclockwise
90 degrees. Then
pull it out of the
slot and dispose of
it carefully.
Make sure you turn the cartridge all the way, or
toner may leak.
1
Page 4
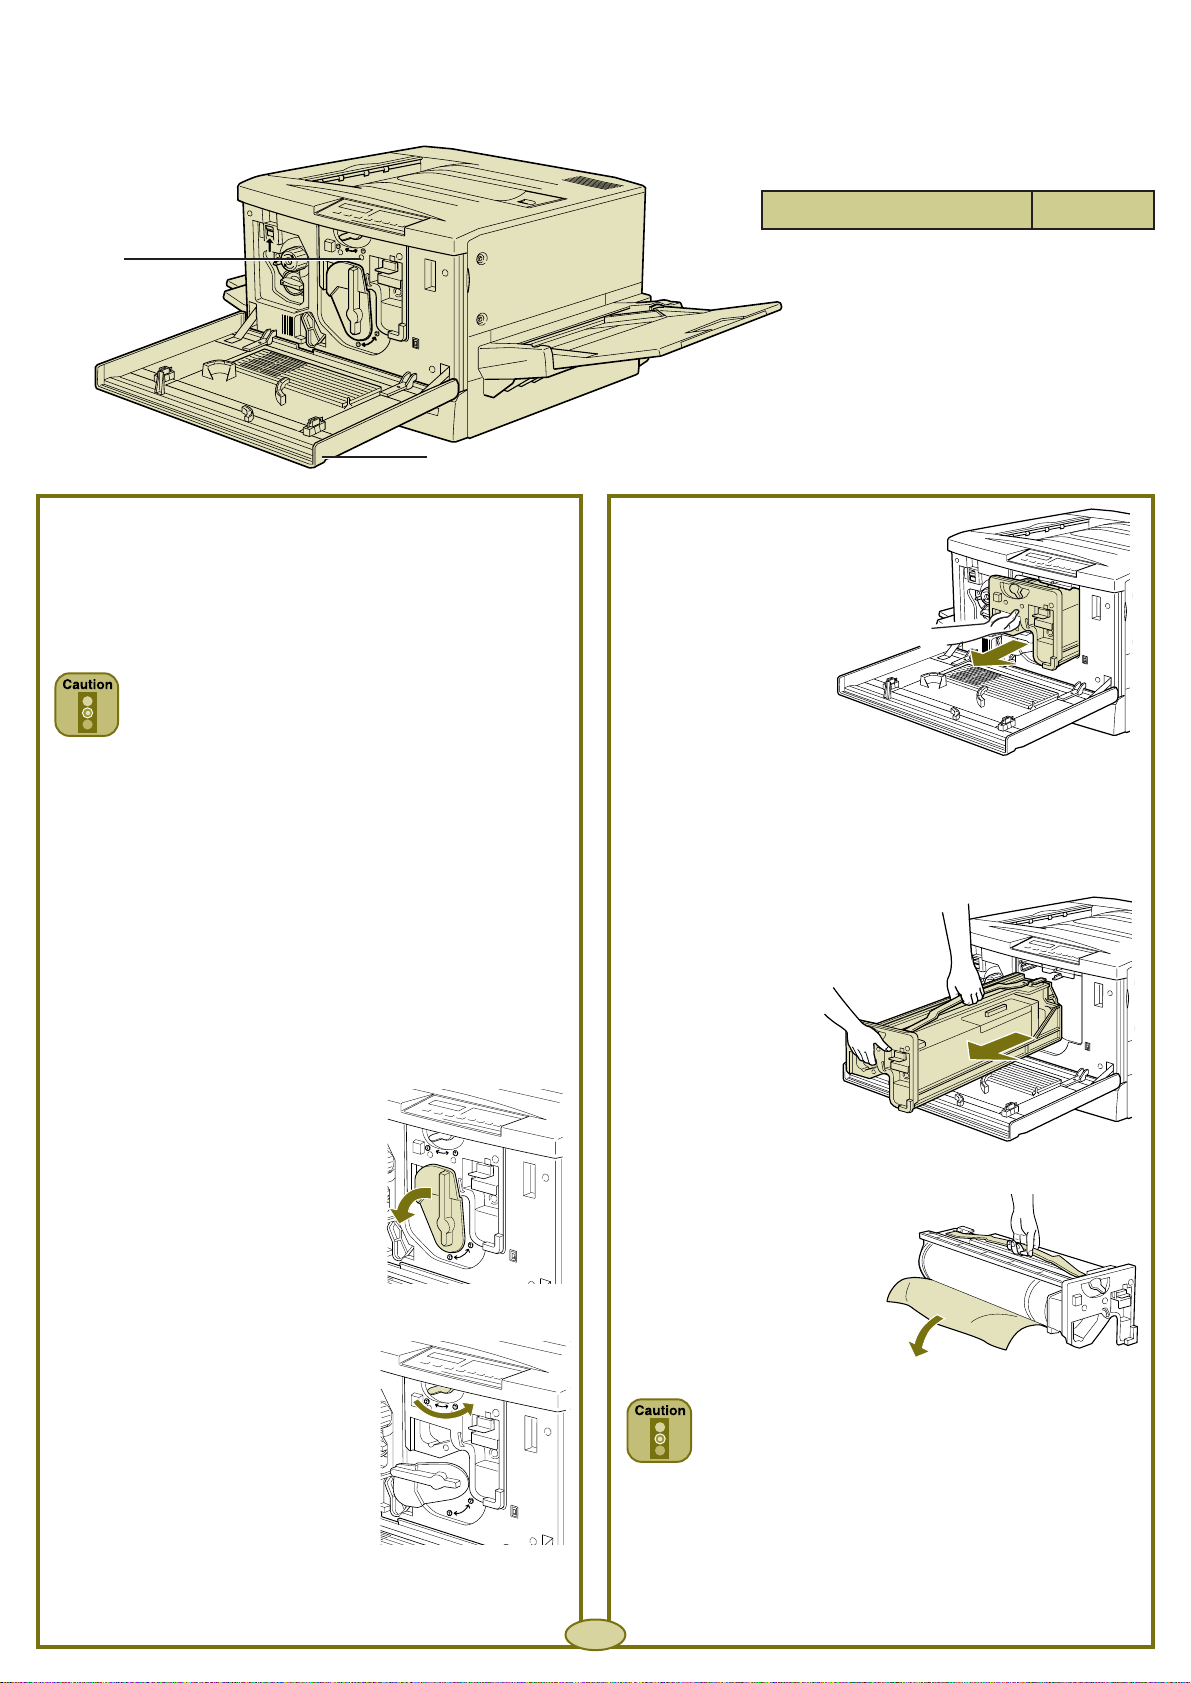
Replacing the Photoconductor
Replacing the Photoconductor
Unit and Waste Toner Collector
Unit and Waste Toner Collector
photoconductor
unit
front cover
Photoconductor Unit S051061
The control panel display lets you know when to replace
the photoconductor unit. Since the waste toner collector is
part of this unit, it is replaced at the same time.
Ocassionally, the waste toner collector may need to be
replaced separately. See page 3 for instructions.
The photoconductor unit requires careful
handling. Avoid exposing the unit to room light
any longer than necessary. Also, don’t touch or
scratch the surface of the drum.
1 Turn off the printer and open the front cover.
4 Pull the photoconductor unit
out about 12 inches (30 cm).
5 Grab the handle at the top of
the photoconductor unit and
gently pull it all the way out.
2 Turn the large lever
counterclockwise 90 degrees.
3 Turn the small lever on the
photoconductor unit to the
right.
6 Take a new photoconductor
unit out of its package.
Hold the unit by the
handle and remove the
protective sheet as
shown.
Don’t touch or scratch the surface of the drum.
Avoid exposing it to room light any longer than
necessary.
▲
Continue
2
Page 5

Replacing the Photoconductor Unit and
Replacing the Photoconductor Unit and
Waste Toner Collector (Continued)
Waste Toner Collector (Continued)
waste toner
collector
front cover
Waste Toner Collector S050020
7 Position the unit over the guide rails
inside the printer. Then carefully slide
it all the way in.
8 Turn the small lever on the unit to the left.
Replacing the waste toner collector
separately
The waste toner collector is replaced each time you replace
the photoconductor unit. However, you may need to
replace the collector separately, as shown.
1 Grab the handle of the waste toner collector and press
down on the tab above the handle to release the lock.
Then pull out the collector and dispose of it.
9 Turn the large lever clockwise 90 degrees.
The display message appears for only one
consumable part at a time. Check the control
panel display for additional replacement
messages.
2 Take out a new waste toner
collector (S050020). Hold the
handle of the collector and
insert it all the way into the
slot.
3 Close the front
cover.
3
Page 6

Replacing the Fuser Oil Roll
Replacing the Fuser Oil Roll
fuser unit
face-up
tray
Fuser Oil Roll S052002
1 Lower the face-up tray, if necessary. Then pull the fuser
unit all the way out.
Be careful not to touch the fuser—marked
CAUTION! HIGH TEMPERATURE—or the
adjoining areas. If you’ve used the printer
recently, the fuser and the area around it can be
very hot.
2 Grab the handle of the fuser oil roll and remove it.
3 Take a new fuser oil roll (S052002) out of its box and
remove the cover and shipping pins, as shown.
4 Hold the roll handle and insert it into the fuser unit,
matching the green marks on the roll and unit.
handle
fuser oil roll
Do not dispose of the used oil roll in fire; it can
explode and cause injury.
positioning marks
5 Push the roll down firmly until it clicks into place.
6 Slide the fuser unit back into the printer.
4
Page 7

Clearing Paper Jams
Clearing Paper Jams
paper path
paper cassette
multipurpose tray
When a paper jam occurs, the printer stops and displays a message on the control panel. The table below lists the error messages
and tells you where to check for jammed paper:
Message Description Action
Feed Jam Paper is jammed in one of the Check the following areas and clear jammed paper
feed areas. if necessary: standard cassette, multipurpose tray,
paper path, large capacity paper unit.
Paper Jam Paper is jammed at the fuser unit. Clear the fuser unit.
Exiting Paper Jam Paper is jammed in the output area. Clear the output path cover.
Check OHP Sheet Transparencies are loaded incorrectly, Clear the multipurpose tray or paper path.
or do not meet printer specifications.
If you need to clear a paper jam, follow these guidelines:
■
Don’t remove jammed paper by force. Torn paper can
be difficult to remove and might cause other paper
jams. Pull it gently to avoid tearing.
■
If jammed paper is torn and remains in the printer, or if
paper is jammed in an area not mentioned below, see
“Where to Get Help” in your Printer Guide.
3 If paper is still jammed in the printer, pull the
multipurpose tray out slowly until it stops. Be careful
not to tear any jammed paper.
multipurpose
tray
Clearing the paper cassette and paper path
Pull the paper cassette out slowly until it stops. Remove
1
any jammed paper.
4 Pull out the jammed paper from the bottom of the
paper path. Then push in the tray firmly.
paper path
2 Replace the paper in the cassette and close it.
Continue
▲
5
Page 8

Clearing Paper Jams (Continued)
Clearing Paper Jams (Continued)
Clearing the multipurpose tray and paper path
If you see paper
1
jammed in the
multipurpose tray,
pull the paper out
gently.
2 If paper is jammed inside the printer, pull out the
multipurpose tray until it stops.
4 Turn the knob clockwise. The jammed paper should
come out.
5 After the jammed paper is ejected halfway, pull the
paper up and out. Then close the cover.
3 Raise the paper path cover.
6 Push in the multipurpose tray firmly.
▲
Continue
6
Page 9

Clearing Paper Jams (Continued)
Clearing Paper Jams (Continued)
fuser unit
face-up output
tray
Clearing the fuser unit
If you see paper jammed in the path to the face-up output
tray, don’t try to pull it out of the tray. You’ll need to clear it
from the fuser unit instead:
1 Pull the fuser unit out gently until it stops.
3 Turn the knob in the
fuser unit to eject
any jammed paper
and pull out the
paper.
4 Reattach the fuser oil roll.
2 Grab the handle of the fuser oil roll and remove it.
Do not touch the fuser; it may be very hot.
Replace the fuser oil roll as soon as you clear the
jammed paper. To avoid oil leakage, make sure
you keep the roll horizontal and do not let it
touch anything.
5 Push in the fuser unit firmly.
▲
Continue
7
Page 10

Clearing Paper Jams (Continued)
Clearing Paper Jams (Continued)
output path
cover
large
capacity
cassette
feeder
cover
Clearing the output path cover
When you see the Exiting Paper Jam message, follow
these steps to clear paper from the output path cover:
1 Open the output path cover on the left side of the
printer.
Clearing the large capacity paper unit
If you’ve checked the paper cassettes and you still see a
Feed Jam message, follow these steps to clear paper from
the large capacity paper unit:
1 Open the feeder cover on the right side of the paper
unit.
2 Carefully lift or pull the jammed paper out of the
printer.
3 Close the output path cover.
2 Pull the jammed paper out gently.
3 Close the feeder cover.
8
Page 11

Control Panel Messages
Control Panel Messages
For a complete list of status messages, see your Printer Guide.
Status message list
Messages Description
Form Feed The printer is feeding paper.
Ready The printer is ready to print.
Reset The printer’s current interface has been reset and the buffer is cleared.
Reset All All printer settings have been reset to the user default configuration, the last settings that
were saved.
Reset to Save You should reset the printer to save the current settings.
Self Test The printer is running a self-diagnostic program.
Standby Level X The printer is turned on, but is in energy-saving mode.
(X = 1 or 2)
Warming Up The printer is warming up.
For a complete list of error messages, see your Printer Guide.
Error message list
Messages Description Action
Check Paper Size The paper size setting is different from Make sure the correct size of paper is loaded
the size loaded in the printer. in the tray; then press the Continue button.
Irregular Density The document density is too great. Clear any jammed paper from the multipurpose
The printer stops loading paper. tray paper path.
Image Optimum There printer doesn’t have enough If the printout is not acceptable, try limiting
memory to print the page at the the number or size of graphics on the page.
specified resolution. The printer
automatically reduces the print quality Turn off the Image Optimum setting in the
so it can continue. SelecType Config menu.
Maintenance Req An internal printer part needs Press the Continue button to print. Make sure you
<error number> to be replaced. note the error number and contact your dealer.
Continue
9
▲
Page 12

Error message list (continued)
Messages Description Action
Mem Overflow The printer doesn’t have enough Press the Continue button on the control panel.
memory available for the current If the message remains, reset the printer by
print job. holding down the Alt and Reset buttons.
If the same message appears when you try
printing again, you may need to reduce the
number or size of graphics or fonts, lower the
resolution, or add memory to your printer.
Replace Oil Roll The fuser oil roll is empty. Replace the fuser oil roll (see page 4).
Replace Photocondctr The photoconductor unit has reached Replace the photoconductor unit (see page 2).
the end of its service life.
Replace Waste T Box The waste toner collector is full. Replace the waste toner collector (see page 3).
Error message list (continued)
Messages Description Action
<
CMYK
> Toner Out The indicated toner cartridge is empty. Replace the indicated toner cartridge (see page 1).
Service req e A controller error or a print engine Write down the error number and turn off the
<error number> error has been detected. printer. Wait at least 10 seconds and then turn it
back on. If this error still appears, turn off the
printer, unplug the power cord, and contact
your dealer.
10
Page 13

EPSON is a registered trademark for SEIKO EPSON
CORPORATION.
Copyright © 1998 by Epson America, Inc. 12/98
 Loading...