

Page 1

Using the Transparency Unit
The optional transparency unit (part number B81310*) lets you
scan full color transparencies, strips of negatives or positives,
and slides. You can also scan normal opaque documents with
the TPU installed.
Follow the steps in these sections to install and use the TPU:
◗ Unpacking the Transparency Unit
◗ Removing the Shipping Screws
◗ Installing the Transparency Unit
◗ Installing the Transparency Guide
◗ Scanning Transparencies and Oversized Film
◗ Using the Film Holders
◗ Scanning Normal Documents with the Transparency Unit
Installed
◗ Adjusting the Transparency Guide Angle
Page 2
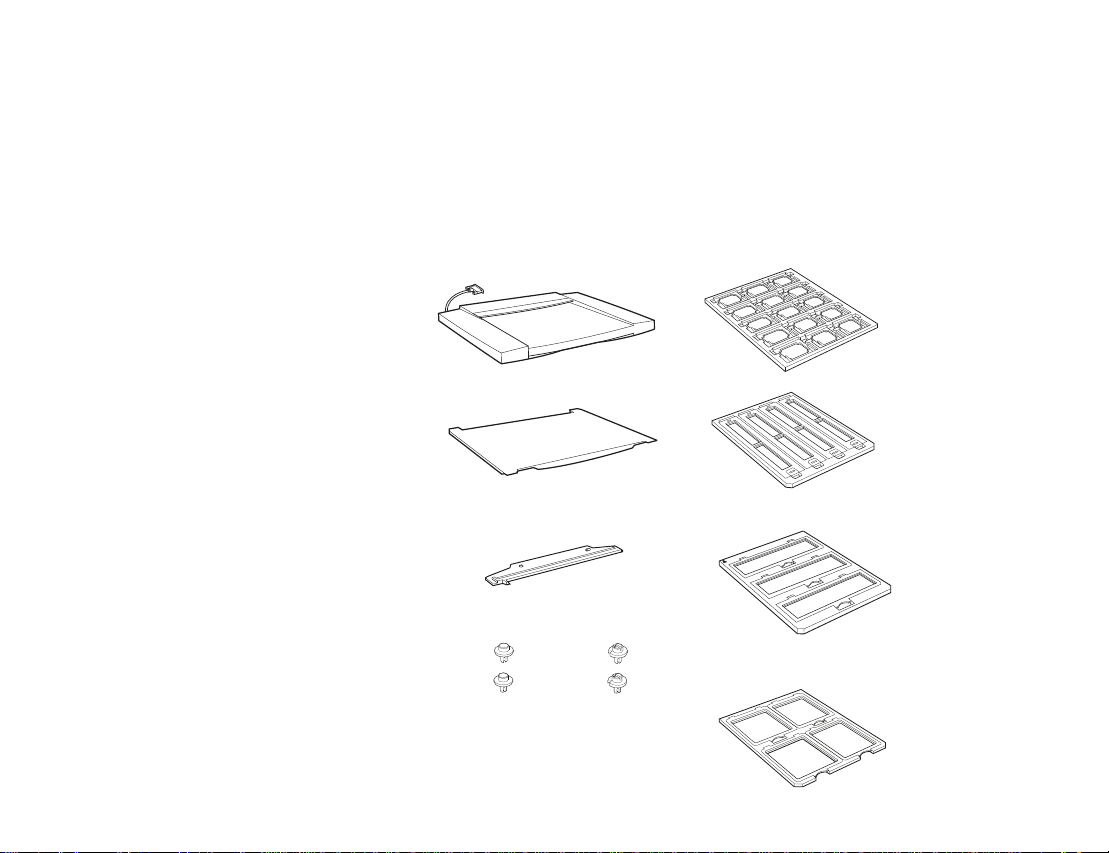
Unpacking the Transparency Unit
Make sure all these items are included in the box with the
TPU. Contact your EPSON dealer if anything is missing or
damaged.
transparency unit
reflective document mat
transparency guide
guide and adjust pins
35 mm slide holder
35 mm filmstrip
holder
medium format film
holder
×
4
5-inch film holder
Page 3
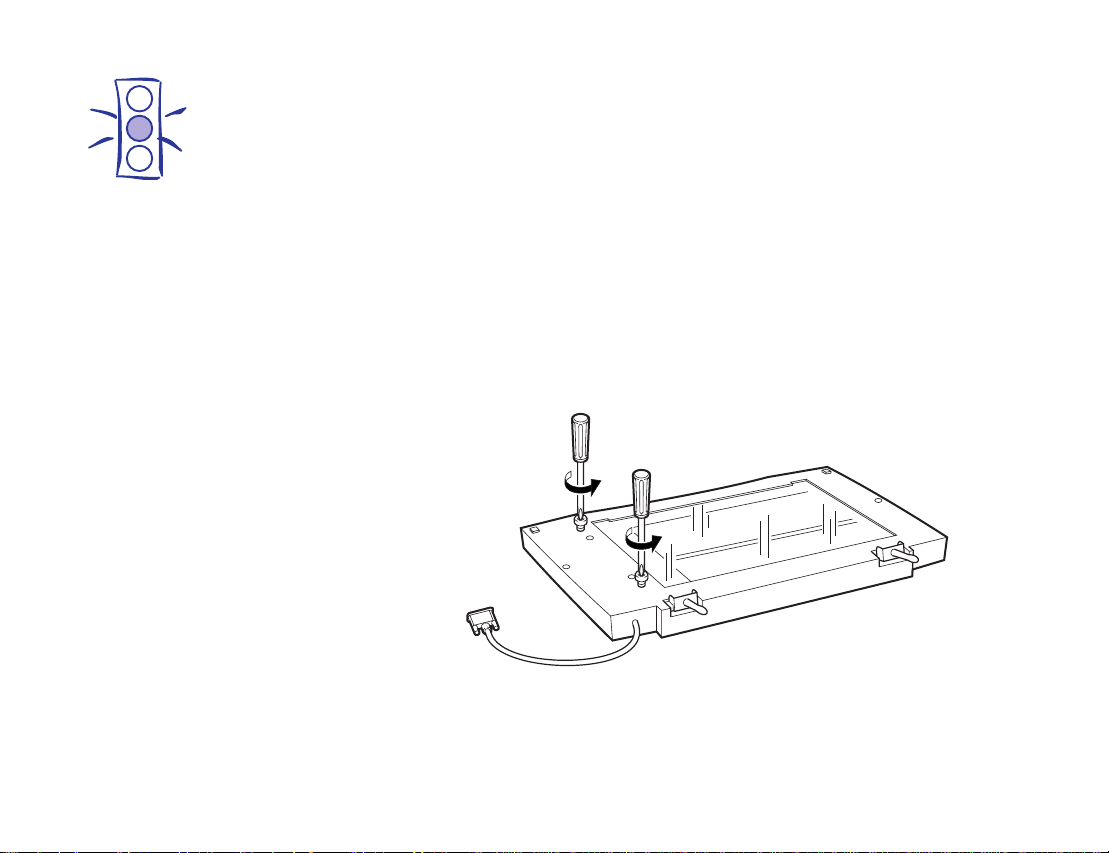
Caution:
If a screw is left in
an outer hole while
using the TPU, the
TPU may be
damaged.
Removing the Shipping Screws
To prevent damage during shipping, shipping screws are
attached to the TPU to secure its lamp assembly. You must
remove these screws before using the TPU.
1 Turn the TPU so the glass side faces up.
2 Use a Phillips head (cross head) screwdriver to remove
both shipping screws from the holes labeled CLAMP, as
shown below.
Page 4
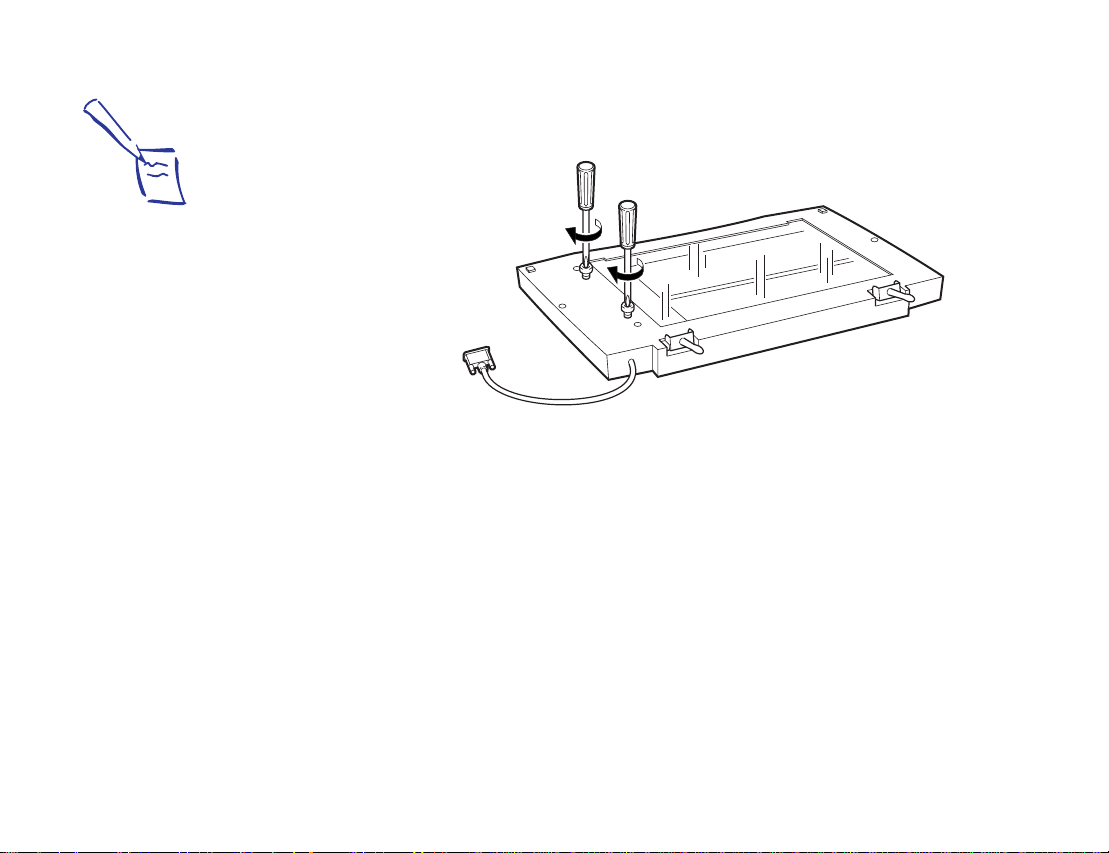
Note:
If you can’t replace
the shipping
screws, the TPU’s
lamp assembly may
not be in its home
position. If this is the
case, reattach the
TPU to the scanner,
close the TPU, and
turn on the scanner.
The lamp assembly
returns to its home
position. Turn off the
scanner, remove the
TPU, and insert the
screws.
3 Install the screws in the storage holes labeled STOCK
between the shipping holes, as shown below.
Before transporting the scanner, turn it off, remove the TPU,
and replace the shipping screws in the outer shipping holes
labeled CLAMP. The transportation lock screw on the scanner
must also be locked before transporting the scanner (see the
scanner’s
Setup Guide).
Page 5
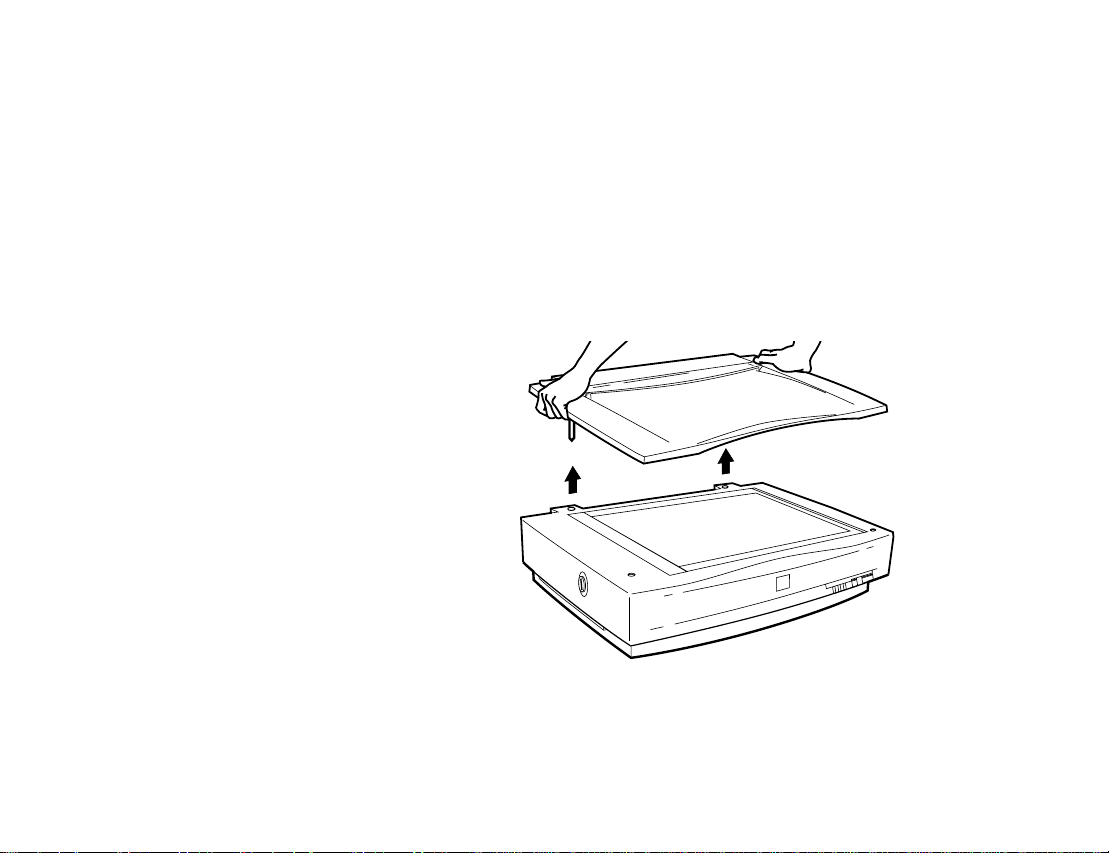
Installing the Transparency Unit
Follow the steps below to install the TPU:
1 Make sure the scanner is turned off. Then unplug the
power cable from the scanner.
2 Remove the document cover by grasping it beside the
hinges and lifting it straight up.
Page 6
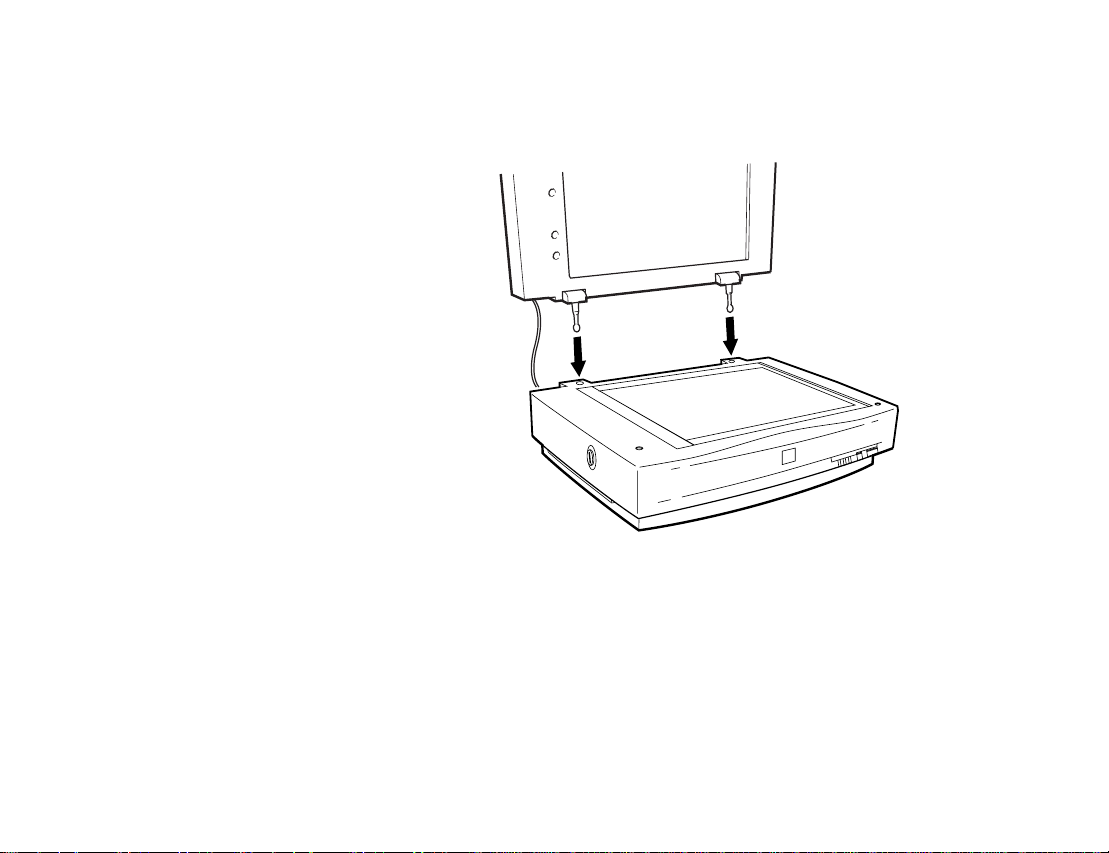
3 Align the TPU hinge pins with the holes in the scanner,
then lower the TPU until the pins rest securely in the holes.
4 Close the TPU.
Page 7
Caution:
Do not put heavy
objects on the
TPU—doing so may
damage the TPU.
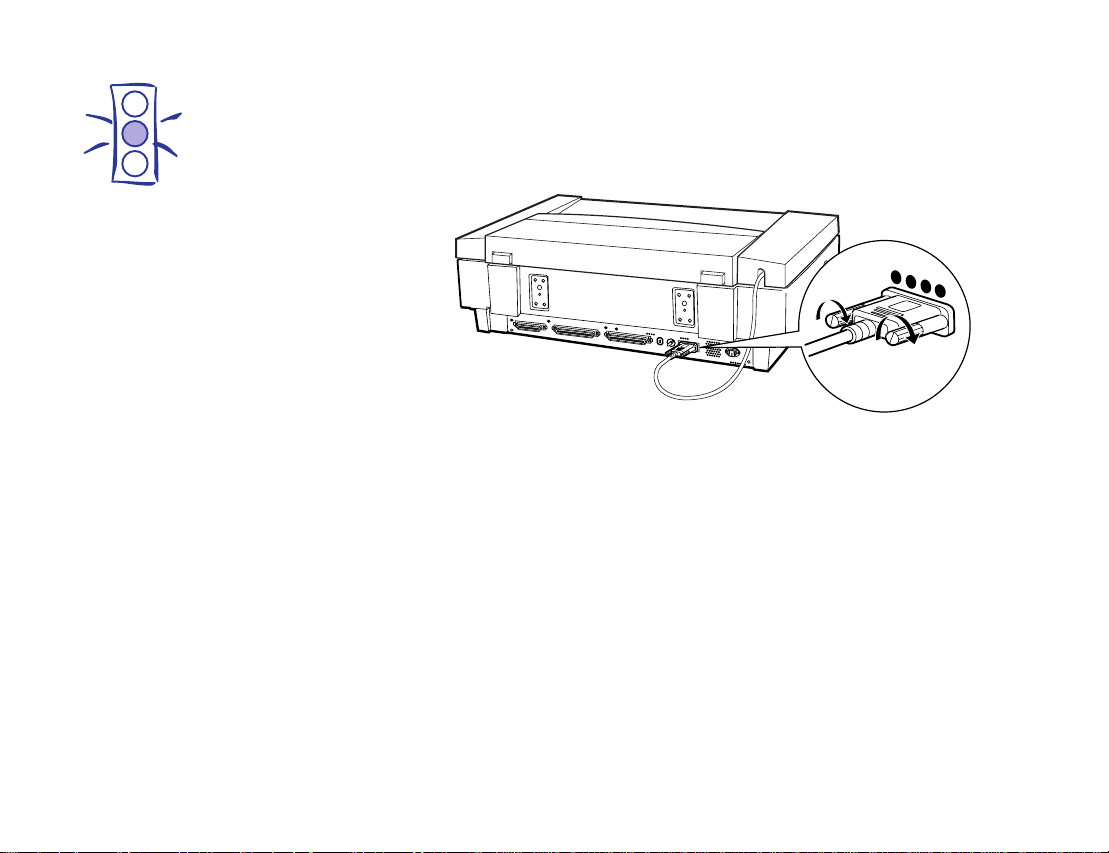
5 Attach the TPU connector to the option connector at the
back of the scanner. Secure the connector using the
attached screws.
6 Plug the scanner back in and turn it on.
Page 8
Installing the Transparency Guide
Follow the steps below to install the transparency guide:
1 Lift the TPU.
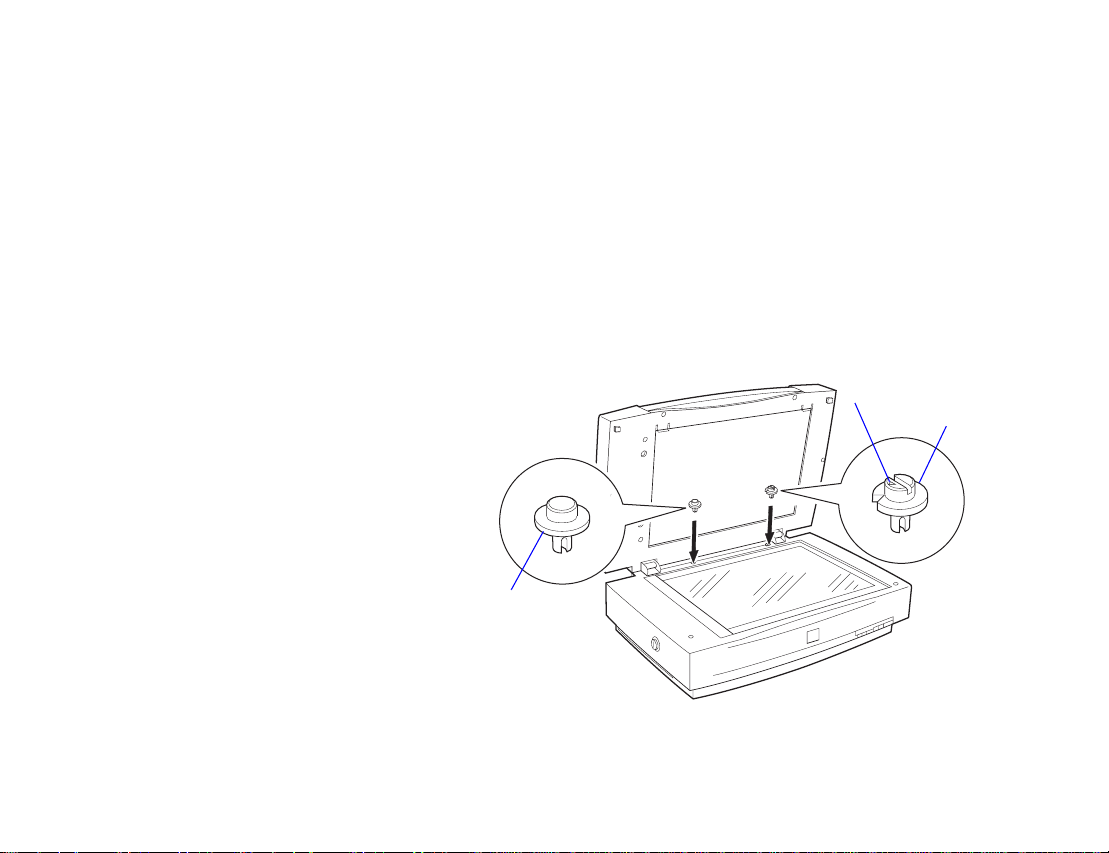
2 If your scanner doesn’t already have a guide pin and
adjust pin installed as shown below, insert the guide pin
and adjust pin that came with the TPU. Make sure the
adjust pin’s arrow faces the guide pin.
arrow
adjust pin
guide pin
Page 9

3 Place the transparency guide above the scanner’s
document table over the pins as shown below. Make sure
the oval hole is on the right.
Page 10

Before scanning transparencies, use a soft, dry, lint-free cloth
to wipe the glass of the TPU and the scanner’s document
table, including the narrow window visible through the
transparency guide.
◗ To scan transparencies, see Scanning Transparencies
and Oversized Film.
◗ To scan slides or strips of negative or positive film, see
Using the Film Holders
◗ To scan normal documents with the transparency guide
installed, Scanning Normal Documents with the
Transparency Unit Installed.
.
Page 11

Scanning Transparencies and Oversized Film
To scan transparencies or film that is larger than the guides on
the document table, place the transparency or film facedown
on the document table with the corner against the notch on the
transparency guide, as shown below. The maximum film size
is 11.4 × 16.5 inches (290 × 420 mm).
Close the TPU and scan according to the instructions in your
scanner software’s online guide.
Page 12

Using the Film Holders
You can use the four film holders that came with the TPU to
scan 35 mm slides, strips of 35 mm negative or positive film,
strips of medium format (2 1/4-inch) film, and 4 × 5-inch (102 ×
127 mm) film. Follow the steps in these sections:
◗ Loading 35 mm slides
◗ Loading strips of negative or positive film
◗ Loading medium format (2 1/4-inch) film
◗ Loading 4 x 5-inch film
Page 13
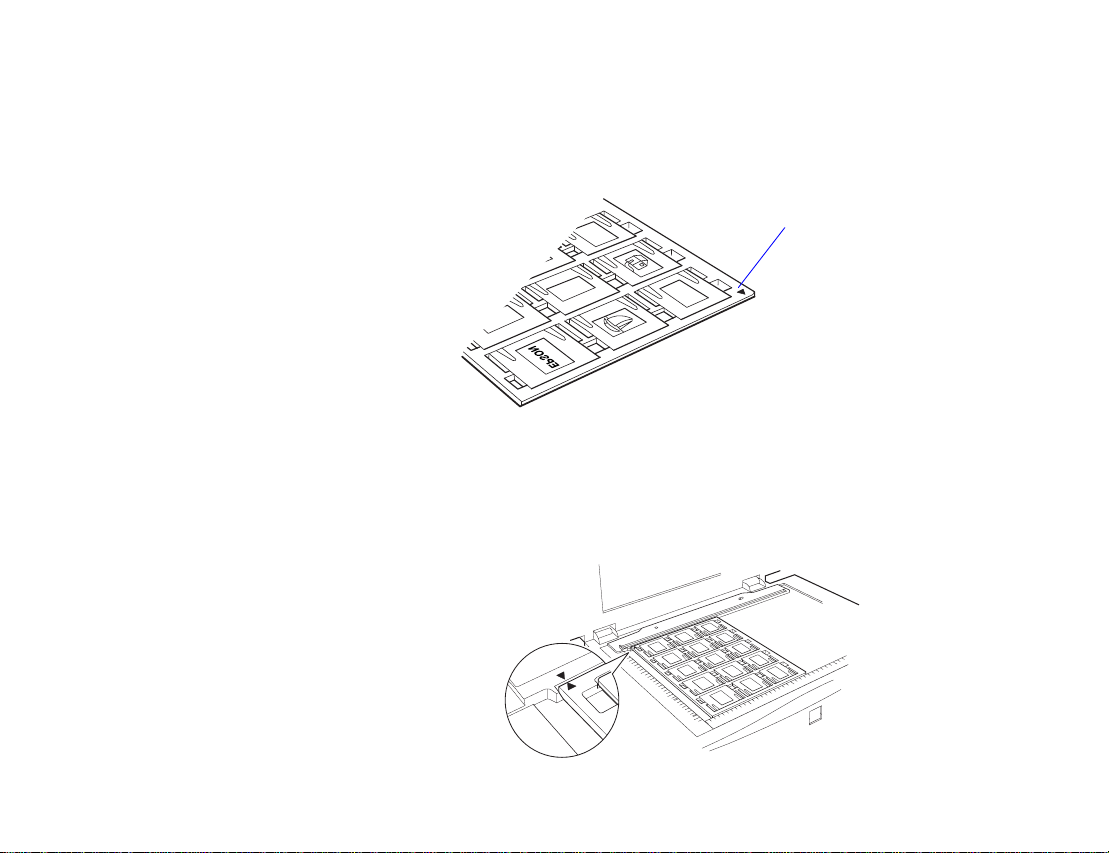
Loading 35 mm slides
1 Load slides in the 35 mm slide holder, facedown with the
tops of all slides facing the triangle side, as shown below.
triangle
2 Place the slide holder on the document table with the
corner against the notch on the transparency guide, as
shown below. Align the triangles on the slide holder and
the transparency guide.
3 Close the TPU and scan the slides according to your
scanner software’s online guide.
Page 14

Loading strips of negative or positive film
1 Place the 35 mm filmstrip holder on a flat surface, then lift
up one end of the strip cover and remove it.
2 Insert a strip of film in the filmstrip holder facedown.
Page 15

3 To replace the strip cover:
◗ Insert the two tabs on one end of the cover into the two
corresponding slots in the holder.
◗ Swing the cover down, fitting the cover holes over the
pins on the holder.
◗ Snap the cover shut.
4 Repeat steps 1 through 3 for all the filmstrips you want to
scan.
5 Place the filmstrip holder on the document table with the
corner against the notch on the transparency guide. Align
the triangles on the filmstrip holder and the transparency
guide.
Page 16

6 Close the TPU and scan the film according to your
scanner software’s online guide.
Loading medium format (2 1/4-inch) film
1 Place the medium format film holder on a flat surface, then
lift up the side of the strip cover to open it.
Page 17

2 Insert the film in the holder facedown.
3 Close the cover until it snaps shut.
4 Repeat steps 1 through 3 for all the film you scan.
Page 18

5 Place the holder on the document table with the corner
against the notch on the transparency guide. Align the
triangles on the holder and the transparency guide.
6 Close the TPU and scan the film according to the
instructions in your scanner software’s online guide.
Page 19

Loading 4 x 5-inch film
1 Place the 4 × 5-inch film holder on a flat surface, then lift
up the side of the film cover to open it.
2 Insert the film in the holder facedown.
Page 20

3 Close the cover until it snaps shut.
4 Repeat steps 1 through 3 for all the film you want to scan.
Page 21

5 Place the holder on the document table as shown with the
corner against the notch on the transparency guide. Align
the triangles on the holder and the transparency guide.
6 Close the TPU and scan according to the instructions in
your scanner software’s online guide.
Page 22

Scanning Normal Documents with the Transparency Unit Installed
To scan normal documents with the TPU installed, insert the
reflective document mat included with the TPU as described
below.
1 Open the TPU and remove the transparency guide from
the scanner’s document table, if necessary.
2 Slide the reflective document mat into place and insert the
tabs into the slots on the TPU as shown below. Then firmly
pull up the mat while inserting the top two tabs into the
slots in the top of the TPU.
pull up into slots here
tabs go into slots here
Page 23

3 Place your document on the document table and close the
TPU.
4 Scan according to the instructions in Scanner Basics
setting your Document Source to Flatbed (TWAIN Pro) or
your Document Type to Reflective (SilverFast).
To remove the reflective document mat, slide it down and
then pull it up and out of the slots on the TPU.
,
Page 24

Adjusting the Transparency Guide Angle
Most scanners scan at a slight angle due to the movement of
the carriage. If you find that your scanned images are being
scanned at a slight angle, adjust the angle of scanning by
turning the adjust pin.
The direction and degree you should turn the adjust pin
depends on your scanner and the placement of the document
to be scanned. You may want to experiment with it to
determine the best angle.
+0.2
+0.1
0
-0.1
-0.2
 Loading...