

Page 1

B813071 - Transparency Unit
Using the Transparency Unit
Unpacking the transparency unit
Removing the shipping screw
Installing the transparency unit
Storing the transparency guides and reflective
document mat
Positioning transparencies and slides
Scanning normal (reflective) documents
..................
............
........
..........
.........
.....
....
3-2
3-2
3-3
3-4
3-6
3-7
3-11
Options 3-1
Page 2
Using the Transparency Unit
When installed on your scanner, the transparency unit
provides high-quality, full-color scanning of transparencies and
slides. Also, once you install the transparency unit, you can
leave it in place when scanning normal reflective (paper)
documents.
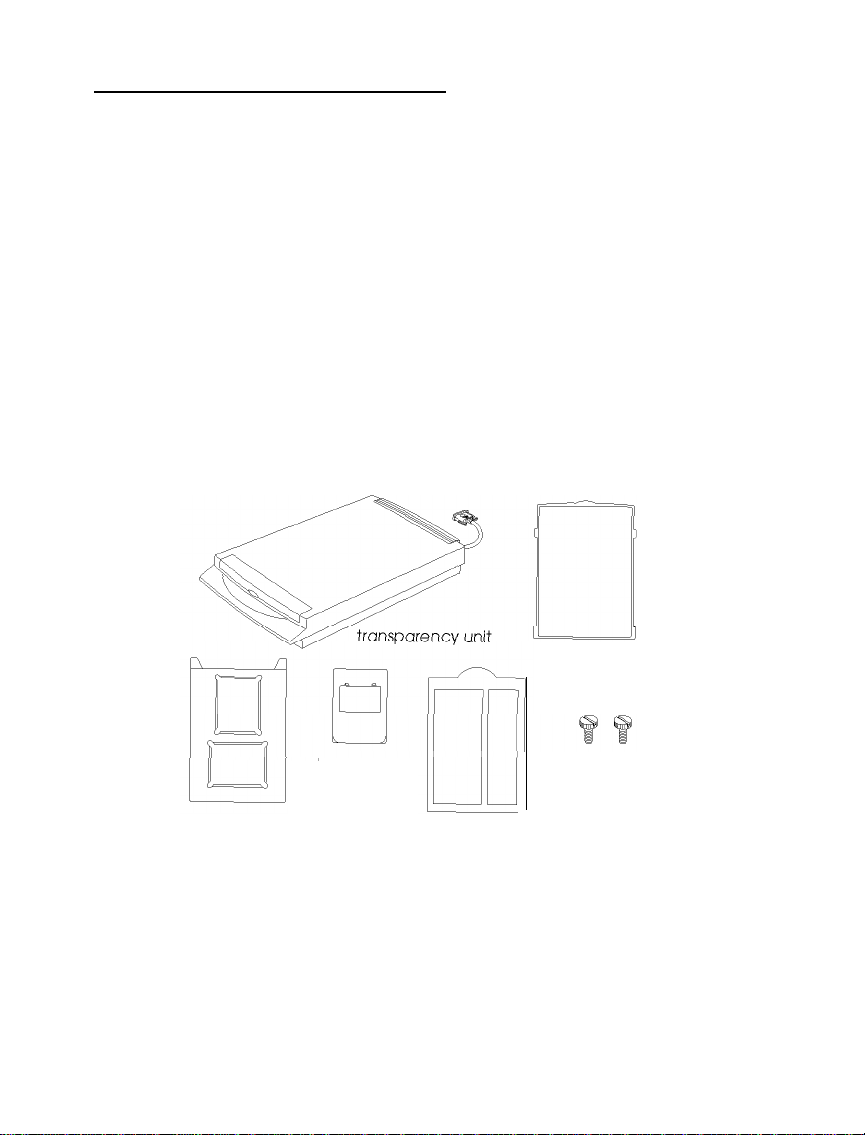
Unpacking the transparency unit
When you unpack your transparency unit, make sure you have
all the items shown below and that none has been damaged
during shipping. Contact your EPSON dealer if any item is
missing or damaged.
reflective
document mat
transparency
guides
two screws
Page 3

Removing the shipping screw
To prevent damage during shipping, a shipping screw is
attached to the transparency unit. Follow the steps below to
remove this screw before you install the transparency unit.
1.
Turn the transparency unit so the glass side faces up.
2.
Remove the screw as shown below.
(labeled CLAMP
3.
Insert the screw you just removed into the storage hole as
shown.
labeled STOCK)
Page 4

Note:
Before transporting the scanner, you need to remove the transparency
unit and reattach its shipping screw. You can attach the shipping
screw only when the transparency unit’s lamp assembly is in its home
position. To move it to its home position when the transparency unit
is attached to the scanner, close the transparency unit, turn on the
scanner, and then turn it off.
Installing the transparency unit
Follow the steps below to install the transparency unit on the
scanner.
Note:
You cannot have the automatic document feeder and the transparency
unit installed on the scanner at the same time.
1.
Make sure the scanner is turned off, and unplug the
scanner’s power cable.
2.
Remove the scanner’s document cover by holding the cover
behind the hinge and lifting the back of the cover straight
up as shown on page 2-6.
Page 5

3.
Locate the two screws at the back of the scanner and slide
the slots on the transparency unit forward underneath
these two screws.
Insert the two screws provided with the transparency unit
4.
into the holes in the scanner as shown below, and then
tighten the screws with a coin.
Close the transparency unit.
5.
Page 6

6.
Connect the transparency unit’s cable to the option
connector on the scanner. Then reconnect the scanner’s
power cable.
Storing the transparency guides and reflective document mat
As shown on the next page, the transparency unit comes with
three transparency guides for scanning transparencies or slides
and a reflective document mat for scanning normal paper
documents. To use the transparency guides, see “Positioning
transparencies and slides” on the next page. To use the
reflective document mat, see “Scanning normal (reflective)
documents” on page 3-11.
When you are not using the reflective document mat or the
large transparency guides, you can open the storage slot cover
and insert them into the storage slot for safekeeping. Do not
insert the small transparency guide; you may have trouble
removing it.
Page 7

-ransparency
I-L
guides
Positioning transparencies and slides
You can scan transparencies or slides of various sizes using the
transparency guides. Select the transparency guide to use
according to the size of your transparency or slide as described
in the table below.
1
1
Transparency or slide size
1
Up to 2.4 x 3.5 inches (6 x 9 cm)
Up to 4 x 5 inches (10.2 x 12.7 cm) Transparency guide with two
Up to 4 x 10.25 inches
(10.2 x 26.0 cm)
Note:
Before scanning transparencies OY slides, wipe the glass of the
transparency unit, the scanner’s document table, and the narrow
window behind the scanner’s document table with a soft cloth.
Appropriate transparency guide
1
Small transparency guide
4 x5-inch openings
Transparency guide with two
10.25.inch-long openings
Page 8

If your transparency is larger than the sizes in the table above,
you can place it directly on the scanner’s document table
without using a transparency guide, as shown below. The
transparency unit allows you to scan transparencies up to
8% x 11 inches (21.6
Utilities
manual for information on scanning with the
x 27.9
cm) in size. See your
Scanning
transparency unit.
Follow the steps below to position transparencies or slides
using the small transparency guide or the transparency guide
with two 4 x 5-inch openings:
1.
Open the transparency unit.
Page 9

2.
Hold up the clear plastic flap and insert the transparency or
slide in the transparency guide, as shown below.
3.
Place the transparency guide containing the transparency or
slide face down on the scanner’s document table, aligning it
in the upper right corner as shown below.
4.
If the reflective document mat is in place, remove it from the
transparency unit.
5.
Close the transparency unit. (If you do not close it
completely, an option error results and you cannot scan the
document.)
Page 10

Follow the steps below to position transparencies or slides
using the transparency guide with two 10.25-inch-long
openings:
Open the transparency unit.
Place the transparency guide on the scanner’s document
table.
Place the transparency face down on the document table,
aligning it with the upper right corner of the transparency
guide as shown below.
4.
If the reflective document mat is in place, remove it from the
transparency unit.
5.
Close the transparency unit. (If you do not close it
completely, an option error results and you cannot scan the
document.)
Page 11

Scanning normal (reflective) documents
To scan a normal reflective (paper) document when the
transparency unit is installed, always use the reflective
document mat included with the transparency unit. Also, make
sure you remove the transparency guide from the scanner’s
document table.
Insert the reflective document mat as described below.
1.
Open the transparency unit.
2.
Insert the tabs on the reflective document mat into the slots
on the transparency unit and slide the mat into place.
Page 12

3.
Position the reflective document and close the transparency
unit.
To remove the reflective document mat, slide it up and out of
the slots on the transparency unit.
Using the Automatic Document Feeder
The automatic document feeder allows you to automatically
load multiple-page documents into the scanner. It is
particularly useful for OCR (optical character recognition)
scanning, or for creating an image database.
 Loading...