

Page 1

Transparency Unit
for use with EPSON Scanners
B813021/B813022
Page 2
This transparency unit is a high-quality device developed to enable
Epson Scanner owners to scan transparencies and slides. By
installing this unit on your Epson scanner, you can scan
transparencies and slides beautifully, in full color. Also, it is not
necessary to remove this unit if you wish to return to scanning
normal reflective (paper) documents.
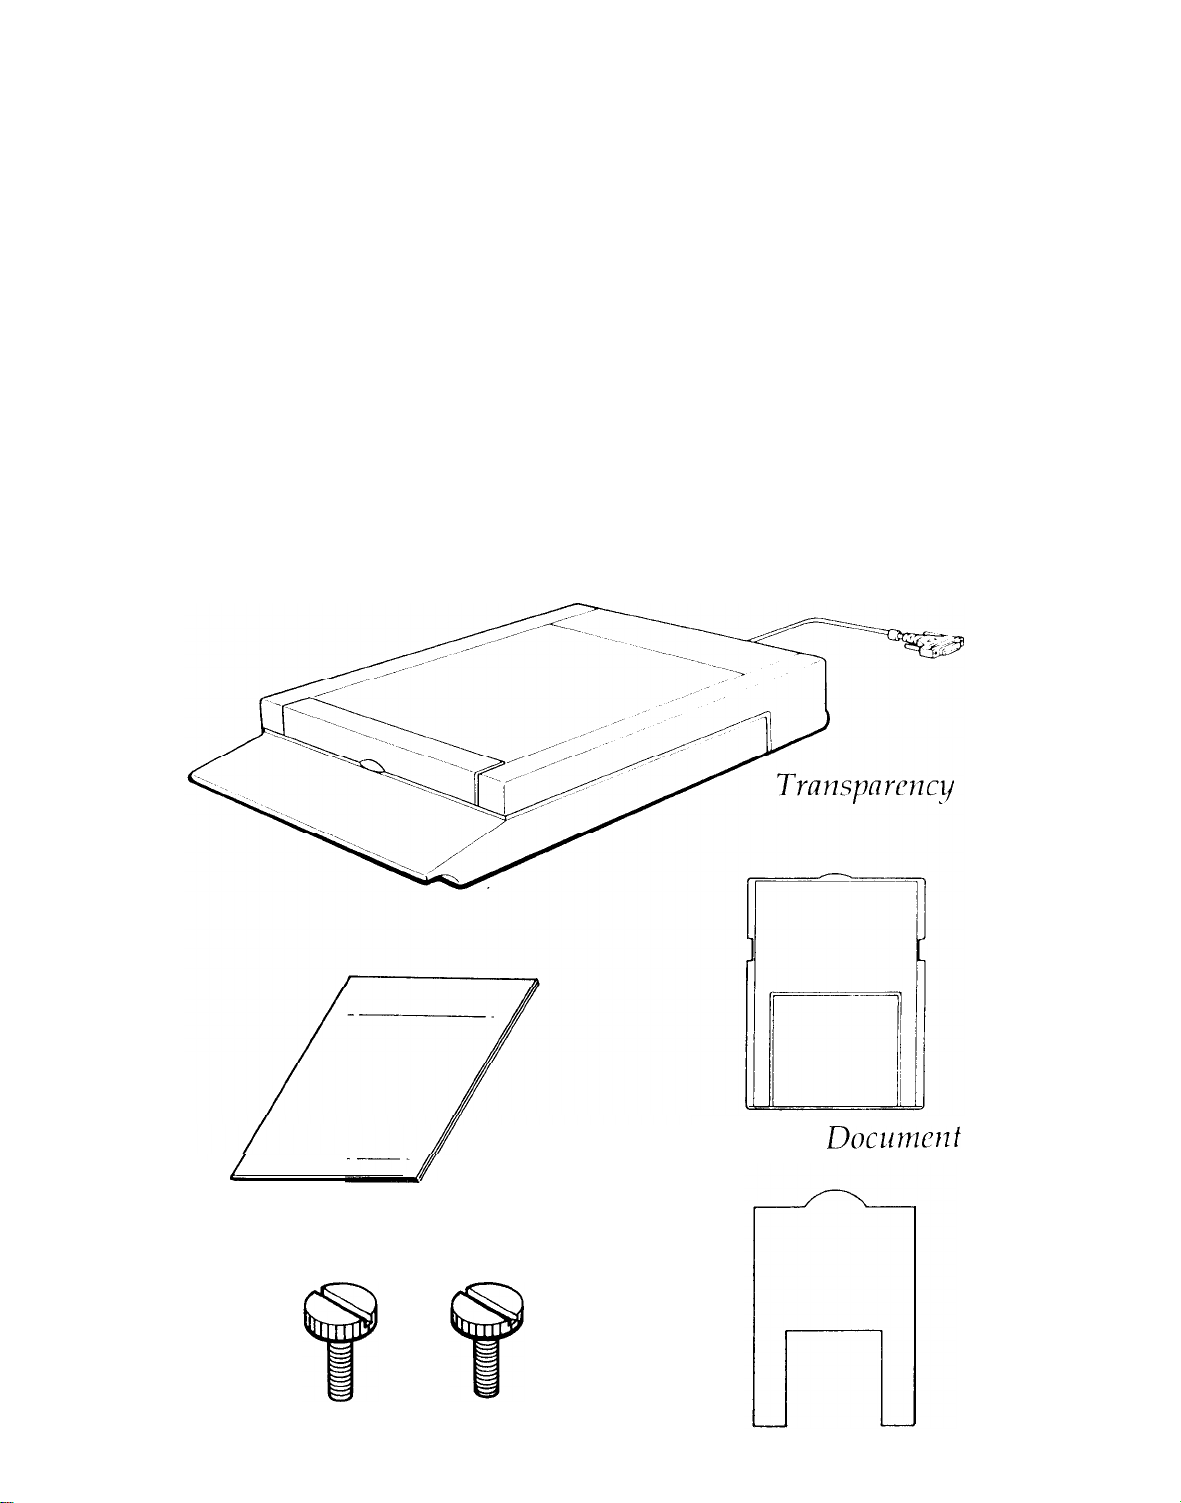
Unpacking the Unit
When you first open the package, make sure that all the following
items are included and that none has been damaged during
shipping. Contact your Epson dealer if any item is missing or
damaged.
Unit
Reflective
/
User’s Guide
Doclrmclzt
Mat
Screws (2)
Transparency Document Guide
Page 3
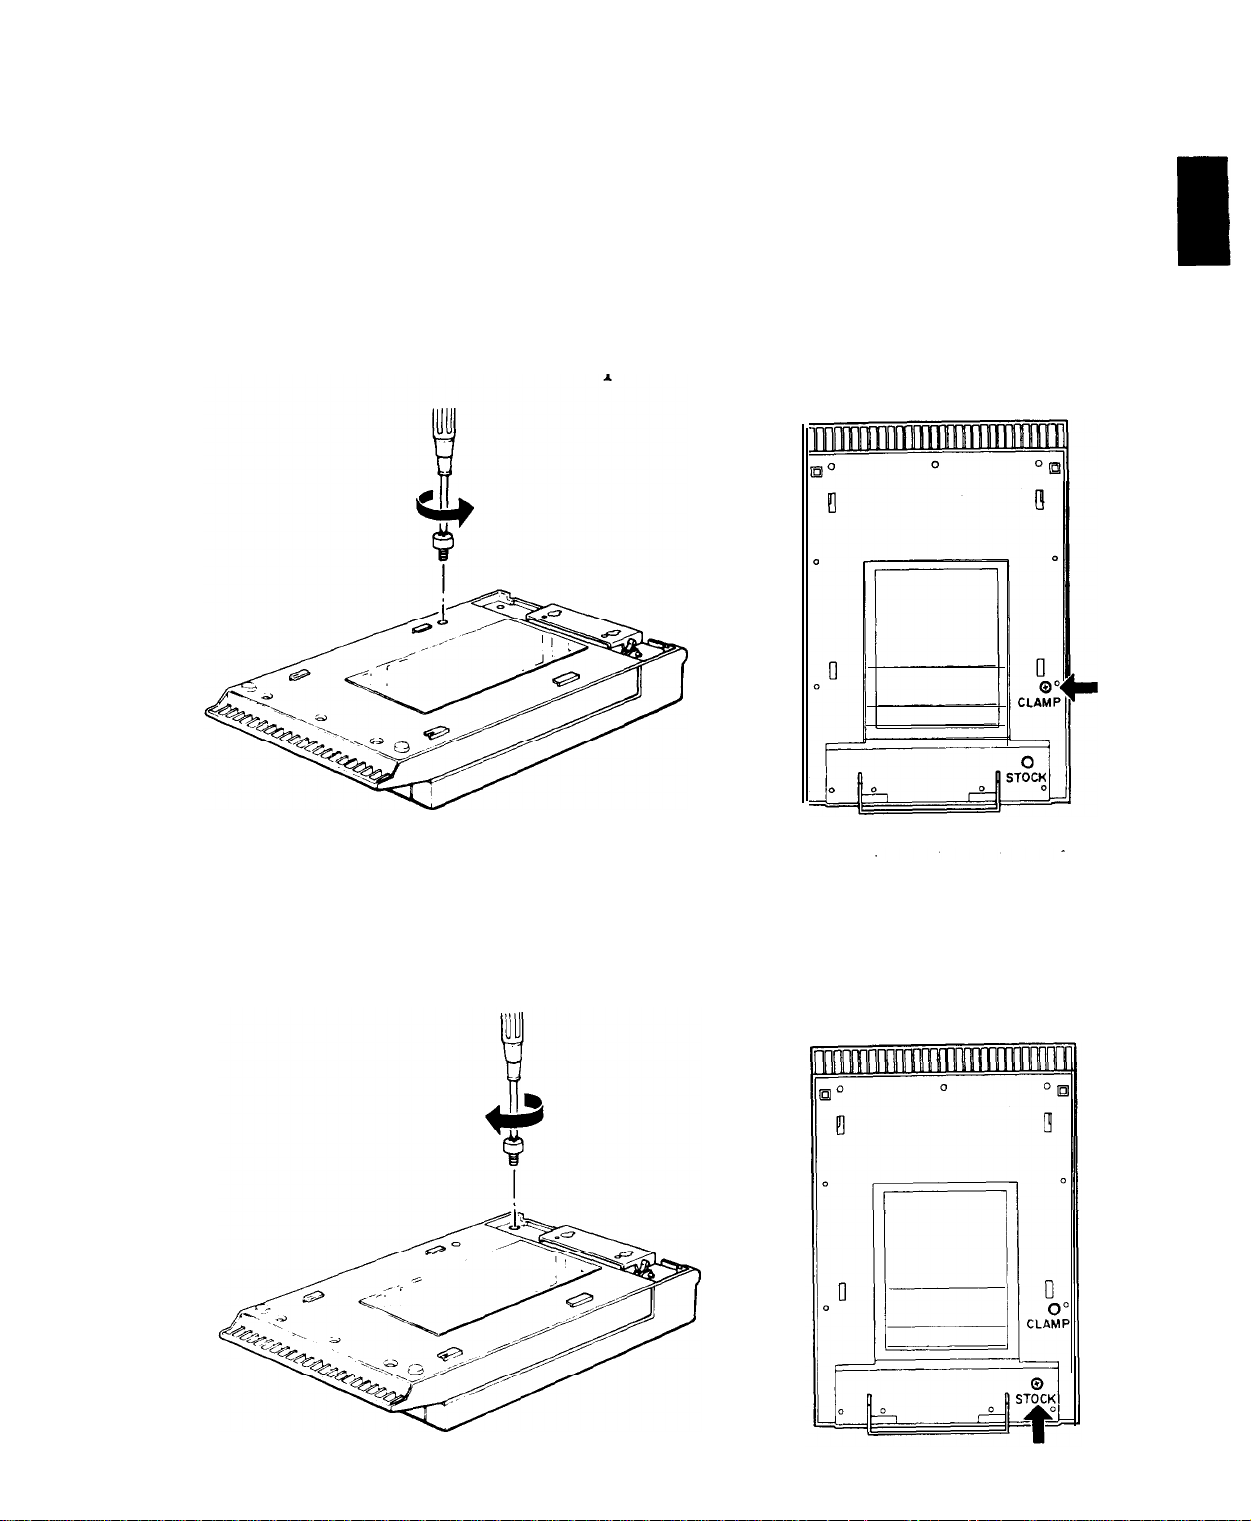
Removing the Shipping Screw
To prevent damage during shipping a shipping screw is attached to
the transparency unit. Make sure this screw
to the following steps before you attempt
1. Turn the unit so the glass side faces up.
2. Remove the screw from the position shown below.
is removed according
to use this unit.
3. Insert the screw you just removed into the storage-hole in the
position shown.
Page 4

Note: l
Keep the shipping screw in a safe place; you will need it if
you should need to transport the scanner. When
transporting the scanner, you should remove the
transparency unit and reattach the shipping screw.
l If the unit’s lamp assembly is not in its initial position, you
cannot attach the shipping screw. If this happens,
reattach the unit to the scanner, close the unit, and turn
the scanner on; the unit’s lamp assembly then returns to
its initial position. Then turn off the scanner and remove
the transparency unit.
Installing the Transparency
Unit on the Scanner
Follow the steps below to install the transparency unit on the
scanner.
1. Make sure the scanner’s power switch is turned off and remove
the power cable from the scanner.
2. Remove the document cover from the scanner.
3. The scanner comes with two mounting screws attached; slide the
mounting slots on the transparency unit forward underneath
these two screws.
Page 5

4. Use a coin to tighten the two screws and secure the transparency
unit.
5. Close the transparency unit.
6. Connect the transparency unit’s connector to the option
connector on the scanner.
Page 6

Transparency Document Guide and Reflective
Document Mat
A transparency document guide and reflective document mat are
included with this unit. Use as necessary.
Positioning Transparencies
You can scan the transparency types shown below:
Document type
Scanning size
Note: l Wipe the glass of the transparency unit, the scanner’s
document table, and the narrow window near the
mounting bracket before scanning transparencies.
l
Your scanner software automatically handles the
operation of the transparency unit.
Transparency documents (including slide film) in
color or monochrome
Up to 5 x 5 inches (127 x 127 mm)
Page 7

Position transparency documents according to the steps below.
1. Open the transparency unit.
2. Place the transparency document guide on the scanner’s
document table.
3. Using the transparency document guide, place the transparency
document face down on the scanners glass document table.
Align the transparency document with the upper right-hand
corner of the transparency document guide.
4. Close the unit. If the reflective document mat is in place, remove
it from the transparency unit.
Note: Make sure the unit is completely closed. If it is not closed, an
option error results and you cannot scan the document.
Page 8

Scanning Normal (Reflective) Documents
When you return to scanning normal reflective documents, you
should always insert the reflective document mat included with this
unit. Also, make sure you remove the transparency document
guide from the scanners document table.
Insert the reflective document mat as described below.
1. Open the transparency unit.
2.
Insert the reflective document mat.
3.
Position the reflective document and close
To remove the reflective document mat, lift up on the mat and pull
it out of the transparency unit.
the unit.
 Loading...