

Page 1
Epson AcuLaser® CX11NF
Fax Guide
Page 2

Copyright Notice
All rights reserved. No part of this publication may be reproduced, stored in a retrieval system, or transmitted in
any form or by any means, electronic, mechanical, photocopying, recording, or otherwise, without the prior
written permission of Seiko Epson Corporation. The information contained herein is designed only for use with
this Epson product. Epson is not responsible for any use of this information as applied to other products.
Neither Seiko Epson Corporation nor its affiliates shall be liable to the purchaser of this product or third parties for
damages, losses, costs, or expenses incurred by purchaser or third parties as a result of: accident, misuse, or abuse of
this product or unauthorized modifications, repairs, or alterations to this product, or (excluding the U.S.) failure to
strictly comply with Seiko Epson Corporation’s operating and maintenance instructions.
Seiko Epson Corporation shall not be liable for any damages or problems arising from the use of any options or
any consumable products other than those designated as Original Epson Products or Epson Approved Products by
Seiko Epson Corporation.
A Note Concerning Responsible Use of Copyrighted Materials
Epson encourages each user to be responsible and respectful of the copyright laws when using any Epson product.
While some countries’ laws permit limited copying or reuse of copyrighted material in certain circumstances, those
circumstances may not be as broad as some people assume. Contact your legal advisor for any questions regarding
copyright law.
Trademarks
Epson and Epson AcuLaser are registered trademarks and Exceed Your Vision is a trademark of Seiko Epson
Corporation.
General Notice: Other product names used herein are for identification purposes only and may be trademarks of
their respective owners. Epson disclaims any and all rights in those marks.
2
© 2006 Epson America, Inc. 3/06
Page 3

Contents
1 Introduction
About Your Documentation............................................................................5
Changing to Fax Mode....................................................................................6
Accessing Fax Settings .....................................................................................7
2 Sending Faxes
Sending a Basic Fax .........................................................................................9
Using Speed-Dial Codes................................................................................10
Using One-Touch Buttons ............................................................................12
Faxing to Multiple Recipients........................................................................13
Canceling a Fax .............................................................................................14
3 Receiving Faxes
Using Fax Tones............................................................................................16
Using Fax Polling ..........................................................................................17
Accessing Settings for Receiving Faxes ...........................................................17
Distinctive Ring Pattern Detection................................................................18
Fax Forwarding .............................................................................................19
4 Speed Dialing
Using the Setup Menu...................................................................................21
Using the Speed Dial Utility (Windows Only) ..............................................28
Contents 3
Page 4

5 Customizing Settings
Fax Menu ..................................................................................................... 41
Customizing Transmit and Receive Settings ................................................. 44
Selecting Outgoing Fax Settings.................................................................... 47
6 Reports
Printing Reports............................................................................................ 49
Fax Job Information...................................................................................... 51
7 Solving Problems
Fax Error Messages ....................................................................................... 53
Sending and Receiving.................................................................................. 53
Printing Problems .........................................................................................55
Where To Get Help...................................................................................... 56
8 Notices
4 Contents
Important Safety Instructions ....................................................................... 57
FCC Compliance Statement ......................................................................... 58
Declaration of Conformity............................................................................ 60
Epson America, Inc. Limited Warranty......................................................... 61
Page 5

Introduction 1
This chapter describes the documentation that is included with your Epson AcuLaser®
CX11NF, and how to access the fax mode and settings.
About Your Documentation
This Fax Guide tells you how to send and receive faxes with your AcuLaser CX11NF.
It also tells you how to set up speed dialing, specify fax settings, and maintain and
troubleshoot fax-related problems.
Please follow these guidelines throughout:
Warning:
Warnings must be followed carefully to avoid bodily injury.
Caution:
Cautions must be observed to avoid damage to your equipment.
Note:
Notes contain important information about your product.
Tip:
Tips contain hints for better faxing.
For instructions on setting up your product and installing your software see your
Start Here sheet.
For information on configuring your product to work on a network see your
on-screen Network Guide. You need to install this guide from the software CD-ROM
to your computer’s hard disk before referring to it.
For information about printing, scanning, and copying, see your Basics Guide.
For detailed information about your product see your on-screen User’s Guide.
Introduction 5
Page 6
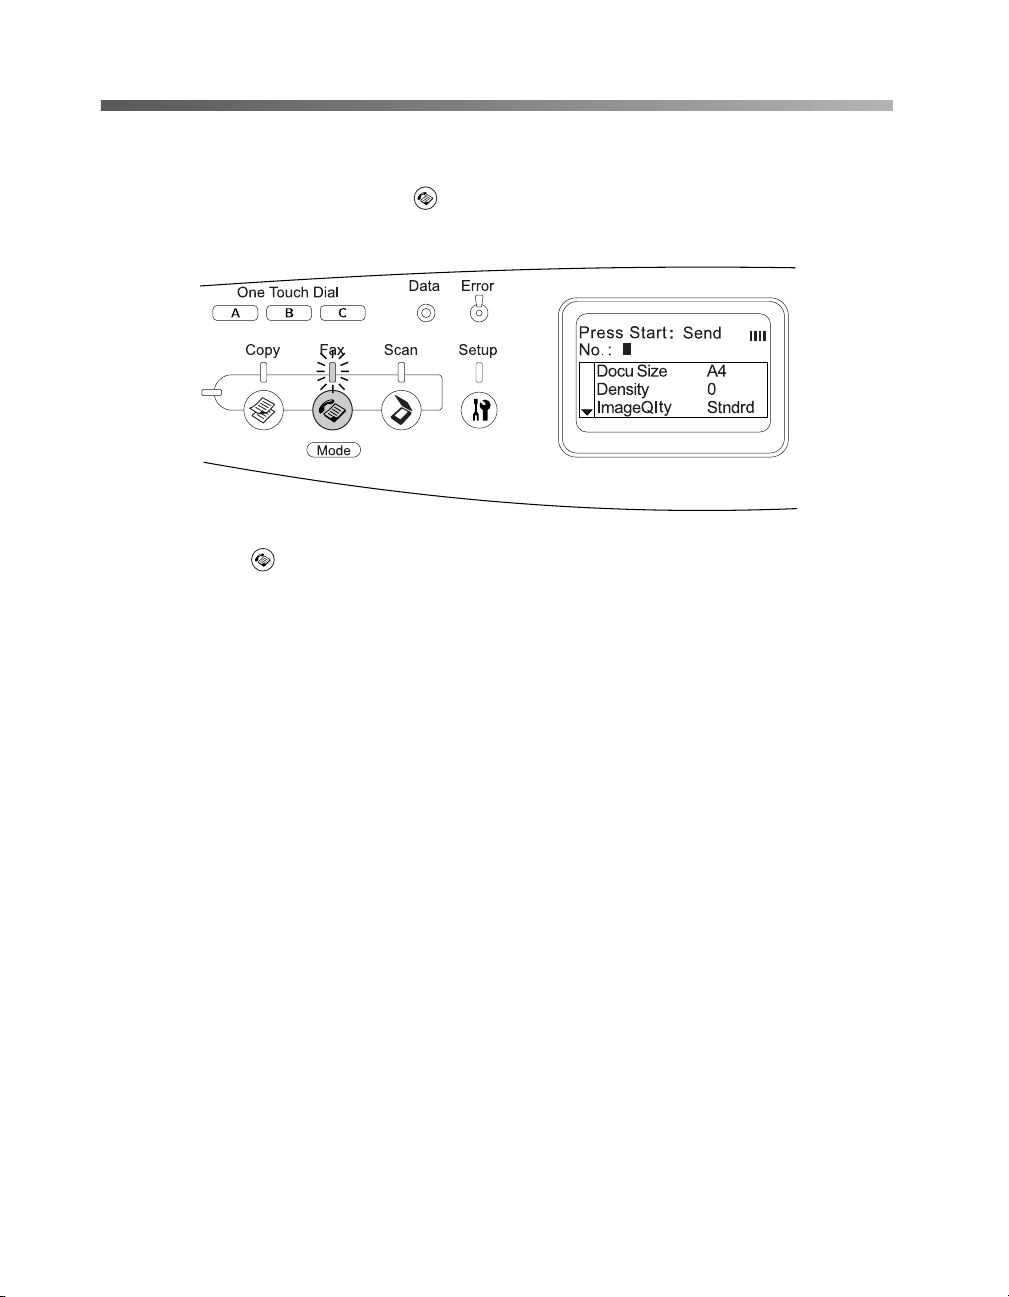
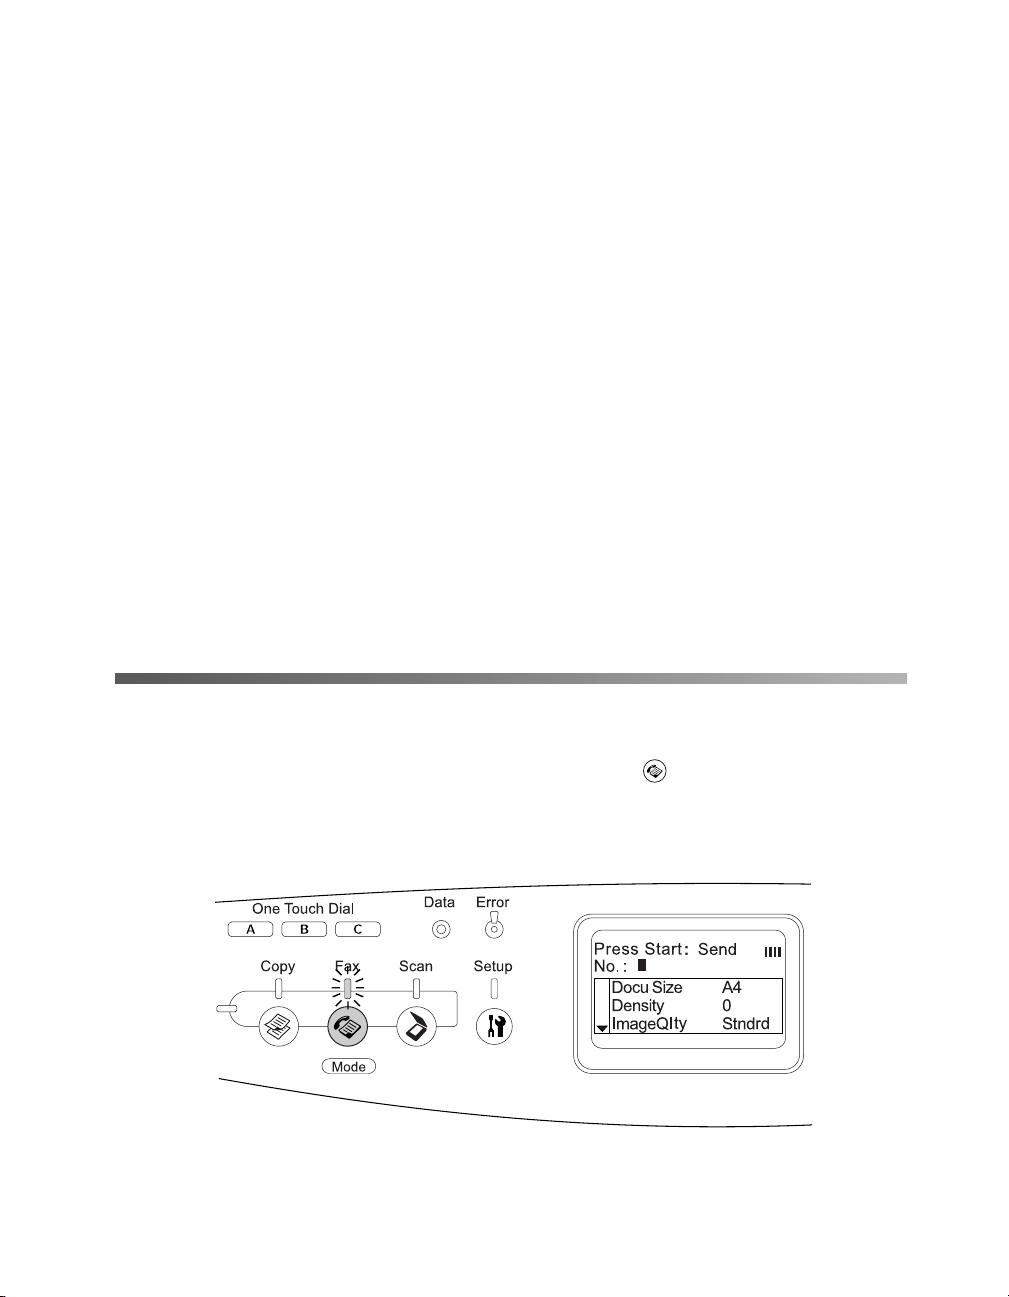
Changing to Fax Mode
To enter the Fax mode, press the Fax button. The Fax menu appears in the LCD
screen.
If you press the Fax button while in Fax mode, the screen returns to the Print
mode. You can still scan and print from your computer in Fax mode.
Note:
If no button is pressed for more than 3 minutes, any changes made are canceled and
the CX11NF returns to the Print mode.
6 Introduction
Page 7
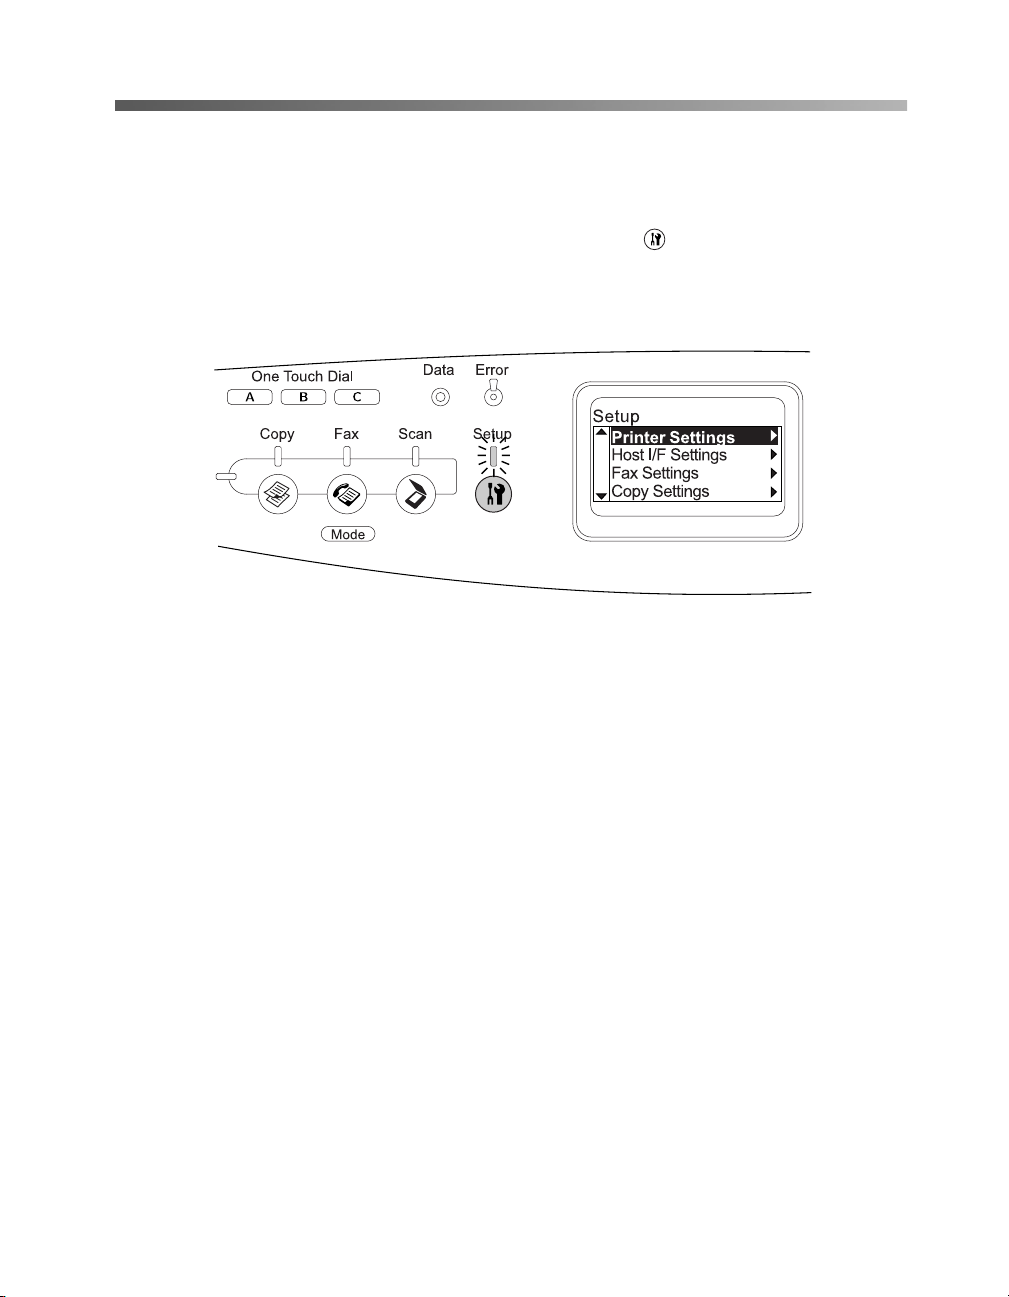
Accessing Fax Settings
You can access the Fax settings through the Setup menu in the LCD screen.
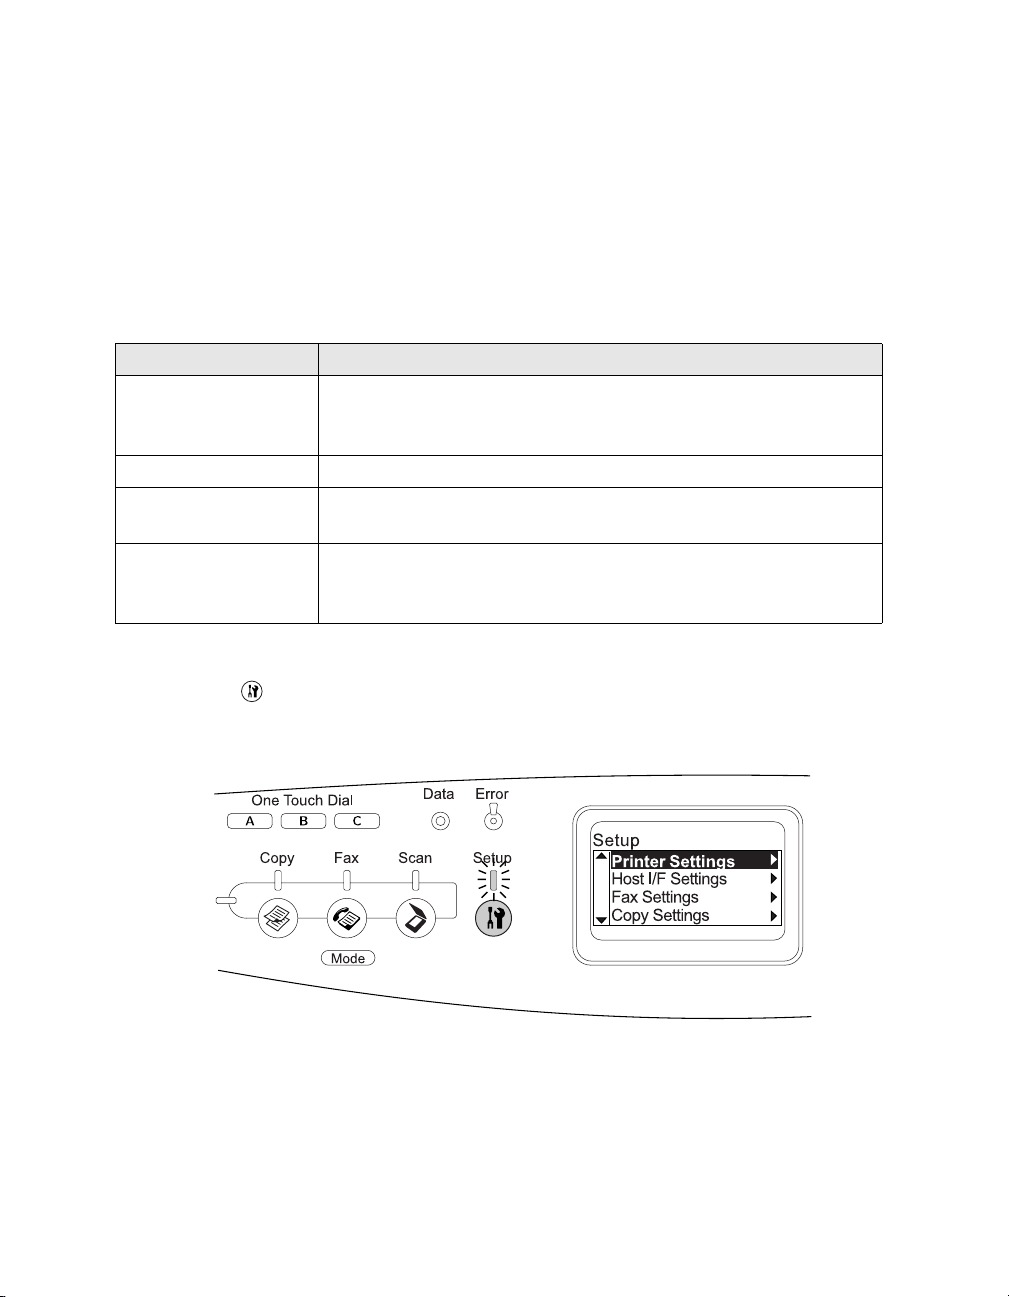
1. Make sure the CX11NF is turned on, then press the Setup button.
The Setup light turns on and the LCD screen displays Setup Mode for a few
seconds, and then changes to the Setup menu.
2. Use the d button to select the Fax Settings menu, then press the r button to view
the items in the menu. You can select the following from the Fax Settings menu:
■ “Basic Settings” on page 42
■ “Transmission Settings” on page 42
■ “Reception Settings” on page 43
■ “Speed Dial Settings” on page 43
■ “Forward Settings” on page 43
■ “Report Setup” on page 43
■ “Fax Factory Settings” on page 44
3. Use the u and d buttons to scroll through the items, and then press the r button
to carry out the operation indicated by the selected item, or to view the settings
available for the item.
Accessing Fax Settings 7
Page 8
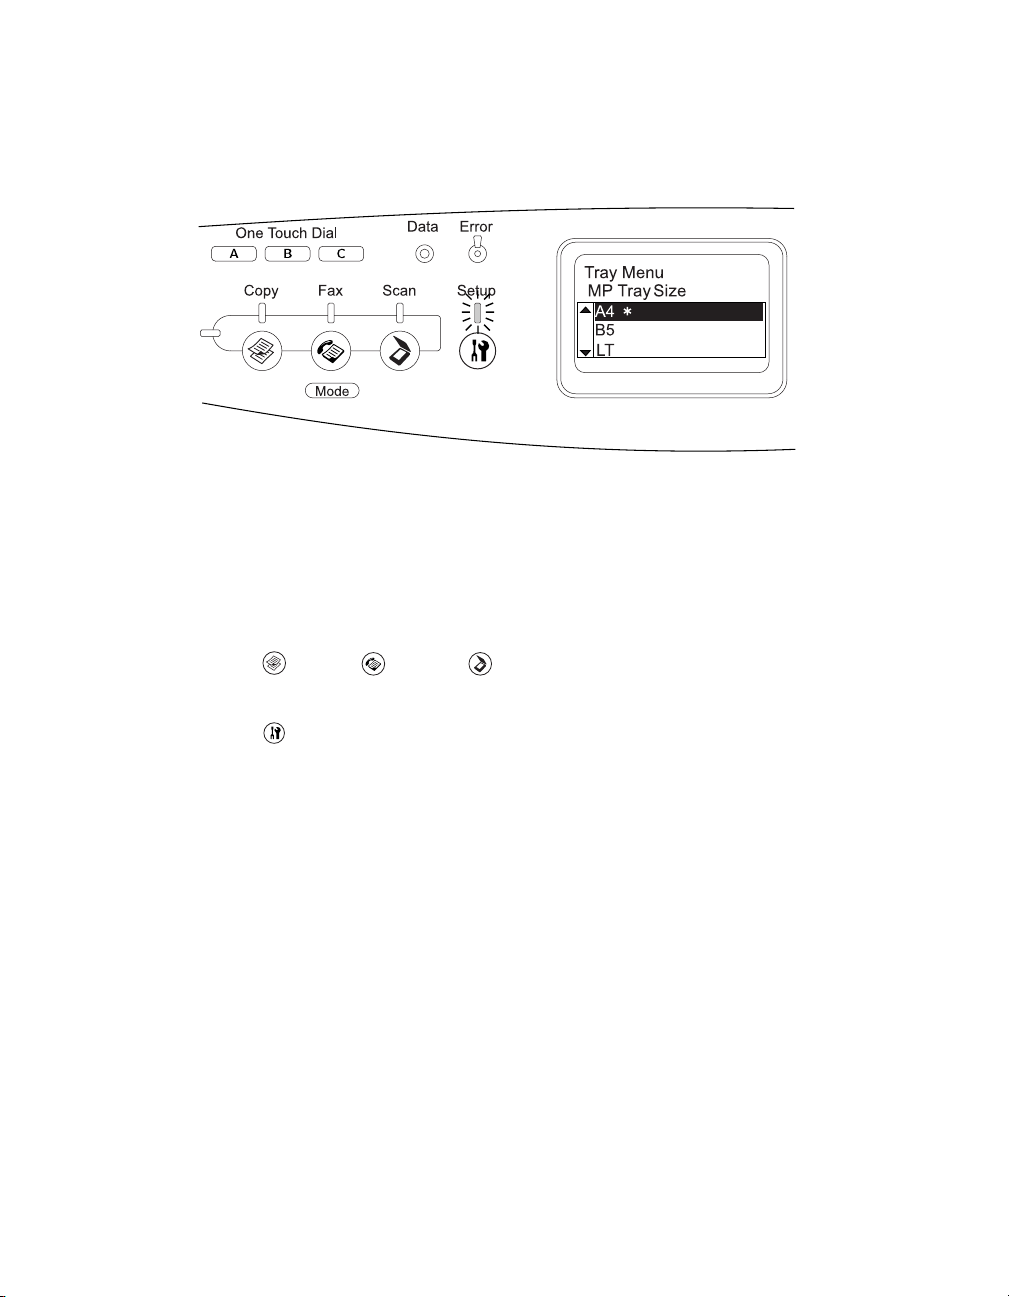
For some settings, you need to use the u and d buttons to scroll through available
values, then press the r button to select a value. An ✽ asterisk appears next to the
selected value. Press the l button to return to the previous (higher) level.
Note:
Some menus and items appear only when a corresponding optional device is
installed or an appropriate setting has been made.
4. To exit the Setup menu and switch to another mode you can do one of the
following:
■ Press the Copy, Fax, or Scan button to switch to the
corresponding mode.
■ Press the Setup button again in Setup mode to switch to the Print mode.
For more information on changing these settings see “Fax Menu” on page 41.
8 Introduction
Page 9
Sending Faxes 2
You can place a document either on the document table or in the Auto Document
Feeder (ADF).
Letter, A4, and Legal size originals can be sent for fax transmission. Please note the
following:
■ You can fax Legal size documents only with the ADF.
■ If documents are placed both in the ADF and on the document table, only the
documents in the ADF are scanned.
■ The transmission result might differ from the original size. For example, when
you fax an original smaller than Letter size, it is transmitted in Letter landscape.
Sending a Basic Fax
1. Make sure the CX11NF is turned on, then press the Fax button.
The Fax light turns on and the LCD screen shows Fax Mode for a few seconds,
then changes to the fax menu.
Sending Faxes 9
Page 10

Note:
Do not turn off the power or press any other button while faxing. If no button is
pressed for more than 3 minutes, any changes made are canceled and the mode
returns to the Print mode.
2. Place your original either on the document table or in the Auto Document
Feeder. For details, see page 9.
3. Enter the recipient’s fax number directly from the numeric keypad on the control
panel. Keep these points in mind:
■ You can enter a maximum of 50 characters.
■ To re-enter the last number used, press the Redial button.
■ If you press the Pause button while entering the recipient number, a “-” is
displayed for the pause.
■ If you enter an incorrect number, press the Reset button to delete a
character to the left of the cursor. Pressing the l or r button moves the cursor
left or right.
■ You can also enter a fax number using the One Touch Dial button or the
Speed Dial button. For details, see page 12.
4. Specify any settings if necessary. You can specify the Document Size, Density,
Image Quality, Polling Reception, and Overseas transmission mode settings. For
details, see Chapter 5 “Customizing Settings” beginning on page 41.
5. Press the x B&W Start button (for a black and white fax) or x Color Start
button (for a color fax) to start the transmission.
Note:
When the recipient’s fax machine supports only black-and-white fax, a color fax is
received as a black-and-white fax even if you press the x Color Start button.
Using Speed-Dial Codes
When a recipient fax number is registered on the CX11NF, you can send a fax by
choosing the desired recipient from the speed-dial list in the LCD screen. You can
register up to 60 recipient fax numbers.
10 Sending Faxes
Page 11
Before using the speed dial function, you need to register recipient fax information
beforehand. For details, see page 21.
1. Make sure the CX11NF is in Fax mode. If not, press the Fax button.
2. Place your original either on the document table or in the Auto Document
Feeder. For details, see page 9.
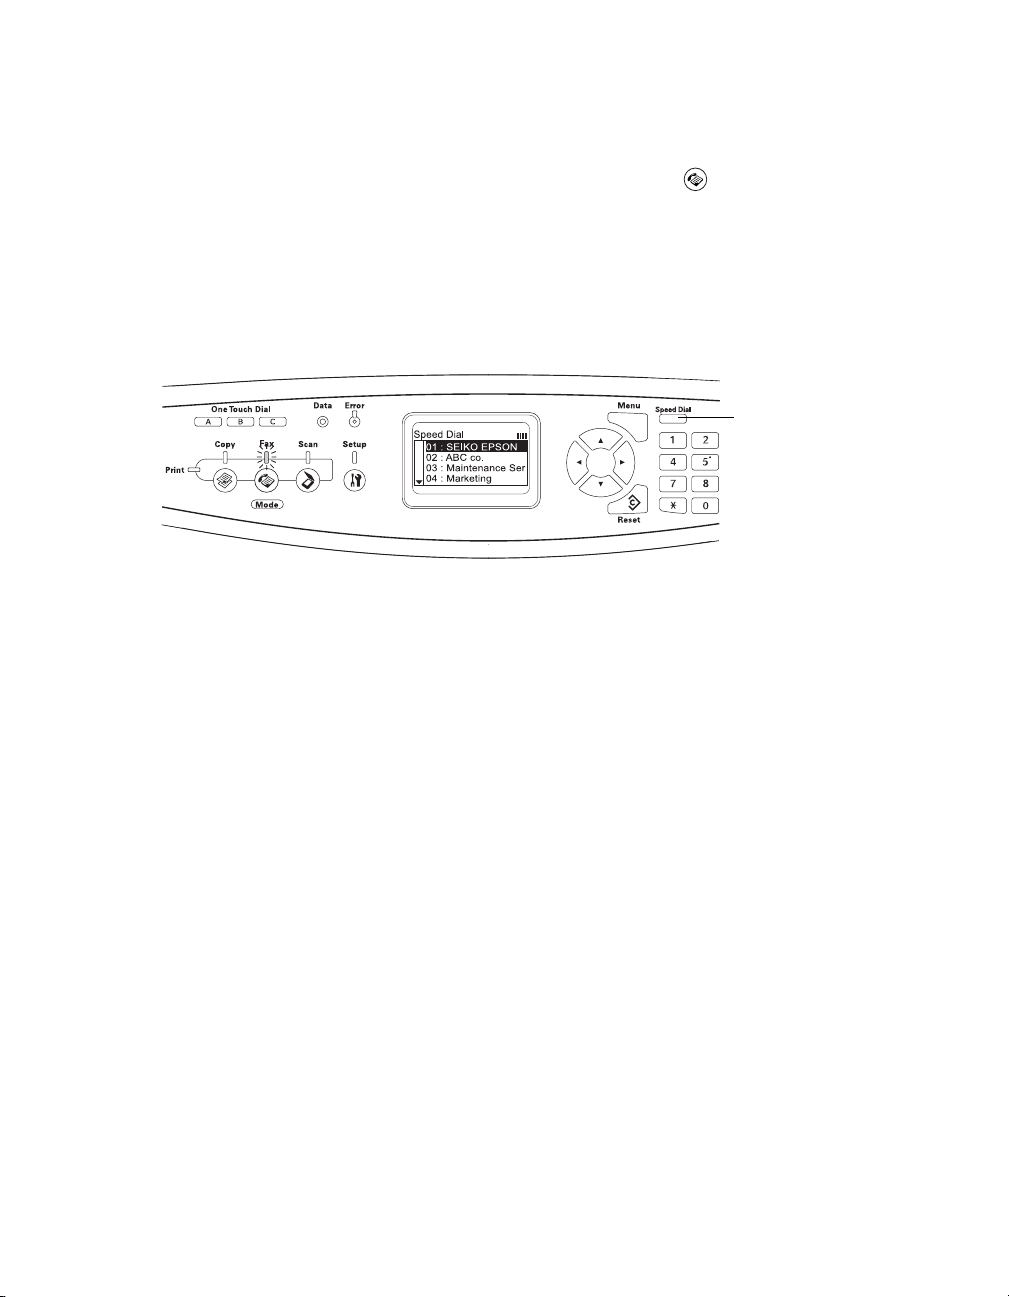
3. Press the Speed Dial button.
The registered recipient list appears in the LCD screen.
Press the Speed
Dial button
4. Press the u or d button until the recipient you want is selected, then press the r
button.
The selected recipient appears in the second top row in the LCD screen.
You can also select a recipient by entering the number directly.
To display the details of the assigned recipient, press the Menu button while the
recipient is selected. To return to the list again, press either the Menu button or
the l button.
5. Specify any settings if necessary. You can specify the Document Size, Density,
Image Quality, Polling Reception, and Overseas transmission mode settings. For
details, see page 44.
6. To send a black-and-white fax, press the x B&W Start button. To send a color
fax, press the x Color Start button.
Note:
When the recipient’s fax machine supports only black-and-white fax, a color fax is
received as a black-and-white fax even if you press the x Color Start button.
Using Speed-Dial Codes 11
Page 12
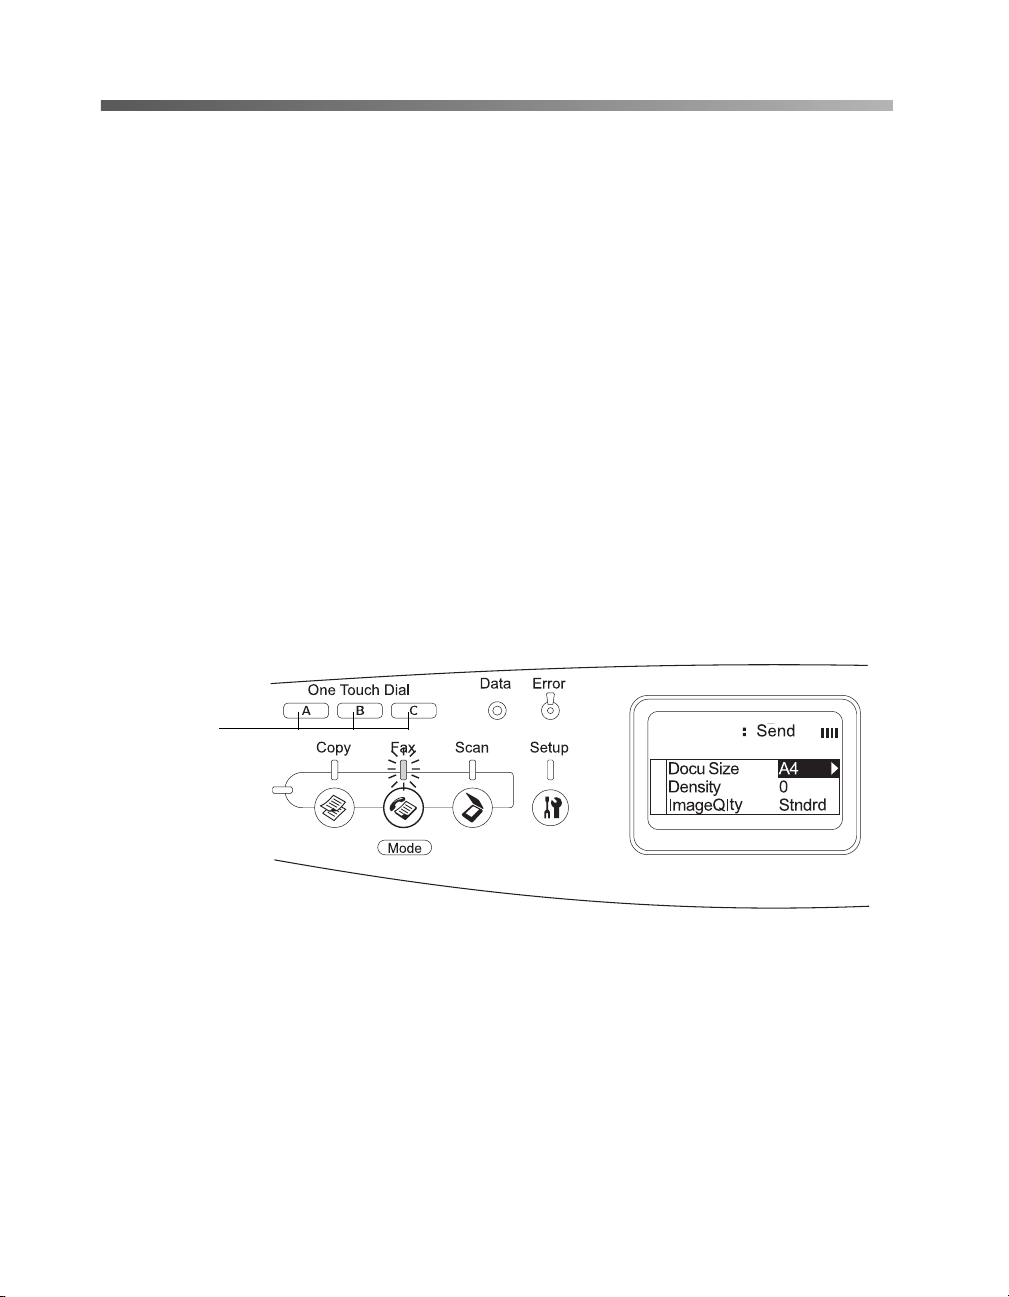
Using One-Touch Buttons
When a frequently used recipient fax number is assigned to a One Touch Dial button
(A, B, or C), you can send a fax to the recipient by simply pressing the corresponding
One Touch Dial button. Pressing a One Touch Dial button (A, B, or C) in any
mode accesses the Fax mode.
Before using the one-touch dial function, you need to register recipient fax
information. For more information, see page 21.
Note:
When you use a One Touch Dial button, the original is transmitted as a black-and-white
fax.
1. Place your original either on the document table or in the Auto Document
Feeder. For details, see page 9.
2. Press a One Touch Dial button (A, B, or C).
The recipient assigned to the button appears in the LCD screen, and then fax
transmission starts.
Press a One
Touch Dial
button
Press Start to Fax
01 : SEIKO EPSON
12 Sending Faxes
Page 13
Faxing to Multiple Recipients
When multiple recipient fax numbers are registered in a group, you can send the same
original to all the registered recipients by choosing the desired group number. You can
register up to 20 groups.
Before using the group-dial function, you need to register recipient fax information.
For more information, see page 29.
Note:
When you use the group-dial function, the original is transmitted as a black-and-white fax.
1. Make sure that the product is in Fax mode. If not, press the Fax button to
enter the Fax mode.
2. Place your original either on the document table or Auto Document Feeder. For
details, see page 9.
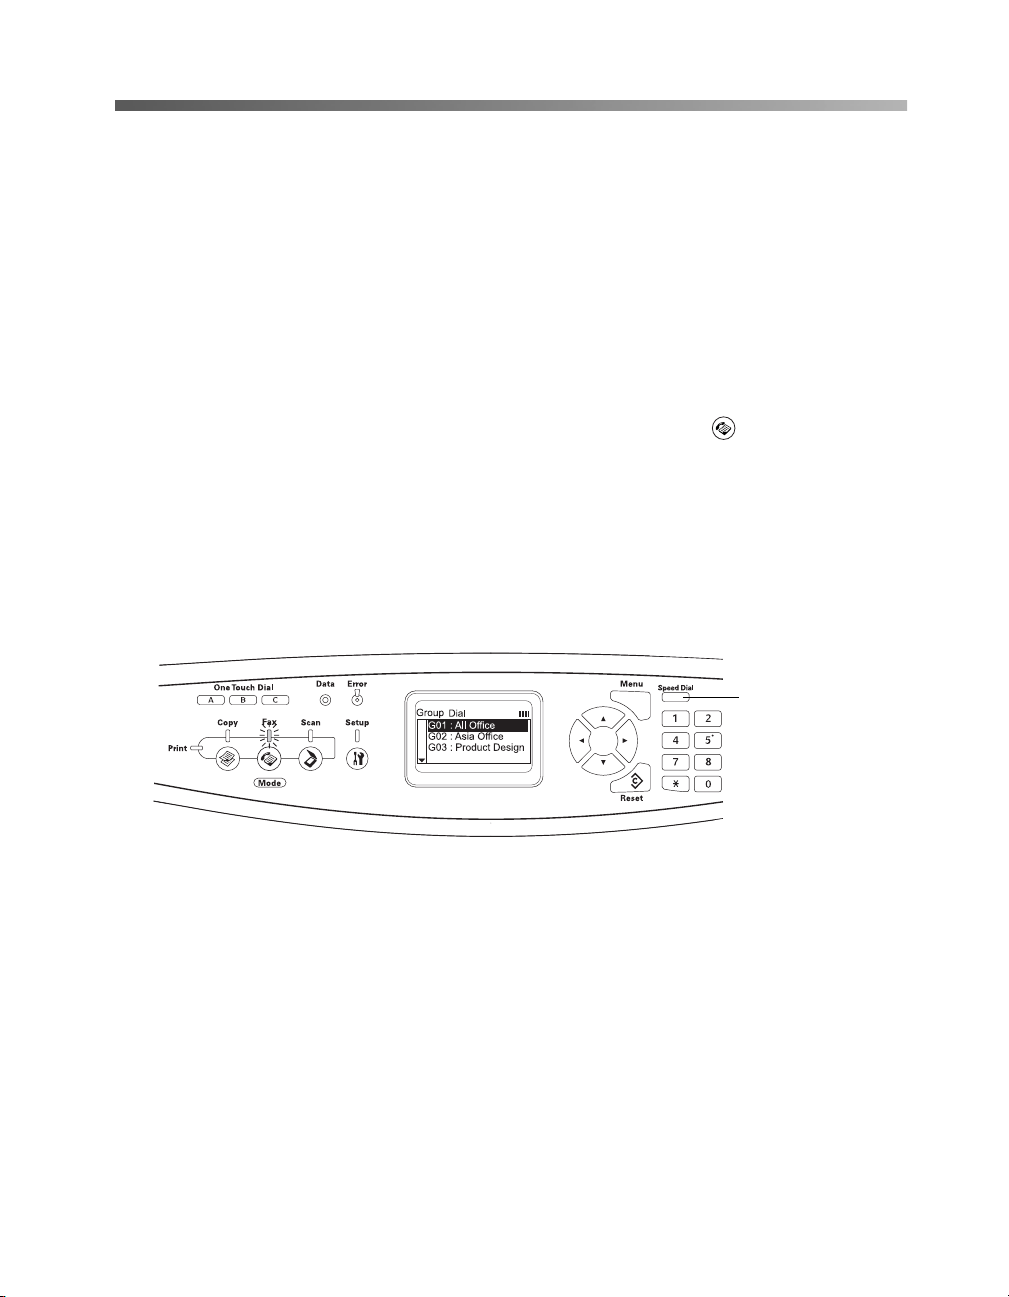
3. Press the Speed Dial button twice on the control panel.
The group dial list appears in the LCD screen.
Press the Speed
Dial button twice
4. Press the u or d button several times until your desired group is selected, then
press the r button.
The selected group appears at the top of the LCD screen.
To display the details of the registered group, press the Menu button while a
group is selected. To return to the group list again, press either the Menu button
or the l button.
5. Specify any settings if necessary. You can specify the Document Size, Density,
Image Quality, Polling Reception, and Overseas transmission mode settings. For
details, see page 44.
6. Press the x B&W Start or x Color Start button to start the transmission.
Faxing to Multiple Recipients 13
Page 14

Canceling a Fax
You can cancel a fax by using the y Cancel button or the Fax Settings menu.
Using the Cancel Button
While a fax is being transmitted or received, press the y Cancel button. The LCD
screen displays Cancel Print Job and the fax job is canceled.
Using the Fax Settings Menu
You can use the menu to cancel a fax transmission job stored in memory.
1. Make sure the product is in Fax mode. If not, press the Fax button.
2. Press the Menu button.
3. Press the d button to select Fax Job Information, and then press the r button.
4. Press the d button to select Fax Transmission Job, and then press the r button.
The Fax Transmission Job list is displayed.
Note:
To cancel a receiving fax job stored in memory, press the u or d button several
times until Fax Reception Job is selected, then press the r button. Select the
incoming fax you want to cancel from the Fax Reception Job list.
5. Press the u or d button to select the fax job you want to cancel, and then press the
Reset button.
6. Press the u or d button to select Yes for confirmation, then press the r button.
14 Sending Faxes
Page 15
Receiving Faxes 3
There are four modes for receiving faxes. The default setting is Fax only.
Item Description
Auto switching The call is received by the attached phone and the CX11NF
automatically answers after the phone rings for a certain
duration specified by the Attached Phone Timeout setting.
Fax only The CX11NF automatically answers and receives the fax.
Phone only The call is received by the attached phone. Fax reception is
not performed.
TAM When an attached phone detects a fax/phone signal while
answering an incoming call, the CX11NF automatically
receives the fax.
To change Incoming Mode settings, follow these steps.
1. Press the Setup button.
The Setup light turns on and the Setup menu appears in the LCD screen.
2. Press the d button twice to select Fax Settings, then press the r button.
3. Press the d button twice to select Reception Settings, then press the r button.
4. Press the d button twice to select Incoming Mode, then press the r button.
Receiving Faxes 15
Page 16
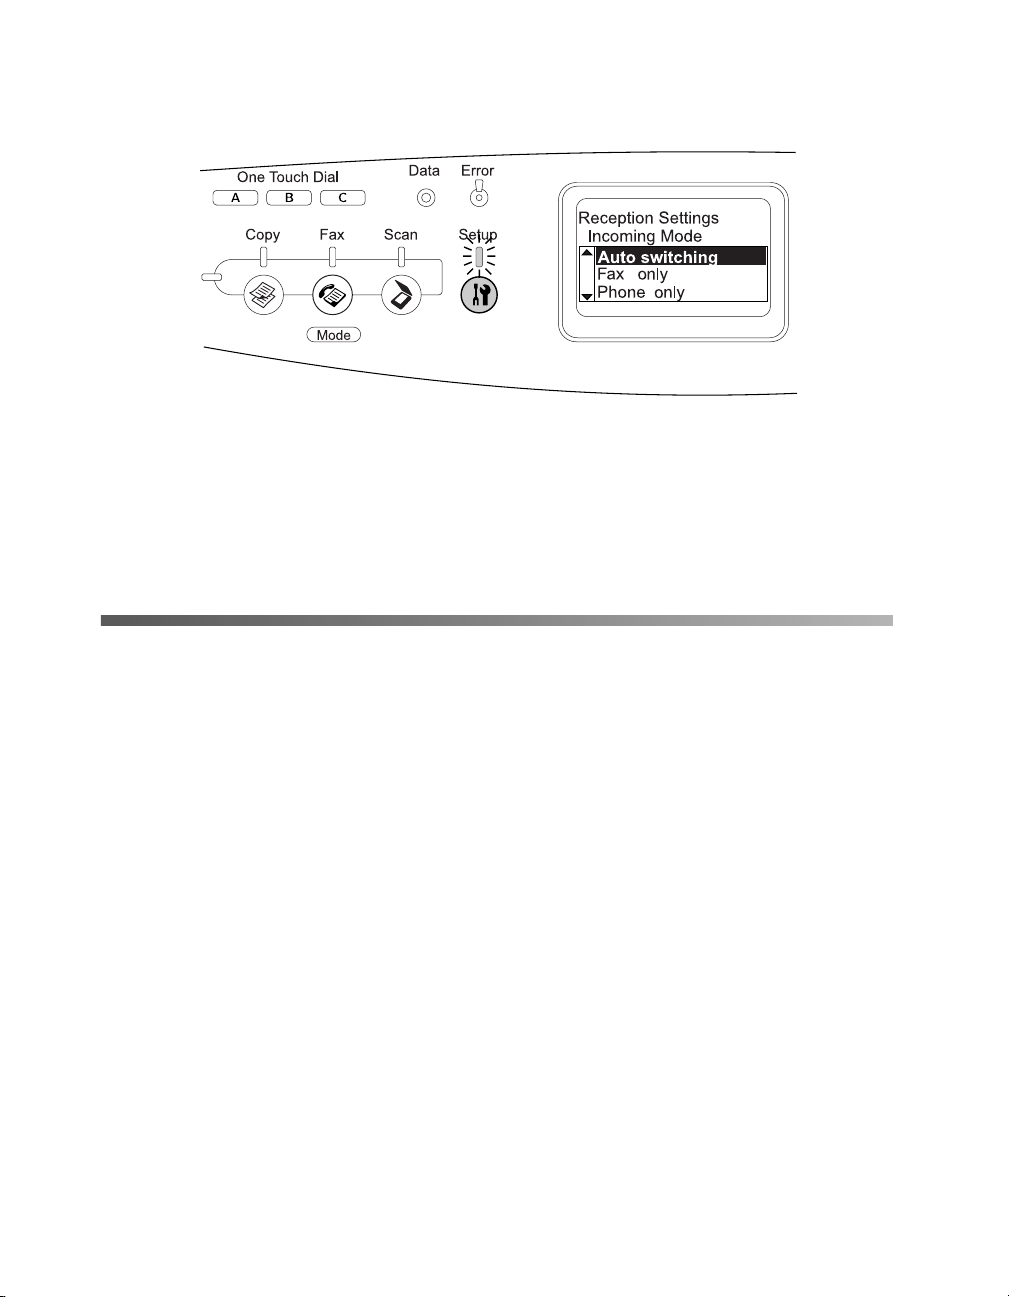
The Reception Settings menu appears.
5. Press the u or d button to select the reception mode you want, then press the r
button.
6. To exit the settings, press the l button several times or press one of the mode
buttons.
Using Fax Tones
This function is used to print faxes after answering the incoming call using an
attached phone.
Note:
To use this function, the CX11NF needs to have an attached phone, and Incoming Mode
in Reception Settings needs to be set to Auto Switching.
1. Answer the incoming call using the attached phone.
2. Press the x B&W Start or x Color Start button after confirming the fax tone.
The received faxes are printed page by page as they are received.
16 Receiving Faxes
Page 17
Using Fax Polling
This function is used to get the identifying information stored in the other party’s fax
machine.
1. Make sure the CX11NF is in Fax mode. If not, press the Fax button.
2. Enter the other party’s fax number using the numeric keypad.
3. Press the u or d button several times until Polling Rcptn appears, then press the
l or r button to select On.
4. When you hear a beep sound or voice guidance, press the x B&W Start or
x Color Start button to start the transmission.
Accessing Settings for Receiving Faxes
You can specify the following settings for receiving faxes.
Setting Options
Paper Cassette Auto, MP Tray, Paper Cassette
Incoming Mode Autoswitching, Fax only, Phone only, TAM
Attached Phone Timeout 1 to 99
DRPD On, Off (Normal, All)
1. Press the Setup button on the control panel.
The Setup light turns on and the Setup menu appears in the LCD screen.
2. Press the d button twice to select Fax Settings, then press the r button.
The Fax Settings menu appears.
3. Press the d button twice to select Reception Settings, then press the r button.
4. Press the u or d button several times to select the item you would like to change,
then press the r button.
When you set the Attached Phone Timeout, you can also specify the number of
seconds with the numeric keypad.
Using Fax Polling 17
Page 18

5. Press the u or d button to select your desired settings.
6. To exit the settings, press the l button several times or press one of the mode
buttons.
Distinctive Ring Pattern Detection
Your CX11NF is capable of receiving distinctive ring pattern telephone calls. Your
telephone company can add a second telephone number to your main telephone line
that will ring with a distinctive pattern. The DRPD (Distinctive Ring Pattern
Detection) setting allows the AcuLaser CX11NF to distinguish between different ring
patterns.
When DRPD is set to On (Normal), the CX11NF will answer the one regular ring
and ignore distinctive ring tones. When DRPD is set to Off (All), all ring tone calls
will be answered.
Follow these steps to set DRPD:
1. Press the Setup button.
The Setup light turns on and the LCD screen displays Setup Mode for a few
seconds, and then changes to the Setup menu.
2. Press the d button twice to select Fax Settings, then press the r button.
3. Press the d button twice to select Reception Settings, then press the r button.
4. Press the d button three times to select DRPD, then press the r button.
5. Press the u or d button to select Normal or All. Then press the r button.
The DRPD is set.
6. Press the Setup button to exit the menu.
For further details on adding distinctive ring patterns to your telephone, contact your
telephone company.
18 Receiving Faxes
Page 19

Fax Forwarding
You can set up your CX11NF to automatically forward any faxes it receives to another
fax machine.
Follow these steps to set up fax forwarding:
1. Press the Setup button.
The Setup light turns on and the LCD screen displays Setup Mode for a few
seconds, and then changes to the Setup menu.
2. Press the d button twice to select Fax Settings, then press the r button.
3. Press the d button four times to select Forward Settings, then press the
r button.
4. Make sure Number= is selected, then press the r button.
The speed dial list appears.
Note:
Numbers must be registered to the speed dial list before a forward number can
be selected. For more information, see page 21.
Unregistered appears if no number is selected.
5. Press the u or d button to select the number you want, then press the r button.
6. Press the d button once to select Forward, then press the r button.
7. Press the u or d button to select On, then press the r button.
The CX11NF is now ready to forward any fax it receives to the selected number.
Fax Forwarding 19
Page 20

20 Receiving Faxes
Page 21

Speed Dialing 4
If you want to send faxes using speed dial, one-touch dial, or group dial codes,
you need to register the recipient’s information in advance. You can register up to
60 recipient fax numbers using either the Epson Speed Dial Utility or the Setup
menu in the LCD screen.
Note:
While using a fax function such as sending/receiving faxes or specifying fax settings in
Setup mode, do not use Epson Speed Dial Utility to change a recipient.
Using the Setup Menu
You can register, change, or delete a recipient number for one-touch dial or speed dial
through the Setup menu on the control panel.
Note:
If you want to register multiple recipient fax numbers as a group, use the EPSON Speed
Dial Utility. For details, see “Using the Speed Dial Utility (Windows Only)” on page 28.
Registering Speed Dial Recipients
You can register up to 60 numbers in the speed dial list.
1. Press the Setup button.
The Setup light turns on and the Setup menu appears in the LCD screen.
2. Press the d button twice to select Fax Settings, then press the r button.
The Fax Settings menu appears.
3. Press the u or d button several times to select Speed Dial Settings, then press
the r button.
Speed Dialing 21
Page 22

4. Make sure Individual Speed Dial is selected, then press the r button.
The Speed dial list appears.
5. Press the u or d button several times to select the number displayed as
Unregistered, then press the r button.
Unregistered
6. Press the d button to select Number=, then press the r button.
Note:
To register a recipient name to the speed dial, see “Using the Speed Dial Utility
(Windows Only)” on page 28.
22 Speed Dialing
Number=
Page 23
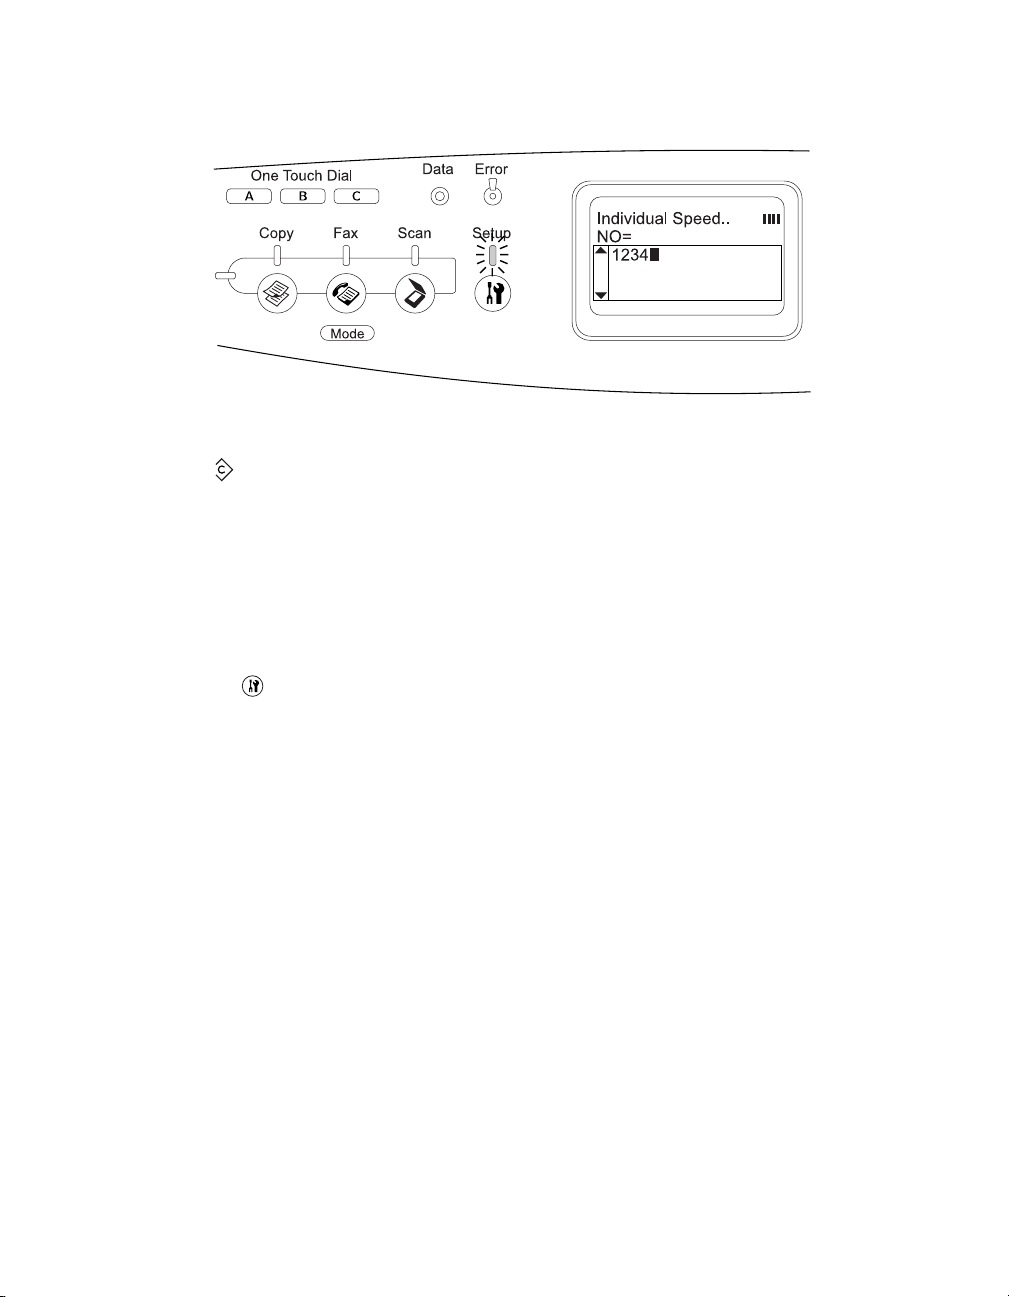
7. Enter the phone number you want to register, and then press the r button.
To correct a number while entering it, use the l button to go back one character
or the Reset button to delete.
The registered number is added to the speed dial list.
Changing Speed Dial Recipients
Follow these steps to change a recipient registered in the speed dial list.
1. Press the Setup button.
The Setup light turns on.
2. Press the d button twice to select Fax Settings, then press the r button.
The Fax Settings menu appears.
3. Press the u or d button several times to select Speed Dial Settings, then press
the r button.
4. Make sure Individual Speed Dial is selected, then press the r button.
The Speed dial list appears.
Note:
Only the speed dial number can be changed. To change the name, see “Using
the Speed Dial Utility (Windows Only)” on page 28.
Using the Setup Menu 23
Page 24

5. Press the u or d button several times to select the recipient you want to change,
then press the r button.
Unregistered
6. Make sure Change Fax Number is selected, then press the r button.
7. Press the d button to select Number=, then press the r button.
8. Enter the new phone number, then press the r button.
To correct a number while entering it, use the l button or the Reset button.
The registered number is changed to the new one on the speed dial list.
Deleting Speed Dial Recipients
Follow these steps to delete a registered recipient from the speed dial list.
1. Press the Setup button.
The Setup light turns on.
24 Speed Dialing
Page 25

2. Press the d button twice to select Fax Settings, then press the r button.
The Fax Settings menu appears.
3. Press the u or d button several times to select Speed Dial Settings, then press
the r button.
4. Make sure Individual Speed Dial is selected, then press the r button.
The speed dial list appears.
Note:
To clear all recipients that are registered in the speed-dial list, select Clear Speed
Dial and press the r button.
5. Press the u or d button several times to select the recipient you want to delete,
then press the r button.
Unregistered
6. Press the d button to select Delete, and then press the r button.
7. Press the d button to select Yes for confirmation, then press the r button.
The registered recipient in the speed-dial list is deleted.
Assigning Recipients to One-Touch Dialing
You can assign recipients from the registered speed dial list to the three One Touch
Dial buttons A, B, or C.
1. Press the Setup button.
The Setup light turns on.
Using the Setup Menu 25
Page 26

2. Press the d button twice to select Fax Settings, then press the r button.
The Fax Settings menu appears.
3. Press the u or d button several times to select Speed Dial Settings, then press
the r button.
4. Press the d button to select One-Touch Dial, then press the r button.
The One-Touch Dial list appears.
5. Press the d button to select one-touch dial A, B, or C (displayed as
Unregistered), then press the r button.
Unregistered
Unregistered
6. Press the d button to select a recipient you want to assign to One Touch Dial,
then press the r button.
The selected recipient is assigned to One-Touch Dial A, B, or C.
26 Speed Dialing
Page 27

Deleting One-Touch Dial Recipients
Follow these steps to delete recipients from the assigned One-Touch Dial buttons A,
B, or C.
1. Press the Setup button.
The Setup light turns on.
2. Press the d button twice to select Fax Settings, then press the r button.
The Fax Settings menu appears.
3. Press the u or d button several times until Speed Dial Settings appears, then
press the r button.
4. Press the d button to select One-Touch Dial, then press the r button.
The One-Touch Dial menu appears.
5. Press the d button to select One-Touch Dial button A, B, or C, then press the
r button.
Unregistered
Unregistered
6. Press the d button to select Delete, then press the r button.
Using the Setup Menu 27
Page 28

7. Press the d button to select Yes for confirmation, then press the r button.
The recipient assigned for the one-touch dial is deleted.
Using the Speed Dial Utility (Windows Only)
You can use the Epson Speed Dial Utility (Windows Only) to register multiple
recipient fax numbers as a group, or to register recipients’ names. All data entered
using the Speed Dial Utility must be uploaded to the CX11NF before it can be used.
Note:
You cannot print or fax while uploading or downloading speed dial data.
To open the Speed Dial Utility, click Start, point to All Programs (Windows XP) or
Programs (Windows Me, 98, or 2000), EPSON Speed Dial Utility, and then click
Speed Dial Utility.
The Speed Dial Utility window appears:
28 Speed Dialing
Page 29

Registering Speed Dial Recipients
First, make sure the CX11NF is in Print mode. Then follow these steps to register a
recipient using the Epson Speed Dial utility.
1. Open the Edit menu on the left side of the screen, then select Create New.
The Speed Dial tab appears:
2. Click the Add button.
The Edit Address window appears:
Using the Speed Dial Utility (Windows Only) 29
Page 30

3. Select the Speed Dial Number from the drop-down list. You can select a number
from 1 to 60.
4. Type the Recipient Name.
5. Type the Telephone Number.
6. Click the OK button.
The number is added to the registered recipient list.
Note:
Remember to click the Save button to save any changes. For more information,
see page 37.
Remember to click Send Record to send changes to the CX11NF. For more
information, see page 40.
To add your name to the fax cover page on faxes you send, see page 36.
30 Speed Dialing
Page 31

Editing Speed Dial Recipients
Follow these steps to edit a registered recipient from the Speed Dial List.
1. In the Speed Dial tab, select a registered recipient from the list.
2. Click the Edit button.
The Edit window appears:
3. Make the desired changes to the information. Then click OK.
The changes are saved and displayed in the registered recipient list in the Speed
Dial tab.
Deleting Speed Dial Recipients
Follow these steps to delete a registered recipient from the Speed Dial List.
1. In the Speed Dial tab, select a registered recipient from the list.
2. Click the Delete button.
3. At the Confirmation window, click Yes to delete the selected registered recipient.
Note:
Once a recipient is deleted from the registered list, you cannot select it for Group
Dial or One-Touch Dial.
Using the Speed Dial Utility (Windows Only) 31
Page 32

Registering Groups
Follow these steps to register a particular list of recipients as a group.
1. Click the Group Dial tab.
The list of group dial names appears:
2. Click the Add button.
32 Speed Dialing
Page 33

The Register Group [Add] window appears:
3. Select a Group Number from the drop-down list. You can select a number from
1 to 20.
4. Type a Group Name.
5. From the Speed Dial Data Available for Registration table, select a registered
recipient from the list, then click the Add to Group button.
The registered recipient is added to the group.
6. Repeat step 5 for each recipient to be added to the group.
7. When you have finished adding the recipients to the group, click the OK button.
The group is registered and appears in the Group Dial tab.
Using the Speed Dial Utility (Windows Only) 33
Page 34

Editing Groups
Follow these steps to add or delete recipients from a registered group.
1. In the Group Dial tab, select the group from the list, then click the Edit button.
The Register Group [Edit] window appears.
2. Add registered recipients to the group, and/or delete them. See “Registering
Groups” on page 32 for instructions.
To edit individual names see page 29.
3. When you are finished, click OK.
The changes are saved and displayed in the registered group list in the Group
Dial tab.
Deleting Groups
Follow these steps to delete a group.
1. In the Group Dial tab, select the group from the list.
2. Click the Delete button.
3. At the confirmation, click Yes to delete the selected group.
34 Speed Dialing
Page 35

Assigning One-Touch Dial Recipients
Follow these steps to assign a registered recipient to a One-Touch Dial button.
1. Click the One-Touch Dial tab.
The Set One-Touch Dial list appears:
2. Click the Edit button for the button to which you want to assign a registered
recipient.
The Set Button window appears:
3. Select the registered recipient from the list, then click OK.
The registered recipient is assigned to the button.
Using the Speed Dial Utility (Windows Only) 35
Page 36

Deleting One-Touch Dial Recipients
1. In the One-Touch Dial tab, click the Not Set button for the button from which
you want to remove a registered recipient.
2. At the confirmation, click Yes.
The recipient is deleted from the button assignment.
Adding Sender Information for the Fax Cover Page
Follow these steps to add your name to the fax cover page on faxes you send:
1. Click the Sender Information tab.
The Set Sender Information window appears.
2. Type the name you want to appear on the fax cover page in the Sender name field,
then click the Send Record button.
A confirmation window appears.
36 Speed Dialing
Page 37

3. Click Yes.
A progress meter appears.
4. Once the upload is complete, a message window appears. Click OK.
To include the Sender Name on the fax cover page, set the Print Sender Info
setting to On as described on page 48.
Saving Speed Dial Information
After you register Speed Dial or One-Touch recipients, you need to save the
information as a file and send it to the CX11NF.
Follow these steps to save additions or changes made in the Speed Dial Utility to a file
on your PC.
1. From either the Speed Dial, Group Dial, or One-Touch Dial tab, click the Save
button.
Using the Speed Dial Utility (Windows Only) 37
Page 38

The Save As window appears.
2. Select a location on your PC’s hard drive, type a File Name, then click Save.
3. At the confirmation, click OK. The speed dial data is saved to a file with the
extension .CSV.
38 Speed Dialing
Page 39

Editing Speed Dial Information
Follow these steps to edit the speed dial information stored in a file.
1. Open the Edit menu and select Edit Existing File.
2. Click the Browse button to select the CSV file to edit.
3. Click Next.
The Speed Dial tab appears, displaying a list of registered recipients. From here
you can add, edit, or delete registered recipients and group lists, or assign or
reassign recipients to one-touch dial.
Using the Speed Dial Utility (Windows Only) 39
Page 40

Sending Speed Dial Information
Changes made in the EPSON Speed Dial Utility do not take effect in the CX11NF
until the data is sent to it.
Follow these steps to send the speed dial information created and/or changed in the
Speed Dial Utility to the product.
1. While in the Speed Dial, Group Dial, One-Touch Dial, or Sender Information
tabs, click the Send Record button.
The Confirm Execution dialog box appears:
2. Click Yes.
The information is sent to the product.
Note:
Do not attempt to perform any other functions (fax, copy, scan, etc.) or disconnect the
CX11NF before the transfer is complete or the speed dial information will be corrupted.
40 Speed Dialing
Page 41

Customizing Settings 5
You can customize the settings in the Fax menu, the transmit and receive settings, and
the outgoing fax settings.
Fax Menu
You can use the Fax Settings menu to make changes to the following settings:
■ Basic Settings
■ Transmission Settings
■ Reception (Incoming Fax) Settings
■ Speed Dial Settings
■ Forward Settings
■ Report Setup
■ Fax Factory Settings
Customizing Settings 41
Page 42

Basic Settings
This menu allows you to specify the basic settings for the fax mode.
Item Settings
Line Type PSTN, PBX, FlashStart
Dial Type
Personal Number Name
Speaker Volume Off, 1, 2, 3
Country/Area Setting Argentina, Australia, Austria, Belgium, Brazil, Canada,
Report Print Setup
1 This item is only available in Germany and France.
2 Available settings vary depending on the destination.
3 Name can be registered only with EPSON Speed Dial Utility. For details, see page 28.
4 Default value is determined according to the country/area setting.
2
Tone, 10 pps, 20 pps
3
: up to 32 characters
Number: up to 50 digits
China, Czech, Denmark, Finland, France, Germany,
Greece, Holland, Hong Kong, Hungary, Ireland, Italy, Korea,
Luxembourg, Malaysia, Mexico, New Zealand, Norway,
Poland, Portugal, Russia, Singapore, Spain, Sweden,
Switzerland, Taiwan, Thai, U.K., U.S.A.
4
English, French, German, Italian, Spanish, Swedish,
Danish, Dutch, Finnish, Portuguese, Simplified Chinese,
Traditional Chinese, Korean, Russian
1
Tip:
Press the ✽ asterisk button on the numeric keypad when you want to enter a
in a Personal Number. Press the
enter a space.
Transmission Settings
This menu allows you to specify the following transmission settings for fax mode.
Item Settings
Auto Redial Tries 0 to 99
Print Sender Info On, Off
42 Customizing Settings
+ mark
# button on the numeric keypad when you want to
Page 43

Reception Settings
This menu allows you to specify the following reception settings for fax mode.
Item Settings
Paper Cassette Auto, MP Tray, Paper Cassette
Incoming Mode Auto switching, Fax only, Phone only,
TAM
For details, see page 15.
Attached Phone
Timeout
DRPD On, Off (Normal, All)
1 to 99
Speed Dial Settings
This menu allows you to specify the following items, as described in Chapter 4.
Item Settings
Individual Speed Dial Register, Delete
One-Touch Dial Register, Delete
Clear Speed Dial Clears all registered speed dial
information.
Forward Settings
This menu allows you to specify the fax forwarding settings, as described on page 19.
Item Settings
Forward Number Number: Name *
Forward On, Off
*Unregistered is displayed when no forward (speed dial) numbers are registered.
Report Setup
This menu allows you to specify when you want to print the following reports.
Item Settings
Activity Report On, Off
Transmission Report On, Error Only, Off
Multiple Trans Report On, Error Only, Off
Fax Menu 43
Page 44

Fax Factory Settings
The Factory Settings menu item sets the fax mode to its factory settings.
Customizing Transmit and Receive Settings
You can change the following settings for transmitting or receiving faxes:
■ Density
■ Document Size
■ Image Quality
■ Output Paper Size
■ Overseas Transmission Mode
■ Polling Reception
Adjusting Fax Density
When sending a fax, you can specify seven levels of transmission density (–3 to 3).
The greater the number, the darker the image.
1. Make sure the CX11NF is in Fax mode. If not, press the Fax button.
2. Press the d button to select Density.
3. Press the l or r button several times to specify your desired density level.
You can also set the density by entering the number directly with the numeric
keypad.
4. Press the u button twice to return to the recipient item, or specify other settings
if necessary.
44 Customizing Settings
Page 45

Selecting Document Size
You can specify the document size from A4, B5, Letter, and Legal. The default size is
set to Letter.
1. Make sure the CX11NF is in Fax mode. If not, press the Fax button.
2. Press the d button to select Document Size.
3. Press the l or r button several times until your desired paper size appears.
4. Press the u button to return to the recipient item, or change other settings
if necessary.
Selecting Image Quality
In black-and-white transmission, you can specify the image quality according to the
document type.
1. Make sure the CX11NF is in Fax mode. If not, press the Fax button.
2. Press the d button twice until Image Qlty appears.
3. Press the l or r button several times until your desired image quality appears.
You can select the following image quality settings.
Quality Description
Standard Fax is transmitted with standard image quality.
Fine (Quality) Fax is transmitted with the moiré-removal and
background-clearance functions active. Use for documents
such as magazines and catalogs.
S. Fine (Super Fine)
(High Quality)
Photo Use for photos taken with a camera. Accurately reproduces
Use this setting for documents containing small characters,
graphics or thin lines. Although the transmission speed is
slower, a finer fax can be transmitted.
the gradation and subtle tonal variations. Also prevents
moiré patterns from appearing on the fax.
4. Press the u button three times to exit the image quality setting, or specify other
settings if necessary.
Customizing Transmit and Receive Settings 45
Page 46

Output Paper Size
The received fax can be printed in A4, B5, Letter, or Legal. When the output paper
size does not match the received data size, the image of the received data is divided
according to the output paper size as shown in the table below:
Cassette
paper size
Letter Reduced
Legal
1 Received image is reduced in the sub-scan direction only.
2 Received image is output on 2 pages.
Received document size
Letter A4 Legal
1
Divided
2
In the table above, the shaded area indicates the printable area and a vertical line in
the shaded area indicates the location of the header information (head of the original).
Using Overseas Transmission Mode
When you transmit faxes overseas, set this function to On.
1. Make sure the CX11NF is in Fax mode. If not, press the Fax button.
2. Press the u or d button several times to select Overseas Mode.
3. Press the l or r button to select On or Off.
4. Press the u button several times to exit the Overseas Mode setting, or specify
other settings if necessary.
46 Customizing Settings
Page 47

Using Polling Reception
This function enables you to import the fax data stored in the sender’s fax machine.
1. Make sure the CX11NF is in Fax mode. If not, press the Fax button.
2. Press the d button several times to select Polling Rcptn.
3. Press the l or r button to select On or Off.
4. Press the u button several times to exit the Polling Rcptn setting, or specify other
settings if necessary.
Selecting Outgoing Fax Settings
You can change the number of auto redial attempts and the sender’s record by using
the buttons.
Setting Auto Redial
This function is used to specify the total number of redial attempts when unable to
connect to the recipient due to a busy line. The number of redial attempts can be set
from 0 to 99. Setting the number of attempts to 0 disables Auto Redial.
1. Press the Setup button.
The Setup light turns on and the Setup menu appears in the LCD screen.
2. Press the d button twice to select Fax Settings, then press the r button.
The Fax Settings menu appears.
3. Press the d button to select Transmission Settings, then press the r button.
4. Make sure Auto Redial Tries is selected, then press the r button.
5. Press the u or d button to specify the number of redial attempts.
You can also set the number of auto redial attempts by entering the number using
the numeric keypad.
6. To exit the settings, press either the l button several times or press one of the
mode buttons.
Selecting Outgoing Fax Settings 47
Page 48

Printing Sender Information
This function is used to print sender information on outgoing faxes. When Print
Sender Info is set to On, the date, day of week, time, sender’s name, sender’s phone
number, and page number (fraction style display) are automatically printed at the top
of the transmission image. See page 36 for instructions on entering the sender name
using the EPSON Speed Dial Utility (Windows only).
1. Press the Setup button on the control panel.
The Setup light turns on and the Setup menu appears in the LCD screen.
2. Press the d button twice to select Fax Settings, then press the r button.
The Fax Settings menu appears.
3. Press the d button to select Transmission Settings, then press the r button.
4. Press the d button to select Print Sender Info, then press the r button.
5. Press the u or d button to select On, then press the r button.
The ✽ asterisk shows the current settings.
6. To exit the settings, press the l button several times or press one of the mode
buttons.
48 Customizing Settings
Page 49

Reports 6
You can print a variety of reports, including communication reports and lists of fax
job information and fax settings.
Printing Reports
You can print the following communication reports or a fax information list to check
various transmission information and transmission results.
Type of report Description
Speed Dial List Prints a list for one-touch dial, group dial, and speed
dial information.
Activity Report Prints a list of faxes sent and received.
Fax Settings List Prints a list of Fax settings.
Memory Job Info Prints job information stored in memory.
1. Make sure the CX11NF is in Fax mode. If not, press the Fax button.
2. Press the Menu button.
3. Make sure Printing Report is selected, then press the r button.
4. Press the u or d button to select the report or list you want to print, then press the
r button.
The report is printed.
Reports 49
Page 50

Report (Communication) Setup Settings
You can specify the following settings for fax communication reports.
Type of Report Description and Settings
Activity Report This report contains transmission and reception information.
On Print this report automatically for every 50 transmissions.
Off To not print this report automatically.
Transmission
Report
Multiple Trans
Report
This report contains transmission information such as start time,
number of pages, and transmission result.
On Print this report automatically each time a fax
transmission occurs.
Error Only Print this report automatically only when an error occurs.
Off To not print this report.
This report contains transmission information for multiple
transmissions.
On Print this report automatically each time a multiple fax
transmission using group dial occurs.
Error Only Print this report automatically only when an error occurs.
Off To not print this report.
Follow these steps to change the report settings.
1. Press the Setup button.
The Setup light turns on and the Setup menu appears in the LCD screen.
2. Press the d button twice to select Fax Settings, then press the r button.
The Fax Settings menu appears.
3. Press the u or d button several times to select Report (Communication) Setup,
then press the r button.
The Report Setup menu appears.
4. Press the u or d button to select the report you want, then press the r button.
5. Press the u or d button to select the setting you want, then press the r button.
6. To exit the settings, press the l button several times or press one of the mode
buttons.
50 Reports
Page 51

Fax Job Information
This function confirms the status for a fax transmission or reception.
Setting Description
Memory Info Display Displays the remaining memory level in percent.
Fax Transmission Job Displays the list of faxes to be transmitted.
Fax Reception Job Displays the list of faxes to be printed.
Follow the steps below to change the Fax Job Information settings.
1. Press the Fax button on the control panel.
The Fax light turns on and the Fax menu appears in the LCD screen.
2. Press the Menu button.
3. Press the d button to select Fax Job Info, then press the r button.
The Fax Job Information menu appears.
4. Press the d button to select the job information you want, then press the
r button.
5. To exit the settings, press the l button several times or press one of the mode
buttons.
Fax Job Information 51
Page 52

52 Reports
Page 53

Solving Problems 7
This chapter describes ways for you to solve any problems that might occur with the
fax functions.
Fax Error Messages
Message Action
Fax Error Turn off the product, wait several minutes, then turn it on again. If the
error occurs again, contact Epson as described on page 56.
Insufficient memory Wait until the fax jobs stored in memory are finished, then try
transmission/reception again, or a lower Image Quality setting.
Send failed This message appears when you send a fax manually or when a color
fax transmission fails. Try sending a fax using the memory
transmission function.
Sending and Receiving
Problem Solution
Document stops
feeding during faxing
• The maximum length of a page you can load is 14 in. Faxing a
longer page stops at 14 in. The maximum page size for the Auto
Document Feeder is 8.5 × 14 in. If the item is too small, it can jam
inside the Auto Document Feeder.
• There might be problems with the fax machine you are sending
to. Try contacting the recipient by phone.
• There might be problems with the phone line.
Turn up the volume on the unit and press the
Color Start button on the control panel. If you hear a dial tone,
x
the phone line is working. To change the speaker volume, see
“Basic Settings” on page 42.
Disconnect the product from the phone jack and connect a phone.
Try to make a phone call to make sure the phone line is working.
x B&W Start or
Solving Problems 53
Page 54

Problem Solution
Unit is receiving faxes
but not sending them
Outgoing fax calls
keep dialing
Faxes you send are
not arriving
Incoming fax calls are
not being answered
• If your product is on a PBX system, the system might be
generating a dial tone the product cannot detect. Disable the
detect dial tone setting. See “Basic Settings” on page 42.
• If you think there might be a poor connection on the phone line,
try sending the fax later.
The product will automatically redial if the Auto Redial Tries setting is
between 1 and 99. Press the
redialing. Change the redial setting if necessary.
• Call the recipient to make sure the fax machine is on and ready to
receive faxes.
• Make sure the fax is still waiting in memory. A fax might be in
memory because it is waiting to redial, other jobs are ahead of it
waiting to be sent, or the fax is set up for a delayed send. If a fax
job is in memory for any of these reasons, an entry for the job
appears in the fax log. Print a fax activity report and check the
Status column for jobs with a Pending designation.
• Check if the Incoming Mode is set to Fax only. Answer the phone
and start receiving the fax yourself. See page 43 for more
information.
• Make sure the product is connected properly to a phone line.
• Check if there are too many devices connected to the phone line.
Try removing the last device connected to see if the product
works. If not, continue removing devices one at a time and retry
after removing each one.
• Disconnect the product from the phone jack and connect a phone.
Try to make a phone call to make sure the phone line is working.
• Check the paper supply. If the product is out of paper and its
memory is full, it will not be able to receive faxes. Refill the MP
tray or the paper cassette. The product will print all of the faxes it
has saved in memory and will then resume answering fax calls.
y Cancel button when the fax is
54 Solving Problems
Page 55

Problem Solution
Faxes are transmitting
or being received very
slowly
A blank copy is output Make sure the ADF and the ADF cover are closed firmly.
• Check if you are sending or receiving a very complex fax. A
complex fax, such as one with many graphics, takes longer.
• Check if the receiving fax machine has a slow modem speed. The
CX11NF only sends the fax at the fastest modem speed the
receiving fax machine can use.
• Check if the resolution at which the fax was sent or received is
very high. A higher resolution typically results in better quality, but
also requires a longer transmission time. If you are receiving the
fax, call and ask the sender to lower the resolution and resend the
fax. If you are sending, lower the resolution and resend the fax. To
change the default setting, see page 44.
• Check the phone line connection. If there is a poor connection,
the product and the receiving fax machine slow down line
transmission to adjust for errors. Hang up and resend the fax. If
this does not work, have the phone company check the phone
line.
Printing Problems
Problem Solution
Faxes are not printing
or are printing
incorrectly
Received faxes are too
light or are printing
only on half of the
page
Reports are not
printing correctly
Make sure there is paper in the MP tray or the paper cassette. Load
the MP tray or the paper cassette, if necessary. Any faxes received
while the input tray is empty are stored in memory and will print out
once the tray has been refilled.
Check if the product ran out of toner while printing a fax. The product
stores up to 10 of the most recently received faxes. Replace the
toner cartridge. For more information, see “Maintenance” in the
Basics Guide.
If a transmission report or activity report is not printed correctly, try
one the following solutions:
• Check the driver settings and the specifications and status of the
connection cable.
• If the product is connected to a network, consult the network
administrator.
Printing Problems 55
Page 56

Where To Get Help
Epson Technical Support
Epson provides these technical support services:
Internet Support
Visit Epson’s support website at http://support.epson.com and select your product
for solutions to common problems. You can download drivers and documentation,
get FAQs and troubleshooting advice, or e-mail Epson with your questions.
Speak to a Support Representative
Before you call for support, please have the following information ready:
■ Product name (Epson AcuLaser CX11NF)
■ Product serial number (located on the back of the product)
■ Proof of purchase (such as a store receipt) and date of purchase
■ Computer configuration
■ Description of the problem
Then call:
■ U.S.: (562) 276-4350, 6 am to 6 pm, Pacific Time, Monday through Friday and
7 am to 4 pm, Saturday.
■ Canada: (905) 709-2170, 6 am to 6 PM, Pacific Time, Monday through Friday.
Toll or long distance charges may apply.
Purchase Supplies and Accessories
You can purchase genuine Epson toner cartridges and paper from an Epson
authorized reseller. To find the nearest reseller, call 800-GO-EPSON
(800-463-7766). Or you can purchase online at www.epsonstore.com (U.S. sales) or
www.epson.ca (Canadian sales).
56 Solving Problems
Page 57

Notices 8
This chapter contains safety instructions and information about the product’s
regulatory compliance.
Important Safety Instructions
When Using the CX11NF With Telephone Equipment
When using the CX11NF with telephone equipment, follow these basic safety precautions to reduce
the risk of fire, electric shock, and injury:
■ Do not use the CX11NF near water.
■ Avoid using a telephone during an electrical storm. There may be a remote risk of electric shock
from lightning.
■ Do not use the telephone to report a gas leak in the vicinity of the leak.
Caution:
Be sure the telephone’s AC power cord meets the relevant local safety standards.
Use only the power cord that comes with the product and don’t use the cord with other
equipment. Use of another cord may result in fire or electric shock.
Caution:
To reduce the risk of fire, use only No. 26 AWG or larger telecommunication line cord.
Notices 57
Page 58

FCC Compliance Statement
For United States Users
1. This equipment complies with Part 68 of the FCC rules and the requirements adopted by the
ACTA. On the top of FAX MODEM board of this equipment is a label that contains, among other
information, a product identifier in the format US: BKMMM00BEU-96. If requested, this number
must be provided to the telephone company.
2. RJ11C is available for this equipment.
3. A plug and jack used to connect this equipment to the premises wiring and telephone network must
comply with the applicable FCC Part 68 rules and requirements adopted by the ACTA. A compliant
telephone cord and modular plug is provided with this product. It is designed to be connected to a
compatible modular jack that is also compliant. See installation instructions for details.
4. The REN is used to determine the number of devices that may be connected to a telephone line.
Excessive RENs on a telephone line may result in the devices not ringing in response to an incoming
call. In most but not all areas, the sum of RENs should not exceed five (5.0). To be certain of the
number of devices that may be connected to a line, as determined by the total RENs, contact the local
telephone company. For products approved after July 23, 2001, the REN for this product is part of the
product identifier that has the format US: BKMMM00BEU-96. The digits represented by 00 are the
REN without a decimal point (e.g., 00 is a REN of 0.0). For earlier products, the REN is separately
shown on the label.
5. If this terminal equipment Model EU-96 causes harm to the telephone network, the telephone
company will notify you in advance that temporary discontinuance of service may be required. But if
advance notice isn’t practical, the telephone company will notify the customer as soon as possible. Also,
you will be advised of your right to file a complaint with the FCC if you believe it is necessary.
6. The telephone company may make changes in its facilities, equipment, operations or procedures that
could affect the operation of the equipment. If this happens the telephone company will provide
advance notice in order for you to make necessary modifications to maintain uninterrupted service.
7. If trouble is experienced with this equipment Model EU-96, for repair or warranty information,
please contact EPSON AMERICA, INC. 800-556-6025. If the equipment is causing harm to the
telephone network, the telephone company may request that you disconnect the equipment until the
problem is resolved.
8. This equipment cannot be used on public coin phone service provided by the telephone company.
Connection to party line service is subject to state tariffs. (Contact the state public utility commission,
public service commission or corporation commission for information.)
9. The Telephone Consumer Protection Act of 1991 makes it unlawful for any person to use a
computer or other electronic device, including fax machines, to send any message unless such message
clearly contains in a margin at the top or bottom of each transmitted page or on the first page of the
58 Notices
Page 59

transmission, the date and time it is sent and an identification of the business or other entity, or other
individual sending the message and the telephone number of the sending machine or such business,
other entity, or individual. In order to program this information into your fax machine, you should use
the FAX Recipient Registration Tool (EPSON Speed Dial Utility).
10. According to the FCC’s electrical safety advisory, we recommend that you may install an AC surge
arrestor in the AC outlet to which this equipment is connected. Telephone companies report that
electrical surges, typically lightning transients, are very destructive to customer terminal equipment
connected to AC power sources and that this is a major nationwide problem.
11. If your home has specially wired alarm equipment connected to the telephone line, ensure the
installation of this equipment Model EU-96 does not disable your alarm equipment. If you have
questions about what will disable alarm equipment, consult your telephone company or a qualified
installer.
Canada
1. This product meets the applicable Industry Canada technical specifications.
Le présent matériel est conforme aux spécifications techniques applicables d’Industrie Canada.
2. The Ringer Equivalence Number is an indication of the maximum number of devices allowed to be
connected to a telephone interface. The termination on an interface may consist of any combination of
devices subject only to the requirement that the sum of the RENs of all the devices does not exceed five.
L’indice d’équivalence de la sonnerie (IES) sert à indiquer le nombre maximal de terminaux qui
peuvent être raccordés à une interface téléphonique. La terminaison d’une interface peut consister en
une combinaison quelconque de dispositifs, à la seule condition que la somme d’indices d’équivalence
de la sonnerie de tous les dispositifs n’excède pas 5.
FCC Compliance Statement 59
Page 60

Declaration of Conformity
According to 47CFR, Part 2 and 15 for Class B Personal Computers and Peripherals; and/or
CPU Boards and Power Supplies used with Class B Personal Computers:
We: Epson America, Inc.
Located at: MS: 3-13
3840 Kilroy Airport Way
Long Beach, CA 90806
Telephone: (562) 290-5254
Declare under sole responsibility that the product identified herein, complies with 47CFR Part 2 and
15 of the FCC rules as a Class B digital device. Each product marketed is identical to the representative
unit tested and found to be compliant with the standards. Records maintained continue to reflect the
equipment being produced can be expected to be within the variation accepted, due to quantity
production and testing on a statistical basis as required by 47CFR §2.909. Operation is subject to the
following two conditions: (1) this device may not cause harmful interference, and (2) this device must
accept any interference received, including interference that may cause undesired operation.
Trade Name: Epson
Type of Product: MFPP
Model: KBA-5b
60 Notices
Page 61

Epson America, Inc. Limited Warranty
What Is Covered: Epson America, Inc. (“Epson”) warrants to the original retail purchaser that the
Epson product covered by this limited warranty statement, if purchased new and operated only in the
United States or Canada, conforms to the manufacturer’s specifications and will be free from defects in
workmanship and materials for a period of one (1) year from the date of original purchase. For
warranty service, you must provide proof of the date of original purchase.
What Epson Will Do To Correct Problems: Should your Epson Product require service during the
warranty period, you must contact Epson at 800-556-6025 for service diagnostic and repair
instructions. If service is needed, Epson will provide on-site service, where available, to repair or replace
the Product without charge for parts or labor. On-site service may not be available in all areas or all
instances. If on-site service cannot be accomplished, Epson has the option to perform repairs at an
Epson authorized repair center, or to exchange the product. In the case of service at an authorized
repair center, Epson will arrange and pay for shipping to and from the repair location. In the case of an
exchange of the defective unit, Epson will ship a replacement product to you, freight prepaid, so long as
you use an address in the U.S. (excluding Puerto Rico and U.S. Possessions) or Canada. Shipments to
other locations will be made freight collect. You are responsible for securely packaging the defective
unit and returning it to Epson within five (5) working days of receipt of the replacement. On
exchanges, Epson requires a debit or a credit card number to secure the cost of the replacement product
in the event that you fail to return the defective one. When warranty service involves the exchange of
the product or a part, the item replaced becomes Epson property. The replacement product or part
may be new or refurbished to the Epson standard of quality, and, at Epson’s option, may be another
model of like kind and quality. Exchange products and parts assume the remaining warranty period of
your original product covered by this limited warranty.
What This Warranty Does Not Cover: This warranty does not apply to refurbished or reconditioned
products and is not transferable. This warranty covers only normal use in the United States and
Canada. Using this product for continuous production or similar high duty purposes is not considered
normal use; damage, maintenance or service from such use will not be covered under this warranty.
This warranty does not cover any color change or fading of prints or reimbursement of materials or
services required for reprinting. This warranty does not cover damage to the Epson product caused by
parts or supplies not manufactured, distributed or certified by Epson. This warranty does not cover
toner cartridges or third party parts, components, or peripheral devices added to the Epson product
after its shipment from Epson, e.g., dealer or user-added boards or components. Epson is not
responsible for warranty service should the Epson label or logo or the rating label or serial number be
removed or should the product fail to be properly maintained or fail to function properly as a result of
misuse, abuse, improper installation, neglect, improper shipping, damage caused by disasters such as
fire, flood, and lightning, improper electrical current, software problems, interaction with non-Epson
products, or service other than by an Epson Authorized Servicer. If a claimed defect cannot be
identified or reproduced, you will be held responsible for the costs incurred.
THE WARRANTY AND REMEDY PROVIDED ABOVE ARE EXCLUSIVE AND IN LIEU OF
ALL OTHER EXPRESS OR IMPLIED WARRANTIES INCLUDING, BUT NOT LIMITED TO,
THE IMPLIED WARRANTIES OF MERCHANTABILITY, NON-INFRINGEMENT OR
Epson America, Inc. Limited Warranty 61
Page 62

FITNESS FOR A PARTICULAR PURPOSE. SOME LAWS DO NOT ALLOW THE
EXCLUSION OF IMPLIED WARRANTIES. IF THESE LAWS APPLY, THEN ALL EXPRESS
AND IMPLIED WARRANTIES ARE LIMITED TO THE WARRANTY PERIOD IDENTIFIED
ABOVE. UNLESS STATED HEREIN, ANY STATEMENT OR REPRESENTATIONS MADE
BY ANY OTHER PERSON OR FIRM ARE VOID. EXCEPT AS PROVIDED IN THIS
WRITTEN WARRANTY. NEITHER EPSON AMERICA, INC. NOR ITS AFFILIATES SHALL
BE LIABLE FOR ANY LOSS, INCONVENIENCE, OR DAMAGE, INCLUDING DIRECT,
SPECIAL, INCIDENTAL OR CONSEQUENTIAL DAMAGES, RESULTING FROM THE USE
OR INABILITY TO USE THE EPSON PRODUCT, WHETHER RESULTING FROM BREACH
OF WARRANTY OR ANY OTHER LEGAL THEORY. EPSON’S ENTIRE LIABILITY FOR
LOSS OR DAMAGE OF ANY KIND SHALL BE LIMITED TO A REFUND OF THE PRICE
PAID FOR THE EPSON PRODUCT.
In Canada, warranties include both warranties and conditions.
Some jurisdictions do not allow limitations on how long an implied warranty lasts, and some
jurisdictions do not allow the exclusion or limitation of incidental or consequential damages, so the
above limitations and exclusions may not apply to you. This warranty gives you specific legal rights and
you may have other rights which vary from jurisdiction to jurisdiction.
To find the Epson Authorized Reseller nearest you, visit our web site at: http://www.epson.com.
To find the Epson Customer Care Center nearest you, visit http://support.epson.com.
You can also write to: Epson America, Inc., P.O. Box 93012, Long Beach, CA 90809-3012
62 Notices
Page 63

Page 64

CPD-19582R2
Printed in XXXXXX XX.XX-XX XXX
 Loading...