

Page 1

User’s Guide
(Abridged Version)
NPD4281-00 EN
Page 2

AcuLaser C3900 Series User’s Guide (Abridged Version)
About This Manual
This manual is an abridged version of the User’s Guide.
See the table below for information about the contents of the User’s Guide and the parts excerpted from the User’s Guide.
To read the User’s Guide in different languages, start the installer from the Software Disc and select the language you want.
Contents of the User’s Guide and the parts that have been excerpted
Chapter Description
No. Title
1 Introduction Gives an overview of the printer, such as the names of the printer's parts and
system requirements.
2 Using the Printer Driver Describes how to set up and use the printer driver.
3 Printer Control Panel and
Configuration Menu
4 Memory Direct Describes how to print from a USB memory device.
5 Media Handling Describes supported paper and how to load paper into the paper tray.
6 Replacing Consumables and
Maintenance Parts
7 Maintaining the Printer Describes how to transport and clean the printer.
8 Troubleshooting Describes how to solve misfeeds and other problems and explains the error
9 Installing Accessories Describes how to replace options.
Describes the control panel and the settings for each menu. The abridged
version contains an excerpt on how to use the control panel from this
chapter. See “Printer Control Panel” on page 3.
Describes how to replace consumables and maintenance parts. The
abridged version contains an excerpt from this chapter. See “Replacing
Consumables and Maintenance Parts” on page 6.
messages.
About This Manual 2
Page 3
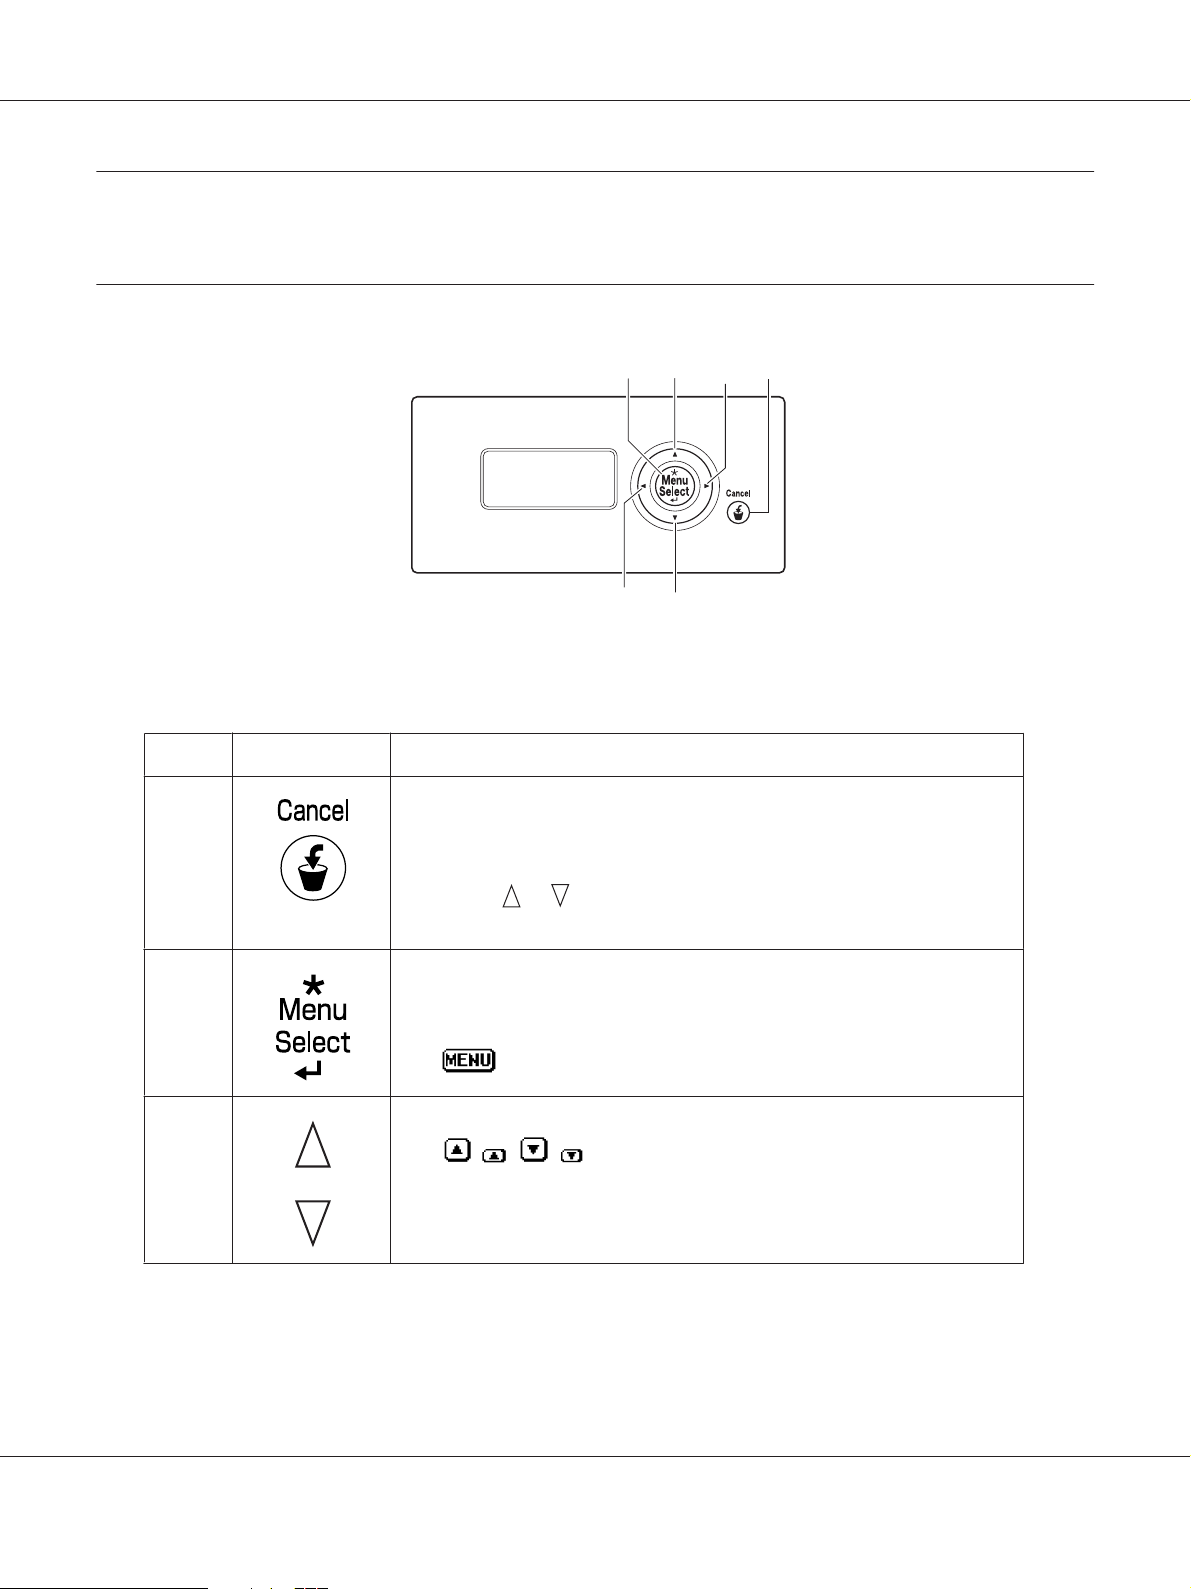
Printer Control Panel
About the Control Panel
MESSAGE
WINDOW
AcuLaser C3900 Series User’s Guide (Abridged Version)
23 41
4
3
Control Panel Indicators and Keys
No. Key Function
1
2
3
❏ Press to cancel the setting that is currently displayed
❏ Cancels one or all print jobs that are currently being printed or processed:
1. Press the Cancel key.
2. Press the
3. Press the Menu/Select key.
❏ Enters the menu system
❏ Moves down in the menu structure
❏ Applies the selected setting
❏
❏ Moves up and down through menus, options, or choices
❏
or keys to select either CURRENT JOB or ALL JOBS.
appears in the message window
, , , appears in the message window
Printer Control Panel 3
Page 4

No. Key Function
AcuLaser C3900 Series User’s Guide (Abridged Version)
4
Message Window
No. Details
1 The printer status is indicated by the color of the indicator and lighting/flashing of the message window.
❏ READY: Indicator lit up in blue and window lit up
❏ PROCESSING or PRINTING: Indicator flashing and window lit up
❏ ENERGY SAVER: Indicator lit up in blue and window goes off
❏ ERROR: Indicator lit up in red and window lit up
❏ Moves left and right through menus, options, or choices
, appears in the message window
❏
1
2
3
5
4
2 The current status of the printer is displayed.
❏ If the operator or service representative must be called, the symbol
displayed.
❏ If a warning occurs, the symbol
❏ Wh en a U SB me mo ry d ev ic e i s p lu gge d i nt o t he US B mem or y p or t, th e sy mb ol
side of the message window.
❏ While a print job is being received, the symbol
While a memory direct print job is being received, the symbol
3 ❏ Error messages are displayed.
❏ While a print job is being received, the user name and the print progress are displayed.
4 Key information is displayed.
5 The approximate amount of toner remaining is displayed.
appears.
and the error status are
appears on the right
appears on the right side of the message window.
appears.
Printer Control Panel 4
Page 5

AcuLaser C3900 Series User’s Guide (Abridged Version)
Help Screens
The help screens appear when the key is pressed after an error occurred, such as a media misfeed, so
that the error can be corrected.
Configuration Menu Overview
PROOF/PRINT MENU
Note:
This menu appears only if an optional hard disk drive is installed.
With this menu, print jobs that were set to be saved on the hard disk by using Job Retention on the
Basic tab of the printer driver can be printed or deleted.
Note:
If SYS DEFAULT MENU/SECURITY/LOCK PANEL is set to ON, the password must be entered in order for
the contents of PROOF/PRINT MENU to be displayed.
Printing a Stored Job
1. Press the Menu/Select key.
2. Select PROOF/PRINT MENU, and then press the Menu/Select key.
3. Select the desired user name, and then press the Menu/Select key.
4. Select the desired job name, and then press the Menu/Select key.
5. Select PRINT, and then press the Menu/Select key.
6. Press the
7. Press the Menu/Select key.
Printing begins.
and keys to specify the number of copies to be printed.
Printer Control Panel 5
Page 6

AcuLaser C3900 Series User’s Guide (Abridged Version)
Replacing Consumables and Maintenance Parts
❏ Failure to follow instructions as outlined in this manual could result in voiding your warranty.
❏ If an error message (REPLACE TONER, FUSER UNIT END OF LIFE, etc.) appears, print out the
configuration page, and then check the status of the other consumables.
About Toner Cartridges
Your printer uses four toner cartridges: black, yellow, magenta, and cyan. Handle the toner cartridges
carefully to avoid spilling toner inside the printer or on yourself.
Note:
❏ When replacing the toner cartridges, install only new cartridges. If a used toner cartridge is installed,
the amount of remaining toner may not appear correctly.
❏ Do not open the toner cartridge unnecessarily. If toner is spilled, avoid inhaling it or allowing it to
come in contact with your skin.
❏ If toner gets on your hands or clothes, immediately wash them with soap and water.
❏ If toner was inhaled, move to an area with fresh air, and gargle thoroughly with a large quantity of
water. If conditions such as coughing appear, seek professional medical attention.
❏ If toner gets in your eyes, immediately flush them with water for at least 15 minutes. If any irritation
persists, seek professional medical attention.
❏ If toner gets in your mouth, thoroughly rinse it, and then drink 1 to 2 cups of water. If necessary, seek
professional medical attention.
❏ Store toner cartridges out of the reach of children.
Note:
The use of non-genuine toner cartridges may result in unstable performance. In addition, any damage
caused by the use of non-genuine toner cartridges is not covered by the warranty, even if it occurs during
the warranty period. (Although damage is not certain to result from using non-genuine toner cartridges,
we strongly recommend that you use genuine toner cartridges.)
Type Parts Number
Toner Cartridge (Yellow) 0590
Replacing Consumables and Maintenance Parts 6
Page 7
AcuLaser C3900 Series User’s Guide (Abridged Version)
Type Parts Number
Toner Cartridge (Magenta) 0591
Toner Cartridge (Cyan) 0592
Toner Cartridge (Black) 0593
Double Toner Cartridge (Black) 0594
Note:
For optimum print quality and performance, use only the corresponded TYPE genuine Epson toner
cartridges.
Keep toner cartridges:
❏ In their packaging until you’re ready to install them.
❏ In a cool, dry location away from sunlight (due to heat).
The maximum storage temperature is 35˚C (95˚F) and the maximum storage humidity is 85%
(noncondensing). If the toner cartridge is moved from a cold place to a warm, humid place,
condensation may occur, degrading print quality. Allow the toner to adapt to the environment for
about one hour before use.
❏ Level during handling and storage.
Do not turn cartridges upside down; the toner inside the cartridges may become caked or
unequally distributed.
❏ Away from salty air and corrosive gases such as aerosols.
Replacing Consumables and Maintenance Parts 7
Page 8
AcuLaser C3900 Series User’s Guide (Abridged Version)
Replacing a Toner Cartridge
Note:
Be careful not to spill toner while replacing a toner cartridge. If toner spills, immediately wipe it off with a
soft, dry cloth.
If TONER LOW on the SYS DEFAULT MENU/ENABLE WARNING is set to ON, the message TONER LOW X
(where “X”. represents the color of the toner) appears when toner cartridge becomes near empty.
Follow the steps below to replace the toner cartridge.
Note:
If TONER LOW on the SYS DEFAULT MENU/ENABLE WARNING is set to OFF, you are advised to replace the
indicated toner cartridge when the message REPLACE TONER X appear.
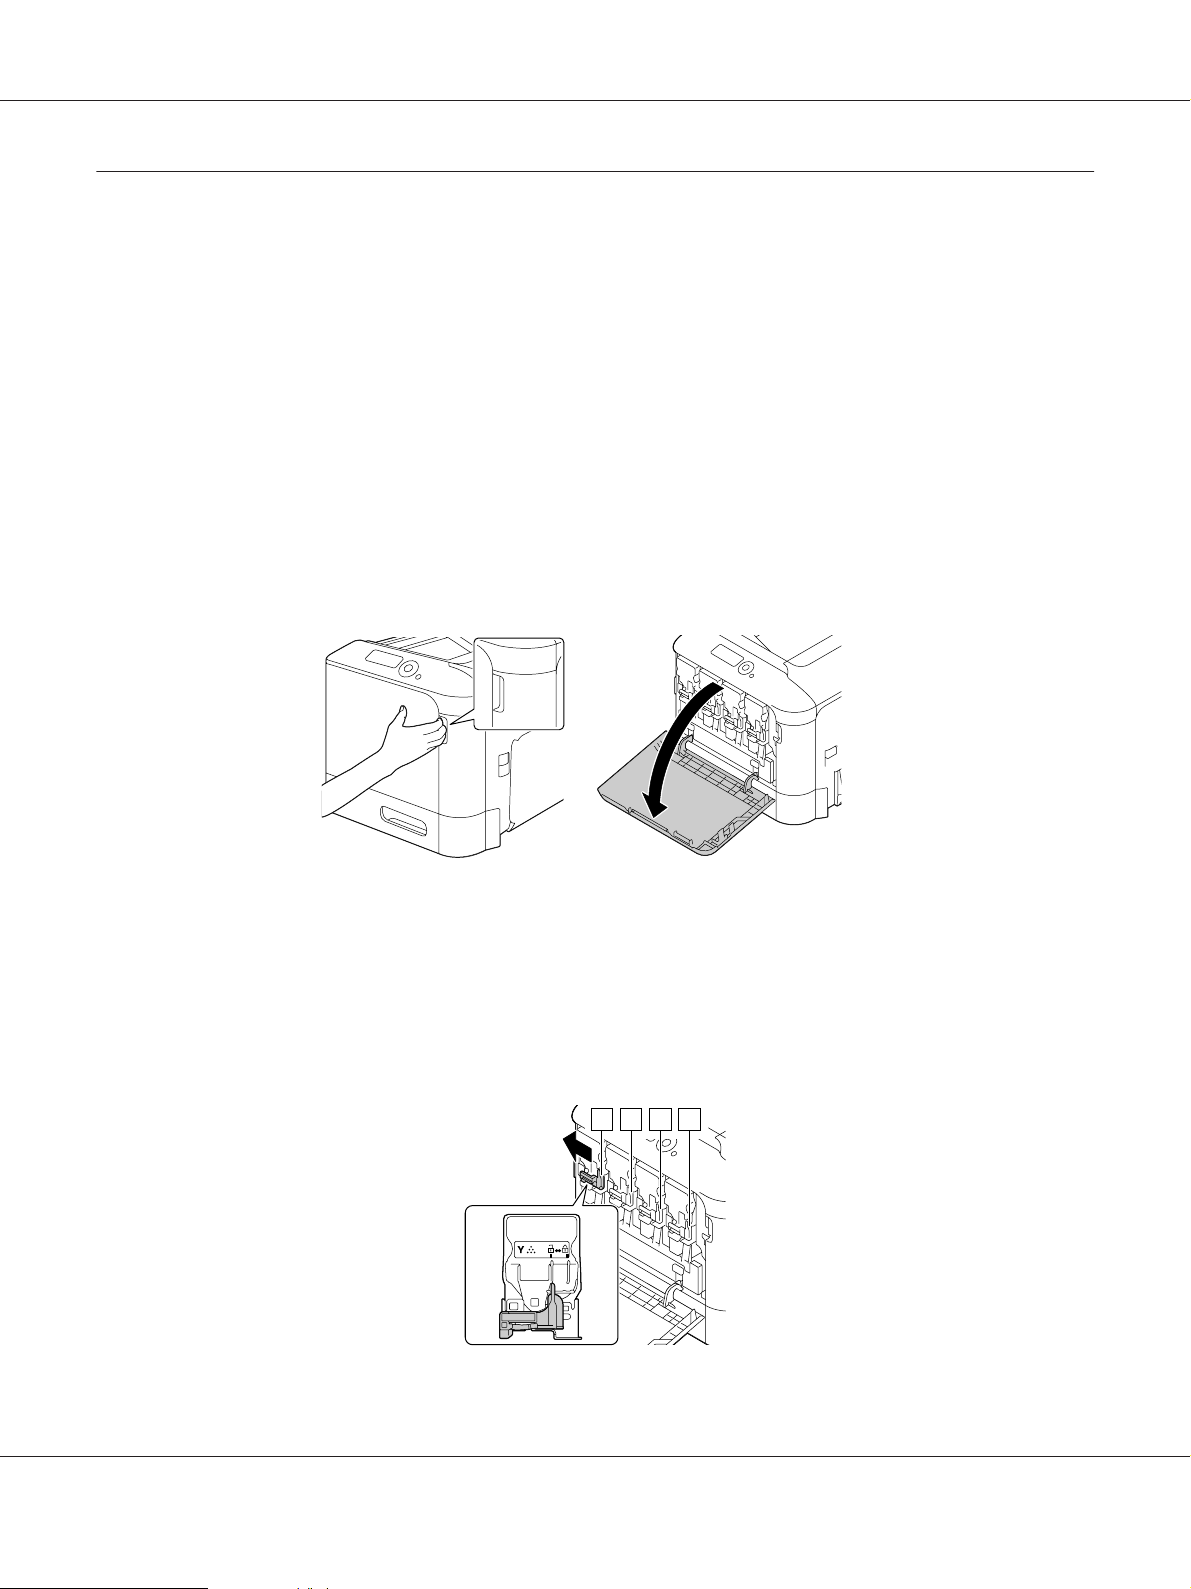
1. Open the printer’s front cover.
2. Pull the front lever of the color toner cartridge indicated to the left.
The replacement procedure for the toner cartridge is the same for all colors (yellow: Y, magenta:
M, cyan: C, and black: K). The following instructions show the procedure to replace the toner
cartridge (Y).
Y M C K
Replacing Consumables and Maintenance Parts 8
Page 9
AcuLaser C3900 Series User’s Guide (Abridged Version)
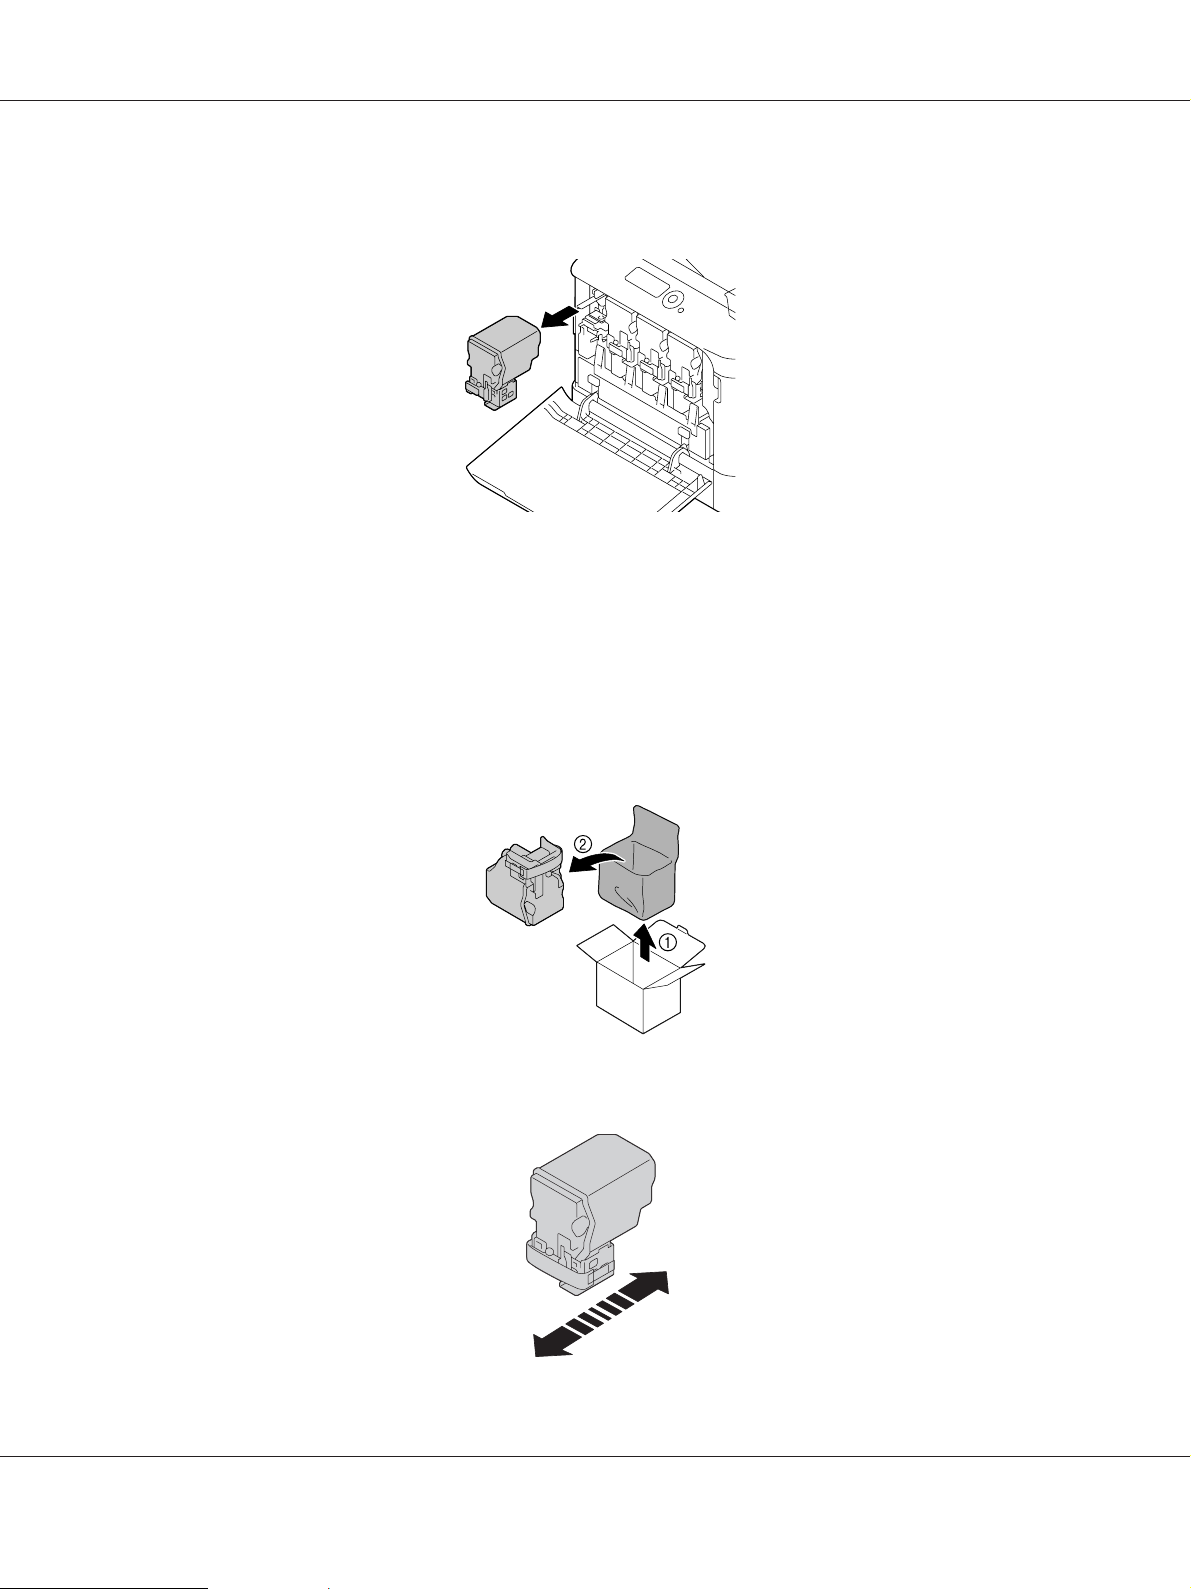
3. Grab the handle of the toner cartridge to be replaced, and then pull out the cartridge.
The following instructions show the procedure to replace the toner cartridge(Y).
Note:
Dispose of the used toner cartridge according to your local regulations. Do not burn the toner
cartridge.
For details, refer to “About Toner Cartridges” on page 6.
4. Check the color of the new toner cartridge to be installed.
5. Remove the toner cartridge from the bag.
6. Shake the cartridge to distribute the toner.
3 Z
Replacing Consumables and Maintenance Parts 9
Page 10

AcuLaser C3900 Series User’s Guide (Abridged Version)
7. Peel off the protective film from the right side of the toner cartridge.
8. Make sure that the toner cartridge is the same color as the printer compartment, and then insert
the toner cartridge into the printer.
Note:
Fully insert the toner cartridge.
9. Pull the lever to the right to lock it in place.
Replacing Consumables and Maintenance Parts 10
Page 11

AcuLaser C3900 Series User’s Guide (Abridged Version)
Note:
❏ The front lever should be securely returned to its original position; otherwise, the front cover of
the printer cannot be closed.
❏ If it is difficult to operate the lever, push it in.
10. Make sure that the toner cartridge is securely installed, and then peel off the protective film.
11. Close the front cover.
Note:
When closing the front cover, press the area of the cover with small projections.
Replacing Consumables and Maintenance Parts 11
Page 12

AcuLaser C3900 Series User’s Guide (Abridged Version)
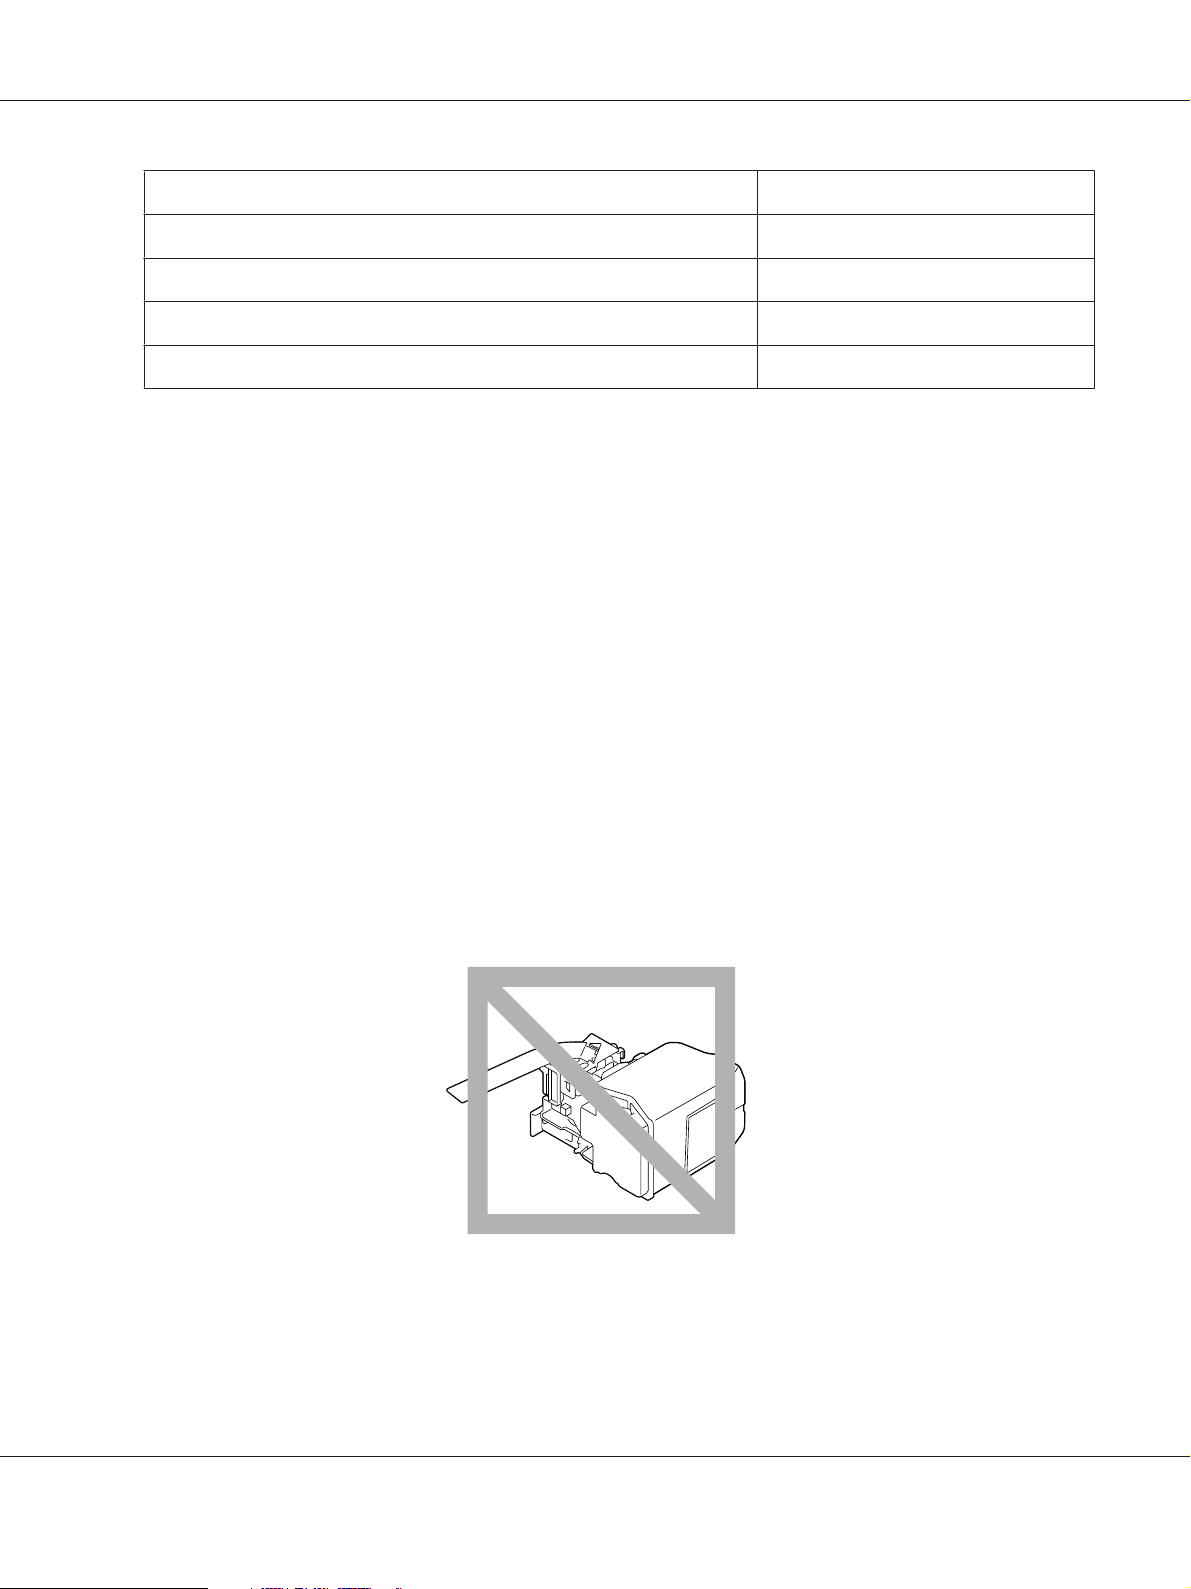
Replacing a Photoconductor Unit
Type Parts Number
Photoconductor Unit (Yellow) 1201
Photoconductor Unit (Magenta) 1202
Photoconductor Unit (Cyan) 1203
Photoconductor Unit (Black) 1204
Note:
Do not touch the OPC drum surface. This could lower image quality.
If P/U LOW on the SYS DEFAULT MENU/ENABLE WARNING is set to ON, the message P/U LOW X (where
“X”. represents the color of the toner) appears when a photoconductor unit becomes near empty.
Follow the steps below to replace the photoconductor unit.
Note:
You are advised to replace the indicated photoconductor unit when the message P/U LIFE X appears.
1. Check the message window to see which color photoconductor unit needs replacing.
2. Open the printer’s front cover.
Replacing Consumables and Maintenance Parts 12
Page 13

AcuLaser C3900 Series User’s Guide (Abridged Version)
3. Pull the front lever of the color toner cartridge indicated to the left.
The replacement procedure for the photoconductor unit is the same for all colors (yellow: Y,
magenta: M, cyan: C, and black: K). The following instructions show the procedure to replace the
toner cartridge (K).
Y M C K
4. Grab the handle of the toner cartridge to be removed, and then pull out the cartridge.
Note:
Do not tilt removed toner cartridge, otherwise toner may spill.
Replacing Consumables and Maintenance Parts 13
Page 14

AcuLaser C3900 Series User’s Guide (Abridged Version)
5. Pull up the waste toner bottle to unlock it.
6. Grab the left and right handles of the waste toner bottle, and then slowly pull out the bottle.
Note:
Do not tilt removed waste toner box, otherwise waste toner may spill.
7. While pressing down the area marked “Push” on the photoconductor uni t t o b e r ep la ce d, sli de th e
unit completely out of the printer.
The following instructions show the procedure to replace the photoconductor unit (Black).
Replacing Consumables and Maintenance Parts 14
Page 15

AcuLaser C3900 Series User’s Guide (Abridged Version)
Note:
Dispose of the used photoconductor unit according to your local regulations.
Do not burn the photoconductor unit.
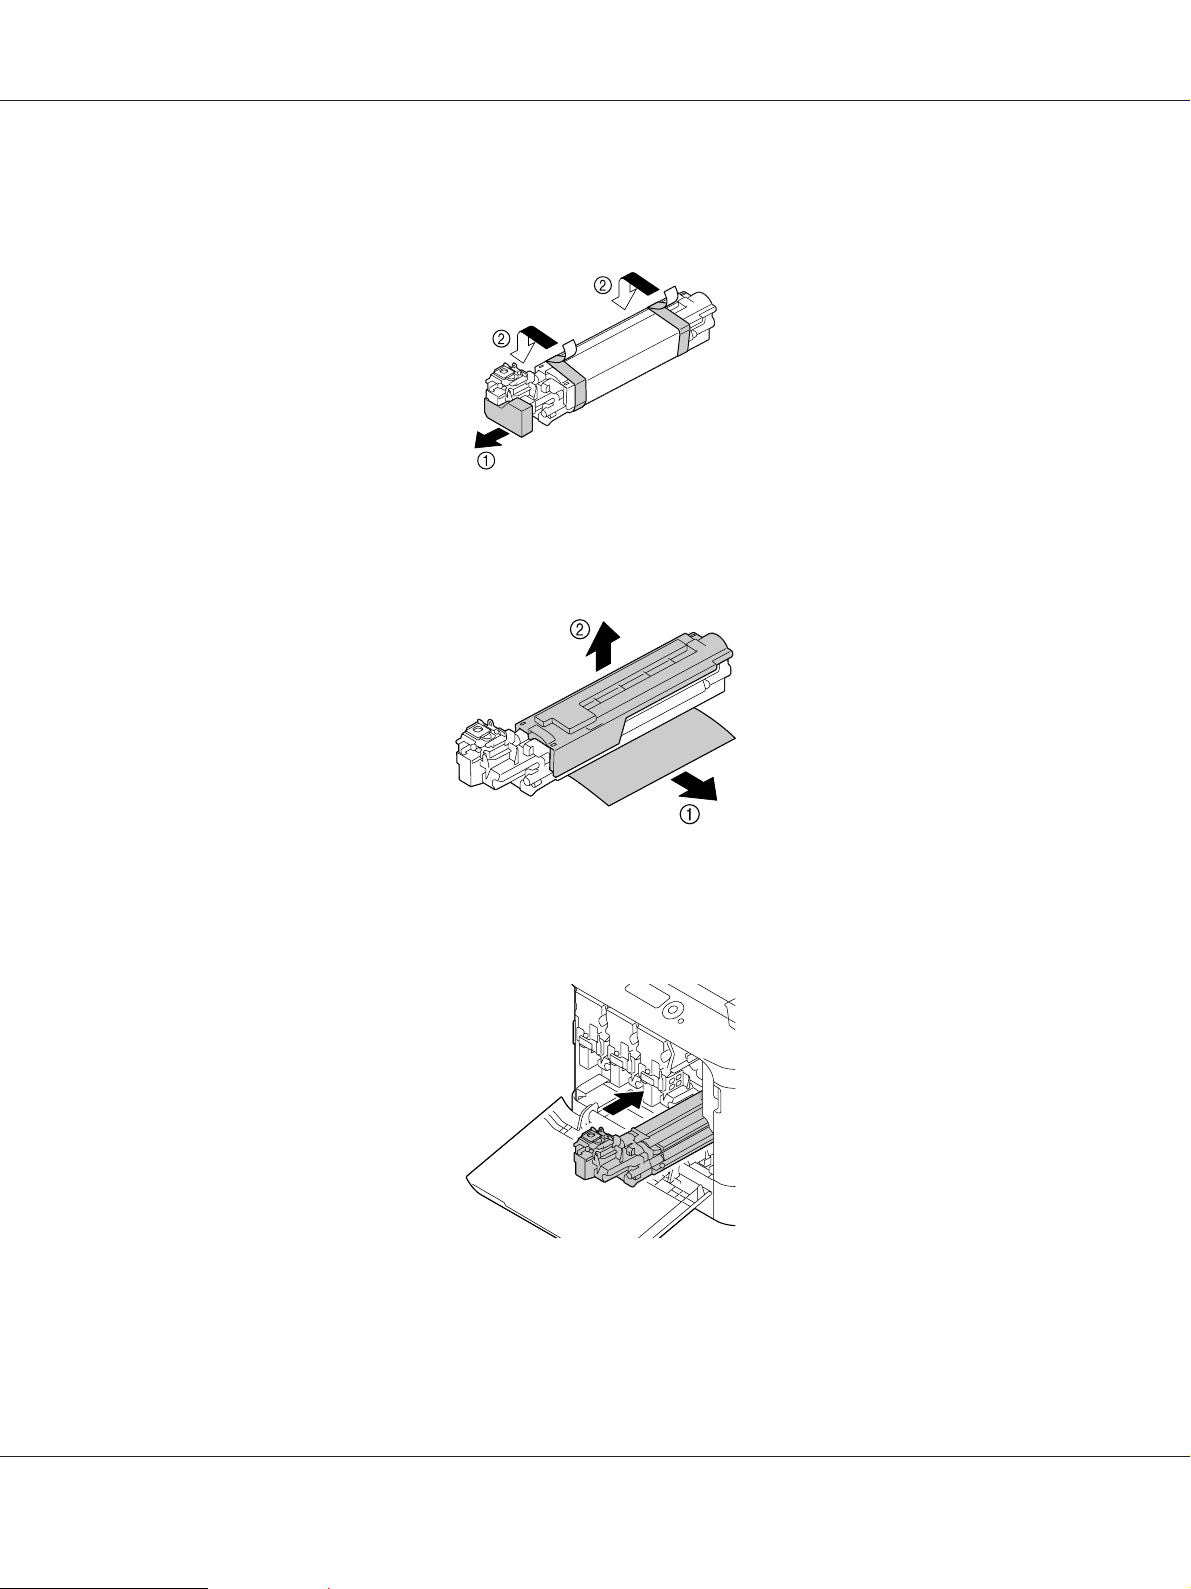
8. Check the color of the new photoconductor unit to be installed.
Note:
In order to prevent toner from spilling, leave the photoconductor unit in the bag until step 7 is being
performed.
9. Remove the photoconductor unit from the bag.
10. Hold the photoconductor unit with both hands, and then shake it twice as shown in the
illustration.
Note:
Do not grab the bottom of the bag; otherwise, the photoconductor unit may be damaged, resulting in
decreased print quality.
Replacing Consumables and Maintenance Parts 15
Page 16
AcuLaser C3900 Series User’s Guide (Abridged Version)
11. Remove the protective cover from the photoconductor unit.
Remove all packing tape from the photoconductor unit.
12. Remove the paper from the photoconductor unit.
Remove the protective cover from the photoconductor unit.
13. Make sure that the new photoconductor unit to be installed is the same color as the printer
compartment, and then insert the photoconductor unit into the printer so it locks.
Replacing Consumables and Maintenance Parts 16
Page 17

AcuLaser C3900 Series User’s Guide (Abridged Version)
14. Press in on the waste toner bottle until it locks into place.
15. Make sure that the toner cartridge is the same color as the printer compartment, and then insert
the toner cartridge into the printer.
Note:
Fully insert the toner cartridge.
16. Pull the lever to the right to lock it in place.
Replacing Consumables and Maintenance Parts 17
Page 18

AcuLaser C3900 Series User’s Guide (Abridged Version)
Note:
❏ The front lever should be securely returned to its original position; otherwise, the front cover of
the printer cannot be closed.
❏ If it is difficult to operate the lever, push it in.
17. Close the front cover.
Note:
When closing the front cover, press the area of the cover with small projections.
Replacing the Waste Toner Bottle
When the waste toner bottle becomes full, the message WASTE TONER FULL/REPLACE BOTTLE
appears in the message window. The printer stops and will not start again until the waste toner bottle is
replaced.
1. Open the printer’s front cover.
Replacing Consumables and Maintenance Parts 18
Page 19

2. Pull up the waste toner bottle to unlock it.
AcuLaser C3900 Series User’s Guide (Abridged Version)
3. Grab the left and right handles of the waste toner bottle, and then slowly pull out the bottle.
Note:
Do not tilt removed waste toner box, otherwise waste toner may spill.
4. Remove the new waste toner bottle from its packaging. Insert the used waste toner bottle into the
plastic bag included in the box, and then box it up.
Replacing Consumables and Maintenance Parts 19
Page 20

AcuLaser C3900 Series User’s Guide (Abridged Version)
Note:
Dispose of the used waste toner bottle according to your local regulations. Do not burn the waste
toner bottle.
5. Press in on the waste toner bottle until it locks into place.
6. Close the front cover.
Note:
❏ When closing the front cover, press the area of the cover with small projections.
❏ If the waste toner bottle is not fully inserted, the front cover cannot be closed.
Replacing Consumables and Maintenance Parts 20
Page 21

AcuLaser C3900 Series User’s Guide (Abridged Version)
Replacing the Backup Battery
When the backup battery is at its end of life, the printer’s date and time cannot be retained. Follow the
procedure described below to replace the backup battery.
Note:
Only use the coin-shaped 3V lithium battery CR2032. It’s very important to protect the printer controller
board and any associated circuit boards from electrostatic damage. In addition, always handle circuit
boards by the edges only.
1. Turn off the printer and disconnect the power cord and interface cables.
2. Using a screwdriver, remove two screws.
3. Slide the panel slightly to the down and lift it off the printer.
Replacing Consumables and Maintenance Parts 21
Page 22

4. Remove the backup battery.
5. Insert a new backup battery.
AcuLaser C3900 Series User’s Guide (Abridged Version)
Note:
❏ When inserting the new backup battery, be sure that the + side faces front.
❏ Risk of explosion if battery is replaced by an incorrect type. Dispose of used batteries according to
your local regulations.
Do not burn the backup battery.
6. Reinstall the panel and tighten two screws.
7. Reconnect all interface cables.
8. Reconnect the power cord, and turn on the printer.
9. Use DATE on the SYS DEFAULT MENU/CLOCK menu to set the date, and use TIME on the SYS
DEFAULT MENU/CLOCK menu to set the time.
Replacing Consumables and Maintenance Parts 22
Page 23

AcuLaser C3900 Series User’s Guide (Abridged Version)
Replacing the Fuser Unit
When the time to replace the fuser unit is reached, the message FUSER UNIT/END OF LIFE appears.
Printing can continue even after this message appears; however, since the print quality is reduced, the
fuser unit should be replaced immediately.
1. Turn off the printer.
Note:
There are extremely hot parts within the machine. Before replacing the fuser unit, wait about
40 minutes after turning off the machine, and then check that the fusing section has reached room
temperature, otherwise, you may get burnt.
2. Pull the lever, and then open the right side cover.
Note:
Before opening the right side cover, fold up Tray 1.
3. Open the eject cover.
Replacing Consumables and Maintenance Parts 23
Page 24

4. Open the fuser unit cover.
5. Pull down the 2 levers.
AcuLaser C3900 Series User’s Guide (Abridged Version)
6. Remove the fuser unit.
Replacing Consumables and Maintenance Parts 24
Page 25

7. Prepare a new fuser unit.
Note:
Be careful not to touch the surface of the fuser roller.
8. Pull down the 2 levers of a new fuser unit.
AcuLaser C3900 Series User’s Guide (Abridged Version)
9. Insert the fuser unit until it locks into place.
Replacing Consumables and Maintenance Parts 25
Page 26

10. Lift up the two levers.
11. Close the fuser unit cover.
AcuLaser C3900 Series User’s Guide (Abridged Version)
12. Close the eject cover.
Replacing Consumables and Maintenance Parts 26
Page 27

AcuLaser C3900 Series User’s Guide (Abridged Version)
13. Close the right side cover.
14. Reset the counter in the MAINTENANCE MENU/SUPPLIES/REPLACE/FUSER UNIT menu.
Replacing Consumables and Maintenance Parts 27
 Loading...