

Page 1
EPSON AcuLaser C1900 Quick Reference
Control Panel Operation
How to access the control panel menus
For a complete description of the items and
settings available in the control panel
menus, see “Control Panel Menus” in the
Reference Guide.
1. When the printer’s Ready light is on,
press any of the control panel buttons
shown below accesses the control panel
menus.
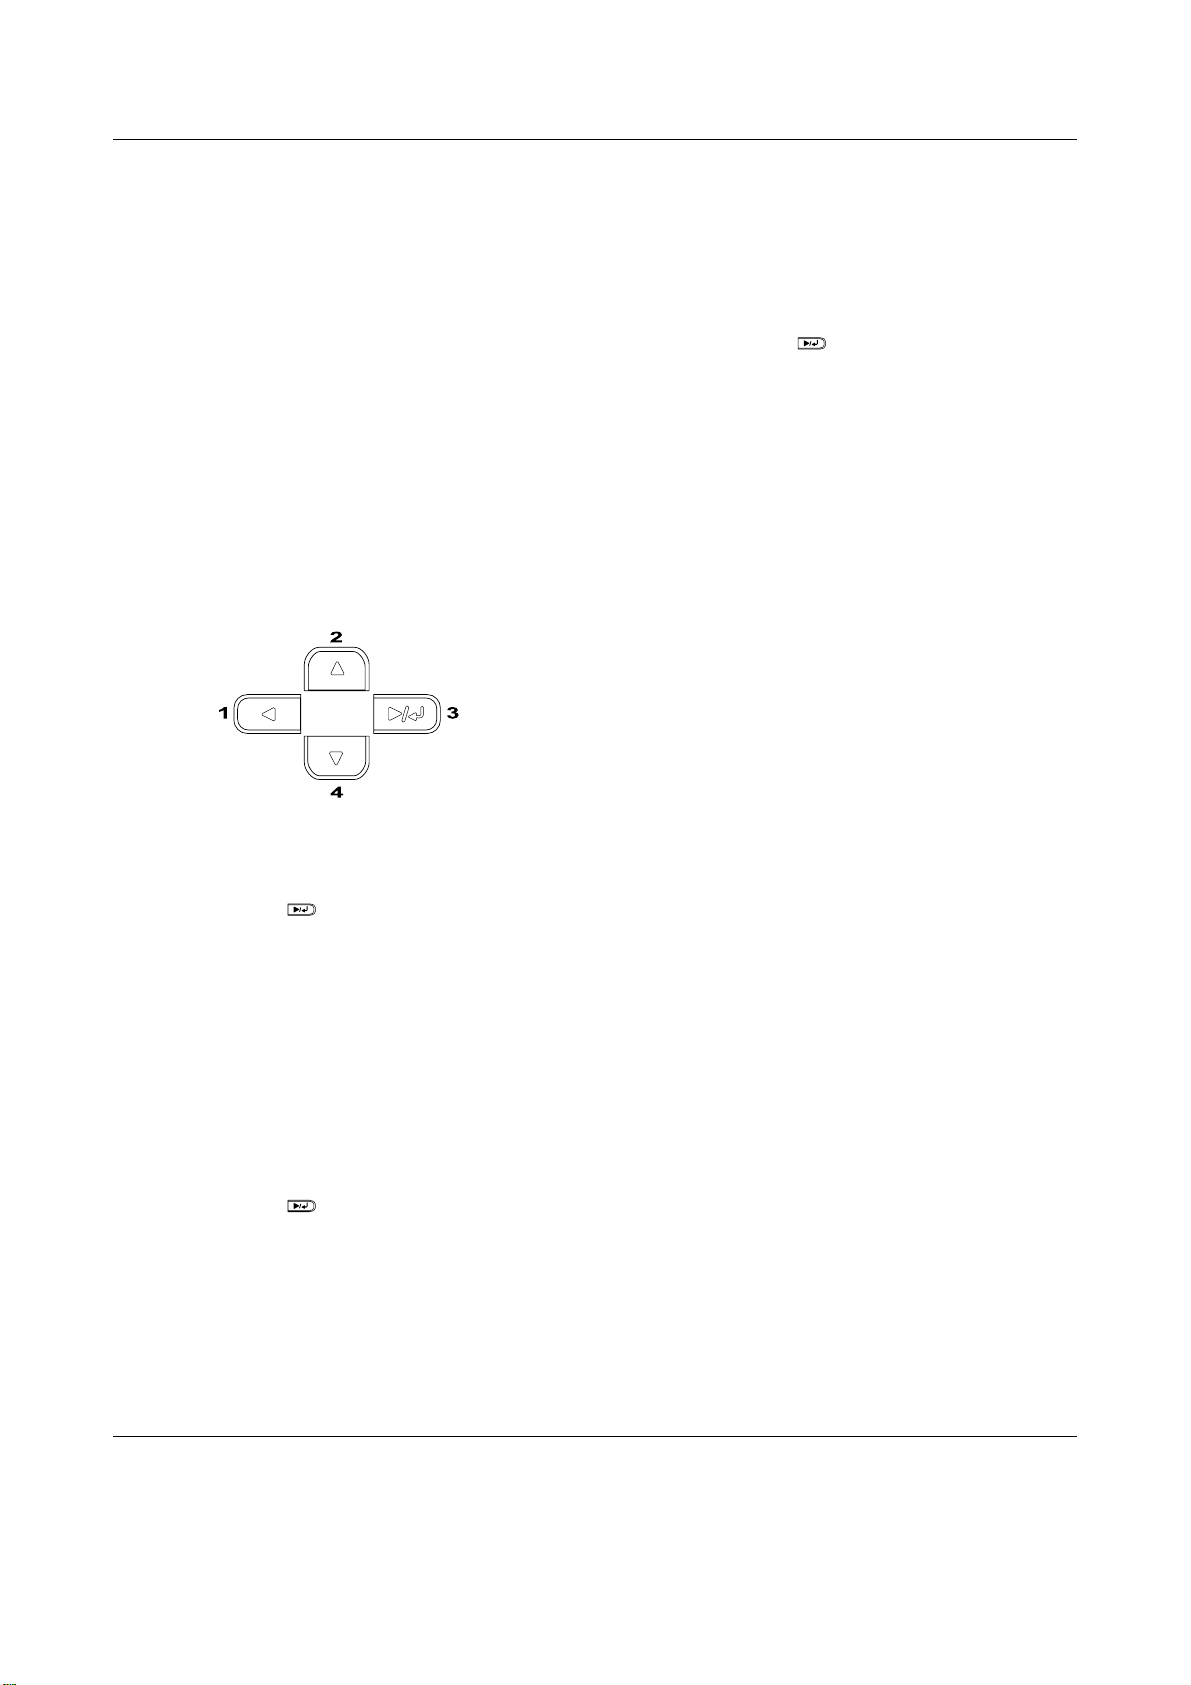
2. Use the
scroll through the menus.
u Up and d Down buttons to
Use the
scroll through available settings, and
press the Enter button to select a
setting and return to the previous level.
Press the
previous level without changing the
setting.
Note:
You need to turn the printer off and then on
to activate some settings. For details, see
“Control Panel Menus” in the Reference
Guide.
6. Press the
control panel menus.
u Up and d Down buttons to
l Back button to return to the
N
Start/Stop button
to exit the
3. Press the Enter button to view the
items in a menu. Depending on the
menu, the LCD panel displays an item
and the current setting separated by an
*
asterisk (YYYY
(YYYY).
4. Use the
scroll through the items, or press the
Back button to return to the previous
level.
5. Press the Enter button to carry out
the operation indicated by an item, such
as printing a status sheet or resetting the
printer, or to view the settings available
for an item, such as paper sizes or
emulation modes.
u Up and d Down buttons to
ZZZZ), or only an item
l
Control Panel Operation (1/1)
Page 2
Status and Error Messages
EPSON AcuLaser C1900 Quick Reference
This section contains a list of error messages
shown on the LCD panel, giving a brief
description of each message and suggestions
for correcting the problem. Note that not
every message shown on the LCD panel
indicates a problem.
Calibrating Printer
The printer automatically calibrates itself
when any of its covers are opened and there
is no error inside. This is not an error
message, and will clear itself after a few
minutes. While the printer displays this
message, do not open the covers or turn off
the printer.
Cancel All Print Job
The printer is canceling all print jobs in the
printer memory, including jobs the printer is
currently receiving or printing. This
message appears when the Cancel Job
button has been pressed down for more than
2 seconds.
Cancel Print Job
The print is canceling the current print job.
This message appears when the Cancel
Job button has been pressed and released
within 2 seconds.
Can’t Print Duplex
The printer has encountered problems
during duplex printing. Make sure you are
using an appropriate type and size of paper
for the Duplex Unit. The problem could also
be a result of incorrect settings for the paper
source you are using. Pressing the
will print the rest of the print job on
button
only one side of the paper. Press the
Cancel Job button to cancel the print job.
Start/Stop
Check Duplex P-Size
The paper size loaded in the printer is not
appropriate for the optional Duplex Unit.
Only A4 or letter size can be used.
Check Paper Size
The paper size setting is different from the
size of paper loaded in the printer. Check to
see if the correct size of paper is loaded in the
specified paper source.
To clear this error, select Clear Warning
from the control panel’s Reset Menu. See
“How to access the control panel menus” for
instructions.
Check Paper Type
The media loaded in the printer does not
match the paper type setting in the printer
driver. Media that matches only the paper
size setting will be used for printing.
To clear this error, select Clear Warning
from the control panel’s Reset Menu. See
“How to access the control panel menus” for
instructions.
Check Media Type
You have loaded media other than
transparencies when the Paper Type setting
in the printer driver is
printer stops loading to prevent printer
damage. Load transparencies in the
specified paper source, then press the
Start/Stop button.
Clean Sensor
The sensor inside the printer is dirty. Open
and close the front cover. Automatic
cleaning is performed.
Transparency
. The
Status and Error Messages (1/7)
Page 3

EPSON AcuLaser C1900 Quick Reference
Collate disabled
Printing by specifying the number of copies
is no longer possible due to a lack of memory
(RAM) or free disk space on the optional
Hard Disk Drive. If this error occurs, print
only one copy at a time.
To clear this error, select Clear Warning
from the control panel’s Reset Menu. See
“How to access the control panel menus” for
instructions.
Cooling Down
The printer lowers its temperature to
optimize for the fixing toner. Wait for a
moment for Ready to appear in the LCD
panel.
Cover C Open
Cover C of the optional 500-Sheet Paper
Cassette Unit is open. Close the cover.
Duplex Mem Overflow
Format Error ROM A
An unformatted ROM module has been
inserted. If the ROM module has been
formatted, but is still unreadable, format it
again. If the ROM is still unreadable after
reformatting, take the module to your dealer
for repair or replacement.
To clear this error, either press the
or turn off the printer and remove the
button
ROM module.
Formatting HDD
The printer is formatting the optional Hard
Disk Drive.
Form Data Canceled
Unable to store form overlay data on the
printer’s Hard Disk Drive. Either the drive is
full, or the maximum number of form
overlay files has been reached. Delete any
form overlay files you no longer need, then
try storing the new overlay again.
Start/Stop
There is not enough memory for duplex
printing. The printer prints only on the front
and ejects the paper. To clear this error,
follow the instructions below.
If Off is selected as the Auto Cont setting on
the control panel’s Setup Menu, press the
Start/Stop button to print on the back of the
next sheet, or press the Cancel Job button
to cancel the print job.
If On is selected as the Auto Cont setting on
the control panel’s Setup Menu, printing
continues automatically after a certain
period of time.
To clear this error, select Clear Warning
from the control panel’s Reset Menu. See
“How to access the control panel menus” for
instructions.
Form Feed
The printer is ejecting paper due to a printing
error. This message appears when the
Start/Stop button
more than 2 seconds in order to recover from
a printing error.
has been held down for
Hard Disk Full
The printer has insufficient memory. Delete
the unnecessary data from the Hard Disk
Drive.
Status and Error Messages (2/7)
Page 4

EPSON AcuLaser C1900 Quick Reference
To clear this error, select Clear Warning
from the control panel’s Reset Menu. See
“How to access the control panel menus” for
instructions.
HDD Check
The printer is checking the Hard Disk Drive.
Image Optimum
There is insufficient memory to print the
page at the specified print quality. The
printer automatically lowers the print
quality so that it can continue printing. If the
quality of the printout is not acceptable, try
simplifying the page by limiting the number
of graphics or reducing the number and size
of fonts.
To clear this error, select Clear Warning
from the control panel’s Reset Menu. See
“How to access the control panel menus” for
instructions.
Turn the Image Optimum setting off on the
control panel’s Printing Menu if you do not
want the printer to automatically lower the
print quality to continue printing.
You may need to increase the amount of
printer memory to be able to print at the
desired print quality for your document. For
more information on adding memory, see
“Memory module” in the Reference Guide.
Install Photocondctr
There is no photoconductor unit installed or
the photoconductor unit is not installed
properly. Install the photoconductor unit if
it is not installed.
If a photoconductor unit is already installed,
open the front cover, then remove the waste
toner collector. Remove the photoconductor
unit, then reinstall it correctly. Reinstall the
waste toner collector, and close the front
cover. The error clears automatically if the
photoconductor unit is installed correctly.
Install Waste T Box
The waste toner collector is not installed, or
is installed incorrectly. If there is no waste
toner collector installed, install one in the
printer. If there is a waste toner collector
already installed, try removing it and
reinstalling it. See “Replacing the waste
toner collector” in the Reference Guide for
instructions.
Invalid AUX I/F Card
This message means that the printer cannot
communicate with the installed optional
interface card. Turn off the printer, remove
the card, then reinstall it.
Invalid HDD
Either the optional Hard Disk Drive is
damaged or it cannot be used with this
printer. Turn off the printer and remove the
Hard Disk Drive.
Invalid PS3
An optional PostScript 3 ROM module that
cannot be used on this printer is installed.
Turn off the printer and remove the module.
Invalid ROM A
The printer cannot read the installed
optional ROM module. Turn off the printer
and remove the ROM module.
Status and Error Messages (3/7)
Page 5
EPSON AcuLaser C1900 Quick Reference
Jam XX
The location where the paper jam occurred
is displayed at xxxx. xxxx indicates the
location of the error.
If a paper jam occurs at two or more locations
simultaneously, the corresponding multiple
locations are displayed.
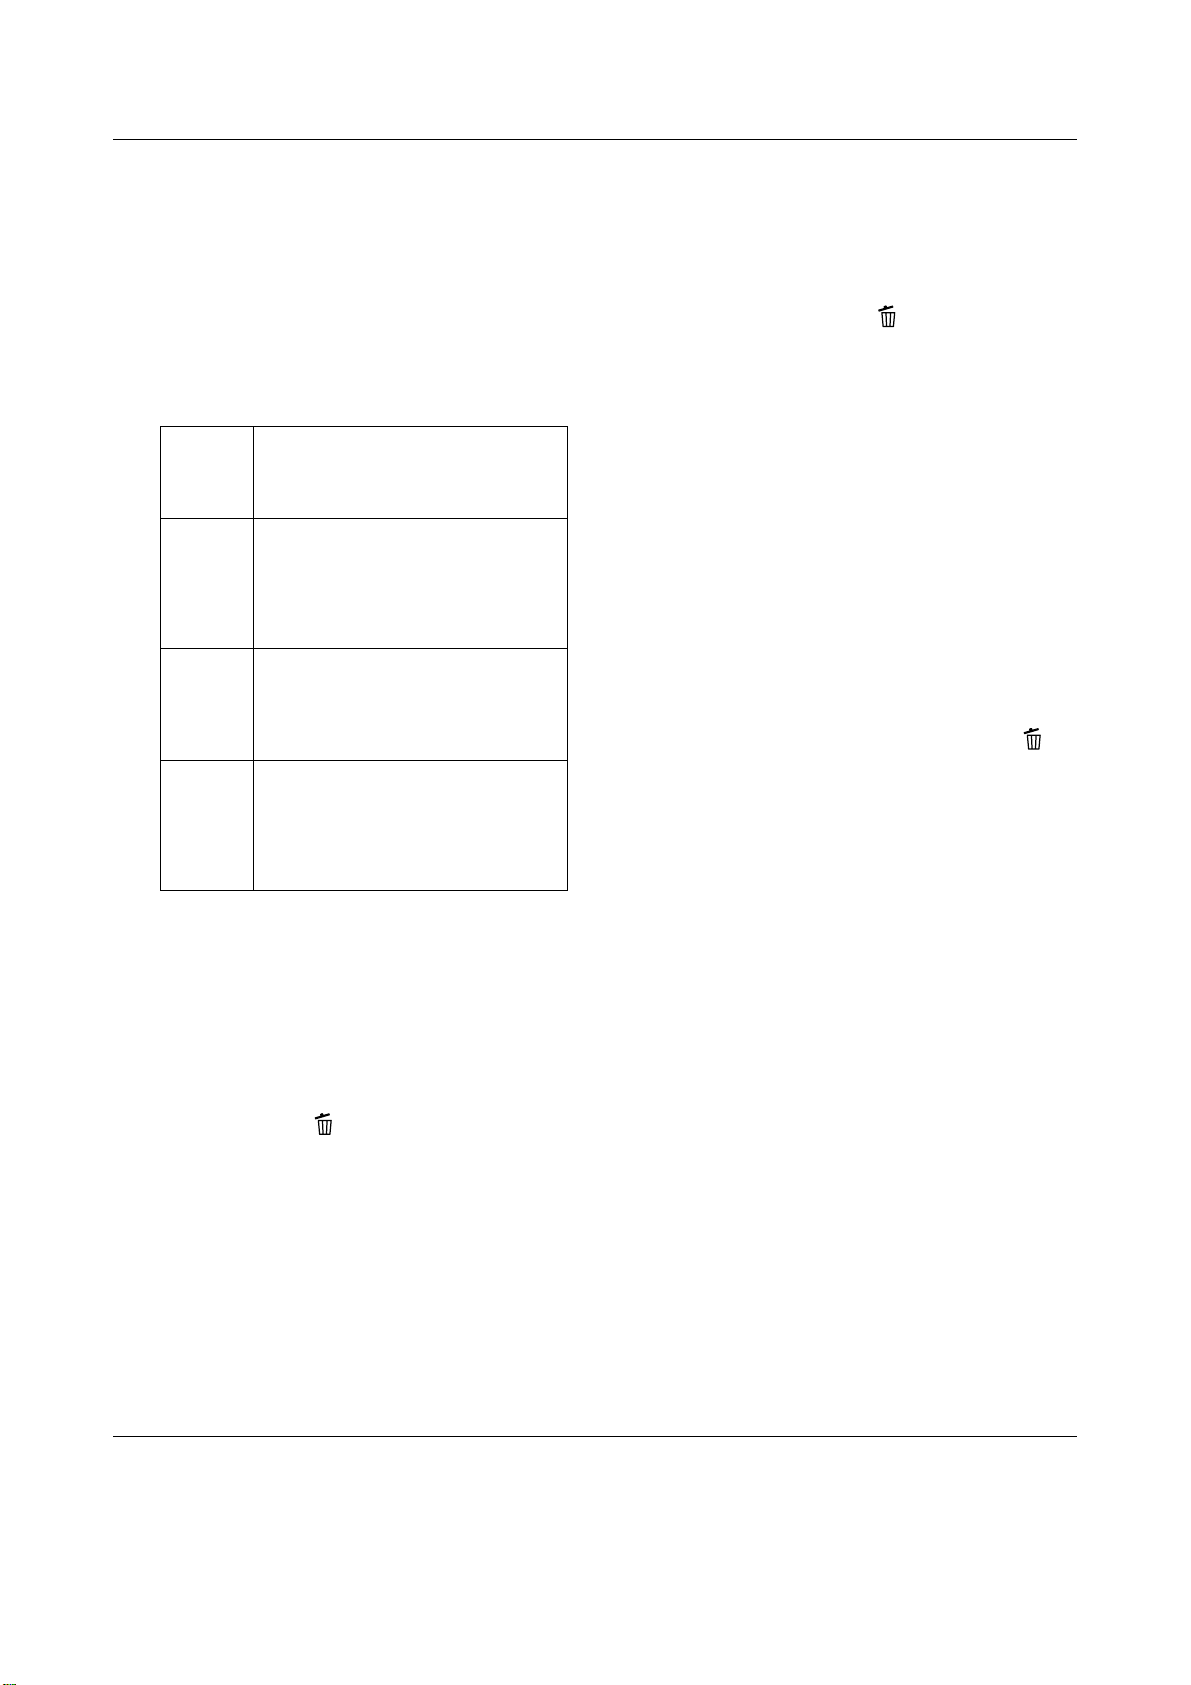
Jam A
Jam B
Jam C
Jam DM
Paper is jammed at the MP tray. For
instructions on how to remove
jammed paper at the MP tray, see
“Jam A (Cover AB)”.
Paper is jammed inside the output
path cover (cover AB) or fuser unit.
For instructions on how to remove
jammed paper at the output path
cover or fuser unit, see “Jam B
(Cover AB)”.
Paper is jammed inside the optional
lower cassette (Cover C). For
instructions on how to remove
jammed pape r in the optional lower
cassette, see “Jam C (Cover C)”.
Paper is jammed inside the optional
Duplex Unit’s paper path or cover
(cover DM). For instructions on how
to remove jammed paper at the
Duplex Unit, see “Jam DM (Cover
DM)”.
Mem Overflow
The printer has insufficient memory to
execute the current task. Press the
on the control panel to resume
button
printing. Or press the Cancel Job button
to cancel the print job.
Menus Locked
This message appears if you try to change
the printer’s settings through the control
panel when the buttons are locked. You can
unlock them by using the EPSON WinAssist
or WebAssist utility. Refer to the
Administrator’s Guide for information.
Need Memory
The printer has insufficient memory to
complete the current print job. Cancel
printing by deleting it from the print queue
on your computer, or by pressing the
Cancel Job button on the printer.
To clear this error message, select Clear
Warning from the control panel’s Reset
Menu. See “How to access the control panel
menus” for instructions.
Start/Stop
Manual Feed xxx
The manual feed mode is specified for the
current print job. Make sure the paper size
indicated by xxx is loaded, then press the
Start/Stop button
.
If you do not want to print this job in manual
mode, press the Cancel Job
button
printer feeds paper from the specified paper
source.
For details on the manual feed mode, see
“Manually feeding paper” in the Reference
Guide.
Paper Out XXX YYY
There is no paper in the specified paper
. The
To prevent this problem from happening
again, add more memory to your printer as
described in “Memory module” in the
Reference Guide.
Offline
The printer is not ready to print. Press the
Start/Stop button
.
Optional RAM Error
The optional memory module may be
corrupted or incorrect. Replace it with a new
one.
source (
size (
XXX
). Load paper of the indicated
YYY
) into the paper source.
Status and Error Messages (4/7)
Page 6

EPSON AcuLaser C1900 Quick Reference
Paper Set XXX YYY
The paper loaded in the specified paper
source (
paper size (
with the correct size paper and press the
Start/Stop button to resume printing. Or
press the Cancel Job button to cancel the
print job.
If you press the Start/Stop button without
replacing the paper, the printer will print on
the loaded paper even though it does not
match the required size.
XXX
) does not match the required
YYY
). Replace the loaded paper
Please wait
The developer cartridge to be replaced is
moving to the replacement position in the
printer.
Printer Open
One or more of the following covers are
open; the front cover, Cover AB, Cover DM,
or Cover C.
PS3 Hard Disk full
The memory allocated for writing PostScript
3 commands on the optional Hard Disk
Drive is full.
To clear this error, select Clear Warning
from the control panel’s Reset Menu. See
“How to access the control panel menus” for
instructions.
RAM Check
The printer is checking the RAM.
Ready
The printer is ready to receive data and print.
Replace Toner X
The developer cartridge to be replaced has
been moved to the replacement position in
the printer.
Replace Photocondctr
Print Overrun
The required time to process the print data
exceeded the print engine speed because the
current page is too complex. Press the
Start/Stop button
press the Cancel Job button to cancel the
print job. If this message appears again,
select On as the Page Protect setting in the
control panel’s Setup Menu.
If you continue to receive this message when
printing a particular page, try simplifying
the page by limiting the number of graphics
or reducing the number and size of fonts.
You can also add more memory to the
printer as described in “Memory module” in
the Reference Guide.
to resume printing. Or
The photoconductor unit has reached the
end of its service life. Replace the
photoconductor unit with a a new one. See
“Photoconductor Unit” in the Reference
Guide for instructions.
The error clears automatically after you
replace the unit and close all printer covers.
The photoconductor service life counter is
reset automatically.
Replace TransferUnit
The transfer unit has reached the end of its
service life. Replace the transfer unit with a
new one. See “Transfer Unit” in the Reference
Guide for instructions.
The error clears automatically after you
replace the unit and close all printer covers.
The transfer unit service life counter is reset
automatically.
Status and Error Messages (5/7)
Page 7

EPSON AcuLaser C1900 Quick Reference
Replace Waste T Box
The waste toner collector is full of toner.
Replace it with a new waste toner collector.
See “Replacing the waste toner collector” in
the Reference Guide.
The error clears itself after you have replaced
the waste toner collector and close the front
cover.
Reserve Job Canceled
The printer cannot store the data of your
print job using the Reserve Job function. The
maximum number of print jobs stored in the
printer's Hard Disk Drive has been reached,
or the drive has no more memory available
to store a new job. To store a new print job,
delete a previously stored job. Also, if you
have any Confidential Jobs stored, printing
those jobs will make more memory
available.
ROM Check
The printer is checking the ROM.
Self Test
The printer is performing a quick internal
check.
Service Req xyyy
A controller error or a print engine error has
been detected. Turn off the printer. Wait at
least 5 seconds and then turn it back on. If
the error message still appears, write down
the error number listed on the LCD panel
(xyyy) and turn off the printer, unplug the
power cord, and contact a qualified service
representative.
Sleep
The printer is in sleep mode.
To clear this error, select Clear Warning
from the control panel’s Reset Menu. See
“How to access the control panel menus” for
instructions.
Reset
The printer's current interface has been reset
and the buffer has been cleared. However,
other interfaces are still active and retain
their settings and data.
Reset All
All printer settings have been reset to the
default configuration, or to the last settings
that were saved.
Reset to Save
A control panel menu setting was changed
while the printer was printing. Press the
Start/Stop button
setting will become effective after printing
has finished.
to clear this message. The
Unable Clear Error
The printer cannot clear an error message
because the error status still remains. Try
solving the problem again.
Warming Up
The printer is warming up.
Waste T BoxNearfull
The waste toner collector is nearly full of
toner. You can continue to print until the
Replace Waste T Box error message
appears, but early replacement is
recommended to maintain high print
quality. See “Replacing the waste toner
collector” in the Reference Guide.
Status and Error Messages (6/7)
Page 8

EPSON AcuLaser C1900 Quick Reference
Worn Fuser
This message indicates that the fuser unit is
near the end of its service life. Turn the
printer off, then replace the fuser unit with a
new one. Contact your dealer.
To clear this warning message and continue
printing, select Clear Warning from the
control panel’s Reset Menu. See “How to
access the control panel menus” for
instructions.
Worn Photoconductor
This message indicates that the
photoconductor unit is near the end of its
service life. You can continue to print until
the Replace Photocondctr error message
appears, but early replacement is
recommended to maintain high print
quality.
To clear this warning message and continue
printing, select Clear All Warnings from
the control panel’s Reset Menu. See “How to
access the control panel menus” for
instructions.
Worn Transfer Unit
XXXX Toner Low
The indicated developer cartridges have
little toner remaining. (The letters C, M, Y, or
K appear in place of XXXX and indicate the
colors Cyan, Magenta, Yellow, and Black
respectively.)
You can continue to print until the Replace
Toner XXXX error message appears. Waiting
until this message appears before replacing
the toner is recommended as toner may spill
during replacement if toner remains in the
cartridge. When printouts become faint, see
“Developer Cartridge” in the Reference Guide
for instructions.
To clear this error, select Clear Warning
from the control panel’s Reset Menu. See
“How to access the control panel menus” for
instructions.
XXXX Toner Cart Out
One or more developer cartridges are not
installed in the printer.
Install the cartridges. See “Developer
Cartridge” in the Reference Guide for
instructions.
This message warns you that the transfer
unit is near the end of its service life. You can
continue to print until the Replace
TransferUnit error message appears, but
early replacement is recommended to
maintain high print quality.
Write Error ROM A/Write Error ROM P
This message indicates an internal error in
the printer. Reset the printer. If this error
persists, consult your dealer.
Writing ROM A/Writing ROM P
This message indicates that a ROM module
in slot A or P is being written. Please wait
until this message disappears.
Status and Error Messages (7/7)
Page 9

EPSON AcuLaser C1900 Quick Reference
Printing and Deleting Reserve Job Data
Print jobs stored on the printer’s optional
Hard Disk Drive using the Re-Print Job,
Verify Job, and Stored Job options of the
Reserve Job function can be printed and
deleted using the control panel’s Quick Print
Job Menu. Jobs saved using the Confidential
Job option can be printed from the
Confidential Job Menu. Follow the
instructions in this section.
Using the Quick Print Job Menu
Follow these steps to print or delete Re-Print
Job, Verify Job, and Stored Job data.
1. Make sure the LCD panel displays Ready
or Sleep, then press the Enter button
to access the control panel menus.
2. Press the
until Quick Print Job Menu appears on
the LCD panel, then press the Enter
button.
d Down button repeatedly
Using the Confidential Job Menu
Follow these steps to print or delete
Confidential Job data.
1. Make sure the LCD panel displays Ready
or Sleep, then press the Enter button
to access the control panel menus.
2. Press the
until ConfidentialJobMenu appears on
the LCD panel, then press the Enter
button.
3. Use the
to the appropriate user name, then press
the Enter button.
4. Enter your four-digit password by using
the corresponding buttons, as shown
below.
d Down button repeatedly
d Down or u Up button to scroll
3. Use the
to the appropriate user name, then press
the Enter button.
4. Use the
to the appropriate job name, then press
the Enter button.
5. To specify the number of copies you
want to print, press the Enter button,
then use the
to select the number of copies.
To delete the print job without printing
any copies, press the
display Delete on the LCD panel.
6. Press the Enter button to start
printing or to delete the data.
d Down or u Up button to scroll
d Down or u Up button to scroll
d Down and u Up buttons
d Down button to
Note:
❏ Passwords are always four digits.
❏ Passwords consist of numbers from 1
through 4.
❏ If no print jobs have been saved with the
password you entered, Password
Error appears briefly on the LCD panel
then the printer exits the control panel
menus. Confirm the password and try
again.
Printing and Deleting Reserve Job Data (1/2)
Page 10

EPSON AcuLaser C1900 Quick Reference
5. Use the
d Down or u Up button to scroll
to the appropriate job name, then press
the Enter button.
6. To specify the number of copies you
want to print, press the Enter button,
then use the
d Down and u Up buttons
to select the number of copies.
To delete the print job, press the
d Down
button to display Delete on the LCD
panel.
7. Press the Enter button to start
printing or to delete the data.
Printing and Deleting Reserve Job Data (2/2)
Page 11

EPSON AcuLaser C1900 Quick Reference
Clearing Jammed Paper
If paper becomes jammed in the printer, the
printer’s LCD panel and the EPSON Status
Monitor 3 utility provide alert messages.
Precautions for clearing jammed paper
Be sure to observe the following points when
you clear jammed paper.
❏ Do not remove jammed paper by force.
Torn paper can be difficult to remove
and might cause other paper jams. Pull
it gently in order to avoid tearing.
❏ Always try to remove jammed paper
with both hands to avoid tearing it.
❏ If jammed paper is torn and remains in
the printer, or if paper is jammed in a
place not mentioned in this section,
contact your dealer.
Jam A (Cover AB)
Follow these steps to clear paper jams from
Cover AB.
1. Open Cover AB.
2. Open the cover below the paper path
roller as shown below. Remove any
jammed paper gently with both hands.
Be careful to not tear the jammed paper.
c
Caution:
Unless specifically instructed in this
guide, be careful not to touch the fuser,
which is marked
Surface Avoid Contact
surrounding areas. If the printer has been
in use, the fuser and the surrounding
areas may be very hot.
CAUTION Hot
, or the
Note:
❏ Always try to remove jammed paper
with both hands to avoid tearing it.
❏ If paper is torn, be sure to remove all torn
pieces.
Clearing Jammed Paper (1/7)
Page 12

EPSON AcuLaser C1900 Quick Reference
3. Remove the MP tray cover and open the
MP tray flap.
4. Gently pull out any sheets that have fed
part way into the printer.
6. Fan a stack of paper, and set the paper
back into the MP tray.
7. Close the MP tray flap and set the MP
tray cover.
5. Remove paper stacked on the MP tray.
Check if any paper is jammed inside the
MP tray.
8. Close Cover AB.
If the message Jam XX still appears on the
LCD panel, follow the next steps.
Clearing Jammed Paper (2/7)
Page 13

EPSON AcuLaser C1900 Quick Reference
Jam B (Cover AB)
Follow these steps to clear paper jams from
Cover AB.
Caution:
c
1. Open Cover AB.
Unless specifically instructed in this
guide, be careful not to touch the fuser,
which is marked
Surface Avoid Contact
surrounding areas. If the printer has been
in use, the fuser and the surrounding
areas may be very hot.
CAUTION Hot
4. Pull the levers up to release the paper
path as shown below.
, or the
5. If you turn the dial towards you, the
jammed paper comes out from the
face-down tray. If you turn the dial
towards the printer, the jammed paper
comes out from Cover AB side.
2. Open the cover above the paper path
roller, until it stops, as shown below.
Remove any jammed paper gently with
both hands. Be careful not to tear the
jammed paper.
z
3. Close the cover that you opened in
step 2.
6. Pull the levers down to close the paper
path as shown below.
Clearing Jammed Paper (3/7)
Page 14

EPSON AcuLaser C1900 Quick Reference
7. Close Cover AB.
Note:
If you installed the 500-Sheet Paper Cassette
Unit, close Cover C.
If the message Jam XX still appears on the
LCD panel, follow the next steps.
1. Open Cover AB.
3. Open the cover of the fuser unit as
shown below. You can open it narrowly.
Note:
Be careful not to touch the red rollers in the
fuser unit, because they may be hot.
4. Remove any jammed paper by hand. Be
careful not to tear the jammed paper.
2. Pull the levers up to release the paper
path as shown below.
5. Close the cover of the fuser unit.
Clearing Jammed Paper (4/7)
Page 15

EPSON AcuLaser C1900 Quick Reference
6. Pull the levers down to close the paper
path as shown below.
7. Close Cover AB.
Jam C (Cover C)
Follow these steps to clear paper jams in the
500-Sheet Paper Cassette Unit.
1. Open Cover C of the optional 500-Sheet
Paper Cassette Unit.
2. Gently remove the jammed paper with
both hands. Be careful not to tear the
jammed paper.
Note:
If you installed the 500-Sheet Paper Cassette
Unit, close Cover C.
When the paper jam is cleared completely
and Cover C is closed, the jammed page’s
print data is automatically reprinted.
Note:
If you cannot find any jammed paper in Cover
AB, check Cover DM of the optional Duplex Unit
or Cover C of the 500-Sheet Paper Cassette Unit.
Clearing Jammed Paper (5/7)
Page 16

EPSON AcuLaser C1900 Quick Reference
3. Pull out the paper cassette and discard
any crumpled paper.
4. Close the paper cassette.
Jam DM (Cover DM)
Follow these steps to clear paper jams in the
Duplex Unit’s cover.
1. Open the Cover DM of the Duplex Unit.
2. Gently remove the jammed paper inside
Cover DM. Be careful not to tear the
paper.
5. Close Cover C.
When the paper jam is cleared completely
and Cover C of the 500-Sheet Paper Cassette
Unit is closed, the jammed page’s print data
is automatically reprinted.
Note:
If paper is torn, be sure to remove all torn
pieces.
Clearing Jammed Paper (6/7)
Page 17

3. Close Cover DM.
When the paper jam is cleared completely
and Cover DM is closed, the jammed page’s
print data is automatically reprinted.
EPSON AcuLaser C1900 Quick Reference
Clearing Jammed Paper (7/7)
 Loading...